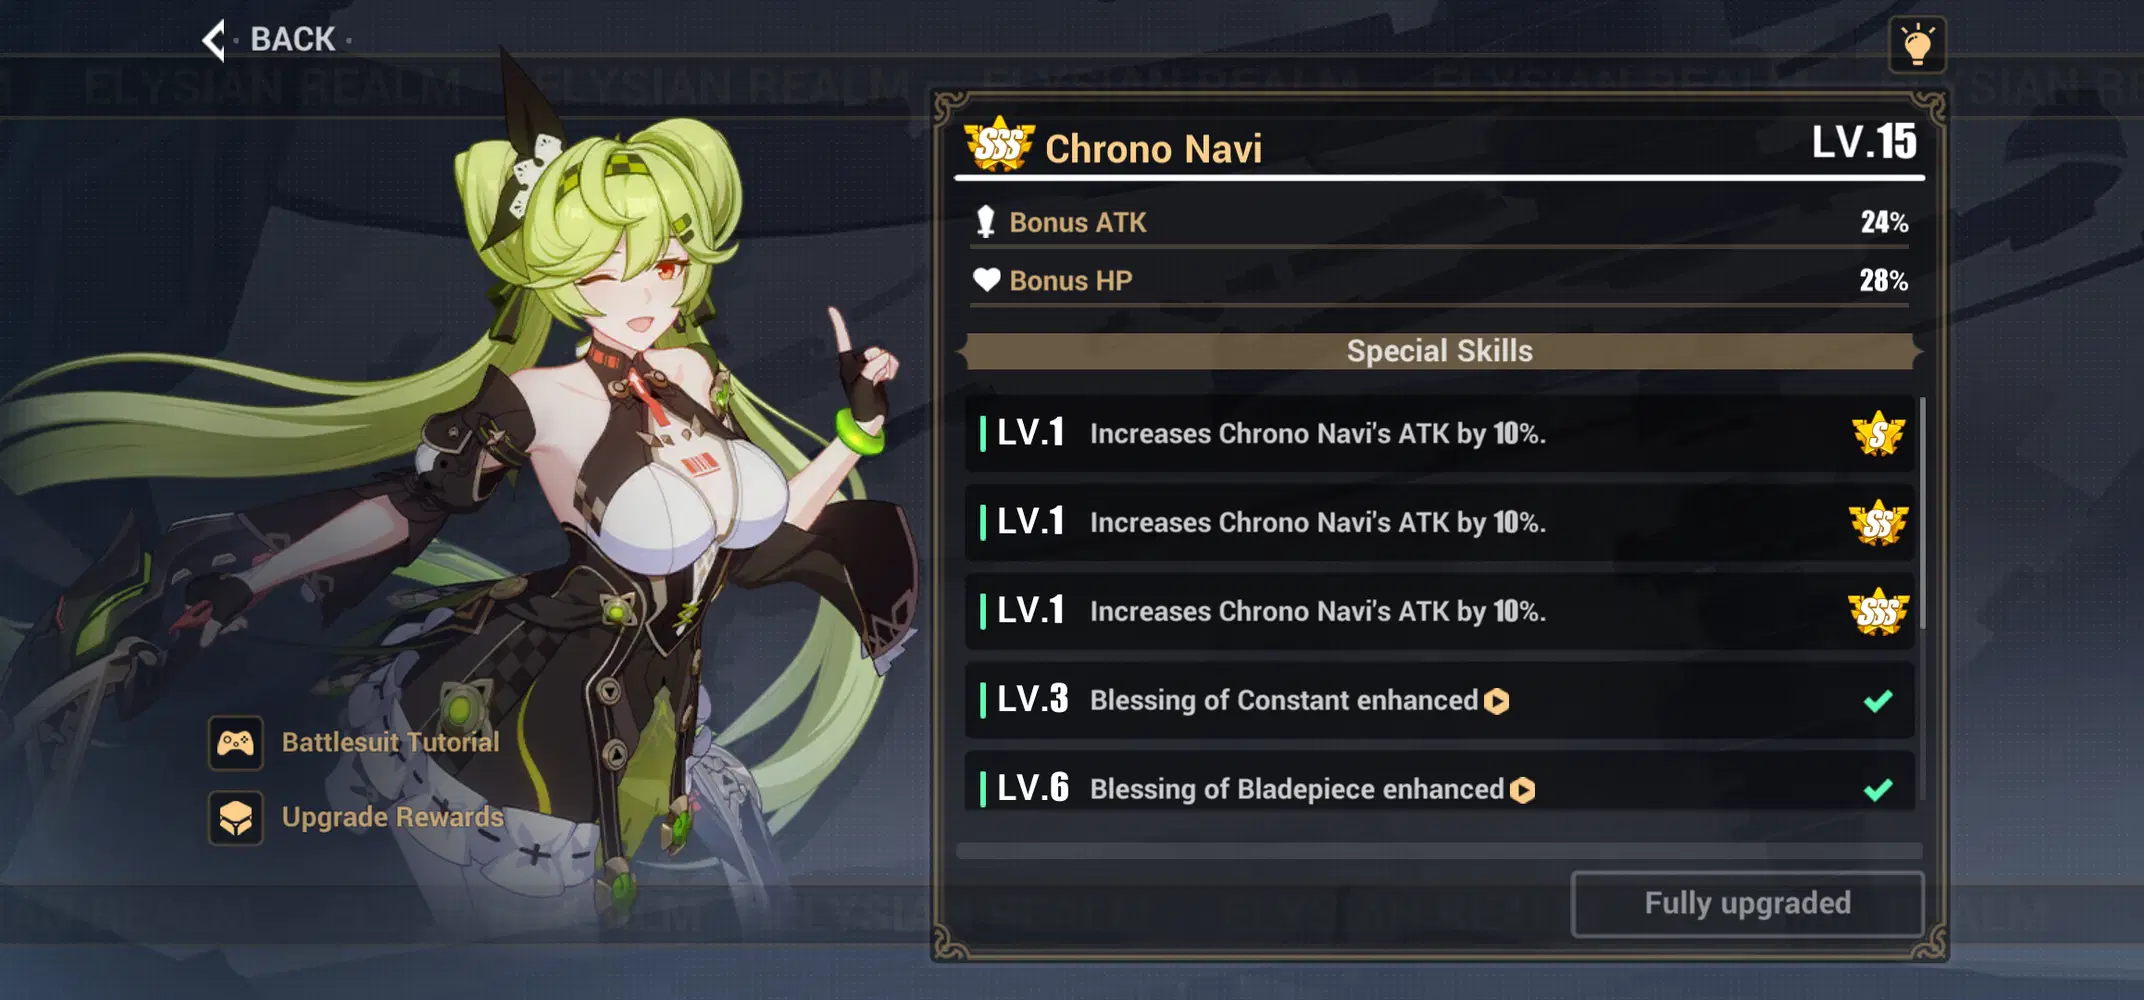
This guide aims to teach the basics of handling the Valkyrie. The ability to tackle higher difficulties depend on your personal loadouts and acquired advantages at present.

Core Playstyle
Nothing changes from the original. You simply get buffed up to inflict more damage in whatever Ai does.
Usage Difficulty
Handling: Moderate
- Ai-chan operates like a juggler. While the timing for the rebound attacks are lenient enough, they can easily get interrupted by hardy foes, who knock you off your feet as you are about to execute the rebounds. This isn't a problem with normal fights, but with timed fights every second you're disrupted will add up.
- Remember that evasion can rebound chakrams as well. This means that smart use of evasions to play defensively can also help complete your rebound combos when you're in tight situations. It also helps with repositioning your field of view too.
- To maximise on her rebounding playstyle, positioning is important in manipulating where the rebounds go. They follow your angle of attack relevant to your targeted enemy, not where you face. So for eg, if you want a Chakram to go north, position yourself southwards of your HUD-aimed target, and the chakram should follow through on rebound, no matter which angle the returning chakram is coming from.
Fun Fact: If an intended target of the Aimer-γ Chakram dies midflight, it will redirect its flight towards the next available target.
Power Ramping
- Ai's starting signets seemingly do not do much, but will slowly add up as the rebounding and splitting chakrams do their work.
Power Drought Situation(s)
- The trouble also comes from Ai's lack of innate defense. She is completely vulnerable from every angle of attack and cannot attack aggressively without some form of damage reduction to mitigate. Players have to go on defensives at times to ensure she doesn't get staggered greatly from attacking.
- Anytime Ai is interrupted and gets broken out of her chakram dance, she loses DPS quickly just by having to restart the routine.
Equipment

Special Adjustments

Exclusive Signets
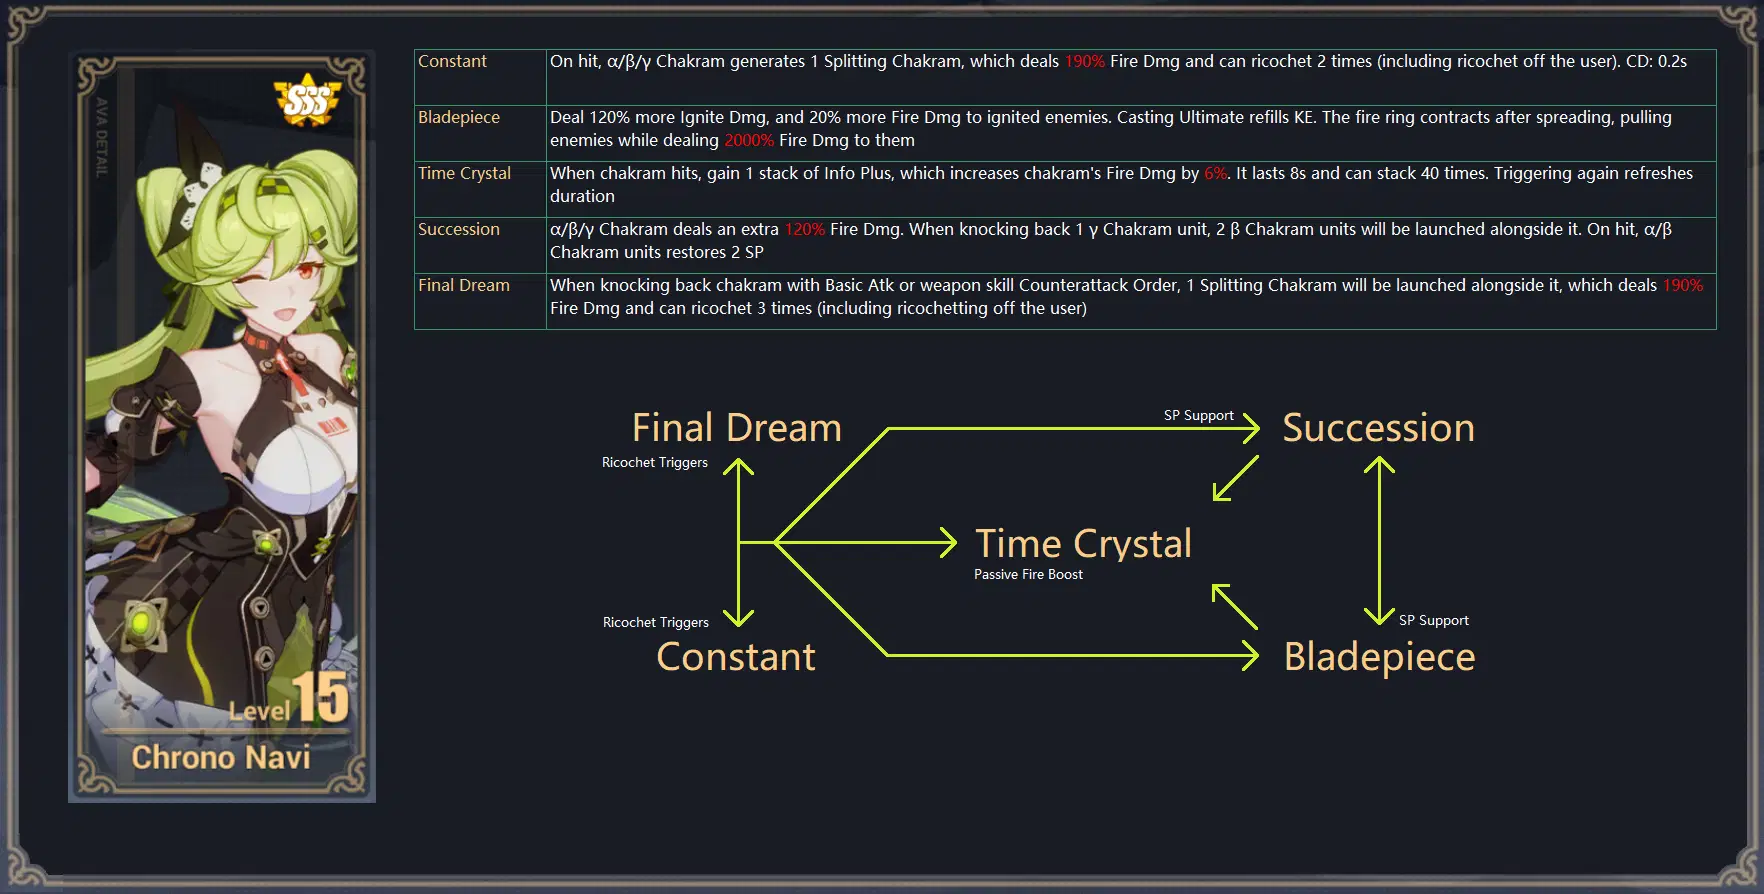
To understand what each Aimer unit is- (Alpha, Beta, Gamma & Lambda, in written order)
Aimer-α Chakram - The one tossed by the Weapon Active
Aimer-β Chakram - Charged Atk, the two side chakrams
Aimer-γ Chakram - Charged Atk, specifically the central chakram
Aimer-γ Cutter - What the Aimer-γ becomes when struck back by Basic Atk or Counterattack Order
Aimer-Λ Domain - What the Aimer-γ Cutter becomes when ignited by Ai's Ultimate
To also clarify, all the signets empower only the Aimer chakrams. So your Basic Atks do not count.
In addition, there are other aspects to using the Aimers.
- The position of the Cutter chakram is aimed at the target your HUD is focused on. So bear that in mind when positioning certain attacks you have in mind.
- Both Aimer-γ Cutter and Aimer-Λ Domain can exist on the field at the same time, but only 1 of each is allowed at any time. Casting any new ring of either type will delete and replace it with the new one.
[Succession -> Time Crystal] -> Bladepiece -> Constant / Final Dream
RIght away, you may notice that Constant and Final Dream perform nearly the same function, so where's the difference?
Constant activates on hit, so when an Aimer chakram is nearby, Ai deflects Splitting Chakrams off enemies and herself.
Final Dream activates during rebounds, so it works during the Charged Atk combo.
- When both of these are combined, the entire combo from start to finish will continuously deflect out Splitting Chakrams.
- Caution: If you're playing Decimation early, do not take Final Dream. This is because you have to rebound Chakrams as necessitated by the signet, and you will end up recovering HP way too fast and dampen Decimation's power. (Each rebound recovers 200 HP)
Time Crystal provides a Fire Dmg boosting stack whenever Aimer chakrams strike a target - EACH target. So multiple targets being struck at once ramps it up quicker. Given that it has a refreshable 8-second duration, unless you're being dragged onto the floor, you won't lose them easily. When Aimer-γ or Aimer-Λ is active, they will keep your stacks going indefinitely as long as something is being hit.
Bladepiece makes for a good third choice after you've stabilized your main combo, where you can then empower your Ultimate with a dual-hit ability. It can also provide a quick shortcut to KE gauge refill. It's actually a pity that there's no cooldown reduction for the Ultimate, otherwise the dual-hit ability is pretty useful if you can use it frequently once you've secured high SP regen.
Succession creates two more Aimer-β chakrams from the final rebound (the usual is 3, so you have 5 with this). The other effect is SP regen, which unfortunately doesn't do much given its limitations. You'll actually get more value from SP signets if they become part of their sets and Cores.
Using Thorn Crown
1) Succession + Time Crystal
- Since the Ultimate doesn't play a huge part, then all you need is to empower the basic combo and carry the damage passive. Unfortunately, there's no significant synergy when it comes to Ai's signet pairings, so make do with whatever your plan is.
Signets
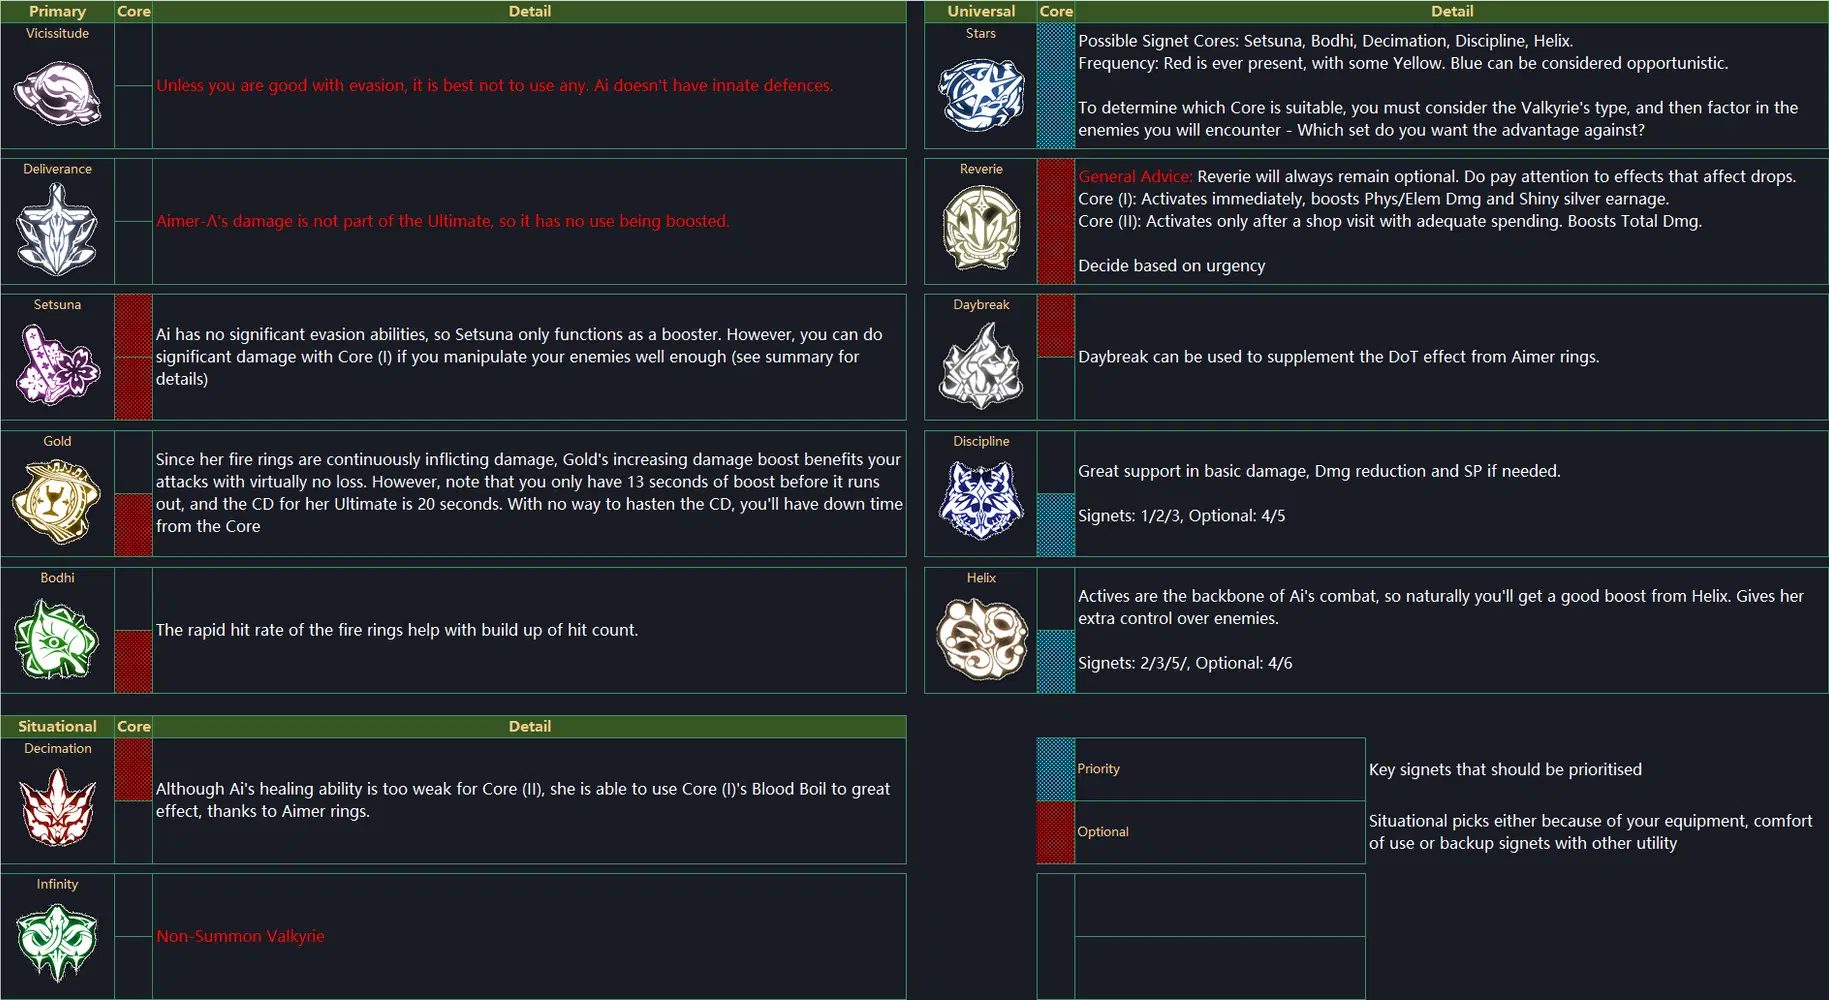
Priorities
Key Signets - Discipline, Helix
Sub Signets - Bodhi, Setsuna, Decimation, Daybreak
Do take care to give Ai Damage Reduction. She's going to need it to take hits, while performing many of her rebounds, and she has no innate defenses of her own.
Core Contributions
Decimation (I) - (Bonus: Ignite)
- Grants AoE damage to the gathered enemies at Aimer rings, as they will also activate Blood Boil for you.
- Low HP combat will be exceptionally risky on Ai, what with her lack of defenses. Because she has HP recovery, a control element is needed to drop her HP, usually the Enhanced signet** for HP consumption, or even Blood Rose's support.
- **If you're not confident, do not attempt to use this. It can set you dangerously low beyond what you can manage.
Helix (II)
- Helix 2nd's will present a minor contradictory effect with Aimer-γ Cutter. This is due to range, owing to the huge leap backwards that Ai makes upon Charged Atk. She will create the gravity sphere, but with its range of influence just shy of Aimer's fire ring.
- To remedy this - Using evasions or attacks instead can move you closer to your target, and then using an active to trigger the gravity mine in front of them. In this manner, you will not create a new sphere that displaces your enemies until you choose to.
Setsuna (I)
- Using Core (I), you can freeze aggressive enemies inside Aimer Cutters, prolong their injury inside with various signets to aid that. This also synergises with secondary attacks like Blood Boil to aid you.
- With the Enhanced signets for freeze extension and additional hits, you can further boost the damage inflicted during Sakura Screen while the Aimer rings burn down your enemies.
Bodhi (II) - (Bonus: Fast Atk)
- You can get a bonus from a hit-count signet, if nothing else more.
Discipline (II)
- Effective support to cover what Ai lacks. Pretty much the only source of passive Breach besides Helix's.

Any Questions? Go ahead and write in the comments below too. Thanks for reading!