- - - THUMBNAIL PURPOSES ONLY - - -
Credits for emojis used in thumbnail : Genshin Impact
"Teyvat Times" Series Emojis: Special Review Edition

Last time we talked about Movement
Did you guys incorporated movement in your shots? 
I hope the last guide helped you in elevating your pictures!!
But before we proceed, of course we gotta have a recap!
(Its been a while too so you might have forgotten the last one)

You can add movement in your shots by using the character's idle and attack animations!!
Just like in this photo for example:
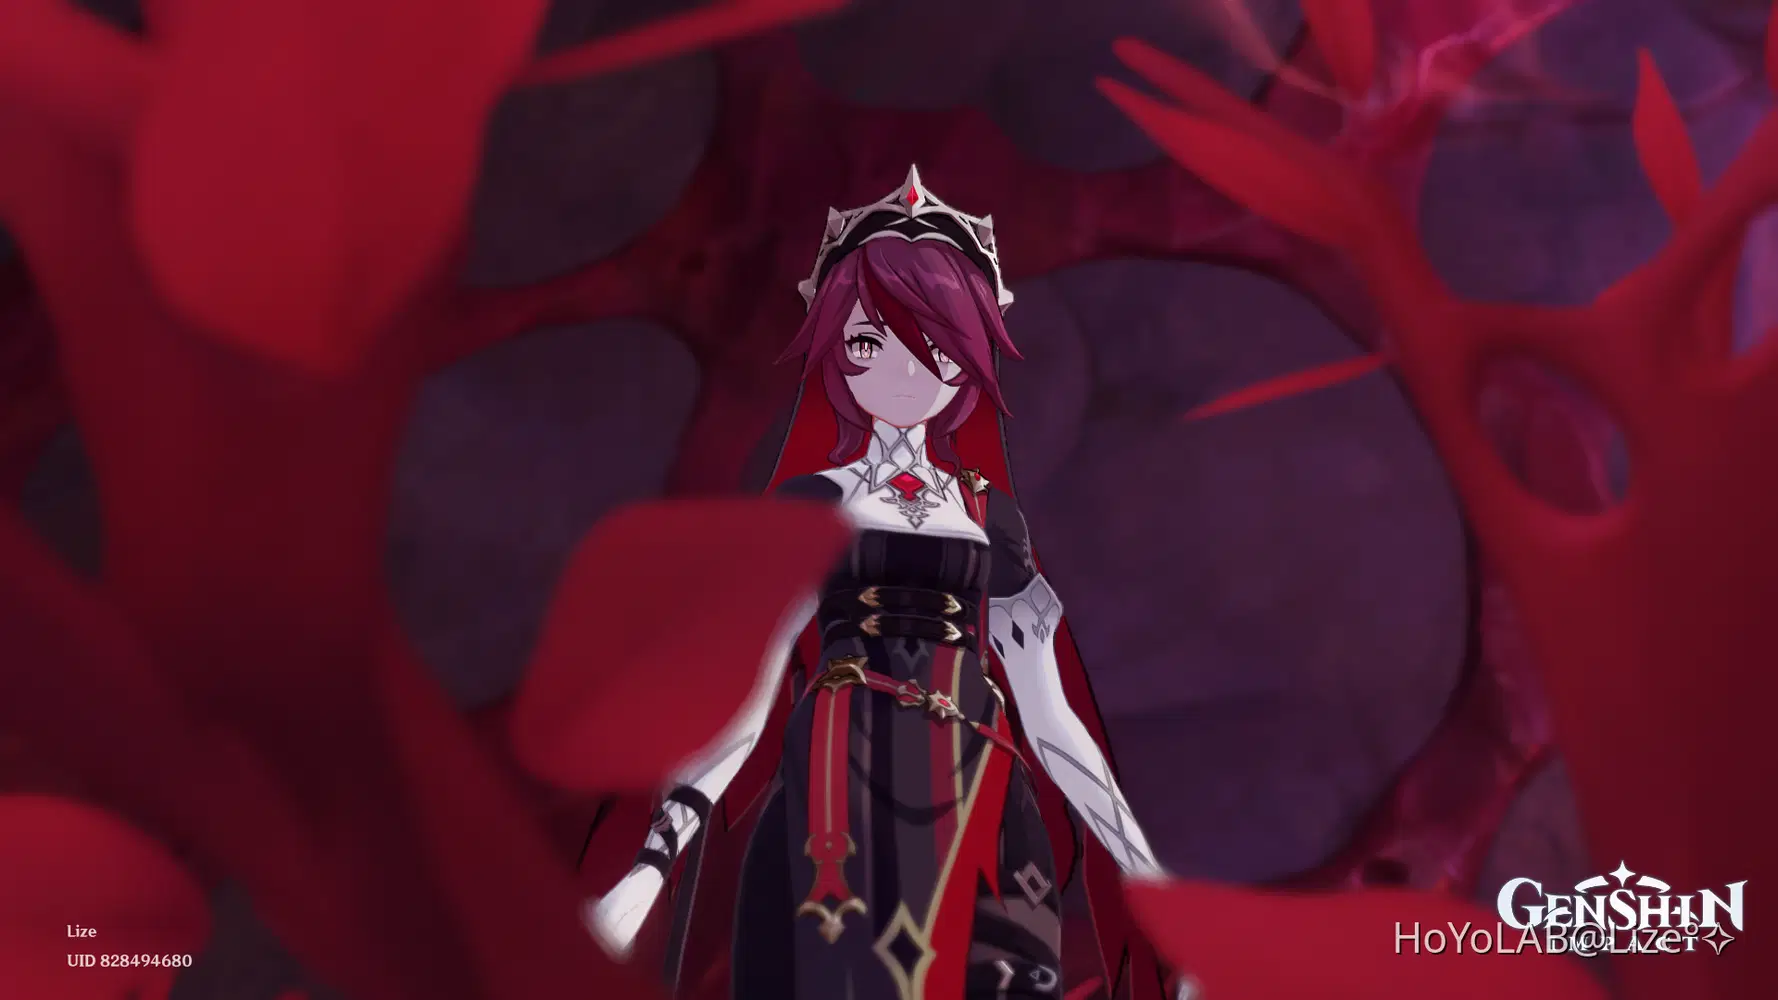
Blur and foreground is used in the photo but Rosaria is just standing still.
Looking nice, but looks lacking.
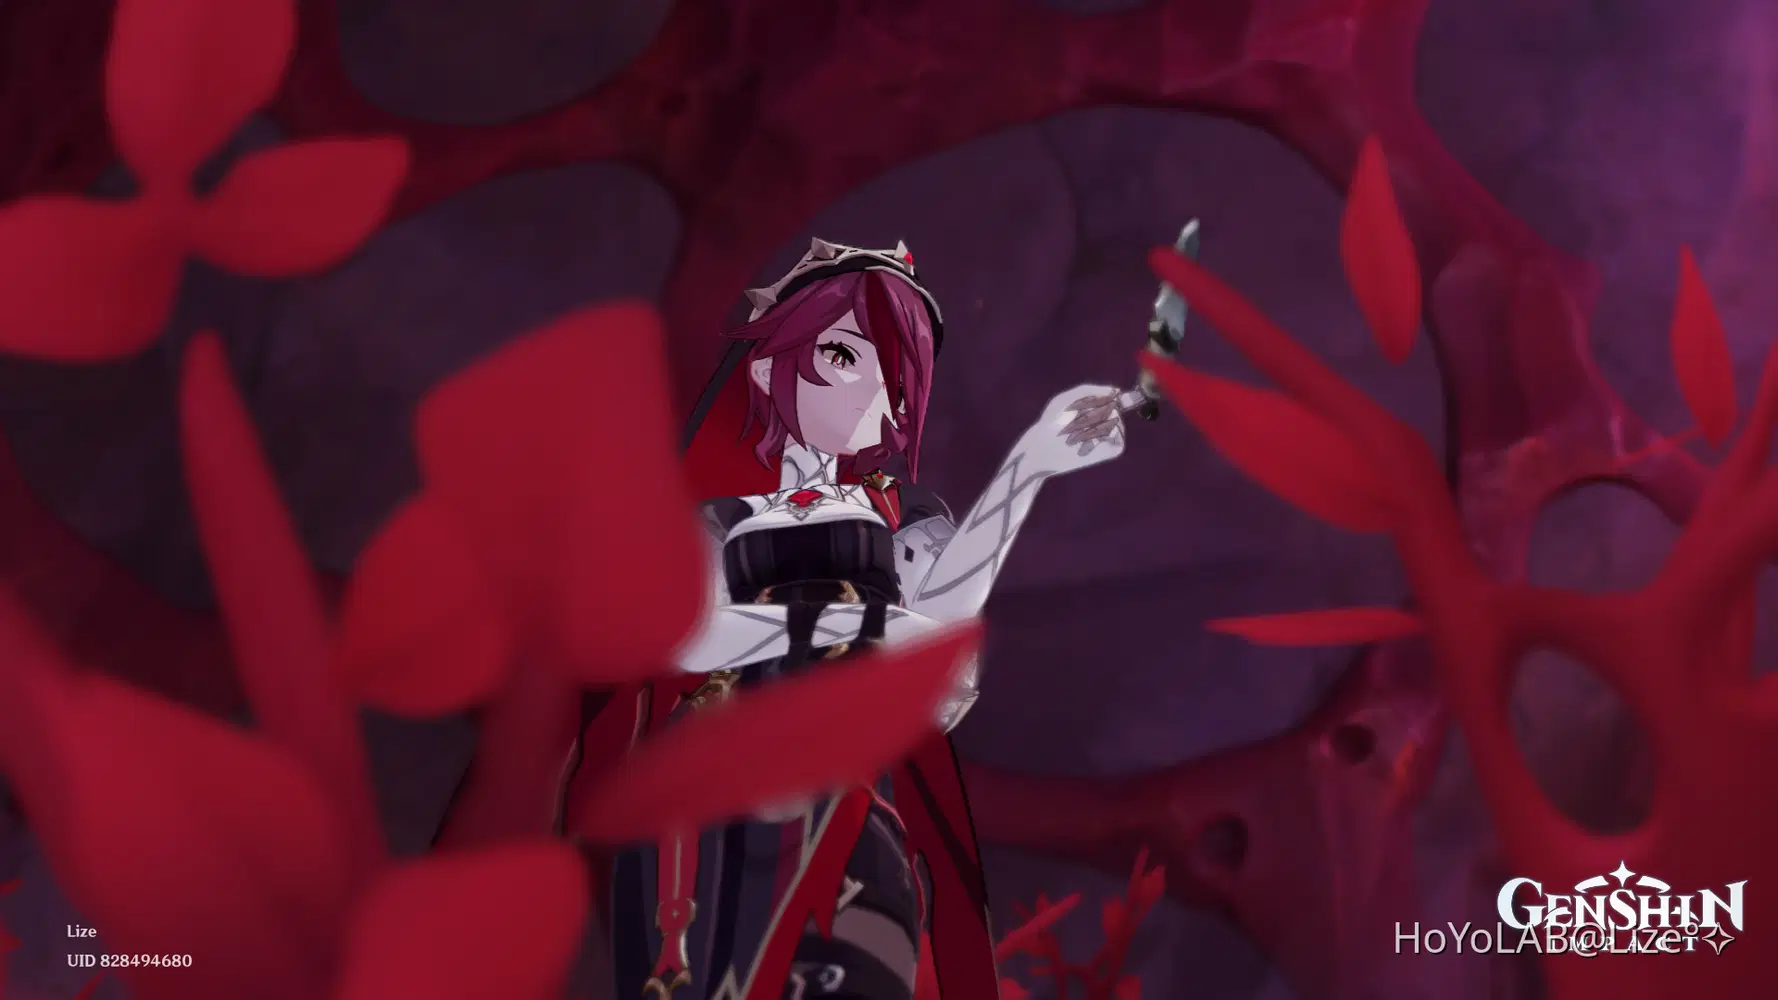
This one makes use of both blur and foreground, together with Rosaria's idle animation which gives it an attitude and sense of humanity (not like a doll getting photographed)
But there is actually one more element that plays a role in order to arrive at that picture.

You can see that Rosaria is placed more on the right and the red plants in the foreground changed positions.
These things are all affected by what we call the angle which is our topic for today!!
I am not a professional photographer, but I'll share all the things I've learned in taking pictures.
Here are some tips and tricks that I use in my shots!!

I will do these in parts so I can go through each tips in depth! Feel free to share some of yours as well!!
Also, there's a Table of Contents feature now in Hoyolab so you can use it to skip to the part that you want to see!!
The Angle
The angle plays a major role in framing the character in a way that the elements of the picture wouldn't block or overpower the subject of the picture.
Making use of different angles can show various perspectives of a scenario.
You can make a character appear smaller or weak, but you can also make them appear strong and intimidating.

For today's guide I'm gonna show you some angles that I usually use as well as the scenarios where it is suitable to use!!

Different Angles Used in Photography!
Today I'll talk about 5 different angles that I usually use in my photos as well as a tip on making a good composition/photograph.
I will go through each one of these in depth with pictures as example to make it easy to understand!

Long Shot
 This shot contains the character's whole body in the frame.

Its pretty great when you want to show how the character interacts with the surroundings or if you really want to showcase the scenery together with the character!
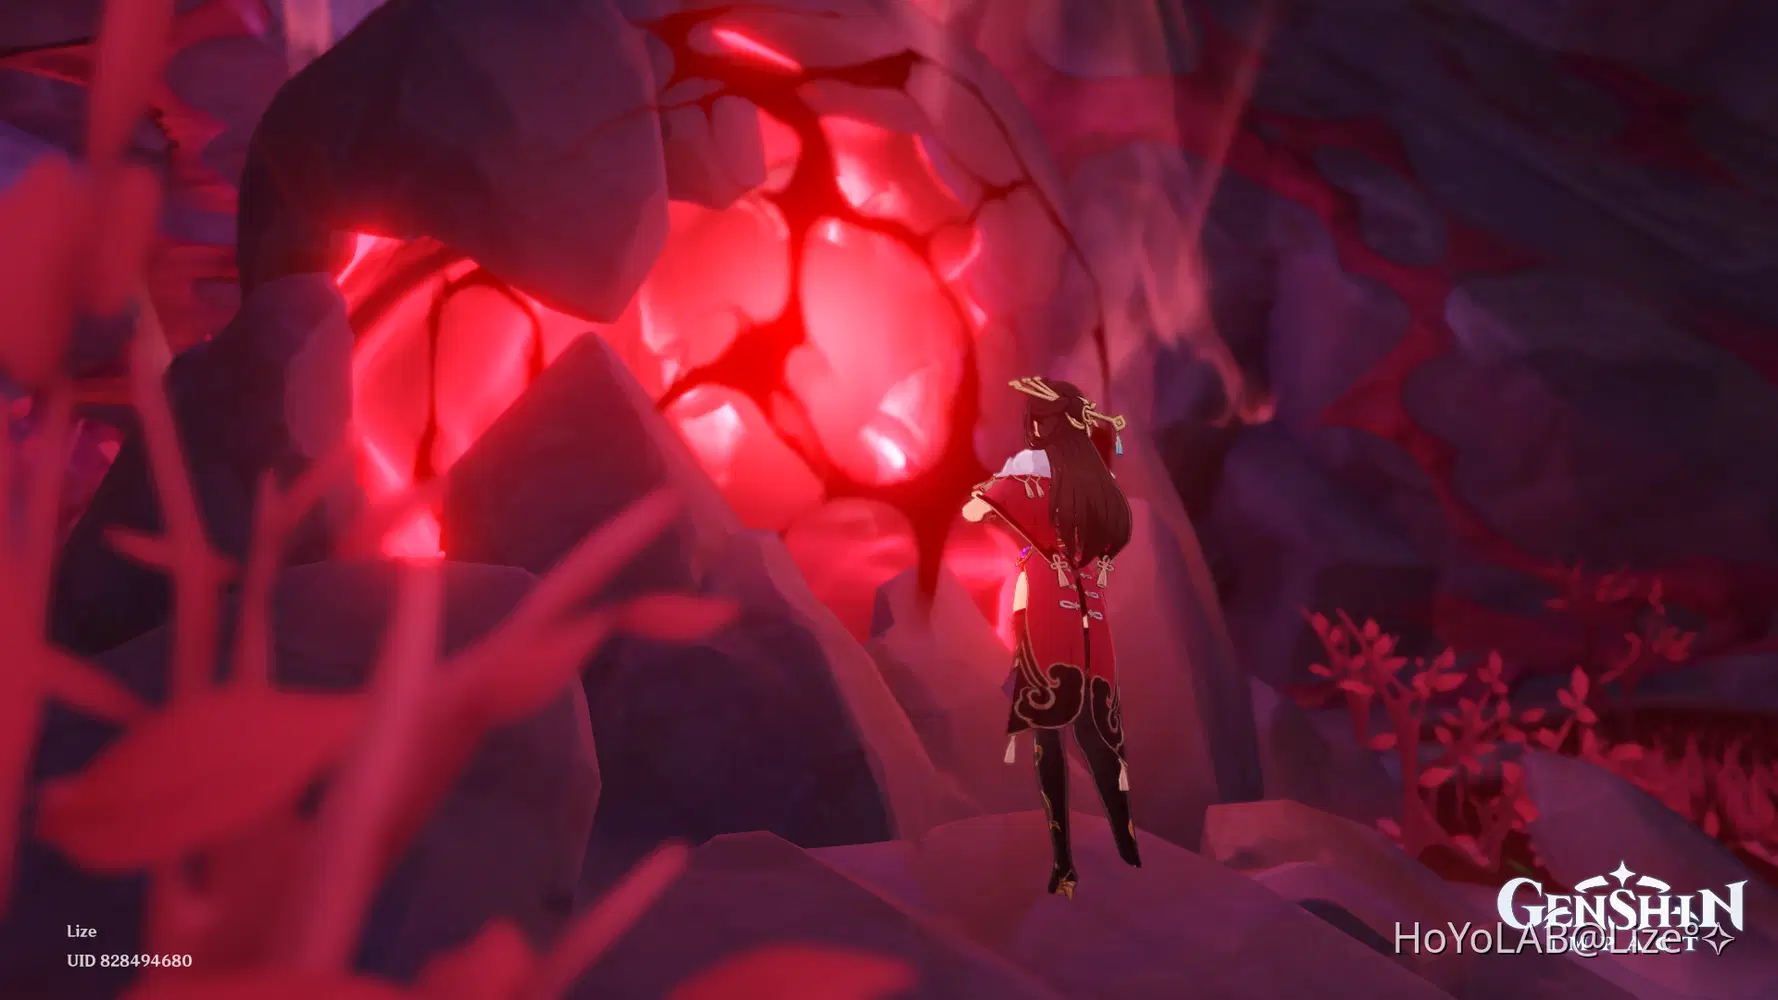
Beidou examining Durin's Heart
Medium Shot
A shot where the character is framed from the knees or waist up from the subject.

This angle is actually the one that I use the most in my photos since I focus more on showcasing the characters themselves!

It is also ideal to use in group shots or you want to take a picture with your friend!

But you could also use a long shot if you want to show their whole bo***

This photo is from my "Bad Jinni" post btw!
Close Up
An angle where the character’s face occupies most of the frame.
Normally its a shot from the shoulders all the way to the head of the subject.
But
if you try to zoom in all the way,
you would observe that the maximum zoom still shows the character from the chest area all the way to the head.
But going into co op mode solves this problem!!
By having someone stand closer to the camera, you can just focus on taking shots of the characters in a close up!
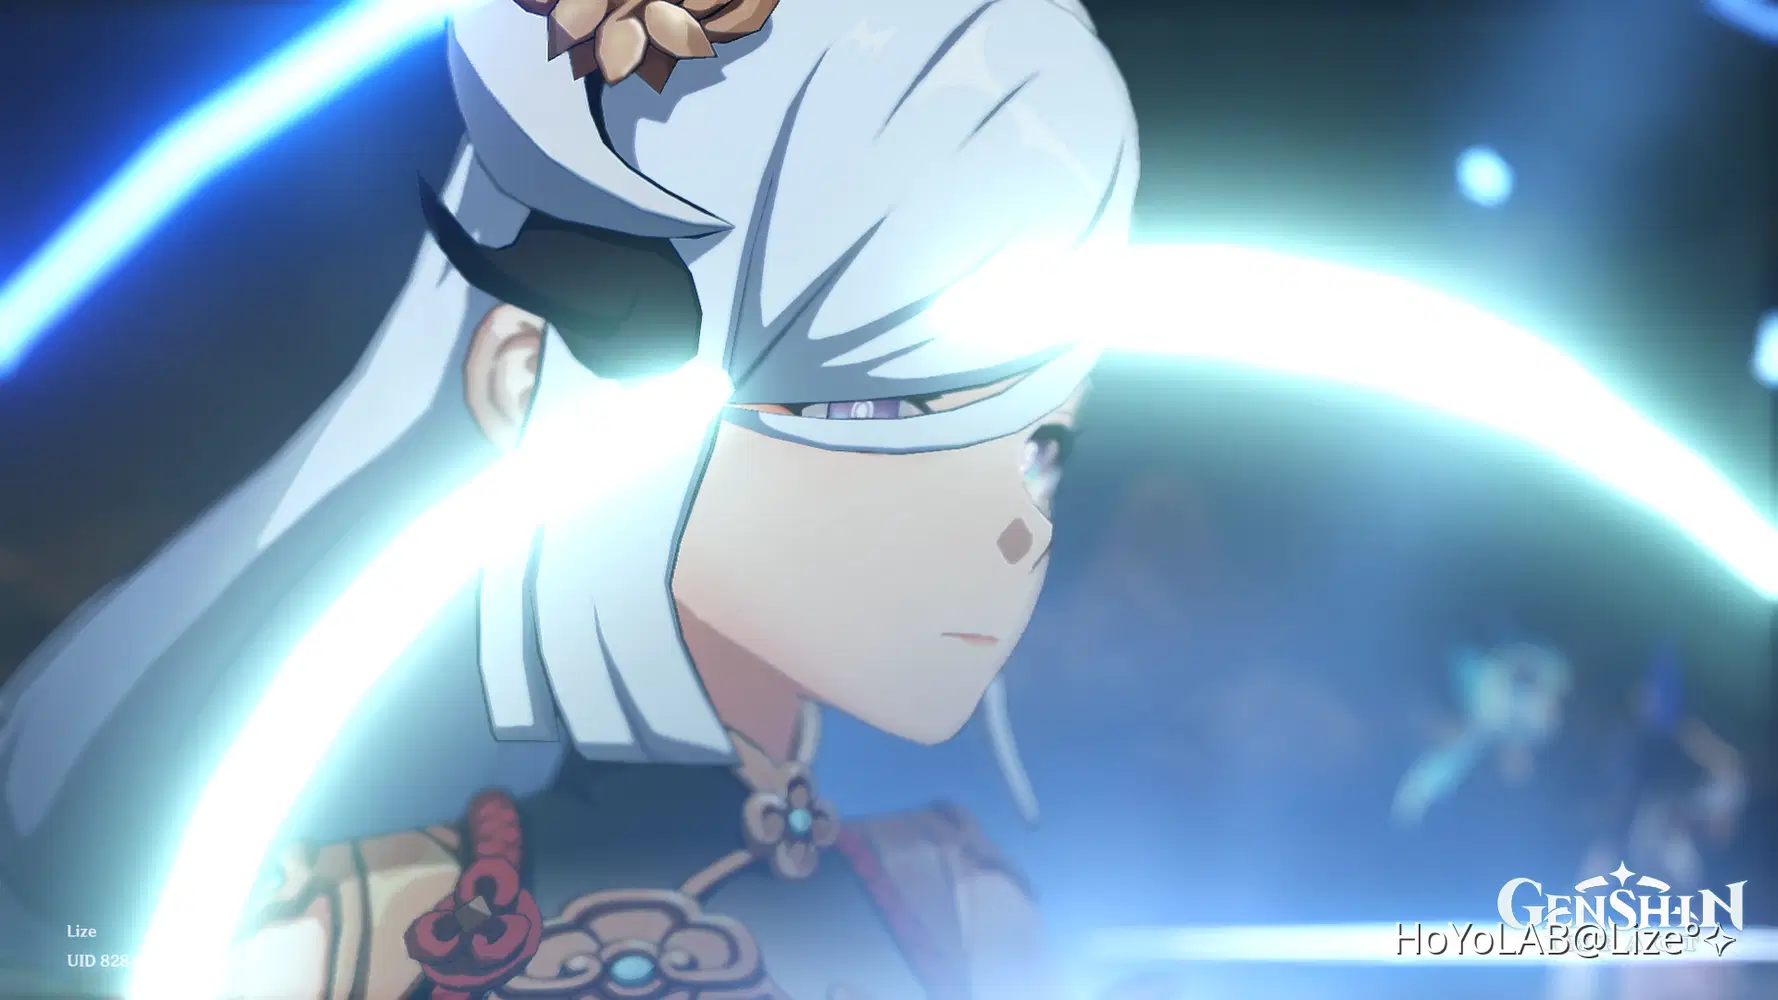
The trick when doing this is to stand behind the other player (then erase yourself) so you can zoom in the character more!
Be careful in zooming though!!
If you zoom in too much, you might end up seeing things you don't want to see 
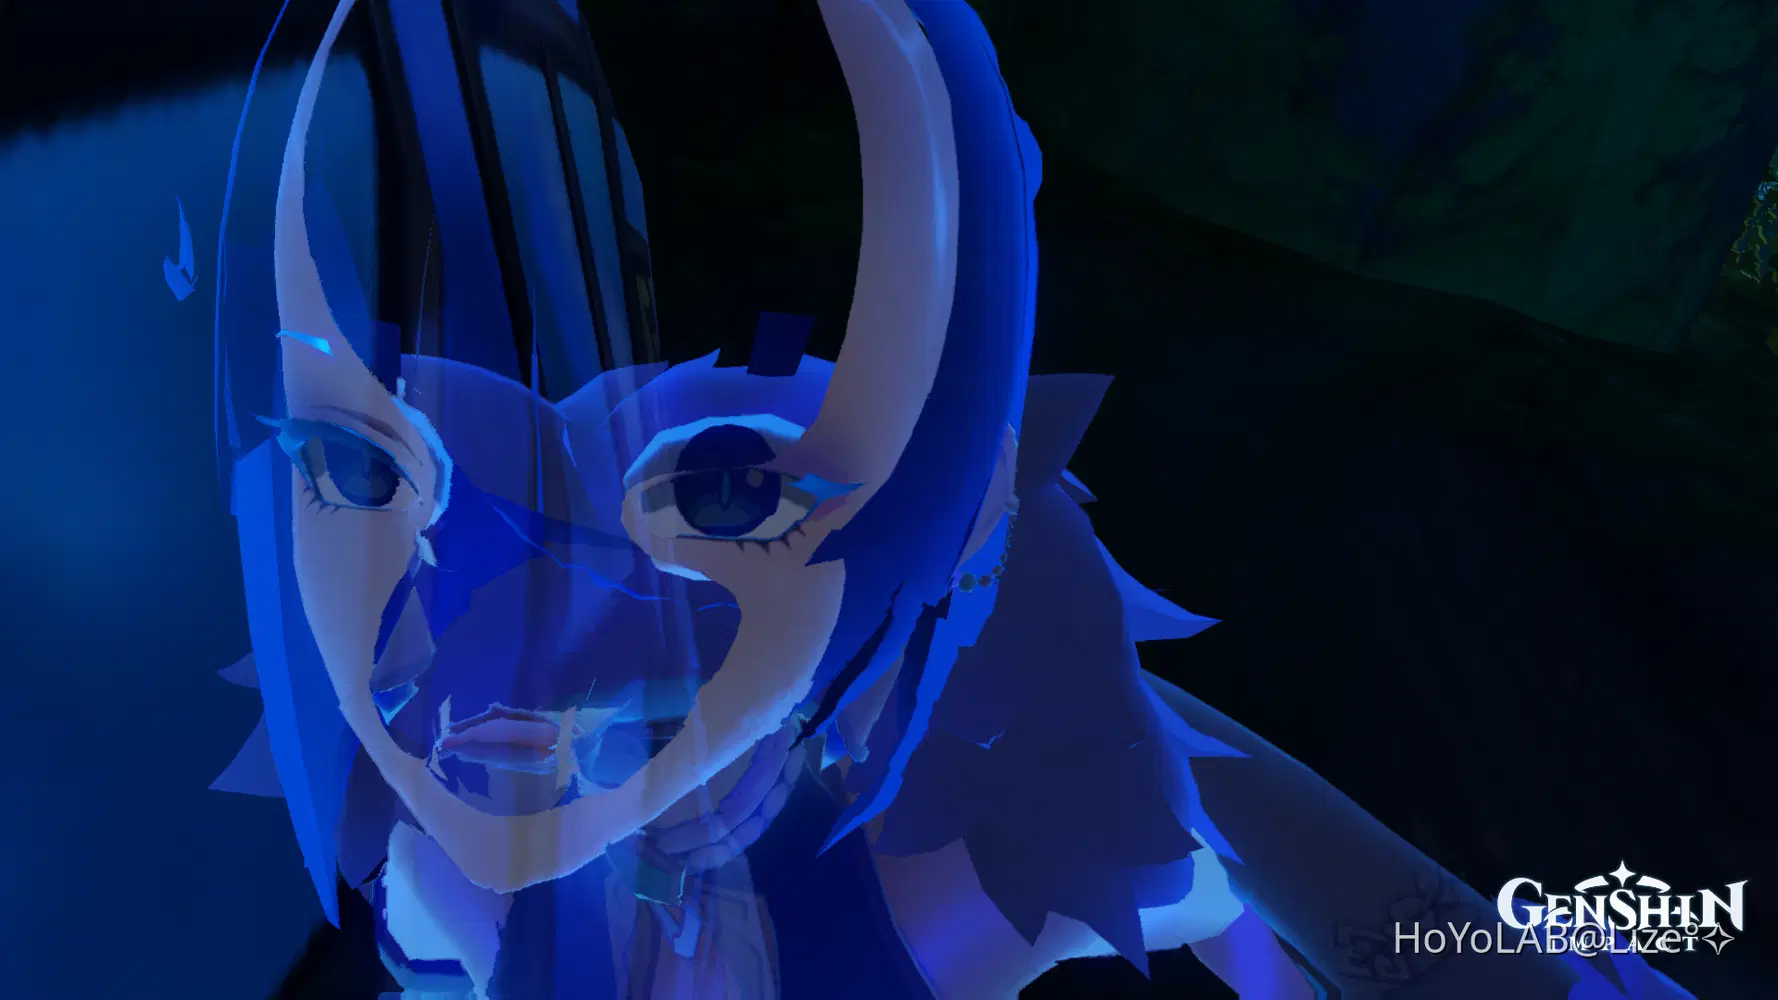
Jumpscare? (I'm sorry)
 Or, you could end up making the character transparent and blurry.
(If that is the effect you want to achieve then zoom in all you want!)
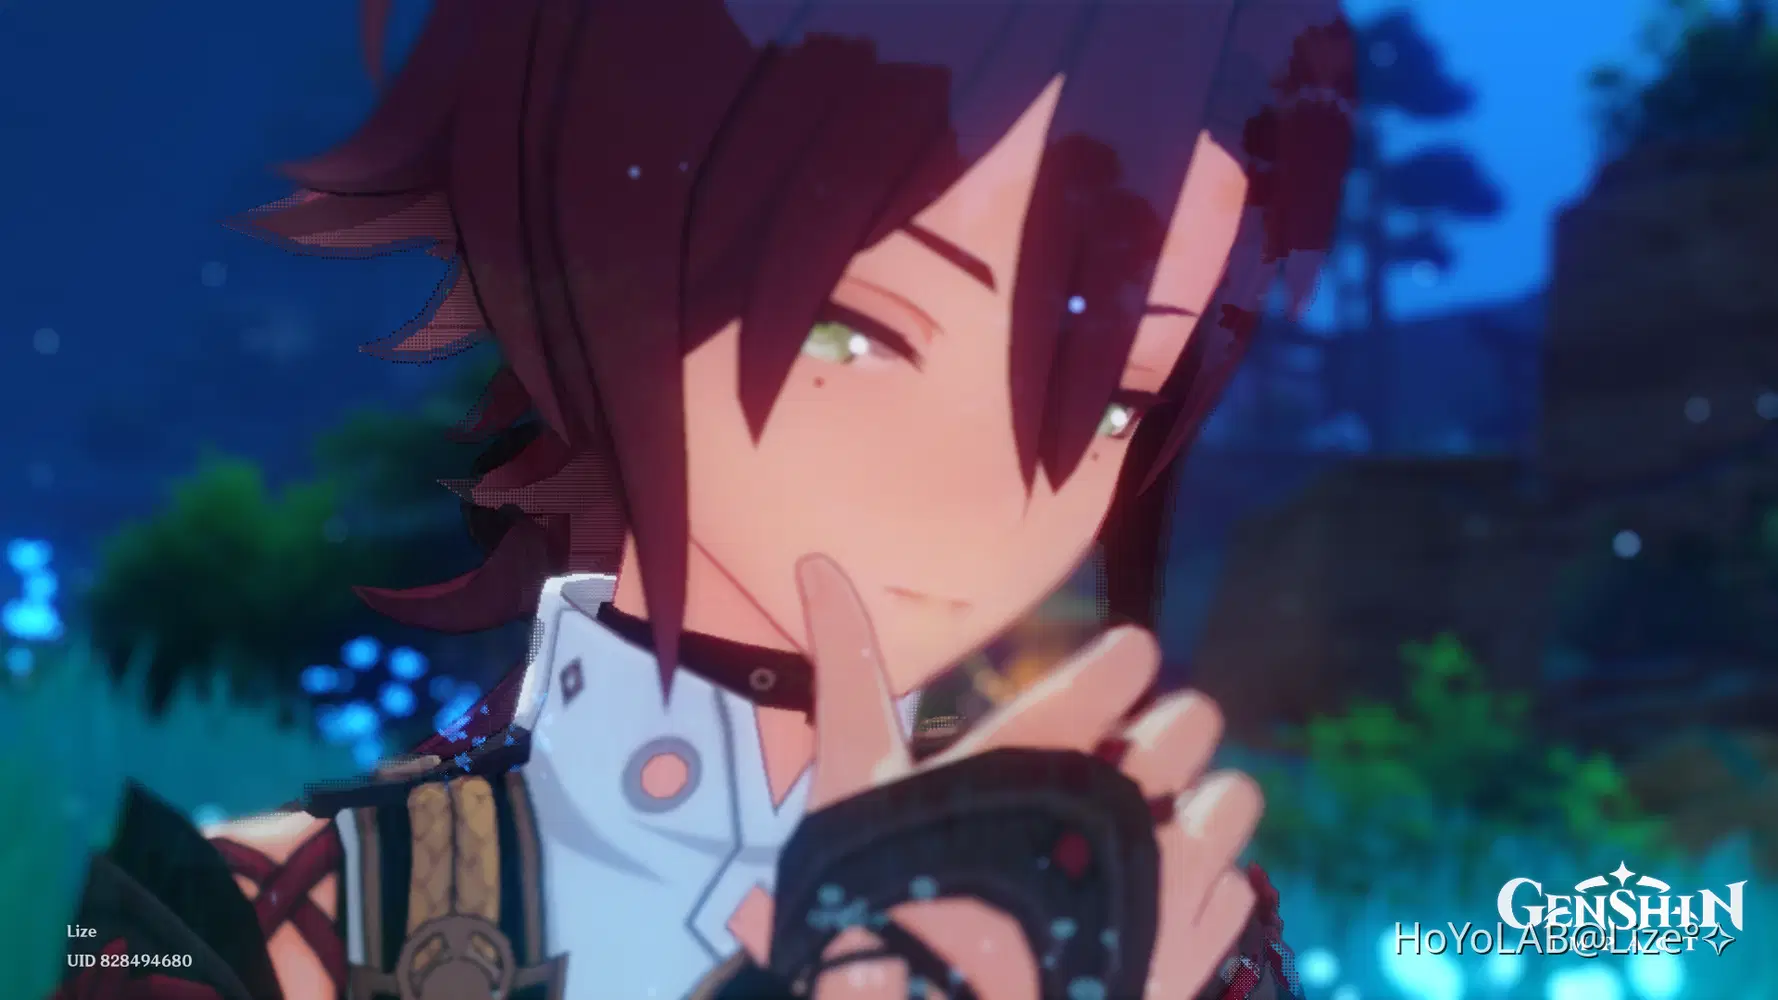
Why is he staring at us like that though (;´д`)ゞ
I actually took this one during the latest event (the test of courage one) so this works for npcs or characters that appeared in the story as well!!
Another tip if you want Close ups!
You can crop the picture so that you end up with a close up of the face of the character!!
Make sure that your original photo is pretty clear / high resolution so that end result wouldn't be blurry.

Cropped Version
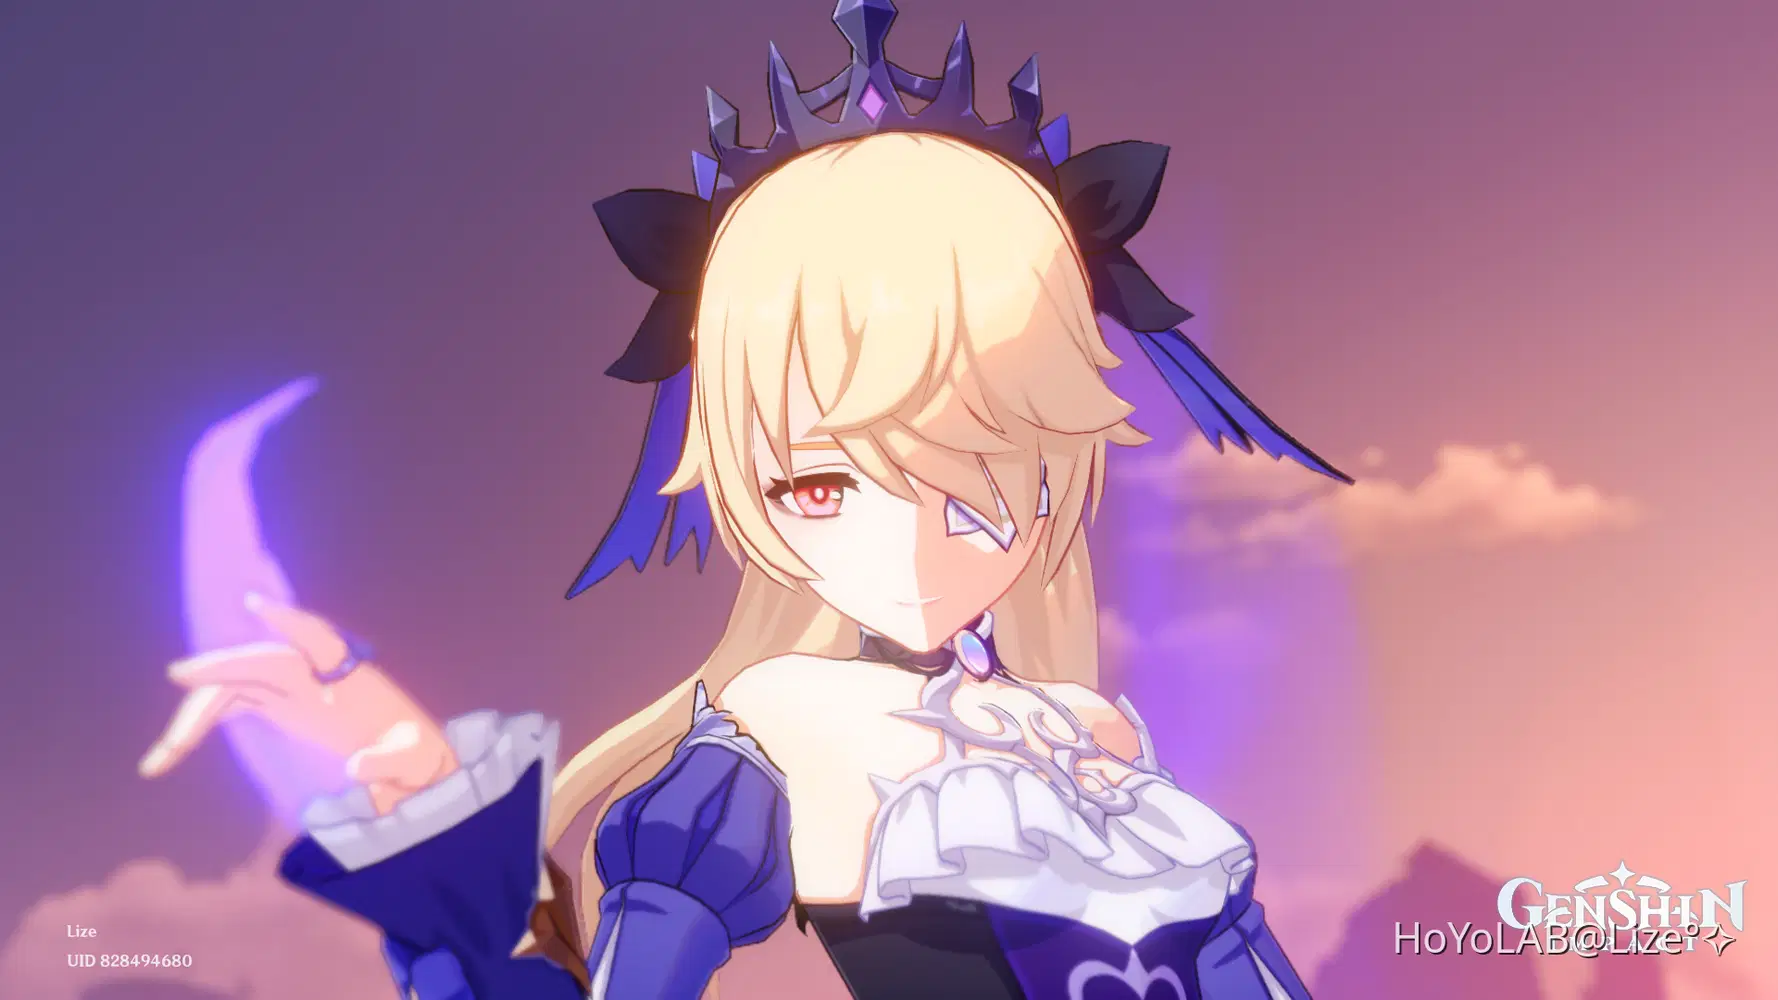
Original Photo
I'm not a fan of close ups so I prefer the original more, but this is just a way to achieve a close up of a character in an easy way!

High Angle
Just like what the name suggests, it is when you take a shot from a high angle, the camera is tilted down towards the character.
It gives the effect of making the character look smaller, cuter or more vulnerable.
This angle is a great pick if you want to make the character look cuter, which is very ideal for the child characters!! 

Nahida looks extra cute in this High Angle shot!!
It gives the character that puppy dog eyes feeling, don't ya think?


Another one!
This shot of Sayu reaching her arms toward you is so adorable don't you think?
If you take a picture of this idle in another angle, the feeling or scene changes too.
You'll see what I'm talking about later 
You can use this angle for characters that has an idle or any animation that let's them look up.
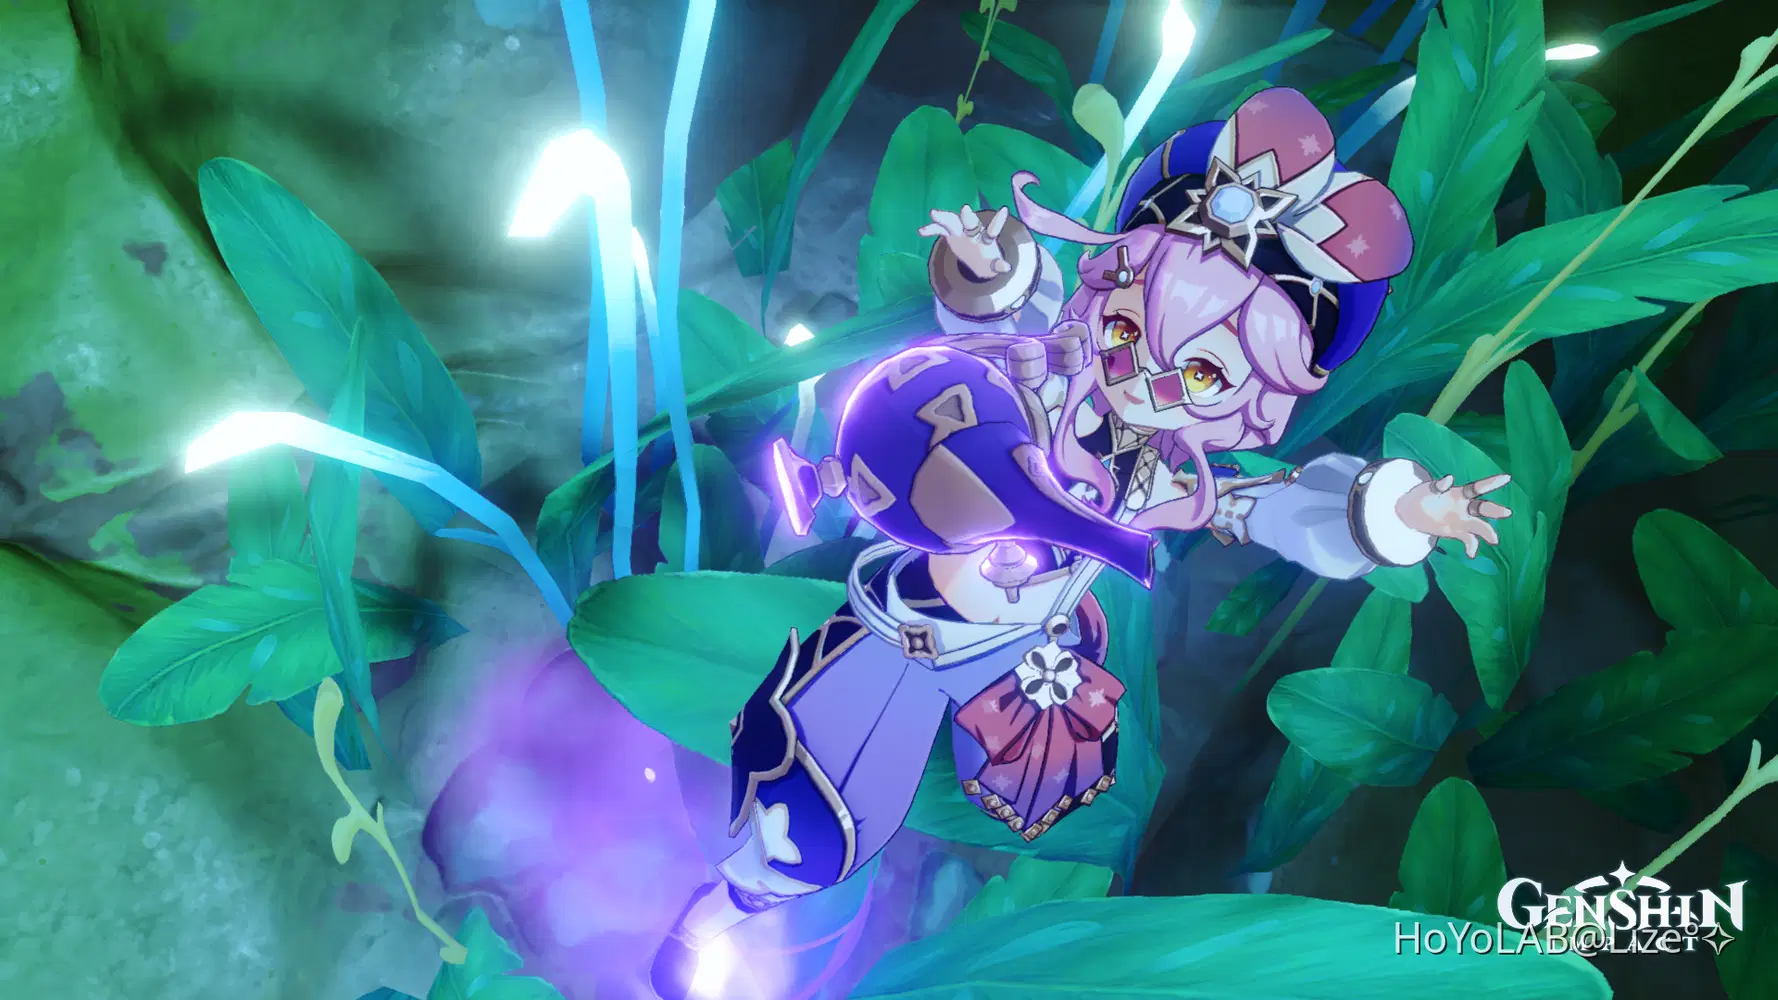
This shot of Dori for example, 
after attacking the enemy using the elemental skill, she throws her lamp upwards, making it an ideal position to take a high angle shot!!
Here's another example!
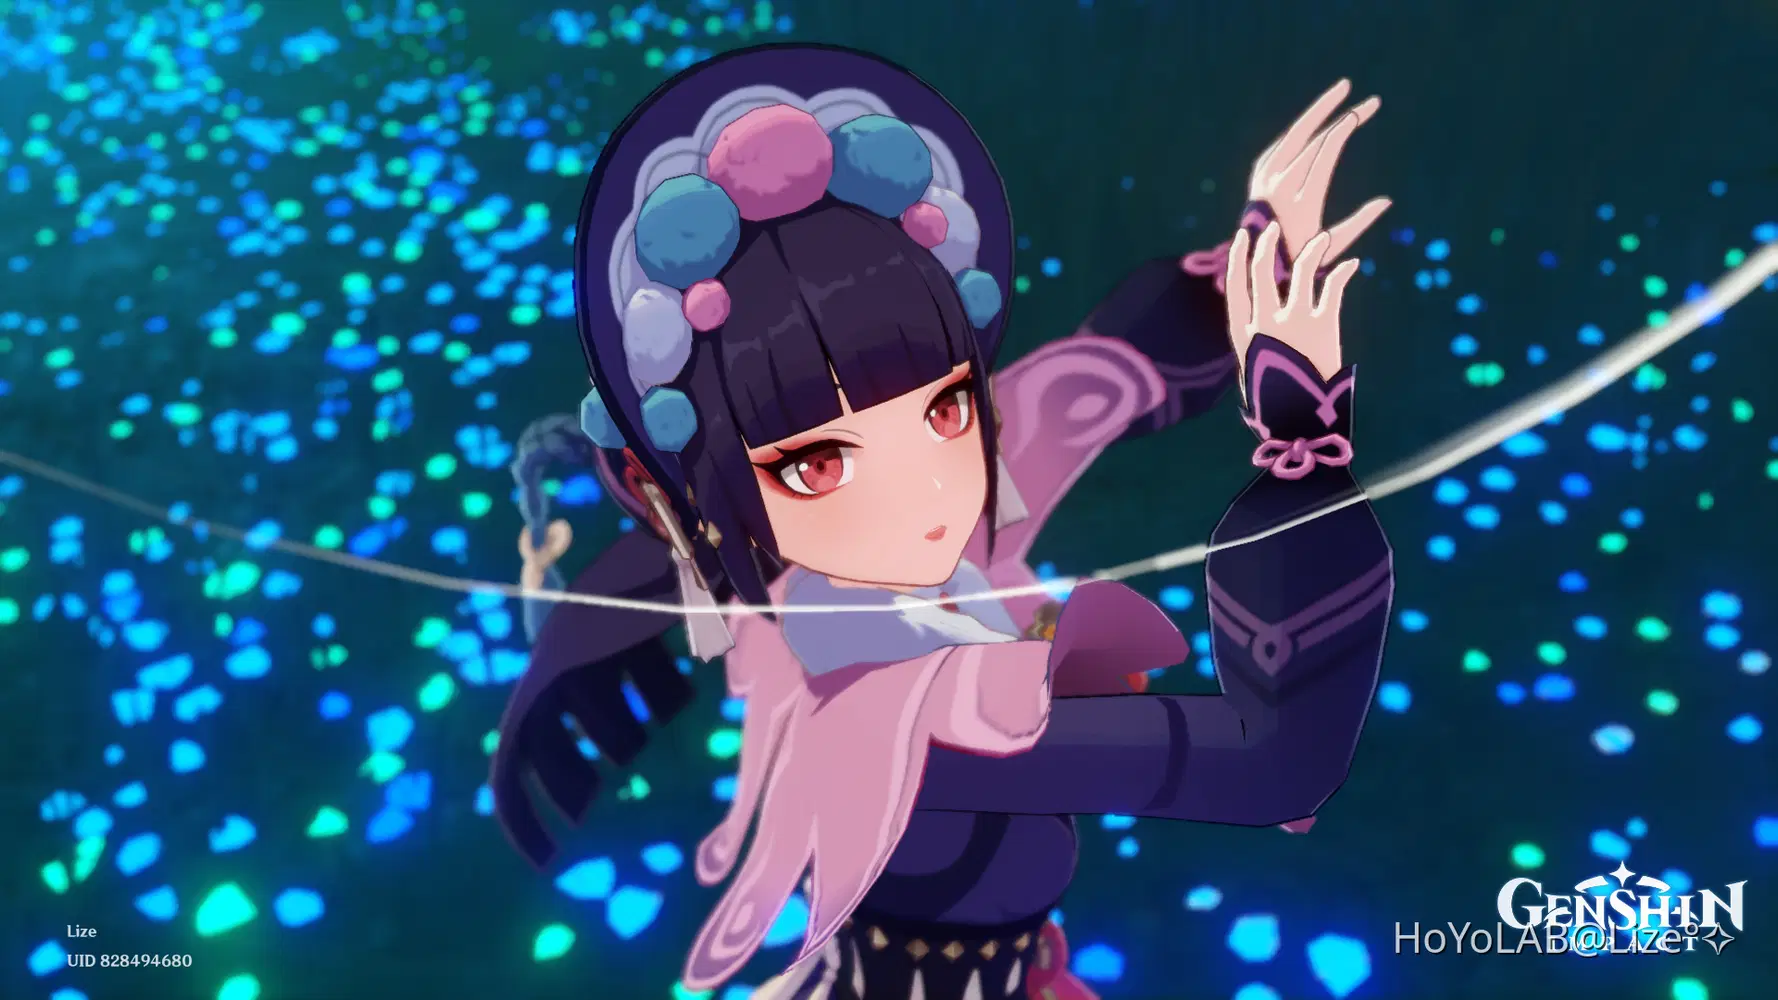
The moment Yunjin throws her pole/baton (I don't know what its called I'm sorry  ) , she looks up before she catches it so you can take a photo at that moment!!
This picture is what you'll get.
More often than not, characters who throw things either in their idle or attack animations are pretty good models for a high angle shot.
But there are instances where it doesn't make the character cute at all.
Take a look at this photo for example
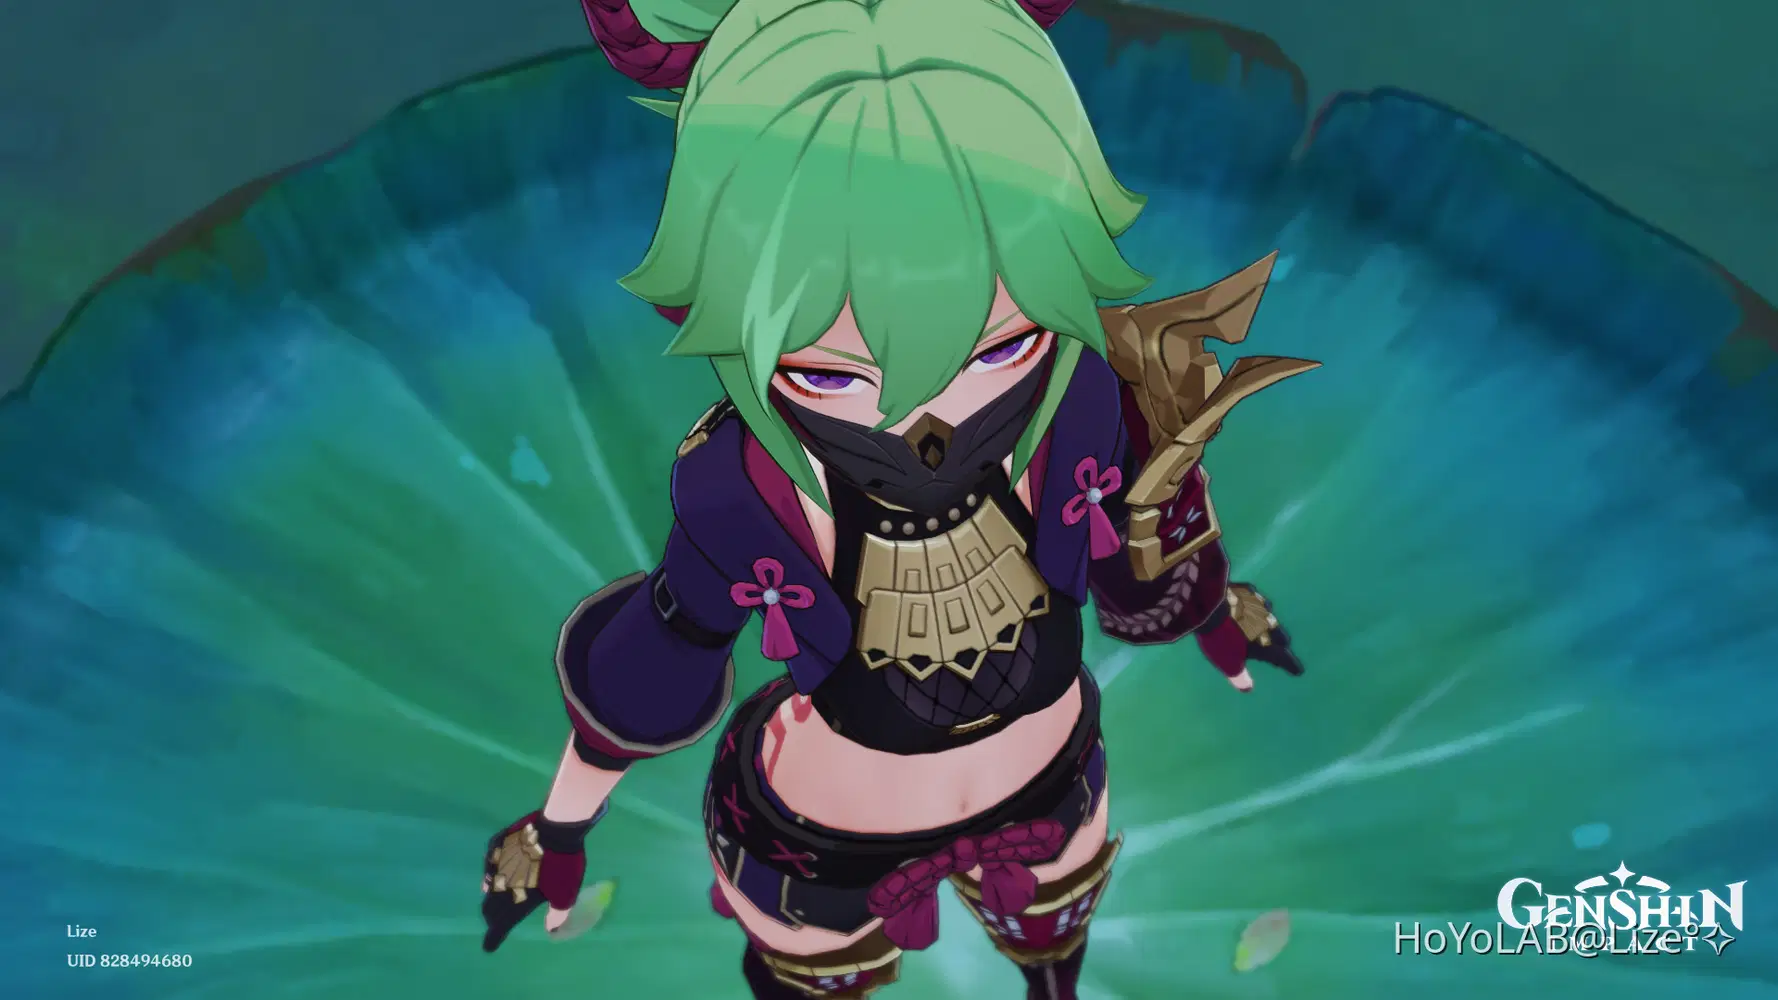
She's nowhere cute nor adorable, rather she looks intimidating 
This is because when you tilt the angle down, the pupils of the eyes moves up and may appear as if it is glaring at you.

I observed that this trick works best for characters who already have sharp eyes like Kuki Shinobu!
Low Angle
This is the angle where it appears that you are looking up to the character.
Due to that, it seems that the character is looking down at you giving that big, scary and intimidating feeling.
The Rosaria picture at the beginning actually uses this type of angle (although I didn't use an extremely low angle)
Here's another example:

Yelan is looking pretty threatening here as if she caught us peeking at them.

Well that is the story I wanted to convey in this photo hence why I used this angle!
And remember the Sayu idle I talked about earlier?
If you take a picture of Sayu doing that idle but use a Low Angle instead, you'll get this

BIG SAYU!!
The character appears bigger than they are using this angle!
Well by using this angle, I made Sayu's wish to be taller come true 
Rule of Thirds
While we are on the subject of framing, let's tackle a trick used to effectively place a character in a photo.
This will only be a brief discussion so if you want a more in-depth guide I could make a guide dedicated to it!

First, you gotta imagine a 3x3 grid on the screen.

Mihoyo please make this a feature T^T
Then, you want to use that grid as a reference on where to place the subject and the other elements in the photo.
Instead of just placing the character in the middle, aligning them to the points or line of the grid can make it look more balanced and aesthetically pleasing.

In this photo, I tried to align Shinobu to one line of the grid while I positioned the flowers on the other.
This creates a balance within the photo and assures that even though I placed the subject on one side, it wont overpower the other side.

Final Result!!
But what if you want to apply the rule of thirds on an already existing photo?
Simple, Editing gets the job done.
1. Ready your picture
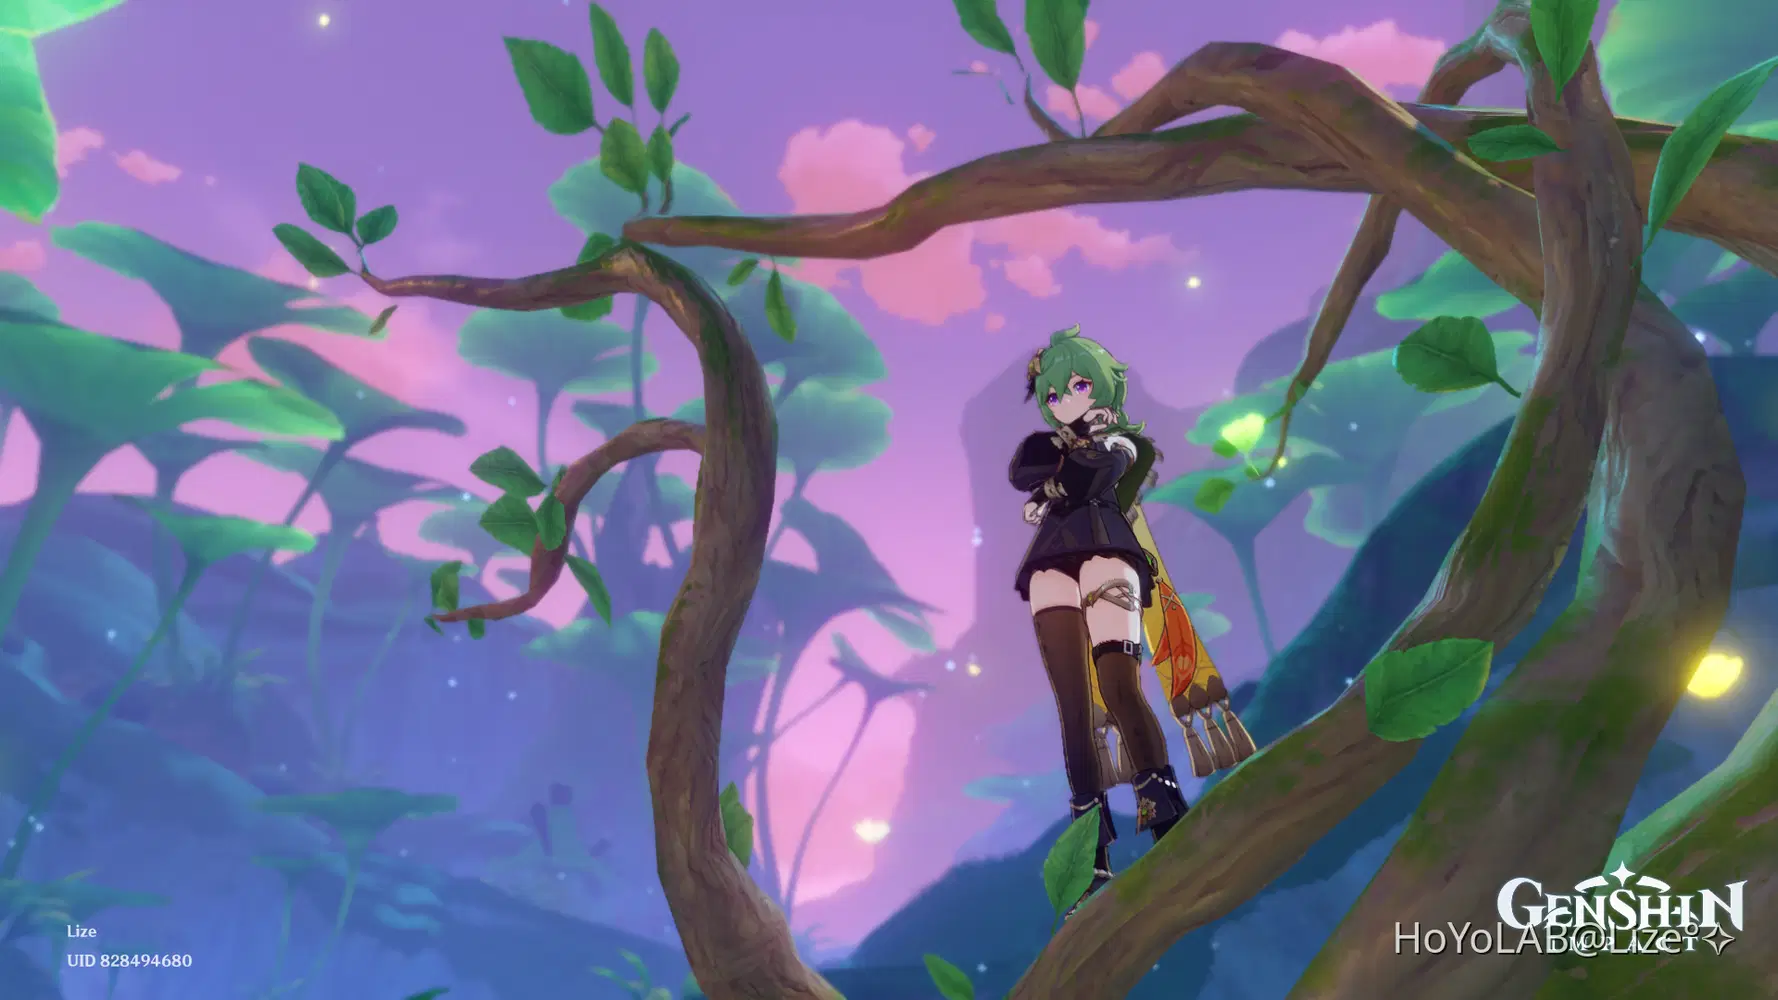
Original Photo
2. Lay down your Grid and Align!

Original photo with Grid
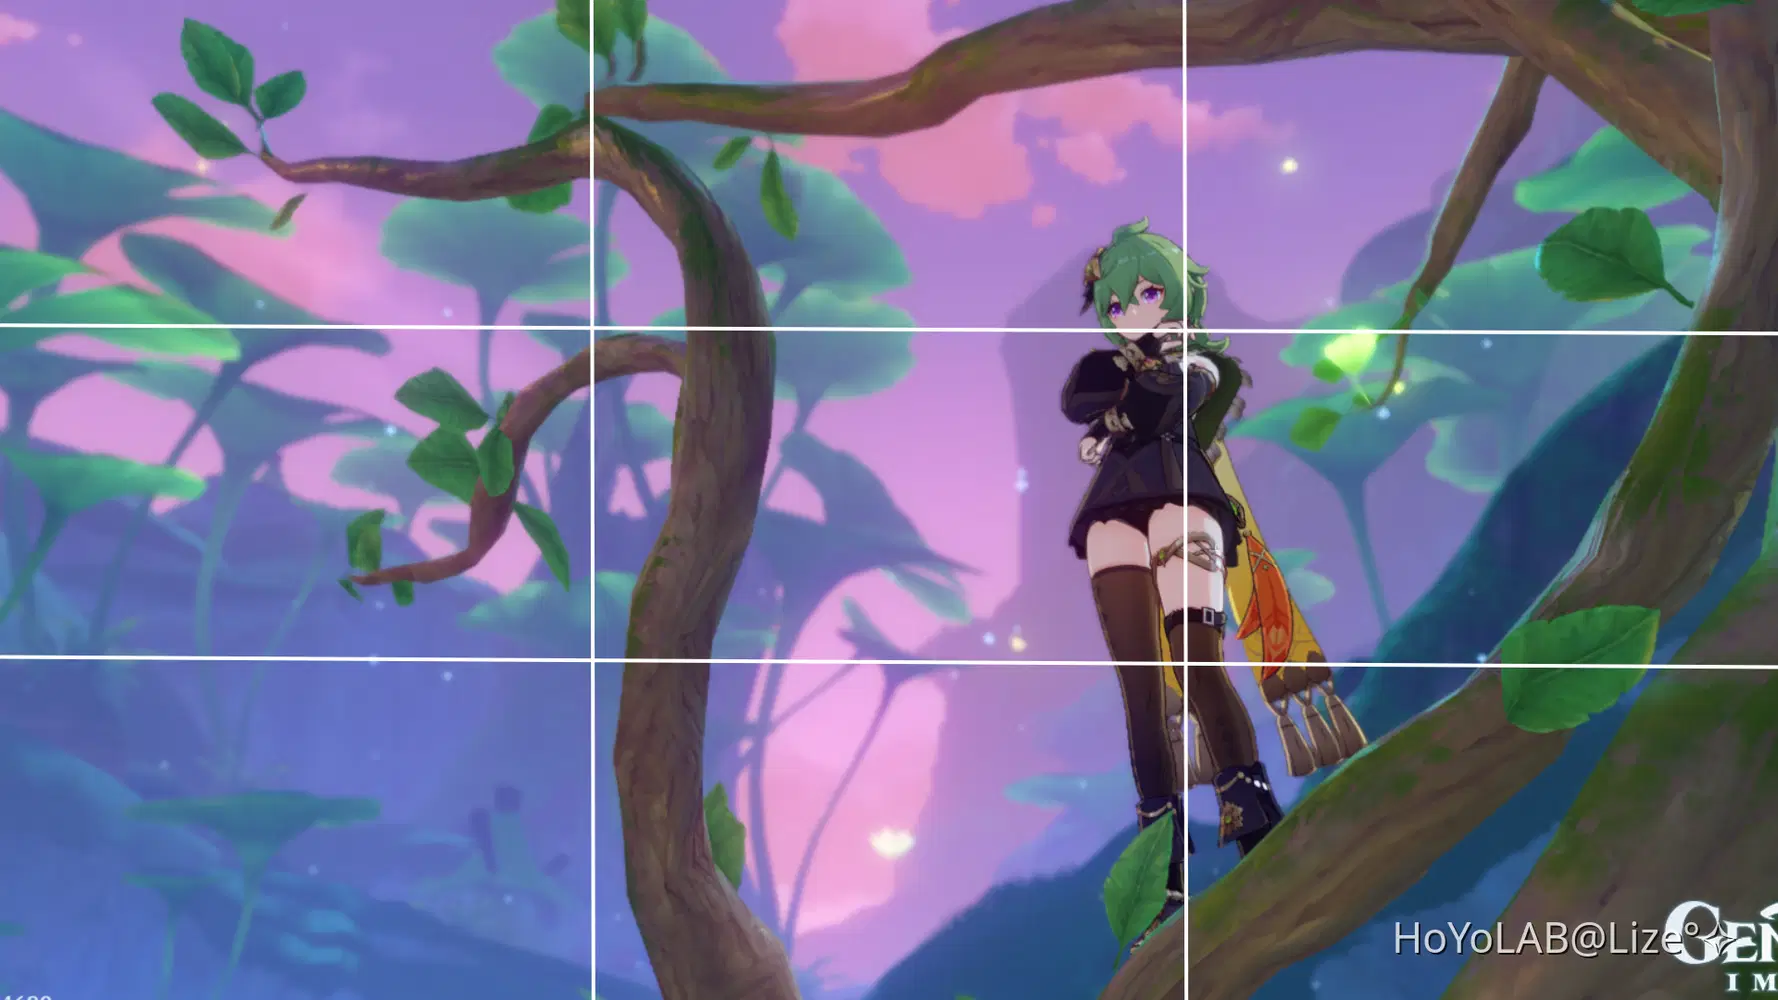
Lining the character up to one of the grid lines
3. Remove and Done!!
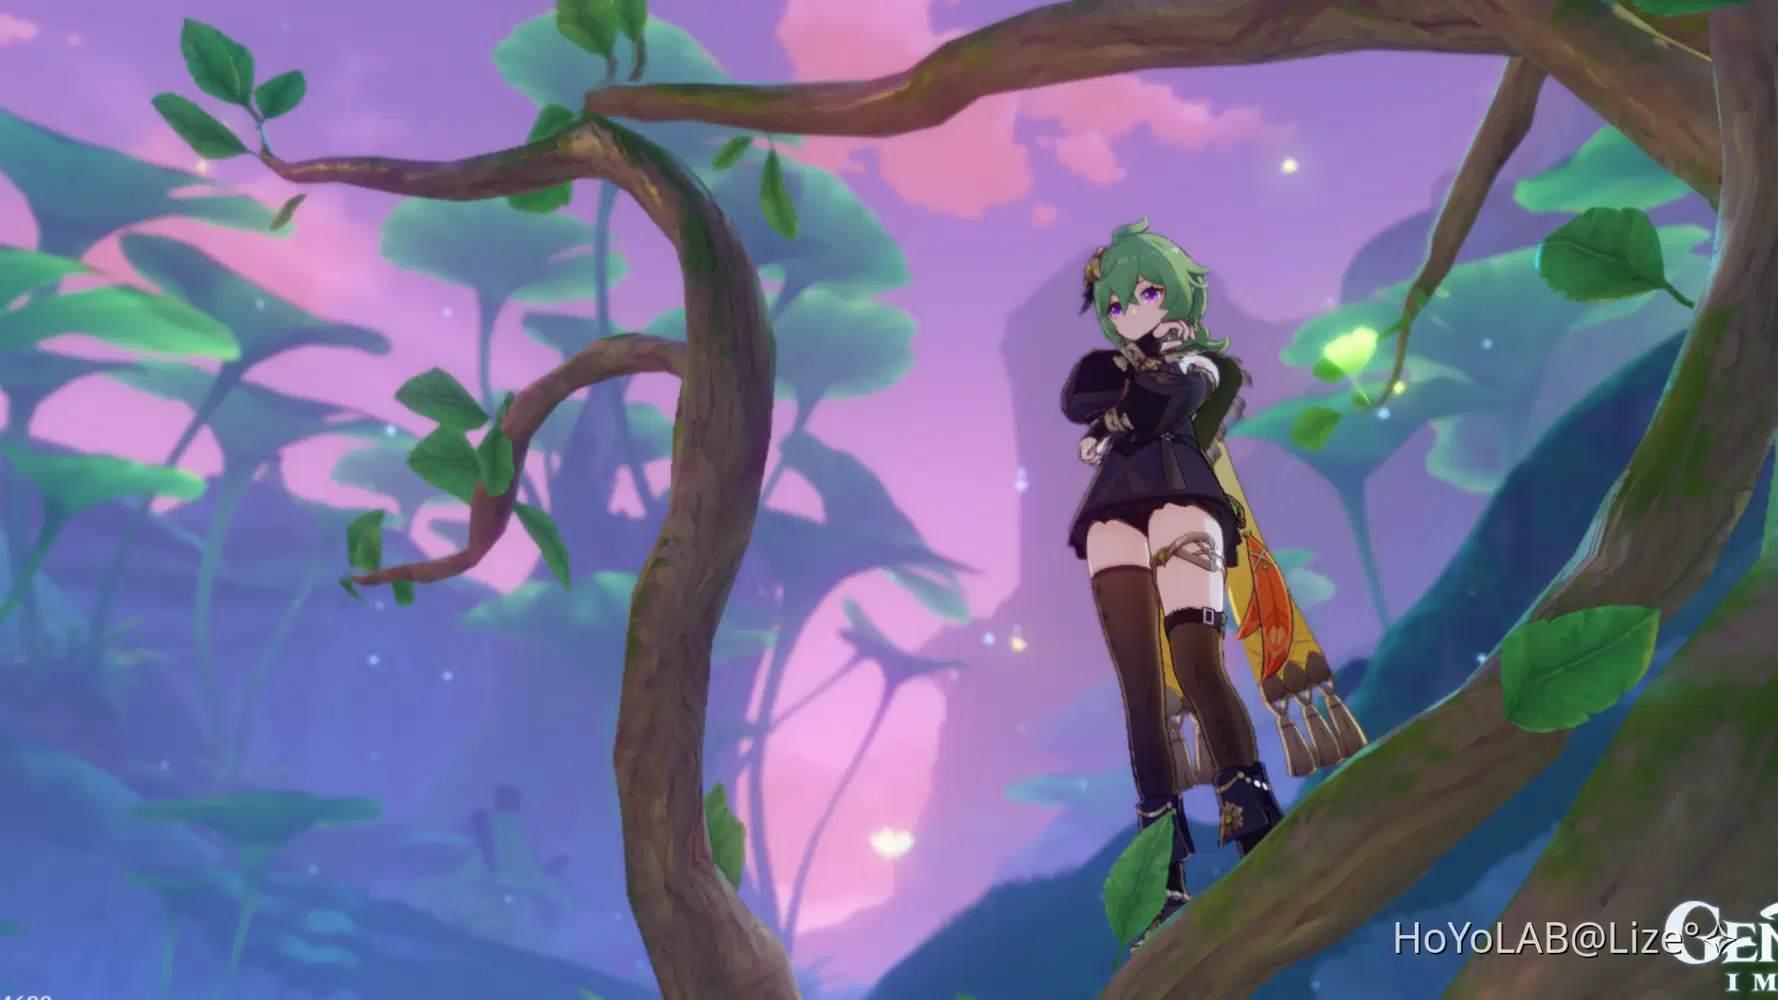
Final Result
This is very useful when you want the Character to not be in the middle when doing their Normal Attack/Skill

Credits to tangytakufor this tip!! (Go check her out!!)
The character remains in the center unless you go into the camera mode (all good if you are just standing still).
But if you want to use the normal attacks of the characters or any skill animation, then the character will stick at the center of the screen the whole time.
 But,
If you crop out one side (for example the right side), then the character would be placed on the right side of the shot as well!!
Moreover, you can take advantage of the rule of thirds if you don't know how to crop it nicely!
Let's look at the process shall we?
Its the same 3 steps I used above!
1. Ready your picture

I'll use this shot of Ningguang doing her normal attack.
2. Lay down your Grid and Align!
You can skip the grid if you already know where to put the character, but I would still recommend it if you want to ensure a balanced and aesthetically pleasing photo.

Original photo with Grid
I'm planning to put Ningguang a little to the left, so I'll crop out the left side and align her to the left vertical line.

3. Remove and Done!!
This is the finish product when all cleaned up!
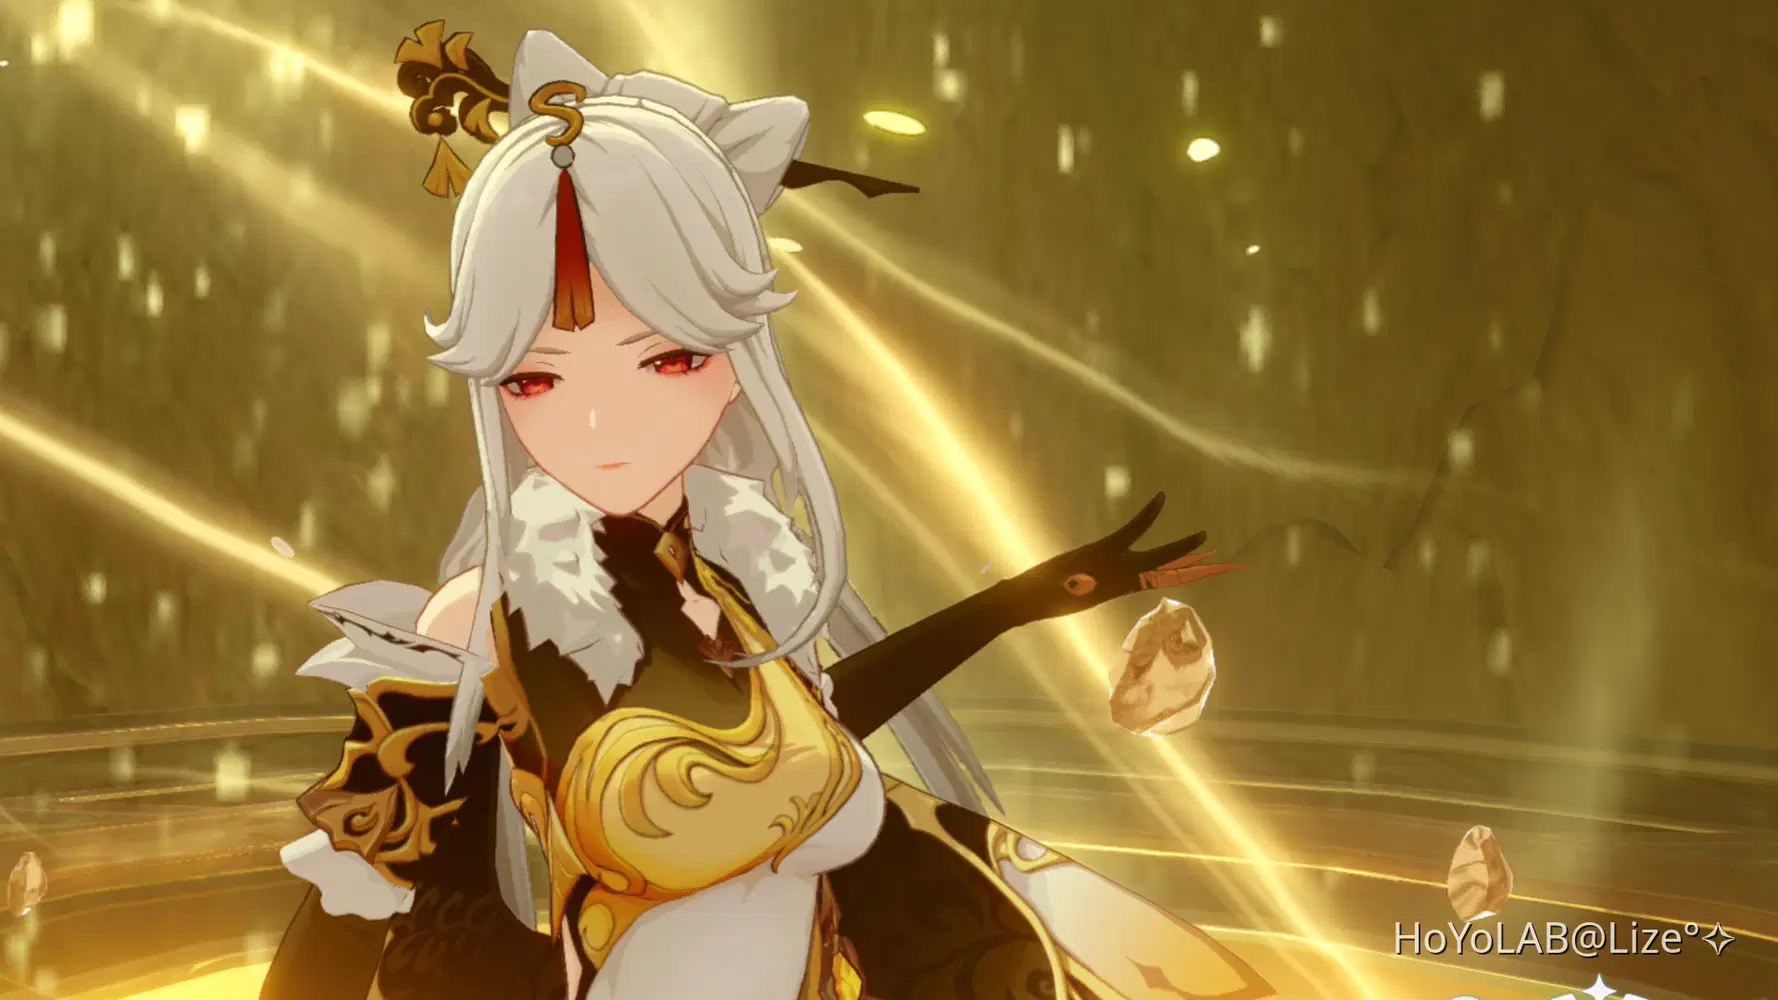
Genshin logo peeking through O^O
And that is it for today!
At last I finished the guide! The last one was like 3 months ago? (Yeah this took way too long)
Well I can only work on it during break hence the reason why it took so long (plus its a long guide too)

I feel like every new guide that I come up with ends up being longer and longer XD
Good thing there's a table of Contents now!! (Its in the other guides as well)
For the next guide, I'm actually not sure what to put in it 
Maybe a more in depth guide about Rule of Thirds? Or maybe listing different photo spots in Genshin??
Just let me know what you want to see next!!
I hope this guide helped you in taking better photos in Genshin!
I would love to see your improvements and queries are very much welcome as well!!
(Just keep it coming~) 
If you want more photography guides, you can check out the whole collection here,
✧°․ Guide in Teyvat Photography .°✧
And if you missed the guide before this one, just click the right arrow below to see it!
I hope you look forward to it!!

Have a wonderful day everyone~