


Dear Travelers, are you still worrying over not having enough levels on your Lumenstone Adjuvant in The Chasm? Worry no further, because today we bring you the complete guide on Lumenspar collection in The Chasm!
There is a total of 80 Lumenspars in The Chasm and three Lumenstone Ores. Lumenspars are materials needed to upgrade your Lumenstone Adjuvant, every 8 Lumenspar upgrades the Lumenstone Adjuvant by one level. As you level up the Adjuvant, you’ll receive great rewards such as Acquaint Fate, Intertwined Fate, and Talent materials.
We’ll go over Lumenspar collection in eight chapters. This is the first chapter and our search area is the Ad-Hoc Main Tunnel.
==Preparations==
1. Lumenstone Adjuvant is the key item for exploring this area. You can unlock new exploration mechanics upon leveling up such as illuminating your surroundings, activating mechanisms, enabling Dash even within Dark Mud, and marking the Lumenspar nearby.
2. Before you start exploring, you’ll have to complete the prerequisite world quest: Surreptitious Seven-Star Seal Sundering to gain access to The Chasm underground.
3. Players without Venti or Zhongli should resonate with the Geo Statue of The Seven on Traveler before starting, because the Geo Traveler’s E skill can summon a meteorite that can make climbing easier.
I. Area Overview
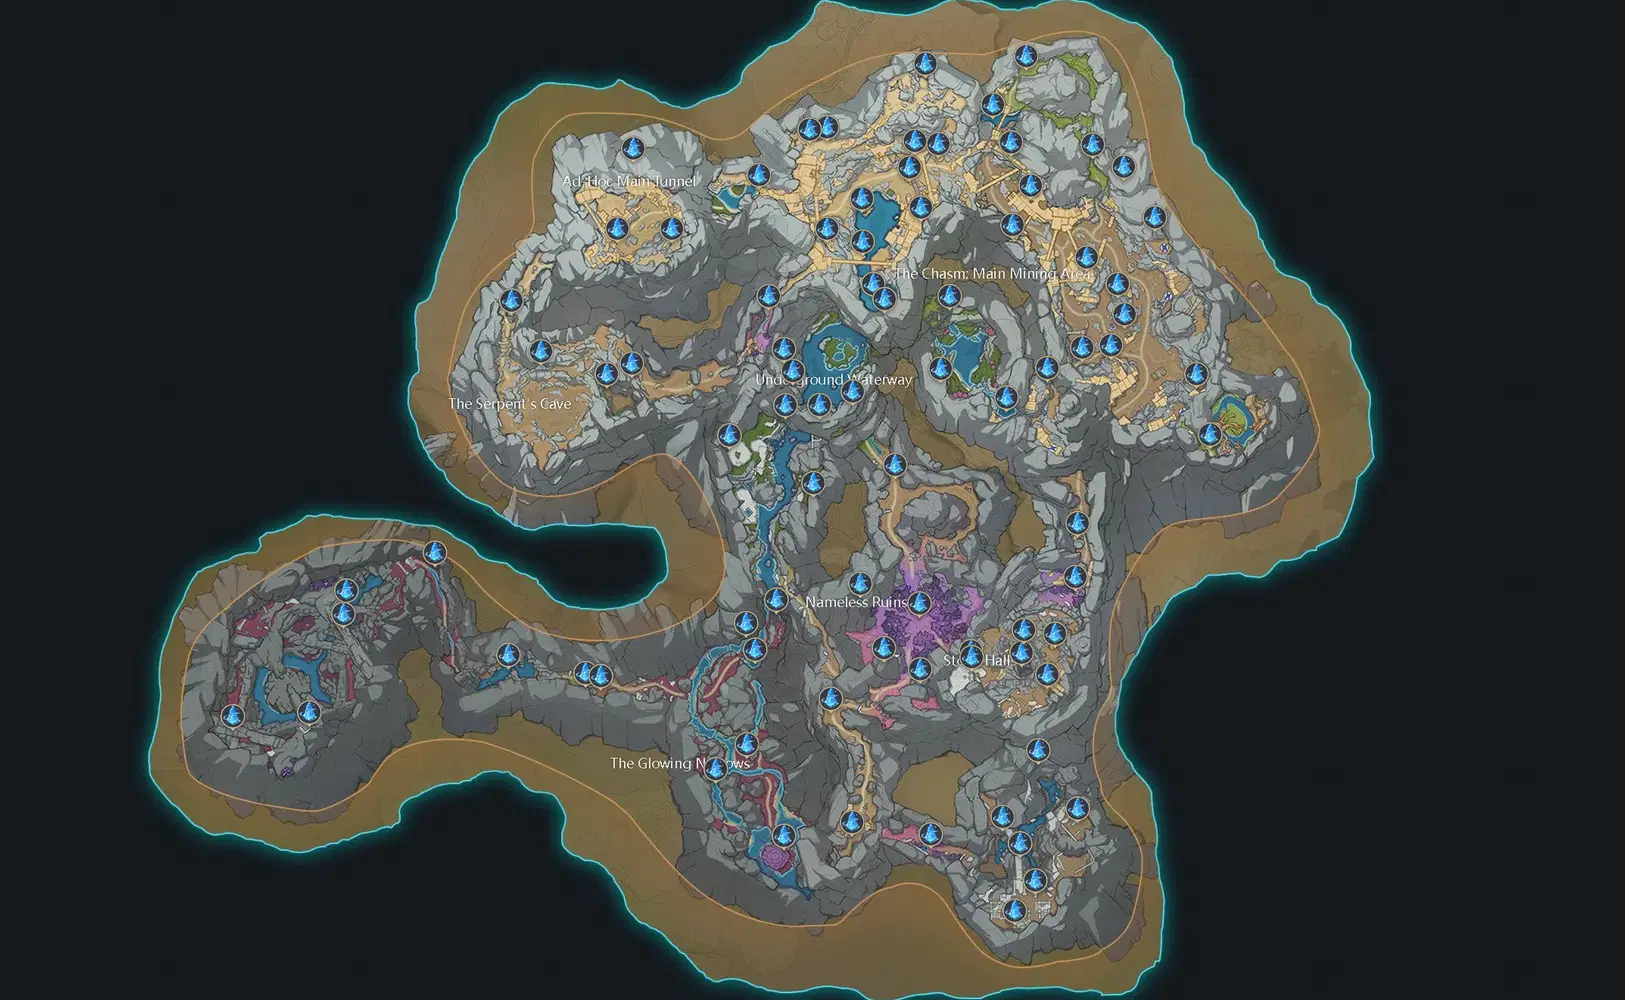
II. Collection Route
Area 1: Ad-Hoc Main Tunnel (#1-12, 12 Total)
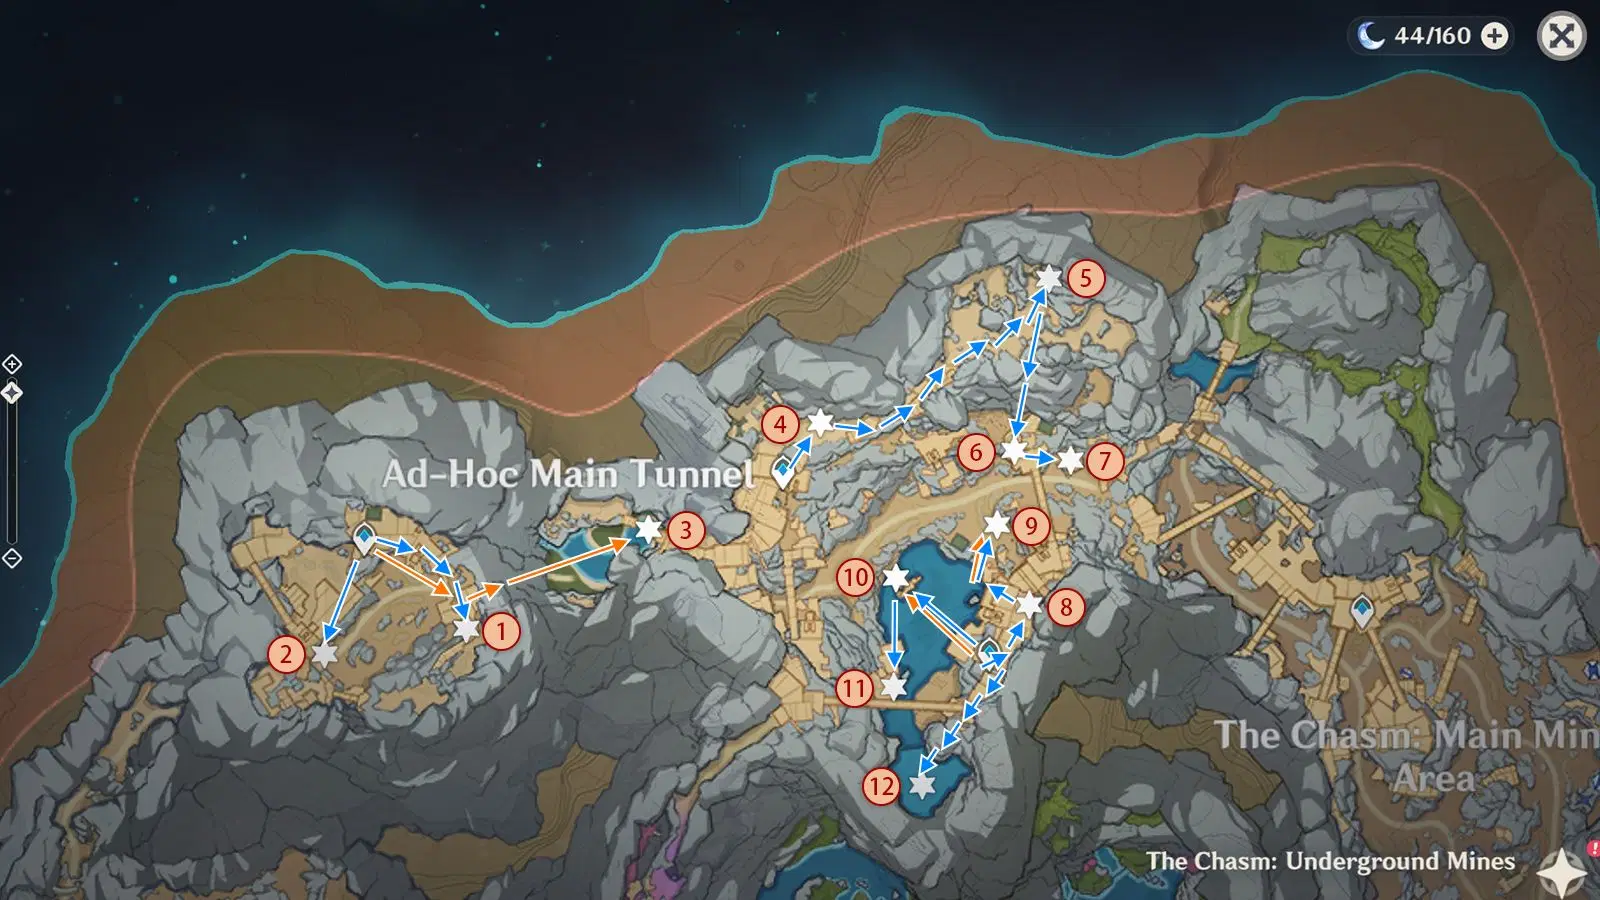
Area Description: This area focuses on collection around the Ad-Hoc Main Tunnel. The Chasm has a very complicated geography and the exploration environment is not great, so it’s best to have the Lumenstone Adjuvant equipped before you start. You obtain the Lumenstone Adjuvant from the world questChasm Spelunkers.
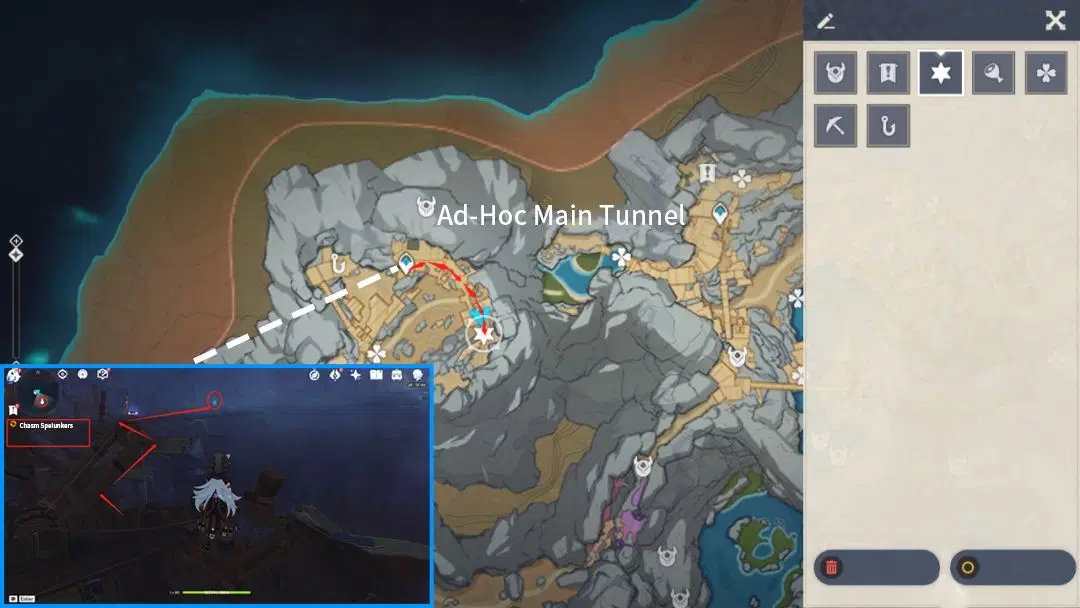
Lumenspar 1:
From the quest Chasm Spelunkers, you’ll gain one Lumenspar.
Lumenspar 2:
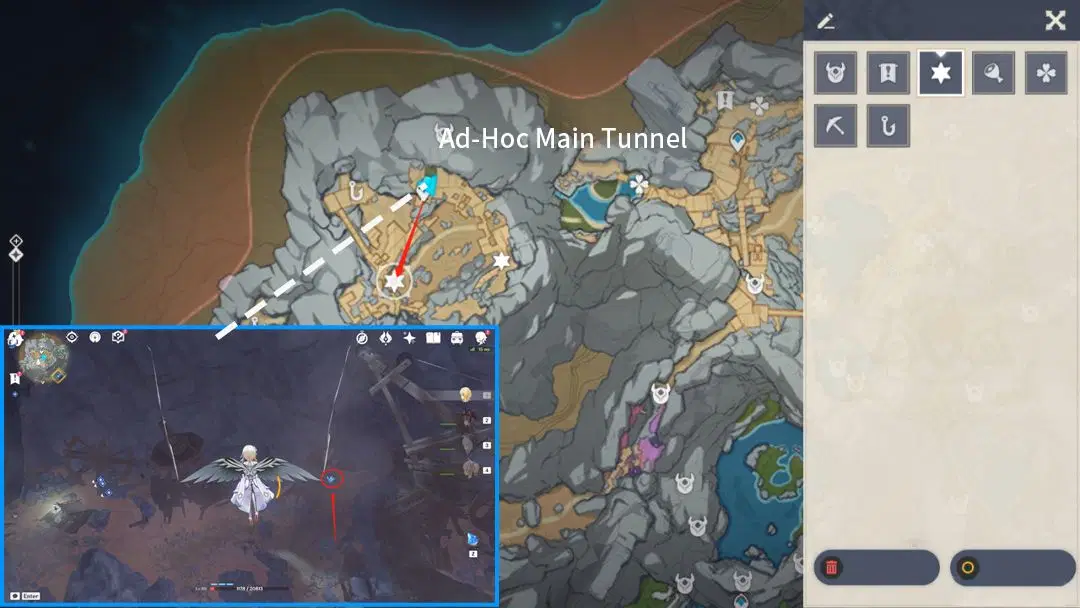
Teleport to the Ad-Hoc Main Tunnel west waypoint and go southwest. The Lumenspar is on the hook of the crane, glide down to grab it.
Lumenspar 3:
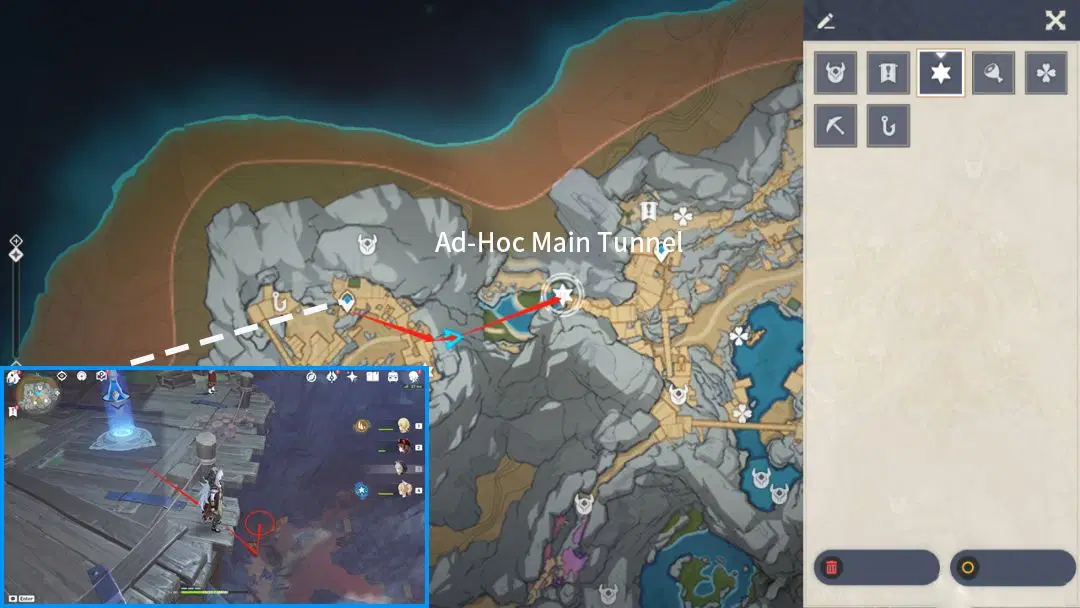
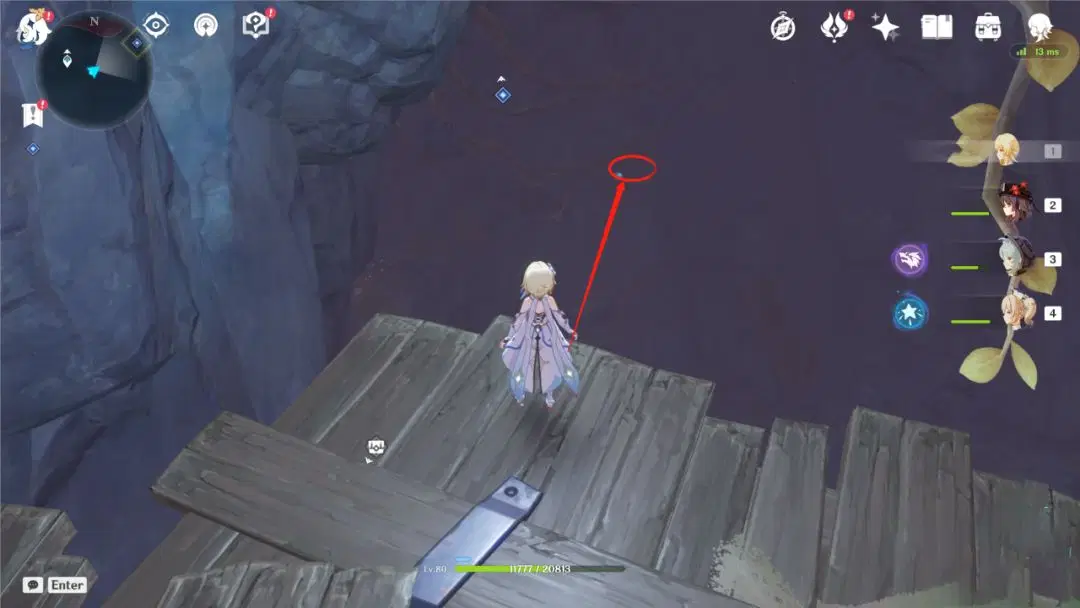
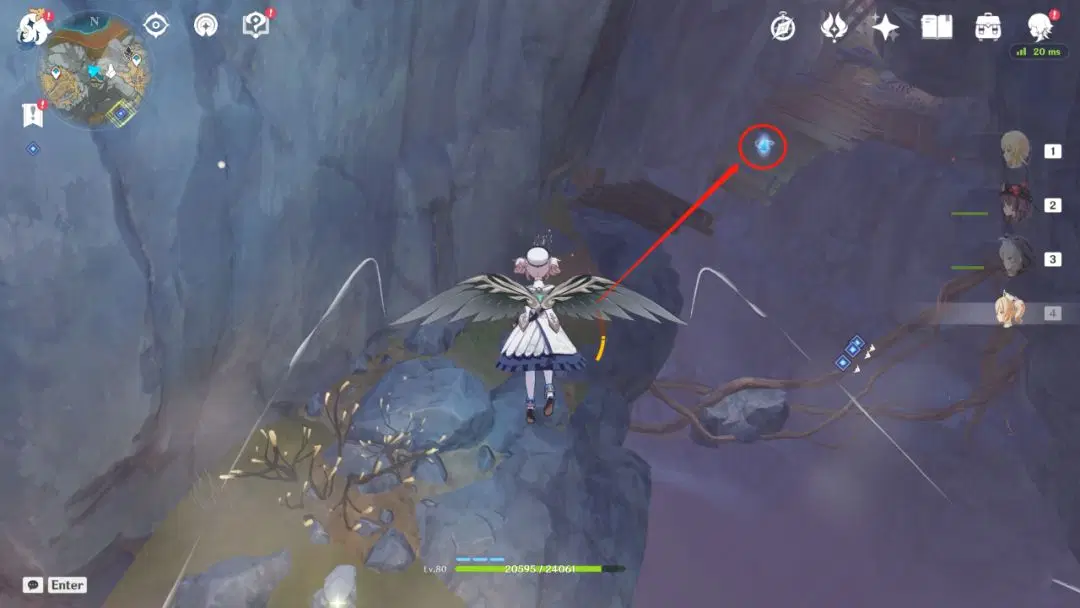
Return to the Ad-Hoc Main Tunnel west waypoint and go southeast until you arrive at the cave entrance below. Enter the tunnel and keep moving until you see a broken bridge where you’ll find the Lumenspar. Note that you should glide onto the bridge, don’t jump down.
Lumenspar 4:
Teleport to the Ad-Hoc Main Tunnel east waypoint and look north, the Lumenspar is floating above the path.
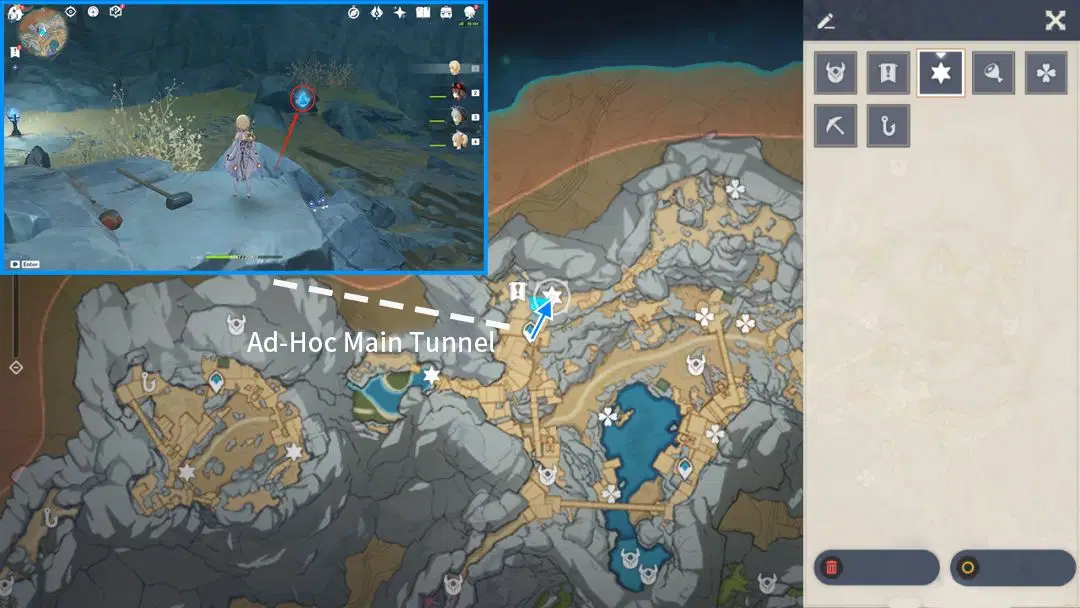
Lumenspar 5:
Once you have Lumenspar #4, go northeast to find the next Lumenspar in the air next to the scaffolding, climb up to grab it.
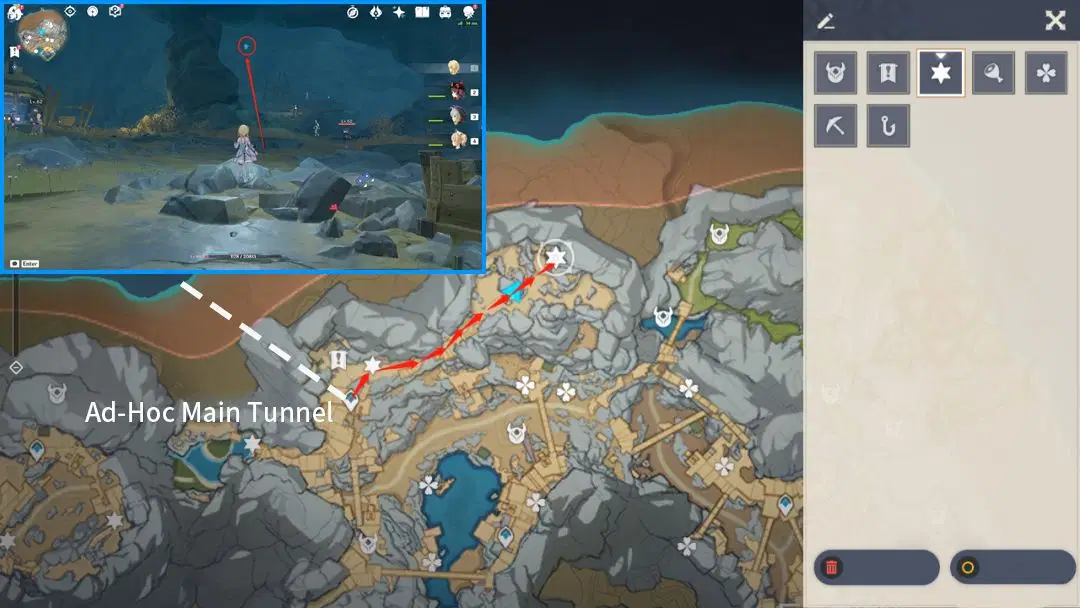
Lumenspar 6:
Once you have Lumenspar #5, go south to spot the next Lumenspar above the wooden beams across. You can also teleport back to the waypoint and go east to get there, climb up the beams to reach it.
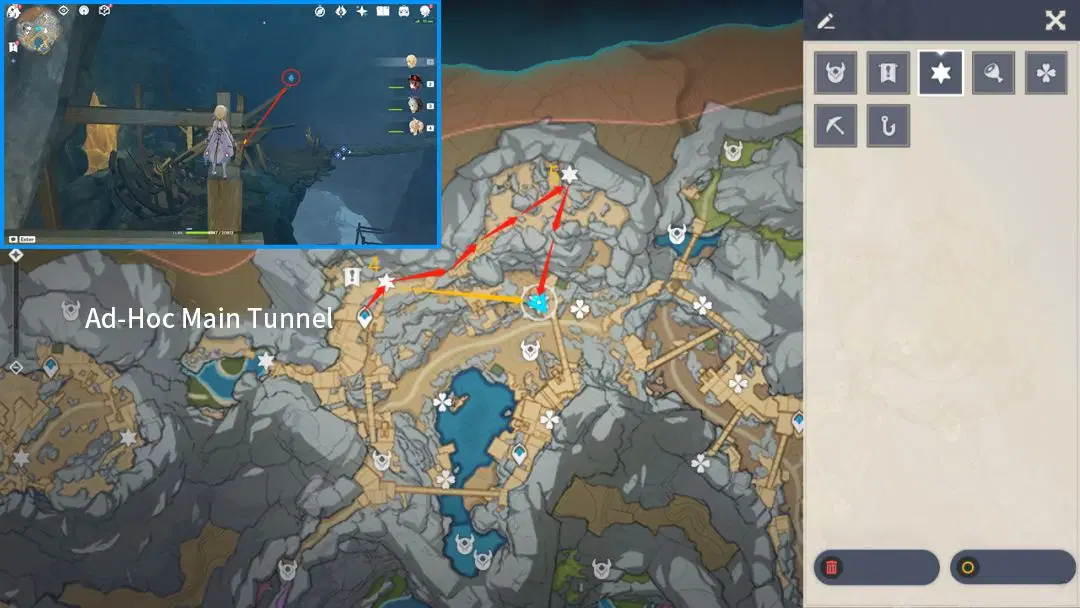
Lumenspar 7:
Once you have Lumenspar #6, go east and you’ll see the Lumenspar just above the wooden beam, climb over to grab it.
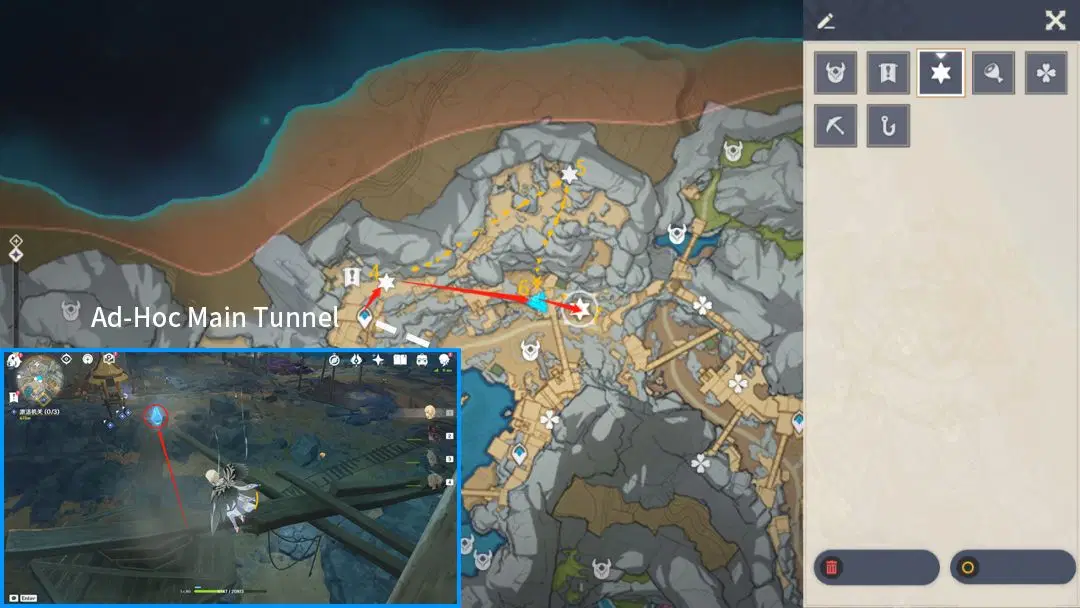
Lumenspar 8:
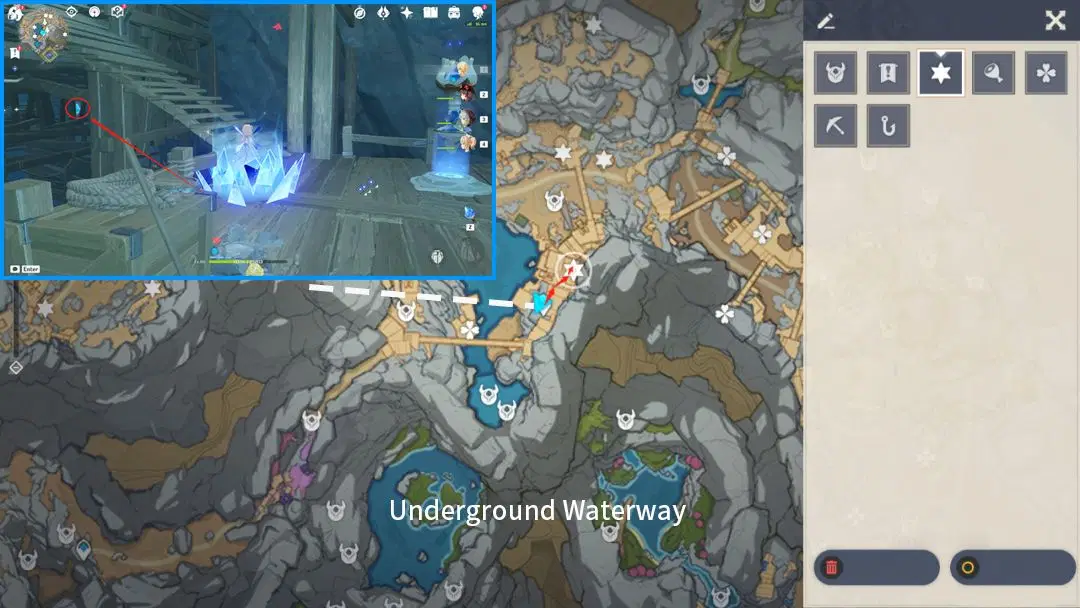
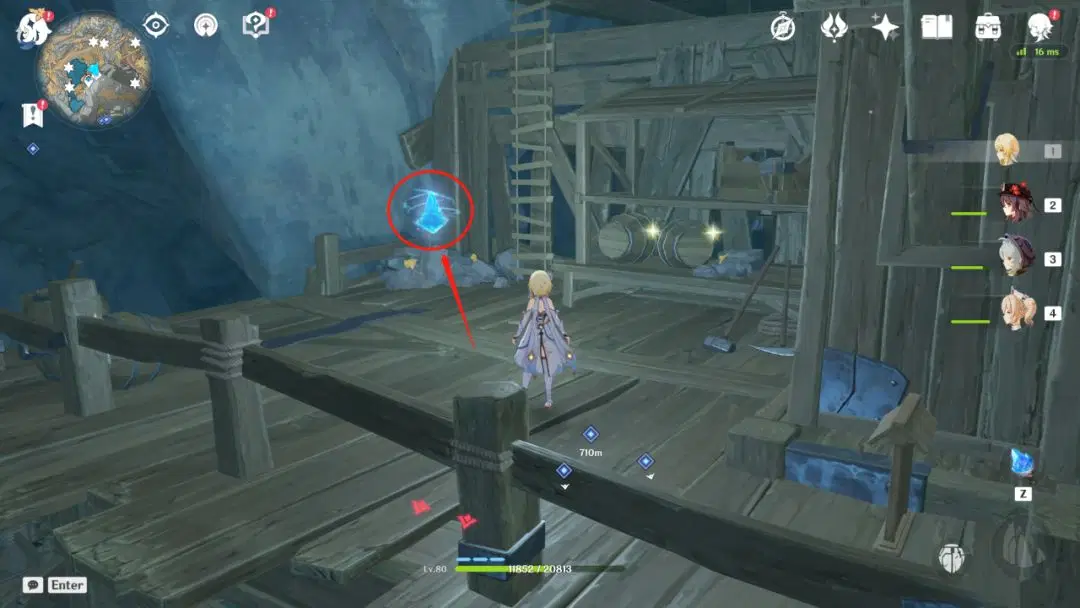
Teleport to the Underground Waterway north waypoint and go towards the staircase to the northeast. Climb the stairs and go down on the other side to find a Lumenspar.
Lumenspar 9:
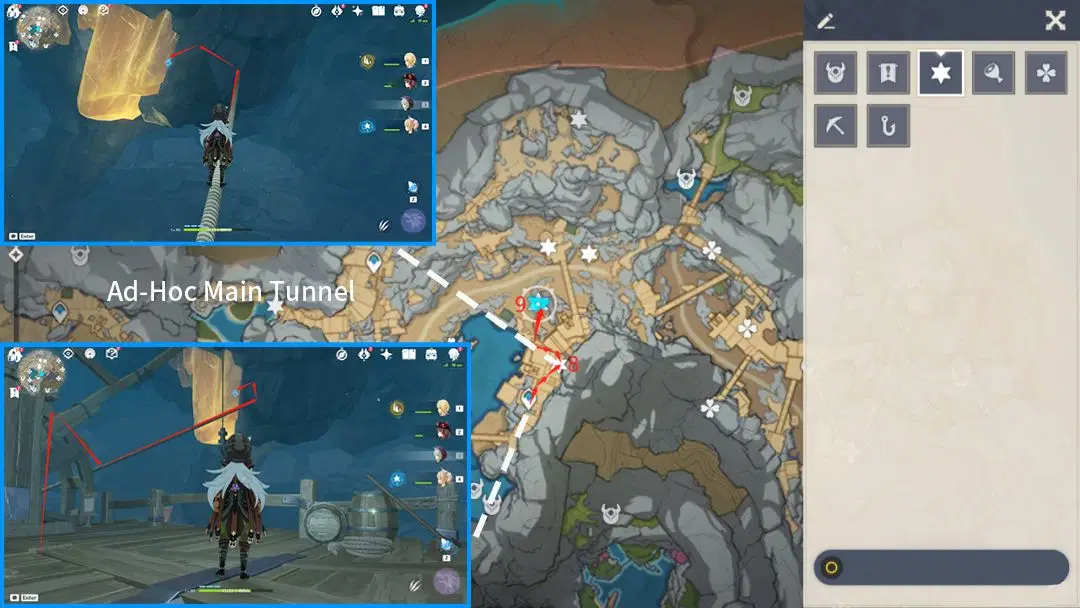
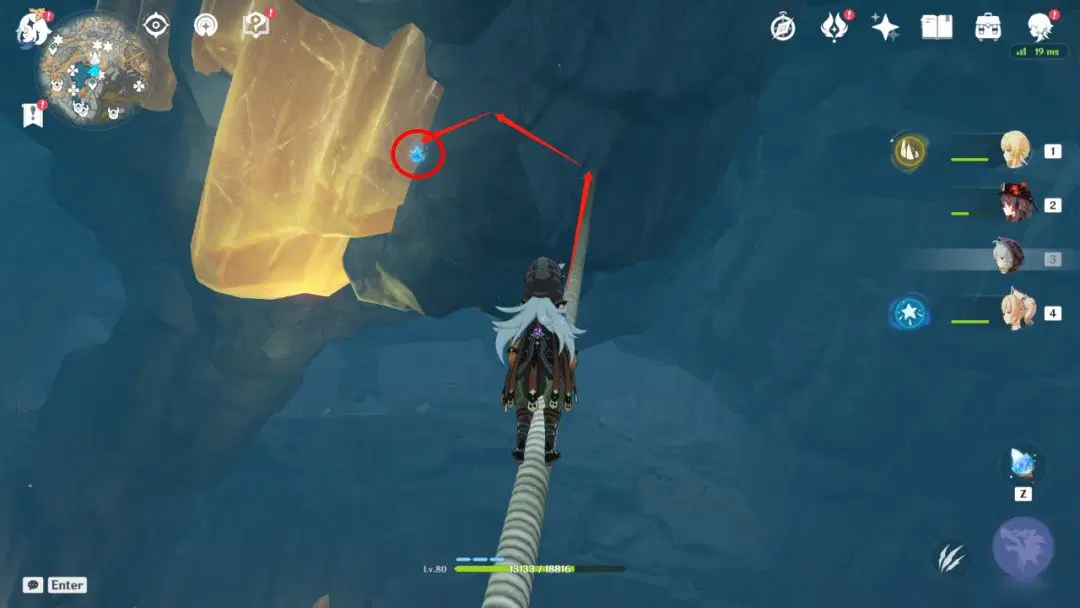
This one is next to a cliff face mid-air, you’ll need to walk the tight rope from location 8 to get over. We recommend switching to a Bow character and hold down aim as you walk. Once you’re there, climb onto the wall and slowly make your way over to grab it.
Lumenspar 10:
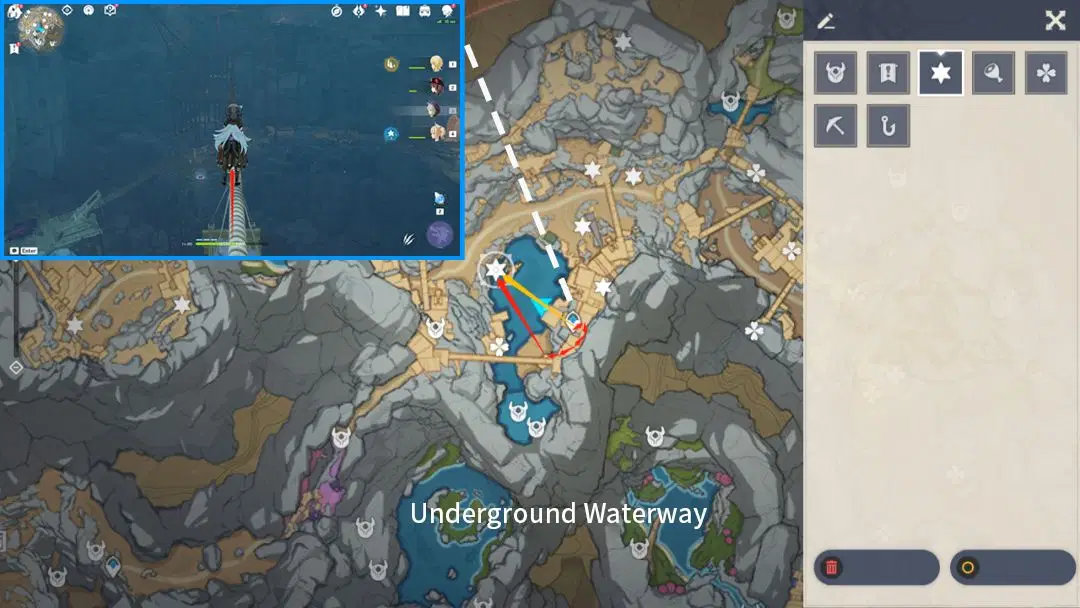
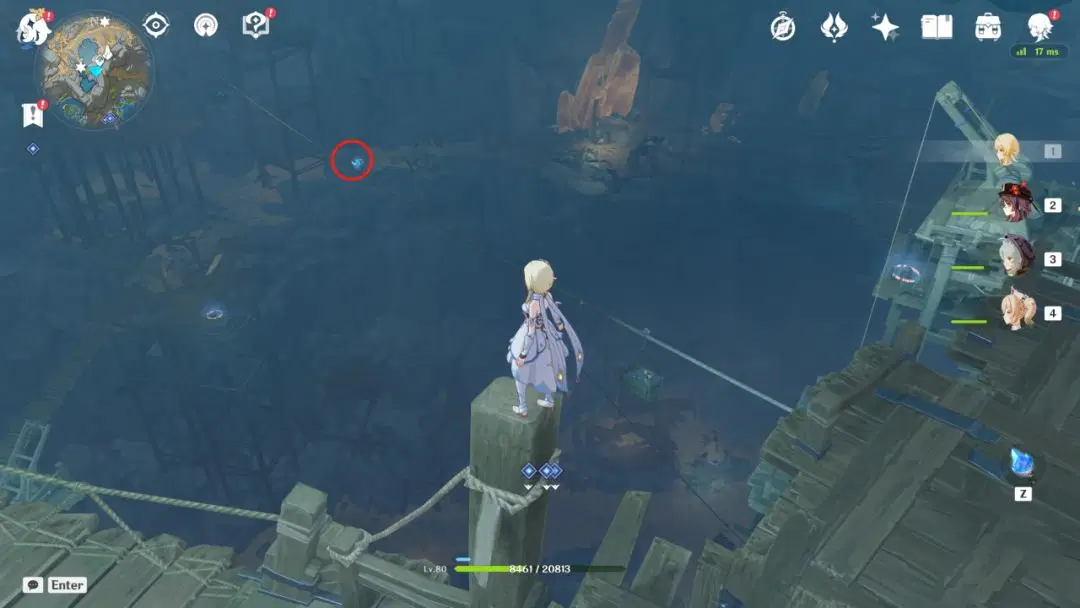
Return to the Underground Waterway north waypoint and walk the tight rope to the northwest. You’ll find the Lumenspar above the rope, walk or glide over to grab it.
Lumenspar 11:
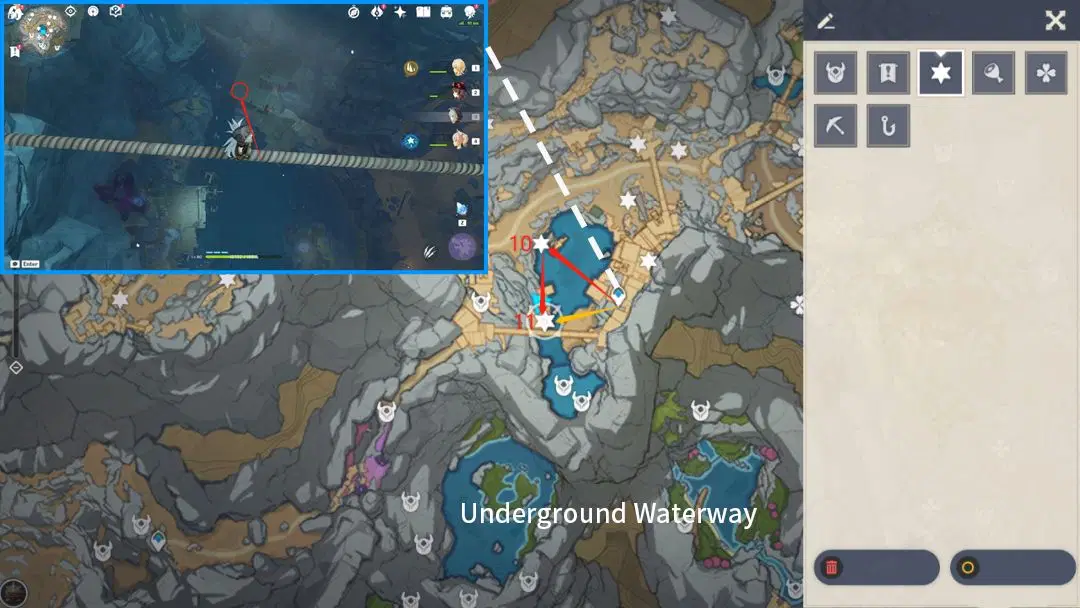
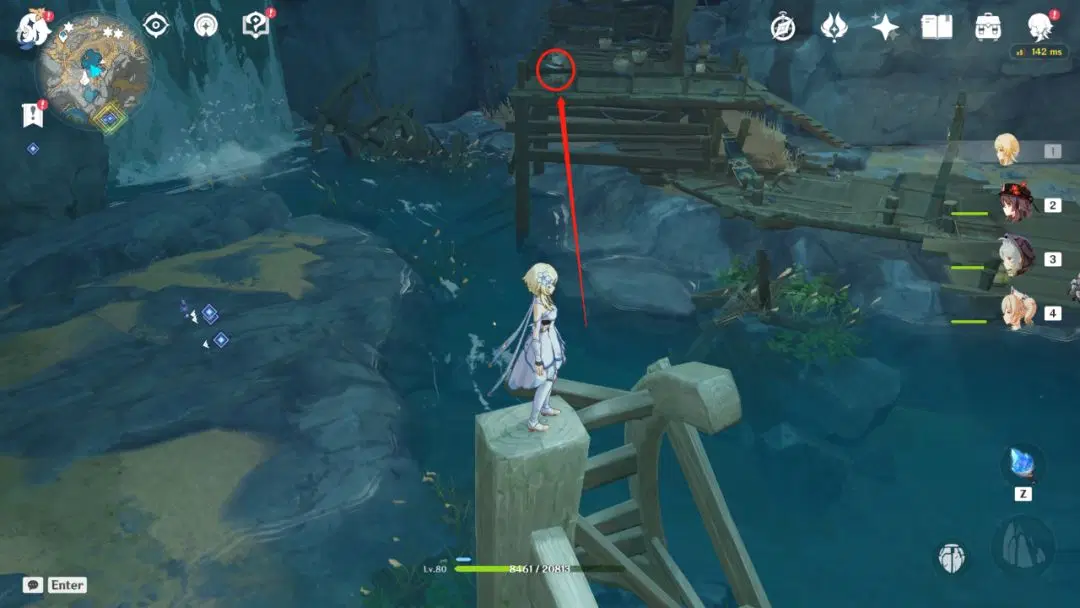
Return to the Underground Waterway north waypoint and glide west, the Lumenspar is inside the clay jar on the low wooden plarform.
Lumenspar 12:
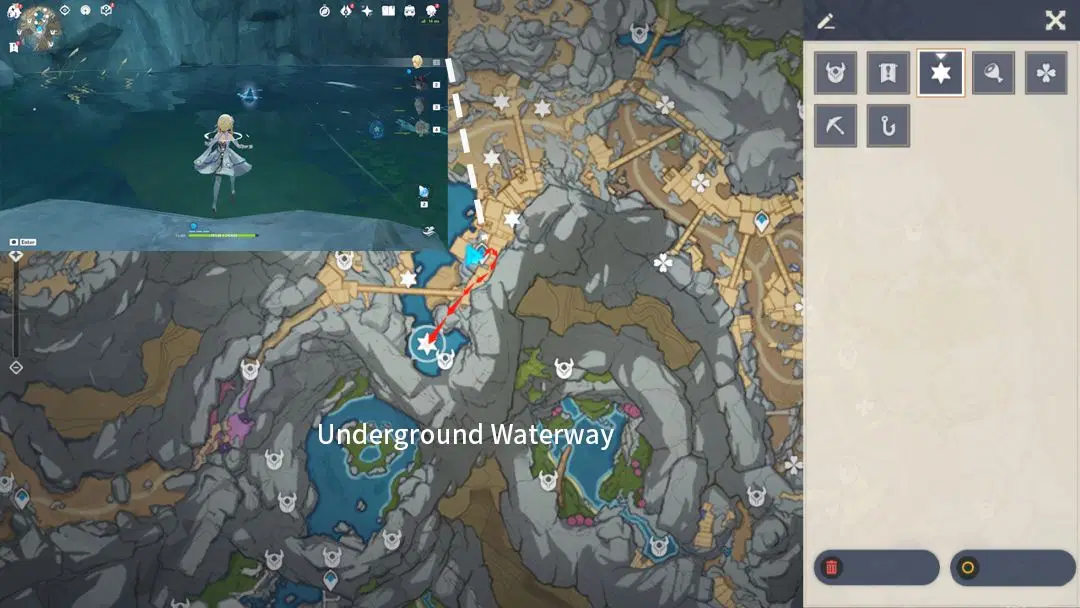
Return to the previous Underground Waterway waypoint and climb the stairs to the right. Once you reach the middle of the bridge, turn your camera towards the south, you’ll see a Lumenspar in the middle of the underground lake, glide down to grab it.
To make it easier for you to look up the Lumenspar you need, we’ll stop this chapter for now. Travelers can follow the link below and look for the remaining Lumenspars.
The Chasm is dark and has bad visibility, so we recommend having the Luminstone Adjucant with you as you explore. Also keep in mind to not step into the Dark Mud on the ground, doing so will reduce the energy level, and the Adjuvant will cease shining when the energy is depleted; To recharge it, simply return to any waypoint.
See you in the next part!
Up Next: Lumenspar Collection Guide (II/VIII) - The Serpent's Cave (7 Total)



