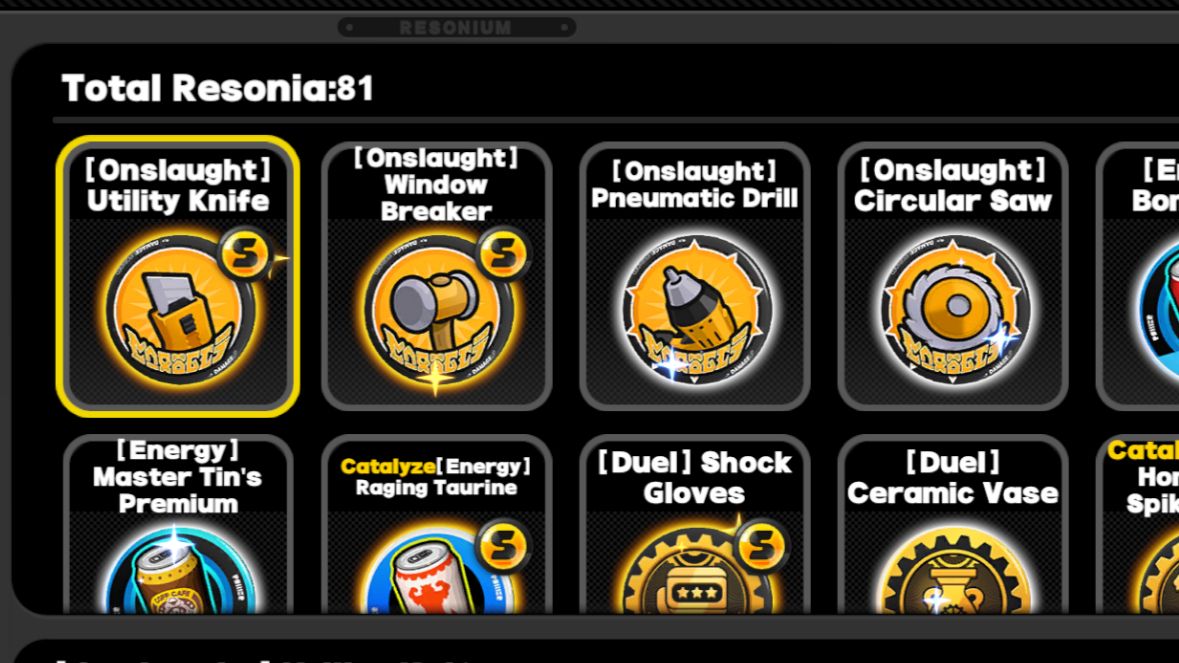
Prelude
As part of my upcoming series of guides, I think here's as good a place to start as any. After just recently hitting my new damage record in Inferno Reap, I'd like to share some tips and tricks for those who like to similarly test themselves on how much damage can be achieved within Nineveh's short five lives.
Let's take a look at a few of the mechanics in the Hollow(s) and strategies to finetune your Resonia gathering.
Element and Type
Each Agent will follow a specific formula that can be visualized like this: {{Agent}}: {Element}{Type}. Let's make that a little easier to understand.
Attack: [Element] Critical
Support: [Element] Assist
Stun: [Element] Duel
Anomaly: [Element] Energy
Defense: [Element] Shield
Note: There may be some changes to the way this system works, now. I've seen some small inconsistencies with the release of Tenacity Resonia so while this still seems to be mostly true, you may find slight variances.
The Element corresponds to the type of Anomaly it represents. These are Onslaught, Ignite, Freeze, Shock and Ether.
The Type will typically relate to how the agent plays. Attack units want to crit as often and as potent as possible. Supports use a lot of assists in their kits because mostly their roles are to switch in, use their Ex Special, switch back out. Anomaly Agents want a lot of energy because their Anomaly Buildup (which is basically just their Anomaly Mastery) is built up much quicker through Ex Specials and Ultimates.
Why Is This Important?
Two reasons. Let's start with your opening loadout.
Who you bring with you is important
Using the above information, I'll provide an example Hollow Zero loadout:
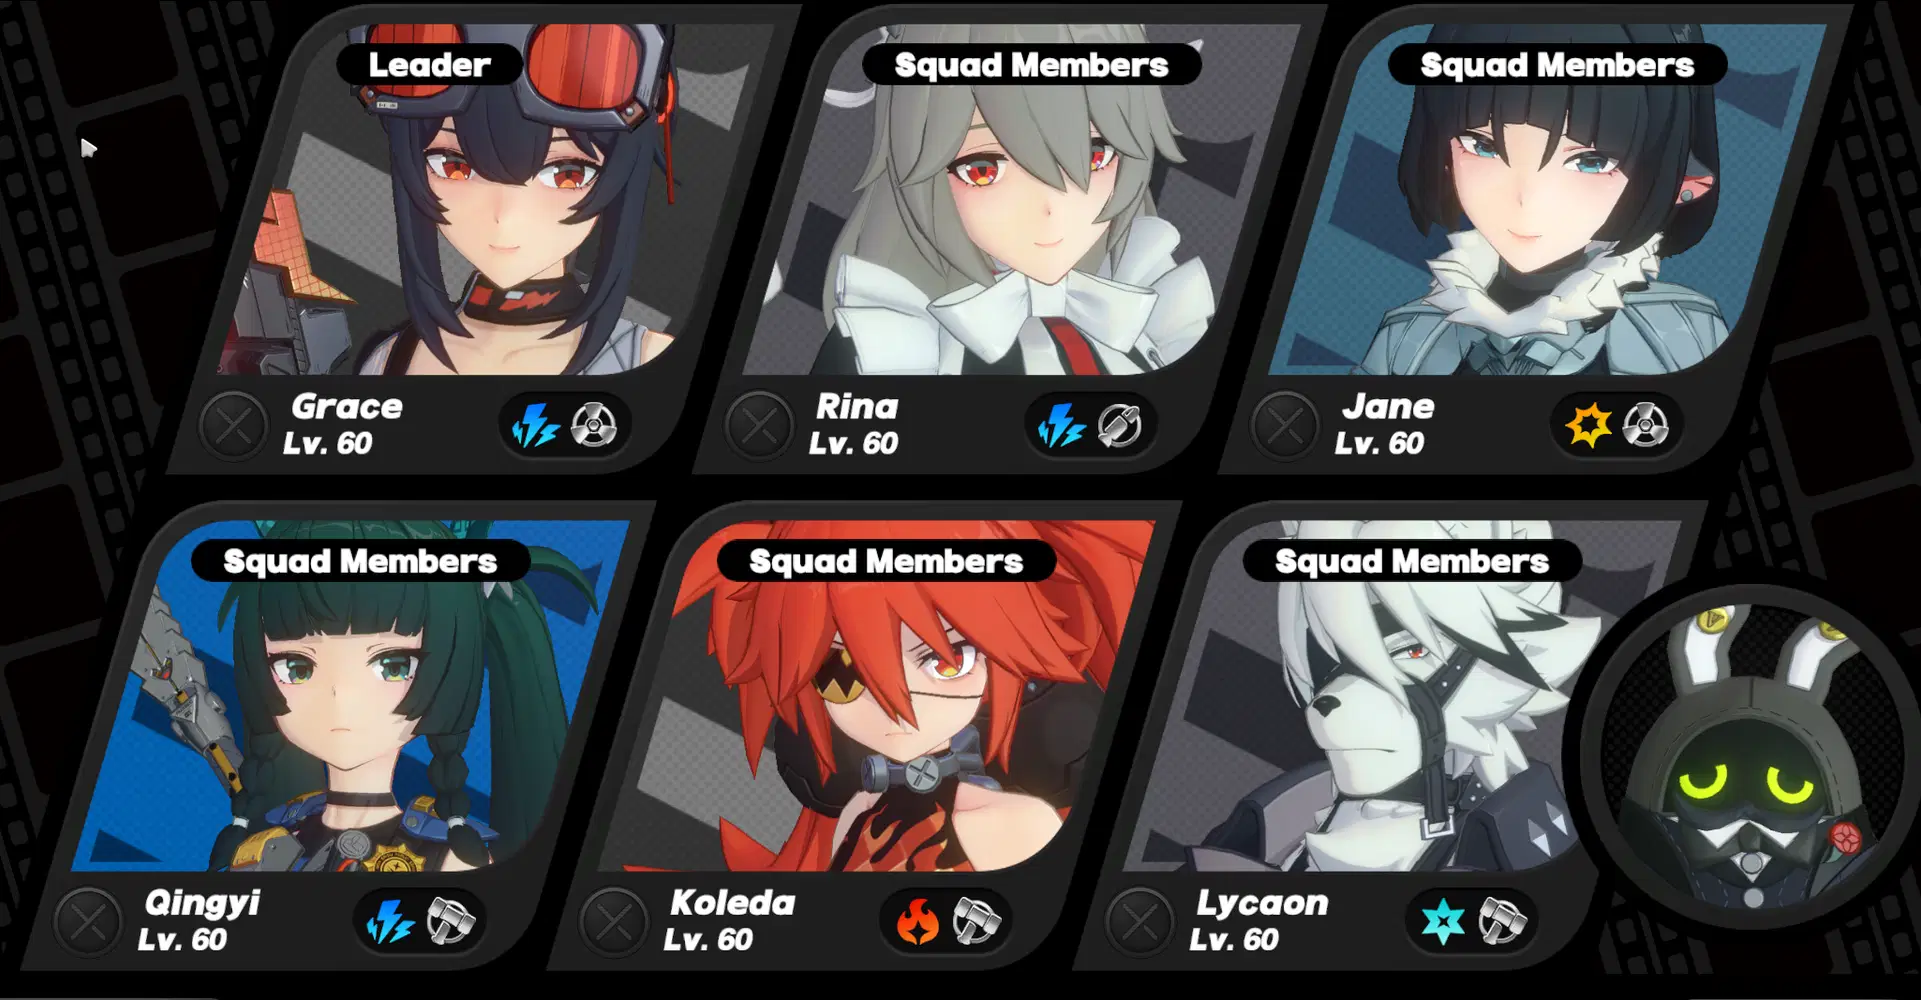
Disorder rocks
To supplement this, I'll just bring over my explanation of dismissals from my guide on Jane Doe.

Note: Dismissals now seem to give you a Resonia that corresponds to any elemental type in your party ie. if you have Yanagi as leader and Burnice as position 2, dismissals will now give you an Ignite Resonium
So, if you were to run through Hollow Zero with Grace and were to encounter each of these agents, dismissing them would give you Assist (Rina), Energy (Jane), Duel (Qingyi), Duel (Koleda) and Duel (Lycaon). You can use this information to slightly manipulate what you can get from Agents when dismissing them. Typically I run through solo with Jane but this is my usual loadout:
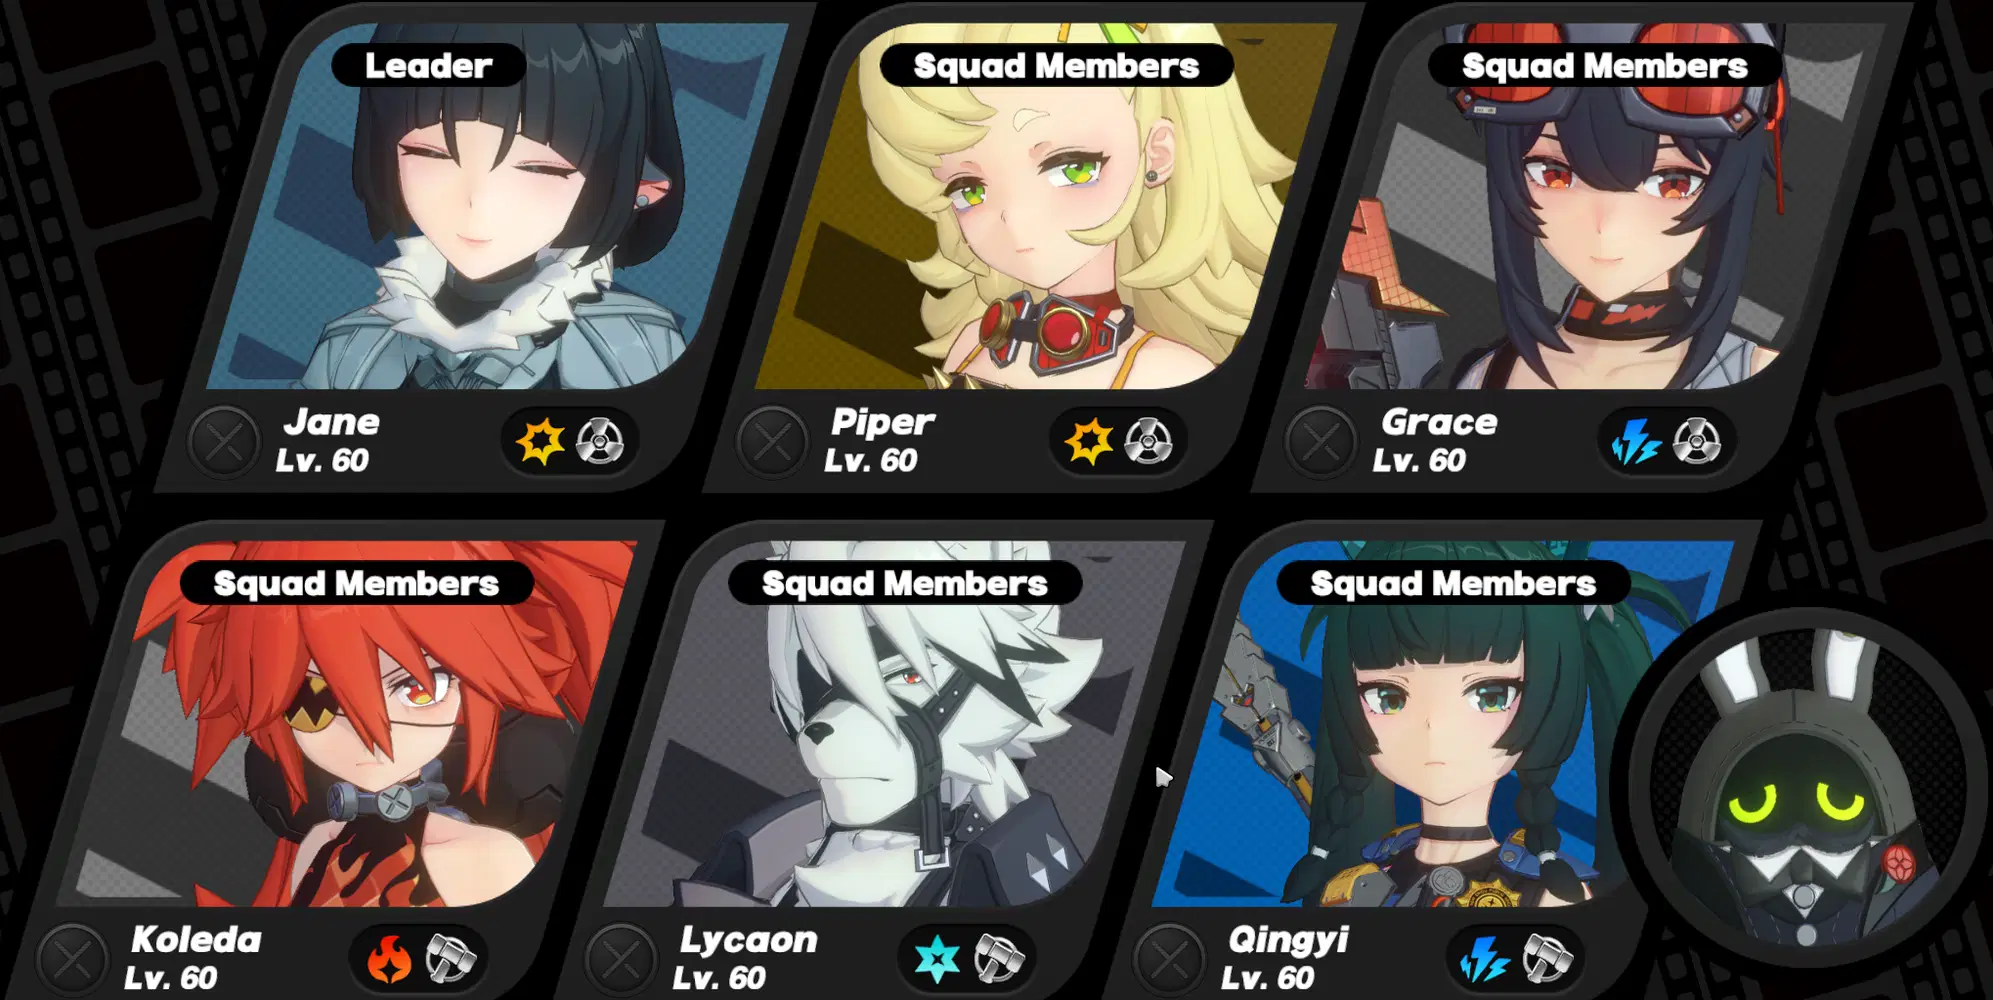
Let's break this down a bit in terms of strategy and what I'm looking for:
Piper - Energy
Grace - Energy
Koleda - Duel
Lycaon - Duel
Qingyi - Duel
You may ask yourself 'Why would you want a Resonium type related to Stuns (Duel)? In my experience, Duel Resonia are incredibly important during longer fights, especially in the absence of a dedicated Stun Agent. If you're running something like say, Caesar/Jane/Piper like the run I've shown below, Caesar alone is not enough to Stun Nineveh consistently enough to kill her before she begins the invulnerable phases.
As you can see, it's possible to reach eighty Resonia in a single Hollow Zero run and you can get more if you're lucky enough (I think my highest was 85).
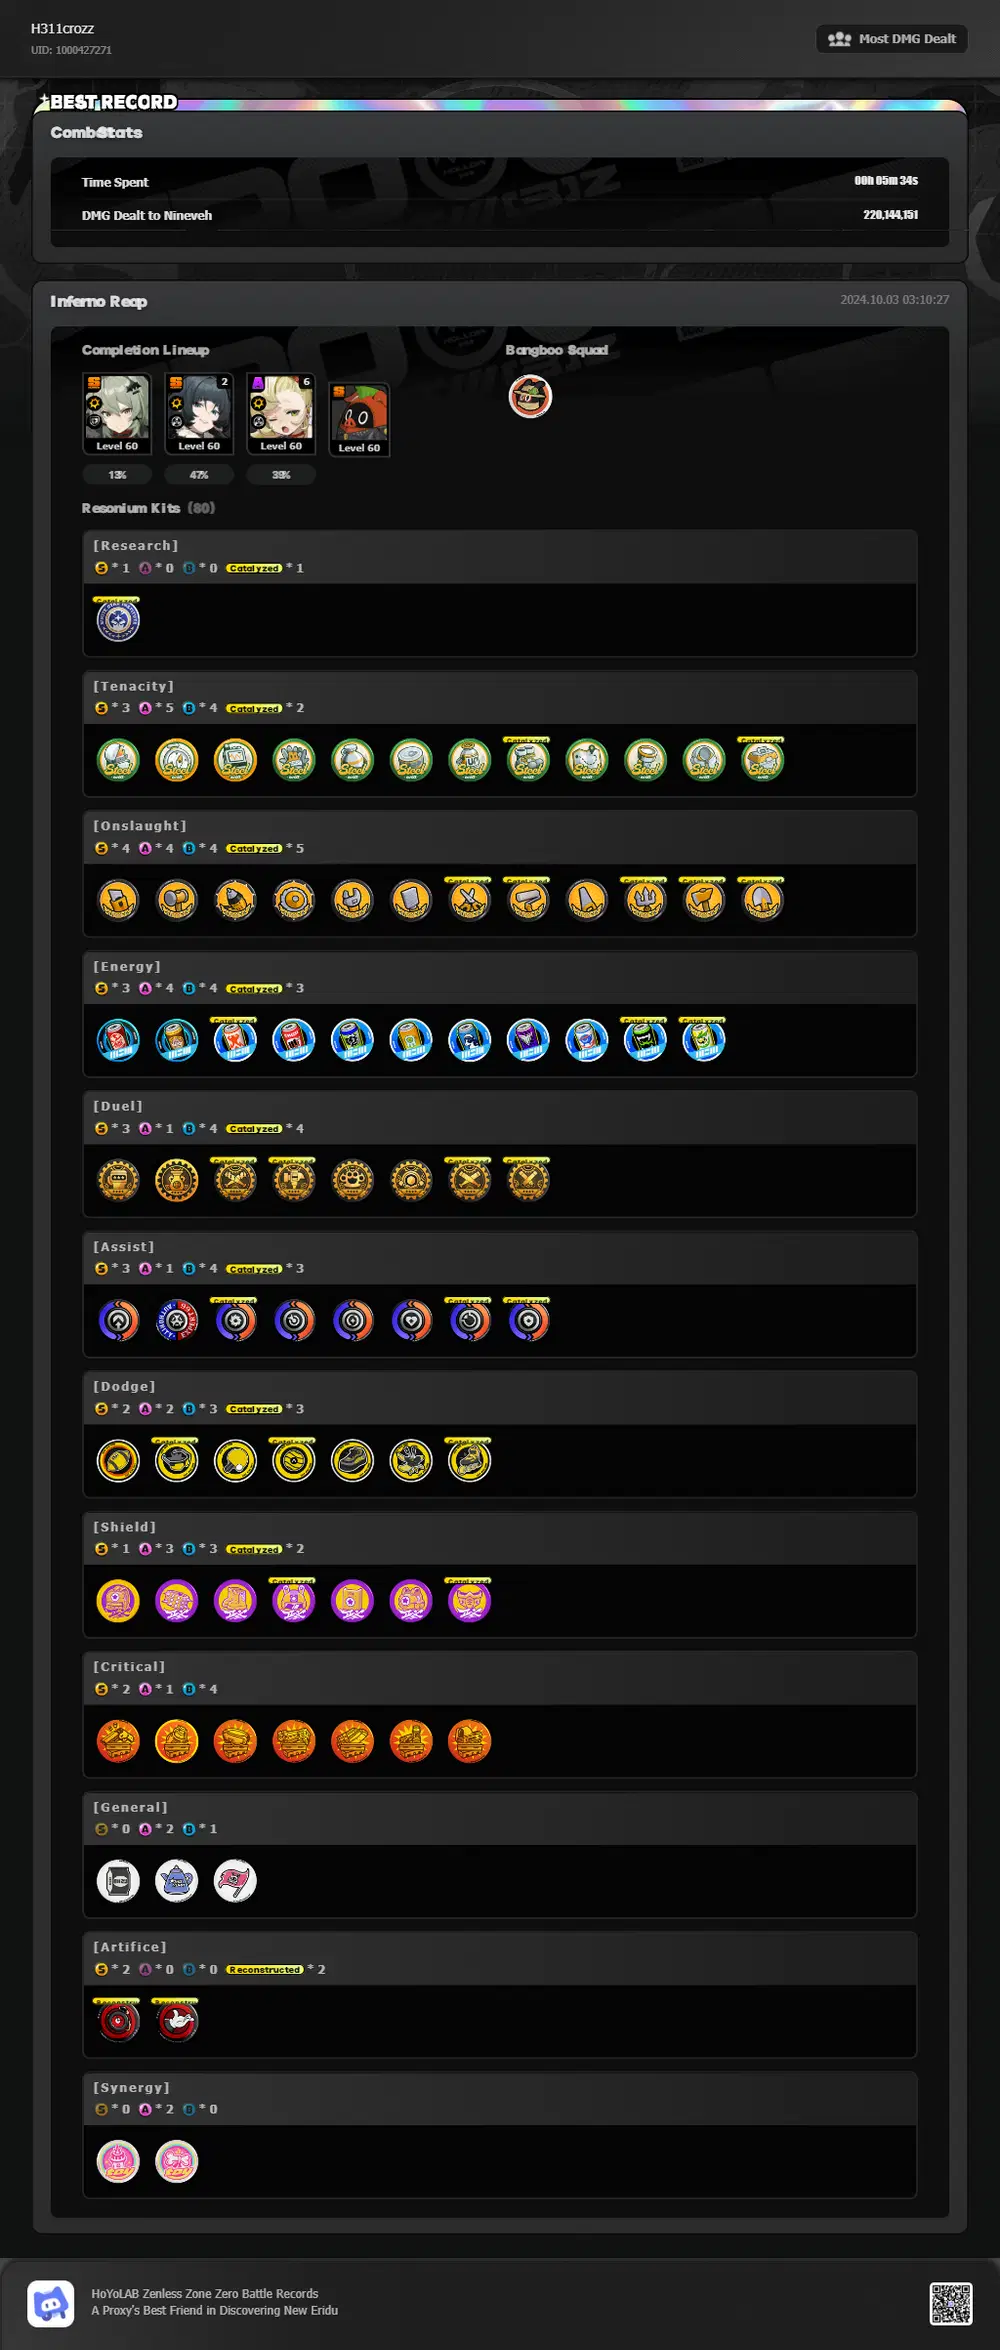
Too many crit and Onslaught Resonia but you take what you can get
This brings me to my next and possibly more important point.
Adding agents to your active party will also add their element
Why is this relevant? Let's say we use that first example with Grace. Let's say you reach a fissure and your first opportunity is to add Koleda to your party. You're thinking 'I could actually use a Stun against that upcoming Hans/Greta.'
Well, now you've added Ignite to your possible Resonia pool and diluted it with a bunch of Ignite Resonia that won't help you against the Nineveh fight. Let me give some quick examples of what i mean to make this easier to visualize.
Starting with Jane -> You want to use Jane/Seth/Caesar during Inferno Reap -> Adding Seth has now introduced Shock Resonia into your pool, which dilutes it. If you're trying to use Jane as your hypercarry against Nineveh, Shock Resonia will help you very little.
Another example: Starting with Zhu Yuan -> You want to use Qingyi/Nicole/Zhu against Nineveh -> Adding Qingyi has now introduced Shock Resonia into your pool. This again dilutes it because for Zhu to deal big damage, Shock Resonia will do absolutely nothing for her. There are a few Resonia that may help, such as doing more DMG to shocked enemies, but I don't find those worth adding the entirety of another element to your pool.
You can use the following rough guidelines for what types of Resonia you'd want for each 'hypercarry', which you should always begin a Hollow Zero run with.
Jane: Dodge, Energy, Duel and Onslaught (but make sure you only get 7 Onslaught as the 8th will cause your Assaults to execute) Still testing this but I believe if you execute Nineveh it will add the entirety of her HP pool to your DMG count
Piper: Piper is pretty much the same as Jane except you'll likely want Shield Resonia rather than Dodge.
Zhu: Ether, Critical (avoid getting Critical 4 so you don't execute during the Nineveh fight) Still testing the effects of the Execute mechanic on total DMG numbers, Duel (if you're running a Stun with Zhu, which you should be) and Assist (I find myself switching Zhu out a lot more so I can let her build up her energy in reserve to quickly and easily get Shotshells when she comes back in).
Ellen: Honestly, Ellen doesn't need much more than just Critical and Freeze, although Dodge is also good due to her Roaming State and Dash Attacks.
Any other Agent that may fill your DPS role ie Billy, Corrin, Neko, Burnice, etc: As many of their Elemental Resonia as possible
Don't sleep on Energy Resonia. While some of the types I've listed here are pretty optional, Energy is what fuels your teams. Whether it's Anomaly Agents directly or fueling your Supports to buff your Attack Agents. It is single-handedly one of the most important mechanics in the entire game
Make sure you pay close attention to who you're bringing in and who's being added to your party
Avoid Execute! (tentative)
Speaking of Onslaught and Critical Resonia, they have transformations that allow your agents to execute enemies if they're below [x] amount of health. For higher damage during the fight, you want to avoid this. This is because if you're executing a hornet or vine, you're simply deleting that enemy once you reach the execute threshold. Instead, you could be killing them the better way of bypassing the execute and dealing all the remaining damage of their health bar. These Resonia include:
- High-Explosive Grenade: Received for obtaining 4 Critical Resonia - Allows your critical hits to execute normal enemies with less than 75% HP. Just think, you could be doing all that damage instead of just deleting it!
- Circular Saw: Received for obtaining 8 Onslaught Resonia - This one is maybe even worse if you're using an Assault team. It allows your Assaults to execute Normal enemies under 70%, Elites under 20% and bosses under 10%. We don't want that! That's more damage we could be missing out on. I believe Onslaught 8 can help achieve better numbers by Executing Nineveh, will need to test first. This section of the guide is under construction and investigation while I test the effects of the Execute mechanic
Which path to take?
This most definitely varies depending on who you ask, but I find the coins path much more consistent.
Gear Coins > Health Management > Pressure Management.
Going the Health Management route (pick all health options at the beginning of the run) can get you a lot of Resonia if you get lucky and get the right events, but this path presents two issues to me that may push people away from it.
- Due to using your health as a resource, you will find that many of the Elite and Boss fights must be done with very little to no health. There are some ways to offset this, but more often than not you may find yourself up against a Thanatos and a Hati with 8HP where one wrong move will kill you on the spot. This can be very frustrating, discouraging and can even end entire runs if you put yourself in a bad spot.
- The effect that's added to Trigger Instinct (Peak Physique) is incredibly underwhelming as it only adds a 20% shield during the Nineveh fight. This can be obtained through numerous other means including other Agents or Resonia.
Of the other two, you may find either Pressure Management (added by catalyzing Overload Distribution) or the Matthew Effect (added by catalyzing Resource Conversion) more useful depending on preference, I just hate running Hollow Zero using the Pressure path as it feels like there's not enough opportunity to get rid of corruptions.
Matthew Effect: 'Agent DMG is increased by 30% for 5s when a Perfect Dodge or Evasive Assist is triggered.'
^ Matthew Effect is great for Jane or other Agents which may be dodging a lot or using a lot of Assists ^
Pressure Management: 'Each Perfect Assist recovers 5% of the Agent's Max HP (can be triggered up to 6 times by each Agent in each combat) and increases Agent DMG by 30% for 10s'
^ Not a huge fan of this myself due to the limit of how often it can be proc'd, but it depends on your playstyle ^
Quick Tip:
Always choose all three of the same options. If you chose Resource Conversion (gear coins) then pick Financial Management Plan (+20% Gear Coins) and Bankruptcy Risk (All shop prices +15%). I know this sounds counterintuitive, but I'll explain why shortly.
In this guide, I will make the assumption that you've chosen to take the Gear Coin path.
Things to look out for
Okay, now that you've chosen your path, Collection type Resonium and an additional Resonium, you find yourself on the first floor.
White Star Institute Research Station
The absolute highest priority for you to find are the White Star Institute Research Station. The square will look like this:

HELP THEM WITH THEIR RESEARCH!!!!!
You'll want to either enter this square as early as possible on the floor or use as many Gear Coins as you can first. Select the second option here:
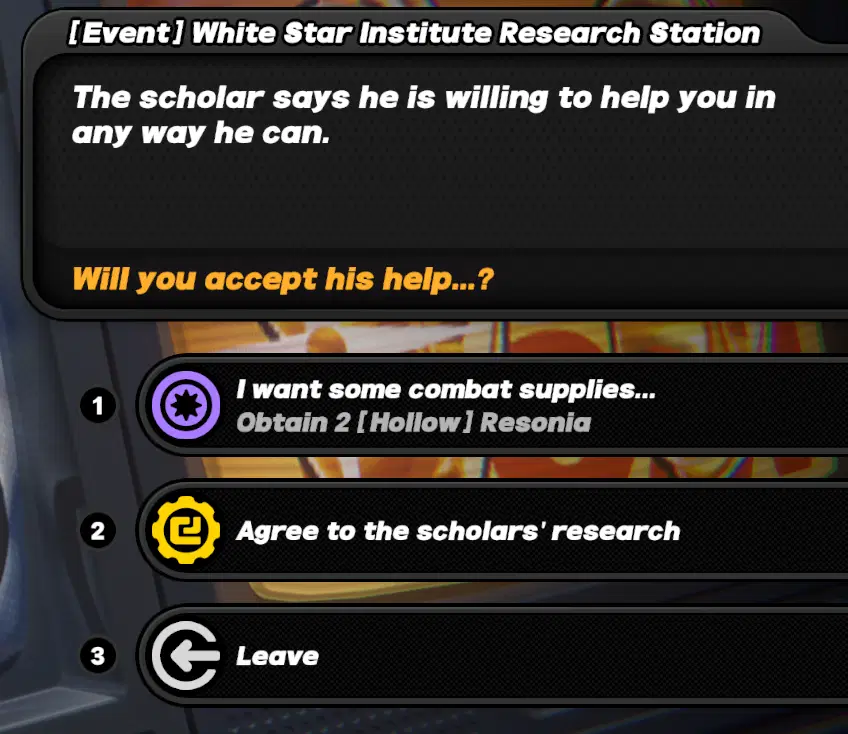
Then the first:
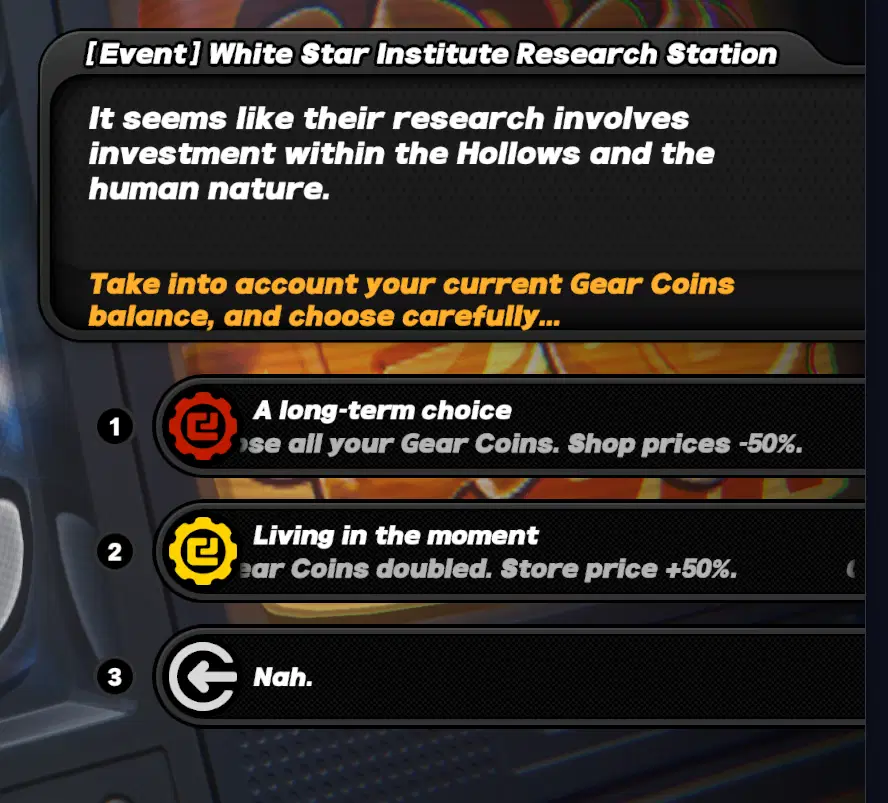
In exchange for losing all of your currently held Gear Coins, Shop prices get a -50% reduction. Wow! You just completely negated the negative modifier from the beginning of the run that made shops 15% more expensive. Now, the clever among you may already see where I'm going with this.
Although exceedingly rare, you can experience this event twice, and even three times during a single run. Once on the first floor, once on the second floor and they do have a chance of spawning in Challenge rooms (I've never seen them on the third floor, but I guess it's theoretically possible).
Now, as you can imagine, this can lead to some pretty nutty things like say, purchasing S-Rank Resonia for 320 Gear Coins?
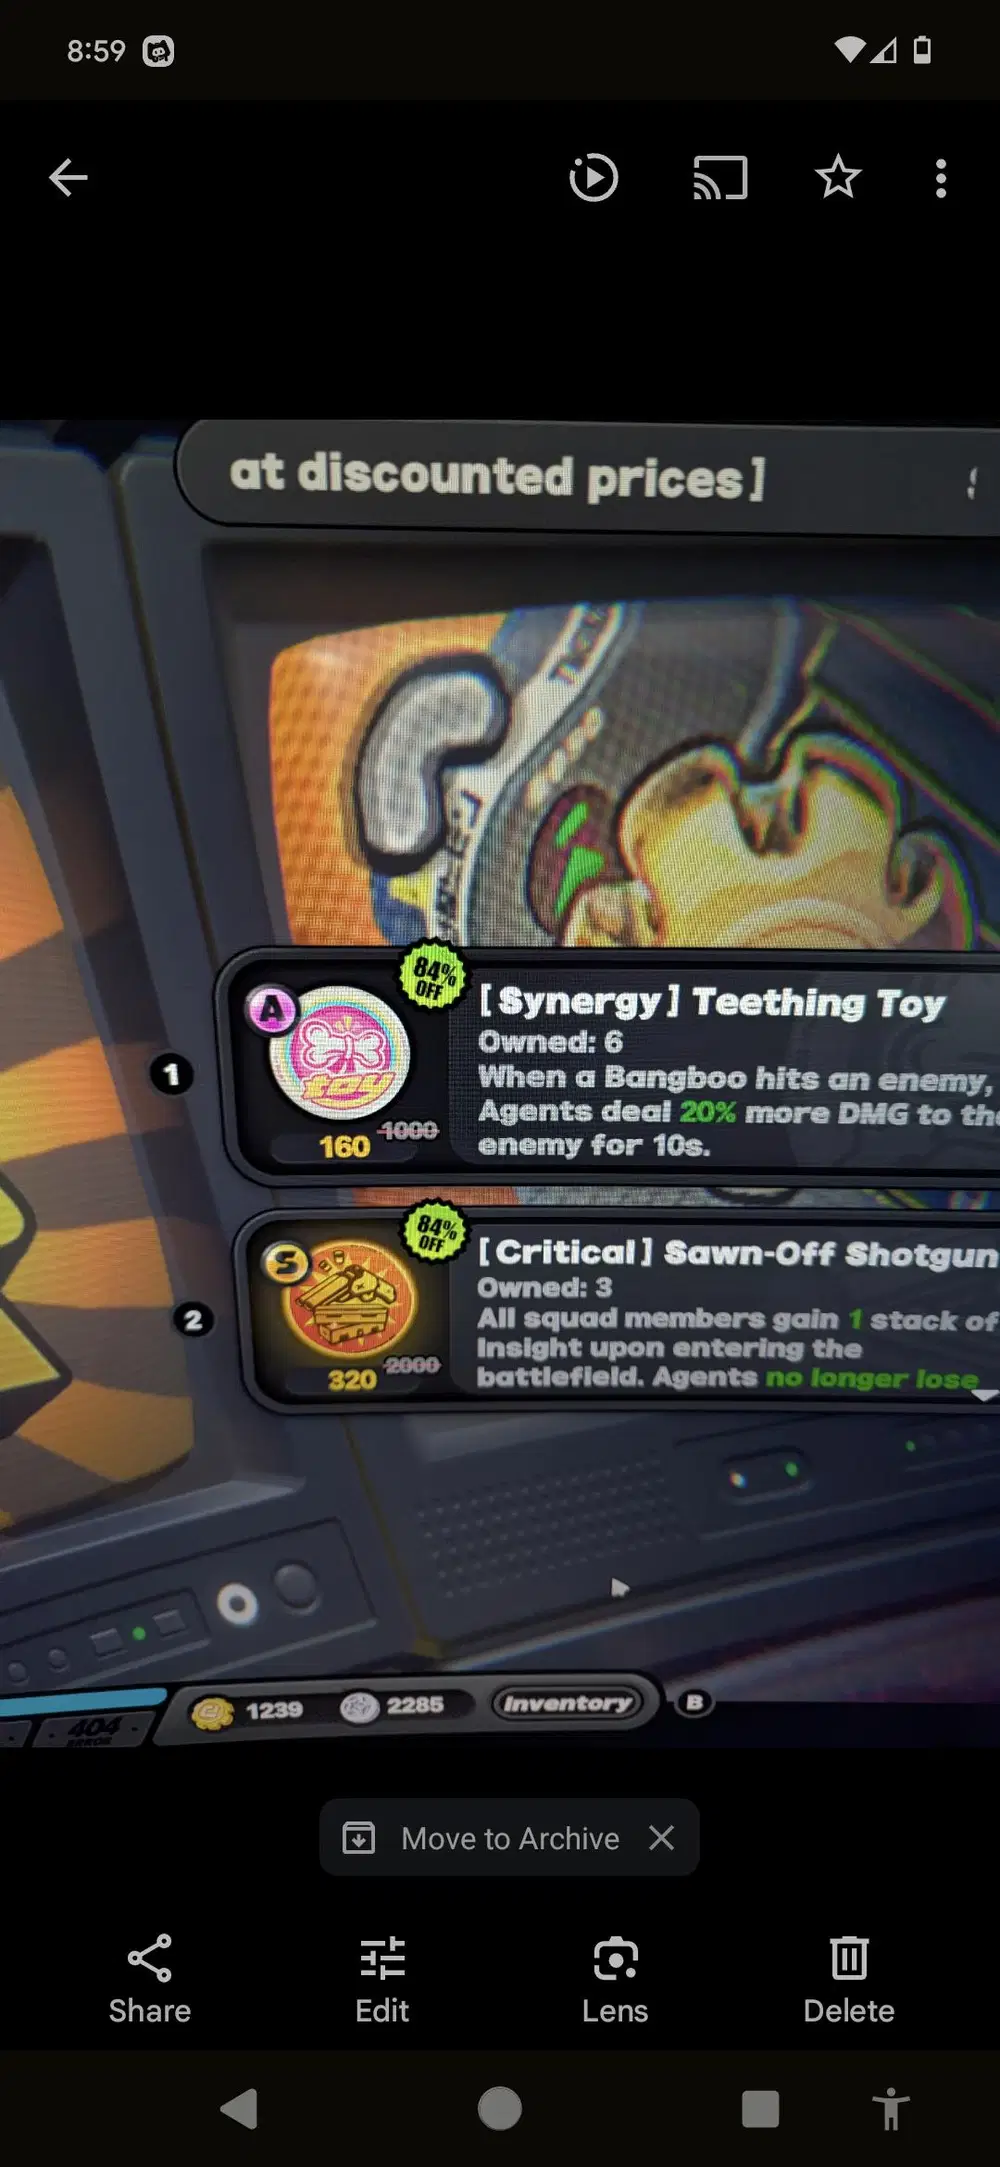
That's a fair price
The Truth

Not mandatory, just nice
The earlier you can encounter this, the better. Obviously this wouldn't do much for you if found on the third floor, but choose the second option which will give you a global boost of +15% Gear Coins found during the run. Very nice, indeed.
Passage
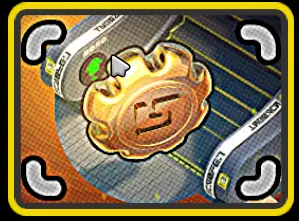
Passage...I think?
I believe this one is called Passage, but it's very nice for getting a lot of Gear Coins early. If you're running Solo, ensure you enter it with full health. It will keep asking you to give some health away in exchange for coins and you can walk away from it with ~10k+ Gear Coins on just the first floor.

Keep on losing that health ;)
This is one of the reasons we take the Gear Coins path. If you go the Health path, this event will only let you select one of these options once and send you on your way. By going Gear Coins, you can do it many more times and will even receive a Resonium at the end.
Fateful Reunion
For me, it really depends here but usually if I see 'Powerful Excavation' I'll pass on it and wait until floor 2. It's one of my favorite plug-ins :)
I think Gear Coins are usually a safe bet on the first floor but you can pick whichever you'd like or none of them. The choices will be improved each floor.
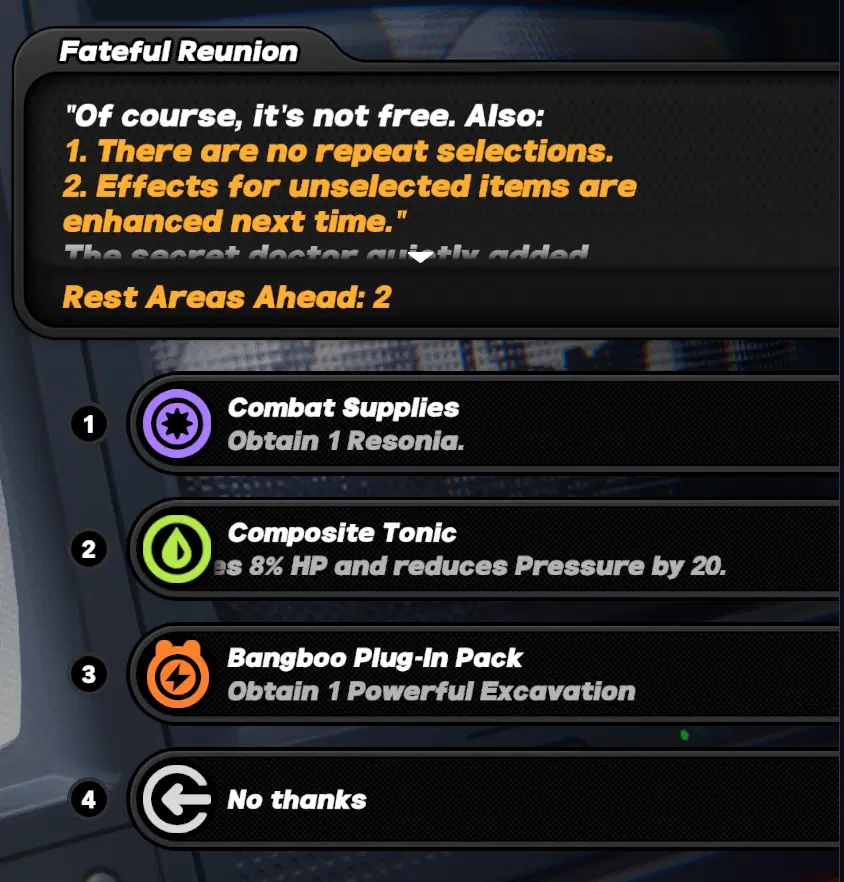
don't care for HP and will usually pick up Resonium on last floor when it's 'Obtain 3'
Busy Rest Area
One last thing I'll mention is that in between floors, you can use the Busy Rest Area to change your Collection type.

Busy Rest Area
This can certainly be useful if you feel you've already got enough of one type and want to switch. An example may be if you've collected 6 Dodge Resonia but want more Energy because you only have 1...or something similar.
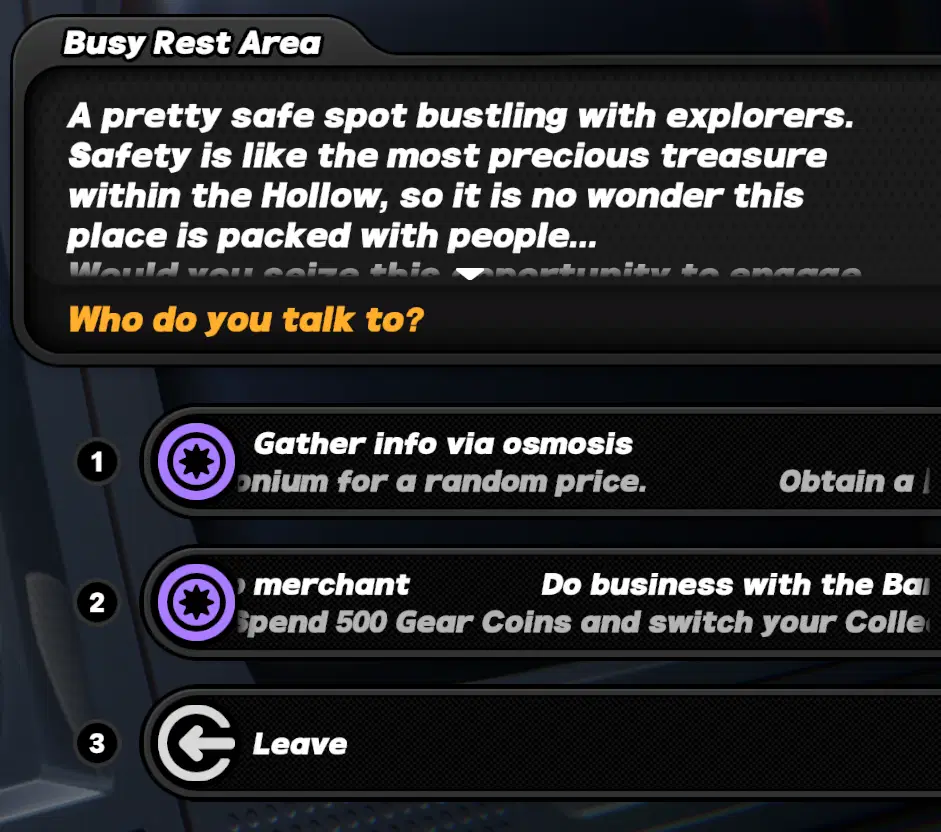
Middle Option
Here it's 500 Gear Coins but if you go the HP route you'll need to pay HP instead of Gear Coins.
Closing Thoughts and Tips
As always, this will be a living guide so if I discover anything new or notice any errors I've made, I'll do my best to fix them up. Let's wrap up with some simple tips:
- Gear Coins route is more consistent
- Always prioritize the Research Institute when you see them
- Always fight when given the opportunity as it will yield Resonia
- Health and Pressure are resources - Use them!
- Become comfortable with low-health/one-hit/max corruption runs
- Be cognizant of which Resonia will be helpful to your agents during the Nineveh fight
Let me know if you see any errors and take it easy. Good luck in the Hollows