Overview
The Tenebrous Papilla is a Normal Boss that was added in Genshin Impact Version 5.2 - Tapestry of Spirit and Flame. He's accessible as soon as you access the new areas added in Natlan during Version 5.2. Although the Tenebrous Papilla isn't the bulkiest boss by a long shot (especially when compared to fellow Abyss Normal Boss Golden Wolflord), it makes up for its frailty with three different movesets that test your knowledge of foes from all across Teyvat, using the world's memories of familiar faces to inflict various Elemental reactions that you have no way of planning for before the fight begins. Much like the Tenebrous Mimiflora it resembles, it is possible to stun the Tenebrous Papilla, so there will be moments of calm beneath the Boss' Elemental onslaught. As previously mentioned, the Tenebrous Papilla is the boss variant of the Tenebrous Mimiflora and all of the Tenebrous Mimesis enemies who share its category as an Enemy of The Abyss in the Archive.
The Tenebrous Papilla can be found underground in a cavern east of the Flower-Feather Clan, although the entrance to said cave is much further south than the Boss' location would suggest.
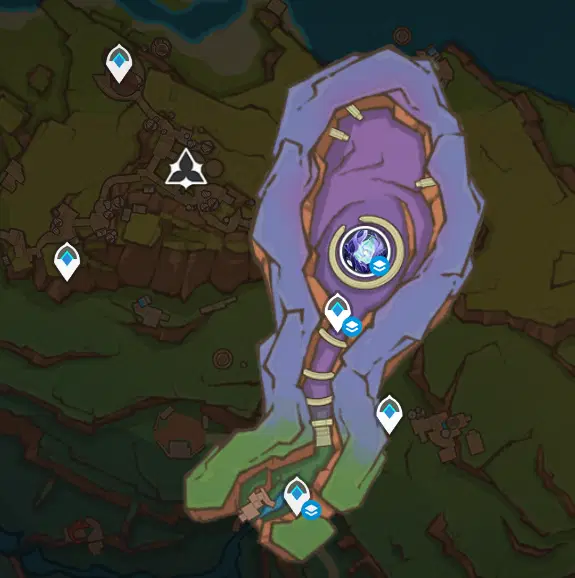
The location of the Tenebrous Papilla.
Archive Bio
Abyssal Creatures with plant-like forms that have descended from a deep, dark, unfathomable, contorted underworld.
These twisted monstrosities are capable of infiltrating deep down in the bowels of the earth, extracting memories to imitate and manipulate. Through this process of distorting the past's memories into more abstruse and sordid forms, they gradually draw closer to Irminsul's core, threatening to undermine its very existence. Some say that these aberrations work constantly to corrupt the many colors of light, leaving only pitch-black information in their stead. Such a hypothesis
seems to be confirmed by the branches they extend outward, as if to pierce the void itself...
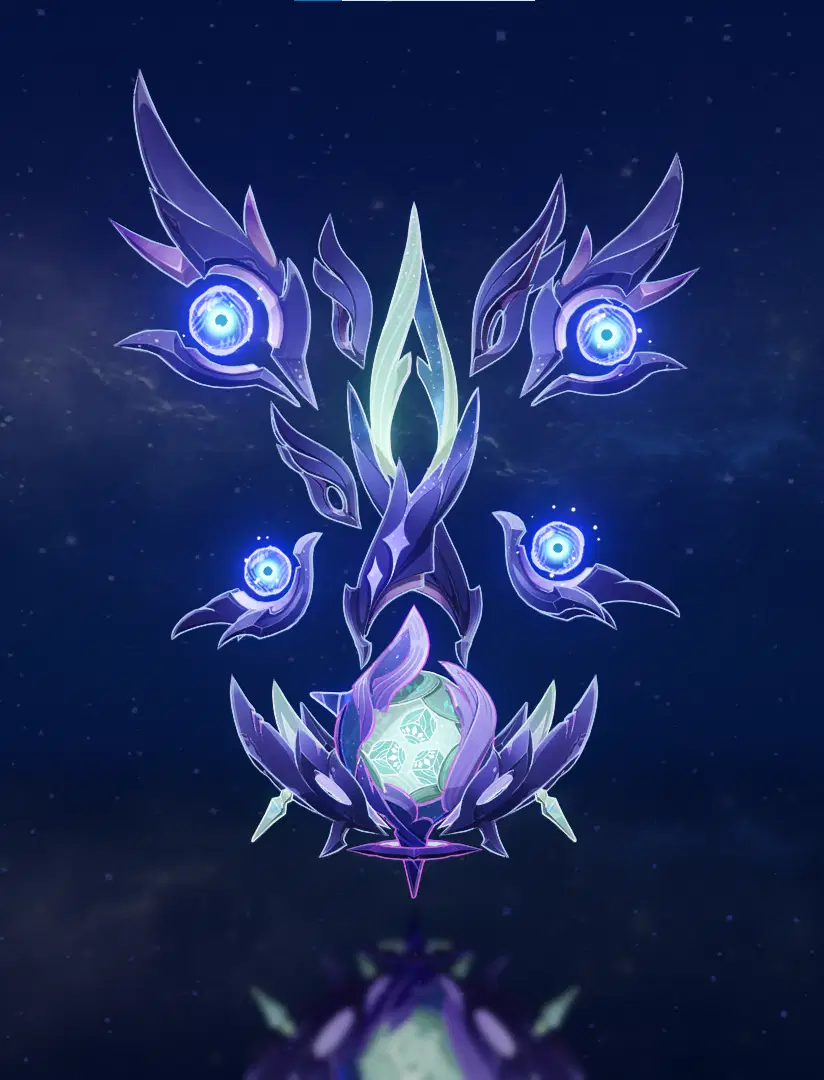
Tenebrous Papilla - Void Fantasy Plant
Battle Notes
The Tenebrous Papilla has three movesets that it can start each battle with, much like fellow Abyss Normal Boss Iniquitous Baptist. Unlike the Iniquitous Baptist, however, there is no way to tell which "variant" of the Tenebrous Papilla you will be forced to face. The Tenebrous Papilla's resistances don't change based on these forms, fortunately, but it has a higher resistance to all attacks to make up for this. Each of these forms will mimic a previous Normal Boss added to the game, and every single move the Tenebrous Papilla has besides its signatures are copied from other bosses from Natlan all the way back to Mondstadt. It's good to be prepared for each of these phases, making it difficult to keep track of which moves it will use during any given fight. The possible movesets are as follows:
- Electro Hypostasis, Cryo Hypostasis, Hydro Hypostasis, Primo Geovishap and Maguu Kenki.
- Cryo Regisvine, Pyro Regisvine, Electro Regisvine, Aeonblight Drake and Jadeplume Terrorshroom.
- Millenial Pearl Seahorse, Statue of Marble and Brass and Gluttonous Yumkasaur Mountain King.
Some of the Tenebrous Papilla's attacks will inflict a status condition on the damaged Party member called Attrition. This essentially serves as a delayed DoT, dealing a set amount of damage after a set amount of time. Damage dealt is based on the afflicted Character's HP.
The Tenebrous Papilla is difficult to prepare for, but there are some units you can bring to potentially make the fight a little easier. For F2P players, Catalyst users such as Lisa and Barbara are useful as they will be able to quickly destroy the Tenebrous Papilla's Void Ward without having to wait for Elemental Skills to charge. Kachina's Elemental Skill allowing for multiple rapid hits and her ability to access the Nightsoul's Blessing also makes her an excellent choice to break this Void Ward as well, as she can easily access both forms of DMG that the Tenebrous Papilla is vulnerable to. For specific Mimesis movesets, Noelle is extremely useful as her shield has the ability to almost entirely nullify the "Primo Geovishap's" Primordial Shower, lowering the risk of one of the Tenebrous Papilla's most dangerous attacks. Aside from this, there isn't much you need to prepare for as the boss has no weaknesses or resistances. The Traveler (Anemo) also provides rapid Anemo DMG with their Elemental Skill, although they aren't as reliable as Lisa (who just attacks faster) or Barbara (who you should bring as an F2P anyway as a healer).
Otherwise, use whoever you want to fight the Tenebrous Papilla. It's recommended to bring someone like Zhongli who can create a shield that blocks Hydro DMG and/or Cryo DMG as well as a fast, powerful Catalyst Character such as The Wanderer or Neuvilette in order to shred the Void Ward. Other than that, go wild. My recommended team comps are as follows:
- Any DPS, Lisa, Noelle, Barbara (F2P)
- Any DPS, Any Sub-DPS/Support, Any Shield, Any Healer
Moveset - Tenebrous Papilla
Beseech the Dark --- The Tenebrous Papilla will return to the center of the arena after 40 seconds have passed or it has reached 70% of its HP. It will subsequently give itself a Void Ward that requires Elemental Attacks or Nightsoul Attacks to shatter and summon various spikes that will rise out of the ground, dealing 10% Physical DMG if hit while also applying 10 instances of Attrition. If you fail to destroy the Void Ward in time it will explode, dealing 300% Physical DMG and applying 10 instances of Attrition. Although the spikes and explosion can be dodged with well timed dashes, it's much more beneficial to destroy the Void Ward as it will paralyze the Tenebrous Papilla for a brief period of time.
Moveset - Mimesis (Type 1)
Rock-Paper-Scissors Combo --- The Tenebrous Papilla will mimic the Electro Hypostasis from Mondstadt. The "Electro Hypostasis" will first form a fist made out of cubes for a forward punch before rearranging to create a pair of scissors for a conal AoE in front of it and a piece of paper that will slam into the ground for a circular AoE. The Rock and Scissors part of the combo will deal 70% Electro DMG while the Paper section of the attack will deal 100% Electro DMG to whoever is hit. Each hit must be dodged with a well timed dash for i-frames, although the fist can also be avoided by dashing to the side of it.
Clap --- The Tenebrous Papilla will mimic the Cryo Hypostasis from Dragonspine. the "Cryo Hypostasis" will create two walls of cubes at its sides before slamming them together in front of it, dealing 100% Cryo DMG if hit and applying 15 instances of Attrition. This attack can easily be avoided by dashing away from the "Cryo Hypostasis".
Wave Slam --- The Tenebrous Papilla will mimic the Hydro Hypostasis from Inazuma. The "Hydro Hypostasis" will take the form of a manta ray before slamming into the ground, creating three pillars of water that will burst forward a few times. The first hit will deal 66.6% Hydro DMG while the subsequent blasts will hit 33.3% Hydro DMG on hit. It's possible to avoid this attack through i-frames or dashing away or to the side of the "Hydro Hypostasis" as it copies the manta ray.
Combo Smash --- The Tenebrous Papilla will mimic the "Primo Geovishap" from Liyue. The "Primo Geovishap" will appear in either its Cryo or Hydro form before swinging forward twice, each hit dealing 40% and 50% Cryo DMG or 40% and 50% Hydro DMG respectively. The "Primo Geovishap" will slam towards the player afterwards, dealing 62.5% Cryo DMG or 62.5% Hydro DMG if hit and will apply 10 instances of Attrition. Each hit can be avoided by dashing away.
Leaping Smash --- The Tenebrous Papilla will mimic the "Primo Geovishap" from Liyue. The "Primo Geovishap" will appear in either its Cryo or Hydro form before leaping towards the player, dealing 70% Cryo DMG or 70% Hydro DMG should it land on you. This attack is easily avoided by dashing in any direction away from the "Primo Geovishap".
Primordial Shower --- The Tenebrous Papilla will mimic the "Primo Geovishap" from Liyue. The "Primo Geovishap" will appear in either its Cryo or Hydro form before shooting a giant blue laser at the ground, eventually resulting in a giant explosion that will deal 50% Cryo DMG or 50% Hydro DMG while also applying 15 instances of Attrition. This damage will be reduced to 10% Cryo DMG or 10% Hydro DMG if the player can apply a shield. This attack can be dodged by dashing as far away from the "Primo Geovishap" as you can get as soon as the Elemental energy appears in its mouth.
Ichimonji --- The Tenebrous Papilla will mimic the Maguu Kenki from Inazuma. The "Maguu Kenki" will slash at the player three times, dealing 50% Anemo DMG. Just dash away from the "Maguu Kenki" to avoid this attack.
Blustering Blade --- The Tenebrous Papilla will mimic the Maguu Kenki from Inazuma. The "Maguu Kenki" will summon an Anemo Shadowsword, who will send 5 mobile slashes at the player in tandem with the "Maguu Kenki" to deal 50% Anemo DMG. These slashes may also apply 10 instances of Attrition and can be dodged by dashing to the side of each slash.
Dual Sword Burst --- The Tenebrous Papilla will mimic the Maguu Kenki from Inazuma. The "Maguu Kenki" will charge Elemental energy above its head before slamming two swords on the ground in front of it, dealing 80% Anemo DMG, 80% Cryo DMG and 15 instances of Attrition if you are hit by the blast. Much like Primordial Shower, you should dash away from the "Maguu Kenki" as soon as it raises its swords due to the large range of the blast if you want to dodge the shockwave.
Moveset - Mimesis (Type 2)
Spin --- The Tenebrous Papilla will mimic the Cryo Regisvine from Mondstadt. The "Cryo Regisvine" will look towards the sky before spinning its petals on the ground, dealing 100% Cryo DMG and applying 15 instances of Attrition if hit. Much like its worldly counterpart, you can dodge this attack by dashing away from the "Cryo Regisvine".
Faceplant --- The Tenebrous Papilla will mimic the Pyro Regisvine from Liyue. The "Pyro Regisvine" will briefly shake it's corolla before slamming into the ground, dealing 100% Pyro DMG and creating three explosions that will deal 50% Pyro DMG and apply 15 instances of Attrition. This attack can be avoided by dashing to the side of the "Pyro Regisvine" as it slams its head into the floor.
Thunderbolt Rain --- The Tenebrous Papilla will mimic the Electro Regisvine from Sumeru. The "Electro Regisvine" will summon a multitude of thunderbolts that are forewarned by circular markers on the ground. Each of these bolts will deal 40% Electro DMG. These can be easily dodged by avoiding the purple circles on the floor.
Grounded Charge --- The Tenebrous Papilla will mimic the Aeonblight Drake from Sumeru. The "Aeonblight Drake" will charge at the player before sweeping its tail around itself, each hit dealing 75% Physical DMG and applying 15 Instances of Attrition. Again, just dodge to the side of the "Aeonblight Drake" to evade its pursuit.
Grounded Combo --- The Tenebrous Papilla will mimic the Aeonblight Drake from Sumeru. The "Aeonblight Drake" will try to headbutt the player twice before sweeping its tail at the player, dealing 60% Physical DMG and 75% Physical DMG with each hit respectively. Like the aforementioned Grounded Charge, just dodge away from the "Aeonblight Drake".
Energy Surge --- The Tenebrous Papilla will mimic the Aeonblight Drake from Sumeru. The "Aeonblight Drake" will charge its wings before launching a multitude of missiles into the air that deal 100% Random DMG when they land. This attack can deal any element of DMG, so be aware of this when utilizing infusions. Dodge this move with a well timed dash.
Rapid Pecks --- The Tenebrous Papilla will mimic the Jadebloom Terrorshroom from Sumeru. The "Jadeplume Terrorshroom" will swing its beak four times, each hit dealing 120% Dendro DMG. just dodging away from the attack should suffice as the "Jadeplume Terrorshroom" is quite slow.
Feather Spreading --- The Tenebrous Papilla will mimic the Jadebloom Terrorshroom from Sumeru. The "Jadeplume Terrorshroom" will launch numerous green spores into the air before homing into the player. if hit, these homing spores will deal 45% Dendro DMG and apply 5 instances of Attrition. This is a more difficult attack to dodge, as you need to monitor each spore to make sure you don't dash into one.
Majestic Dance --- The Tenebrous Papilla will mimic the Jadebloom Terrorshroom from Sumeru. The "Jadeplume Terrorshroom" will try to bite the player before subsequently slamming their beak into the ground, each hit dealing 60% Dendro DMG and applying 5 instances of Attrition if hit. The "Jadeplume Terrorshroom" is fortunately slow enough that you can dash away from the attacks with no issue.
Moveset - Mimesis (Type 3)
Tail Swipe --- The Tenebrous Papilla will mimic the Millenial Pearl Seahorse from Fontaine. The "Millenial Pearl Seahorse" will swipe its tail three times, with the first two hits dealing 60% Electro DMG and the final hit only dealing 50% Electro DMG. This attack is very slow, so just dashing away from the "Millenial Pearl Seahorse" will suffice.
Swirling School of Fish --- The Tenebrous Papilla will mimic the Millenial Pearl Seahorse from Fontaine. The "Millenial Pearl Seahorse" will create a plethora of fish-like projectiles before launching them at the player, each projectile dealing 35% Electro DMG. Dash from side to side to evade each launched fish.
Earthshock Descent --- The Tenebrous Papilla will mimic the Millenial Pearl Seahorse from Fontaine. The "Millenial Pearl Seahorse" will leap around twice before performing a large ground pound, dealing 95% Electro DMG. After this, it will raise its legs and slam them in front of it, with the shockwave dealing 50% Electro DMG. Both of these will apply 15 instances of Attrition if hit, and can be dodged by dashing away from circular markers that telegraph the "Millenial Pearl Seahorse" and its landing.
Triple Heatblades --- The Tenebrous Papilla will mimic the Statue of Marble and Brass from Fontaine. The "Statue of Marble and Brass" will briefly charge its blade with Pyro before swinging forward, unleashing three moving slashes that travel forward and deal 80% Pyro DMG. This attack is easily telegraphed and the animation takes a while so it is easy to simply dash to the side of the "Statue of Marble and Brass" or dash away from each slash to avoid taking DMG.
Raining Melody --- The Tenebrous Papilla will mimic the Statue of Marble and Brass from Fontaine. The "Statue of Marble and Brass" will perform a brief musical piece using its sword and shield as a violin, creating 3 rings of musical notes above its head. These rings will eventually slam into the ground around the "Statue of Marble and Brass", dealing 70% Pyro DMG and applying 10 instances of Attrition. This attack can be dodged by dashing away from the musical notes as they appear in the air, which shouldn't be too strict as the notes closest to the "Statue of Marble and Brass" fall first.
Fulgent Fortissimo --- The Tenebrous Papilla will mimic the Statue of Marble and Brass from Fontaine. The "Statue of Marble and Brass" will raise its sword to charge it with a heavy amount of Pyro, eventually jumping up and slamming the ground with its sword. This will create a brief line marker on the ground in front of it that will telegraph the strike, which deals 200% Pyro DMG and applying a whopping 30 instances of Attrition if you can't dodge. There is ample time to see the "Statue of Marble and Brass" charge up this attack, giving you time to prepare to dash to the side of or through the strike.
Belly Spin --- The Tenebrous Papilla will mimic the Gluttonous Yumkasaur Mountain King from Natlan. The "Gluttonous Yumkasaur Mountain King" will pat its stomach twice before rapidly spinning towards the player on its belly, dealing rapid 35% Dendro DMG as a combo if caught by the attack. Fortunately, dashing away as soon as the "Gluttonous Yumkasaur Mountain King" starts to pat itself should get you enough distance away from the Boss that you can simply walk away as it spins due to its slow approach.
Stomp and Wham --- The Tenebrous Papilla will mimic the Gluttonous Yumkasaur Mountain King from Natlan. The "Gluttonous Yumkasaur Mountain King" will raise its foot and stomp on the floor in front of it, dealing 50% Dendro DMG and applying 10 instances of Attrition. after this, the "Gluttonous Yumkasaur Mountain King" will swing its tail in front of itself, dealing 65% Dendro DMG and applying 10 instances of Attrition if hit. This attack's telegraph is much quicker than the Tenebrous Papilla's other forms, so you should dash away as soon as you see the "Gluttonous Yumkasaur Mountain King" raise its leg.
Triple Flamegranate Spit --- The Tenebrous Papilla will mimic the Gluttonous Yumkasaur Mountain King from Natlan. The "Gluttonous Yumkasaur Mountain King" will breifly surround itself with fire before spitting two ignited Flamegranates at the player, each dealing 100% Pyro DMG and applying 10 instances of Attrition if they hit you. After spitting these fireballs at the player, the "Gluttonous Yumkasaur Mountain King" will launch a giant stream of fire at the player, dealing 250% Pyro DMG and applying 15 instances of Attrition if hit. Both the fireballs and the laser can be dodged by dashing to the side of them as they approach you.
Drops
After you defeat the Tenebrous Papilla you will be able to spend 40 Original Resin to claim various rewards from the following item pool:
- Agnidus Agate (Pyro Character Ascension Material)
- Vajrada Amethyst (Electro Character Ascension Material)
- Adventurer (1*/2*/3* Artifact Set)
- Berserker (3*/4* Artifact Set)
- Instructor (3*4* Artifact Set)
- Prayers for Illumination (3*4* Artifact Set)
- Gladiator's Finale (4*/5* Artifact Set)
- Wanderer's Troupe (4*/5* Artifact Set
In addition to the rewards from the above loot table, the Tenebrous Papilla also has a unique drop called the Ensnaring Gaze. This seems to be a coalescence of Abyssal Energy that formed as a "fruit" of the Tenebrous Papilla. It can be used as Character Ascension Material for fellow Natlan Character Chasca.

Ensnaring Gaze
Writer's Notes
This took fooorreeeeeverr to do, but I'm super happy with how it turned out. I'm absolutely loving the new direction Genshin Impact is going with the Abyss and the Fatui, and I'm excited to see how Natlan's war with the Abyss will play out. Anyhow, I hope you all enjoyed the guide and find it useful! If there's anything else you want a guide on, let me know in the comments!

See ya!