


Hey Creator,
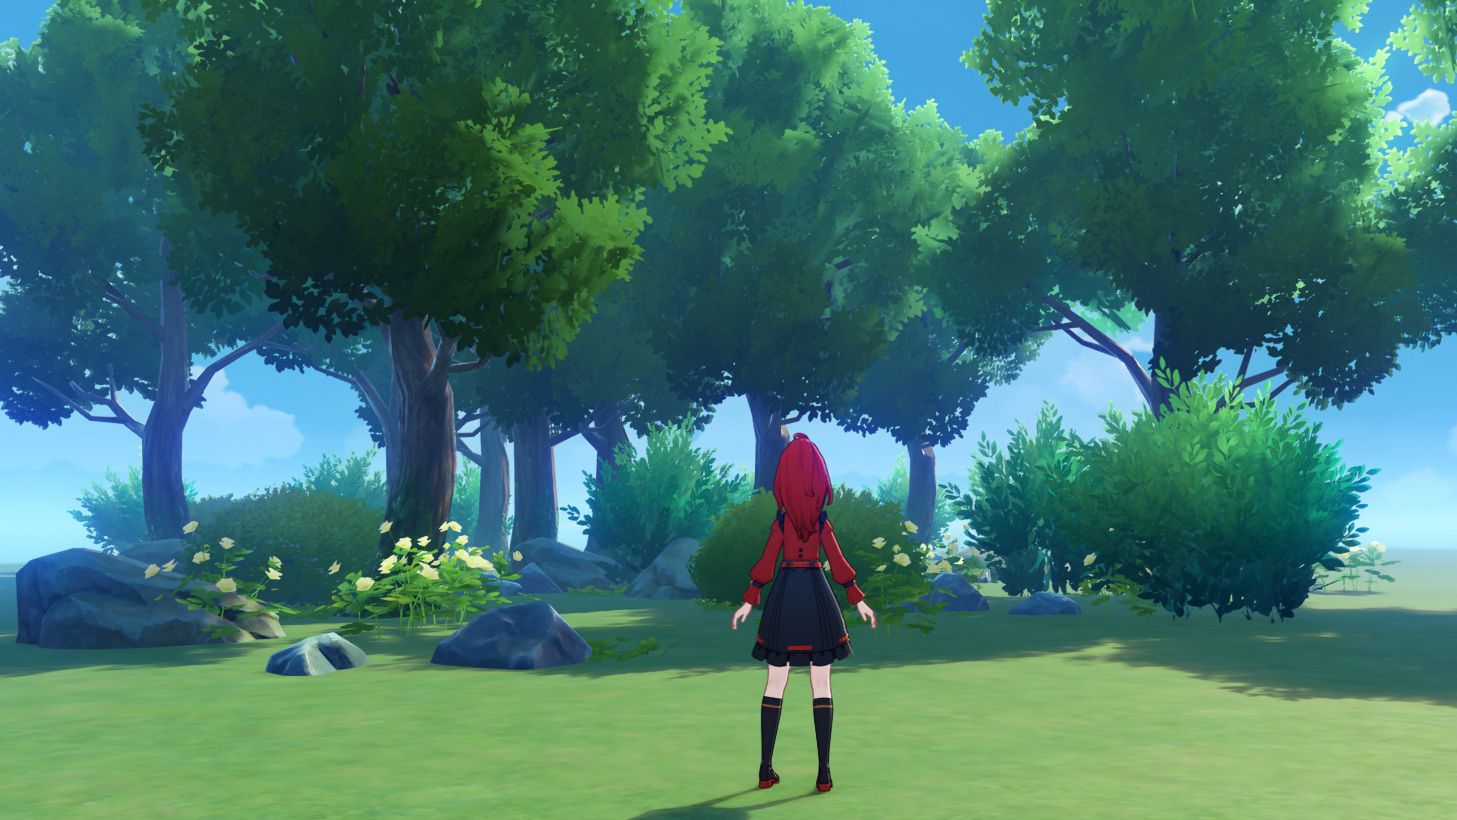
do you like forests, clutters or general masses of things spread over a specific area? (also see: clothes chair) Me, too! But putting all those items there is quite the amount of work. So let's do it the IT way and automate those things for us!
I love forests. Like actual trees. In real life, and in video games. And I like putting cool forests in my levels. But putting down 200 trees and bushes somewhat random in an area is quite the work.
In order to achieve exactly that task, and maybe even more in the future, I have created the „forest generator“ diagram.
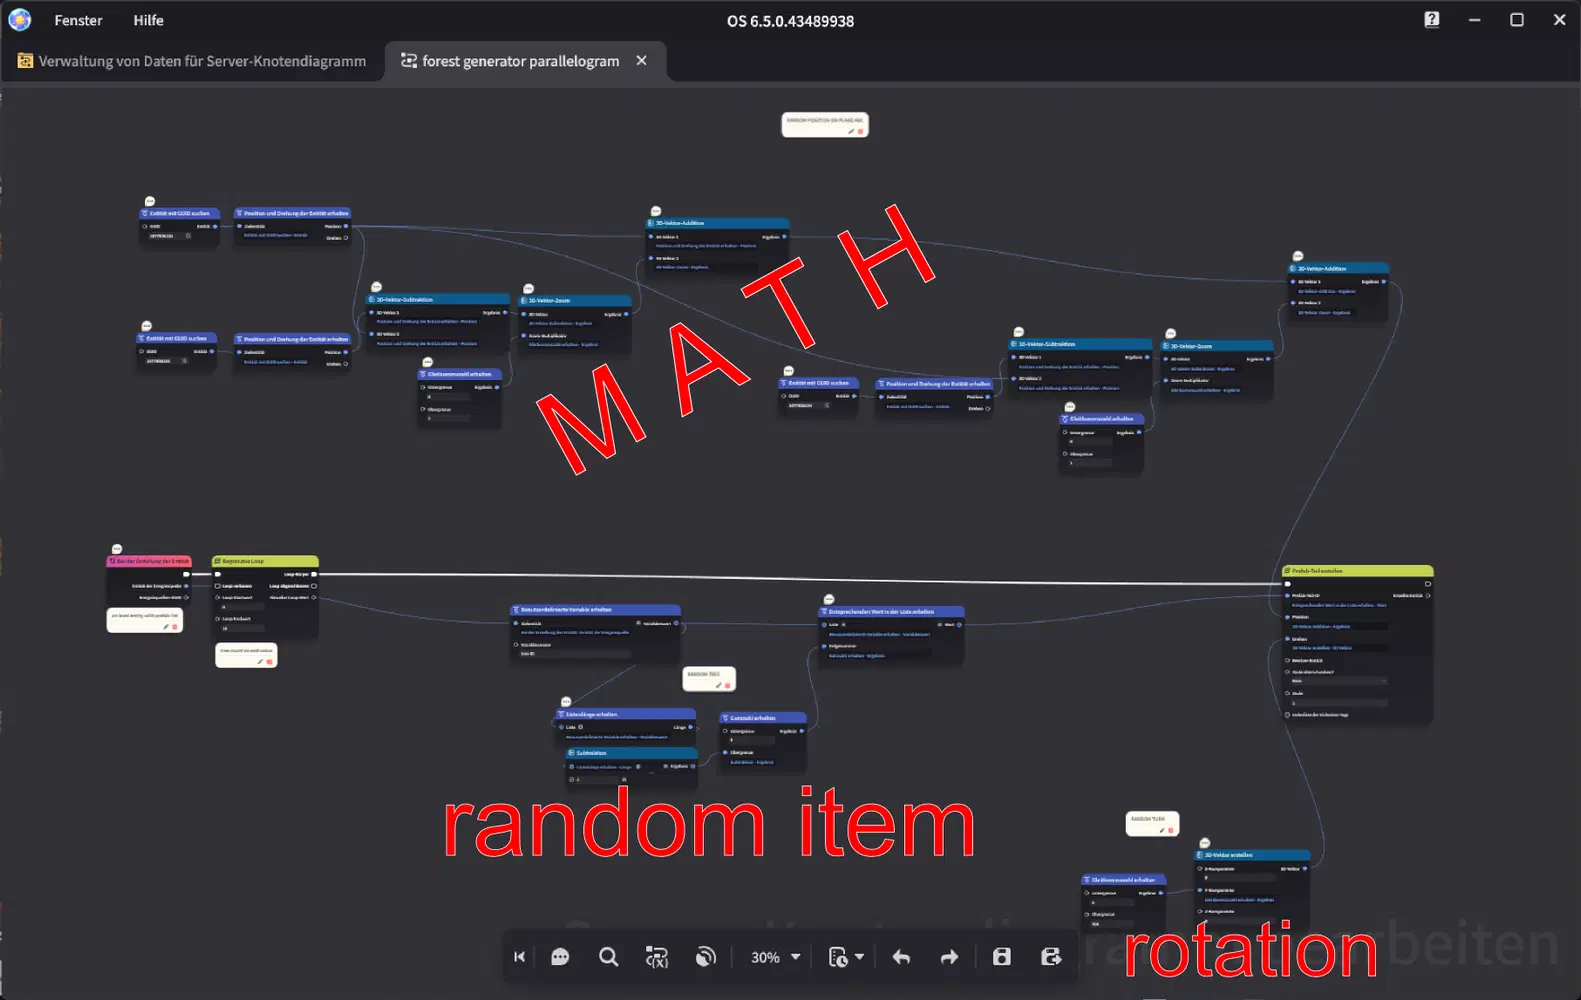
full diagram, may be used for things other than trees
Mine is in german, but I believe it will change to your language if you download the diagram. I will share the ressources at the end of the article. I added comments in english to appeal to you as a broad community. But fret not, I will explain in detail, and in english, what happens here. 
 Here is how it works:
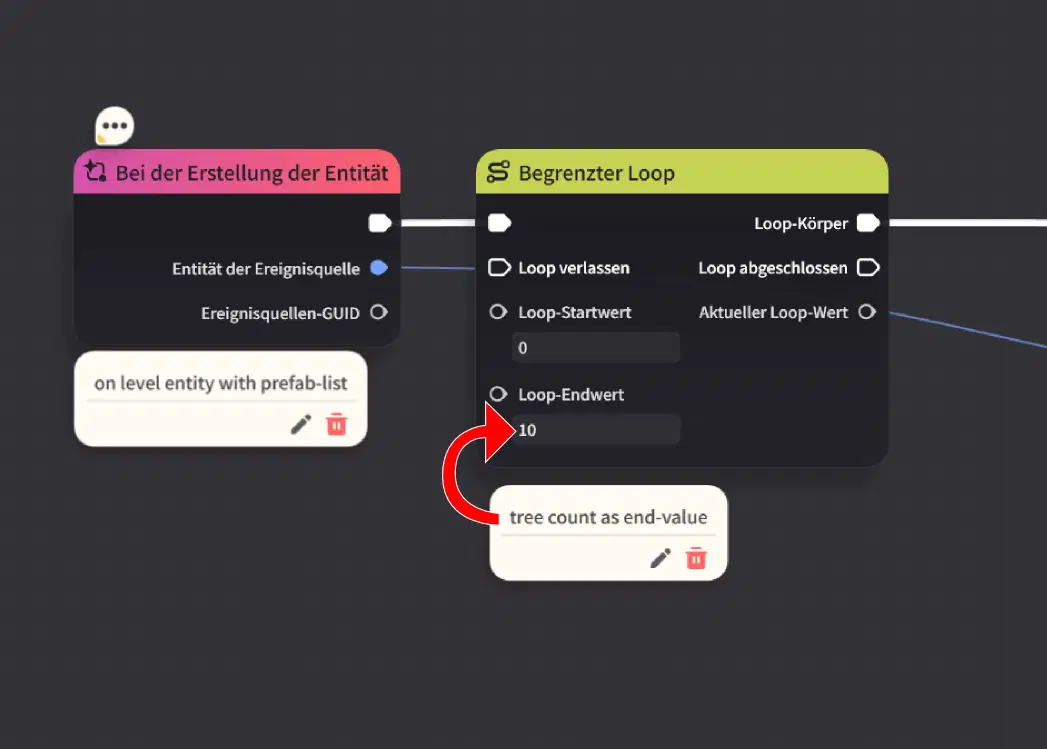
start of the diagram, put it on the level entity
On creating the level entity, so at the start of the level, the programming lets the game create a specified amount of items in a pre-defined area. This is done by looping a creation command x amount of times, where x is the amount of items I want, in this case 10 trees.
These items come from a list, where I put the prefab-IDs of my trees (or whatever items you want to spread) into a list and put that onto the level entity.
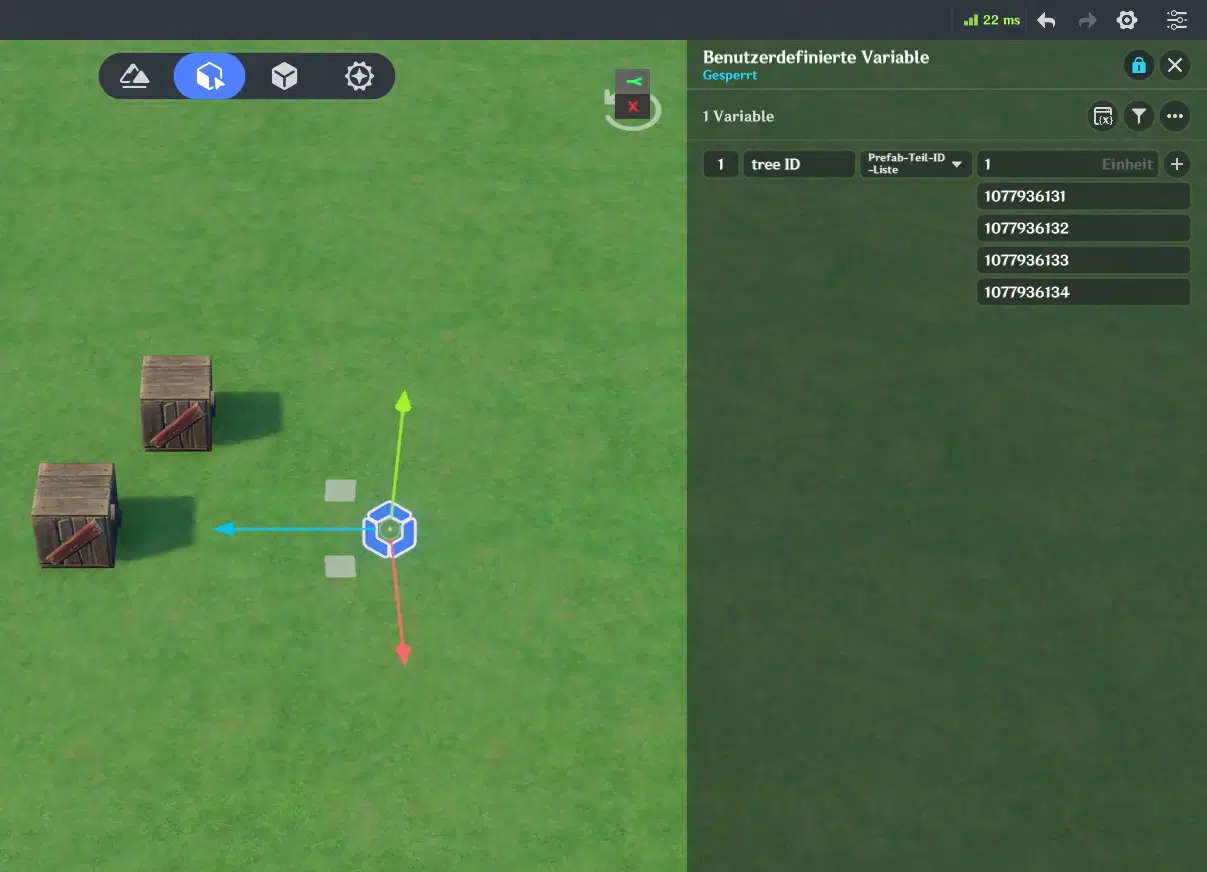
level entity with a list of the items you want to spread
Be sure to remember the name you give the variable and make sure it is set as a prefab-ID-list!
From there, we can get a random item with this little collection of code:
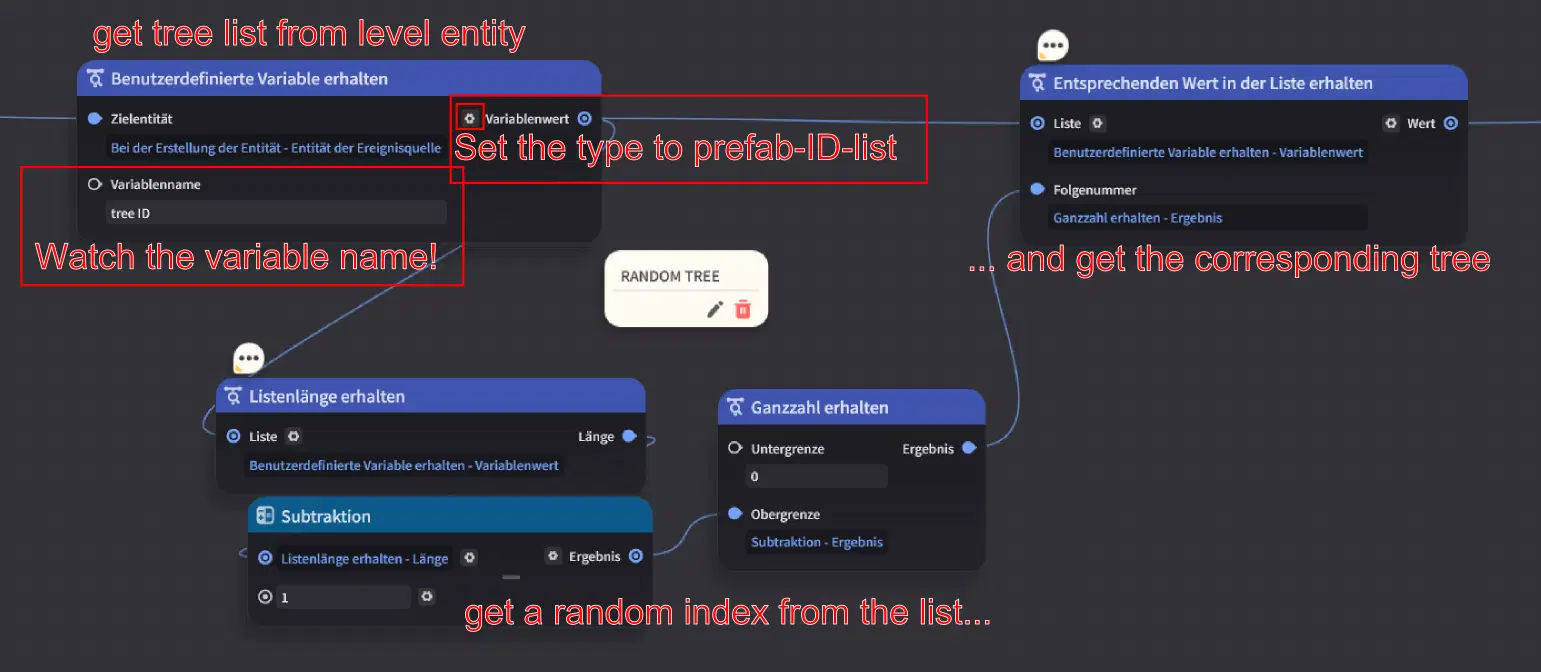
random item part
First, we get the list from the level entity, which comes from the trigger node. You can also let it come from an „own entity“ node. But this setup works as well and has less clutter on screen. Make sure you set the correct variable name and set the variable as prefab-ID-list with the gear symbol so there will be no hiccups in the internal workings.
Next, the code checks the list length to make the upper limit of the randomization dynamically change to your list length. It's a neat trick I discovered recently. But since list lengths start at 1 and list indices start at 0, we'll have to subtract 1. We'll then get a random number, and thus an item, from the list with the last part.
So far so good. Now all that is left is position, and maybe turning. To get a random position on a plane, we'll use math. That's right, there is actual uses for math! 
In 3-D vector calculations, there is a standard formula for planes in a 3-D space:
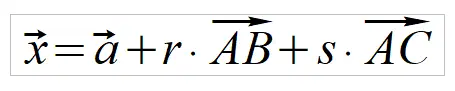
general 3-point-formula for planes in 3-D geometry
with vector x being a location on the infinitely wide plane across space. The point A and its position vector are the base from where the plane "starts" and the vectors from A to B and A to C being the directional vectors in which the plane spans. The parameters r and s define, how far we wander on the plane, so you can go to anywhere on the 2-D plane that is generated from the formula.
But how does that help us? 
Imagine a rectangle built from A, B and C like this:
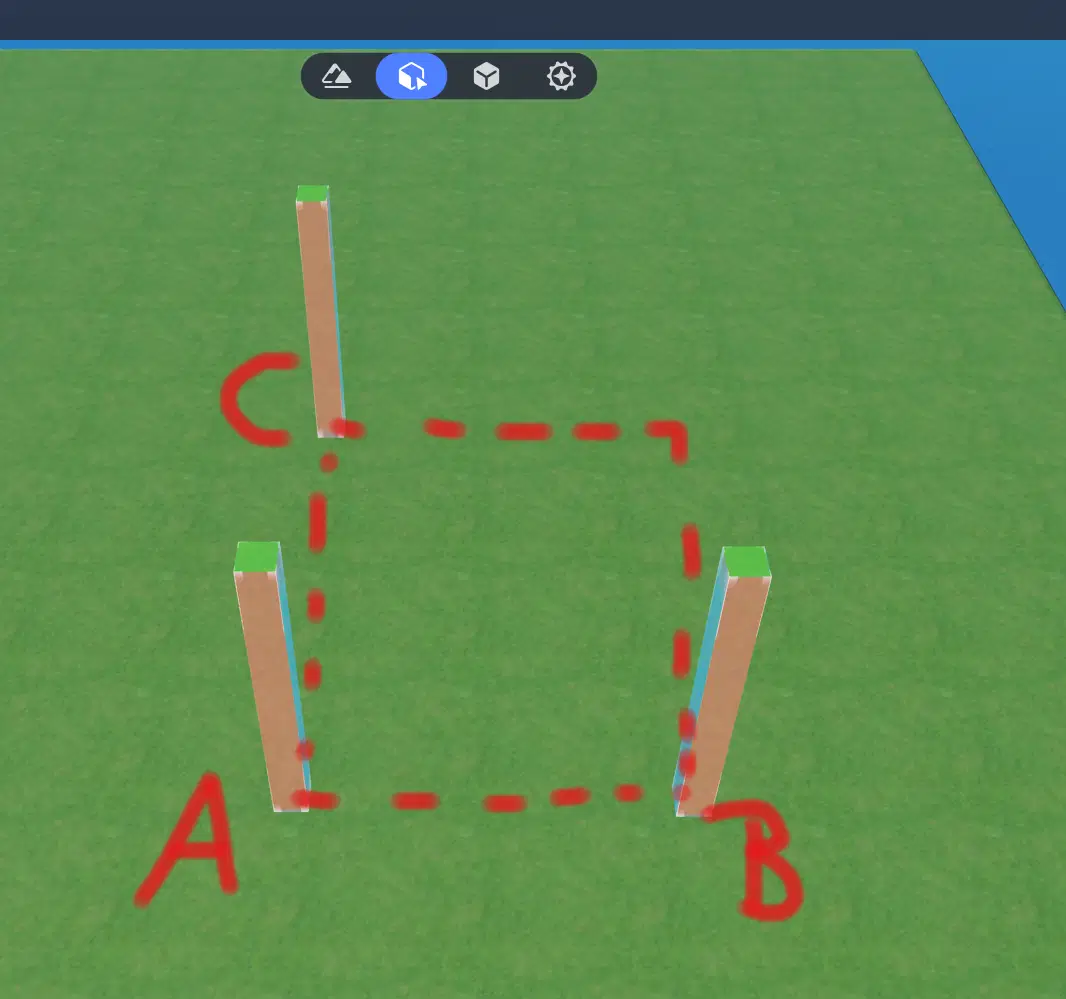
Points A, B and C as reference for our plane
If you start from Point A and walk a certain bit towards B (so right in the image) and then a certain portion of the way from A to C (so up in the image), you can go to any location within the rectangle. In our math equation up there, r and s tell us, how far we wander to the right and up.
And that's where the magic happens! We'll let the game decide a random number between 0 and 1 (so only a part of the whole way) for r and s each and let the cursor wander that way from A onwards. It reaches random spot within the rectangle and places a tree there.
Thanks to the loop function, we can let the game do exactly that about 200 times, no problem. We can even add a little spin to it and let the game decide a random rotation of the tree (the game's up-direction in the y-axis, so we rotate around that like a drunkard goes around a lamp post back in classy 80's movies. )
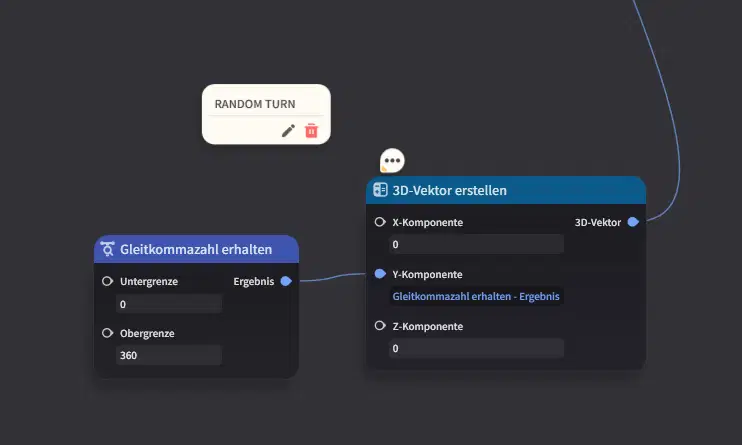
rotation part
Here we are getting a random number from 0 to 360 and set this as the degrees for the rotation around the y-axis (which points actual up in the game). If you need other rotations, or no rotation at all, edit this part accordingly!
And there you go! The game now makes trees (or anything else you put into that list) in an area we designate with some pillars (representing A, B and C for our math). Every start brings up a new forest, so levels are never the same again!
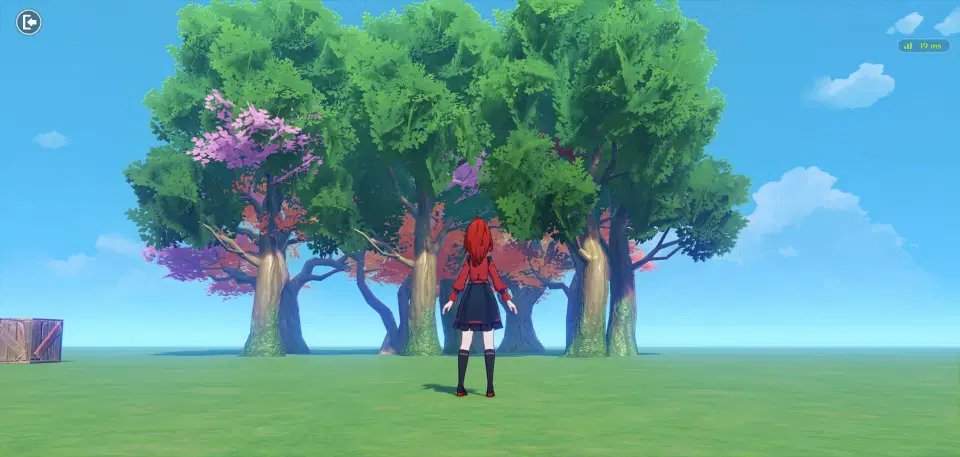
RNG forest 1
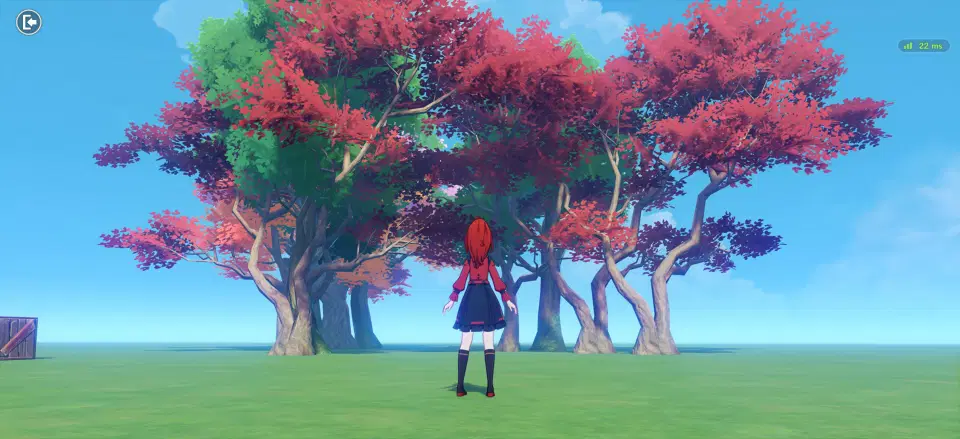
RNG forest 2
Now all you have to do is slap that diagram onto the level entity and it will create a beautiful, ever changing forest for you totally automatically.
And you can easily change the size with the pillars A, B and C, the density with the amount of loops and the "vegetation" with the prefab-IDs in the list.
 How to use the diagram:
You can get the diagram in-game or with my link. You can also rebuild it for yourself with the given screen shots. Once you have it, all that is left to do is decide on things you want to create, make those into prefabs and put all their prefab-IDs into a list on the level entity (make a custom variable as a prefab-ID-list). Put the diagram onto the level entity.
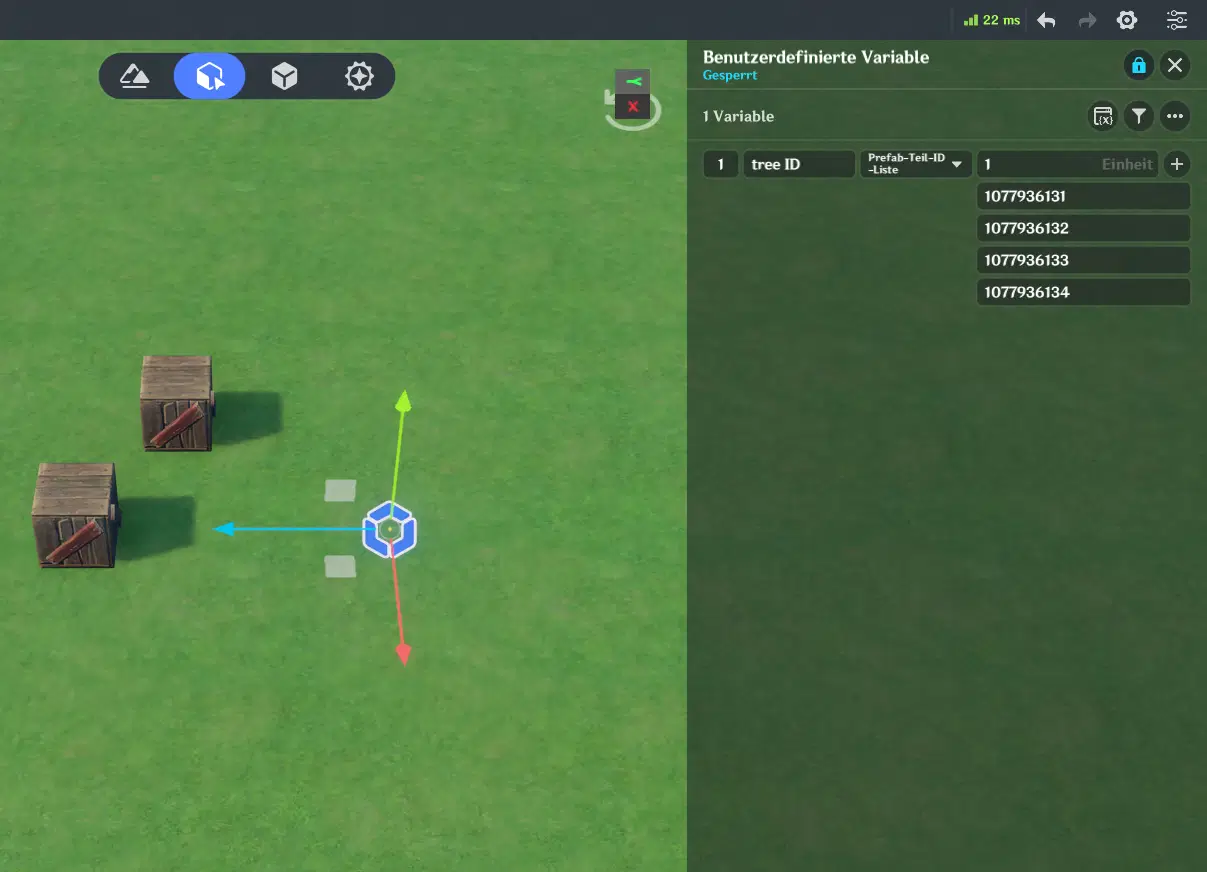
the level entity with the prefab-ID-list as a user defined variable
Now you need the reference points on your world map. I made some empty model pillars without collision and pretty tall as a prefab and put some of those onto the map, where the forest should go.
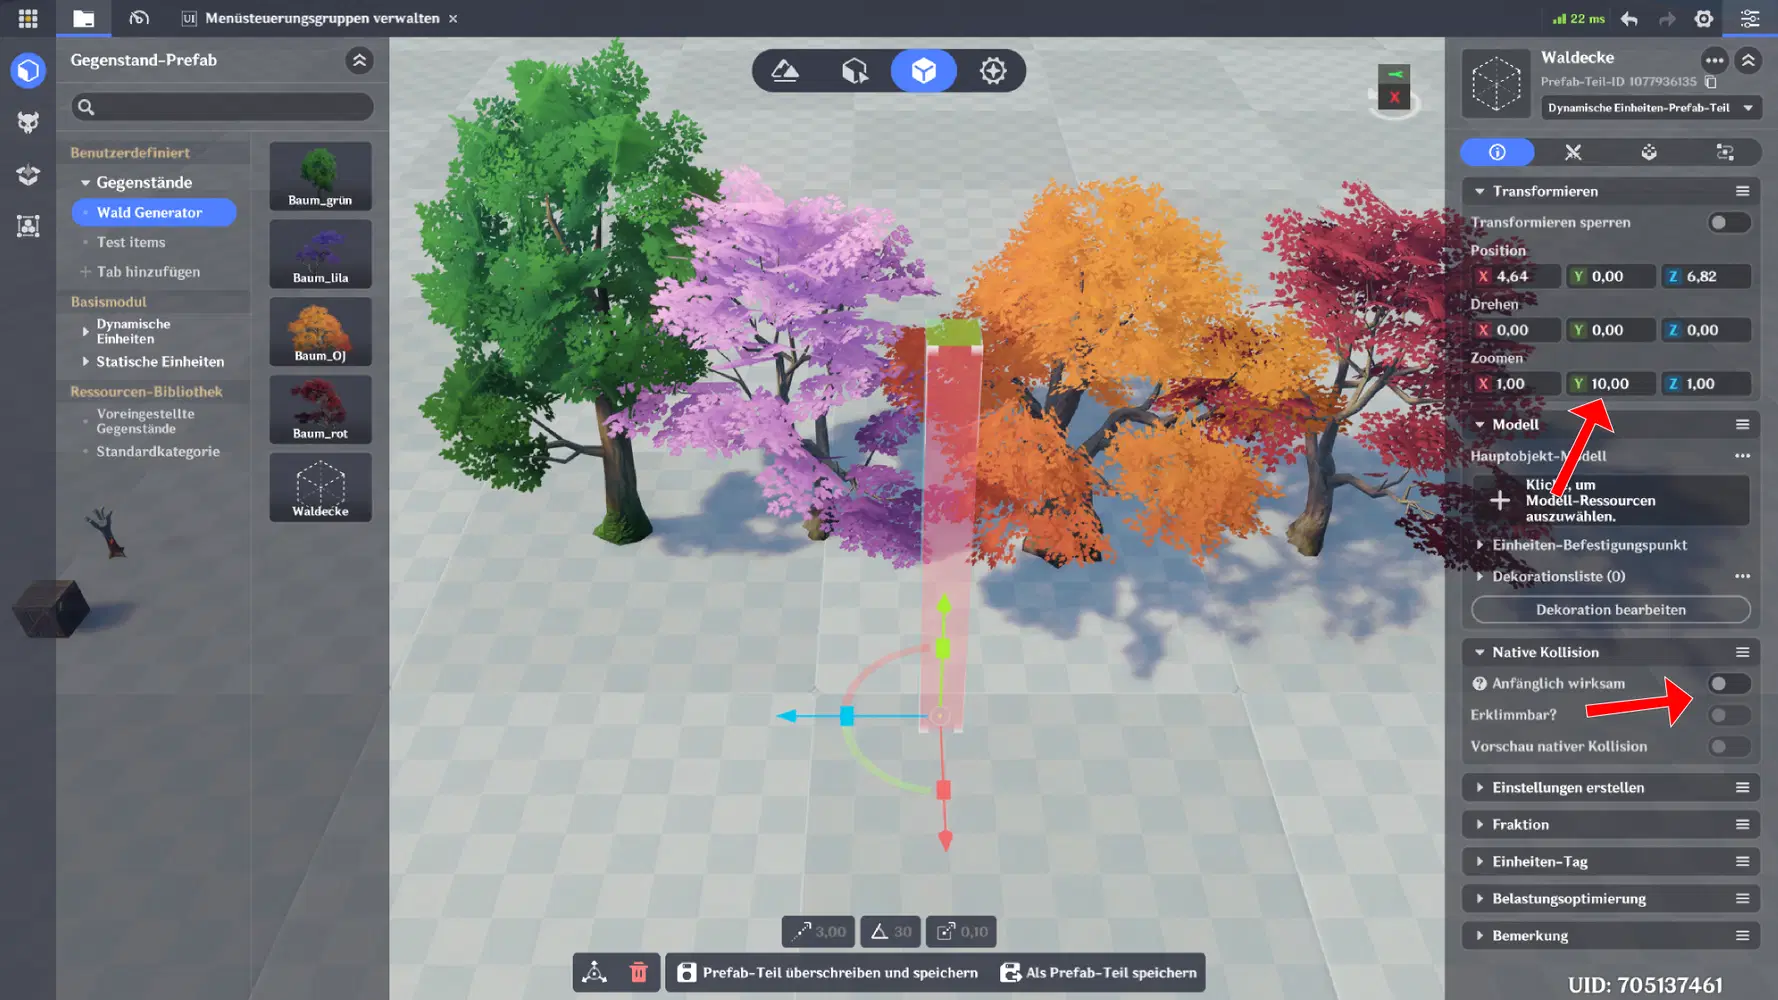
corner markers for the shape
Once you have placed those in your world, go into the diagram itself and correctly reference the pieces. You will need the the empty model pillars as markers A, B and C as seen in the pictures. Clicking onto the little lense helps you choose what you need, but you can also simply copy the needed GUID into the input field.
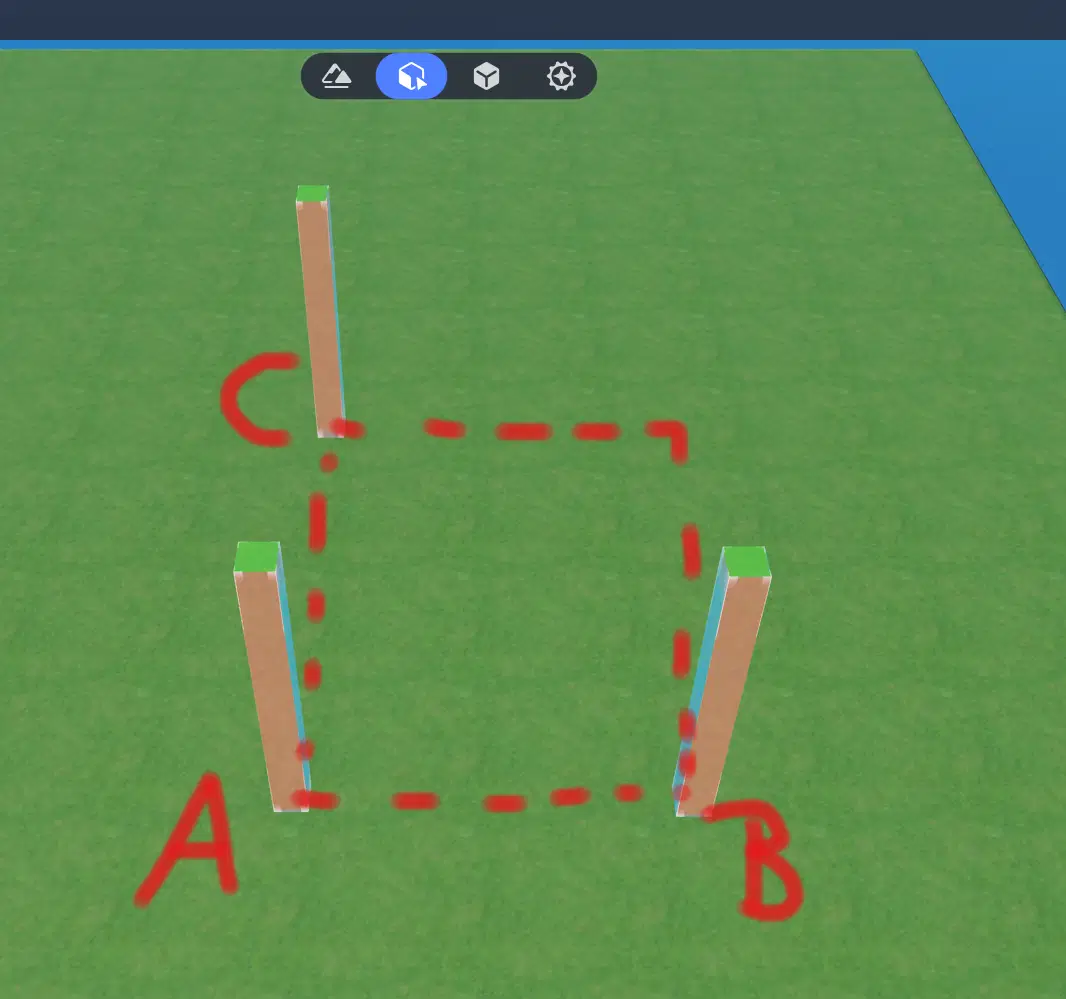
pillars placed to mark the forest area
Make sure you mark your areas in that way, so start with the bottom left and then mark the two directions where your area spans, so the bottom side and the left side. It also works if you put it differently, but the 4th corner will automatically be set according to your choices for the corners A, B and C. So in order to keep your overview, I reccomend always sticking to the layout as seen above.
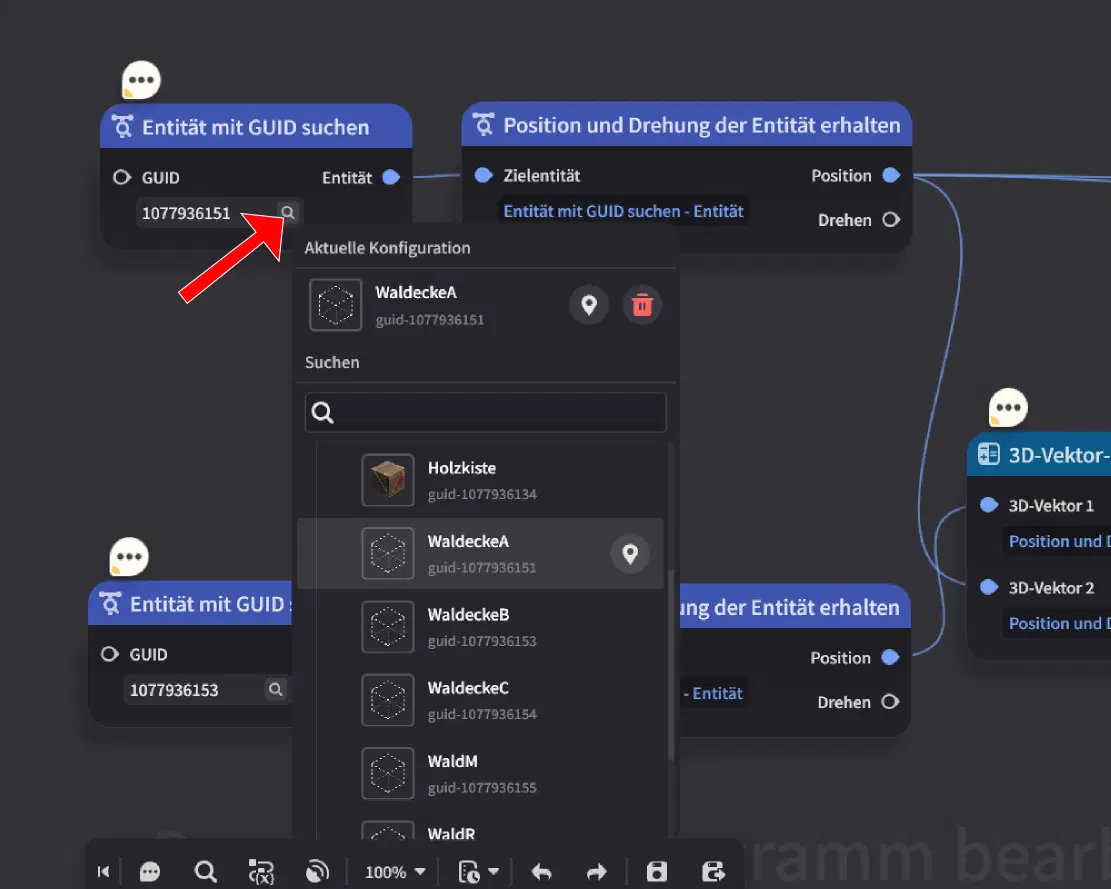
refer the markers via their GUID or choose them from the list
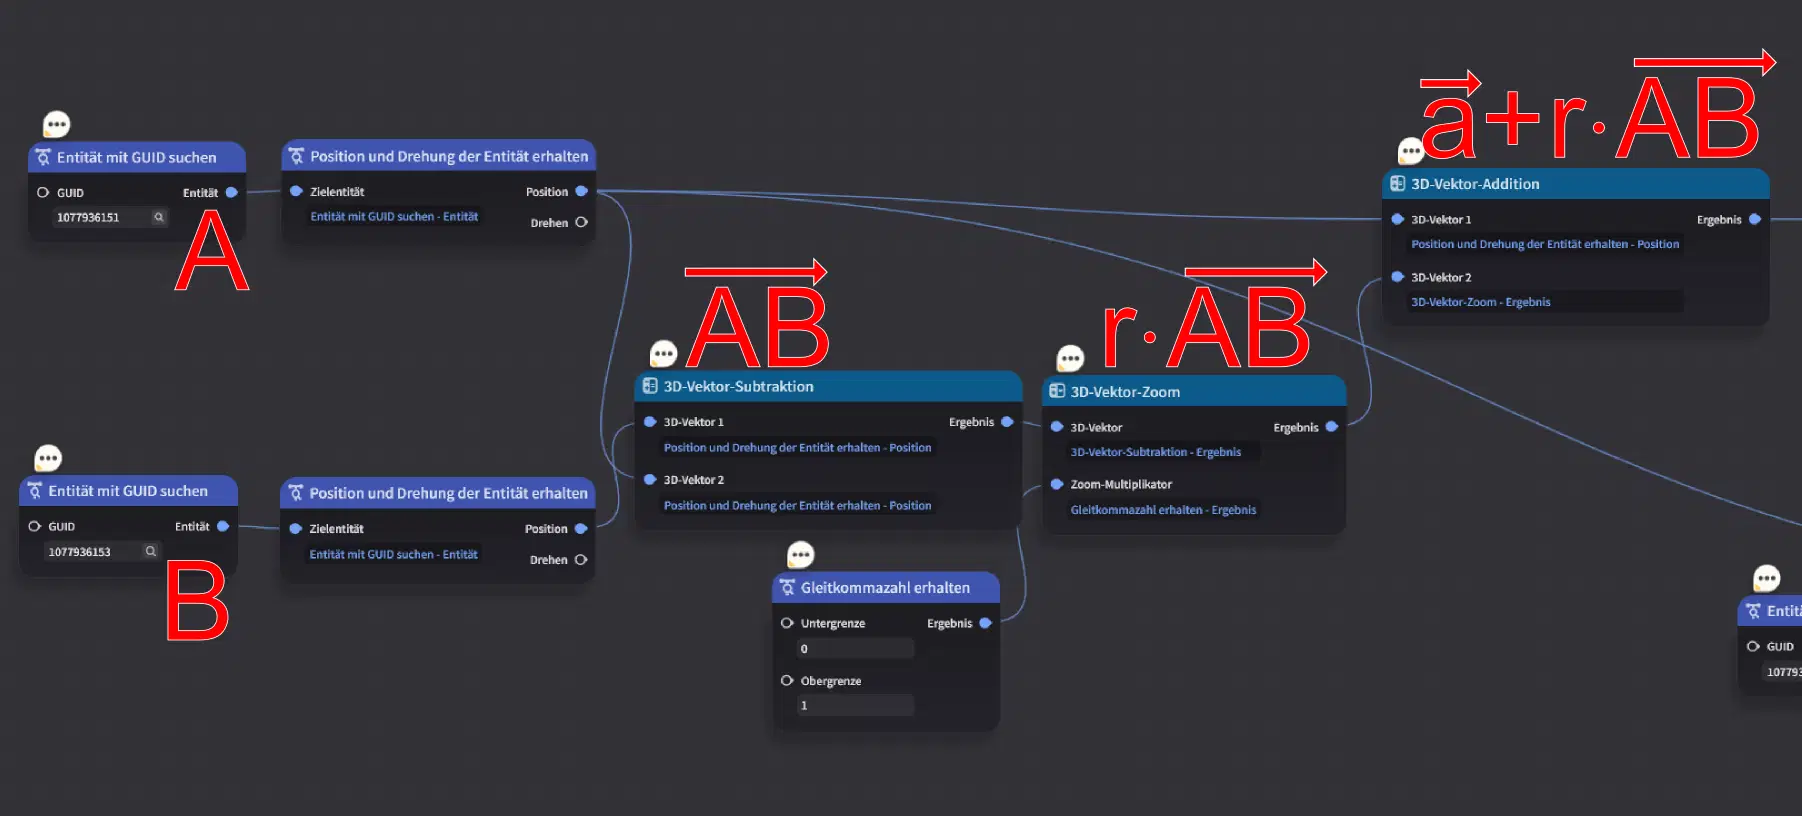
math part 1, put corner A into the A-part, and B respectively
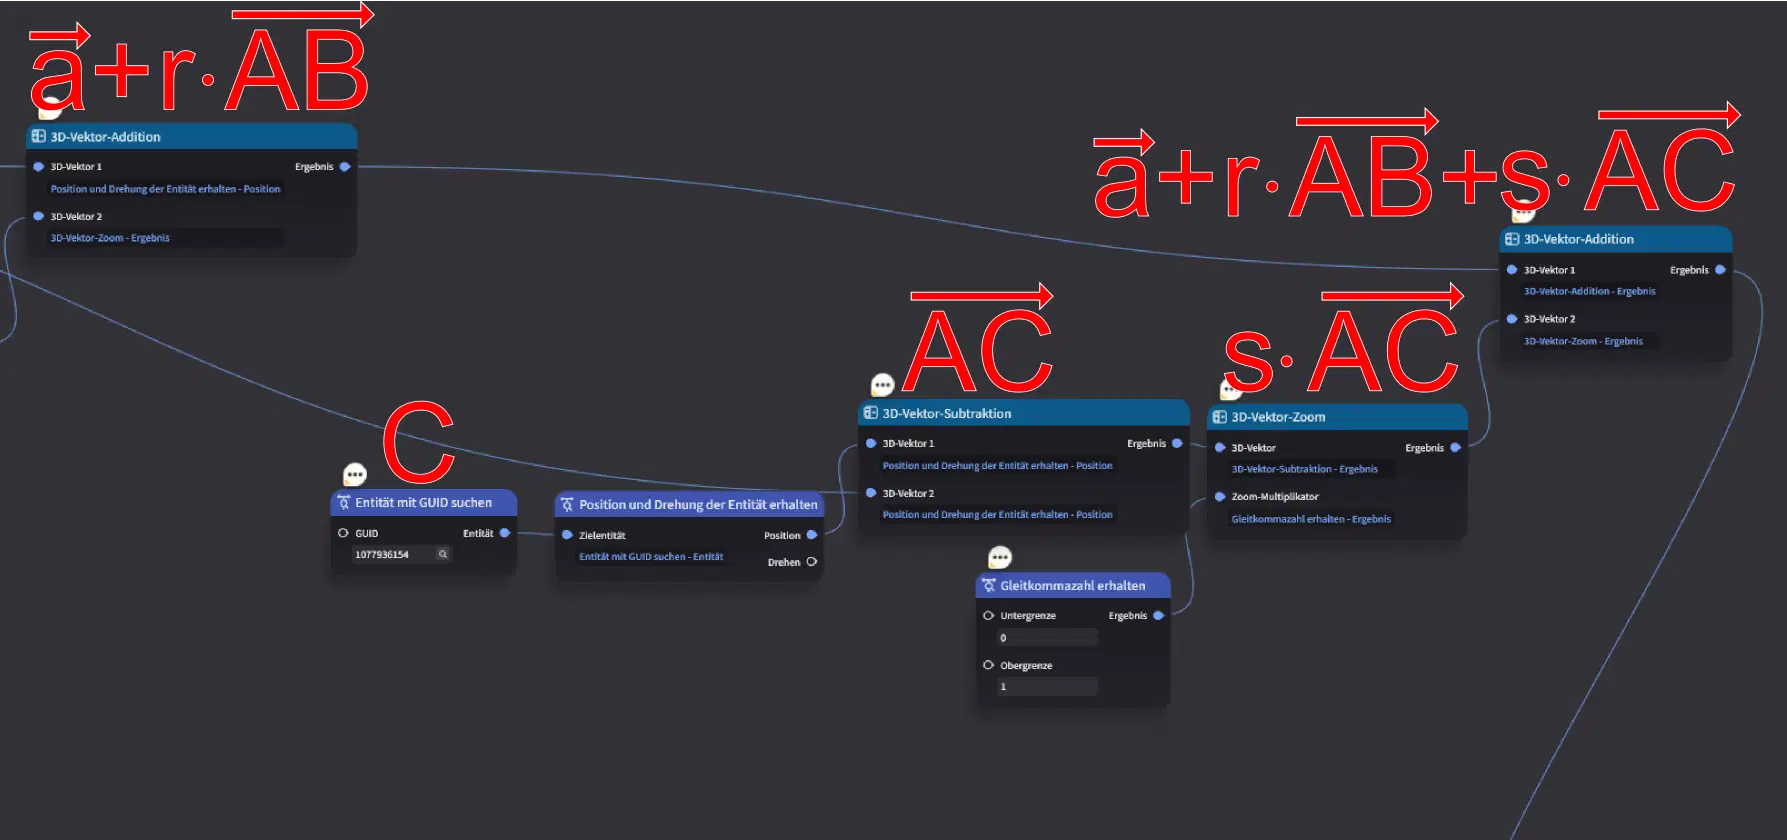
math part 2, put the corner representing C into the node
If you are confused, check the comment notes on the specific nodes, they will tell you if it wants A, B or C. You can ignore the rest of the math, it works on its own. That's a good thing about math.
Be careful, that you can only make parallelograms with this specific diagram!
If you need any adjustments, do them now! Change the size and general shape by repositioning the pillars for A, B and C, change the density with the amount of loops at the start of the diagram and check your items in the prefab-ID-list on the level entity. Apply other changes like removing the rotation part or add other code that you might need for your clutter.
If you need multiple areas, make sure that each needs its own diagram, but you can just copy it and set the reference points A, B and C anew. Be sure to add the new diagrams to the level entity as well and use a different variable with a different name if you want to spawn other things. Keep it the same if you want to spawn the same things.
What about other shapes?
The parallelogram is the easiest to follow and often enough quite useful. Other than that, you only need 2 other diagrams in order to make any 2-D shape imaginable: one for circles and one for triangles. Every other form can be made as a combination of those. I will also share diagrams for those shapes.
The circle uses a line vector and spins that around to have an actual circle as a random area.
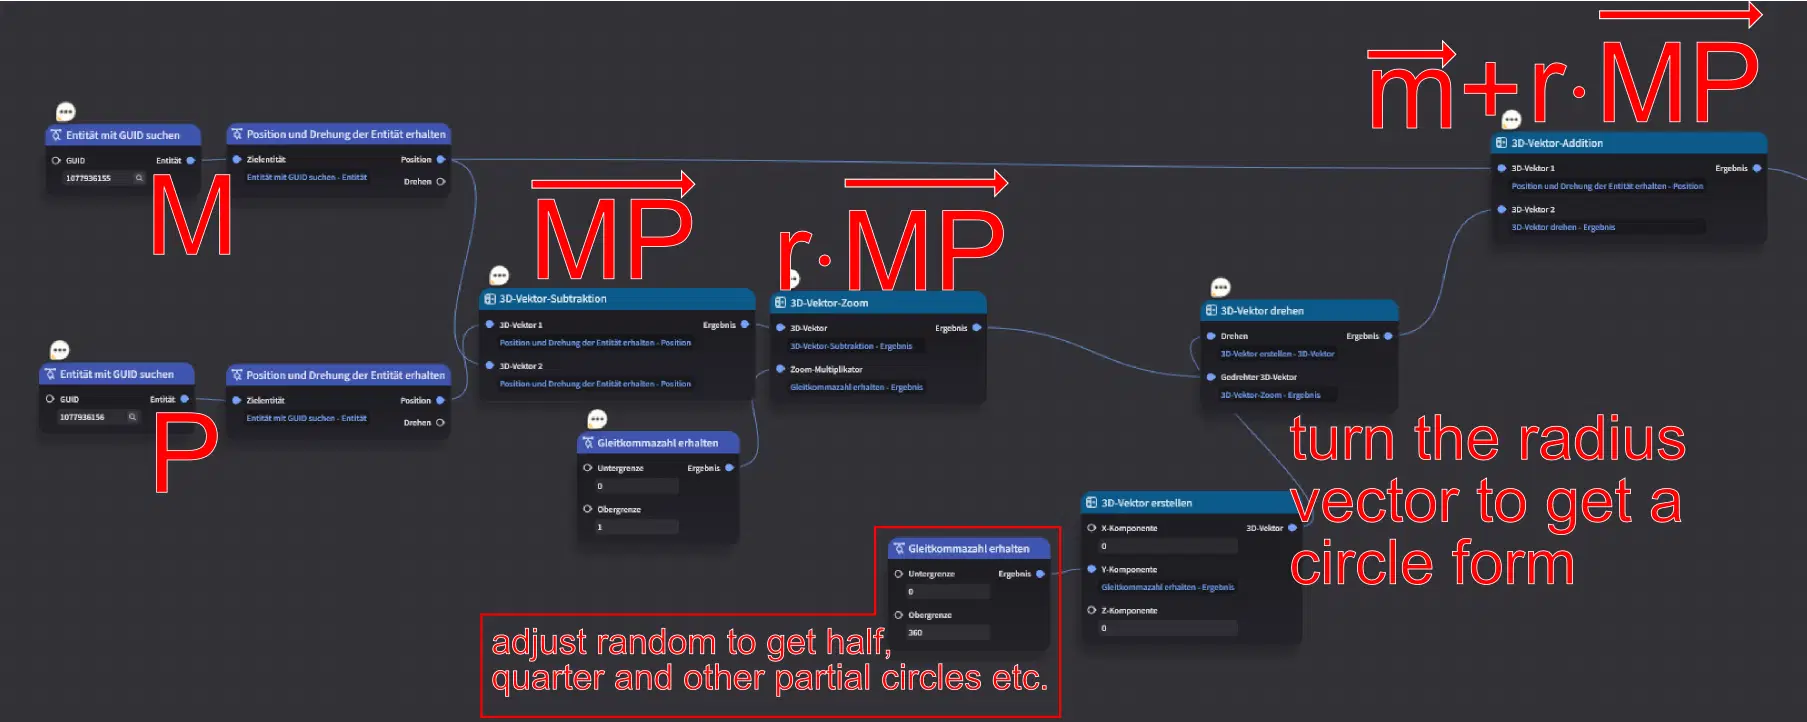
math part of the circle diagram, works with middle point M and edge point P
The triangle needs a bit extra programming so the trees stay within the triangle, but don't wory, I got you covered. For you, it basically works exactly as the parallelogram diagram. Put in the corners as A, B and C and you're good to go.
Can I use this tool for other stuff?
Of course! Just put the things you want into the prefab-ID-list. Anything goes from slimes, to bushes to rocks. You could also build an army of Fatui with it. If you further need to manipulate the pieces, just add those functions into the diagram. You can also edit the rotation paterns, remove it completely so everything faces the same direction, or make a weighted random formula instead of an even randomization. Have faith in your creativity and get creatin'! And if you think you screwed the programming beyond saving, just re-download the file. 
 Ideas for further development:
I have tried to keep the diagrams rather simple so anybody can use it. But fiddling around here and there lets you adjust the workings to your needs.
For example, you could have a hollowed circle so you can dynamically create around other objects, by setting the lower limit for the vector zoom randomization to about 0.5.
Maybe you can then figure out, how to only spawn in a specific segment of the circle, so you can spawn things behind others in a cone or such, by adjusting the random numbers given to the radius vector rotation.
You could also add the third dimension to whole whole deal and let things float randomly, maybe for ballons. You would need to add a third vector for the height, but that should works just like the others from the parallelogram.
You could also add some code to have the game declutter the resulting forest, so trees that spawned within each other get removed again.
As for other uses, the given math chooses a random location in a given parallelogram, so especially squares and rectangles. You can use that part of the diagram to have a things spawn randomly in an area, if you need that for arena survivals, bullet hells or other genres of games.
If you have any questions about the diagrams, the math behind it or other cool ideas, feel free to contact me! As a teacher, I am always willing to help.
 links to resources
forest generator parallelogram  is being used in the example above
samples
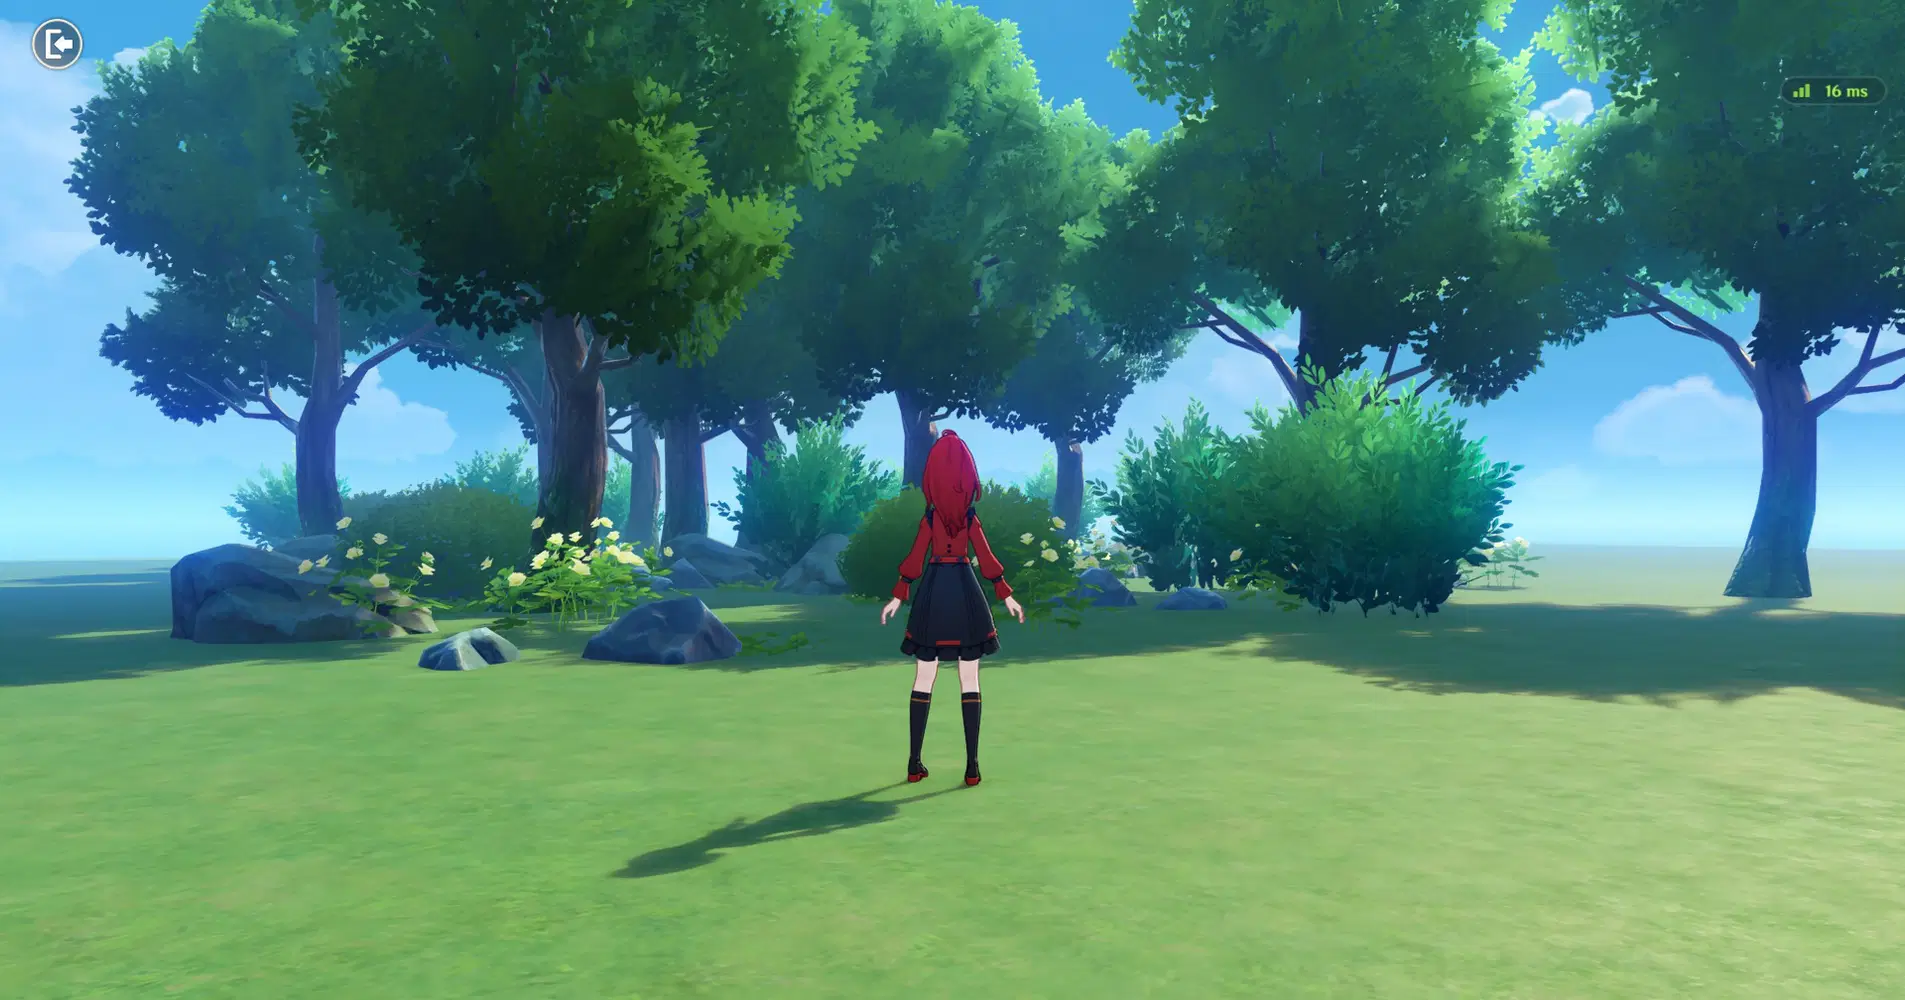
sample forest I created with a list of trees, stones and bushes



