


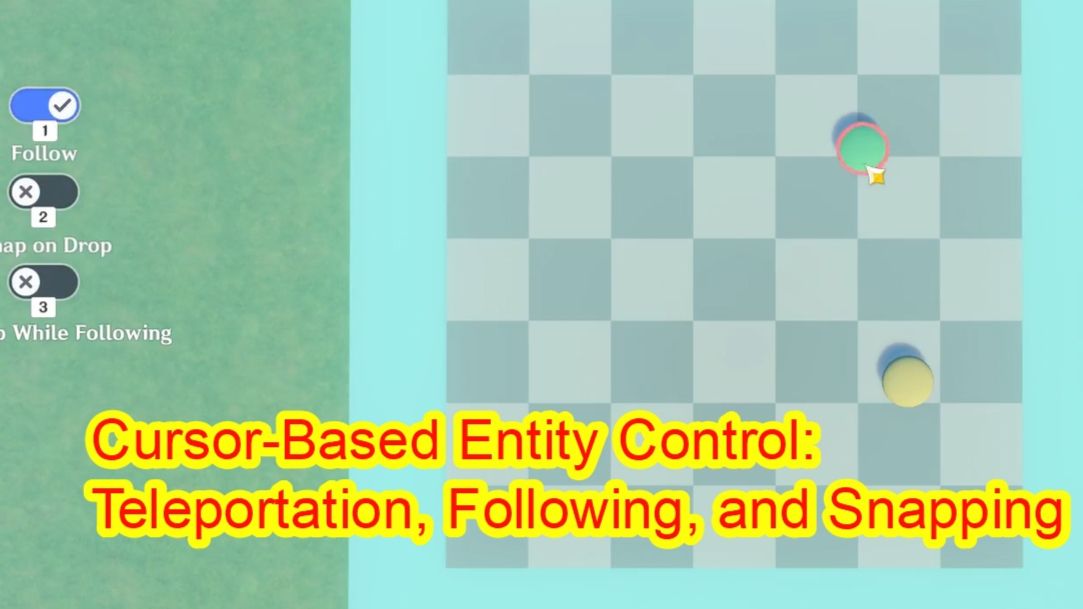
Overview
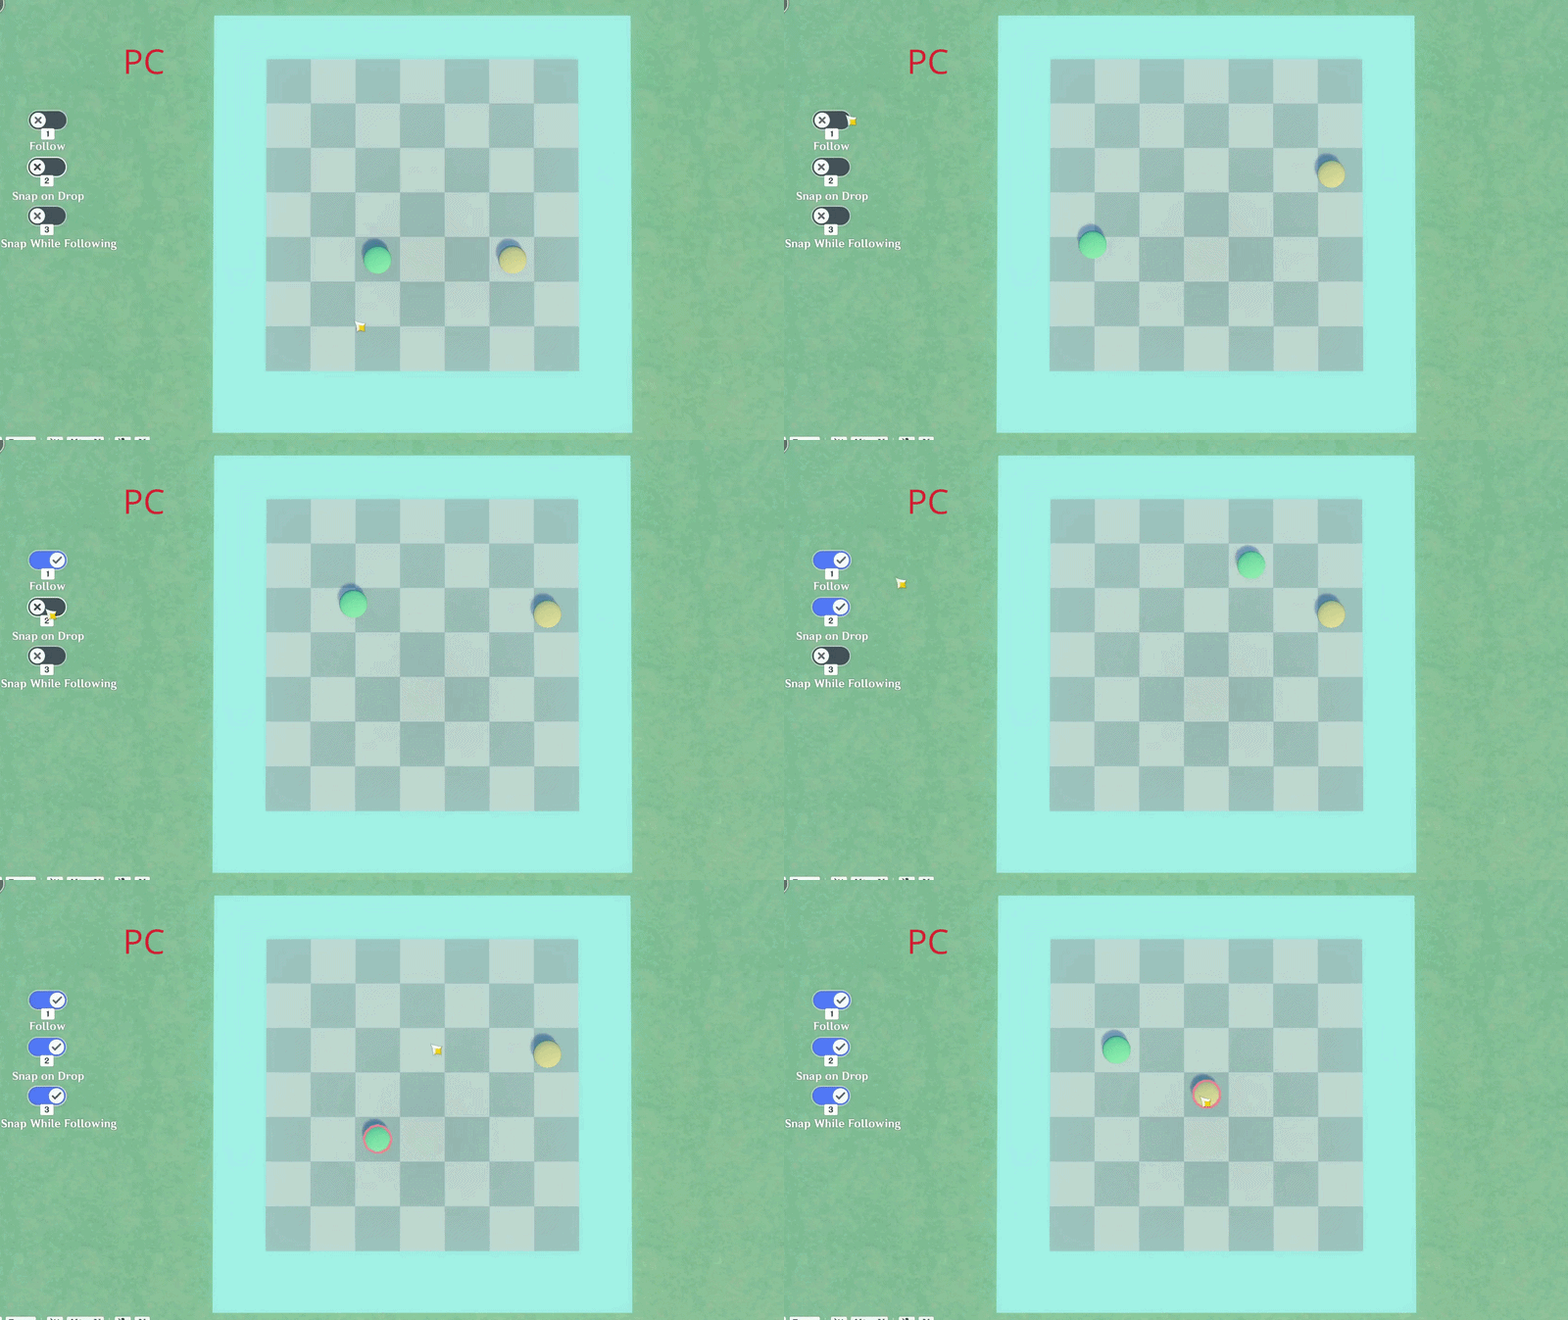
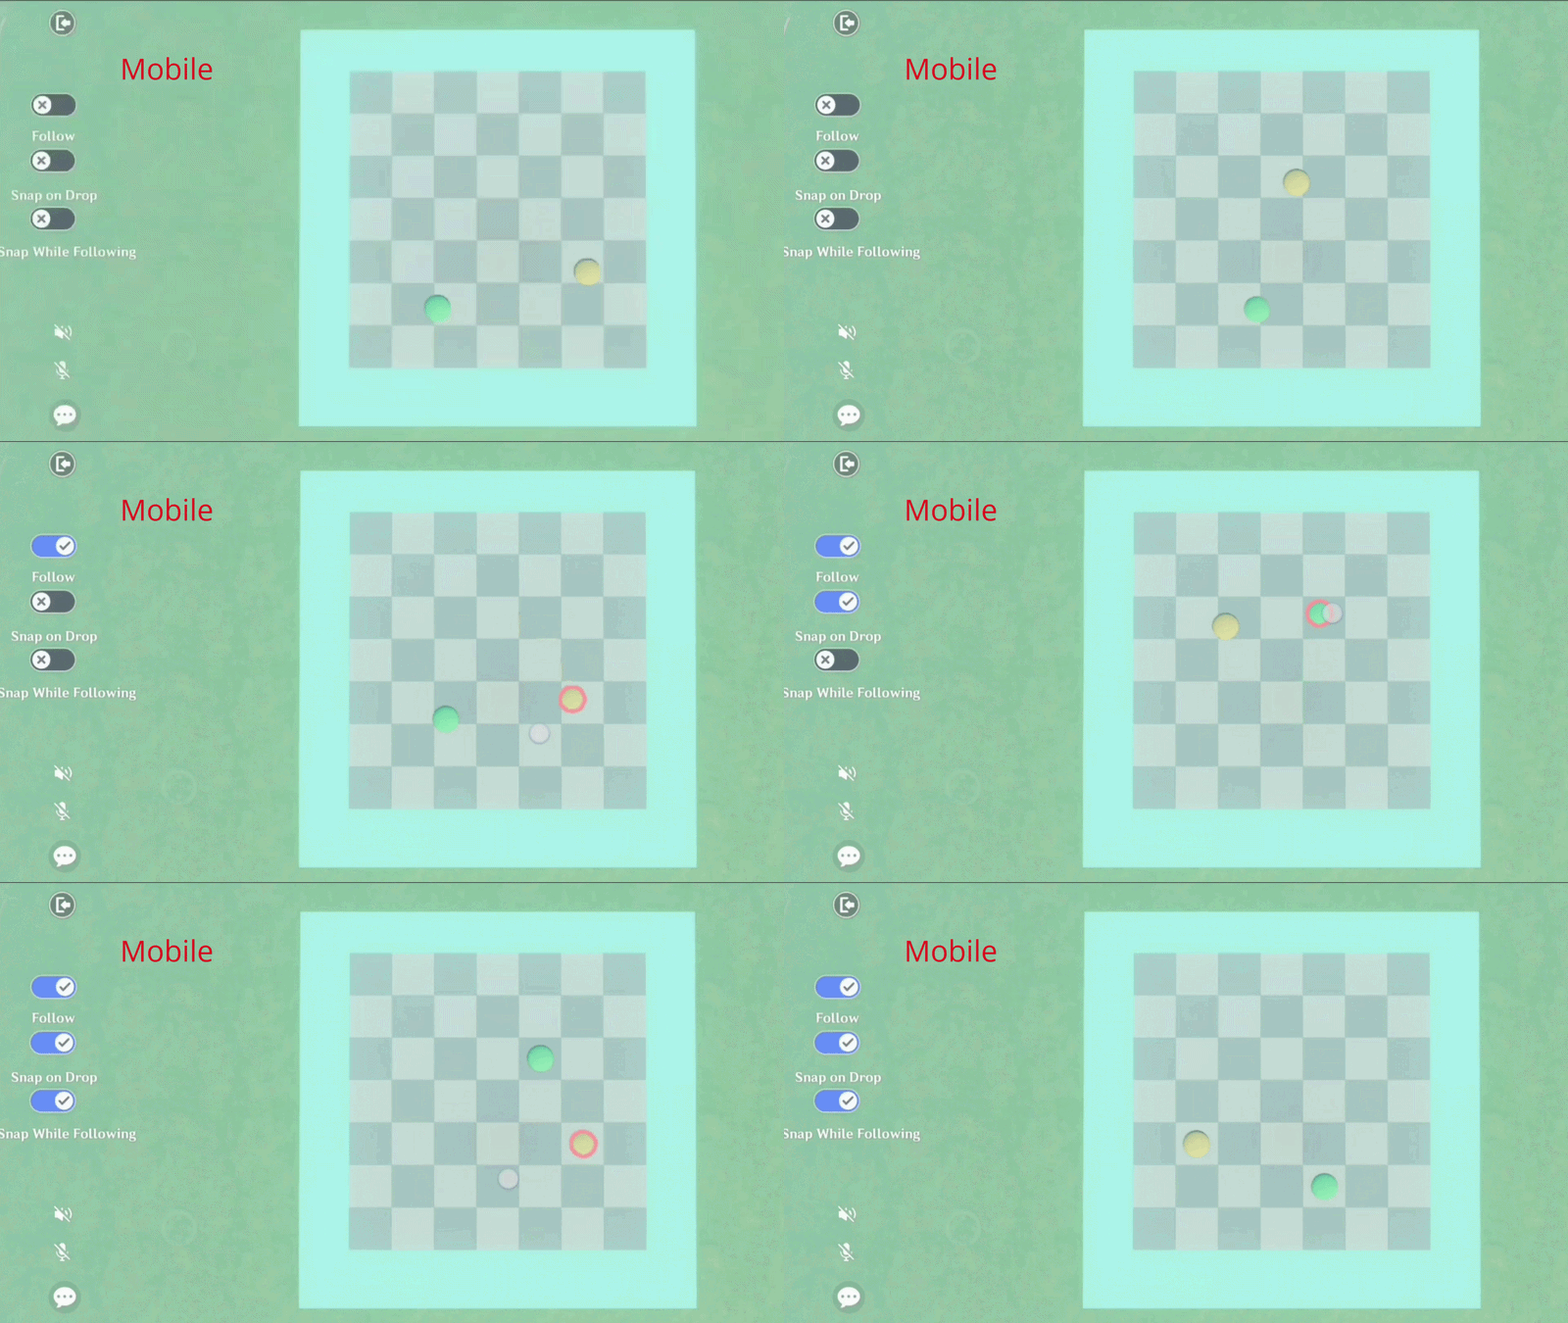
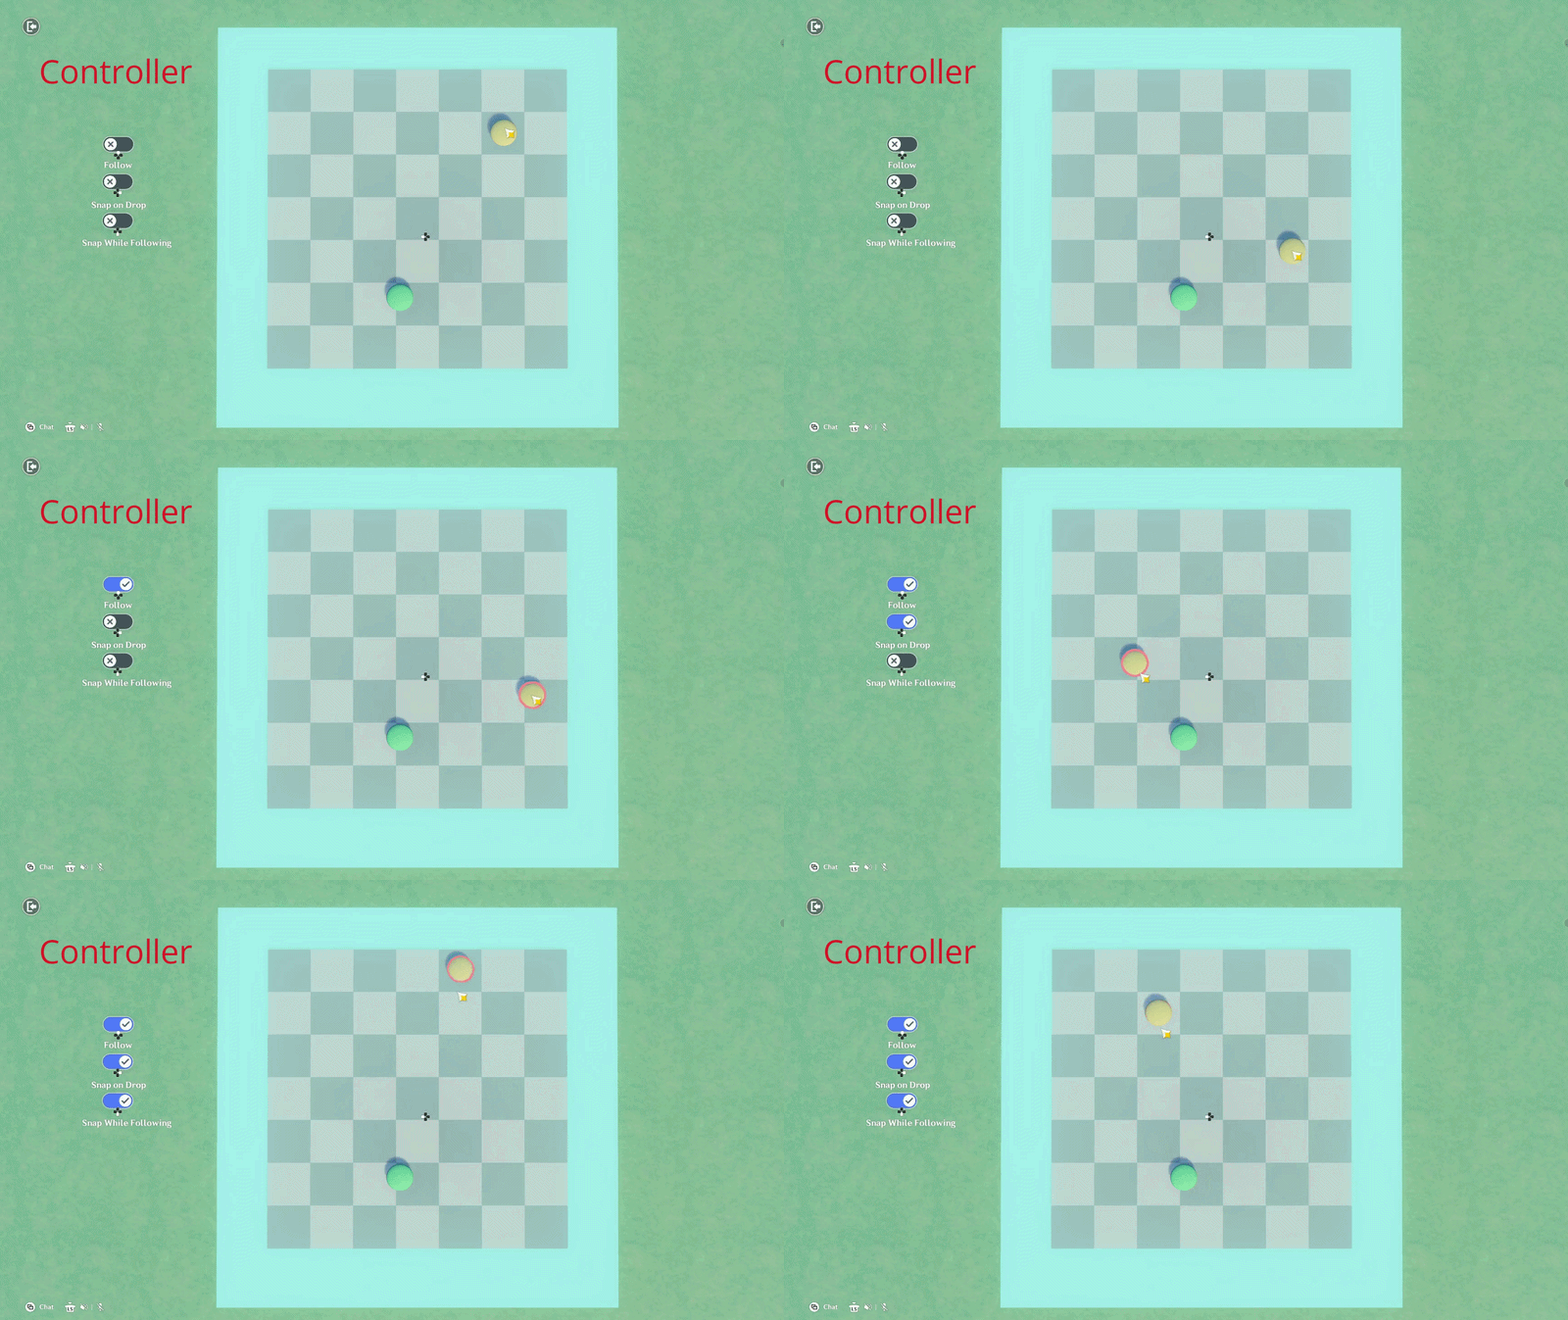
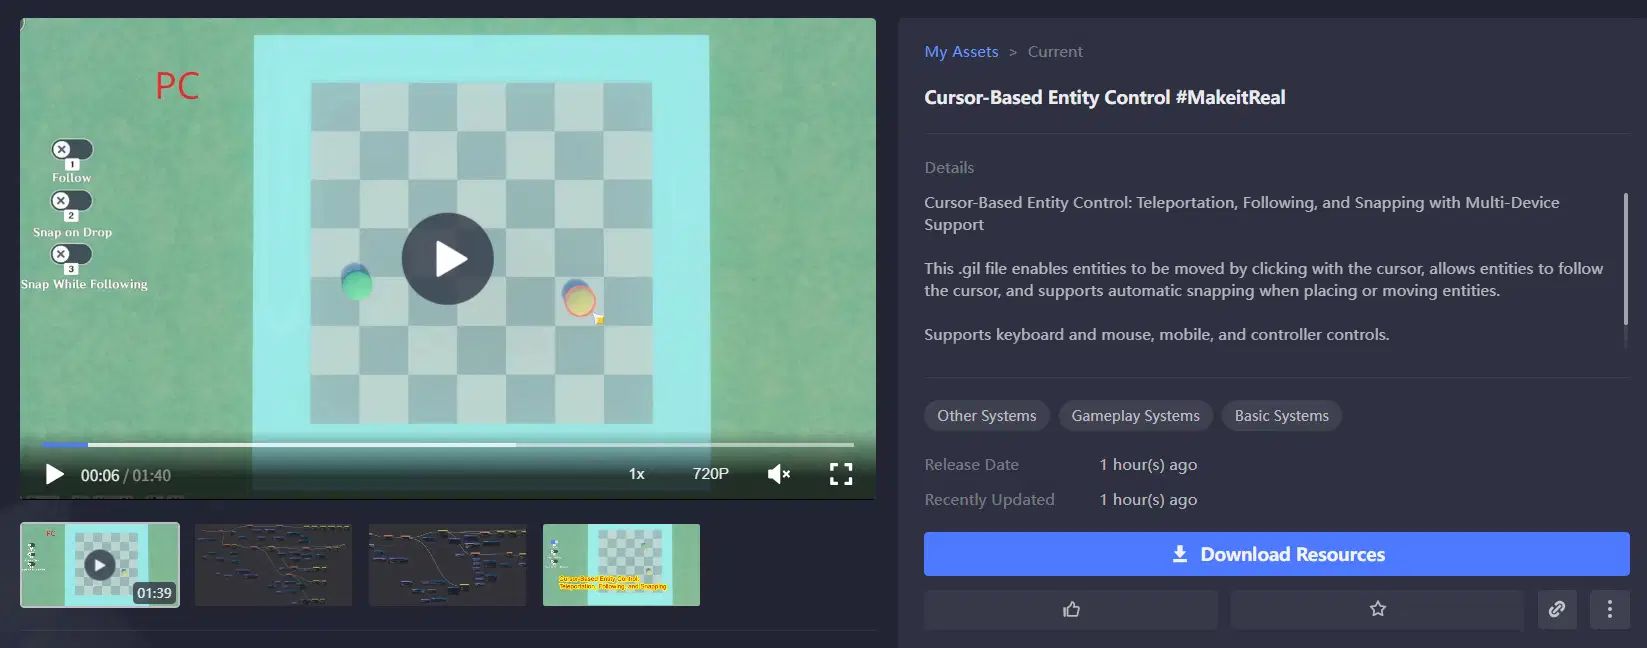
Persistent Cursor and Cursor Position Retrieval are new features introduced in the latest version. These features allow you to move entities by clicking with the cursor, make entities follow the cursor, and enable automatic snapping when placing or moving entities. As shown in the figures:
Keyboard & Mouse:
Mobile:
Controller:
The .gil file used in this tutorial has been uploaded to the Asset Center. You can also watch the demo video in the Asset Center.
https://act.hoyoverse.com/ys/prod/ugc/component-store/index.html?t=1785834293677#/item/2084581668936511488
1. Basic Introduction
First, you need to display the cursor. In the player editing interface, you can set the cursor to be persistent.
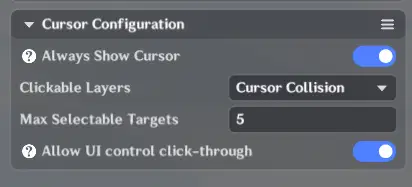
You can configure the Clickable Layers. In this tutorial, only Cursor Collision needs to be enabled.
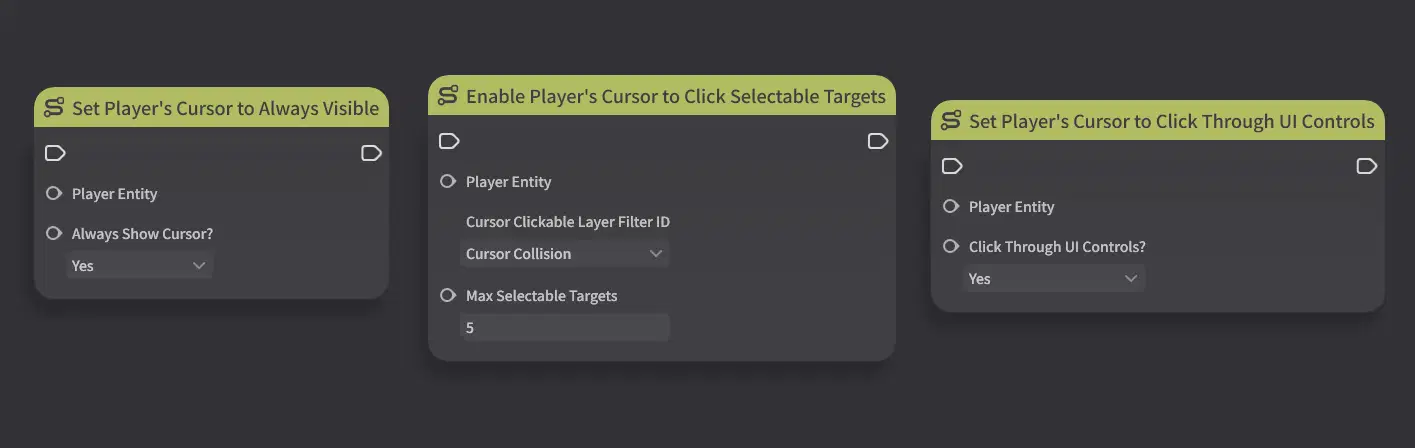
You can also configure these settings in the node graph.
Entities can also have a Cursor Collision Box component attached to them.
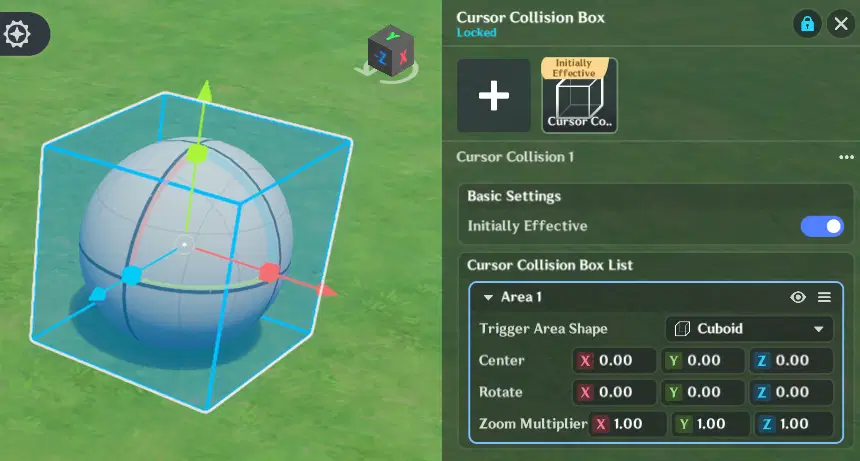
Unlike collision triggers, the cursor does not provide event nodes. The entity hit by the cursor and the cursor hit position must be retrieved on the client side through a character skill. Cursor-related node graphs also cannot directly detect whether the cursor is hovering over an object or being pressed.
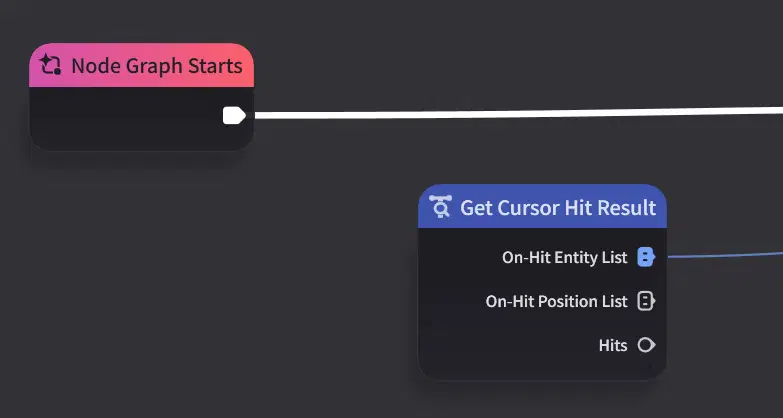
There are other cursor-related node graphs, but they are not used in this project, so they will not be introduced here.
2. Keyboard & Mouse
2.1 Preparation
This article focuses on top-down control, so first add an Object Camera.
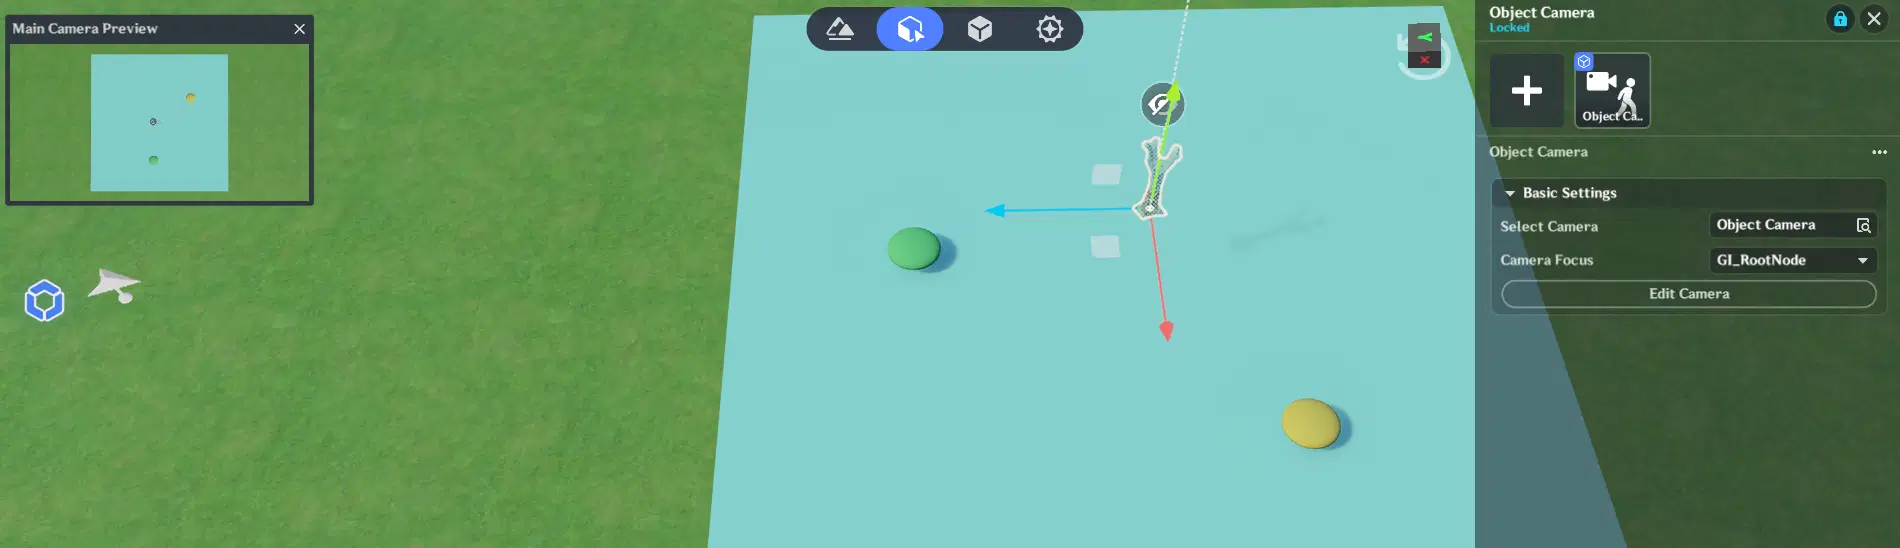
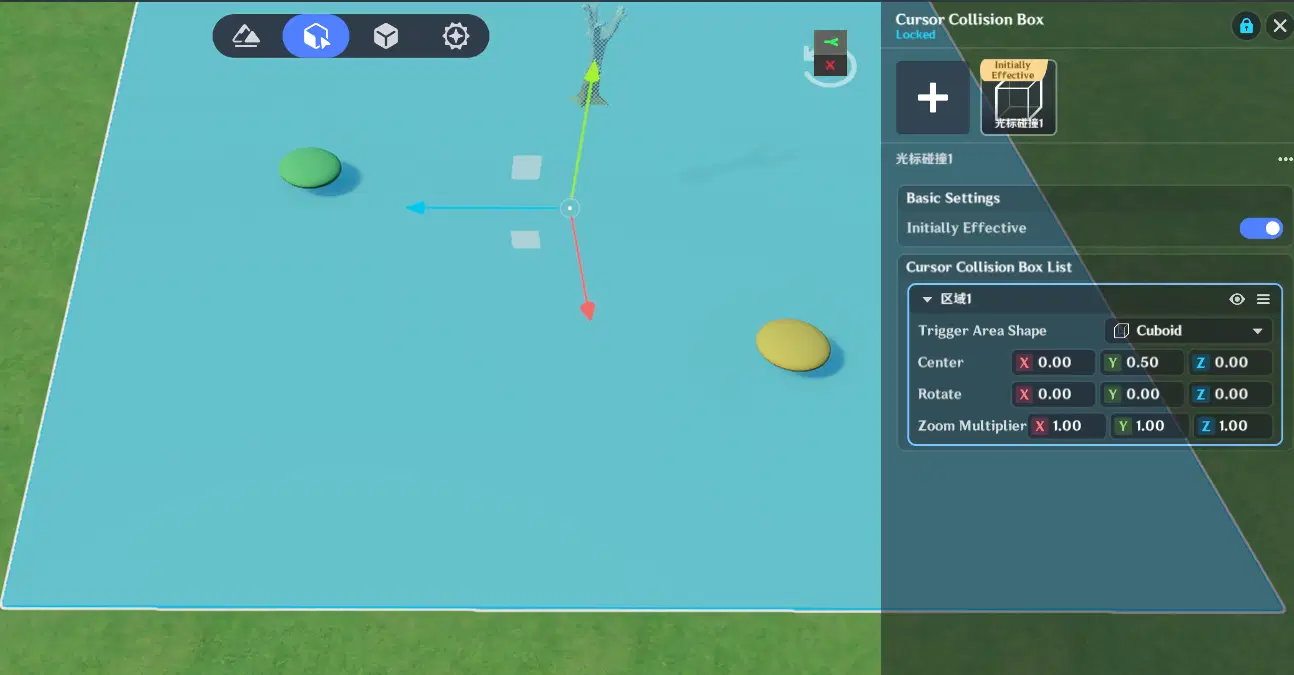
You need an entity with a Cursor Collision Box component to serve as the background.
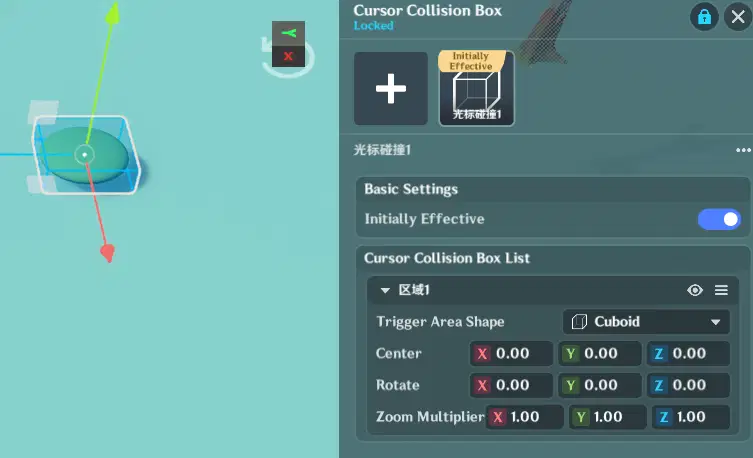
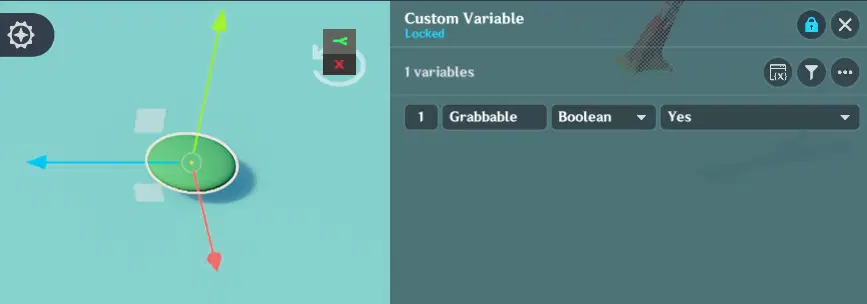
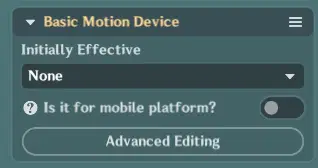
For pickable entities, in addition to adding a Cursor Collision Box component, you also need to set a custom variable to mark them as pickable, as well as add the components required for movement.
2.2 Pick Up and Drop
The current feature works as follows: click an entity with the cursor, then click another position, and the entity teleports there.
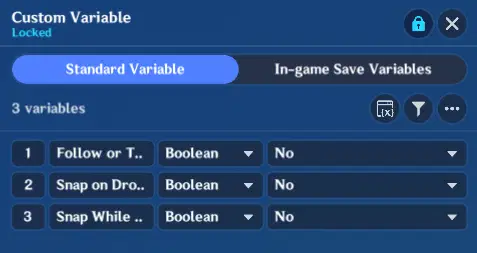
Therefore, you need to set the player's custom variable "Follow or Teleport" to No.
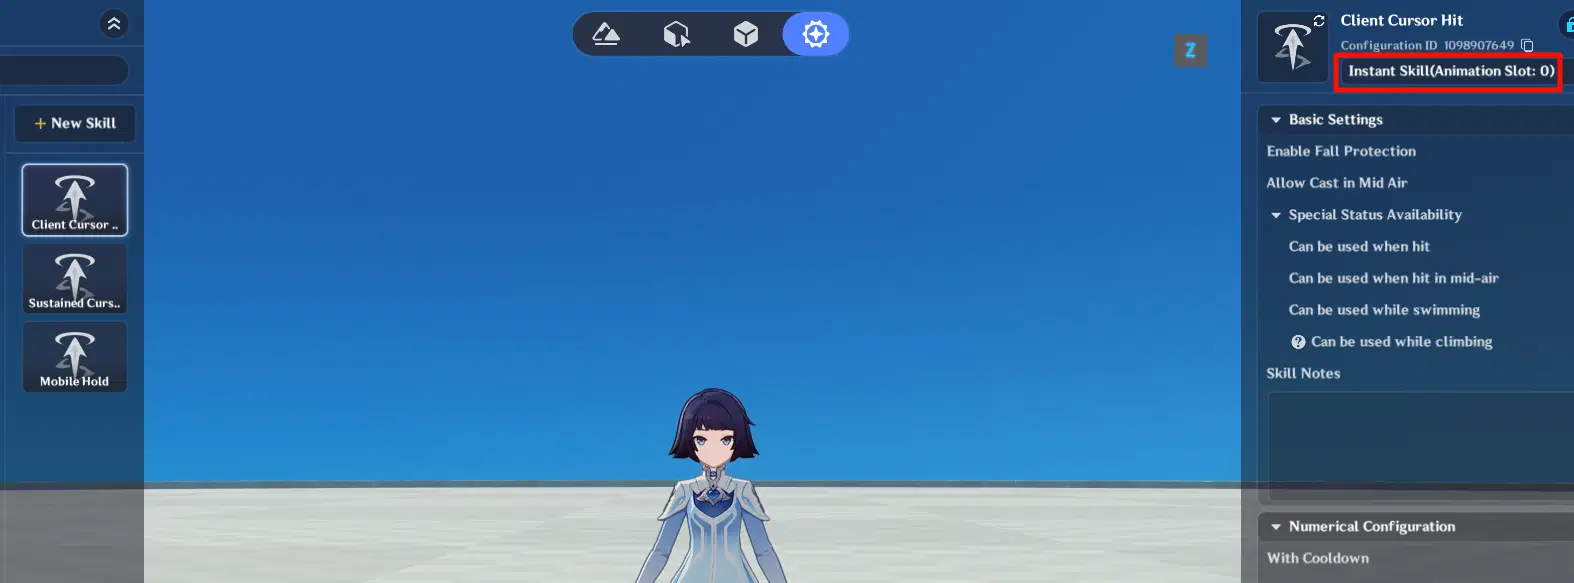
Since the cursor position is obtained through a skill, you need to create an instant-cast skill.
And configure the corresponding client-side node graph.
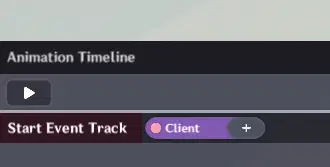
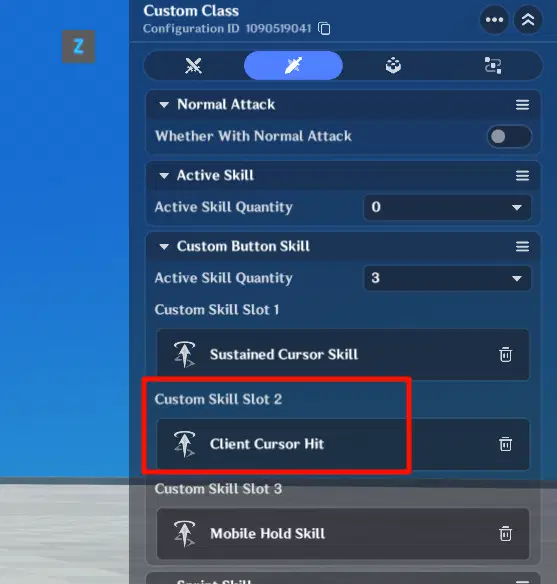
So how is this skill triggered?
You can set it as a normal attack, or as a custom skill.
Then set up a custom button in the UI, change its style to a custom style, set the Key Type to Skill, and select the skill you just created.
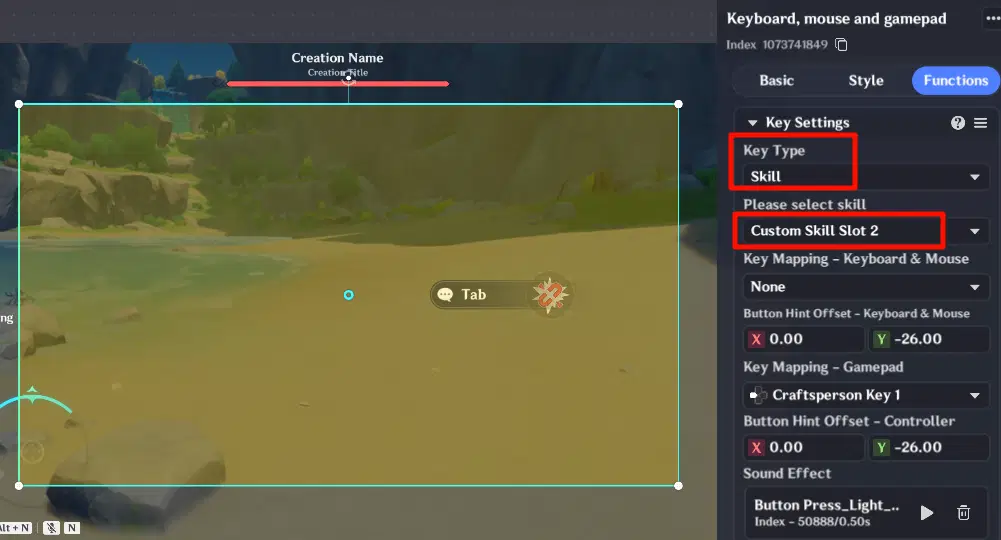
In this way, when the player clicks this custom button with the cursor, the skill will be triggered.
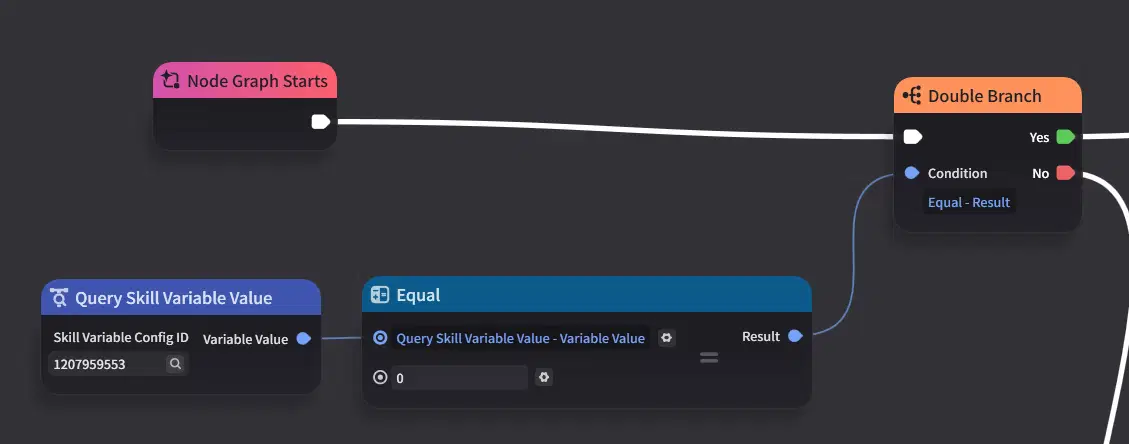
The first step of the node graph is to check the skill variable.
What is a skill variable?
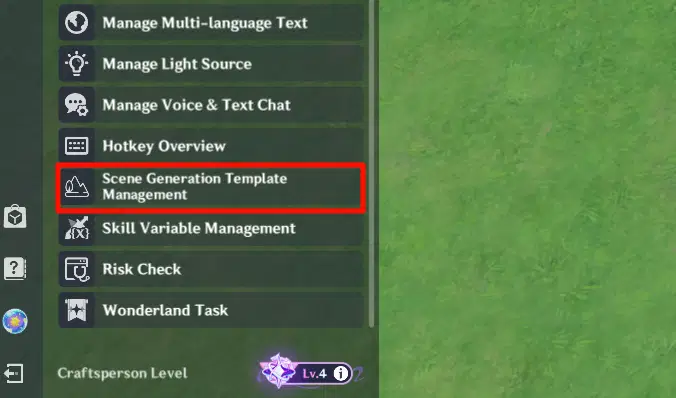
A skill variable is a variable stored on the client side. You can find it in the editor.
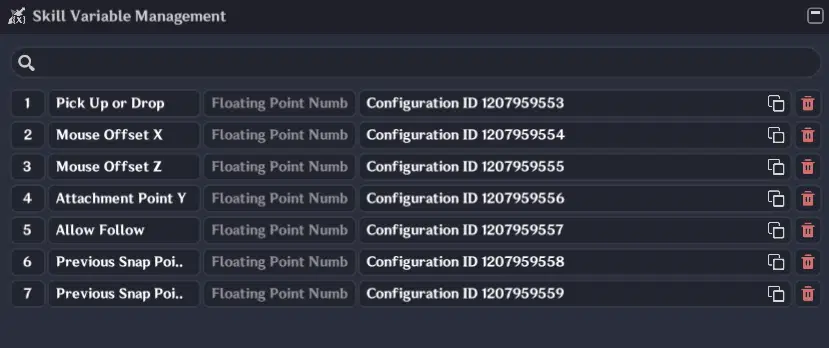
Custom variables are stored on the server side. They cannot be modified directly from the client; the client can only read their values. If you modify a custom variable on the server side by sending a signal, because of network latency, the client may not receive the updated custom variable value in the next frame. Skill variables, however, do not need to go through the server; they run on the client, avoiding network latency. Therefore, this project makes frequent use of skill variables.
Currently, skill variables can only be floating-point numbers, and their initial value cannot be set in the editor; the initial default is 0.
Since both picking up and dropping entities are handled in the same node graph, you need to determine whether it is currently a pick-up or a drop. The skill variable is initially 0, so set it so that when the skill variable "Pick Up or Drop" is 0, it enters the pick-up-related nodes.
Next, check whether the hit list contains at least two entities.
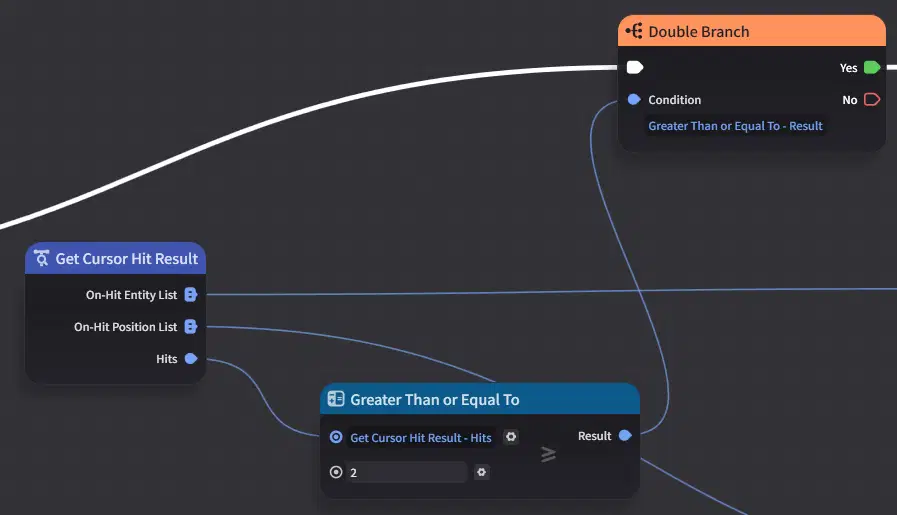
Of course, due to the next node, this check may not be necessary.
That is, check whether item 0 of the hit list has a custom variable that marks it as pickable.
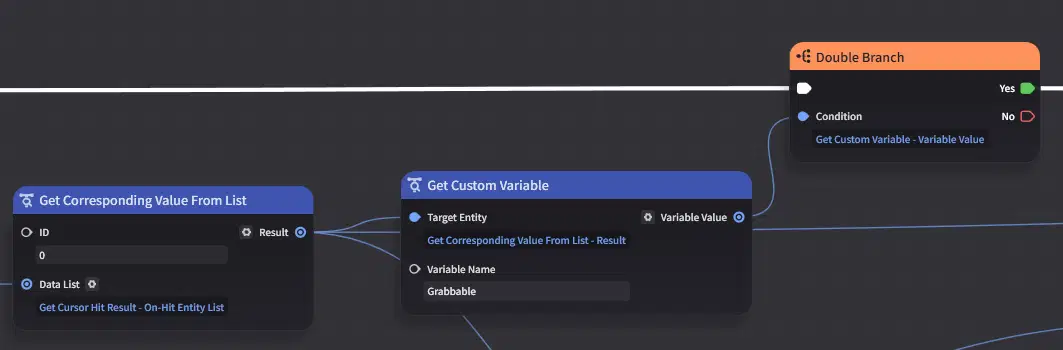
If the variable exists, subtract the cursor hit position from the hit entity's attachment point position to obtain the offset in the x and z directions, together with the Y value of the attachment point position
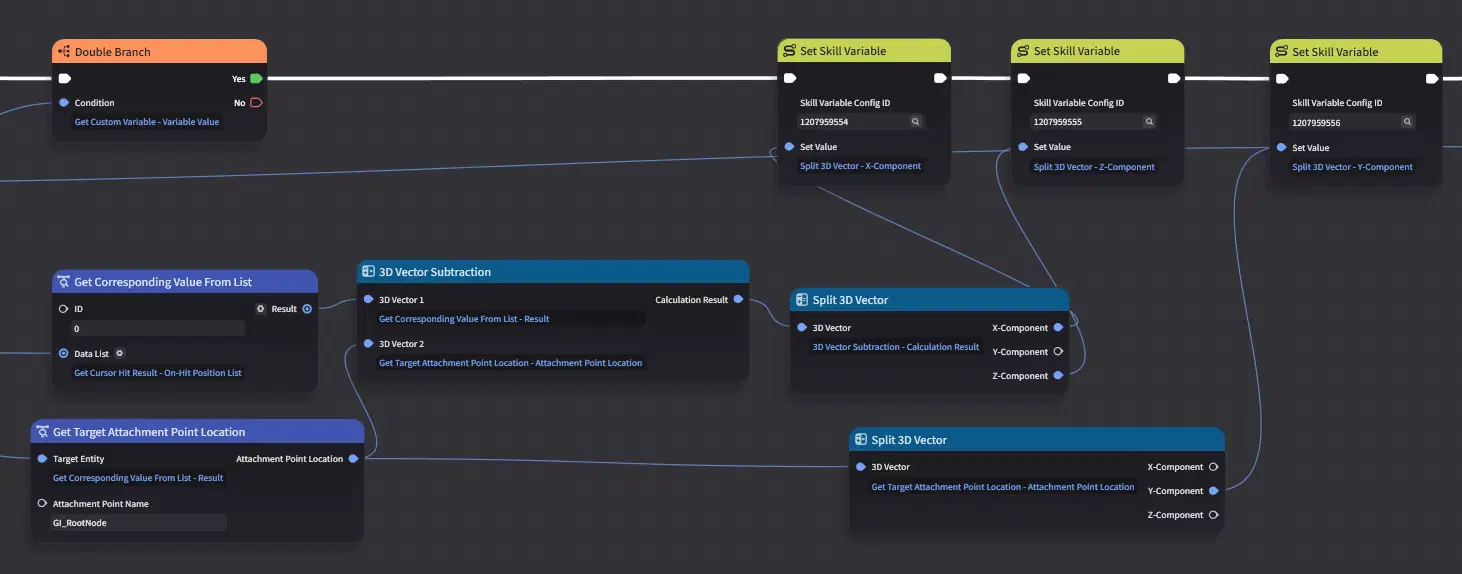
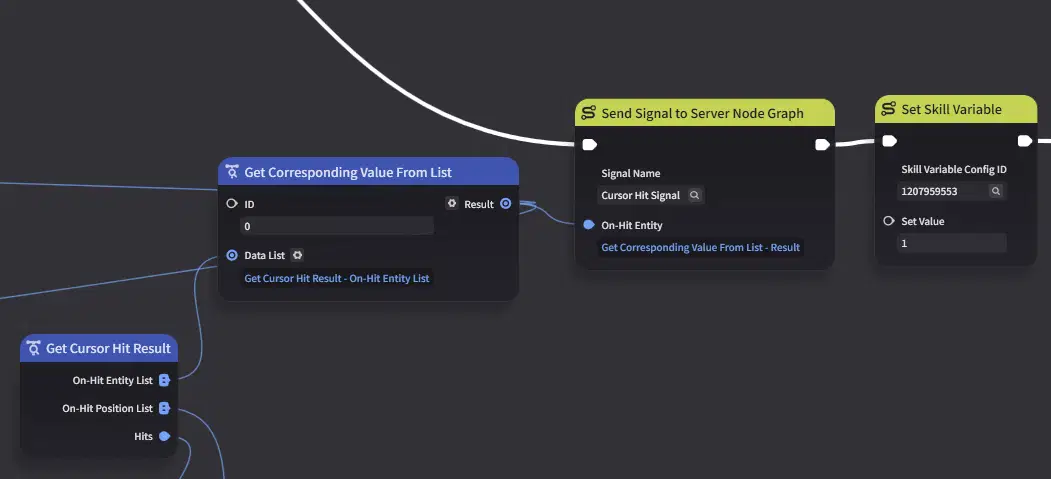
Then send a signal to the server, passing the hit entity as a parameter. Also change "Pick Up or Drop" to 1.
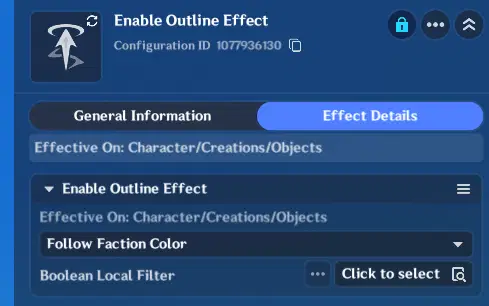
After the server receives the signal, it stores the hit entity as an entity custom variable. It adds an outline effect to the entity to indicate it has been selected. It determines whether following is needed; since following is not needed at the moment, it waits for the next cursor click.
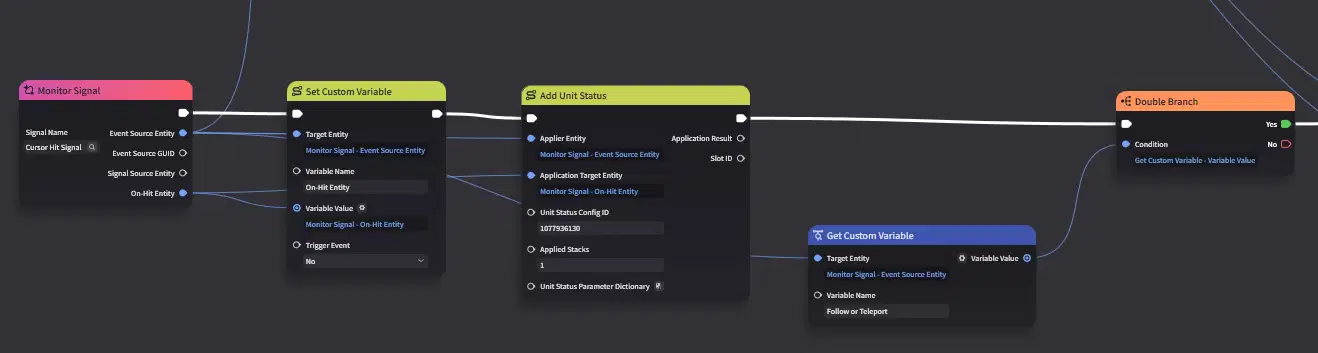
When the player clicks again, since "Pick Up or Drop" is set to 1, the node graph checks whether the cursor has hit an entity.
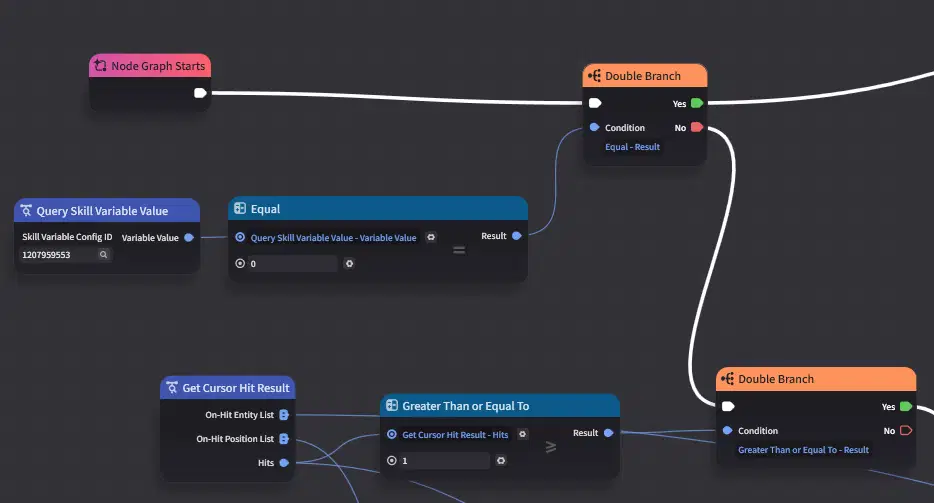
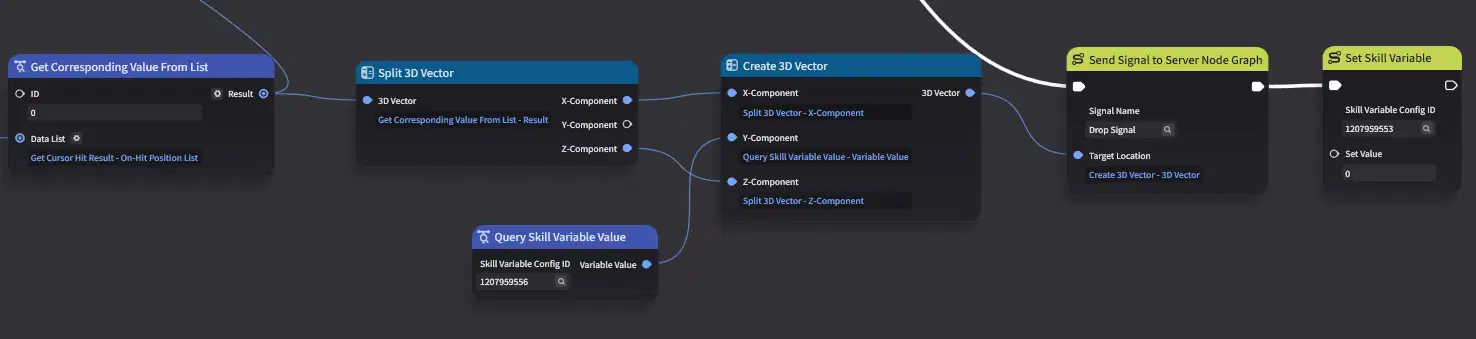
If an entity is hit, since there is no following at the moment, directly use the x and z components of the hit position and the y component of the attachment point to create a three-dimensional vector, send it as a parameter to the server via a signal, and set "Pick Up or Drop" to 0.
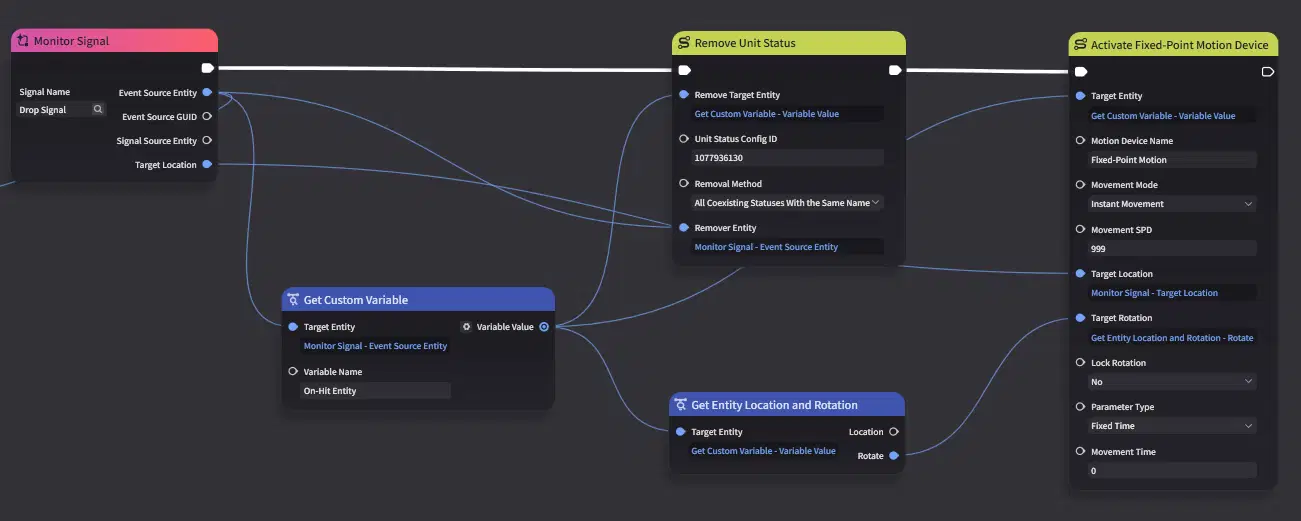
After the server receives the signal, based on the position, it uses a fixed-point motion controller on the selected entity and clears the outline state.
This completes the workflow of selecting an entity with the first click and dropping it at another location with the second click.
2.3 Entity Following the Cursor
After an entity is selected by the cursor, it needs to follow the cursor as it moves.
After the cursor button is pressed, you need to apply a unit state.
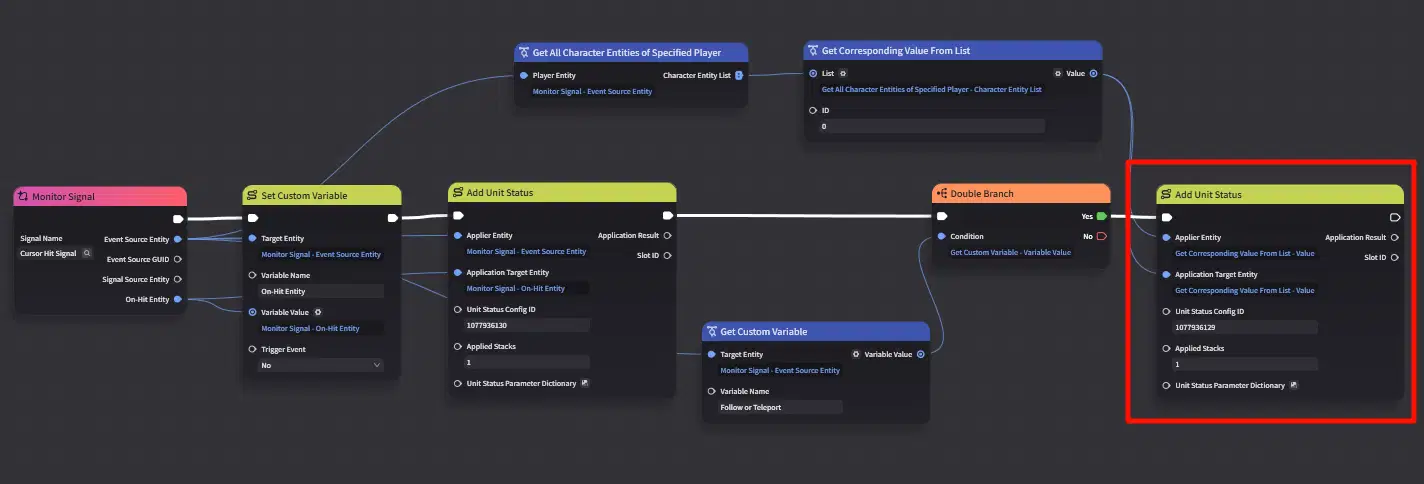
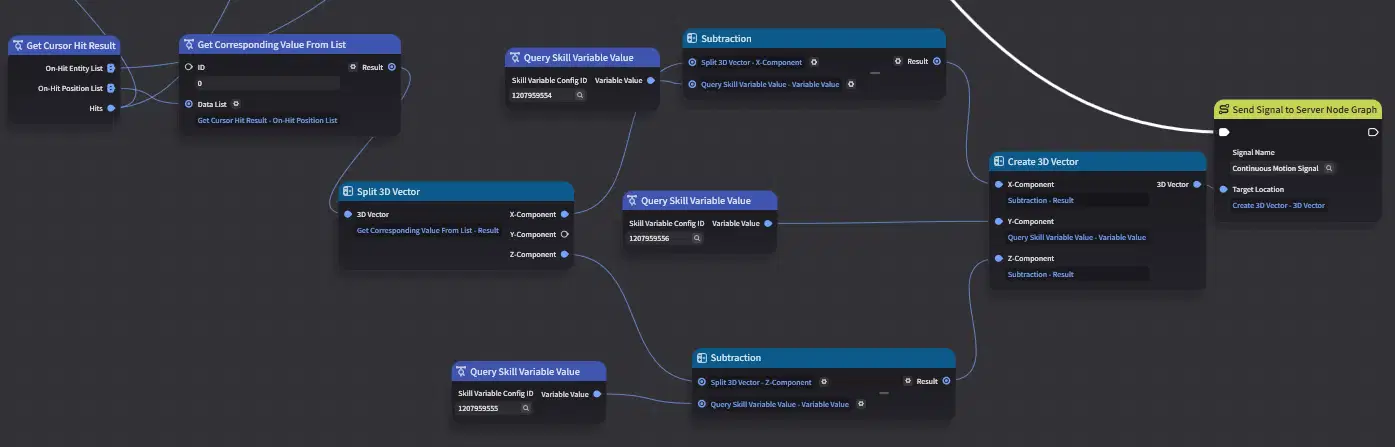
This unit state continuously triggers another skill.
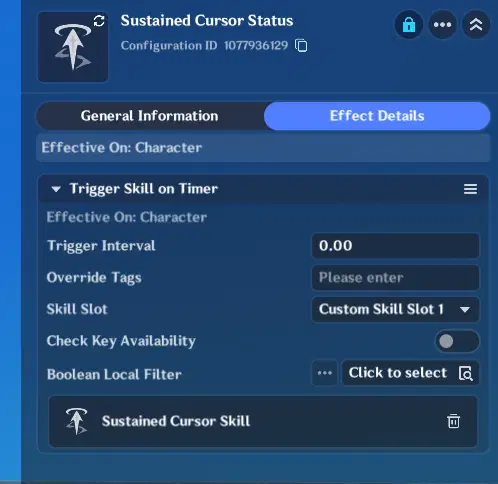
This skill retrieves the current cursor hit position and subtracts the X and Z offsets calculated earlier. Using the Y value of the attachment point, it calculates the target position of the entity. The resulting position is then sent to the server as a parameter.
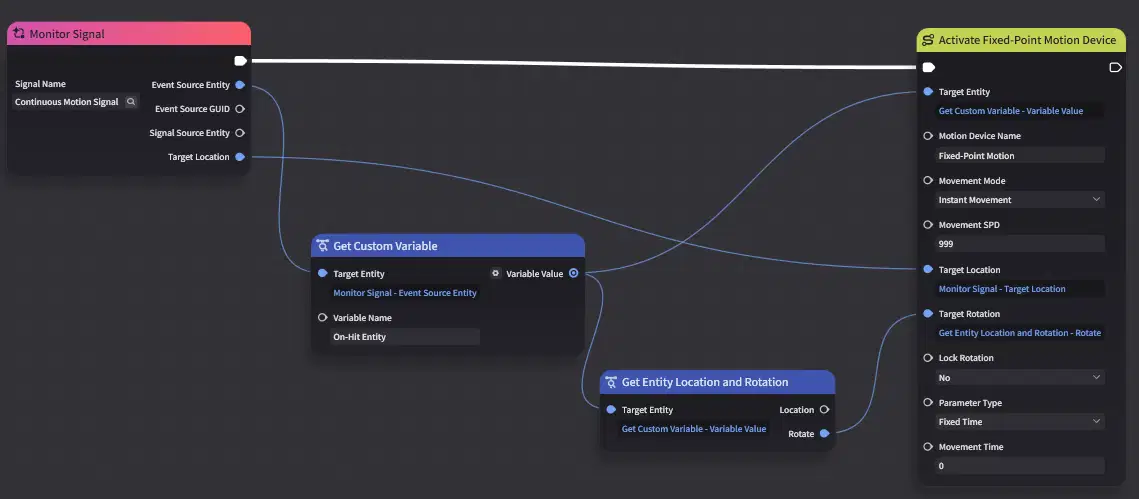
After the server receives the signal, it starts the fixed-point motion controller based on the received position.
When the player clicks again to drop the entity, the same calculation method is applied.
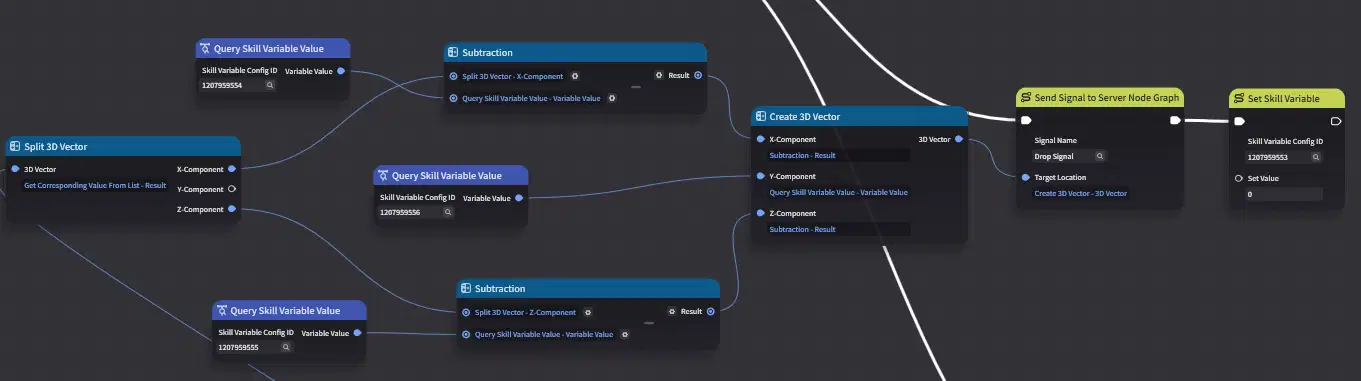
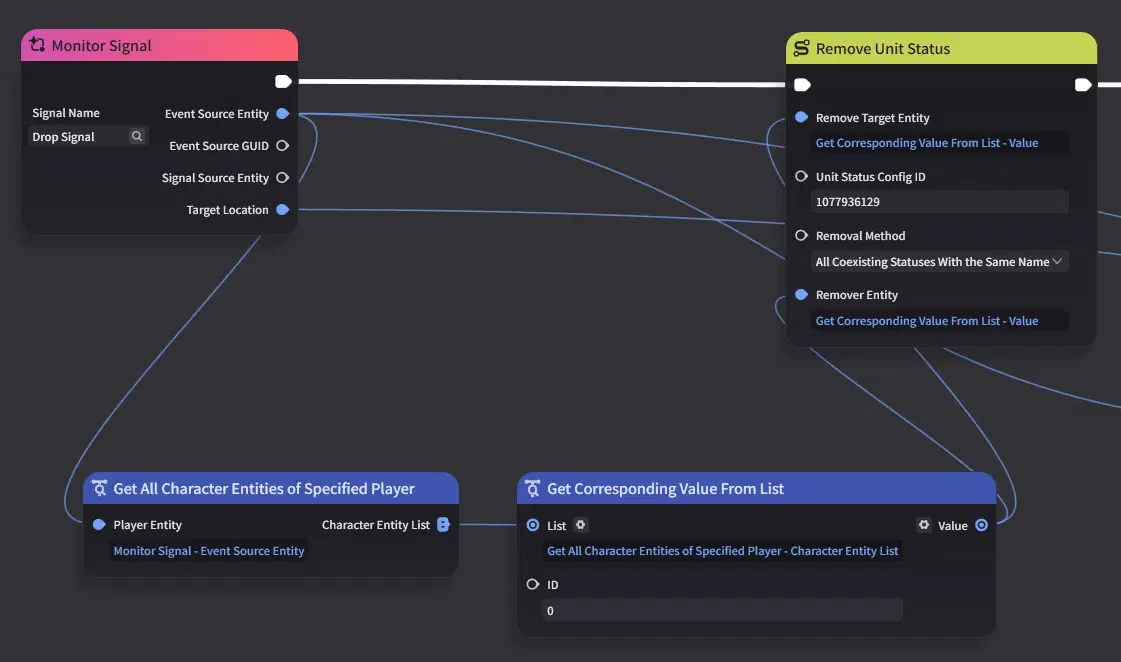
After the server receives the signal to drop the entity, it removes this unit state.
2.4 Snapping During Entity Dropping and Following
Add a Cursor Collision Box component to the entity at the desired snap point in the scene, and add a custom variable to mark it as a snap target.
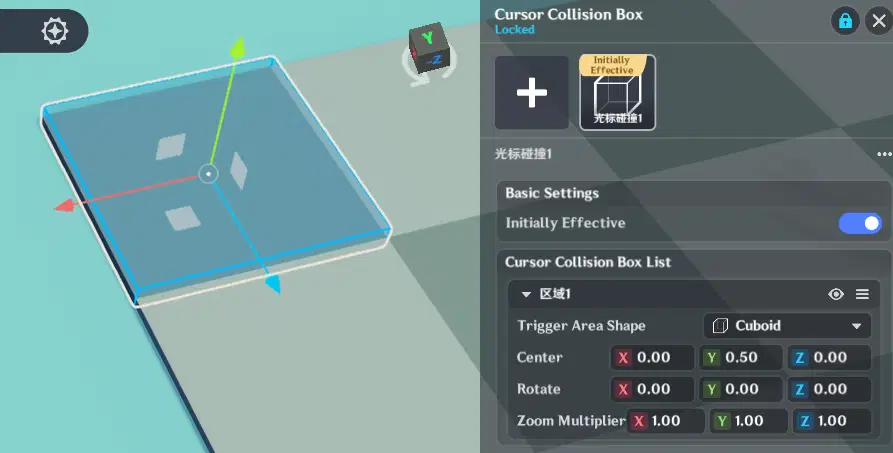
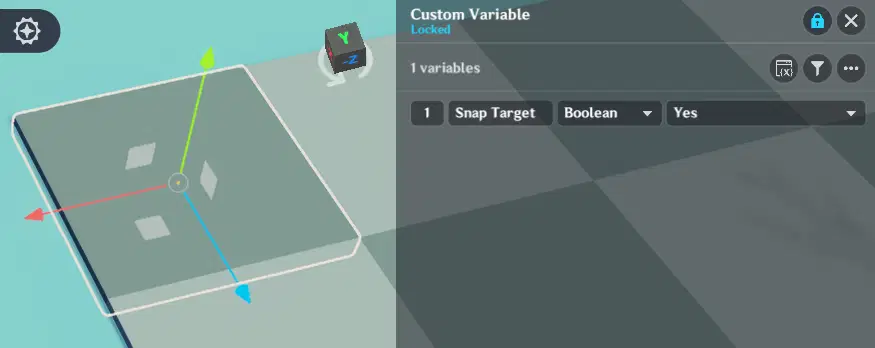
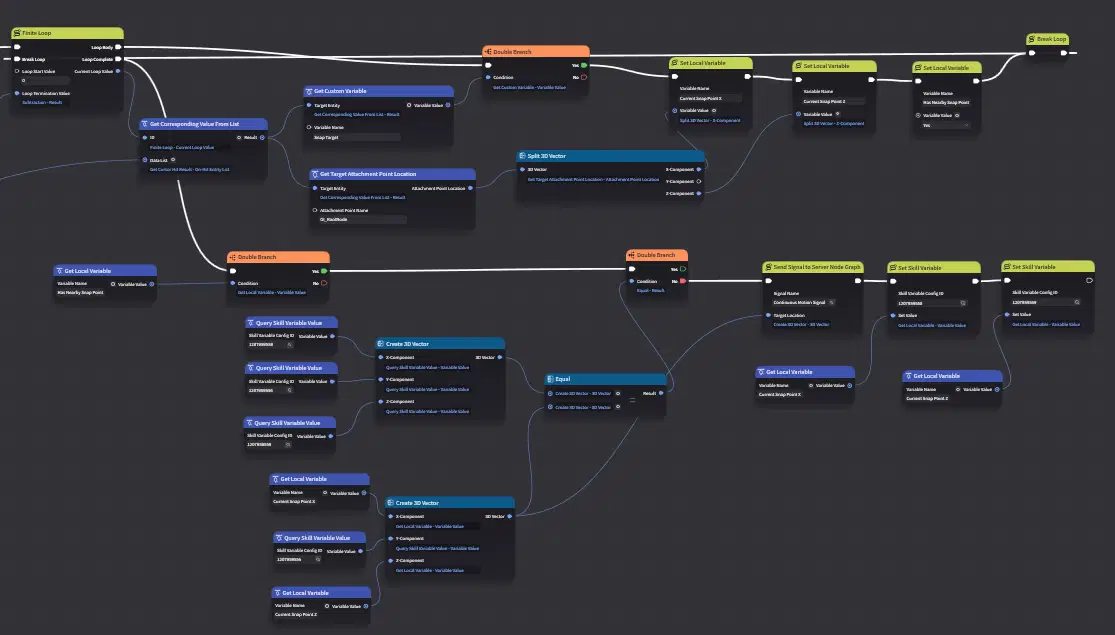
First, let's look at snapping during dropping. Although this node graph appears complex, it simply searches for the snap target among the entities in the cursor hit list and uses the X and Z components of the snap point's attachment position as the X and Z components of the selected entity's target position.
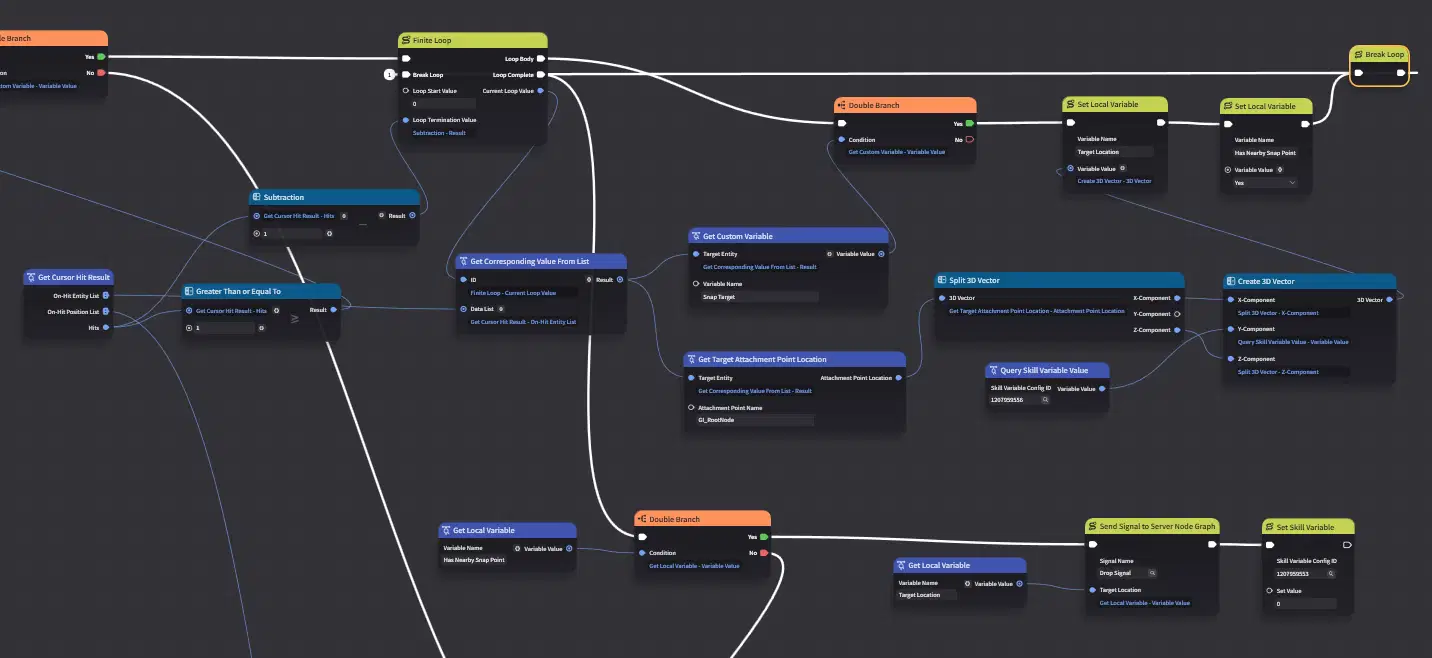
Snapping when following works the same way, except that it additionally checks whether the current snap point position is the same as the previous snap point position. If they are the same, no signal is sent, and the server does not start the fixed-point motion controller, reducing server load.
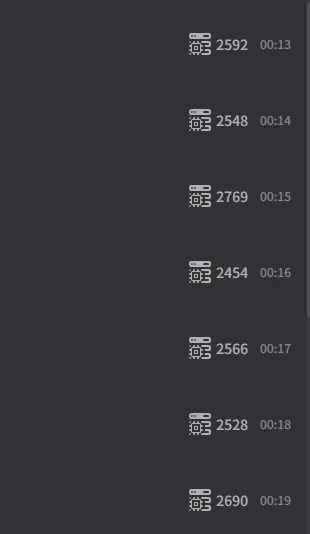
If there is no snapping during following, the server starts the fixed-point motion controller every frame, causing a relatively heavy load. The figure shows the server-side node graph load.
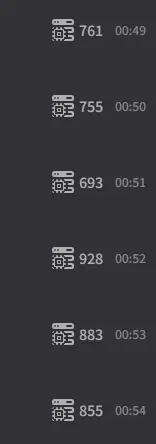
If there is snapping during following, the frequency of the fixed-point motion controller is greatly reduced, and the server load also drops significantly, as shown in the figure of the server-side node graph load.
Note that there is a client-side skill variable called "Allow Follow".
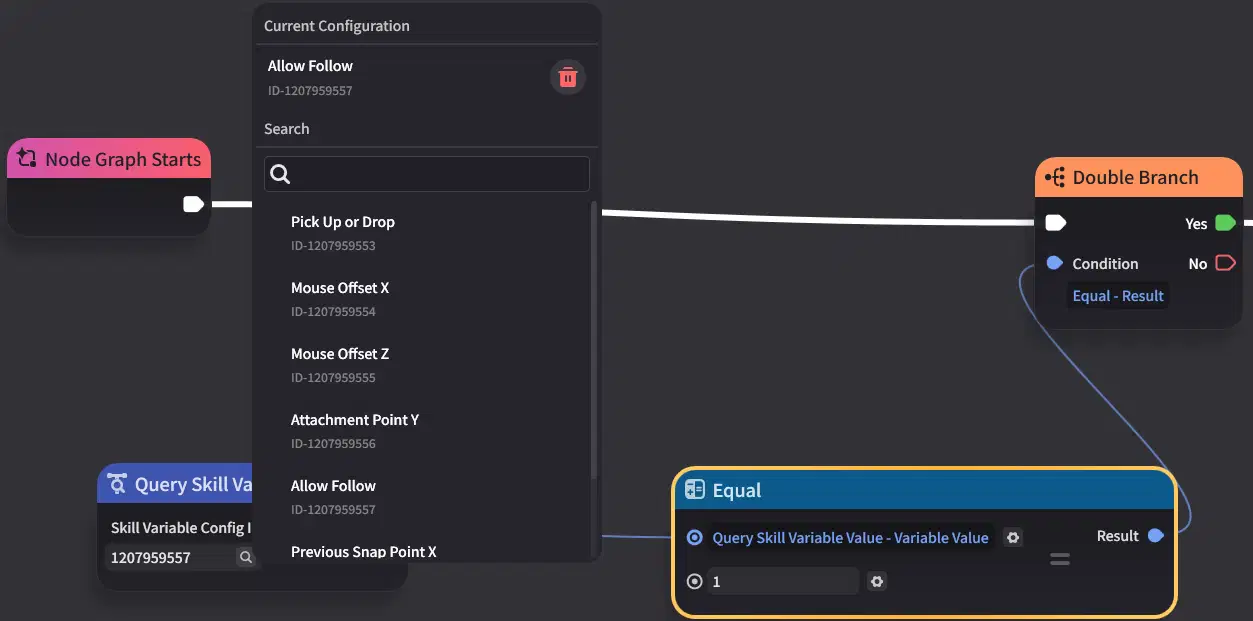
This is used to avoid issues caused by network latency. When the player clicks to drop the entity, this variable immediately prevents the entity from continuing to follow the cursor
With this, the keyboard-and-mouse workflow is complete: entities can be selected and moved with the cursor, follow cursor movement, and automatically snap during dropping and following.
3. Mobile and Controller Sides
3.1 Mobile
On the mobile side, to directly trigger a cursor click, you need a specific unit state. Select the same instant skill as on the keyboard-and-mouse side and directly attach it to the character.
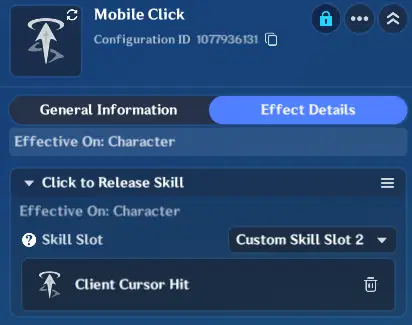
Then set up a Hold skill.
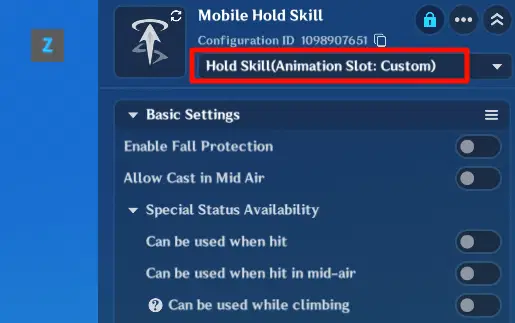
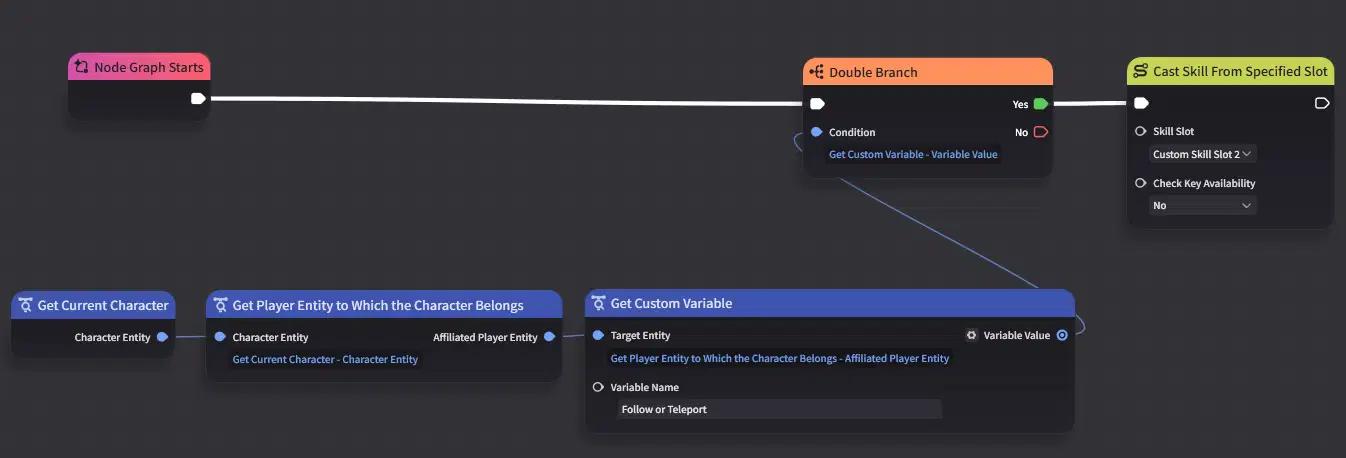
The node graph is as follows. Pressing and releasing are two separate node graphs. The loop action lasts for 100 seconds, and there is a state track that allows the skill to be cast.

The node graph for releasing is as follows.
On the UI, select the skill set above as the Hold skill.
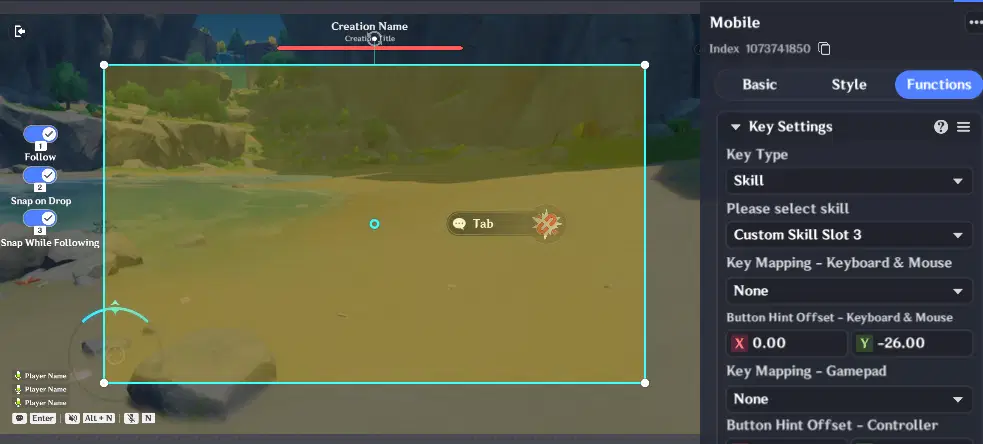
Thus, when the selected entity does not need to follow, it behaves the same as on the keyboard-and-mouse side. When it needs to follow, after the finger presses down, the entity follows the finger's movement. When the finger is released, the client casts the skill, triggering the node graph when "Pick Up or Drop" is 1, and drops the selected entity.
3.2 Controller
In Miliastra Wonderland, the right analog stick is fixedly used to simulate the cursor. The controller UI settings are the same as on the keyboard-and-mouse side.
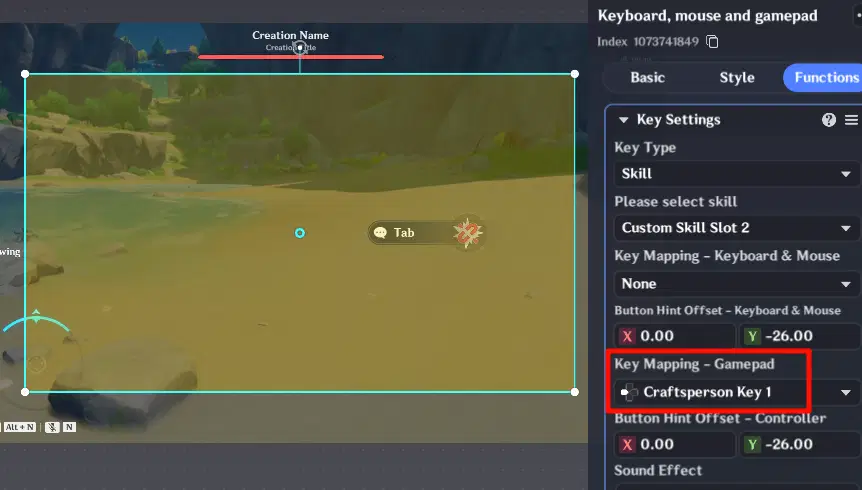
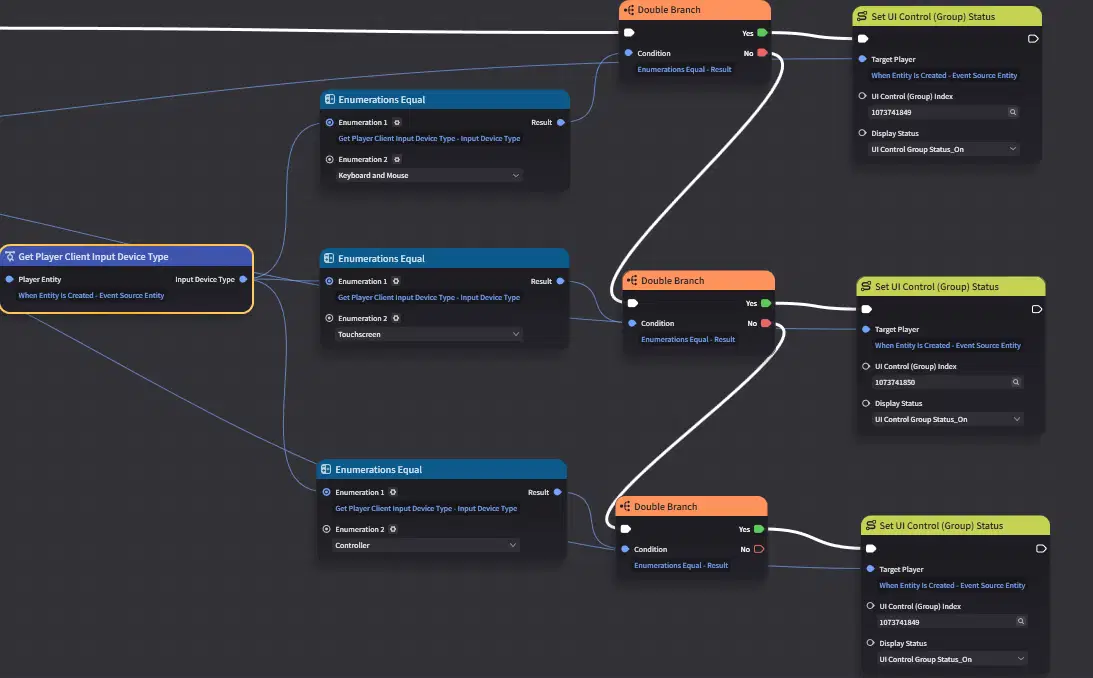
When the level starts, the player's device is detected, and the corresponding UI is displayed.
Conclusion
This tutorial ends here. Controlling entities through the cursor is still a relatively new gameplay in Miliastra Wonderland at present. We look forward to seeing Miliastra Wonderland that make use of the cursor.



