This guide explains how to design and implement a custom creation skill and its associated creation behavior in Miliastra Wonderland.

This guide is divided into two parts due to HoYoLAB's limitations. You can find the second part of the guide here:
Key Topics Covered
- Creation Skill Editor and the Animation Editor status tracks
- Creation Skill Management and cooldown configuration
- The three Creation Node Graph types and how they fit together
- Hitboxes, local projectiles and Ability Units
- Ground Pursuit and Ground Escape tactics
- Spawning prefabs from a skill (grenades, staffs, attached models)
By the end of this guide you will have built three working enemies: an Electro Mage that kites the player with projectiles, an Electro Mage with Custom Model that fires a beam, and a Ruin Guard that lobs grenades and backsteps after throwing.
This guide focuses on skills and combat behaviour. General Complex Creation setup - placement, territory, aggro basics - is only touched on where a skill depends on it.
1. How Complex Creation Behaviour Works
Before opening any editor, it helps to know what you are actually assembling. A Complex Creation's combat behaviour is split across three separate node graph types, and each answers a different question.
Creation Status Decision Node Graph - What should I do right now?
Example: "Player is 8m away — pursue"
Creation Status Node Graph - How do I do that thing?
Example: "Run Ground Pursuit with these distances"
Creation Skill Node Graph - What happens during the attack itself?
Example: "Trigger a hitbox at frame 40"
The flow at runtime looks like this:
Decision Node Graph (evaluates conditions, picks a Status Node Graph) → Status Node Graph (executes a skills/tactics) → Skill Node Graph (triggers on the animation timeline: hitbox, projectile, movement etc.)

The Creation Status Decision Node Graph is the brain, the Creation Status Node Graphs are the available actions, and the Skill Node Graphs form the mechanical backbone of a Skill. You attach the Decision graph to the creation through the Creation Status Decision Node Graph component.
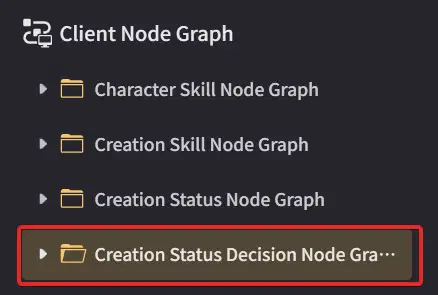
All three types live only in the Client Node Graph Resource Explorer. You won't find them on the server side.
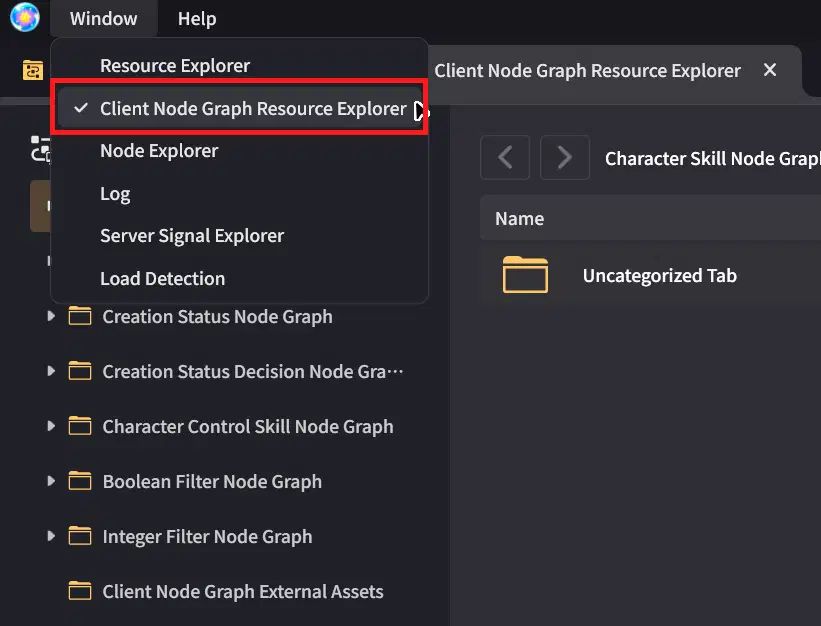
Client Node Graph Resource Explorer
One consequence worth flagging early: anything that needs to happen on the server - spawning a prefab, for example, can't be done from these node graphs directly. You need to send a signal to a server node graph instead.
2. The Creation Skill Editor
Find it under Combat Preset → Skills → Creation Custom Skill category.
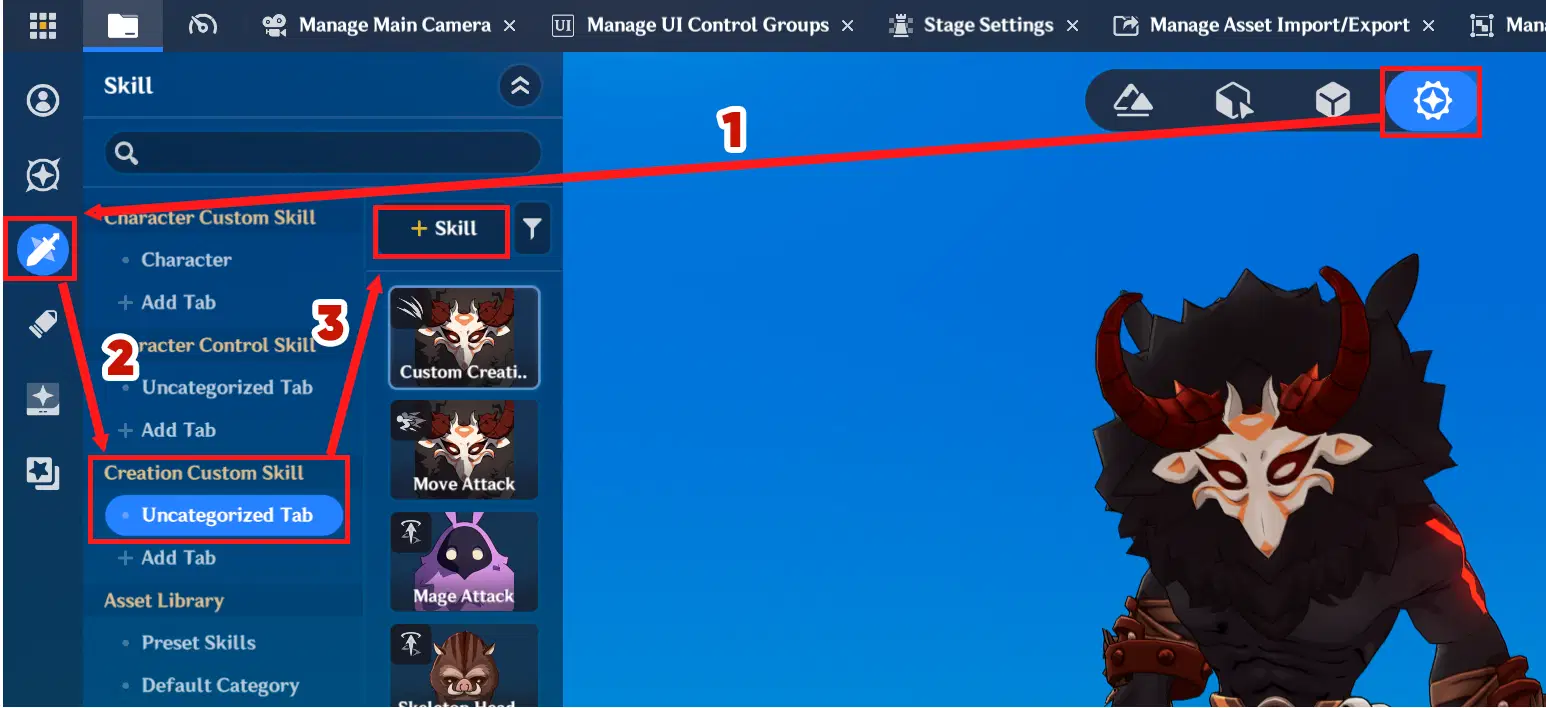
Complex Creation Skill creation
It works much like the character skill editor, with three differences:
- Only Normal and Instant skill types are supported.
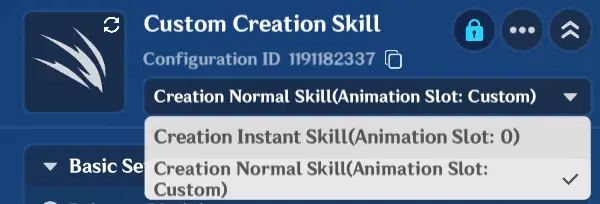
Skill types
- Every skill must be bound to a creation type at creation time. If you are building a skill for a Hilichurl, you pick Hilichurl in the skill creation menu, and that skill will only ever be usable by Hilichurls.
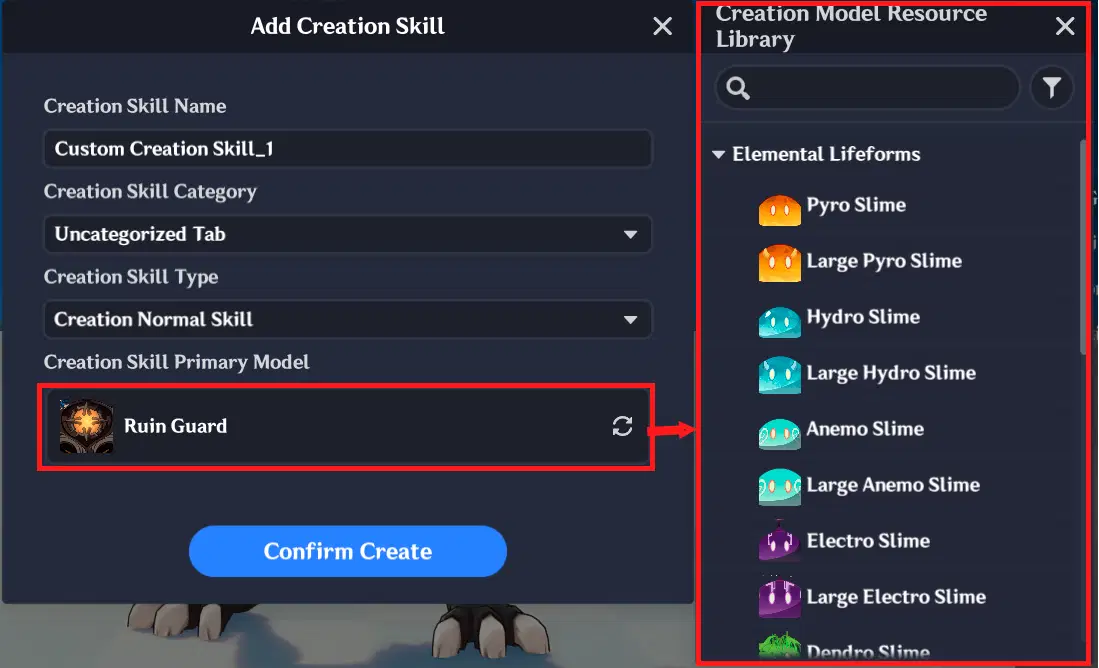
Creation Skill Primary Model
You also can't add node graphs or statuses until an animation is assigned. Press the + on the animation slot and pick one from the list.
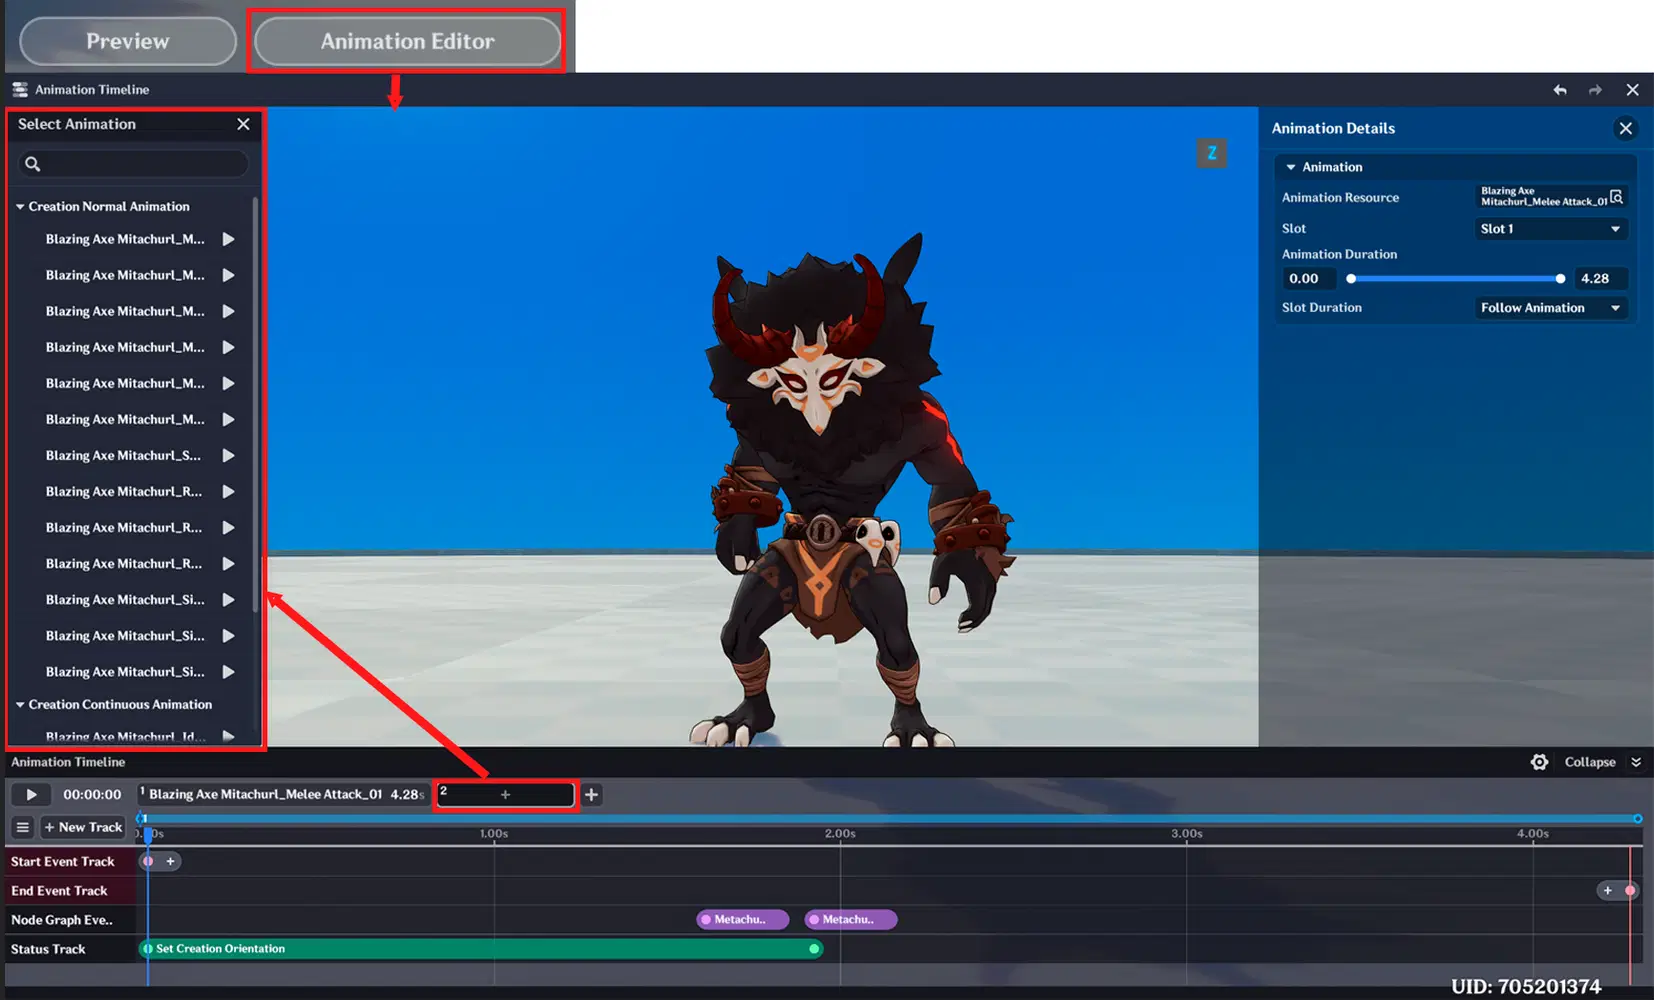
Selecting creation animation
2.1 Status Tracks
The Animation Editor exposes only two status types for Complex Creations.
Set Creation Orientation rotates the creation toward the player (or a custom point) for the duration you give it on the timeline. Add the status to cover the window where you want the turning to happen - typically from the start of the animation up to the moment the attack commits.
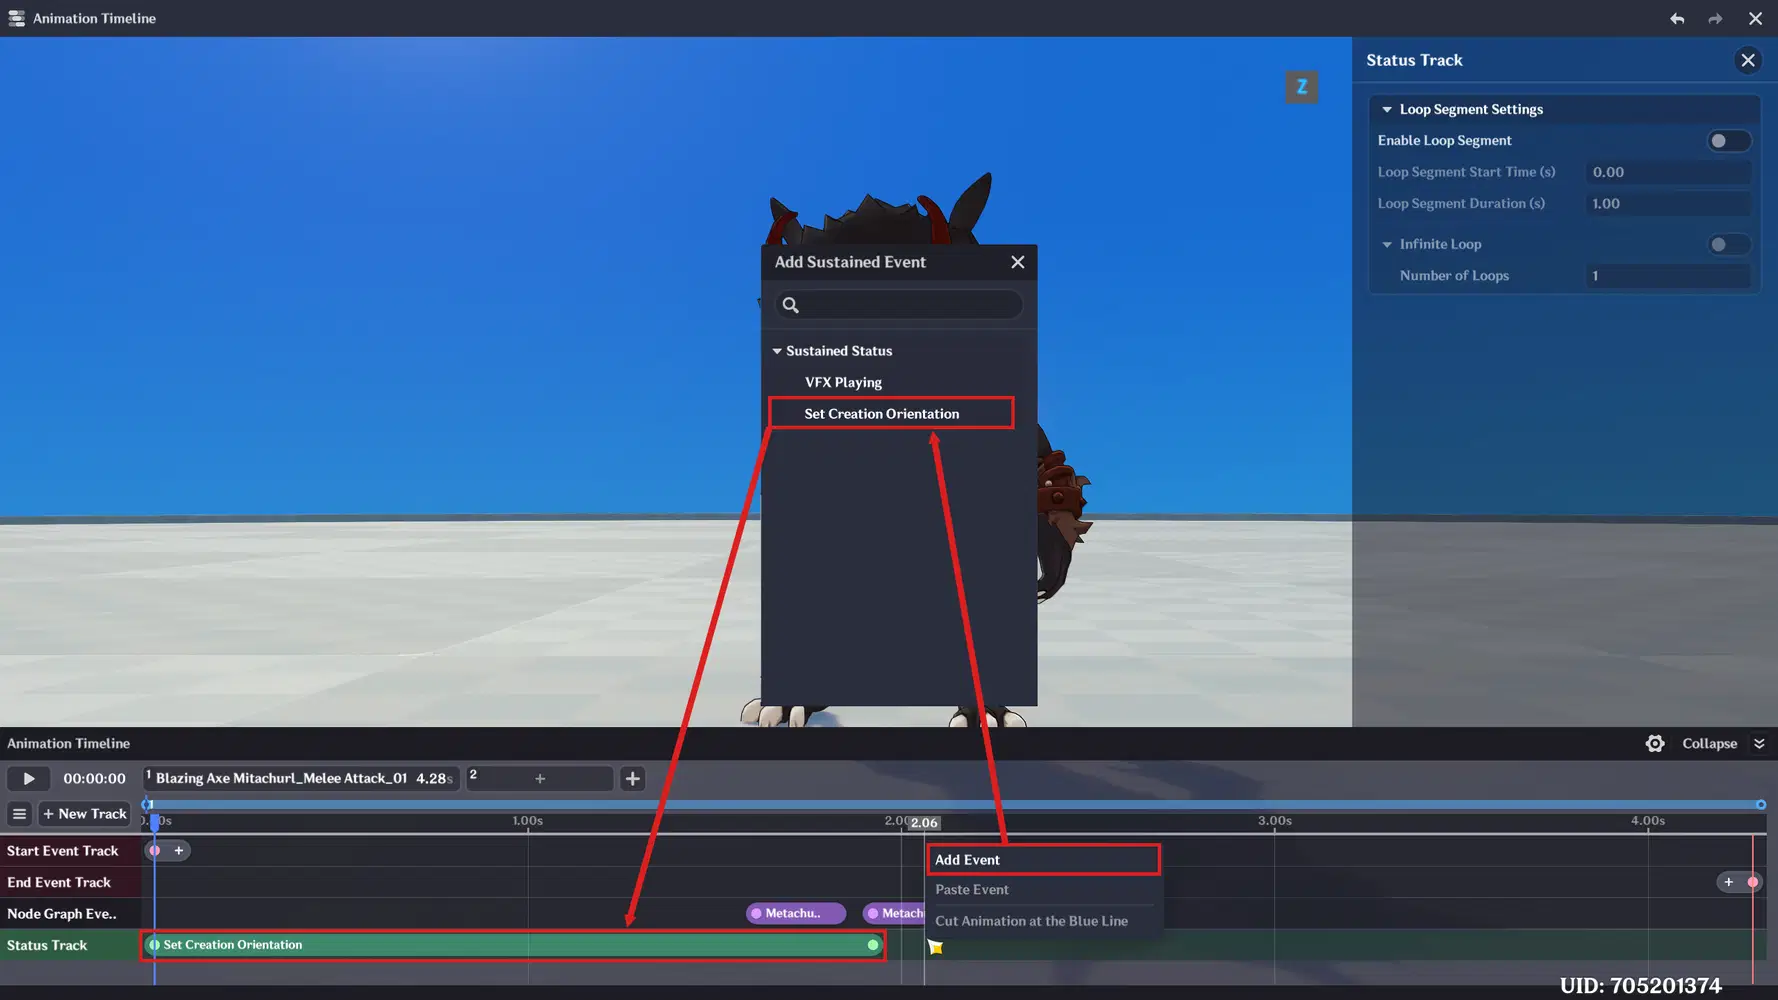
"Set Creation Orientation" status
The only parameter you normally need to turn creation towards player is angular velocity, in degrees per second. This value is a balance knob, not a technical detail:
- High (~180) — the creation turns towards the player almost instantly.
- Low (~60) — the creation tracks slowly and the player can outrun the aim by sprinting sideways. This is what makes a sustained attack dodgeable.
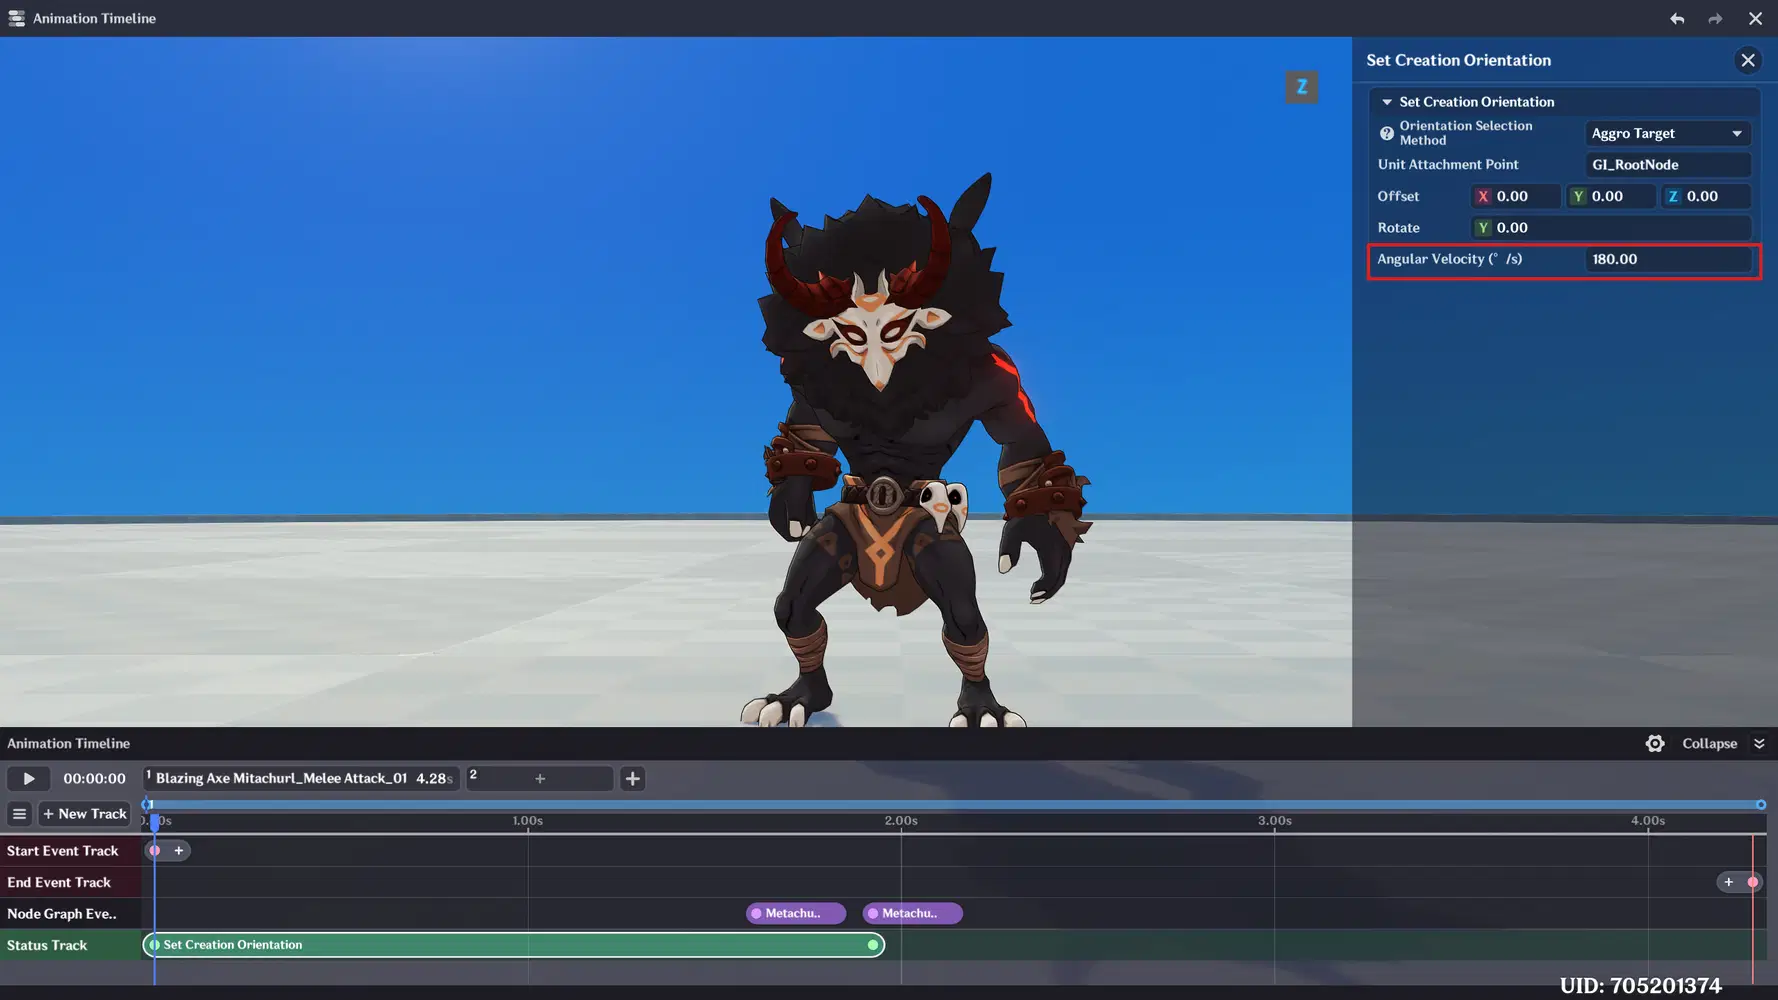
Angular velocity setting
VFX Playing plays a looping visual effect over a chosen window of the timeline. If the effect is supposed to move with the creation - a beam, for example, make sure Follow Rotation is enabled, or the VFX will stay pointing at the world direction it spawned in while the creation turns away from it.
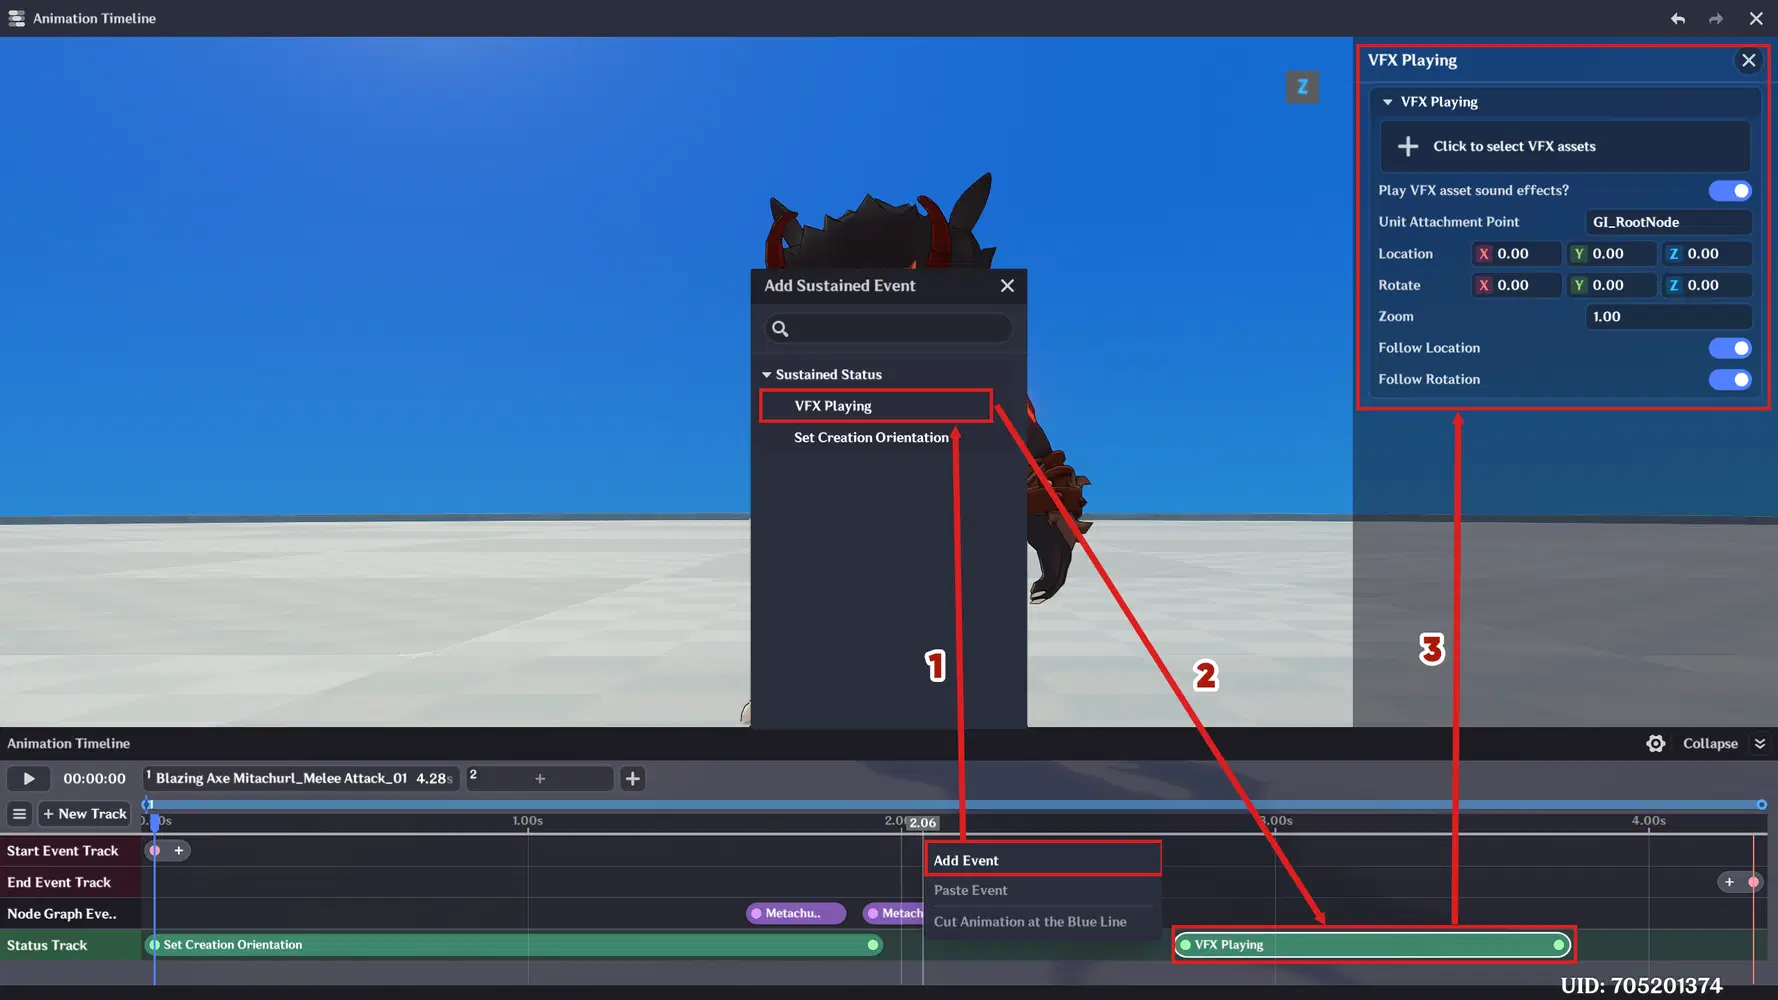
VFX playing status
You can add more tracks with New Track → New Status Track.
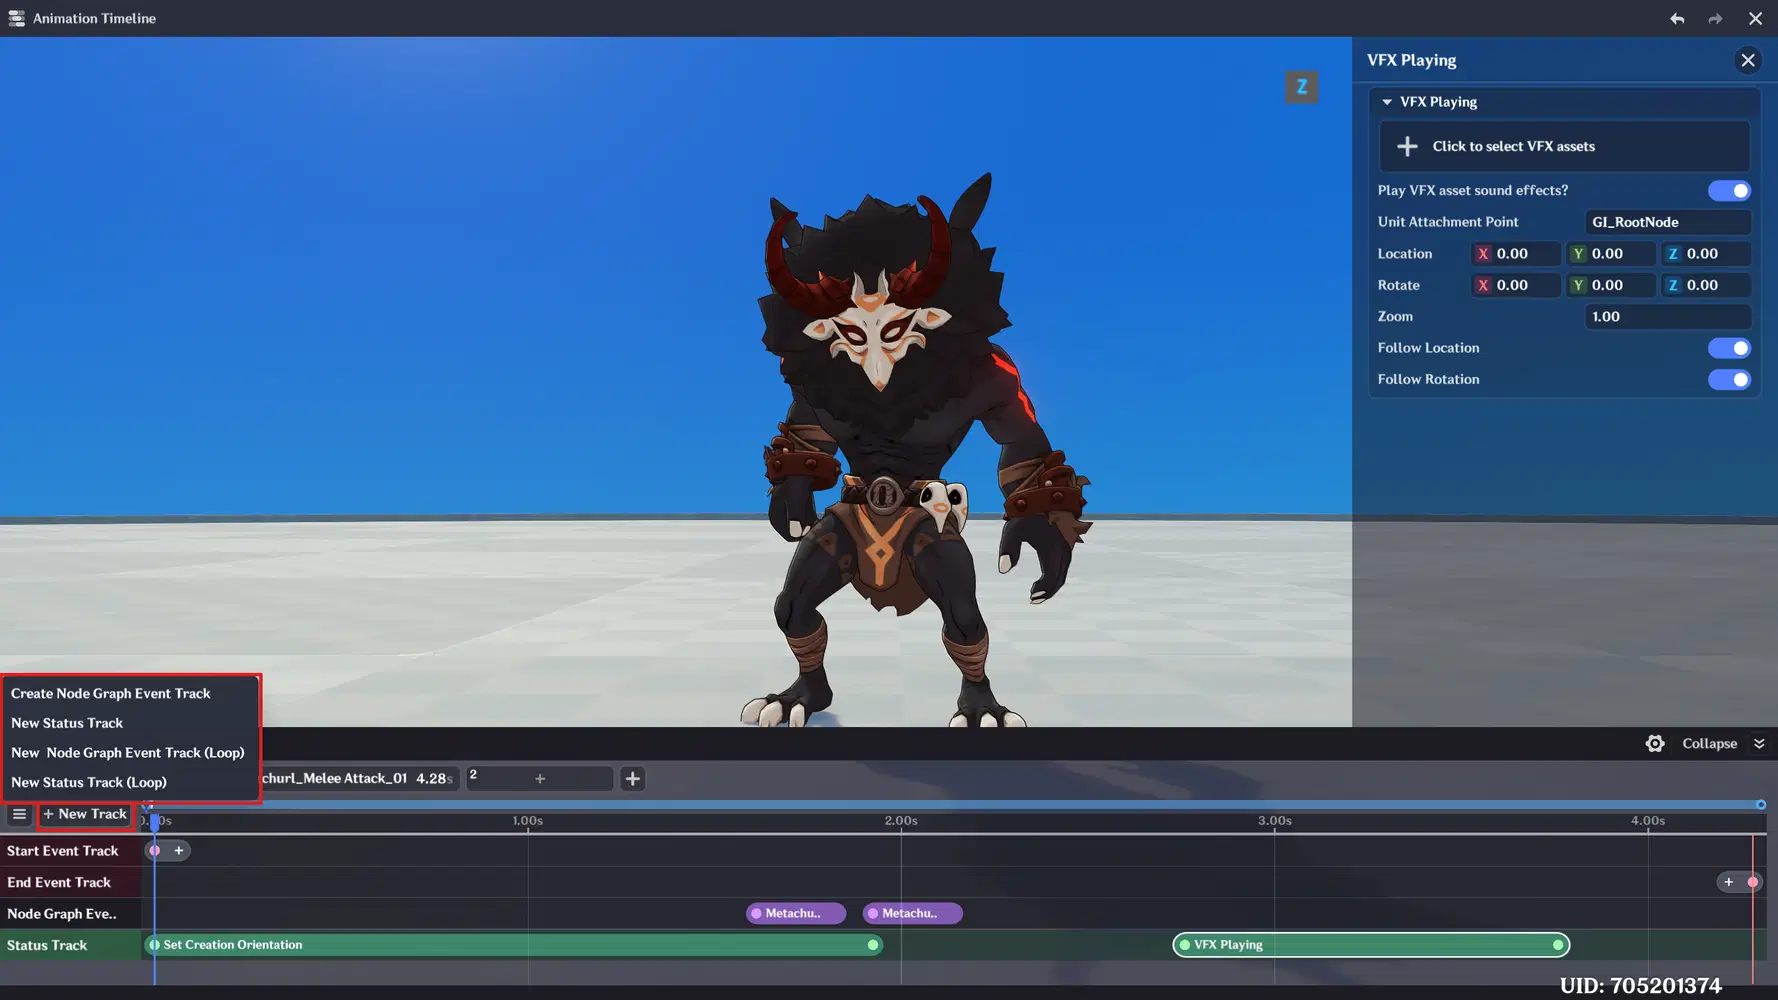
New Track creation
2.2 General Configuration
Also available in the skill's general settings:
- Other skill interruption - whether this skill can be canceled by another.
- Automatic face target - a simpler alternative to Set Creation Orientation. Not needed if you are using the status.
- Skill casting after defeating target - whether the skill still active once the target is defeated.
- Cast skill when target is reachable / unreachable - lets you restrict a skill to targets the creation can or can't path to.
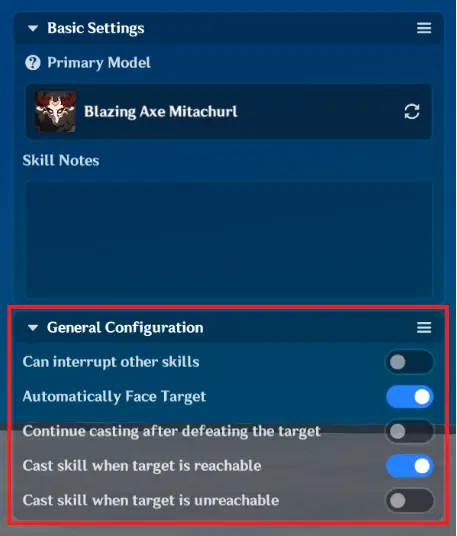
General Configuration
3. Assigning a Skill on the Creation
A skill in the editor is not yet usable. Open the creation's Combat Tab → Creation Skill Management, press + to create a skill template, and link your skill as the skill reference.
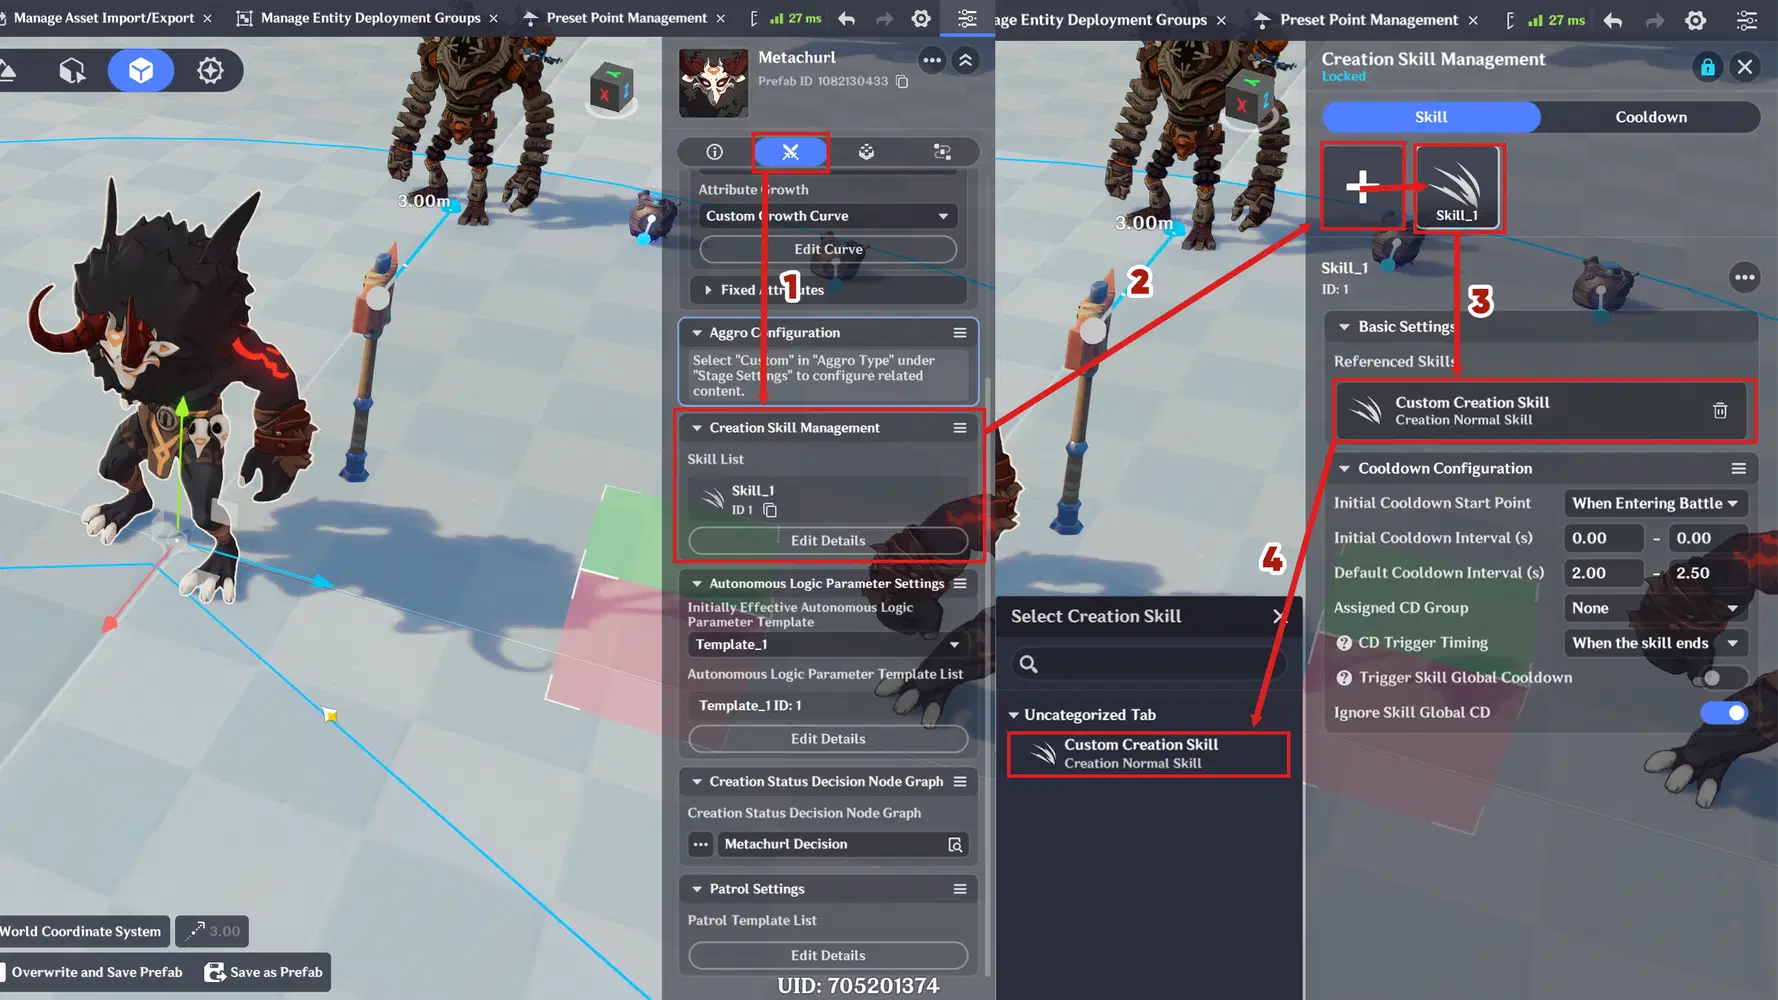
Assigning Skill
Then configure the cooldowns. These are explained once here and referenced by name in the examples later:
- Initial CD Start Point - Whether the initial cooldown begins when the creation enters battle or when it leaves.
- Initial CD Interval (s) - How long the creation waits before it may use this skill for the first time. Enter battle with a 2 s initial CD and the creation stands there for 2 seconds before attacking.
- Default CD Interval (s) - Cooldown after each use.
- Assigned CD Group - Skills in the same group share a cooldown - using one puts the others on CD too.
- CD Trigger Timing - Whether the default CD starts when the skill begins or when it ends.
- Trigger Skill Global CD - Like a CD group, but covering every skill on the creation.
- Ignore Skill Global CD - Lets this one skill bypass the global CD.
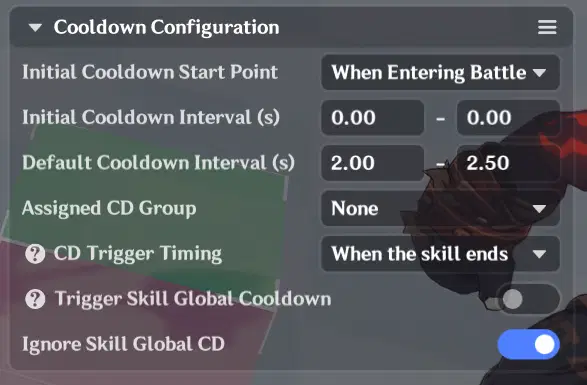
Cooldown configuration
Initial CD is the setting people most often get wrong. Set it to 0 if you want the creation to attack the instant combat starts; use a non-zero value to give the player a moment to react on engage.
Skill IDs are assigned in order starting from 1. With a single skill attached, its ID is always 1.
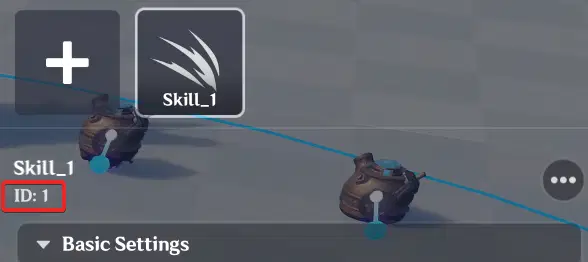
Skill ID
4. Node Graph Types in Practice
We will build a Metachurl that attacks when the player is close and chases when the player is far. It is the smallest example that uses all three graph types.
4.1 Creation Skill Node Graph
This defines what the attack mechanically does, and it triggers from a specific frame on the animation timeline.
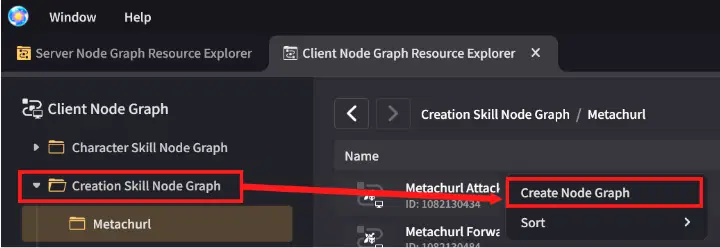
Creating Skill Node Graph
Open the Creation Skill Node Graph folder and create a new graph. Add a single execution node: Trigger Sector Hitbox at Specified Location.
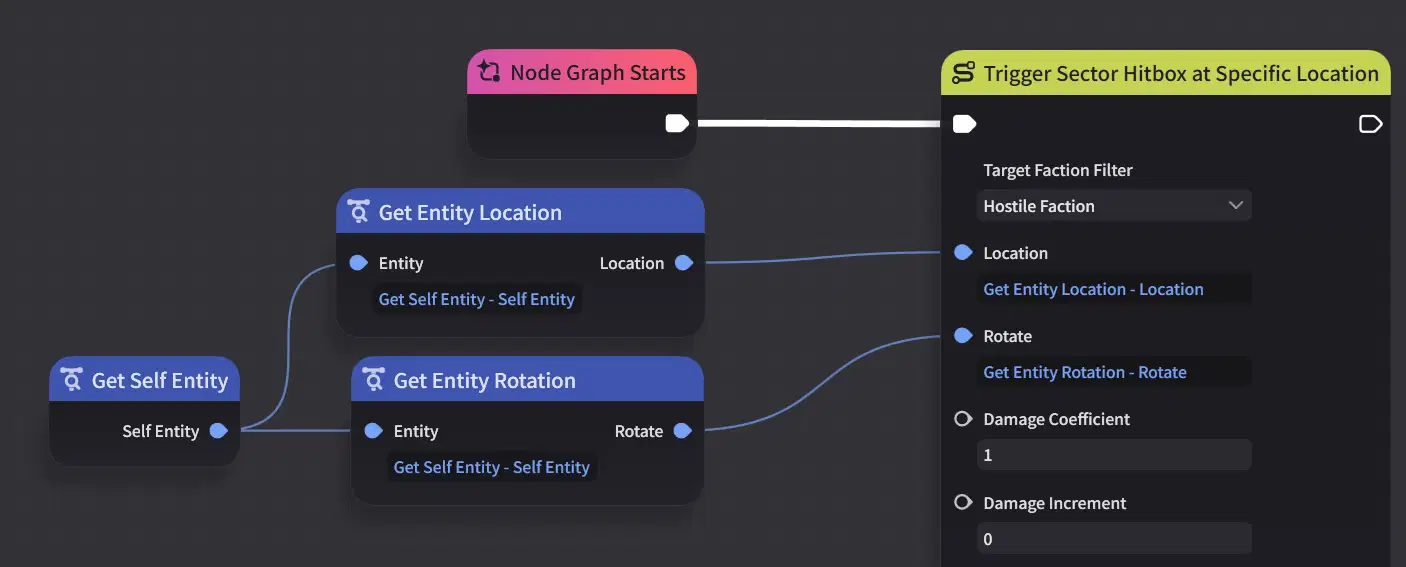
Key parameters:
- Target Faction Filter - set to Hostile Faction. Complex Creations and players are in different factions by default, so a hitbox with no faction filter will damage nothing. Hostile Faction, All, or All Except Self will all work.
- Location and Rotate - where the hitbox spawns and how it is oriented. Get these from Get Entity Location and Get Entity Rotation, with Get Self Entity as the input. Get Self Entity returns the entity that triggered the graph, which here is the creation itself.
- For finer placement, use Get Target Attachment Point Rotation / Location instead. Every creation type is with its own default attachment points, listed in the Complex Creation components tab.
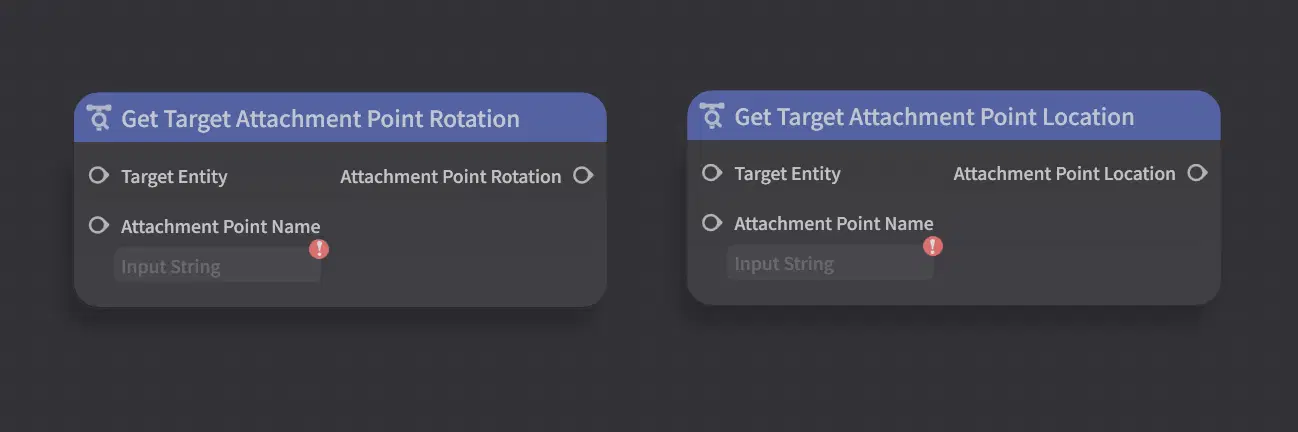
- Damage Coefficient — multiplies base damage.
- Damage Increment — adds a flat amount on top.
- Base damage comes from the creation's Combat tab. Be careful with Base ATK: that raw number is not what lands. If Default Growth Curve is enabled, final damage is calculated through that curve, and the displayed Base ATK is only an input to it.
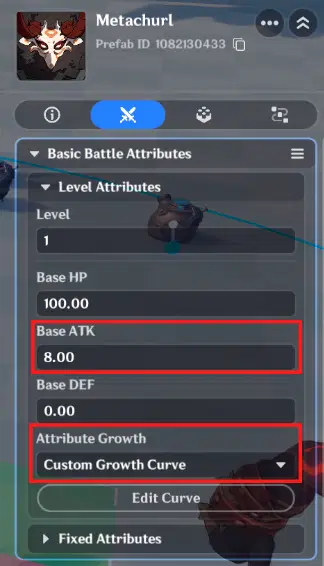
Base ATK
- Trigger Type — once per entity or once per lifecycle. Per lifecycle means the hitbox damages one player, once, and then stops mattering. Per entity lets it hit each player once, which is what you usually want in multiplayer.
- Height / Sector Angle / Sector Radius — the physical shape of the hitbox.
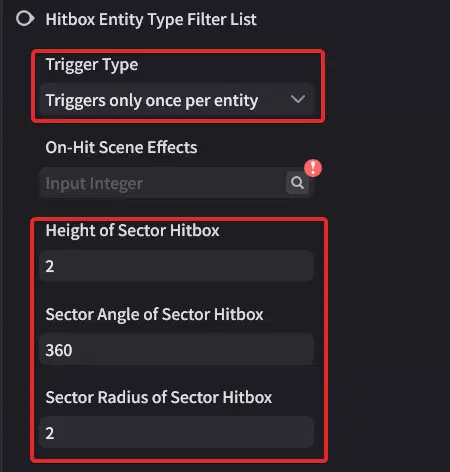
Trigger hitbox node parameters
With the graph finished, place it on the skill timeline at the frame where the animation actually connects.
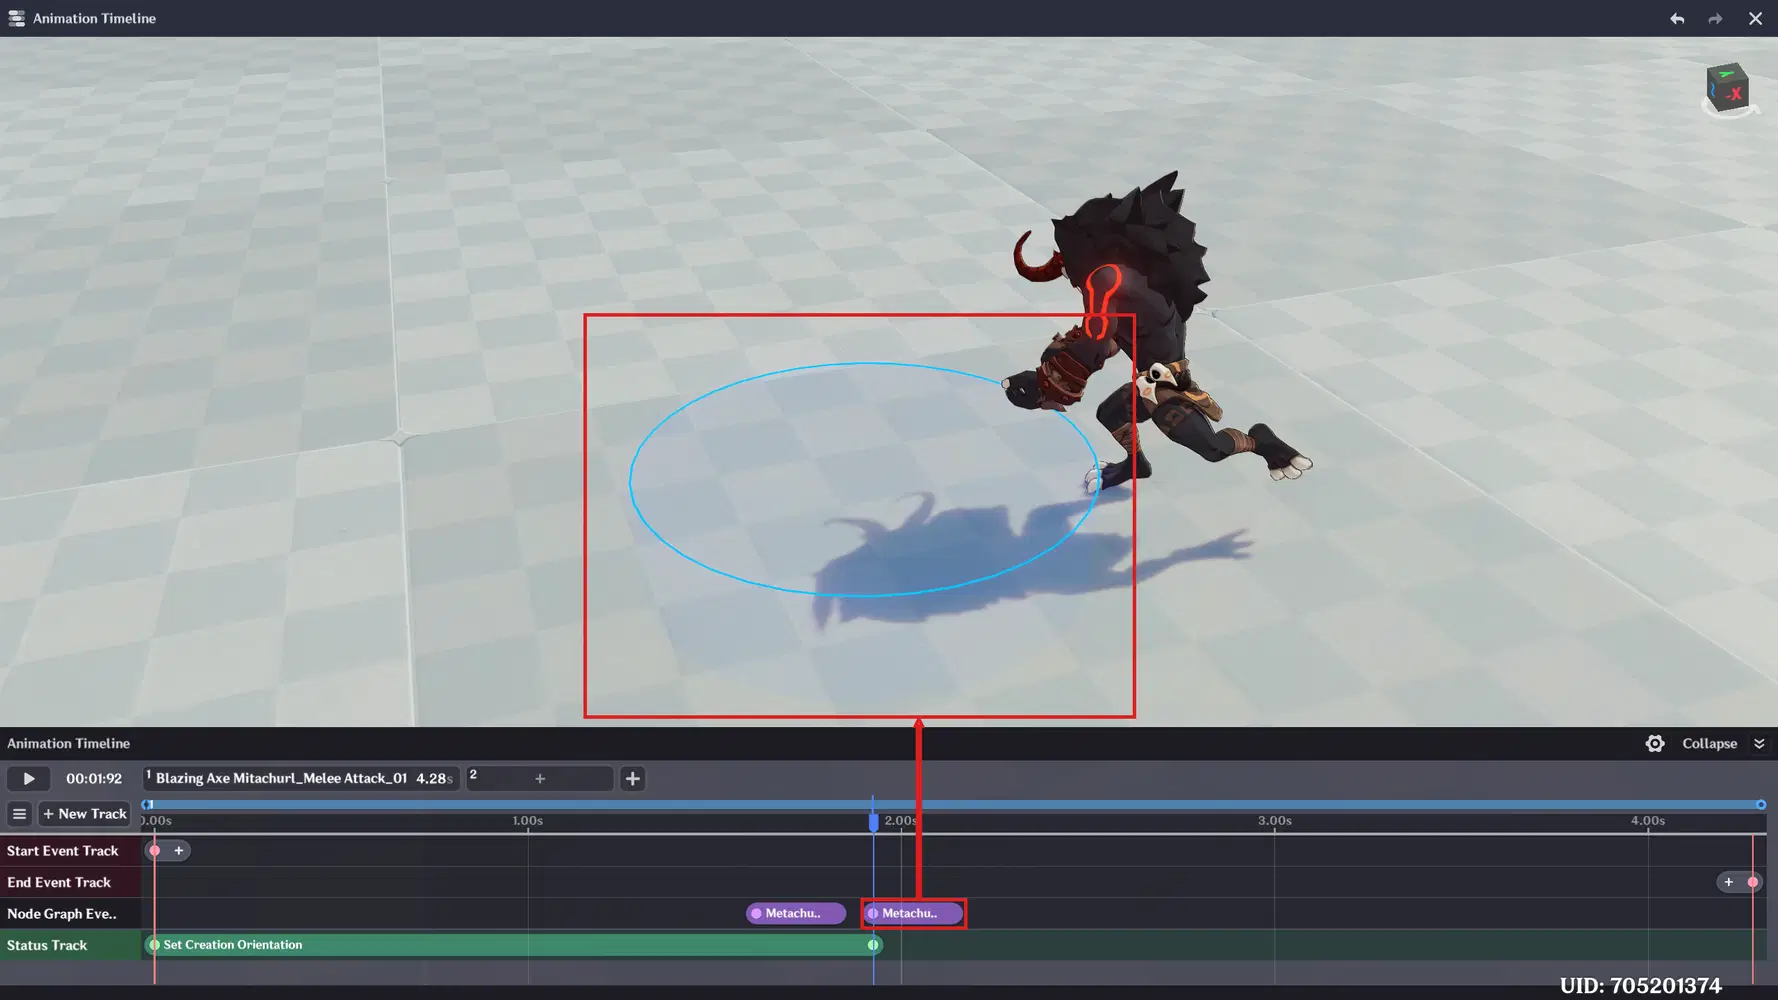
Node Graph event
4.2 Creation Status Decision Node Graph
This is the creation's decision-making layer. Behaviour is triggering by the Execute only by sequence event node. It triggers automatically, for example, every N seconds, and on each trigger it walks its outputs in order: it tries branch 1; if that fails to execute, it tries branch 2; and so on.
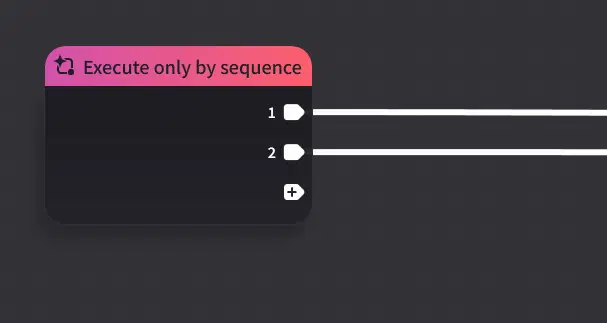
This ordering is your priority list. Whatever you put first is what the creation prefers to do. Put the attack above the chase and the creation will always attack when it can, and only chase when it cannot.
There is exactly one execution node available here: Switch to Self Execution Status. All it does is attempt to run a specified Status Node Graph. It takes a boolean Execute pin (Yes/No), and if the attempt fails, the Failed Execution output pin triggers. You can connect another Switch node onto that pin, which gives you a second way to express priority - either through the sequence order or through chained failure pins. Both work.
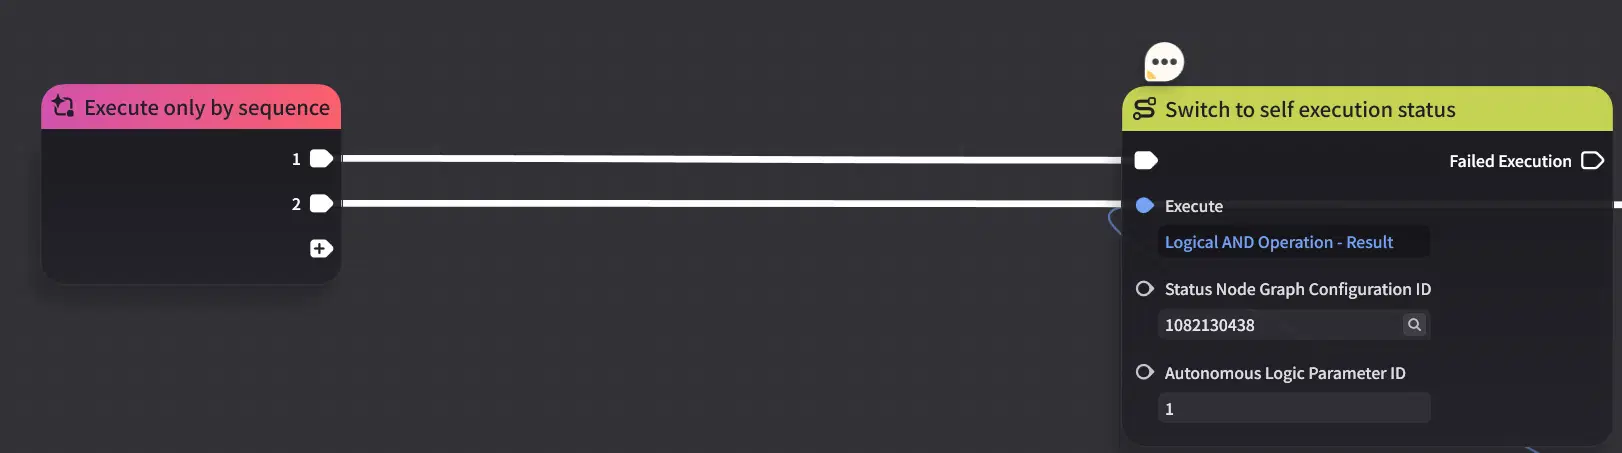
For the Metachurl we want two branches:
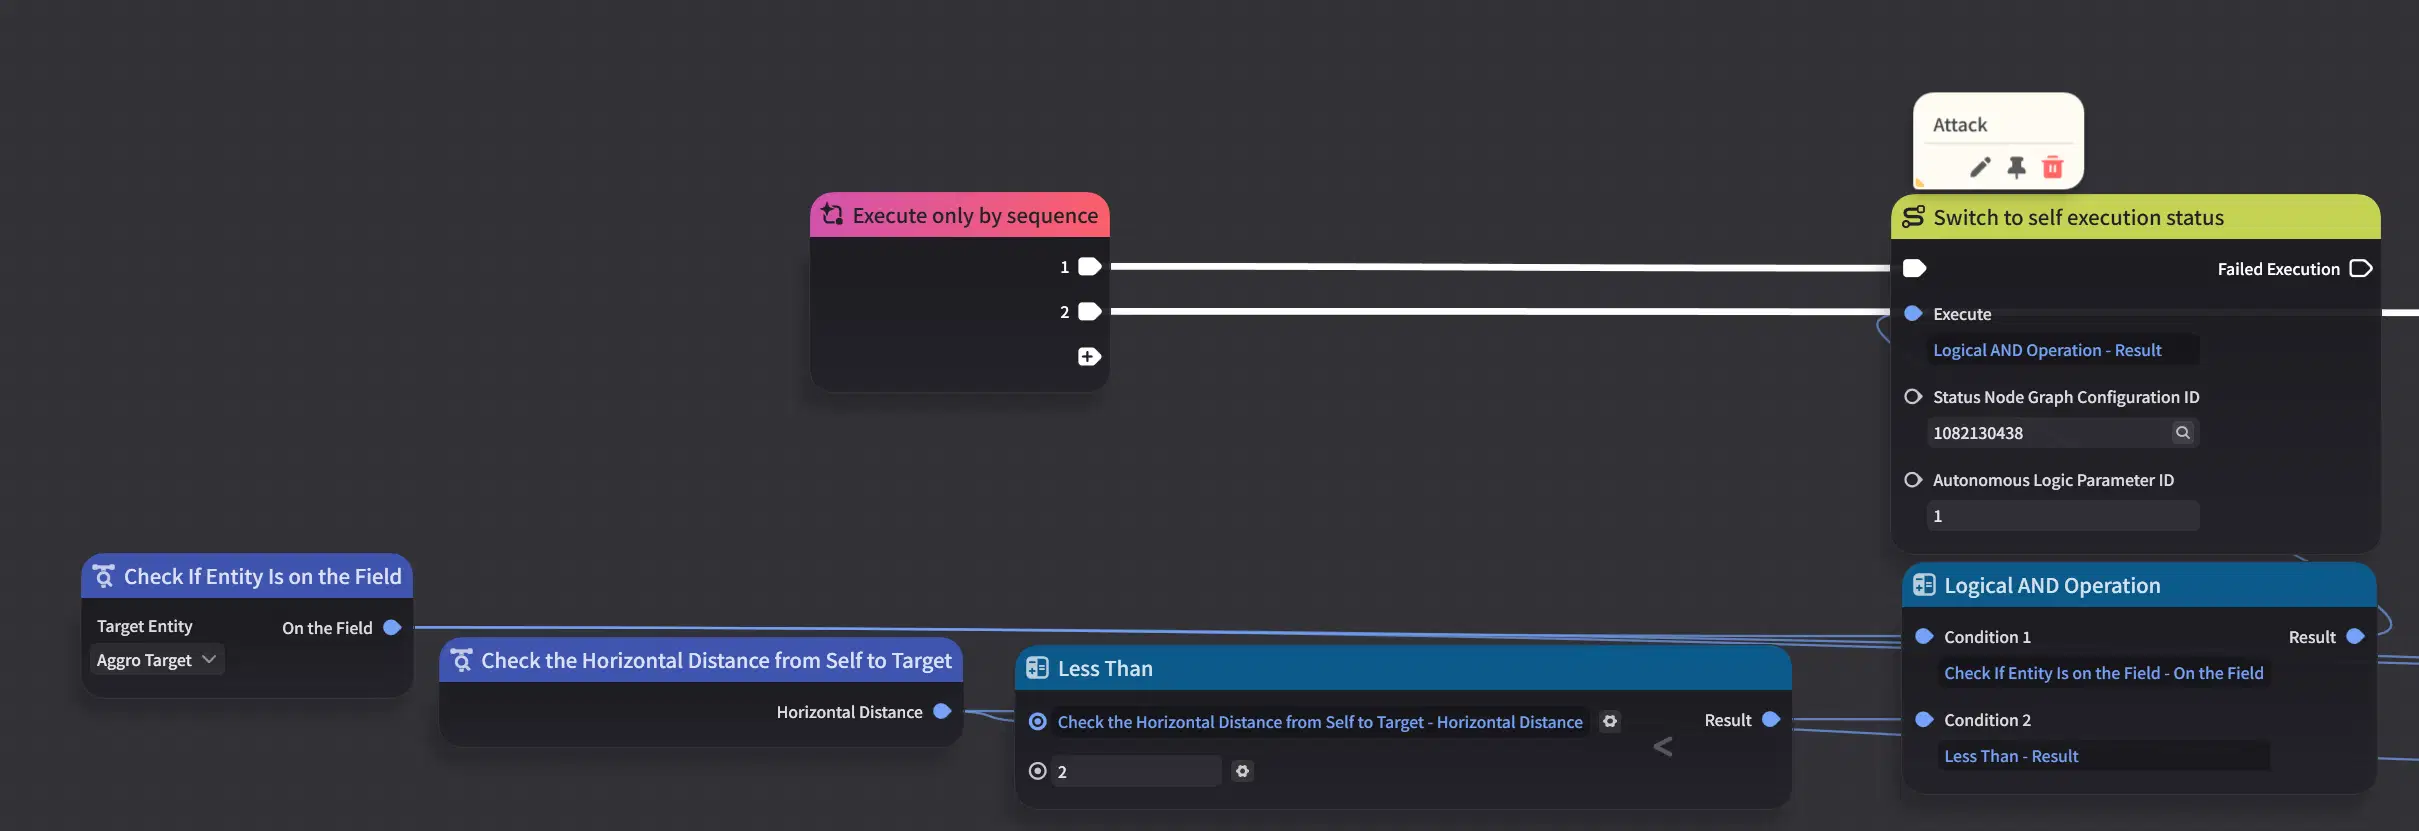
Branch 1 - attack. Use Check the Horizontal Distance from Self to Target, which returns the distance to the player in metres, and test whether it is less than 2. If so, run the Status graph that casts the skill.
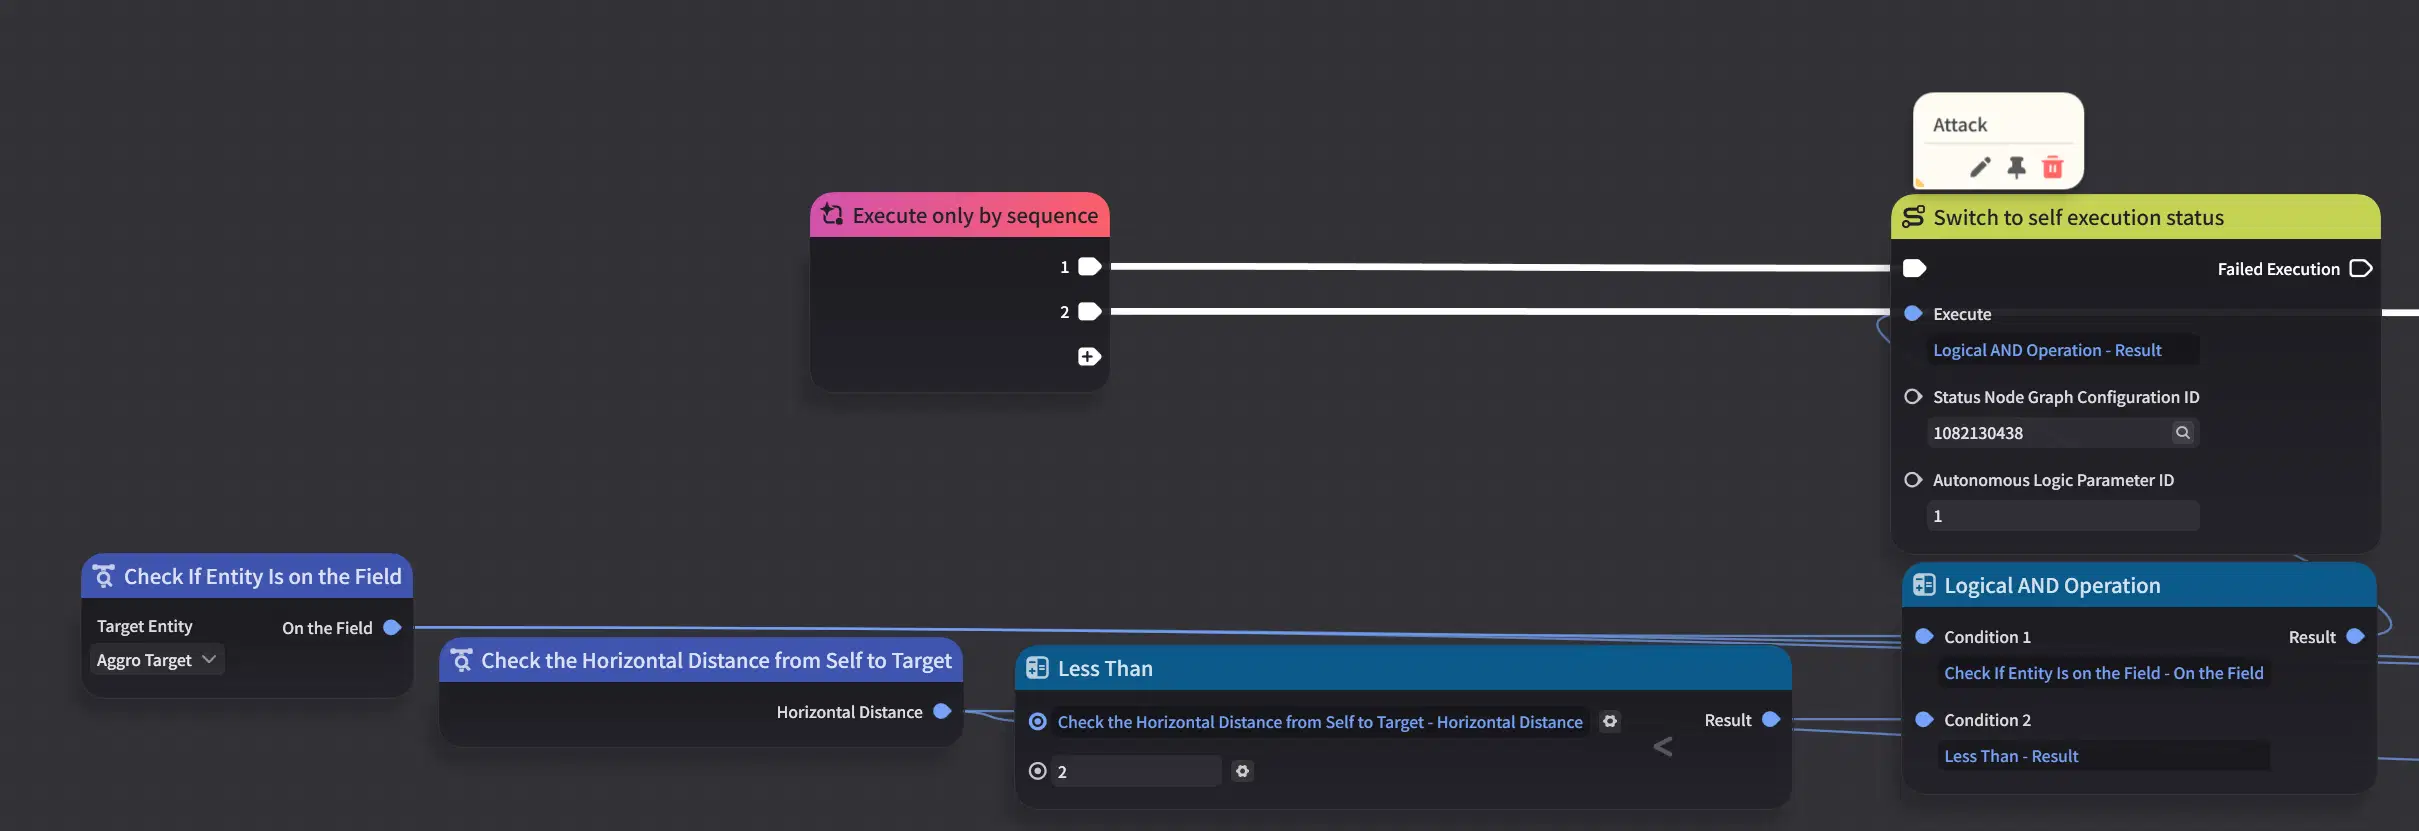
Add a second check: Check if Entity is on the Field, with the entity set to Aggro Target. The creation doesn't always have a target, and without this guard it will try to attack empty space.
Branch 2 - pursue. Identical condition, with the comparison flipped to Greater Than or Equal To.
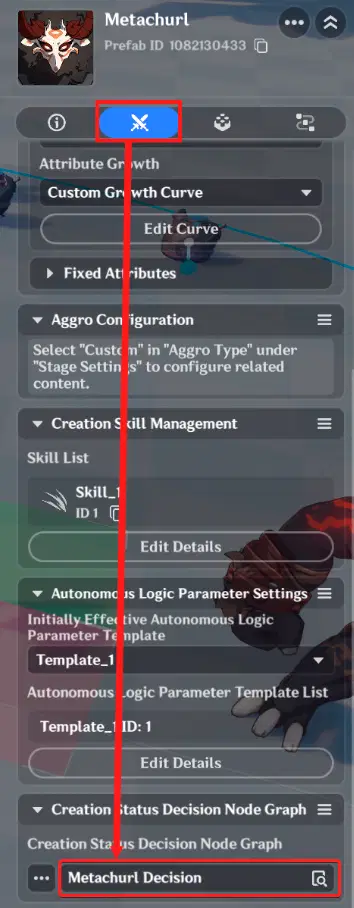
Don't forget to add Status Decision Node Graph to creation
4.3 Creation Status Node Graph
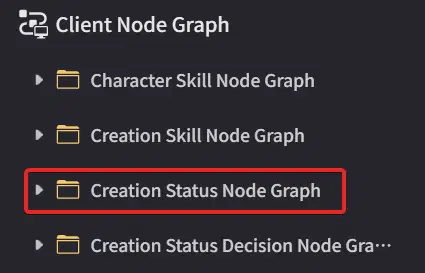
These are the individual actions: casting a skill, chasing, escaping.
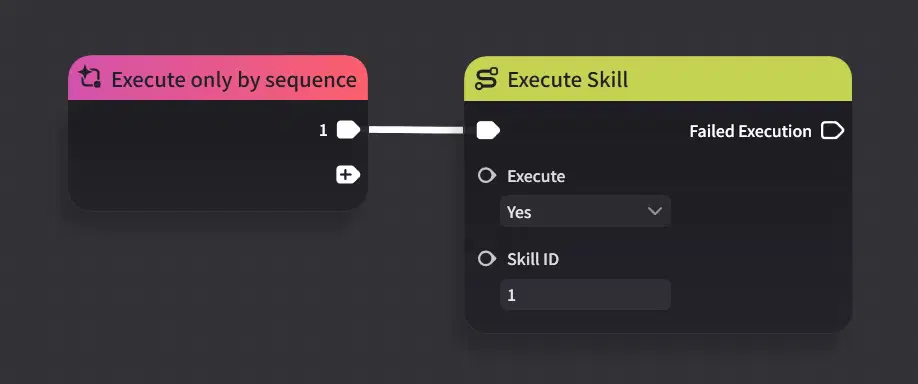
Attack Status Node Graph. Create a graph in the Creation Status Node Graph folder and add a single Execute Skill node. Set the Execute pin to Yes and enter the Skill ID (1, if this is the creation's only skill).
Pursuit Status Node Graph. Create a second graph with Tactic: Ground Pursuit. The tactic only runs while the player is between the minimum and maximum pursuit distances, and it stops at Stop Pursuit Distance.
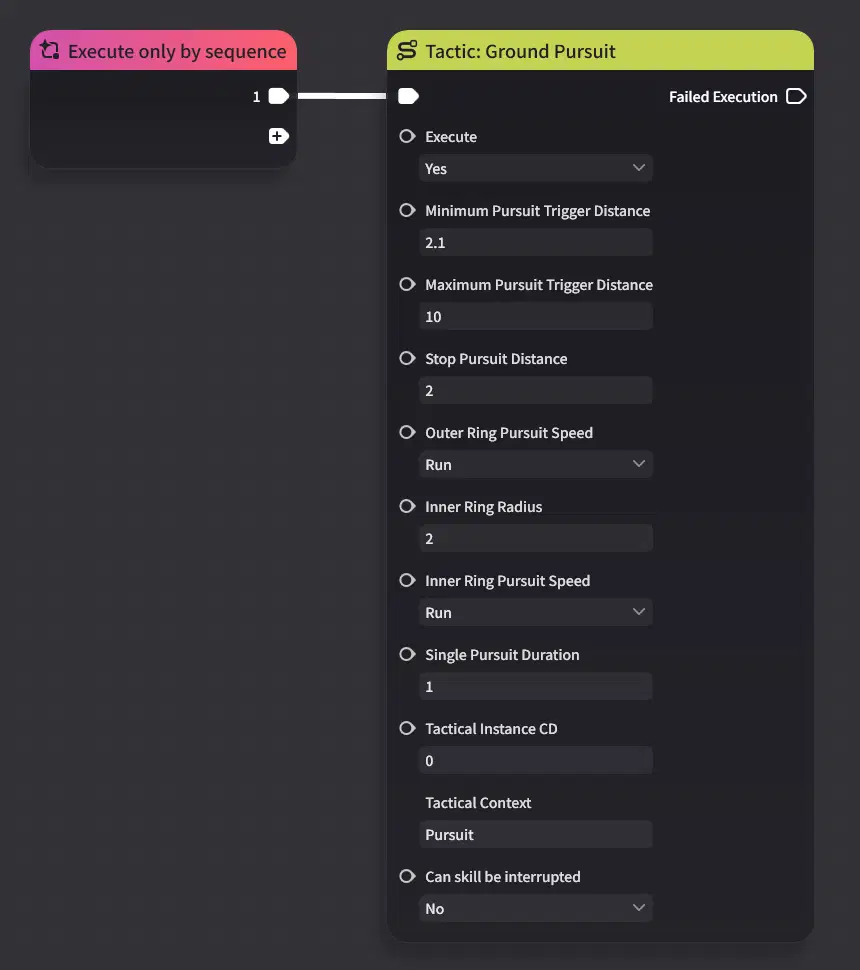
Do not set Minimum Pursuit Distance equal to Stop Pursuit Distance. If both are 3, then at exactly 3 meters the creation simultaneously satisfies "start chasing" and "stop chasing", and it will stutter in place. Set the minimum slightly higher — 3.1 against a stop of 3 - so the two conditions can never both be true.
Two more parameters worth understanding:
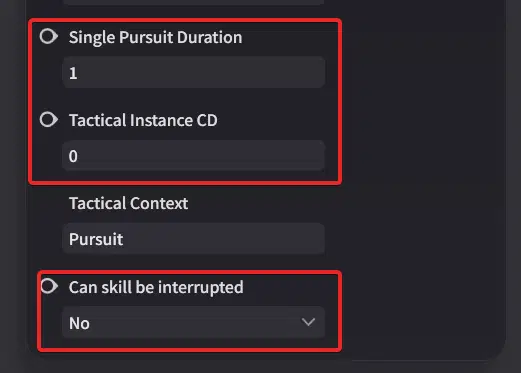
- Single Pursuit Duration - how long one run of the tactic lasts before conditions are re-evaluated. Shorter values make the creation more responsive but re-path more often.
- Tactical Instance CD - how long before this same tactic node may execute again after it ends.
- Can skill be interrupted - if Yes, an in-progress skill is cancelled so the tactic can run. Set to No when you don't want a chase to cut off an attack mid-animation.
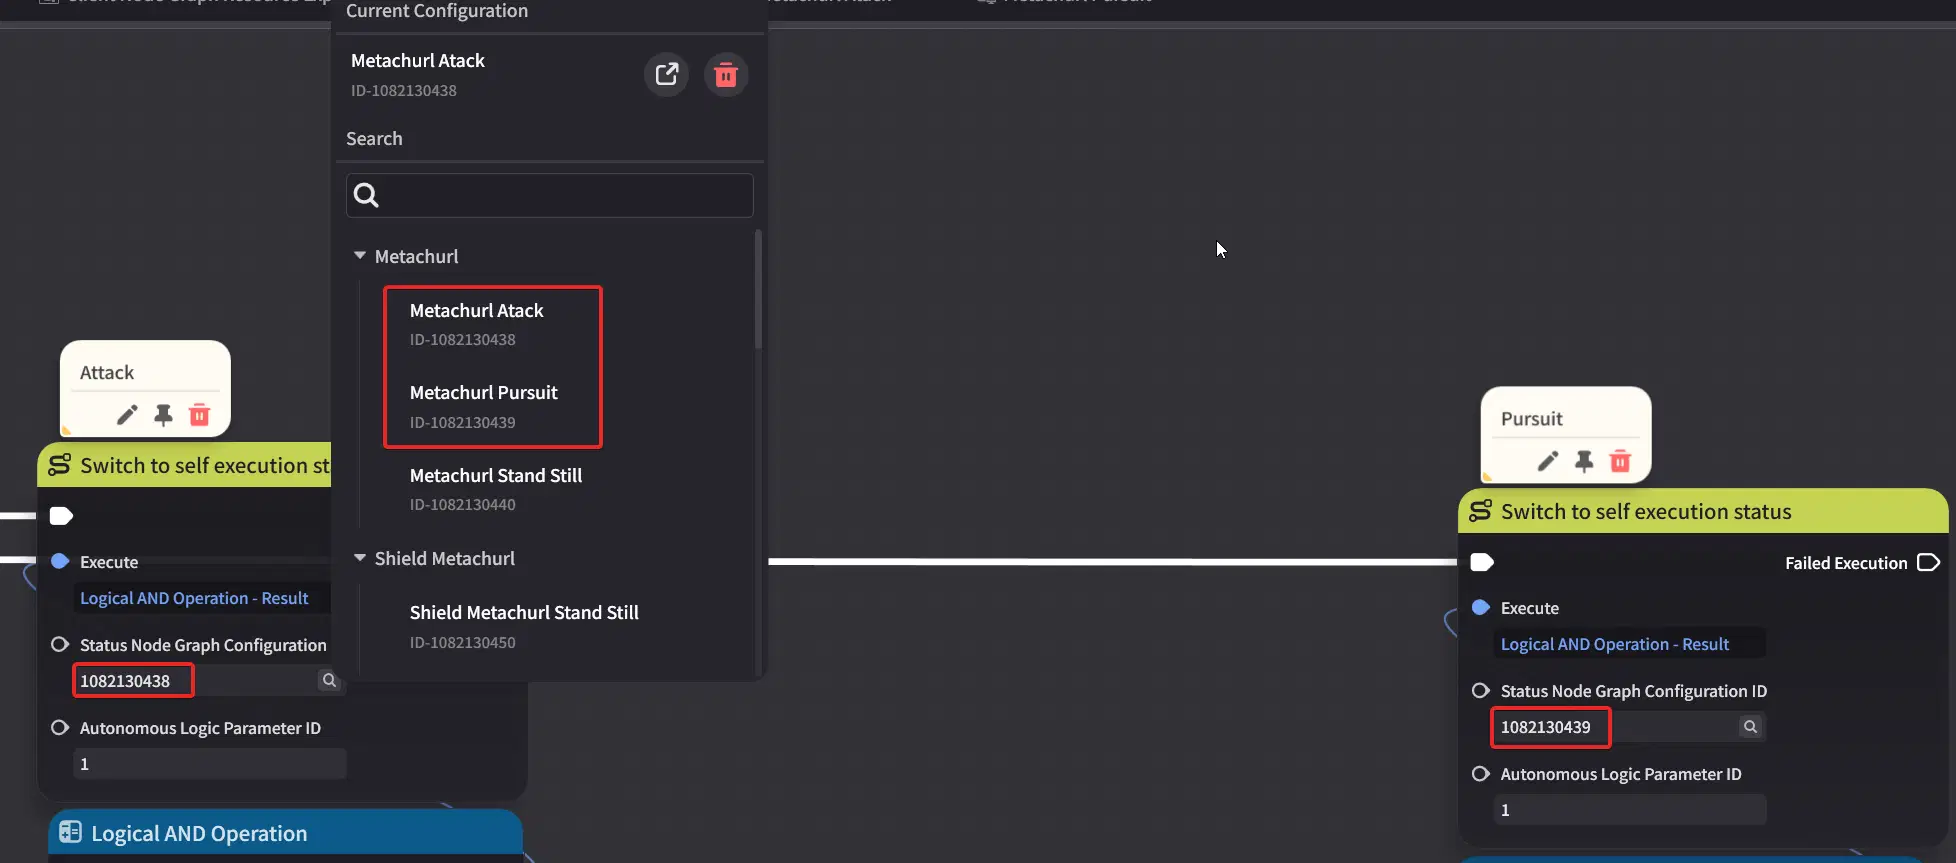
Finally, link both Status graphs into the Decision graph.
4.4 Adding Movement to a Skill
A stationary swing reads as flat. Adding a short lunge before the hitbox makes the same attack feels more dynamic.
Create a second Creation Skill Node Graph containing Complex Creation Directed Movement, and place it on the timeline slightly before the hitbox event.
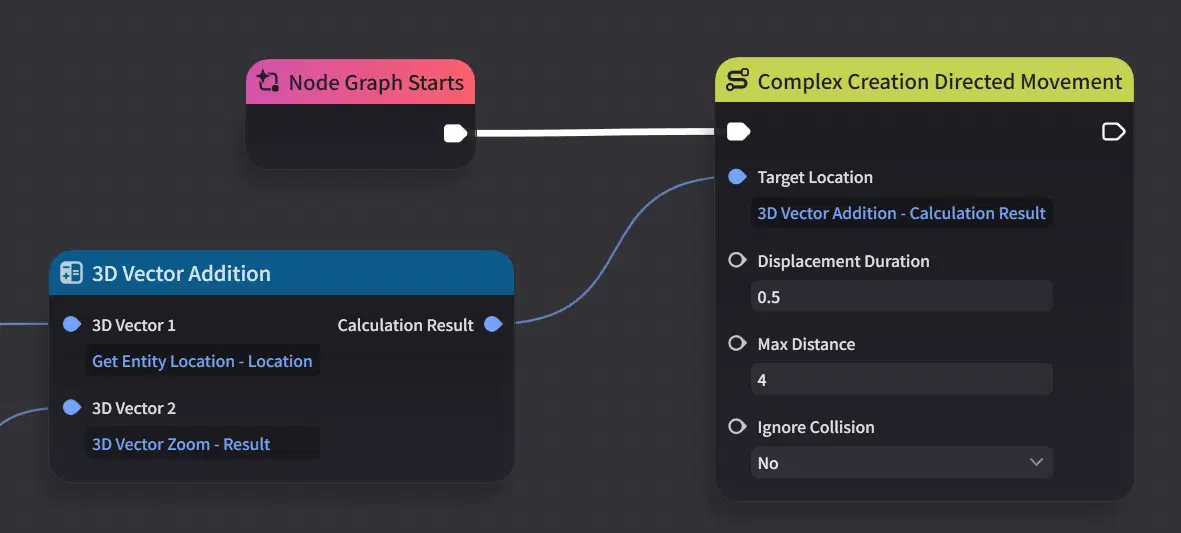
To compute "4 metres forward", you need the creation's forward vector in world space:
- Create 3D Vector (0, 0, 1) - the local forward direction.
- 3D Vector Rotation - rotate that vector by the creation's rotation, taken from Get Entity Rotation. This converts local forward into world forward.
- 3D Vector Zoom - multiply by 4 (or however far you want the lunge to carry).
- 3D Vector Addition - add the result to the creation's location.
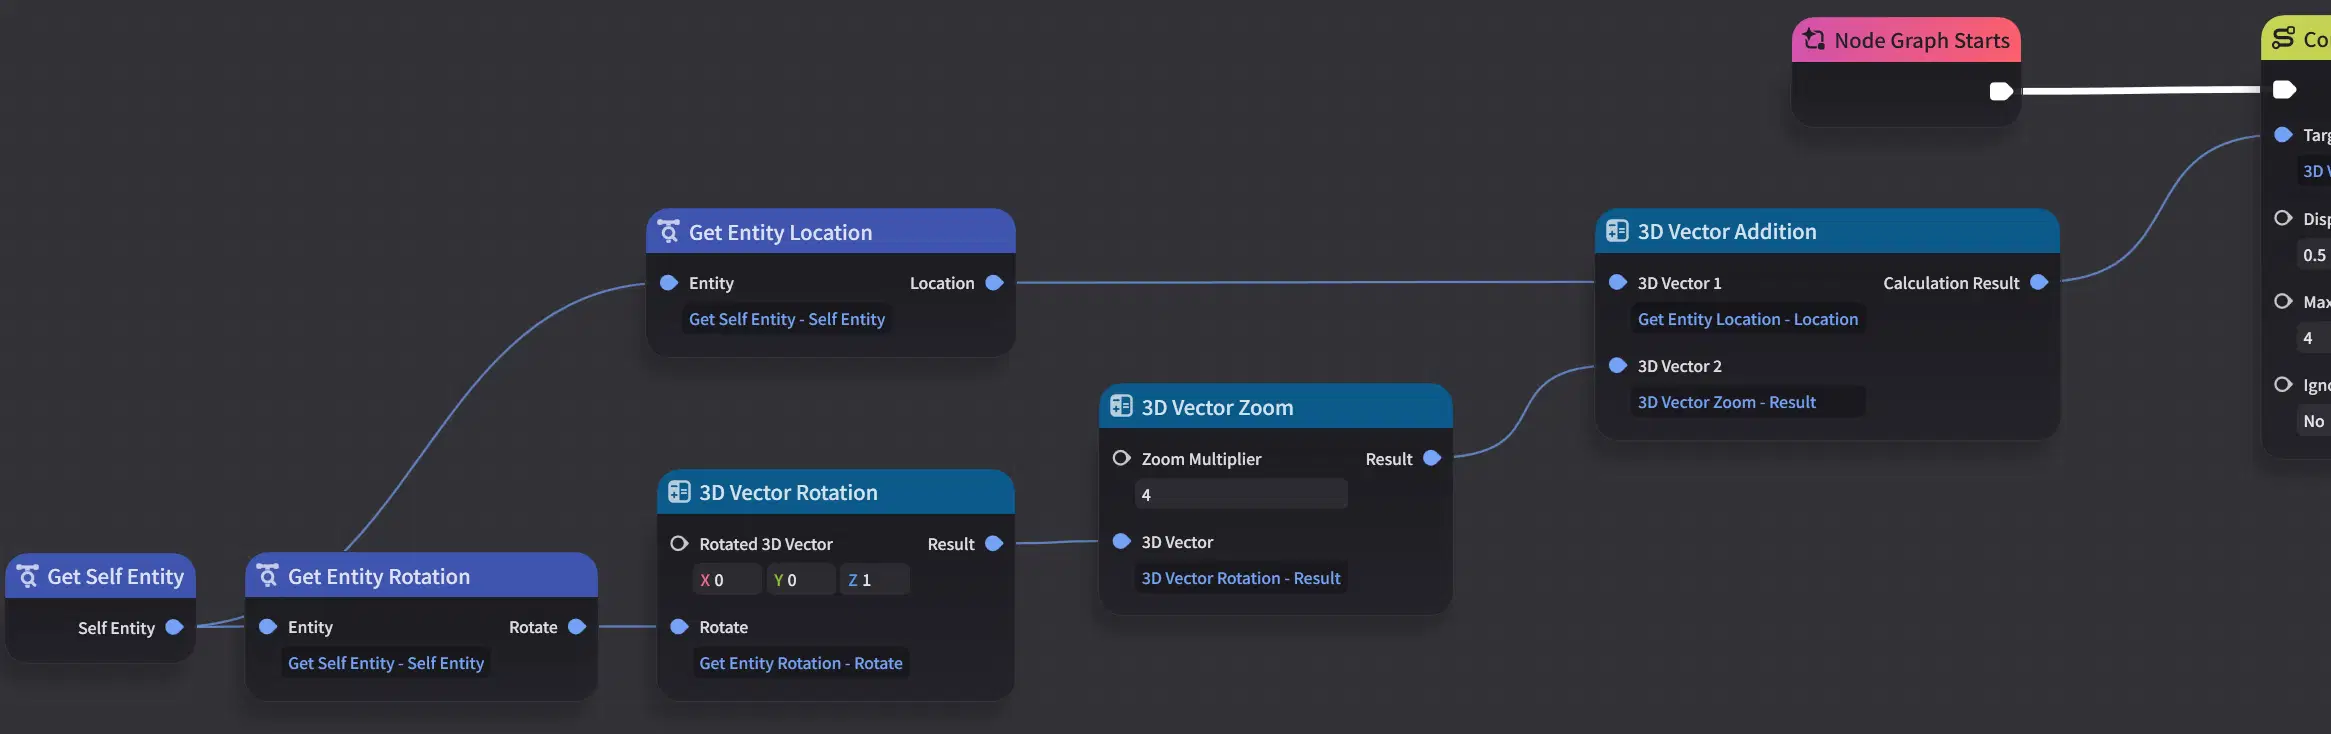
Put that into Target Location, and set Max Distance to the same value you used in Zoom. Displacement Duration controls how fast the lunge is; Ignore Collision decides whether the creation can pass through objects during it.
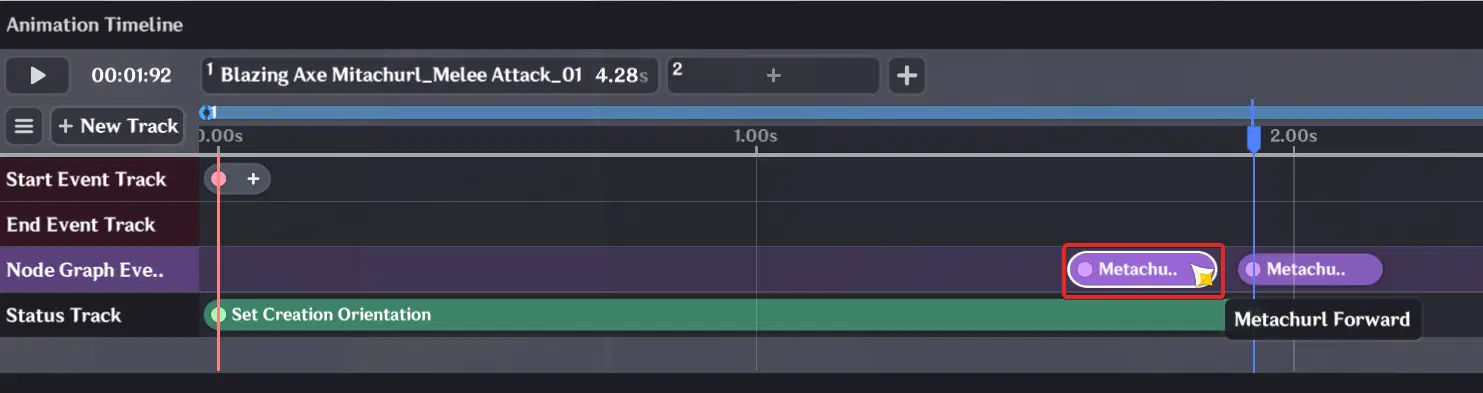
4.5 Metachurl Showcase
Before testing, add an Autonomous Logic Parameter Template. This defines the range at which the creation notices the player and enters combat - without it, nothing you built will ever trigger. For this example: Range + FOV, 10 m each.
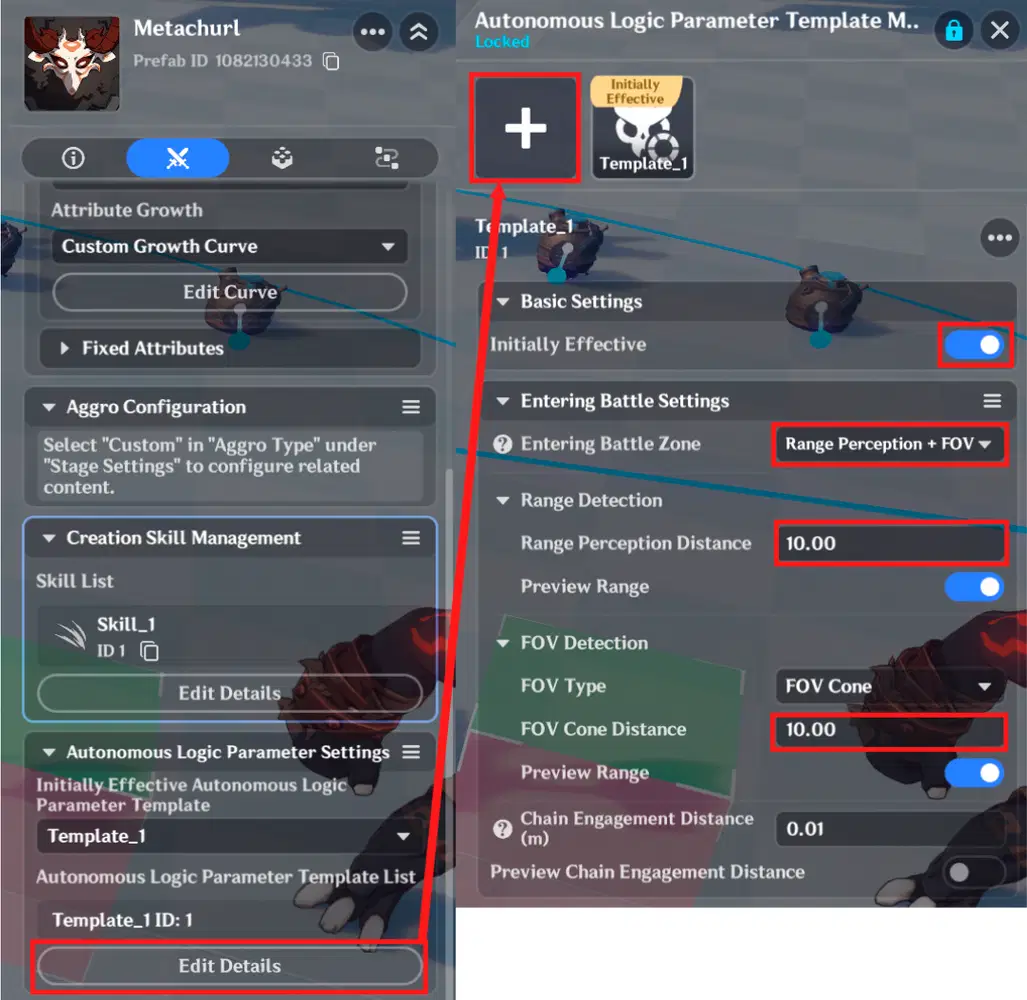
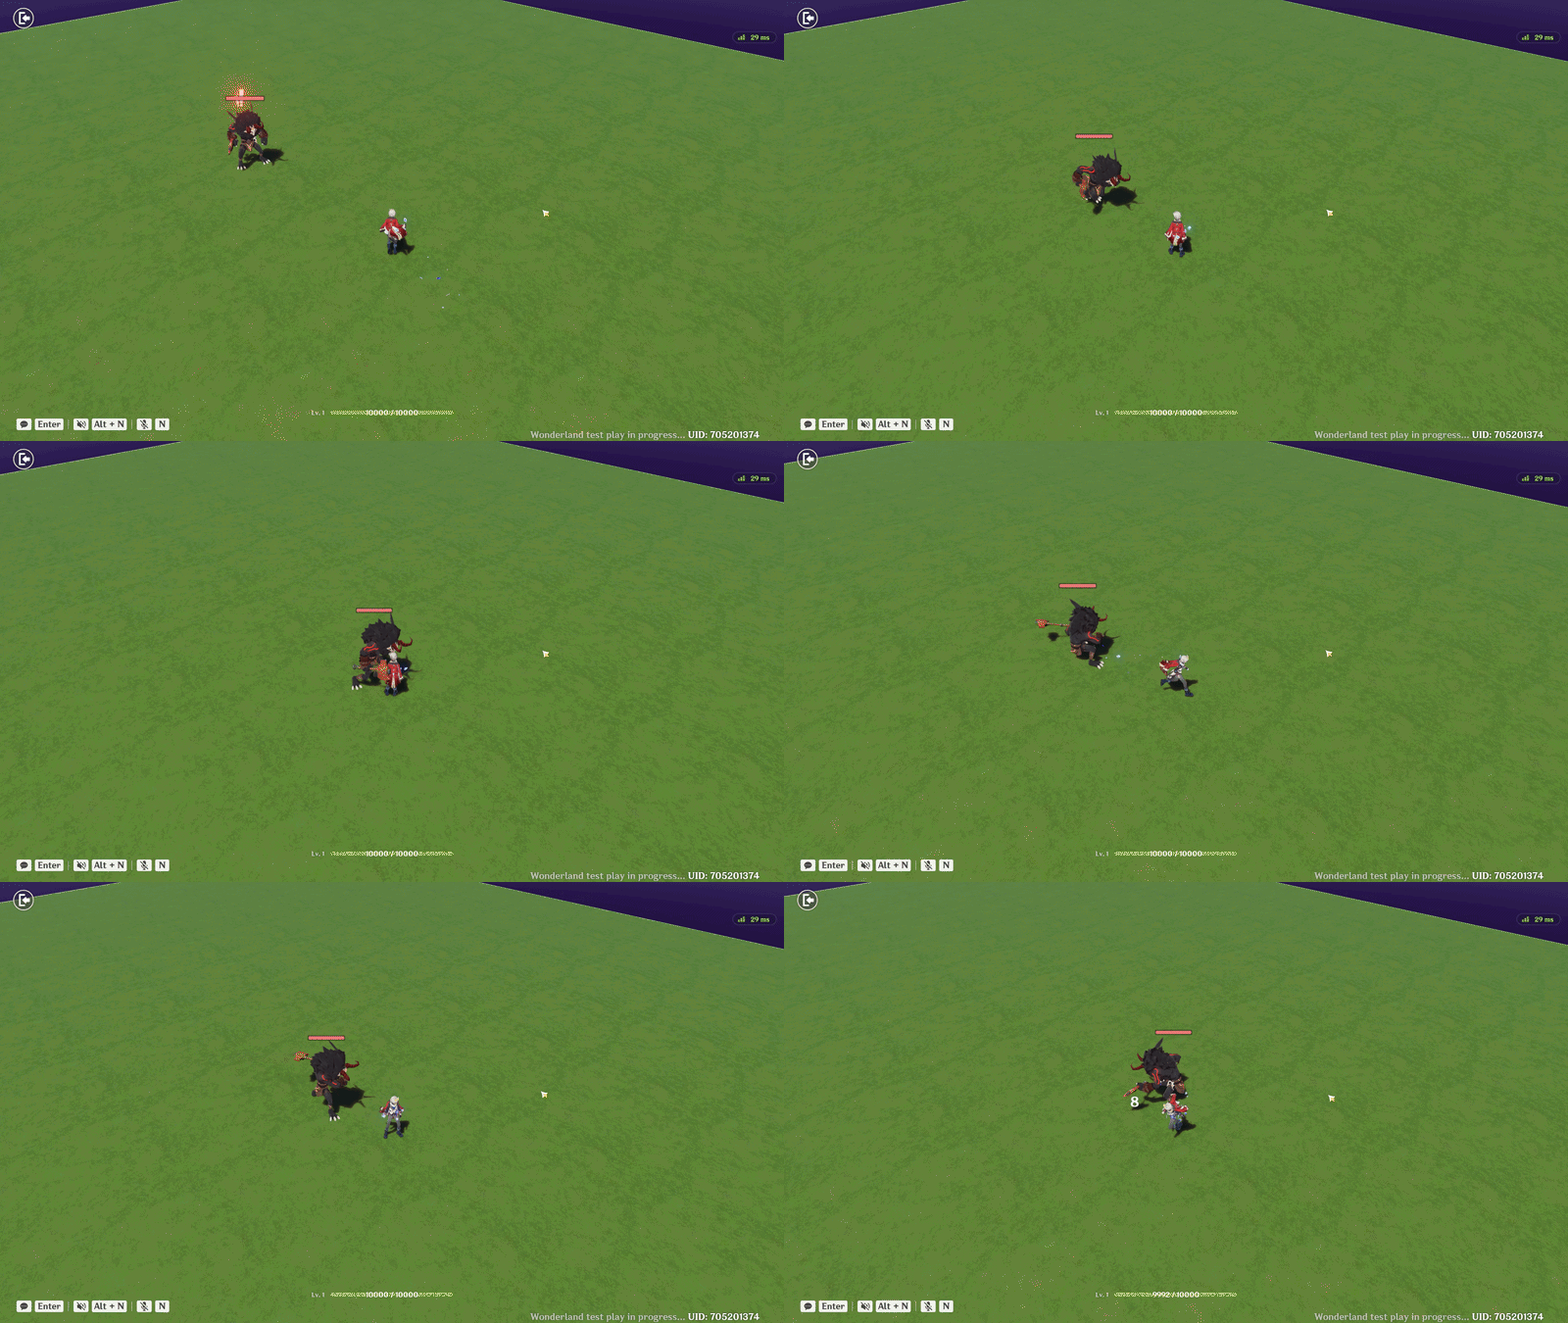
Metachurl Attack
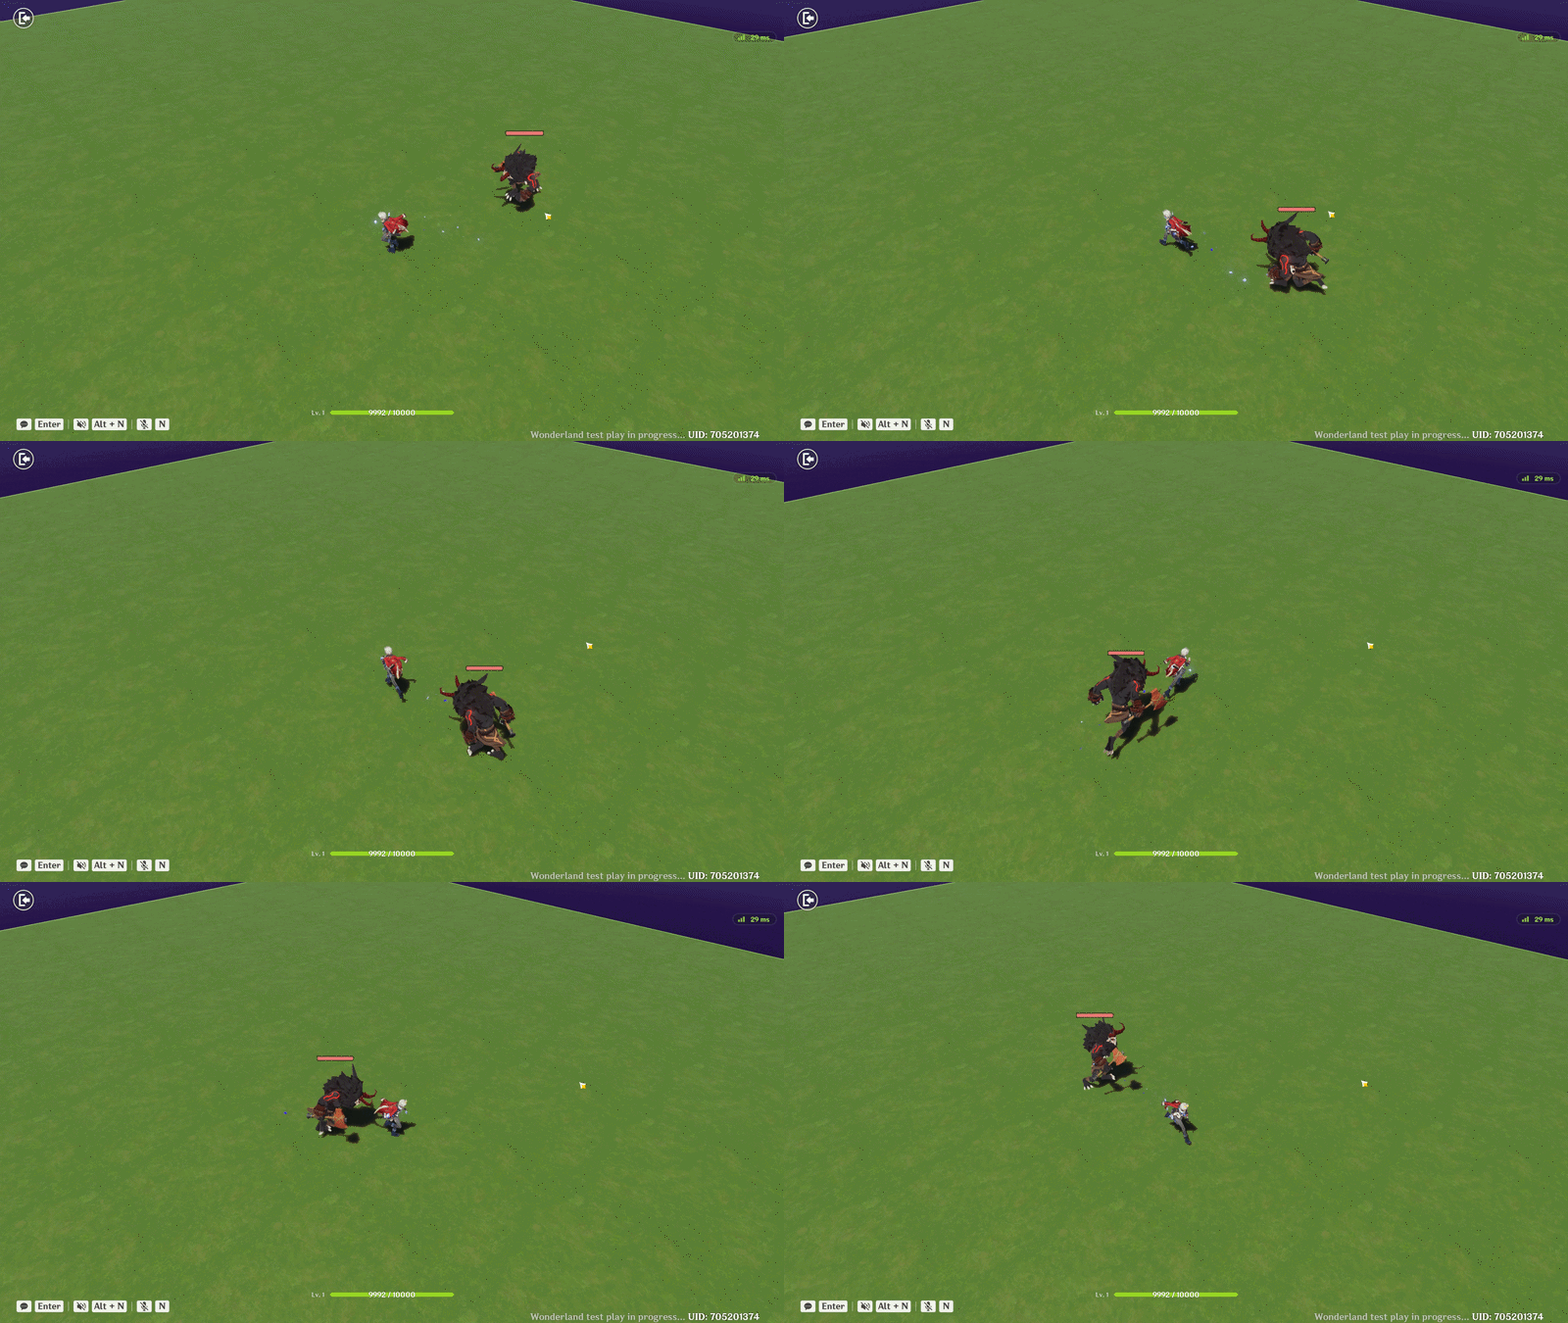
Metachurl pursuit

This guide is divided into two parts due to HoYoLAB's limitations. You can find the second part of the guide here: