
5☆ Catalyst Character (Lowest Base ATK: 116)
ATK Breakdown
• Character Base ATK: 116
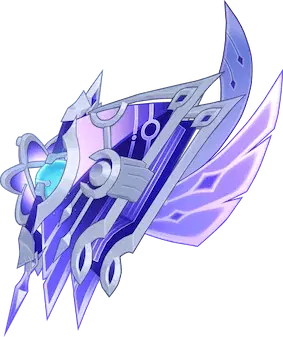
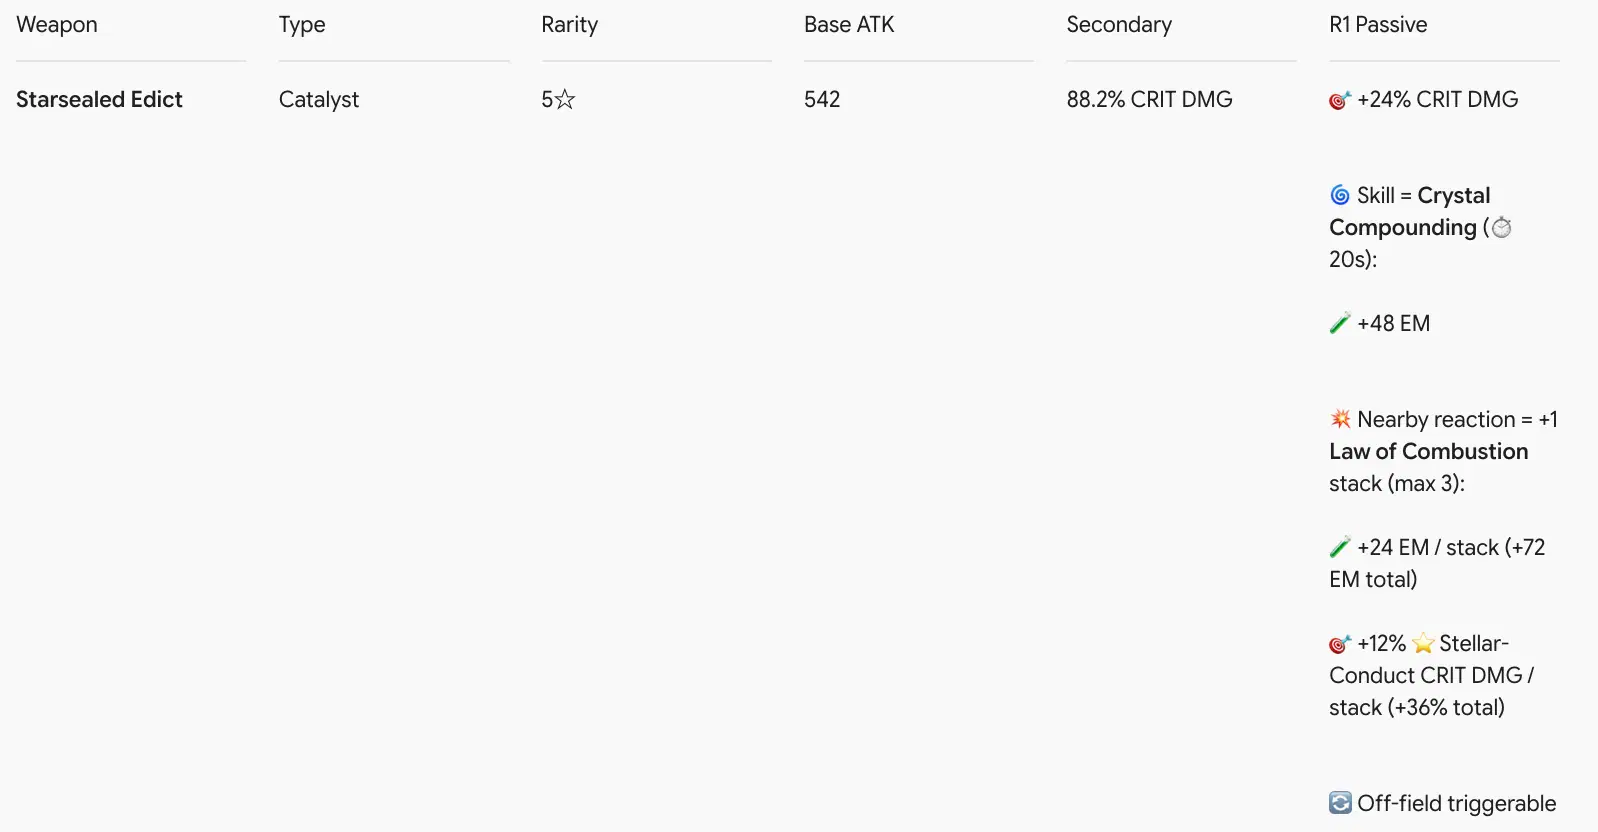
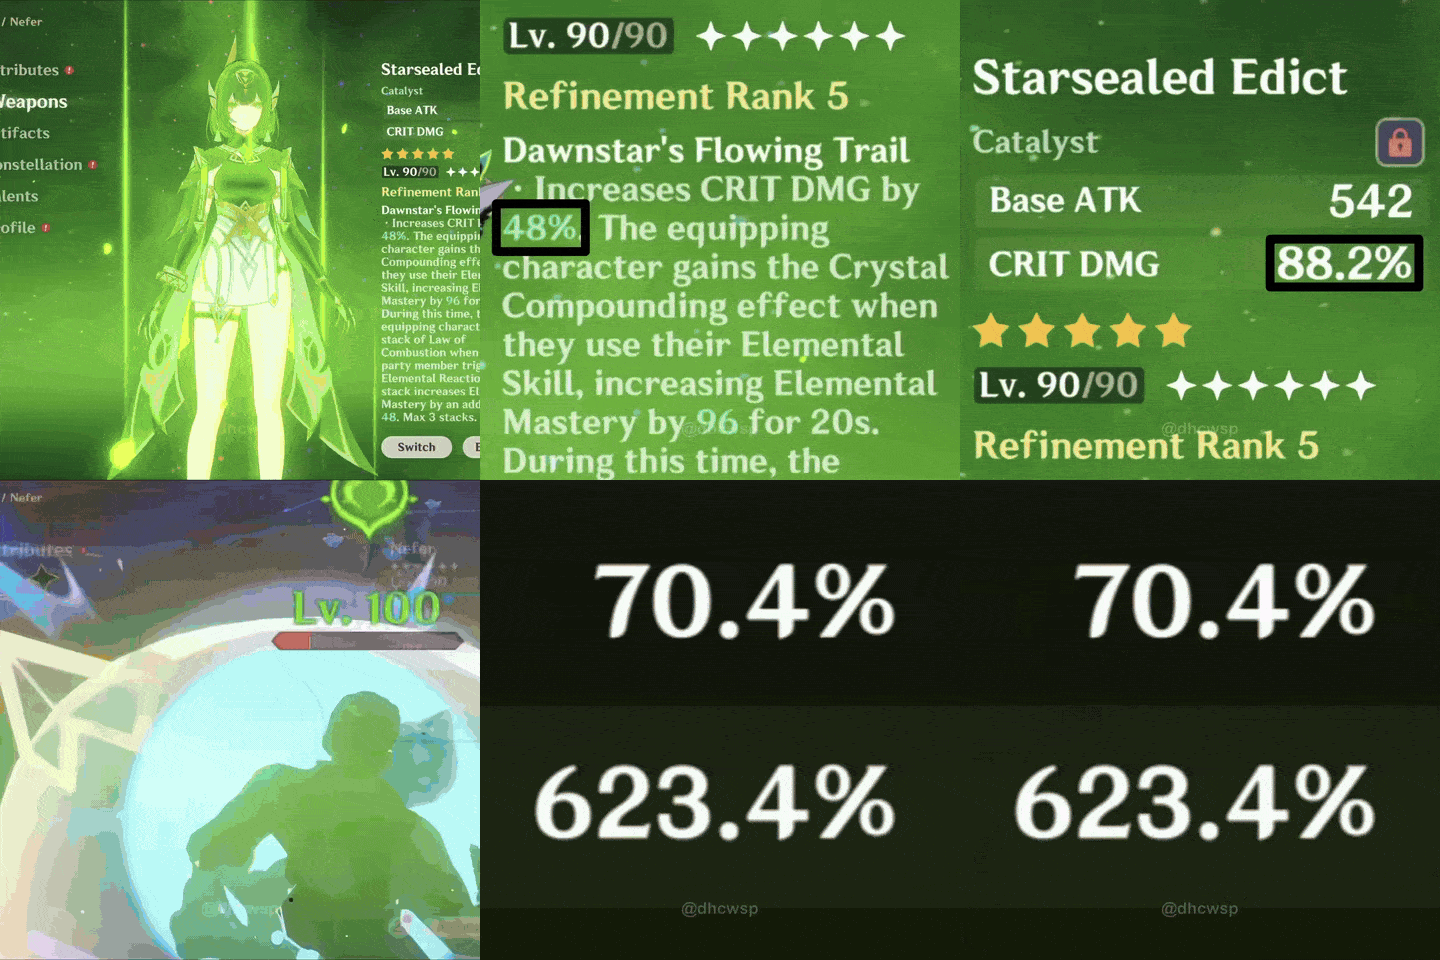
• Weapon Base ATK: 542
• Base ATK Total: 116 + 542 = 658
• Sands Artifact (46.6% ATK): 658 × 0.466 = 306.63
• Plume Artifact: 311
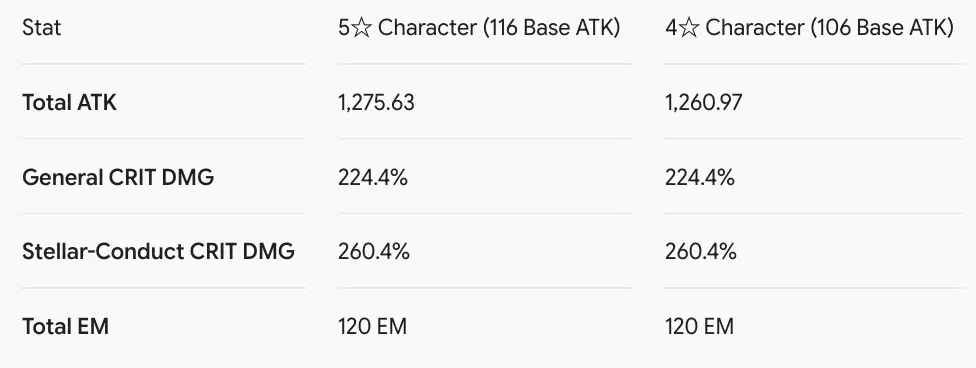
• Total ATK Calculation Breakdown: 658 + 306.63 + 311 = 1,275.63 ATK
CRIT DMG Breakdown
• Base Character CRIT DMG: 50%
• Weapon Secondary Stat: 88.2%
• Weapon Passive (Base): 24%
• Circlet Artifact: 62.2%
• Total General CRIT DMG Calculation Breakdown: 50% + 88.2% + 24% + 62.2% = 224.4% CRIT DMG
• Stellar-Conduct CRIT DMG Bonus: 12% × 3 = 36%
• Total Stellar-Conduct CRIT DMG Calculation Breakdown: 224.4% + 36% = 260.4% CRIT DMG
Elemental Mastery (EM) Breakdown
• Base Character EM: 0
• Weapon Passive Base (Crystal Compounding): 48
• Weapon Passive Stacks (Law of Combustion × 3): 24 × 3 = 72
• Total EM Calculation Breakdown: 0 + 48 + 72 = 120 EM
4☆ Catalyst Character (Lowest Base ATK: 106)
ATK Breakdown
• Character Base ATK: 106
• Weapon Base ATK: 542
• Base ATK Total: 106 + 542 = 648
• Sands Artifact (46.6% ATK): 648 × 0.466 = 301.97
• Plume Artifact: 311
• Total ATK Calculation Breakdown: 648 + 301.97 + 311 = 1,260.97 ATK
CRIT DMG Breakdown
• Base Character CRIT DMG: 50%
• Weapon Secondary Stat: 88.2%
• Weapon Passive (Base): 24%
• Circlet Artifact: 62.2%
• Total General CRIT DMG Calculation Breakdown: 50% + 88.2% + 24% + 62.2% = 224.4% CRIT DMG
• Stellar-Conduct CRIT DMG Bonus: 12% × 3 = 36%
• Total Stellar-Conduct CRIT DMG Calculation Breakdown: 224.4% + 36% = 260.4% CRIT DMG
Elemental Mastery (EM) Breakdown
• Base Character EM: 0
• Weapon Passive Base (Crystal Compounding): 48
• Weapon Passive Stacks (Law of Combustion × 3): 24 × 3 = 72
• Total EM Calculation Breakdown: 0 + 48 + 72 = 120 EM
Mitya (Perfect Synergy)
- How she scales: Mitya relies heavily on high elemental reaction triggers and quick-swapping skill usage to maximize the Starsealed Edict catalyst's cascading Elemental Mastery and Stellar-Conduct CRIT DMG buffs.
- Why she benefits: As the signature weapon's intended user, she seamlessly integrates the 542 Base ATK and 88.2% CRIT DMG while triggering off-field reactions to stack 120 total Elemental Mastery and +36% Stellar-Conduct CRIT DMG without missing a beat.
Nefer (Perfect Synergy)
- How she scales: Nefer relies heavily on rapid elemental reaction triggers and swift on-field skill rotations to fully capitalize on the Starsealed Edict catalyst's cascading Elemental Mastery and Stellar-Conduct CRIT DMG buffs.
- Why she benefits: As an elite damage dealer tailored for these mechanics, she effortlessly weaves her attacks to stack 120 total Elemental Mastery and secure +36% Stellar-Conduct CRIT DMG while maximizing the 542 Base ATK and 88.2% CRIT DMG stats.
Nahida (Great Synergy)
- How she scales: Nahida relies heavily on stacking Elemental Mastery to maximize both her Tri-Karma Purification skill damage and her passive EM-sharing utility for the active party member.
- Why she benefits: The massive 88.2% CRIT DMG secondary stat combined with the weapon's passive yielding up to 120 Elemental Mastery gives her an incredible hybrid stat stick that pushes both her personal spread damage and reaction ceilings to new heights.
Yae Miko (Great Synergy)
- How she scales: Yae Miko scales directly off Elemental Mastery via her passive talent, which converts every point of EM into increased Sesshou Sakura elemental skill damage.
- Why she benefits: The high 88.2% CRIT DMG and 120 total EM bonus directly amplify her off-field turret damage and Aggravate reaction ticks, letting her capitalize on reaction-heavy team compositions effortlessly.
Sucrose (Good Synergy)
- How she scales: Sucrose relies almost entirely on maximizing her Elemental Mastery to strengthen her Swirl reactions and share a percentage of her total EM with her teammates.
- Why she benefits: The massive 120 Elemental Mastery boost from the weapon passive directly increases her core utility, while the heavy 88.2% CRIT DMG substat turns her into a powerful hybrid driver who deals substantial personal damage on-field.

Pull Simulation
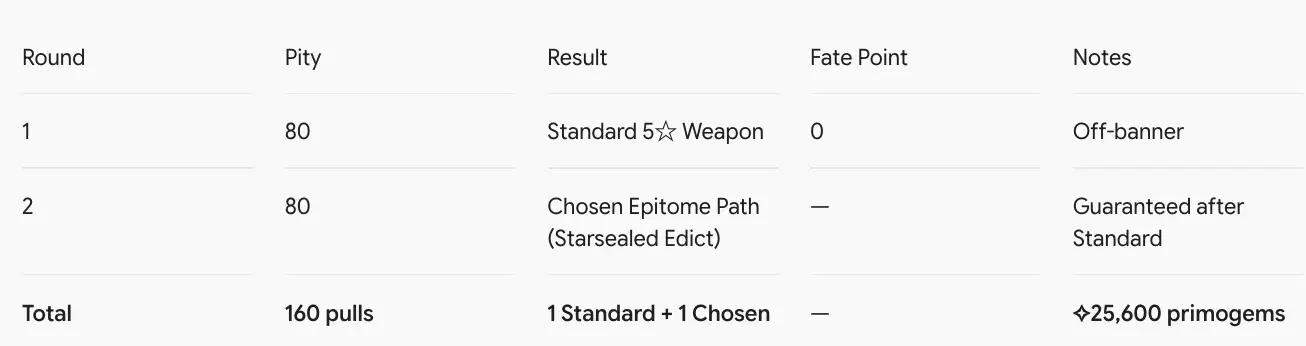
Case 1: 1st 5☆ is Standard → 2nd is Guaranteed Epitome Path
Case 2: 1st 5☆ is On-Banner but Not Chosen → 2nd is Guaranteed Epitome Path
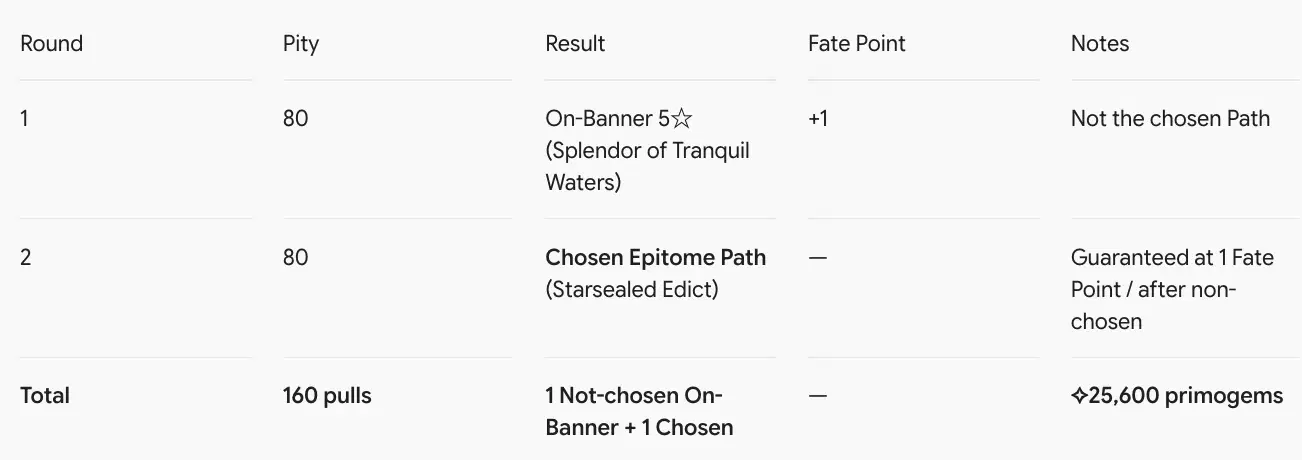
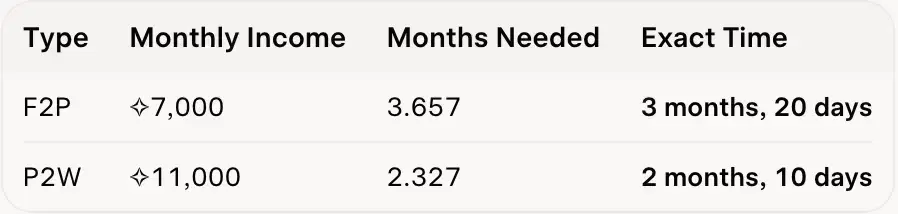
✧25,600 Primogems 💸⏱️ Saving Time