Dear all,
Last week, we invited Brazilian cosplayer Babs to share her cosplay journey and experience, which gave us a lot of inspiration! In today's Creator's Classroom, neratt03 will give a beginners class on how to draw an illustration. She will show us what it is like to create an illustration from scratch. Let's go check it out! 

Hello! Some of you might be interested in drawing your favorite character, but don’t know where to start. If so, this guide might be able to help you. I will be showing you my illustration process: I will be drawing Gorou from Genshin Impact in casual clothes for his birthday on 18th of May to show that!
Software and Drawing Tools
First of all, since I usually draw digitally, I will introduce the software and tools needed for creating digital illustration. The one that I use to draw this piece is Clip Studio Paint PRO on iPad Pro 12 inch.
Clip Studio Paint (★★★★★)
Highly recommended for artists who would like to draw digital characters illustrations, comics/manhwa/manga/manhua/webtoon or create animations. In the software, there is a canvas which is where you will be drawing. It’s like a paper. There are also various tools inside the software like pen, pencil, eraser, paint brush, and many more!
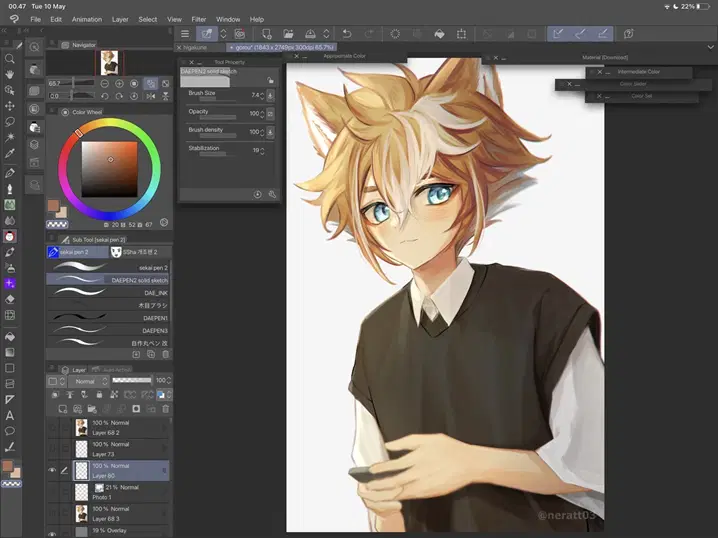
There are different versions of this software. You can choose it depending on your needs. Clip Studio Paint PRO is suitable for character art, concept art and illustration. Clip Studio Paint EX has more features than Clip Studio Paint PRO such as advanced manga, comic, webtoon and animation features. Clip Studio Paint only offers a subscription plan for iPad, and for Mac/Windows there is a permanent license.
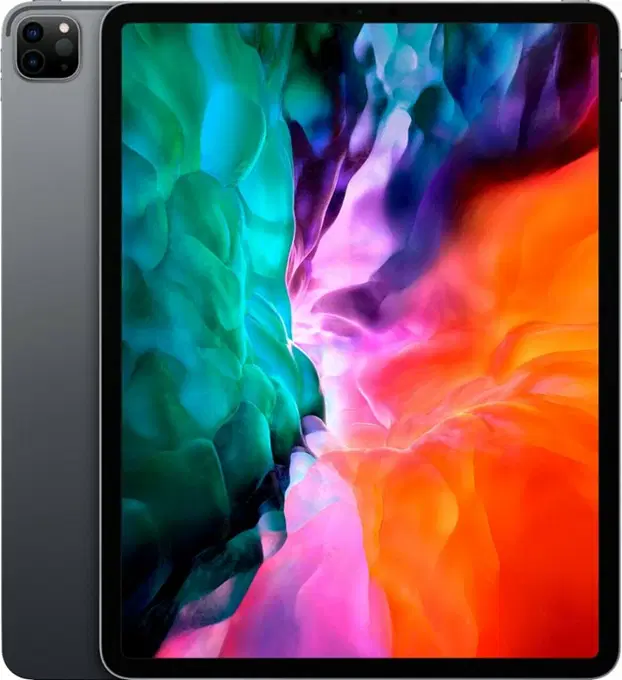
iPad Pro (12.9 inch) (4th generation) (★★★★)
Now that you know the drawing software, you only need the device to install it. iPad Pro is a great choice for artists who like to draw in various places. It's light and portable, and is much easier to set up rather than a pen tab. The screen is large enough, and it has many storage options up to 1TB. iPad also has a liquid retina and true tone display, so the color that you see on your iPad is much more accurate than most other devices.
Clip Studio Paint is available on iPad, it can also be connected to your PC/laptop when needed.
The downside to the iPad is the screen. It’s made of glass and it feels nothing like paper. So it will take time for people to get used to the sensation when drawing on it.
Apple Pencil (2nd generation) (★★★★★)
Apple pencil works just like a normal pencil/pen. You can use it to draw directly on your iPad screen. It’s very light, durable and sensitive to pressure. If by any chance the pen nib is broken or worn out, you can buy new pen nibs from Apple.

Drawing & Coloring Tutorial
Now that you have the device and software ready, lets get into the drawing and coloring tutorial! An illustration process usually contains the following steps:
Sketch
Lineart
Base coloring
Shading
Rendering
The order of the steps may be different for everyone. The steps I mentioned above do not apply to everyone.There might be some artists who don’t follow all the steps as well. For example if their art style focuses more on painting, so they don’t need to do lineart. Some artists might also have specific patterns as their backgrounds, etc. There are no rules! So feel free to be creative and skip/insert your own steps.
In this guide, I will show you how I draw. You don’t have to follow every steps exactly the same as how I do it. If you want to add something you like or skip the parts you don’t like, feel free to do it!
Step 1 - Sketch
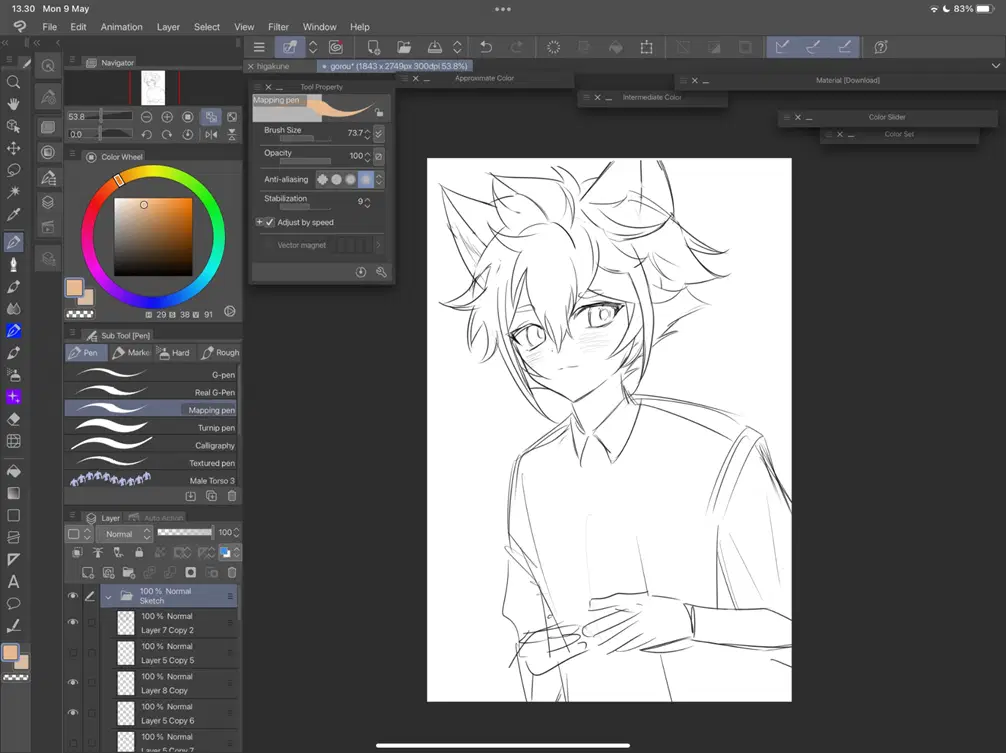
Create a layer to draw anything you want. It doesn’t have to look neat, just draw what you have in mind and it usually comes out better. You can see that I didn't draw the hands properly, I will be defining the shapes more when coloring.
I usually separate the layers for the face, body, hair and details so that it will be easier to adjust later. Then, I put all the layers into the ‘Sketch’ folder.
Tip: frequently flip your drawing horizontally, you will notice some weird parts of the drawing you don’t see. Then you can fix them.
Step 2 - Base Color
Some people may make lineart before this step, but i prefer to color the sketch before defining the lines. Feel free to line your art before this step if you would like!
Create a ‘Color’ folder below the ‘Sketch’ folder. Then, create new layers for base coloring. I usually put skin color layer at the bottom of the folder since it will usually be overlapped by clothes, eyes, hair, and all the other details. I use mapping pen to color the base colors.
Tip: colors that are not saturated will make the drawing look softer. While saturated colors will make the drawing look bolder. Be careful when choosing colors and don’t use too many different saturated colors as it will clash with each other.

Step 3 - Shadow & Lighting
I like to define the shadow and lighting before shading the drawing, so I’ll be able to keep in mind where the light will be heading. Sometimes people do this as last step.
Put the ‘Sketch’ folder and ‘Color’ folder in ‘Merged’ folder. Then create another layer (mode: Multiply) on top of the ‘Merged’ folder. Choose the shadow color you want and just use bucket tool to color the whole layer. In this piece, I will be using warm color.
After applying the shadow, next create another layer (mode: Add (Glow)) for the lighting. Paint anywhere you want the lighting to be.
Tip: adjust the opacity on the shadow and lighting layers to your liking. If you want harsh light, just turn the opacity higher. If you want soft light, turn the opacity lower.

Step 4 - Shading
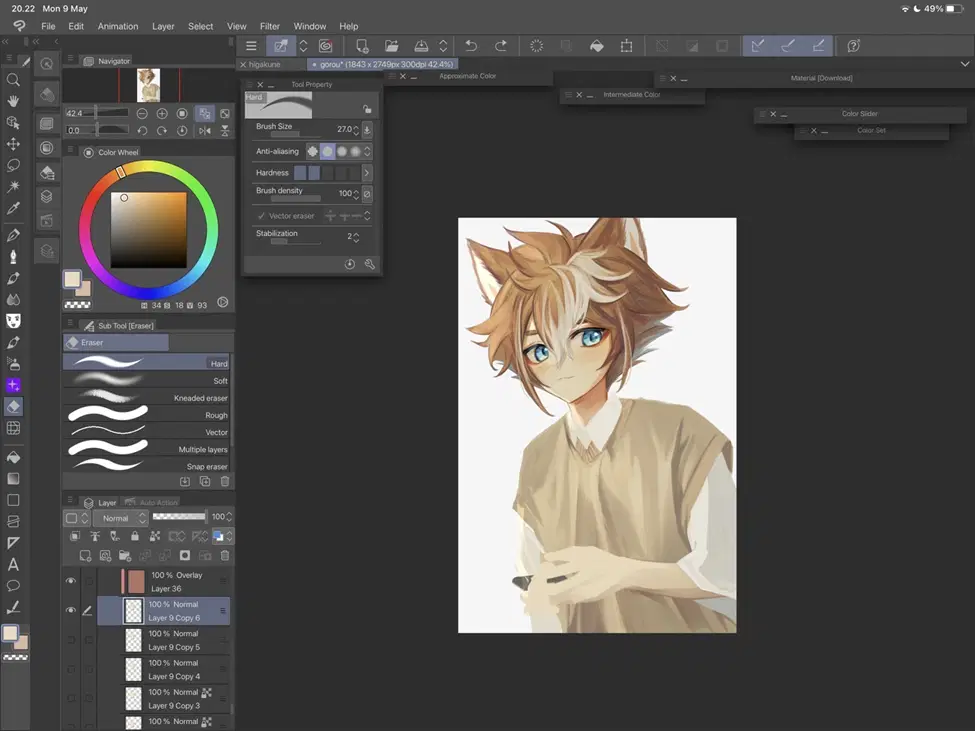
I usually shade directly on the base layer. To avoid the colors leaking outside the base color, I use Protect Alpha feature. After enabling protect alpha, I use transparent watercolor brush with darker color than base color and color it around the part I want to shade to define the shape and make it look softer.
Then, I reduce the opacity of my sketch layers to about (5% - 40%) and shade with an even darker color to further deepen the details.
Remember to turn the hue in the color wheel when picking the colors when shade so the drawing doesn’t look muddy. Sometimes, i pick complementary colors. (ex: Gorou’s brown hair has blue shade on the back)
Tip: color the sketch lines by adding a clipping layer above the sketch layer, with a darker color (preferably not black). It will make the art look softer. Clean up messy parts of sketch layers if you don’t intend to delete it or plan to use it as your lineart.
Step 5 - Adjustments & Rendering
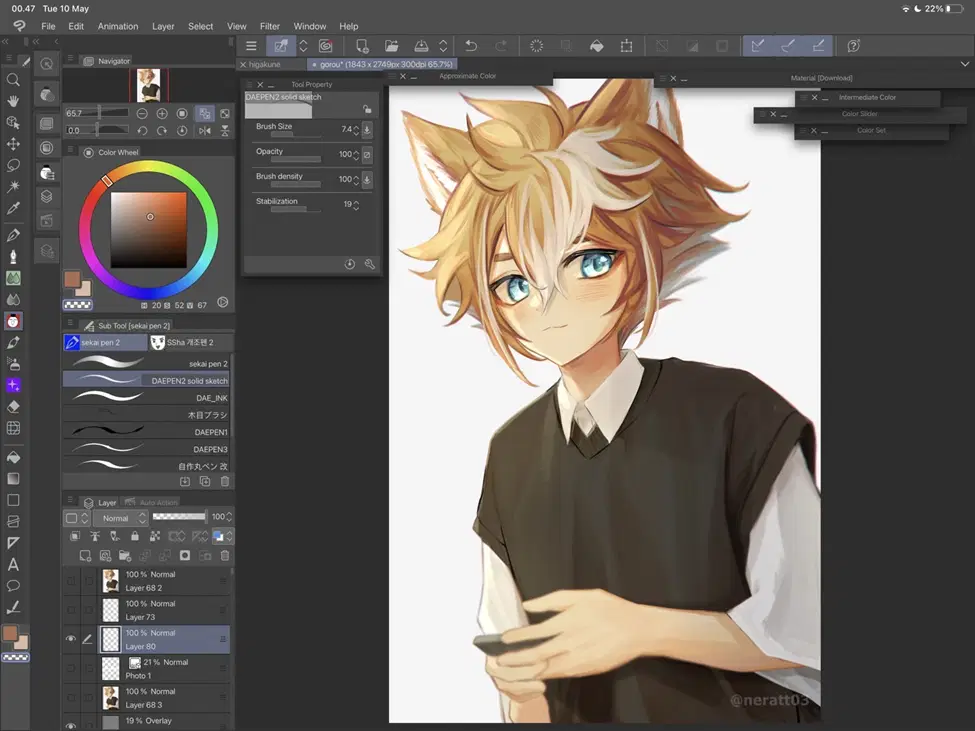
I changed the clothes color to black because I like it better. Redefined the sketch lines (since there was no lineart). I also adjusted the opacity and colors of the shadow and lighting.
Create a soft light layer and use transparent watercolor brush to shade around the part that is hit by the light.
Create an overlay layer, set the opacity to about 5% to 20% and click Filter > Render > Perlin Noise to add some noise to the art.
Tip: merge all the layers after you are satisfied with the illustration, then blur some parts of the illustration to bring more focus to the part you want.
This guide is made to focus on introducing drawing software and tools. Then show you my own process to complete an illustration. I hope you find it helpful. Feel free to leave some comments or share your own drawing tips!
With that, today's Creator's Classroom has come to an end. Next time, neratt03 will walk us through using graphic tablets and software to create art! 
If you have any thoughts on Creator's Classroom, you can leave your feedback here:
>>LINK<<
*The recommendations in this guide come from the creator and do not represent the views or position of HoYoLAB.