


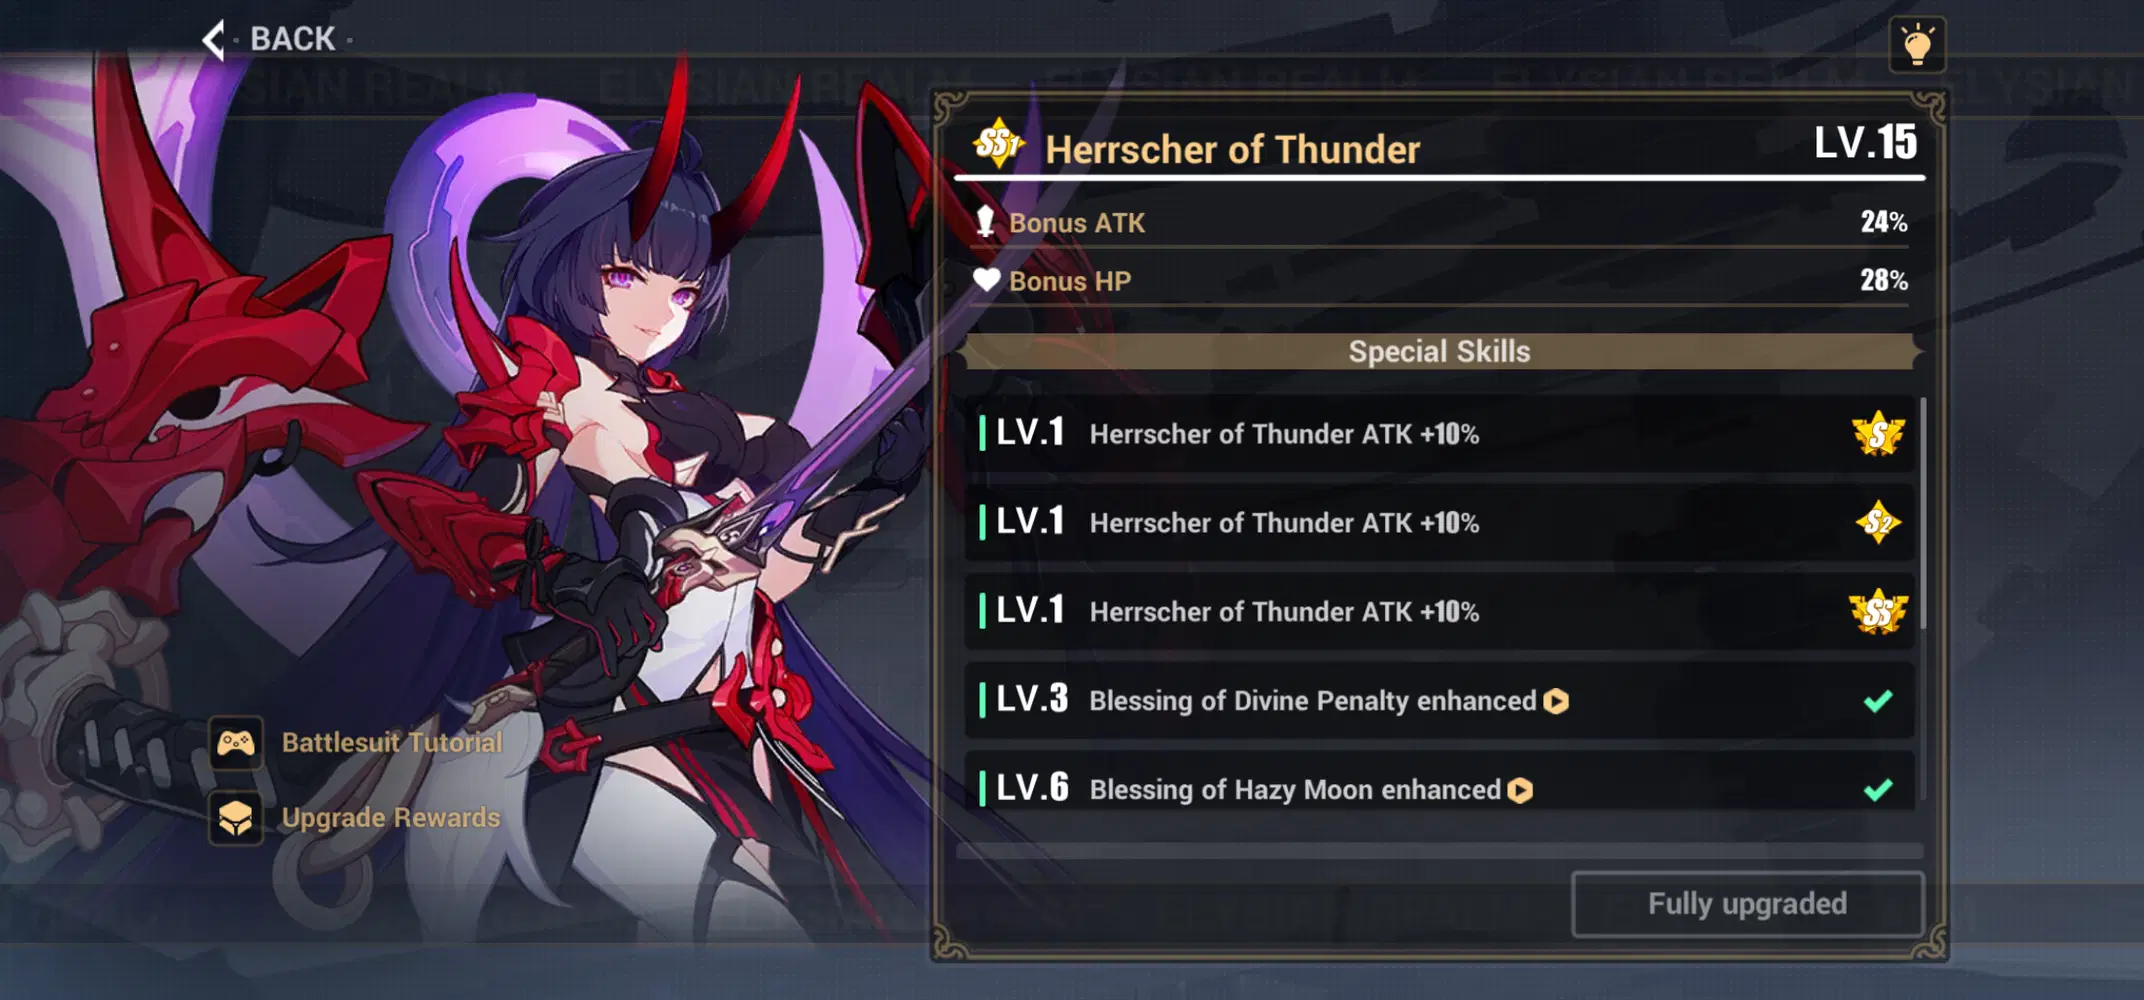
This guide aims to teach the basics of handling the Valkyrie. The ability to tackle higher difficulties depend on your personal loadouts and acquired advantages at present.

Core Playstyle
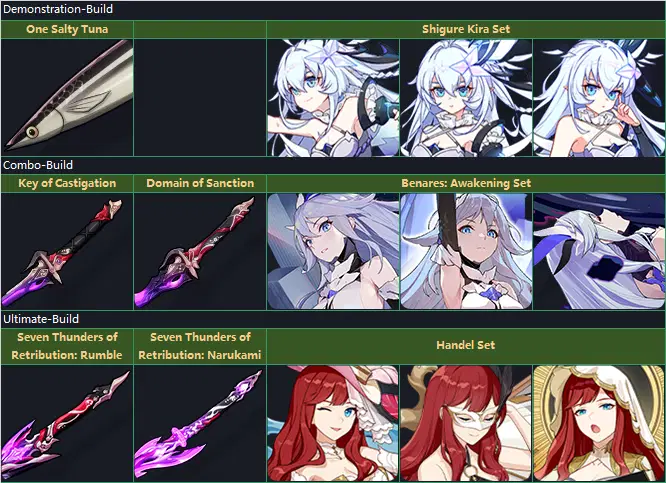
Combo Build
- Evade -> Atk on repeat. She has only one combo that is enhanced for this purpose. Her Ultimate is used when she needs a massive burst of damage, assuming you have the signets that support them. Very straightforward and repetitive.
Seven Thunders Build
- Ultimate-focused. Using the same, but new style given by the PRI-Arm, you'd pick the Ultimate-based signets to inflict greater damage all at once.
Usage Difficulty
Handling: Very Easy - Moderate
- The Combo Build is a repeat attack cycle, while the Ultimate-based Build requires more control and timing of execution.
Power Ramping
- Both the original and Seven Thunders build have severe power issues. Mei's only damage boost is locked behind a support signet which provides SP, but with no means to expend it practically if chosen first.
Power Drought Situation(s)
- With the Combo Build (Tsukuyomi), you have a damage boost and SP, but not the raw power to inflict damage.
- With the Seven Thunders Build, SP is your immediate need, as Mei will definitely need to slash about for a bit until ready for another Ultimate.
Equipment
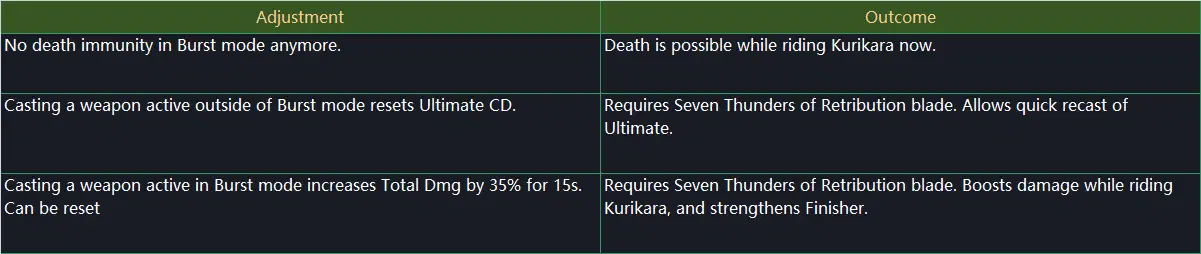
Special Adjustment
Exclusive Signets
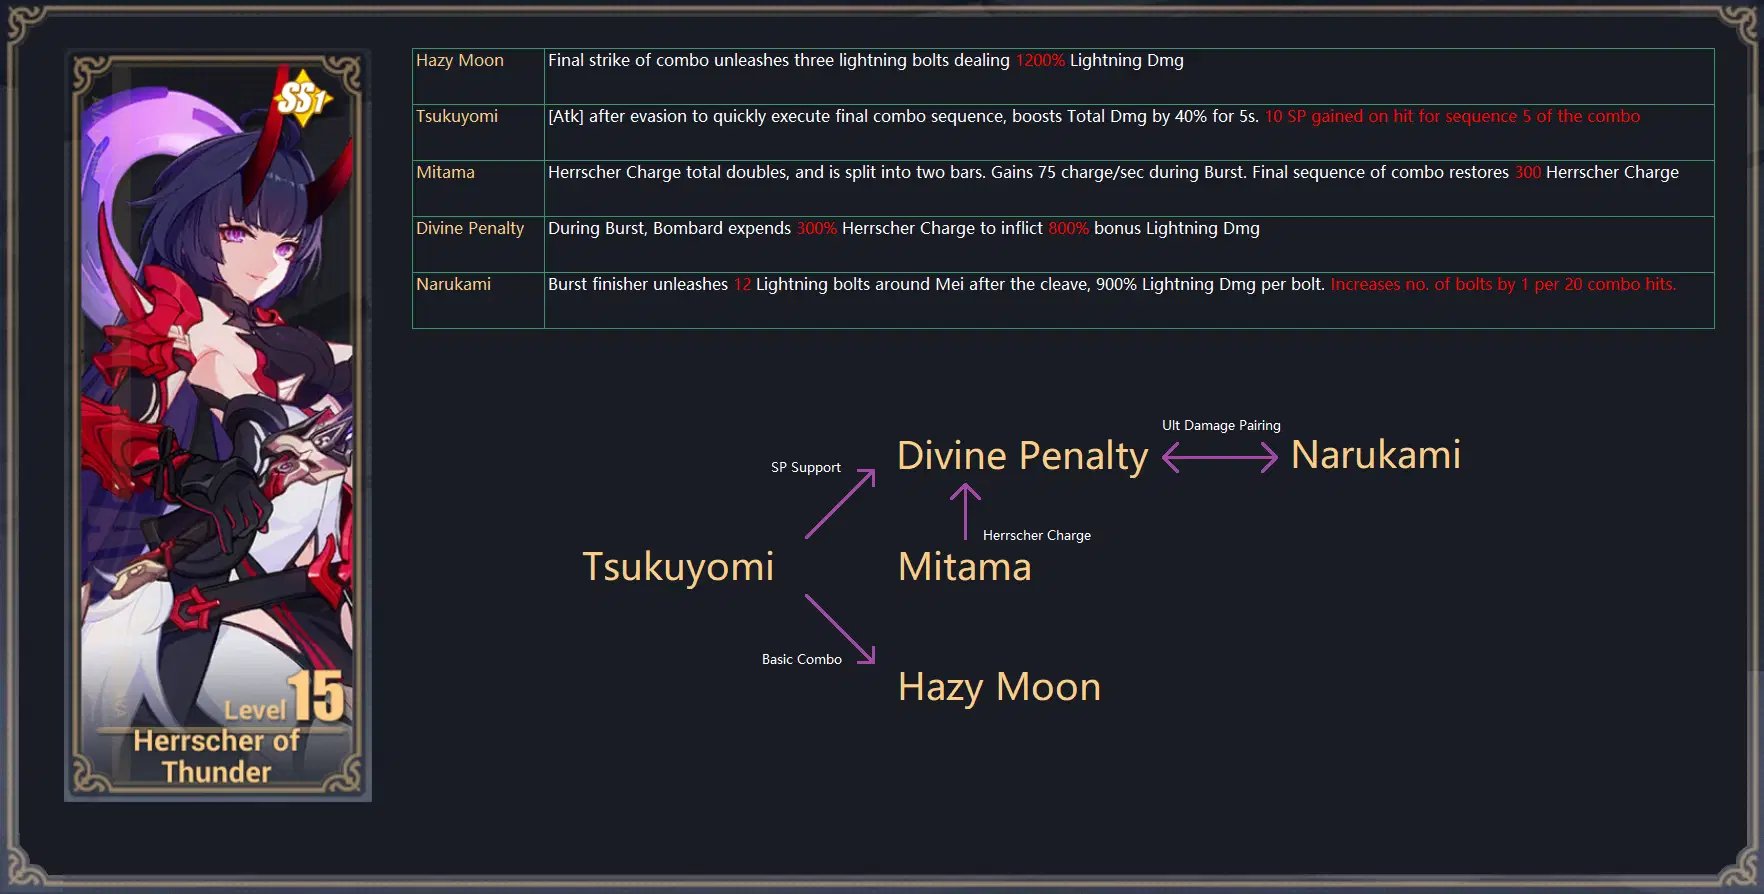
Tsukuyomi is an essential starter as it carries the only damage buff available to Mei, which then leads into Hazy Moon for the 3x lightning bolts. Despite the seemingly large lightning dmg inflicted, the lightning bolts are really useless without Tsukuyomi's Total Dmg buff. One glaring weakness with the signet combo is the way they inflict damage, as their lightning bolts are inconsistent and have trouble striking very small targets like Nihilius Seeds and even Zombies. The tiny splash zone of the lightning bolts is what makes this combo effective yet contentious to use.
Mitama is a support signet that auto-regenerates Herrscher charge, allowing storage of 2 Charged attacks and a lengthier Bombard.
Divine Penalty empowers Bombard and is supported by Mitama, but by itself can be unwieldy without as it finishes Bombard in less than a second.
Narukami strengthens the ultimate Finisher the more hits you inflicted. Be advised that Bodhi signets slightly hinders Narukami's effectiveness as it resets combo count. (It's not a huge loss if you already have the signets for hit count to assist)
Combo Build
[Tsukuyomi -> Hazy Moon] -> Narukami -> Divine Penalty -> Mitama
Standard build for repetitive lightning strikes. Not much to emphasize.
Seven Thunders Build
[Divine Penalty -> Narukami / Mitama] -> Tsukuyomi -> Hazy Moon
With Seven Thunders, you have the ability to cut your Ultimate short and let Kurikara do its job while you continue rebuilding SP. This early exit serves Narukami mainly. With Divine Penalty (and Mitama), you instead want to stay on the dragon and burst down your enemies.
- Tsukuyomi's importance depends on your SP and power situation. If you are building up enough through other signets, Tsukuyomi loses signifiance.
- On equal grounds, Narukami finishes off enemies a little faster than Divine Penalty, but pick your poison anyway.
Using Thorn Crown
1) Tsukuyomi + Hazy Moon
- This combo suits the basic hack-n-slash combat done by any sword up till Domain of Sanction.
2) Divine Penalty + Narukami / Mitama
- You can pick both Attack support signets, or Mitama with Divine Penalty for enhanced dragon bursting.
Signets

Priorities
Combo Build
- Key Signets - Setsuna, Discipline
- Sub Signets - Vicissitude, Decimation, Gold
Seven Thunders Build
- Key Signets - Deliverance, Stars
- Sub Signets - Discipline, Reverie
Mei has a variety of choices to choose from, since her Herrscher abilities provide so much utility from offense to defense. So do be a little flexible and figure out what you need.
Core Contributions
Vicissitude (II)
- Great passive. Make full use of Mei's shielding and imperviousness to damage to keep your stacks as long as possible.
Deliverance (II) - (Bonus: Burst)
- Great permanent buff thanks to the "Burst" bonus. Provides immediate boost even if you do not use the Ultimate.
Setsuna (II) - (Bonus: Time Mastery)
- Useful in Combo or Ultimate build. Mei's damage type is rapid rather than burst, so Core (I) may not be a good idea. (HoT doesn't have the Time pause to hold back Sakura Screen)
Gold (I) - (Bonus: Paralyse)
- Take advantage of this when using the Combo build, since you'll likely be stacking SP. Deliverance, Discipline and Gold itself can support this.
Reverie (I) / (II)
- Good subset to have if you need more strength.
Discipline (II)
- Mainly for attack damage, and some utility with SP.
Stars (I) / (II)
- Stars is pretty weak with Combo build due to a lack of triggers required. Keep this to the Ultimate build.

Any Questions? Go ahead and write in the comments below too. Thanks for reading!




