



Greetings Chests Hunters!
This is the Remarkable Chest Guide for the Sumeru Desert region. There are a total of 30 new Remarkable Chests found in 3.1.
For those who are looking for guides on the other types of Sumeru Desert chests, check out the link below:
I plan to add the guides for the other types of chests soon.
Max Counts / All Chests for Sumeru Desert
This makes a total of 116 Remarkable Chests in the game.
Guide Notes / Suggestions
1. Much of the Sumeru Desert exploration is locked behind quests, so I would highly suggest completing the Golden Slumber, Old Notes and New Friends, and Afratu's Dilema World Quests before conducting your chest sweeps
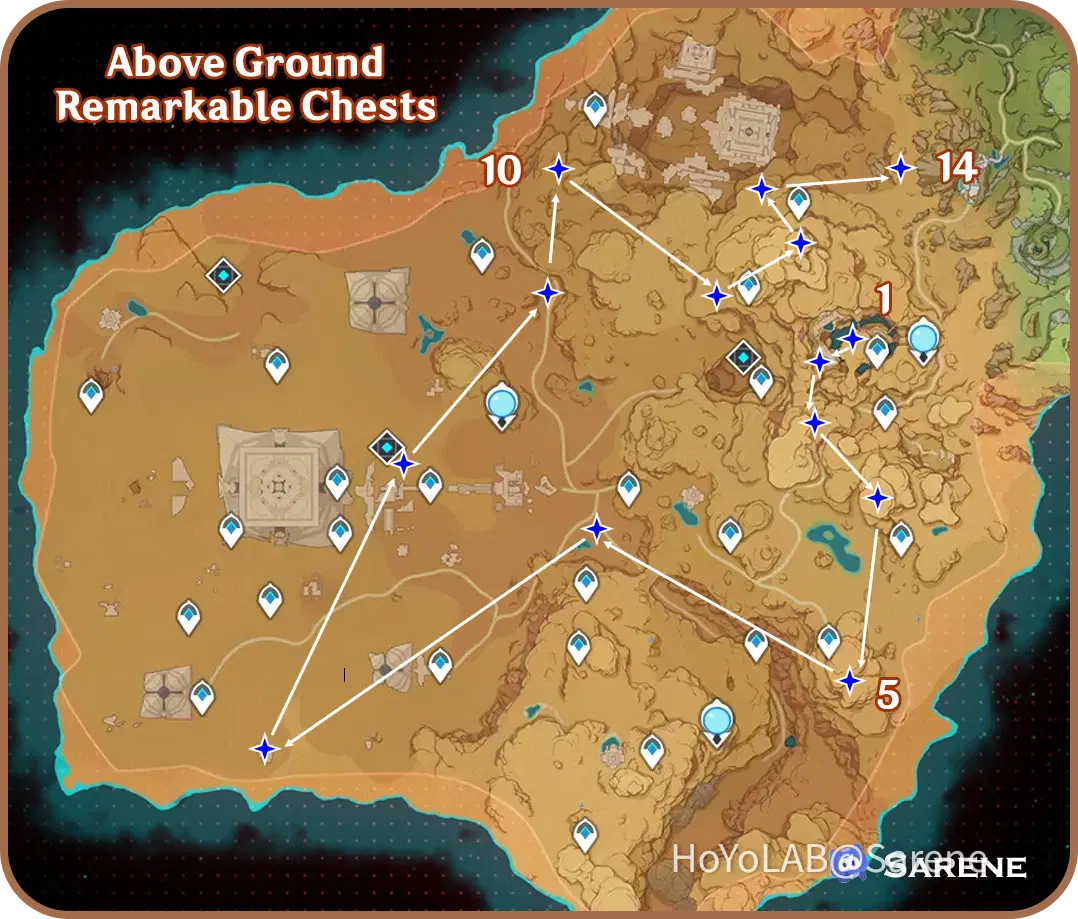
2. The guide below is divided into an Above Ground and Cavern (Below Ground) section to make it easier to locate the chests.
3. You can track down the particular Remarkable chest you are missing if you know what furniture it contains. Use Ctrl-F if you are looking for a chest containing a specific furniture.
1. Desert House: Ordinary Lives
2 .Desert House: Spices Abound
3. Desert Hut: Minutiae
4. The Twisting Mist
5. The Crisp Sweetness
6. Desert House: Hue and Cry
7. Desert Lamp: Lingering Light
8. Athelwood Metal Buckler
9.The Mellow Pot
10. Desert House: Hidden Light
11. Desert Wall: Surprise Attack
12. Desert Hut: Wilting
13. Desert Stone Steps: Climbing
14. Desert House: Brief Sle**
**. Desert Stone Platform: Sturdy
16. Desert Fireplace: Warmth
17. Desert Cabinet: Odds and Ends
18. Desert House: Save and Store
19. Desert Wall-D****s: Flaming Feathers
20. Sun-Scorched Solemnity
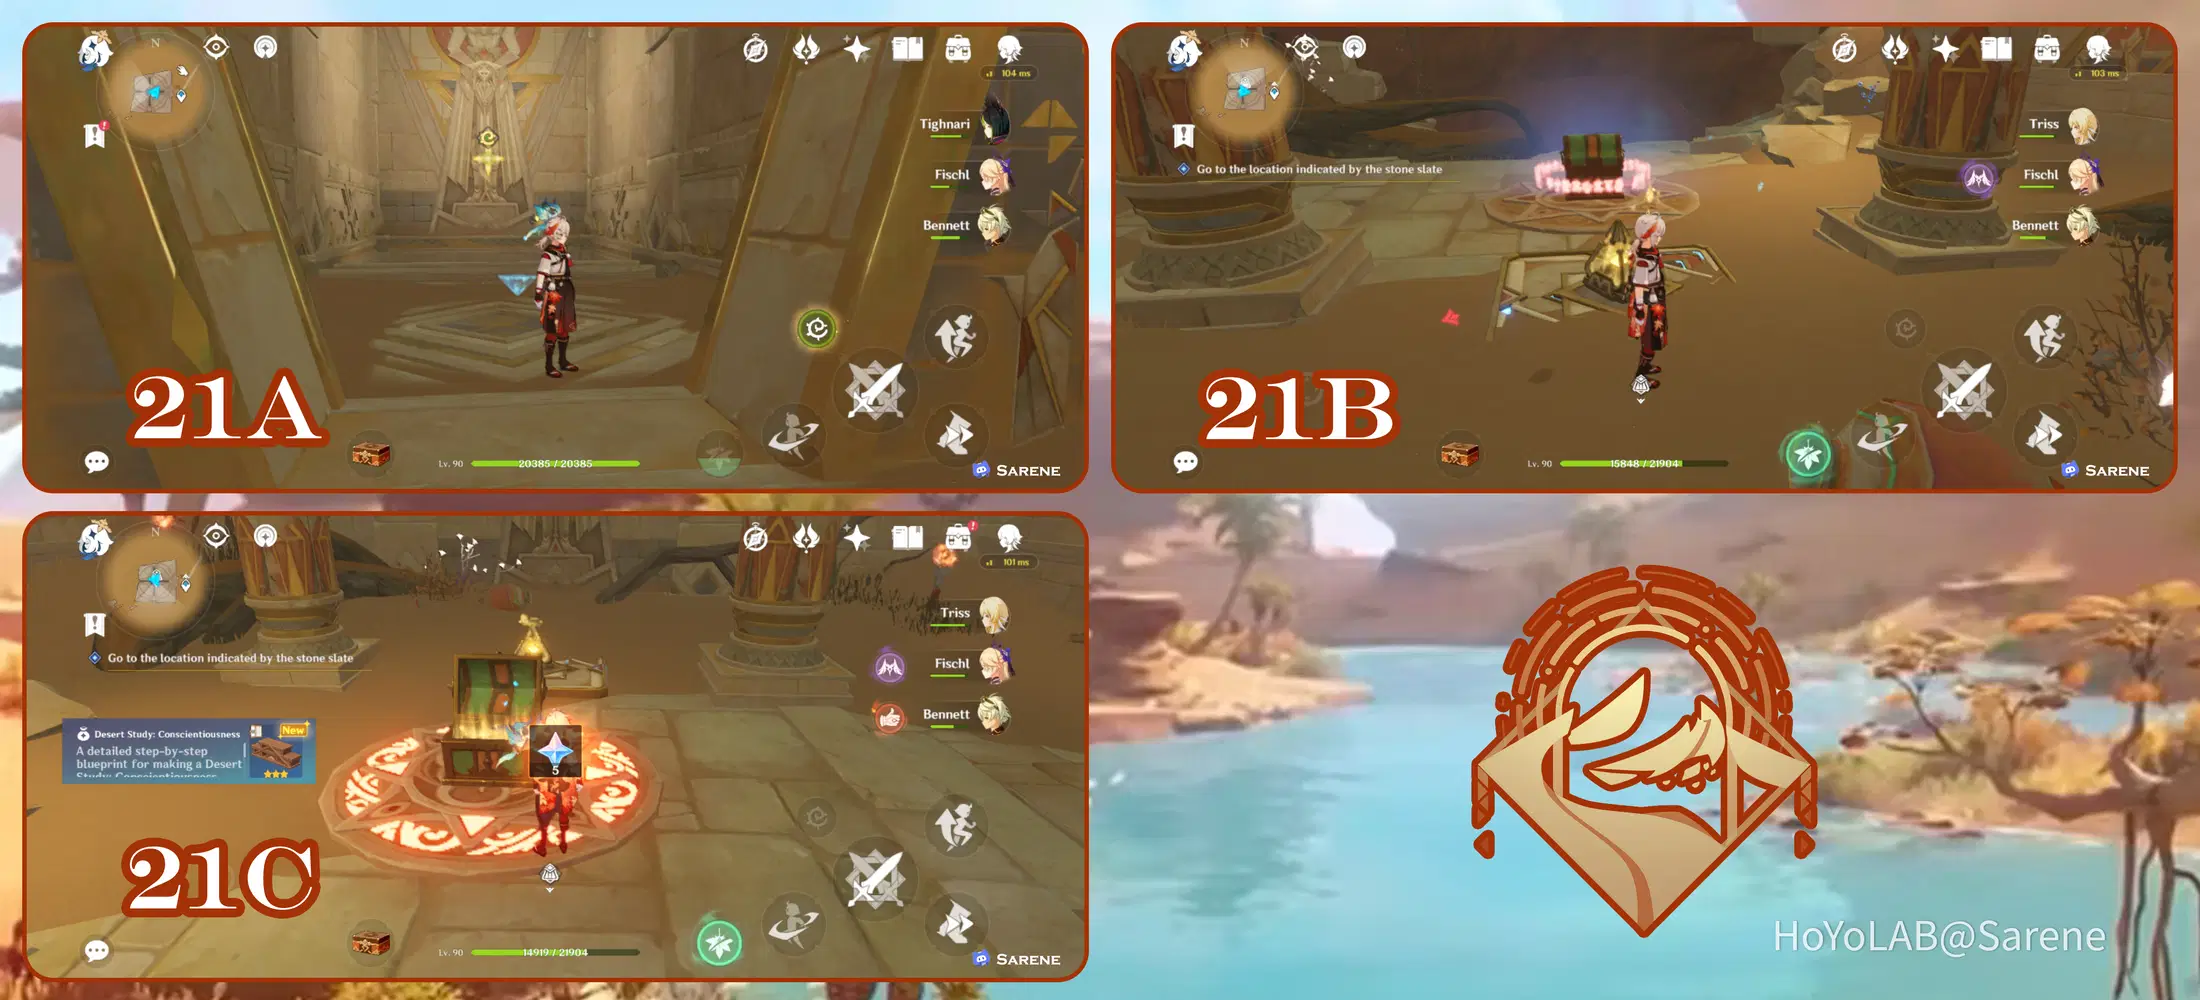
21. Desert Study: Conscientiousness
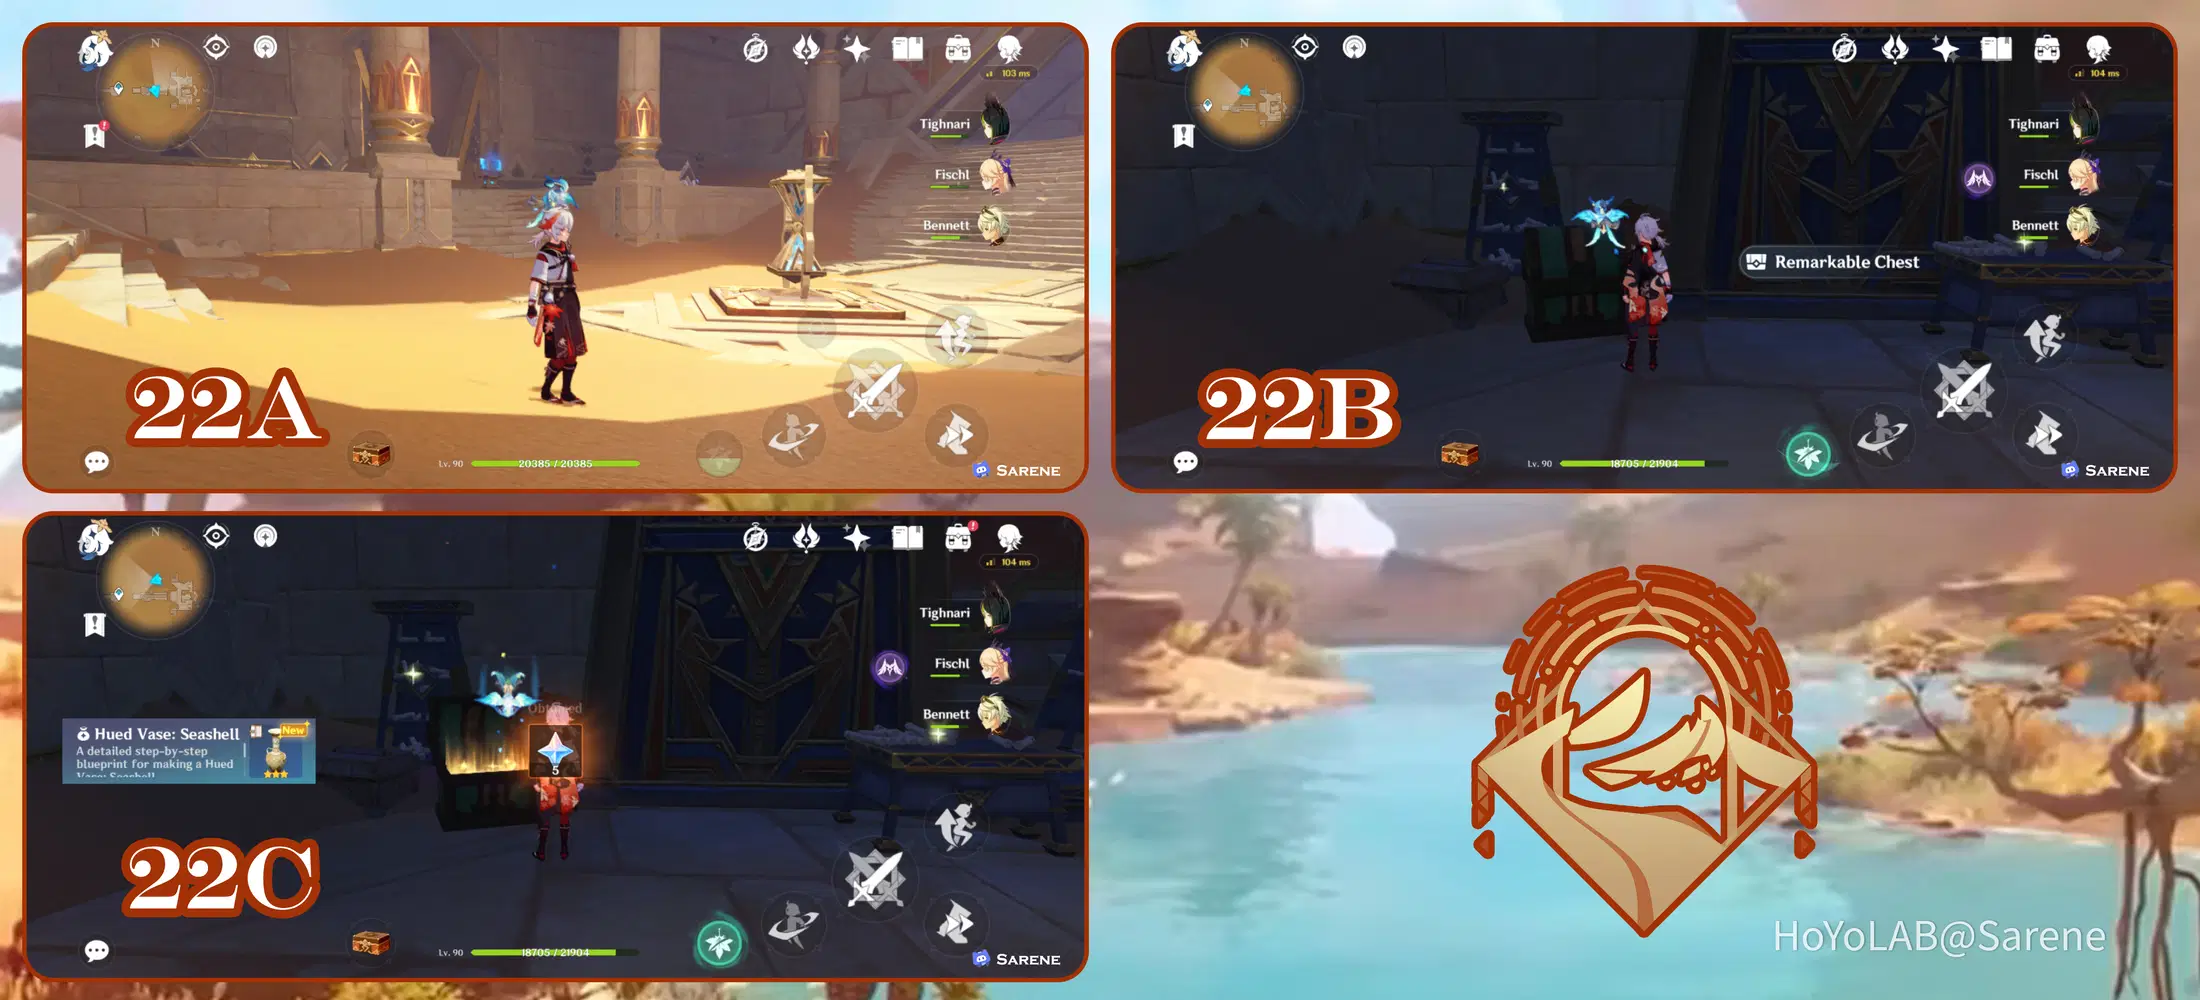
22. Hued Vase: Seashell
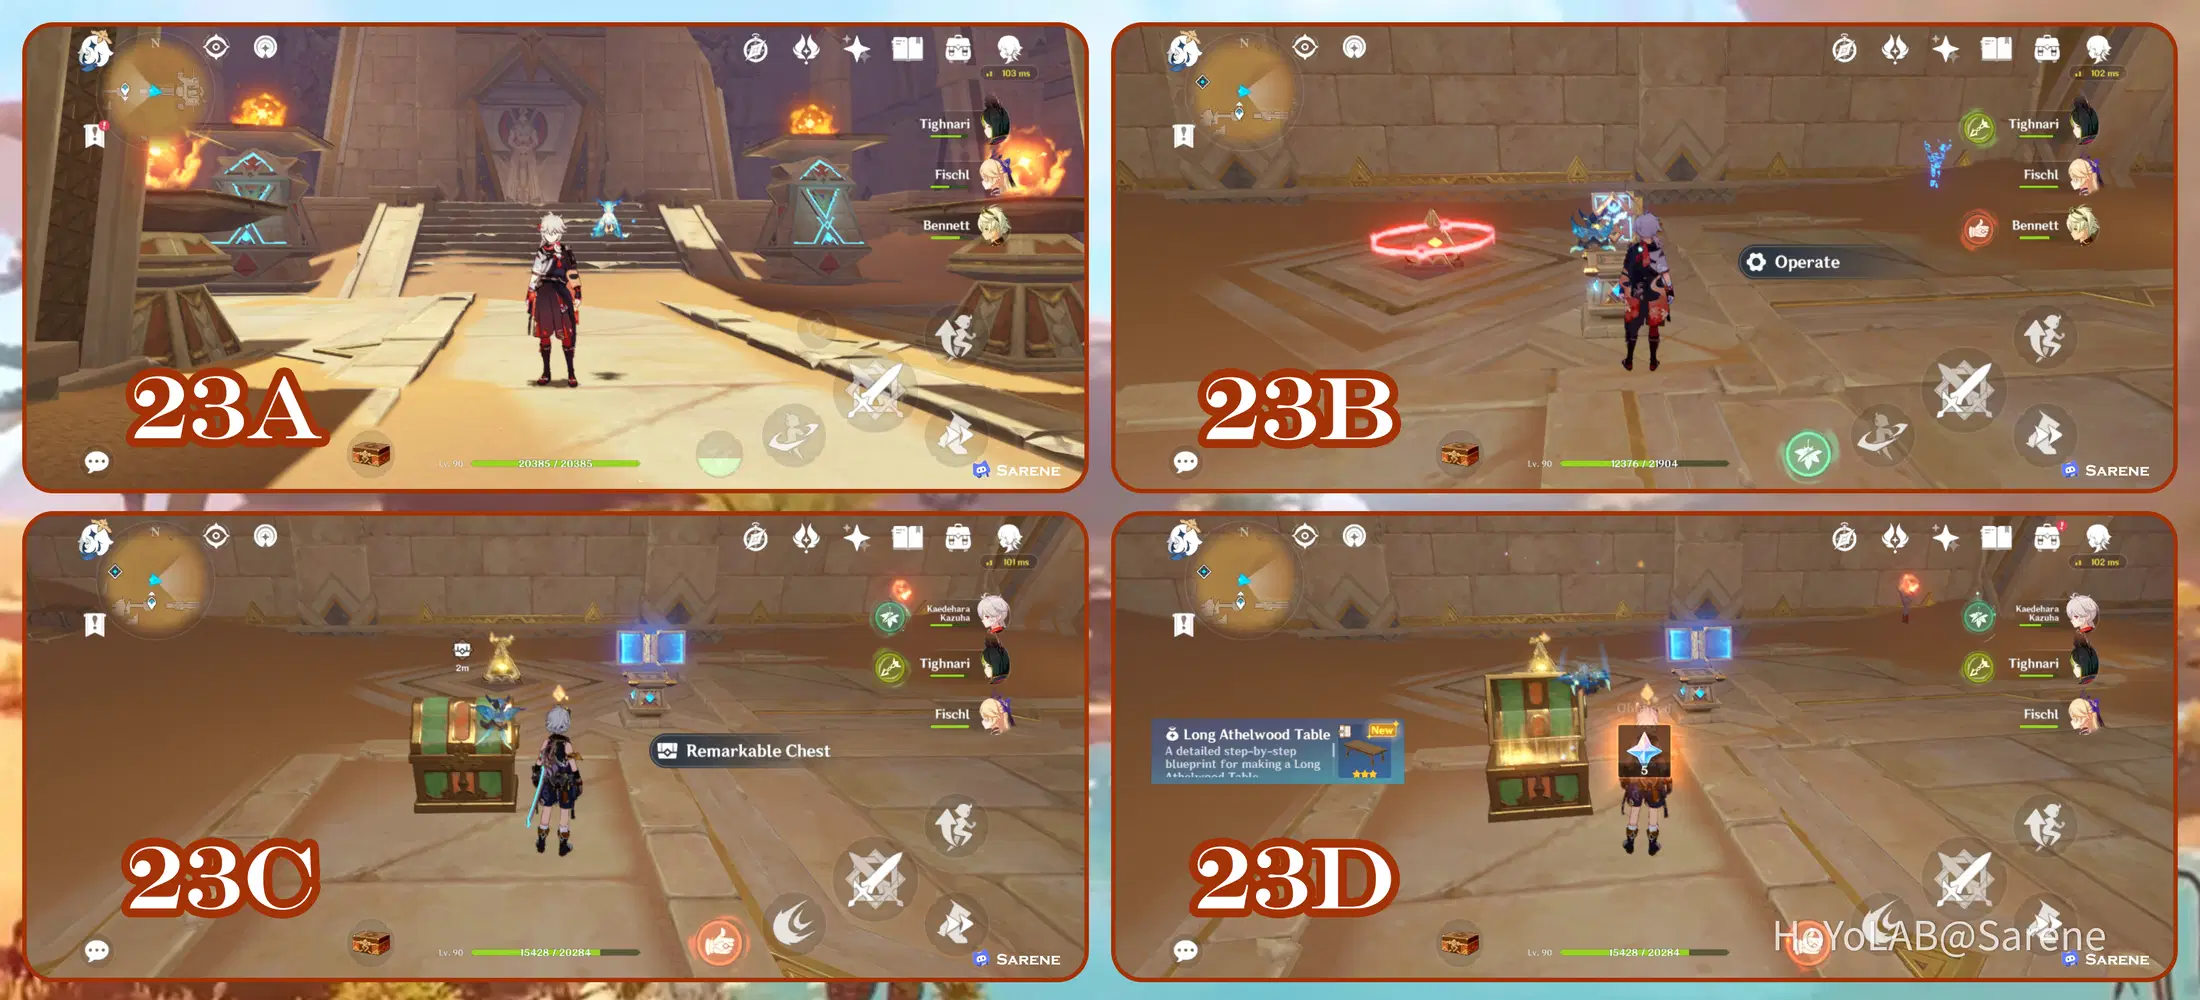
23. Long Athelwood Table
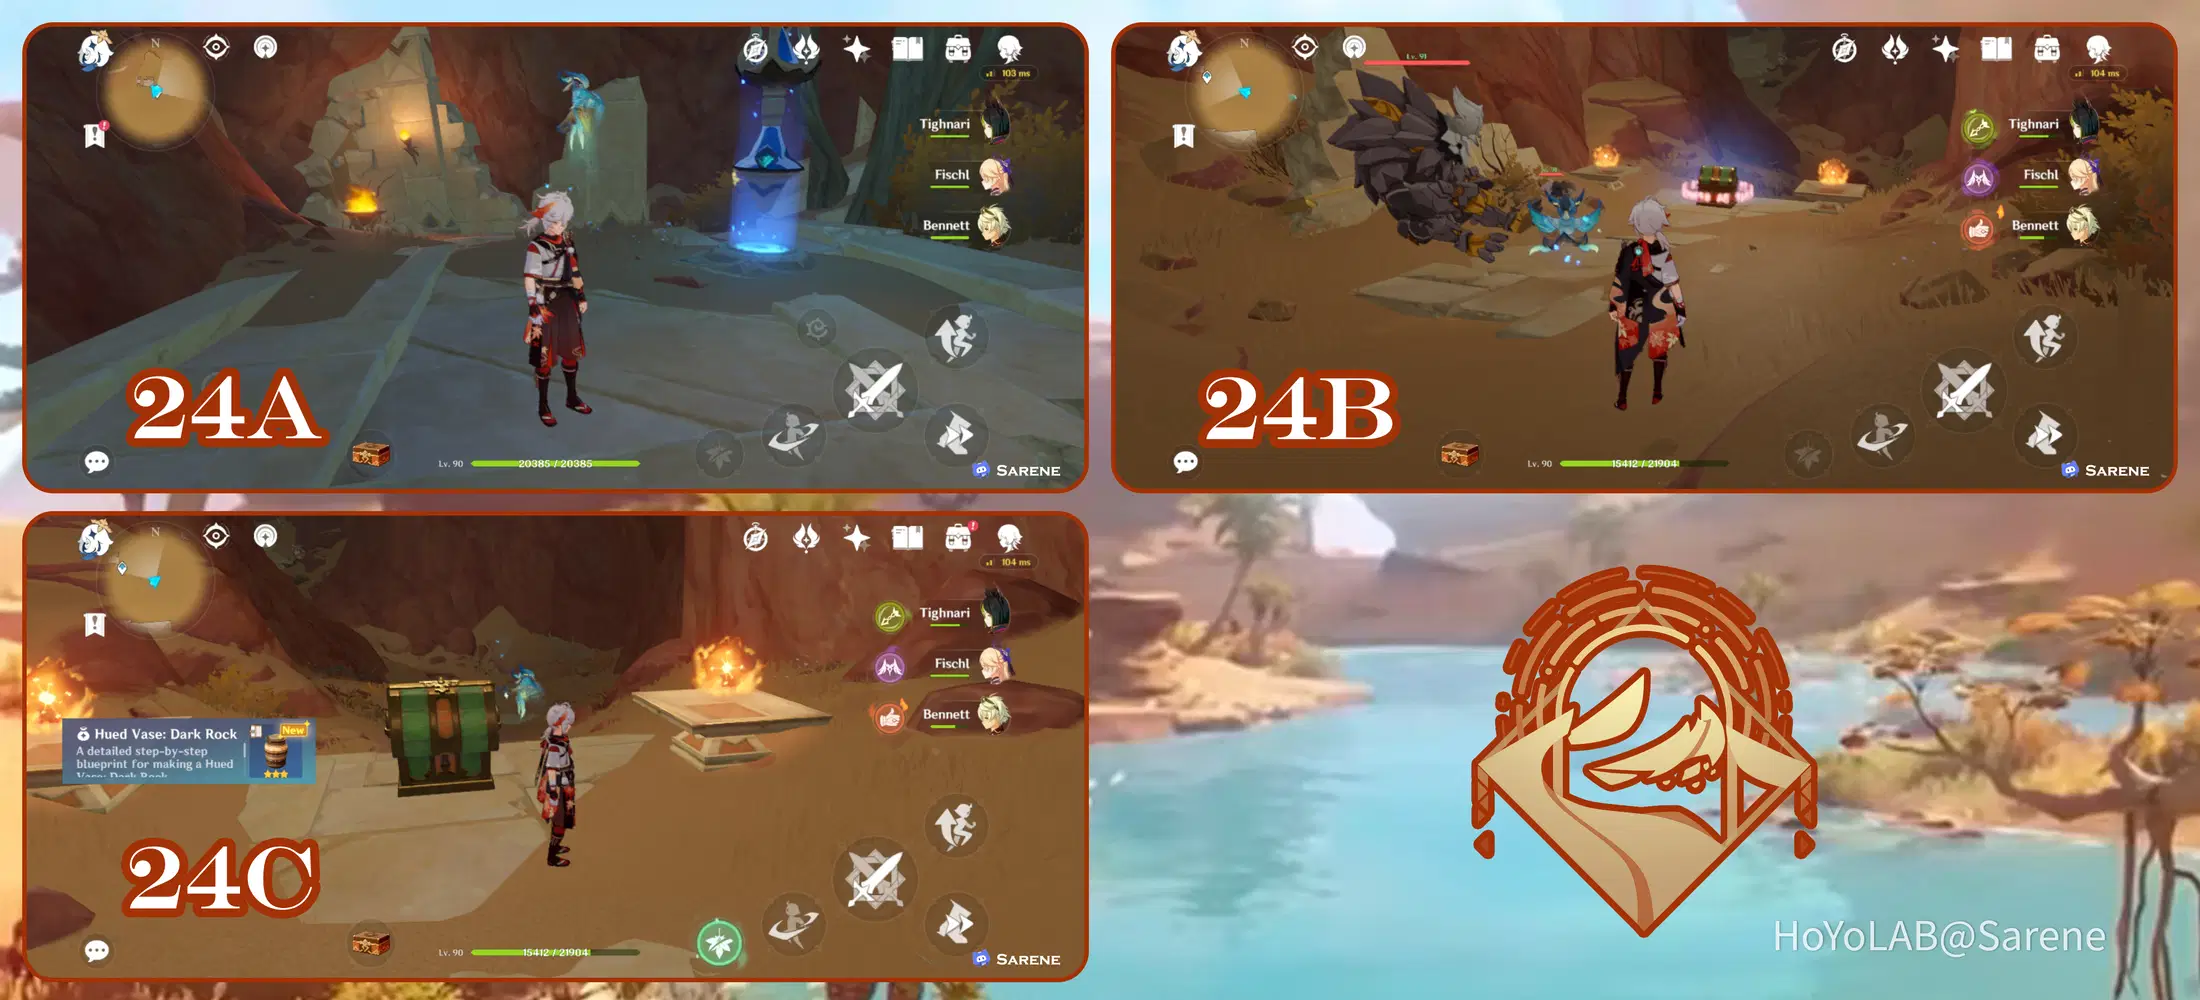
24. Hued Vase: Dark Rock
25. Desert Hut: Rest
26. Desert Desk: Hospitality
27. The Olive Grove
28. Desert Hut: Questions
29. Desert Wall: Stalwart Defense
30. Desert Wall-D****s: Sunset

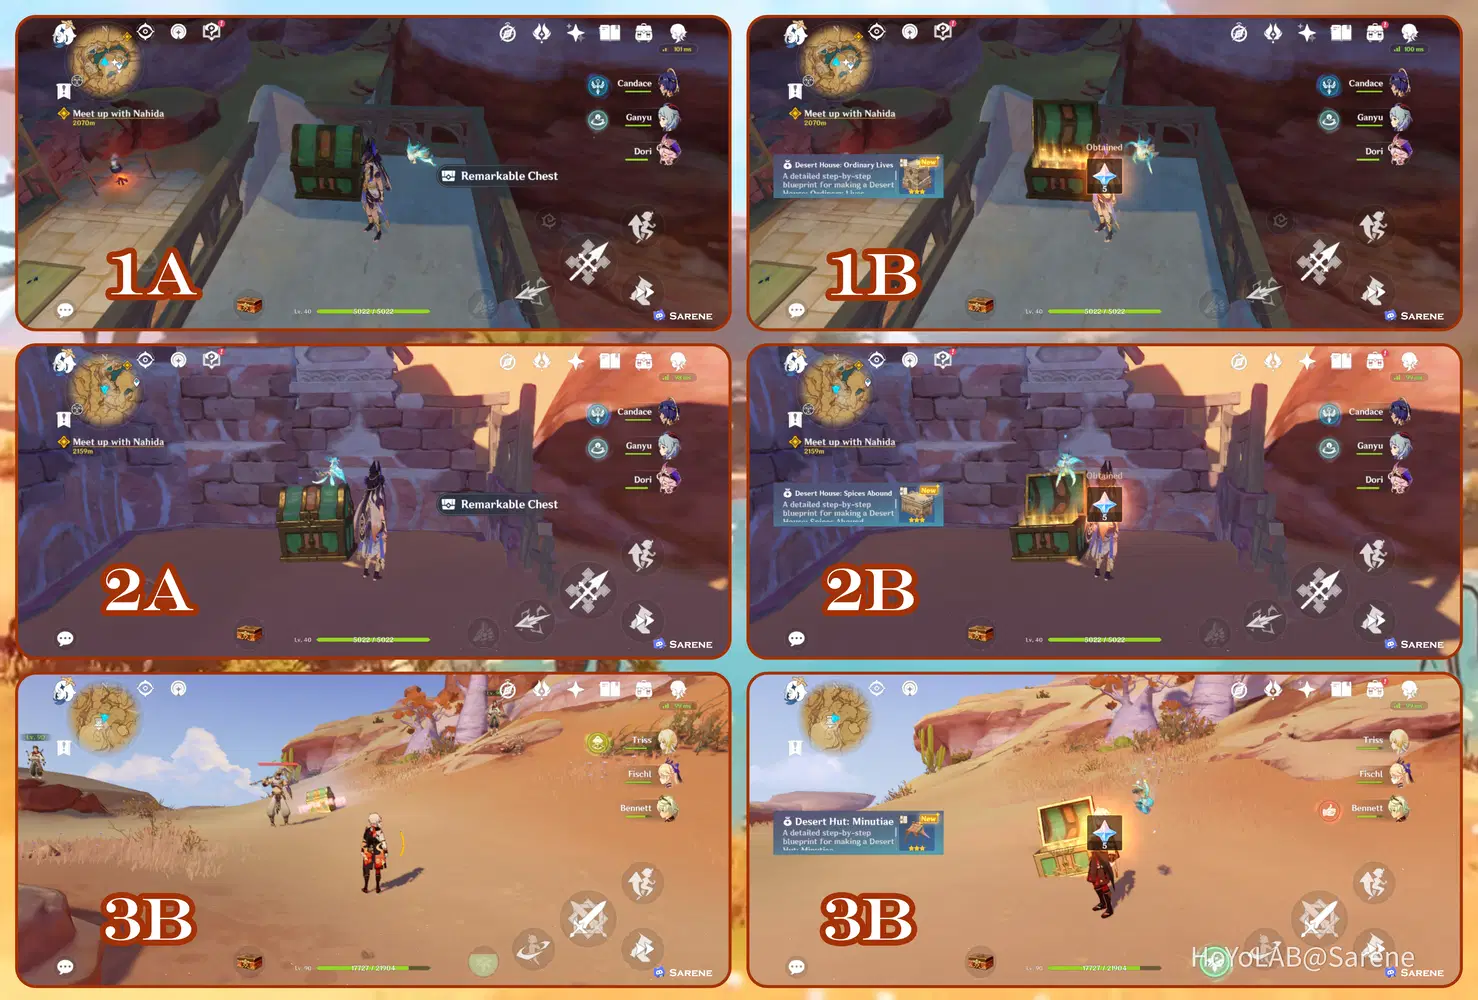
1 - 3
1. Desert House: Ordinary Lives - On the roof of the house in Aaru Village
2. Desert House: Spices Abound - Behind the building on the outskirts of Aaru Village
3. Desert Hut: Minutiae - Defeat the Eremites
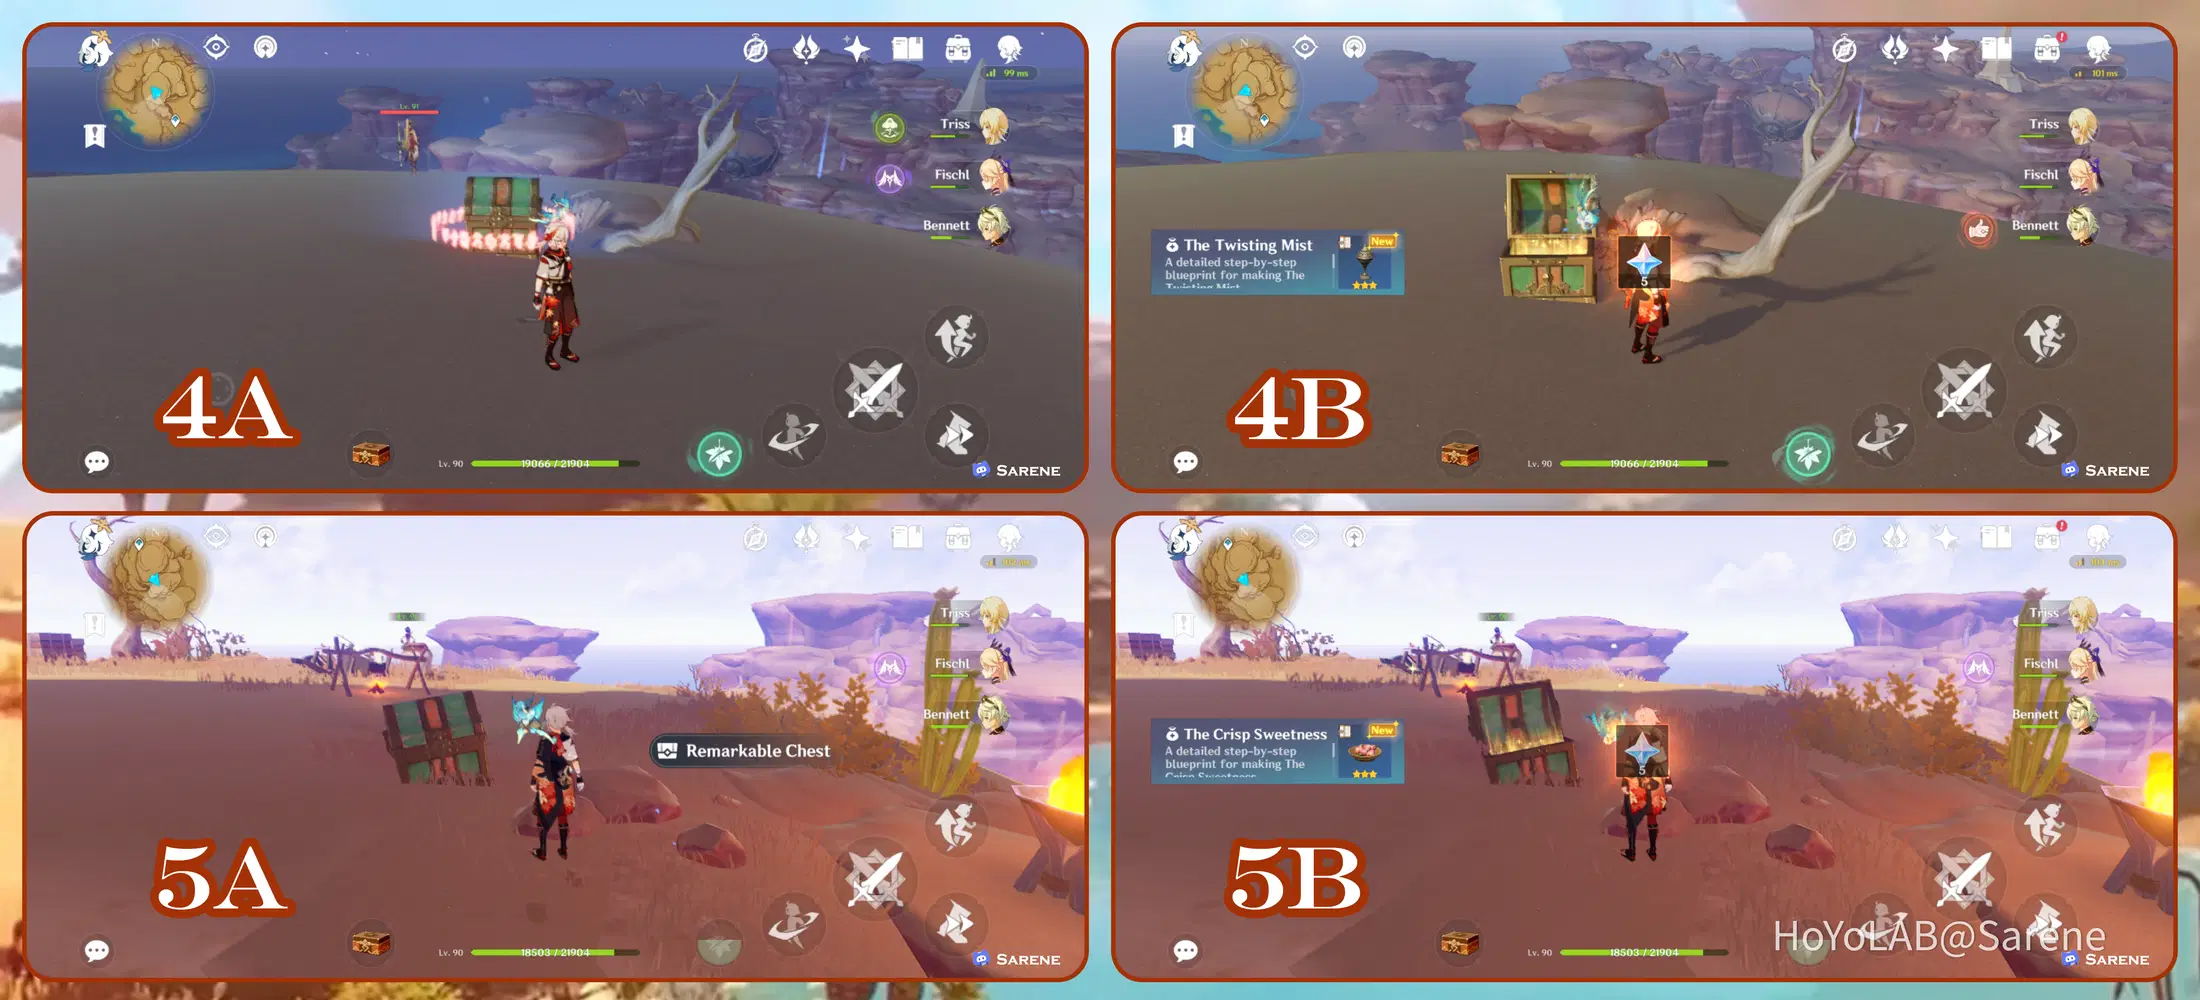
4 - 5
4. The Twisting Mist - Defeat the Eremite
5. The Crisp Sweetness - Located in front of an Eremite camp
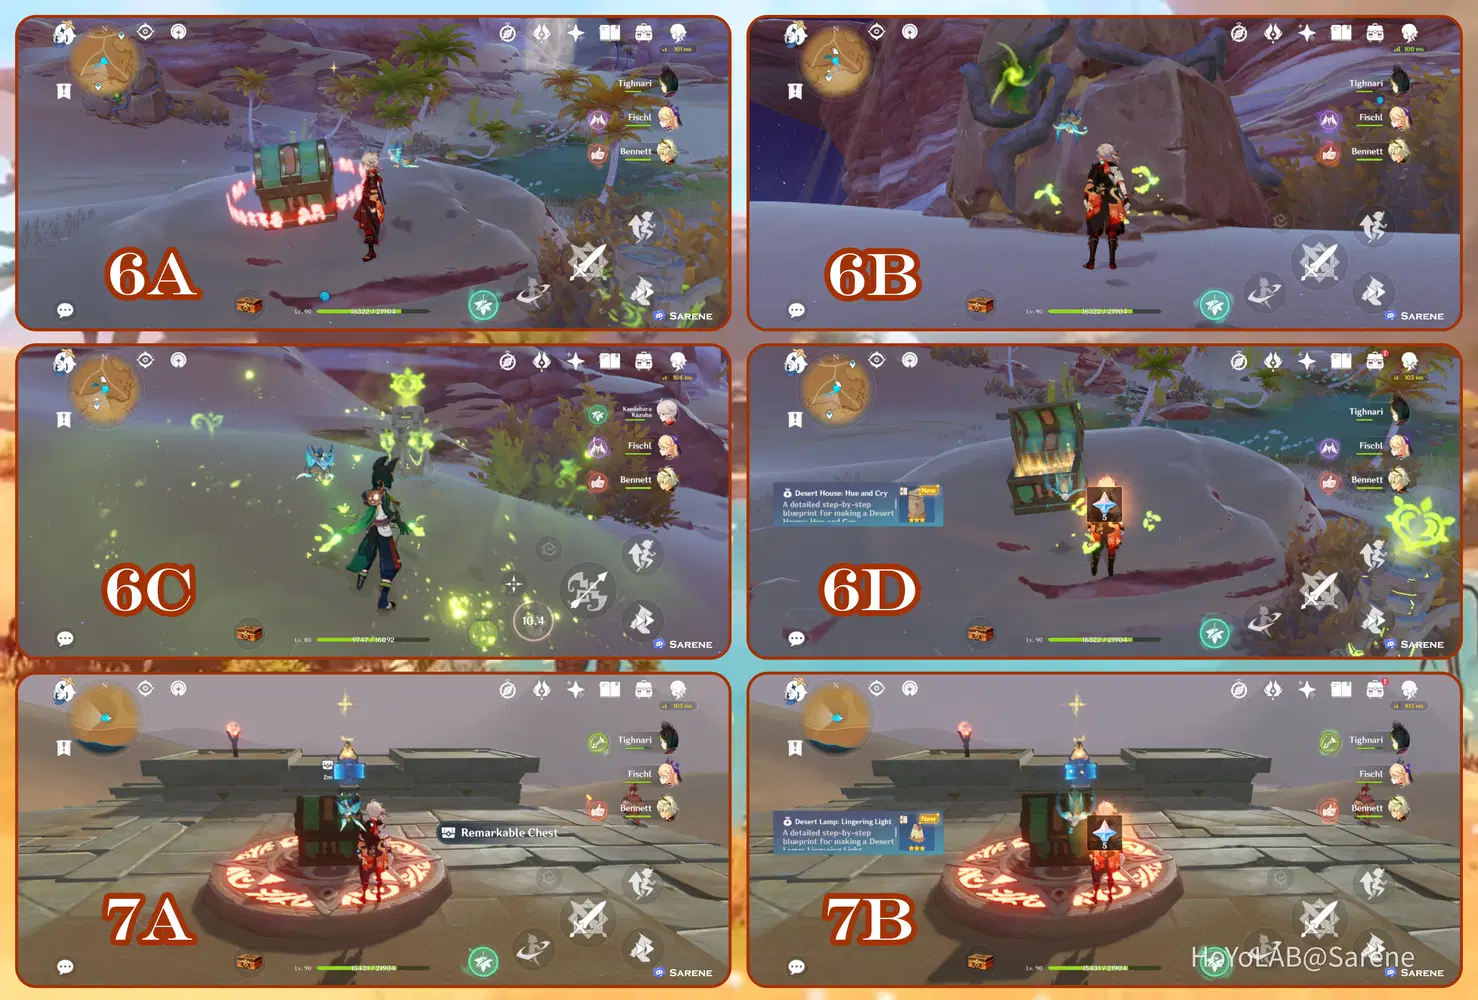
6 - 7
6. Desert House: Hue and Cry - Light all the Dendro Totems
7. Desert Lamp: Lingering Light - Use the Verity Cell to light the Torches
8 - 10
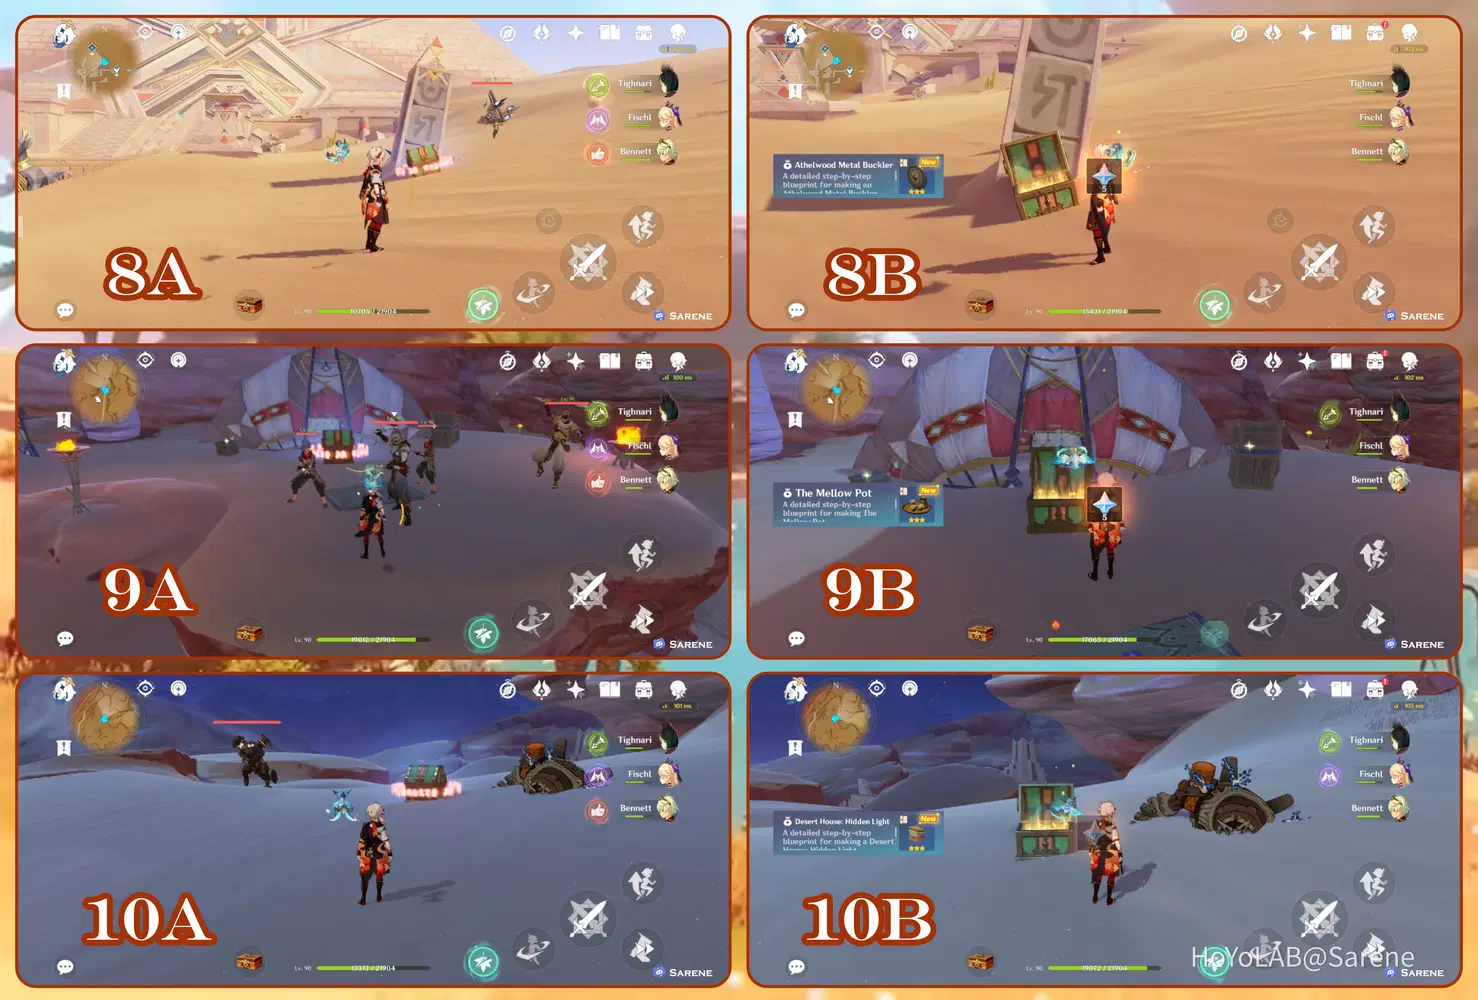
8. Athelwood Metal Buckler - Defeat the Primal Construct
9. The Mellow Pot - Defeat the Eremites
10. Desert House: Hidden Light - Defeat the Ruin Drake
11 - 12
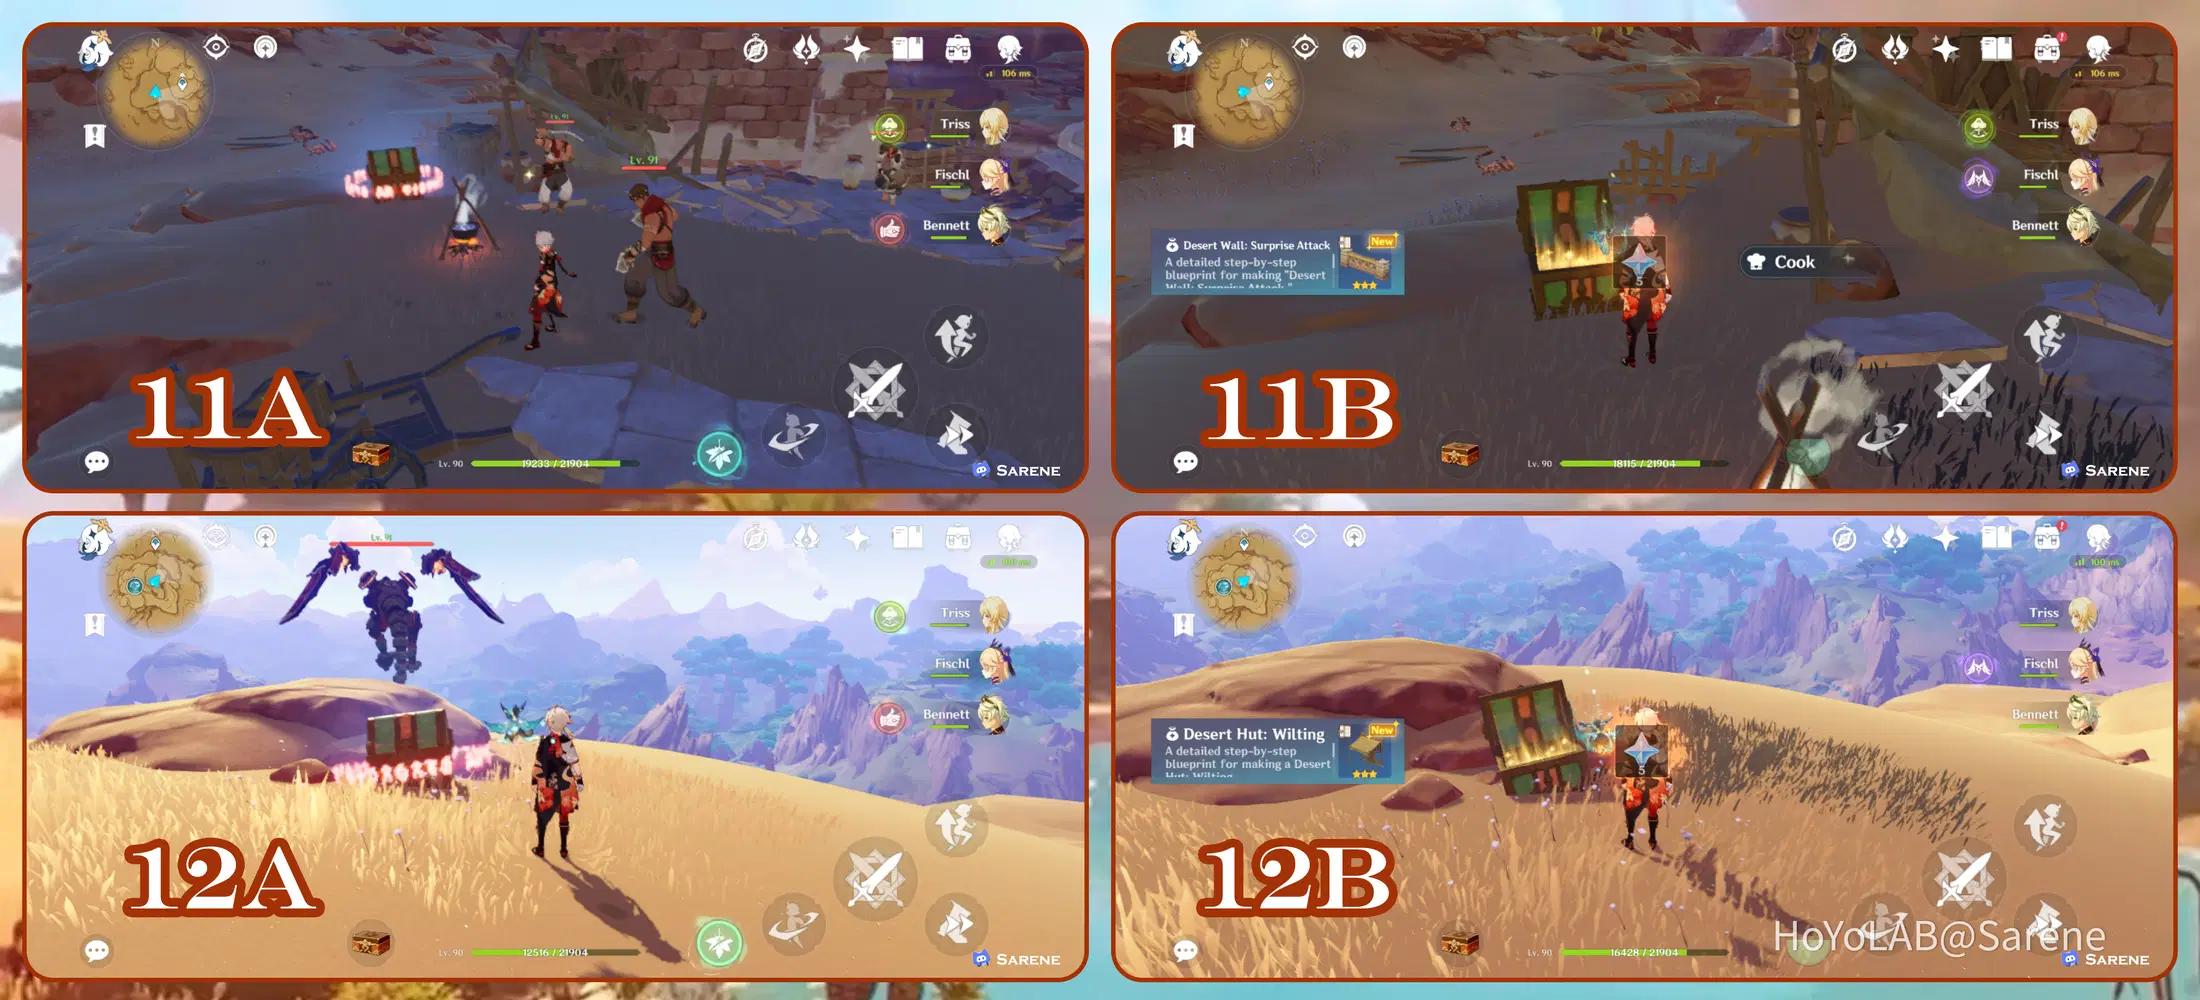
11. Desert Wall: Surprise Attack - Defeat the Eremites
12. Desert Hut: Wilting - Defeat the Ruin Drake
13 - 14
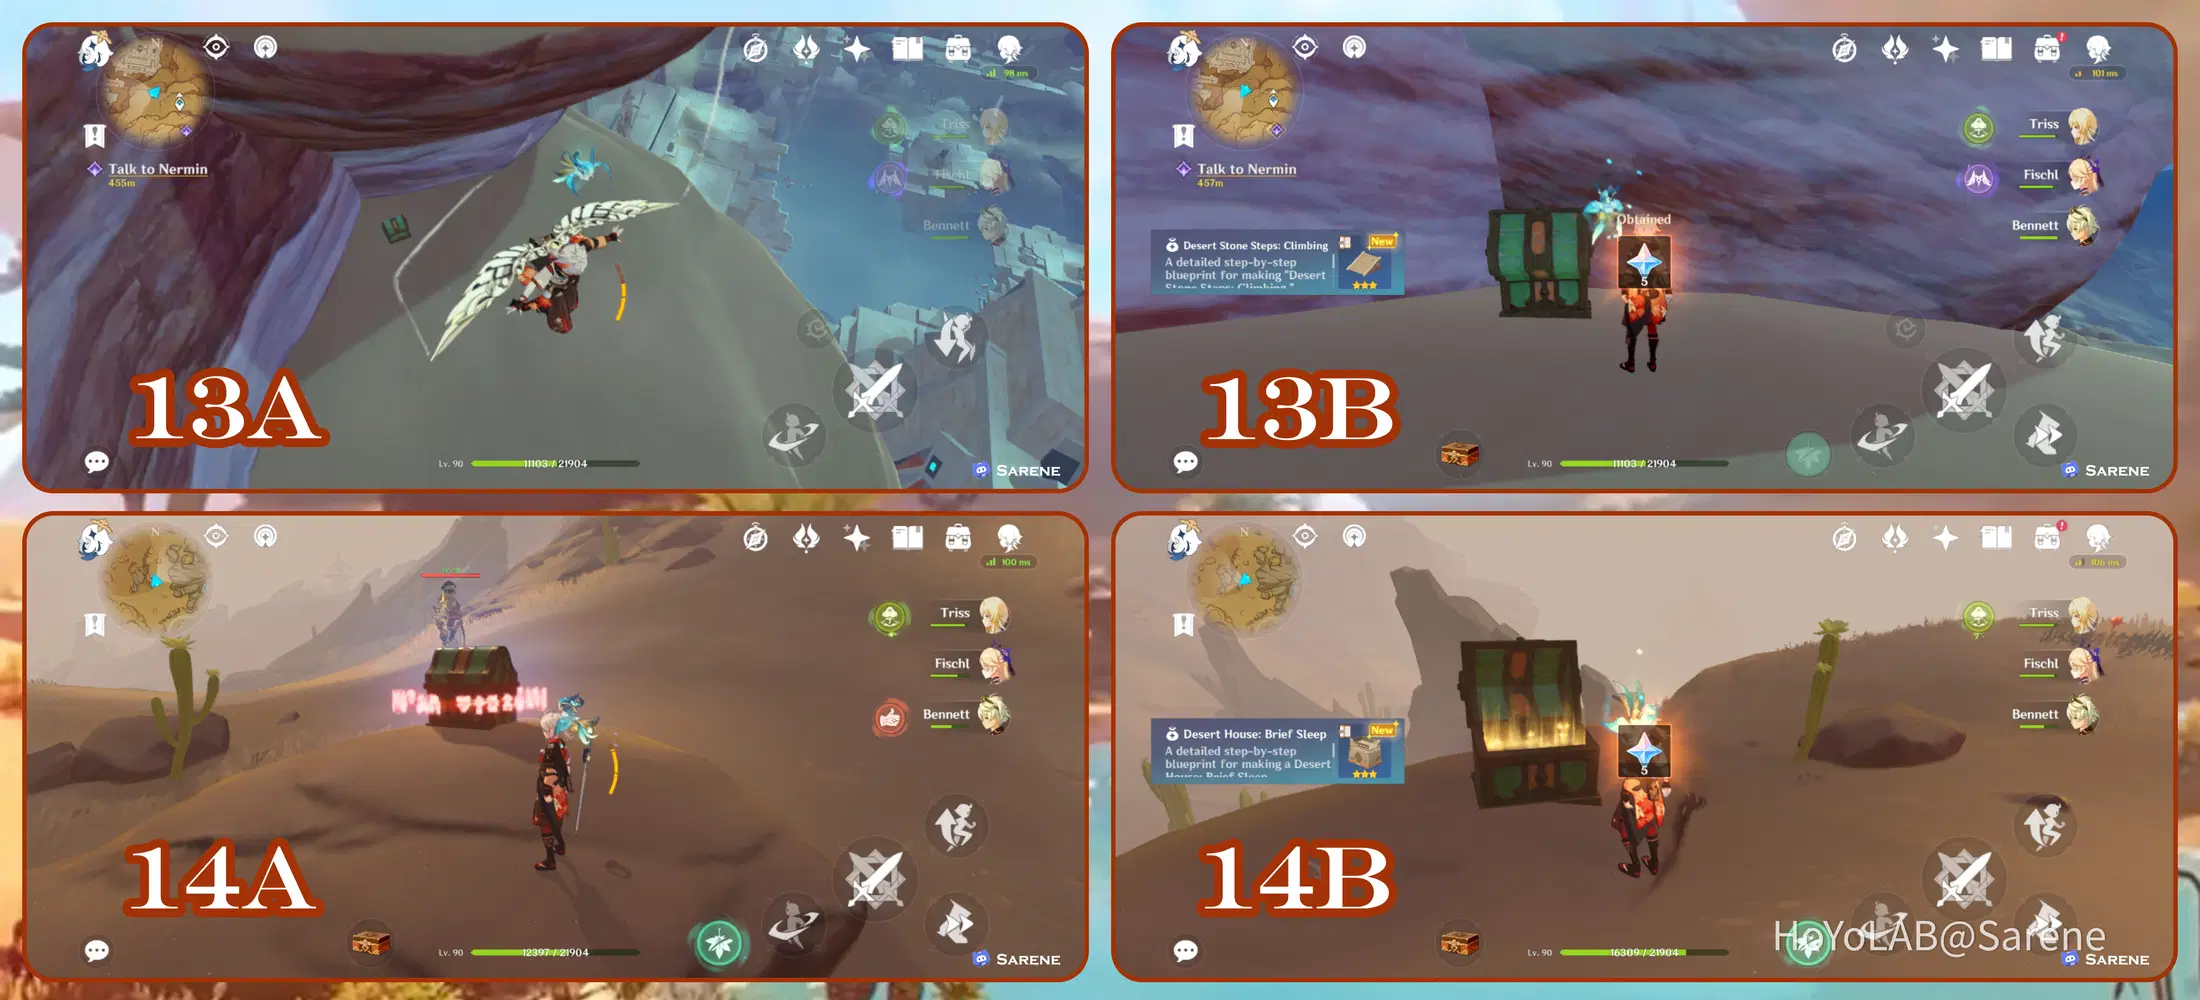
13. Desert Stone Steps: Climbing - Glide down from the nearest teleport. It is hidden in a nook on the cliffside
14. Desert House: Brief Sleep - Defeat the Eremite
15
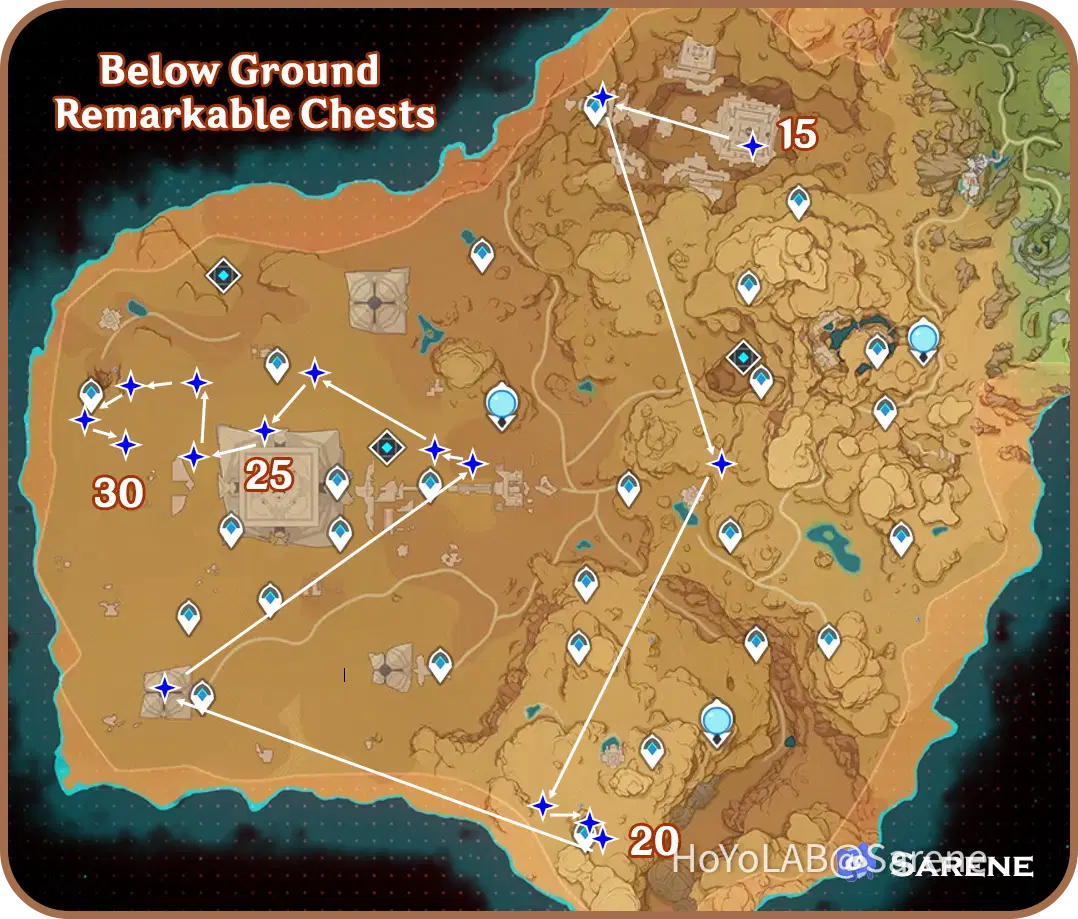
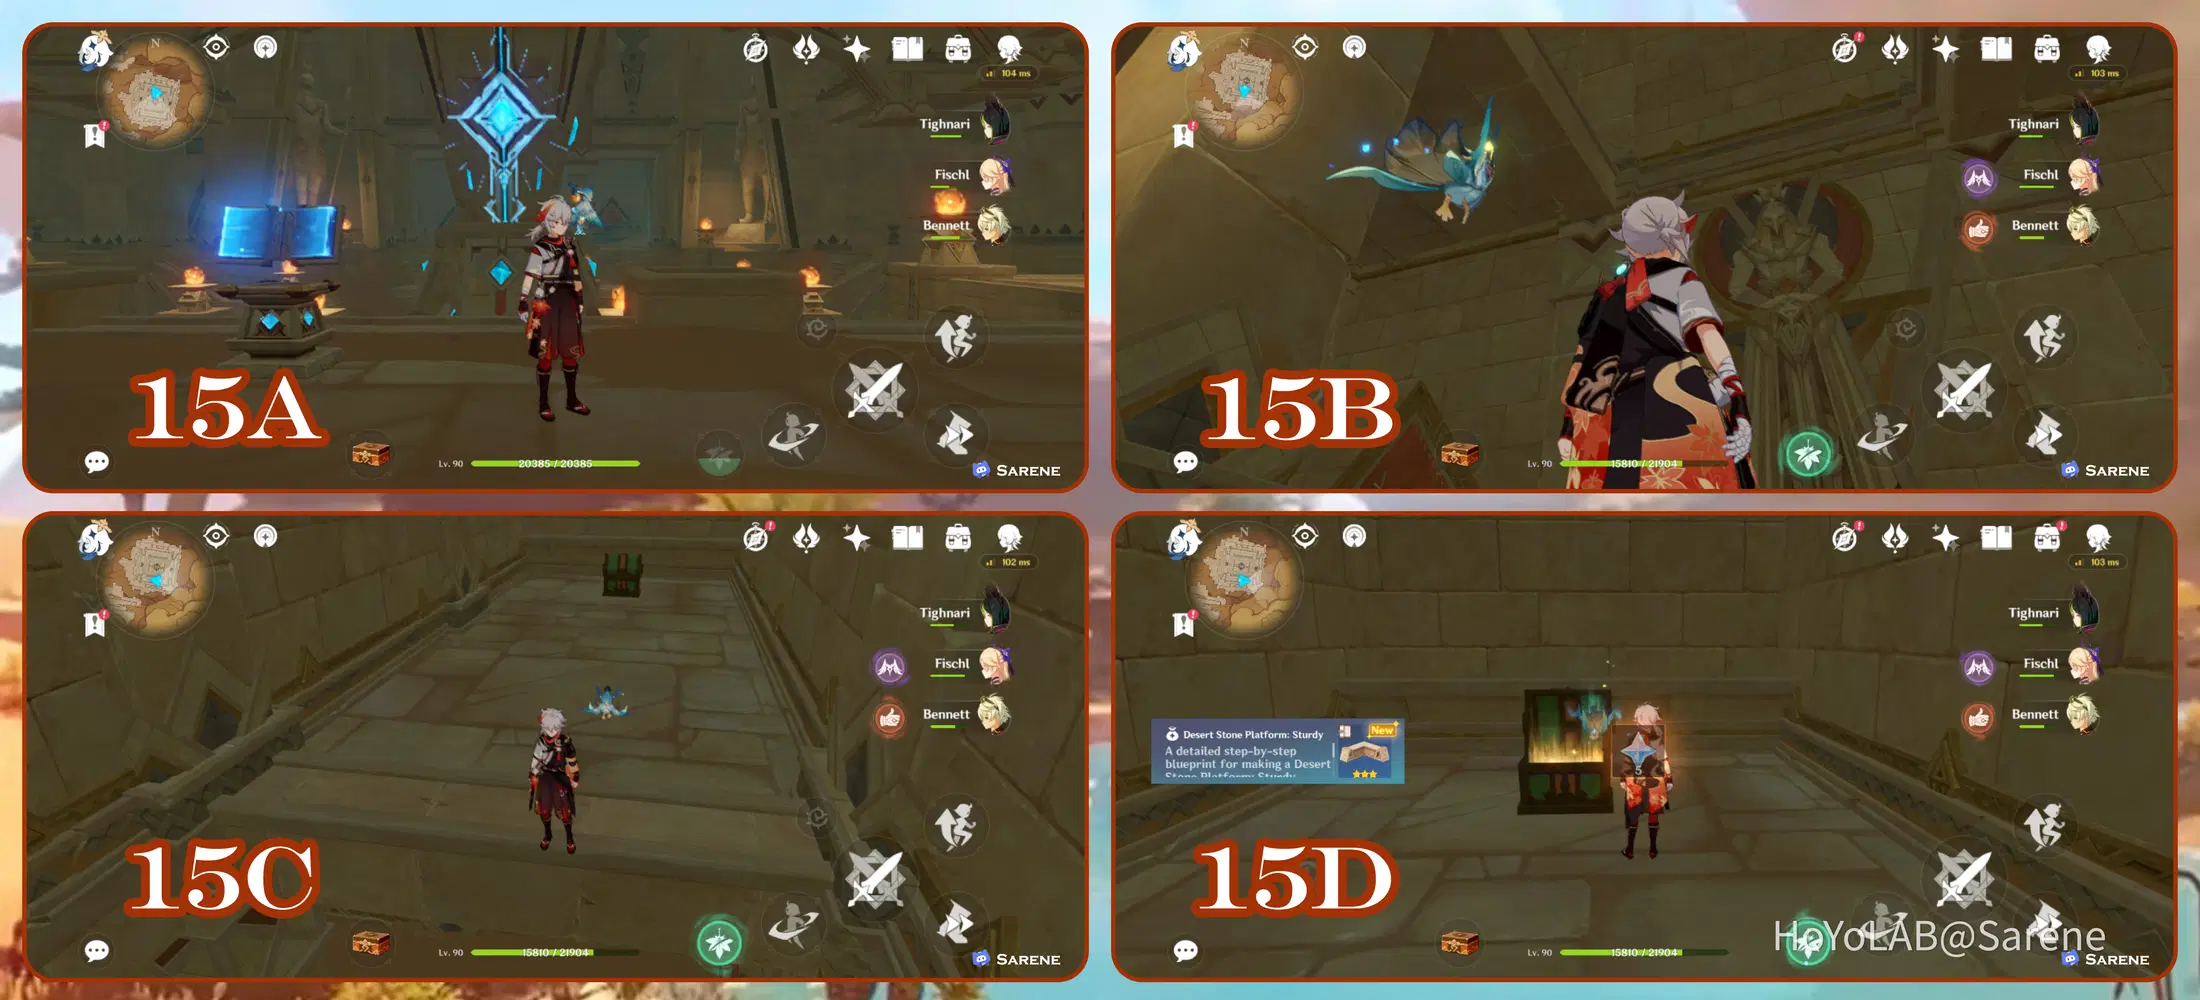
15. Desert Stone Platform: Sturdy - Enter the temple and drop down to the floor shown in 15A. Then head to the south wall and there should be an opening to the floor above. Climb up to the next floor to find the chest.
16
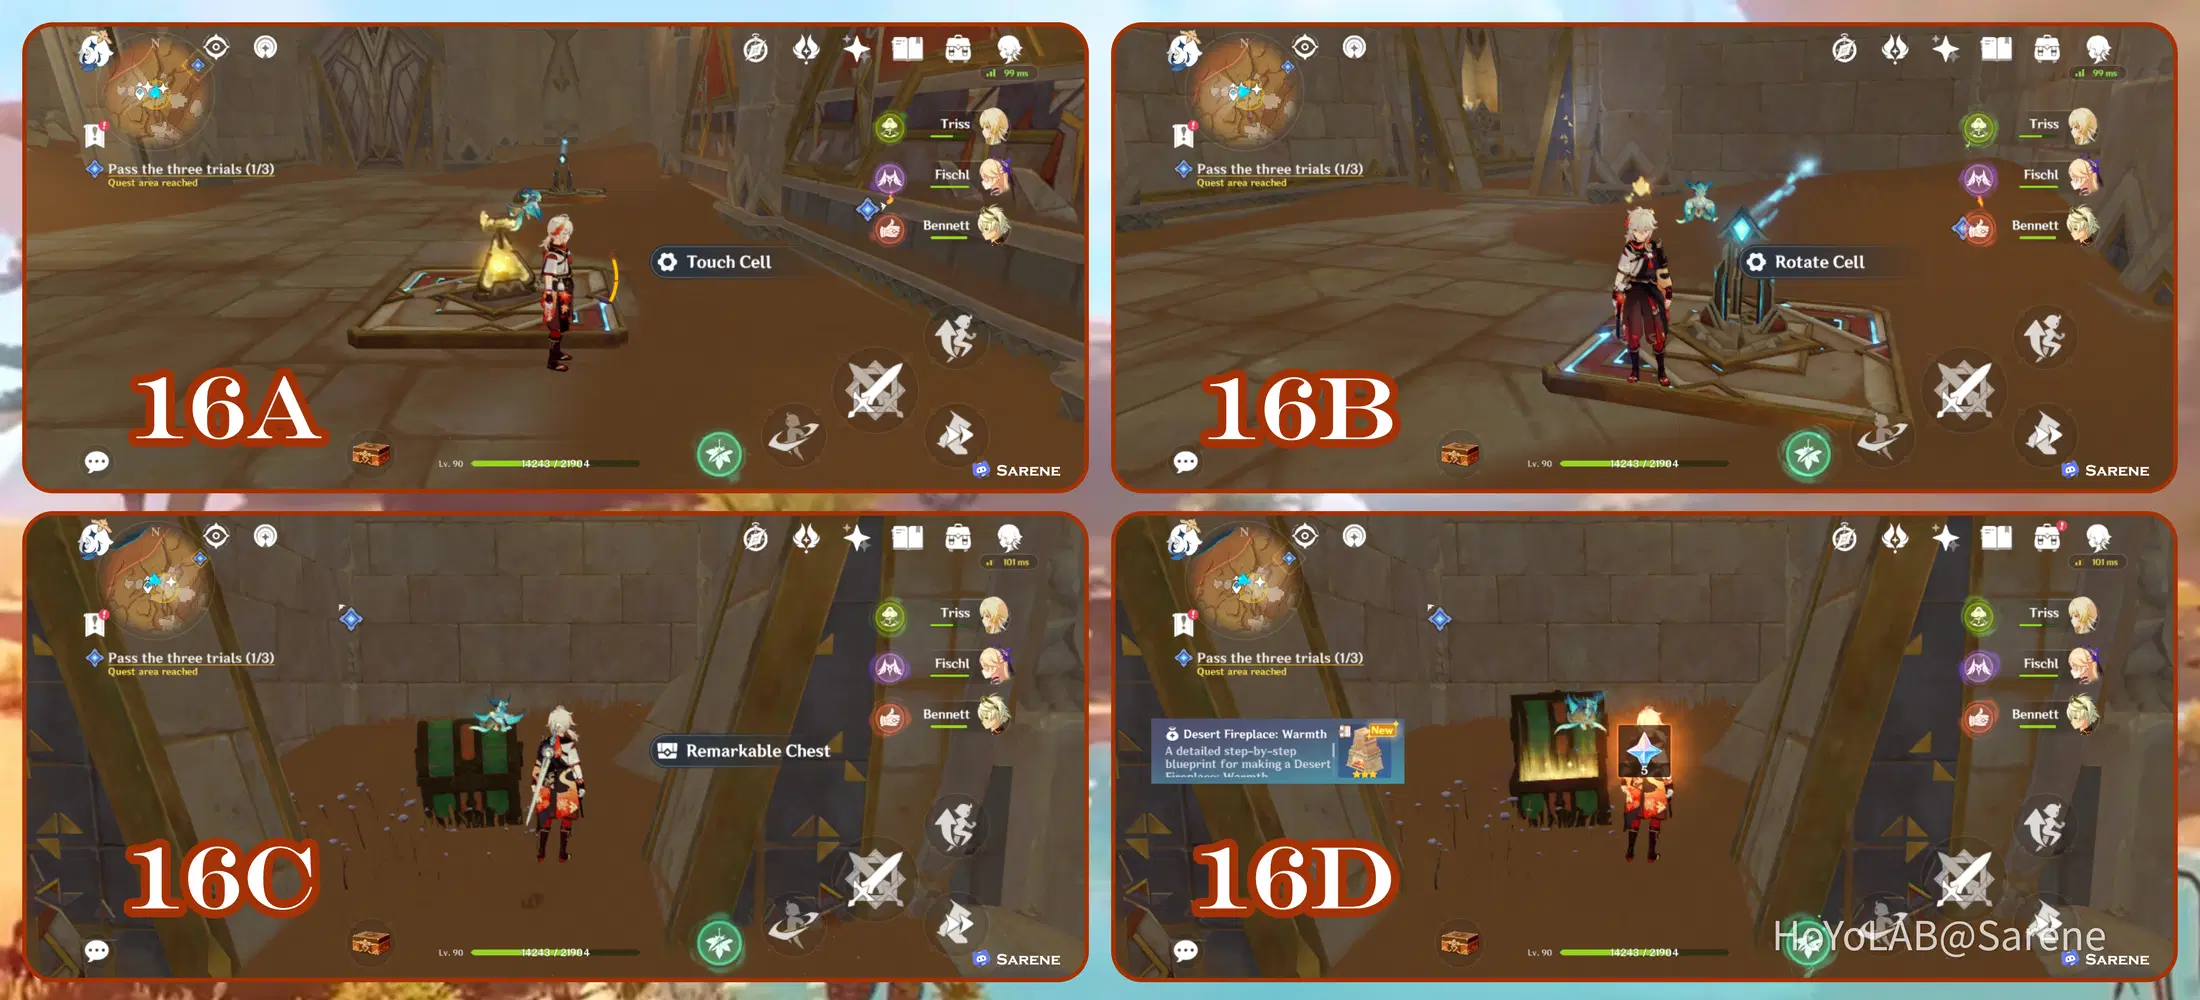
16. Desert Fireplace: Warmth - Complete the Everlight Cell Puzzle (Can be found during Golden Slumber Quest)
17 - 18
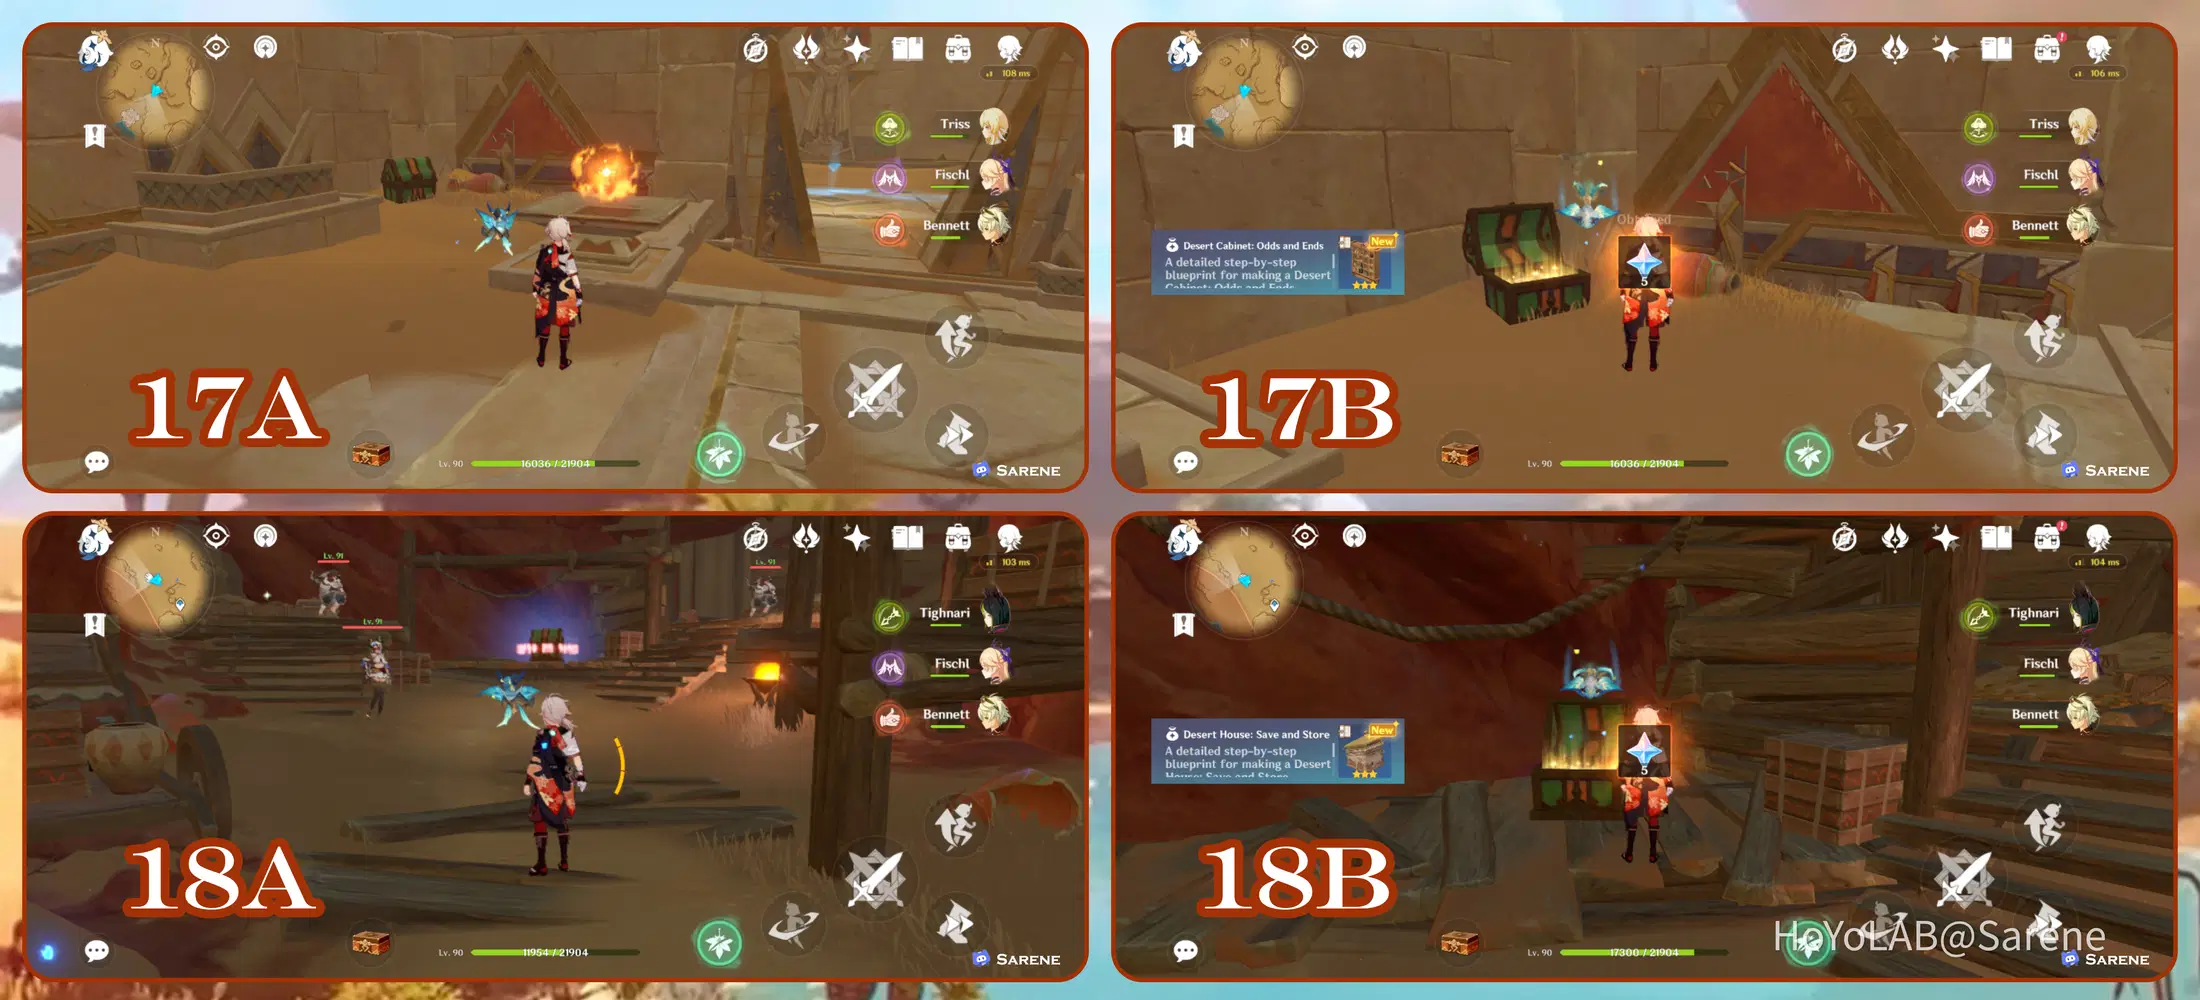
17. Desert Cabinet: Odds and Ends - Found in the corner on the pathway to exiting the temple in the Golden Slumber Quest
18. Desert House: Save and Store - Defeat the Eremites in the Eremite cavern stronghold that is unlocked during the Old Notes and New Friends Quest
19 - 20
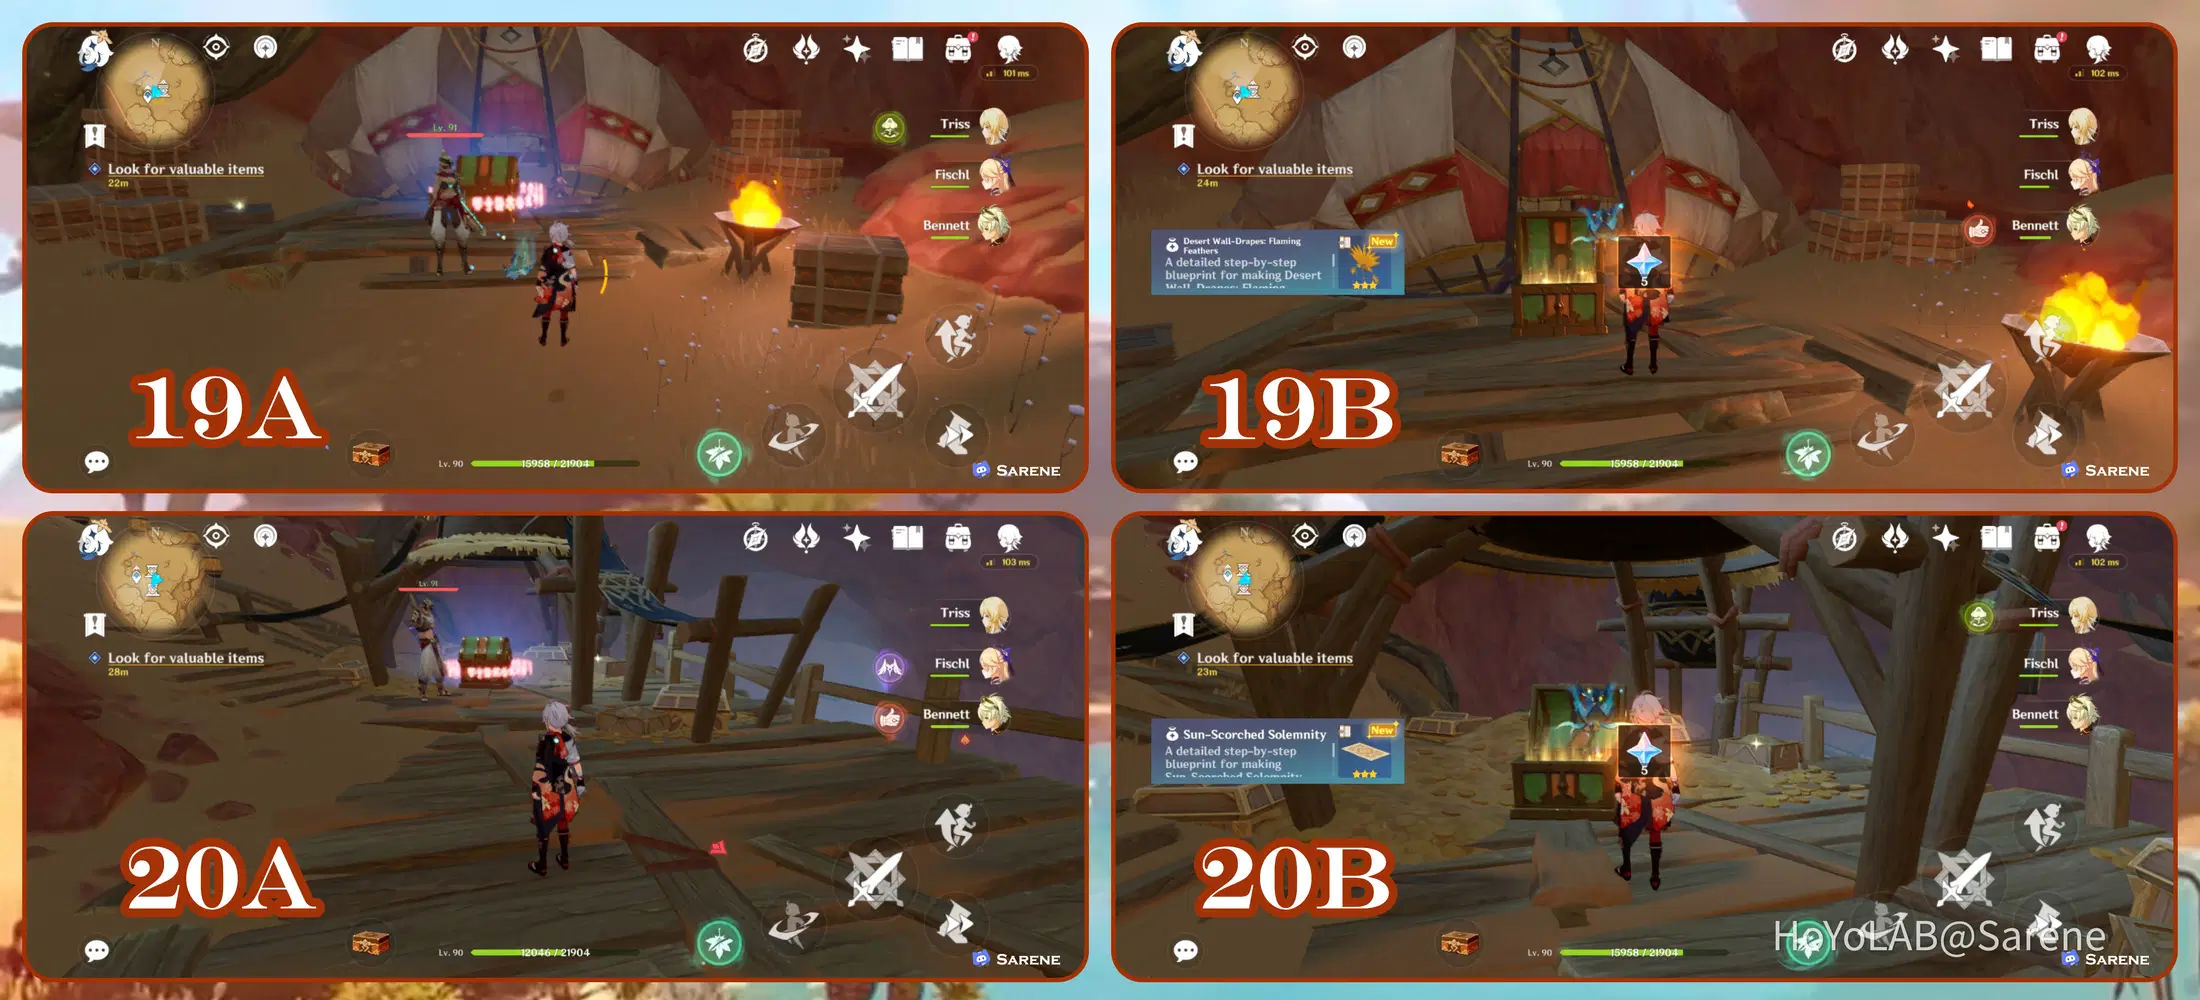
19. Desert Wall-D****s: Flaming Feathers - Defeat Eremites
20. Sun-Scorched Solemnity - Defeat Eremites
21
21. Desert Study: Conscientiousness - Enter the Temple and glide down to the lower floor. Use the Verity Cell to reveal the torches. Light the torches to obtain the chest.
22
22. Hued Vase: Seashell - Go to the nearest teleport and head east until you reach the room with the hourglass. The chest is in the room to the north.
23
23. Long Athelwood Table - Go to the nearest teleport and head east to the room pictured in 23A. Then take the north corridor and drop to the floor below. Complete the torch puzzle to spawn the chest.
24
24. Hued Vase: Dark Rock - Go to the nearest teleport and head in the direction pictured in 24A. Glide down to the floor below and follow the path. Then defeat the Lawachurl to obtain the chest.
25
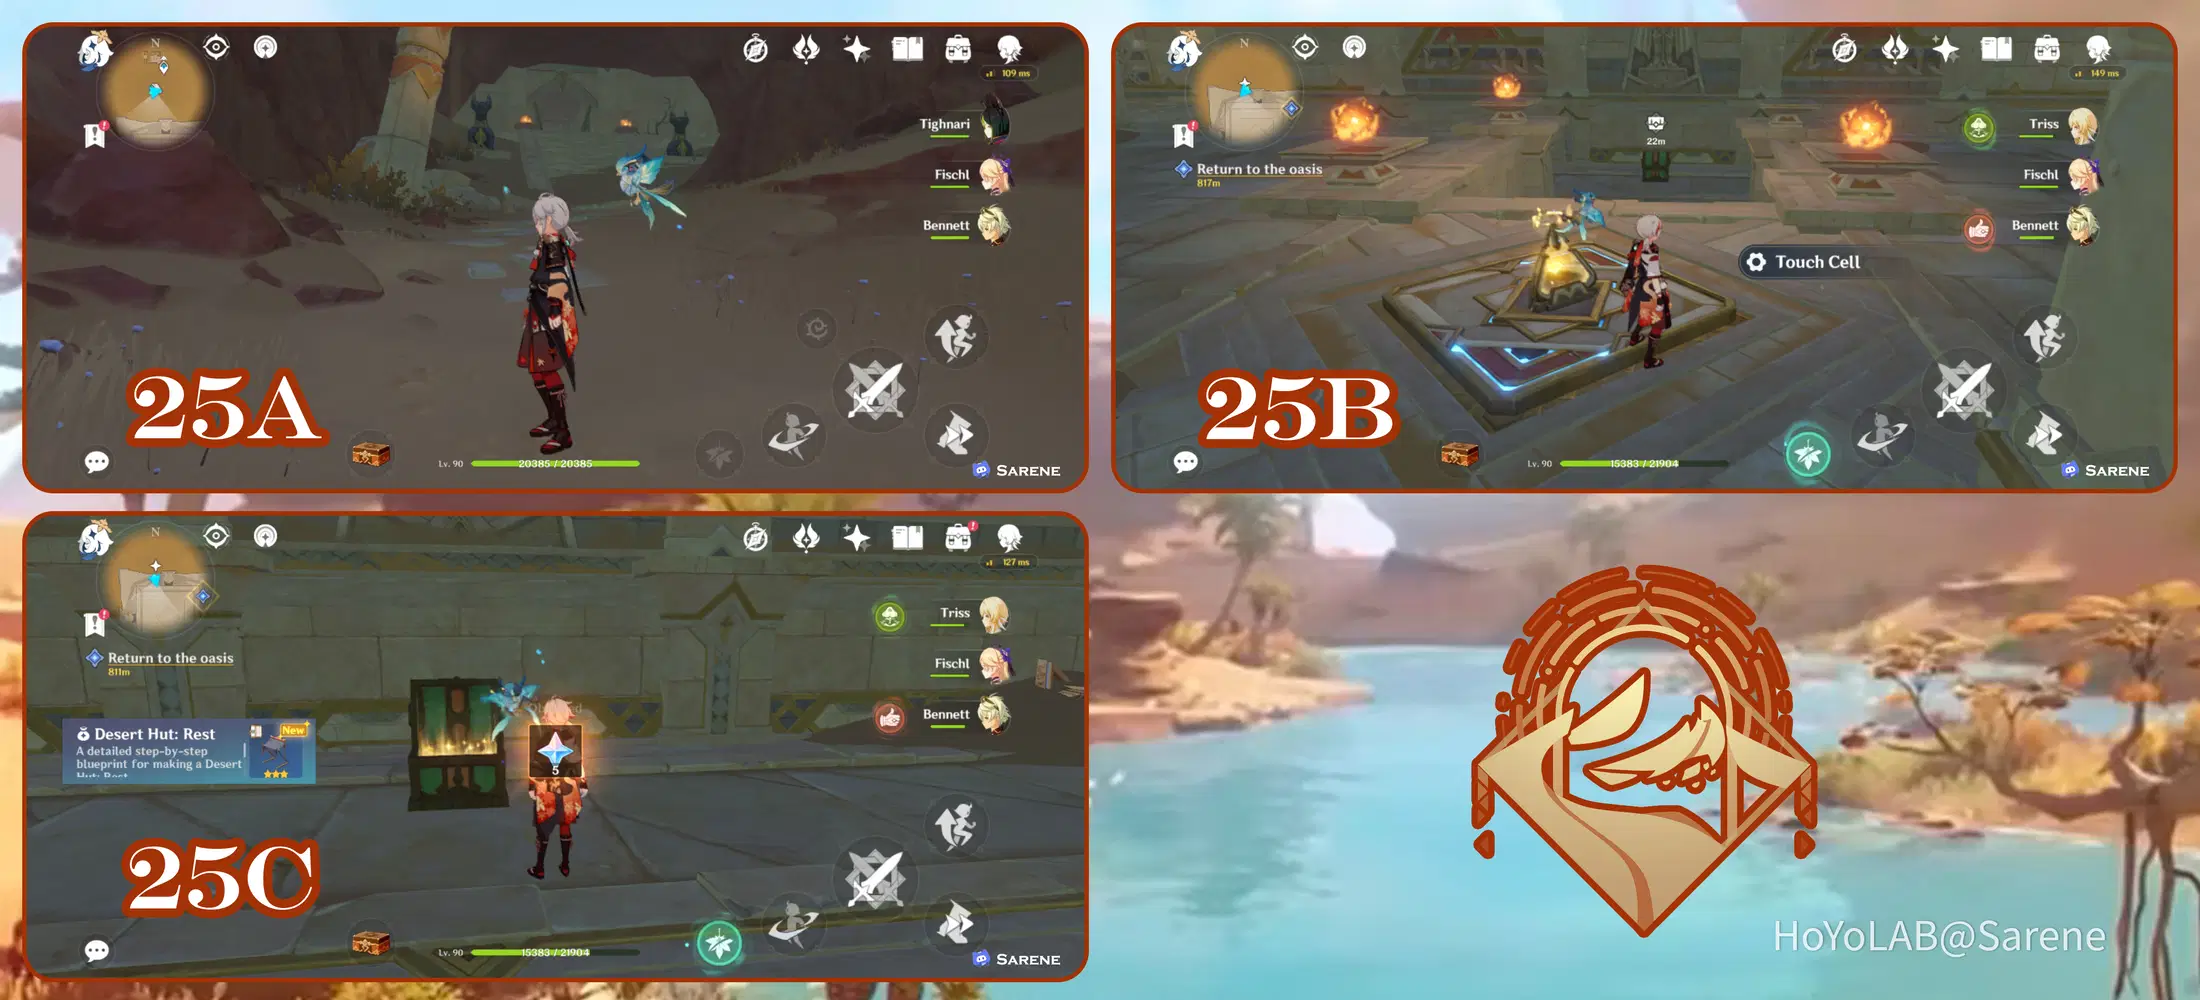
25. Desert Hut: Rest - Go to the nearest teleport and jump down to the floor below. Head south and enter the temple. Follow the path upwards and use the Verity Cell to reveal hidden torches. Light the torches to unlock the chest.
26
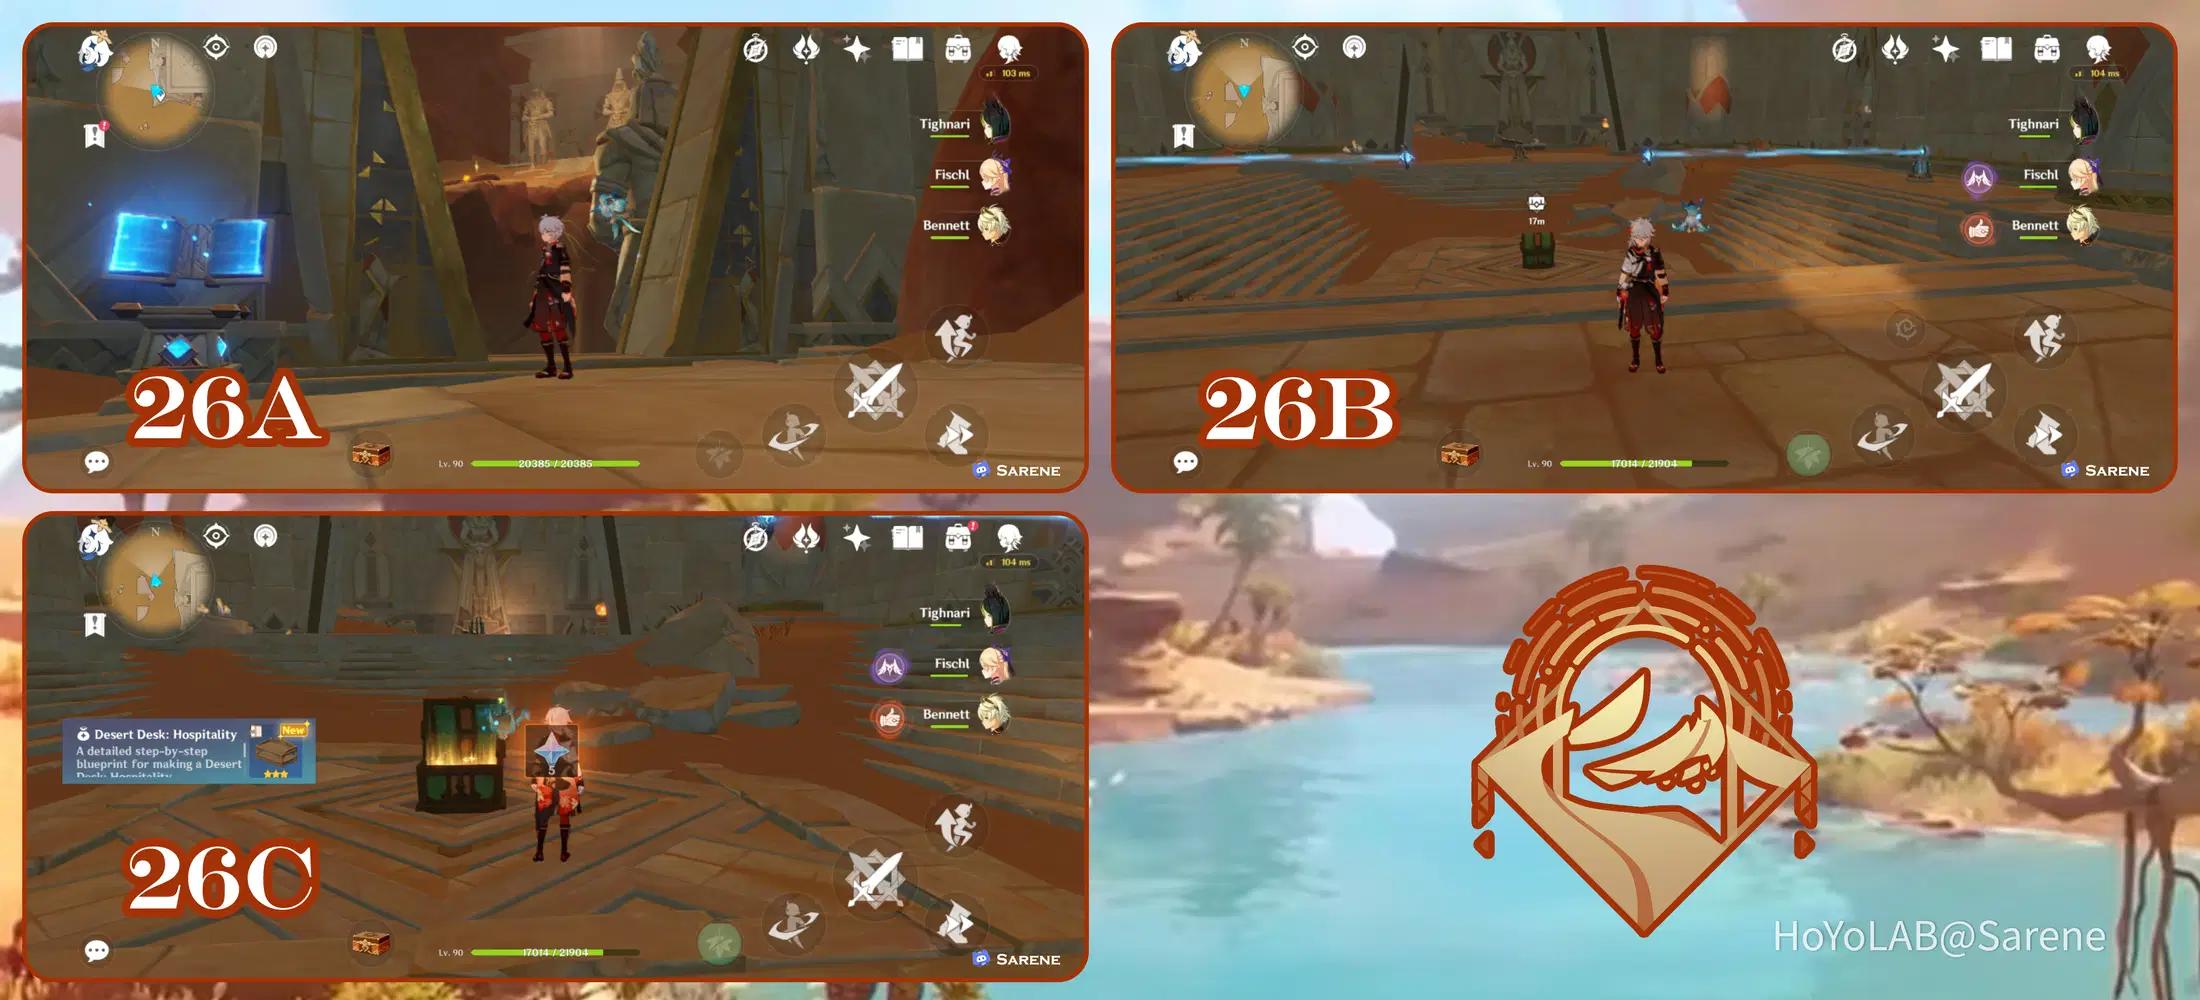
26. Desert Desk: Hospitality - Go to the nearest teleport and use the clovers to reach the temple pictured in 26A. Complete the Everlight Cell Puzzle to unlock the chest.
27
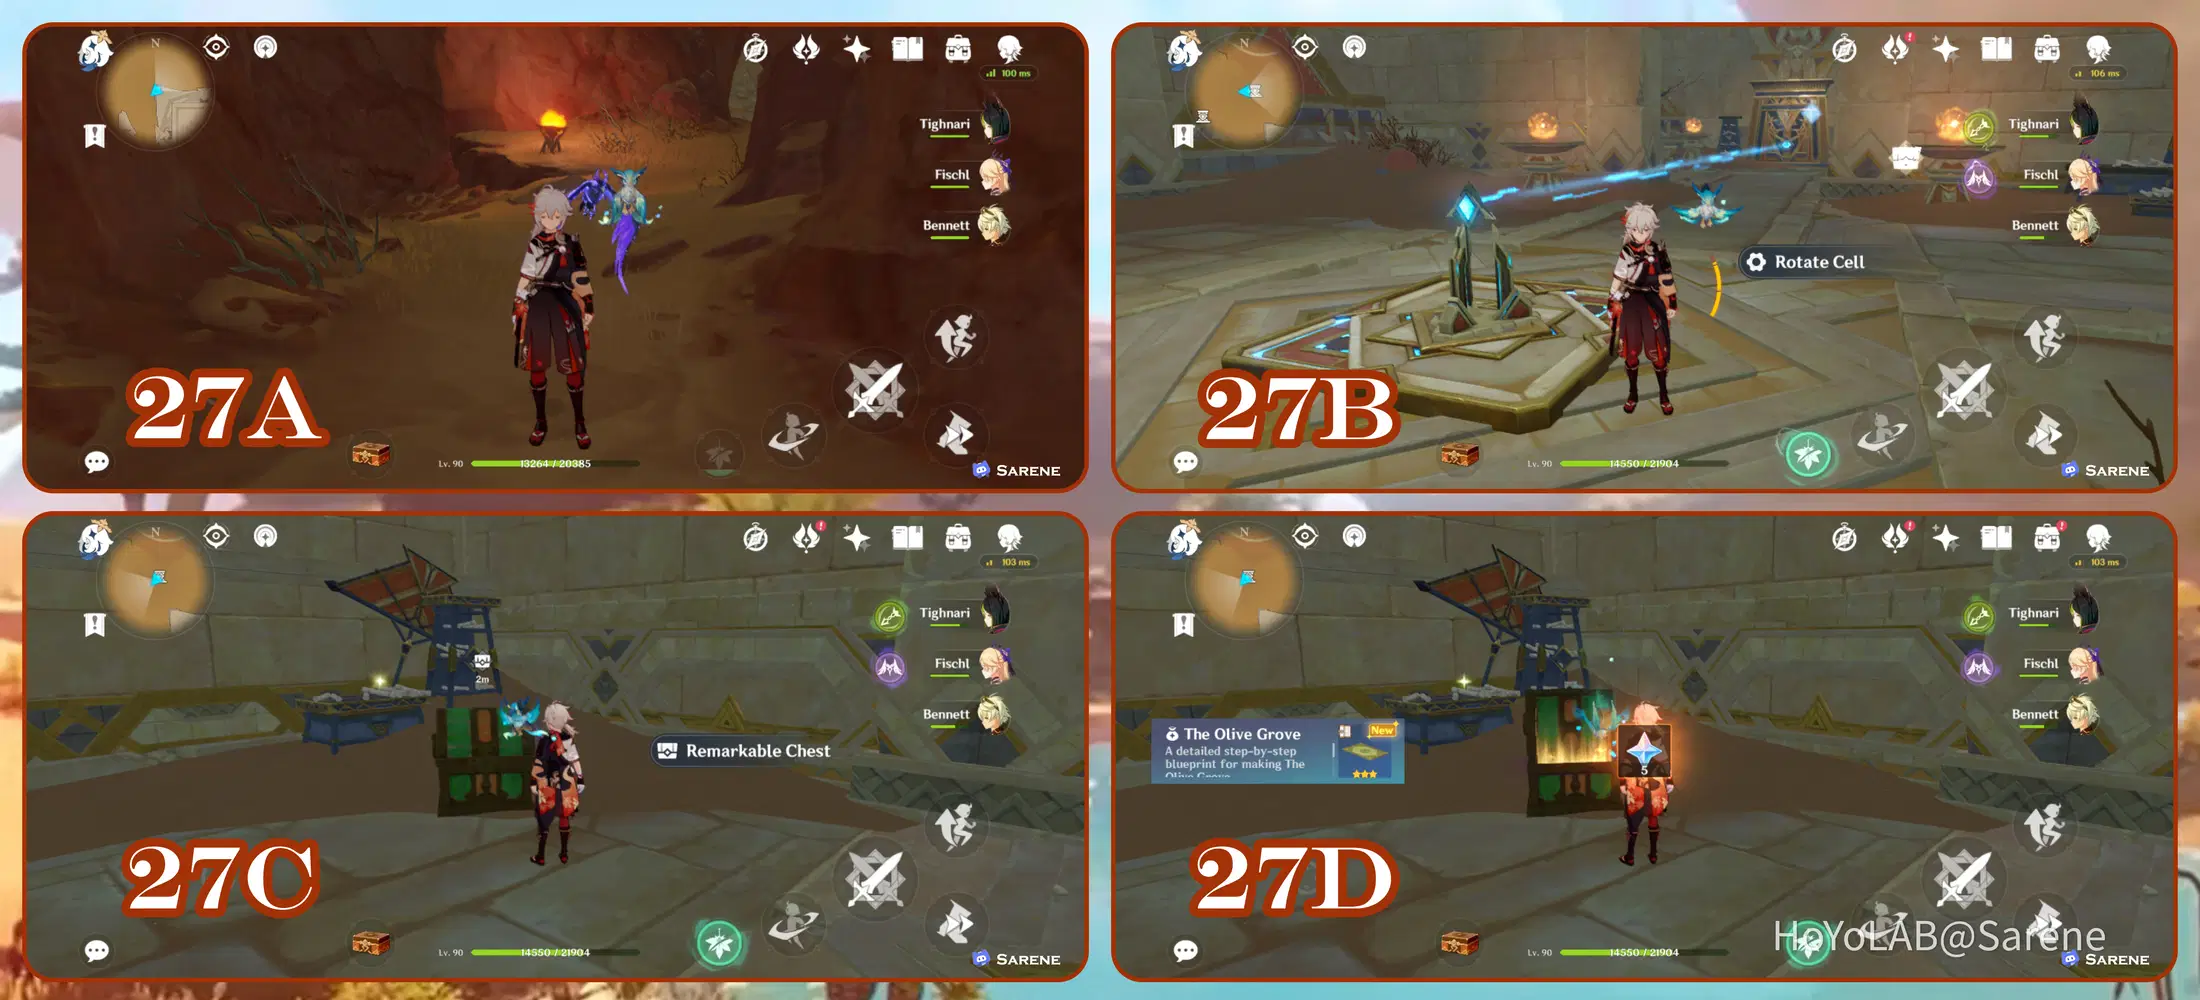
27. The Olive Grove - Use the same teleport as 26. Drop down to the lowest level and head north. At the fork in the road, make a left to reenter the temple. Upon entering the temple, head to room to the right (north). Then solve the Everlight Cell Puzzle to obtain the chest.
28
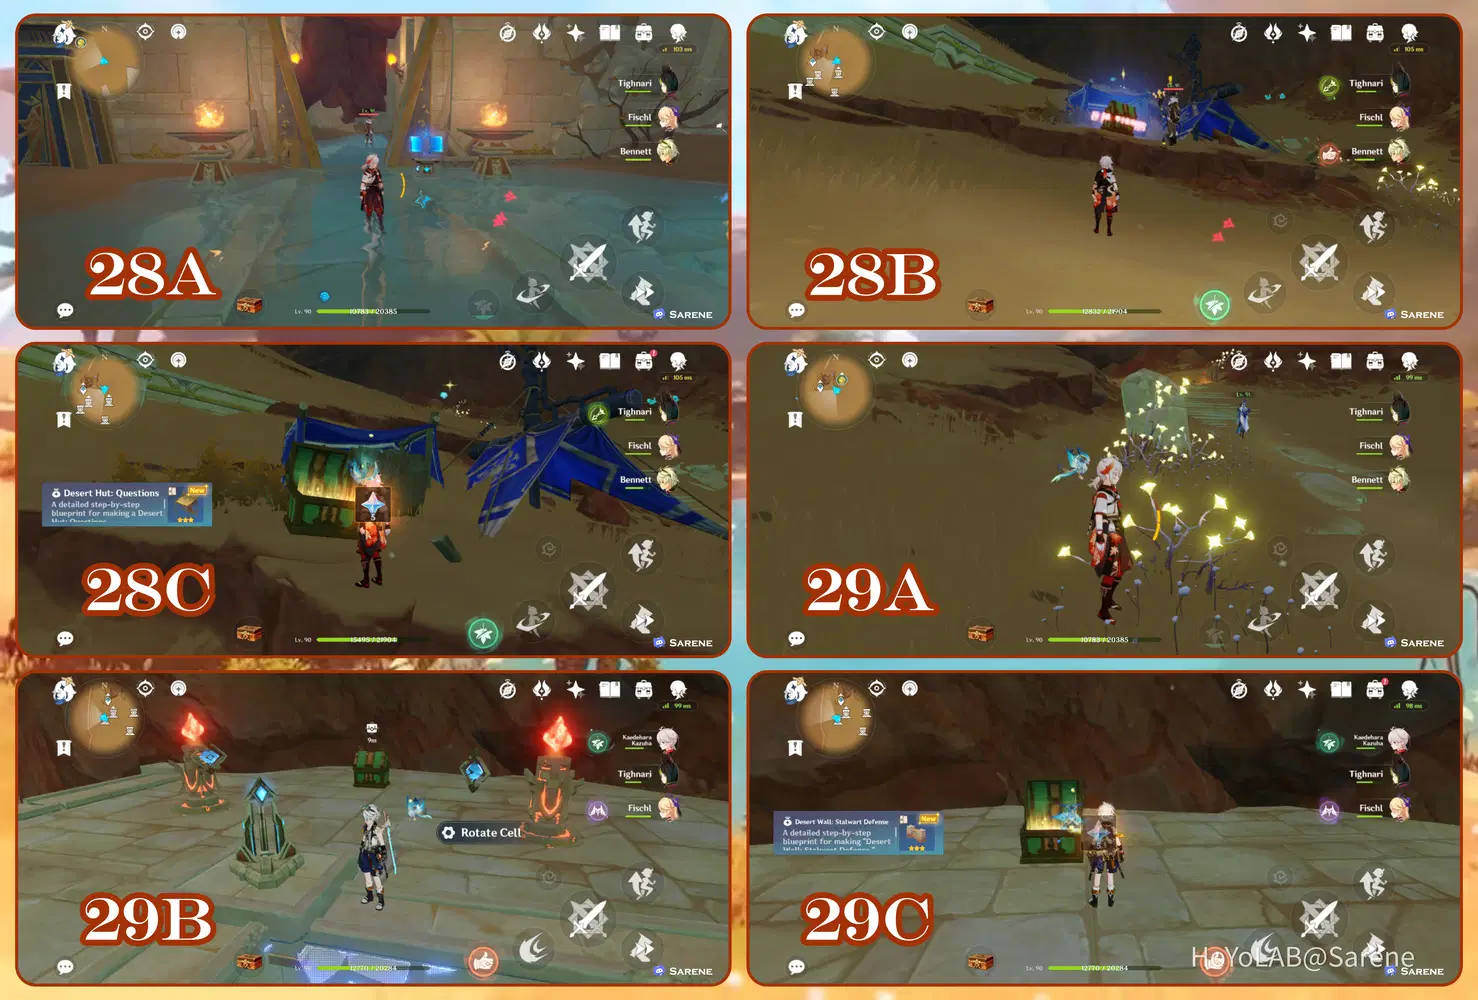
28. Desert Hut: Questions - Return to the center room with water from chest 27. Then go into the hallway with the Fatui. Follow the path and defeat the Fatui to obtain the chest.
29. Desert Wall: Stalwart Defense - Continue down the path from chest 28, as pictured in 29A to reach this next chest. Then completed the totem puzzle to obtain the chest.
30
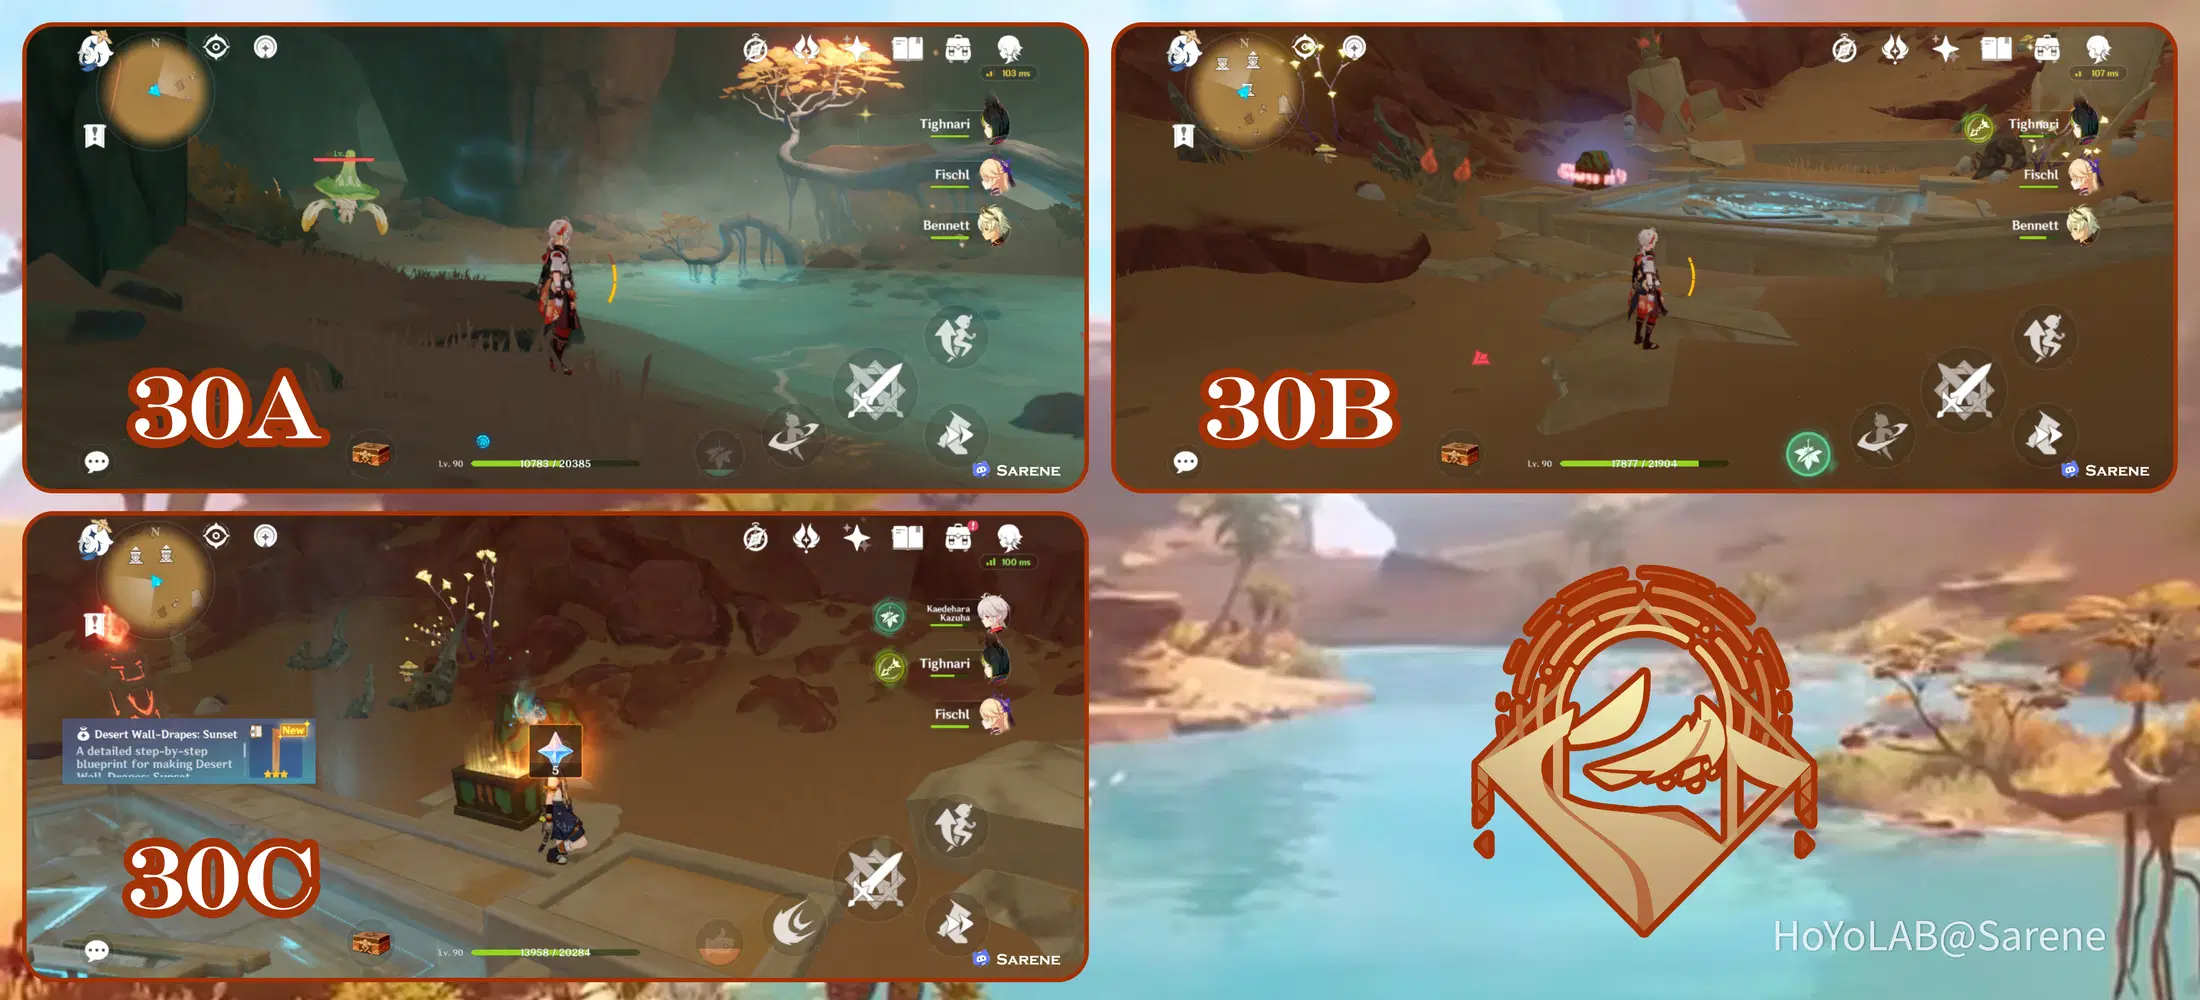
30. Desert Wall-D****s: Sunset - Reach the withering zone take the path on the ground level to reach the final chest. Complete the totem puzzle to obtain the chest.
Now you should have all the Remarkable Chests from 3.1! Thanks for reading and feel free to leave a comment below if you have any questions.

Wishing you the best with your exploration!




