


Continuing from the previous part: Electroculus Collection Guide (IV/VII) - Yashiori Island (27 Total). In this part, we’ll be collecting Electroculi around Watatsumi Island for a total of 21 Electroculi.
Before we move onto this part, be sure to complete The Moon-Bathed Deep quest series and have the Suigetsu Pool Domain unlocked first, otherwise it’ll be very difficult to collect the Electroculi. Now, let’s dive into it!
I. All Electroculus Locations
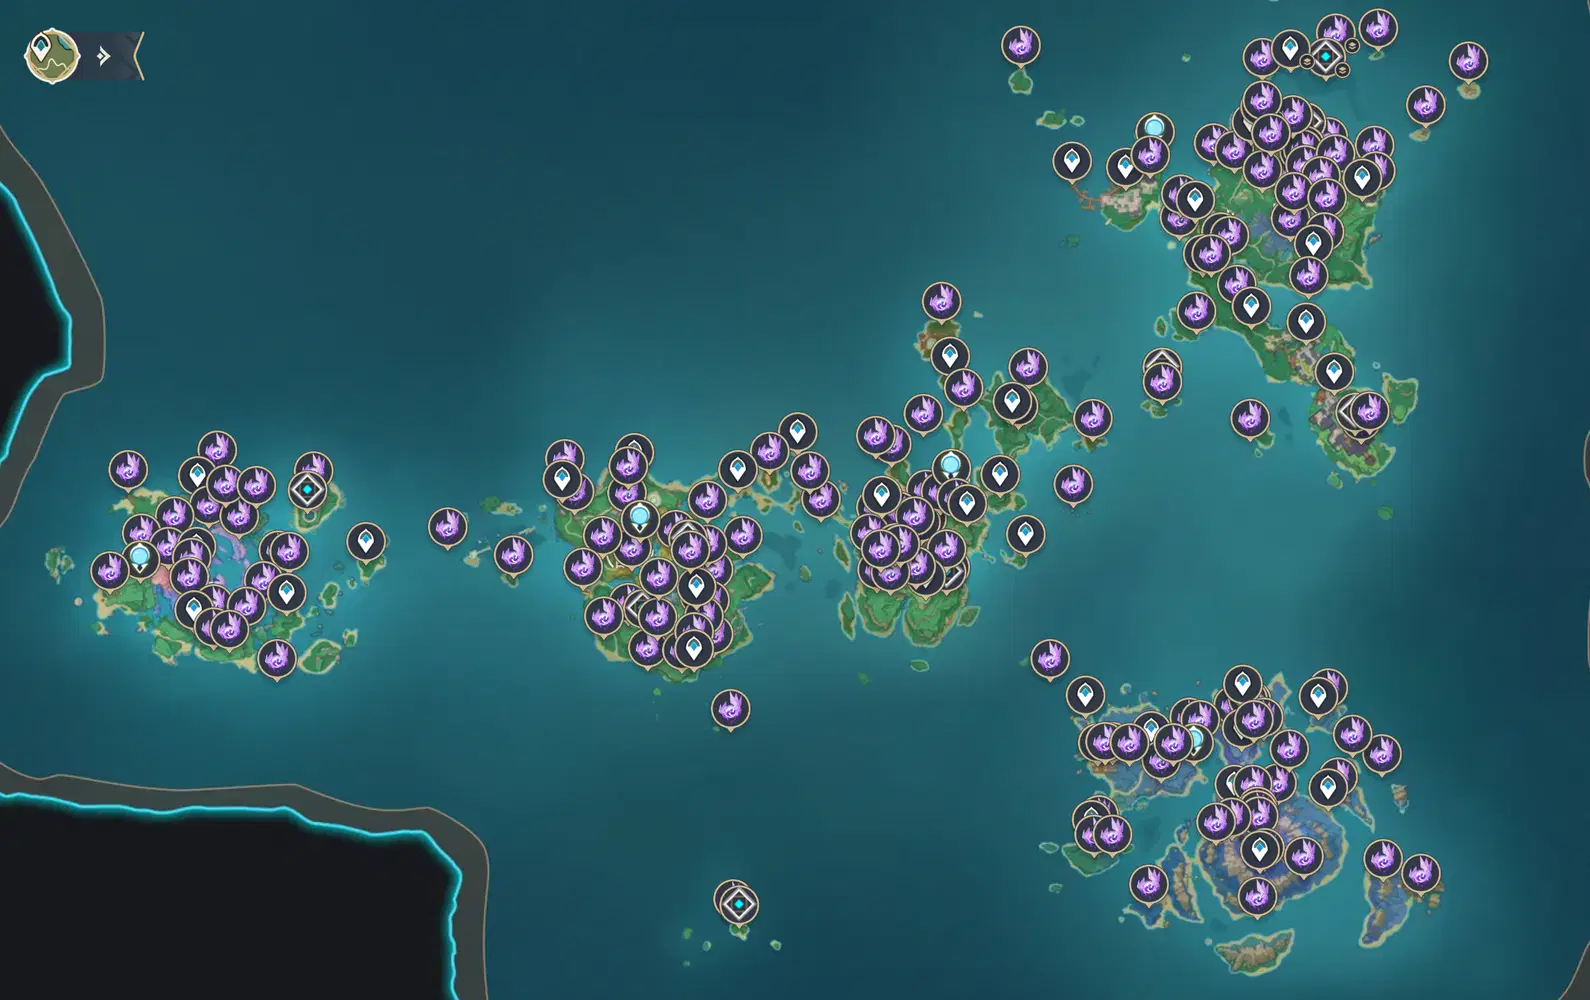
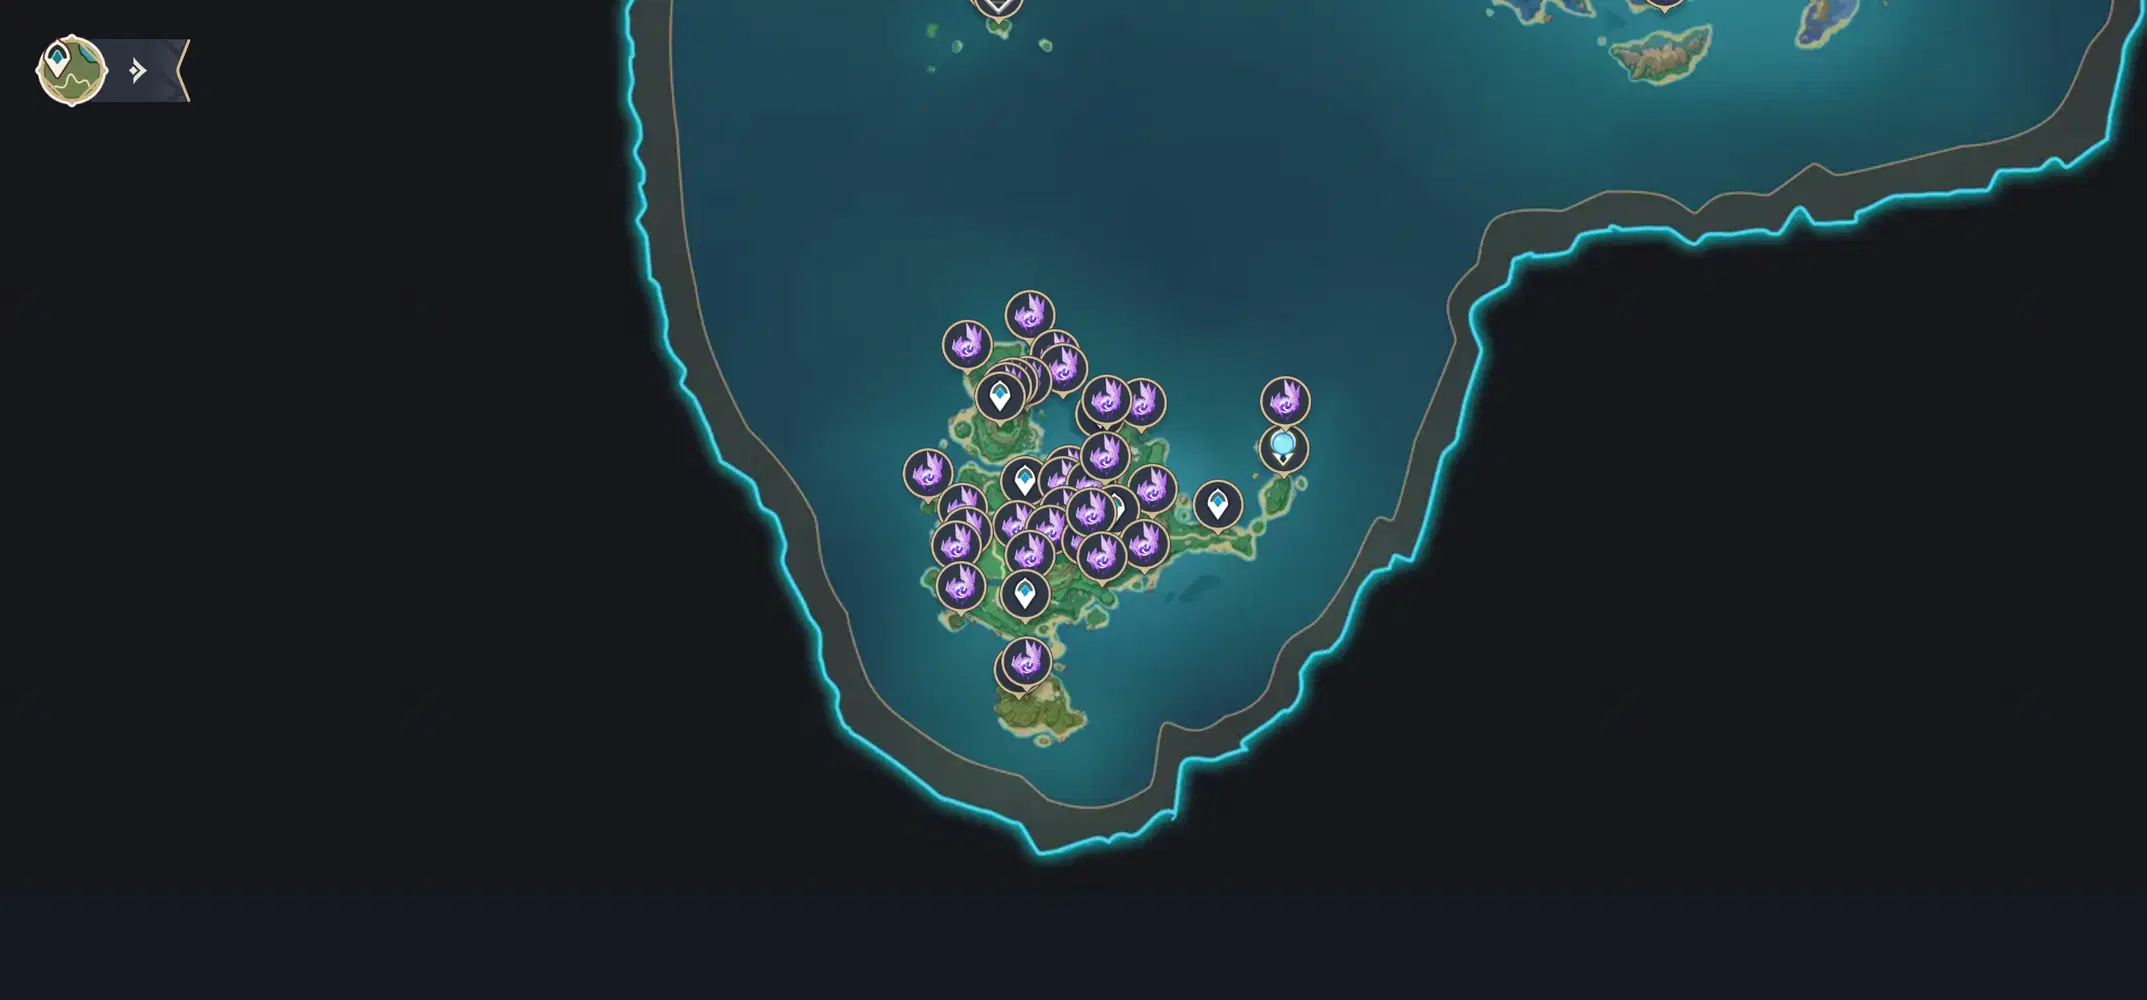
II. Part V Collection Routes Summary

III. Route 1 (Electroculi #96-106)
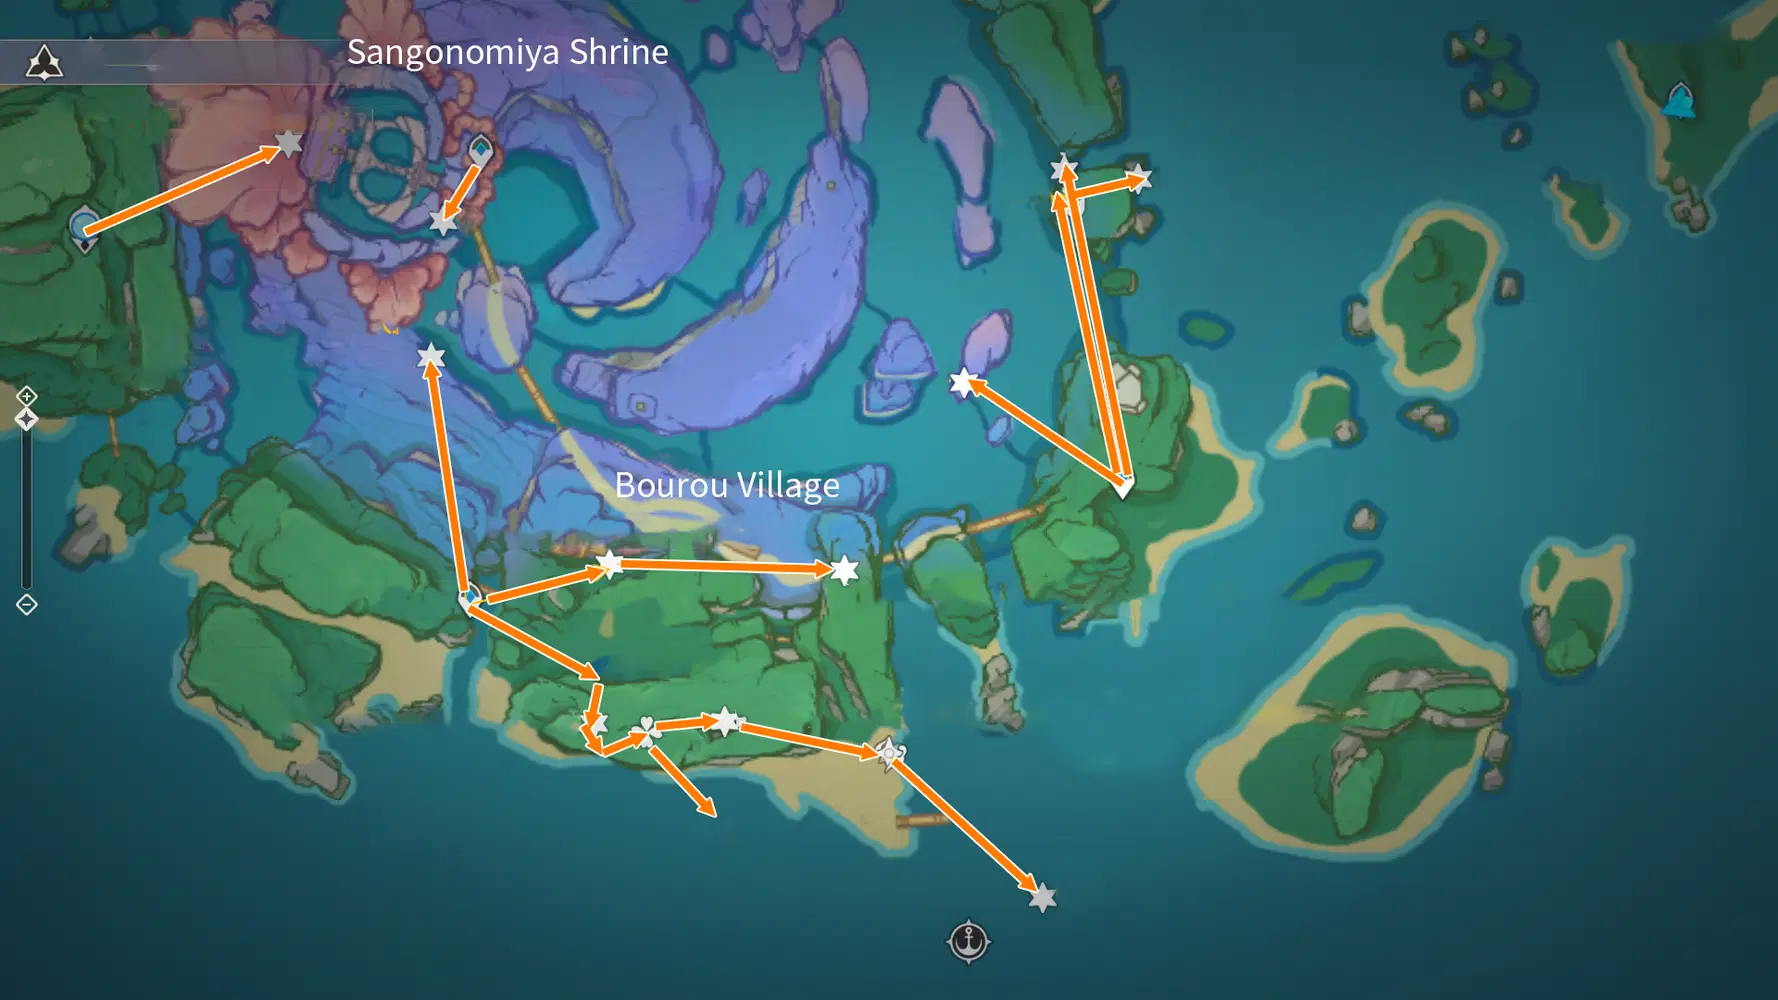
Note: This is a fairly spread route, so pay attention to your Stamina.
Electroculus 96:
Teleport to Sangonomiya Shrine south waypoint and go towards the waterfall in the southwest. The Electroculus is hidden inside the waterfall, just head over and grab it.
Electroculus 97:
Teleport to Statue of The Seven Watatsumi Island then glide east above the Sangonomiya Shrine. The Electroculus is right on top of the Shrine.
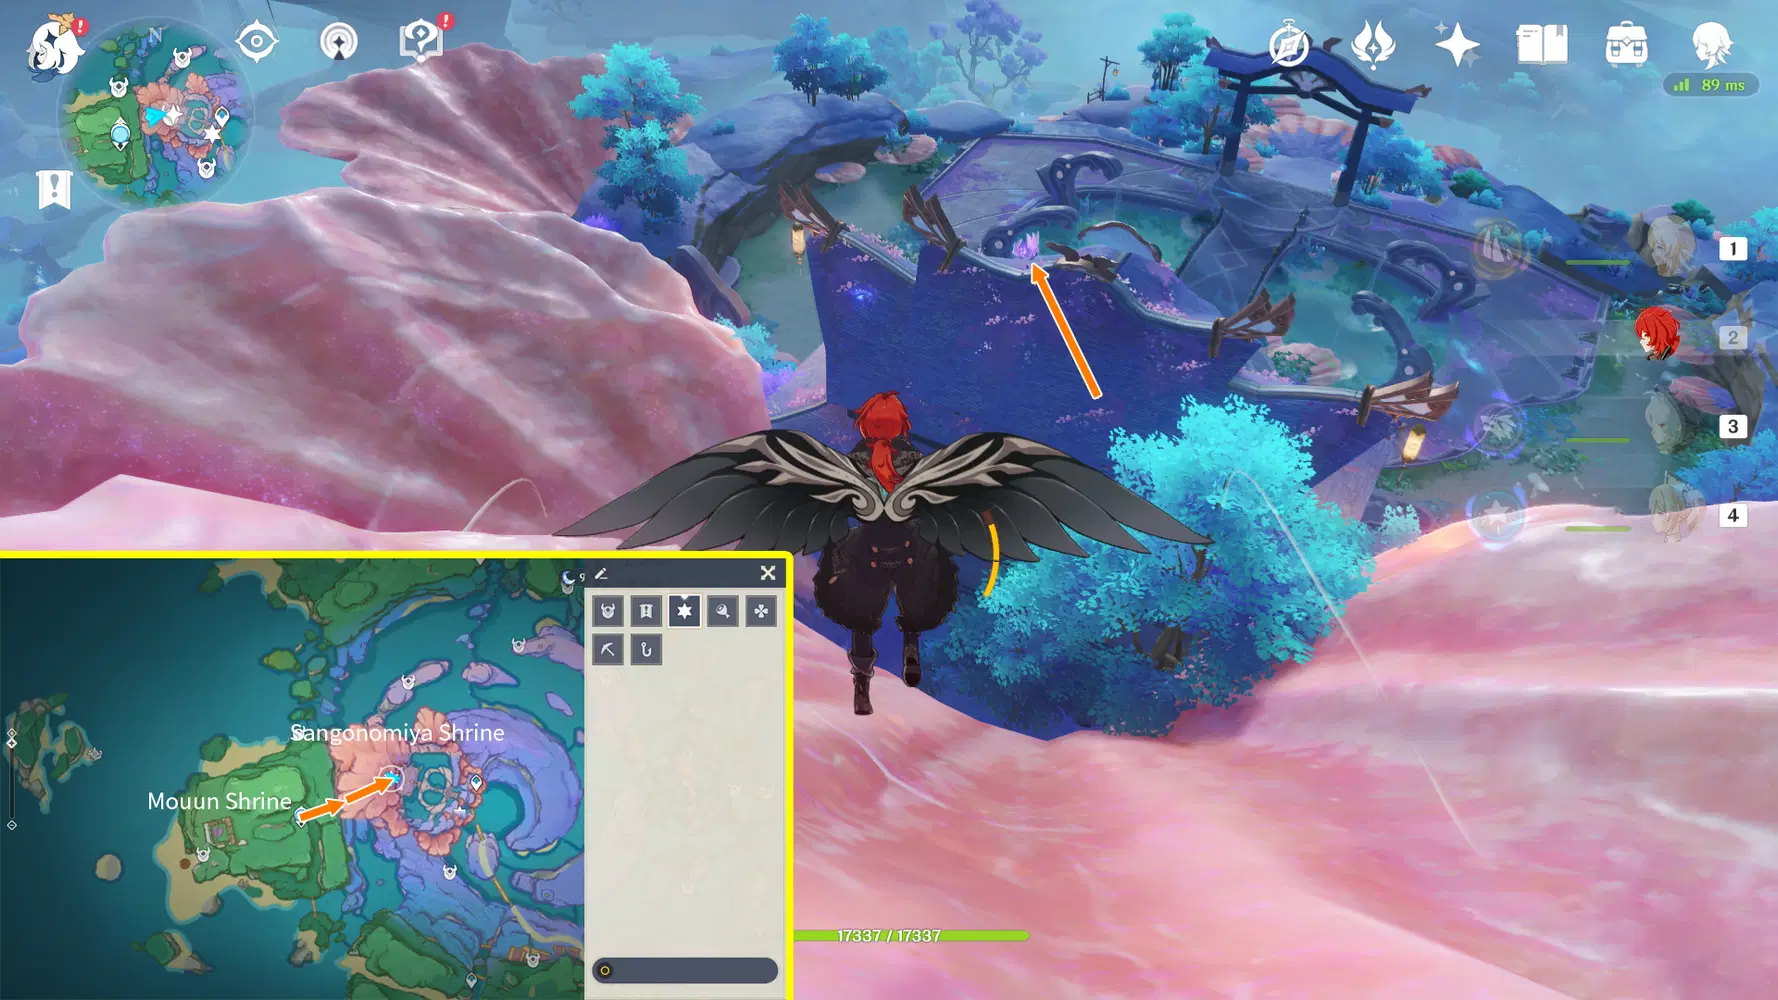
Electroculus 98:
Teleport to the southwest waypoint of Bourou Village and head north just under the cliff. You’ll see a pile of Electro infused rock at the very bottom of the cliff, use Geo/Pyro/Cryo Elements to smash the rock pile.
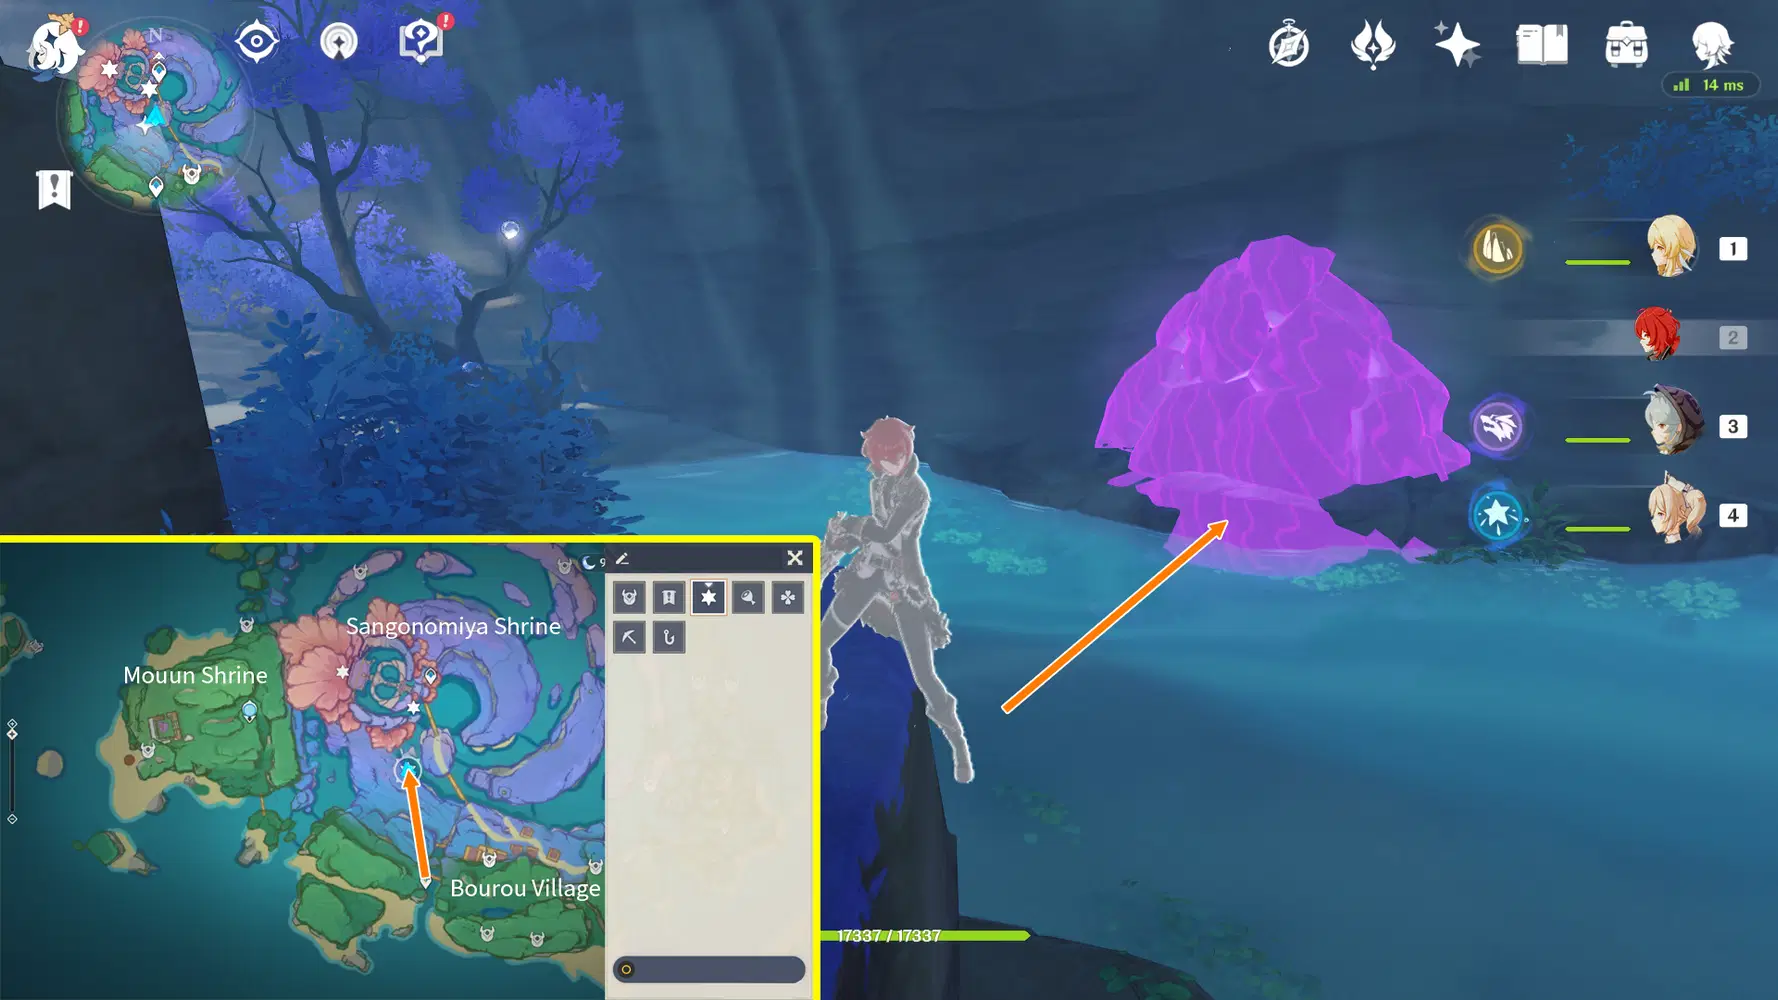
You’ll find the Electroculus after smashing the rock pile, grab it afterwards.
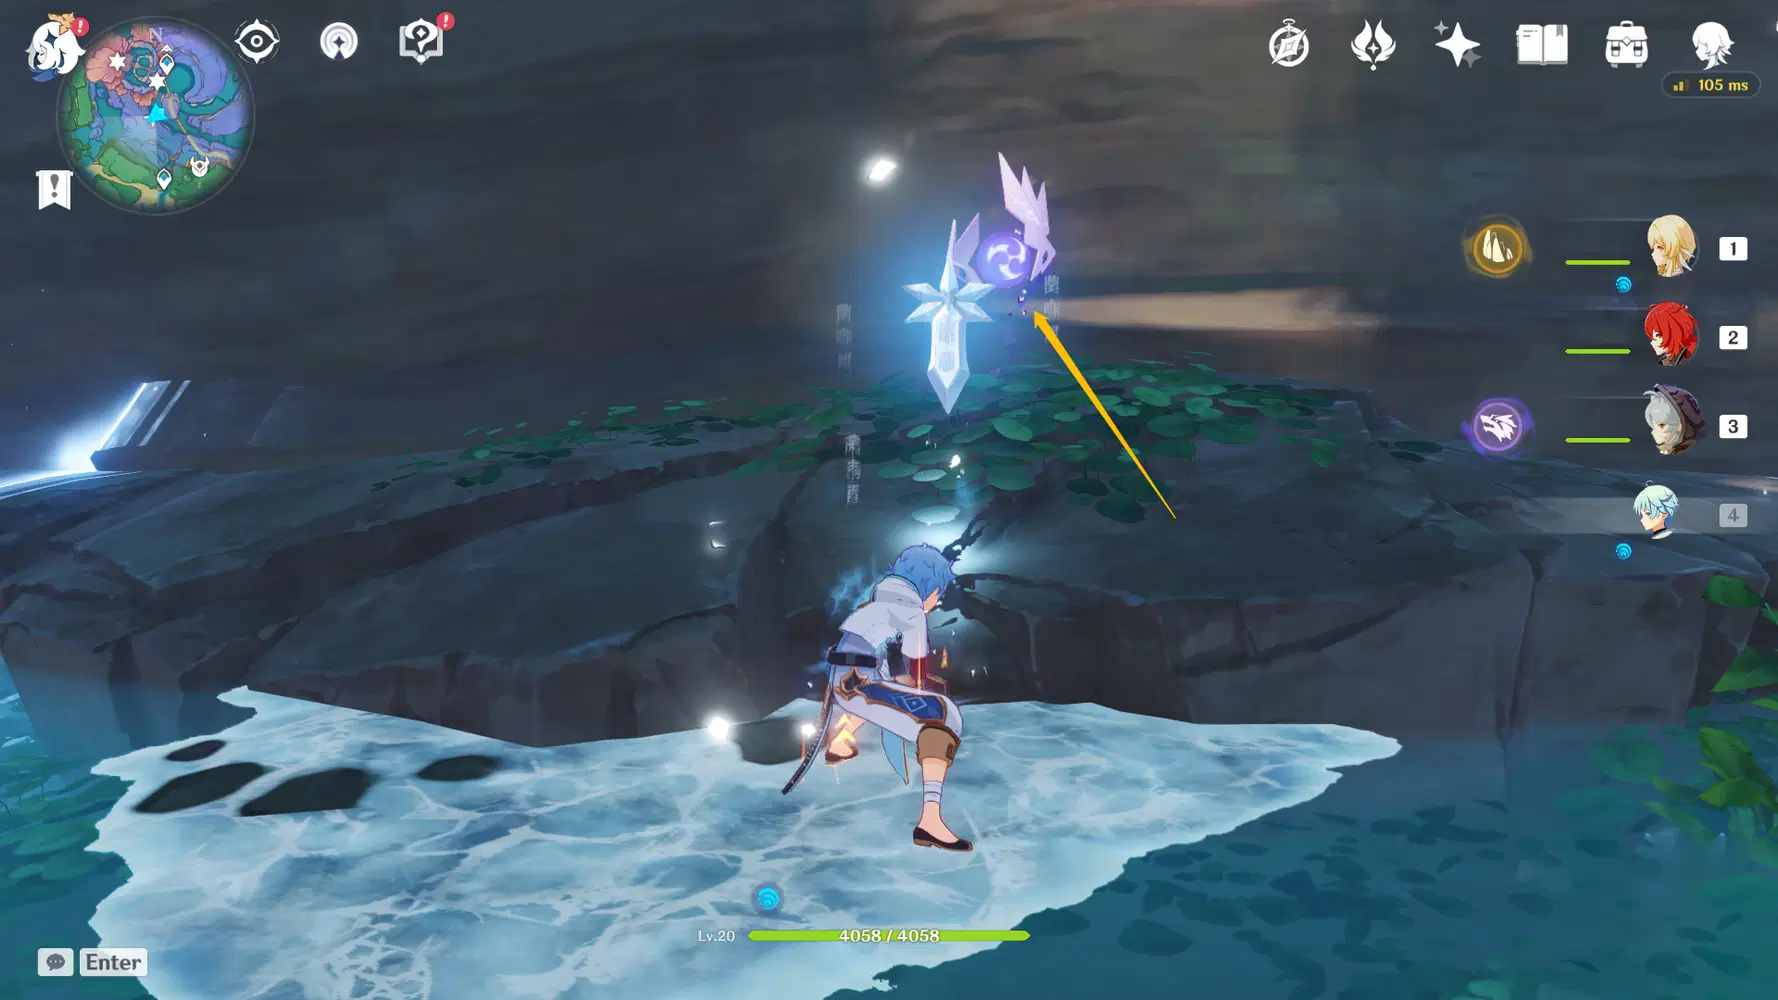
Electroculus 99:
Return to the southeast waypoint of Bourou Village and head northeast, you’ll find an Electroculus in the cellar next to the house.
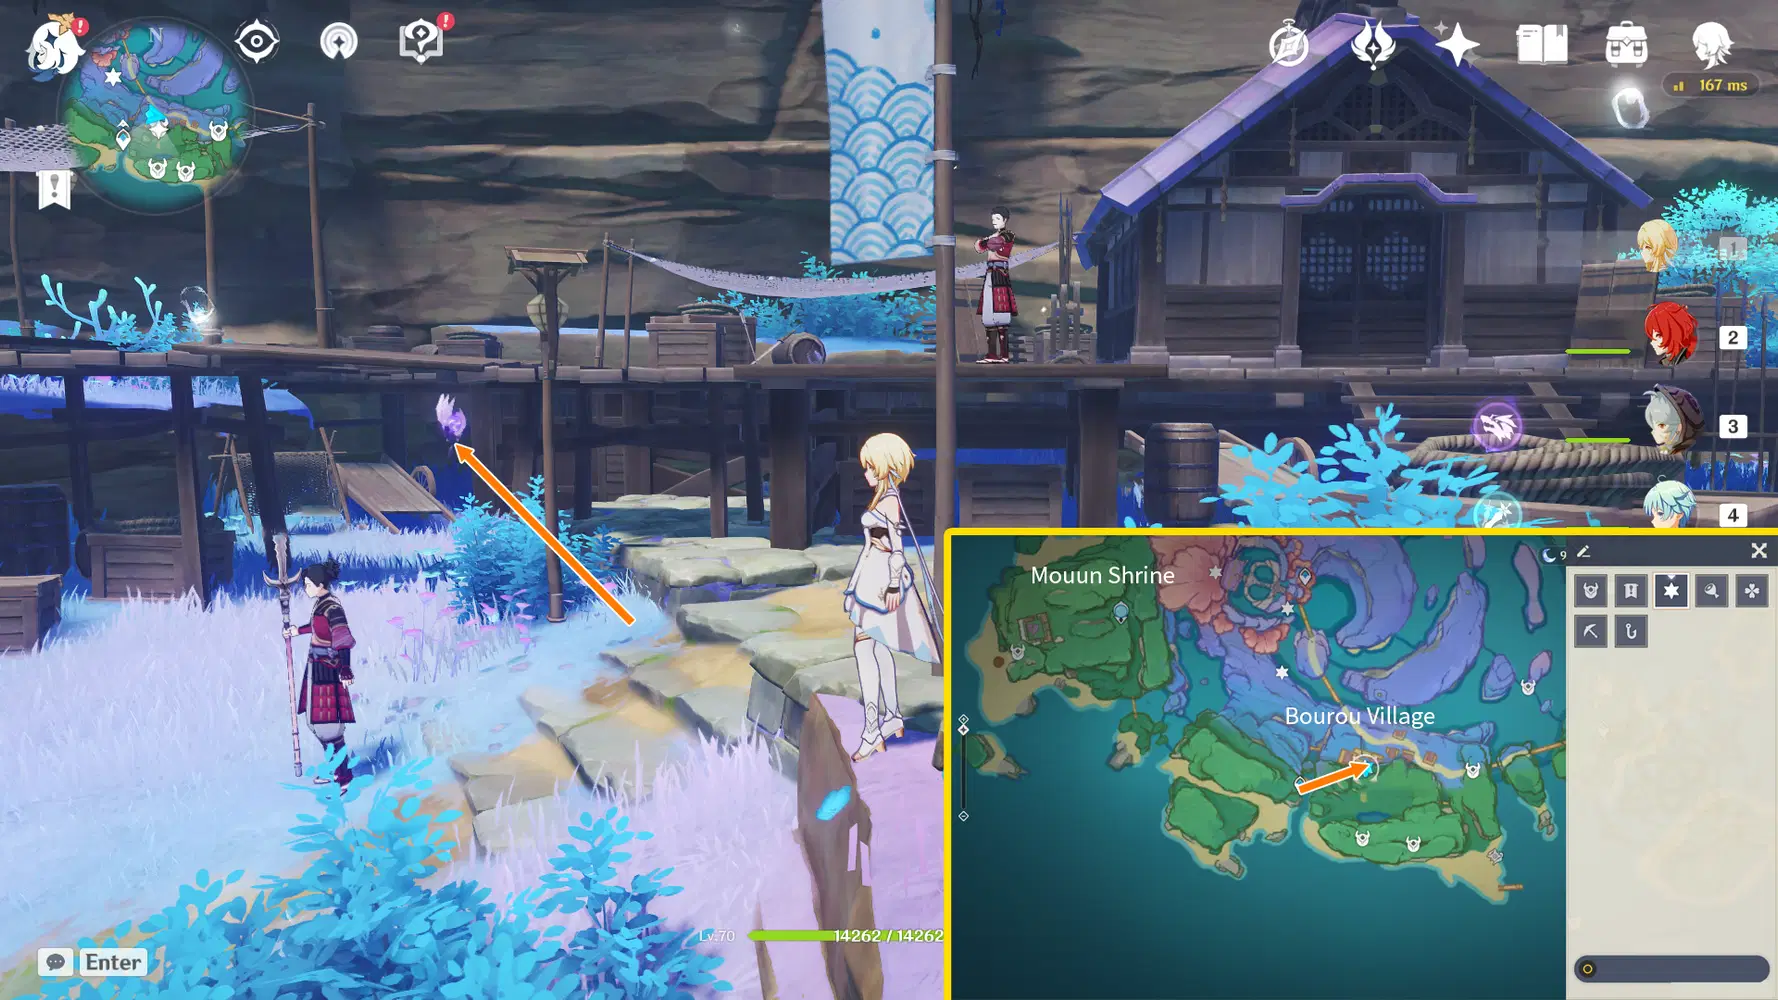
Electroculus 100:
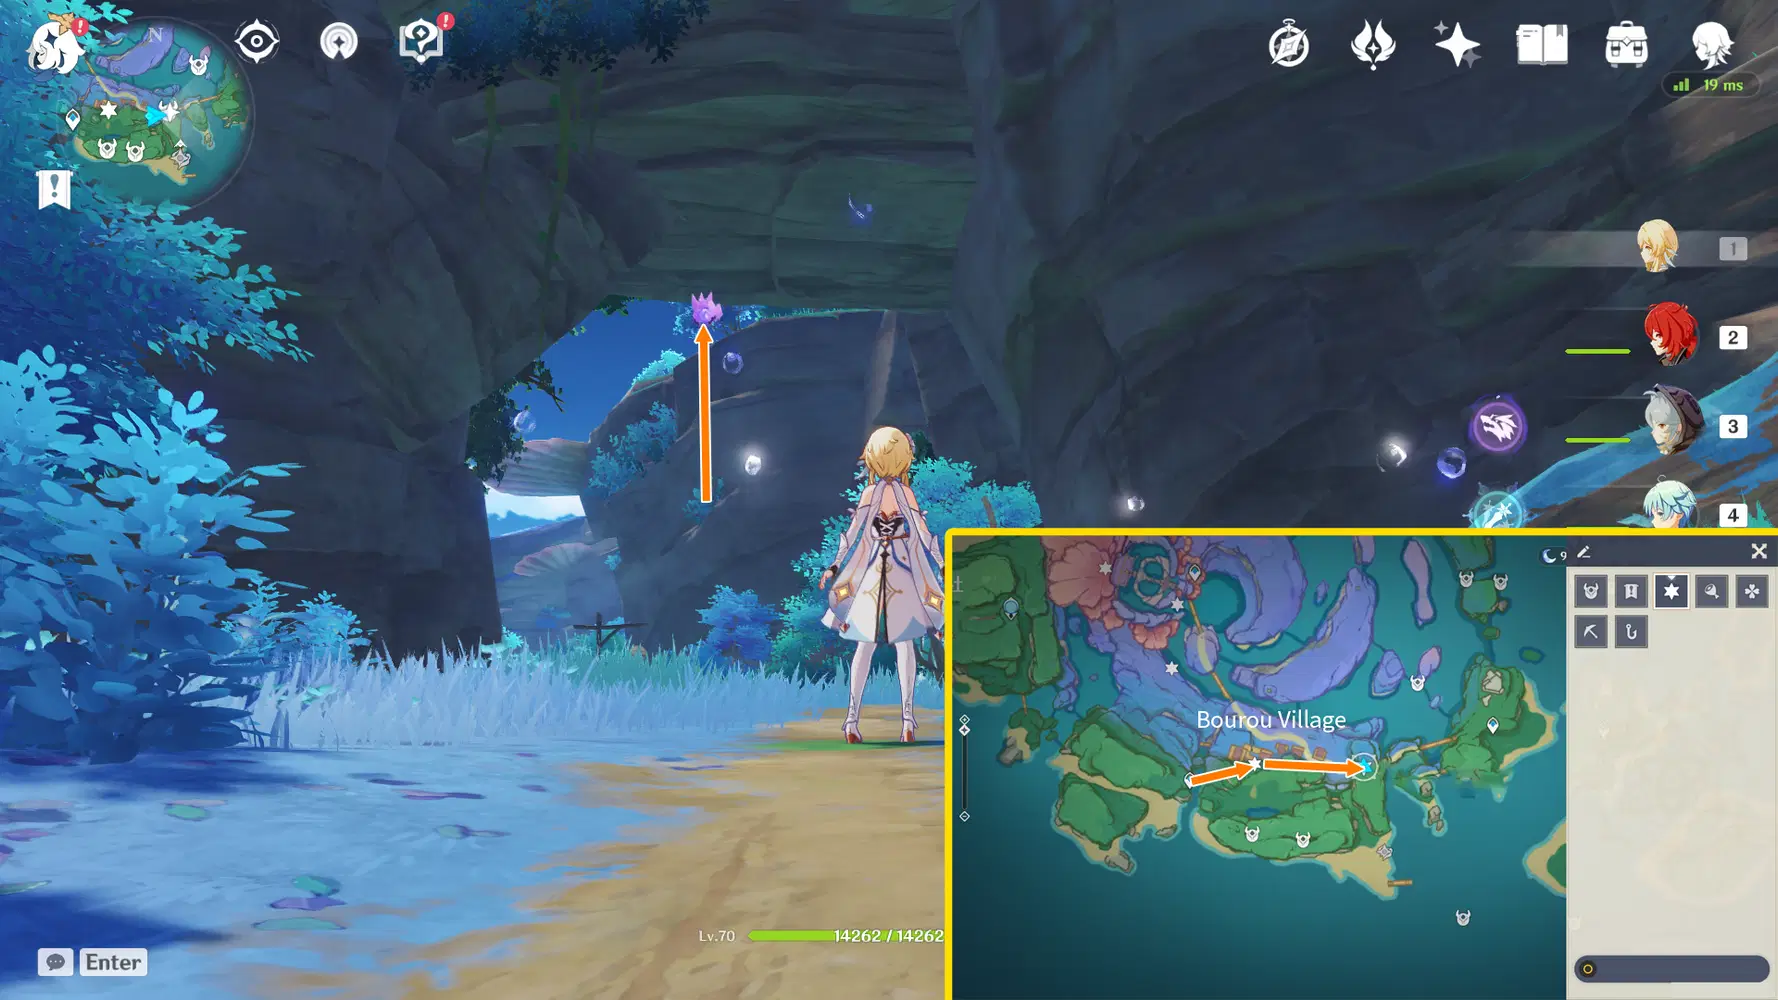
Continue eastward until you reach the stone tunnel. Go inside and you’ll see the Electroculus just slightly below the top side of the cave. Climb onto the side walls and glide to grab it.
Electroculus 101:
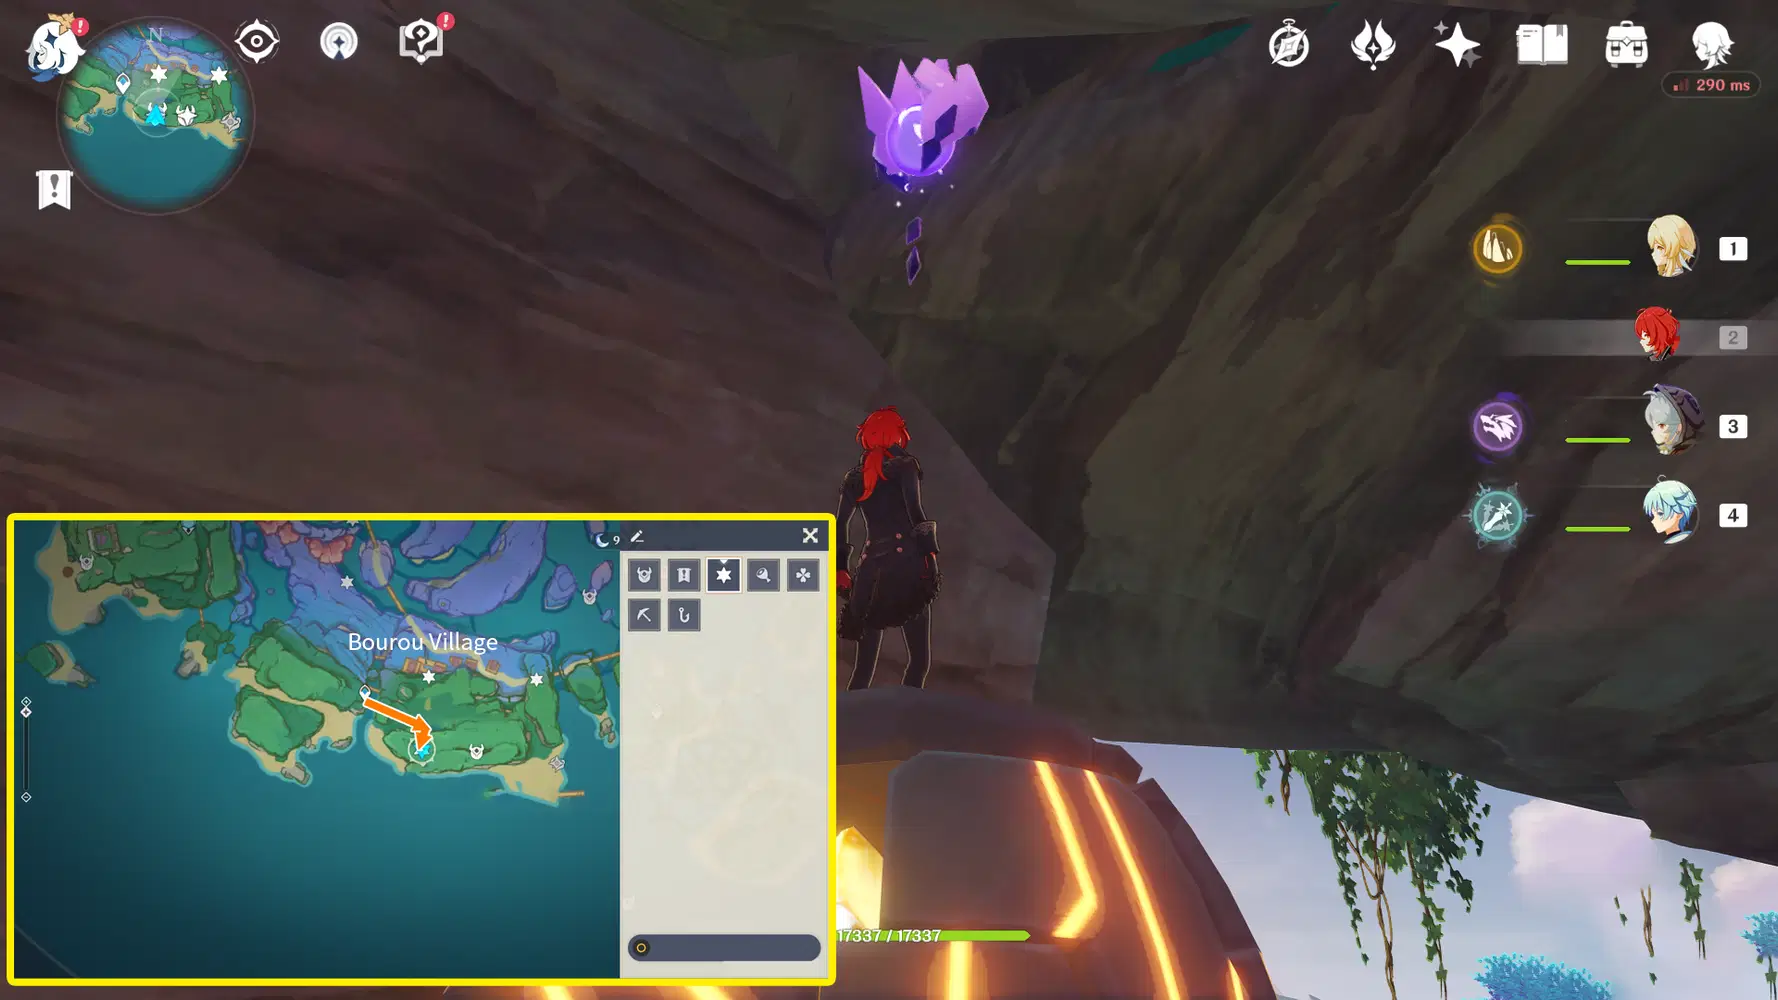
Return to the southwest waypoint of Bourou Village, head southeast and up the mountain. The Electroculus is also near the top of a stone tunnel, so you can use Geo Traveler’s skill for stepping stone and get up.
Electroculus 102:
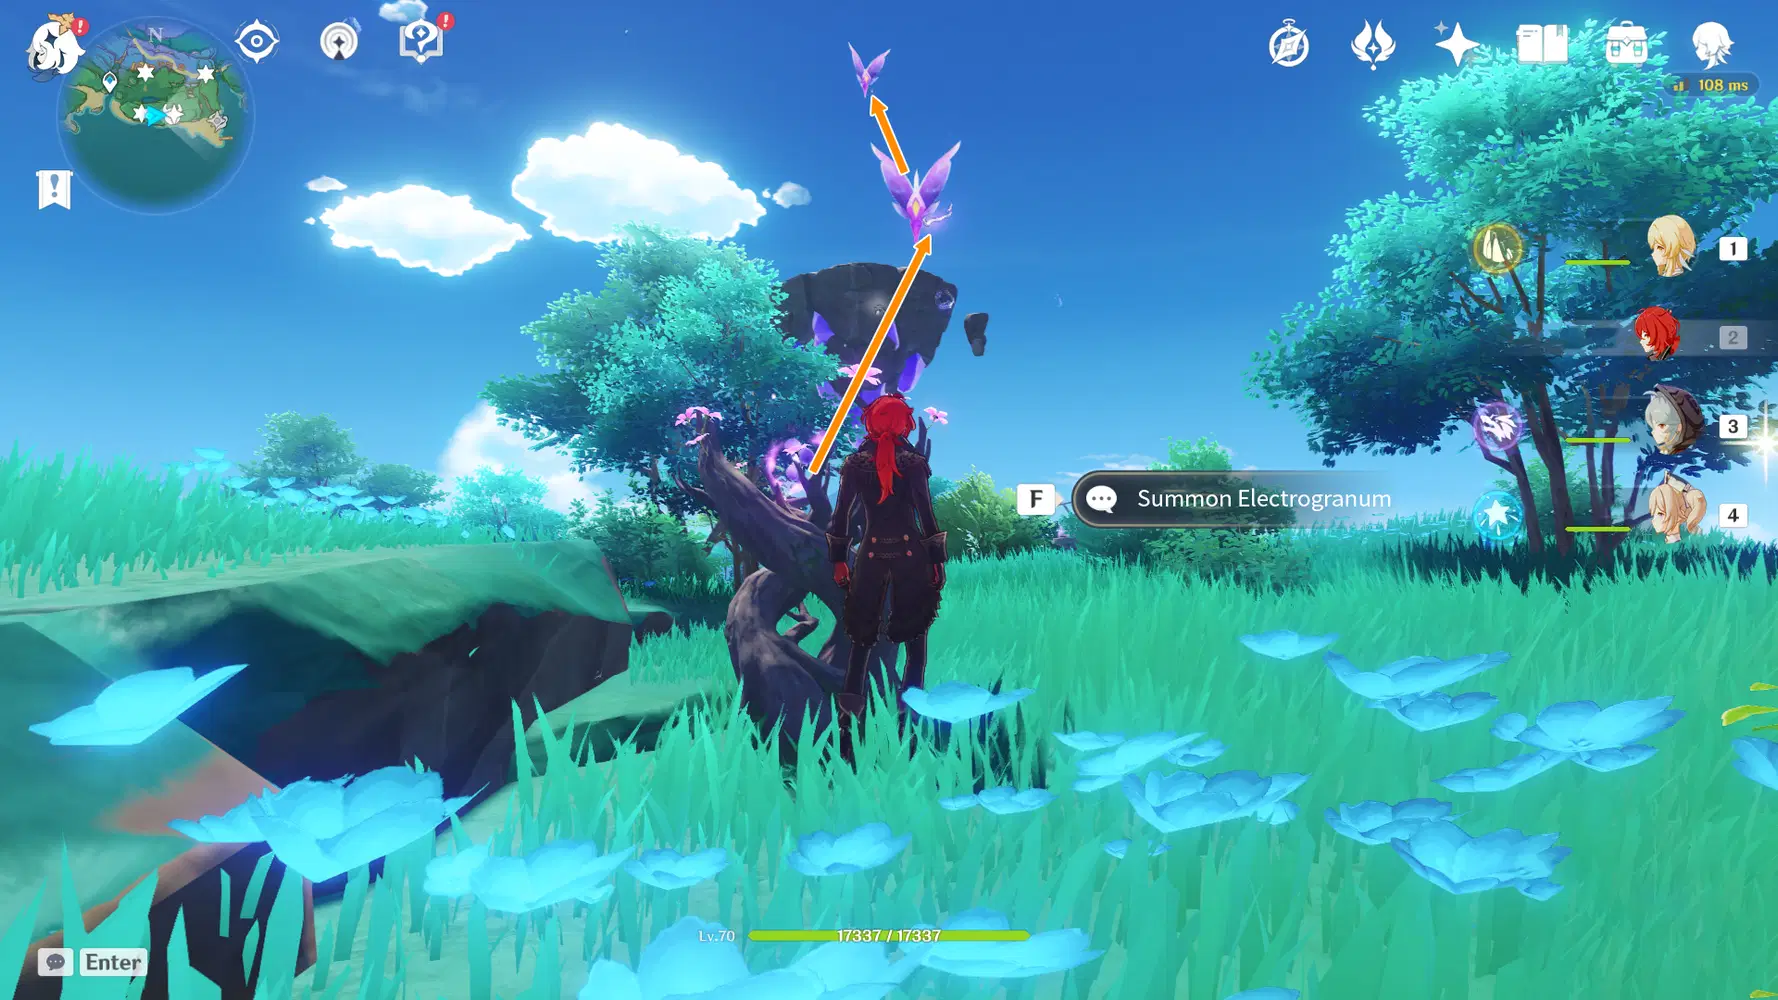
Go east to the floating rocks and you’ll see the Electroculus in the air. You’ll need to solve the puzzle with three Lightning Strike Probes for the Thunder Sphere to appear.
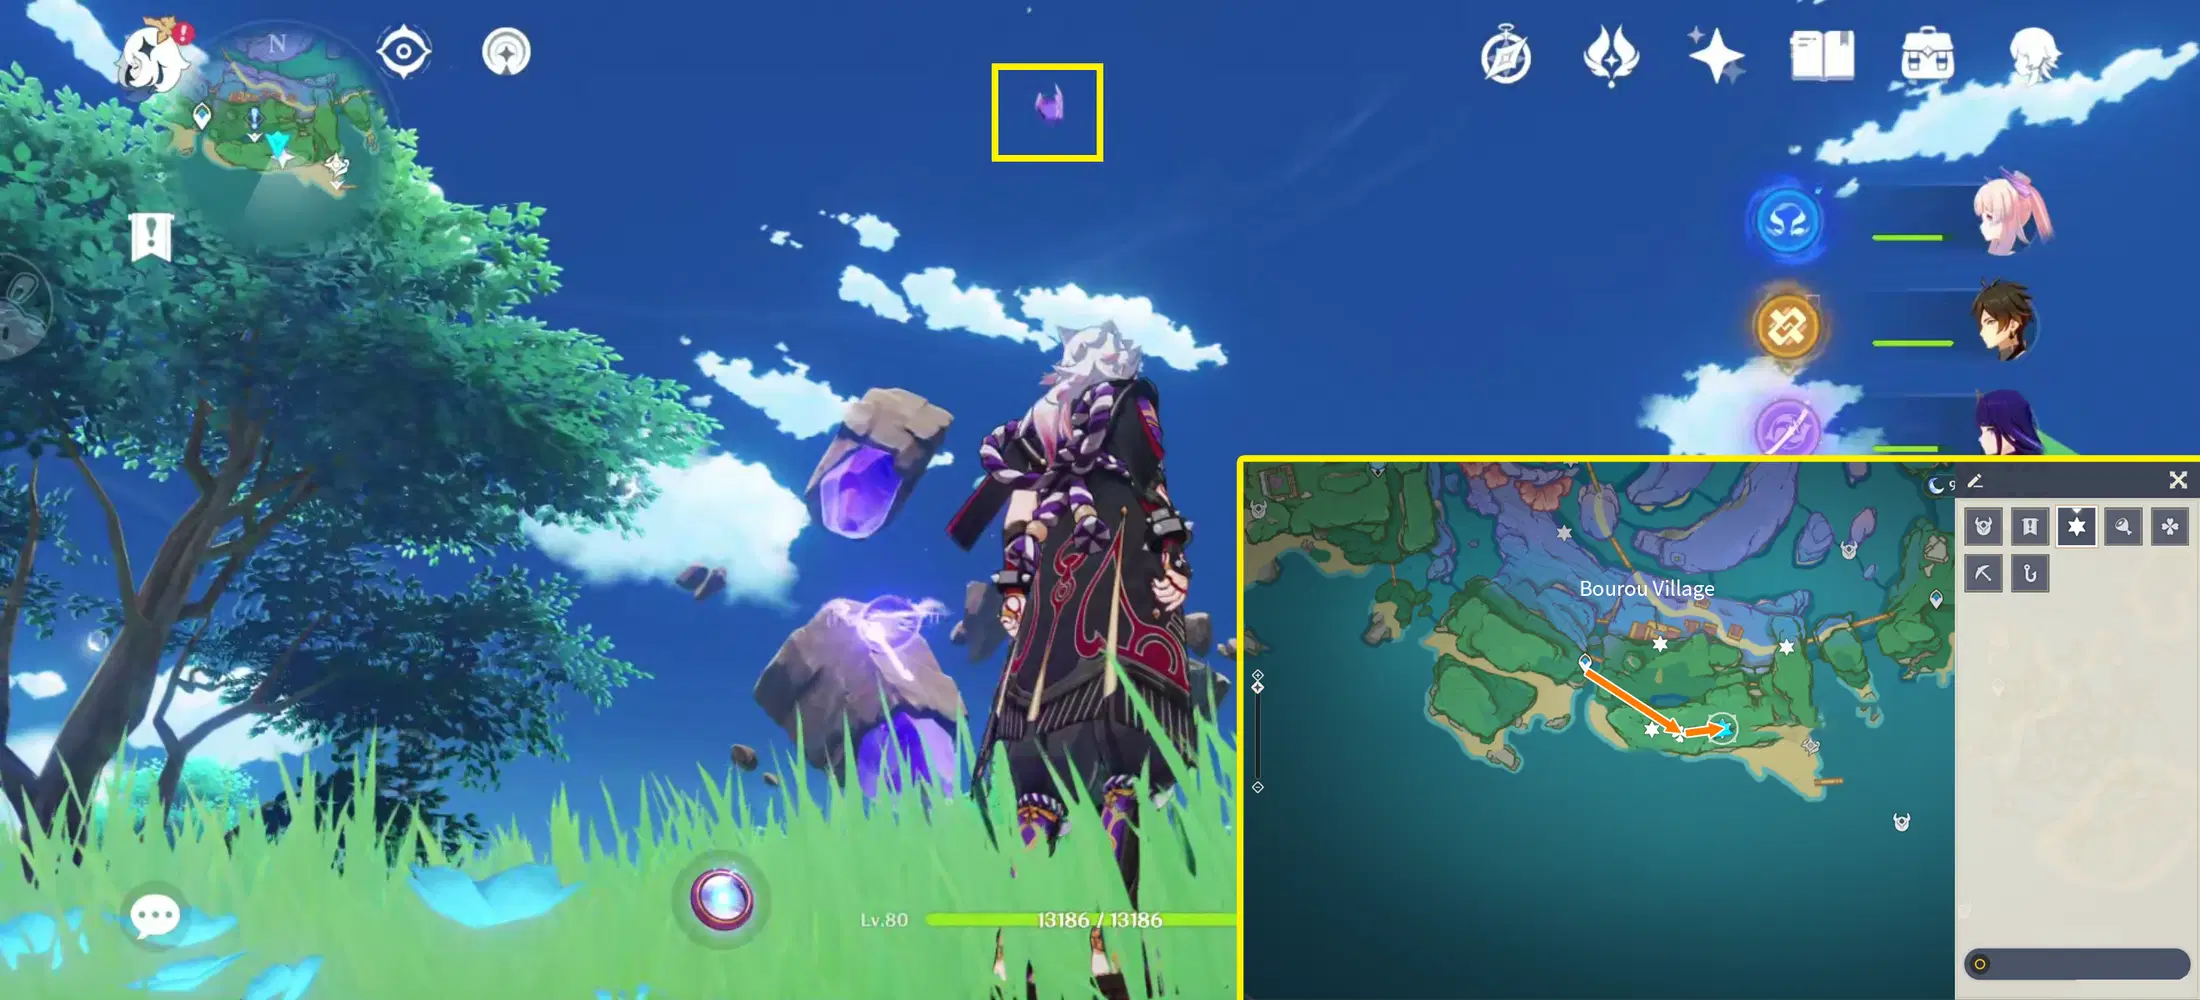
The Electro Seelie will move between the three Lightning Strike Probes, so quickly adjust the direction of the probes after touching the Seelie before it messes the direction up again. The Electro Seelie moves in a pattern, so it’ll become easier when you find the right rhythm.
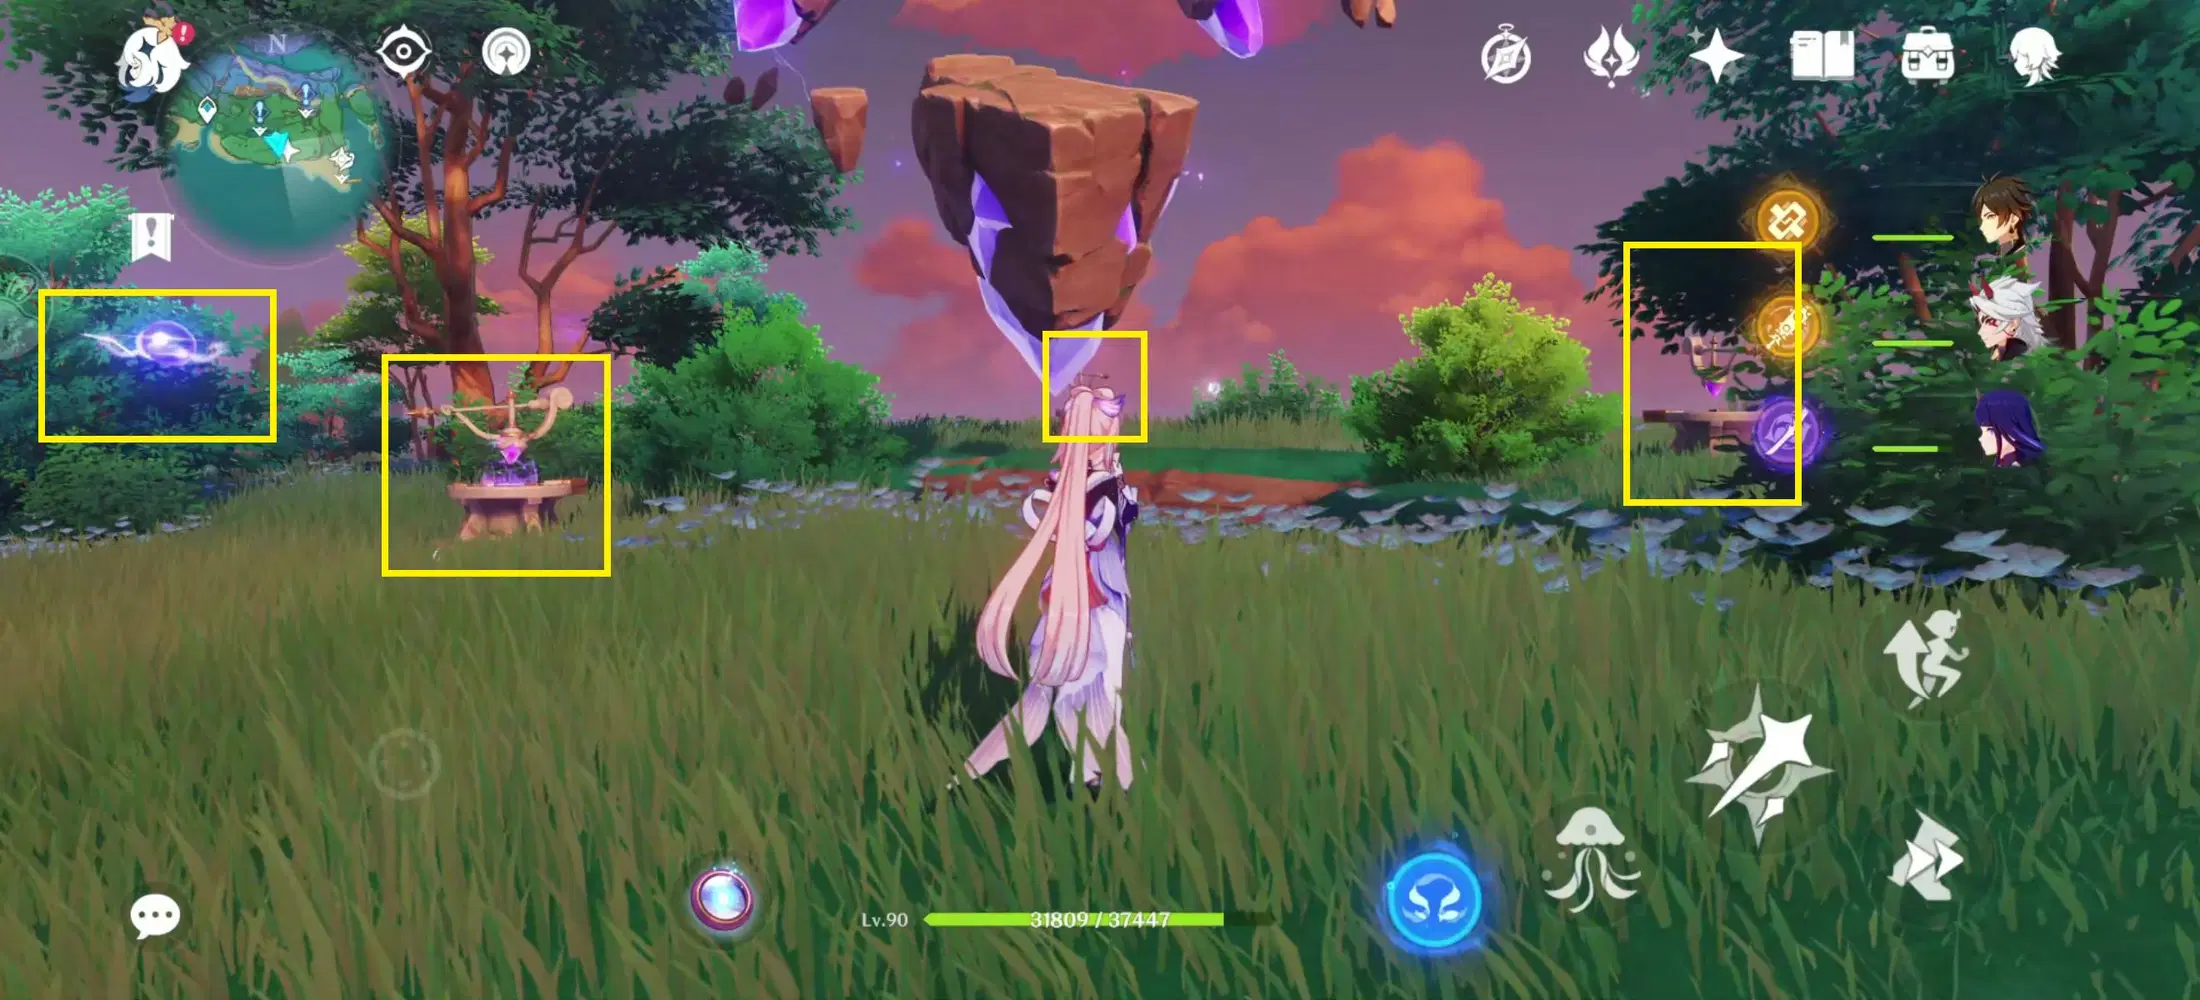
Afterwards the Thunder Sphere will appear, summon an Electrograna nearby to fly up.
Electroculus 103:
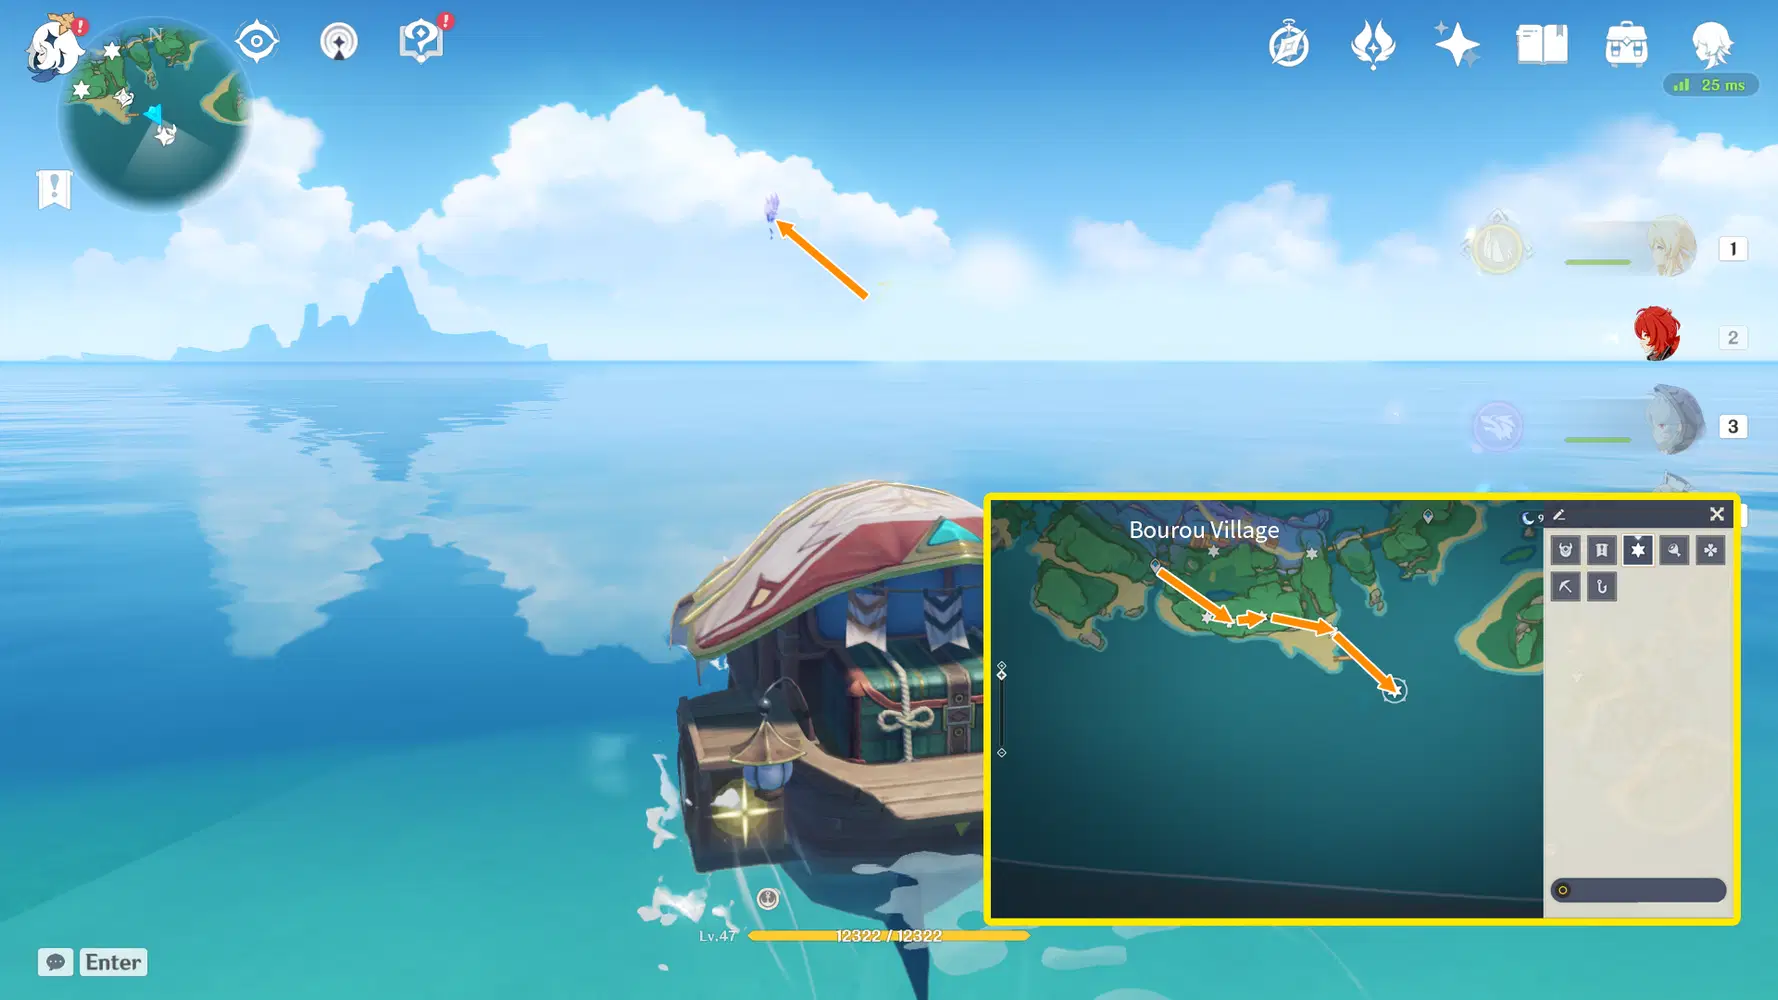
After obtaining #102, go to the Waverider waypoint in the south and drive the boat towards the southeast. When you see the icon pop up on the mini map, simply exit the Waverider to fly up and grab it. Careful to not drive too fast lest you miss it.
Electroculus 104:
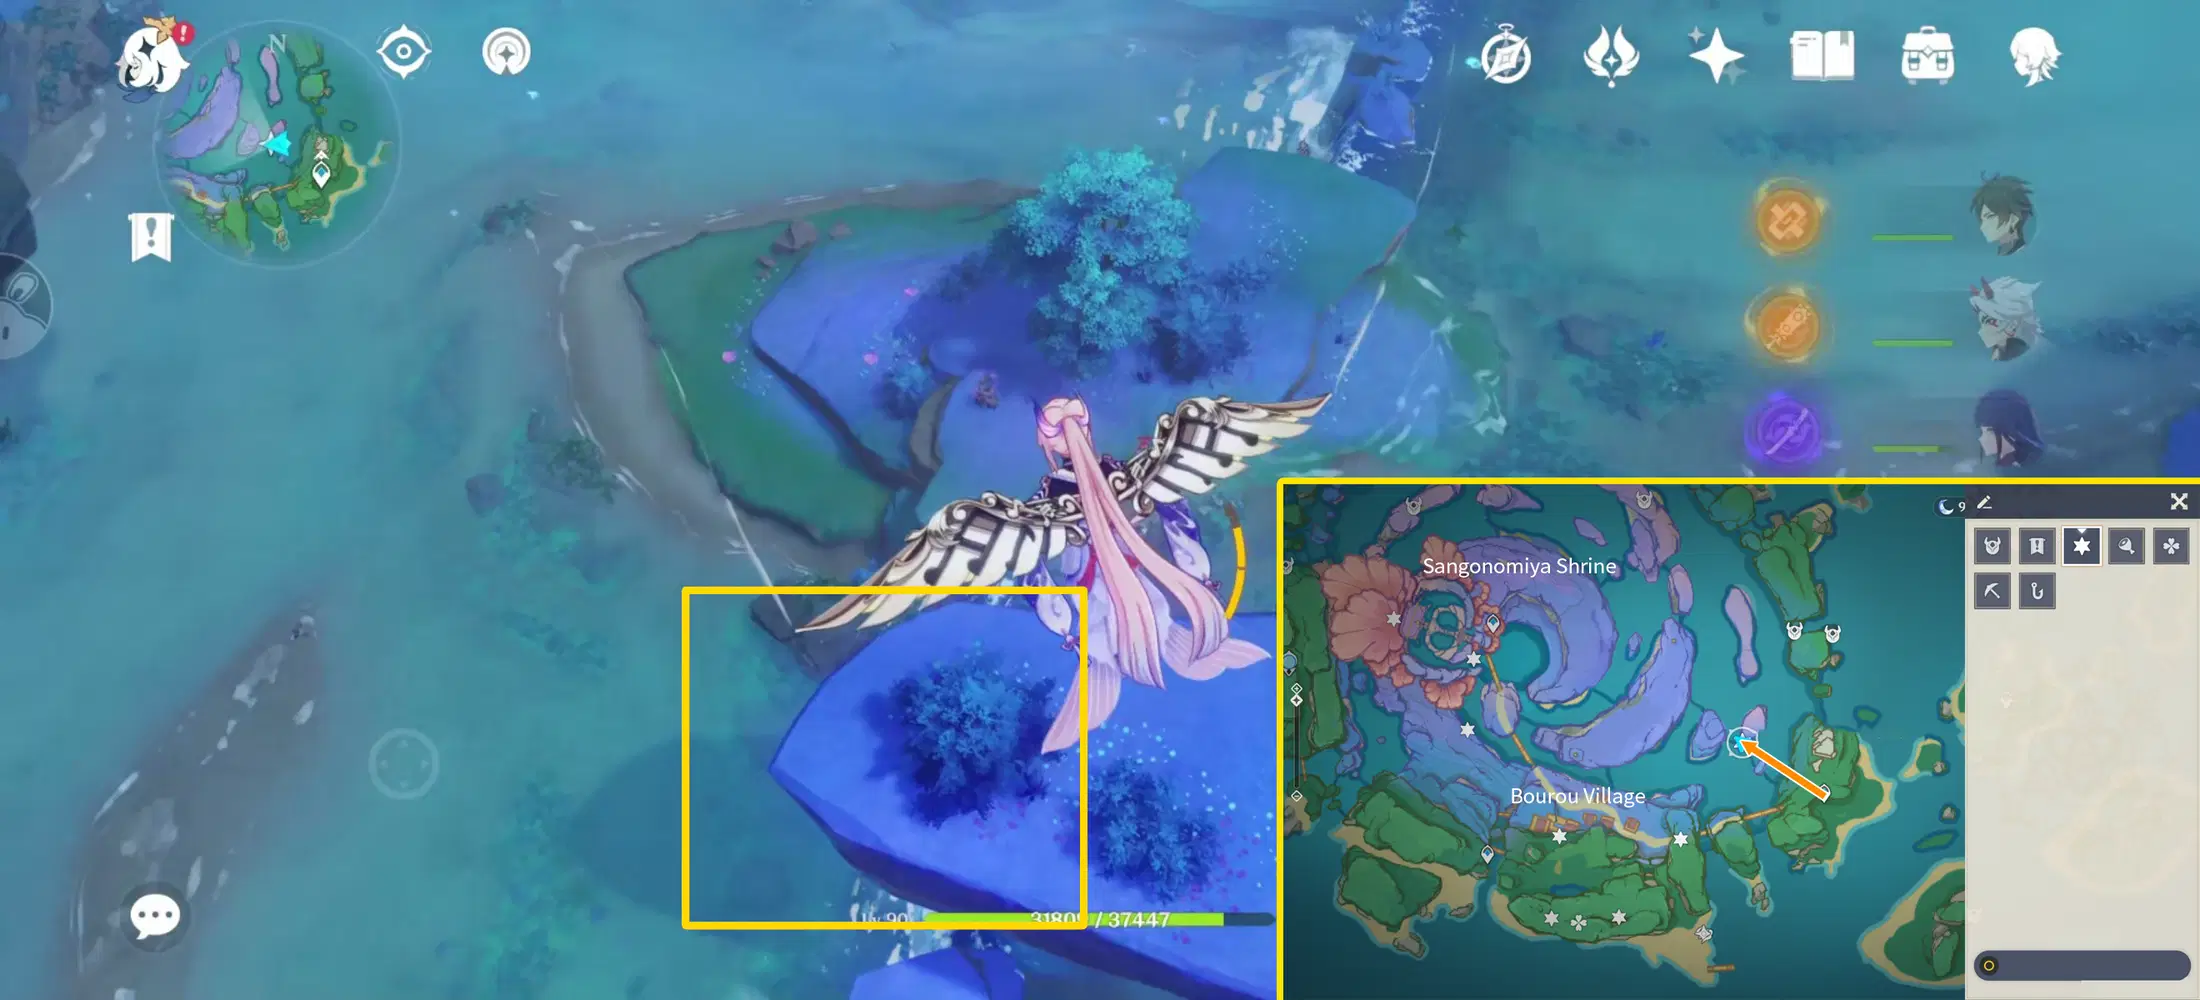
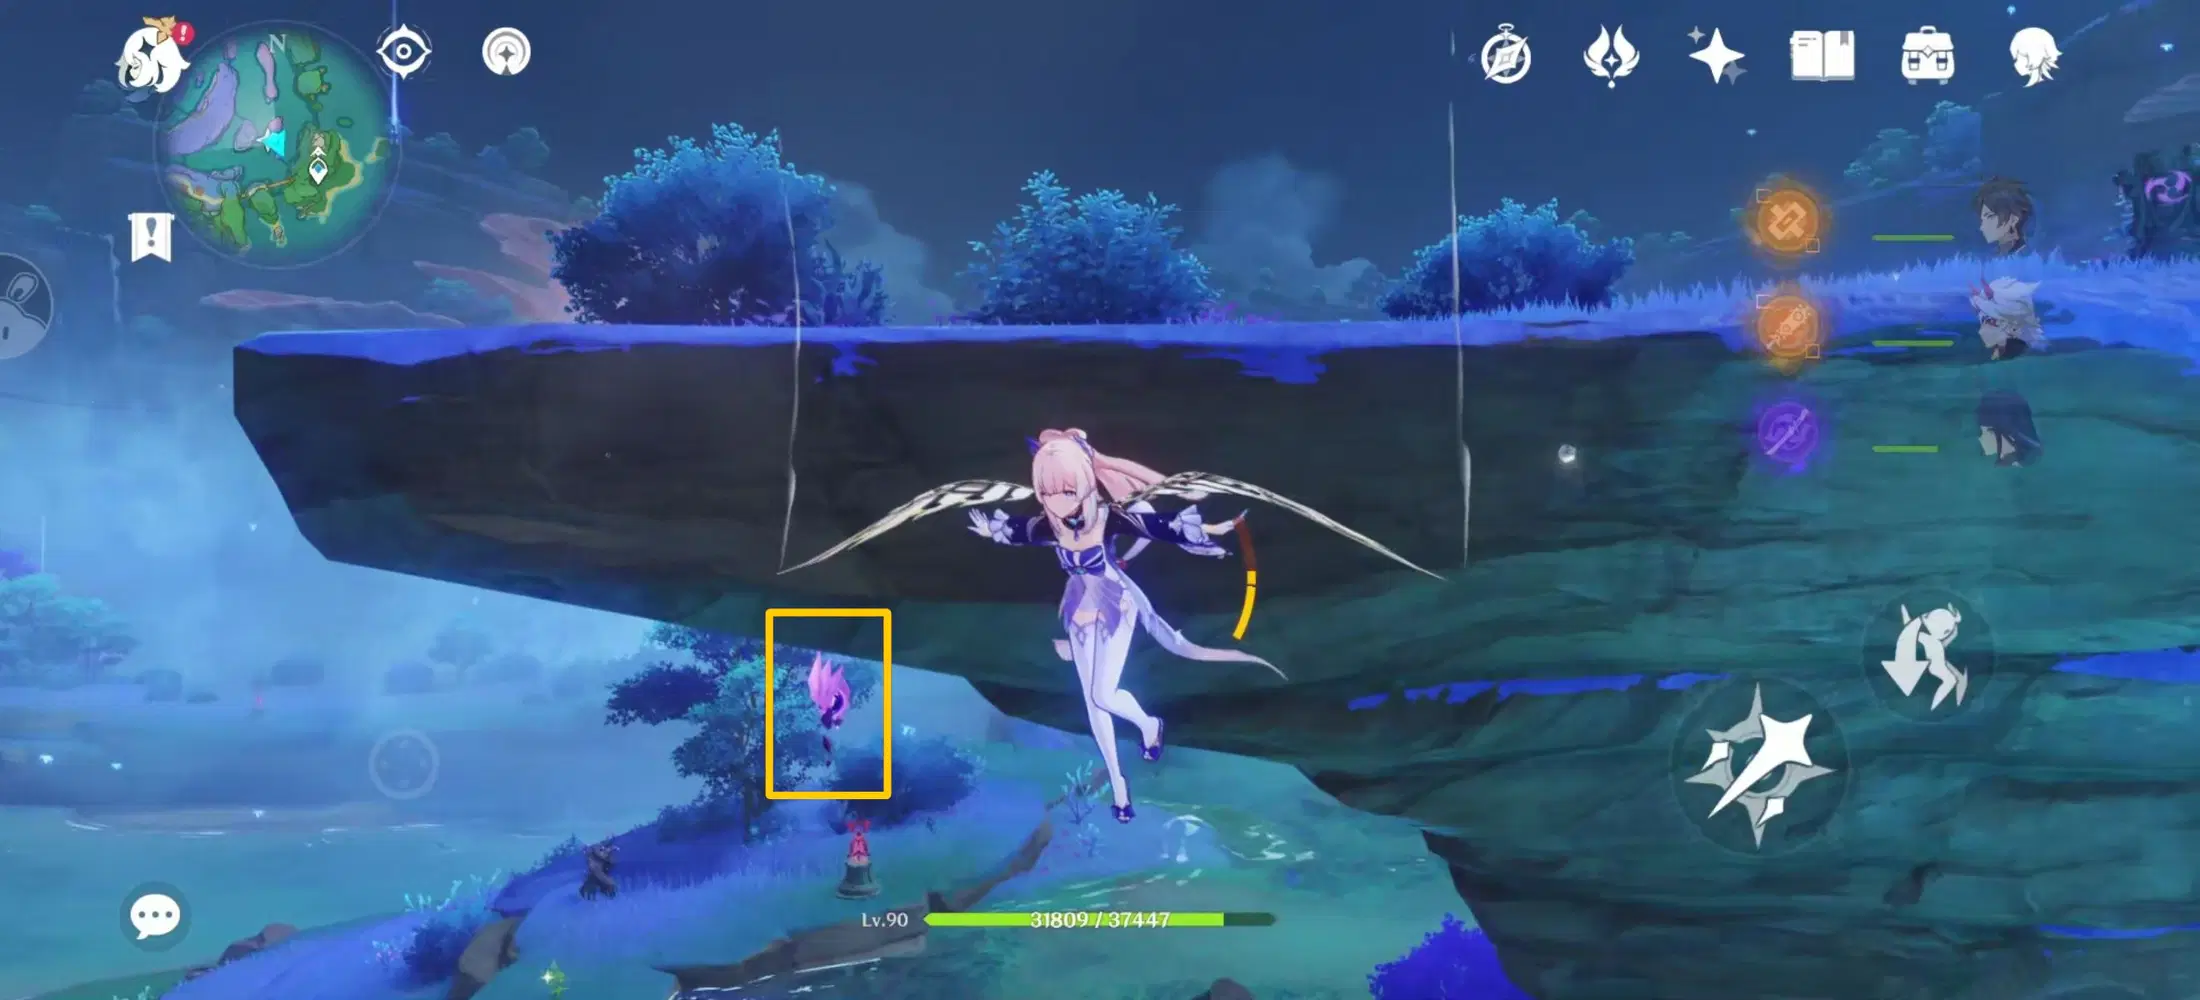
Teleport to the east Bourou Village waypoint and glide northwest. The Electroculus is beneath the cliff near the top, so glide to reach it.
Electroculus 105:
Return to the east Bourou Village waypoint and head north. The Electroculus is behind the waterfall, fly over to grab it.
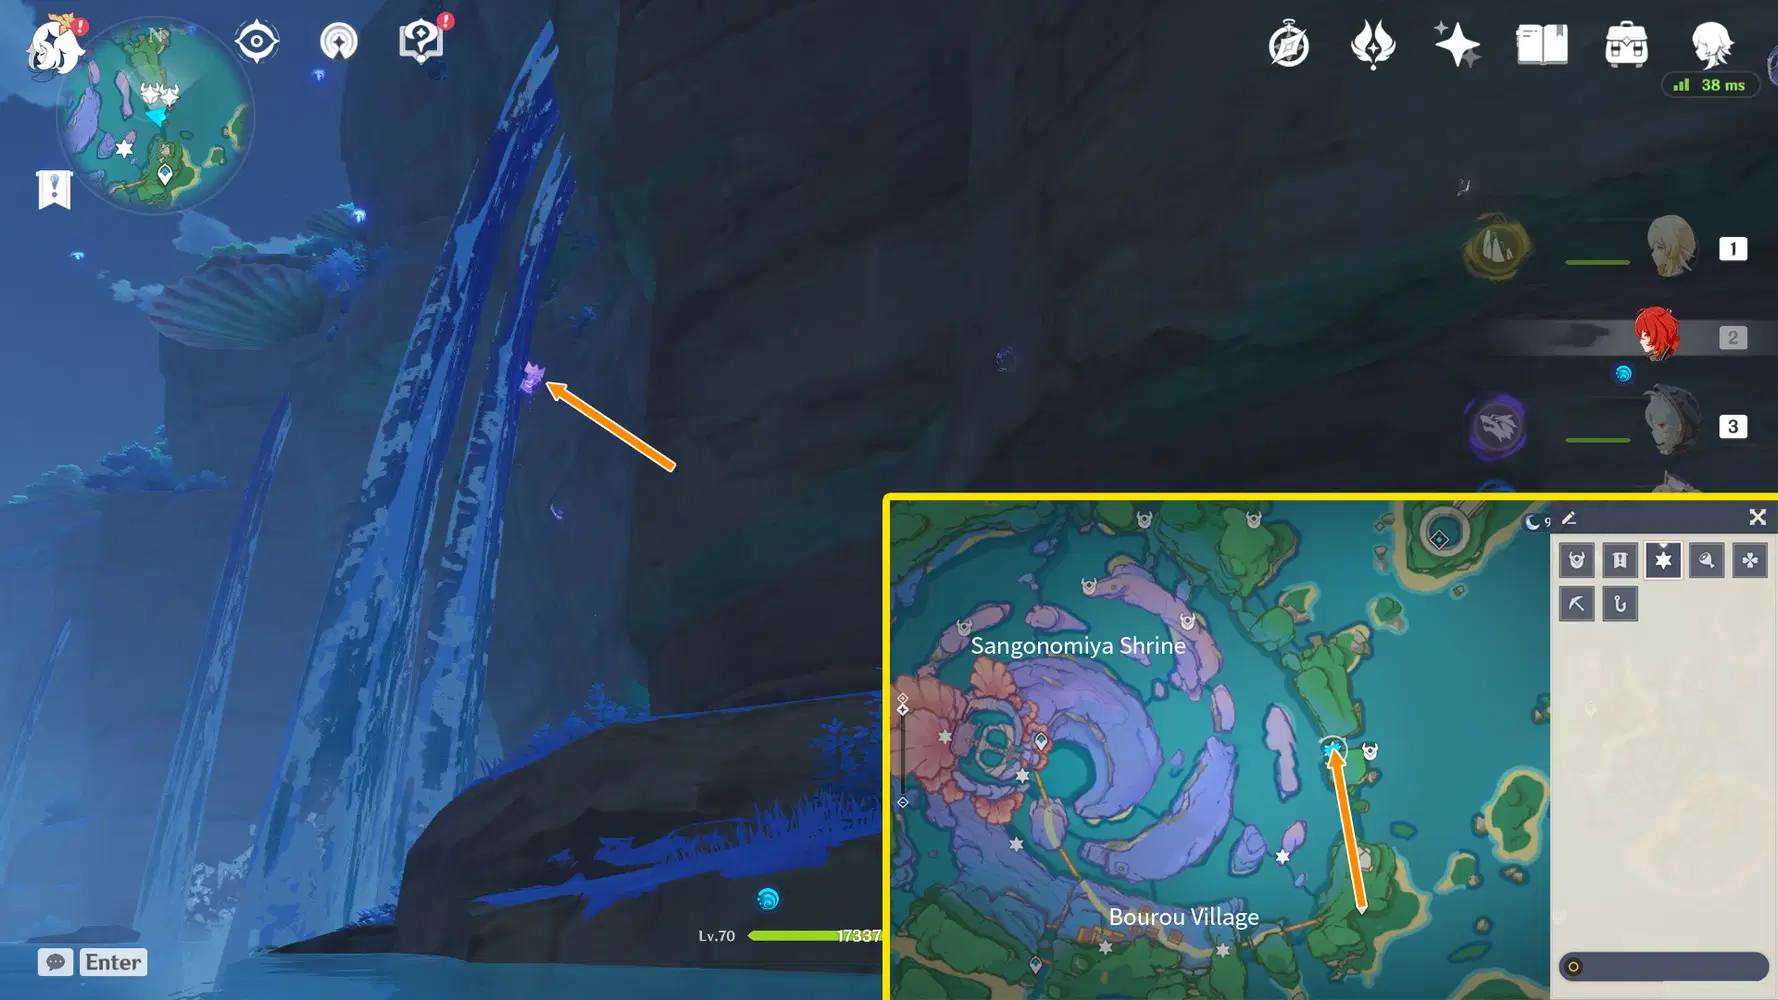
Electroculus 106:
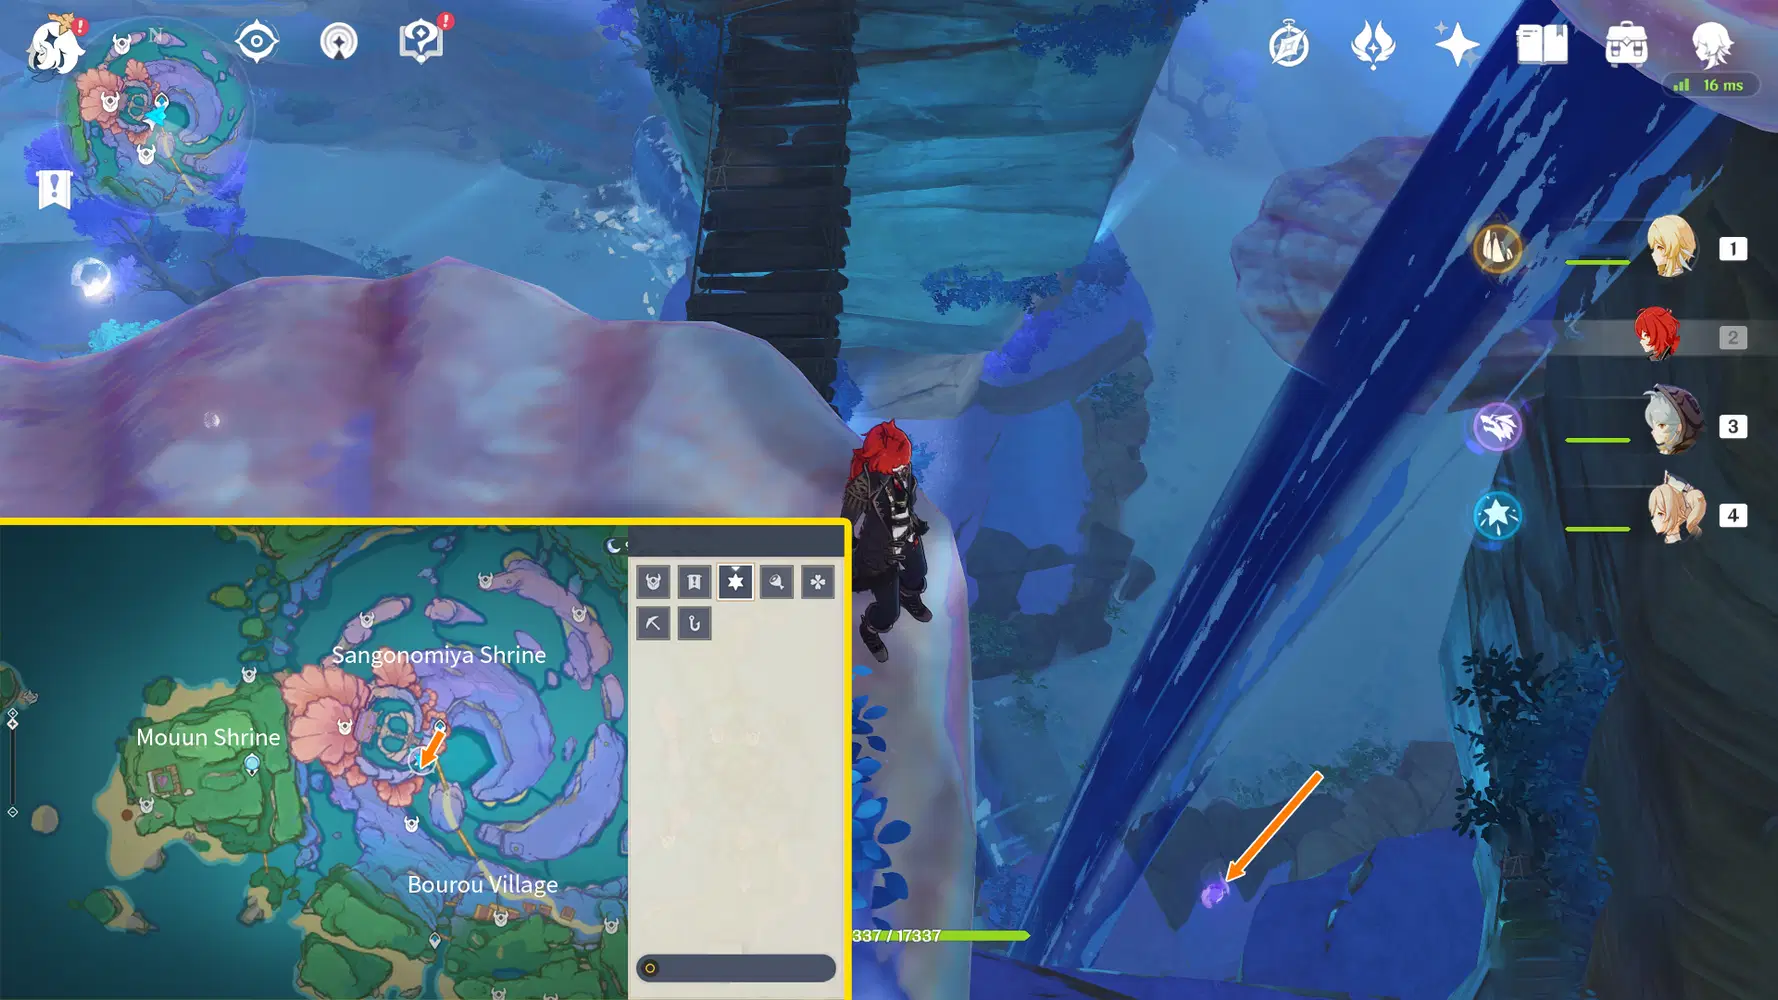
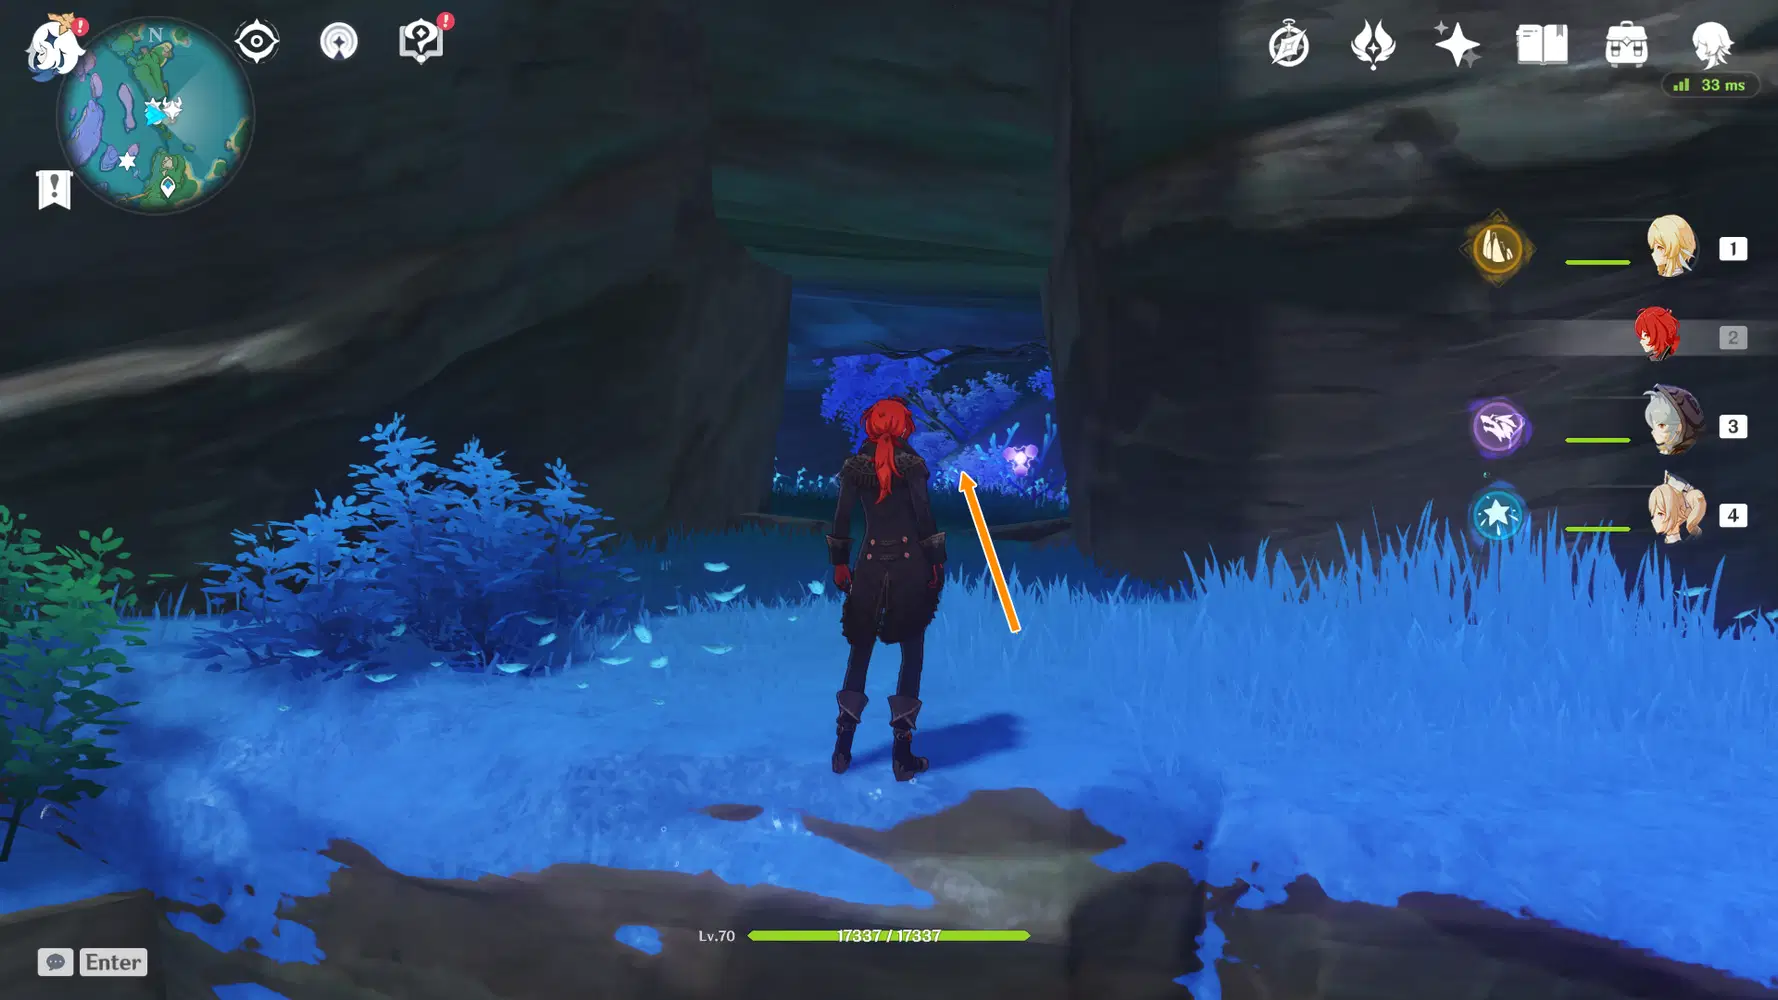
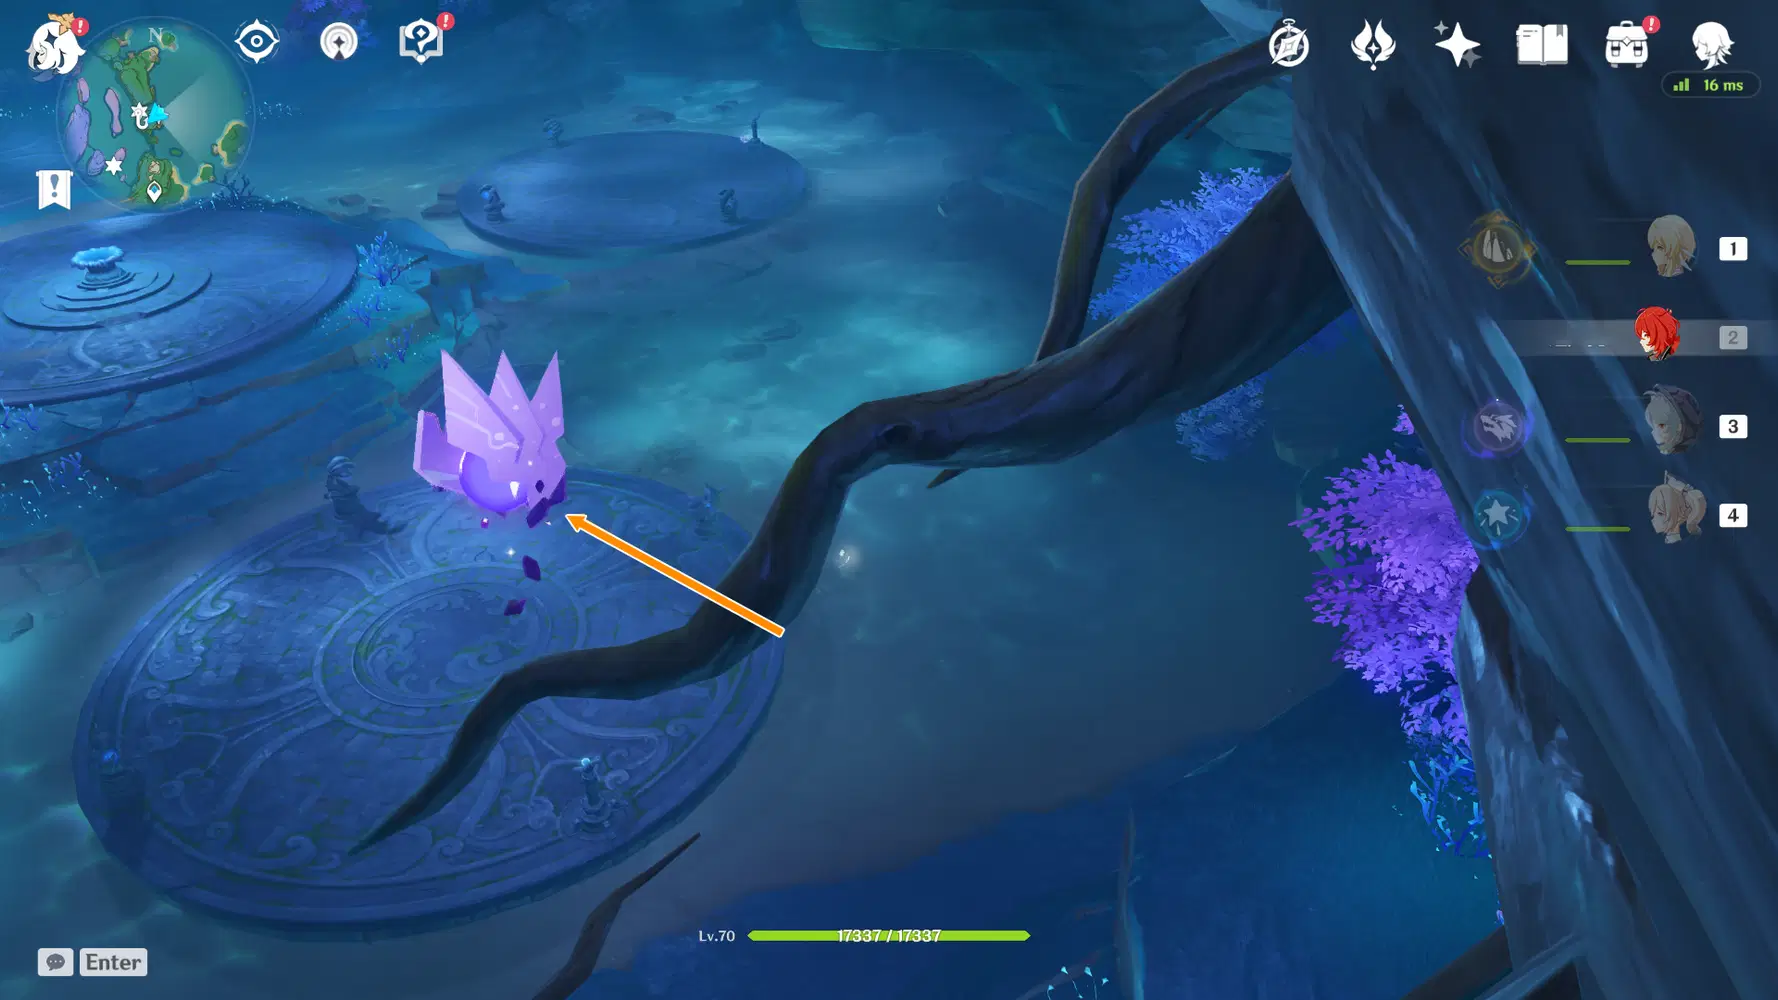
Is located inside the cave of "Heart of Watatsumi" in the The Moon-Bathed Deep quest series. Don’t jump yet once you enter the cave, instead walk a little to the left (north):
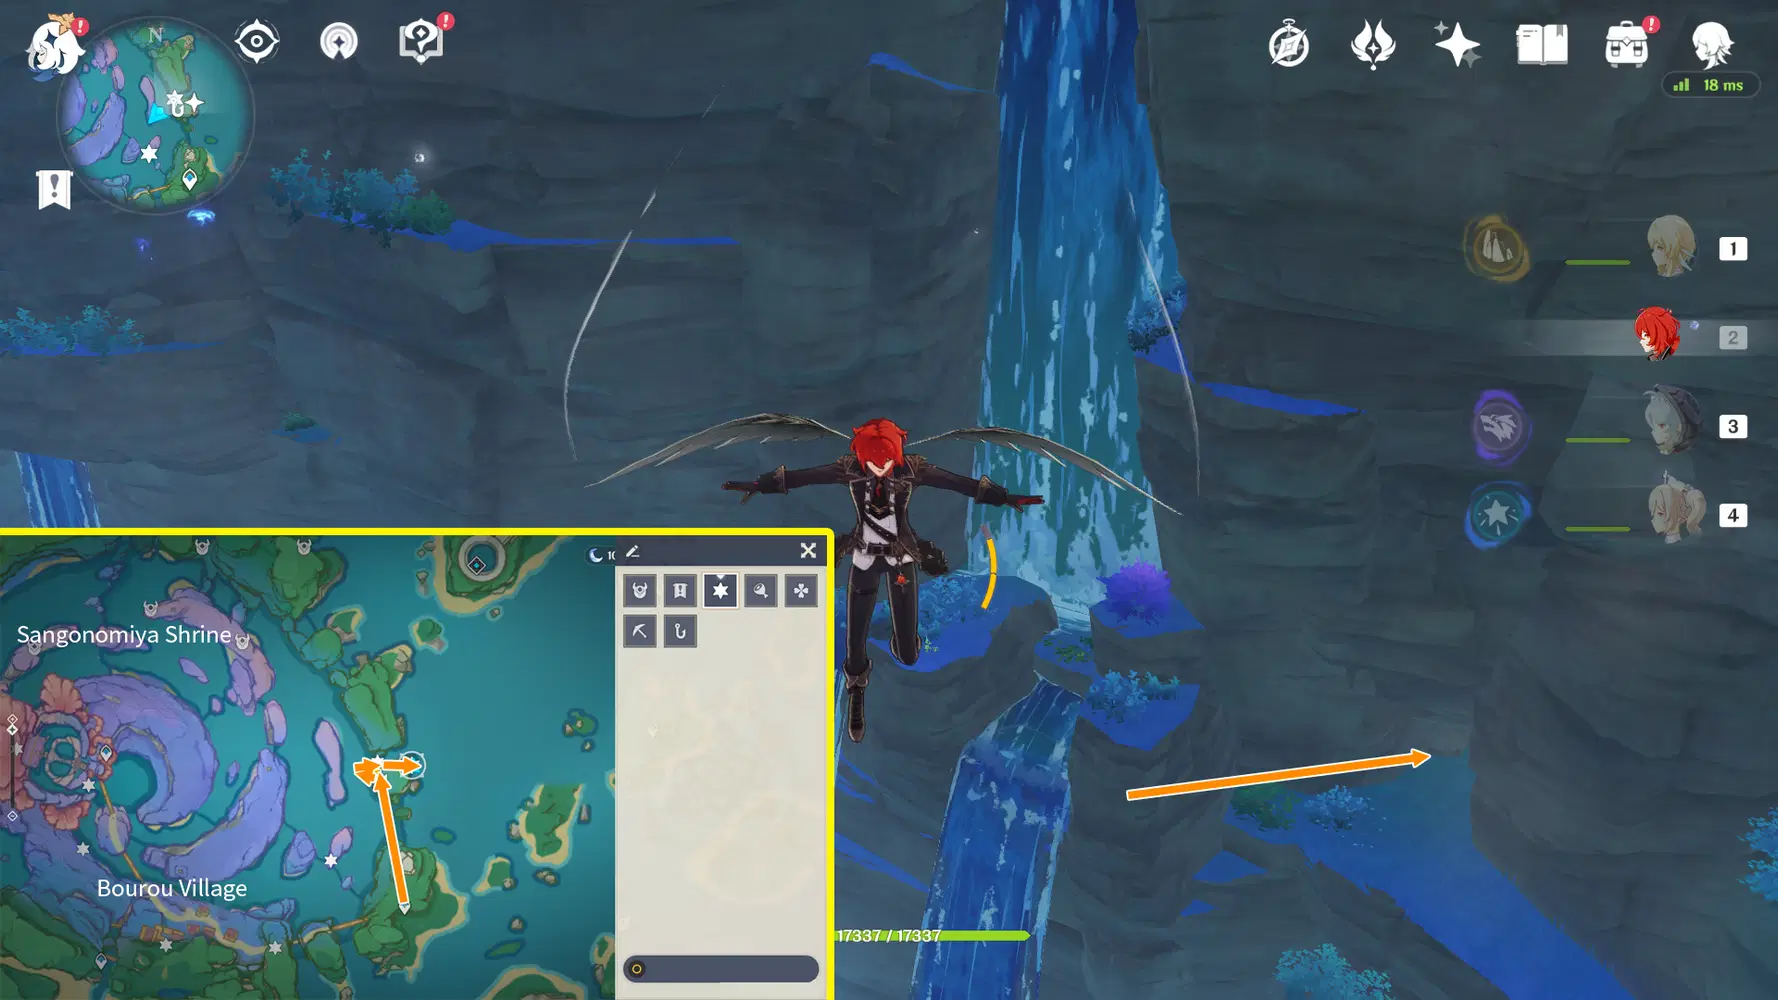
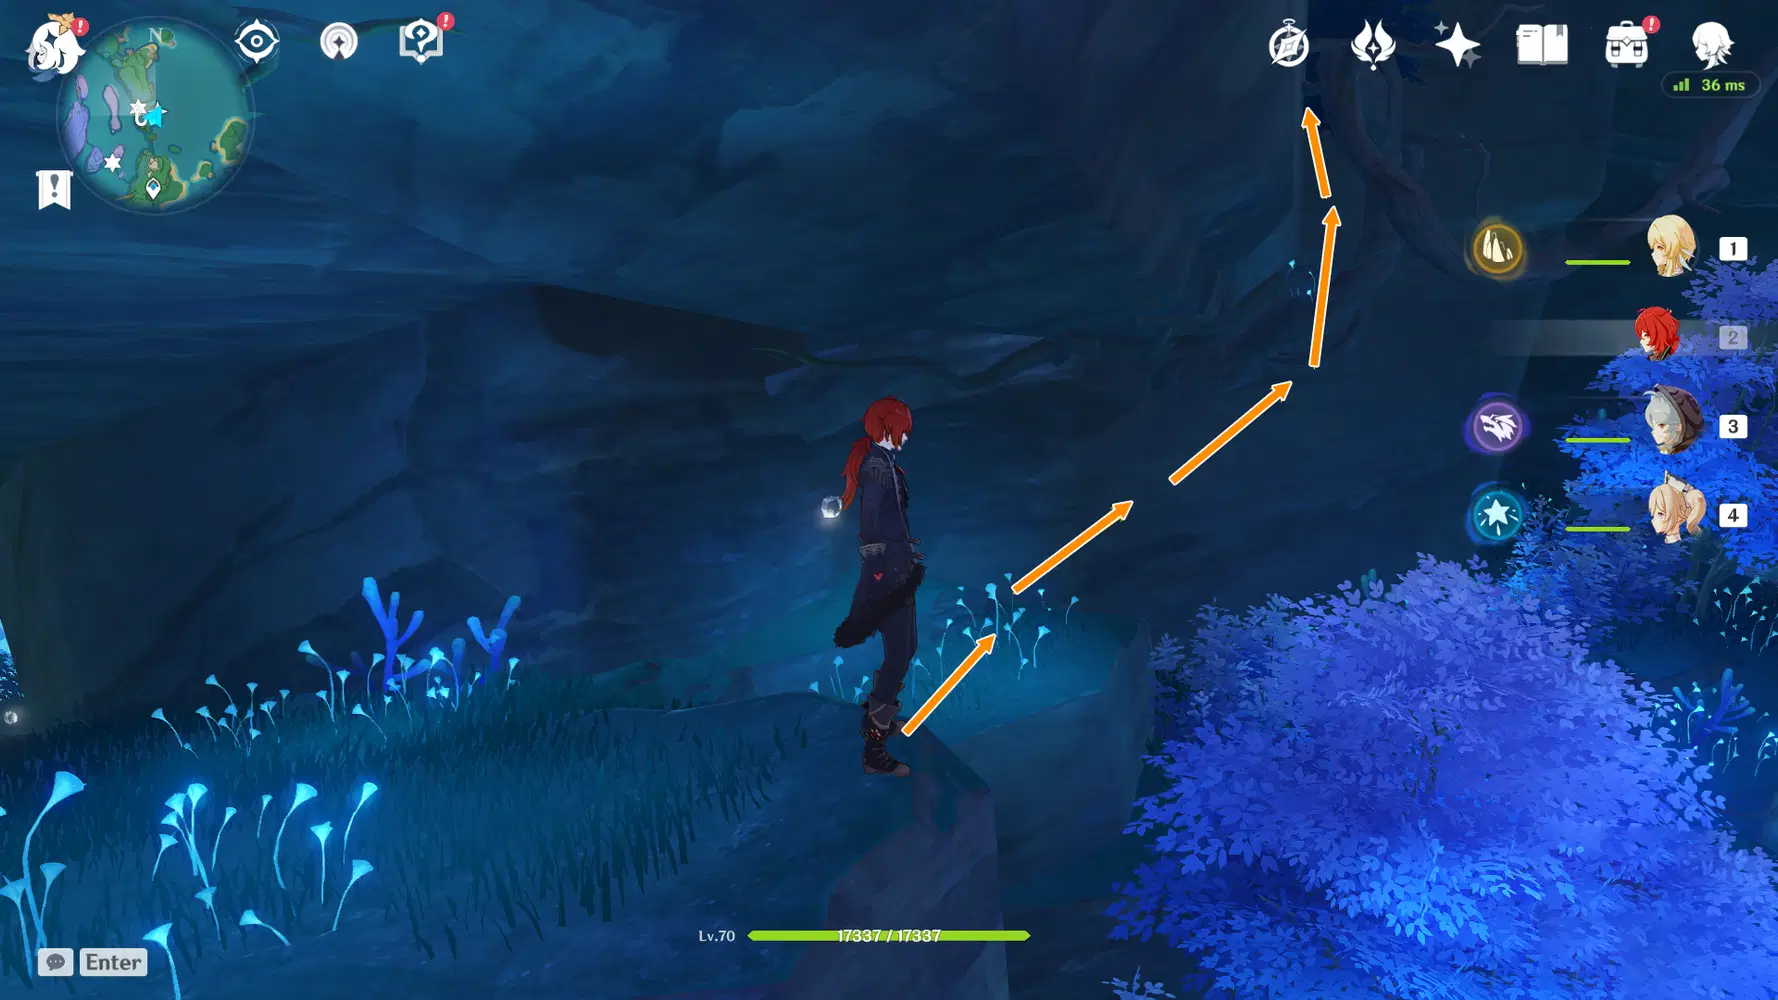
Climb up to find it, the route is depicted in the picture.
IV. Route 2 (Electroculi #107-116)
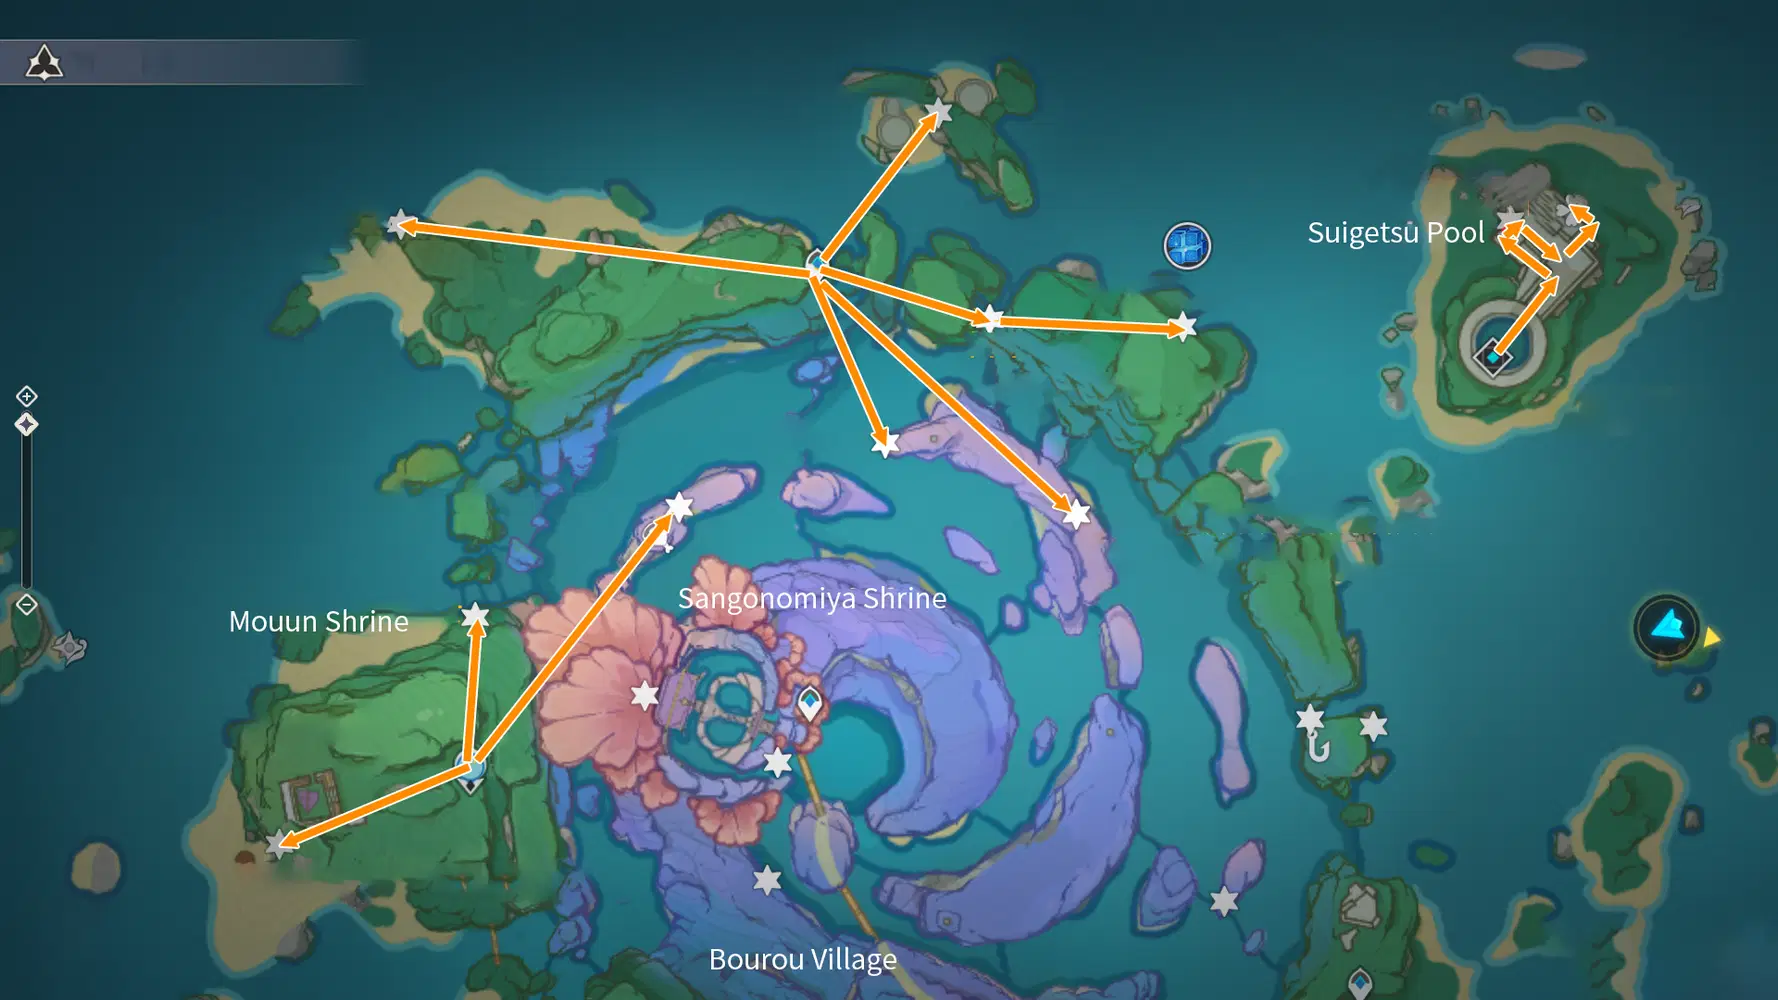
Note: The route mainly focuses on the Electroculi to the north half of Watatsumi Island. This part requires you to be at Sacred Sakura's Favor Lv.17 (Electrograna Lv.6) or above to explore.
Electroculus 107:
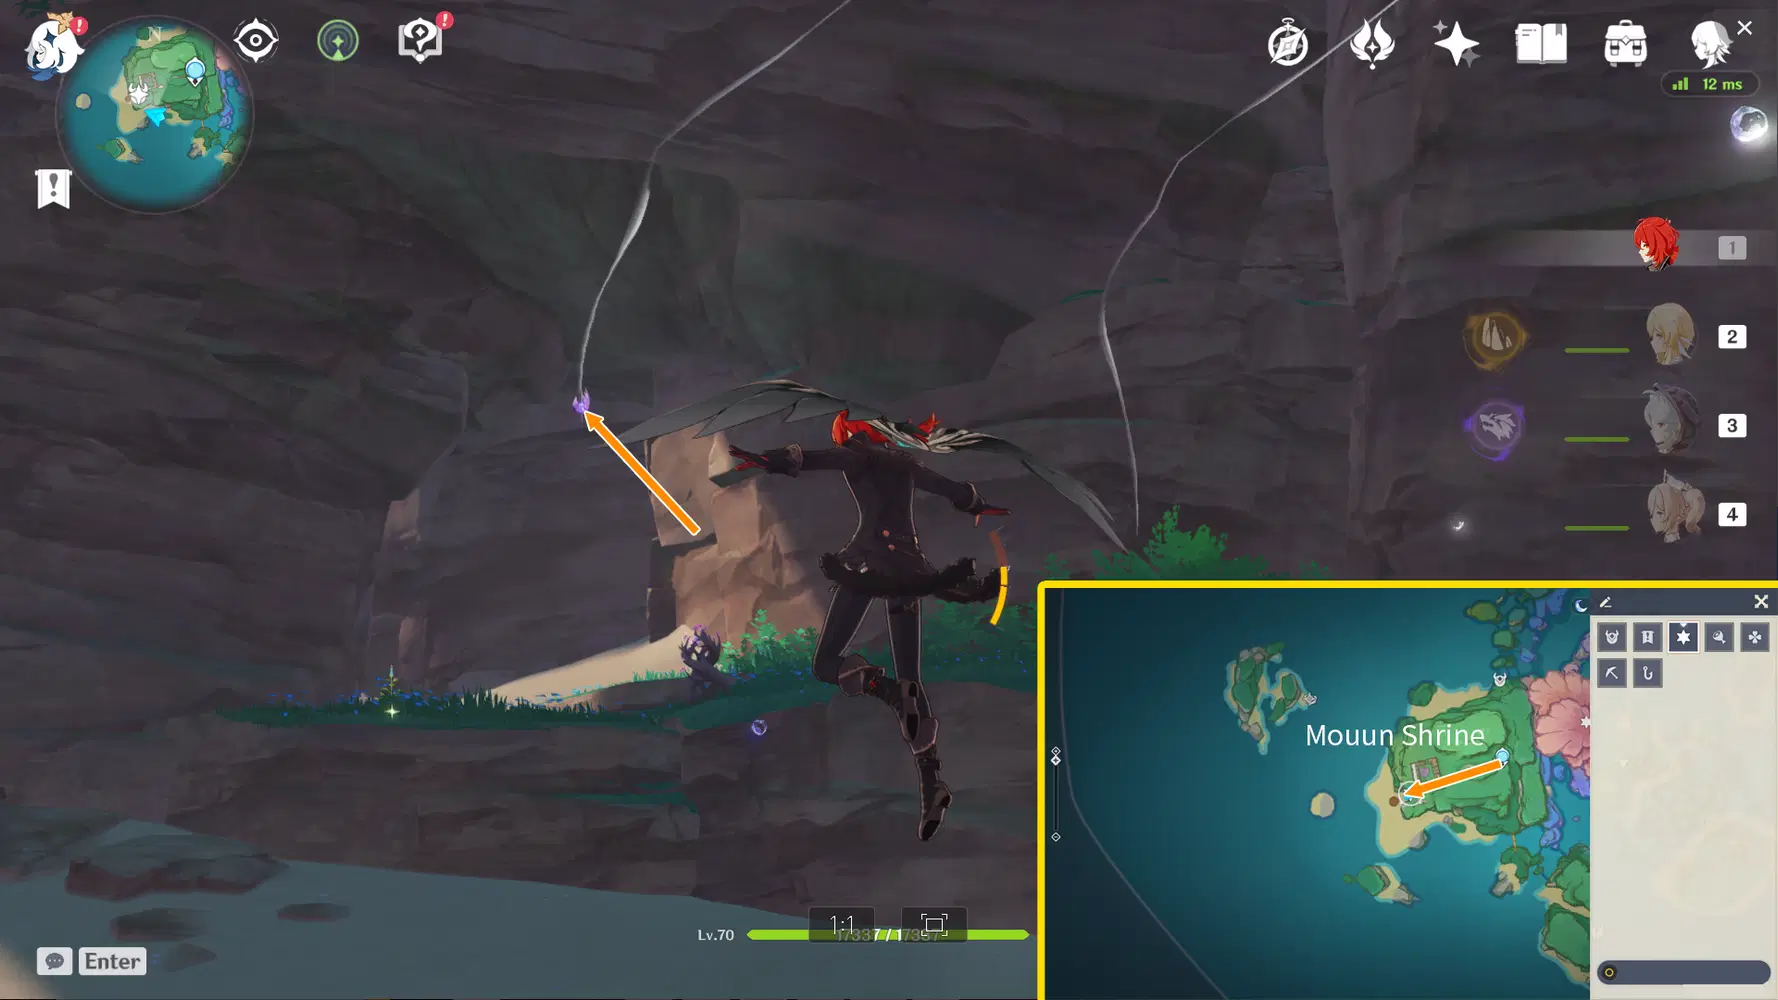
Teleport to Statue of The Seven of Watatsumi Island and go towards the cave in the west, you’ll find the Electroculus mid-air inside. Summon an Electrograna by the Thunder Sakura Bough and fly up via the Thunder Sphere to reach it.
Electroculus 108:
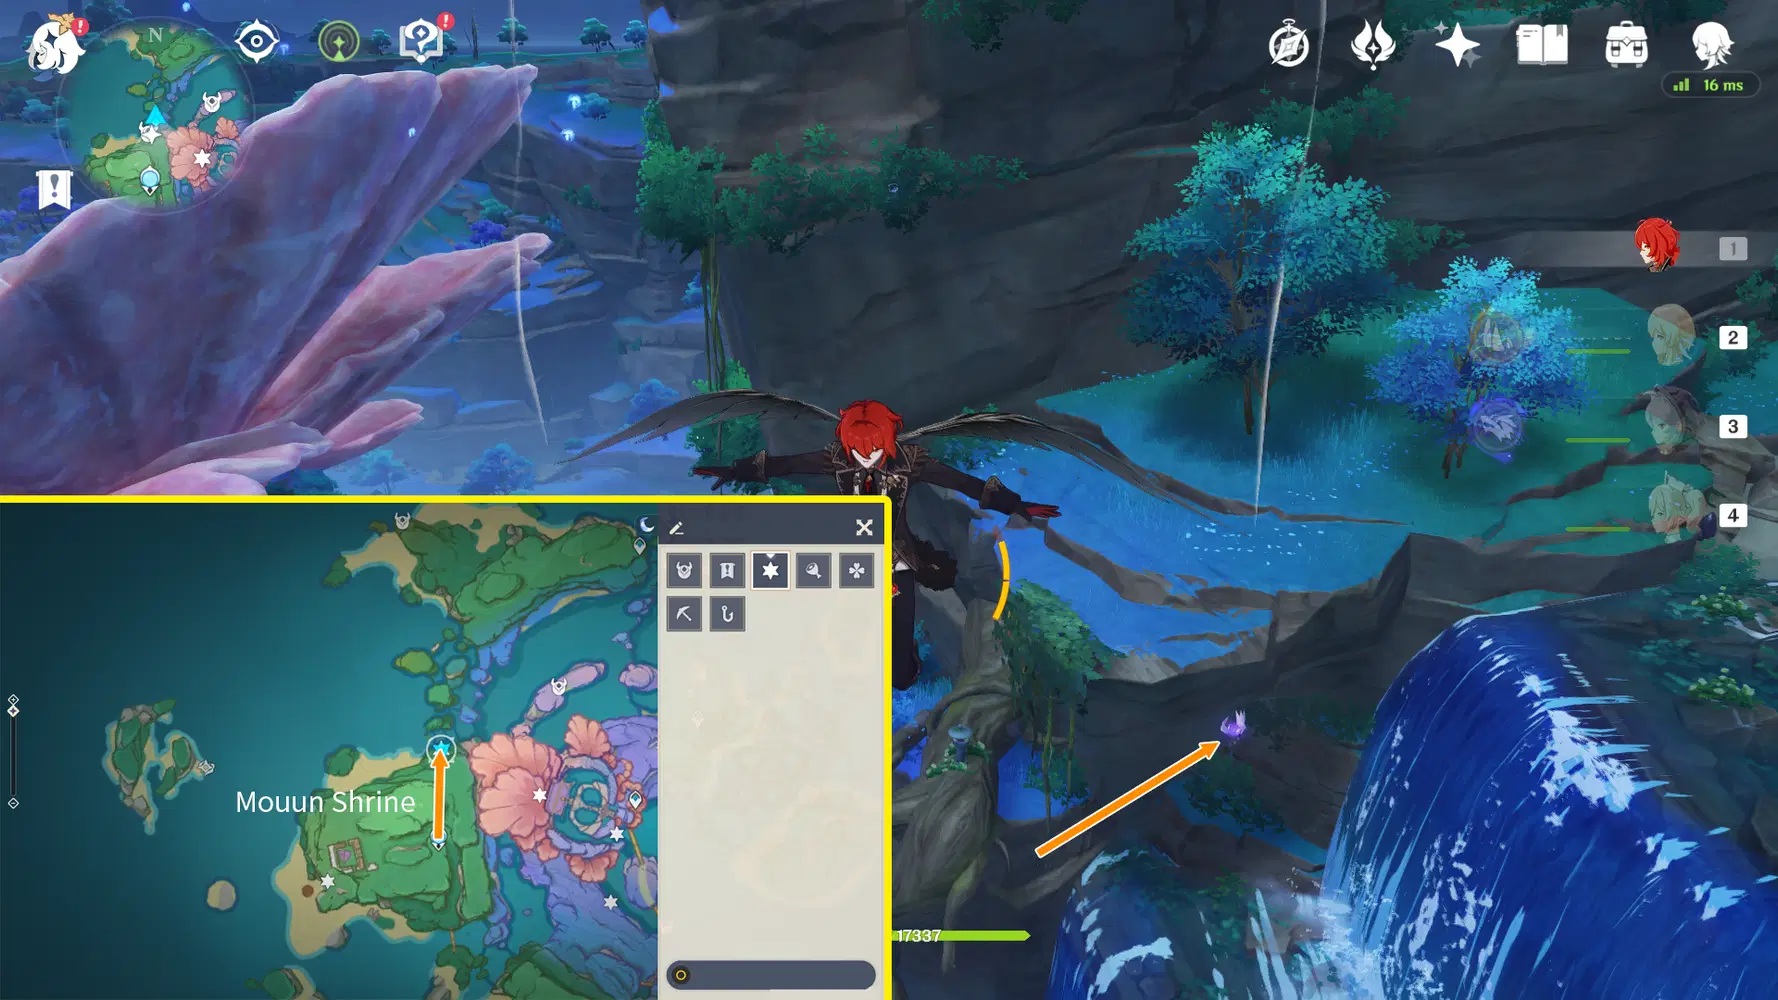
Return to the Statue of The Seven of Watatsumi Island and go north. The Electroculus is beneath the rock next to the waterfall, glide over to grab it.
Electroculus 109:
Return to the Statue of The Seven and fly northeast. The Electroculus is between two cliffs.
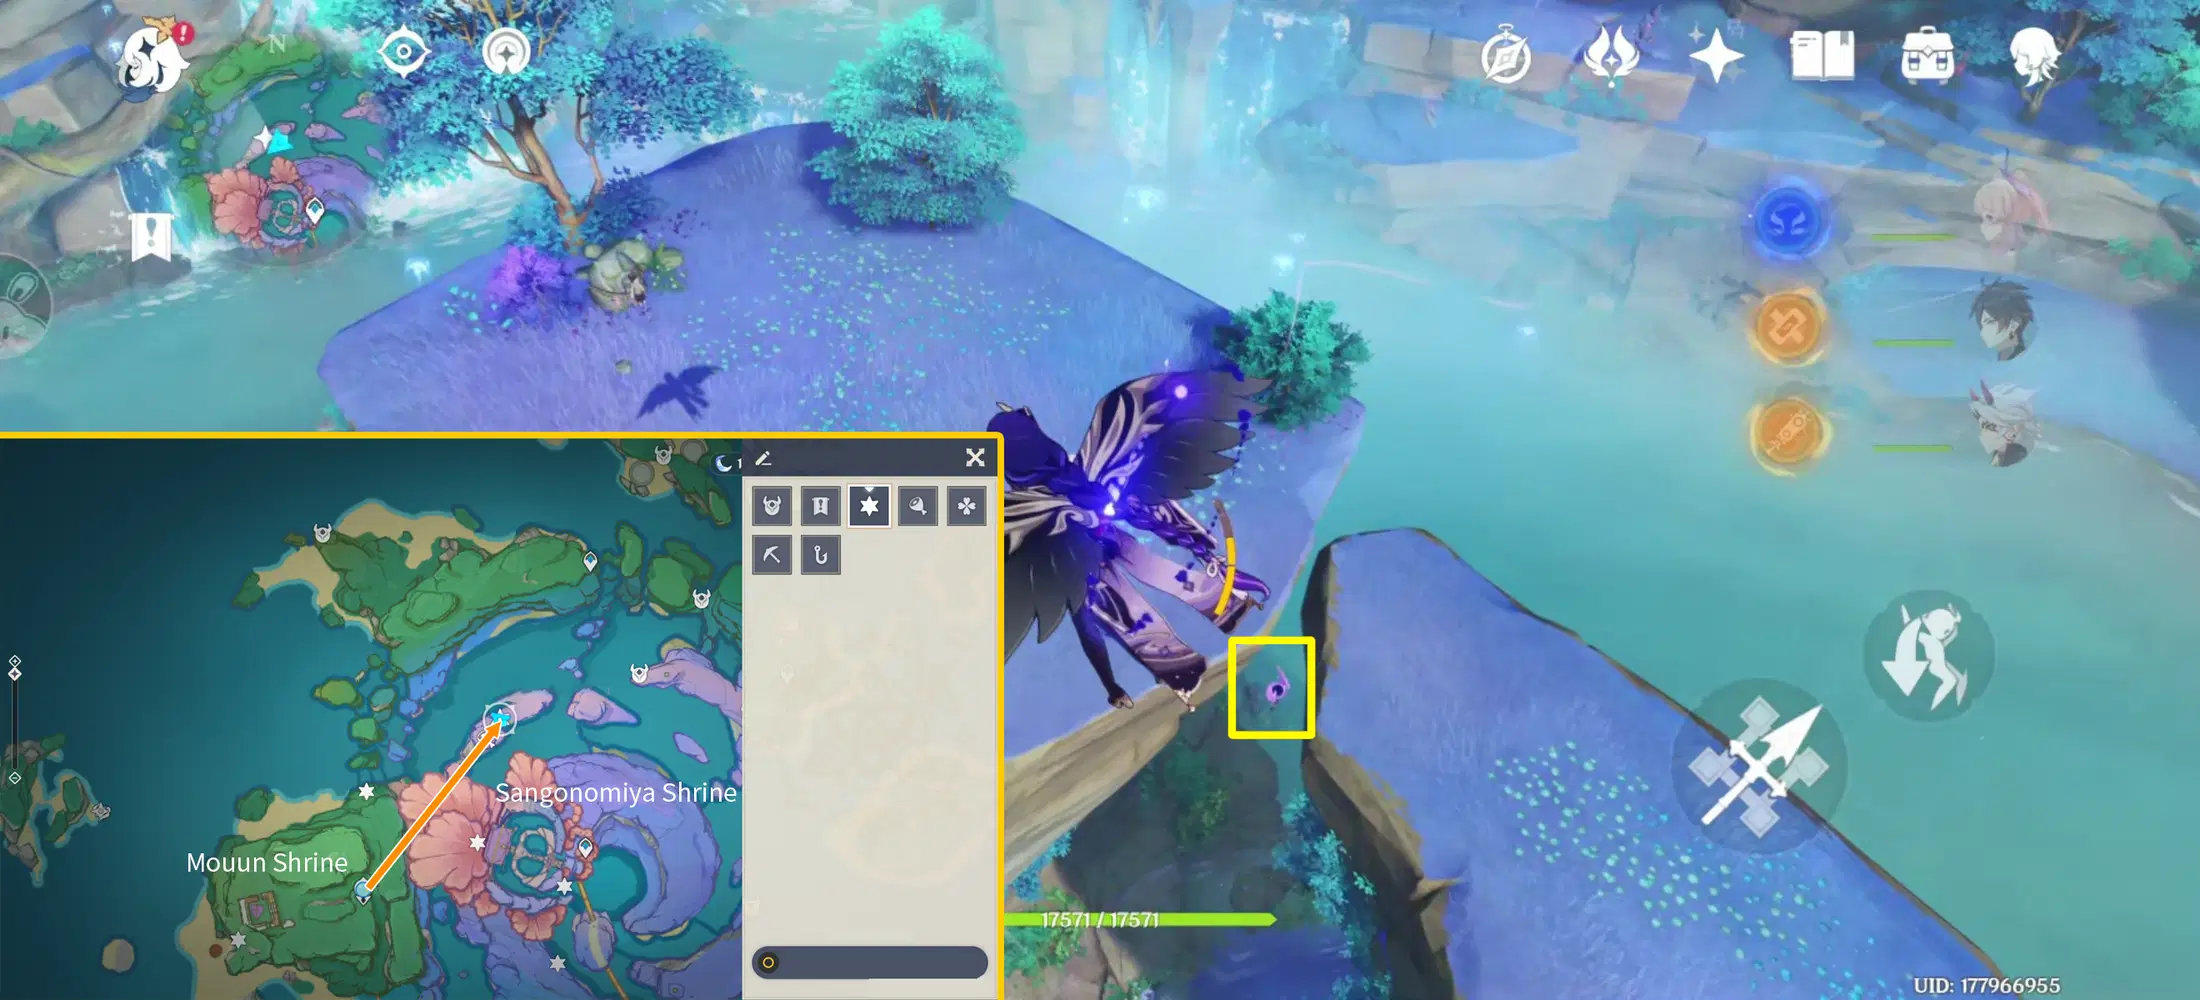
Electroculus 110:
Teleport to north Sangonomiya Shrine waypoint and go west. You’ll find the Electroculus beneath a cliff rock. Glide down from the cliff to grab it.
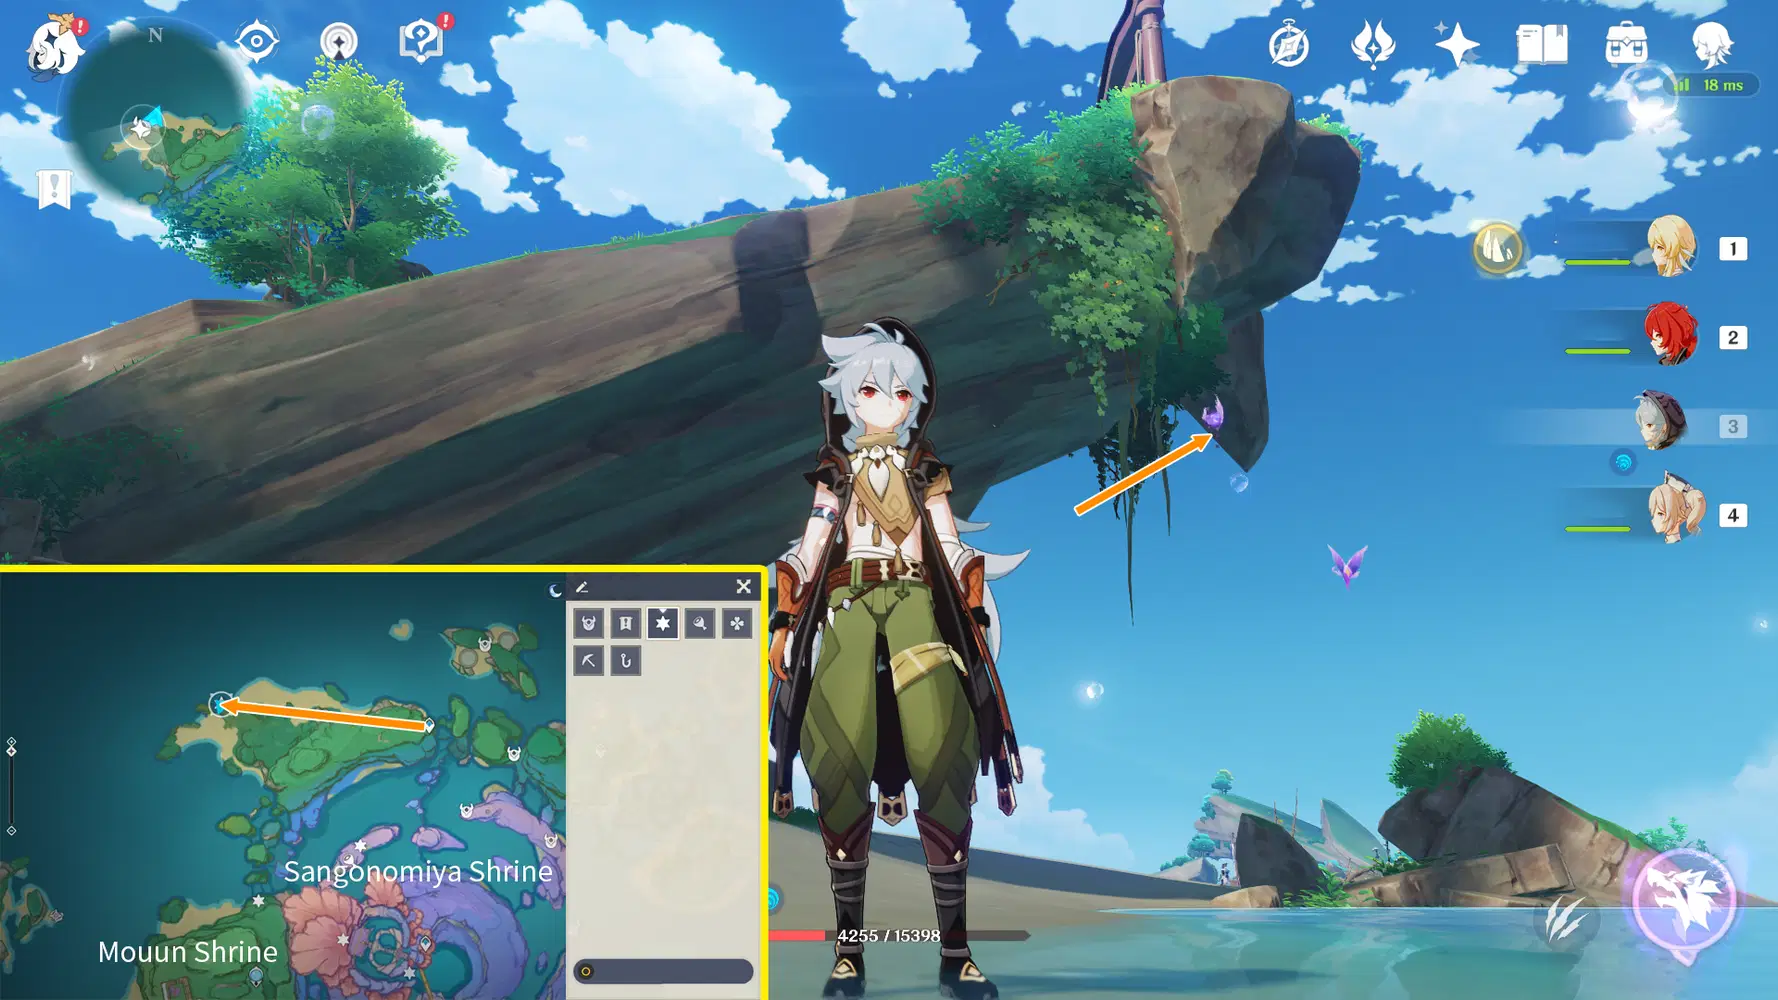
Electroculus 111:
Return to Sangonomiya Shrine north waypoint and glide southeast, you’ll spot another Electroculus beneath a cliff rock up for grabs.
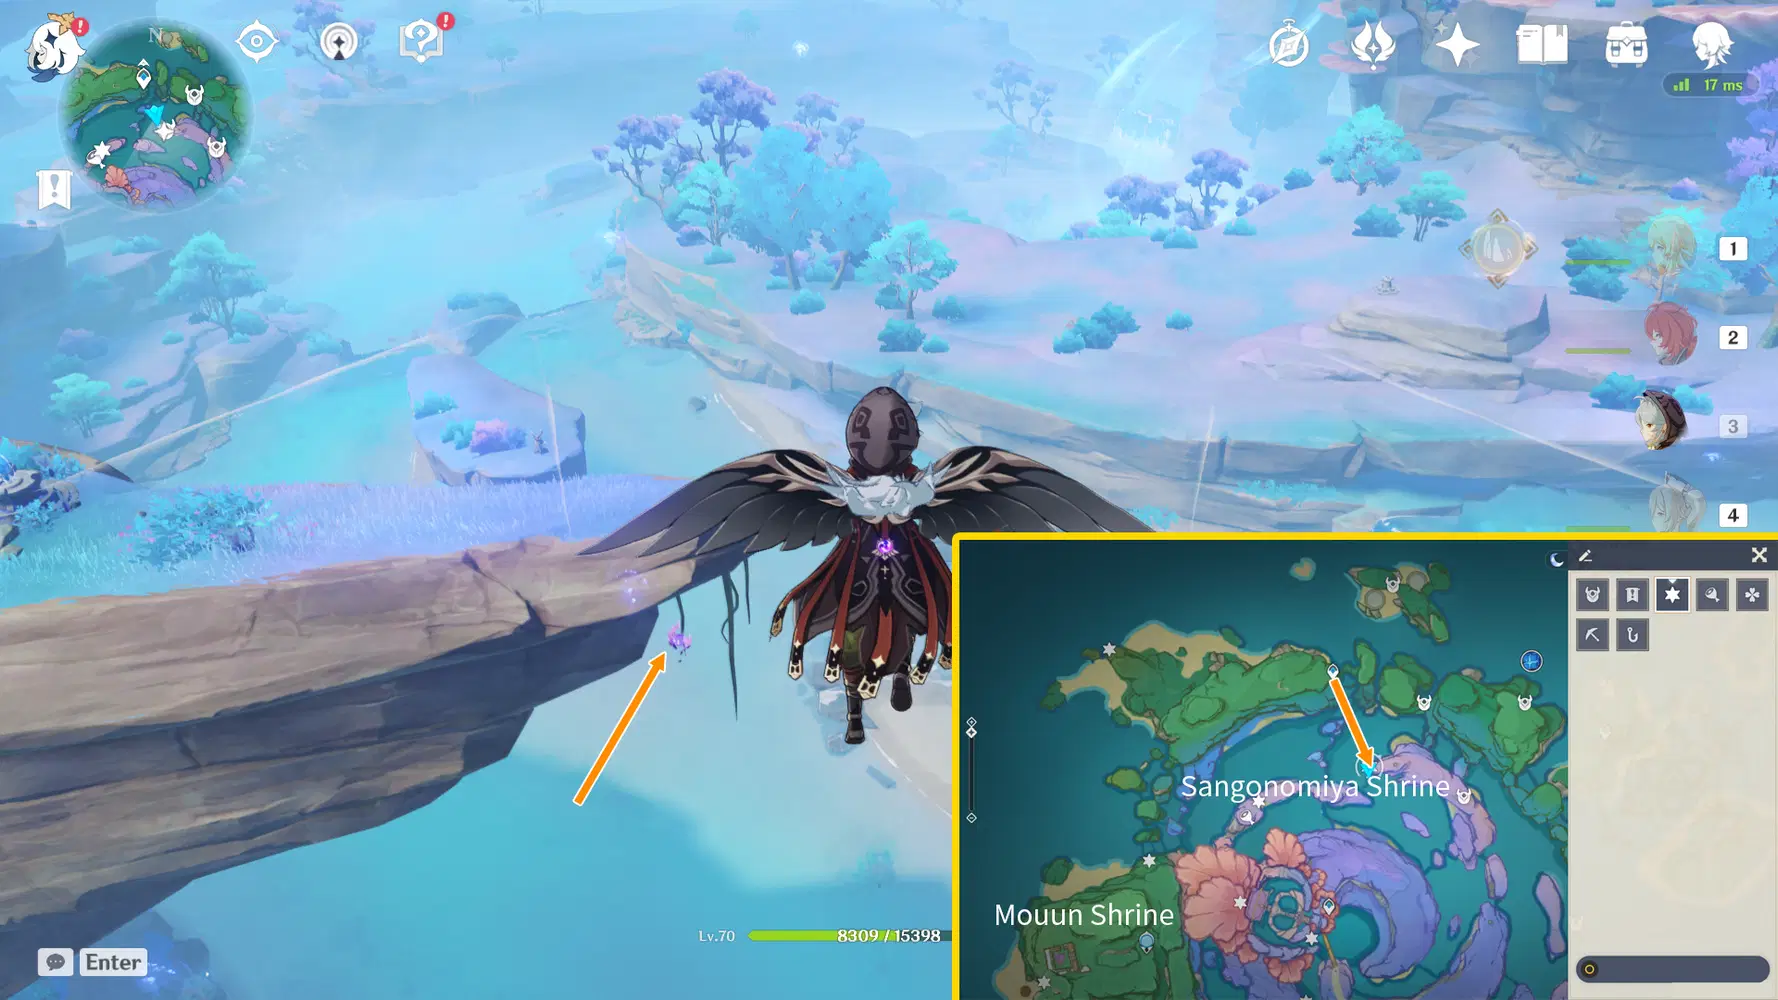
Electroculus 112:
Go southeast along the cliff and pay attention to the mini map icons. The Electroculus is inside the Thunder Barrier beneath the hill, and you need a Lv.6 Electrograna (Sacred Sakura's Favor Lv.17) and above to access it.
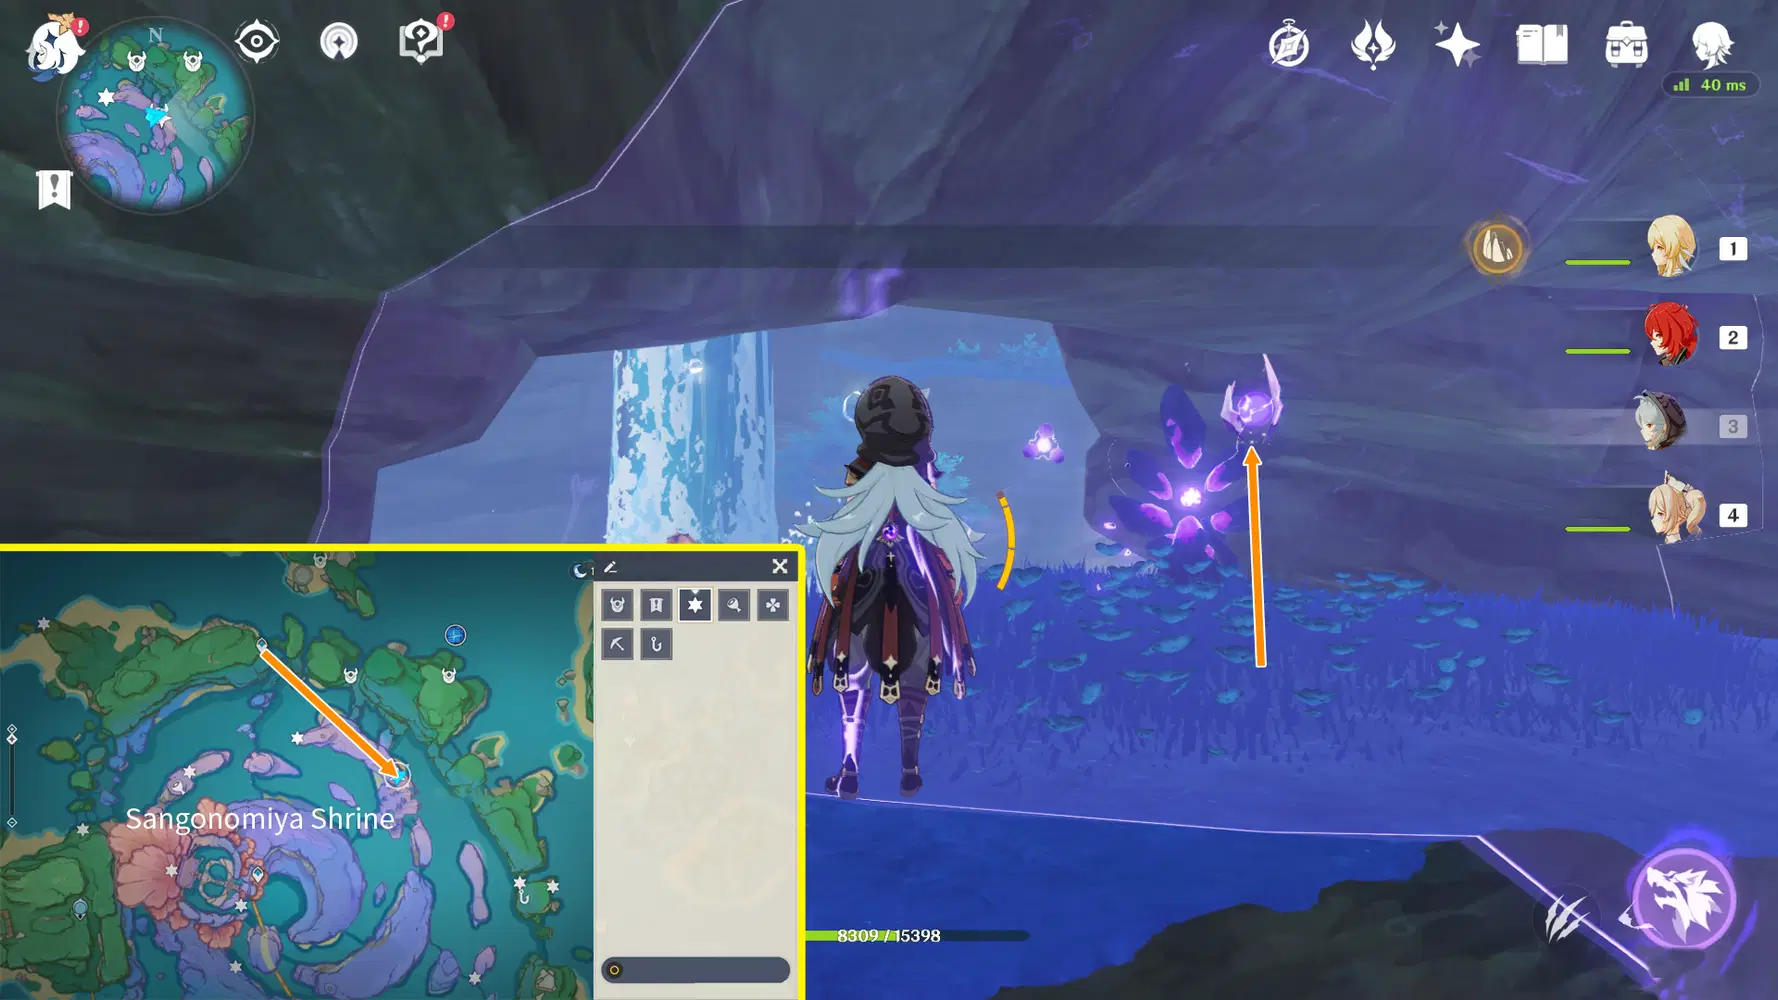
Electroculus 113:
Return to the north Sangonomiya Shrine waypoint and head towards the northeast island. You’ll find the Electroculus beneath the cliff, glide down to grab it.
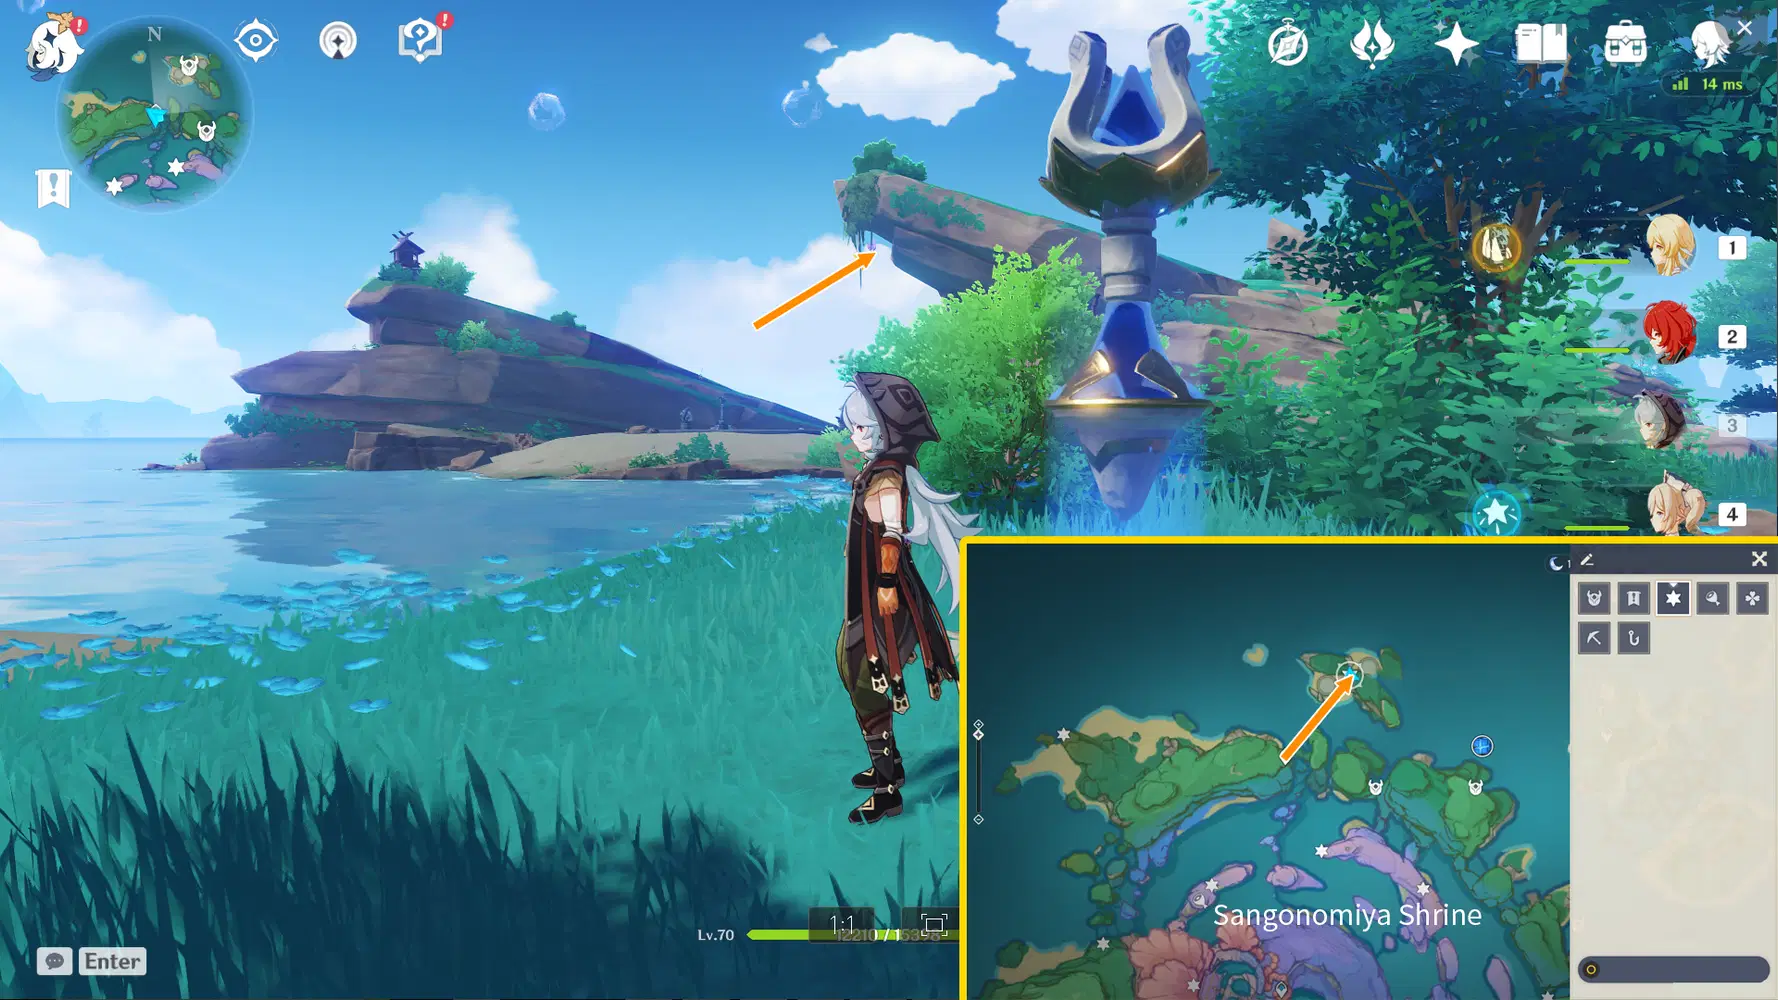
Electroculus 114:
Return to the north Sangonomiya Shrine waypoint and go east. The Electroculus is suspended mid-air and you need to solve a puzzle to get it.
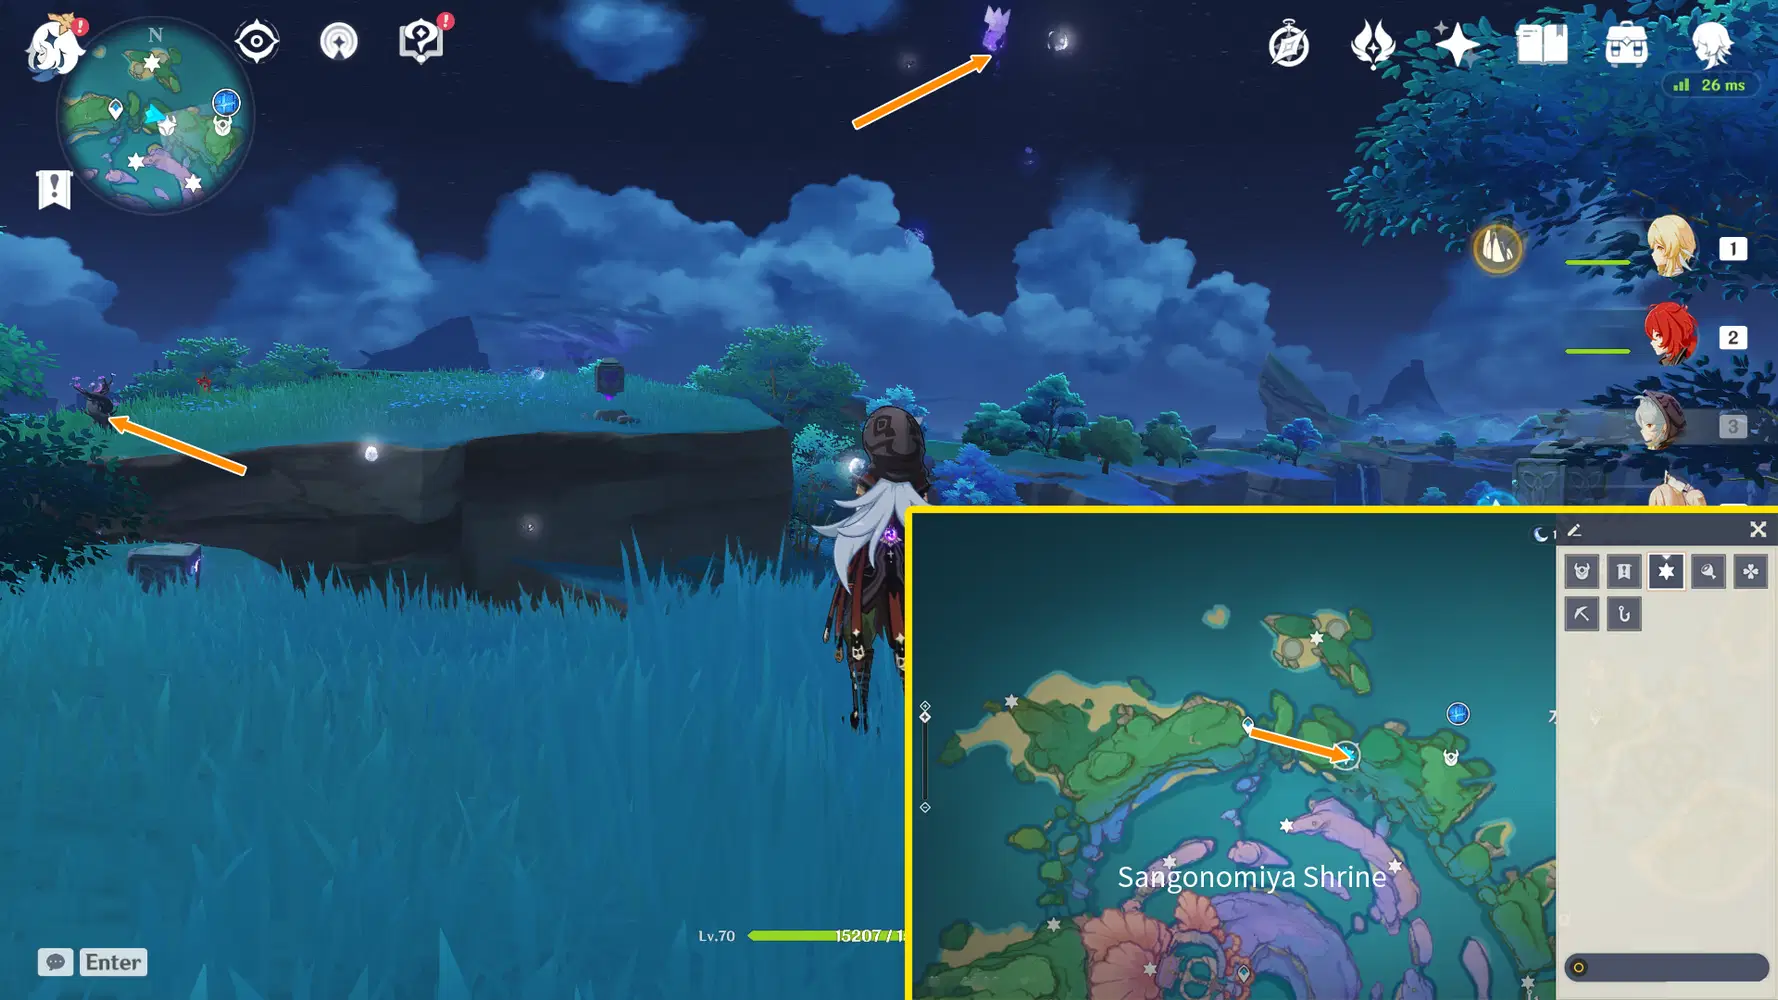
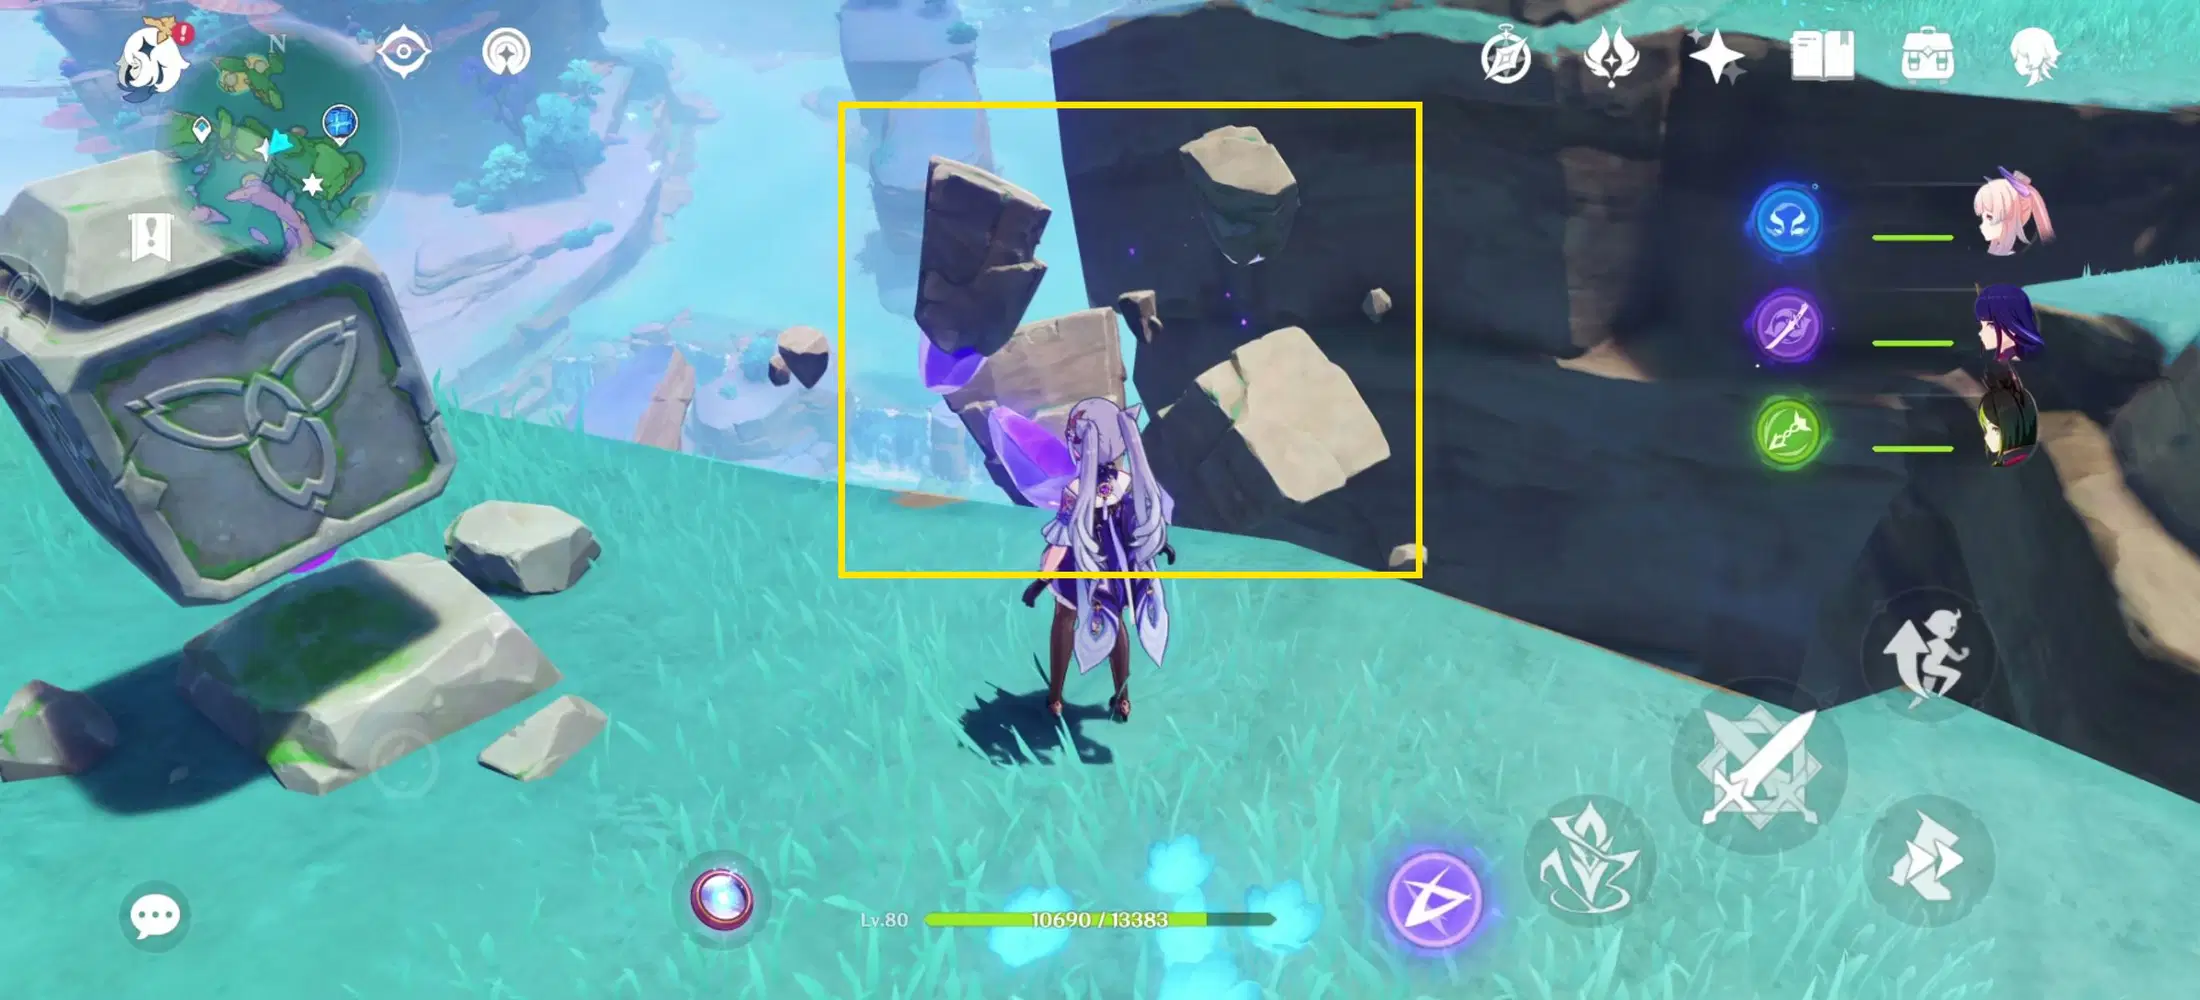
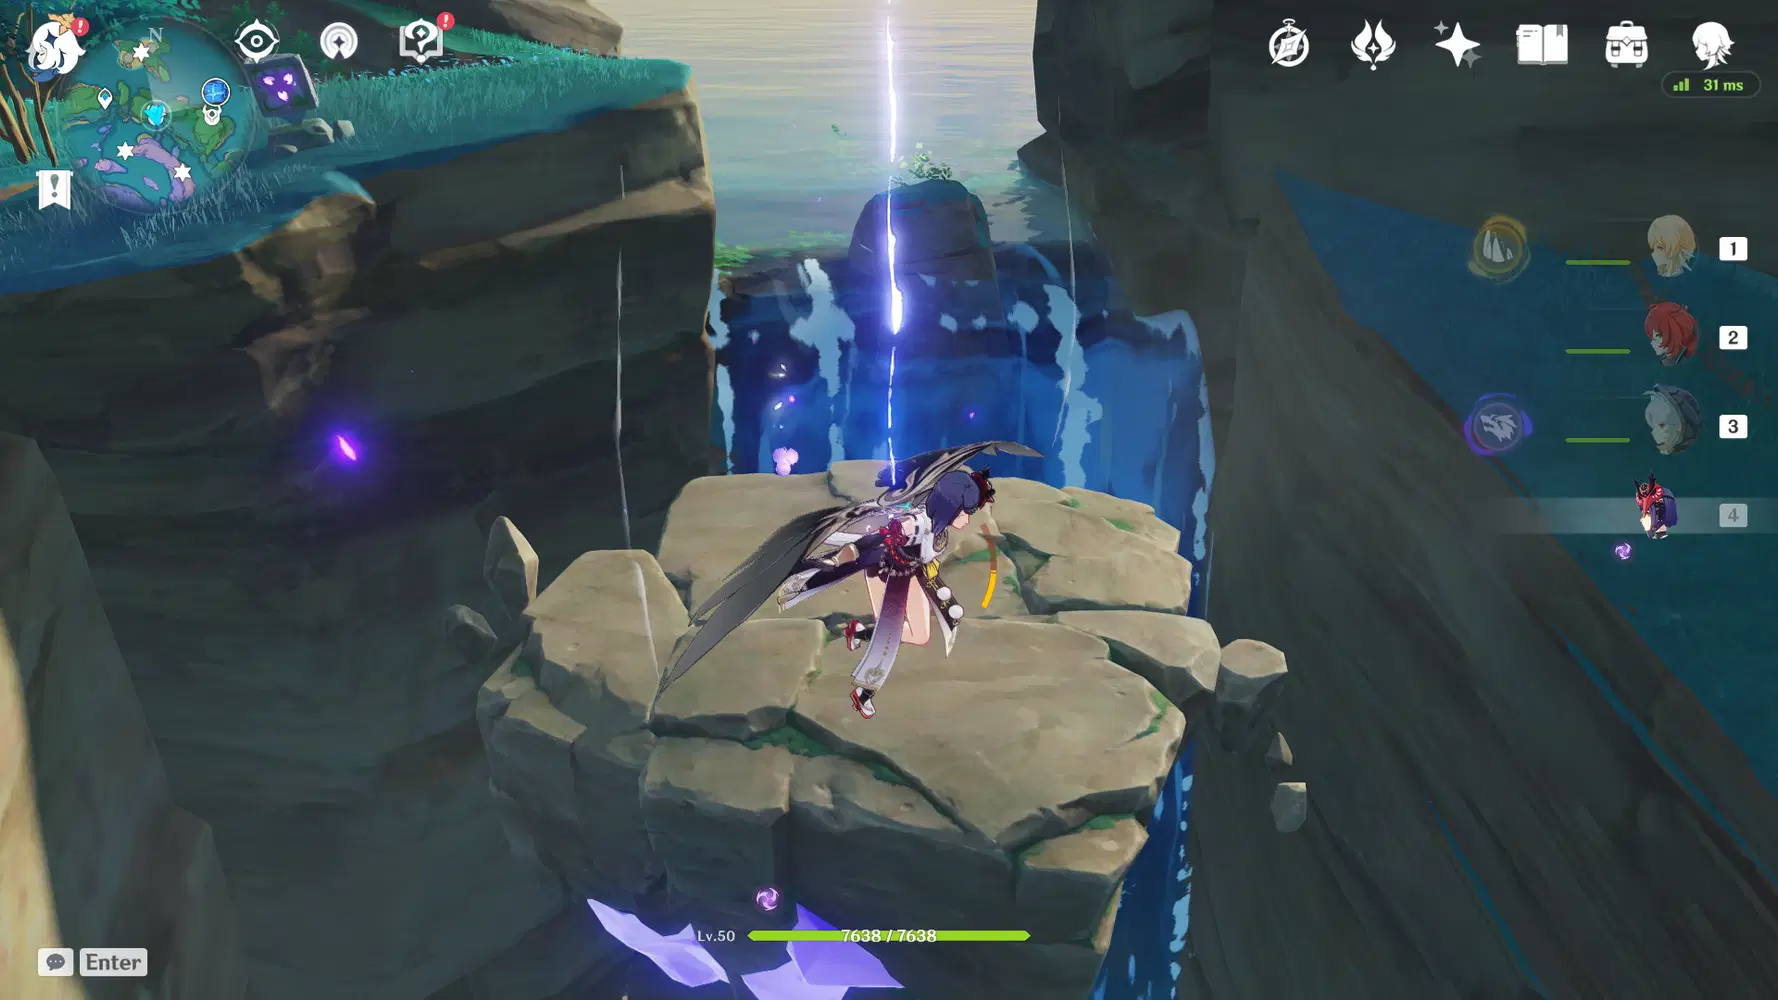
Hit the cubes and make them face the directions below (facing south):
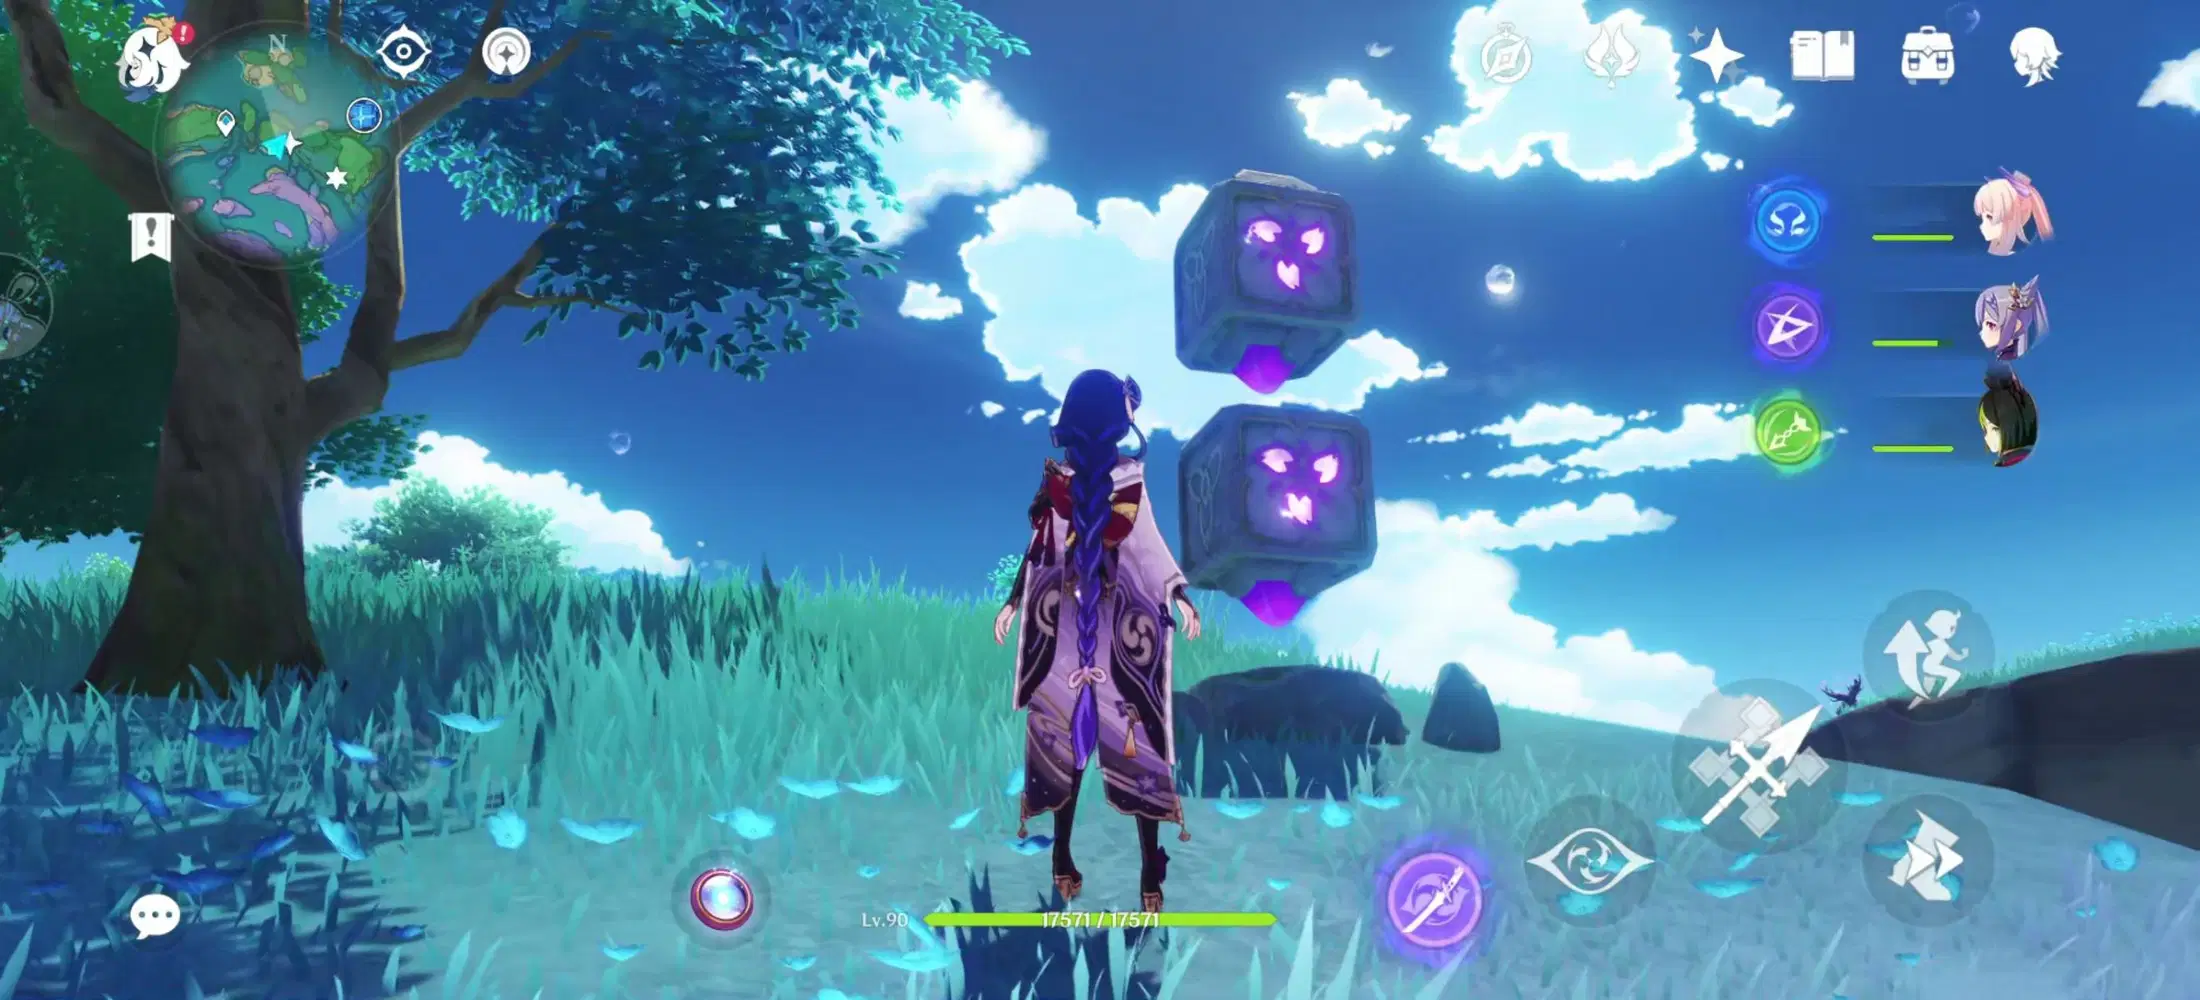
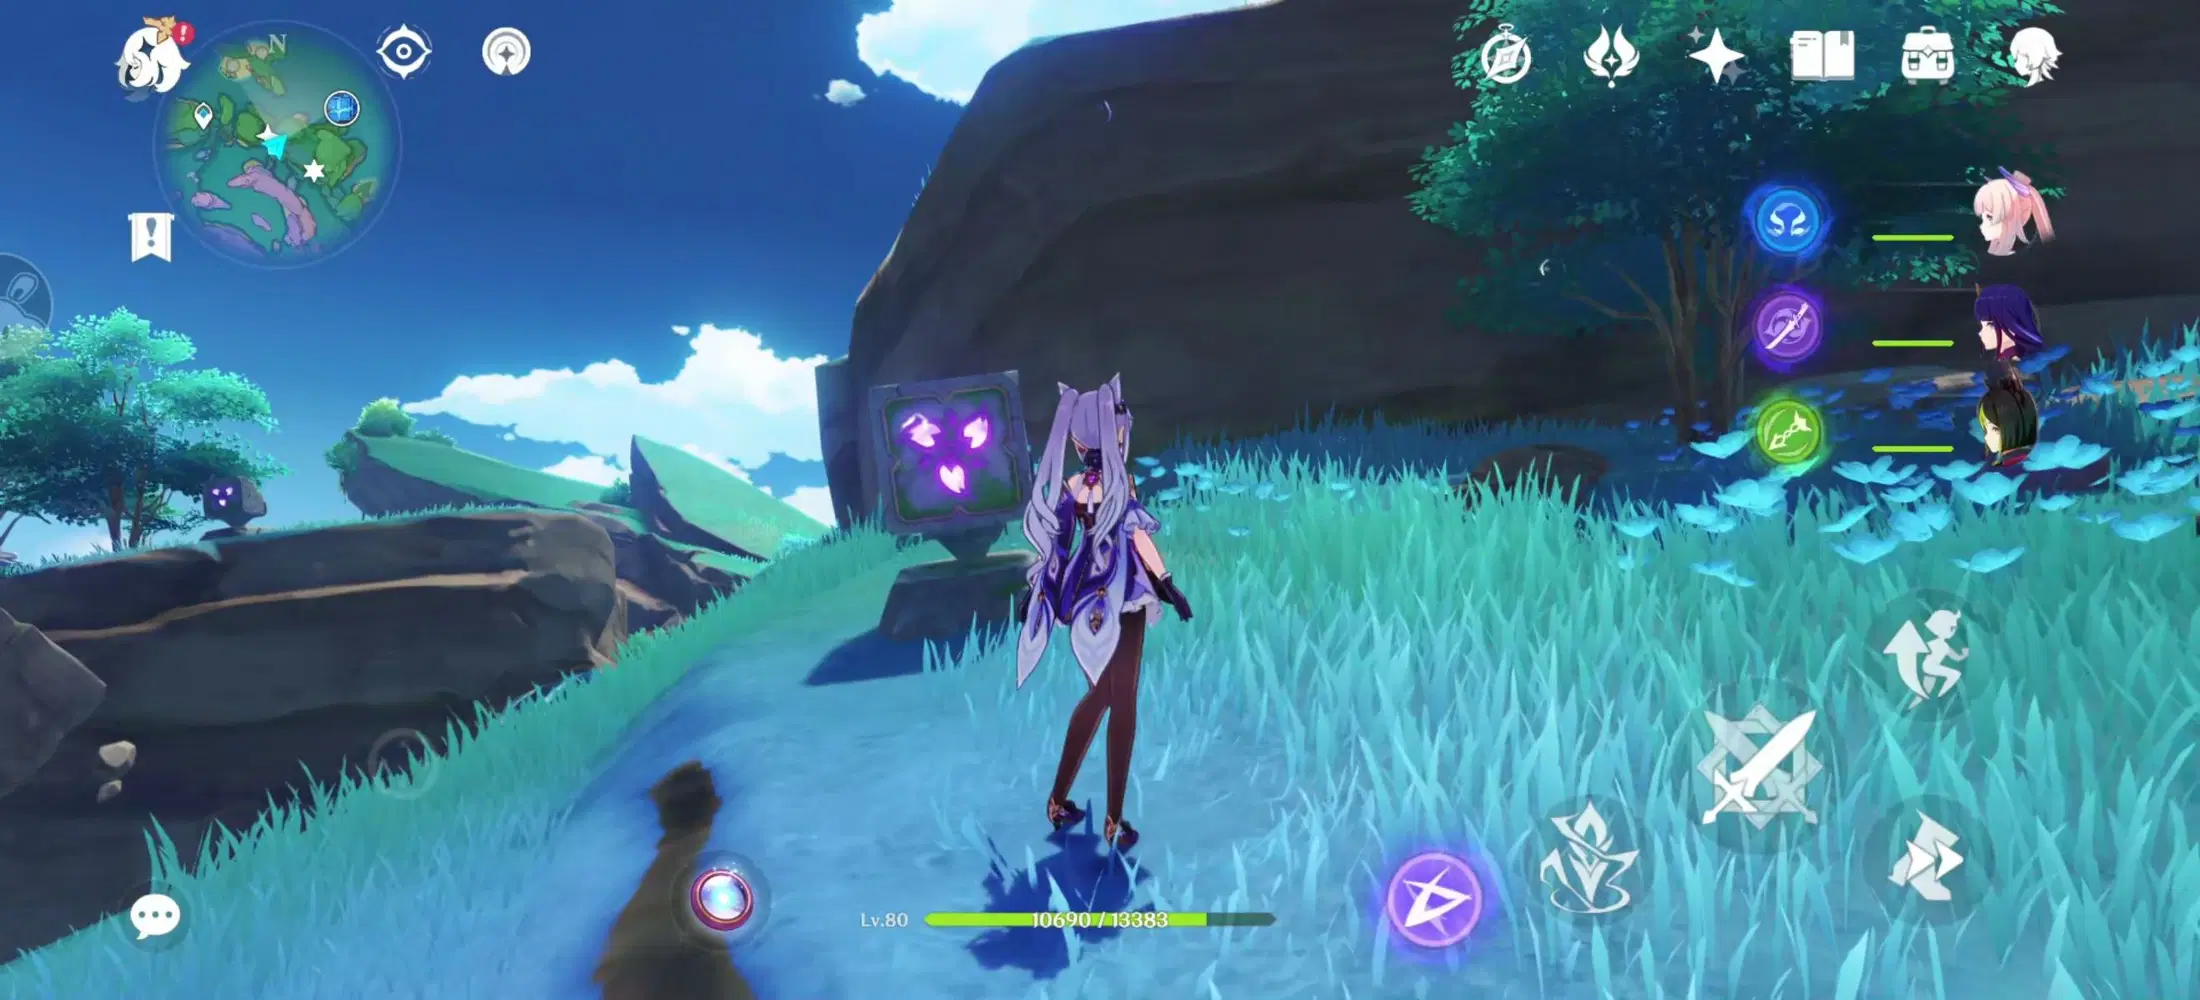
Afterwards, summon the Electrograna and jump onto the floating rocks (they will automatically assemble), then fly up via the Thunder Spheres to get the Oculus.
Electroculus 115:
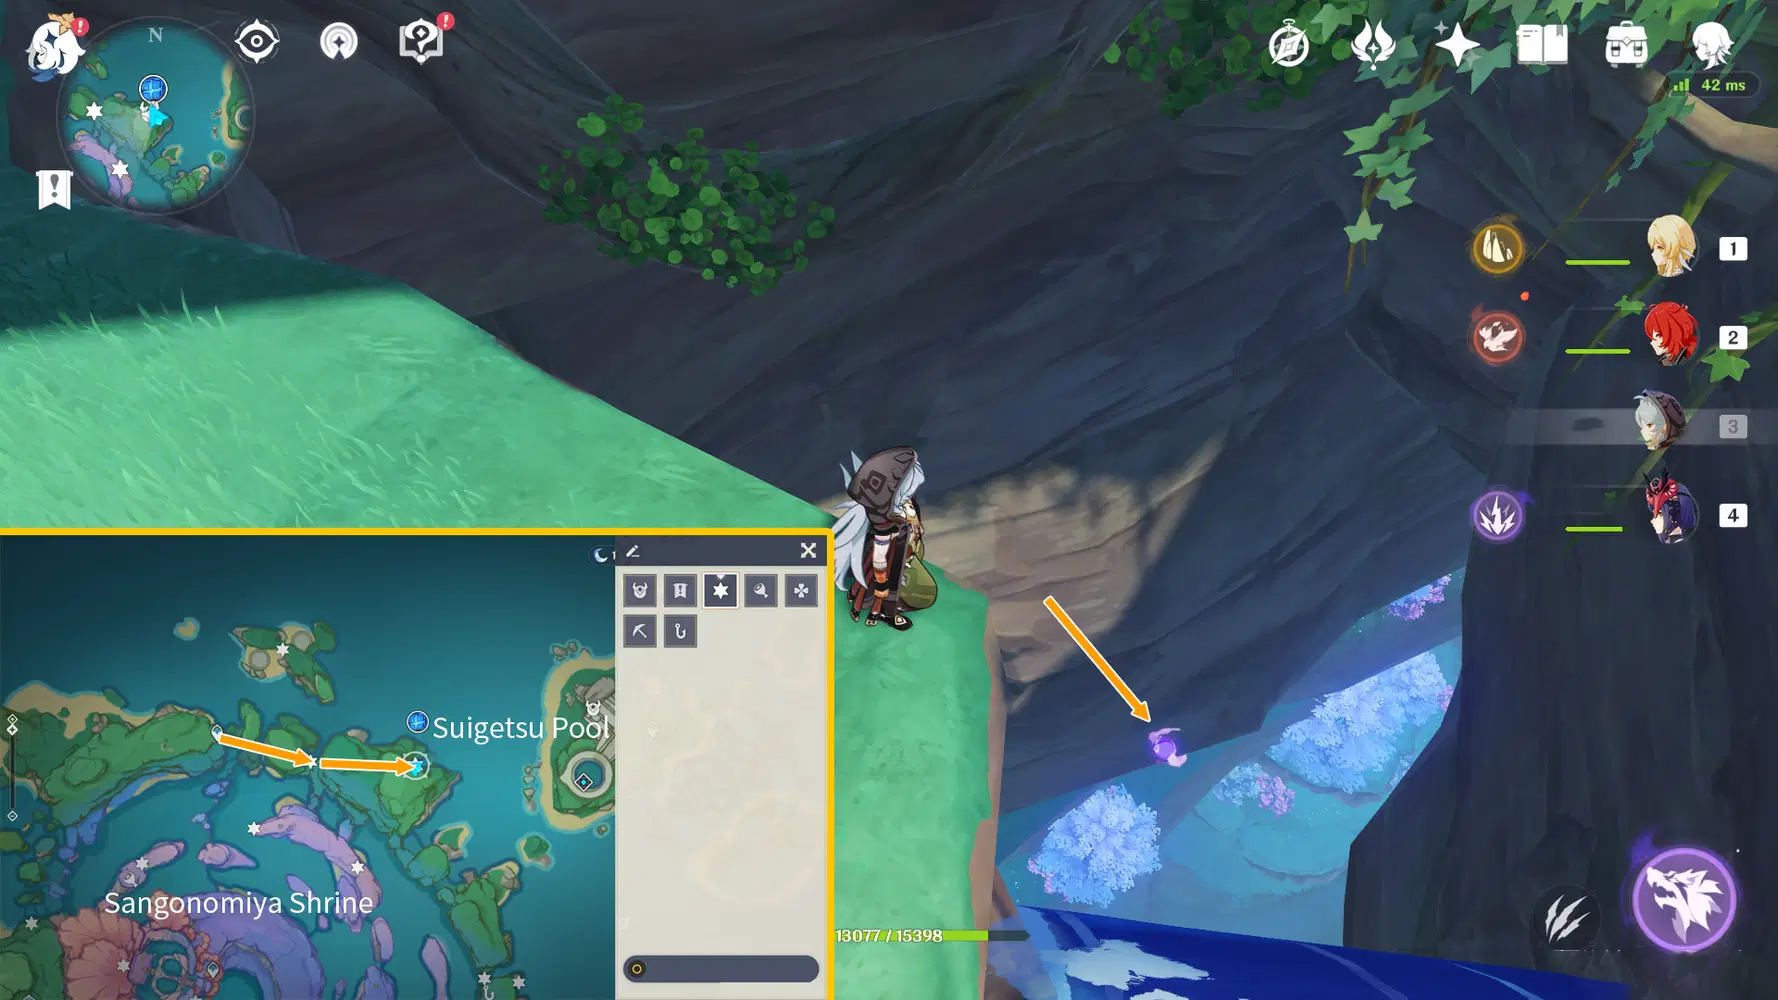
After grabbing #114, go east and you’ll see an Electroculus near the entrance of the waterfall cavern. Glide down to get it.
Electroculus 116:
Teleport to the Suigetsu Pool Domain and keep moving forward then turn left and enter the door to your right.
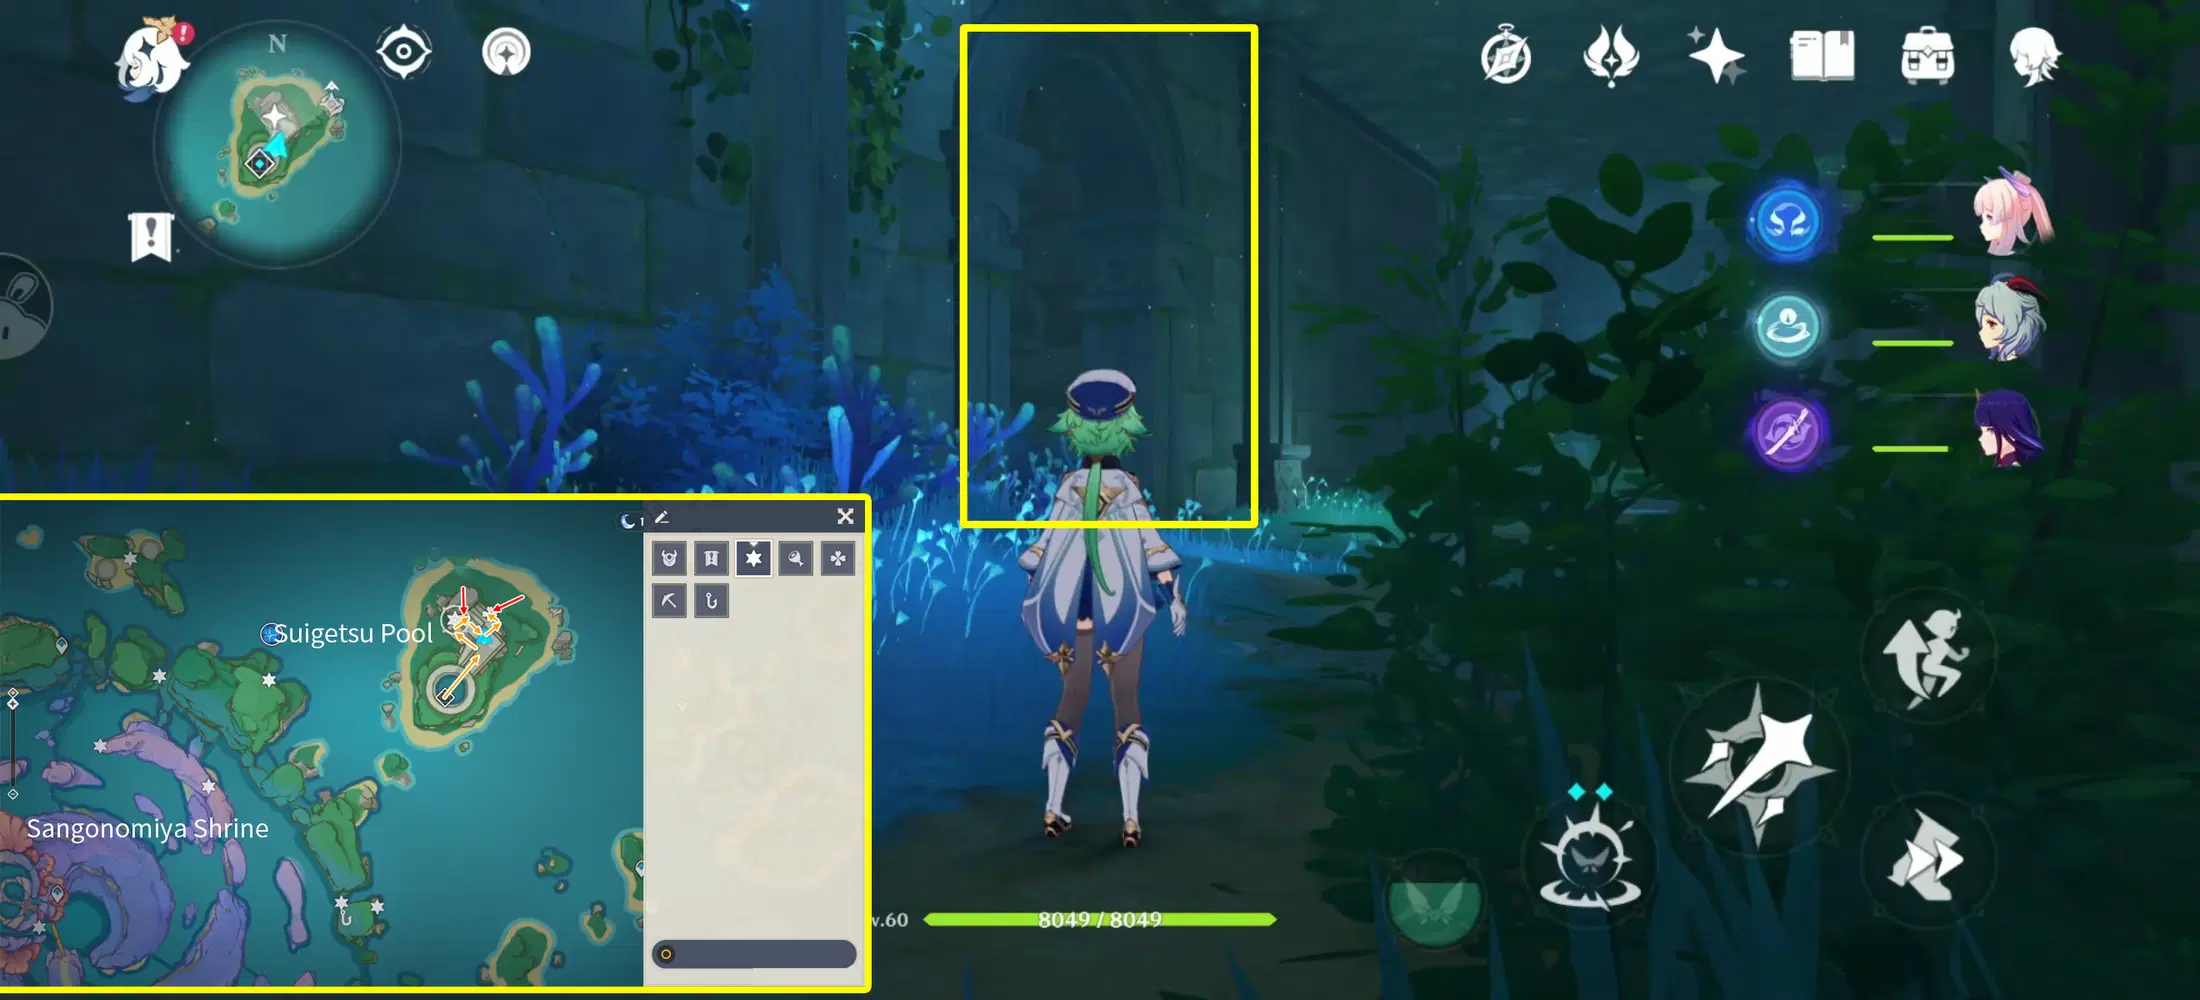
There’s a Phase Gate here which will take you to a Thunder Barrier.
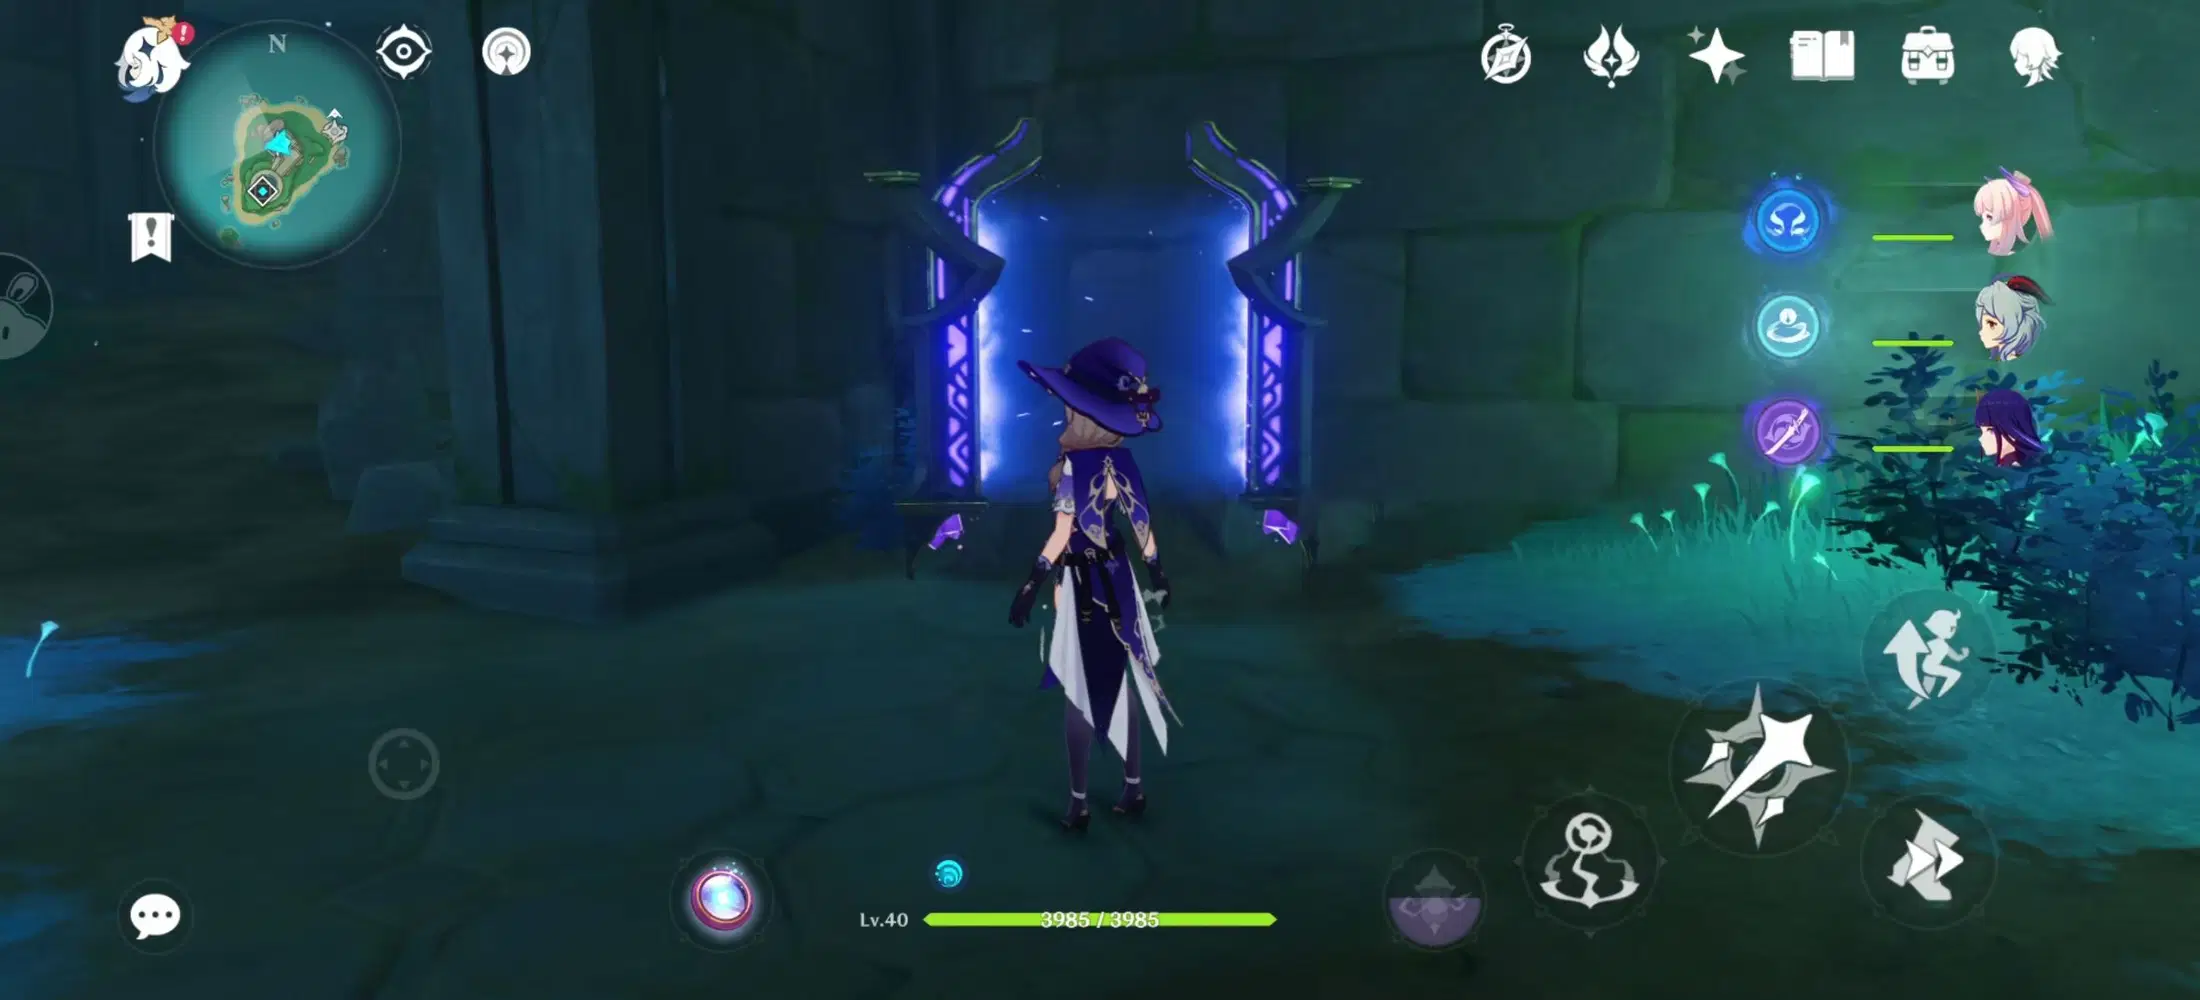
The Electroculus is right behind the Barrier, but you’ll need Lv.6 Electrograna (Sacred Sakura's Favor Lv.17) or above to access it.
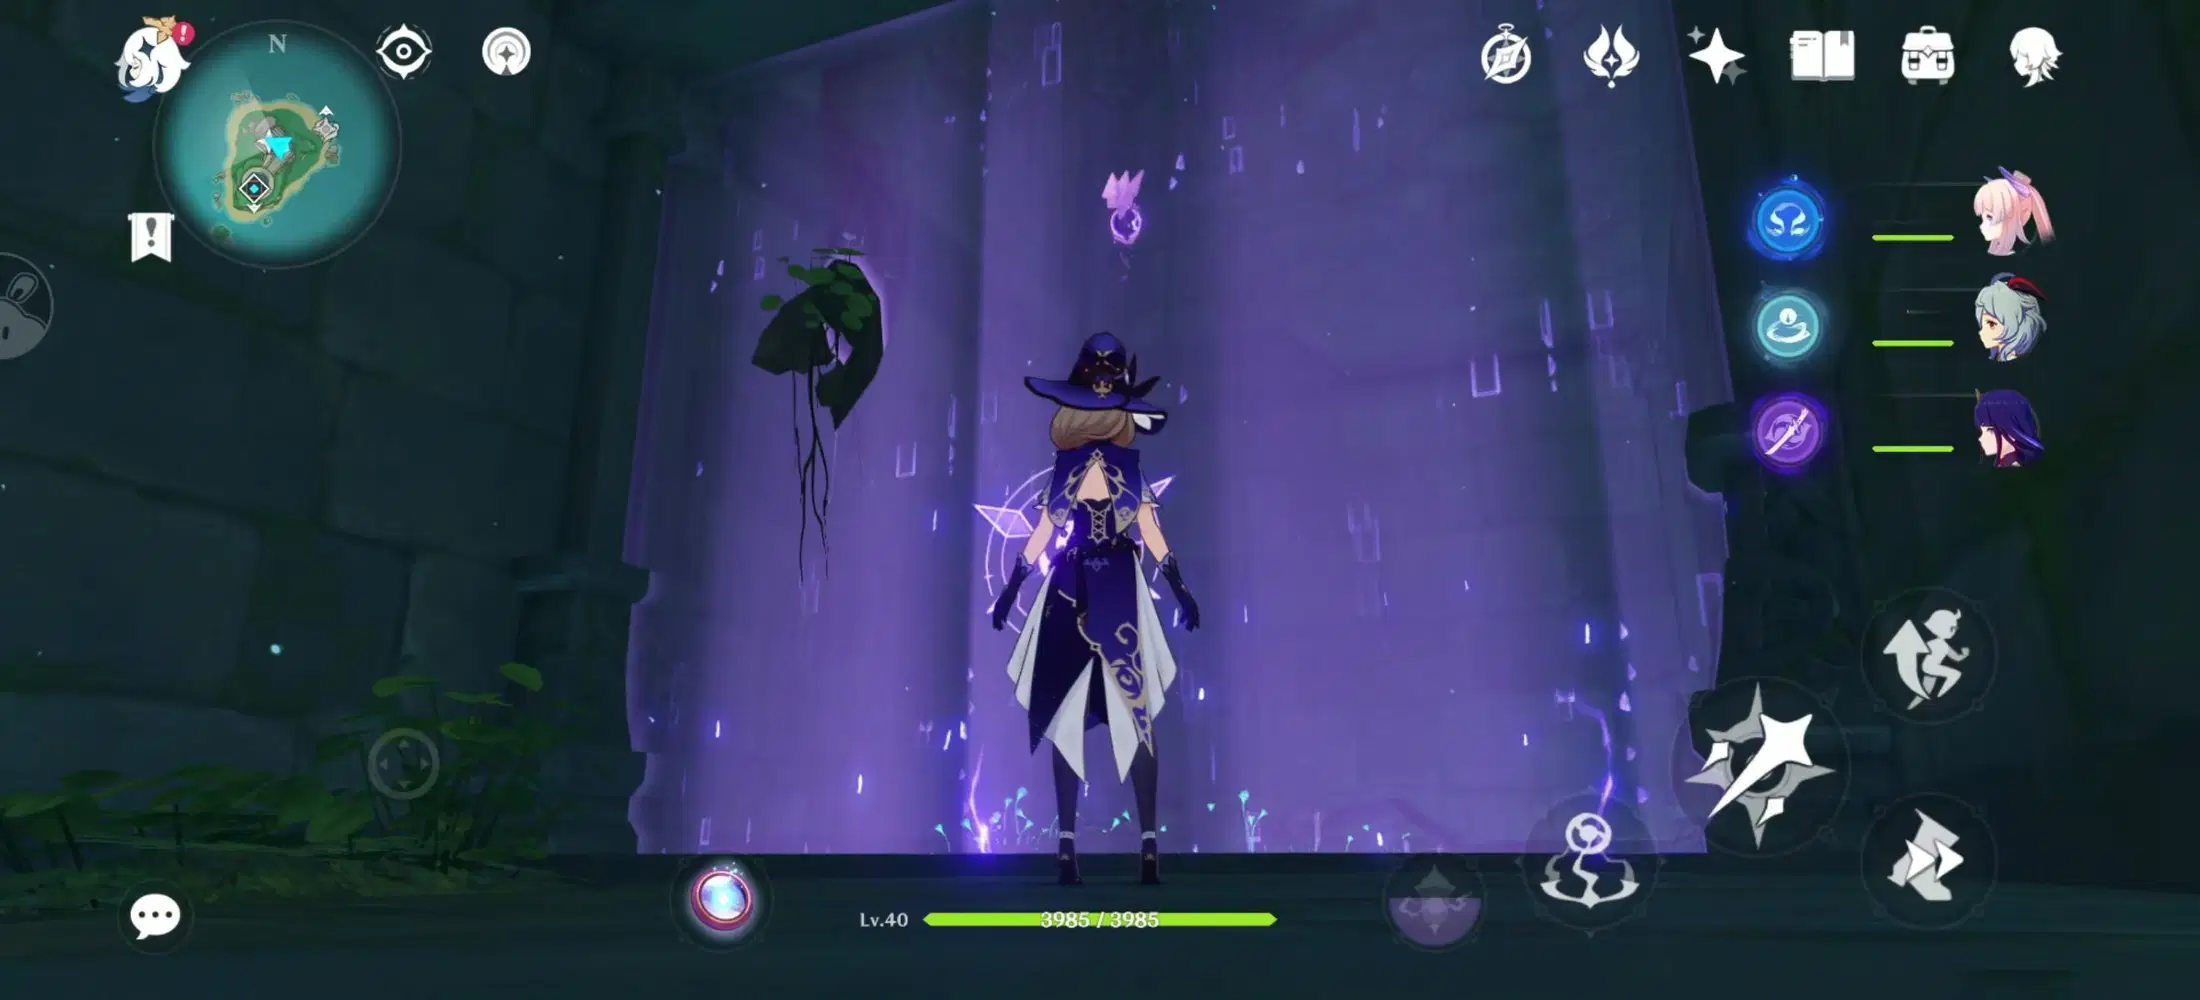
That’s all for the Electroculus collection guide around Watatsumi Island. The island is fairly elevated and many Oculi are underwater, so be sure you’ve completed The Moon-Bathed Deep quest series, have the Suigetsu Pool Domain unlocked, and leveled your Sacred Sakura to Sacred Sakura's Favor Lv.17 (for Electrograna Lv.6) before you start the collection.
Up Next: Electroculus Collection Guide (VI/VII) - Seirai Island (35 Total)



