Continuing from the previous part: Electroculus Collection Guide (V/VII) - Watatsumi Island (21 Total). In this part, we’ll be collecting Electroculi around Seirai Island for a total of 35 Electroculi.
Before starting, Travelers should have completed the following:
Seirai Stormchasers quest series, island puzzle between Kannazuka: Tatarasuna and Seirai Island, "Seiraimaru" puzzle on Seirai Island, Inazuma Reputation quest: Relics of Seirai, Seirai Island large puzzle: Great Amakumo Peak Ruin Maze. Alright, let’s get to it!
Note: Because Seirai Island is loosely arranged, there are more routes for this part – remember to be patient, Travelers!
I. All Electroculus Locations
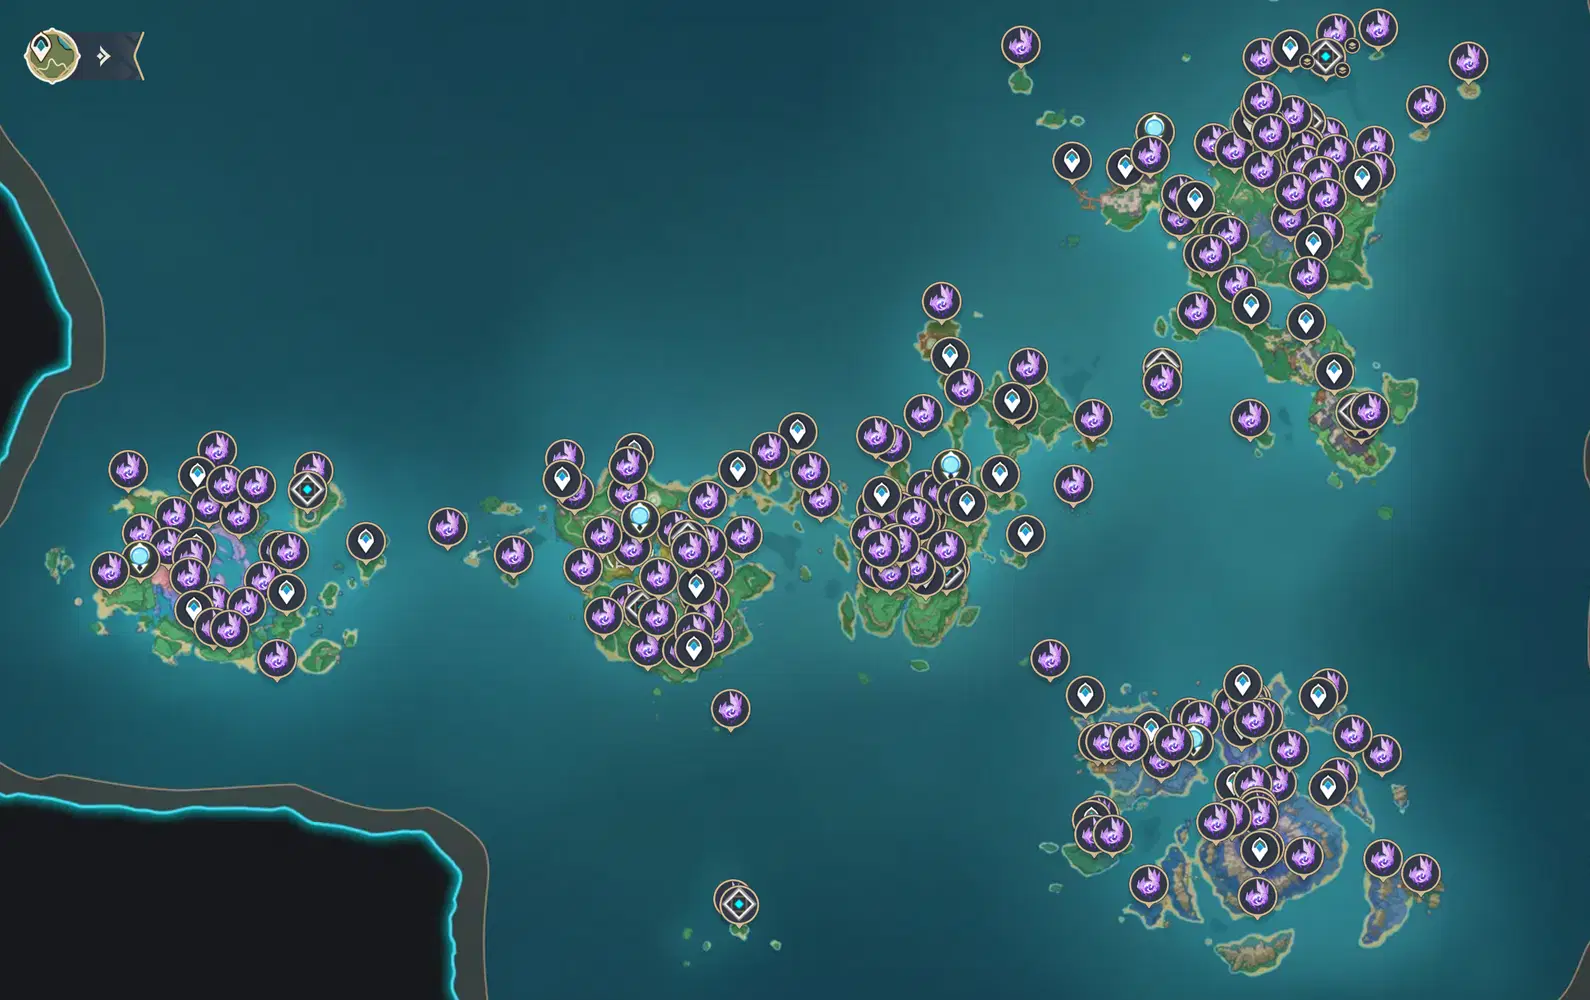
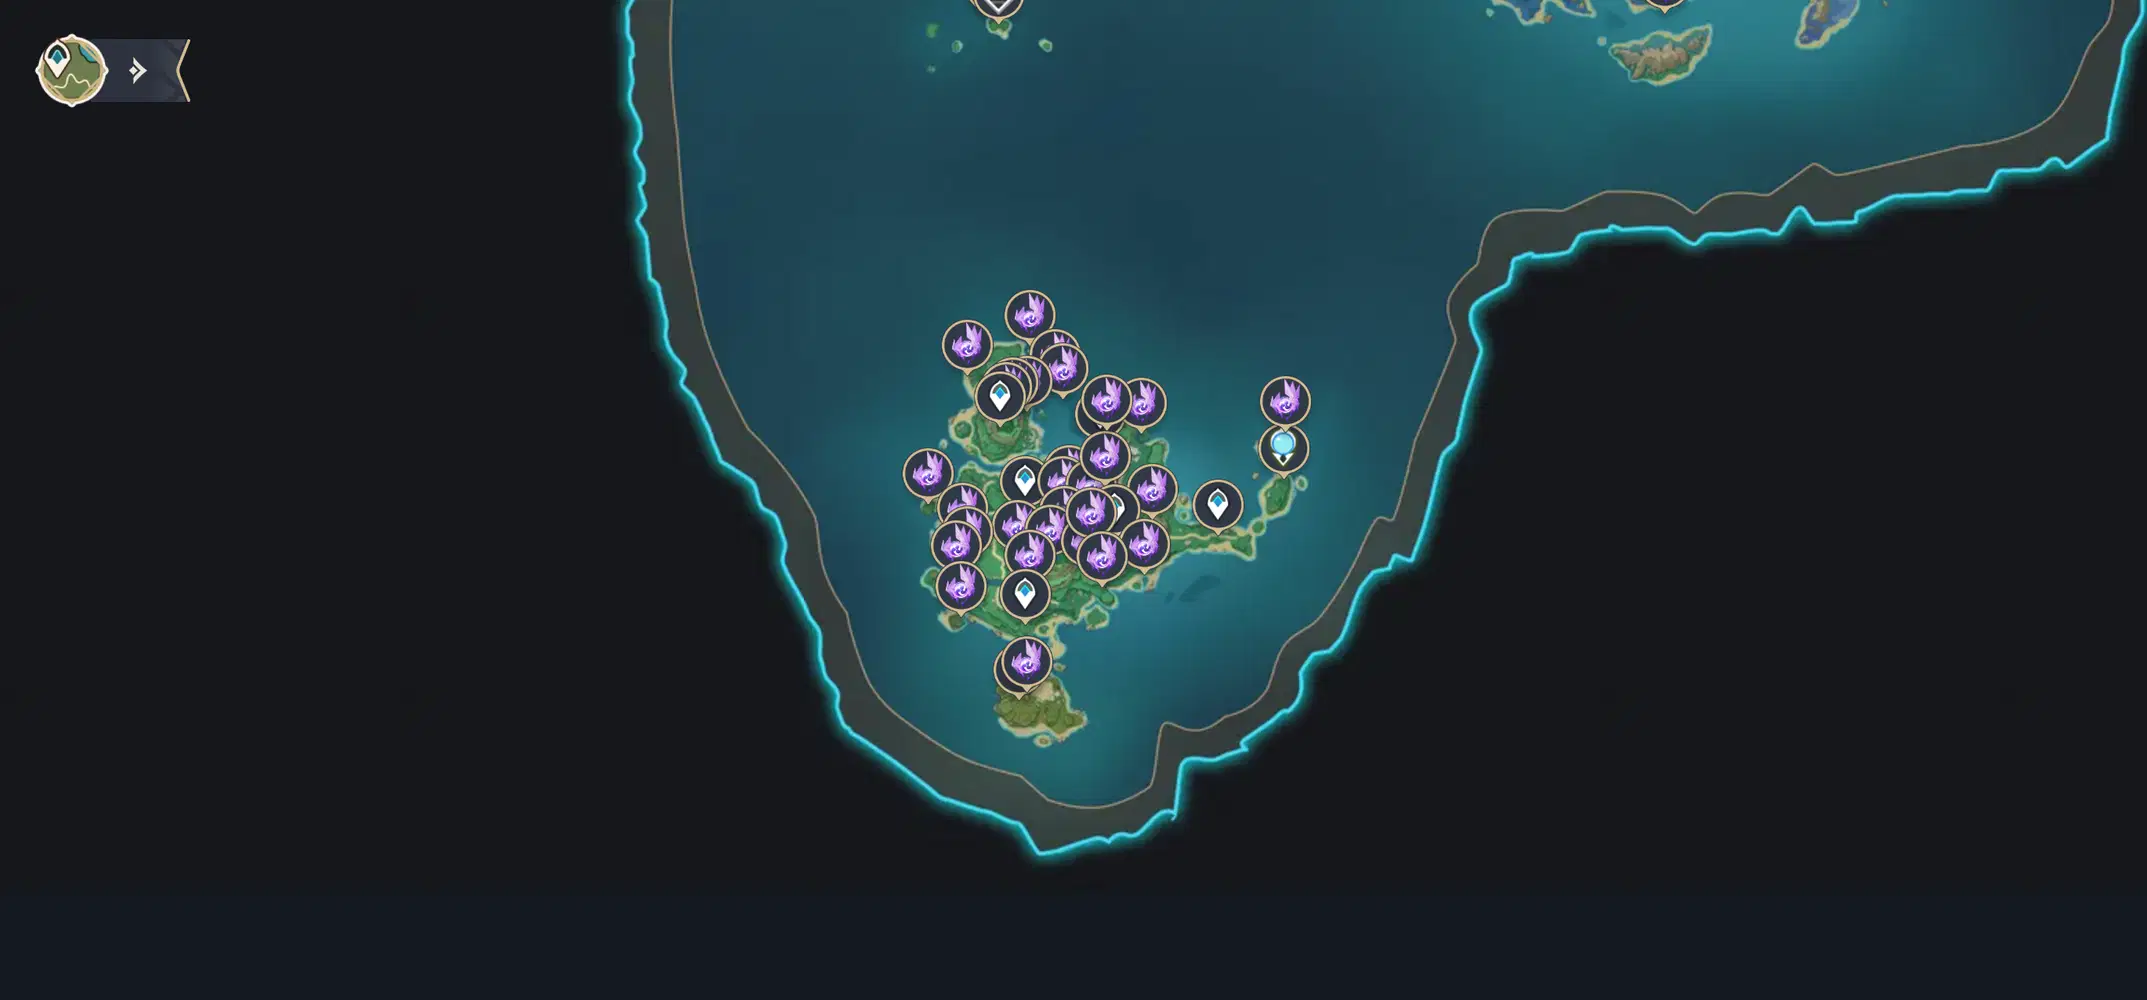
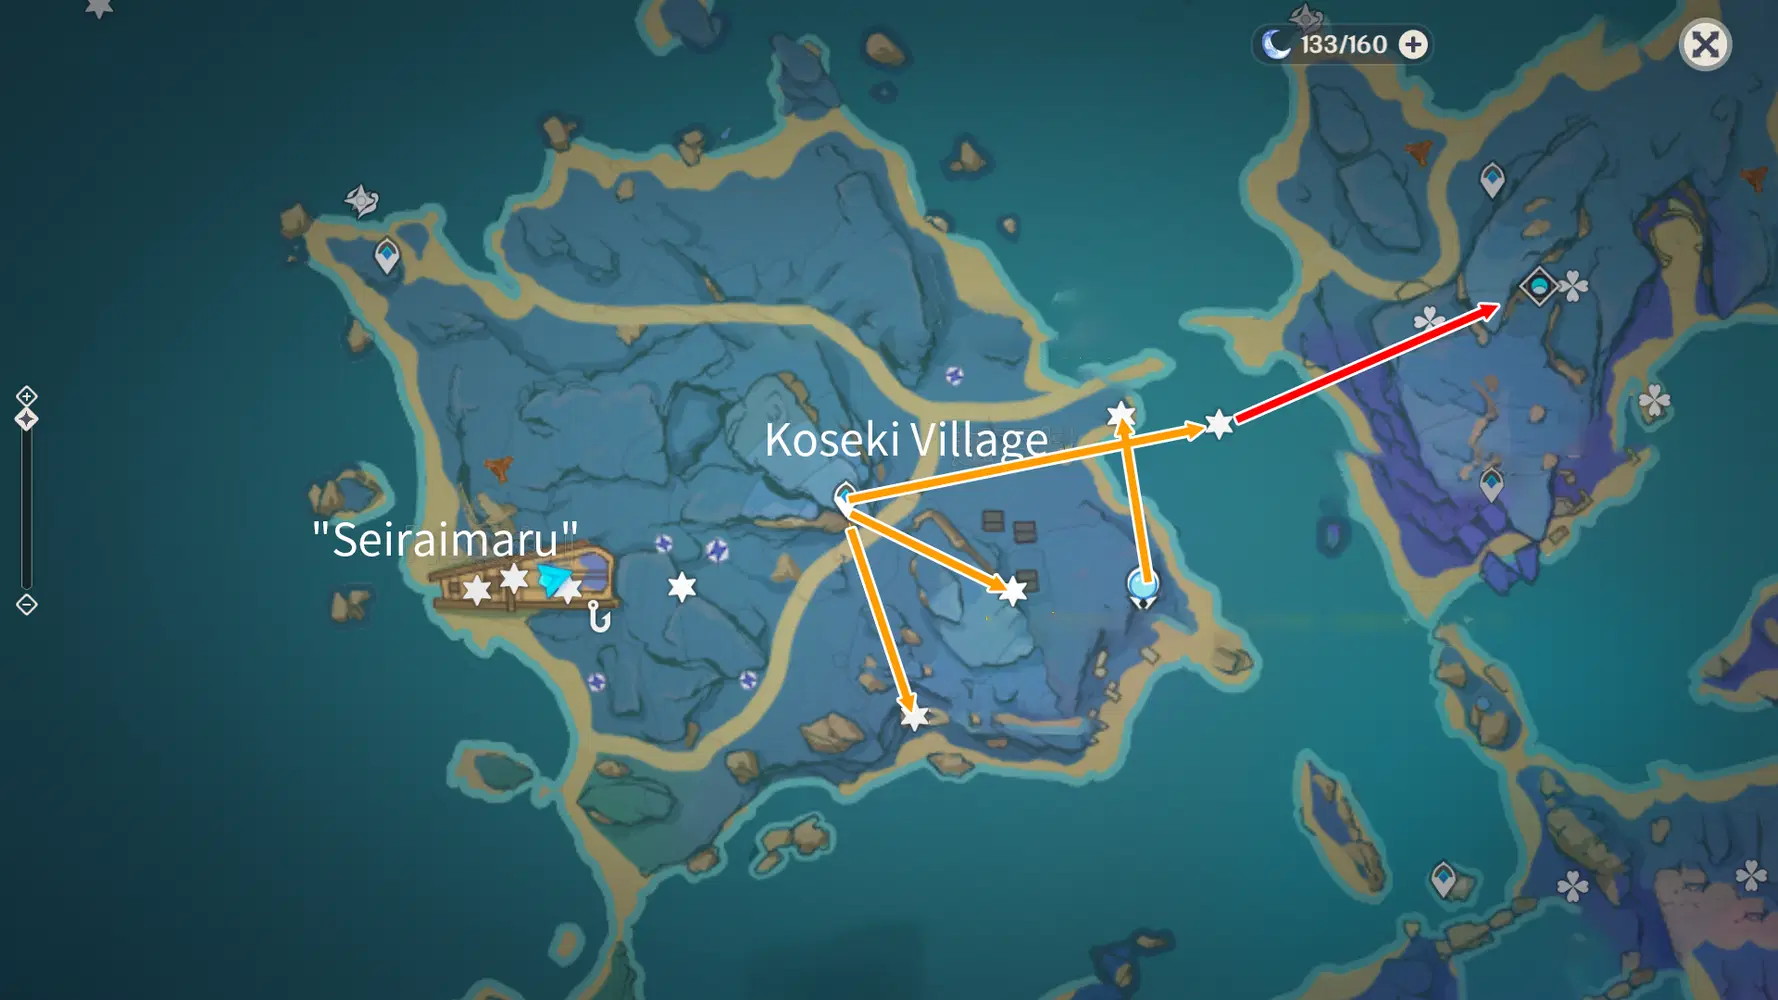
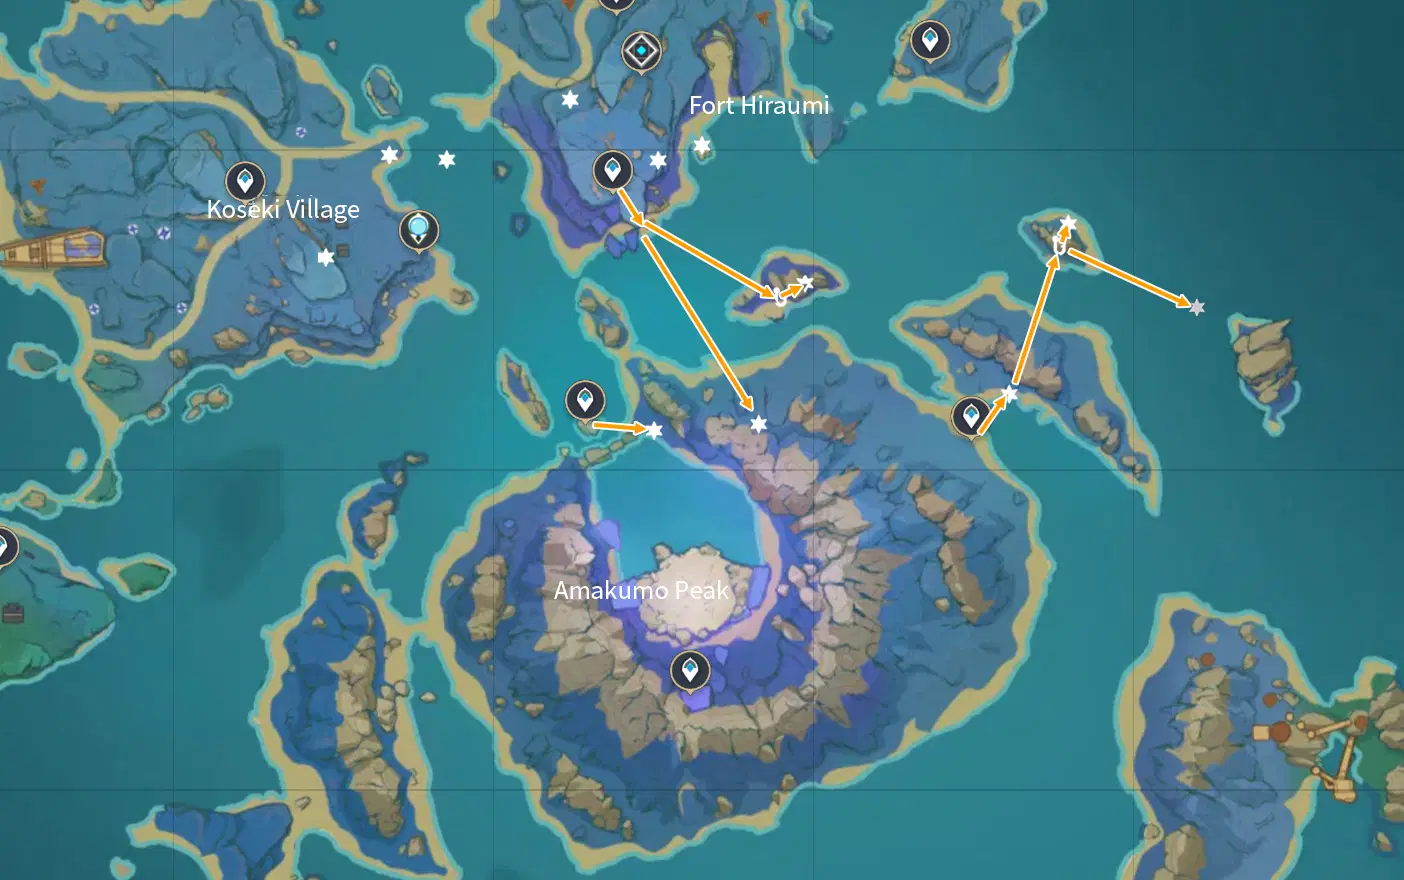
II. Part VI Collection Routes Summary
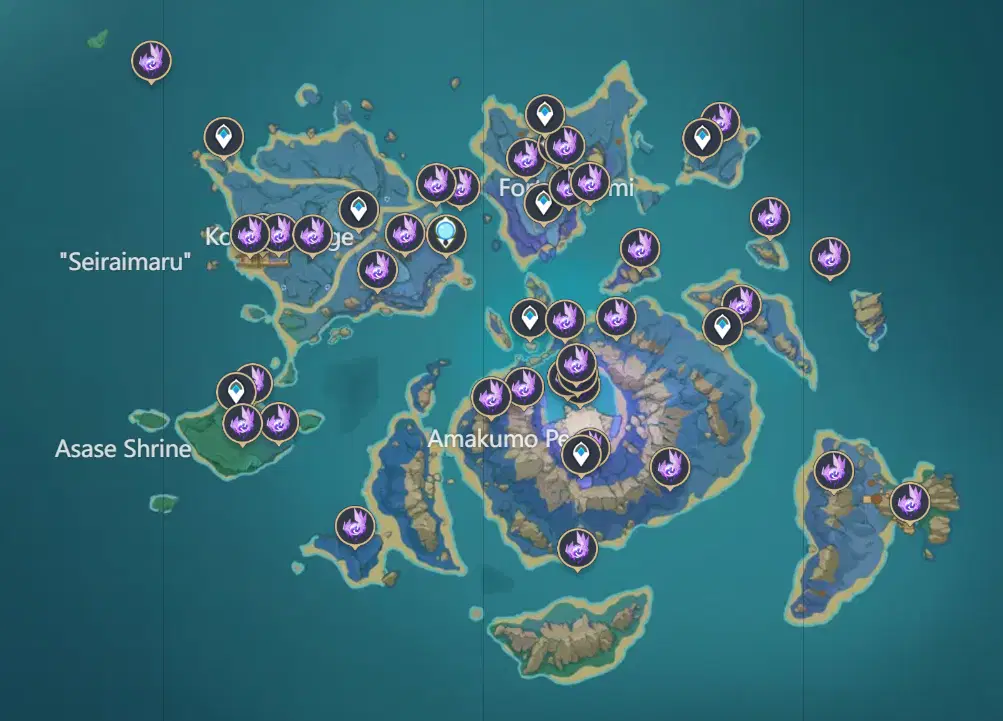
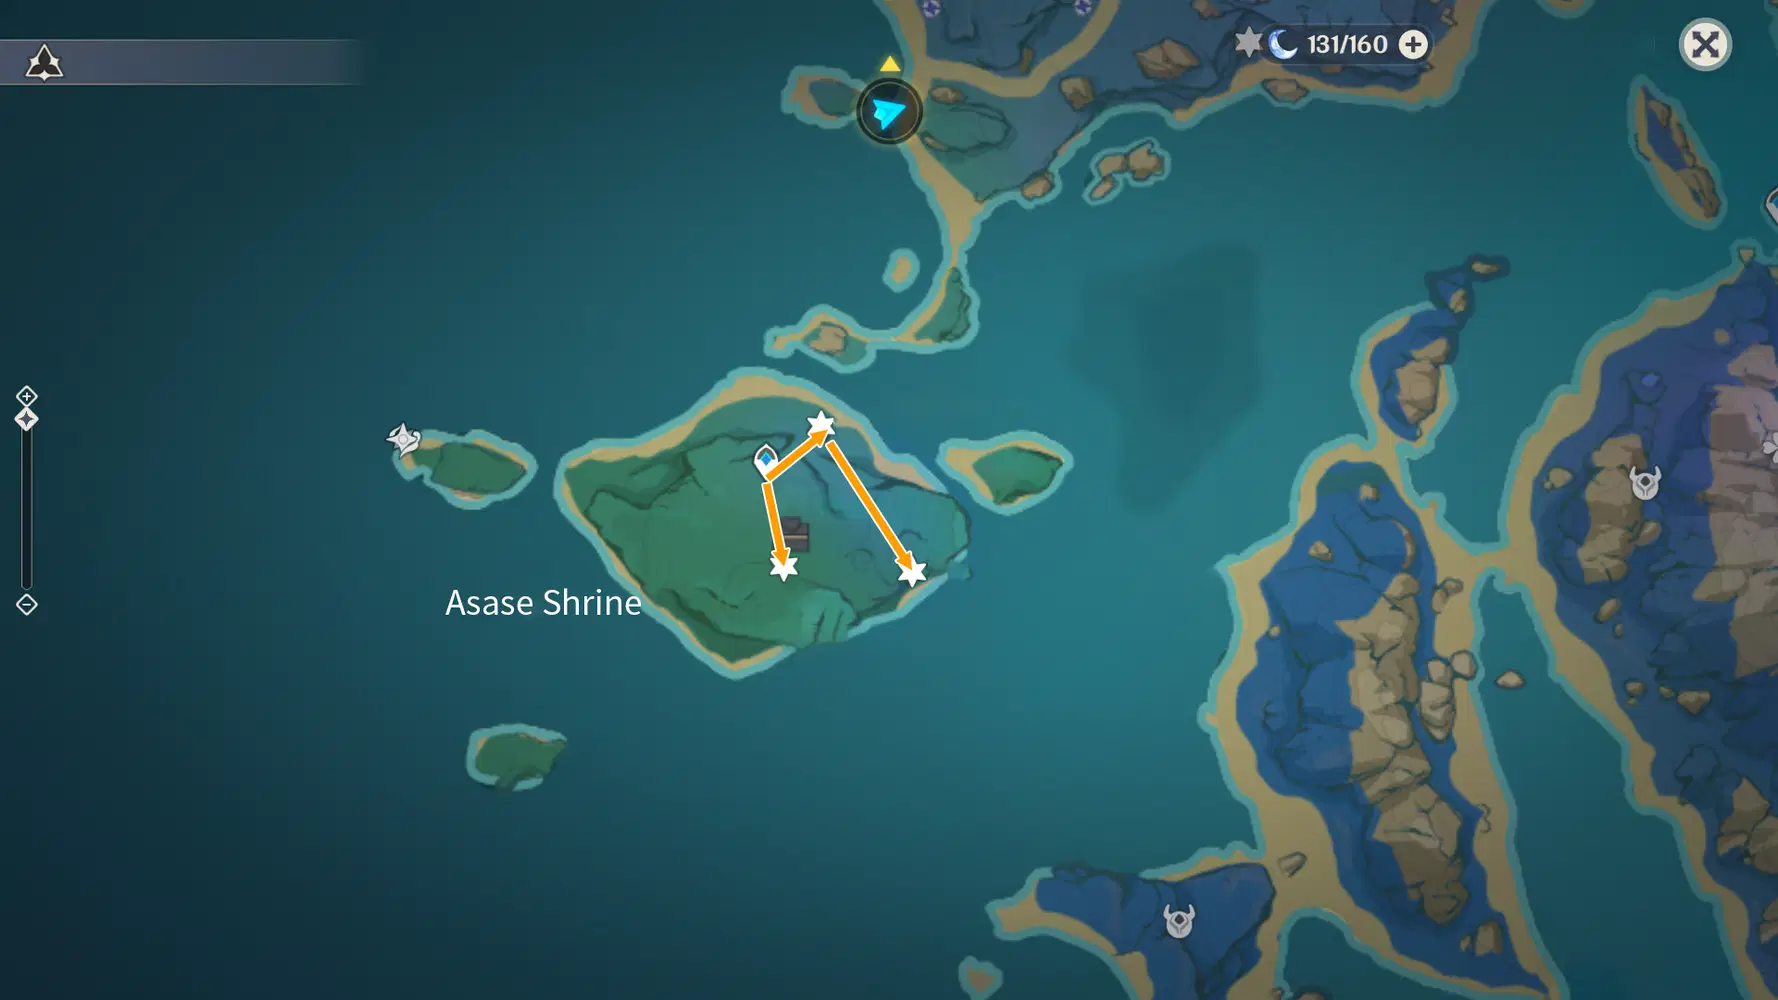
III. Route 1 (Electroculi #117-119)
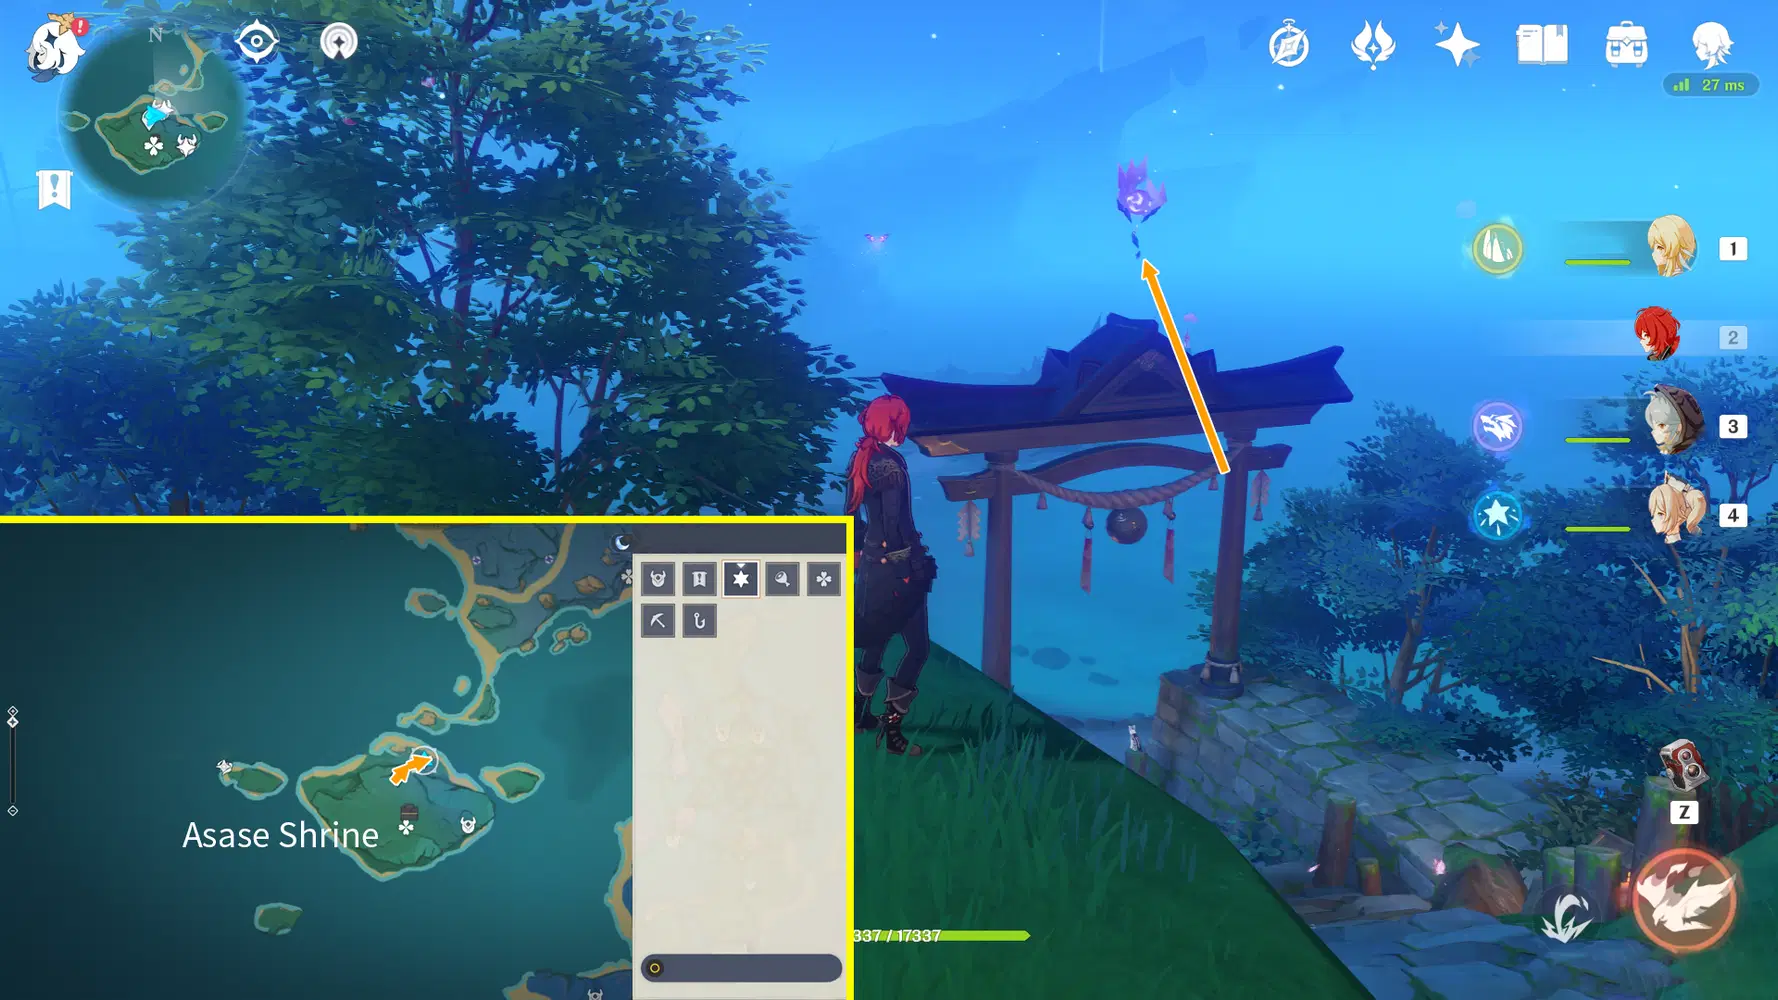
Electroculus 117:
Teleport to the Asase Shrine waypoint and head northeast. The Electroculus is above the gates to the shrine. Switch to a tall male character on the hill right next to it or the Geo Traveler for a height boost and glide over.
Electroculus 118:
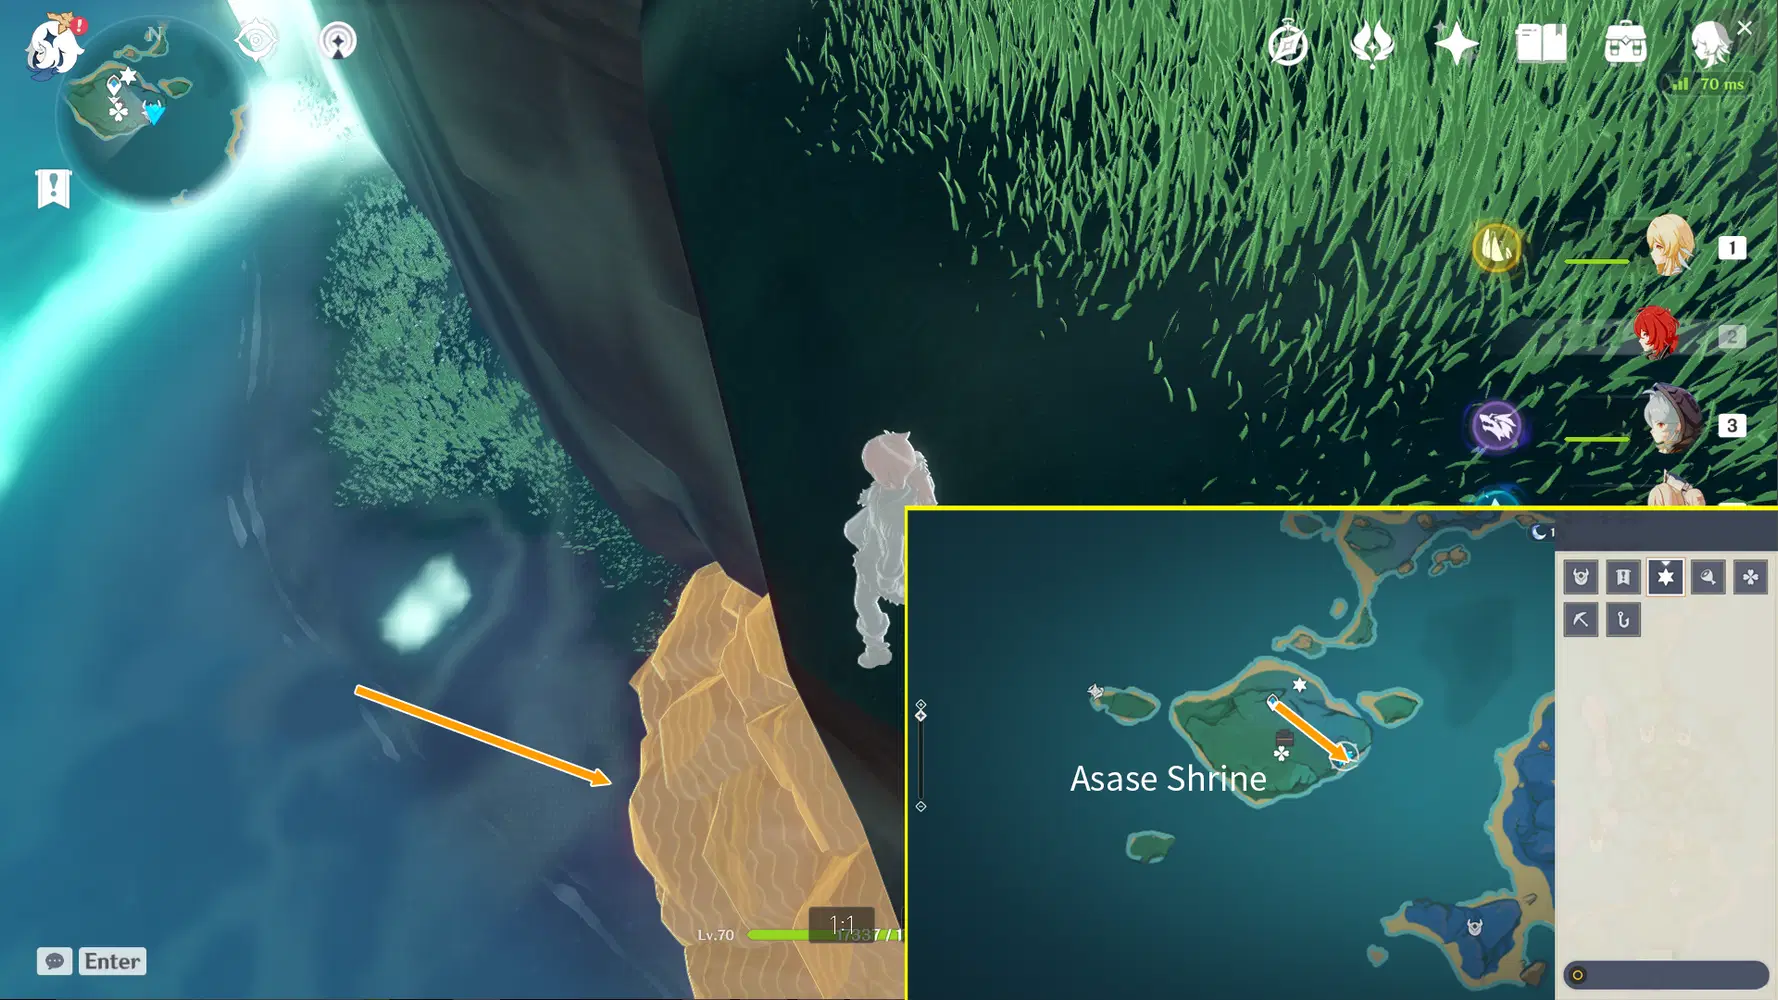
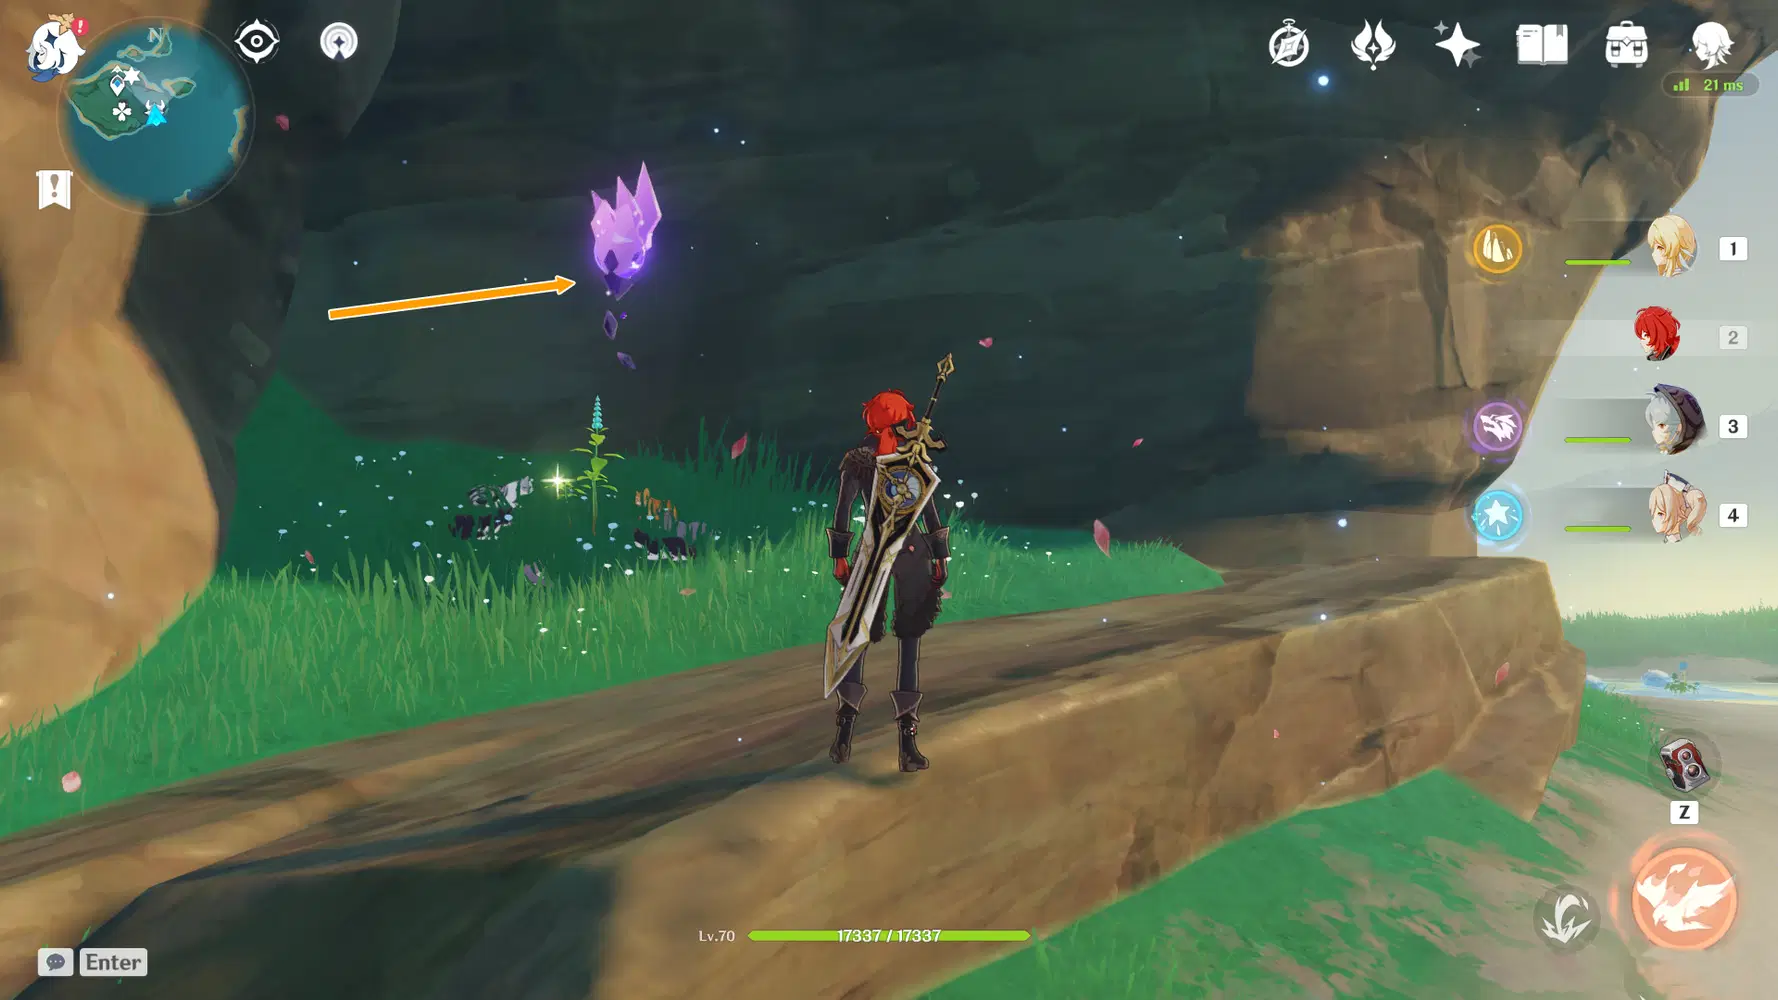
Go southeast of the Asase Shrine island, there’s an Electroculus behind the rock pile beneath the cliff, break the pile to grab the Electroculus.
Electroculus 119:
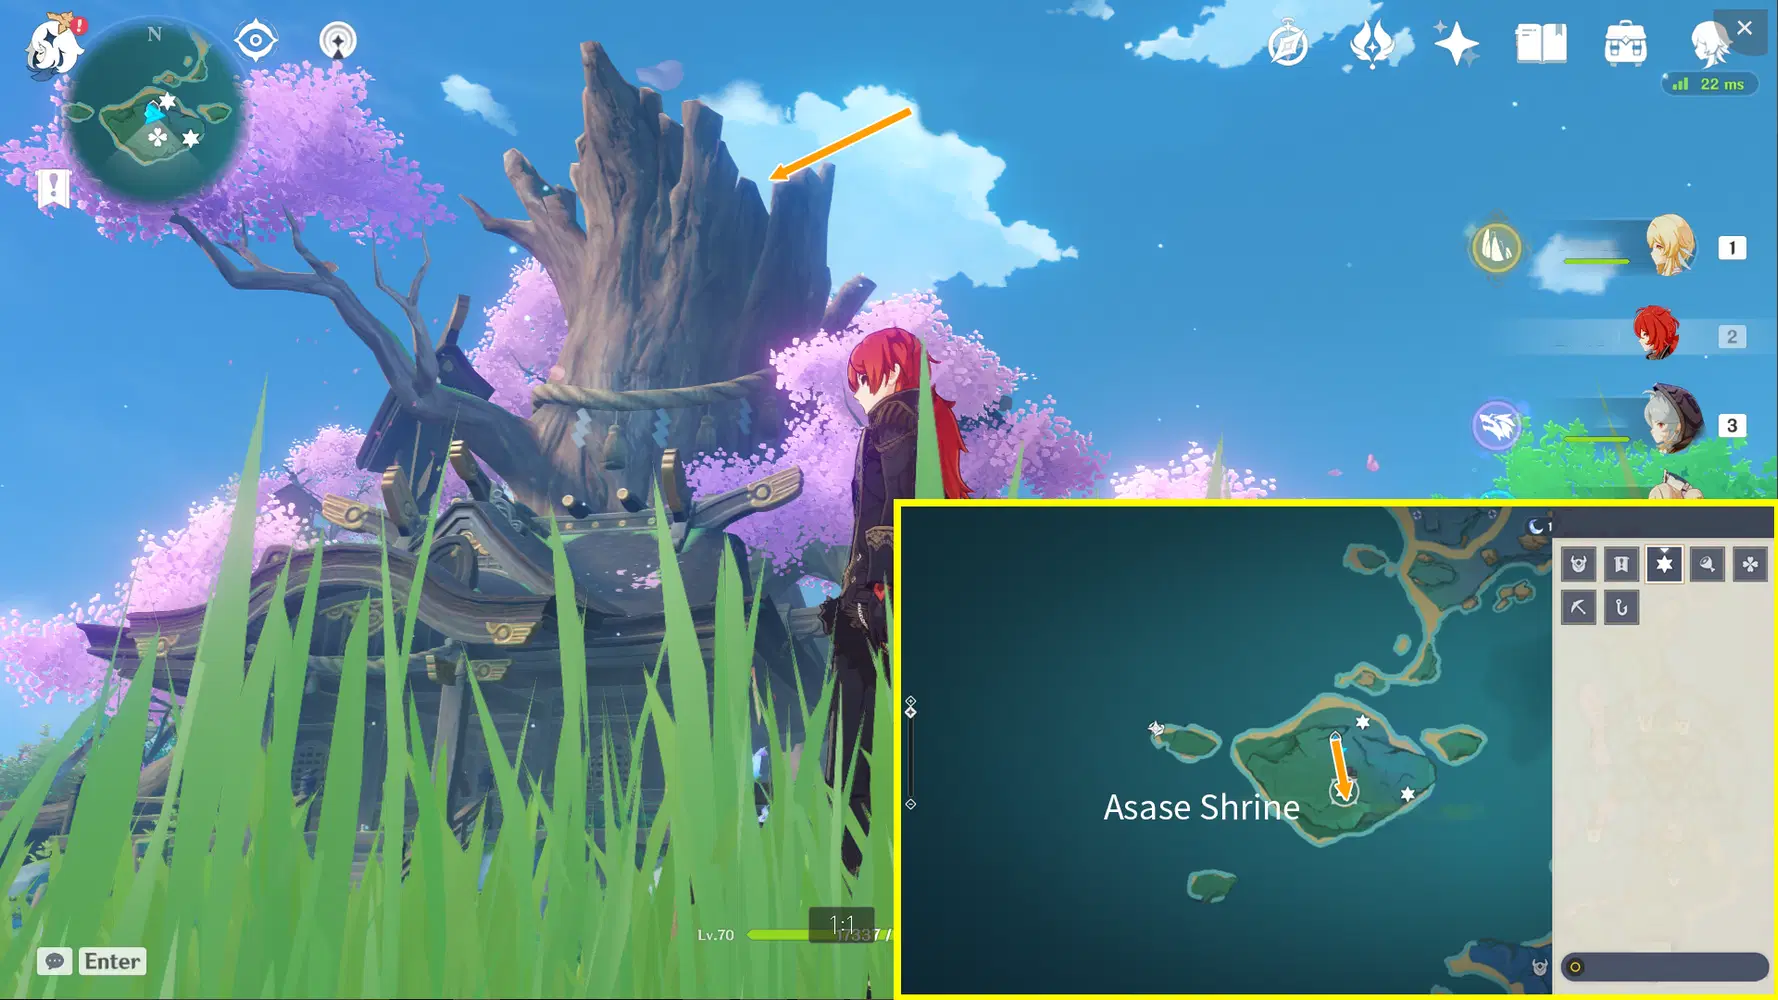
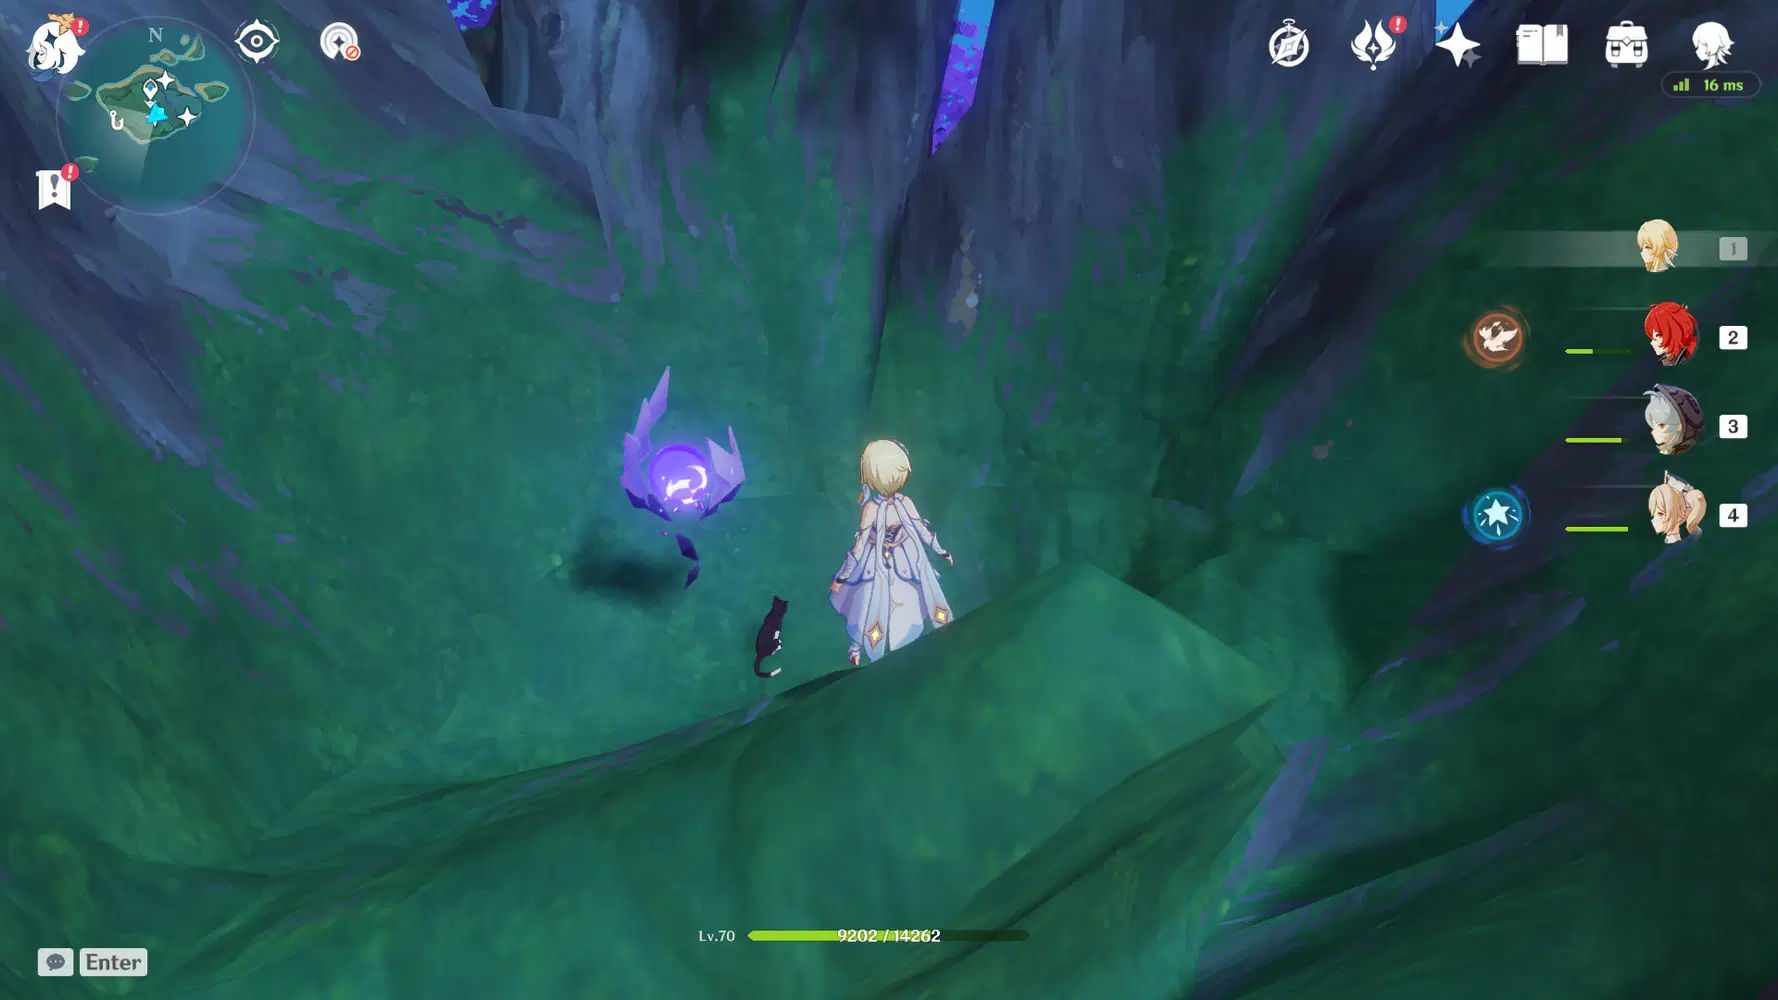
Teleport back to the Asase Shrine waypoint and head south, you’ll find the Electroculus within the giant tree trunk in the picture. Climb up and you’ll see it.
IV. Route 2 (Electroculi #120-124)
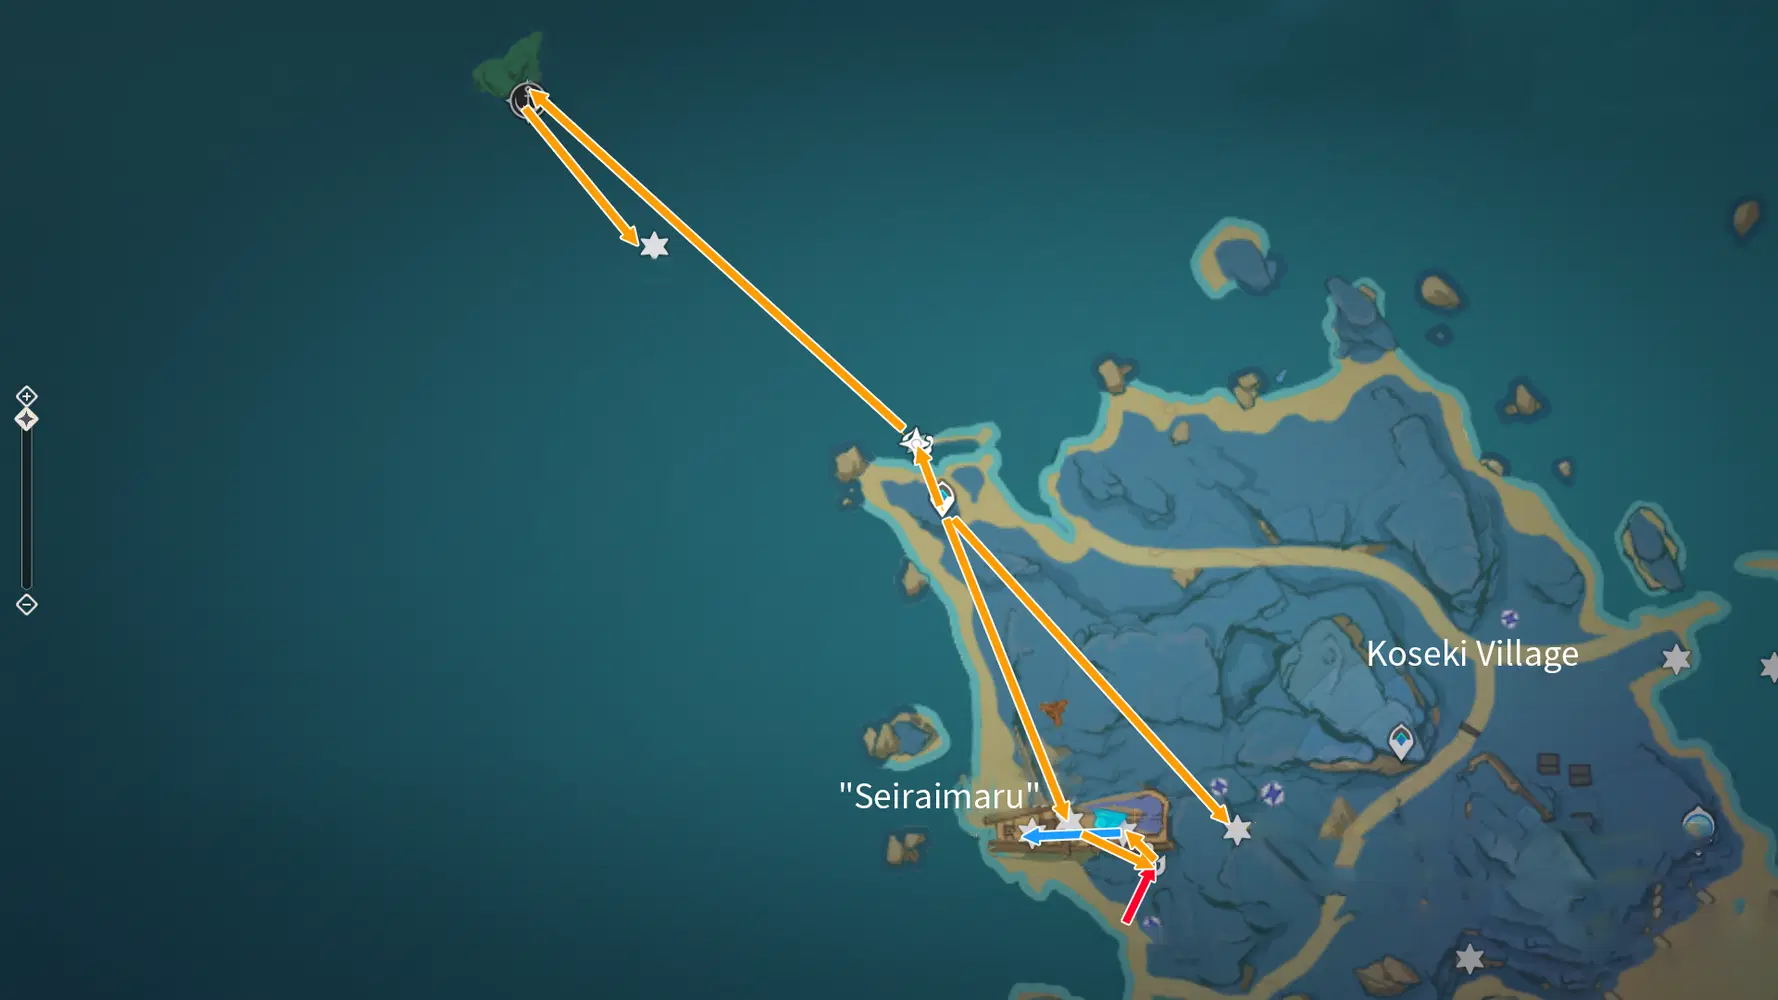
Note: If the Phase Gate is inactive, try “Rotate”; if the Phase Gate doesn’t teleport you, just try a few times until it does. Some of the Electroculus in this route asks you to react quickly after summoning the Electrograna from the Thunder Sakura Bough. You can refer to the “Seiraimaru” Ship Puzzle.
Electroculus 120:
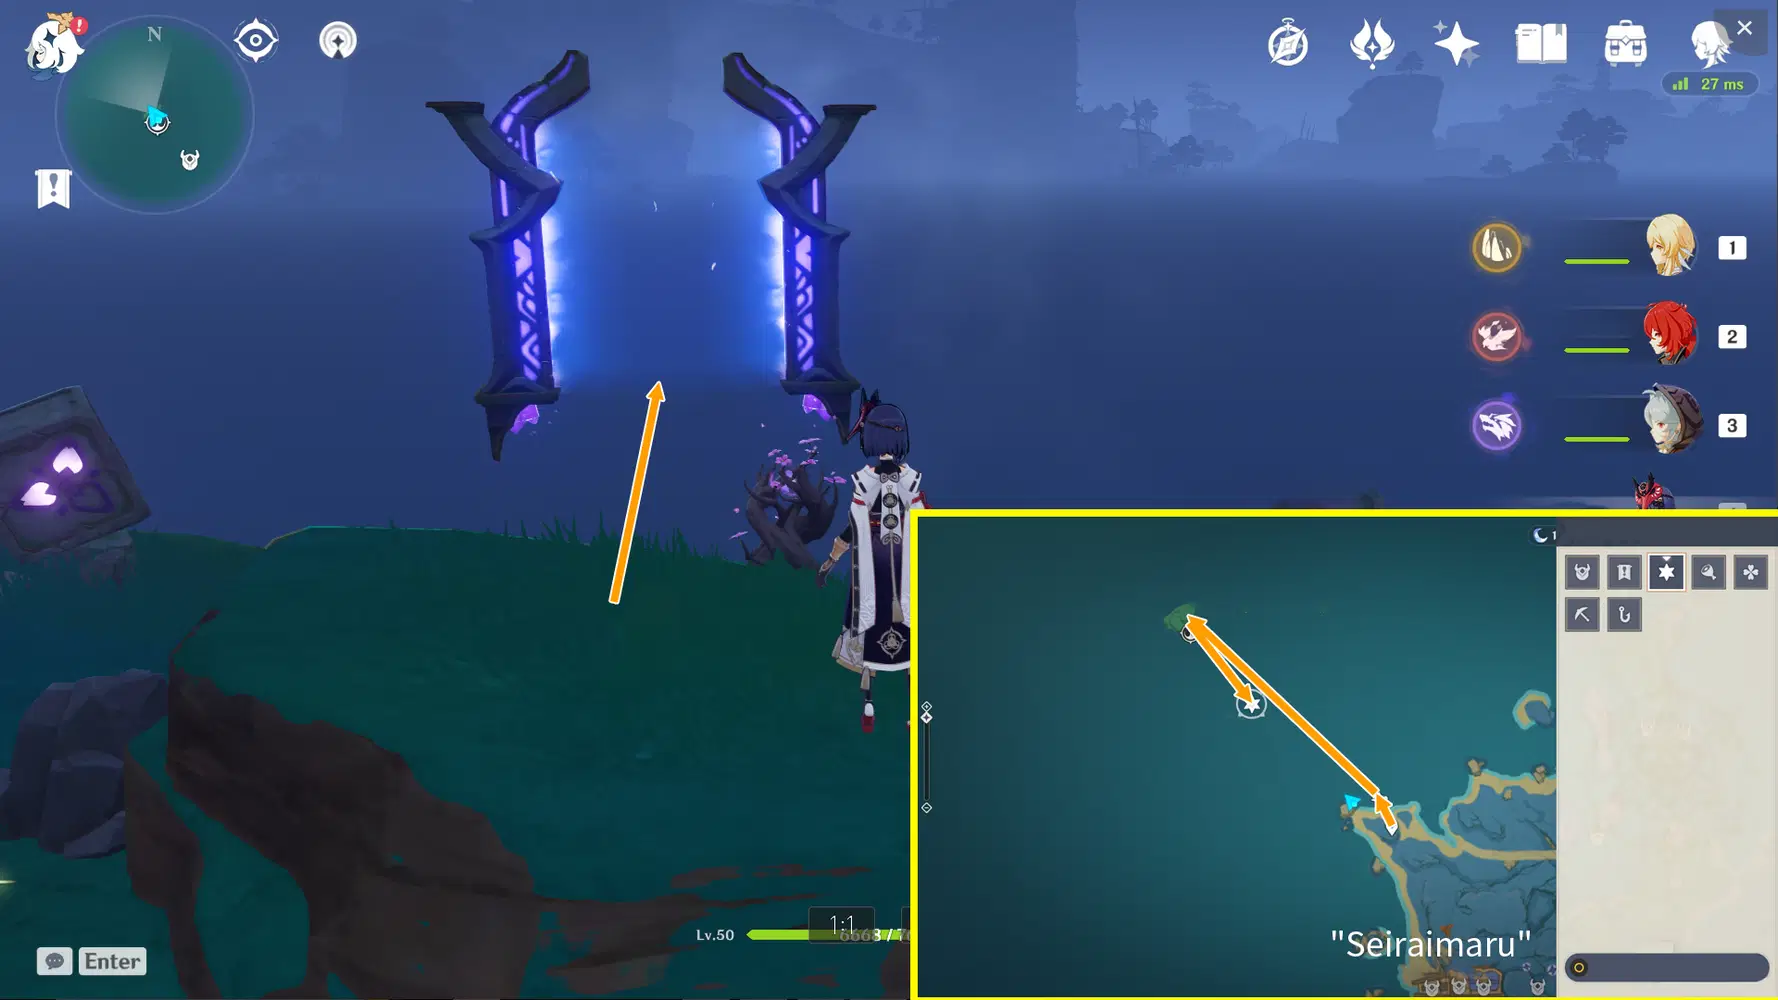
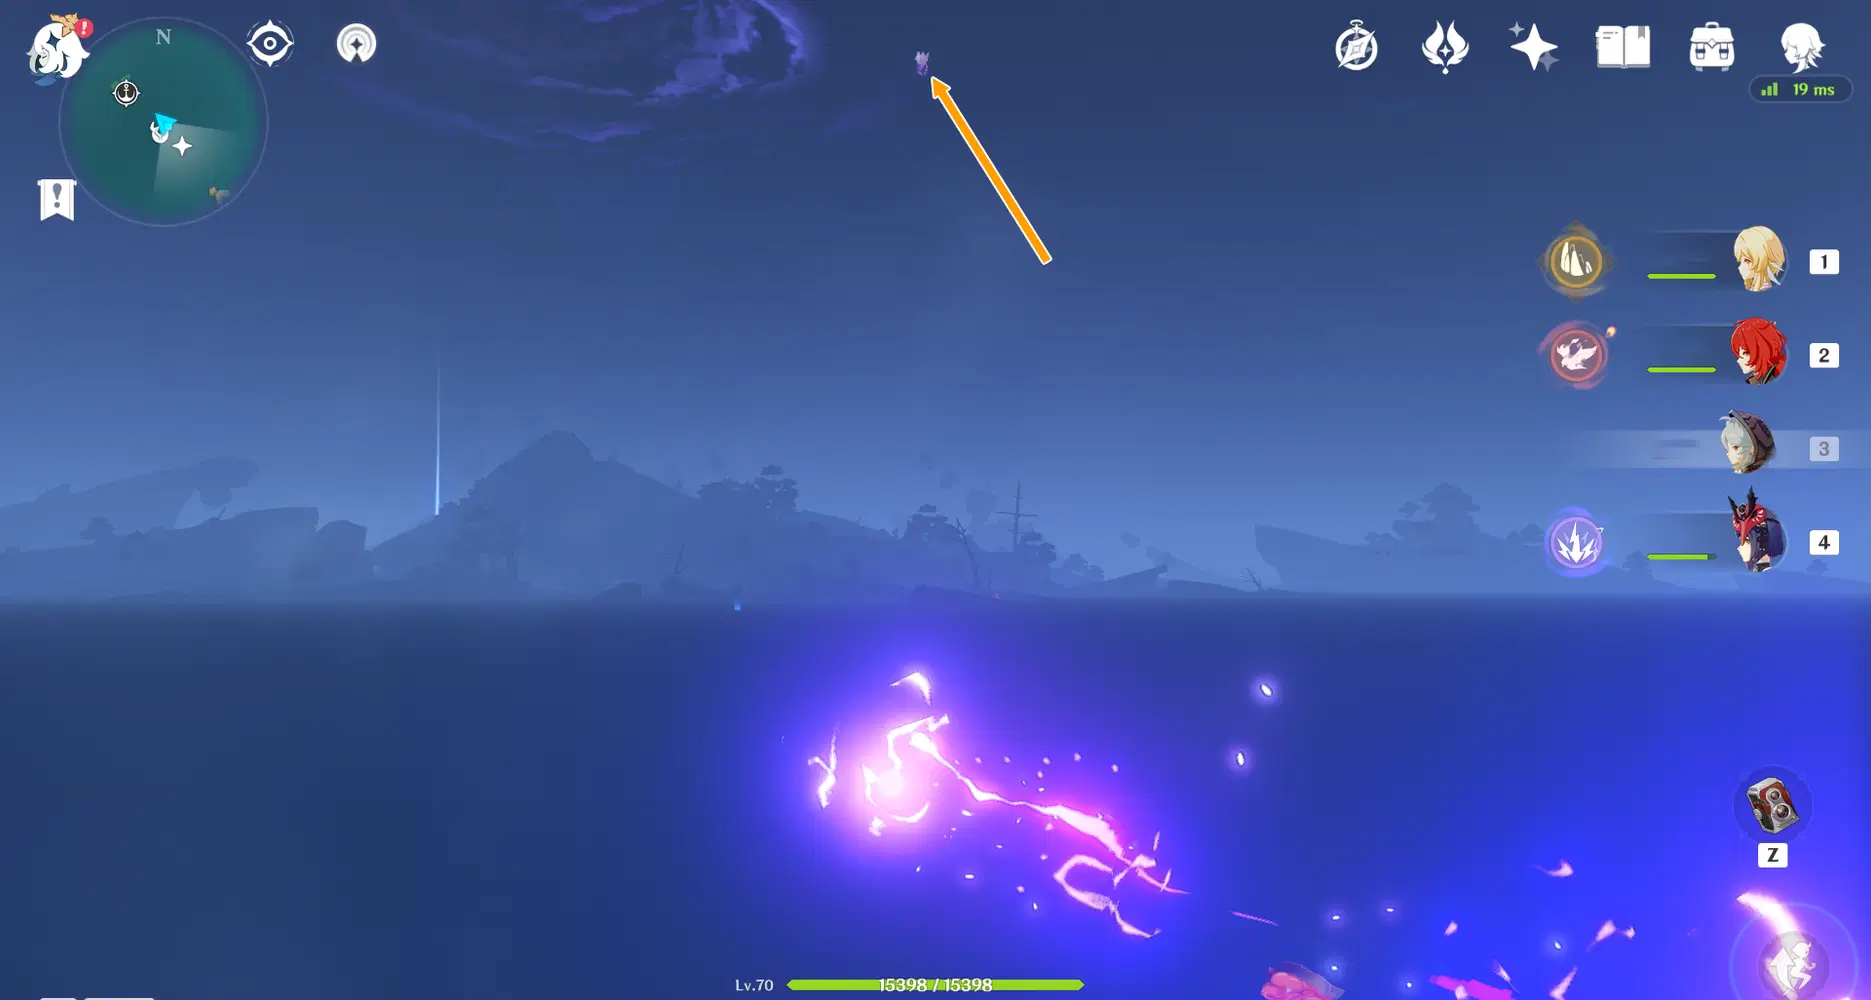
Teleport to the waypoint to the north of “Seiraimaru”, keep going north till you reach the Waverider waypoint and summon the Waverider, sail towards the small island to the northwest, then use the Phase Gate on the island to fly back – you’ll come into contact with the Electroculus in the air during.
Electroculus 121:
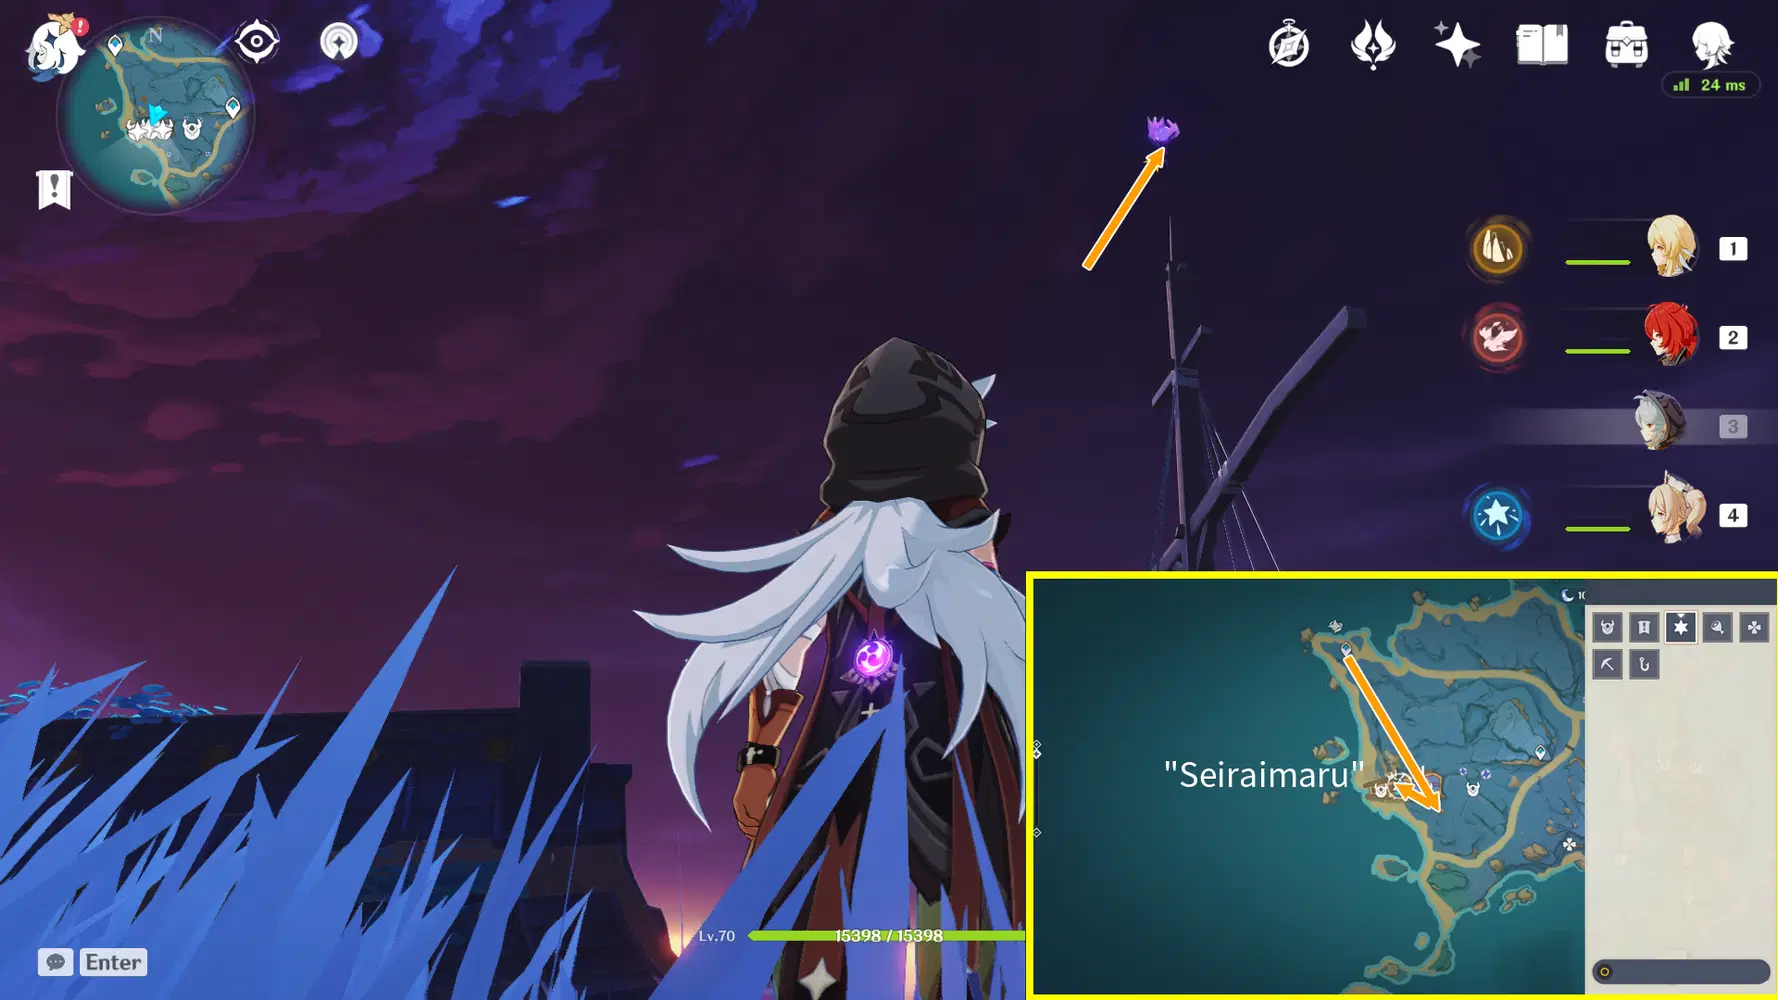
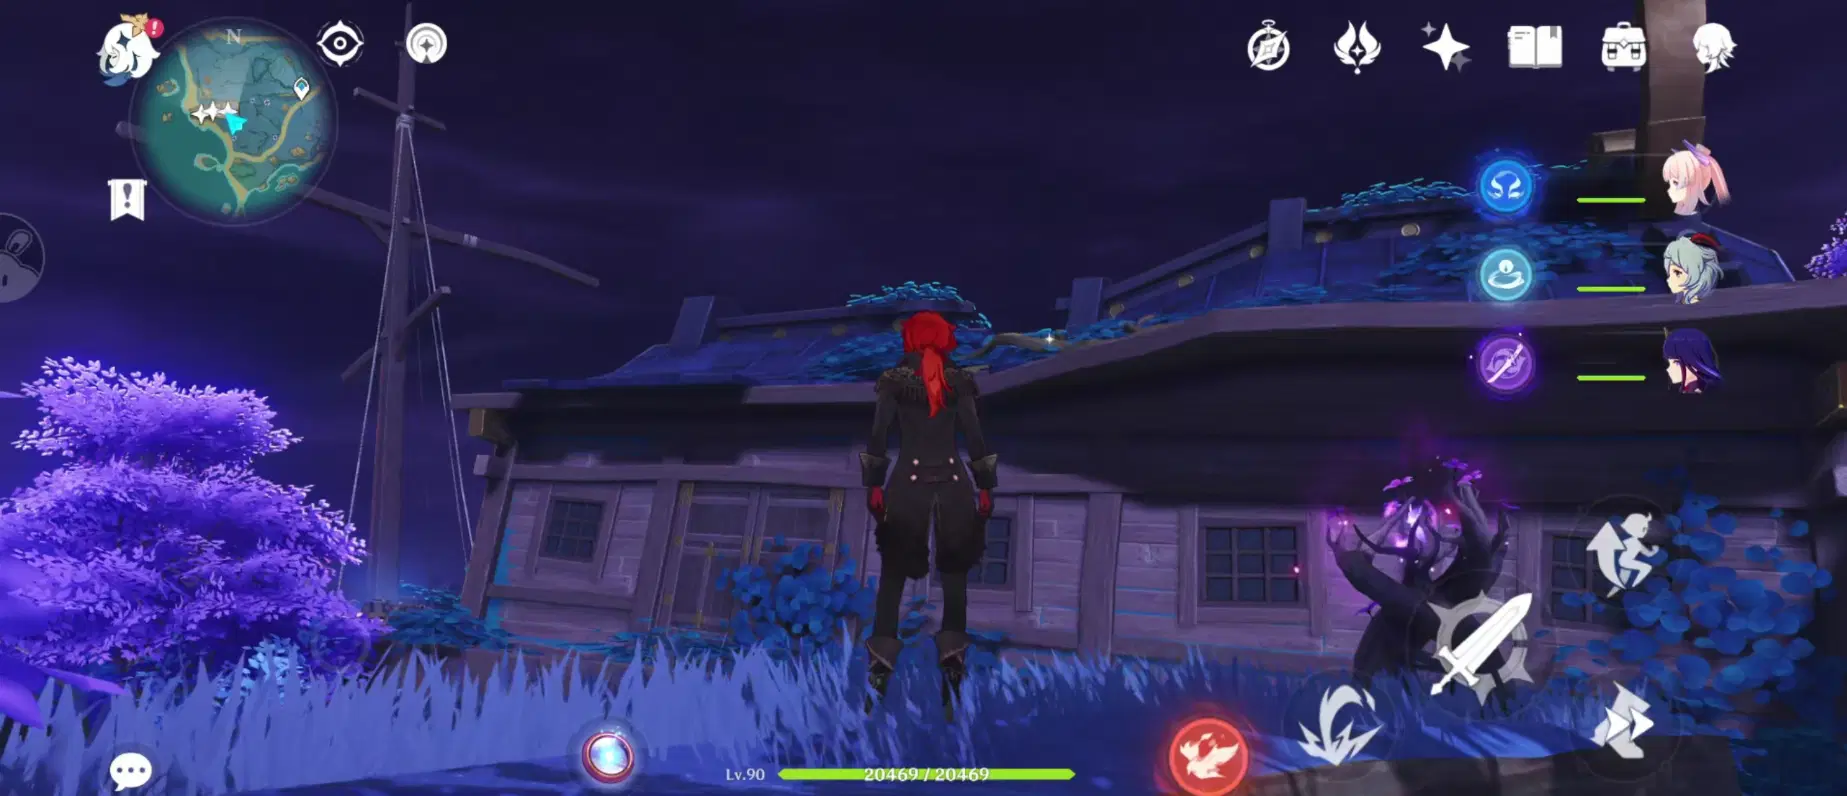
Return to the north “Seiraimaru” waypoint and move towards “Seiraimaru”. There’s an Electroculus on top of the mast, you can get there through summoning an Electrograna with the Thunder Sakura Bough near the stern and travel by Thunder Spheres.
Electroculus 122:
Land after grabbing #121 and solve the puzzle on the deck: form a rectangle with the four wheels.
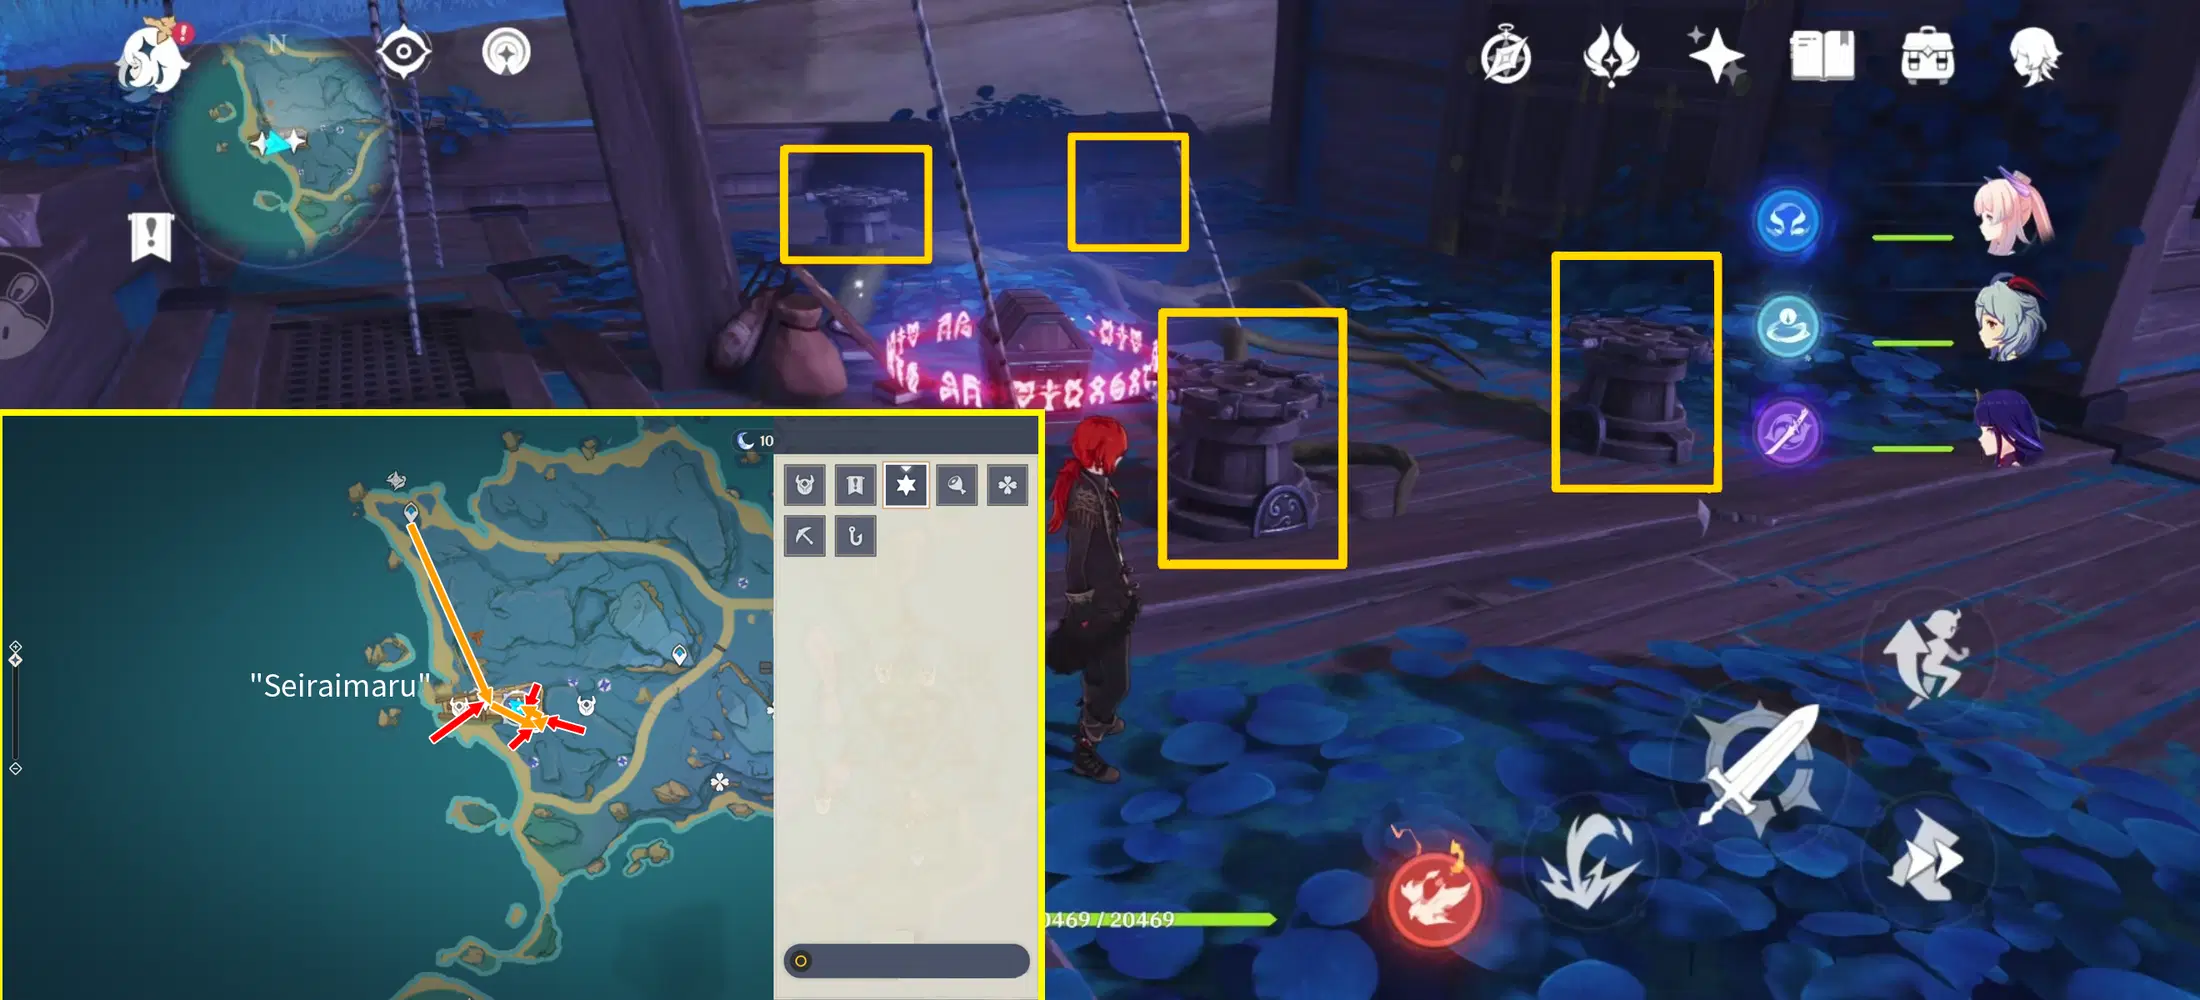
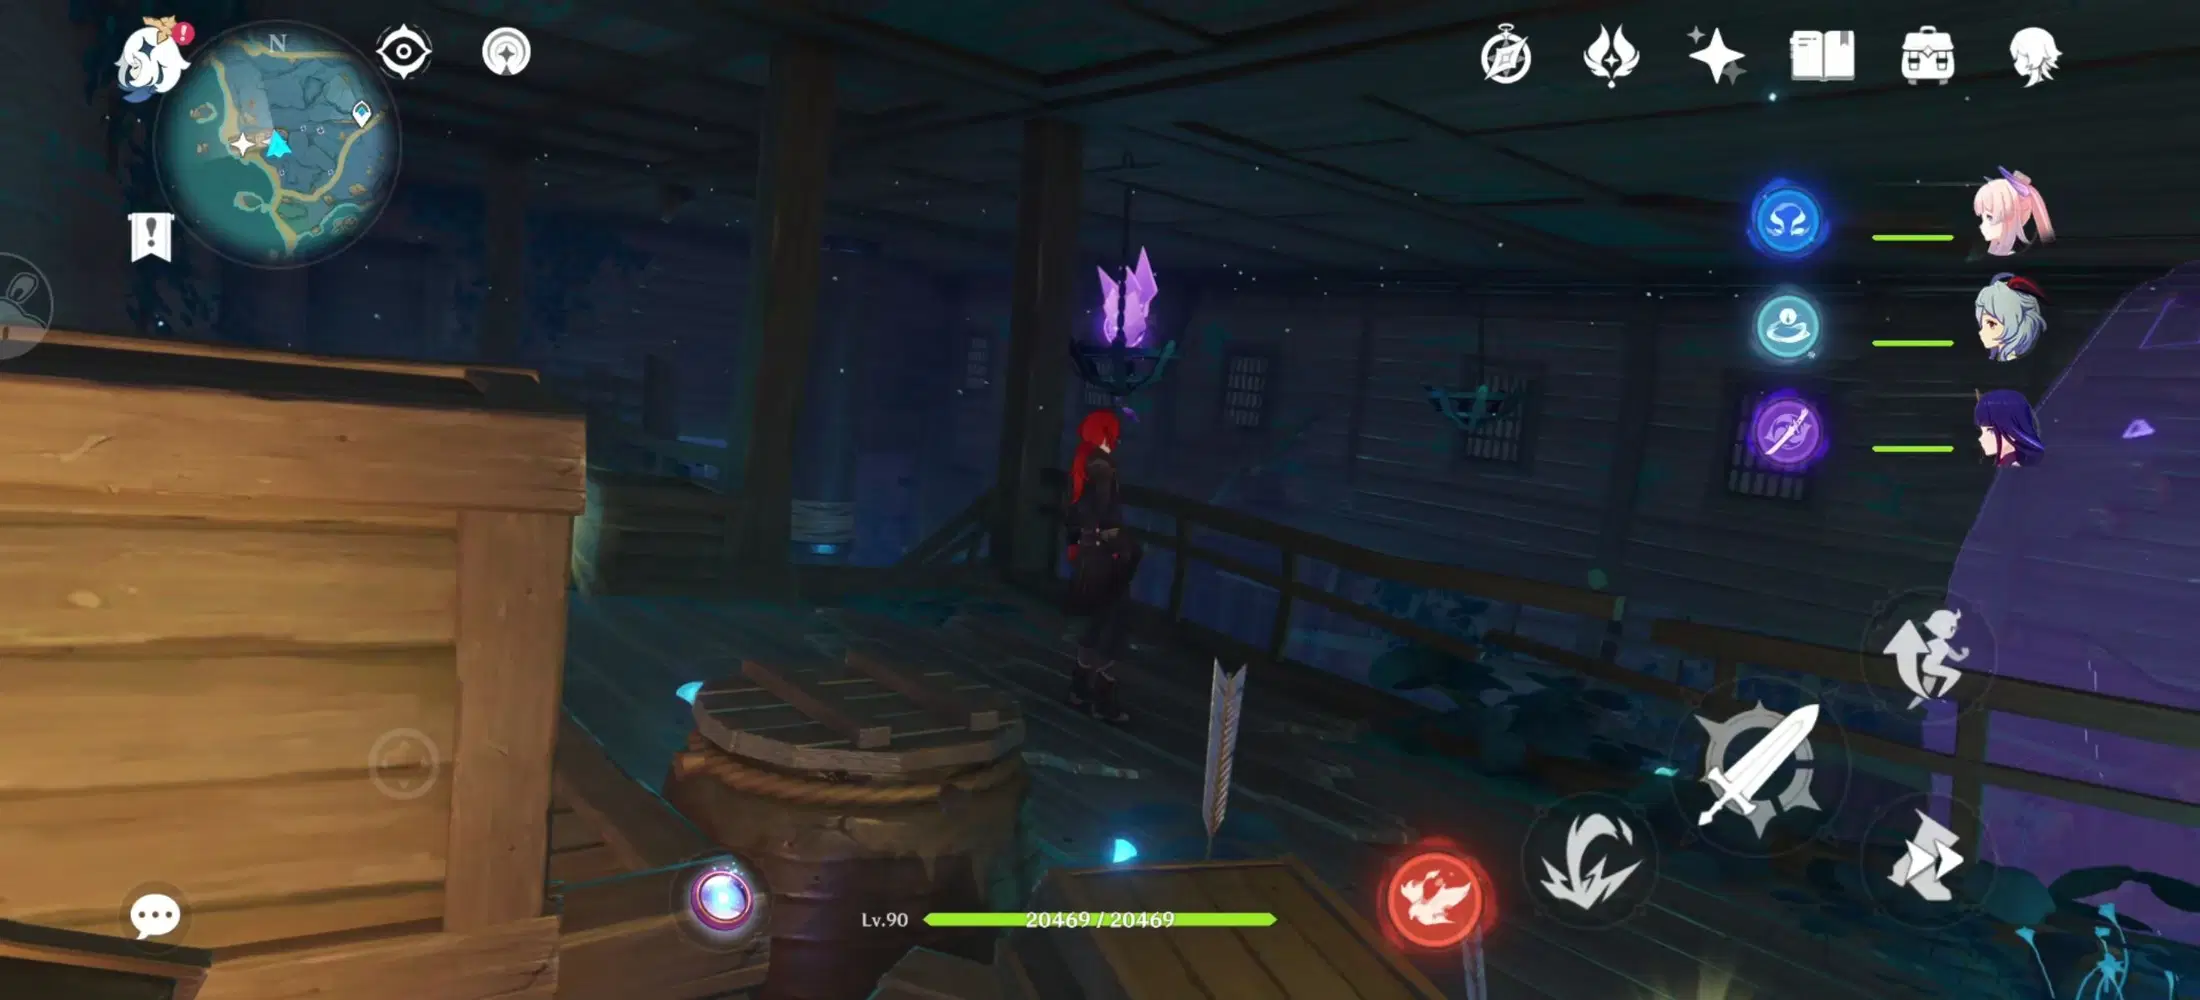
The entrance clip shows the wooden boards next to the Thunder Sakura Bough coming apart on the ship. Summon the Electrograna first, then enter the hole, you’ll see an Electroculus to your left.
Electroculus 123:
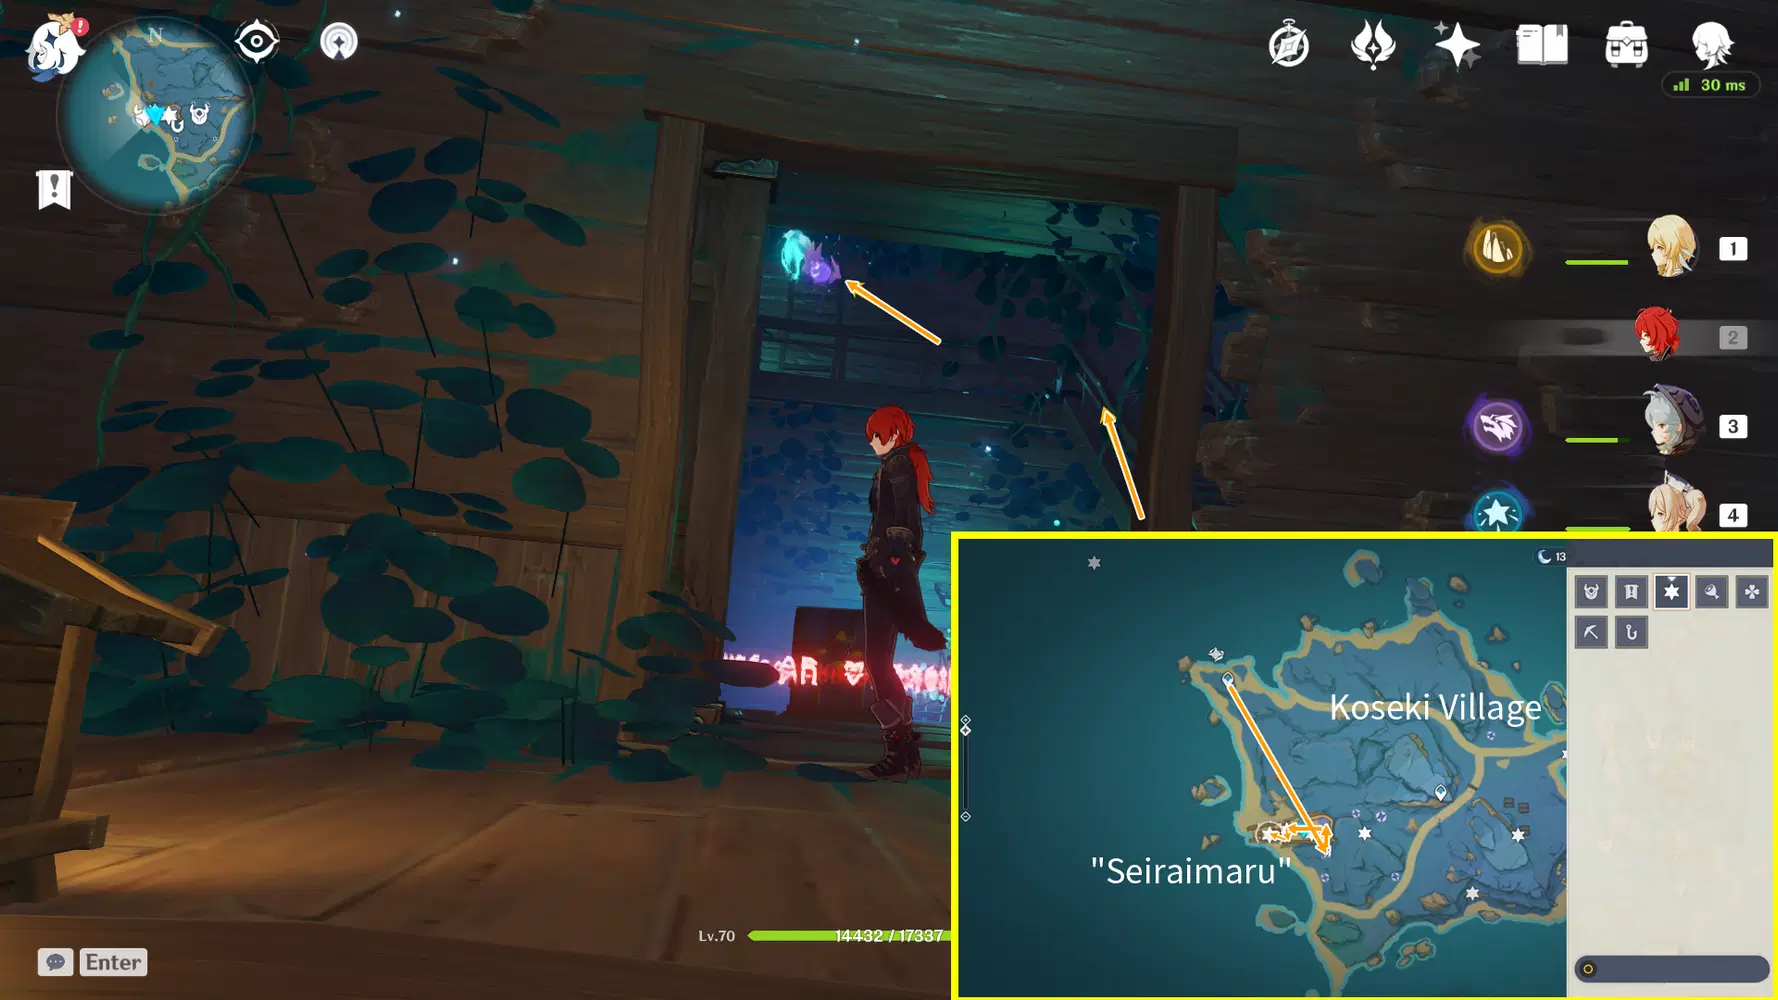
Go to the next level of the ship and follow the Seelie to get the other Electroculus.
Electroculus 124:
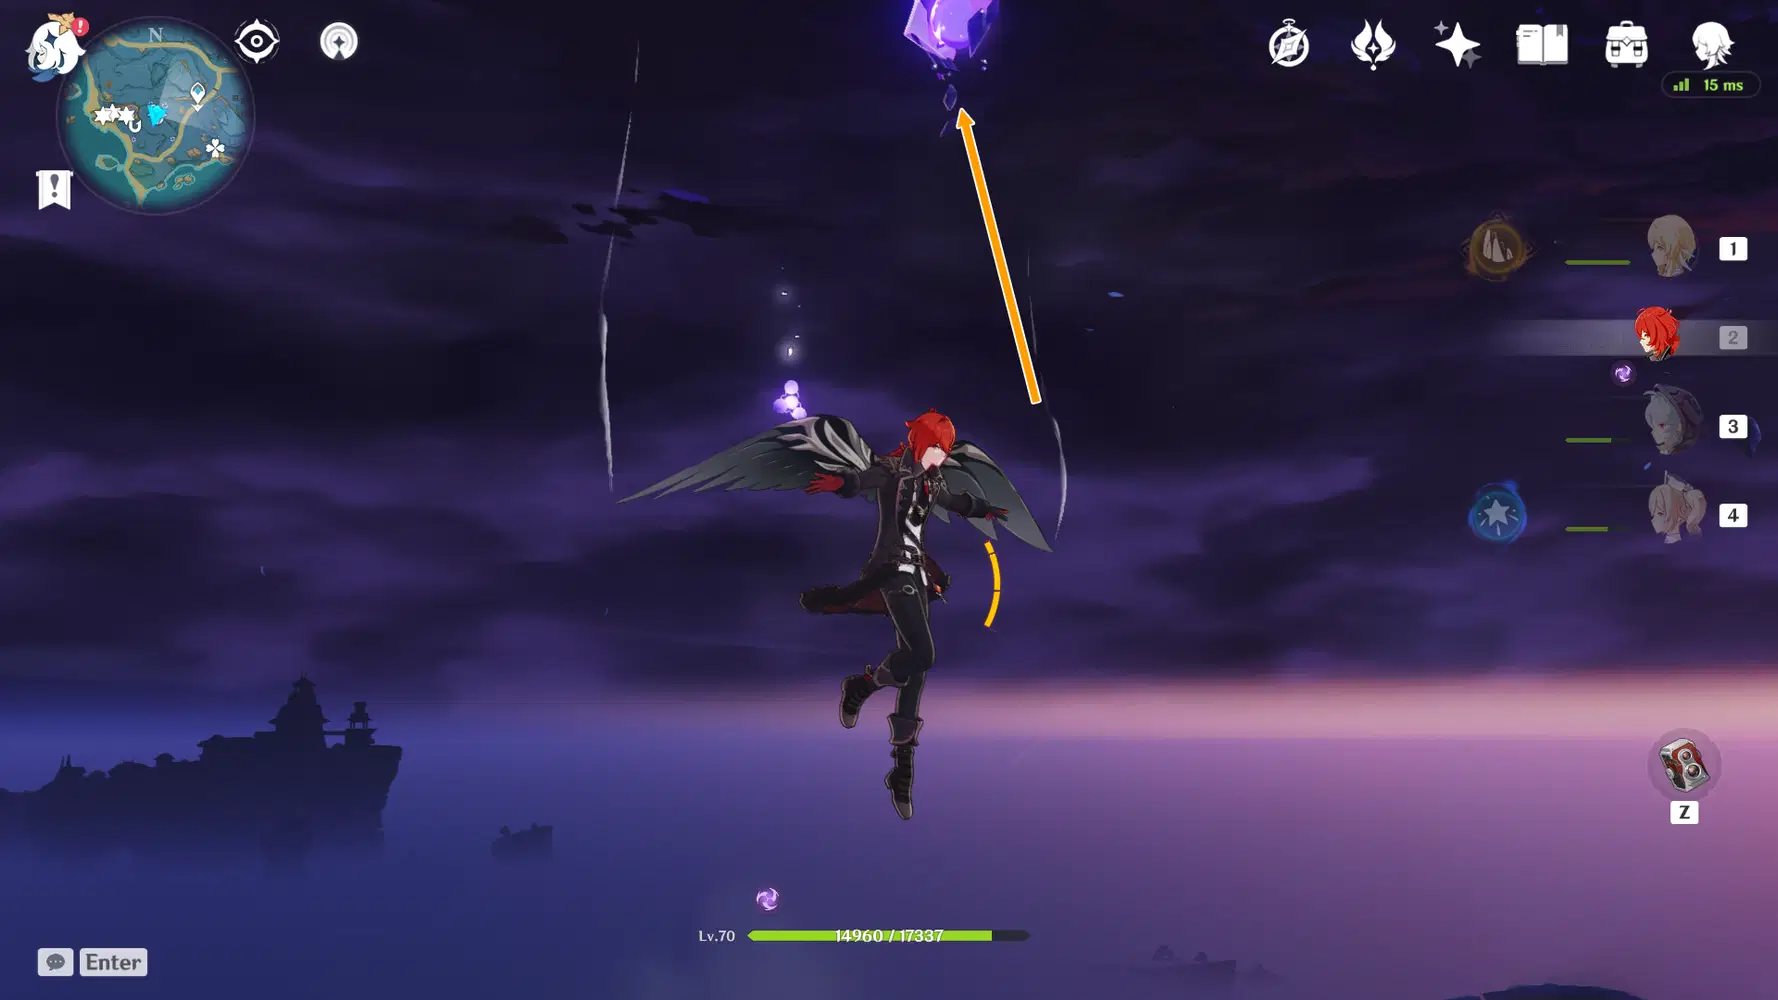
Solve the Electro Current puzzle and activate the Thunder Sakura Bough, summon the Electrograna and quickly fly up to touch the Electrograna and find the Electroculus.
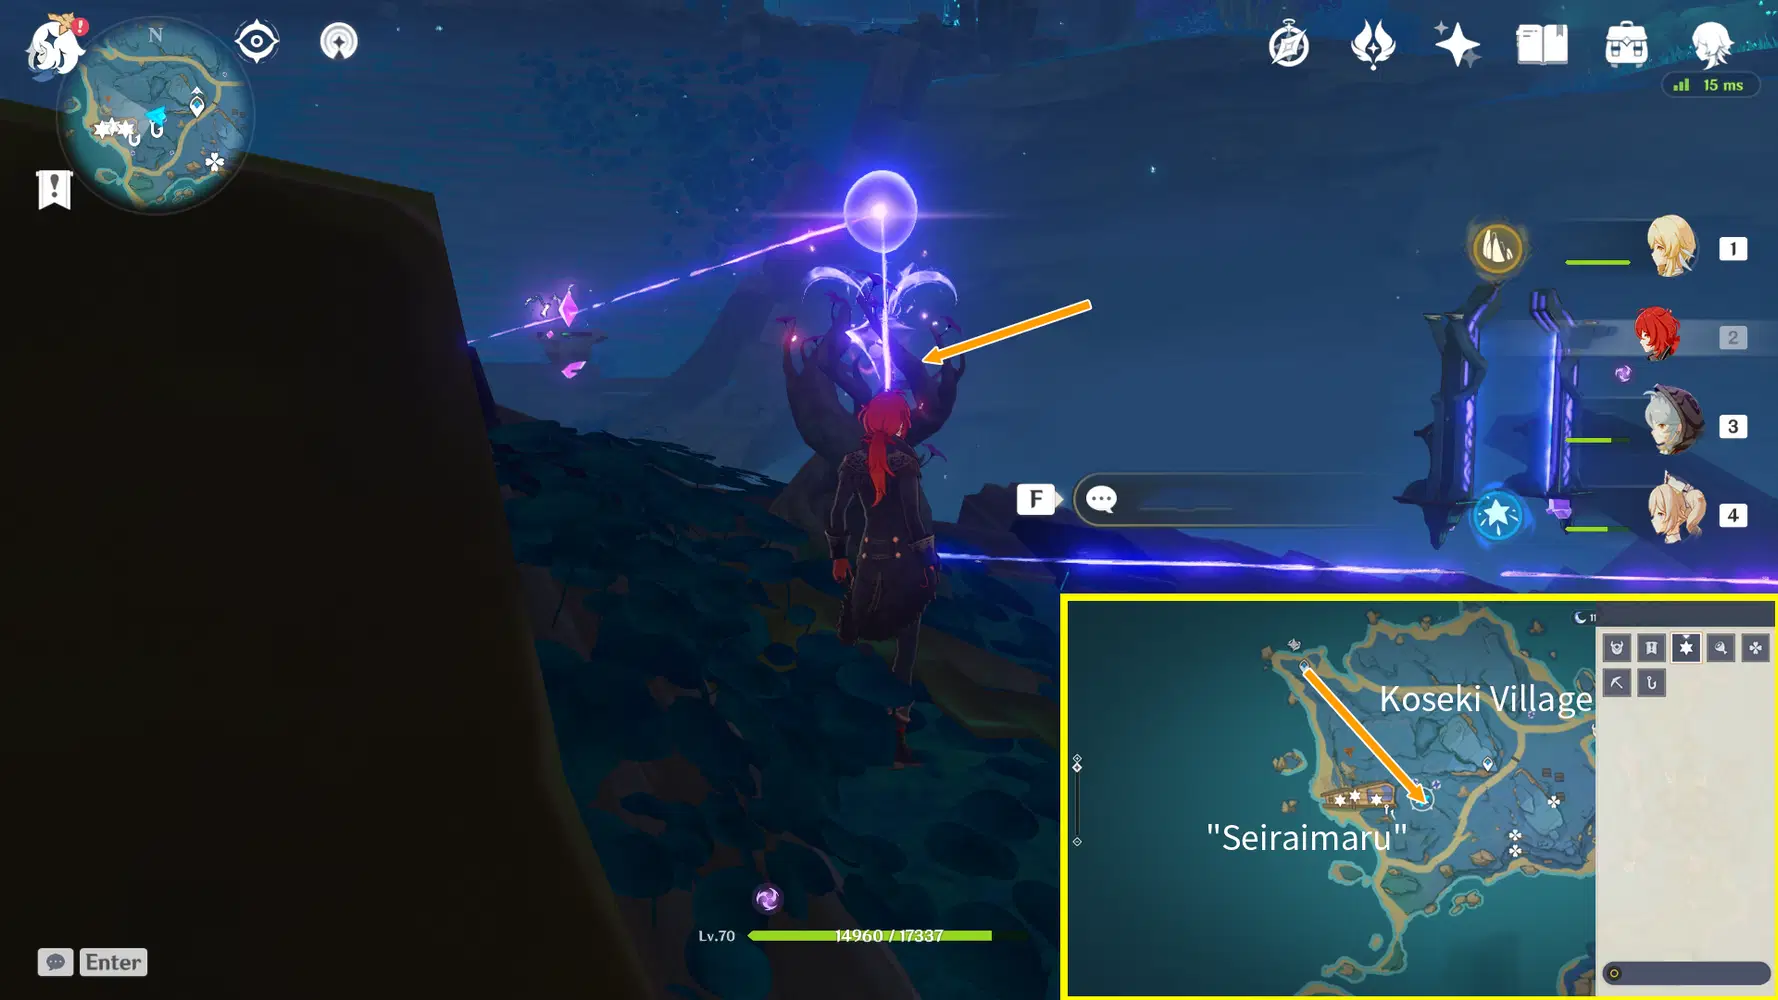
After the Electro Seelie settles in its court, the Thunder Sakura Bough will be activated. Summon the Electrograna to quickly fly up via thee Thunder Spheres and grab the Oculus.
V. Route 3 (Electroculi #125-128)
Note: You need to have completed the Inazuma Reputation quest: Relics of Seirai.
Electroculus 125:
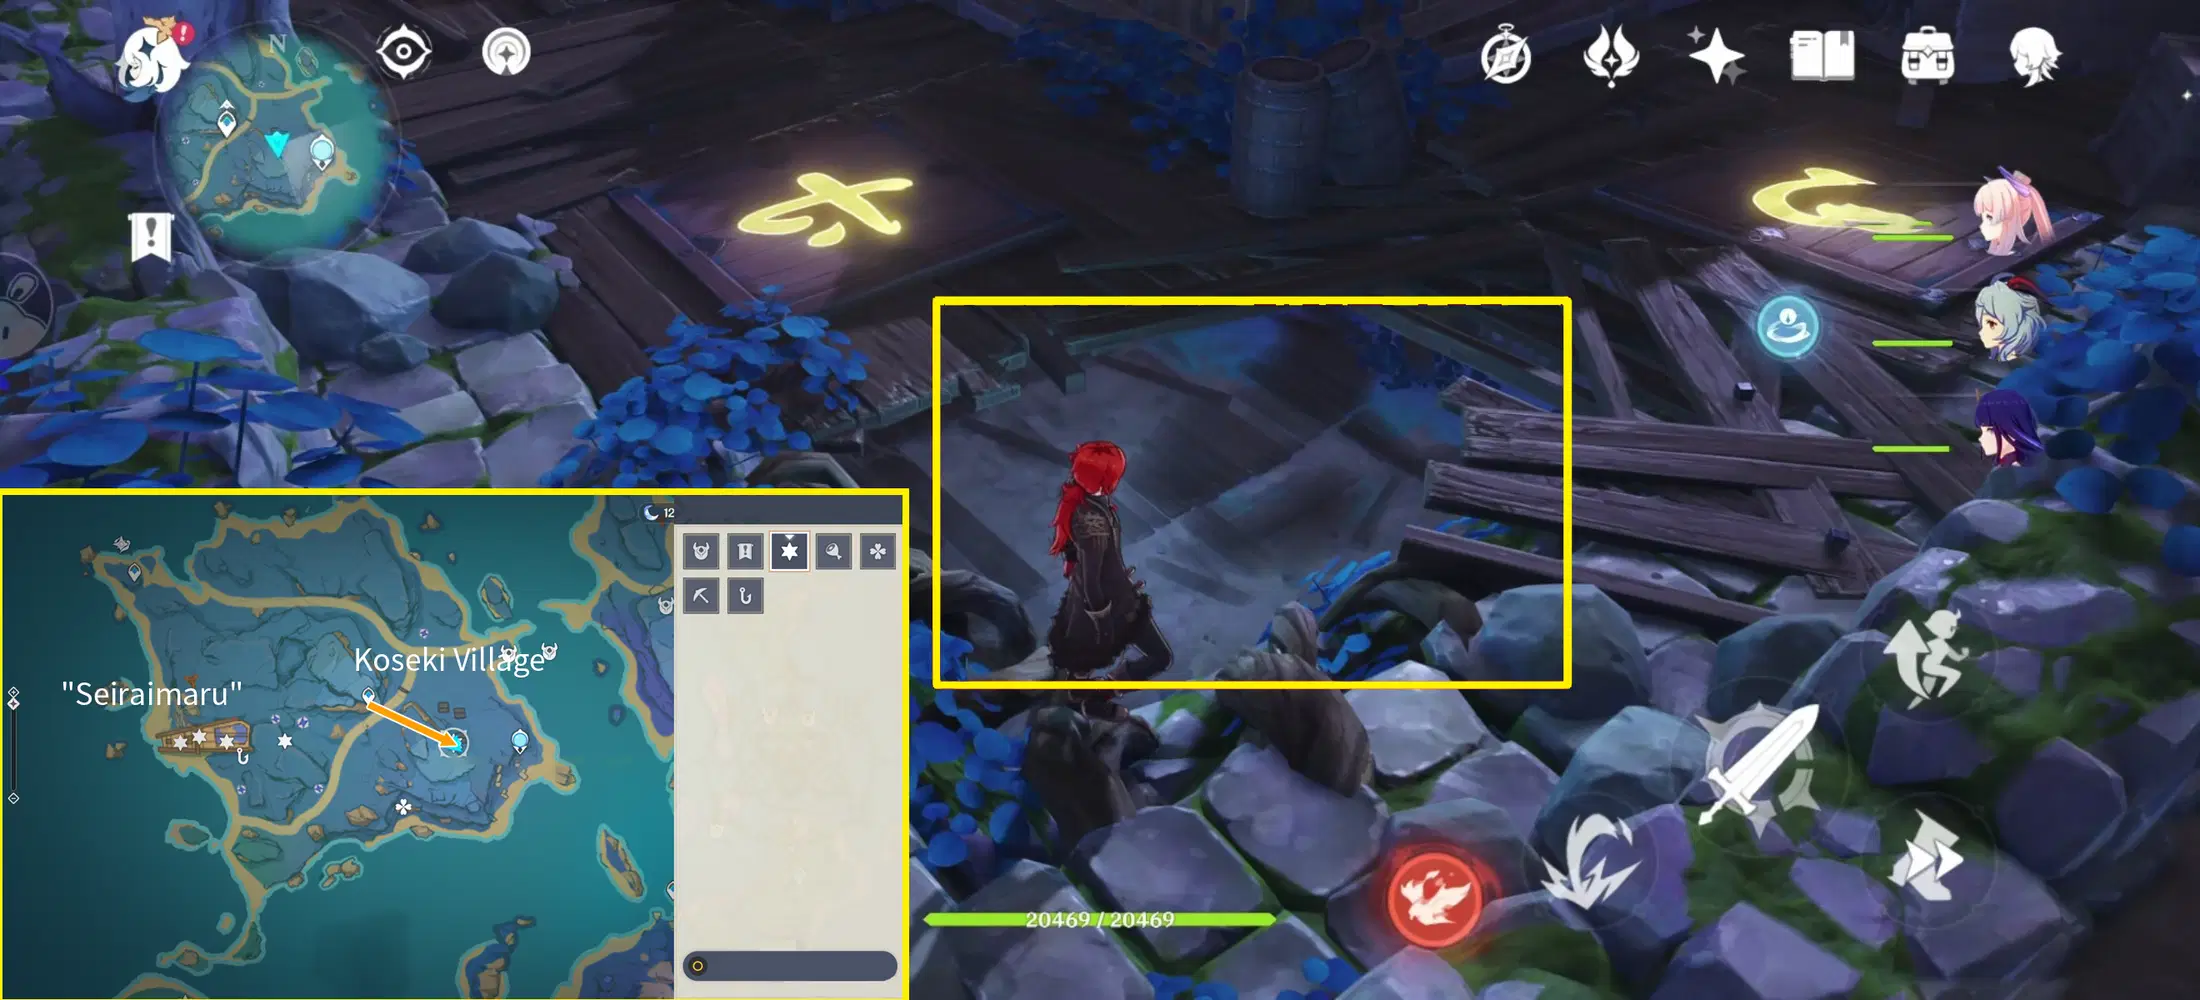
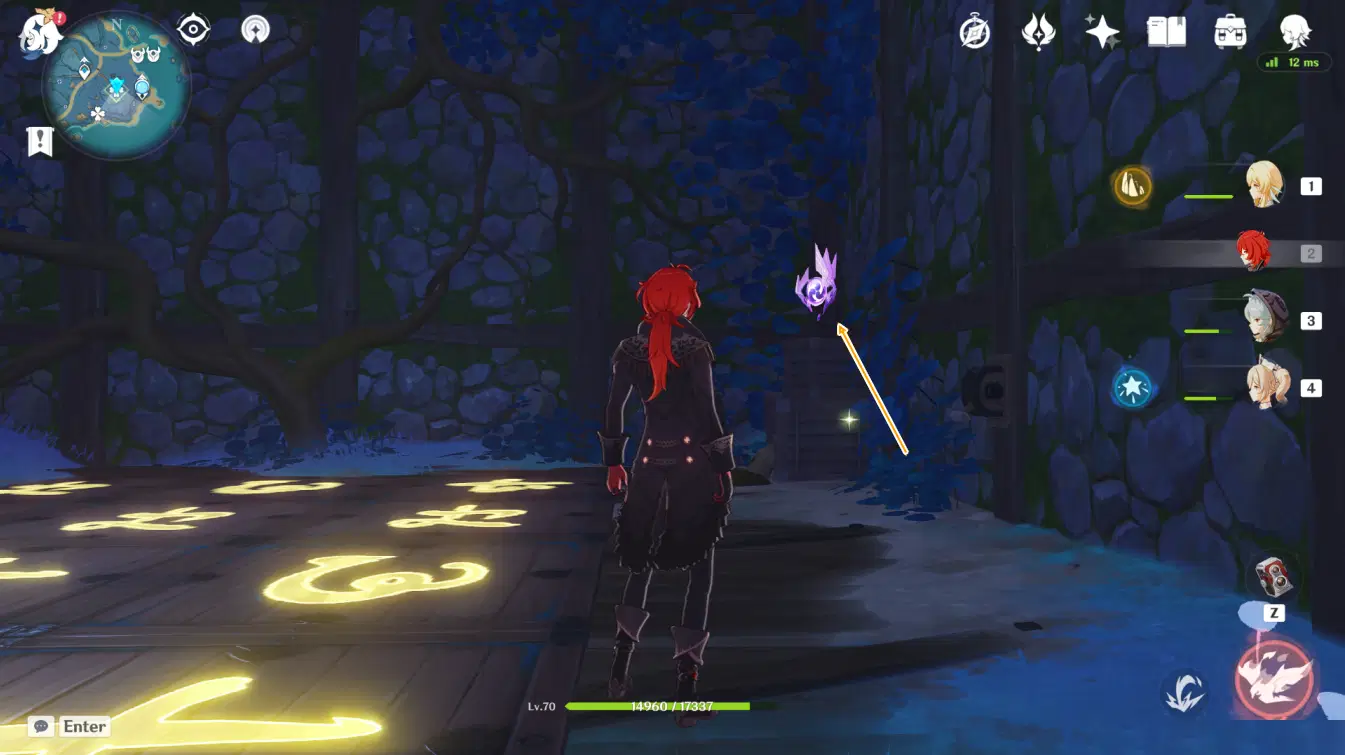
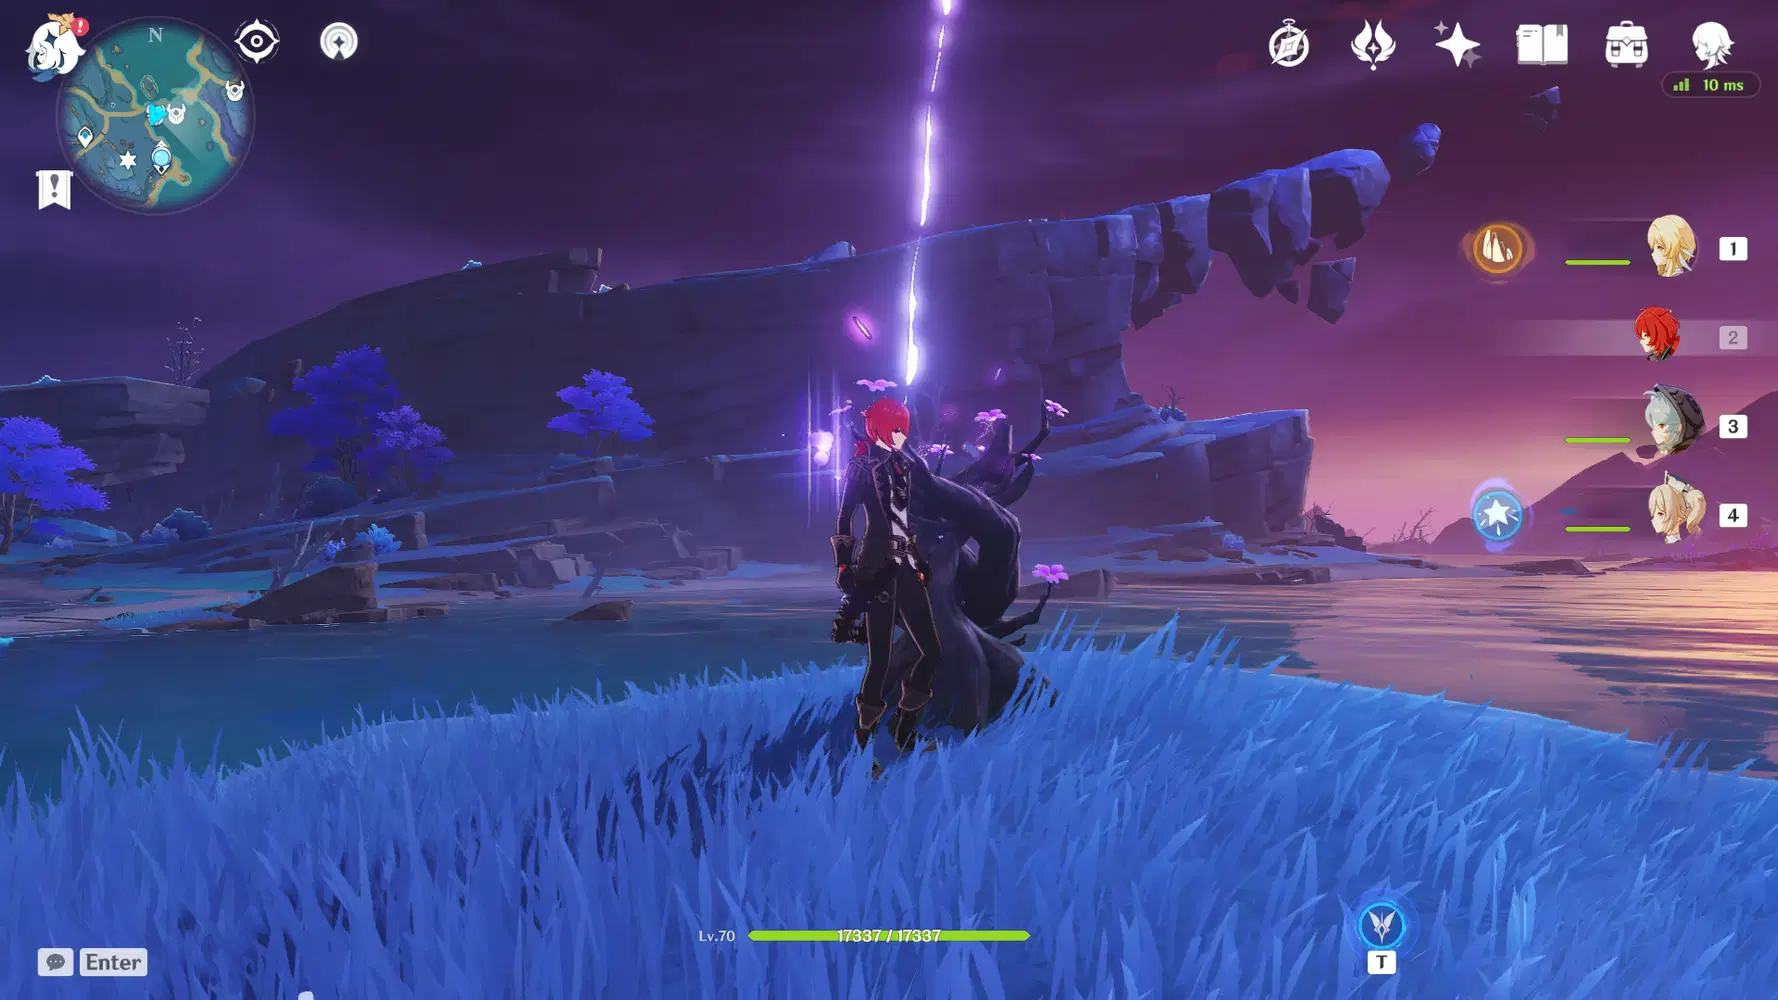
Teleport to the Koseki Village Statue of The Seven and go west to the hut, enter the basement to find the Electroculus.
Electroculus 126:
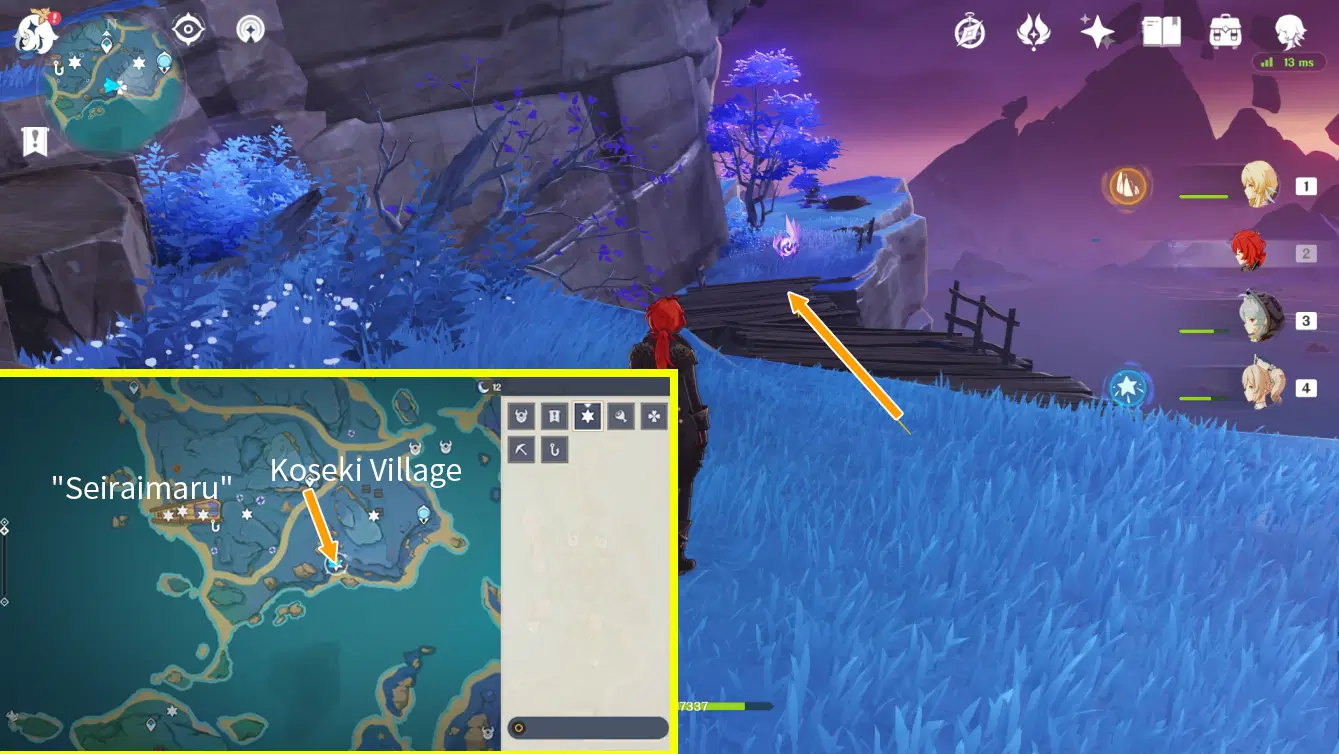
Teleport to the southwest waypoint of Koseki Village. You’ll find an Electroculus above the wooden bridge to the southeast, walk over to grab it.
Electroculus 127:
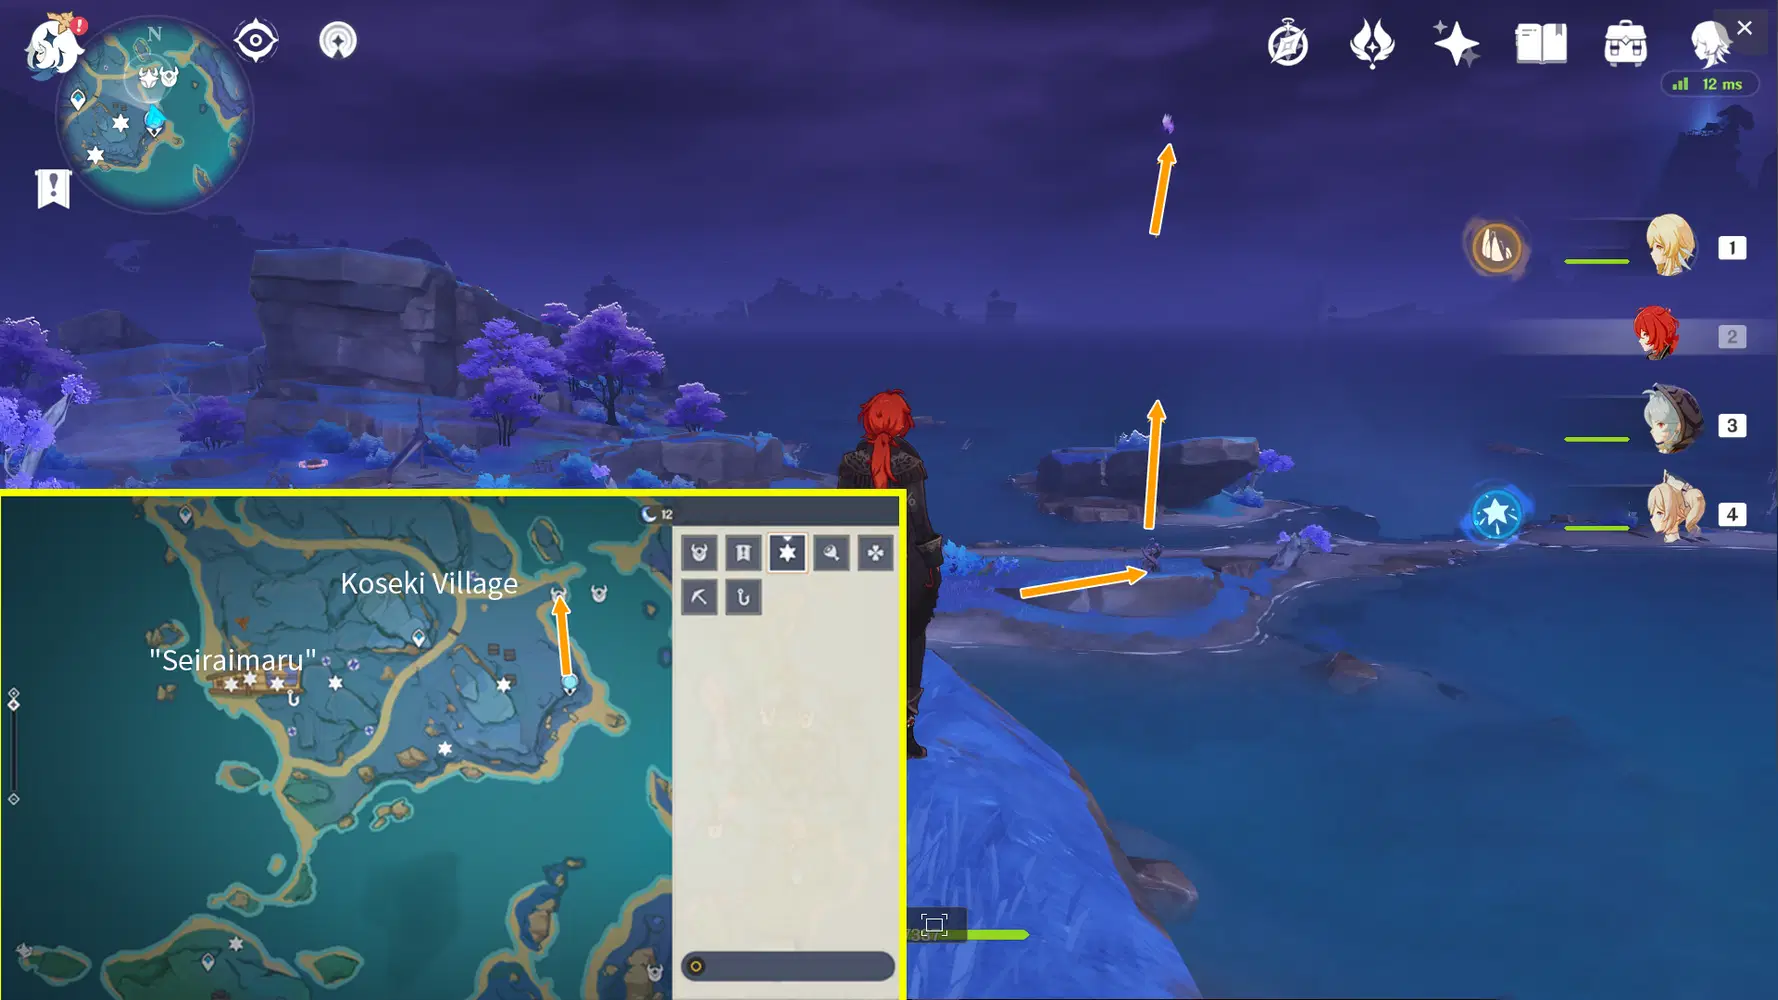
Teleport back to the Statue of The Seven of Koseki Village and head north. The Electroculus is mid-air, so summon the Electrograna and fly up via the Thunder Sphere.
Electroculus 128:
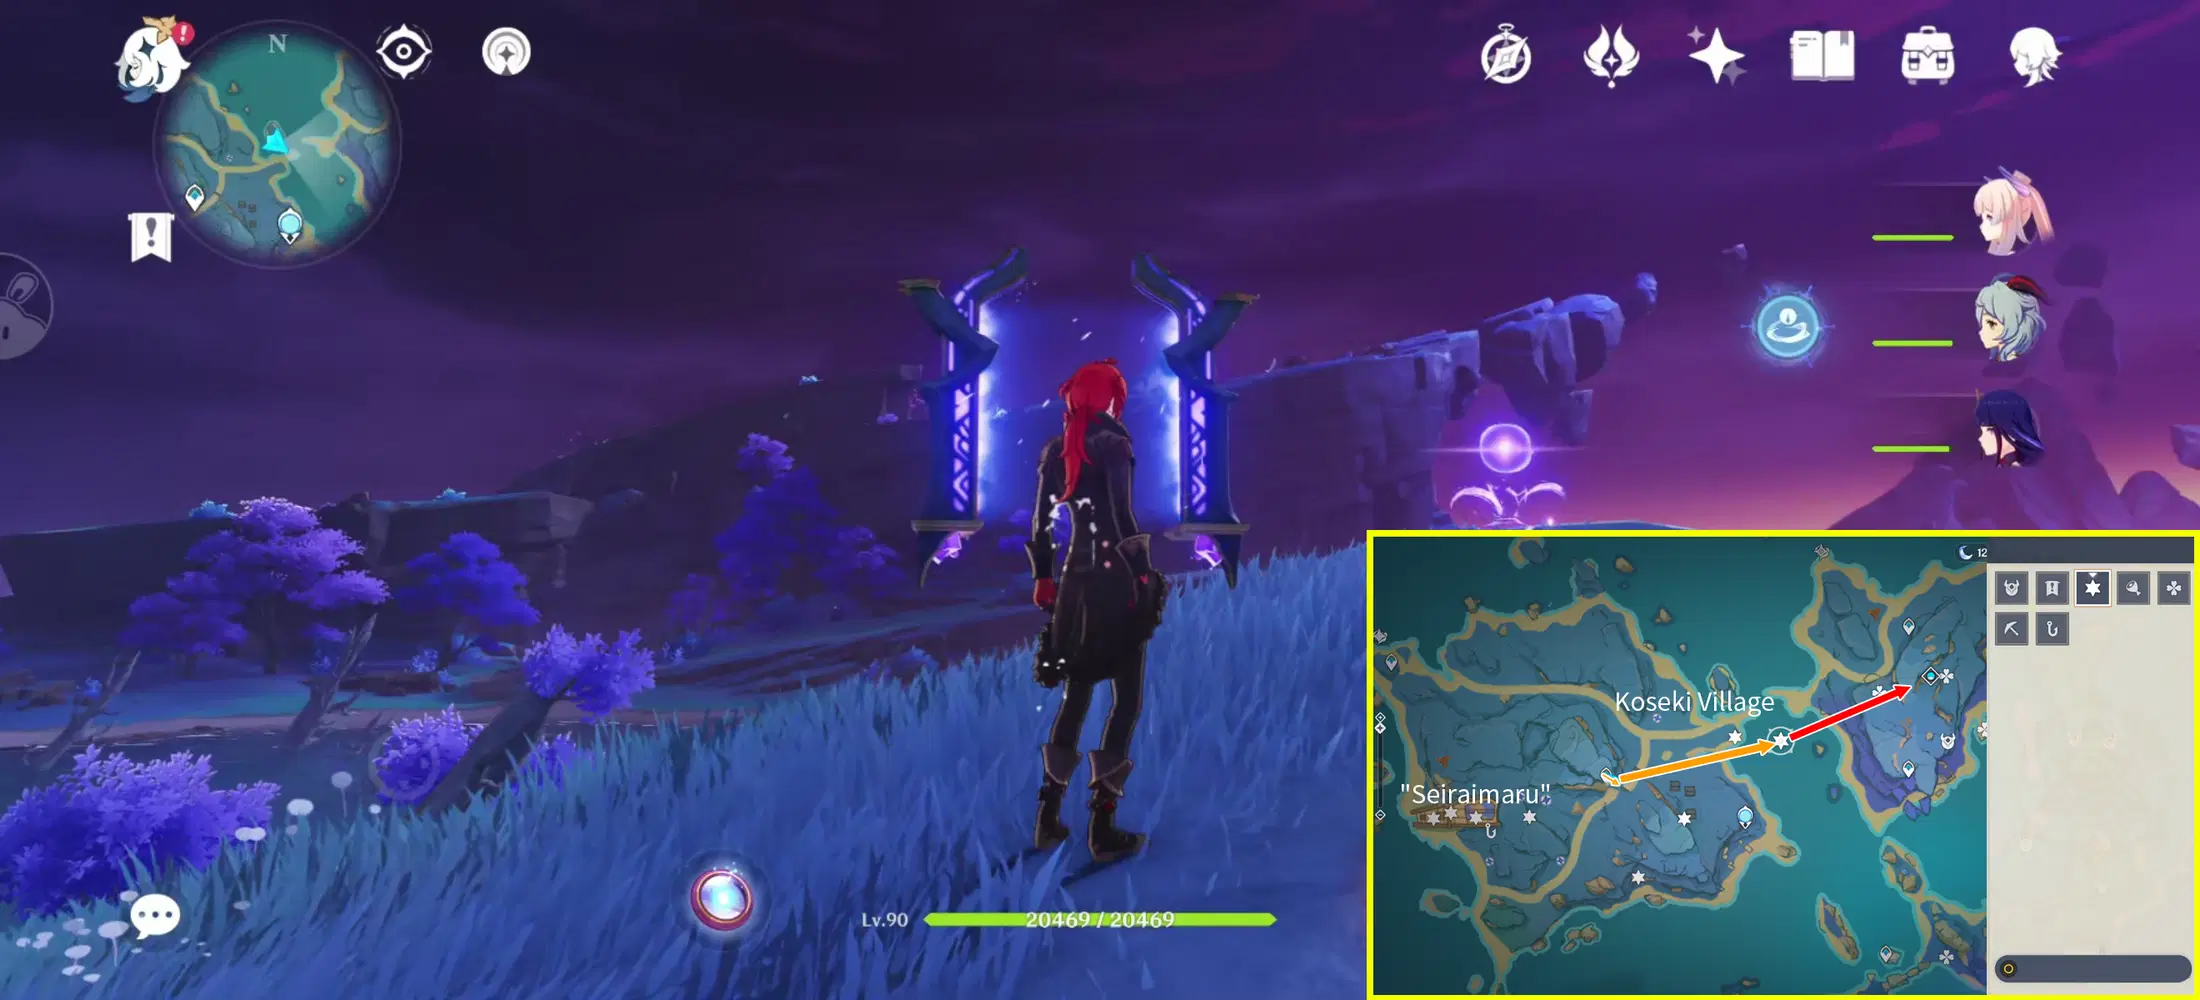
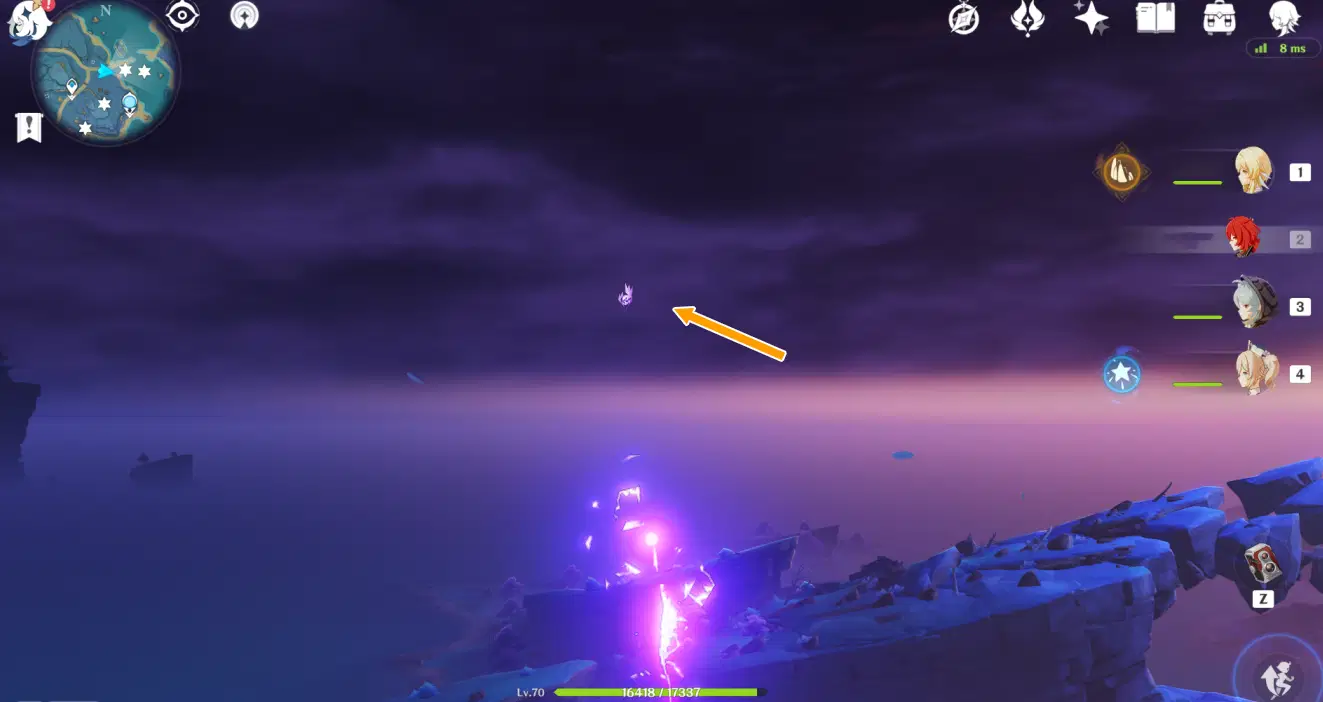
Continue east till you reach the Phase Gate, the Electroculus is mid-air and you can grab it by just traveling through the Phase Gate.
VI. Route 4 (Electroculi #129-133)
Electroculus 129:
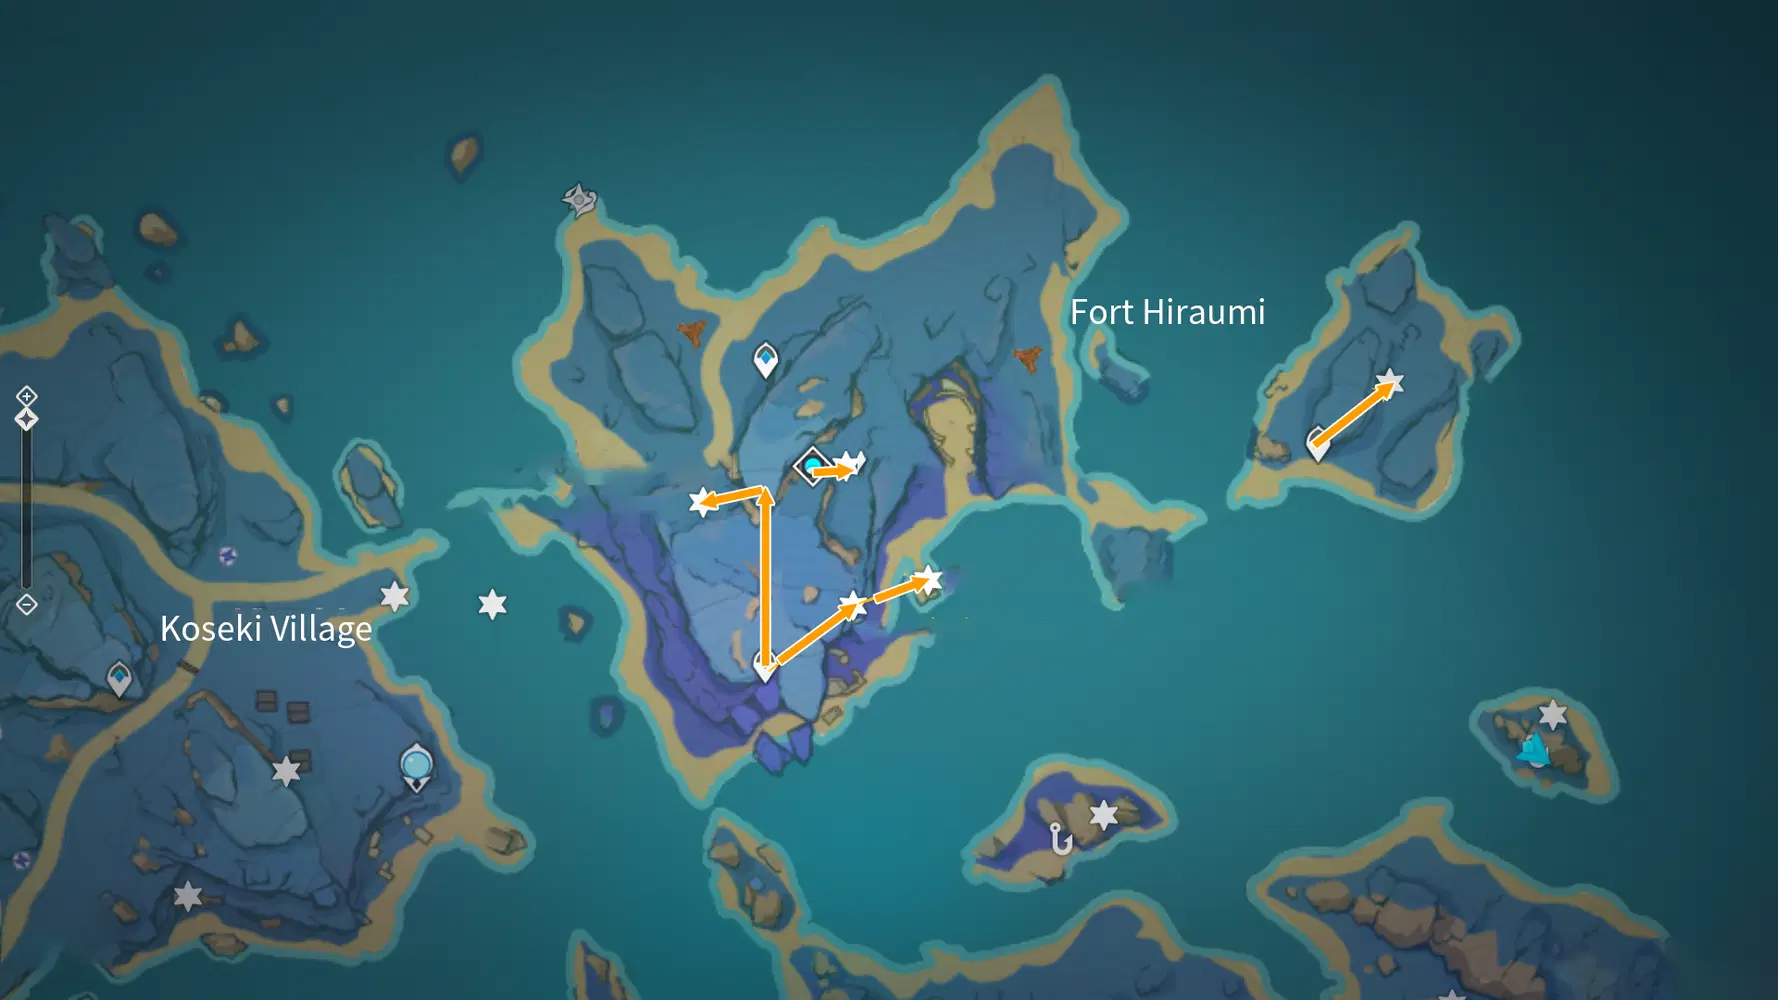
The Electroculus is mid-air here. Use the Phase Gate on top of the mountain and remember to interrupt the gliding during to get the Oculus.
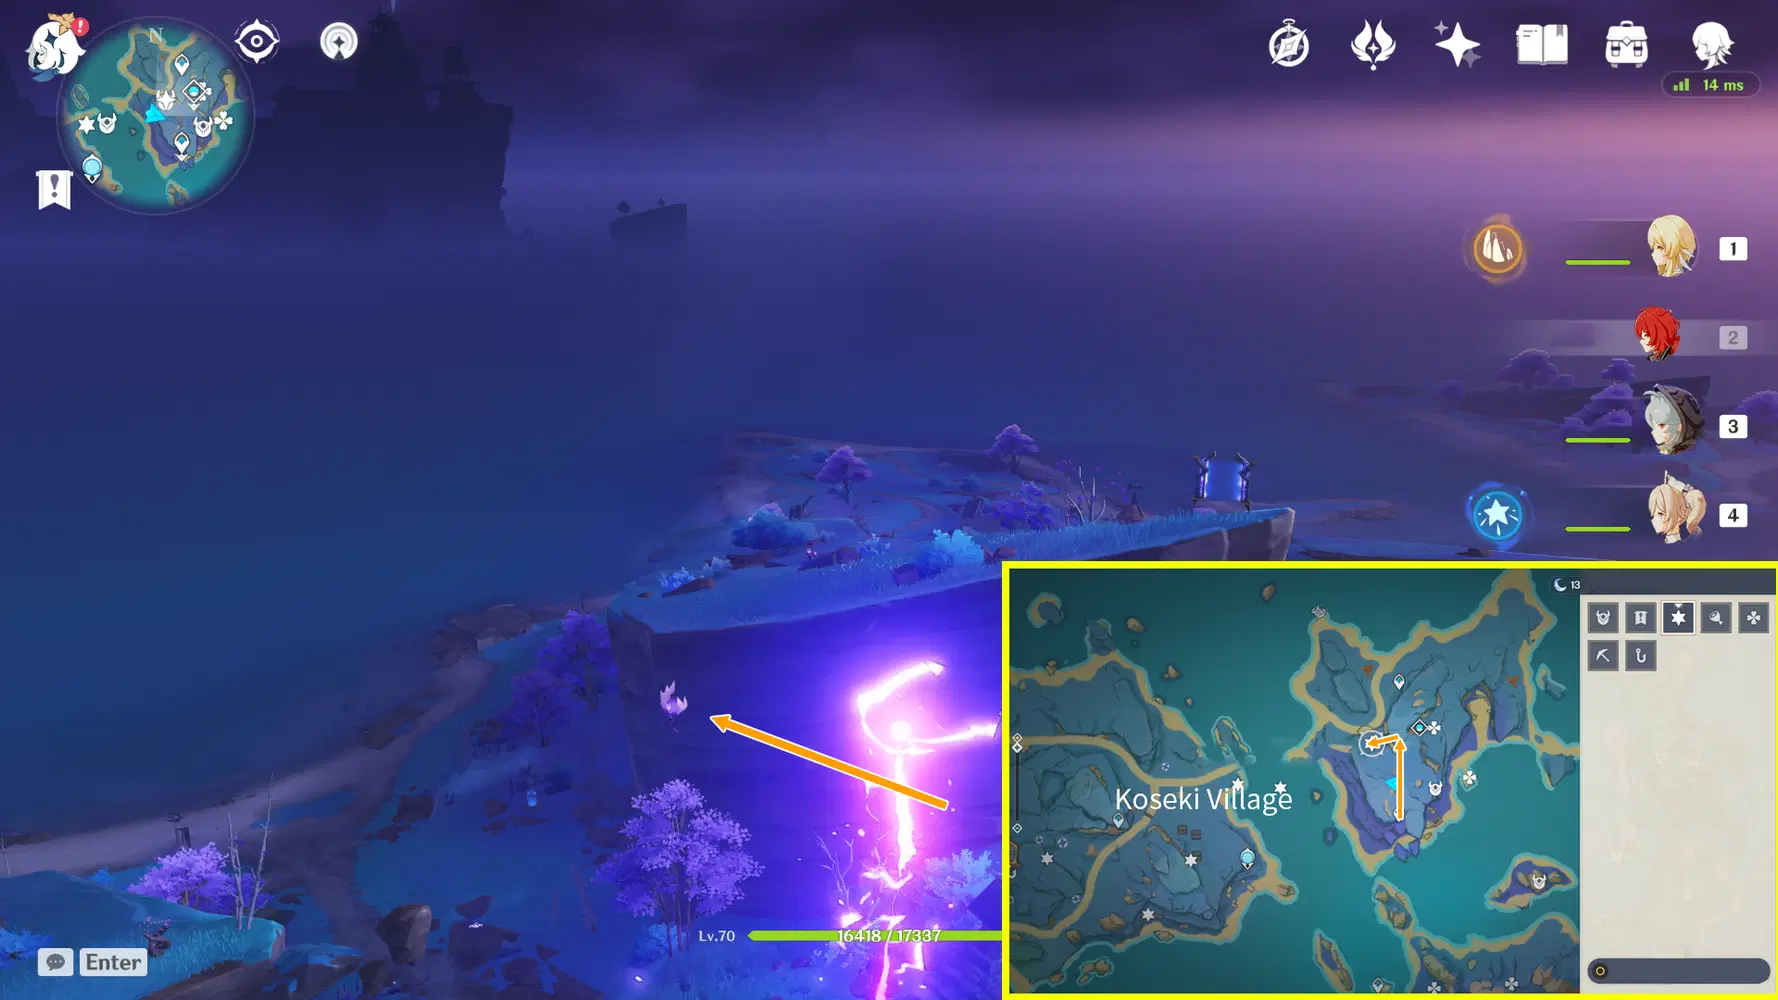
Electroculus 130:
Teleport to the Slumbering Court Domain, you’ll find the Electroculus on a tree nearby, climb up to grab it.
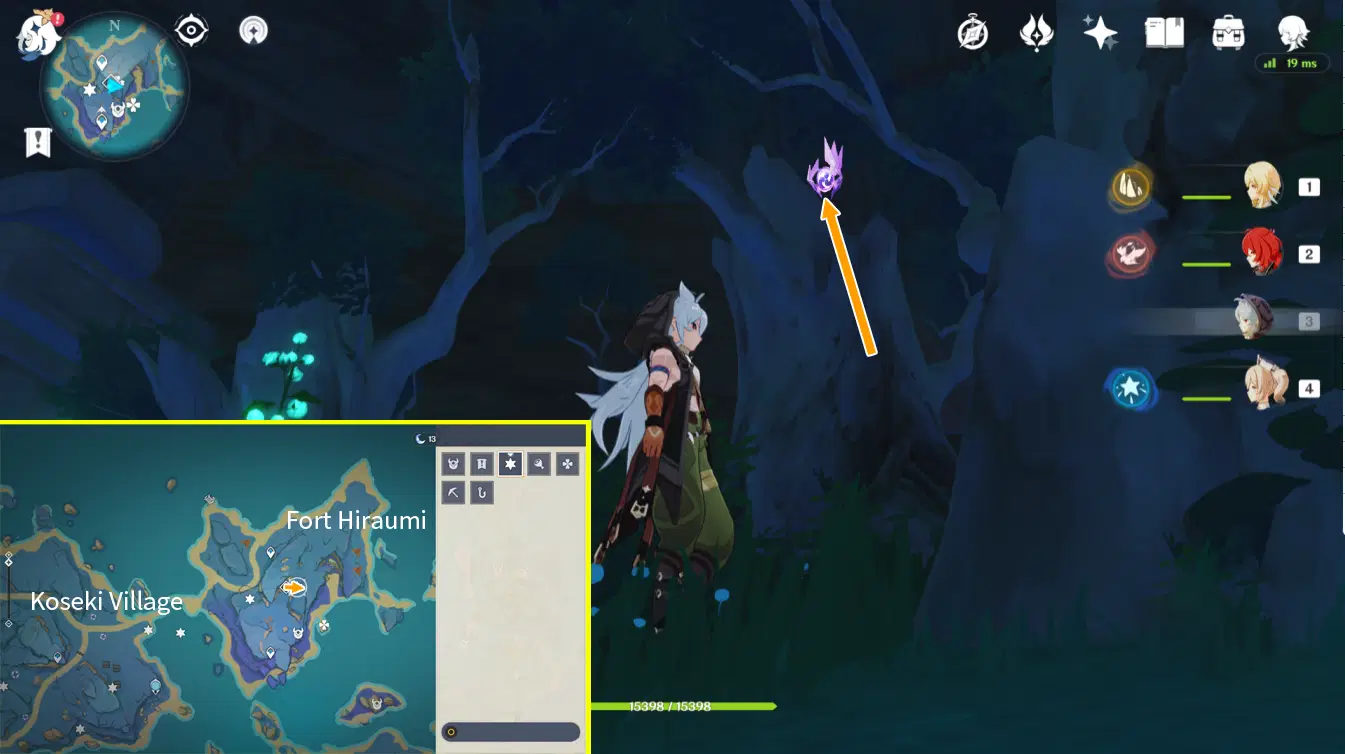
Electroculus 131:
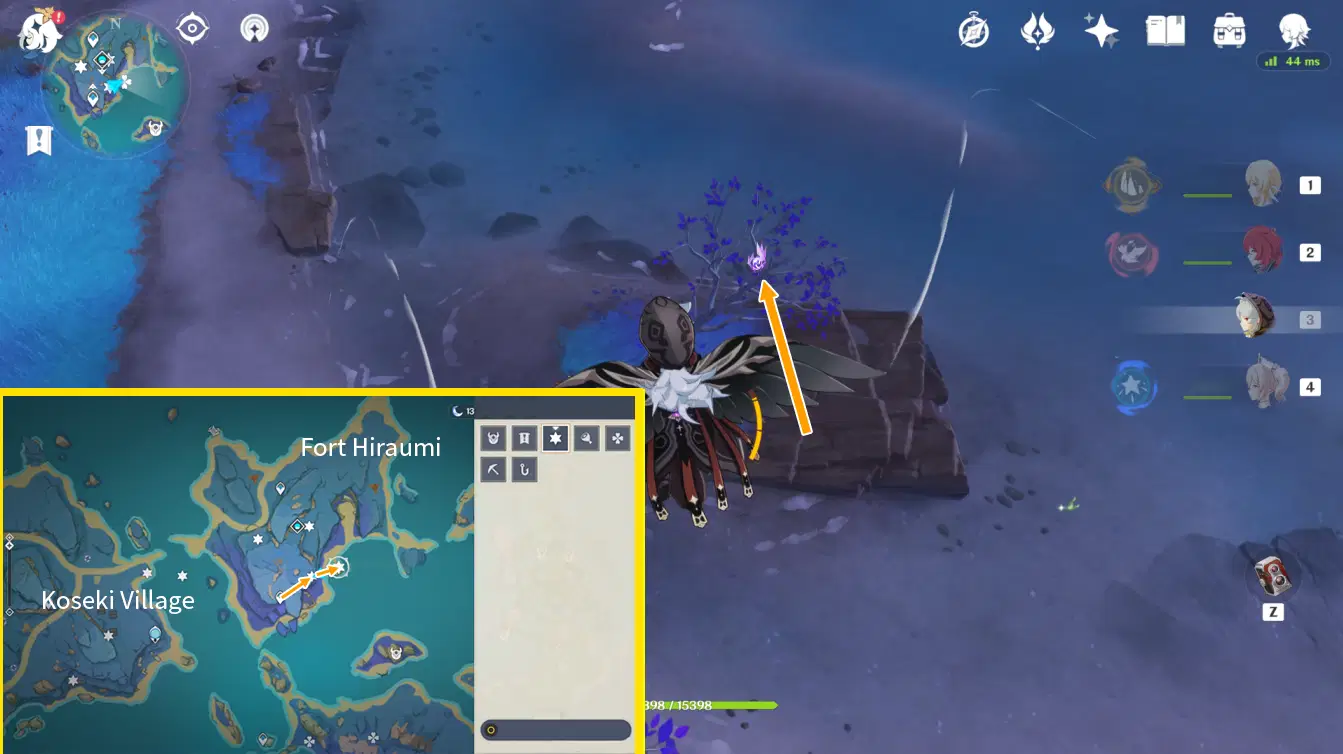
Teleport to the southwest Fort Hiraumi waypoint and head northeast, the Electroculus is mid-air and you can summon the Electrograna from the Thunder Sakura Bough and fly up with the Thunder Sphere.
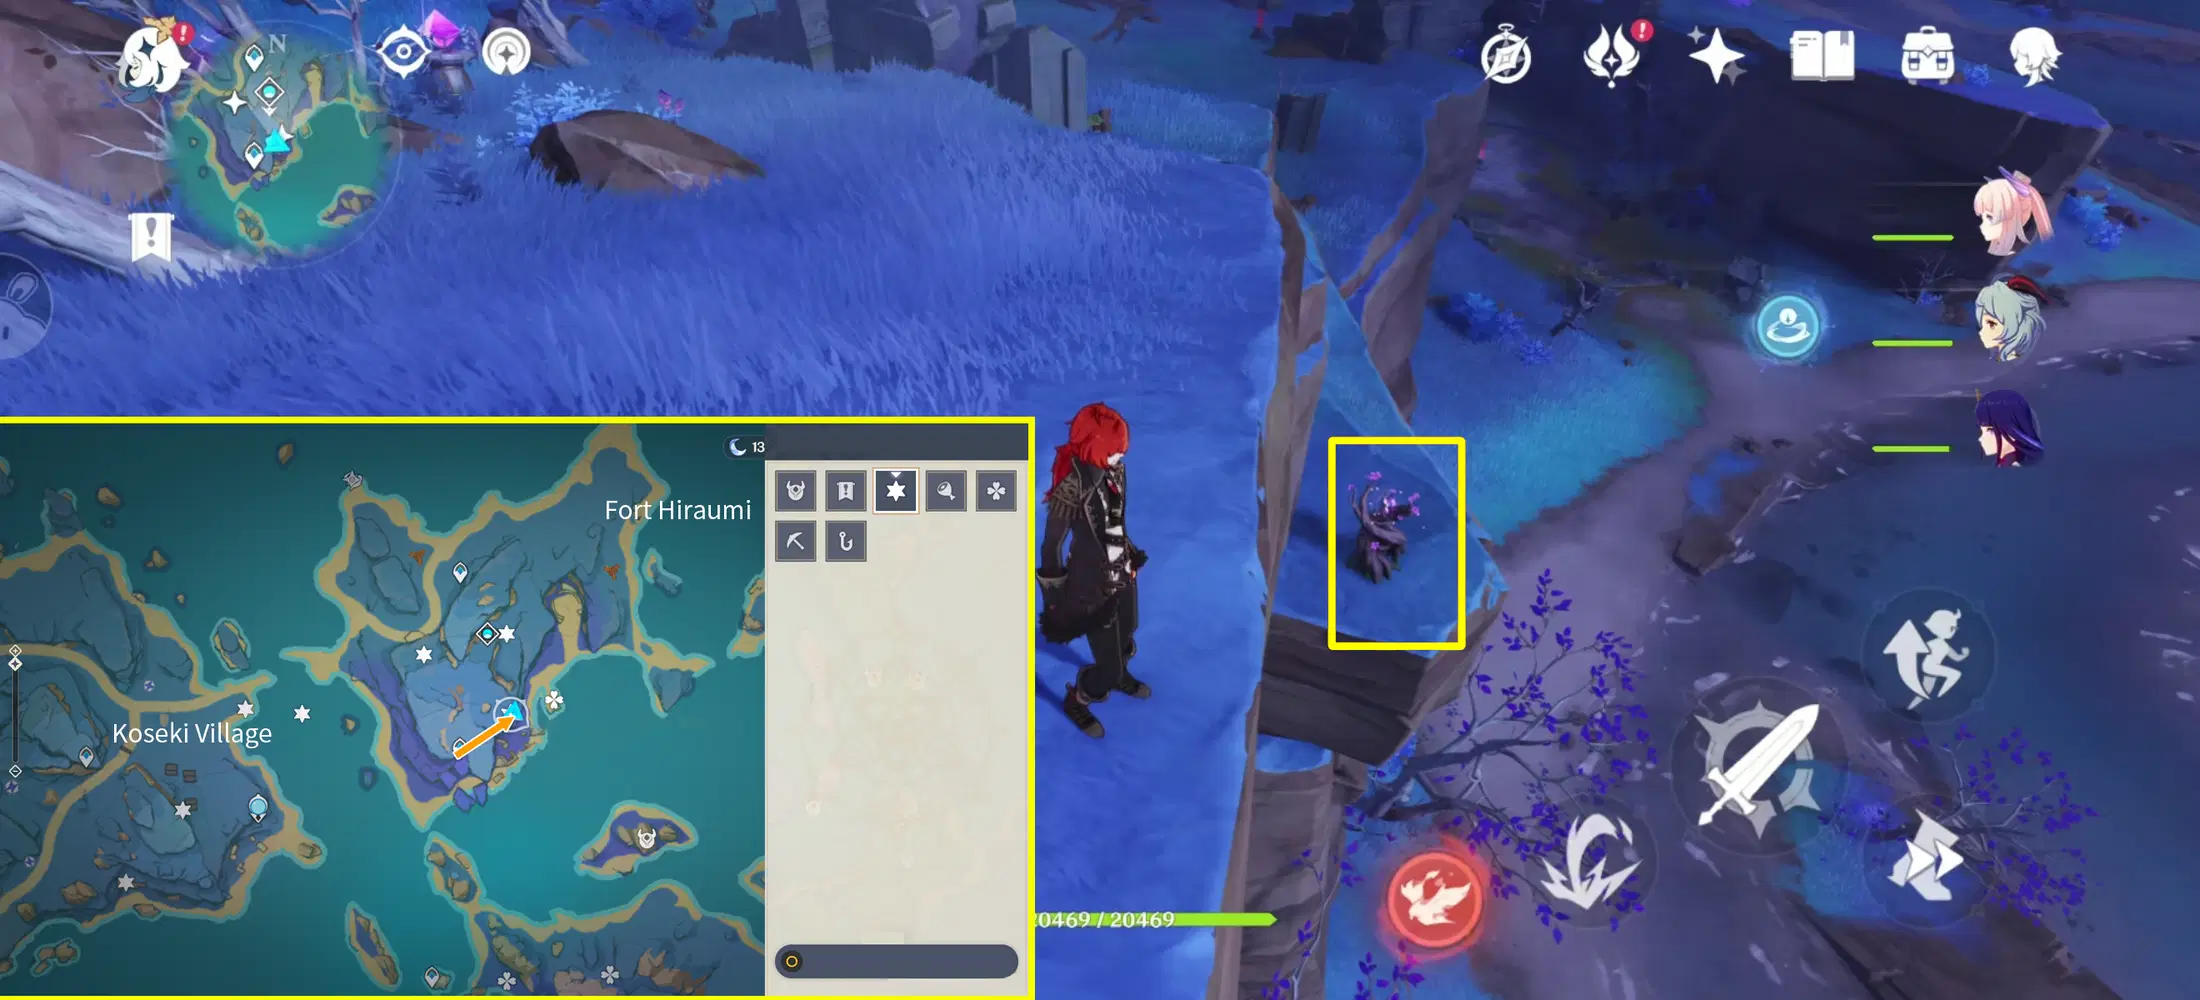
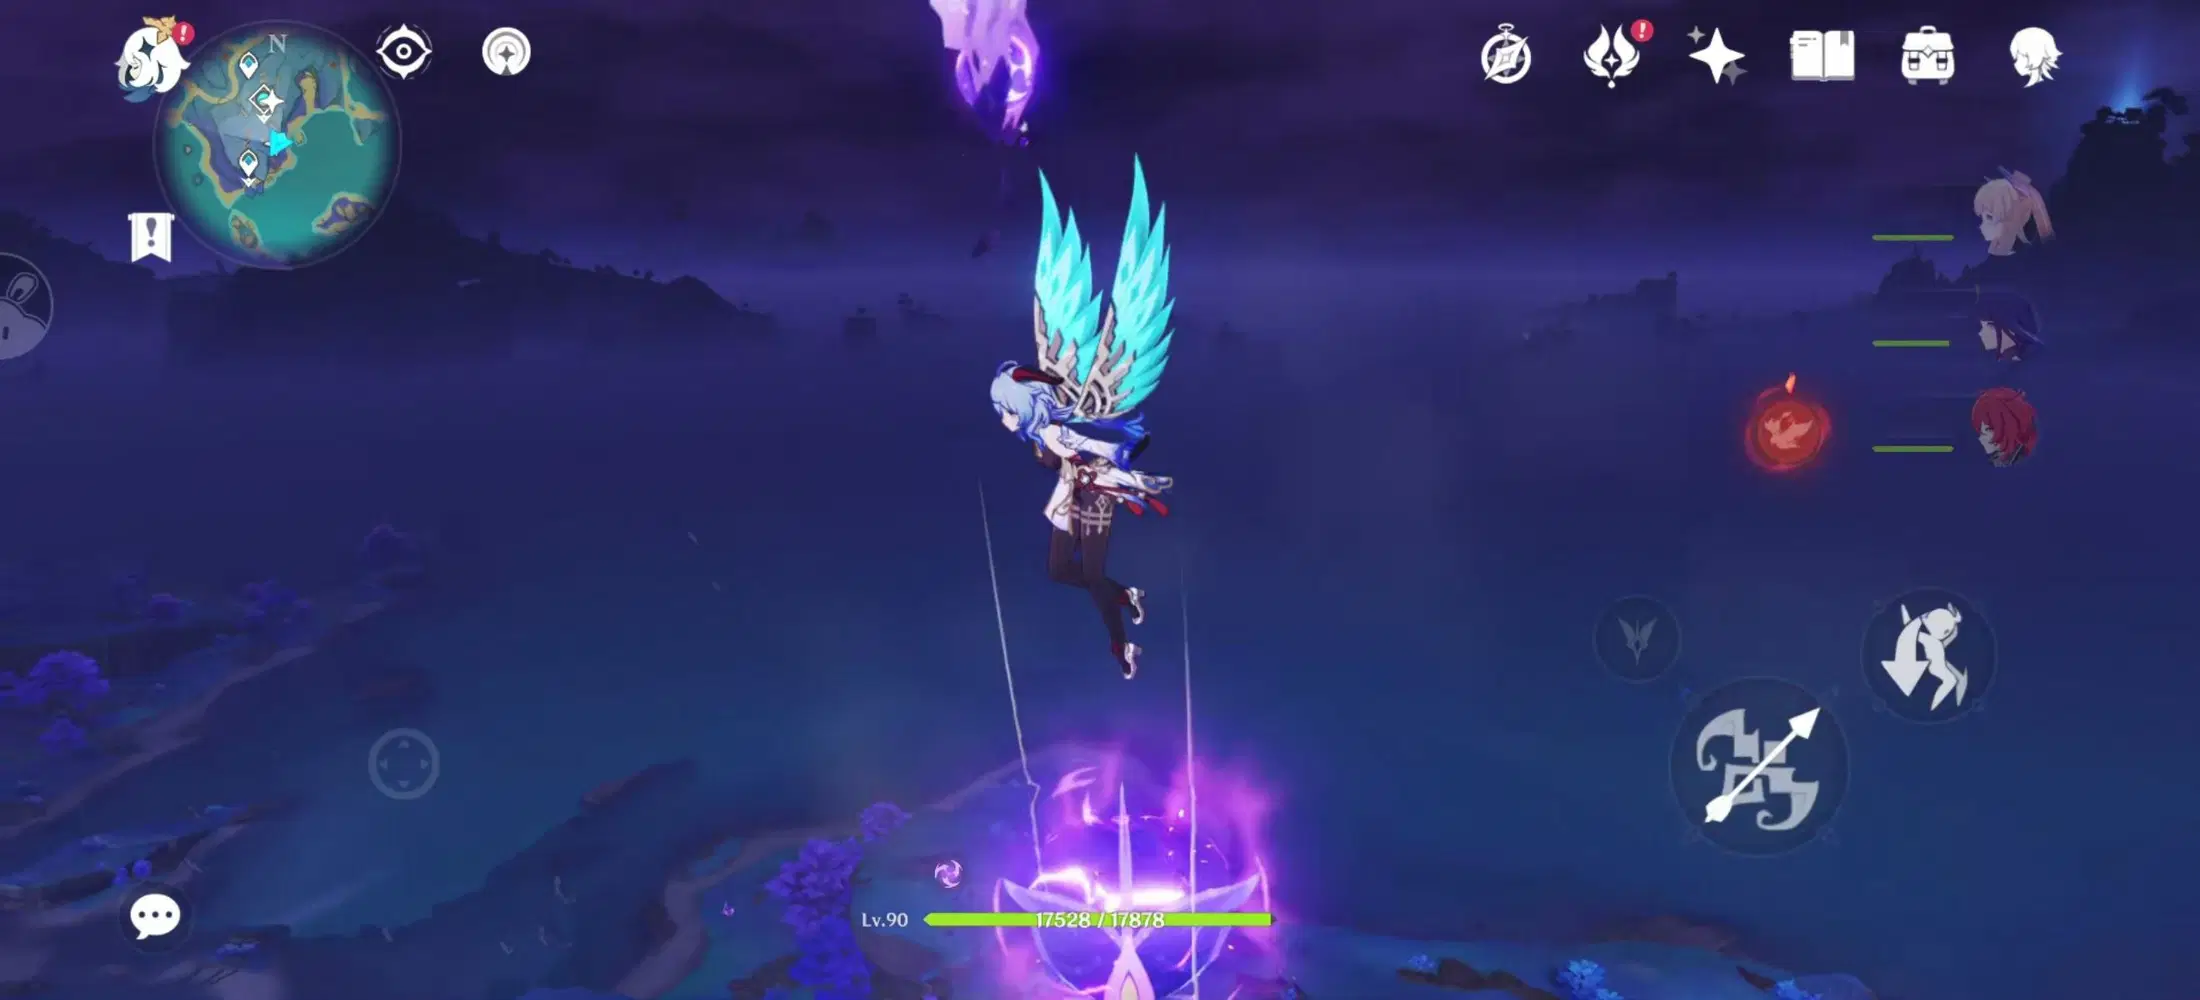
Electroculus 132:
After grabbing #131, keep going east and you’ll find the Electroculus on the wood near the shore up for grabs.
Electroculus 133:
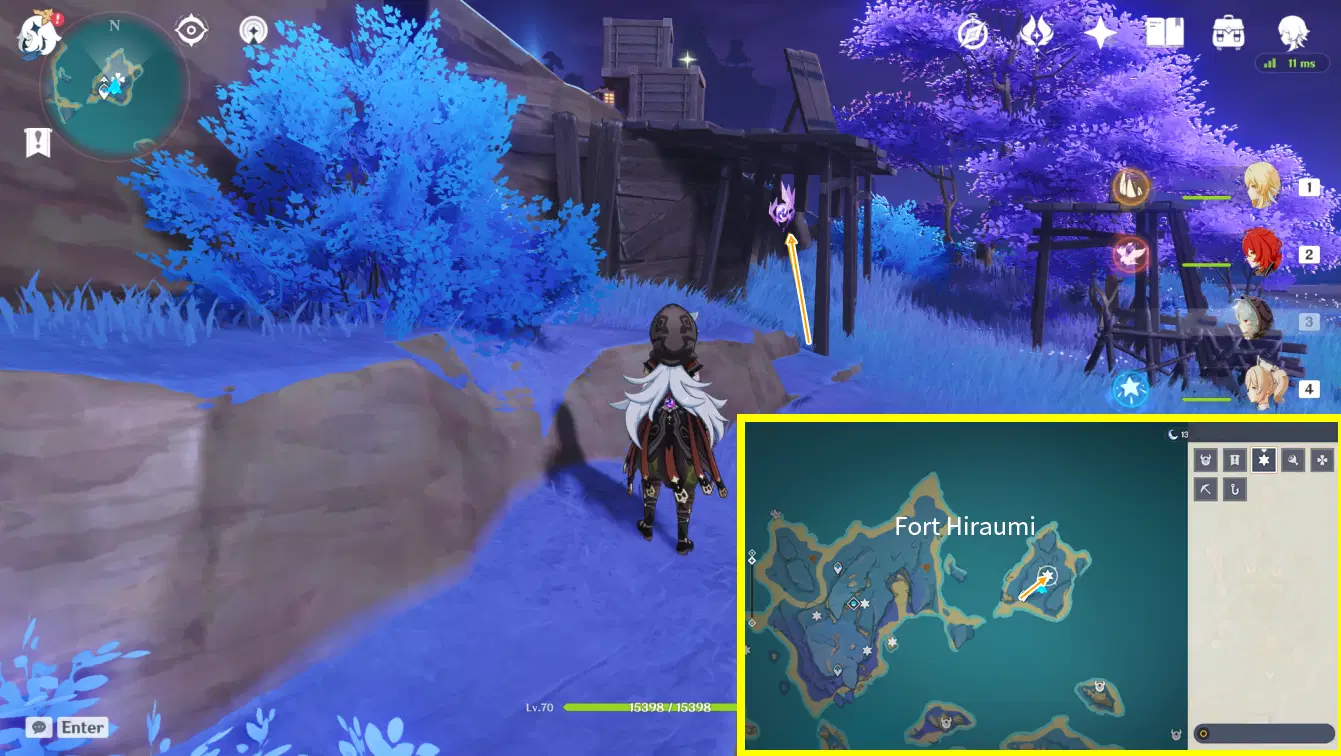
Teleport to the southwest Fort Hiraumi waypoint and head northeast, the Electroculus is beneath the wooden platform.
VII. Route 5 (Electroculi #134-139)
Note: You need to have completed the world quest Seirai Stormchasers series.
Electroculus 134:
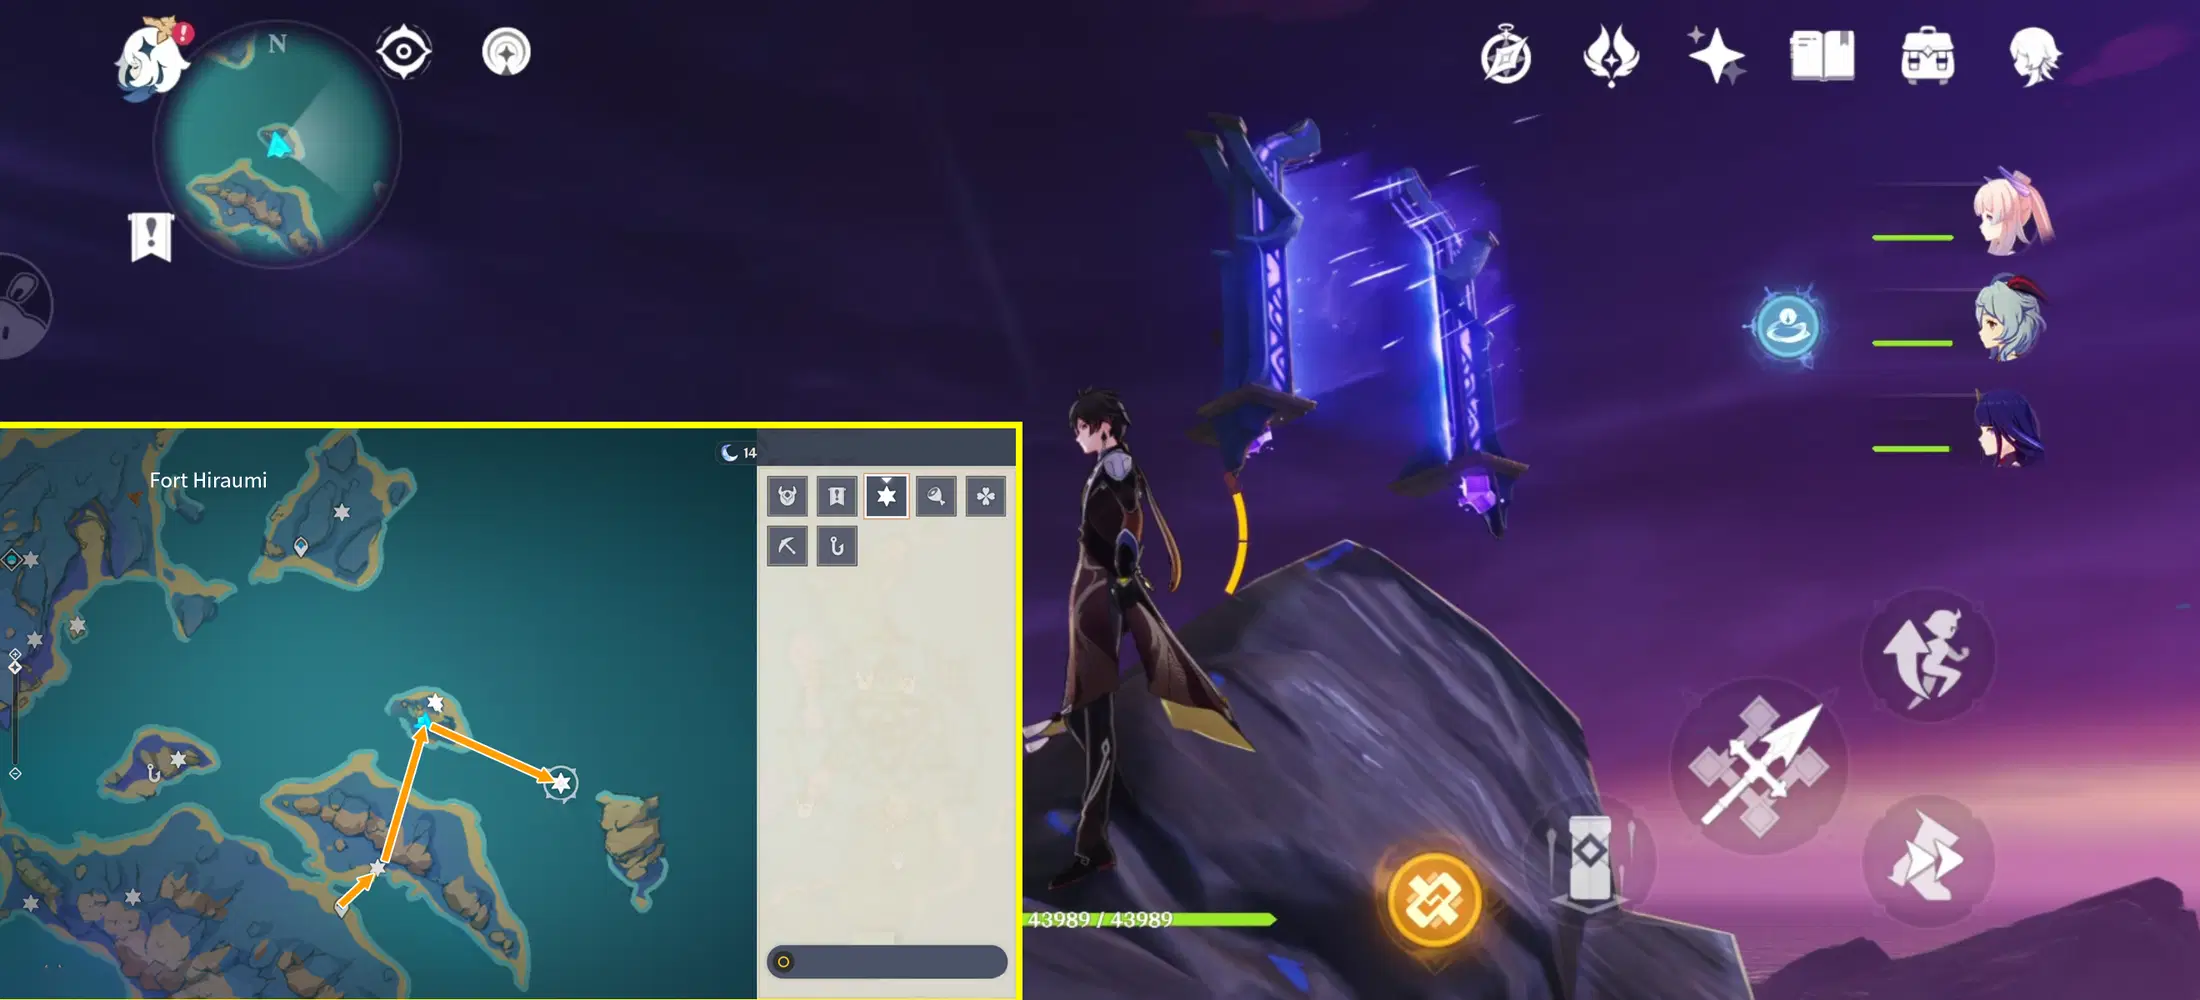
The Electroculus is on the floating rock, you can access it through the Phase Gate next to the Fort Hiraumi waypoint. You’ll pass by this place while doing world quests.
Electroculus 135:
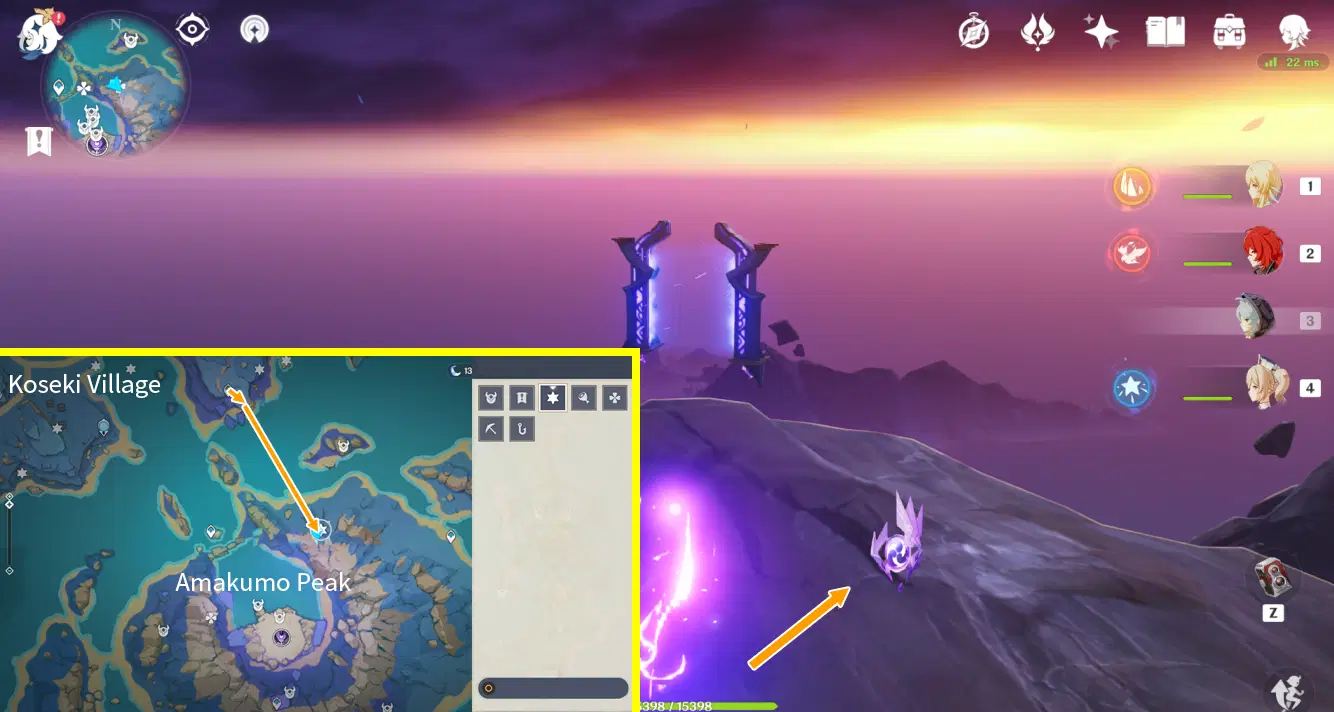
Teleport to the Amakumo Peak north waypoint and glide east. The Electroculus is on a floating rock, you’ll pass by this place while doing world quests.
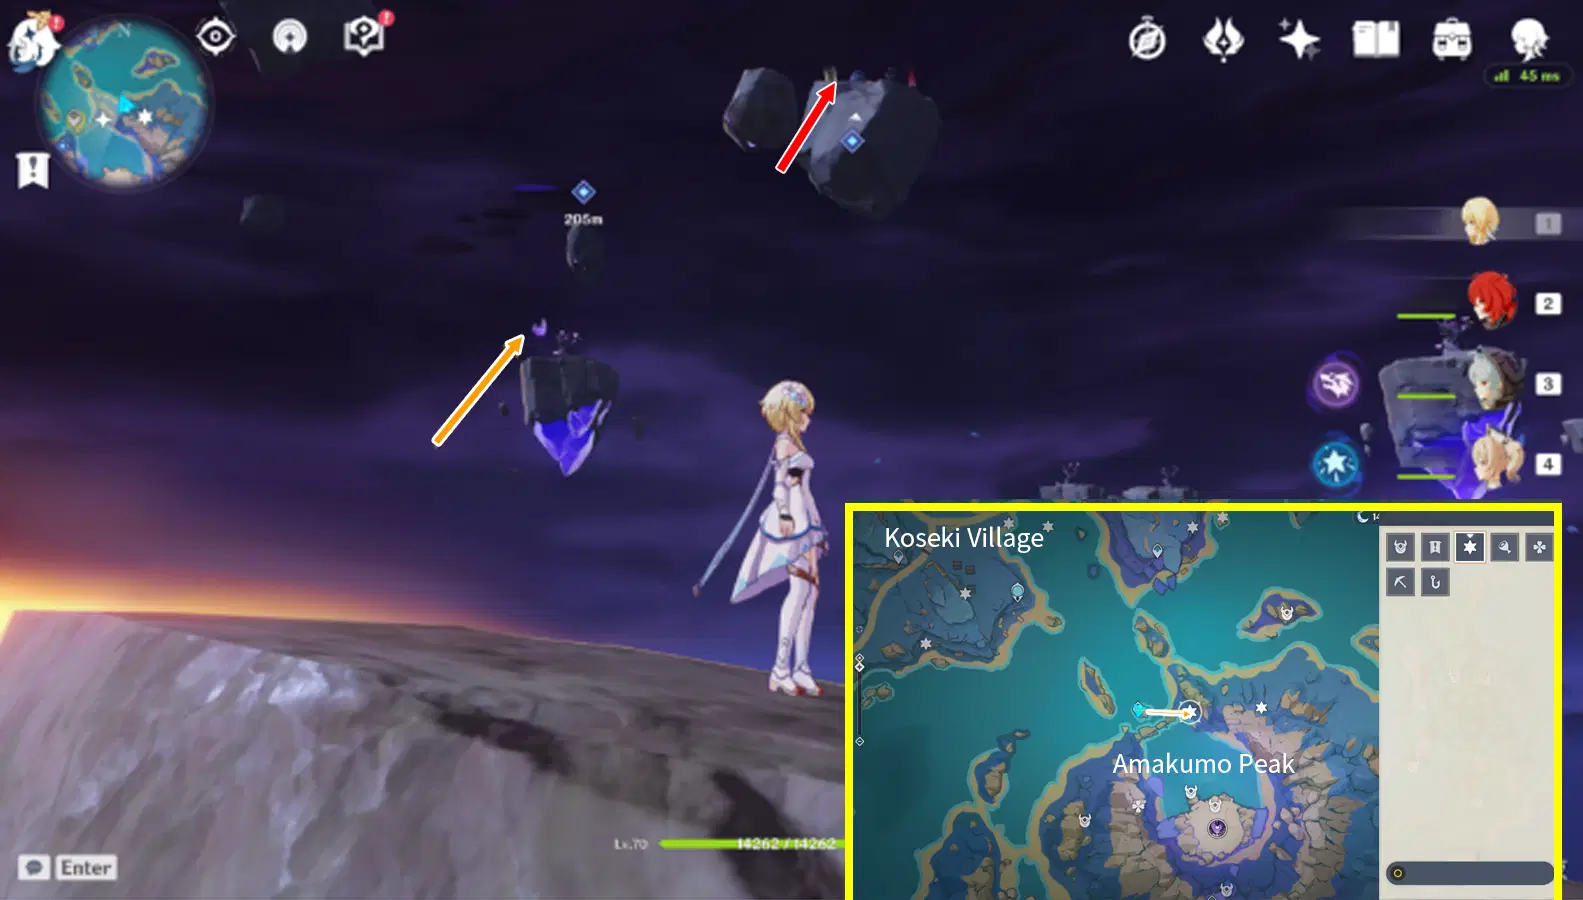
Electroculus 136:
Teleport to the southwest Fort Hiraumi waypoint and go to the island to the southeast, the Electroculus is within the Thunder Barrier. Summon an Electrograna to gain access.
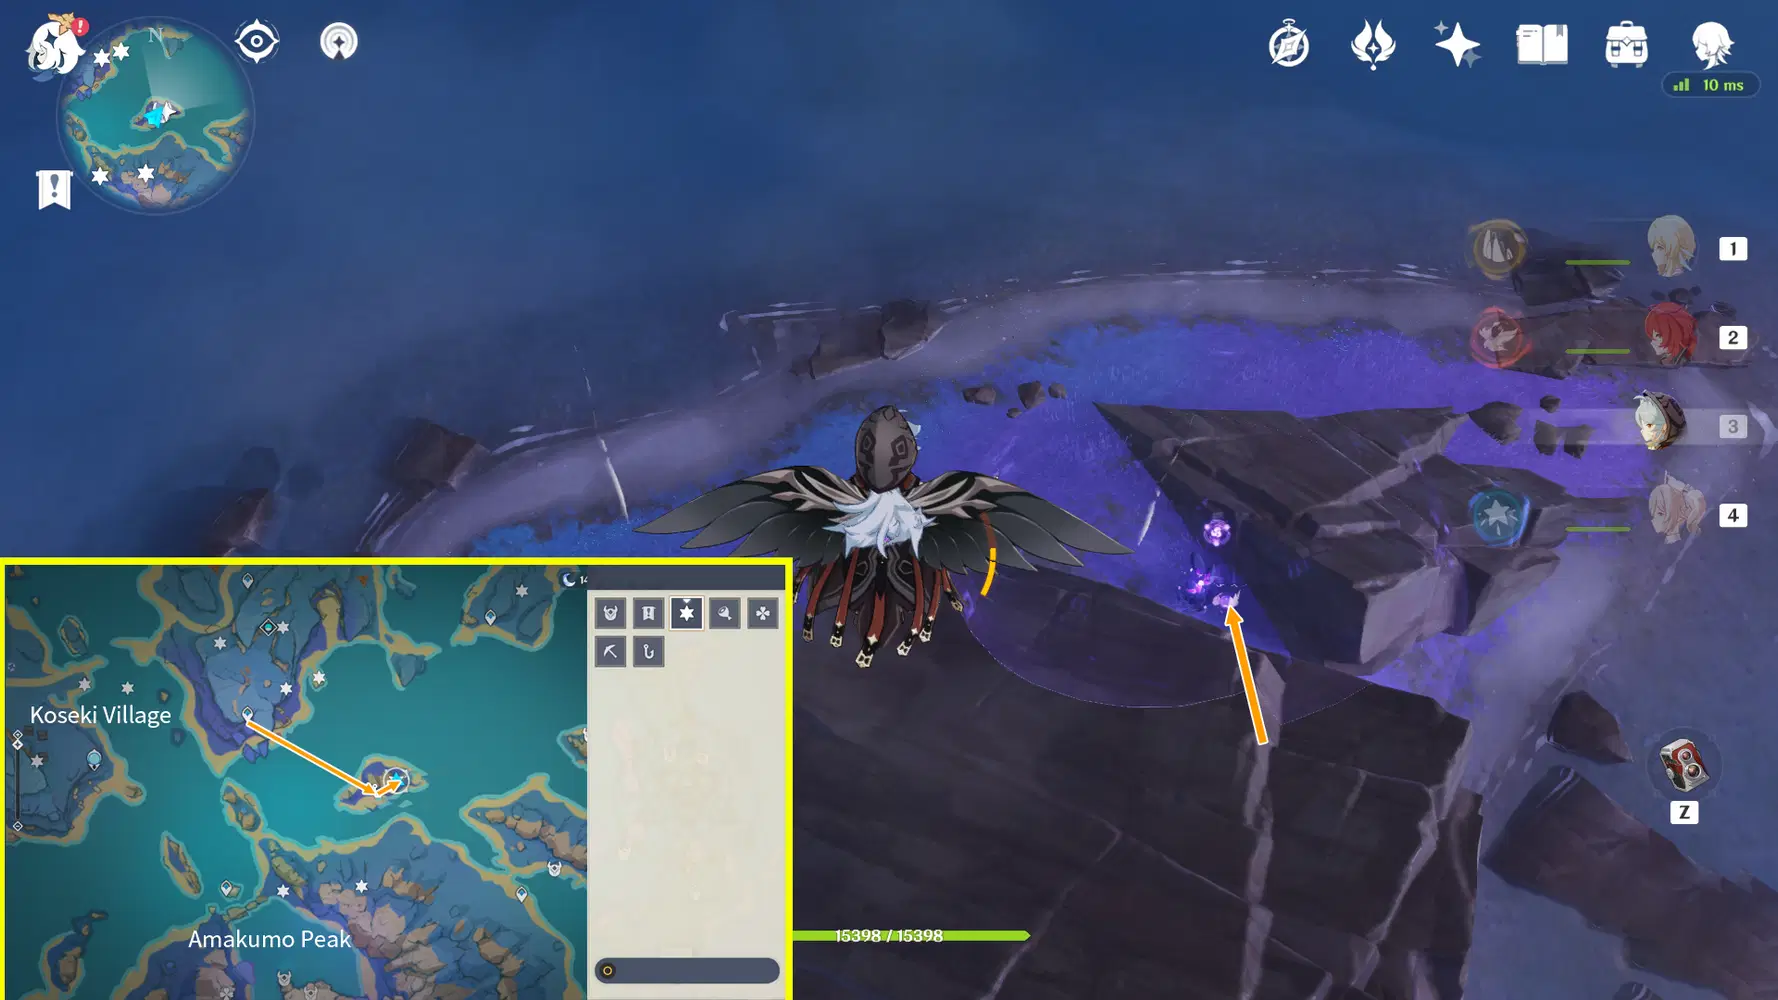
Electroculus 137:
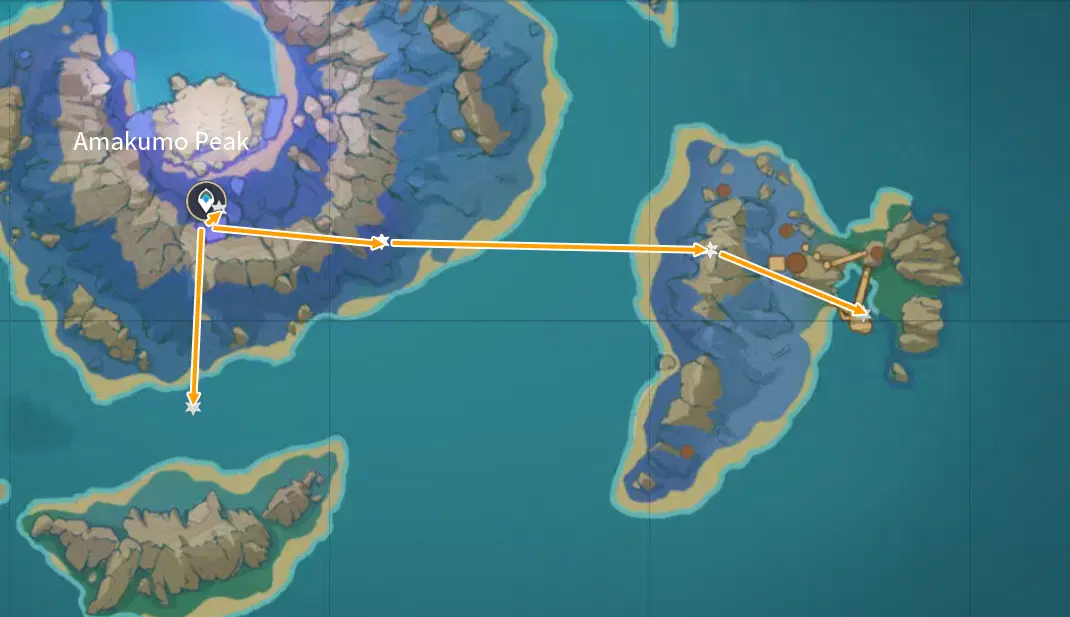
Teleport to the waypoint north to the Amakumo Peak and go northeast. The Electroculus is on the very top of the rock pile, climb up to grab it.
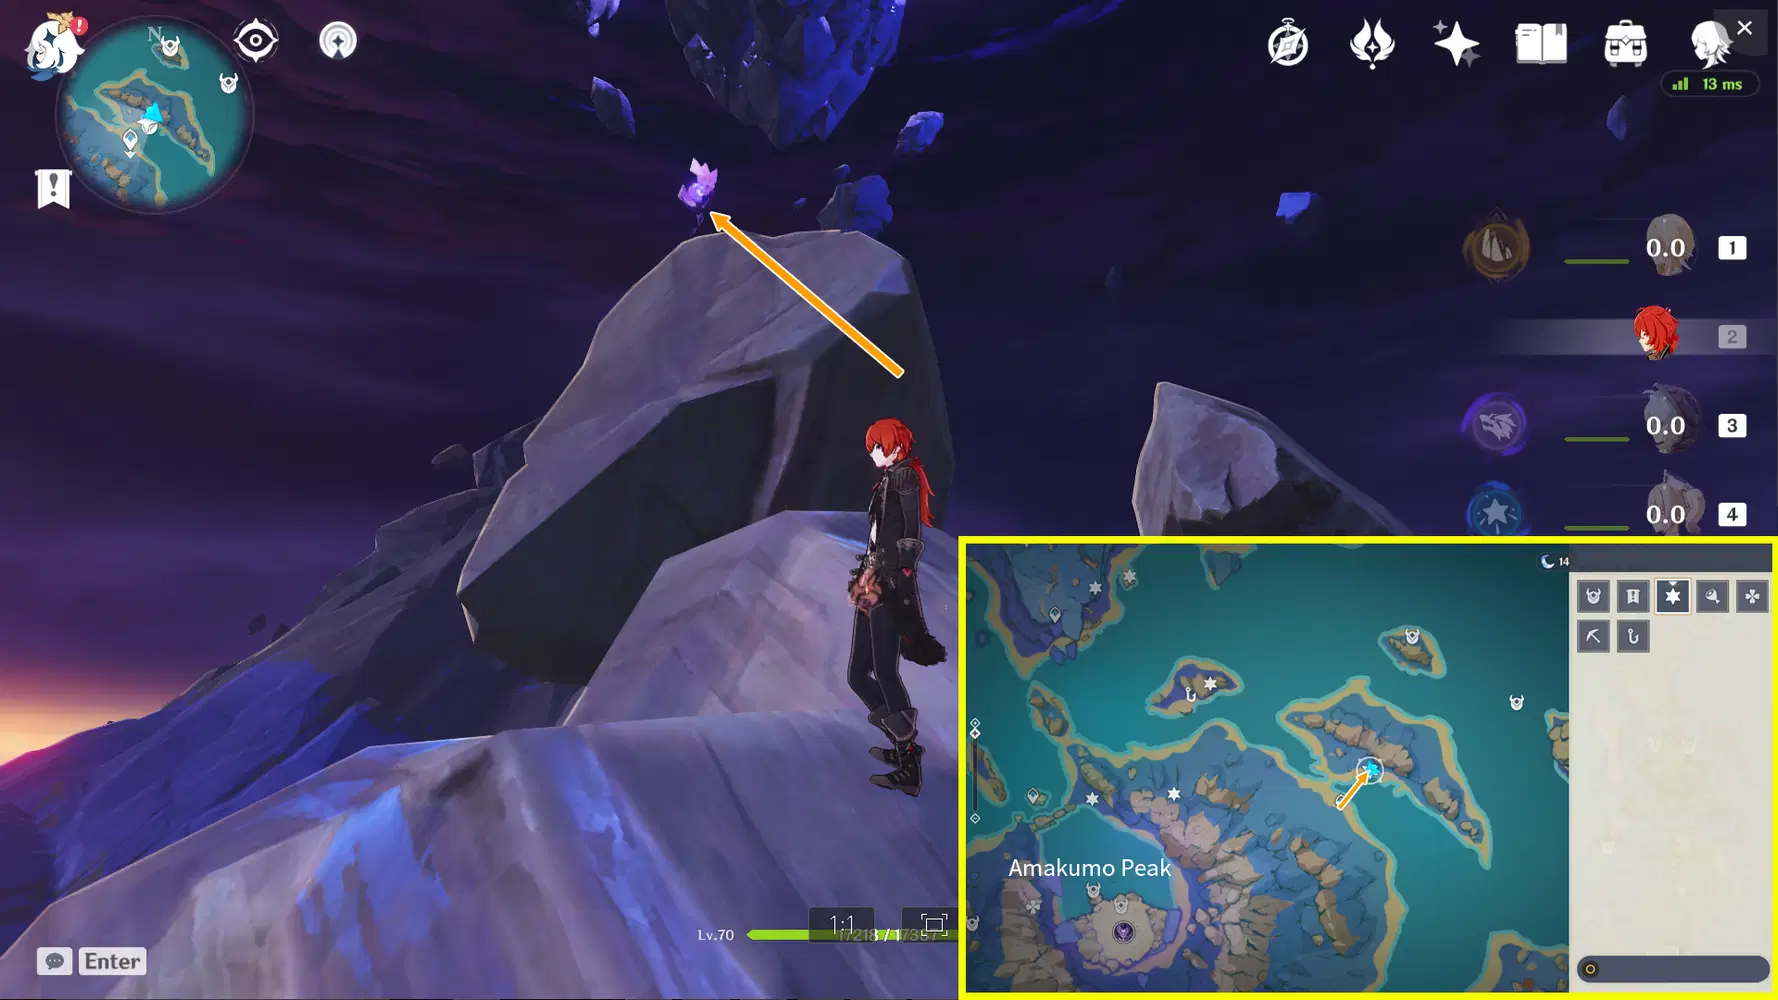
Electroculus 138:
After grabbing #137, keep going northeast until you arrive at the island. The Electroculus is just above the Thunder Sakura Bough, climb up to grab it.
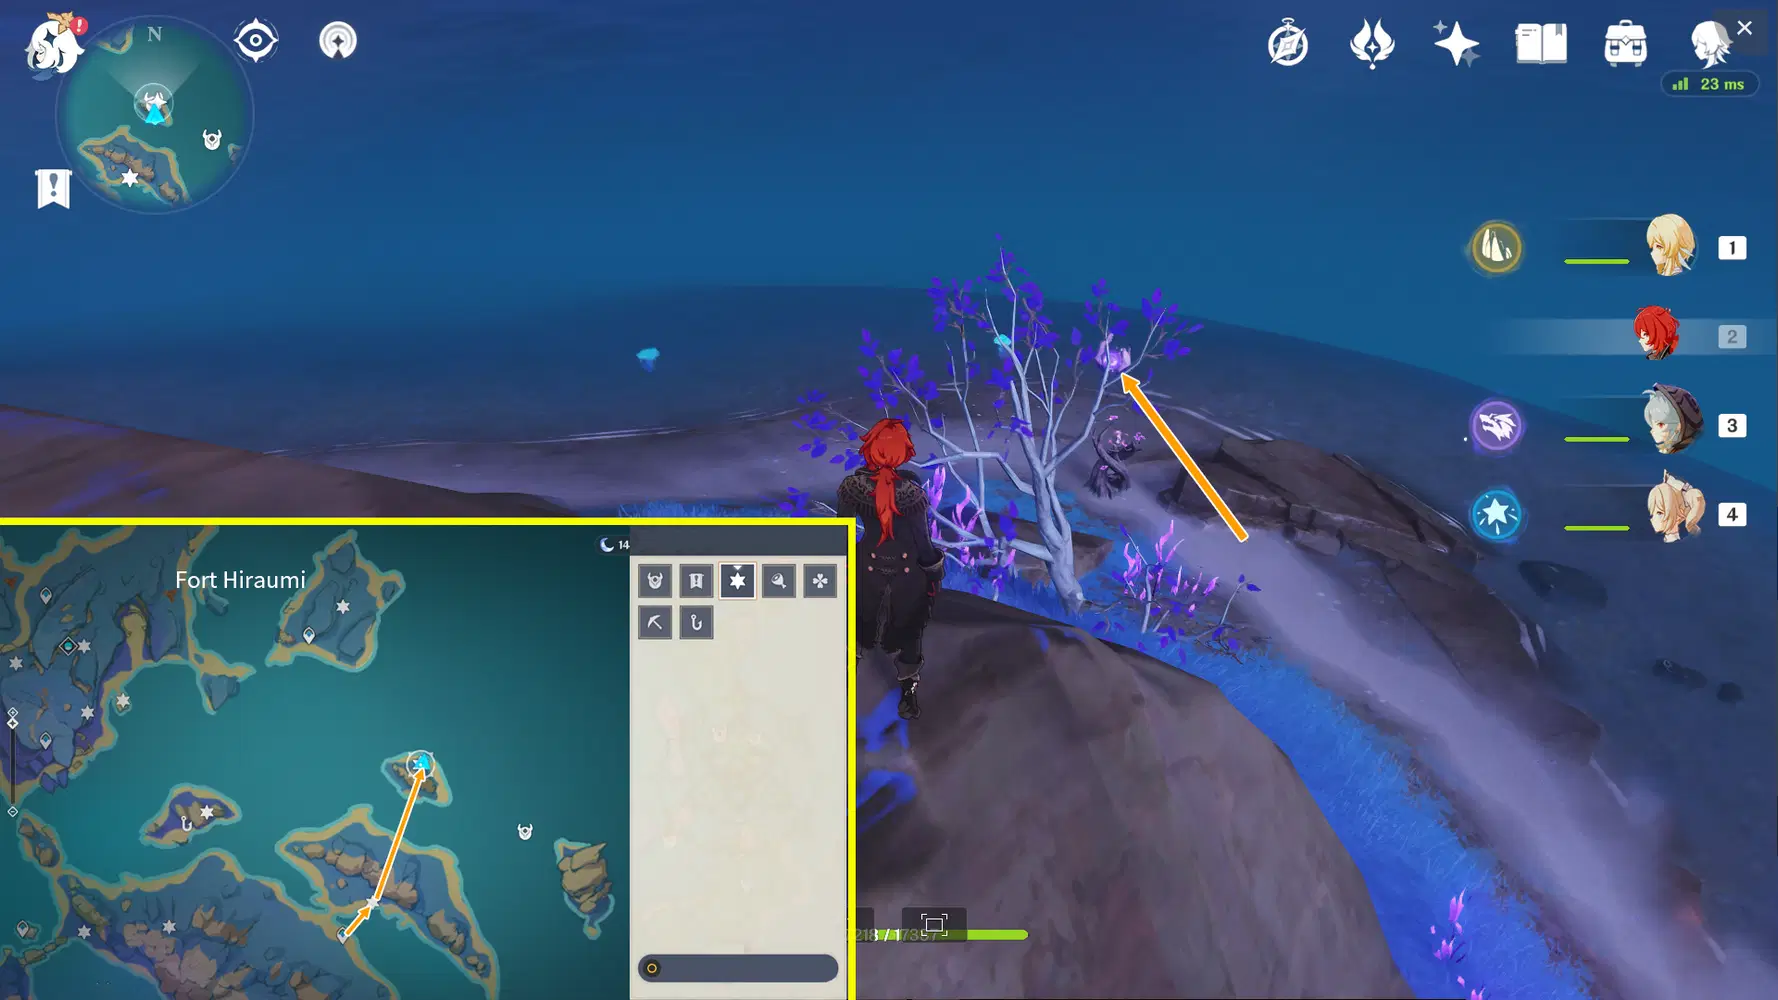
Electroculus 139:
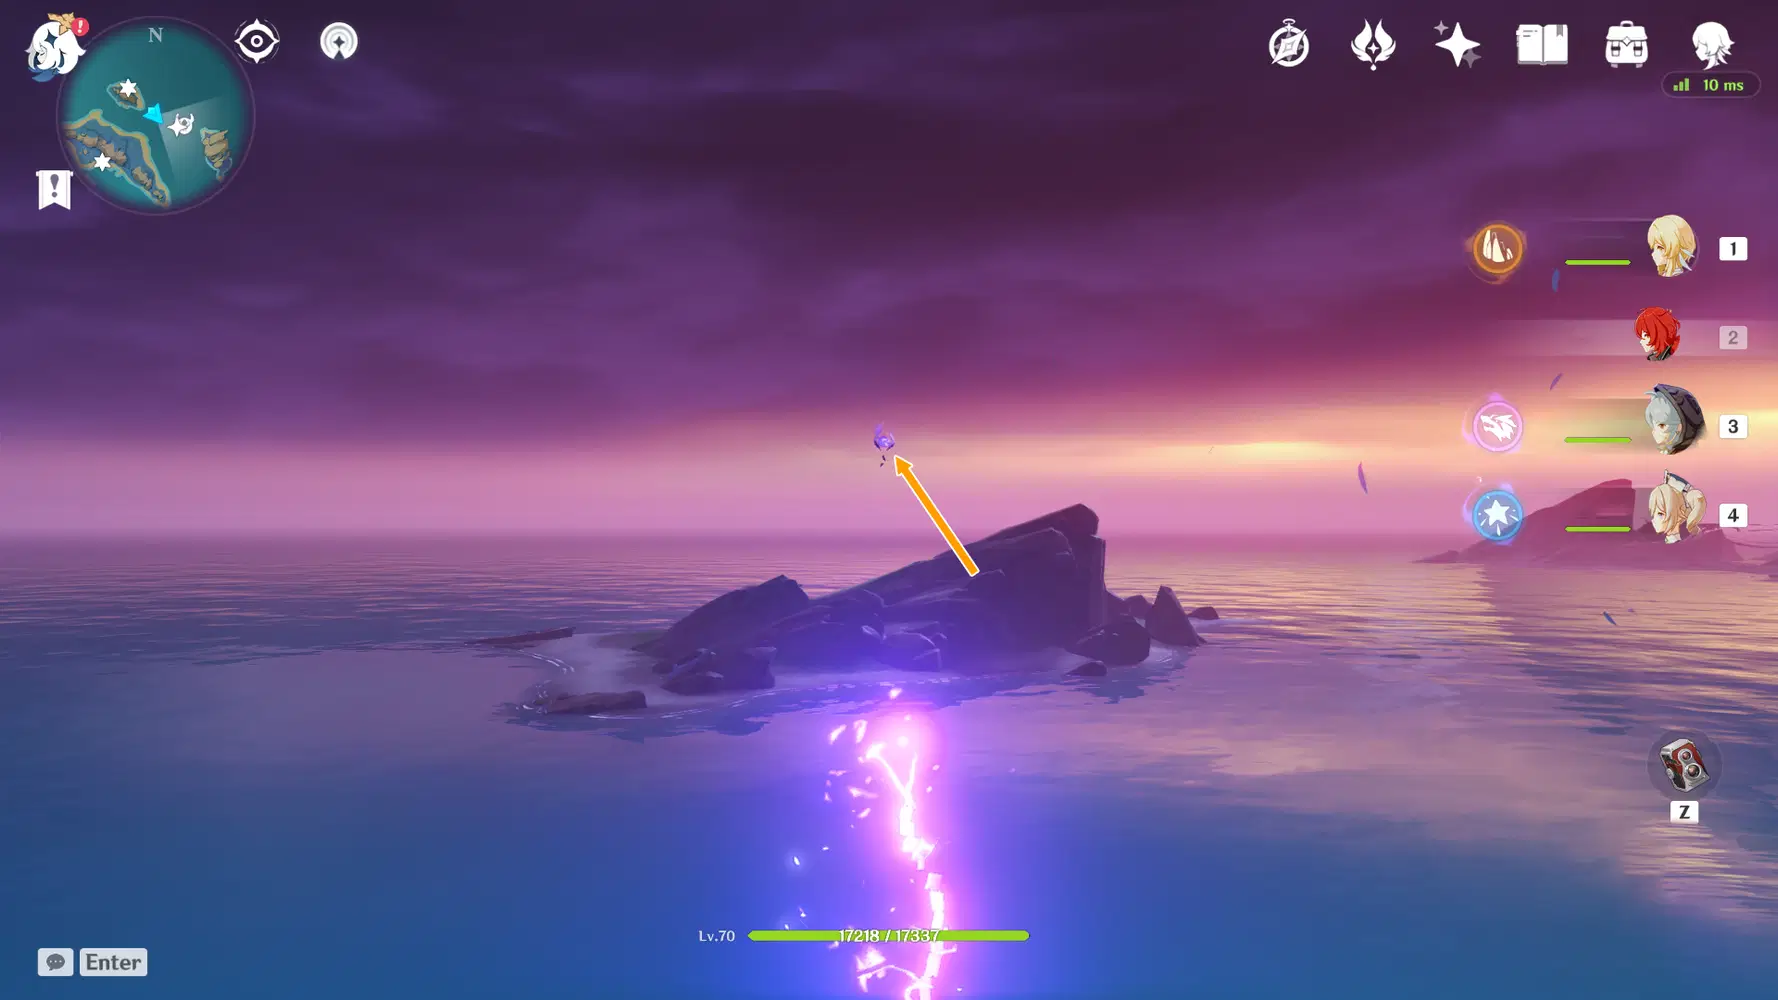
After #138, keep going east and you’ll find the Electroculus above the ocean. Adjust the Phase Gate towards the southeast and go through to reach it.
VIII. Route 6 (Electroculi #140-144)
Note: You need to have completed the Seirai Stormchasers quest series.
Electroculus 140:
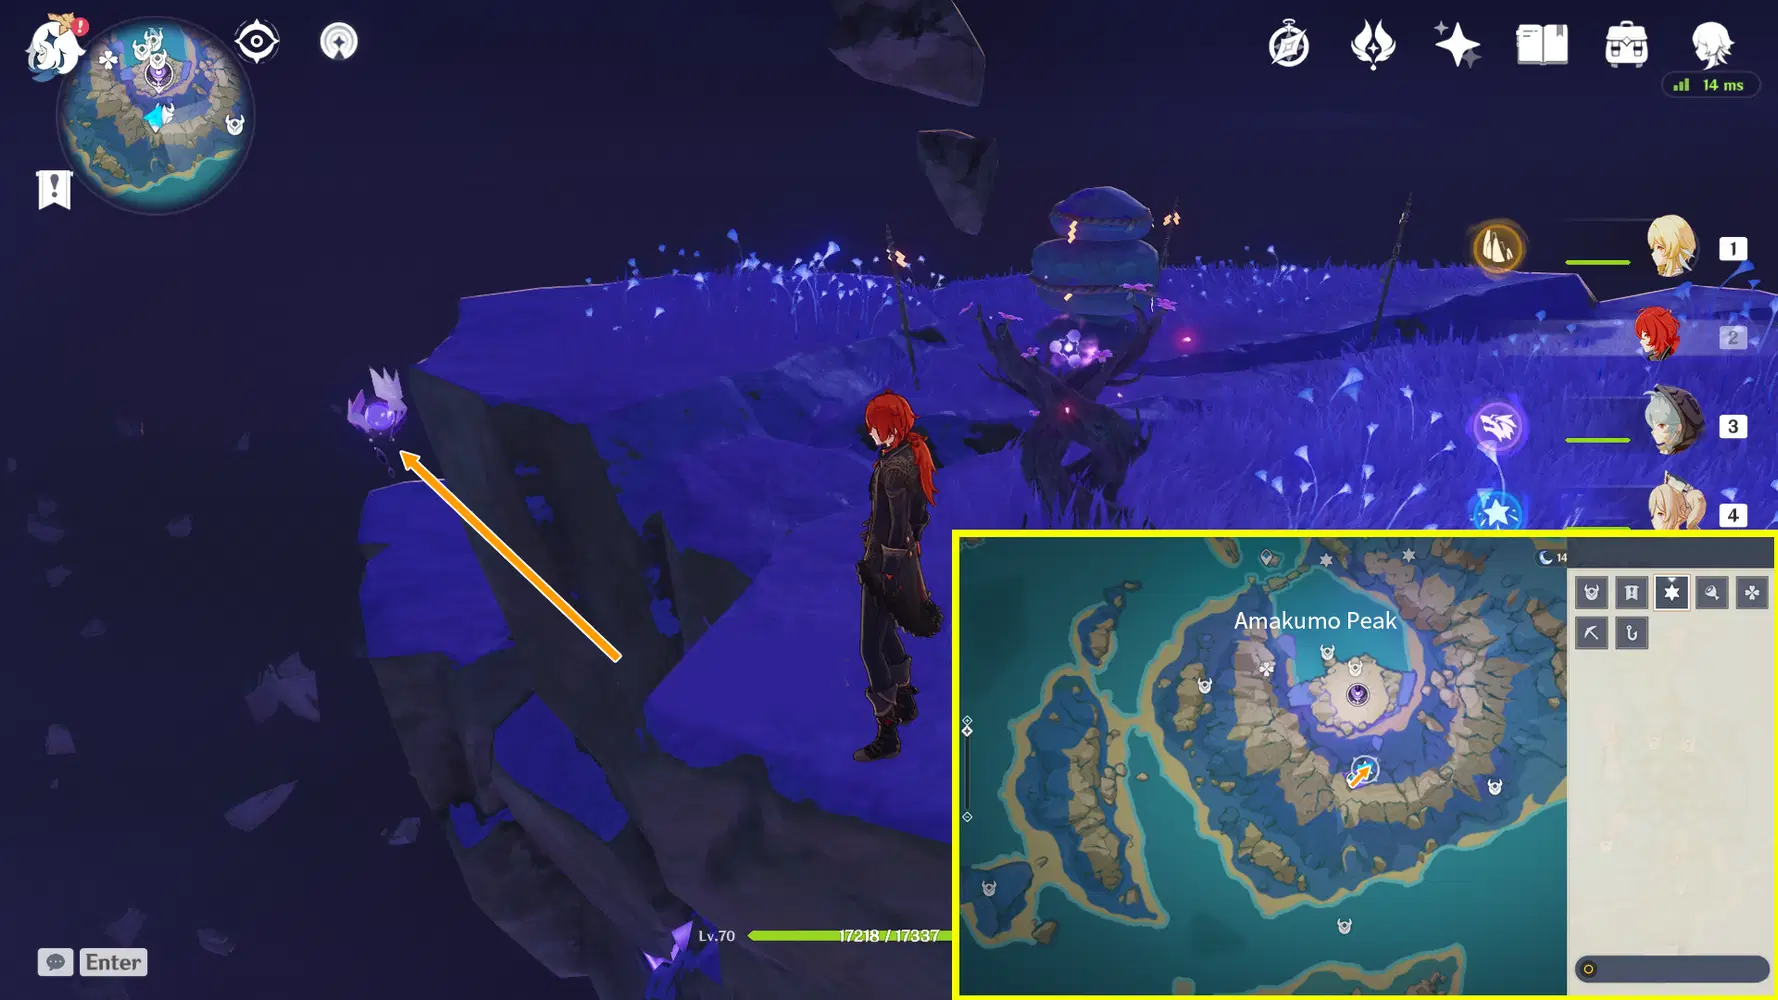
Teleport to the Amakumo Peak south waypoint in the sky. You’ll find the Electroculus next to the waypoint near the cliff. Switch to walk mode to get it.
Electroculus 141:
Return to the Amakumo Peak south waypoint in the sky. The Electroculus is on the shattered rock in the sky, glide south to grab it.
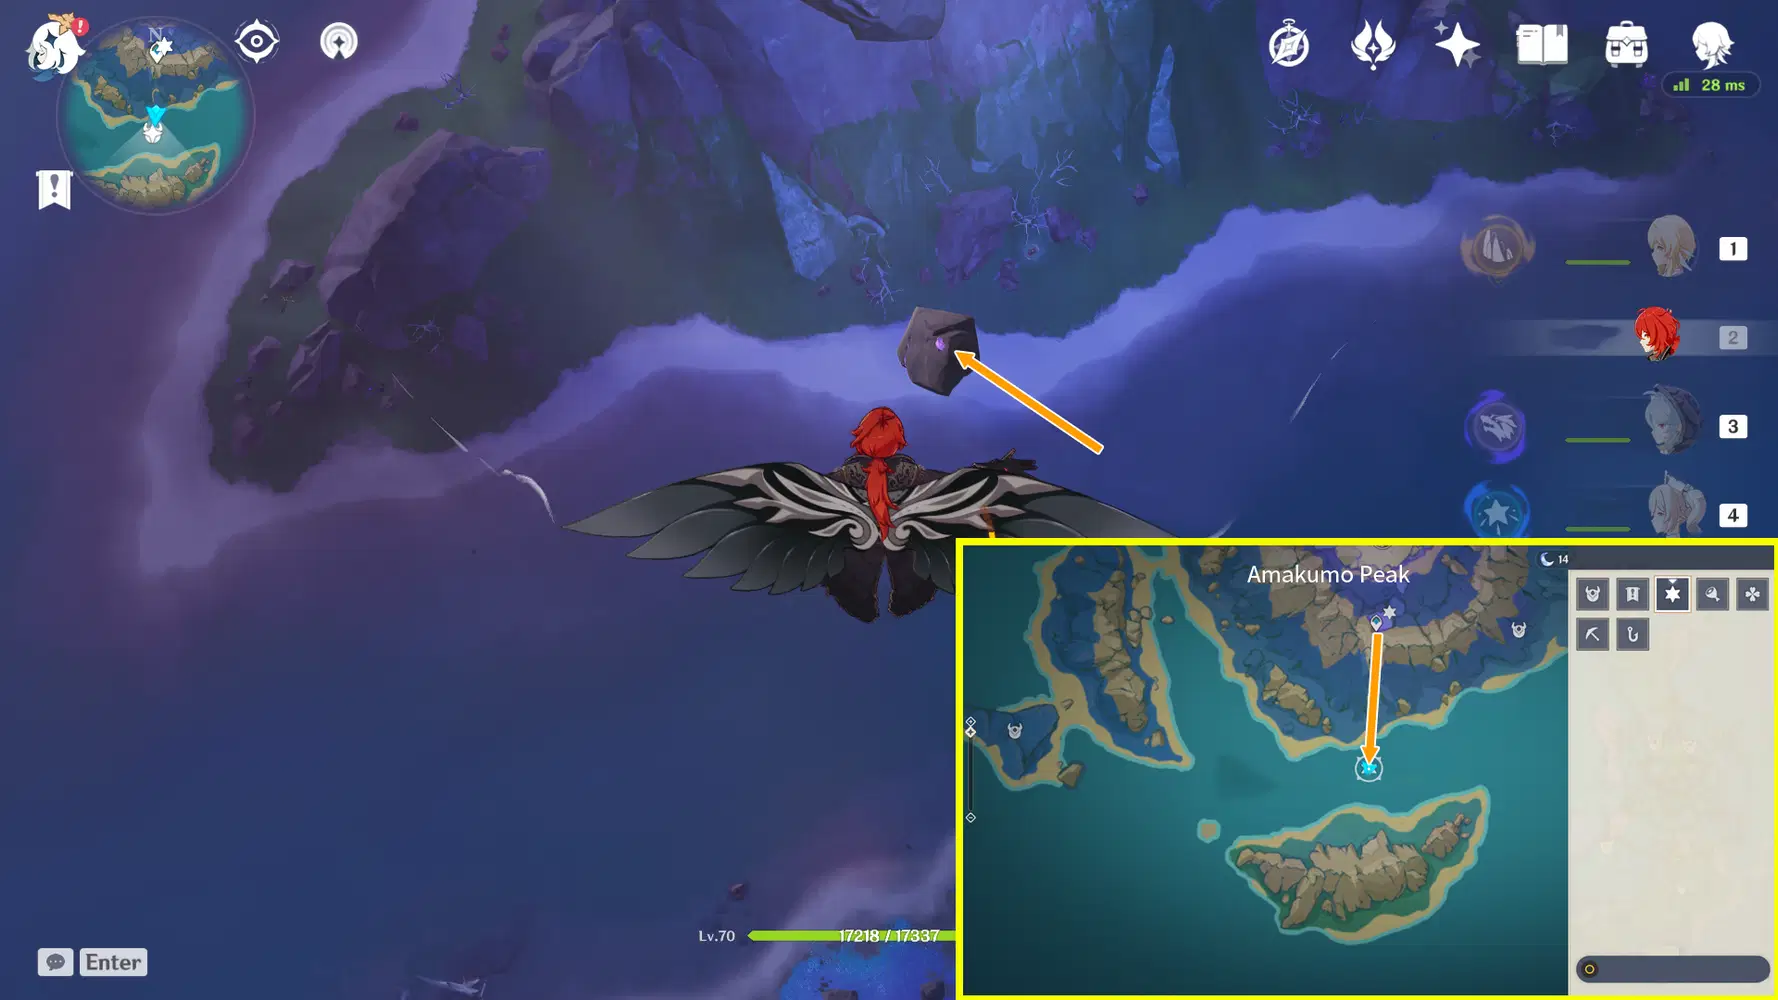
Electroculus 142:
Return to the Amakumo Peak south waypoint in the sky. The Electroculus is in the sky, glide east to grab it.
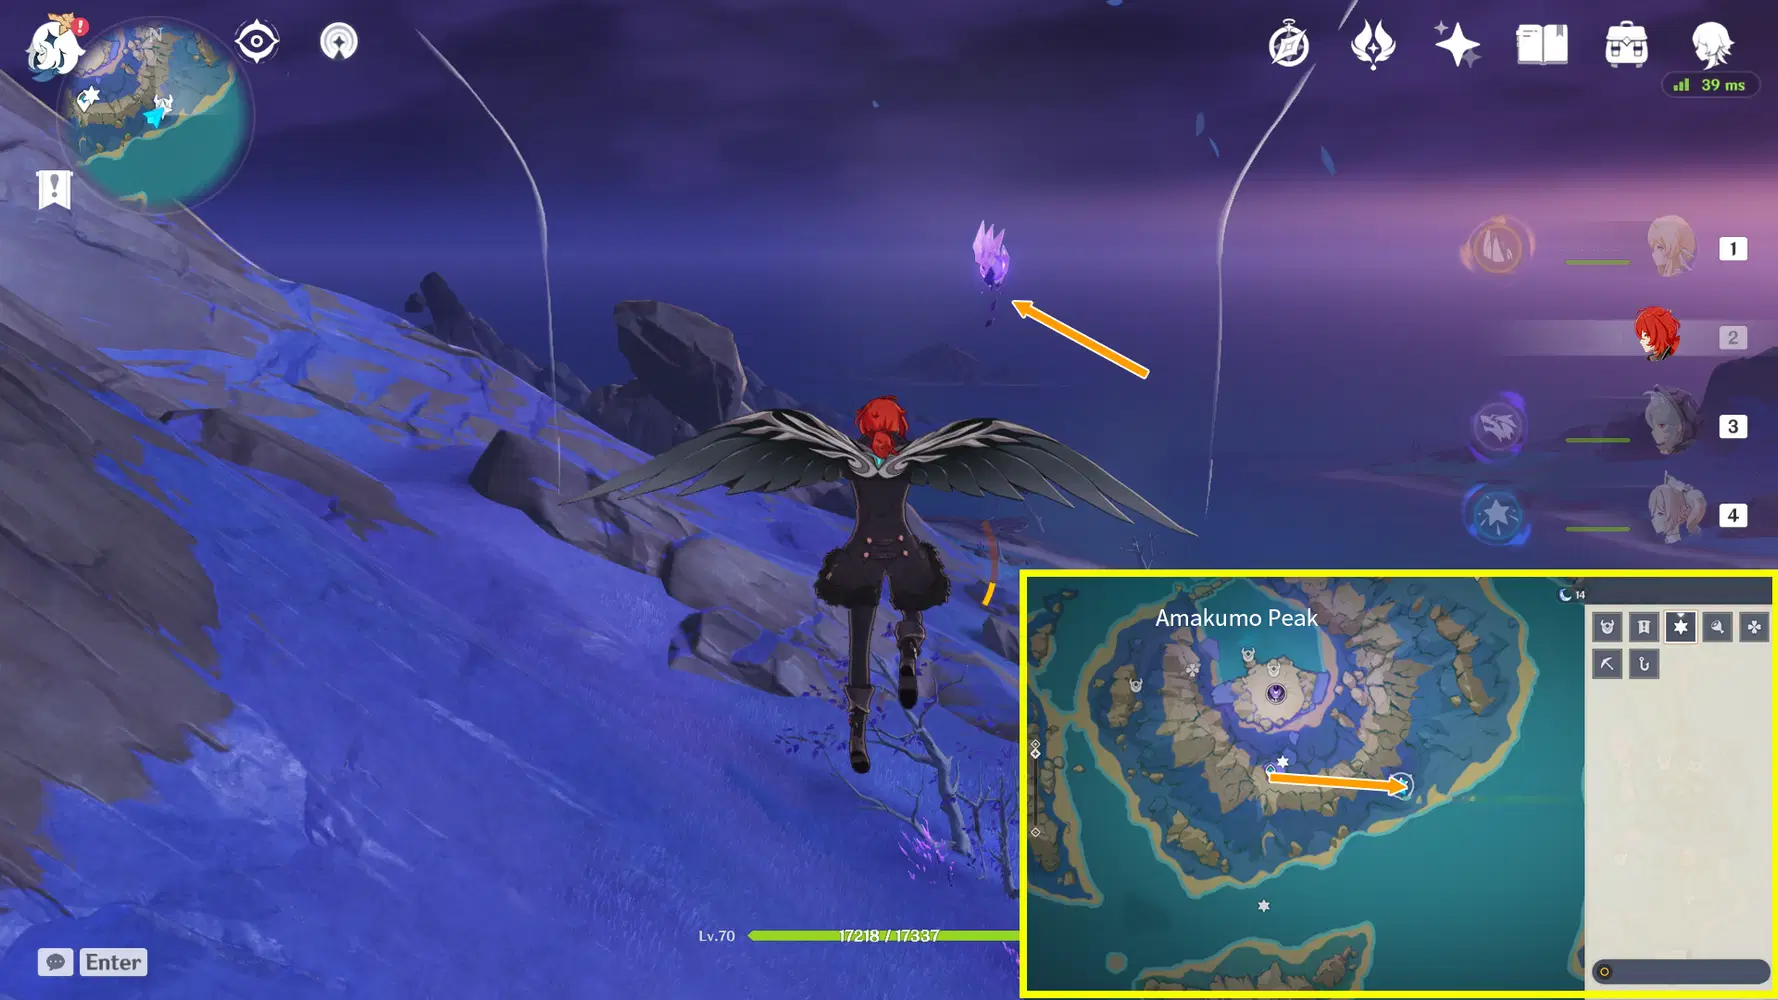
Electroculus 143:
After grabbing #142, keep gliding eastward to find the Electroculus on the broken rock, glide over to grab it.
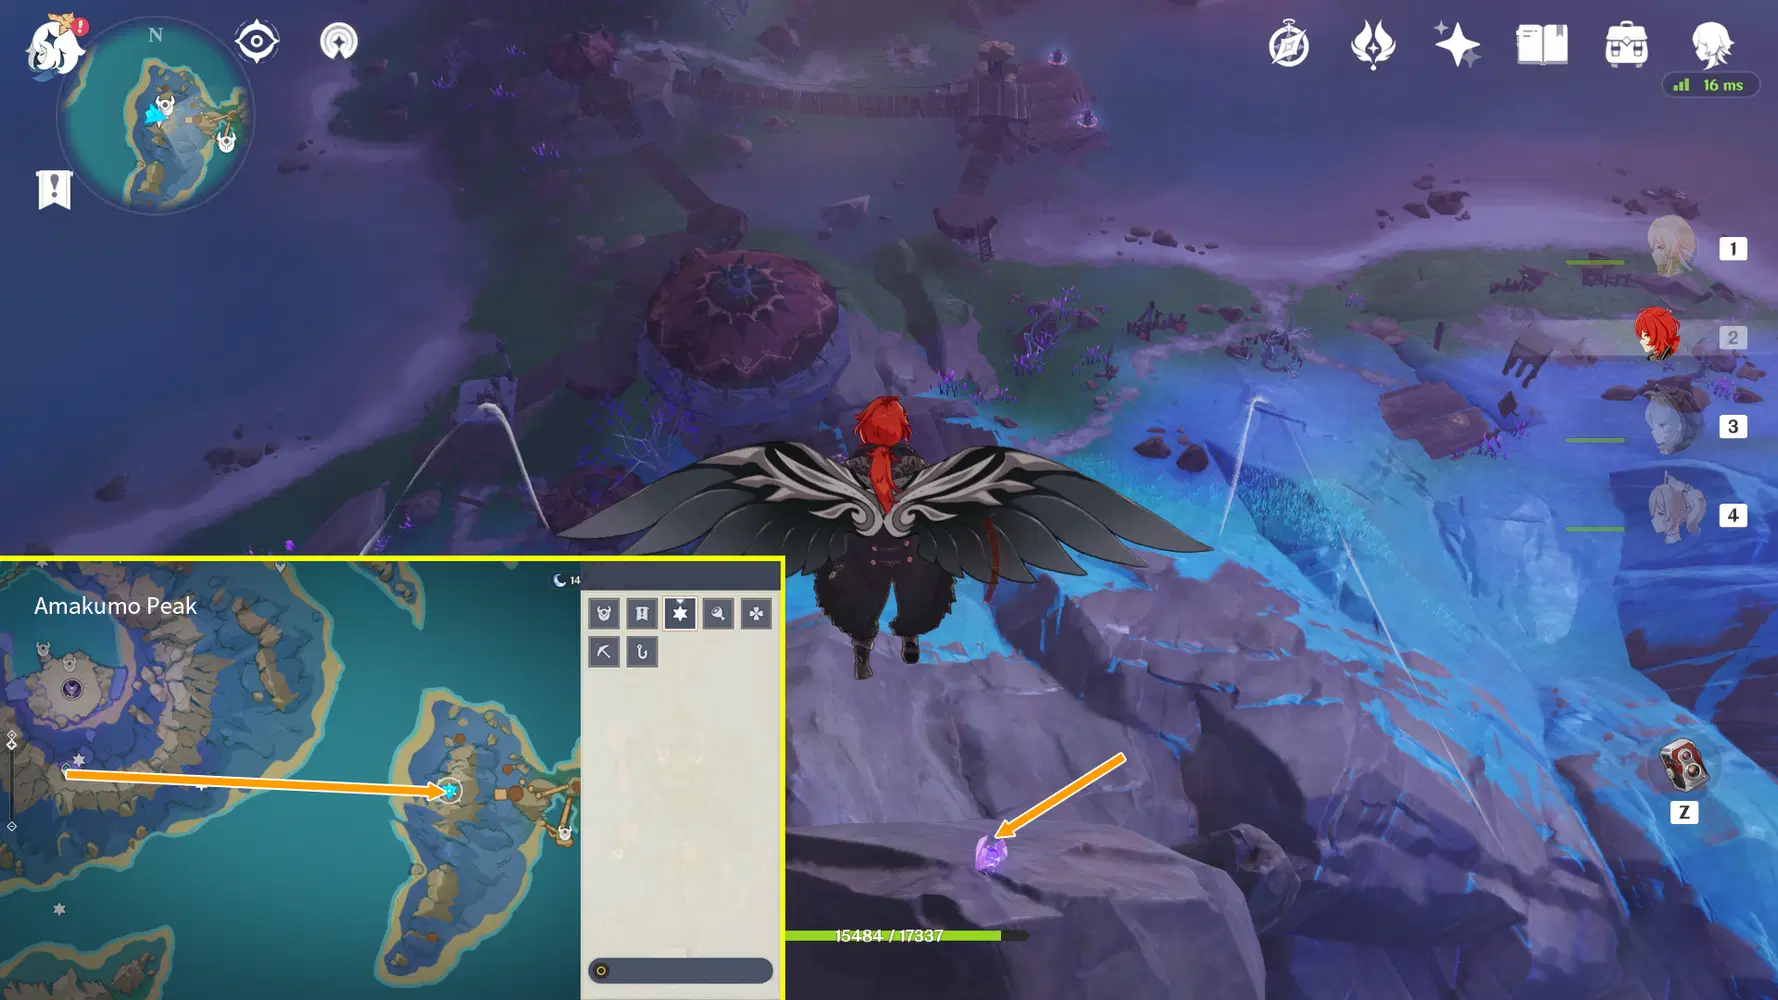
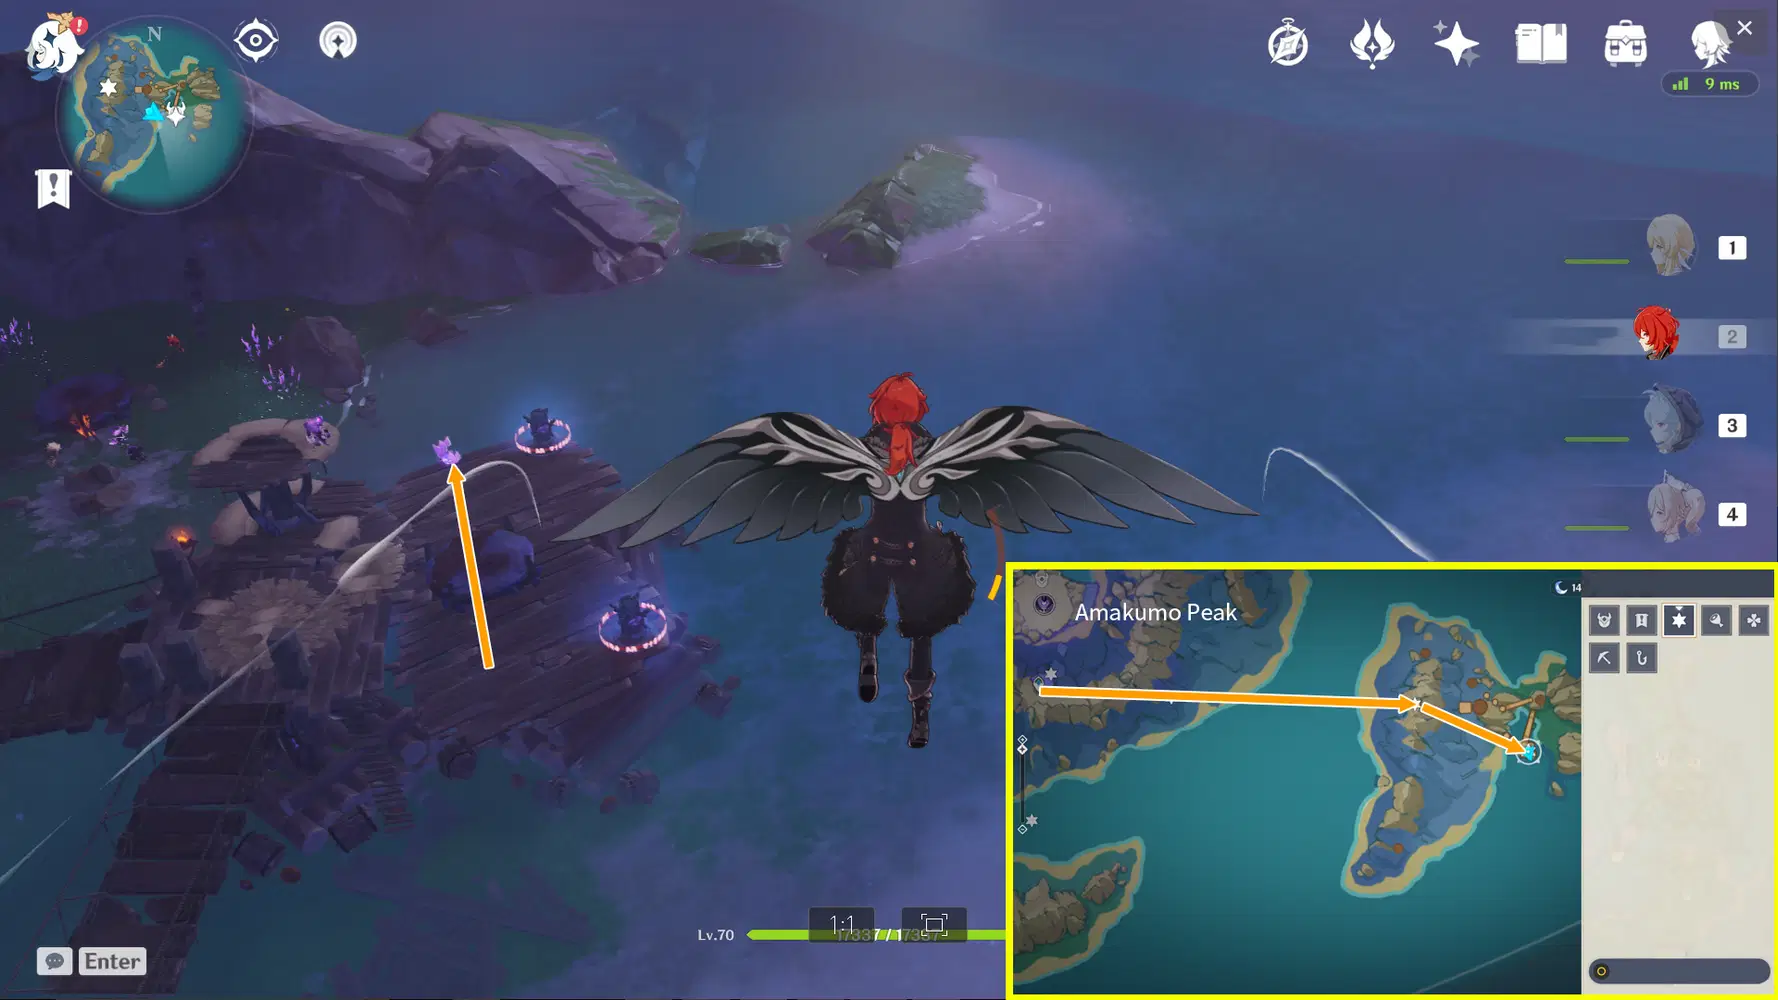
Electroculus 144:
After grabbing #143, keep heading southeast and you’ll find the Electroculus above a Hilichurl Camp. Clear out the camp then get a height boost from Geo Traveler to get it.
IX. Route 7 (Electroculi #145-151)
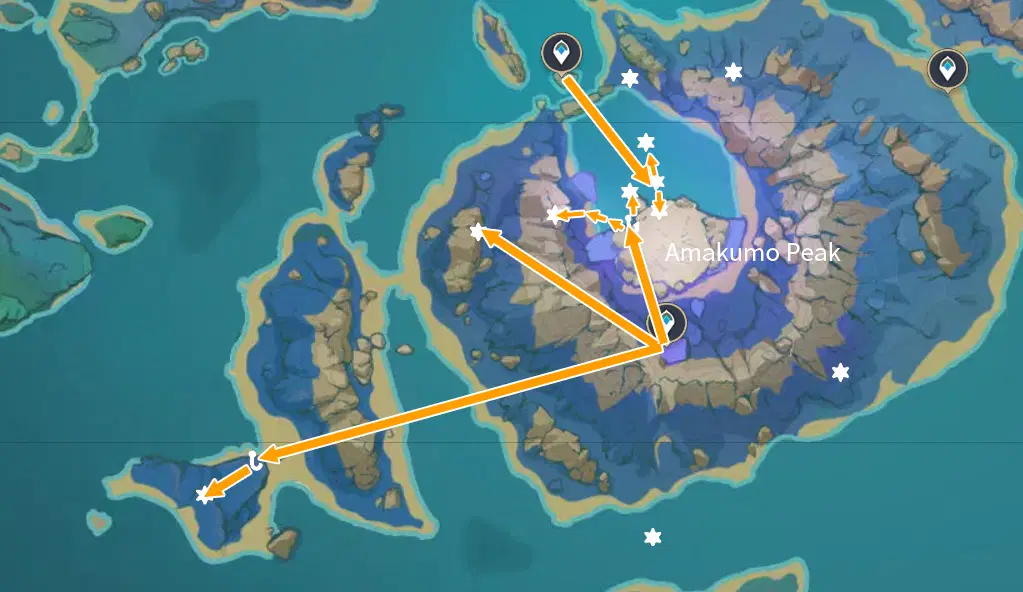
Note: You need to have completed the world quest Seirai Stormchasers series.
Electroculus 145:
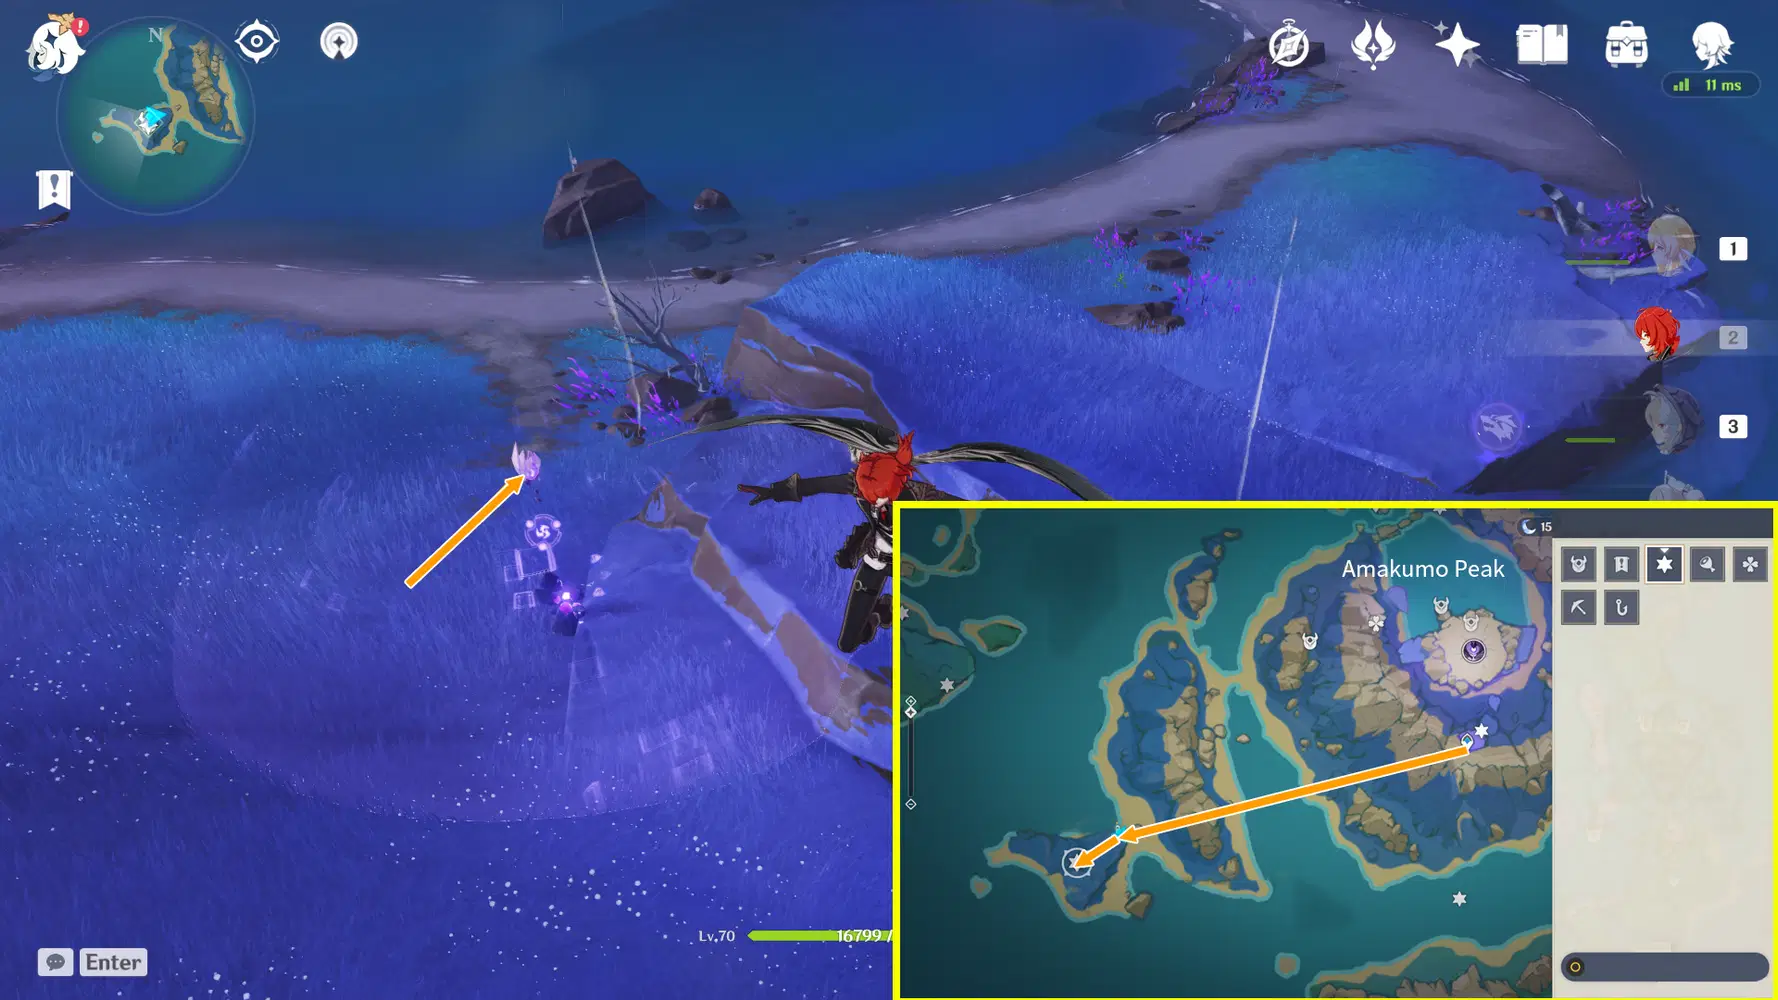
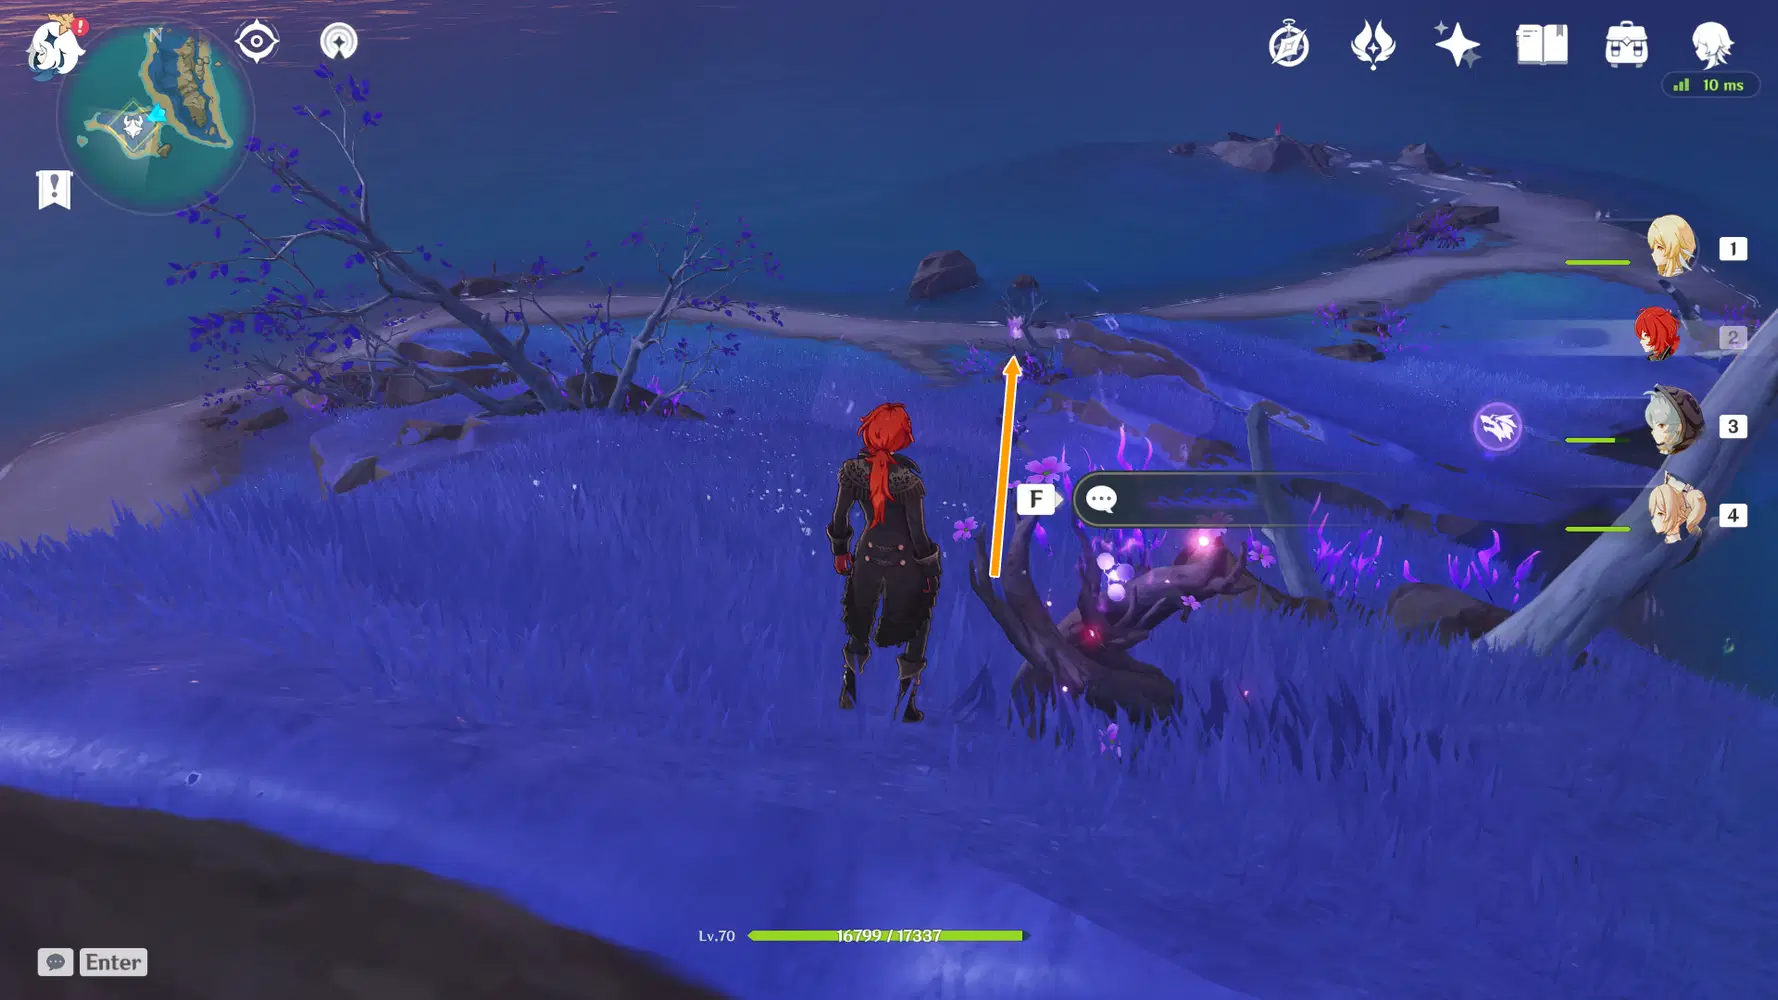
Return to the Amakumo Peak south waypoint in the sky and head southwest to find the Electroculus within the Thunder Barrier. Summon the Electrograna from the Thunder Sakura Bough on top of the hill to get it.
Electroculus 146:
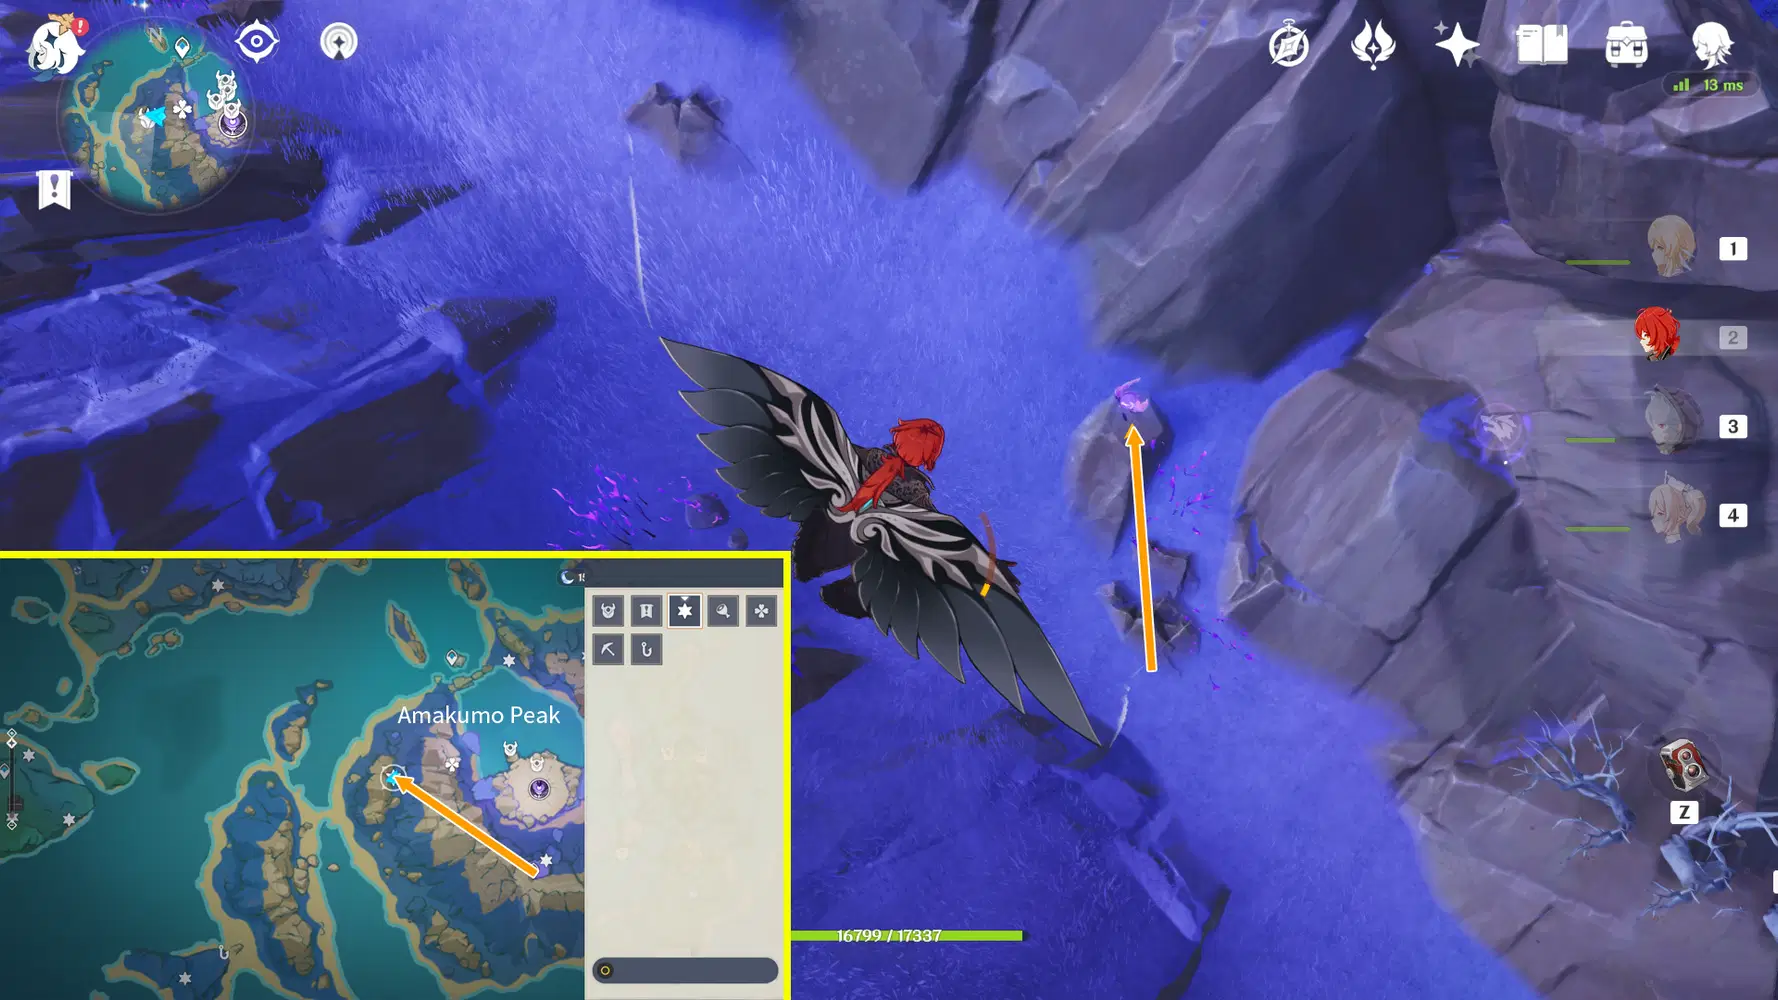
Return to the Amakumo Peak south waypoint in the sky and head northwest, the Electroculus is on the rock on the ground, simply glide over to grab it.
Electroculus 147:
Return to the Amakumo Peak south waypoint in the sky and head north, find the Thunder Sakura Bough (you’ll pass by this place during the Seirai Stormchasers quest series), then summon the Electrograna and fly up via the Thunder Spheres.
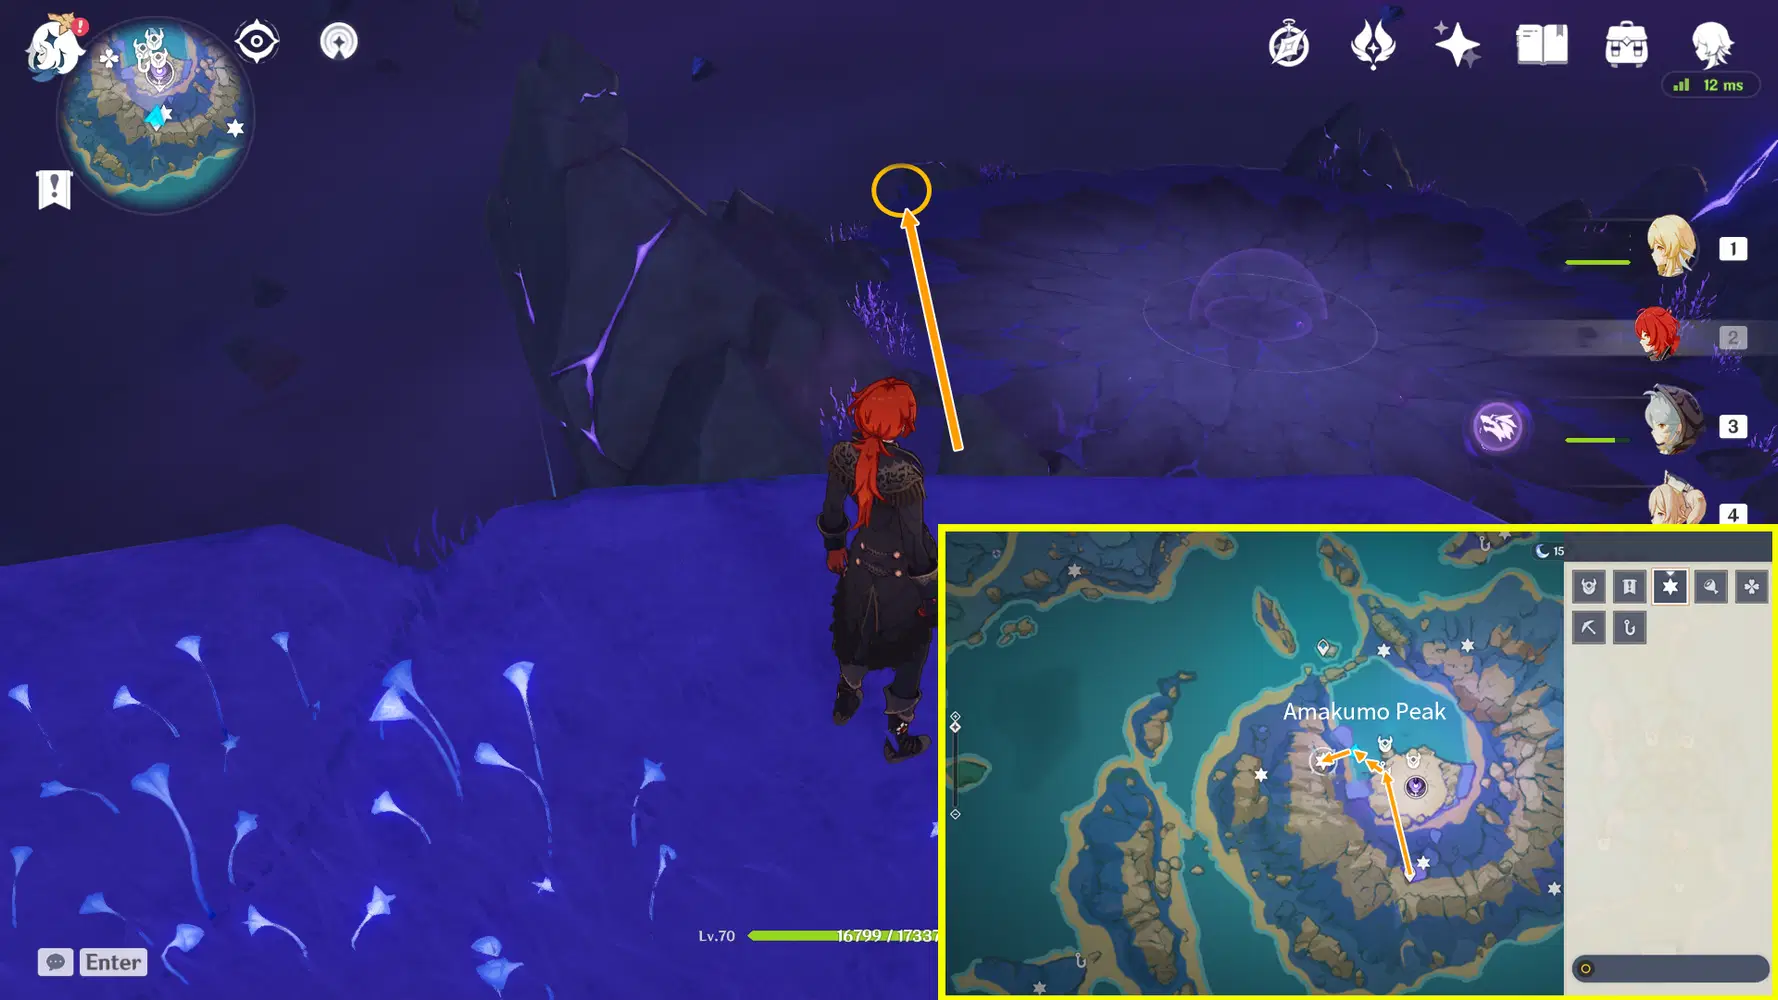
Go to the previous platform and summon the Electrograna again and fly up via the Thunder Sphere to grab it.
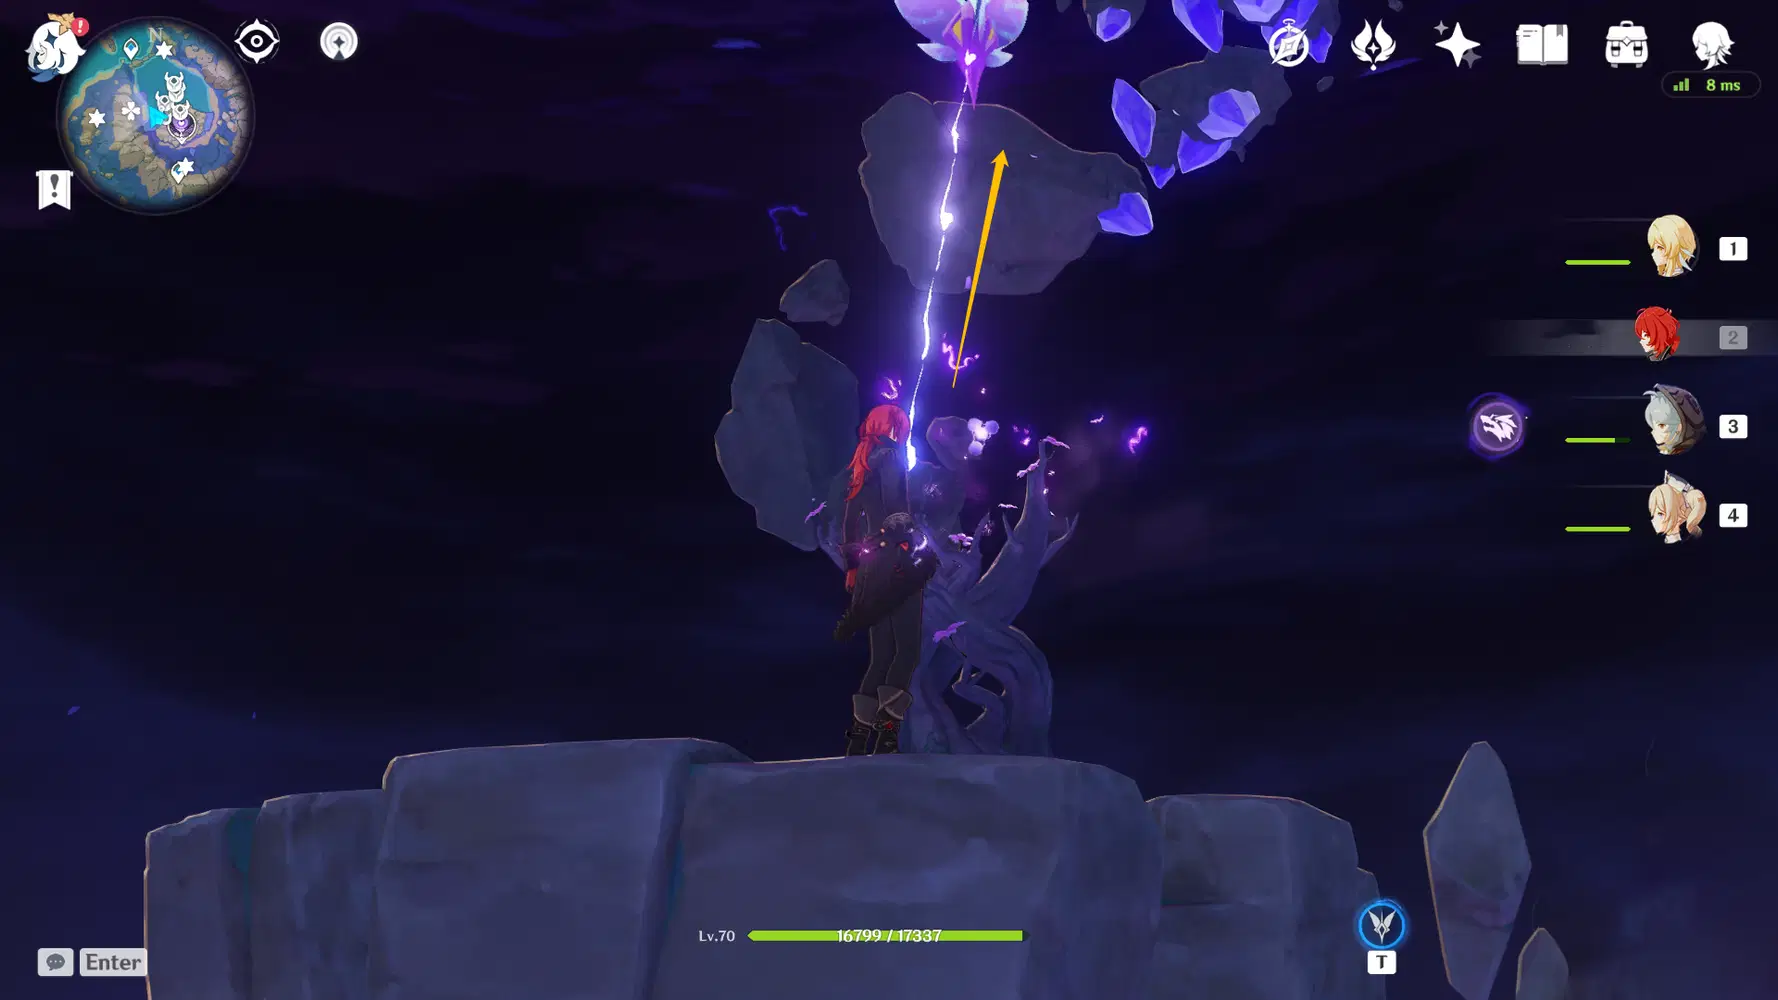
Electroculus 148:
Return to the Amakumo Peak south waypoint in the sky and look for the Thunder Sakura Bough you used for Oculus #147.
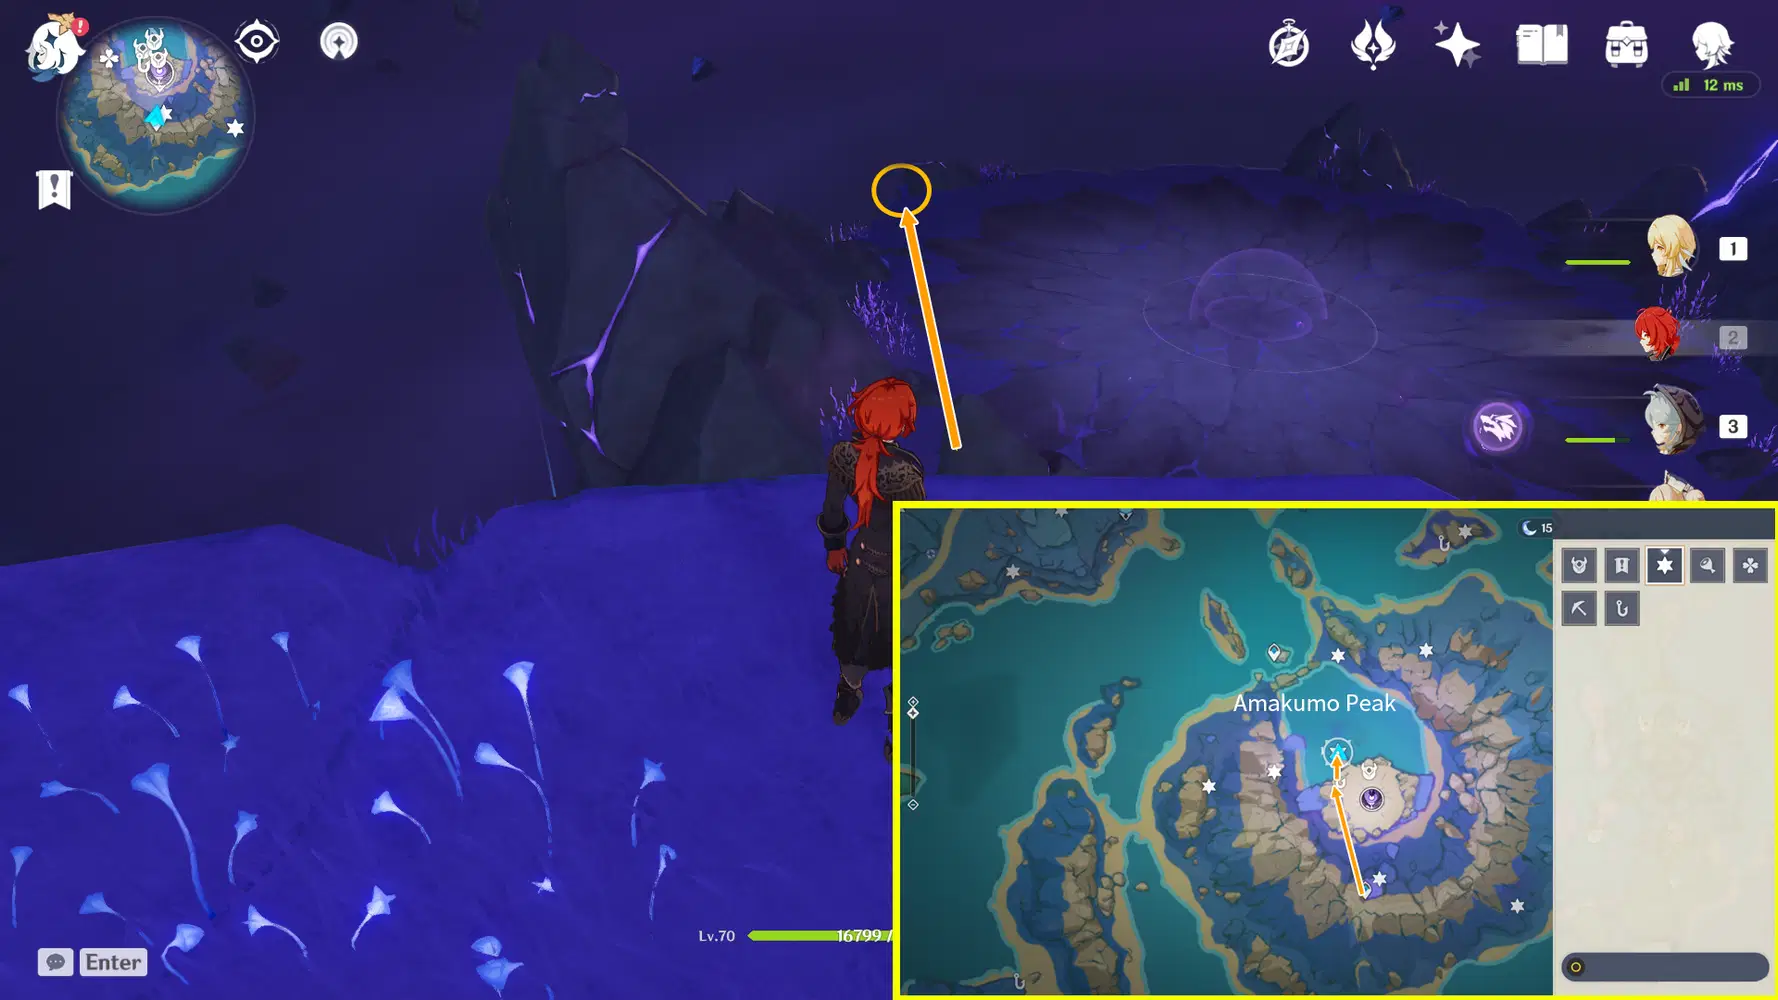
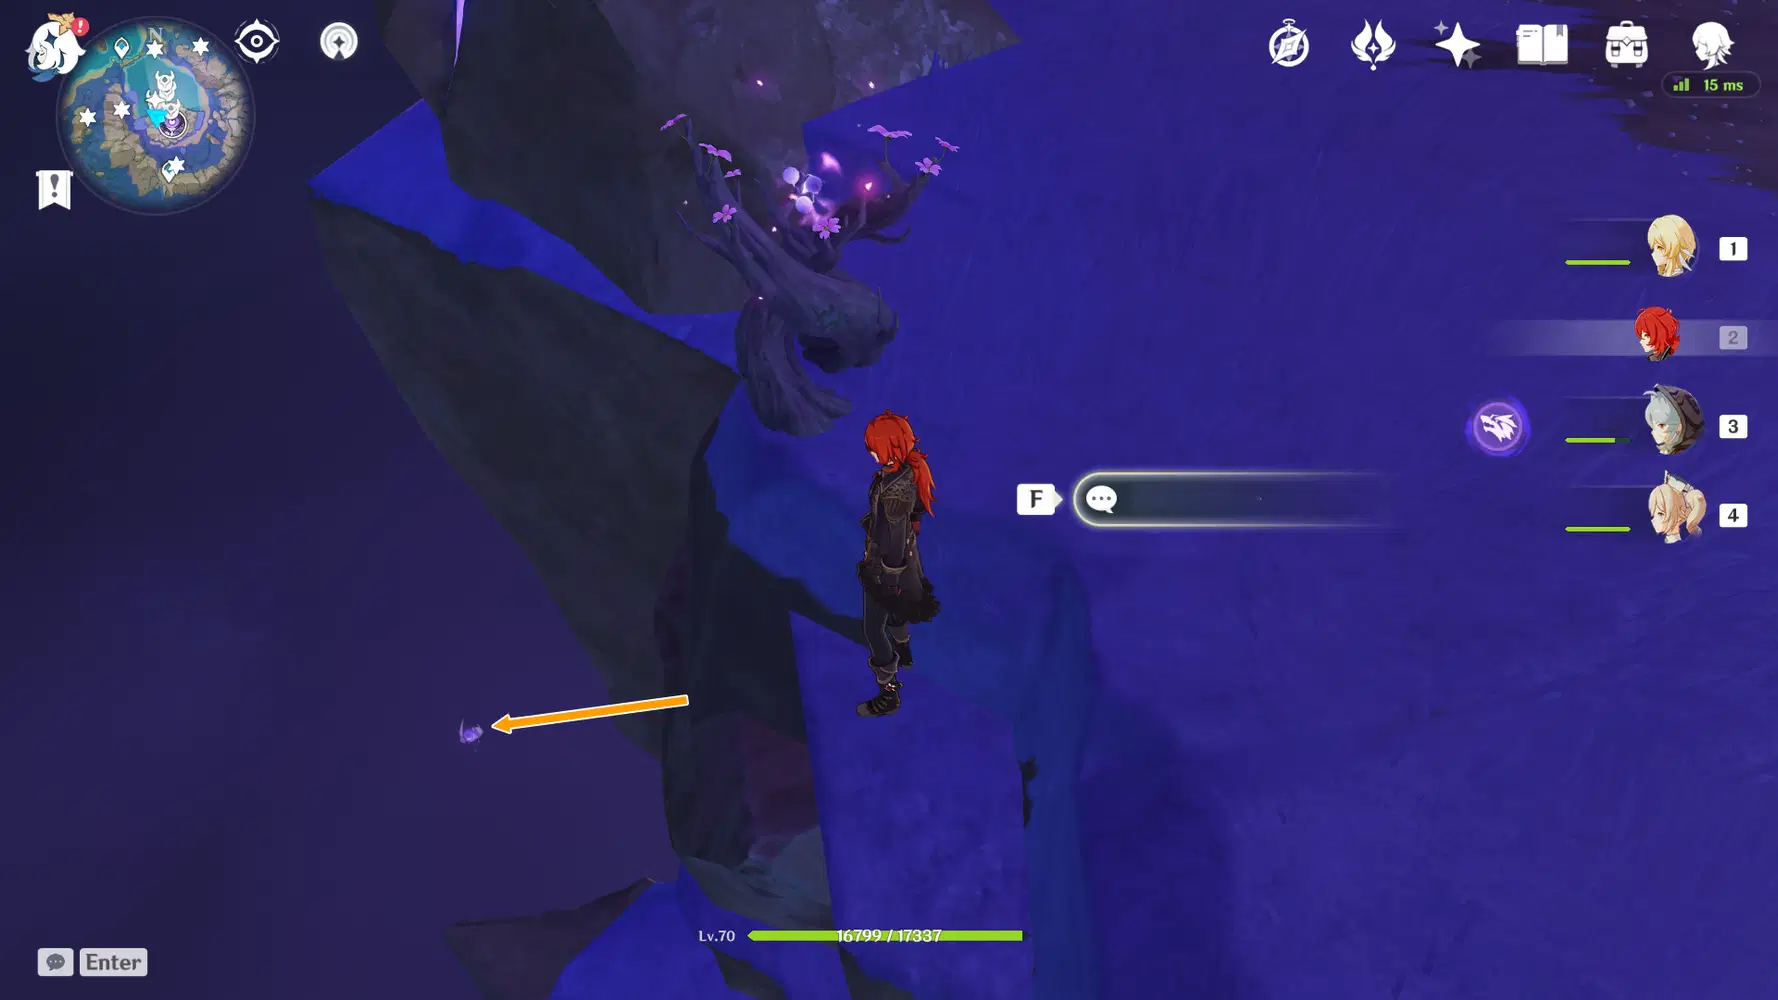
Look down and you’ll see the Electroculus mid-air below the Thunder Manifestation platform. Glide down to get it.
Electroculus 149:
Teleport to the Amakumo Peak south waypoint and glide southeast. The Electroculus is just above the center crater of Amakumo Peak after the water level lowers, so glide over to grab it. You’ll have to have completed the Seirai Island large puzzle: Great Amakumo Peak Ruin Maze first.
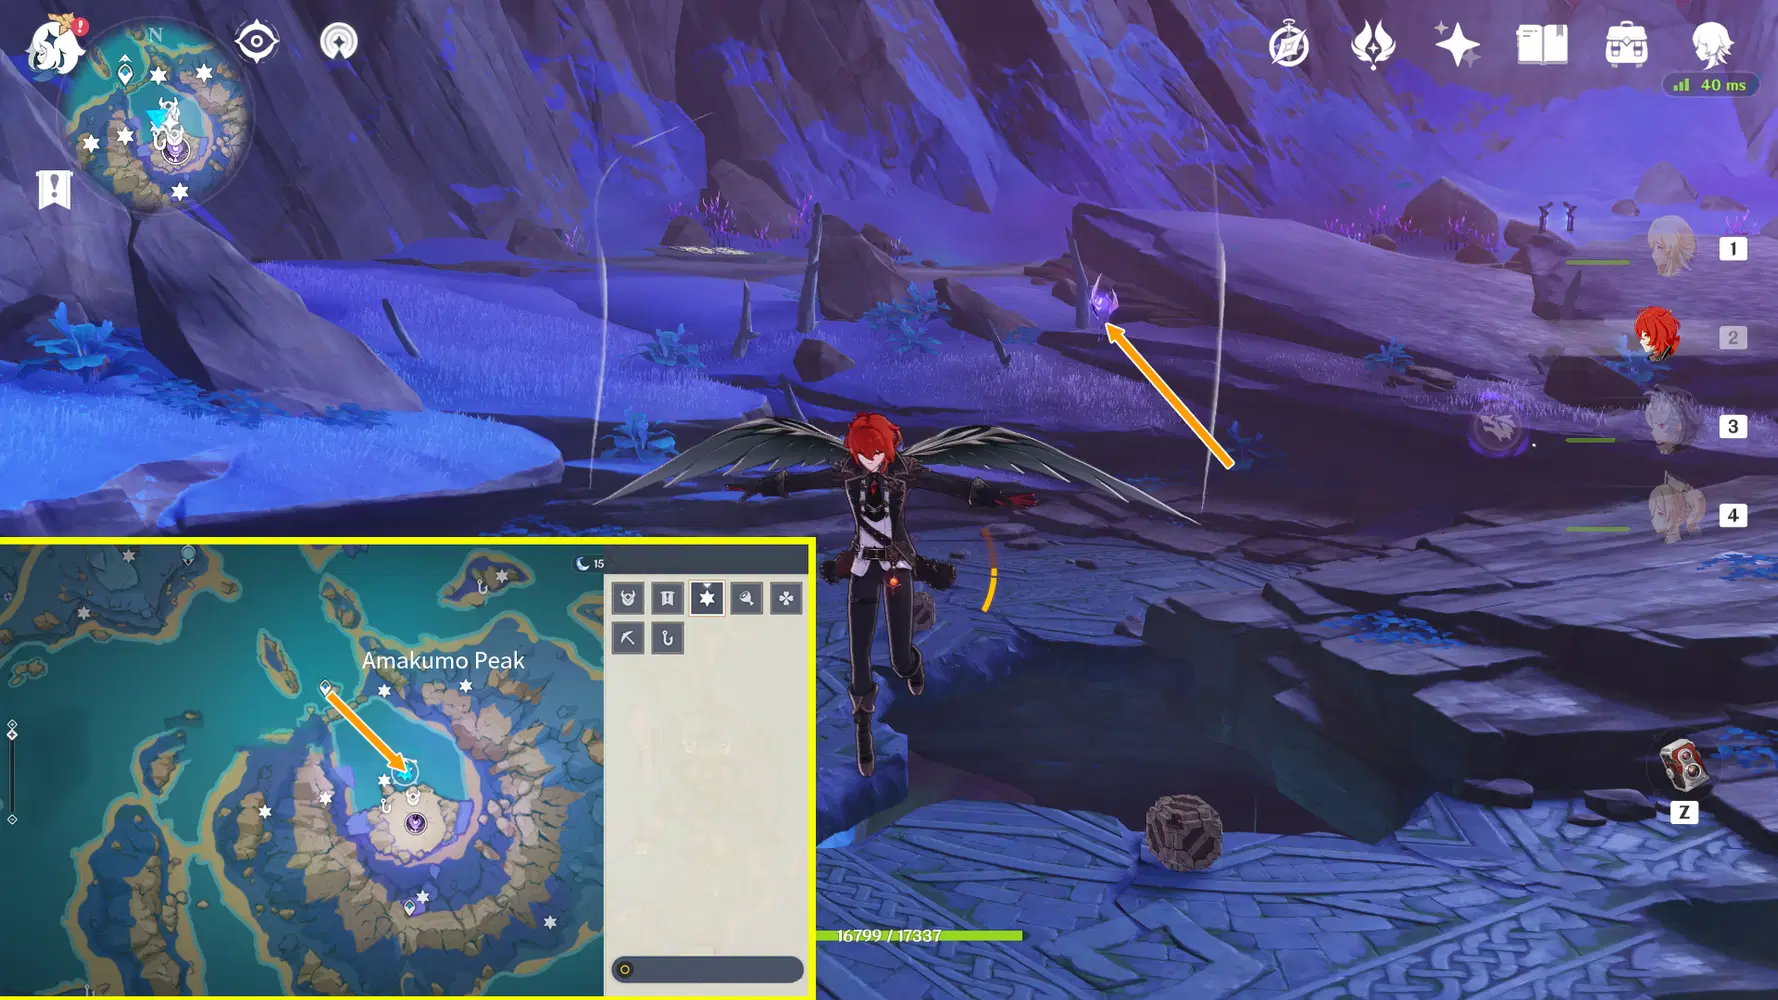
Electroculus 150:
Return to the previous Amakumo Peak north waypoint and head southeast. The Electroculus is just below the hole entrance, behind the rock pile.
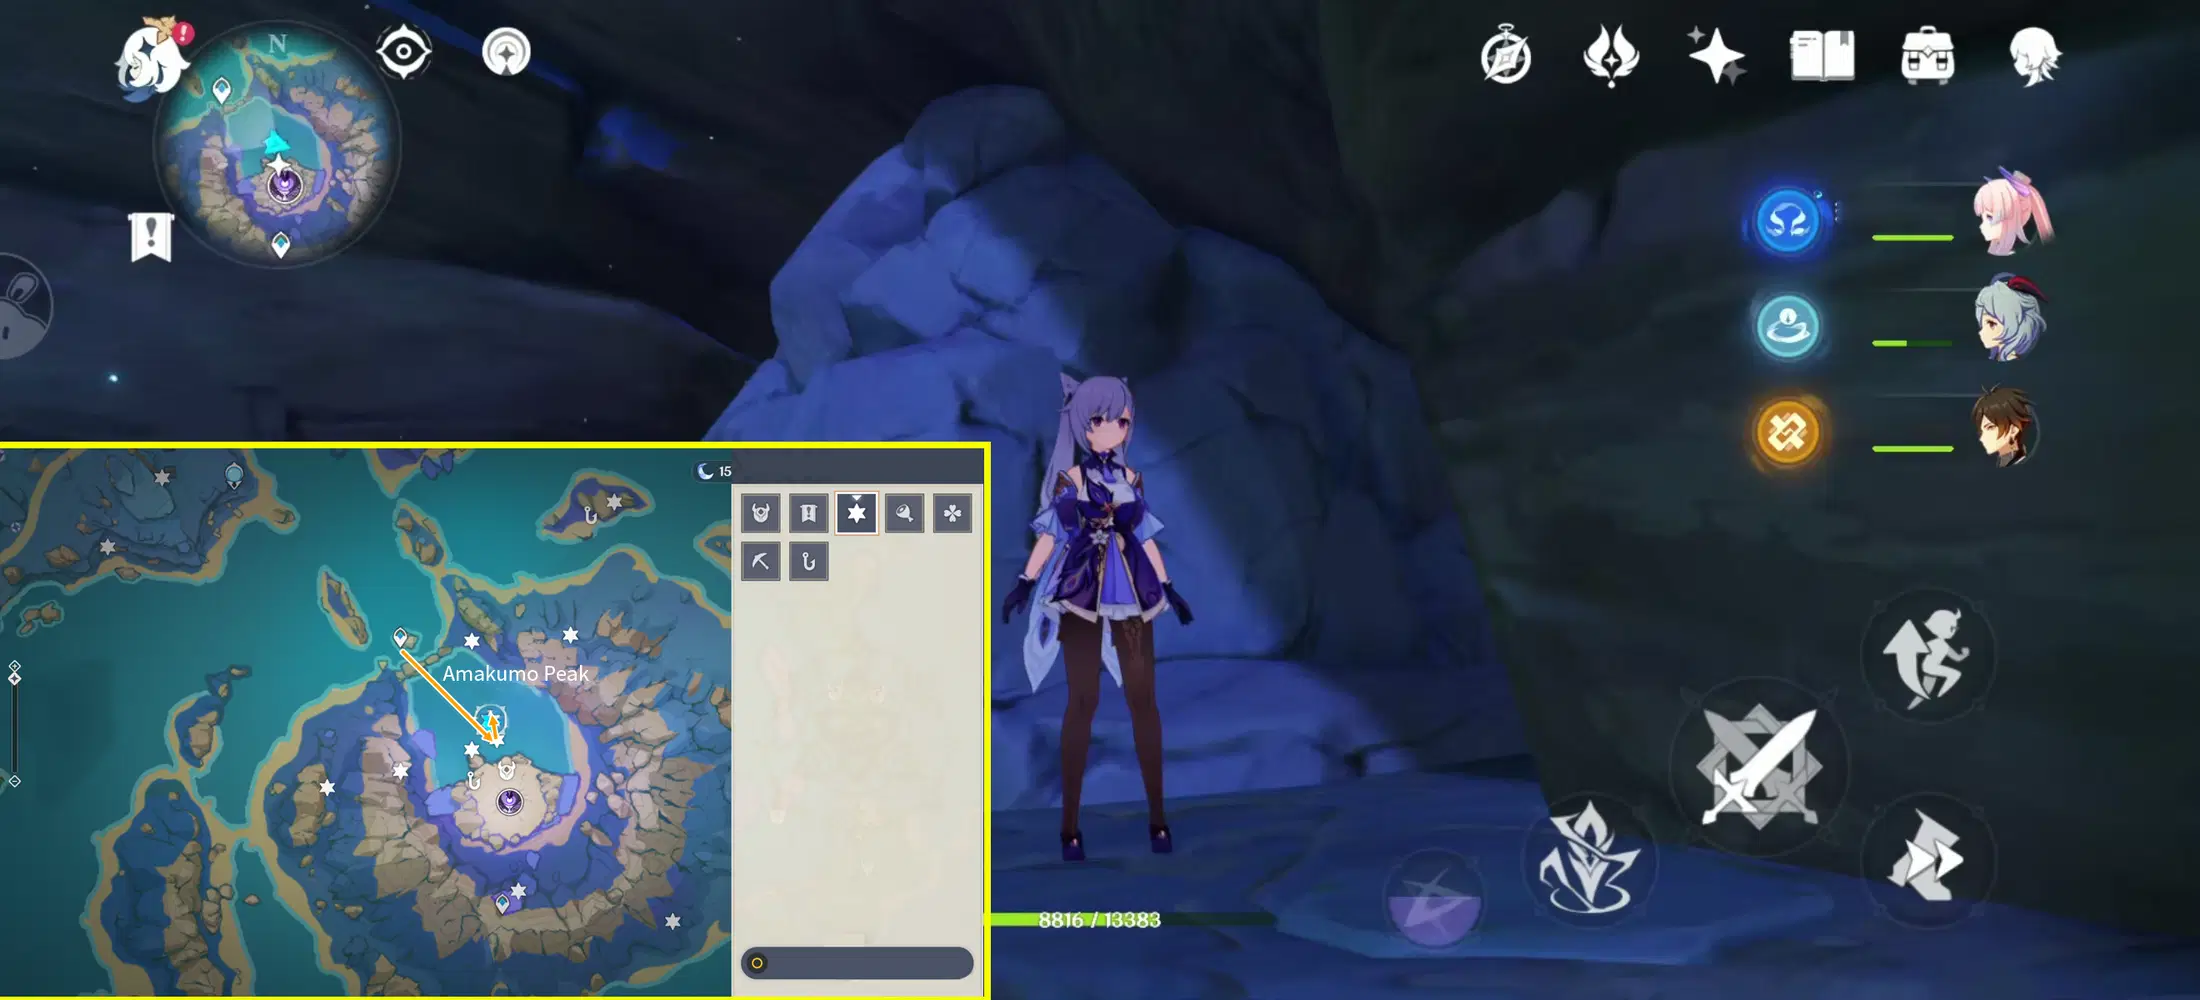
Break the pile to find it.
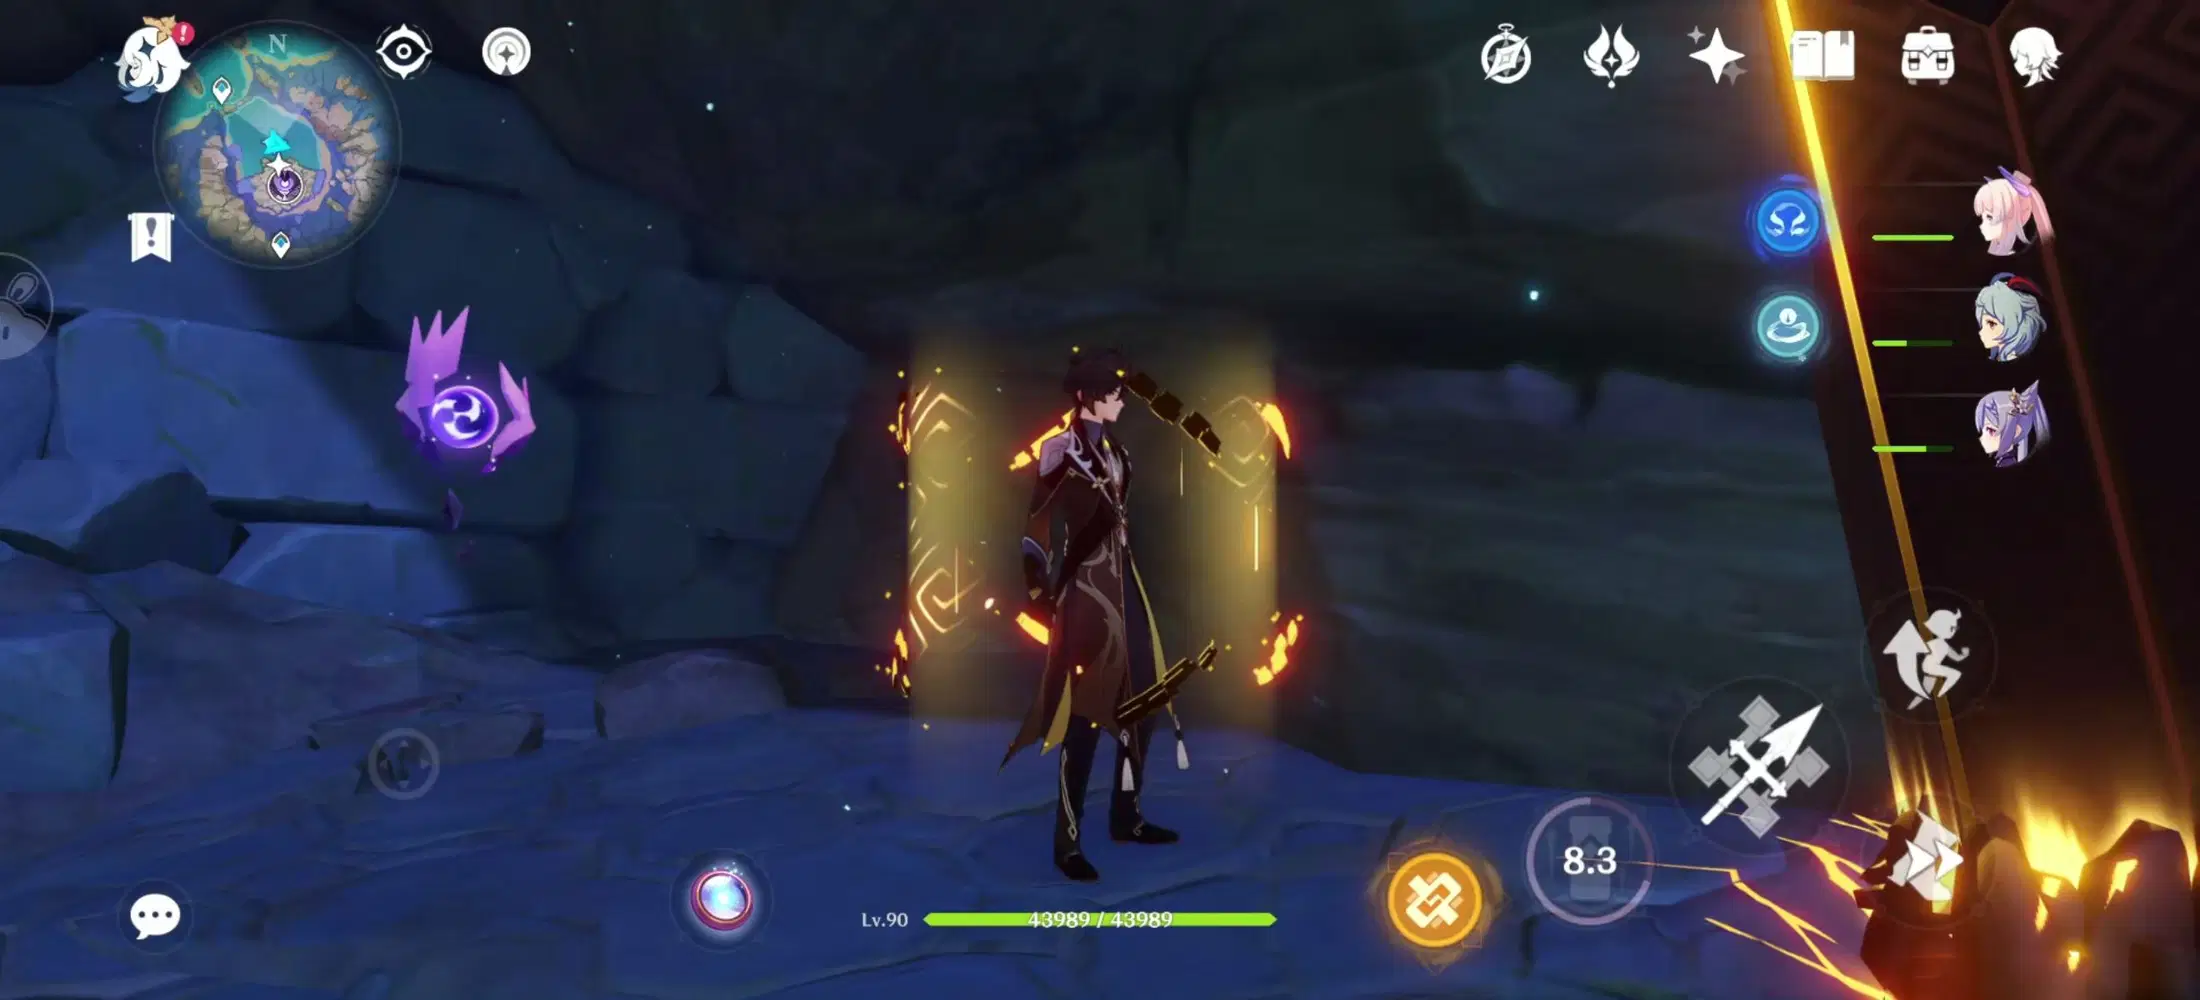
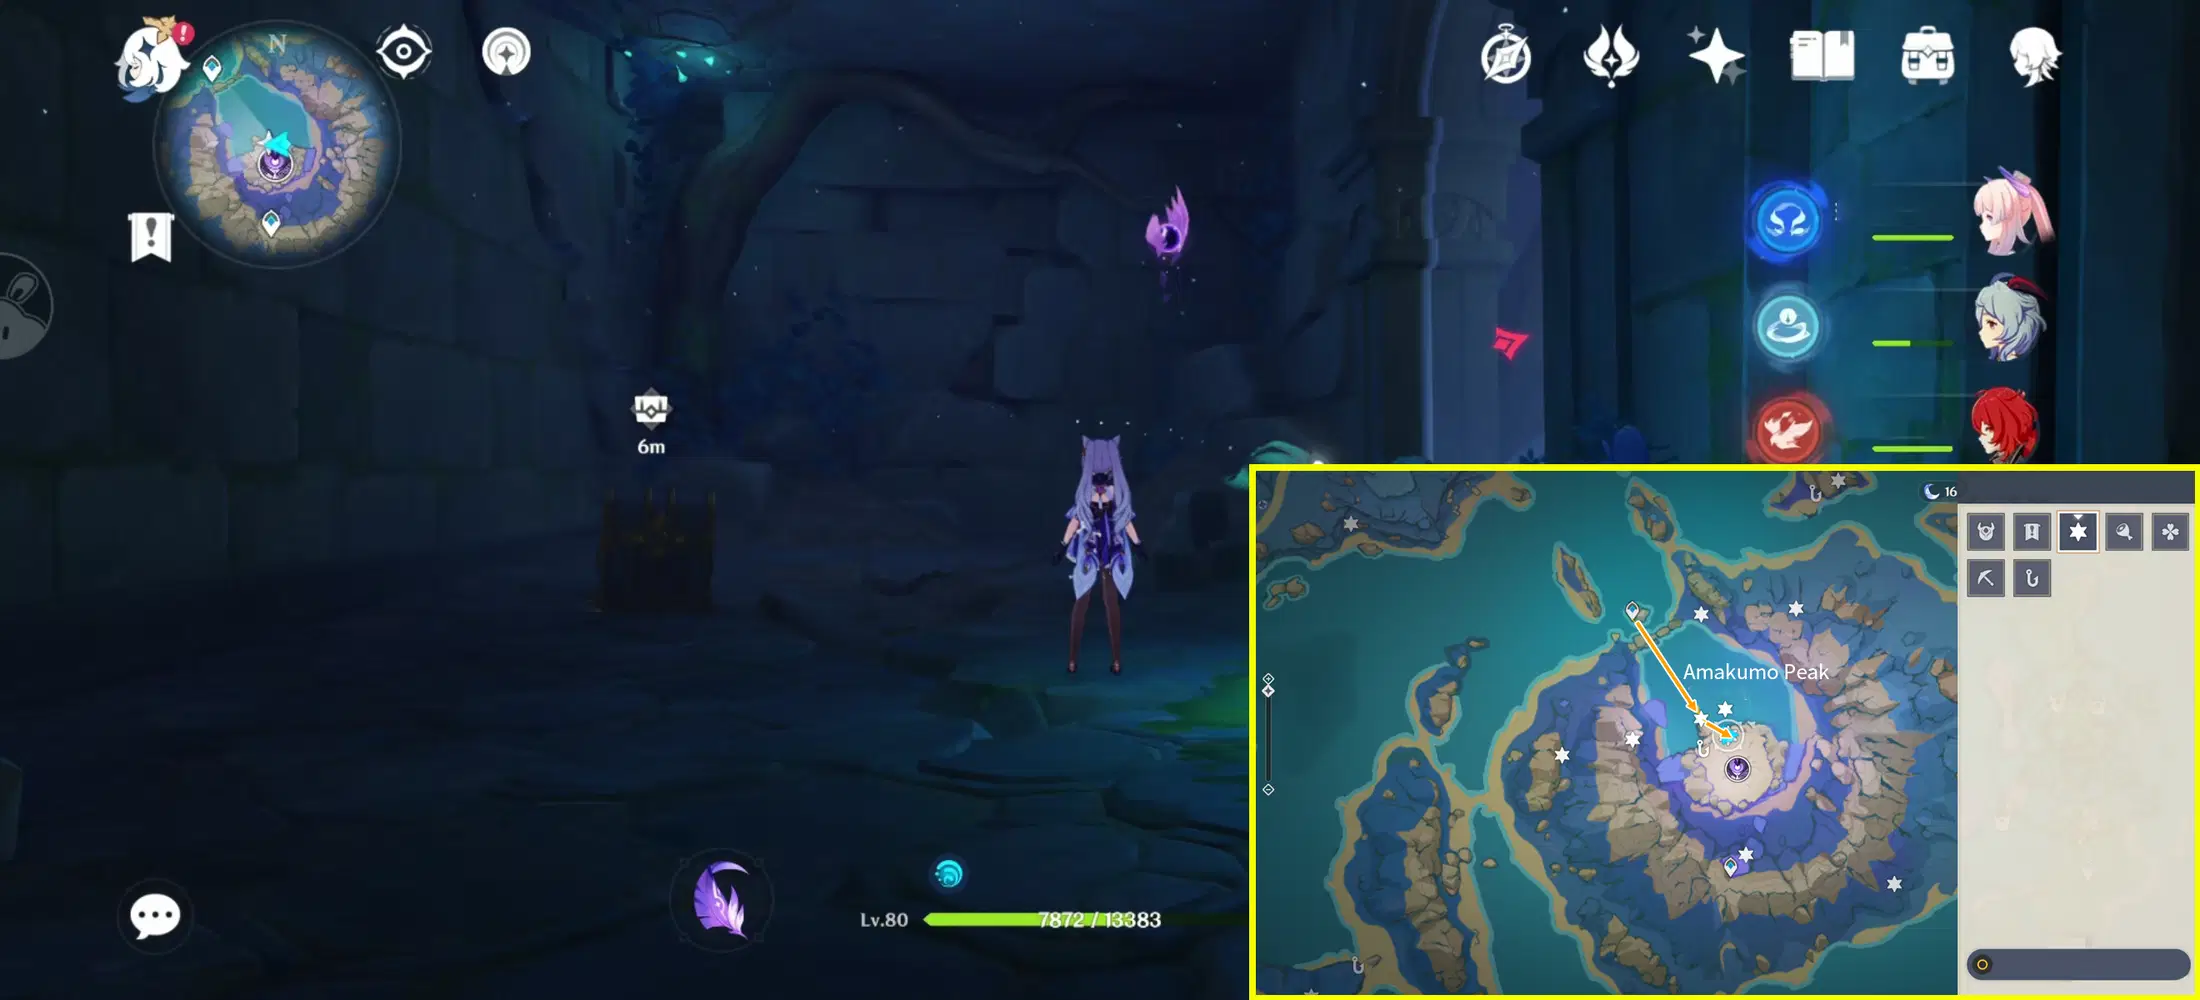
Electroculus 151:
You’ll meet 3 Seelies during the Seirai Island large puzzle: Great Amakumo Peak Ruin Maze, you’ll find the Electroculus during the Seelie walk to solve the puzzle for the three doors.
That’s all for the Electroculus collection guide around Seirai Island. The island has a complex formation and there are many prerequisite quests and puzzles to solve. Make sure you’ve completed all the world quests and puzzles mentioned at the beginning of this guide before collecting the Oculi.
Up Next: Electroculus Collection Guide (VII/VII) - Tsurumi Island (30 Total)