


Hello! 
I'm Jellotin, UID 602311423, and I'm a big enthusiast of teams centered around follow up attackers. My first 5 star was Clara, and the first limited character I got was Jing Yuan, so most of my time spent playing Honkai: Star Rail has been completely centered around follow ups. Outside of the simulated universe, there isn't too much synergy to be had for follow up attacks, since there is no relic set that buffs follow up attacks apart from the Inert Salsotto set, which only buffs the user, and no support units that directly buff follow up attacks specifically. However, the simulated universe is where these team comps can shine, with the help of the Path of The Elation.
To preface this guide, this is not a surefire way to effortlessly complete a simulated universe run. In comparison to strategies using the path of Preservation or Abundance, this takes a little more effort and maintenance, and does have potential flaws, which I will get into. However, this strategy is much faster in my experience than other builds I have tried - if done right, you will have no trouble dealing incredible amounts of damage, and the only room for difficulty at all through your whole attempt will be at the final boss, if you even have any difficulty at all.
I will separate this guide into two sections: Characters and their builds, and Simulated Universe Build. I hope that someone will be able to walk away from this guide with a new, fun strategy to try for the simulated universe. Above all, that is what this build is centered around; fun over viability. With that in mind, let's start!
Characters and their builds
By far the most critical flaw with this build is a simple one - the cast of characters in Honkai: Star Rail lacks many reliable options for follow up attackers, and more than that, the majority of them are 5 stars, making this strategy rather situational depending on your gacha luck. Regardless, if you have even one of these five stars (or maybe even only the four stars!) I think this strategy is fun and worth giving a shot! As I said, the roster of consistent follow up attackers is limited, but there are currently a total of 8 characters able to perform follow up attacks, those being:
- Jing Yuan, the Lightning Erudition
- Himeko, the Fire Erudition
- Bronya, the Wind Harmony
- Clara, the Physical Destruction
- Yanqing, the Ice Hunt
- March 7th, the Ice Preservation
- Herta, the Ice Erudition
- Qingque, the Quantum Erudition
The practicality of each of these character's ability to follow up ranges drastically, from "it is literally their only source of damage in the first place" to "you probably didn't even know this character CAN follow up" but nevertheless, I will talk about each character's builds and what requirements need to be met to follow up on them. Please keep in mind - these builds are completely my opinion and you can absolutely experiment however you'd like. They will be gimmicky at times, some of these characters are better off building normally instead of purely for their follow ups. Keep in mind as well that because of the lack of synergy you're able to have outside of the simulated universe for follow up attacks, these builds are primarily focused on being used in the simulated universe. Use your own judgement to find out what will work best for your team, and what will be the most enjoyable for you! I won't necessarily tell you any team structures to follow, I think it's much more fun for the player to experiment a little. With that said, let's begin.

Jing Yuan, the Lightning Erudition

Overview
To no ones surprise, Jing Yuan is undoubtedly the strongest follow up attacker you can have. He has no special requirements for performing follow up attacks. His talent, Prana Extirpated, is his main method of damage, granting him The Lightning Lord in all battles from the very beginning.

gif from https://www.hoyolab.com/article/18492621
The Lightning Lord will be added to the turn order with a base speed of 60, increasing by 10 for each stack he gains by using his skill or ultimate. His skill will grant the Lightning Lord two stacks, and his ultimate will grant Lightning Lord three stacks. Along with raising the Lighting Lord's speed, these stacks also count how many times the Lightning Lord's attack will hit, up to a maximum of 10. As I'm sure you're aware, what makes this so strong for the path of Elation is that all of the Lightning Lord's attacks are considered follow up attacks. Also worth noting is that the damage Lightning Lord deals scales off of Jing Yuan's ATK. When Lightning Lord attacks, he will slam his weapon into the enemies, selecting one enemy randomly with each hit to take full damage, and enemies adjacent to the selected enemy will take 25% of the damage dealt to the selected enemy. Best of all, Lightning Lord can land critical hits, sharing Jing Yuan's Crit Rate and Crit DMG, and even benefits from increases to stats like Bronya's ultimate because of it! Since follow up attacks are Jing Yuan's main source of damage in and out of the simulated universe, Jing Yuan's build doesn't need to change much, if at all, from a typical build. In case you need that information anyway, I will of course go over it now.
Light Cone
Naturally, Jing Yuan's best light cone option is Before Dawn, the cone that released on the light cone banner alongside his banner. It increases many of his stats allowing for higher damage from himself and Lightning God, and the real kicker, a whopping 48% increase to his follow up damage at base superimposition after he uses his skill or ultimate. If you're like me, though, and you were unlucky enough to lose the 75% chance of getting this cone, don't worry. Jing Yuan has plenty of good options for light cones.
My personal recommendation for the next best is The Birth of the Self, which increases Jing Yuan's follow up damage by 24% at base superimposition, up to 48% if the enemy is below 50% health. This light cone is incredible for buffing Lightning God's damage, however it leaves Jing Yuan's personal damage lacking slightly (which isn't really a problem). This being a 4 star light cone also means that it's much easier to superimpose, which could raise the follow up damage to a 48% buff, or a whopping 96% buff at less than 50% health, if you manage to get it fully superimposed.
After these options, your choices fall off slightly in terms of pure follow up damage buffs, but that doesn't mean your Jing Yuan will be a slouch in damage. Today is Another Peaceful Day, for example, keeps up just as well with The Birth of the Self, increasing Jing Yuan's damage by .20% for each point of max energy he has, therefore increasing all of his damage, including Lightning Lord's, by 26% to match his total of 130 energy.
If you lost the 75% chance on the light cone banner to Night on the Milky Way like I did, or got it by other means, that also does well to keep up - though it's far more situational, increasing Jing Yuan's ATK by 9% for each enemy on the field, and then increasing his overall damage by 30% for one turn if an enemy is inflicted with weakness break.
Lastly, The Seriousness of Breakfast is not bad at all if you can't get any others. You can obtain this one easily from the shop in the forgotten hall. It increases Jing Yuan's, and therefore Lightning Lord's, damage by 12% at base superimposition, as well as boosting Jing Yuan's ATK by 4% for each enemy defeated, up to 3 stacks for a maximum of 12%
Traces
Jing Yuan's trace priority is as you might expect. You'll want to prioritize maxing his Talent, to buff the Lightning Lord's follow up damage as much as possible. After this, you can prioritize either his ultimate or skill, or both at the same time, as they're of similar importance. You can basically leave his basic attack trace untouched, however, since the only situation you should ever be using it is if you don't have skill points, or if you happen to get an extra turn on him and you've already stacked Lightning Lord to 10. You should also get Battalia Crush, Savant Providence, and War Marshal as soon as they become available, and get any crit, atk, or other forms of damage boost buffs you are able to afford.
Relics
Without a doubt, the Band of Sizzling Thunder 4 piece set is Jing Yuan's best relic option. It increases his Lightning DMG, which he and Lightning Lord deal with every attack, by 10%, and grants him a 20% ATK buff for 1 turn every time he uses his skill (which is often!). As for his Ornaments, theInert Salsotto two piece set is the only relic set that buffs follow-up damage, for a convenient 15% if you manage to get your Crit Rate to 50% or above. Luckily, this set gets you started with an 8% boost to Crit Rate, but it should be a priority to get your crit rate above 50% with the actual stats and substats to maximize your damage. You can opt to use Celestial Differentiator or Space Sealing Station instead if you want, but generally speaking, Inert Salsotto is your best bet for this build.
For your main stats, your head and hand pieces will be automatically set to HP and ATK, so focus only on substats for them. Your body piece should be Crit DMG or Crit Rate, depending on which you need more of. Keep in mind that you should get your crit rate to above 50% for your Inert Salsotto to reach its maximum potential, but you should try to get there using substats if possible, so that you can have a crit damage body piece to maximize your damage. Your feet piece should be SPD to ensure that Jing Yuan can use his skill ideally twice before Lightning Lord attacks, to maximize stacks. ATK% also works for this slot if you can't get SPD, or want to build differently. Your sphere will work best as Lightning DMG Bonus, but again, you can opt for ATK% if you're getting unlucky. Lastly, your link rope should be ATK%.
For substats, once again, prioritize getting your crit rate above 50% as well as you can. Once you get there, crit DMG is most important after that. Aside from those, prioritize relics that can give you ATK% and SPD.
Closing
Jing Yuan will no doubt be your strongest fighter for this strategy if you have him. His damage output is already much higher than most characters, so being buffed by Elation blessings is sure to boast huge damage numbers if you're able to add him in.
Himeko, the Fire Erudition

Overview
Himeko is another fantastic addition to a follow up team, one that I personally haven't been blessed with yet! Her kit works well to deal damage outside of follow up attacks. Her skill and ultimate do great damage to groups of enemies, dealing increased damage to enemies she (or others) inflict with burn, meaning she works great as a substitute to Jing Yuan as main dps if needed, but just as she could stand in for him, she can also work alongside him to deal out-of-turn follow up damage using her Talent: Victory Rush.
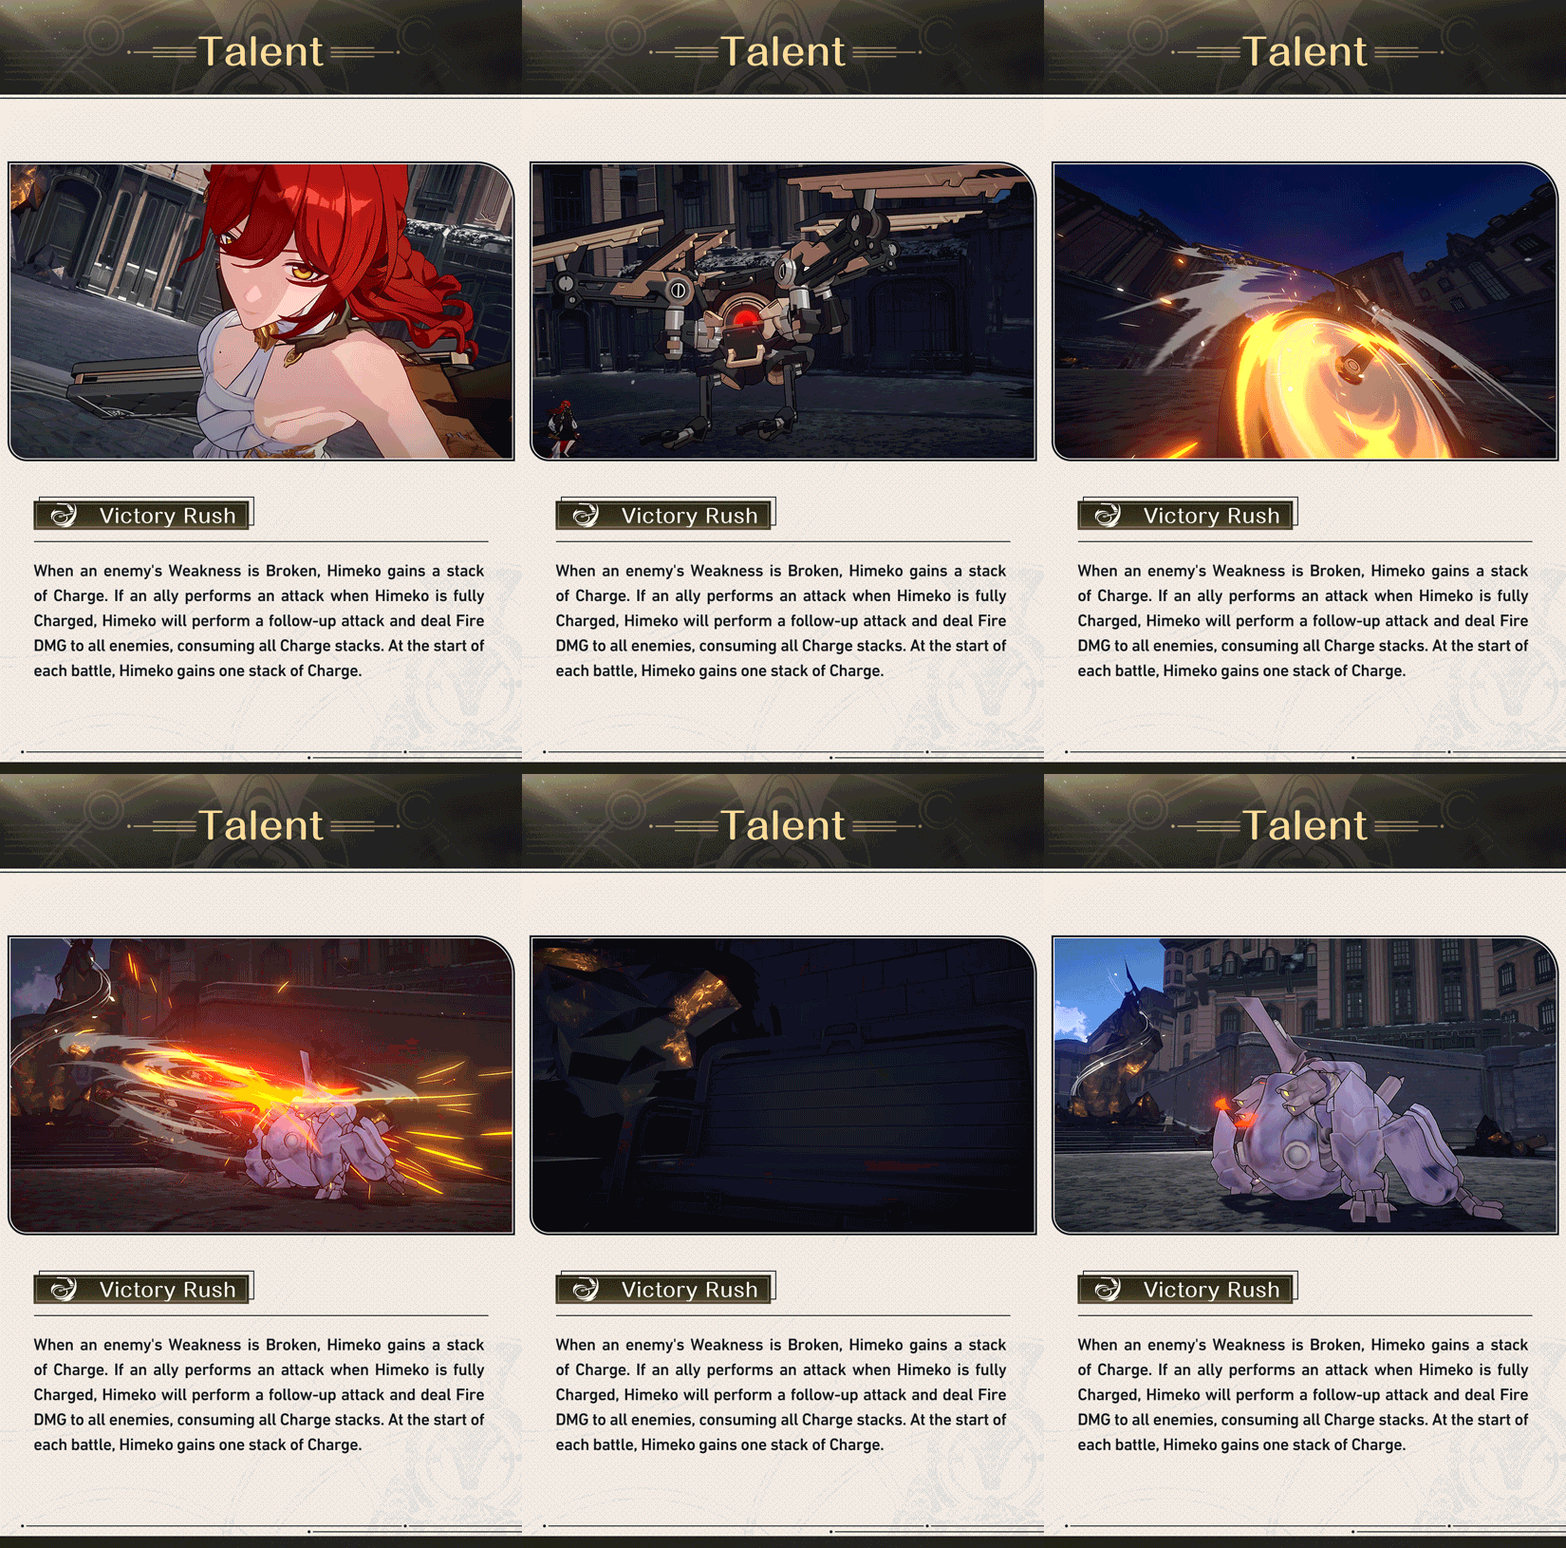
gif from https://www.hoyolab.com/article/17612572
Himeko launches a follow-up attack when she reaches 3 stacks of Victory Rush, dealing Fire DMG scaling to her ATK. Stacks are gained when enemies are inflicted with Weakness Break. Our primary focus with this build will be strengthening this aspect of her kit to the best of our ability to increase her synergy with The Elation blessings. This is what I meant earlier with some builds being "gimmicky". This won't be a guide to a main dps Himeko build, though some of my recommendations will be similar to a build for that. With that grain of salt taken and all this in mind, let's talk about her build.
Light Cone
Because they are both Erudition, my recommendations for this Himeko build are almost identical to my recommendations for Jing Yuan. Her best light cone is easily Before Dawn, for its 48% boost to follow-up damage as well as its benefits to skill and ultimate damage, increasing each by 18%, on top of increasing Himeko's crit rate by 36%. However, you most likely don't have this weapon, and if you do, you almost certainly don't have a spare since you likely got Jing Yuan along with it. Nevertheless, it's worth mentioning.
The next best, once again, would be The Birth of the Self in my opinion, for it's large boost to follow-up damage. A 28% boost with an extra 28% for 48% total is hard to pass up in a build like this. Not to mention that with superimposition, the follow-up attack buff can get as large as 96% if it's fully superimposed and your opponent is below 50% hp.
In contrast to Jing Yuan, Night on the Milky Way actually works fantastically for Himeko, as I'm sure you could expect, since it is her signature light cone. It boasts an ATK increase of 9% per enemy on the field at, up to 5 enemies, for a maximum of a 45% ATK boost. On top of this, whenever weakness break is inflicted on an enemy, Himeko's damage will increase by 30% for one turn. This is fantastic for follow-up attacks, since Himeko only launches follow-ups after reaching three stacks, which are gained by inflicting weakness break. That means that with this cone, Himeko's follow-up damage will always be increased by 30%. This is very arguably better than The Birth of the Self, so if you have to choose between the two, take into consideration if Himeko will be your main dps or not. If she is, I would take Night on the Milky Way over The Birth of the Self, as it allows for more flexibility in Himeko's actions, whereas if she is a sub-dps on your team, The Birth of the Self grants more damage to your follow-ups, which is the goal in this build.
Today is Another Peaceful Day is great on Himeko for it's damage boost that scales to the wielder's max energy, however since Himeko's max energy sits at 120, and Today is Another Peaceful Day boosts damage by .20% per point of energy, totaling to a 24% damage boost at all times, it's good but not ideal, since you can get The Seriousness of Breakfast much easier from the shop in the forgotten hall, which could allow you to easily superimpose it fully. Fully superimposed, The Seriousness of Breakfast boasts the same 24% damage boost as Today is Another Peaceful Day, but also grants an 8% ATK boost for each enemy defeated, up to a 24% ATK boost at the 3 stack maximum.
Traces
For this build in particular, your trace priority will be slightly different than typical Himeko builds. Follow-up damage is our goal above all else, so you'll want to ascend her Talent first to maximize follow-ups. Afterwards, her Ultimate boasts your highest damage outside of follow-ups, so you should prioritize that next. Next, her Skill also deals high damage, so it's also worth leveling. Her basic attack can be left alone, since it's only ever used to regain skill points. Benchmark and Starfire are great traces to get for this build, and Magma is also fantastic, though it doesn't apply to follow-ups (as far as I'm aware!) ATK% and Fire DMG Boost traces should also be highly prioritized since they will each greatly increase Himeko's damage with all of her kit!
Relics
Himeko's relic sets leave some room for improvising. Firesmith of Lava-Forging has a very useful 10% boost to Fire DMG with it's 2 set piece bonus, however its 4 piece bonus is very situational for what we need. You can opt to use its 4 piece bonus to increase Himeko's skill damage by 12%, and after using her ultimate, her Fire DMG will increase by 12% as well. But this only counts for her next attack, so ideally your ultimate would inflict the last weakness break needed to trigger her talent, since you want the damage boost for her follow up for this build, not her skill. But rather than rely on that situation, I suggest using 2 Piece Firesmith of Lava-Forging along with the 2 piece bonus of Musketeer of Wild Wheat for a 10% ATK increase, or the 2 piece Thief of Shooting Meteor for a 16% Break Effect boost, to assist Himeko in inflicting Weakness Break. I would favor the former, since Himeko's teammates will ideally be doing the weakness breaking for her. As for your ornament set, you should absolutely opt for the Inert Salsotto set, to increase Crit Rate by 8%, and boost ultimate and follow-up damage by 15% once your crit rate reaches 50% or higher. You will need to make crit rate a large priority in your substats with this set to maximize damage, however. You can additionally opt towards Space Sealing Station instead, however you will need SPD on your feet piece or in your substats to maximize this, too.
For your main stats, of course your head and hand pieces are set to HP and ATK by default and can't be changed. Your body piece should be Crit Rate or Crit DMG depending on what you need more. Since we're focusing on follow up attacks, I would opt for your feet piece to be ATK% to boost its damage, since we don't need to increase Himeko's speed to use her more often if her skill can be triggered off-turn. Your sphere should absolutely be Fire DMG Boost to increase the damage of every part of Himeko's kit. Lastly, your link rope should also be ATK% to further increase your follow-up damage along with Himeko's other abilities.
Onto substats, you should naturally prioritize Crit Rate to get past 50% if you chose Inert Salsotto, then Crit DMG above all else. Lastly, your remaining stats should ideally be ATK%, SPD, or Break Effect.
Closing
Himeko is a very reliable damage dealer with all of her abilities, but using her with The Elation will give her talent a little extra punch to her follow-ups, creating one of the most reliable sub-dps units you can ask for. And she looks awesome doing it.
Bronya, the Wind Harmony

Overview
Bronya is an essential piece to many team comps in Honkai: Star Rail, so naturally regardless of her ability to perform follow-ups, it's likely you'd stick her in your team somewhere if you've got her. As I mentioned before, there are some characters on this list that you may not even know can follow-up; I'm sure Bronya is one of those for many people. But yes, Bronya can initiate a follow-up attack, in the form of Take by Surprise, her fourth Eidolon.
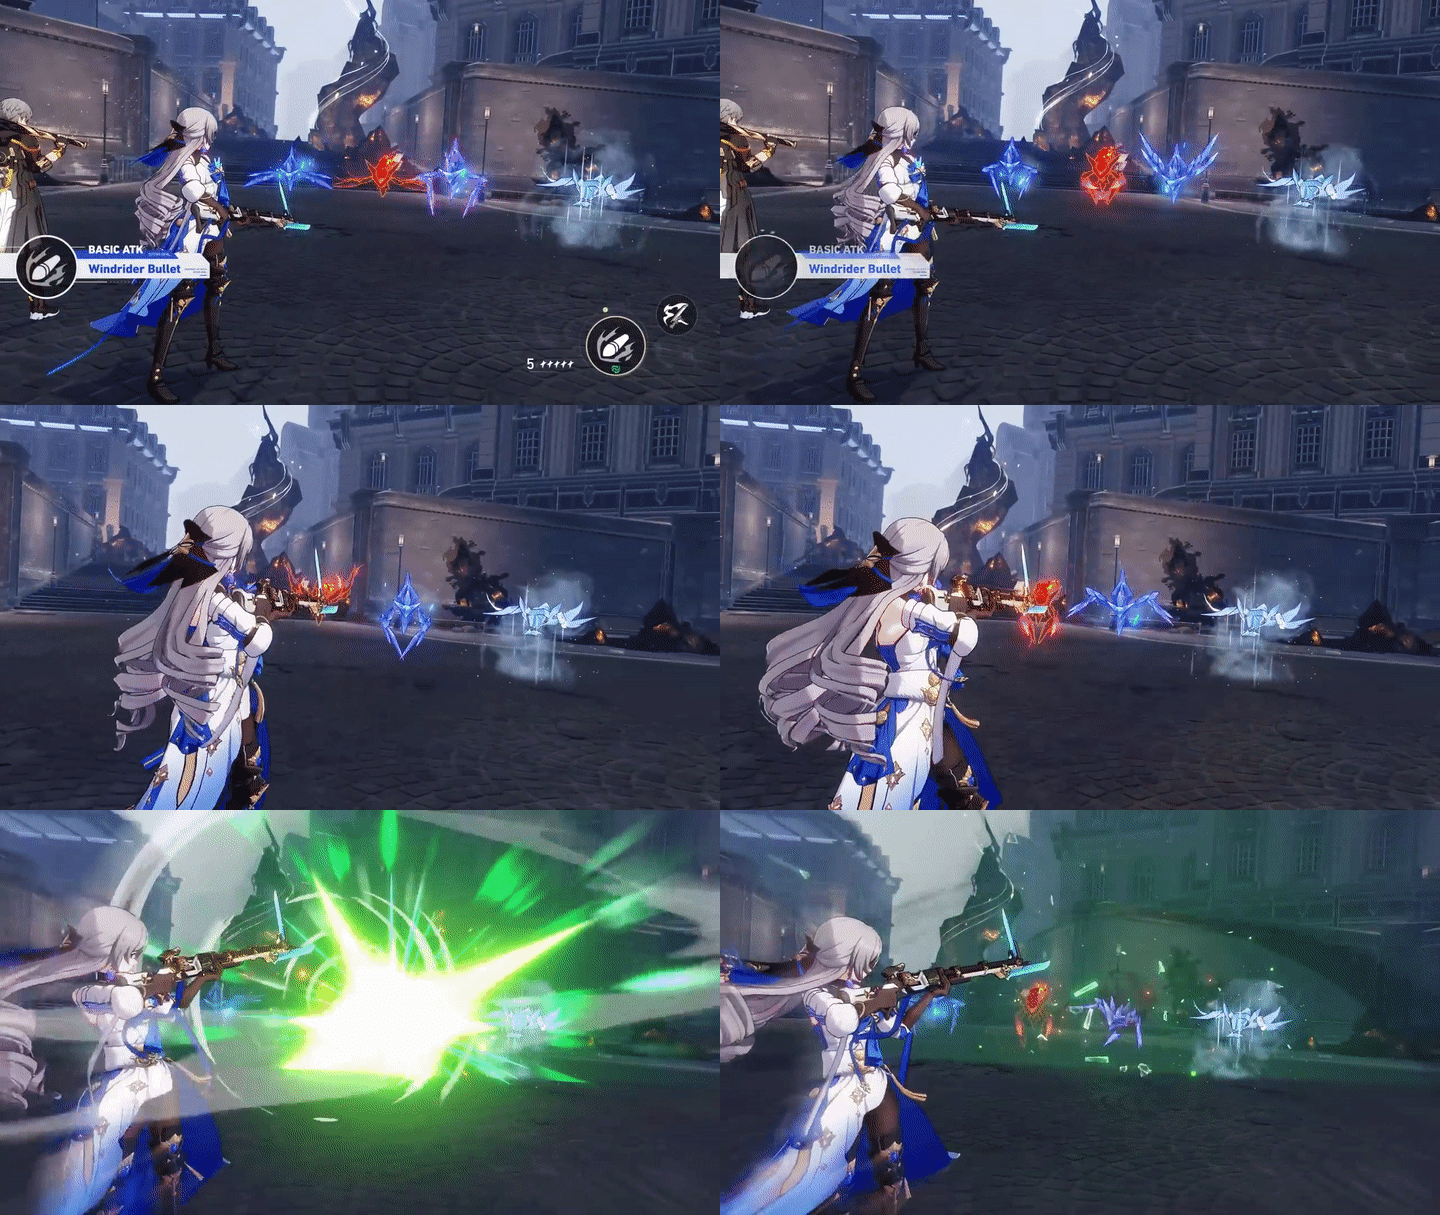
gif clipped from https://www.youtube.com/watch?v=i4MDFMiCYM8 (cant find a vid of her e4!)
Take by Surprise allows Bronya to immediately follow-up attack once per rotation. While out of Bronya's turn, if an ally basic attacks an enemy with a wind weakness, Bronya will follow up with her own basic attack, dealing Wind damage equal to 80% of her normal basic attack damage. Obviously, the massive downside here is that it's tied to her Eidolons, at her fourth no less, so it's extremely unlikely that many people will be able to use her as a follow-up attacker. Even me, who has failed the banner 50/50 every time so far to Bronya, only have her to Eidolon 2. On top of that, it isn't really worth changing her build purely for follow-up attacks, since her usage as a support is much more valuable than the damage you would get. But despite that, her follow-up attack is directly related to her basic attack, meaning if you have the Command trace, your follow-up will always crit, so you only need to build Crit DMG (and maybe some ATK, if you really want to) which luckily means this build wouldn't differ from a normal Bronya build regardless! With all this in mind, this build will be briefer than others since there's nothing special to say for a build here. If you have E4 Bronya, fantastic, if not, doesn't really matter, it doesn't add a whole lot. Anyway, let's get into it.
Light Cone
Like I said - we'll try to keep this brief, since if you have a Bronya, you've probably built this all already. Since there's no Harmony light cone with a buff to follow-ups, Bronya's best Light cone, as you might expect, is her signature light cone But the Battle Isn't Over. This cone increases Bronya's damage buff to an ally from her skill by an extra 30%, increases her energy recharge by 10%, and generates a skill point when she uses her ultimate up to 2 times per battle. Obviously, fantastic in every way for Bronya if you have it.
Next best in my opinion, and my personal choice of light cone since I don't have her signature cone, is Past and Future. An increase to the buff she places on her teammate is more than welcome, and a 16% increase is nothing to scoff at. It's easily obtainable since you can purchase it from the forgotten hall light cone shop, and that means you can superimpose it easily for a maximum 32% increase to this buff. It's only a slight step down from her signature cone, just missing out on the extra bonuses on top of the damage buff.
As a last honorable mention, Carve the Moon, Weave the Clouds is a potential choice, though in my opinion inferior to Past and Future for its slight inconsistency. It grants one effect at random at the start of combat and every time Bronya would take her turn, each time randomly selecting a new effect and replacing the old one. It can increase all allies ATK by 10%, increase all allies Crit DMG by 12%, or increase all allies Energy Recharge by 6%. Very nice effects, but probably more worth it to opt for consistency.
Traces
So, there's a bit of a disclaimer with these traces. Like I said, it's unlikely that you have access to Bronya's follow-ups, and even if you do, it's probably not worth prioritizing the damage of it over the support aspects of her kit. But with that said, if you DO have her fourth eidolon, and you DO want to be a little suboptimal for the sake of fun, increasing her Basic Attack trace is the best method to increase your follow-up damage, since her follow-up damage is based on her basic attack damage. If you don't have eidolon 4 though, you might be better off leaving basic attacks alone almost entirely. In which case, stack into her Skill with your highest priority, and her Ultimate with pretty much equal priority. If you can only afford to level one up past the other, you should make it your skill, otherwise prioritize them equally. Regardless of if you have E4 or not, Command is incredible for Bronya's kit - having E4 with this trace will drastically increase its damage, though. Military Might is fantastic, as you might expect, but Battlefield in my opinion isn't an immediate priority. Get it if you've got the materials, nevertheless. Other than that, get all the Crit DMG and Wind Damage Boost traces you can afford.
Relics
Eagle of Twilight Line is your only practical choice for Bronya's 4 piece set, to increase your wind damage by 10%, granting you much more damage with your basic attacks (and therefore your follow-ups), and to move Bronya up in the turn order after her ultimate, to help you adjust the turn order to your liking. You could opt for Musketeer of Wild Wheat, but simply put, I don't think it's as good. I would recommend your two piece ornament set to be Fleet of the Ageless and prioritize raising your speed past 120 to buff your whole team's ATK by 8%. You can also choose Celestial Differentiator to further increase your Crit DMG by an extra 16%, but given that the second bonus to this set is completely useless on Bronya, I would recommend the former much more.
For your main stats, as always, head and hand pieces are pre-set. Your body piece should be Crit DMG to increase her ultimate's buff to allies and to increase her basic attack/follow-up damage. Her feet piece should be SPD to allow her to benefit from the buff from Eagle of Twilight Line's 4 piece set, and to keep up in the turn order just behind her main DPS to grant them extra turns. Your sphere is a bit flexible, you can choose to go for Wind Damage Boost for more damage to her basic attacks/follow-ups, you could choose ATK% for the same purpose, or you could choose HP or DEF to make her less flimsy. I recommend Wind Damage Boost, personally. Lastly, your link rope should be energy regen, to allow her to use her ultimate more often, boosting the team's (and her own) damage. You can opt for ATK% on this to assist in maximizing follow-up damage, but... I wouldn't.
For substats, get as much SPD as you need to stay just behind your main DPS, then aim for as much Crit DMG as you can get. Afterwards, ATK% will help with follow-up damage, but if you don't have that, HP% and DEF% are pretty much equally important to make sure she can survive.
Closing
For most people, Bronya won't be able to help in dishing out follow-up damage, so her synergy with The Elation is minimal - but I thought it important to mention her to anybody who might have her eidolons built up. Regardless of if she can participate in the massive damage you'll get from elation or not, she's a crucial part to many team comps, and a welcome addition to any team needing that extra damage for your main dps.
Clara, the Physical Destruction

Overview
Clara is a wonderful asset for follow-up teams. She will act as a sort of "bruiser" for your team - a character capable of taking a heavy beating, and dishing it right back out with ease. Though her damage is not as high as a fully DPS focused character like Jing Yuan, and her defensive ability not as impressive as a character like March 7th, she holds her own well as an addition to the team that serves both purposes greatly, but doesn't particularly excel in either. With the help of The Elation, we'll be able to bring Clara's damage up drastically, and make your opponents wish they never attacked her. This is thanks, of course, to her Talent and Ultimate, utilizing the help of Svarog.
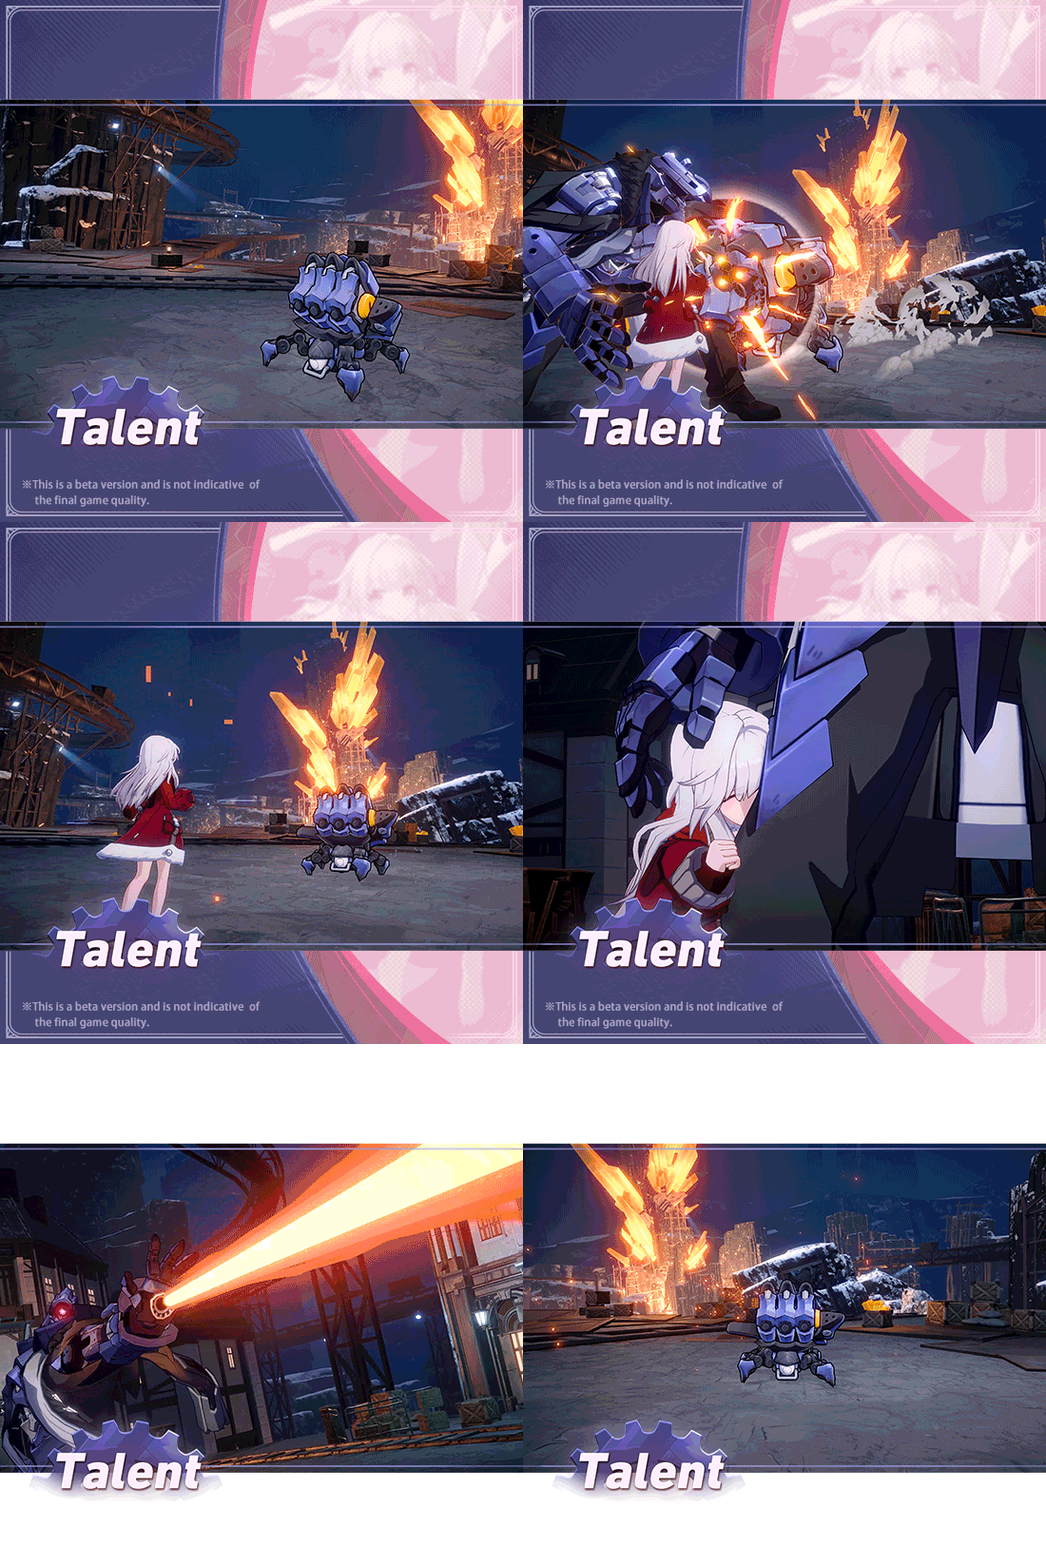
gif from https://www.hoyolab.com/article/17740474
Without her ultimate activated, Clara's talent, Because We're Family, reduces each instance of damage she takes by 10%, and Svarog will retaliate, counterattacking whichever enemy caused her harm, dealing damage scaling to her ATK and leaving them with Mark of Counter, a debuff that causes them to take more damage from Clara's next usage of her skill. With her ultimate, Promise, Not Command, activated, the damage reduction on her talent increases by 15% at level 1 trace, increasing up to 30% extra damage reduction. Svarog's damage multiplier on his follow-up also increases drastically, causes splash damage equal to 50% of the follow-up's damage to enemies adjacent to the one who is counterattacked, AND Svarog will initiate a counterattack when anybody is hit, not just Clara. This ultimate lasts until Svarog has counterattacked twice. Thanks to the damage reduction Svarog gives to Clara, the relic set we will choose, and her INCREDIBLE synergy with March 7th, you'll be able to build your Clara's damage primarily without her suffering defensively. Let's get into how we'll do that.
Light Cone
Something Irreplaceable is, of course, Clara's best cone. It's her signature cone, so that should come as no surprise. It increases her ATK by 24%, and restores HP equal to 8% of her ATK when she takes damage or deals it (once per turn), allowing her to drastically increase her resilience. On top of all of that, she also gets a 24% increase to her damage when the HP restore effect is triggered.
The rest of the Light Cone options are somewhat similar in strength. Since there is no light cone for Destruction that buffs follow-up damage, you're mainly going to be looking for increases to your ATK and/or your damage. The next best, in this case, is On the Fall of an Aeon, which does both. It increases your ATK by 8% every time you attack, up to 4 times for a maximum of a 32% ATK boost. At the same time, if Clara inflicts Weakness Break, her damage increases by 12% for 2 turns. This is all great, but what's even greater is that this 5 star cone is easily obtainable. You can buy it from Herta's Shop in the simulated universe menu, and you can also buy its superimposition material as well, meaning your ATK increase can be brought all the way up to 16% per stack, for a maximum of a 64% increase! The damage increase from weakness break is also raised to 24%. An incredible option all around.
If for some reason you can't get your hands onto On the Fall of an Aeon, there are some other nice options still. A Secret Vowis worth mentioning, though if you put Clara on a team with March 7th or a healer, this might make her function as a bit of a glass cannon, which we might want to avoid. It increases Clara's damage dealt by 20%, and an extra 20% if the percentage of her health is lower than the enemy's. Since we want to keep Clara alive with healing and shielding to ensure she can continue to dish out damage, we don't exactly want to risk having her HP lower than a boss's.
That lastly leads us to what I had used before obtaining On the Fall of an Aeon, which is The Moles Welcome You. It grants you a stack when you deal damage with a basic attack, skill, and ultimate, and each stack increases your ATK by 12%. The description in game on this cone is a bit misleading, for those who didn't know - you may get the impression that it increases your ATK by 12% for each stack INFINITELY, but this is not the case. You can only get one stack for each method of damaging. This means that your ATK buff will cap out at 36% at base superimposition, and with this cone, you should make it a point to basic attack, ultimate, and use your skill once each every fight if possible to max out your stacks.
Traces
For our follow-up attack centered Clara, it should come as no surprise that we want to maximize her Talent and Ultimate with our highest priority - each of these will significantly increase the damage from Svarog's counterattacks and further decrease her damage taken when attacked. Her skill is also very strong, but take into consideration the rest of your team when deciding if you should prioritize her skill or basic attack. Is your team comp very skill point hungry? Will a Himeko or Bronya be eating up your skill points a lot? If so, it may not pay off as well to prioritize your skill trace, because Clara will do plenty of damage with her counters, which can allow her to get away with basic attacking on her turns to generate those skill points for your team. Use your best judgement on this - her skill will boast much more damage if leveled than her basic attack, but if you're not going to use the skill much anyway, don't waste the material. Revenge is an EXTREMELY high priority trace, it should be obtained as soon as it's available because it increases Svarog's counterattack damage more than most light cones would. Kinship and Under Protection are very useful for keeping Clara in the fight constantly at full strength, but they're somewhat of a medium priority compared to Revenge. All of her smaller traces will all come in handy - the ones we want the most are Physical Damage Boosts and ATK% Boosts, though.
Relics
Clara's 4 piece relic set is a no brainer; Champion of Streetwise Boxing increases her physical damage by 10%, and gives her a 5% increase to her ATK each time she takes or deals damage, up to 5 times for a 25% ATK boost. Your ornaments can go one of two ways. I recommend Inert Salsotto for its 8% increase to crit rate, and more importantly, its 15% increase to both Ultimate damage and follow-up attack damage, drastically increasing Svarog's counterattack damage. The catch, though, is that you need to reach 50% crit rate, so we will prioritize that with your main stats and substats.Space Sealing Station is your other option, granting a 12% ATK boost, or a 24% ATK boost if your speed is higher than 120. Like with Inert Salsotto, you'll want to prioritize this requirement in your main stats and substats to maximize your damage. I strongly recommend Inert Salsotto over Space Sealing Station, since you would have to build SPD boots to get the 12% attack boost from SSS's second buff, when you could just build ATK% boots instead which VASTLY surpasses the buff from SSS. Clara won't be needing SPD much anyway in a lot of comps, since she deals her damage more passively, there's not any desperate need for her to attack faster than her other allies.
Now for your main stats. As always, head and hand pieces are pre determined and unchangeable. Your body piece should be either crit rate or crit damage - ideally you should choose crit damage and raise your crit rate up to 50% through substats, but if you're having bad luck with relics, you can just use a crit rate body piece to push yourself over the 50% mark. Your feet piece should be either ATK% or SPD, depending on if you chose Inert Salsotto or Space Sealing Station. If you chose SSS, pick SPD. If not, I recommend ATK% instead for maximum follow-up damage. Your sphere is an easy choice with Physical Damage Boost, and your link rope is another easy one with ATK%.
For substats, push yourself over that 50% Crit Rate barrier with your highest priority, then find yourself relics that upgrade Crit DMG a lot. From there, ATK% is the next most important, and lastly SPD is important still if you chose Space Sealing Station, or Break Effect is also important if you have On the Fall of an Aeon as your light cone.
Closing
Clara is one of the most convenient additions to your follow-up team you can have, being only one of two options that are capable of taking much damage. With her and March 7th combined, enemies won't be able to break through her defenses before they'll be stomped out by counterattacks. She will be a key player, having plenty of opportunities to restore skill points for your supports and main dps, drawing the attention off of your vulnerable teammates, and being able to attack with AOE if needed.
Yanqing, the Ice Hunt

Overview
Of course Yanqing would be able to deal some follow-up damage of his own, given that he's Jing Yuan's retainer! Though not as consistent as other follow-ups, Yanqing does benefit nicely from The Elation thanks to his Talent, One With the Sword.
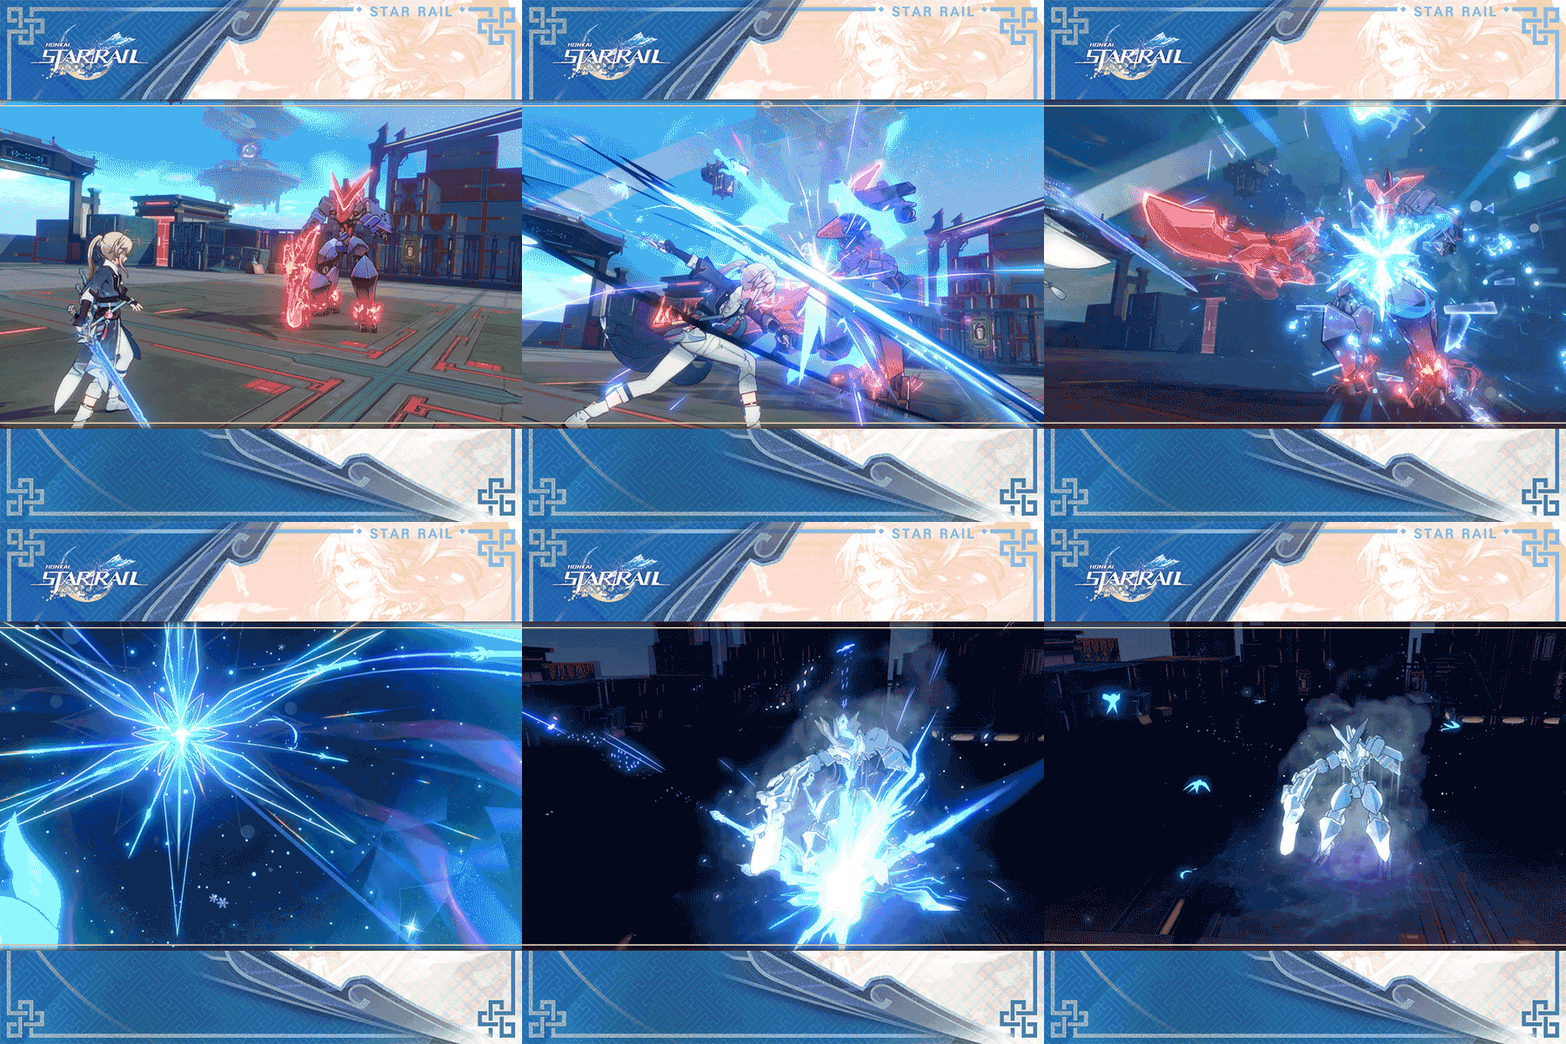
gif from https://www.hoyolab.com/article/16425754
One With the Sword grants Yanqing Soulsteel Sync, which among other things, gives him a 50% fixed chance (at level 1 trace) to immediately follow up after an attack with a barrage of swords, dealing ice damage scaling to Yanqing's ATK, with a 65% base chance to freeze the enemy. The catch is that Yanqing needs to use his skill to enter Soulsteel Sync, and he will lose it if he is dealt damage. Conveniently, this pairs nicely with March 7th, or any shielder, as it doesn't matter if his shield takes damage - it only matters if his health goes down from it. Like I said, this method of follow-up attacking is less consistent than other character's, but it certainly isn't the worst, and we'll do our best using this strategy to maximize the damage it will deal when it does work, starting with the build.
Light Cone
Like most characters on this list, Yanqing's damage group currently doesn't feature any light cones that grant a buff to follow-up damage. Because of this, In the Night is one of his strongest choices, increasing the damage of your basic attack and skill, and the crit damage of your ultimate, based on every 10 SPD your Yanqing has past 100. We're going to assume you either don't have this light cone, or are using it for the Seele you probably got it along with.
Yanqing's signature light cone, Sleep Like the Dead, is his next best option. It increases his Crit DMG by 30%, and increases his crit rate by 36% for one turn if his basic attack or skill don't trigger a critical hit, which can be triggered once per 3 turns. It's a great option, since it helps you secure a crit on your follow-up attacks more often.
The last 5 star cone to mention is Cruising in the Stellar Sea. It's easily obtainable from Herta's shop in the simulated universe menu, and so is it's superimposition material. At base superimposition, it boosts the wearer's crit rate by 8%, and an extra 8% on top of that if the enemy is below 50% hp. Also, when the wearer defeats an enemy, their ATK is increased by 20% for 2 turns, helping increase your damage on your next target even further.
Onto 4 star cones, River Flows in Spring would be my personal first choice of 4 star cone. Its buffs tie in to the exact same requirements needed to perform follow-up attacks, so while using Yanqing for The Elation, these requirements will already be on your mind. The wearer's SPD is increased by 8%, and their damage dealt is increased by 12%. This is lost when the wearer takes damage, and is regained after their NEXT turn ends. It's also purchasable from the forgotten hall light cone shop, so it's incredibly easy to superimpose to the maximum, or to obtain in the first place.
The last cone I will mention, to not drag on for too long in this section, is Swordplay. It's great for any user of The Hunt; It increases the wearer's damage dealt by 8% each time they strike the same target, up to 5 times for a maximum of 40% extra damage at base superimposition. This buff will be lost when the wearer switches their target, however, so keep this in mind!
Traces
Yanqing's traces will be built pretty much the same as a typical build for him. Your talent will be your foremost priority, to buff your crit rate, crit damage, and most of all, the odds that your follow-up attack will trigger, and how much damage it will deal. Afterwards, your ultimate is your main source of damage outside of your follow-up, so you should spend some material into that. Your skill should come after, and from there, your basic attack can be built a little if needed, but you probably aren't gonna be using it too much. Icing on the Kick helps passively deal extra damage while you attack enemies with an ice weakness. Gentle Blade is certainly very nice to have as well, so you should get that when you can! Unless I'm misunderstanding something, Frost Favors the Brave is fine, but not exactly extremely important. Get it if you've got the material. Otherwise, get every Ice Damage Boost and ATK% boost you can afford.
Relics
For your main set, you have a choice to make that's based on what works better, in terms of your relic's substats and main stats. You can choose to wear the 4 piece set of Hunter of Glacial Forest, and that would be my personal recommendation - but if you don't have the crit rate to back up the bonus crit dmg the 4 piece gives you, you may opt to do a 2 piece Hunter of Glacial Forest with a 2 piece Musketeer of Wild Wheat for a 12% ATK increase. For the sake of maximizing follow-up damage, though, I would select Hunter of Glacial Forest's 4 piece set paired with Inert Salsotto for an 8% increase to your crit rate, plus 15% bonus damage to your ultimate and follow-ups if your crit rate reaches 50% or higher. If you want to opt for the 2 piece Hunter and 2 piece Musketeer, you can also choose Space Sealing Station for a further boost to your ATK, but you'll have to build some SPD to maximize it.
Now for main stats! Head and hand pieces are pre set, no changing those. Your body piece should be crit rate or crit damage. Yanqing is a special case for this, though, since Soulless Sync increases Yanqing's crit rate while active, and you can only follow-up while soulless sync is active, you should factor in that crit rate given by your talent (minimum of 15%) when trying to reach that 50% mark for Inert Salsotto. Typically, crit damage will be the better choice for the body. Your feet piece should be ATK% or SPD, I would lean towards ATK% unless you chose Space Sealing Station as your 2 piece ornament. Your sphere should be Ice Damage Boost, as I'm sure you could guess. Lastly, your link rope is an easy choice for ATK%.
Now substats! They're fairly straightforward. Crit rate until you reach 50% for Inert Salsotto (keeping in mind the crit rate from Soulless Sync) then go all in trying for crit damage and ATK%!
Closing
Using Yanqing in The Elation doesn't require much, if anything, different from playing Yanqing normally other than the mindset for it. He does well to deal damage even outside of follow-ups, but utilizing The Elation, those moments where he triggers a follow-up will be all the more devastating for your opponents.
March 7th, the Ice Preservation

Overview
March 7th may be the most fundamental character to this strategy - this team comp wouldn't work well if you didn't have at least one character in there to keep everyone alive! You could theoretically fill that gap with any character you'd like.. but why not choose the shield generator that counterattacks any enemy that attacks the shields she's placed?
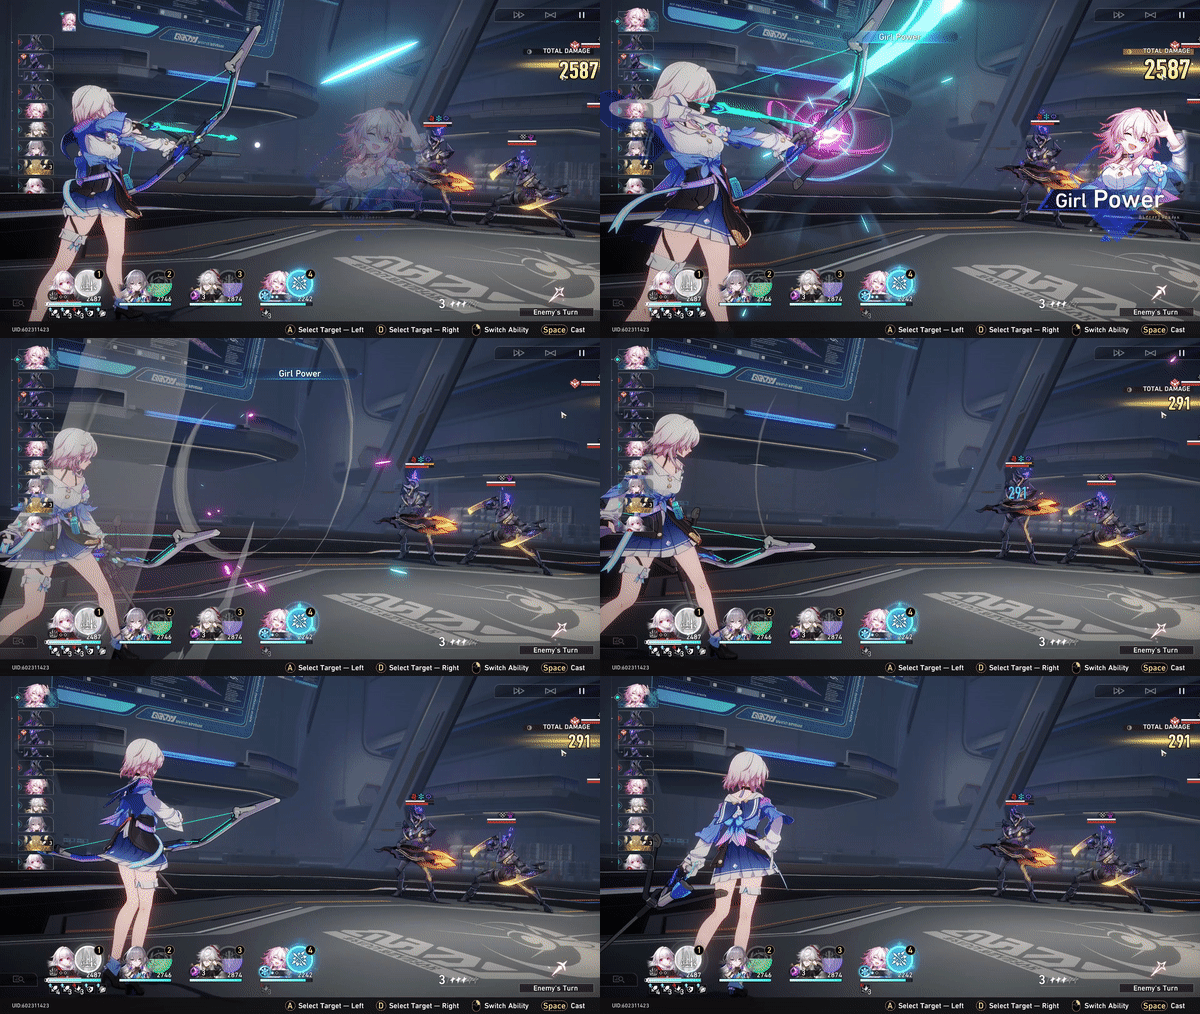
little disclaimer: this gif is not indicative of march's actual damage!
Luckily, March 7th comes free, so I know everybody reading this has her! Her Talent, Girl Power, causes her to launch a follow-up attack against any enemy that damages a shield she has given out, dealing damage scaling to her ATK up to 2 times each turn. She works fantastically with Clara, as her shield will both prevent her from taking damage, and increases the odds of the person with the shield being attacked, which is exactly what Clara wants! It also pairs well with Yanqing, to protect him from losing Soulless Sync so he can continue to launch follow-ups! March is one of the characters in this strategy that you can lean one way or another on for the build.. while you might want to fully stack into ATK all the way to increase her follow-up damage significantly, it's probably more worthwhile to build her defense to increase her shielding capability, to assist in her team's and her own survivability. I'll give some options for each way - but its my personal recommendation that you just leave it to The Elation buffs to increase her follow-up damage and just build defense instead, especially if she's your only healer/shielder. If you have her at Eidolon 4, however, DEF will increase her follow-up damage too! Anyway, with all that out of the way, let's talk about her build.
Light Cone
If you're using March 7th in a team comp with Clara, or another character that you might want to take hits for your team instead of March, I would actually recommend you stay away from Moment of Victory, despite it being a 5 star cone, and the best cone for her DEF. This is because of one of it's bonuses; it increases the wearer's chances of being targeted for attack, and if you have someone like Clara, you want them to be attacked instead, with the help of your shield! However, if you're using a team that lacks much DEF or HP, and you want to increase the odds of taking the heat off of someone like Yanqing for example, this cone will work wonders by increasing your DEF by 24%, and your Effect Hit Rate by 24% as well, raising the odds that you apply freeze to enemies, and assisting in reaching the requirement for an ornament set that we'll get into. On top of all of that, if an enemy does target you, which is likely with the increased odds, March's DEF increases by another 24% until the end of her turn.
Taking exactly what I said for Moment of Victory into account, Landau's Choice serves the exact same purpose, though again it wouldn't be my choice, since I run a team with Clara. It simply raises the wearer's odds of being attacked, and decreases the damage they take by 16%. Useful if March is going to stand in as your main defense as well as shielder.
Lastly, my actual recommendation is Day One of My New Life. It offers a simple DEF boost of 16% to March, and an 8% DMG RES buff to all your allies. It helps to build March's DEF as much as possible to strengthen her shield, but doesn't require you to make her more likely to be targeted.
Any four star or three star cones that boast a DEF buff of some capacity should work fine for the same reason as the previous cone, if you don't have any of the above options. I'm not particular about it personally, so long as it doesn't draw attention to March, and boosts her DEF a little. Amber is an excellent 3 star option because of this, for example. Grants a LOT of defense, can be superimposed easily for even more defense, but you'll start to lose out a little on the actual main stats of your cone with these lower rarity options.
Traces
For the sake of strengthening her follow-up attacks, March's Talent is a high priority to upgrade for this build. Equally, if not more important, is her Skill, increasing the amount of shield she grants her allies is crucial to her role as a shielder on this team. As far as I'm concerned, her basic attack and ultimate can practically be left alone on upgrades, unless you feel like strengthening their damage a little bit. Purify is one of the most important traces out of everyone's on this list. The ability to remove a debuff from an ally is extremely crucial to a more flimsy team structure like this, especially in a situation like World 5's boss, where your allies might turn against you if you don't dispel the debuff quickly. Reinforce is also incredibly useful to increasing the survivability of whoever is shielded by March. Ice spell is nice, but not an immediately important trace. Get it when it's convenient. Get all the DEF boosts and Ice Damage Boosts you can afford, though.
Relics
For March in particular, I'm going to separate her relics into two entirely different choices, based on whether you'd like to completely build into her follow-up damage, or if you'd rather use her as your team's defensive protector. Select whichever sounds more fun to you, or try out both and pick whatever works best. You could even try for some kind of combination.
Full Follow-Up Damage
March's follow-ups scale to her ATK, and they can crit, so our focus with this build is to spec as hard as possible into her damage. We'll do this by using the 2 piece Hunter of Glacial Forest with the 2 piece Musketeer of Wild Wheat to increase her ice damage by 10% and her ATK by 12%. We'll combine these with the 2 piece Inert Salsotto to maximize her follow-up damage while gaining some crit rate. We choose this over Space Sealing Station because we have little interest in building March's SPD just for a little ATK boost.
For your main stats, head and hand pieces are always HP and ATK and can't be changed. Her body piece should be crit rate to raise her past 50% for the buff from Inert Salsotto, but if you can manage to get there with substats alone, choose crit damage instead. For her feet piece, ATK% is an easy choice, to increase the damage of her follow-ups. Your sphere should be Ice Damage Boost, and your link rope should be ATK% as well!
For substats, again, crit rate is top priority until you reach 50%, then you should look for relics that have crit dmg and ATK%. Apart from those, DEF% and Effect Hit Rate are still really nice to have to give a little bit of a buff to your shields, and to freeze the enemy with your follow-ups and ultimate a little more often. DEF% in particular is especially handy in this build if you have March's 4th eidolon, since it increases the damage dealt by her follow-ups by 30% of her DEF.
Full Shielder/Defender
The safe option, leaving the buffing of your follow-ups to The Elation leaves much more room for March to protect her team more effectively. We'll do this by using the 4 piece Knight of Purity Palace, to increase her DEF by 12%, and the maximum damage her shields can take by 20%. Along with this, we'll use the 2 piece Belobog of the Architects to increase her DEF by 15%, and we'll prioritize Effect Hit Rate to reach the 50% requirement for the bonus 15% DEF on this set, too.
So, for main stats, once again, head and hand pieces are unchangeable. Your body piece should probably be Effect Hit Rate to be safe and reach that requirement on the Belobog set, plus it's nice to have those increased odds of freezing and enemy. If you can manage to reach 50% effect hit rate without the body piece somehow, this can be DEF% instead. I would argue that everything else from here - your feet piece, sphere, and link rope - should probably just be DEF% for the best shielding possible. However, for your link rope, you might choose to go into energy regen, to be able to throw out AOE freezes consistently.
Finally, for substats, get to 50% effect hit rate to maximize your ornaments, then go for DEF% primarily. It wouldn't hurt to get some HP% to increase your March's resilience in that department, either. Lastly, ATK% still wouldn't hurt in this build as a little added bonus in your substats for some extra damage to your follow-ups.
Closing
March 7th is undeniably a key asset to follow-up teams, arguably the most important out of all. Her position as the only healer/shielder that can follow-up guarantees her a slot on your team if you're building for pure follow-ups, and her ability to protect your team is so impressive you might even forget she was a free character, and a 4 star.
Herta, the Ice Erudition

Overview
Herta isn't the strongest character in Honkai: Star Rail, and certainly isn't the strongest follow-up attacker, but her central focus for damage as an Erudition character, and therefore an AOE attacker, comes from her ability to attack out of turn with follow-up attacks using her talent: Fine, I'll Do It Myself.
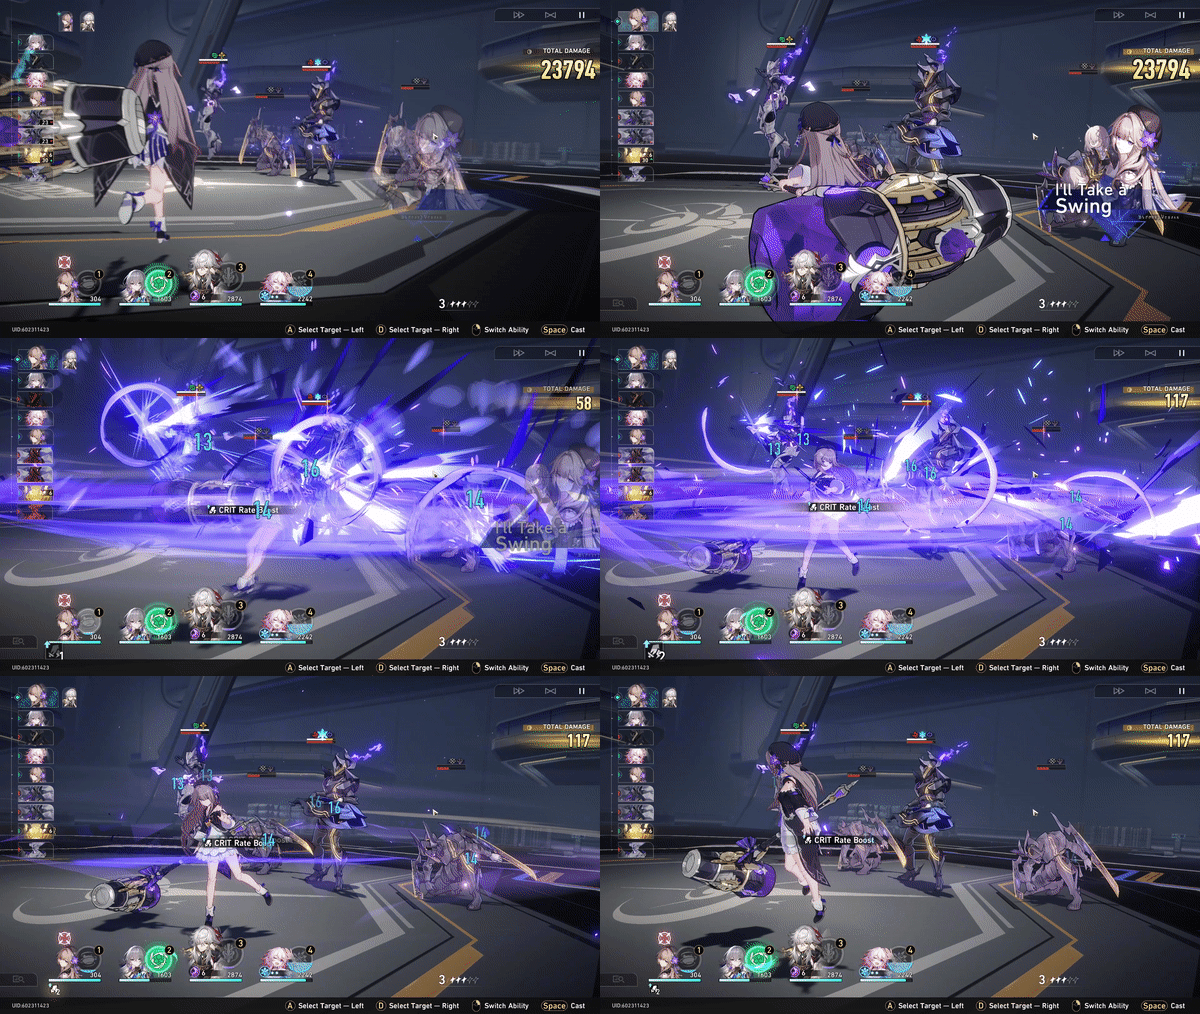
little disclaimer, my herta is not built at all, this is not indicative of her damage!
Thanks to this follow-up attack, Herta has a lot of potential as a sub-dps, especially in the simulated universe utilizing the path of The Elation! Once per enemy, Herta will initiate a follow-up attack when an enemy's HP is lowered to 50% or below, regardless of who on your team deals the damage. This follow-up attack deals ice damage scaling to Herta's ATK. Because her main utility comes from her follow-ups, and all of her abilities scale to the same stats, I feel confident recommending you build Herta to maximize her ATK and ice damage to strengthen her follow-ups as much as we can! Below, I'll discuss how we will do that.
Light Cone
Obviously, as is true with every follow-up attacking erudition character, Before Dawn is pretty objectively the best choice. But like with every other erudition, I'm doubtful you have this light cone and don't have a Jing Yuan to put it on. However, if you do, and you feel like putting it on your Herta, its 36% increase to your crit damage, 18% increase to your skill and ultimate damage, AND 48% increase to follow-up damage obviously puts this ahead of all other cone options.
Night on the Milky Way is another 5 star cone you might have gotten lucky (or unlucky) and gotten your hands on. It works decently for Herta, increasing her ATK by 9% for every enemy on the field. When the enemy is dealt Weakness break, the wearer's damage increases by 30% for 1 turn. This works decently well for Herta - typically if you get an enemy within 50% HP for her to follow-up, it's often they've had their weakness broken in the process. I would lean more towards an option favoring follow-up damage rather than this cone, however.
Onto the more realistic options, most 4 star cones will work just fine. The Birth of the Self is perfect for Herta, which is probably a given since her picture is on the cone. It offers a 24% increase to your follow-up damage, with an extra 24% if the enemy is below 50% HP - which it just so happens, is the exact requirement needed for Herta to launch a follow-up attack anyway. You can basically just consider this a 48% increase to her follow-ups because of that. If you have spares of this cone, you can superimpose it for a MASSIVE buff of up to 96% follow-up damage bonus if you reach the maximum. Insane.
Other cones work well too, but the last one I'll mention is The Seriousness of Breakfast for how easy it is to obtain and superimpose. You can get it easily from the forgotten hall light cone shop, and it increases the wearer's damage by 12%, as well as increasing the wearer's ATK by 4% (at base superimposition) for every time an enemy is defeated, stacking three times for up to 12% extra ATK.
Traces
I'm sure you've guessed it by now, but yes, we're prioritizing Herta's Talent HARD here. It raises her follow-up damage, and in my opinion it's her best source of damage overall. Her talent is practically what defines her gameplay, even if you're not building specifically for follow-ups. Afterwards, her skill and ultimate are both pretty equally important. Personally, I wouldn't spend much into either, and I would build into her ultimate before her skill if I had to pick one, since her place on my team would be solely for her follow-ups, and building skill points for the team. But of course, if her role in your team is as a very reliable dps, you can build into her skill and ultimate with equal priority. Regardless of what you decide on, her basic attack should be pretty much left alone, or at least saved to last. None of her other talents have anything to do with her follow-ups, but Efficiency and Icing are nice if you're building her to be a reliable DPS outside of follow-ups. Puppet is nice but a bit out of place here, so it can be obtained whenever you've got the material and want to. Otherwise, get her crit rate and ice damage boost traces.
Relics
Hunter of Glacial Forest will obviously be one of our artifact sets here, but since we only need it for the 2 piece set, because we don't exactly need her crit dmg to raise after her ultimate, we'll pair it with a 2 piece Musketeer of Wild Wheat for a 12% ATK boost that will feel much more consistent and worthwhile. For the sake of strengthening her follow-up attacks for this build, I'd recommend Inert Salsotto's 2 piece over Space Sealing Station for your ornaments, since we don't have too much use for SPD on Herta, and it'd be more worthwhile to build crit rate for the follow-up boost on Inert Salsotto, than SPD for a 12% boost to ATK. Especially since we can just put on ATK% boots instead of SPD boots and get a bigger buff from that anyway.
Main stats now. As I'm sure you know, head and hand pieces main stats can't be changed. For your body piece, you can build either crit rate or crit damage. Whichever you need more of, but take into account the 50% requirement for Inert Salsotto. Choose wisely with your substats in mind. For your feet piece, we'll choose ATK% over SPD, unless you decided to go for Space Sealing Station for your ornaments. Lastly, your sphere is an easy decision of Ice Damage Boost, and your link rope is another simple choice with ATK%.
Substats! As you could probably guess, it's crit rate and crit damage all the way. Get over that 50% mark for Inert Salsotto and then try to find some relics with nice boosts to your crit dmg. ATK% is also a very welcome stat, and both SPD and Effect Hit Rate could come in somewhat useful, so don't immediately cast a relic aside if it has those.
Closing
Herta struggles against bosses since her talent only triggers once per enemy, however against a crowd, or a boss that spawns in enemies to aid it, Herta excels at dealing follow-up damage in OR out of turn and helps your team keep the pressure on, filling a slot on your team as a nice reliable sub-dps, or a convenient ally who recharges skill points for your team while you work to trigger her talent.
Qingque, the Quantum Erudition

Overview
Our last follow-up attacking candidate, Qingque is one of the most fun and unique characters in Honkai: Star Rail, but she's another that you might not know can follow-up attack! Even when she can, it's completely reliant on luck, so it's one of the most inconsistent methods on this guide. Nevertheless, Qingque can indeed initiate follow-up attacks by utilizing her fourth Eidolon, Right on the Tiles.
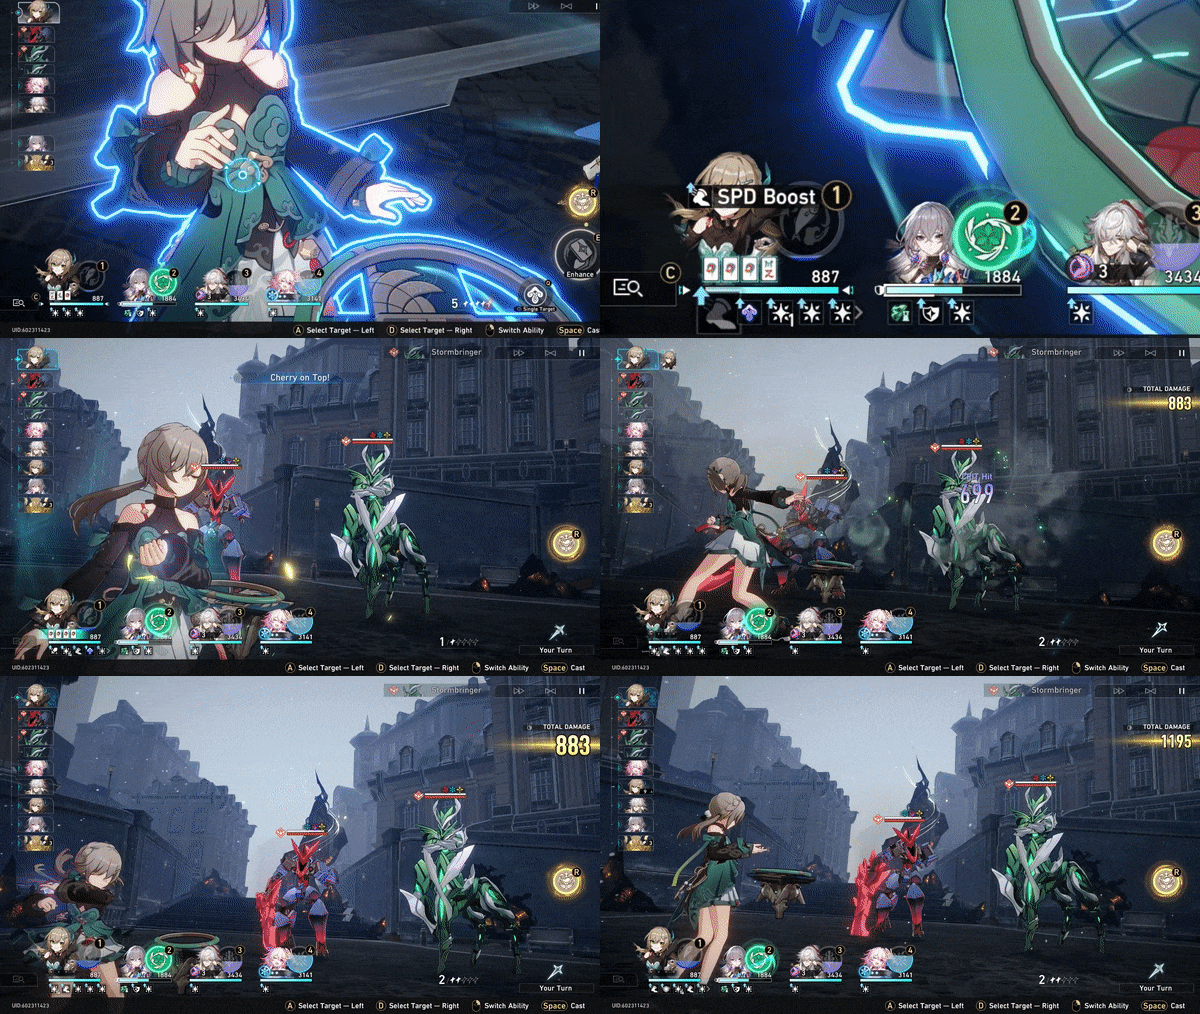
disclaimer again! my qingque is not built, this is not indicative of her damage!
When Qingque's eidolon resonance has reached level four, each usage of Qingque's skill has a 24% fixed chance to gain the buff Autarky, the purple icon underneath Qingque's portrait. Autarky remains on Qingque until the end of her turn, and will be consumed when she performs a basic attack. When she performs a basic attack with Autarky active, she will immediately follow up with a second basic attack that will count as a follow-up, dealing 100% of the damage of the last basic attack as quantum damage. This follow-up attack will also gain the benefits of the Hidden Hand state, meaning if you match 4 of a kind for Qingque and use her enhanced basic attack, your follow-up will also be enhanced. Unfortunately, there are a few problems with this. For one, you need to reach Eidolon 4 with Qingque to even unlock this ability - but since she's a 4 star character and not a 5 star, this is an easier task in contrast to needing the same requirements for Bronya, a 5 star. But still, you may not have that many eidolons yet, and it's completely based on your luck with gacha. Speaking of luck, that's the other downside to Qingque's follow-ups; she can't initiate a follow-up attack unless she hits the 1 in 4 chance on a skill usage. The odds are not HORRIBLE, but they're inconsistent. Considering the probability, you'll only get it on your fourth or fifth usage of her skill on average, which would burn a lot of skill points for the rest of your team. Though the good news is, you don't need to change your build very much, if at all, for her follow-ups to deal their maximum. It's directly linked to her basic attack, which is her main form of damage anyway. Now, let's start with the build!
Light Cone
Here's the obligatory mention of Before Dawn that I have to bring up for every erudition character, because yes, it's easily the best, even for Qingque. Crit damage increases by 36%, skill and ultimate damage increase by 18% (further increasing the damage buff your skill grants your basic attack) and increases follow-up damage by 48% after you use your skill or ultimate. You absolutely cannot go wrong with this light cone, but like I mention with everyone else, if you have this light cone, you likely have a Jing Yuan to pair with it, and it's just more worthwhile there.
Today is Another Peaceful Day is my next best recommendation for Qingque. Although it's locked behind the battle pass, it's one of the best light cones you can get off of it. It increases the wearer's damage by .20% for each point of max energy they have. This adds up to a 28% damage buff for Qingque, permanently, with no requirements necessary. A very, very useful cone.
The Seriousness of Breakfast is a nice and easy one to obtain, simply purchase it from the light cone shop at the forgotten hall and you can stack on its superimpositions easily. At base, it increases the wearer's damage by 12%, and their ATK by 4% for every defeated enemy in the battle, stacking 3 times to 12%. At maximum superimposition, it's a 24% damage buff, and an 8% increase to ATK with every stack, up to 24% ATK. Can't go wrong with that.
I'm really reluctant to mention The Birth of the Self since Qingque's follow-ups are so heavily based on chance, and are locked behind her fourth eidolon. I recommend it ONLY if you have her fourth eidolon and want to experiment to see how much damage you can really do with it and buffs from The Elation combined. Her requirements for follow-ups just aren't consistent enough for this to end up outperforming any of the cones listed above.
Traces
For the sake of both her follow-up attacks and just a general build for Qingque, her basic attack is top priority for leveling. It's her best form of damage (out of only two possibilities, to be fair) and scales incredibly high with her ATK. I would choose to level her talent next to further empower her basic attacks when she's matched 4 of a kind. Afterwards, the damage on her ultimate is good enough and scales nicely enough to warrant leveling it a bit. The trace for her skill is decent but it's not so impactful that you need to go out of your way to level it up. Bide Time is a high priority, it's a very nice increase to your damage on your basic attacks. Winning Hand is very useful for keeping your momentum going after you've launched an enhanced attack. Tile Battle is.. okay? It's limited to only one activation per battle, so at best, it's a convenience. Get all the ATK% and quantum damage boost traces you can afford!
Relics
For your main set, I think the 4 piece of Genius of Brilliant Stars is hard to pass up. It'll increase your quantum damage by 10%, and allow you to ignore 10% of an enemy's DEF. Also, if the enemy is weak to Quantum, Qingque ignores another 10% DEF. For your ornaments, 2 piece Space Sealing Station is absolutely the safer option - increasing your ATK by 12%, and another 12% above 120 SPD is really nice. But I'm, of course, going to mention Inert Salsotto for the sake of follow-up damage. If you can get over 50% crit rate, you'll gain a nice boost to your ultimate damage and follow-up damage. I think generally speaking though, SSS is the better option since we're gonna be building some SPD on her most likely anyway.
Onto Qingque's main stats, your head and hand piece main stats can't be changed, and I'm glad this is the last time I'll have to write that. Her body piece, as usual, should be whichever crit you need more of. Since I recommend you to choose SSS over Inert Salsotto, you might want to use a crit rate body piece here since you won't be getting the free 8% from that. However, you also don't exactly NEED to get above 50% without that piece, so use your best judgement. Crits are nice, but there's not a lot of point doing them if you don't have the crit dmg to back it up. Your feet piece should be SPD, unless you can get really lucky with your substats to push you past 120. Raising her SPD gives you the extra damage from SSS, but also allows her to attack more, giving you more opportunities to discard tiles and gain skill points, or try your luck at getting your follow-up, or a 4 of a kind. Her sphere, of course, should be quantum damage bonus, and her link rope should be ATK%!
For substats, you want to get a good ratio of Crit Rate and Crit Damage, so that your attacks are always doing the most damage that they can on average, so those stats are highest priority on your relic substats. Afterwards, relics ATK% and SPD substats should be your preference.
Closing
Qingque has perhaps the least consistent follow-up attack trigger in the game, but that doesn't mean it lacks in damage or usefulness. Play your tiles right and with luck on your side, you'll pummel your enemies with back to back empowered basic attacks, strengthened even more by buffs from The Elation in the simulated universe!
Simulated Universe Build

Onto the fun part! The simulated universe is where these builds really get to show off. Using the Path of The Elation, your party's follow-up damage increases by 24%, and that's just the beginning. In this section I'll go over your method of traversing through the simulated universe, from which blessings to choose, which portals to take, the curios you should prioritize, even which blessings to upgrade. There's not one correct way in particular to tackle this path. Generally speaking, you should feel the effects quickly if your characters are built well, but I do believe there's better blessings than others.. some of the blessings in this path are so incredibly strong, you might never want to pass them up again even when using another path. I'll chop this up into a couple different categories, but as a general tip - if you pick the Path of The Elation, you can get through a run with extreme ease if you just take every elation buff you can find until you obtain every blessing for elation's path resonance. Until you get to that point, unless you have a blessing that just works better for your team (some for The Hunt are really nice, for example), you should just pick an elation buff if you see it. I'll explain better in the sections below!
General Strategy
Normally, if your team is strong during a simulated universe run using the path of The Elation, it really doesn't matter how you go about your run. The Elation buffs empower your follow-up attacks so much that as long as you have one character built for pure damage with follow-ups, you're not gonna have trouble shredding things quickly. The difficulty, if any, comes in keeping your team alive throughout the run. Thankfully, March 7th does a great job at this, especially paired with Clara, or some kind of high-defense character. The Fire Trailblazer is an option also worth considering - they don't have any method of follow-up attacking or counterattacking, but their skill allows them to taunt all enemies on the field, essentially making it impossible for anyone else on your team to be attacked by the enemies for that turn unless the opponent deals AOE damage. Of course pretty much any preservation character will do the trick, but March and the Trailblazer are ones I've found easily reliable, even without building them very much.
Although I'm not going to tell you exactly how to structure your team, because I think this build is very flexible and allows for pretty easy success regardless of team comp, I will offer this as general advice to anyone who wants it - your team will best if you have at least one character dedicated purely to damage, and one dedicated purely to defense. I know that's probably typical advice for Honkai: Star Rail in general, but it matters a lot in the simulated universe, and in a strategy like this one, where the entire structure of your plan is just big, big damage. Dispelling debuffs is extremely important, and that's why March 7th and Bronya can be so useful here. Particularly in World 5, the final boss has the ability to turn your team's damage against you if you don't have the defenses to quickly deal with it. I would recommend you also bring at least one extra character that's DECENT in damage along with you, but again, that's a bit of an obvious tip in general with Honkai: Star Rail. The boss of World 4 can basically hold one of your teammates hostage, stopping them from being able to take a turn and slowly damaging them overtime. It's important in that world to be able to quickly take out the enemy holding your teammate hostage, especially if it's your offensive carry. All this to say - while buffs and debuffs are nice, you definitely don't NEED them for this strategy, and if your Nihility characters don't help your damage as much as having another DPS does, or if your Harmony characters aren't directly assisting someone like Jing Yuan to use their follow-up attacks more frequently (or in Bronya's case, dealing follow-up damage and dispelling debuffs), it may be better to leave them out if you find yourself struggling using this strategy.
As I mentioned before, when choosing between portals in the simulated universe, it's fairly easy to take down enemies regardless of what you choose, as long as you don't overestimate yourself early. What matters most in an Elation run, similar to most other runs, is stacking every buff you can onto your follow-up attacks, even if it seems like it isn't important. To do this, the most consistent method of obtaining blessings is by going through pretty much every Domain - Combat portal that you come across. Domain - Occurrence portals have the potential for far better rewards, but they're more inconsistent. If you want the closest thing to a guaranteed Elation run with maximum path resonance buffs and the most buffs to your follow-up attacks, Combat is the better choice most of the time, but it's alright to take that gamble for Occurrence sometimes if you're confident in your strength.
With those in mind, there's still two other less common domain portal choices: Domain - Transaction and Region - Encounter. I find it pretty easy to WIN Region - Encounter battles using this strategy, but they feel even more inconsistent than Occurrence for me. Granted, you're still going to get a blessing guaranteed, so long as you beat the challenge, but sometimes you get something that's BARELY better than a normal Combat reward. I think they're still worth choosing over Combat though, since there's only room for improvement unless you lose. Regarding the other option, Transaction, I think it should be left alone most of the time. That may be an unpopular opinion, and to be completely honest, it makes very little difference in your run, so you should choose what you think you can handle and what you think will reward you best. Transaction is typically an opportunity to trade one blessing for another - but the selection it gives you could end up making you have to choose between losing one of three important blessings, just to end up getting something completely useless to your team.
To be clear, my personal preference in portal priority is Encounter > Combat > Occurrence > Transaction, however occurrence could be better than combat or encounter depending on what you get, and if you're strong enough to take that risk.

Path Resonance Priority
Alright, a nice, easy, and quick section. When you choose any path for the simulated universe, you'll be given Path Resonance if you collect 3 blessings of that path's type. Afterwards, you'll be able to make additional selections on 3 buffs to your Path Resonance when you reach 6 blessings of the same path, 10 of the same path, and 14 of the same path. Of course, it will get progressively more difficult to reach these requirements, and that's why you should have an idea of the order in which to pick these resonance formation buffs. Unlike most other things in this guide, I do think there's a pretty objective answer to the best priority for this, but it depends on your goal with it, being if you want to deal more damage with your team, or more damage with your path resonance. Ideally, you'll collect all the resonance formation buffs anyway, but let's go over the priorities, incase you don't get them all.
Path Resonance: Elation
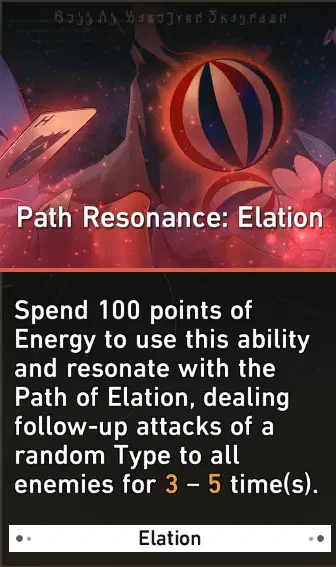
Once you reach 3 Elation blessings, you will receive this path resonance. Trigging it will launch follow-up attacks on all enemies 3-5 times, the number being randomly chosen. This path resonance benefits from any buffs to follow-up attack damage, but not if it's specified to be for a character dealing follow-up damage. Take for example Doctor of Love, which is a blessing that recovers a character's HP after they launch a follow-up. Obviously, your path resonance won't benefit from this, because there's no character involved in this attack. On the other hand, a blessing like Suspiria, which increases the damage of follow-ups by 26%, does give it benefits to path resonance, because it's not specified to only benefit characters. This is the default path resonance and you won't have any choice except for this one. You'll have options to buff this from now on, however. So, onto the order of the choices.
Resonance Formation: Doomsday Carnival

Without a doubt, Doomsday Carnival is the best first option for Elation resonance formations. It allows for reliable scaling of your follow-up attacks, by applying Sensory Pursuit to all enemies hit by it (with very high, if not guaranteed odds). Sensory Pursuit increases the received follow-up attack damage of the enemy who has it by 8% per stack. Ideally, this should be used immediately after the enemy's turn, since it lasts for one turn, and get removed on the enemy's turn, not the character you were on when they got it. While a later option has much higher potential for damage from the path resonance itself, this one applies an incredible damage debuff to enemies that helps both your team's damage and your path resonance damage.
Resonance Formation: Instant Win
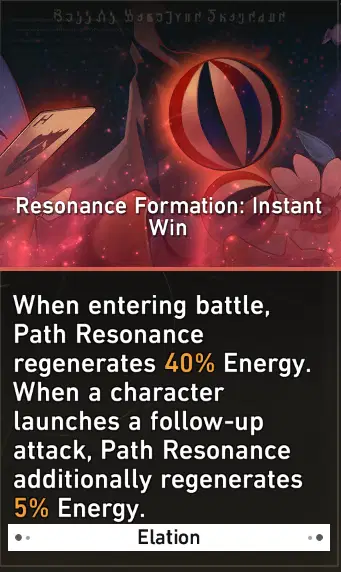
Next up in second for order is Instant Win. The main purpose of choosing this one is to allow you to use your path resonance for Doomsday Carnival's debuff more often. It will generate energy each time you launch a follow-up attack, and generates a large amount of energy at the start of each battle. Simple enough.
Resonance Formation: Dance of Growth

Last in order is Dance of Growth. It's not bad by ANY stretch, in fact I really recommend you try to get all the elation blessings you can so that you can reach this one. It increases the energy limit of path resonance by 2x, basically giving you two charges of it, that will each be consumed at the same time. With the right buffs, I've had path resonance do upwards of 200,000 damage thanks to this thing, so don't skip out on it if you're able to get it along with the others. There are some instances I may recommend getting this before Instant Win or even Doomsday Carnival, like if you have The Doctor's Robe curio to increase your path resonance damage and recharge it fully at the start of each battle. Generally though, this should come last in priority since it's a bit more of a selfish buff strictly for path resonance, as opposed to something your whole team can benefit from like with the two previous.
Blessings
So, like I mentioned earlier in this guide, you're generally going to want to collect as many elation buffs as possible, both to strengthen your follow-ups and to power up your path resonance. You probably already know that much, but on top of that, I think there's some blessings that are just ridiculously strong in this path. At the end of the day, you should just be selecting whatever elation blessings you can find, but I'll go over some of the better ones to help you make a decision if you happen to run into multiple. I'll also go over just a few blessings from other paths that are equally useful, but this section won't be going over EVERY single blessing that is good. You can't go wrong with ANY blessing in this mode, and most of the time, you will just pick an elation blessing if it's available. My intention with this section is to show you a few blessings that I believe to be a top priority in increasing your damage, not your survivability, healing, or anything else. Every blessing not mentioned here, especially all elation blessings, are not bad at all, but simply don't have any kind of priority, in my opinion. With that, here are some of the blessings you should pick right away if you see them.
Champion's Dinner: Cat's Cradle
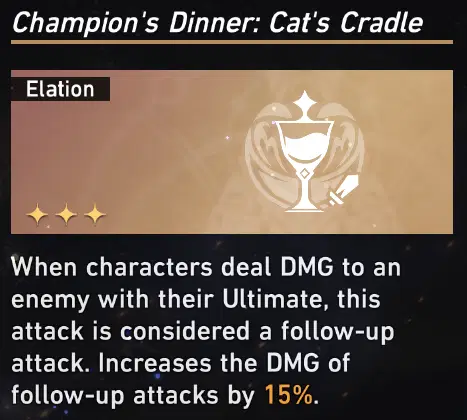
For the purposes of our build, this is easily the best blessing by FAR. Not only does it give a nice buff to all follow-up damage, but it turns every single ultimate that deals damage into a follow-up attack. This means that absolutely any character you have can deal follow-up attacks, as long as their ultimate deals damage, and any characters who do have follow-up attacks also do MORE of them, because their ultimate is transformed into one. This helps fantastically to fill the gaps in your team where you don't have follow-up attackers to fill them. Characters whose primary damage source is typically their ultimate or whose ultimates deal massive damage, like Himeko, Dan Heng, or Seele, will not only benefit from being able to fit into the team, but will also receive massive damage boosts to their ultimates from this blessing, the base buff from the path of The Elation, and every other blessing related to follow-up attacks that you have. I occasionally re-roll the other 3 star elation blessings in an attempt to get this one. It is that good.
Auto-Harmonica: Whitest Night

Of course, I still need to mention the other 3 star elation blessings, because of course they're still fantastic. I prefer Whitest Night to the next option, purely because this one offers more potential for damage in boss fights. Without any requirements other than launching a follow-up attack, your characters will deal Aftertaste DMG (a separate follow-up attack of random damage types) equal to 55% of their ATK, either 1, 2, or 3 times with each follow-up attack. This just adds some extra oomph to all your follow-ups, which is always a welcome addition to your collection of blessings.
Slaughterhouse No. 4: Rest in Peace

Finally, the last 3 star Elation blessing is Slaughterhouse. I personally believe this to be the worst of the 3 options - but that's not to say this blessing is bad in any way. It has basically the exact same effect as the previous, only it offers higher damage on average, but less opportunity for bigger damage per attack. By that I mean, while Whitest Night only deals 55% of your ATK, and Slaughterhouse deals 80%, Whitest Night has the chance of triggering 3 times, essentially dealing 165% of your ATK - whereas Slaughterhouse can deal a maximum of 160% ATK, and that's IF the enemy's weakness is broken. Neither of them are bad options whatsoever, I think you'll find very little difference in them. They each do a great job at giving all your follow-ups a little more kick.
Celestial Annihilation

A 3 star blessing that ISN'T Elation! The Hunt has a couple blessings to offer that will work just fine with follow-up builds. Celestial Annihilation is no exception. This pairs great with someone like Himeko, whose entire gimmick with follow-up attacks is centered around breaking enemy weaknesses. This blessing gives your character another turn if they break an enemy's weakness, and gives a dmg boost to their next attack. This can prove very beneficial if you need to generate SP, get some extra stacks on a Jing Yuan, or like I mentioned before, trigger additional weakness breaks for Himeko's talent.
Imperishable Victory

Another Hunt blessing, this one is similar to the last option. It will give your character another turn if they defeat an enemy, which will help nicely with SP generation and snowballing enemies. It also gives some free crit boosts, adding 4 stacks of Critical Boost to your character, equal to 24% Crit Rate and 48% Crit DMG - or at max stats, 48% Crit Rate, and 96% Crit DMG. The damage boost here is massive, but it's even nicer to be able to quickly clear weaker enemies by triggering extra turns each time you defeat one.
12 Monkeys and Angry Men

I'm not 100% certain of how this blessing works, it's a bit difficult to test if it means what I think it means - but regardless, this is a simple damage boost to your follow-up attacks. I believe that it increases the damage of a specific follow-up attack by 4% each time it triggers. I'm not sure if this scales infinitely - but I believe that it does. Most of the time, I grab this blessing if I see it as an option, as long as one of the above options isn't an option instead. It offers a great snowball effect to each of your characters who can perform follow-up attacks, and if paired with Cat's Cradle, it will therefore give you a boost to every character's ultimate as long as it deals damage to the enemy. The only downside to this one is that characters whose follow-ups trigger only a couple times per battle or are based on luck, like Qingque or Herta, won't benefit very much from this.
Exemplary Conduct
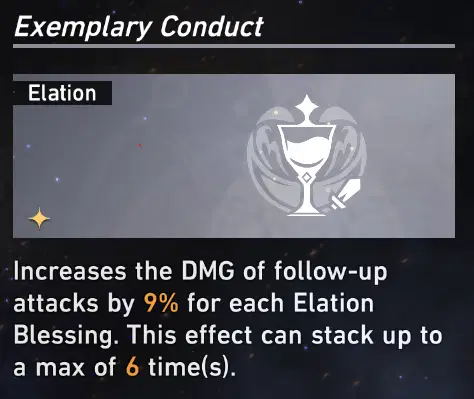
Our first 1 star blessing, which I would consider to be one of the most important blessings in the entire build. I would argue that this blessing is even better than Celestial Annihilation and Imperishable Victory for the purposes of this build. Exemplary Conduct simply grants you a damage increase to all follow-up attacks, constantly, forever, in every battle. The amount the damage increases by is determined by how many blessings of Elation you currently have, increasing by 9% per blessing, up to 6. This means that you can reach a maximum of a 54% increase in follow-up damage for the entirety of your run if you collect enough elation buffs (which happens more often than not.) That's more than TWICE the damage buff of Suspiria, a blessing which has only one effect - buffing your follow-up damage with no strings attached. This is a must have if you see it in your run.
Suspiria

Speaking of Suspiria.. here it is! We will take any increases to follow-up damage that we can get, and this is no exception. Though 26% is significantly lower than the buff Exemplary Conduct boasts, it's obviously a welcome increase, especially for a common blessing. All of your follow-ups will be doing 26% more damage with no strings attached thanks to this blessing, and the simplicity of it alone makes me like this one even more.
Pale Fire
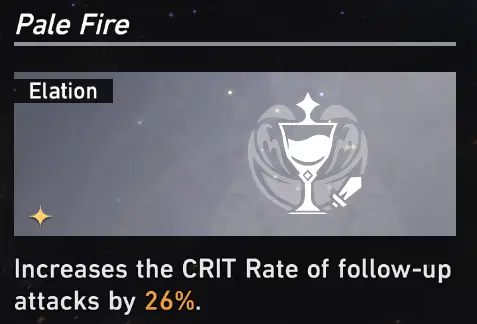
Another small increase.. or at least it would be small, if this wasn't crit rate we were increasing. Since 100% is the maximum crit rate you need for anything, having a blessing cover a whole quarter of that is.. a blessing. All of your follow-up attacks will have a 26% higher chance of critting, dealing extra damage based on the crit dmg of the character who initiated the follow-up. Again, a simple buff that gives you an increase to a stat with no strings attached.
Twenty-First Military Rule
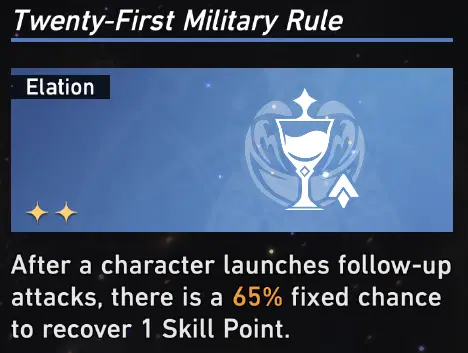
This one doesn't impact your damage directly, but I think it's worth mentioning. Having a blessing that will passively regenerate skill points sometimes can be a huge help with those characters who eat up your skill points, like Jing Yuan or Bronya, and with a 65% chance at base, those are nice odds. Though, you may need a character whose follow-ups happen very often and consistently like Clara, as opposed to someone like Qingque who relies entirely on a chance, or an annoying amount of time, just to use their follow-ups.
Shrewd Arrangement
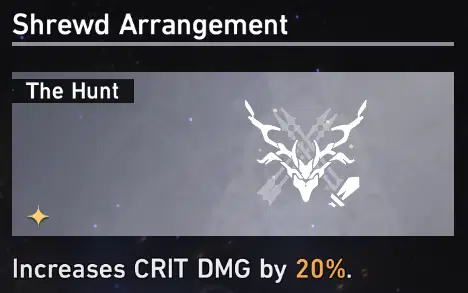
Might be the simplest blessing in the game. It increases your Crit DMG by 20%, constantly and in every battle, no strings attached. You can't go wrong with this, and given that a lot of your characters might be lacking a little crit damage due to potentially having to build crit rate as their body piece to meet Inert Salsotto's requirement, it's a great one to pick up.
Blessing Upgrades
Now that we're past which blessings you should prioritize GETTING, let's look at what blessing you should prioritize UPGRADING. This section will be shorter than the previous, because typically you won't be absolutely rich, so you won't have enough cosmic fragments to upgrade very many blessings. On top of that, a lot of upgrades are just.. okay? They're welcome buffs, for sure, but their impact is mediocre. There are, however, a couple blessings that are VERY worth getting - some, I would even recommend you consistently try to save cosmic fragments for to make sure you upgrade them for the final boss. Anyway, without further ado, here are the very few blessings I think are worth upgrading, in order of the importance of their upgrades, from top (most important) to bottom (least important).
Exemplary Conduct Enhanced

Of all the blessings in the game, when going through an elation run, I always upgrade Exemplary Conduct if I can, and always try to save enough cosmic fragments to make sure I upgrade it. While the base blessing gives you a 54% buff to follow-up damage at max stacks, enhancing this blessing increases the cap AND the amount gained per stack, giving you a 12% damage buff for every elation blessing you have, up to 9 times. That means that every single attack that is considered a follow-up will gain a 108% damage increase at max stacks. That's more than DOUBLE the damage of the follow-up originally, and exactly double of the original blessing's buff. I don't think I need to explain to you why this is incredible, this is an insane buff to any and all follow-up attacks. Enhancing this blessing will make every Lightning Lord attack from Jing Yuan, and every talent proc from Himeko, and every Svarog counter from Clara, do more than twice its original damage. It'd be insane to NOT get this.
Champion's Dinner: Cat's Cradle Enhanced

Up next in our priority is Cat's Cradle. Although this is the most expensive upgrade in this section, I do try to get this one next because usually the 60 extra cosmic fragments aren't usually the difference between being able to afford 2 upgrades instead of just the one, but use your best judgement here. Cat's Cradle's upgrade simply grants you another 40% to the original blessing's follow-up damage buff, up to 55% extra damage on follow-up attacks. On top of that, given that this upgrade requires the original blessing (obviously), this is effectively an extra 40% damage to every ultimate you have that deals damage. Added onto the previous upgrade, this adds up to a total of 163% extra follow-up damage, or a 2.6x multiplier to your follow-up damage, if that's easier to understand. This enhancement is absolutely nothing to scoff at, though it is lower priority than the massive buff from the previous blessing, but higher priority than our next blessing.
Suspiria Enhanced
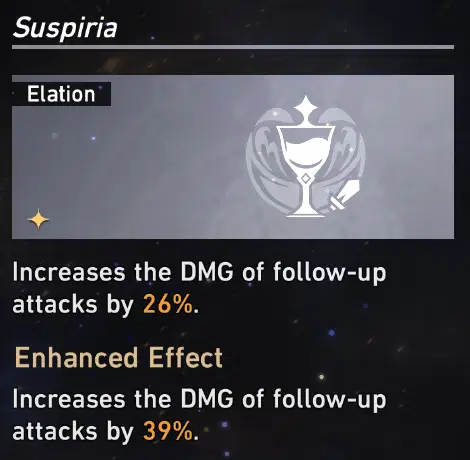
The last direct buff to your follow-up damage that you can get, this buff is pretty pathetic in comparison to the previous two.. but we will take it nonetheless. It's a measly 13% increase added to the base 26% buff to follow-up damage, for a total of a 39% buff. 39% is not bad at all, but given that the increase by enhancement is only 13%... this one should definitely be the last of the 3 increases.
However, assuming you've enhanced every buff previous to this one, that's a 202% damage buff to follow-up damage, or 3x damage multiplier, which is INSANE. Add on the 24% follow-up buff from picking the path of The Elation, and that's 226% extra damage, almost a 3.3x multiplier to follow-up damage. Obviously, if you get to this point, your run is pretty much set in stone. The boss would be lucky to survive a single full turn from your team.
Honorable Mentions
We've hit the point of enhancements where they're pretty much just meh.. although many enhancements can be great situationally, the only ones I feel are consistently GREAT are the ones mentioned above. These last couple are going to be very brief - I seem to be hitting a word limit I didn't know existed on hoyolab.. and there isn't a ton to say about these. Anyway, here are the honorable mentions.
Twenty-First Military Rule Enhanced
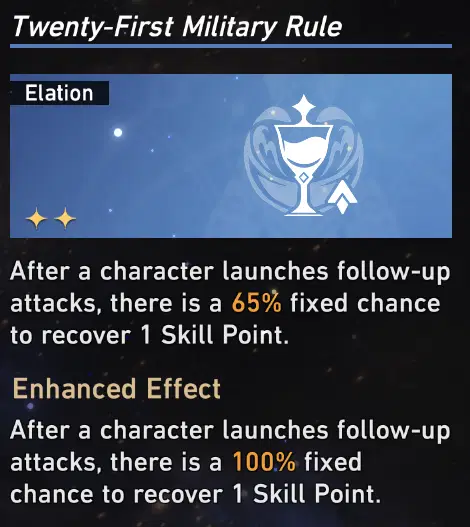
This enhancement increases your the chance of your follow-ups recovering 1 skill point from 65%, to a guaranteed 100% chance. An incredible passive increase to your team's skill points, which can be very, very important with a lot of follow-up teams, though you will likely need characters who initiate follow-up attacks more consistently.
Pale Fire Enhanced
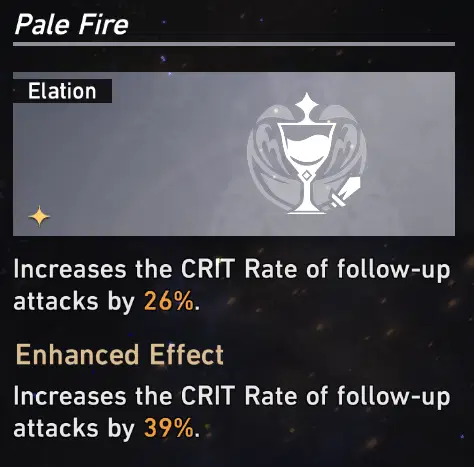
Though only a 13% increase to the crit rate of the base blessing, 39% total increased crit rate is incredibly useful to ensuring extra damage to your follow-ups, allowing you to potentially build another stat instead of crit rate on your relics.
Auto-Harmonica: Whitest Night Enhanced

Just barely increases the aftertaste damage of its original by only 5%, totaling to aftertaste damage equal to 60% of the users ATK. However, the added bonus of increasing aftertaste DMG by 35% actually makes this upgrade quite nice - especially if you've gotten Resonance Formation: Dance of Growth, or even just with the base resonance formation. Assuming both are upgraded, this still barely edges out Slaughterhouse in the most potential damage, however which one is more consistent is dependent on your team. In my opinion, this is the next best upgrade after the follow-up damage buffing ones.
Slaughterhouse No. 4: Rest in Peace Enhanced
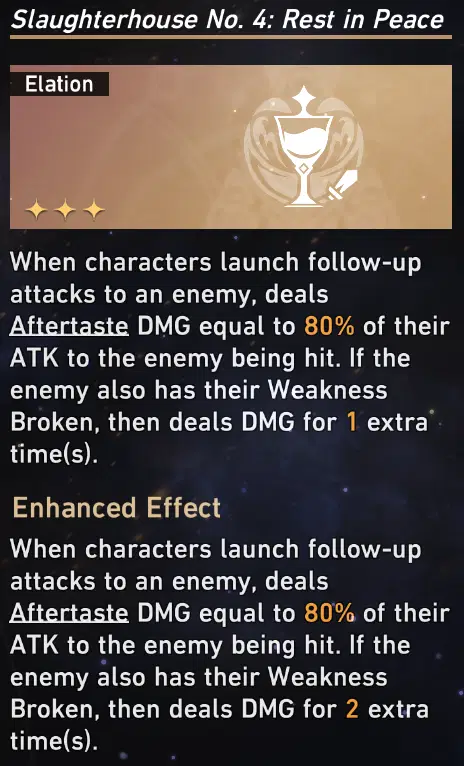
Slaughterhouse's upgrade increases the amount of times the base blessing's aftertaste damage is applied by 1 extra time per weakness break triggered. Unfortunately, this still pales in comparison to upgrading Whitest Night instead, in my opinion, but a team comp centered around weakness breaking, like one with Himeko, might make this one the better option.
Curio Priority
Now, onto the curios at last! These are always welcome additions to your run, however typically in elation runs, I would typically recommend passing on most opportunities to get curios, at least until later in your run when you've got Exemplary Conduct fully stacked, or Dance of Growth obtained from Resonance Formation. That isn't to say curios are bad at all (in fact some of them are incredibly game changing for our run!), but rather that when given a choice between a blessing or a curio, you should typically pick the blessing.
Anyways, this section will cover my opinion of the order of priority that I think you should pick curios. From top (highest priority) to bottom (least priority), I will mention the most important curios in this run - but like the previous section, I will have to cut it slightly short due to the character limit. You can't go wrong with many curios, so at the end of the day, use your own best judgement for what your team needs.
Sealing Wax of Elation

I'm sure plenty will disagree with me on this, but I would argue that Sealing Wax of Elation is the best curio to pick up in an elation run, or at the absolute minimum, in the top 3. Though it doesn't have a direct effect on your strength in battle, it increases the odds of you finding blessings of elation, allowing you to more easily stack Exemplary Conduct to its maximum, and more easily obtain all path resonances. It automatically hands you a blessing of elation for free as well, so getting this from a checkpoint Herta shop would actually be more worthwhile than just picking a 1 star blessing, though the odds of finding this one in a selection of 3 are fairly rare.
The Doctor's Robe

If you're looking for something seriously game changing, look no further. The Doctor's Robe will increase your path resonance damage by 40%, and fill it to its maximum energy at the start of every battle. If you can get this curio, you should take the earliest opportunity you can to get Resonance Formation: Dance of Growth, as it will drastically increase your path resonance damage - so much so that it will one shot almost every single battle that isn't a boss fight, if not LITERALLY every single battle. The only scenario I have ever had dance of growth and doctor's robe together and not instakilled a non-boss battle is in battles with 2 waves, or in battles against mara-struck soldiers or other self reviving or highly defensive enemies. You will blaze through your run effortlessly with this curio in hand, and it will help out plenty in boss fights as well!
Robe of The Beauty

This one's tricky to manage, but if you're able to keep your pockets relatively full, the damage buff from this will feel incredible across your whole team. For every 100 cosmic fragments you have, every ally on your team will have all of their damage increased by 16%. This includes follow-up attacks, naturally, which can allow for hypothetically infinite scaling to your team's follow-up damage and damage in general. However, the fragments spent to upgrade the Exemplary Conduct and Cat's Cradle blessings are far more cost-effective, boasting a much higher damage increase than 16%, while costing the same, or in Cat's Cradle's case, slightly more than the amount needed for another 16% from the robe. After those are upgraded, however, it's actually smarter to keep your cosmic fragments rounded down to the nearest hundred, and keep that extra damage.
Faith Bond

This one's debatable. In an elation run, there's some unfortunate truths you need to accept. The first is that your team is likely pretty fragile, and you may occasionally lose an ally and have to revive them, costing you fragments that could be used on upgrades or on Robe of the Beauty. The second is that your ideal run involves getting as many elation buffs as you can, and upgrading the best ones before the final boss. All of that can become very pricey, which is no good when you're trying to maximize damage with upgrades and Robe of the Beauty, or when you're trying to fully stack Exemplary Conduct or get all the path resonances. That's where Faith Bond comes in pretty clutch! Faith Bond decreases the price of everything I just mentioned by 30%, which isn't a TON, but it's substantial enough to make a pretty decent difference. This one falls in priority the longer it takes to get it in your run, but it falls off less than other money saving/gaining options.
Fortune Glue

Fortune Glue will prove useful if you're having trouble getting your hands on the Cat's Cradle blessing. The other 3 star blessings are nice as well and using this to get them is completely valid, but the only scenario I really pick this one over the above options is when I'm still hunting for Cat's Cradle. Be careful not to grab this one just before the final boss, though!
Space-Time Prism
The last curio I will mention, due to the unfortunate character limit, is Space-Time Prism, arguably the most situational curio in the game. This curio could do almost nothing for you.. or it could literally be the reason your character is capable of follow-ups. That is the case for Qingque for me - and if I had one more Eidolon for Bronya, it would be the same for her. This curio simply grants all of your characters one extra level to their eidolons, which like I said, could be completely worthless or could be the reason your character can even follow-up. Be aware of what benefits an extra eidolon level could bring to the table for your team.
Code Curios
Code Curios! These things are great. You can't exactly go wrong with any of them, but I think there's a couple that are FANTASTIC, then a couple that are good, then it starts to plateau from there - at least when it comes to Elation strategies. There's a big downside to each of these curios that only lasts for 3 different battles, then the negative effect turns into a very good positive effect. Luckily, you won't have to worry about the negative effects too much, because the rooms you get them in always have at least 3 enemies in them (and I've found that one of them is very often a warp trotter!), so you won't have to worry about this negative effect sticking around until boss fights. I'll go over my personal preference of code curios for elation runs, as well as the effect of each of them, since there's only 6 total. From top to bottom, these curios are ranked from most useful to least useful (in my opinion)
Mysterious Code

Starting out with Mysterious Code. Naturally, the best code curio is the one that's most flexible! No matter which characters you run in this strategy, all of them can benefit from extra damage. For the first 3 battles with this curio, enemies will deal 35% more DMG once you defeat one enemy. The 35% damage does not stack with each enemy defeated, it only triggers once per battle after the first enemy is defeated. This can make it tough to stay alive if you're not careful some fights, since this strategy isn't the most defensive.. when picking this curio, you can try to leave all enemies at low HP and then kill them at the same time, so that you don't trigger the buff on the enemies. When this curio is fixed, it will give YOU the damage buff instead, however it will be a 25% buff instead of 35%. It's incredibly strong to have a complete 25% damage buff across all characters and all their moves just from killing one enemy. This easily triggers in boss fights where the boss has weaker allies, or summons allies as one of its moves. Easily the strongest code curio overall, but there are some other options that may occasionally be more worthwhile, like our next curio.
Infinitely Recursive Code

In my opinion, Infinitely Recursive Code is the second best code curio for this run. Most, if not all follow-up team comps are going to be incredibly skill point hungry. Jing Yuan will be using his skill hopefully multiple times per rotation, Bronya will be buffing her allies repeatedly with her skill, March 7th will be trying to keep shields up.. it can get a little hard to make sure you have enough skill points for your damage, and for your defense. This curio will fix that problem easily! For the first three battles, your skills will cost an extra skill point, making this skill point problem even more crippling. You'll basically only be able to use your skill on one, maybe two characters max until this thing is fixed. However, when it's fixed, your basic attacks recover two skill points instead of one, basically completely removing the skill point problem entirely. Depending on your team comp, this might be better than the Mysterious Code, but that's also dependent on your blessings and how strong your damage is.
Elegant Code
This one is great for the same reason the Infinitely Recursive Code is. While it's being fixed, Elegant Cod will enhance a random enemy in the turn order by a significant amount every time your characters use a skill. This is one of the hardest negative effects to deal with. Most likely the whole reason you would pick this curio is your team uses their skills frequently and you want them to take more turns before the enemy - naturally, this curio causes the opposite to happen for three battles. The best way to deal with this is to try to win without using many skills. Rely on the damage from basic attacks and follow-ups while using as few skills as possible, so that you don't keep triggering enemy turns and get beat down. When this curio is fixed, it will of course create the opposite effect - when your character uses a skill, their turn is advanced forward by 25%. This is great for the follow-up attackers like Jing Yuan who use skills often and need more opportunities per turn to use skills. However, you may struggle with the cost of your skills, given that your skill point hungry units will be given more chances to burn skill points.
Corrupted Code

Corrupted Code.. I would say this curio BARELY edges out the next one.. but by this point, if your three options of code curio happen to be these last 3, you've gotten pretty unlucky. This options serves well to help someone like Himeko, since her follow-ups are triggered by enemy weaknesses breaking, and her next highest damage comes from her ultimate. When this curio is being fixed, your character's ultimate charge will be brought to zero when they trigger a weakness break. This is rough for characters whose ultimates are very important, but it's important to note that only the character who triggers the weakness break loses their ultimate charge. You might be able to work around this to cause a weaker character to lose their ultimate. Once it's fixed, your characters will generate energy any time they cause a weakness break - but remember, this energy charge is only granted to the character who caused the weakness break.
Odd Code

Up next is Odd Code. While being fixed, this curio causes your characters to lose 30% of their current (not max) HP each time they use their ultimate. Of course, the easy solution to avoid this negative effect for the three battles needed is to simply not use your ultimate. This negative effect doesn't really impact this strategy much, since no follow-up attackers really rely on their ultimates much. Even the ones who do use their ultimates frequently, like Jing Yuan, Clara, or Himeko, won't really struggle to hold off on using them for a couple battles if needed. When this code curio is fixed, your characters will restore 30% of their max (not current) HP whenever they use their ultimates, basically granting every character an emergency heal button for themselves. This is really nice for team comps where you did not bring a healer, but to be honest, that's mostly the only scenario where this is very useful. You ideally won't be needing the heal this would give you, and you certainly shouldn't pick it over the top 3 code curios just for that heal.
Normal Code

Last, and probably least, is Normal Code. While being fixed, this curio causes your team to take 35% more damage from all sources while their HP is below 50% of their max HP. This just amplifies our strategy's weakness of being flimsy, so if you pick this one at all, you should hope you have an abundance character on board. Once this curio is fixed, your characters will take 25% less damage when below 50% max hp. Of course, this helps our weakness a little bit, but the damage reduction isn't nearly as important as the buffs that all of the above curios could offer. It's not necessarily that this curio is BAD, but for the purposes of our strategy, this just isn't what we want, and because you get three choices of code curio, you'll never HAVE to take this one.
That's all!
Thank you for taking the time to consider any of the advice in my guide! I hope this guide can help even one person complete an elation run and get to see the satisfaction of the massive damage this path is capable of! I would have happily written much, much more, but I've hit the character limit. Once again, thank you very much for reading, even if you just skimmed it! I wish you good luck in all your future runs!  - Jellotin




