


~ Please view this post in Dark Mode for the best experience ~
Guide Overview:
Hello, Travelers ~
➥ Today, I am bringing you a guide on the character, Sangonomiya Kokomi ~
- This guide will show you a gameplay overview, passives, constellations, ascension and talent materials, and recommended weapons, artifact sets, and team compositions. Please take a look if you are interested!
➥ [Version 3.8] Kokomi's banner is now live!
-- -- -- --
Version 3.8 Banner
Banner Overview:
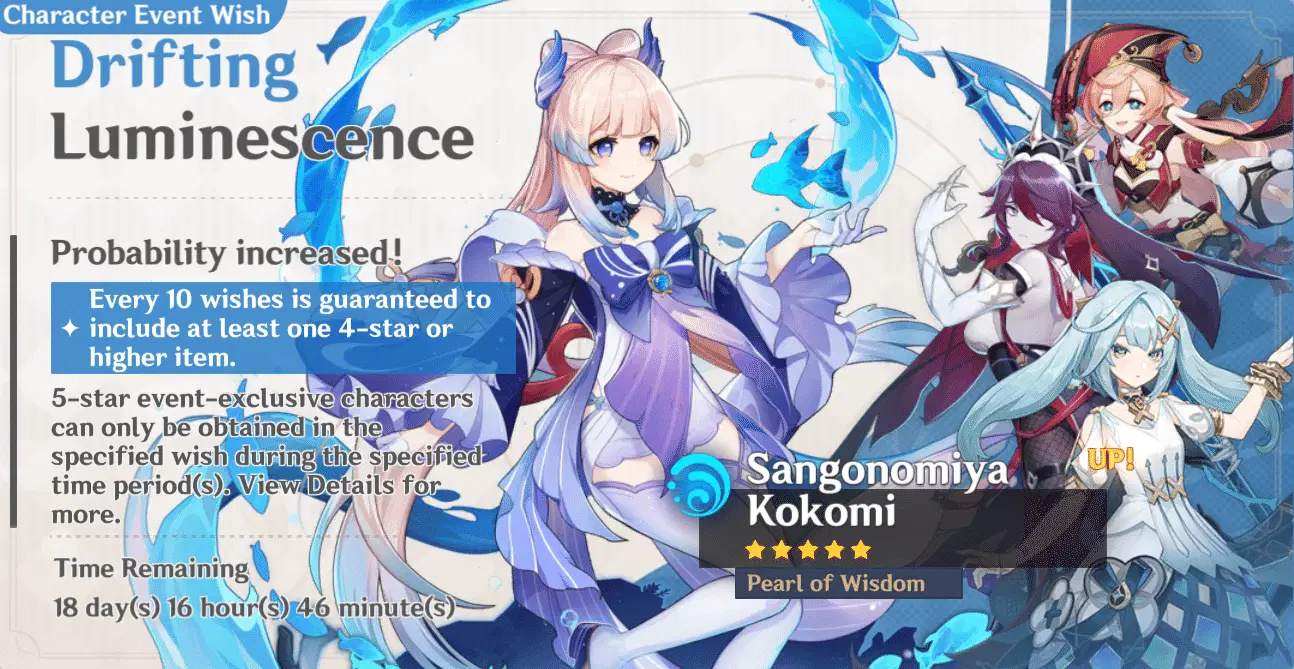
➥ Sangonomiya Kokomi will be available to wish for from 2023/07/25 18:00~2023/08/15 14:59. Make sure to wish for her during this time frame!
➥ The 4-star characters joining Kokomi on this banner are...Faruzan, Rosaria, and Yanfei!

Gameplay Overview

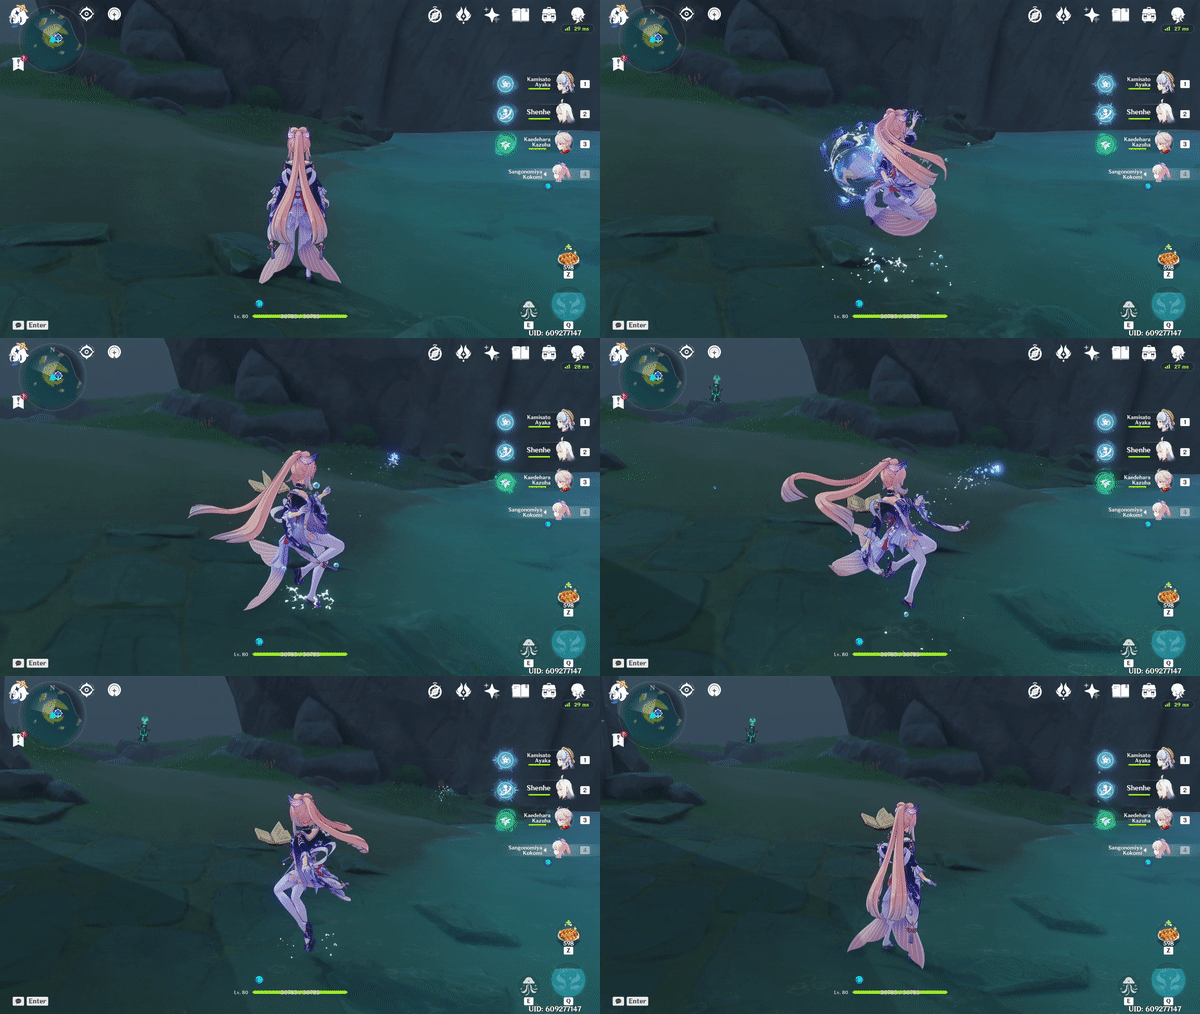
Normal Attacks
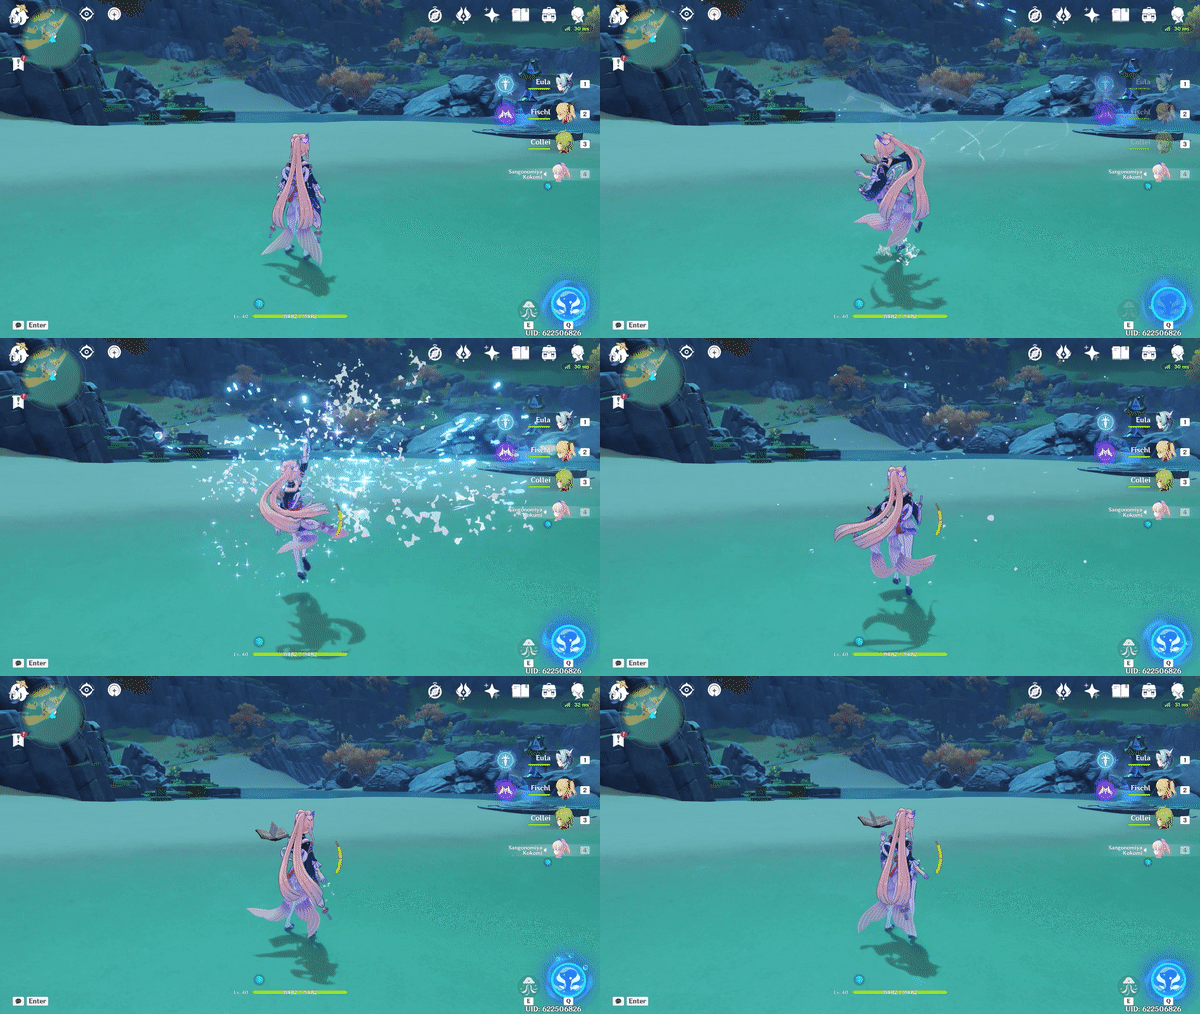
Charged Attack
➥ Normal Attack
- Performs up to 3 consecutive attacks that take the form of swimming fish, dealing Hydro DMG.
➥ Charged Attack
- Consumes a certain amount of Stamina to deal AoE Hydro DMG after a short casting time.
➥ Plunging Attack
- Gathering the might of Hydro, Kokomi plunges towards the ground from mid-air, damaging all opponents in her path. Deals AoE Hydro DMG upon impact with the ground.

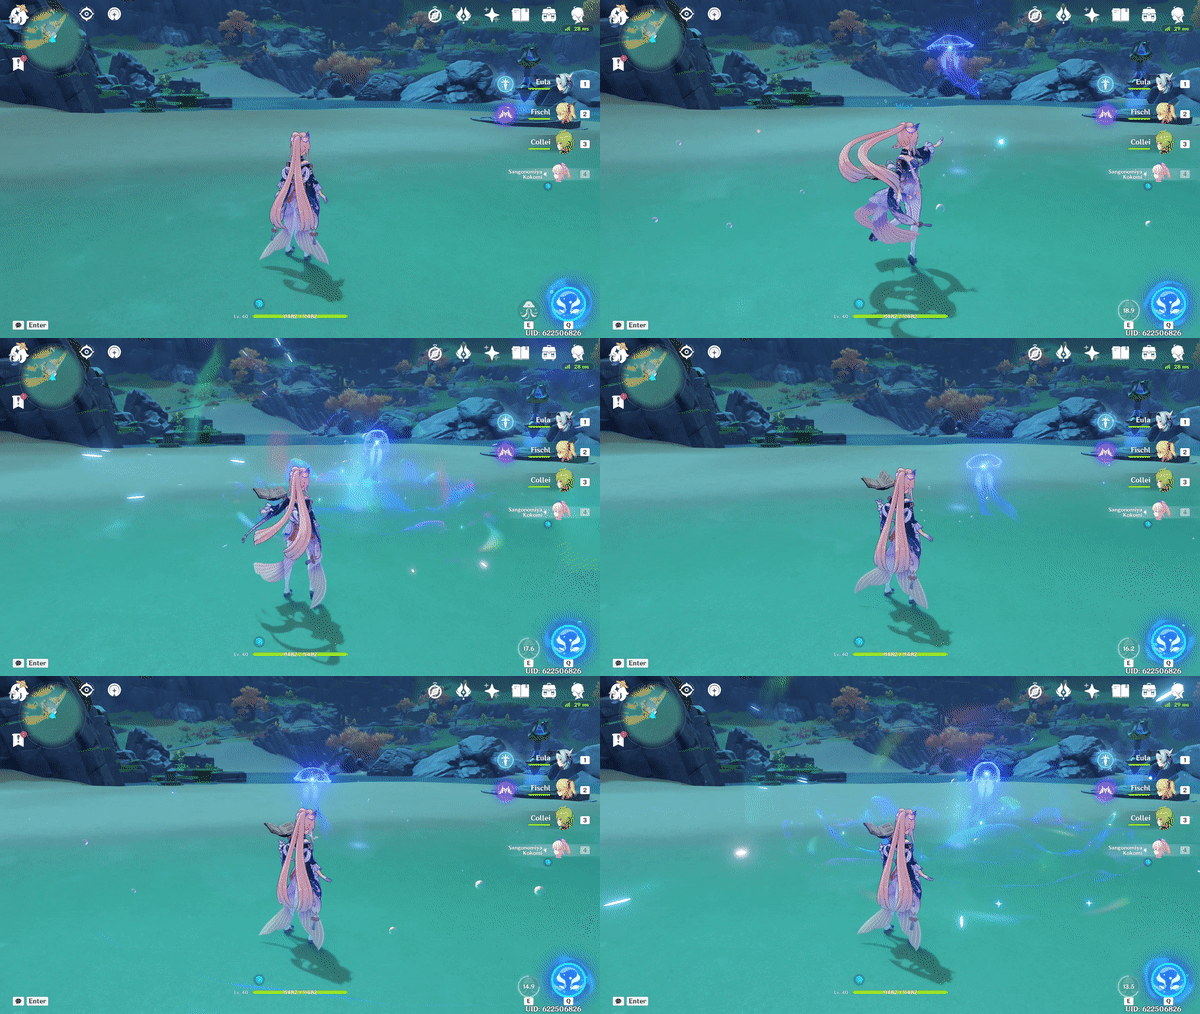
Elemental Skill
➥ Summons a "Bake-Kurage" created from water that can heal her allies.
- Using this skill will apply the Wet status to Sangonomiya Kokomi.
➥ Bake-Kurage
- Deals Hydro DMG to surrounding opponents and heal nearby active characters at fixed intervals. This healing is based on Kokomi's Max HP.

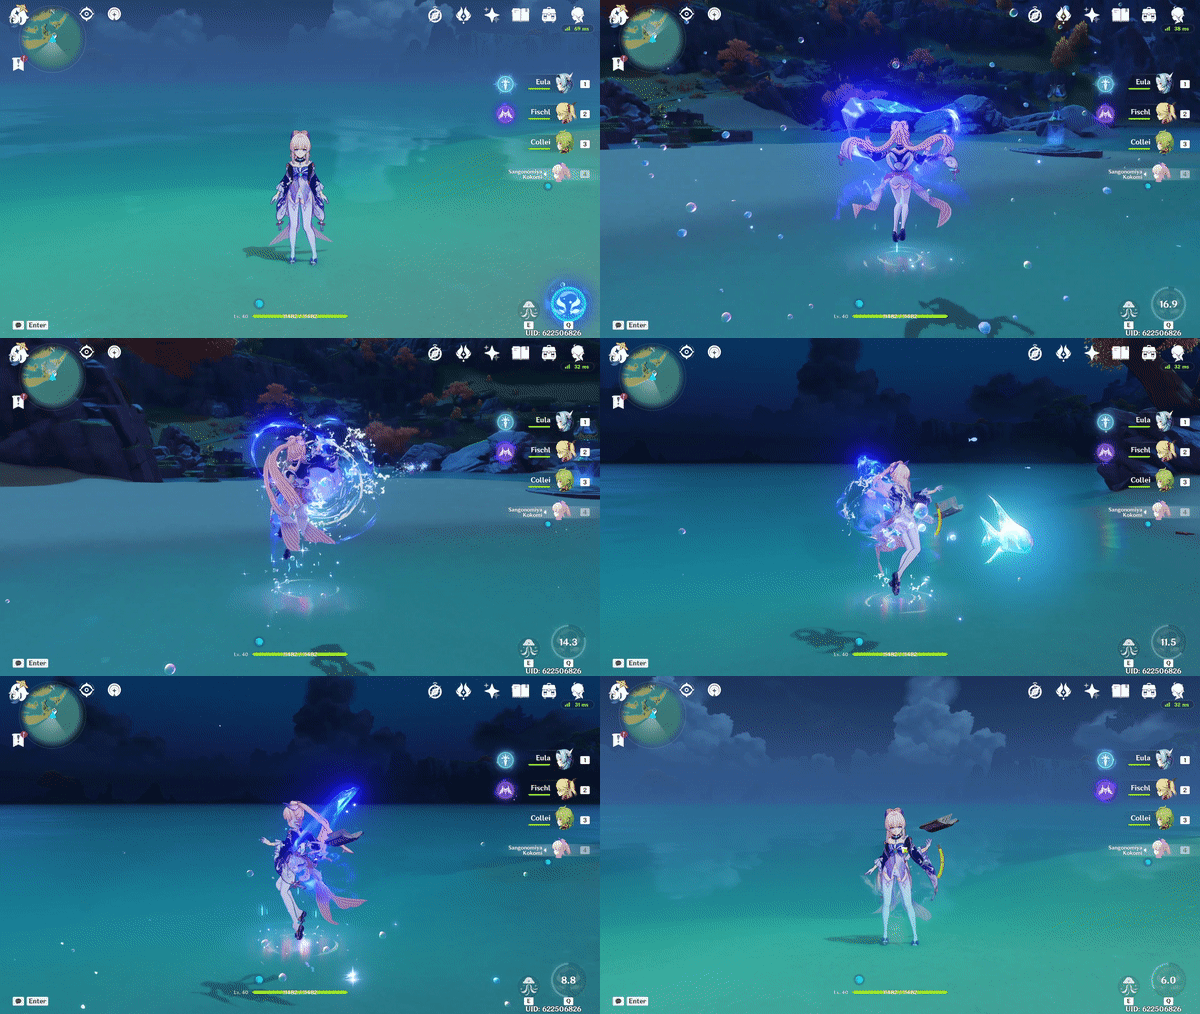
Elemental Burst
➥ Summons the might of Watatsumi, dealing Hydro DMG to surrounding opponents, before robing Kokomi in a Ceremonial Garment made from the flowing waters of Sangonomiya.
➥ Ceremonial Garment
- Sangonomiya Kokomi's Normal Attack, Charged Attack and Bake-Kurage DMG are increased based on her Max HP.
- When her Normal and Charged Attack* *** opponents, Kokomi will restore HP for all nearby party members, and the amount restored is based on her Max HP.
- Increases Sangonomiya Kokomi's resistance to interruption and allows her to walk on the water's surface.
- These effects will be cleared once Sangonomiya Kokomi leaves the field.
Passives

➥ If Sangonomiya Kokomi's own Bake-Kurage are on the field when she uses Nereid's Ascension, the Bake-Kurage's duration will be refreshed.

➥ While donning the Ceremonial Garment created by Nereid's Ascension, the Normal and Charged Attack DMG Bonus Sangonomiya Kokomi gains based on her Max HP will receive a further increase based on 15% of her Healing Bonus.

➥ Decreases swimming Stamina consumption for your own party members by 20%.
- Not stackable with Passive Talents that provide the exact same effects.

➥ Sangonomiya Kokomi has a 25% Healing Bonus, but a 100% decrease in CRIT Rate.
Constellations
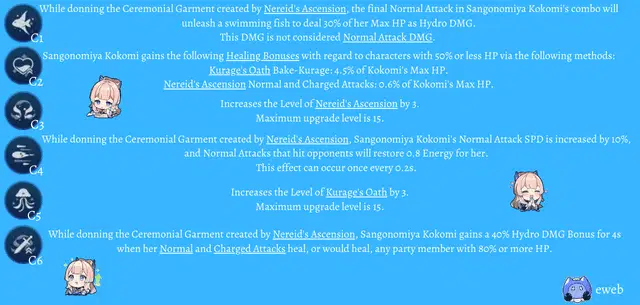
➥ Please zoom in, expand, or download the picture if you are having trouble reading!
Ascension & Talent Materials
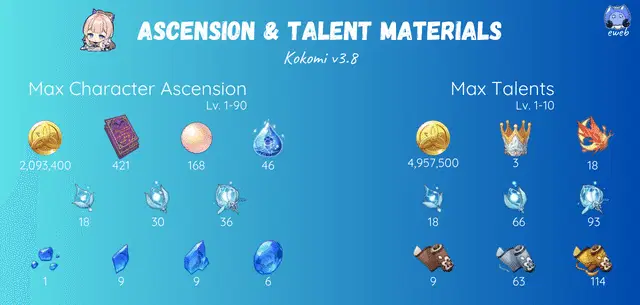
➥ Please zoom in, expand, or download the picture if you are having trouble reading!
Overview:
These are the materials necessary for leveling Kokomi from Lv. 1-90 including ascensions and leveling up her talents from Lv. 1-10.
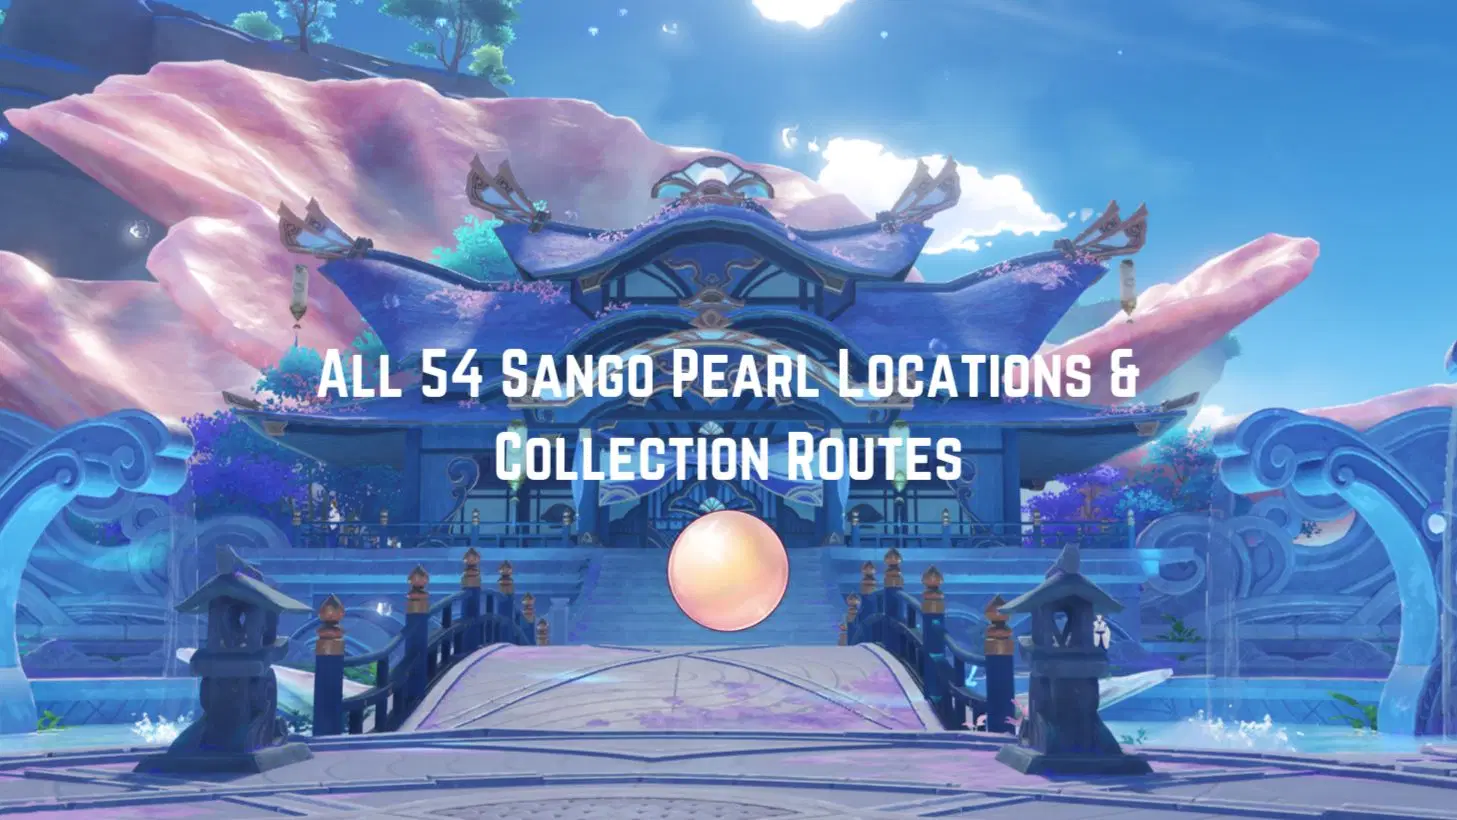
If you need help farming the Sango Pearls for Kokomi, please follow my detailed guide below!
Weapons
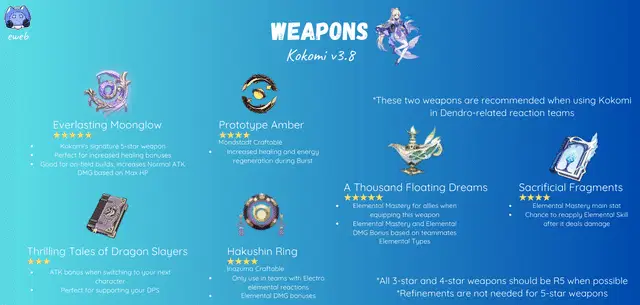
➥ If you are having trouble reading the text...
- Phone users: Click on the image and download, it should make the text clearer.
- PC users: Right click and open the image in a new tab, this should make the text clearer.
Overview:
For regular support
- Everlasting Moonglow, Prototype Amber, Thrilling Tales of Dragon Slayers, Hakushin Ring
- Everlasting Moonglow is also a good option for an on-field Kokomi build.
For EM-based teams
- A Thousand Floating Dreams and Sacrificial Fragments
- You can also use the other weapons in an EM-based team, these are not 100% needed, but they may help increase your elemental reaction damage.
➥ Choose the weapon that best suits your Kokomi and team's needs!
Artifacts
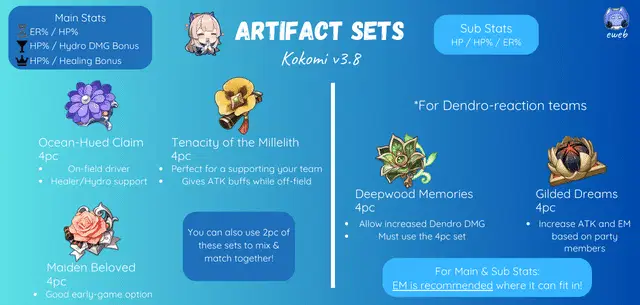
➥ If you are having trouble reading the text...
- Phone users: Click on the image and download, it should make the text clearer.
- PC users: Right click and open the image in a new tab, this should make the text clearer.
Overview:
Ocean-Hued Clam (4pc)
- When utilizing the full 4-piece set, using Kokomi as an on-field DPS/driver is recommended. Although you can certainly use this set for an off-field Kokomi, you will get the most value out of it when you have her on the field for longer. This is because you want to do as much healing as possible to get the most damage out of the Sea-Dyed Foam. This is much easier done when you use her Burst along with her Elemental Skill. Since Kokomi’s Burst makes her stay on the field unlike her Skill, it is better for her to be the driver in the team. Using her Burst often throws off your team’s momentum, which is why mainly using her Skill is the better option for teams where she is a dedicated support.
Tenacity of the Millelith (4pc)
- This is a great set for an off-field support Kokomi! The 2-piece bonus helps increase your HP, and the 4-piece bonus gives a team-wide attack buff when she uses her Elemental Skill. To allow for better flow and momentum between your teams, it is often better to focus on Kokomi’s Elemental Skill instead of her Burst when she is an off-field support. This is because her Burst makes her stay on field, when you really want that time to be taken up by your DPS or setting up for your next big attack. This set allows her to simply drop her Skill, leave the field, and provide an attack buff to your team along with her healing with no extra time taken. Kokomi does not need to stay on the field to trigger this buff.
Maiden Beloved (4pc)
- I recommend this set if you are still in early-game or have a decent set of Maiden Beloved and are waiting to farm for the other recommended sets on this list. This set only provides increased healing, which is not bad at all, but unless your Kokomi is severely lacking in HP, you don’t really need increased healing. She is able to heal well on her own. The other sets provide good buffs to your teams, which is why they are a better fit for Kokomi.
➥ For these three artifact sets, you can always use the 2pc of these sets and mix and match together for a good build. But I do recommend putting together a full 4pc set when you are able to for the best build.
-- -- -- --
Deepwood Memories (4pc)
- This set is specifically tailored for Dendro teams. Although the 2-piece bonus is useless for Kokomi, the full set allows her to buff your Dendro teammates' attacks by decreasing the enemies’ resistance to Dendro when they have been hit by your Elemental Skill or Burst. She does not have to stay on the field to trigger this. This allows Kokomi to be a good off-field support since she can drop down her Skill, leave the field, and provide a Dendro shred when attacking your enemies.
Gilded Dreams (4pc)
- This set is recommended for increasing Kokomi’s Bloom DMG in Bloom-specific [Dendro] team compositions. After Kokomi triggers an Elemental Reaction, she will gain buffs based on your teammates Elemental Types. This can either increase her ATK or EM and can be triggered when she is off-field. This will allow her to help deal more reaction damage. You can also utilize the 2pc set which increases EM +80.
Team Compositions
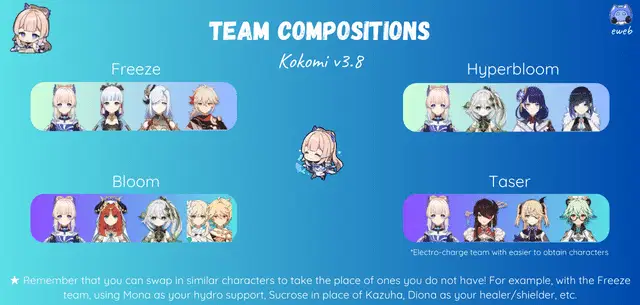
➥ If you are having trouble reading, try downloading the full image on your phone or open the image in a new tab on your PC! It should make the image clearer.
Disclaimer: These are just examples of team compositions that you could use with Kokomi. You can use any team you want, utilize different elemental reactions, or even swap out these characters for others you have. Please play the way that you want ~
Conclusion:
➥ Travelers, this marks the end of the v3.8 Sangonomiya Kokomi Character Guide! I hope this guide helped you understand and build Kokomi ~
- Please refer back to this guide whenever you need more details on Kokomi.
-- -- --
♡ Please keep an eye out for any future guides & consider giving me a like and a follow if you enjoyed this guide! ♡


⚛Check out my social media ~eweb's Carrd⚛




