


I recommend to read this post in dark mode.
Hello and welcome to this Herrscher of Sentience Battlesuit Guide!
Wait a minute, isn't she two years o- 
I hope I'll be able to help you, let's start~
Note: This guide is based on the BETA. Officially released content might differ.

✦ Table of contents ✦
Short overview - What's new
Kit & Skills
Rank-ups
No HoRB = no Senti?
Team & Rotation
Gameplay examples
Conclusion
✦ Short overview - What's new ✦
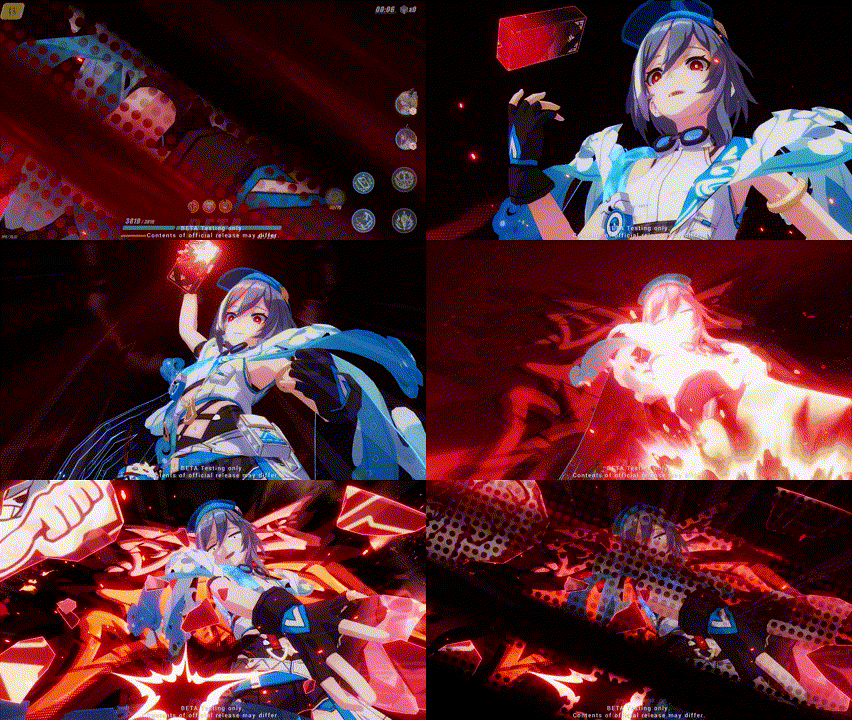
Herrscher of Sentience was released in 4.6. Until 6.8 she was needed in every physical team, until she was replaced by Herrscher of Rebirth.
Now, she got a new weapon called Increadibly Infinite Intimidator and a a new Stigmata set called City-State Epic set containing Pericles T, M and B.
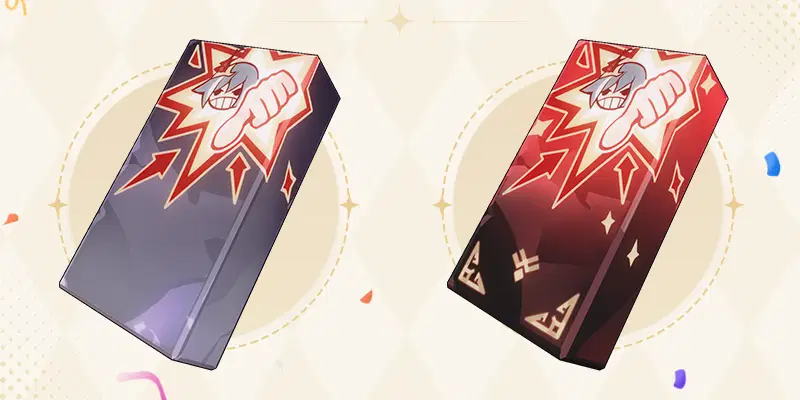
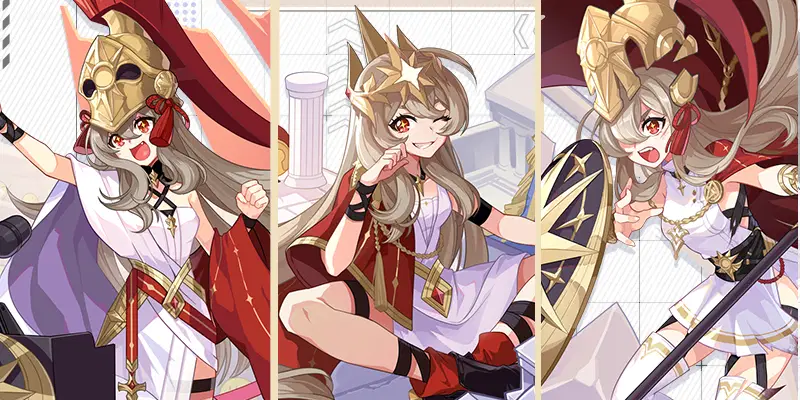
For details on her new equipment, please read my Weapon/Stigmata Guide
I'll link them here in like a month when I remember.
Firstly, this set is a DPS set.
As support, her old set will stay. But Senti's DPS times are back.
*happy Senti stan noises*
So it's time to go over Senti's kit another time, focusing on her DPS side~
✦ Kit & Skills ✦
*numbers are based on S.0
✧ General information ✧
Herrscher of Sentience is a BIO Physical melee DPS and impair support.
She uses fists and bricks as weapon.

➤ Leader Skill
With Senti as leader, the team deals 26% / 28% / 30% more Crit DMG in Burst mode. For every BIO battlesuit on the team, the team has 4% / 5% / 6% bonus Crit Rate.
➤ 3 weapons and kinetic energy
Above Senti's HP bar, there are symbols of her 3 weapon types.
The weapon with red light around it is currently used.

Left: Sword
Middle: Spear
Right: Chain blades
Each weapon has different ATK sequences.
You can switch between them by tapping [ULT].
The weapon order will go Sword -> Spear -> Chain blades -> back to Sword.
Within 5 seconds after switching weapons, Combo ATKs restore 5 more SP.
When attacking with one of those weapons, restore 2 SP and 30 kinetic energy for the fitting weapon is restored. This has a CD of 5s, different weapons DO NOT share this CD.
The current weapon charge, called kinetic energy (KE), is shown by he ring around each weapon. It is used for Combo ATKs.
The ring turns red at 300 (max) stacks.
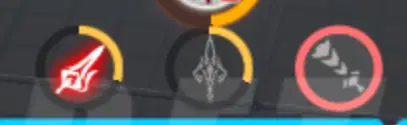
The currently used weapon restores 3 charge every 0,1s while the weapons not in use restore 1 charge every 0,1s.
Enter battle with 300 Charge on all weapons.

✧ Evasion ✧
Tap [EVADE] to spawn an illusion which lasts for 3s.
It taunts enemies. If 3s are over or the illusion is hit, trigger Ultimate Evasion skill.
CD: 20s; can't go below 16s
Illusion Explosion: Deals 400% ATK of Physical DMG, triggers 2,5s of Global Time Fracture
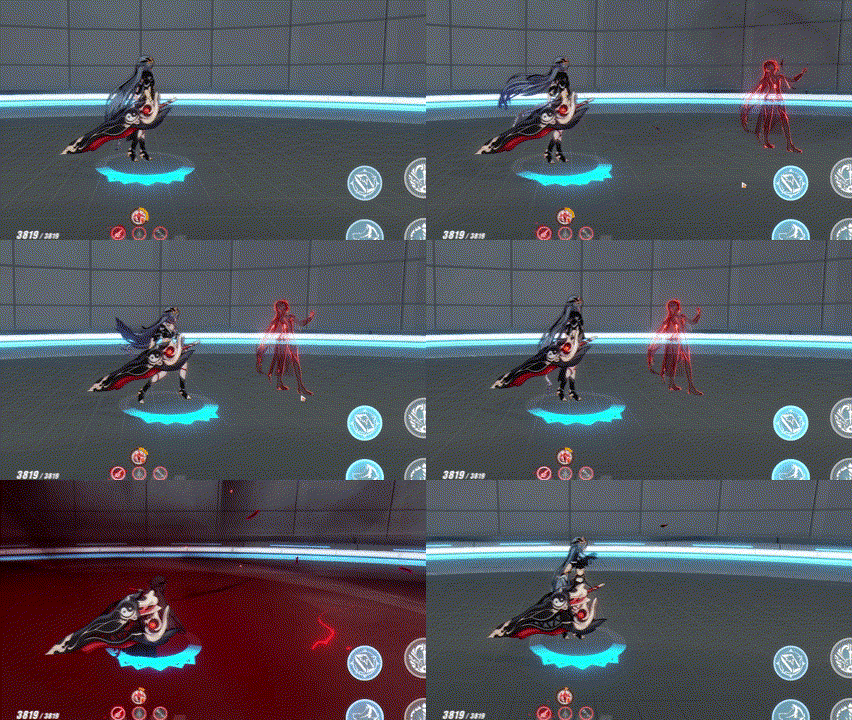
The illusion drops a black plume if hit, picking it up restores 15 SP and 150 HP to the whole team.
✧ QTE ✧
Can only be triggered outside of her Ultimate.
Triggered when an enemy is Time-Slowed
QTE: Enters with spear weapon equipped; deals 400% + 800% of Physical DMG; restores 300 spear kinetic energy
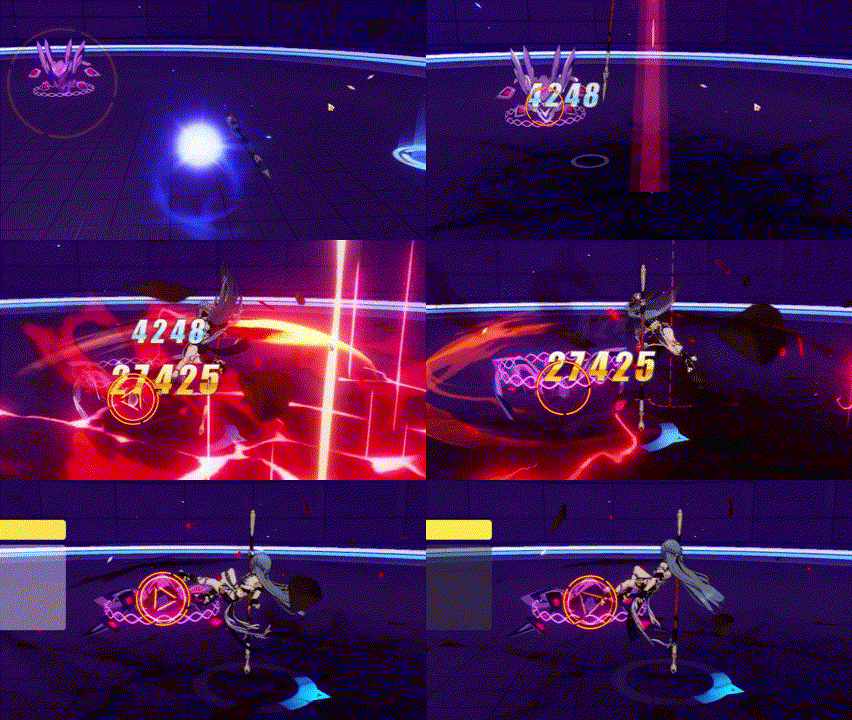
If you cast a Spear Combo ATK during the next 5s, it restores 5 more SP.
This QTE is generally turned off due to a waste of time.
✧ Weapon: Sword ✧
Basic ATK
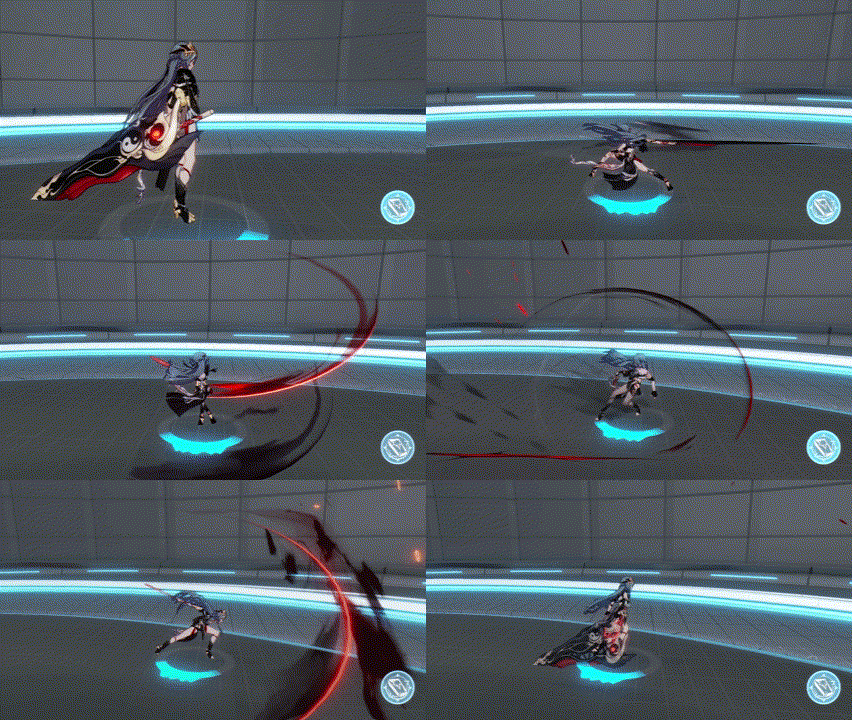
The Basic ATK has 4 Sequences.
Full SEQ: Deals 810% ATK of Physical DMG; restores 9 kinetic energy each
Combo ATK
Hold [ATK] at 200 Sword KE to use her Sword Combo ATK.
Deals 1390% ATK of Physical DMG; gather enemies; Time-Locks enemies
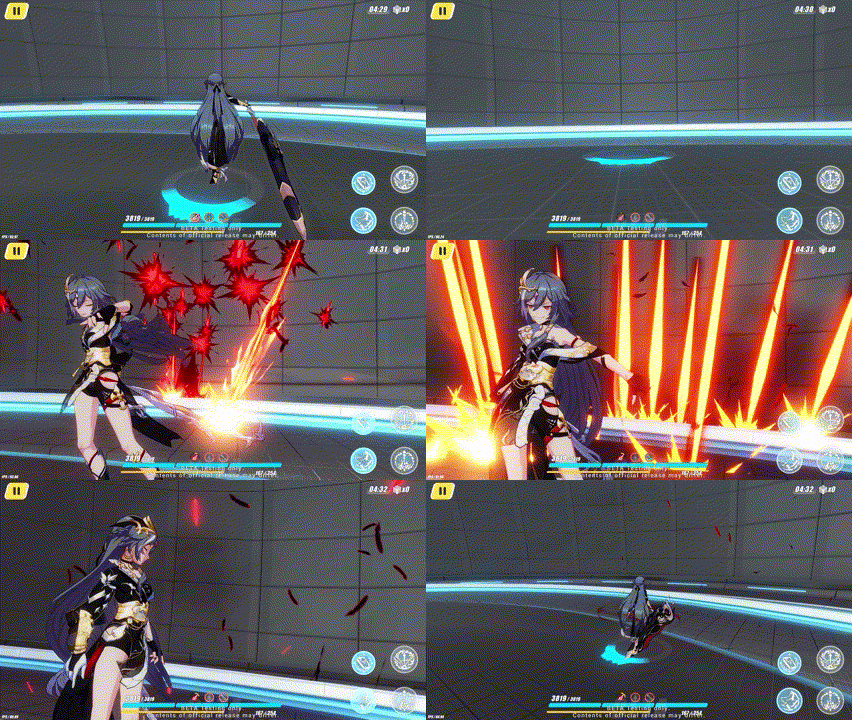
Weapon switch
Chain blades to sword: Deals 160% ATK of Physical DMG
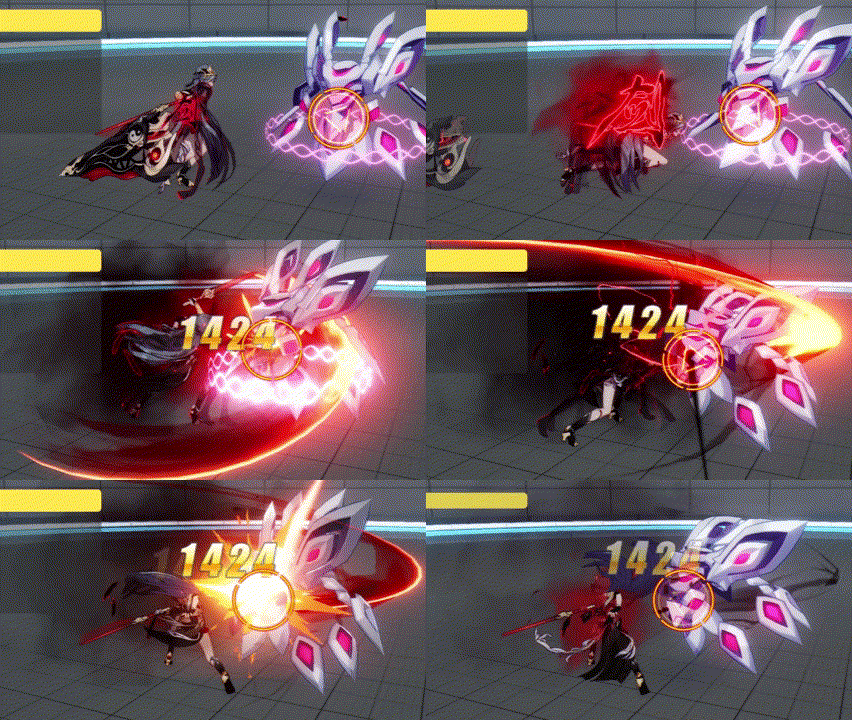
tap [ULT] to switch to Spear weapon.
✧ Weapon: Spear ✧
Basic ATK
The Basic ATK has 5 Sequences.
Full SEQ: Deals 775% ATK of Physical DMG; restores 9 kinetic energy each
SEQ 2 and 5: Gathers enemies
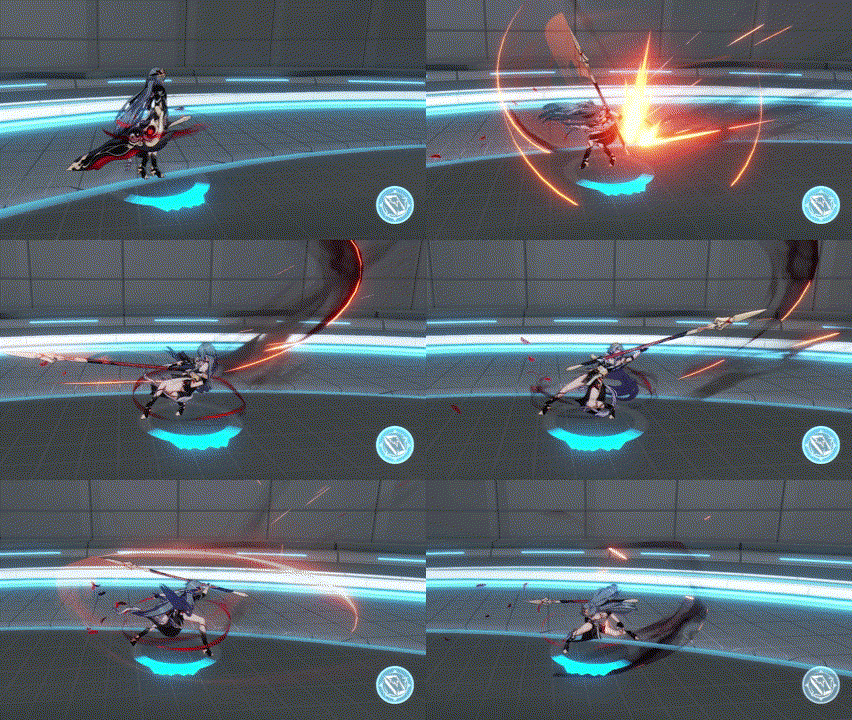
Combo ATK
Hold [ATK] at full Spear KE to use her Spear Combo ATK.
Deals 820% ATK of Physical DMG; gathers enemies

Spear Combo activates following buffs:
✧ Inflict 50% Impair for 15s
✧ Enemies take 15% more Physical DMG for 15s (independent effect, doesn't stack with from her Ultimate)
Senti can be switched out during this attack, the impair effect will trigger anyway.
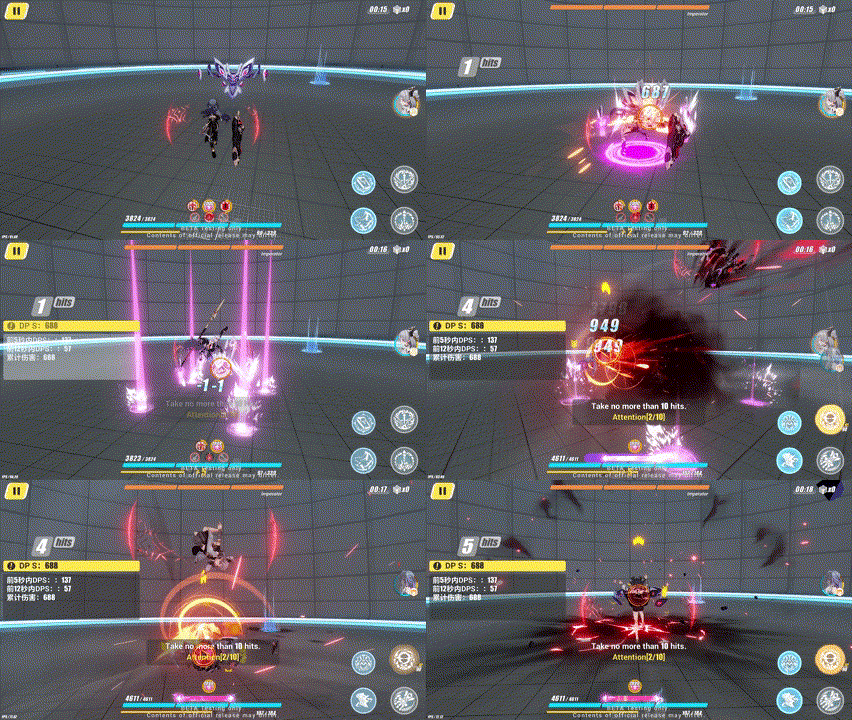
Weapon switch
Sword to Spear: Connect into Spear Basic ATK SEQ 2

Tap [ULT] to switch into chain blades weapon.
✧ Weapon: Chain blades ✧
Basic ATK
The Basic ATK has 3 Sequences.
Full SEQ: Deals 750% ATK of Physical DMG; restore 12 kinetic energy each
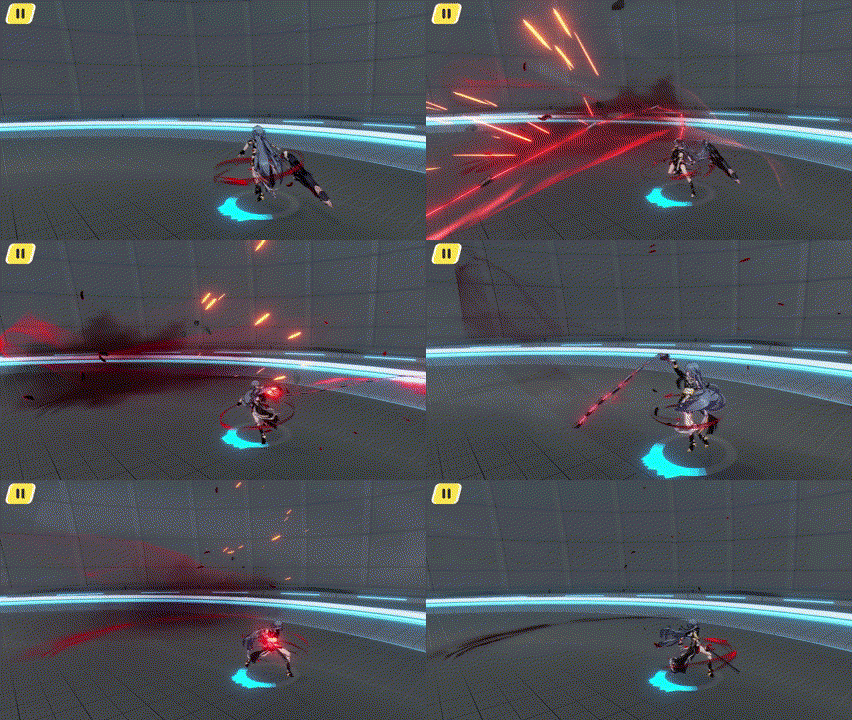
Combo ATK
Hold [ATK] at full Spear KE to use her chain blades Combo ATK.
Deals 850% ATK of Physical DMG; inflict 1,2s of coma; slows down time
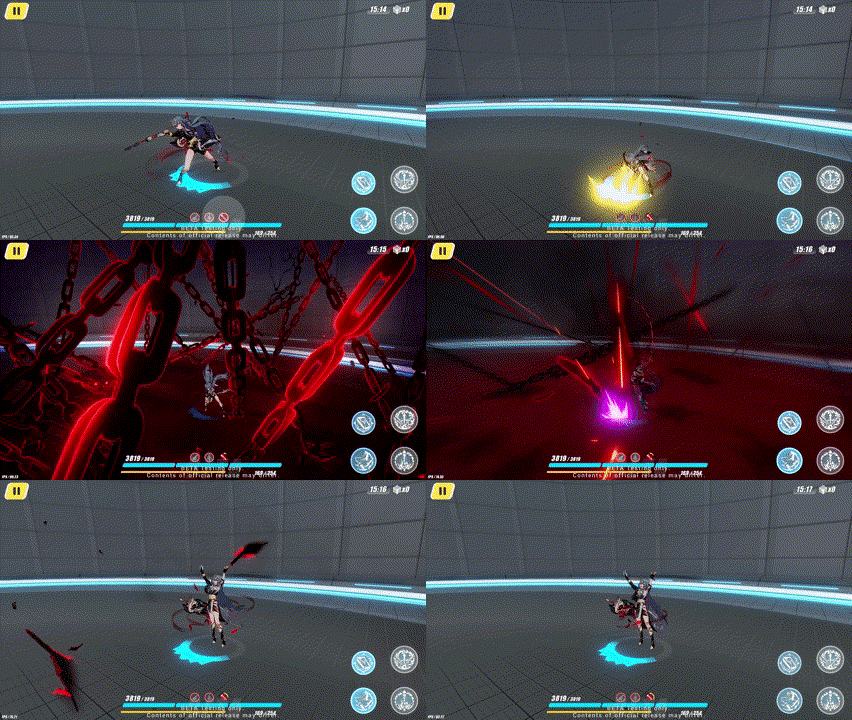
Chain blade Combo activates following buff:
✧ (if coma is applied succesfully,) enemies take 15% more Physical DMG from Senti for 15s. (independent, does not stack with same effect from Special ATK)
Weapon switch
Spear to chain blades: Deals 160% ATK of Physical DMG

✧ Shield: I'm Untouchable ✧
After using any Combo ATK, gain Shield: I'm Untouchable.
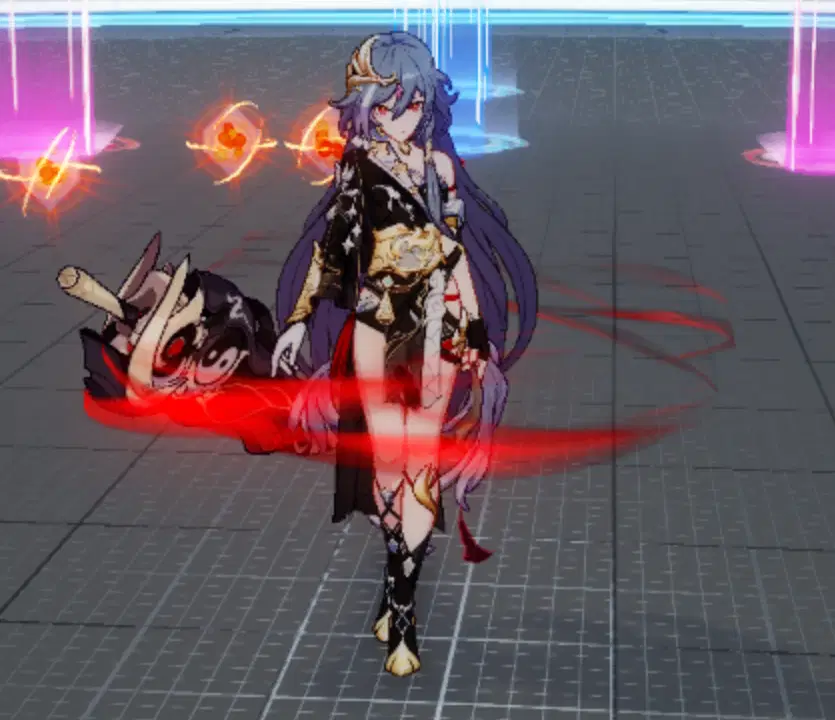
The red aura indicates it being active.
Triggering it again resets the shield; activation has 12s CD
Note: This shield does not trigger if you have a shield already.
*Prometheus*
Shield: I'm Untouchable grants following buffs:
✧ Valkyries take 50% less DMG, the shield can absorb DMG equal to 30% of Senti's HP at max
✧ moderate Ignore Interrupt
✧ The team gains 24% Crit DMG
Note: With her new weapon, this Crit DMG buff is permanently active
✧ Ultimate ✧
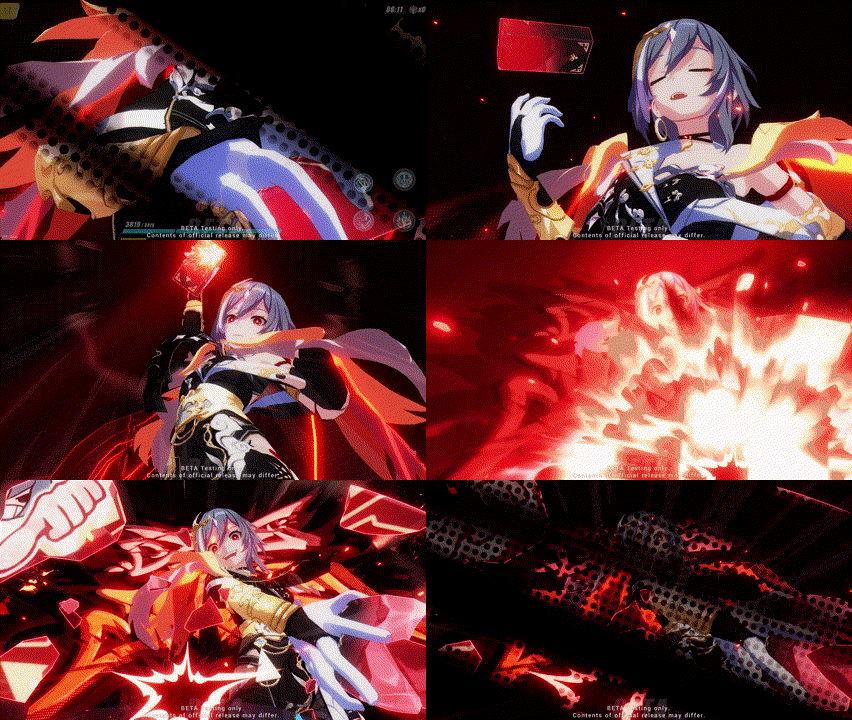
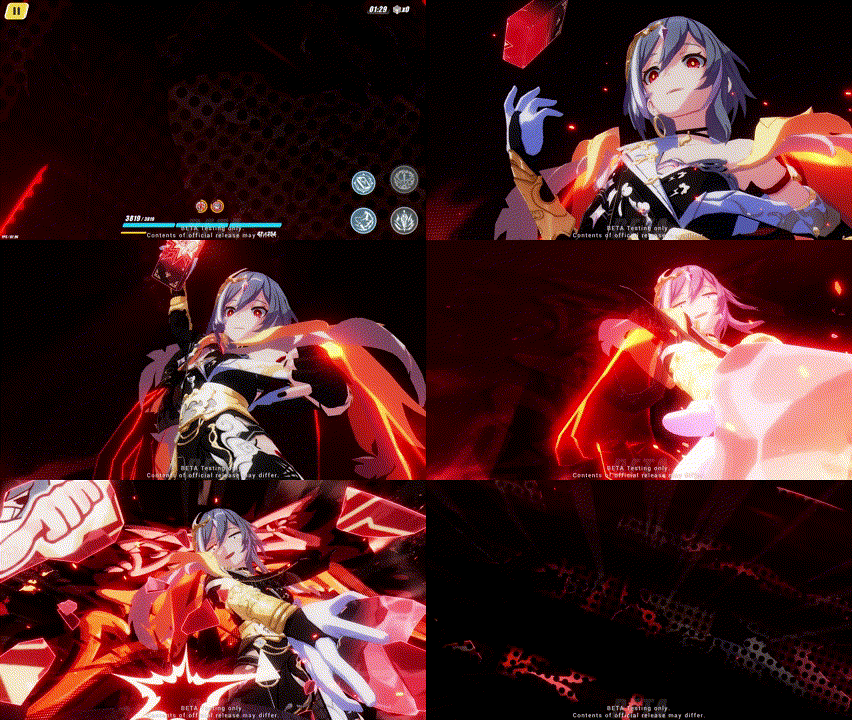
Hold [ULT] to use her Ultimate.
SP: 125 | CD: / (can't be triggered again during burst mode duration)
*All timers are frozen during this animation
Deals 1800% ATK of Physical DMG; enters Herrscher form for 15s
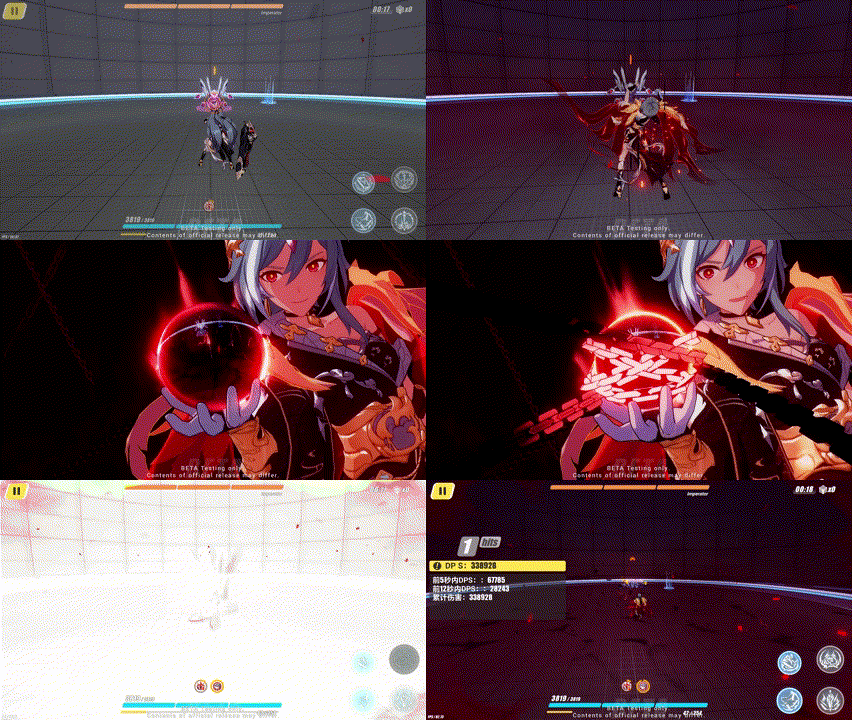
✧ Herrscher form ✧
During Herrscher form, her usual attacks are locked.
Herrscher form grants following buffs:
✧ Teammates attacking allow Senti to attack off field, dealing 150% ATK of Physical DMG; 0,1s CD; max 15 times each Ultimate
✧ Senti gains 35% Crit DMG
✧ Inflict 75% Impair on all enemies
✧ Enemies take 15% more Physical DMG for 15s (independent effect, doesn't stack with from her Spear combo)
✧ Senti gains Improves Ignore Interrupt
✧ Senti takes 40% less DMG
✧ Counts as burst mode
➤ Non-Brick attacks
During Ultimate, Senti attacks with a greatsword.
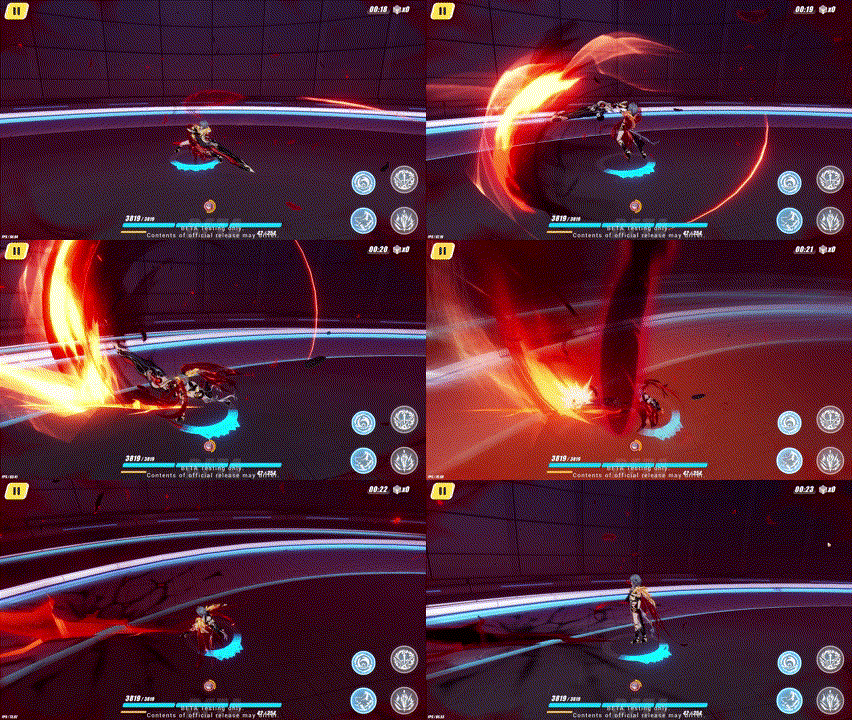
Basic/Combo ATK
The Basic ATK has 3 Sequences.
Full SEQ: Deals 1120% ATK of Physical DMG
hold [ATK] to use her Combo ATK. By holding [ATK] Senti will slash up to 10 times.
Slashes: Deals 105% ATK of Physical DMG each
Combo Finisher: Deals 800% + (amount of slashes) x 50% ATK of Physical DMG
Special ATK
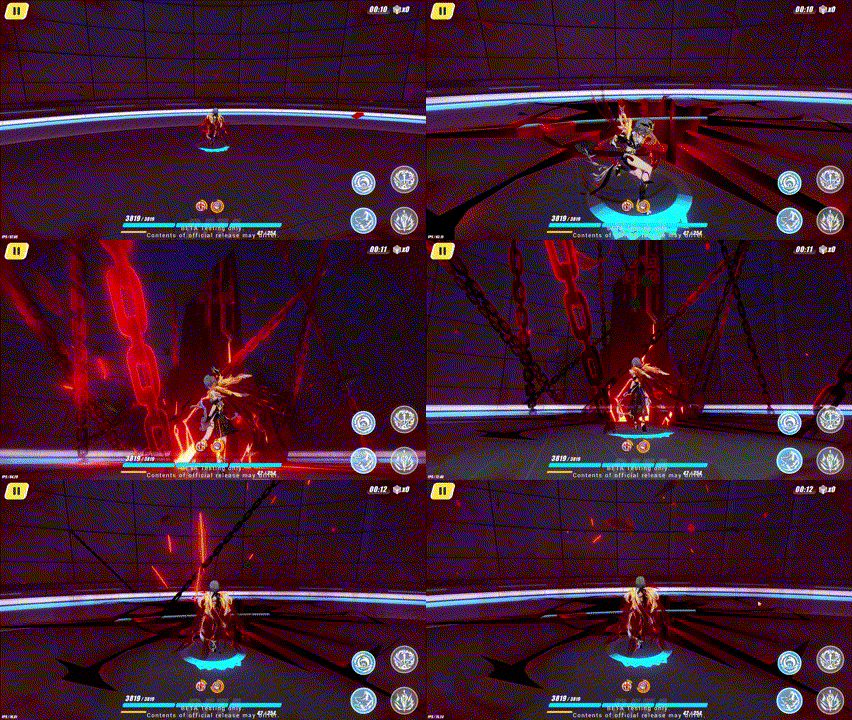
tap [ULT] to use her Special ATK.
CD: 8s
Deals 350% ATK of Physical DMG; gathers enemies; inflicts 1s of coma
➤ Brick attacks
Senti's usual greatsword attacks are disabled with Increadibly Infinite Intimidator equipped.
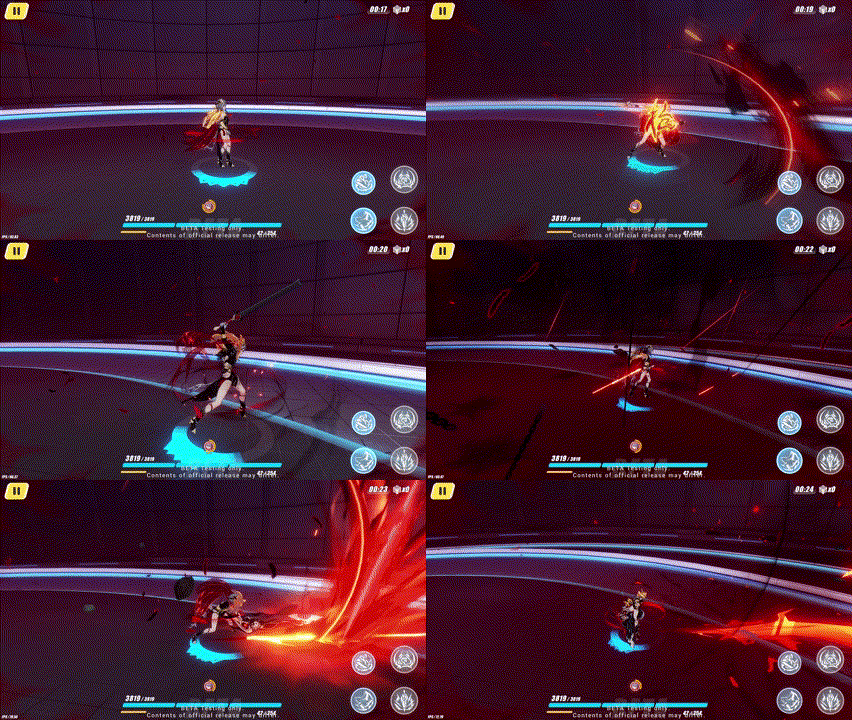
Basic ATKs
The Basic ATK has 10 Sequences.
Full SEQ: Deals 4480% ATK of Physical DMG
Special ATK
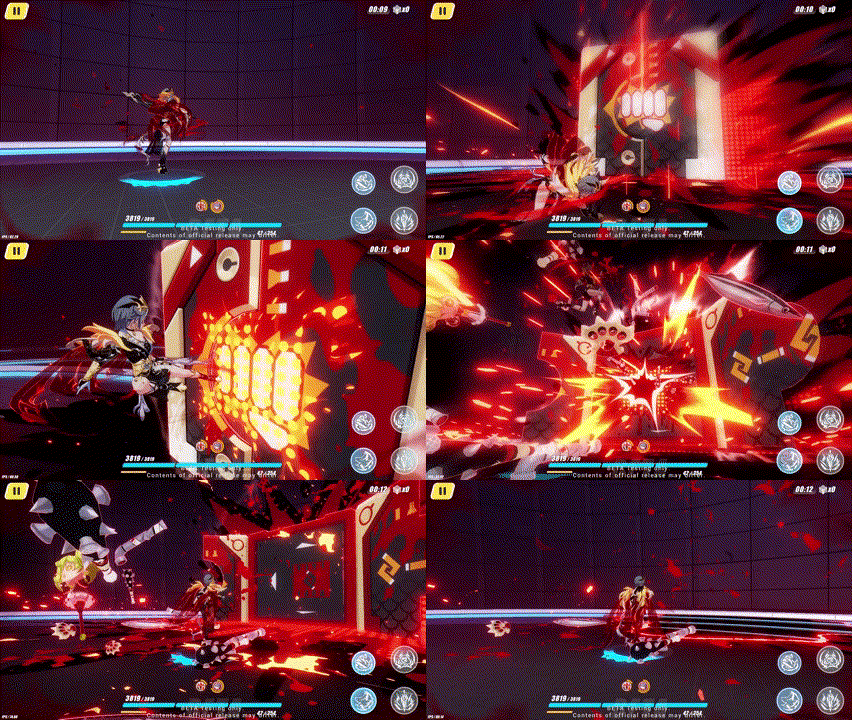
Deals 350% + 700% ATK of Physical DMG; inflicts 0,5s Coma; inflicts 6 Stun Trauma
Finisher
Tap [WA] during Ultimate to end Herrscher form.
Deals 1200% + 100% ATK of Physical DMG; Ultimate enters a 8s CD
✦ Rank-ups ✦
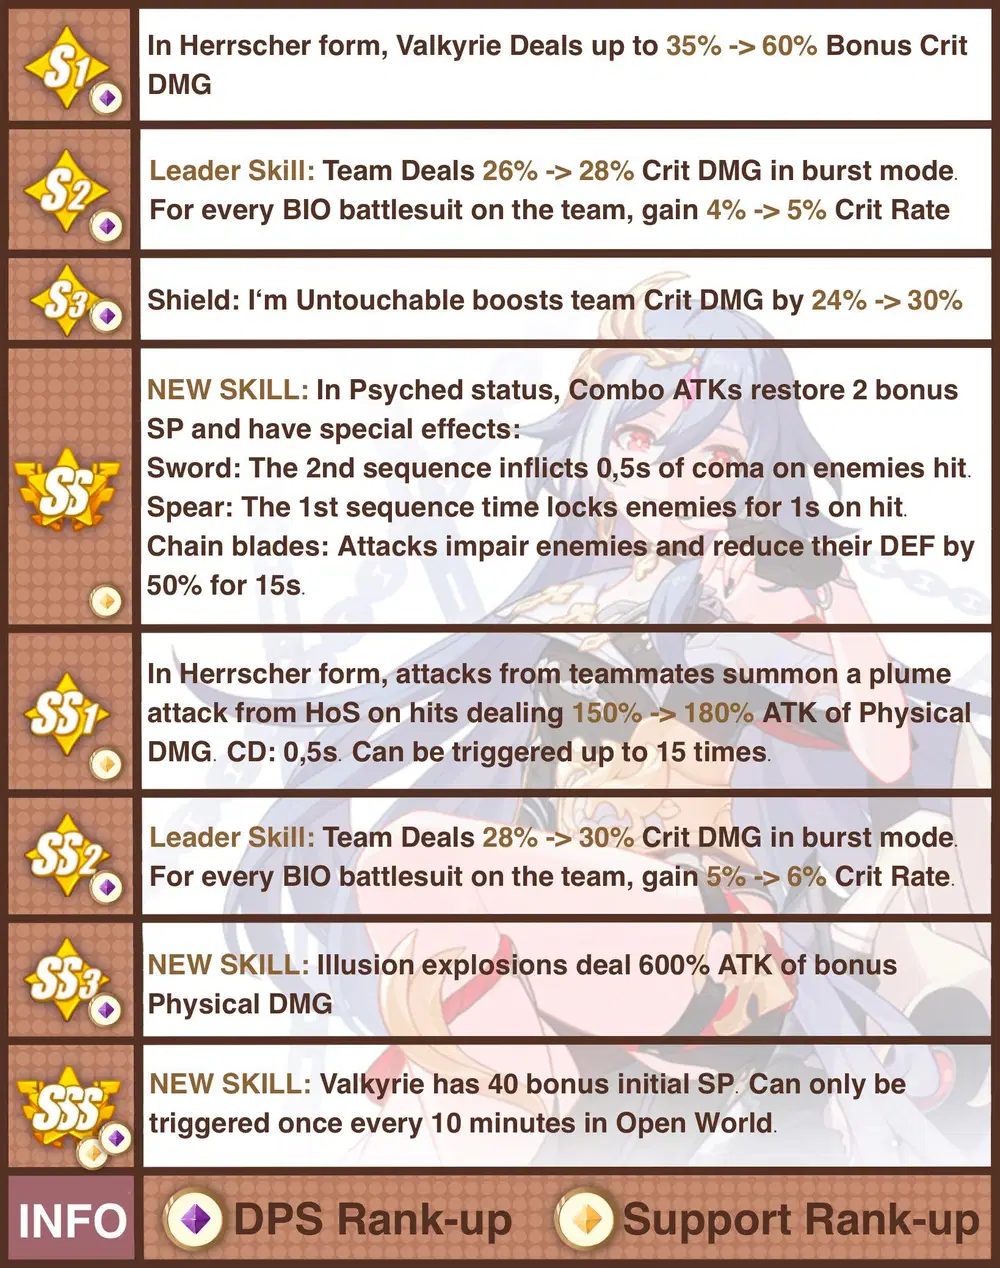
S2 is free from Elysian Realm, so I won't test anything below that.
Otherwise, it's currently not really possible to get her fragments. That's also why I skipped the Source section...
Analysis
✦ S1 ✦
S1 is by far the biggest buff here.
✦ S2 / SS2 ✦
Leader buffs give some buffs as Senti DPS. It's okay. Sadly she currently is the only BIO character in her DPS team though.
✦ SS/SSS ✦
Due to high SP regeneration, Senti barely uses any combos as DPS. That's why SS SP regeneration is almost useless.
SSS is pretty nice though, as it doesn't need combos. If the SP are needed depends on the boss and all.
✦ SS3 ✦
600% more scaling a rotation, pretty nice.
✦ Conclusion ✦
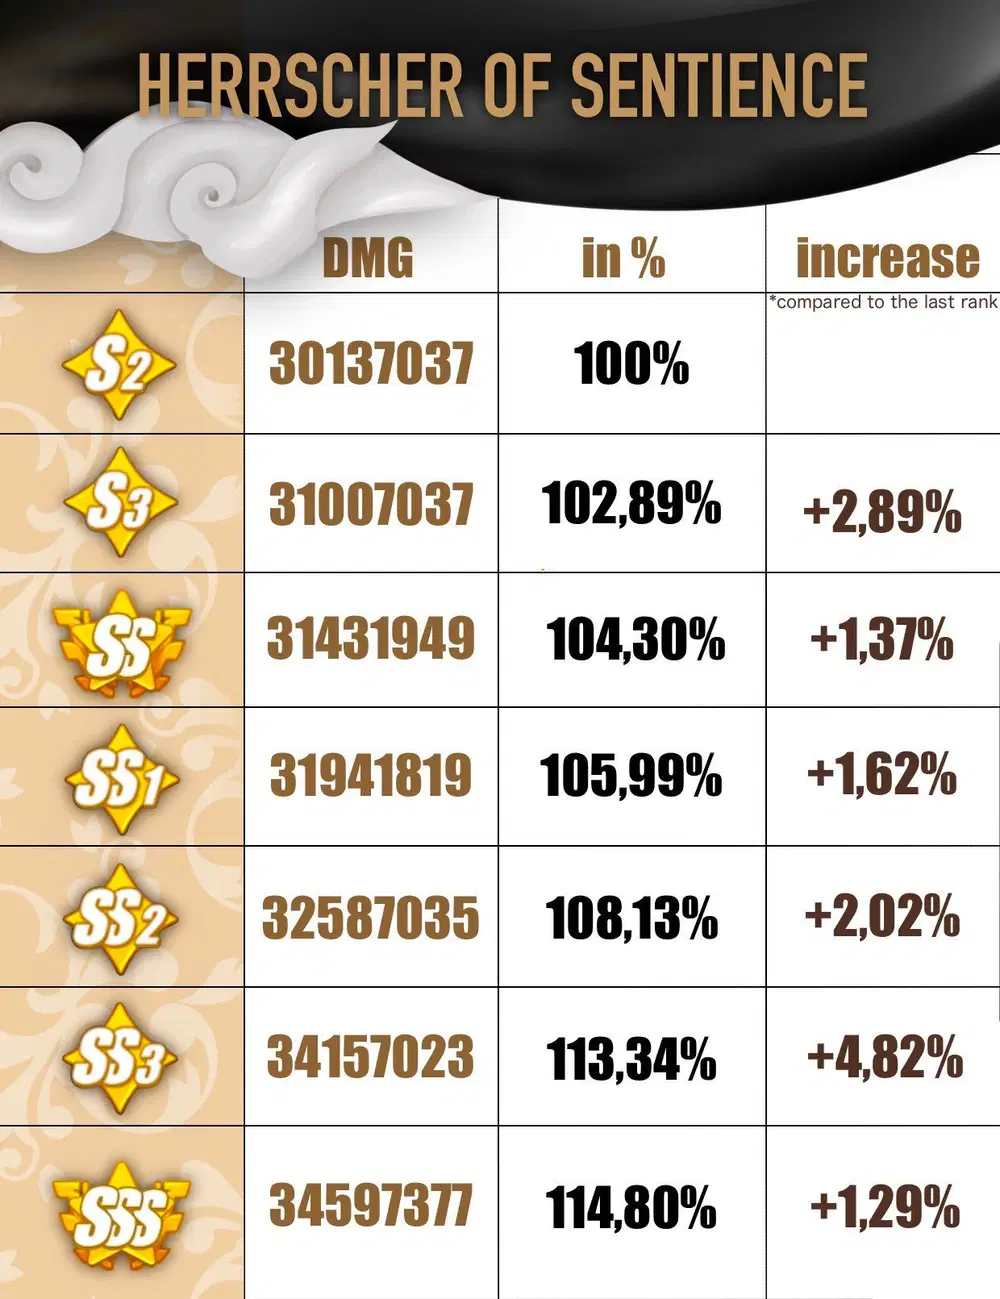
Nowadays, many people have SS+ HoS. Especially cause she already was in battlepass, had many ADV supplies, and so on.
However, her rank ups really aren't as great.
You can say that the S2 that's free from Elysian Realm is enough to work with.
✧ DMG comparison ✧
✦ No HoRb = No Senti? ✦
Firstly.
Go get HoRB.
Secondly.
In a physical team, you always need Herrscher of Sentience or Herrscher of Rebirth for the 75% Impair source.
Now, Herrscher of Sentience has this Impair herself.
Due to the Crit conversion and the effect of her new weapon "When used by Herrscher of Sentience, an enemy who already has Impair inflicted by another character will incur 18% more Physical DMG rather than the Impair associated with the Spiritual Vanquish area."
However, her Impair stays as normally if you don't have Herrscher of Rebirth in your team.
Due to the biggest issue being ignored this way, Griseo can be given a try.
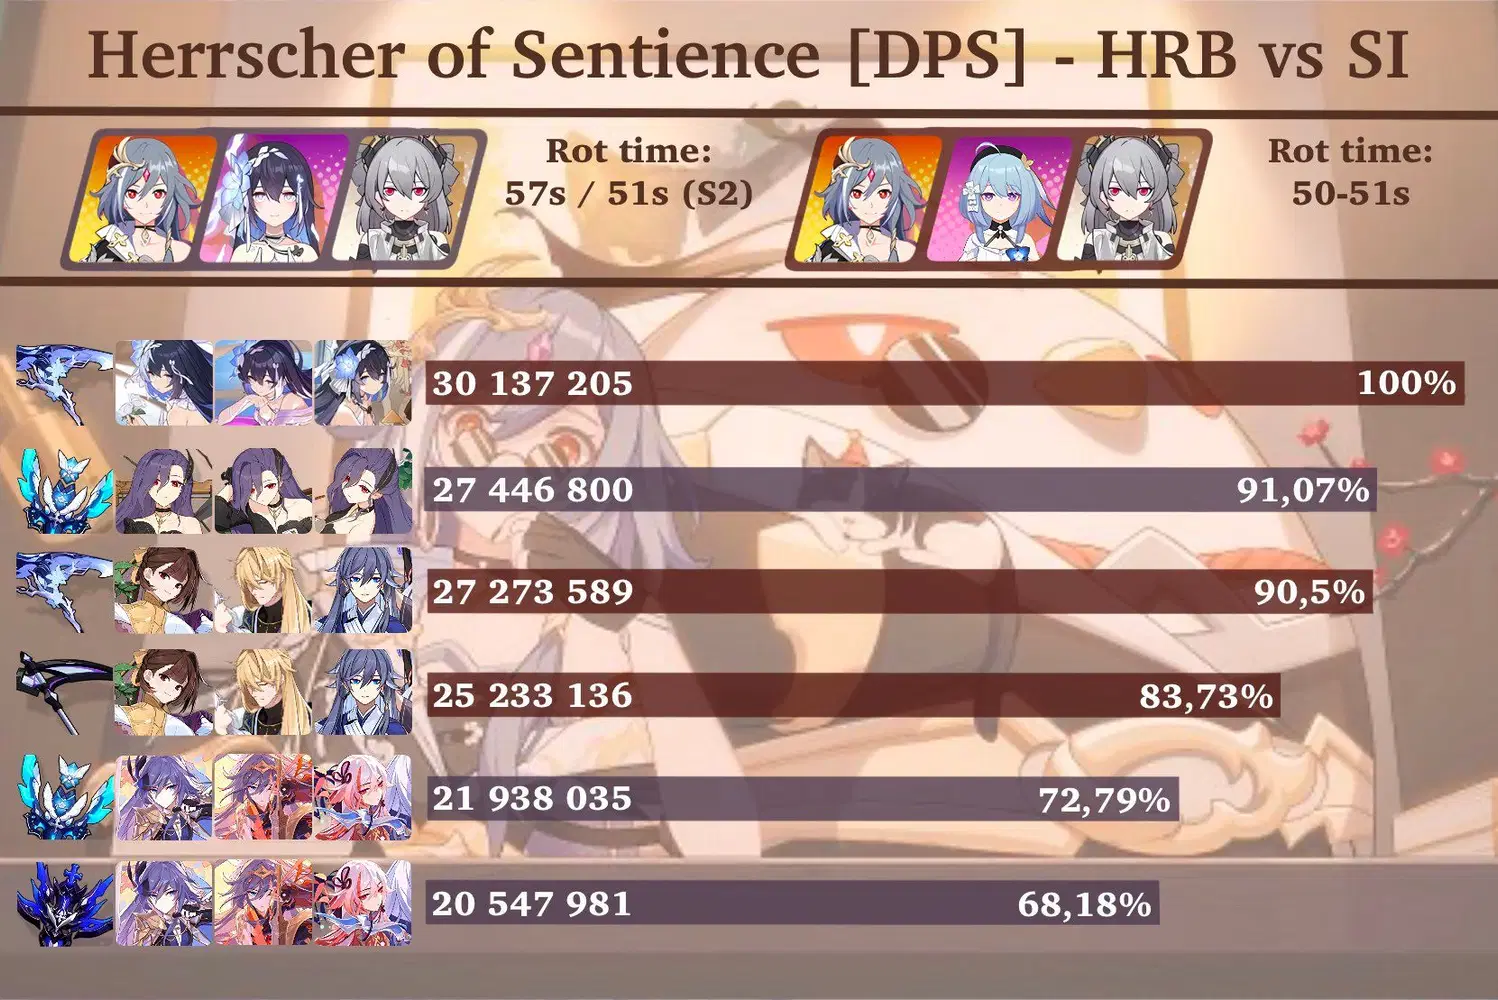
Multiple important notes on this:
✦ The SI runs were crit fished. This is to bring it closer to reality, as abyss/MA runs are usually crit malded.
✦ This is within 2 rotations to allow both HRB rotation variations.
✦ The first rotation with HRB is ~6s longer without S2, the following rotations have a very similar time.
✦ HRB is S1 in this. However, HRB Support at S1 is like 0,4% better than S0.
✦ Crit malding with SI is horrible.
✦ HRB also has team SP recovery, which is pretty nice
✦ Conclusion ✦
Herrscher of Rebirth in fact is not badly needed.
She makes the battle way more comfortable, but a 4/4 Griseo can replace her rather well.
She'll be enough for Redlotus at least, only place where you'd have issues with that is in Nirvana. And if your plan is to retain Phys Nirb without HRB... have fun ig?
I'd like to go into some more detail, feel free to skip if you're not interested, this'll most likely be more of a wall of text feeling.
Alright, here's a more detailed table
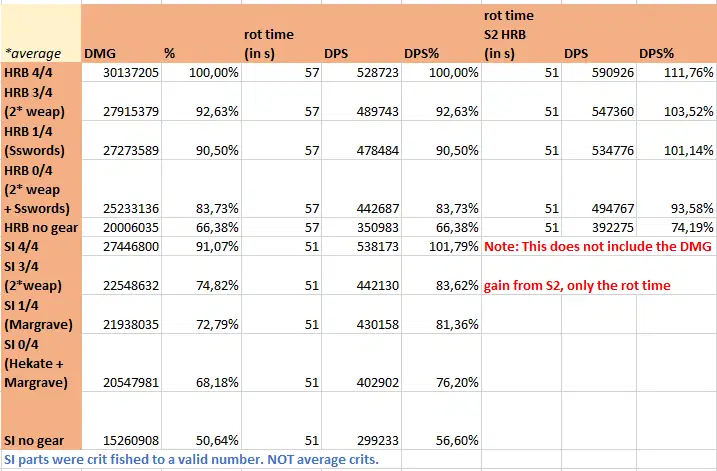
The most important part here is 4/4 Griseo being 1,79% better than S0 HRB in terms of DPS, which is due to the 51s rotation time.
Now, this both considers the first two rotations with S1 HRB and SSS SI.
When calculating the ~0,45% DMG difference from S0 HRB out (30 002 195,12) , the difference ends up being around 2,245%
Looking at a single rotation, S0 HRB would need ~29s, SI ~26s
(and S2 HRB ~23s)
Ignoring the slight DMG differences within the two rotations and taking the S0 HRB and SSS SI numbers from before, the DPS% ends up like
100% / 102,04% / 126,9%
Short conclusion#1:
The DMG per SECOND within one and two rotations is higher with SSS SI than with S0 HRB.
Overall DMG within one or two rotations is higher with S0 HRB than SSS SI.
Going a little further, with even more crit malding I ended up at 27 726 144 DMG, so let's also calculate the DPS with this number
1 rotation:
100% / 103,08% / 126,9%
2 rotations:
100% / 103,29% / 111,76%
now, 1-3% DMG aren't as much, but we'll take every point there is to get, won't we?
no
Short conclusion#2:
More crit malding -> higher difference
This one is kinda obvious, but I'll need it later
Looking at 4 rotations, the amount of time needed for each rotation would look around this:
S0 HRB: 29s - 28s - 22s - 28s -> 107s
S2 HRB: 23s - 28s - 21s - 28s -> 100s
SSS SI: 26s - 25s - 25s - 25s -> 101s
In terms of DPS (using prior 27,7 for SI and 20,0 for HRB)
100% / 97,9% / 107%
Short conclusion#3:
When going above 2 rotations, S0 HRB will outdo SSS SI again.
Now, this is the point at which I'd like to add HRB/SI to this. (This was tested at SSS HS/2 rotations)
HRB/TA: 34 597 377 (57s)
TA/SI: 31 174 649 (51s)
HRB/SI: 31 589 992 (52s)
*A little less crit malding on TA/SI this time
DPS:
100% / 100,71% / 100,09%
Short conclusion#4:
DPS wise, TA/SI also outdoes HRB/SI.
Raw DMG wise the difference also is low enough for it to possibly not matter.
Now, let's look at an actual run.
To put it simple, let's say these are our rotations, each + showing a certain time span, yellowish being the DPS time and the brown +s being the time during which the supports are on field.
let's say this is our HRB/TA team:
+++ +++++++++
and this out TA/SI team:
++ +++++++++
The DMG difference within 2 rotations is around 2 276 051
This is a rather huge difference and the chance that one additional tiny rotation is needed is really realistic.
So, while a run with HRB would look around this:
+++ +++++++++ +++ +++++++++
A run with SI would probably look like this:
++ +++++++++ ++ +++++++++ ++ ++
Which is overall longer.
This has a pretty simple reason: The supports just dont deal as much DPS as the dmg dealer once she is on field.
Short conclusion#5:
Even if HRB can clear within 2 rotations, SI often can't.
This way she does not have the benefit of the higher DPS within 2 rotations. Especially the start of a rotation, being the supports, is a big issue.
✦ Actual Conclusion ✦
Putting the prior conclusions together, time to draw an actual conclusion.
There are very certain situations in which TA/SI could outdo HRB teams.
For this, following is needed:
✧ The floor has to be cleared within 2 rotations
✧ HRBs higher DMG should not allow her to clear one rotation earlier than SI.
✧ SI has to be fully geared.
✧ HRB has to be below S2 rank
✧ The floor should not drop SP packs before HRBs first Ultimate.
✧ You have to be crit malding
However, please note we are talking about a lot of crit malding for 1-3 more points here.
✧ SSS SI
On the other side, let's look at HRBs advantages:
✧ Way less crit malding (Crit conversion)
✧ Higher DMG output within the same amount of rotations
✧ Team SP
✧ Less gear dependent
✧ At 3+ rotations, higher DPS
✧ It's still max 4% worse than SI. lol.
✧ At S2, she'll always outdo SI or TA.
Another special situation, being bleed abysses, can allow SI to be better.
In this case, it is possible for TA/SI ro outdo both TA/HRB and SI/HRB.
In general, all three of these teams are usable though. Expect TA/SI and HRB/SI to be very similar in Bleed abysses.
To put it more short, bleed abysses are basically the only situation in which TA/HRB is a possible team.
And that's only a brute force team.
The conditions above basically only will be met in Redlotus and below. And this min maxing is very unnecessary there honestly.
To say it in another way, HS/TA/SI will basically not be the best team anywhere in Nirvana.
... unless your HRB isn't geared.
And it's 1-3% more DPS with way more crit malding needed
So why did I do such a long explanation just to say HRB is better?
3 things.
1. I CANT FKING SHOW IT WITH 432D IN BETA
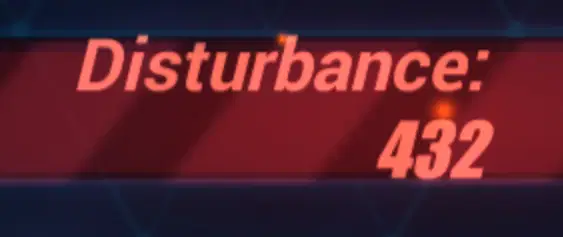
WHAT IS THIS
2. I felt like it could be interesting for people interested in more details of those tests, these graphs alone just don't say everything important
3. I warned you and said u could skip it 
Dear guide rater, I did not mean to bore my nice readers, so please leave me my poor crystals, I want HRBs skin in 7.1.
*ahem*
Back to the actual business
✦ Team & Rotations ✦
✧ Supports ✧
Herrscher of Rebirth - Seele Vollerei

✧ 18% Phys DMG taken from brick can be activated
✧ Crit conversion
✧ Many Crit and Physical DMG buffs
Terminal Aide 0017 - PROMETHEUS

✧ Shield break
✧ Multiple Physical DMG buffs
✧ Self DMG
Starry Impression - Griseo

✧ Bleed application (for Bleed abysses)
✧ Multiple Physical DMG buffs
✧ Pretty short on field time needed
✧ Rotation ✧
Note: Please remember that rotations can always differ based on the boss, the DMG needed and your overall situation. This is only the base rotation, if you want to be sure watch videos of players who know what they're doing.
HoS / TA / HoRb
*includes two rotations
HoRb Evasion - Basic ATKs until full Herrscher Charge - Combo ATK - Joint Combo
TA QTE - Ultimate - WA (SP Skill)
HoRb Ultimate - Joint WA
HoS WA - Evasion - Ultimate - Special ATK - Basic ATK x13 - Special ATK - WA (Finisher)
TA QTE - Ultimate - WA (SP Skill)
HoRb QTE - Joint Combo
HoS WA - Ultimate - Special ATK - Basic ATK x10 - Evasion - Special ATK - Basic ATK x4 - WA (Finisher)
Note: These is the highest amount of Basic ATKs you can possibly force into each Ultimate. If the enemy could die by you finishing earlier, do so.
10 Basic ATKs is one full Sequence (until the 3 bonk animation)
HoS / SI / HoRb
*includes two rotations
HoRb Evasion - Basic ATKs until full Herrscher Charge - Combo ATK - Joint Combo
SI QTE - Ultimate - (Combo ATK)
HoRb Ultimate - Joint WA
HoS WA - Evasion - Ultimate - Special ATK - Basic ATK x13 - Special ATK - WA (Finisher)
SI QTE - Ultimate - (Combo ATK)
HoRb QTE - Joint Combo
HoS WA - Ultimate - Special ATK - Basic ATK x10 - Evasion - Special ATK - Basic ATK x4 - WA (Finisher)
HoS / SI / TA
First rotation only:
HoS Spear Combo
Following rotations:
TA QTE - Ultimate - WA (SP Skill)
SI QTE - Ultimate
HoS WA - Ultimate - Special ATK - Basic ATK x13 - Evasion - Special ATK - WA (Finisher)
➤ Video example
0:00 HoS/HRB/TA
1:30 HoS/HRB/SI
2:59 HoS/TA/SI
✦ Gameplay examples ✦
Cutely steals the video from Inari Gaming (YouTube)
✦ Conclusion ✦
Is Senti's new gear worth pulling?
Definitely.
At least her weapon is. It's not only super strong but also gives 10 global ATK.
And come on, it's the queen Senti

Credits
Cyxo and Alpaca once again provided me some Valkyrie icons, boss images, and so on
And thanks Inari for letting me steal use your gameplay examples
Test details
Herrscher of Sentience:
S.2
Icreadibly Infinite Intimidator / Pericles (TMB)
694 + Equip ATK
6 x 23 ATK affixes
QTE off
... unless said otherwise
Herrscher of Rebirth:
S.1
Life Harvester's Path: Shared Destiny / Seele: Herrscher of Rebirth (TMB)
693 + Equip ATK (1332 ATK)
... unless said otherwise
Terminal Aide 0017:
SSS
Pandora's Box 18th / MEI (TMB)
1251 ATK
Starry Impression:
SSS
Elysian Astra: Heart's Color / Cezanne (TMB)
1236 ATK
Other:
LVL 45 Dorm
86 ATK / 6% Phys DMG from divine keys
2* Project Bunny ELF
RL emblem
Done 3 runs each (average number taken)
Base rotations:
HoRb Evasion - Basic ATKs until full Herrscher Charge - Combo ATK - Joint Combo
TA QTE - Ultimate - WA (SP Skill)
HoRb Ultimate - Joint WA + ELF Ult
HoS WA - Evasion - Ultimate - Special ATK - Basic ATK x13 - Special ATK - WA (Finisher)
TA QTE - Ultimate - WA (SP Skill)
HoRb QTE - Joint Combo
HoS WA - Ultimate - Special ATK - Basic ATK x10 - Evasion - Special ATK - Basic ATK x4 - WA (Finisher)
HoRb Evasion - Basic ATKs until full Herrscher Charge - Combo ATK - Joint Combo
SI QTE - Ultimate + ELF Ult
HoRb Ultimate - Joint
HoS WA - Evasion - Ultimate - Special ATK - Basic ATK x13 - Special ATK - WA (Finisher)
SI QTE - Ultimate
HoRb QTE - Joint Combo
HoS WA - Ultimate - Special ATK - Basic ATK x10 - Evasion - Special ATK - Basic ATK x4 - WA (Finisher)
HoS Spear Combo
TA QTE - Ultimate - WA (SP Skill)
SI QTE - Ultimate + ELF Ultimate
HoS WA - Ultimate - Special ATK - Basic ATK x13 - Evasion - Special ATK - WA (Finisher)
TA QTE - Ultimate - WA (SP Skill)
SI QTE - Ultimate
HoS WA - Ultimate - Special ATK - Basic ATK x13 - Evasion - Special ATK - WA (Finisher)
Thanks for reading my guide, I hope I was able to help you!
Have a great day 
EU/UID: 203184518




