


~ Please view this post in Dark Mode for the best experience ~
Guide Overview:
Hello, Travelers ~
♦ Today, I will be providing a comprehensive guide on completing the World Quest: The Wild Fairy of Erinnyes.
- This World Quest takes place mostly in the Erinnyes Forest region of Fontaine.
♦ This World Quest contains four sub-quests that must be completed:
- Foggy Forest Path
- Wilting Weeping Willow
- Furious Mouth of the Spring
- Within the Depths of Erinnyes
♦ After the completion of this World Quest...
- The Weeping Willow and the surrounding area will be cleansed, allowing for it to return to its natural state.
- You will now be able to collect the Lakelight Lillies growing under the Weeping Willow.
- The storm at Loch Urania will be calmed and you will no longer have to worry about fighting the wind when entering the area.
- New underground/underwater areas will be unlocked during the World Quest, and you will be able to access them indefinitely after finding them.
- There are chests and hydroculus that are accessible only after completing this World Quest.
- Pahsiv will open a shop behind the waterfall north of Loch Urania, containing items that can be bought with Tidalga. She will have a chest waiting for you, and you can complete a fetch quest to gain even more rewards.
- The chest will contain a Drained Conch Cup.
- The shop has 15 Lakelight Lillies for sale, as well as many other items. You can only by them once.

Begin the World Quest
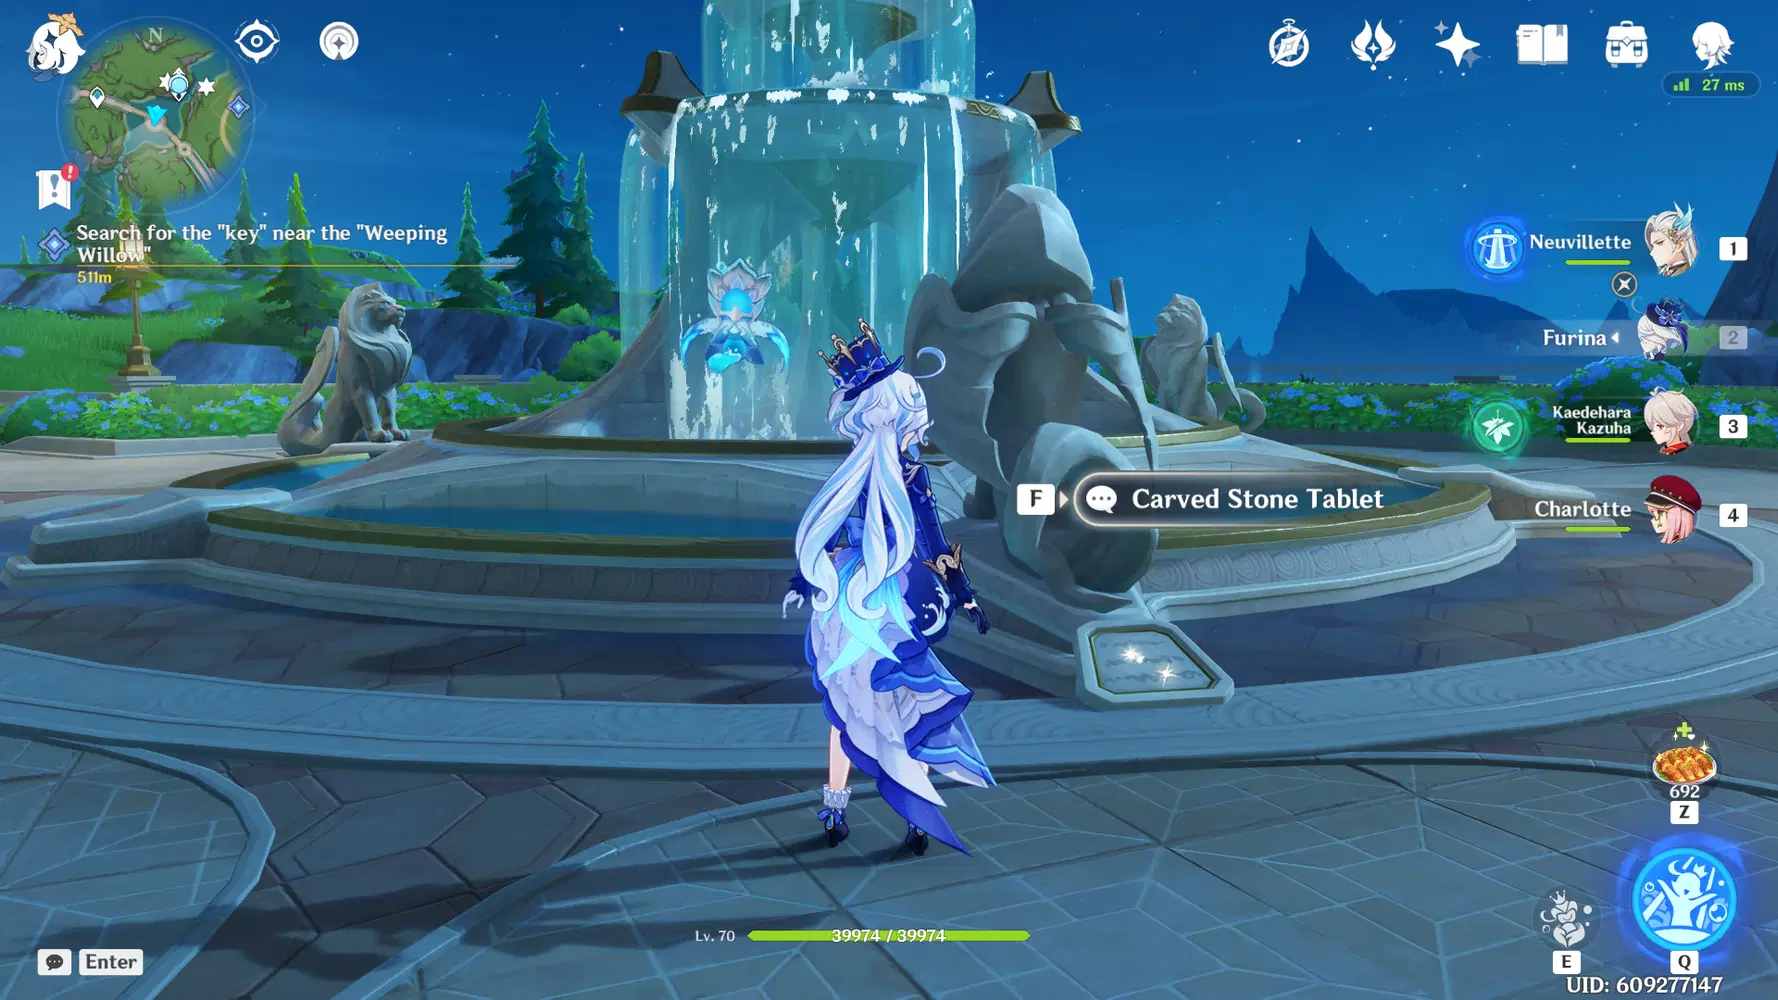
Marcotte Station Fountain
♦ To start the World Quest: The Wild Fairy of Erinnyes, you must go to Marcotte Station and interact with the ‘Carved Stone Tablet’ at the foot of the fountain.
Foggy Forest Path
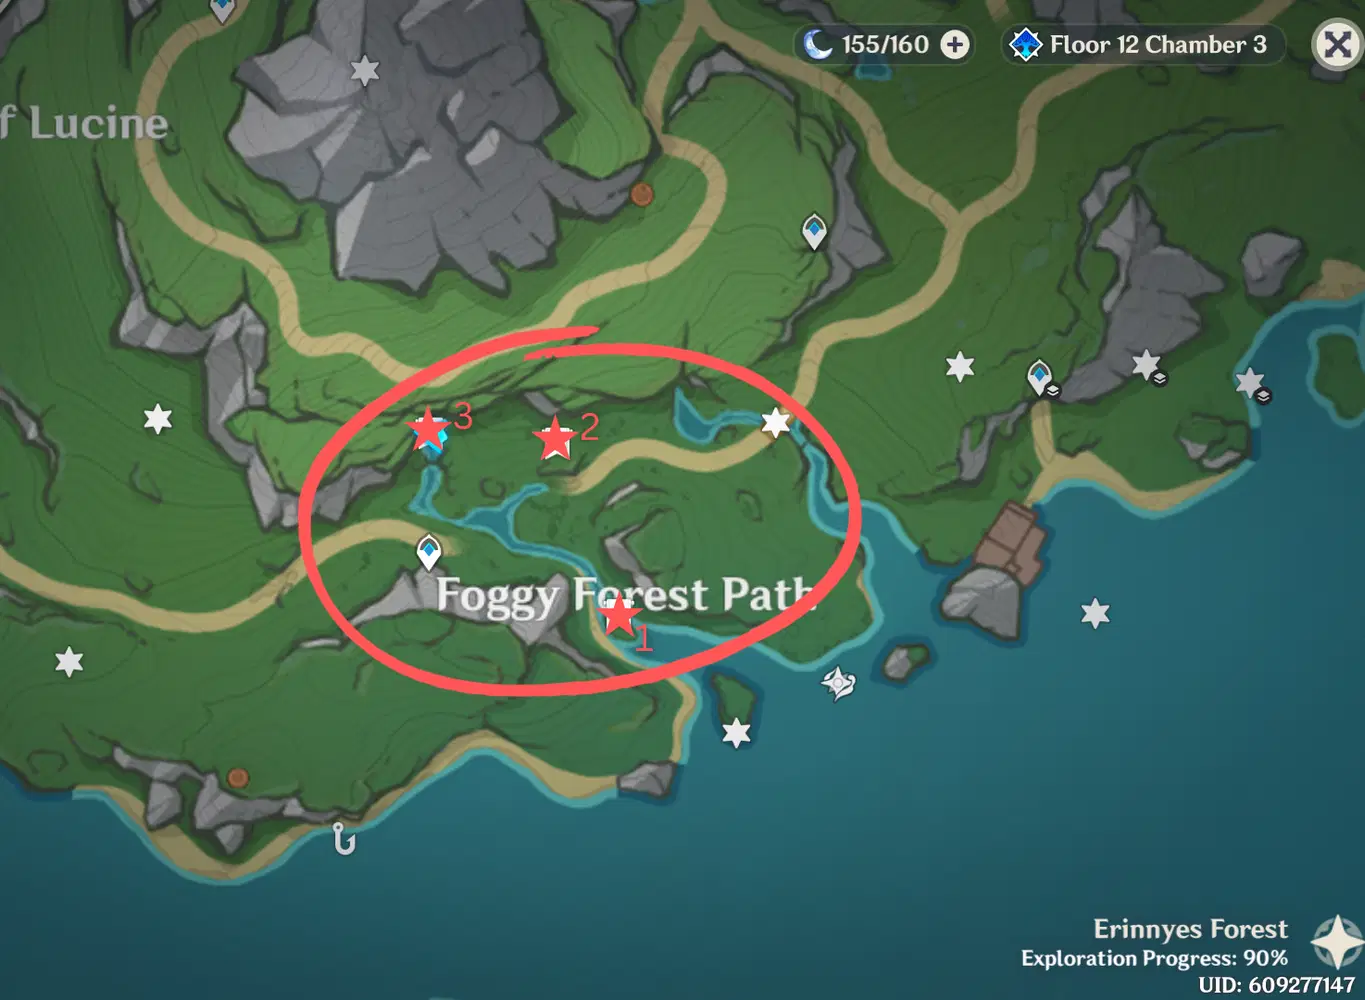
Puzzle Locations
1. Enter the sub-area, Foggy Forest Path, in the southern section of Erinnyes Forest.
2. As you enter this area, you will notice a large, crystalline tree in between a set of paths. In the surrounding area are three Harmonious Reed Pipe puzzles that you must complete in order to complete the first part of the World Quest: The Wild Fairy of Erinnyes.
Puzzle 1
3. Take the southern path and head to the first puzzle.
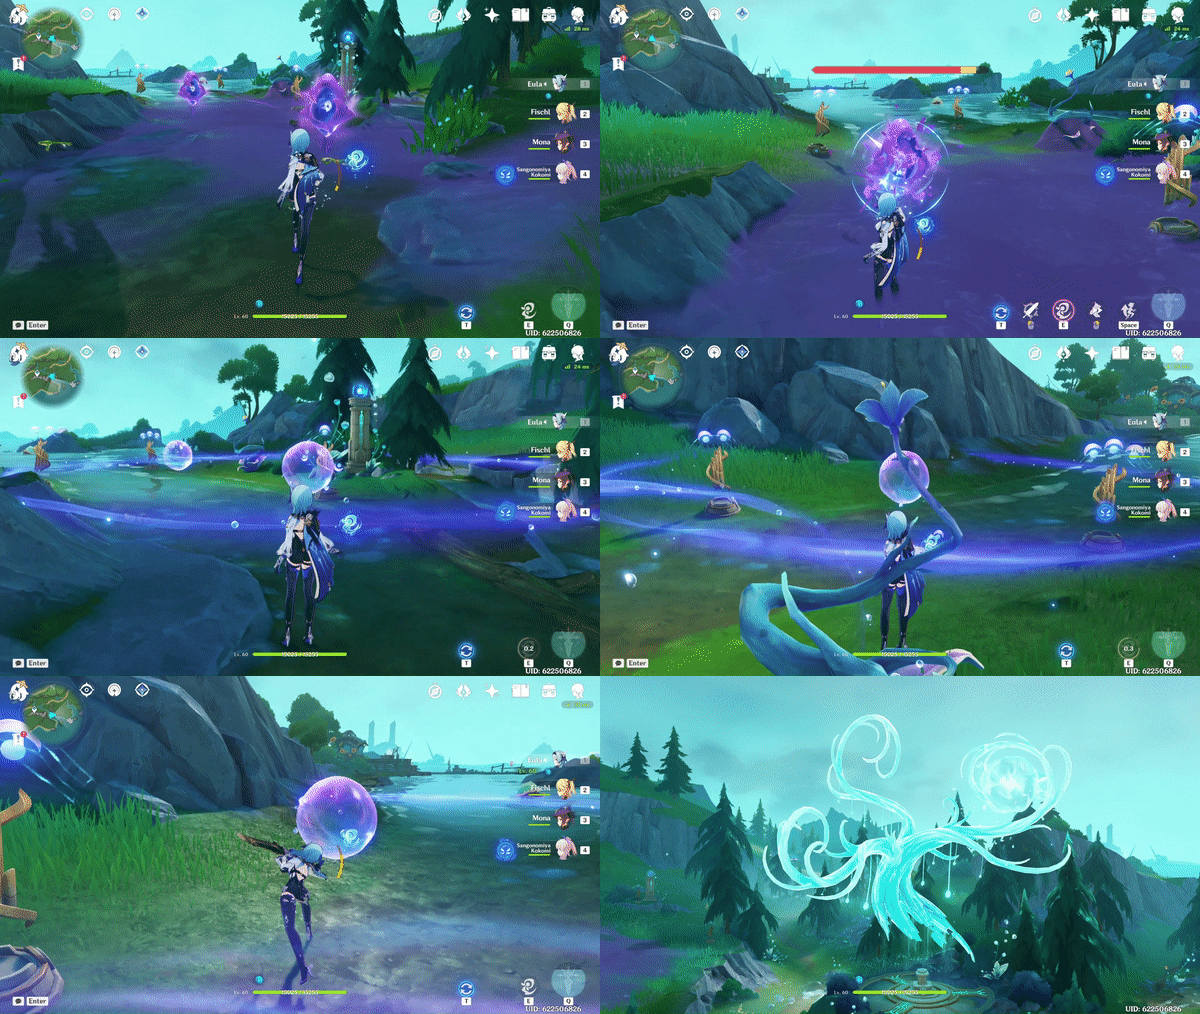
Complete the first puzzle
4. The three Harmonious Reed Pipes each have a designated rune number (1 - 2 - 3). This indicates the order that they have to be activated in.
5. Obtain the Xenochromatic Ball Octopus’ ability and cleanse the Contaminated Bacterial Mats.
6. Use the ability to push the first Dew Bubble until its closest to the pipe with a rune number of one. Push the second Dew Bubble until it is between the last two pipes, but its AoE is closer to the pipe with a rune number of two. Since we have to activate them in order of their runes, you want the first Dew Bubble to be closest to the first pipe so that that one is activated first. Make sure the second Dew Bubble's AoE will then activate the second pipe second, and the third pipe last.
7. Strike the Dew Bubbles in order to activate their AoE effect.
Puzzle 2
8. Head to the northern side of Foggy Forest Path to begin the second puzzle.
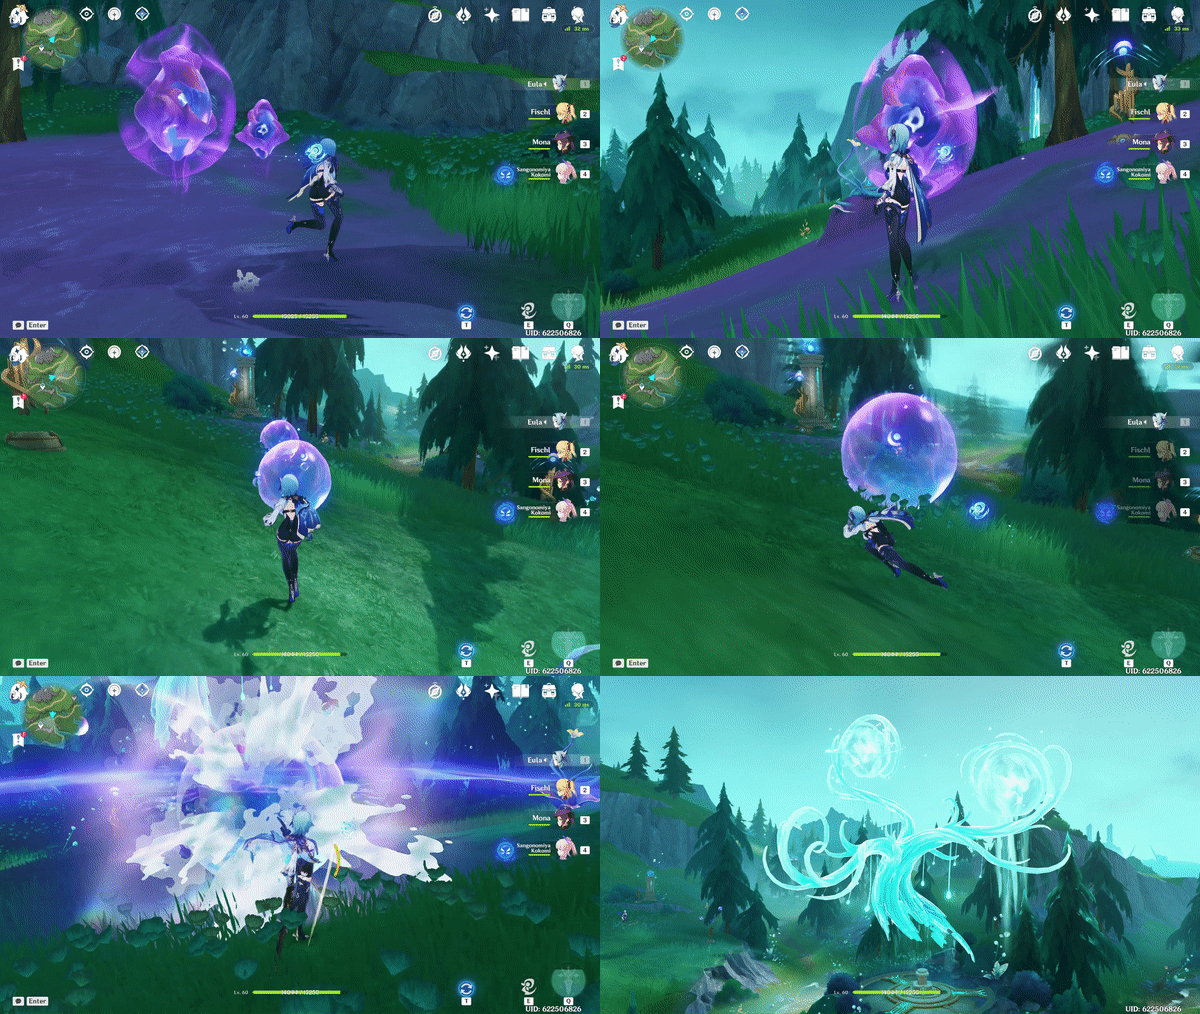
Complete the second puzzle
9. The three Harmonious Reed Pipes all share the same rune number, which means they must all be activated at the same time.
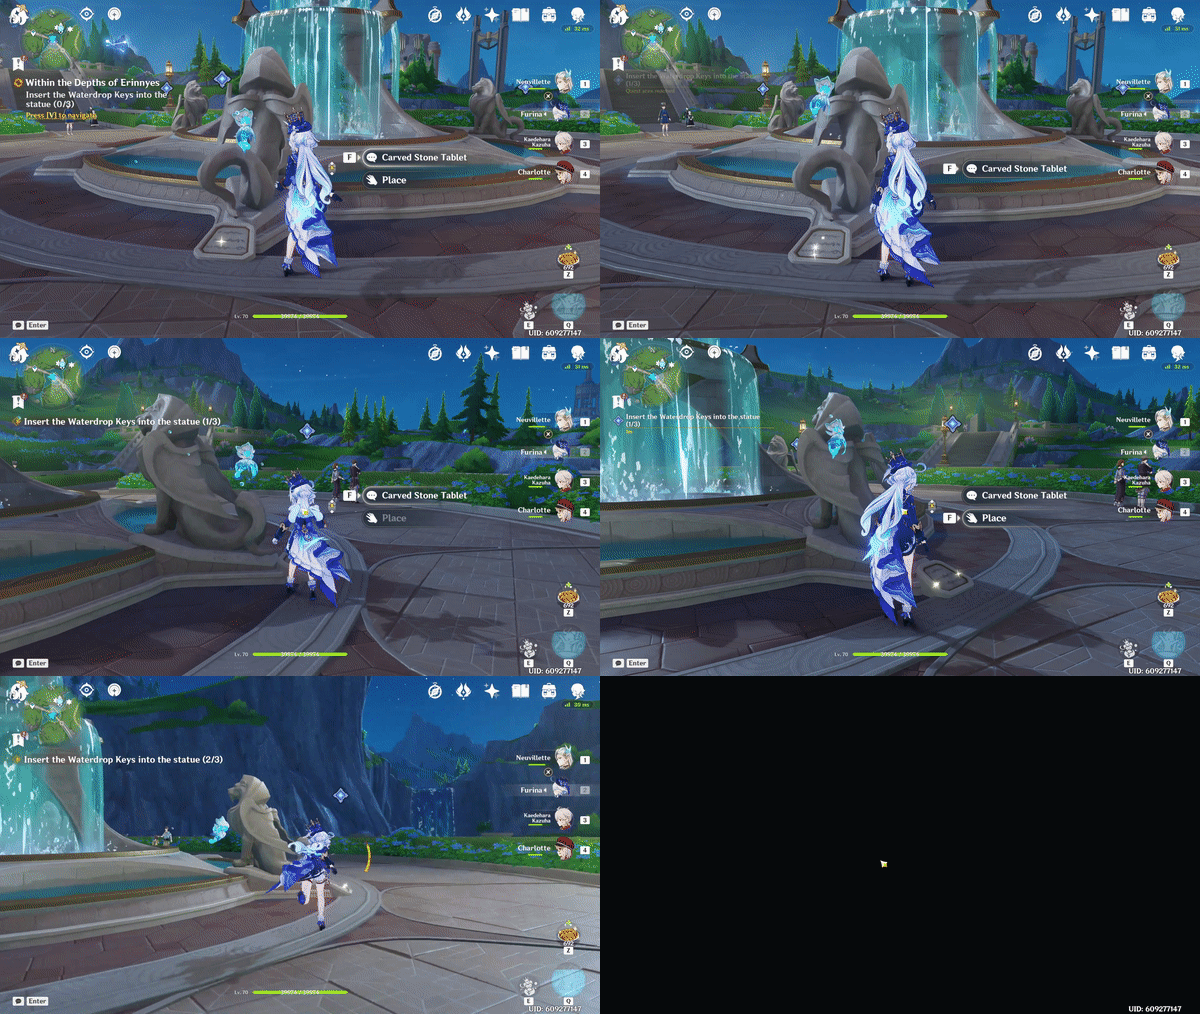
10. Obtain the Xenochromatic Ball Octopus’ ability and cleanse the Contaminated Bacterial Mats.
11. Now, push both Dew Bubbles into each other to combine into one larger Dew Bubble. Use the ability again to move the Dew Bubble into an ideal position which will activate all three of the Harmonious Reed Pipes at the same time after you strike the Dew Bubble.
Puzzle 3
12. Head to the northwest side of Foggy Forest Path to begin the third puzzle.
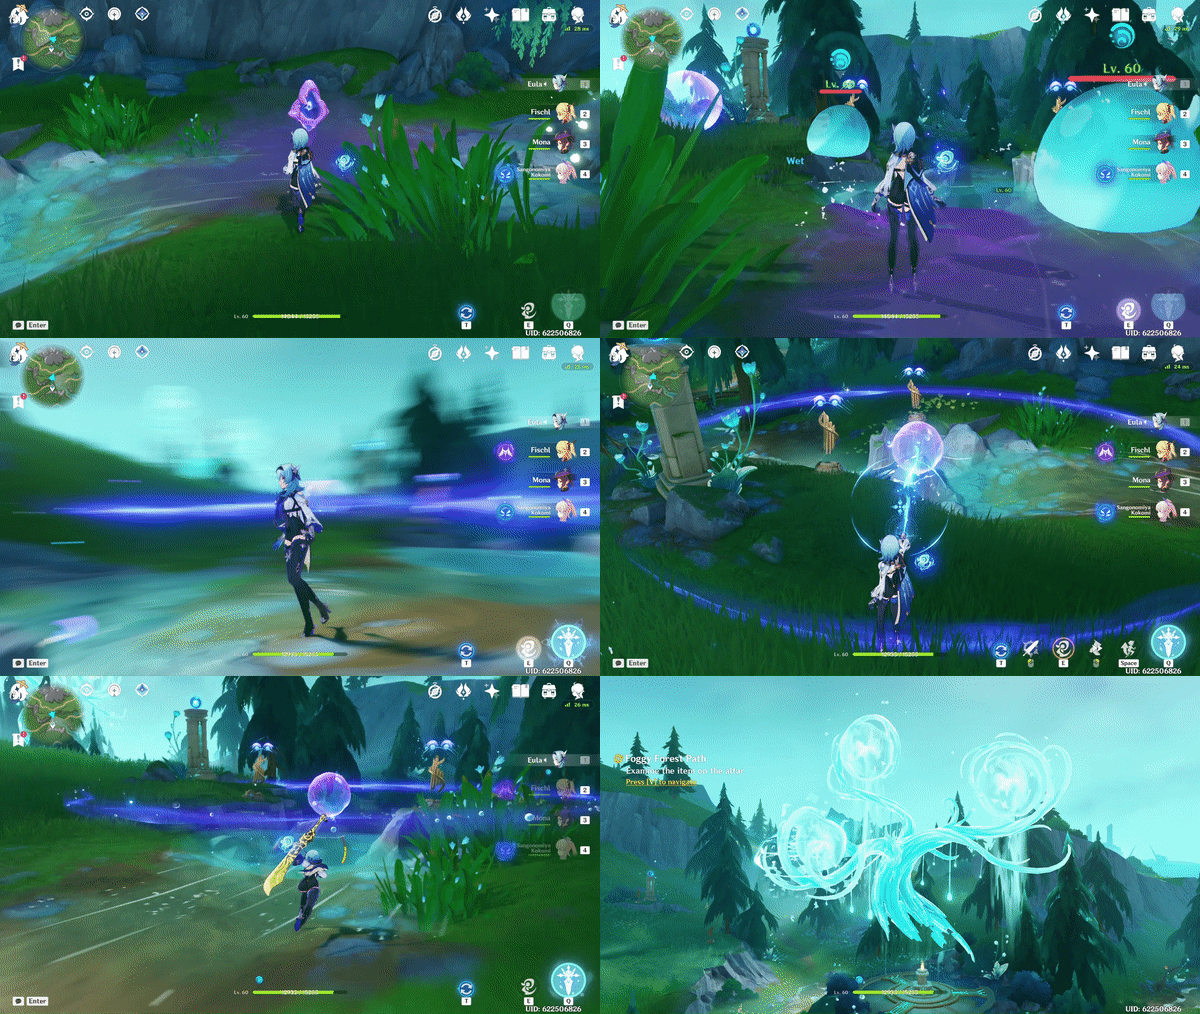
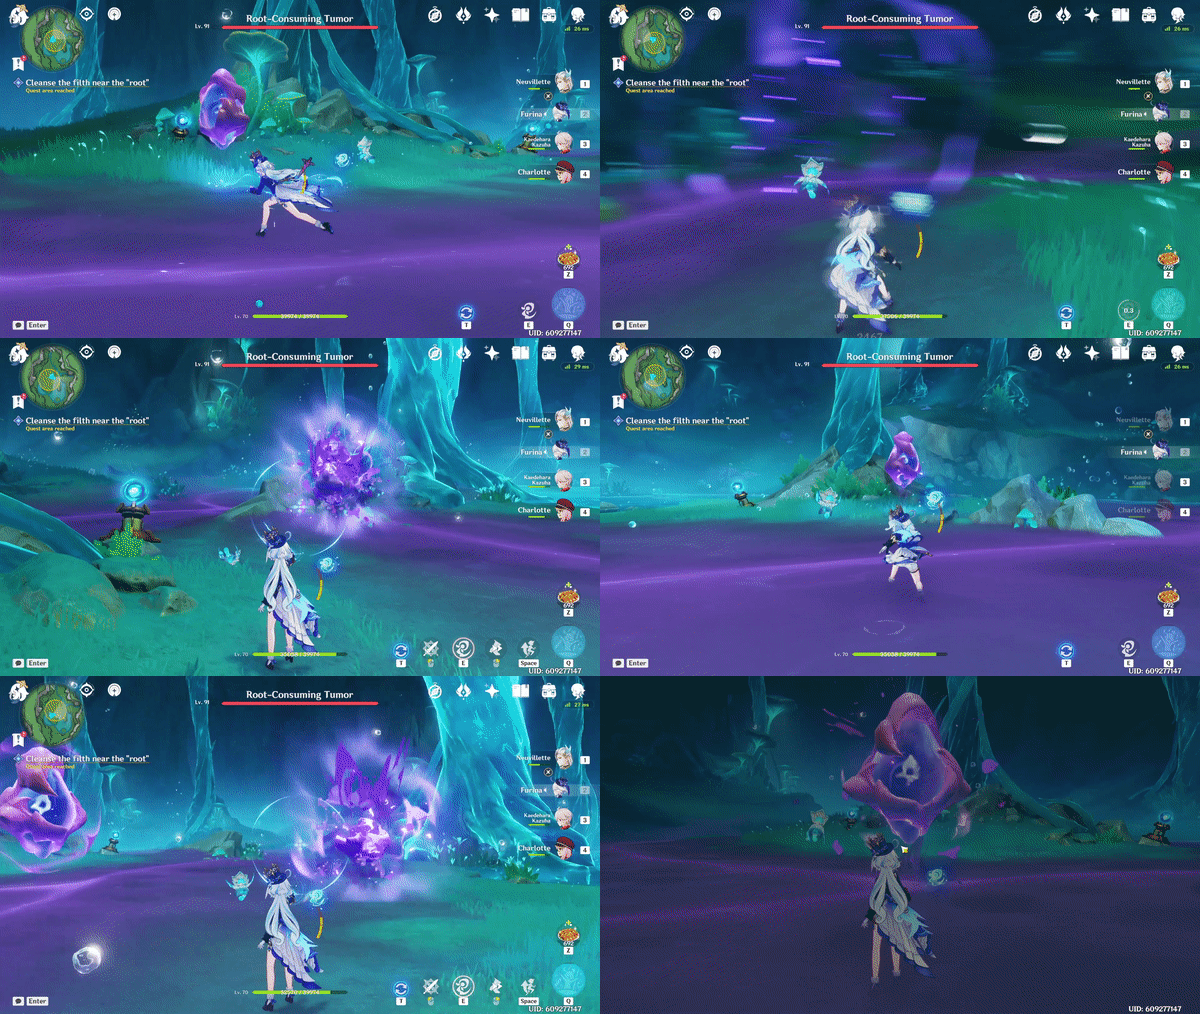
Complete the third puzzle
13. As you examine the Harmonious Reed Pipes, you will notice that two share the same rune number while the third pipe does not.
14. Obtain the Xenochromatic Ball Octopus’, cleanse the Contaminated Bacterial Mats, and defeat the hydro slimes that appear.
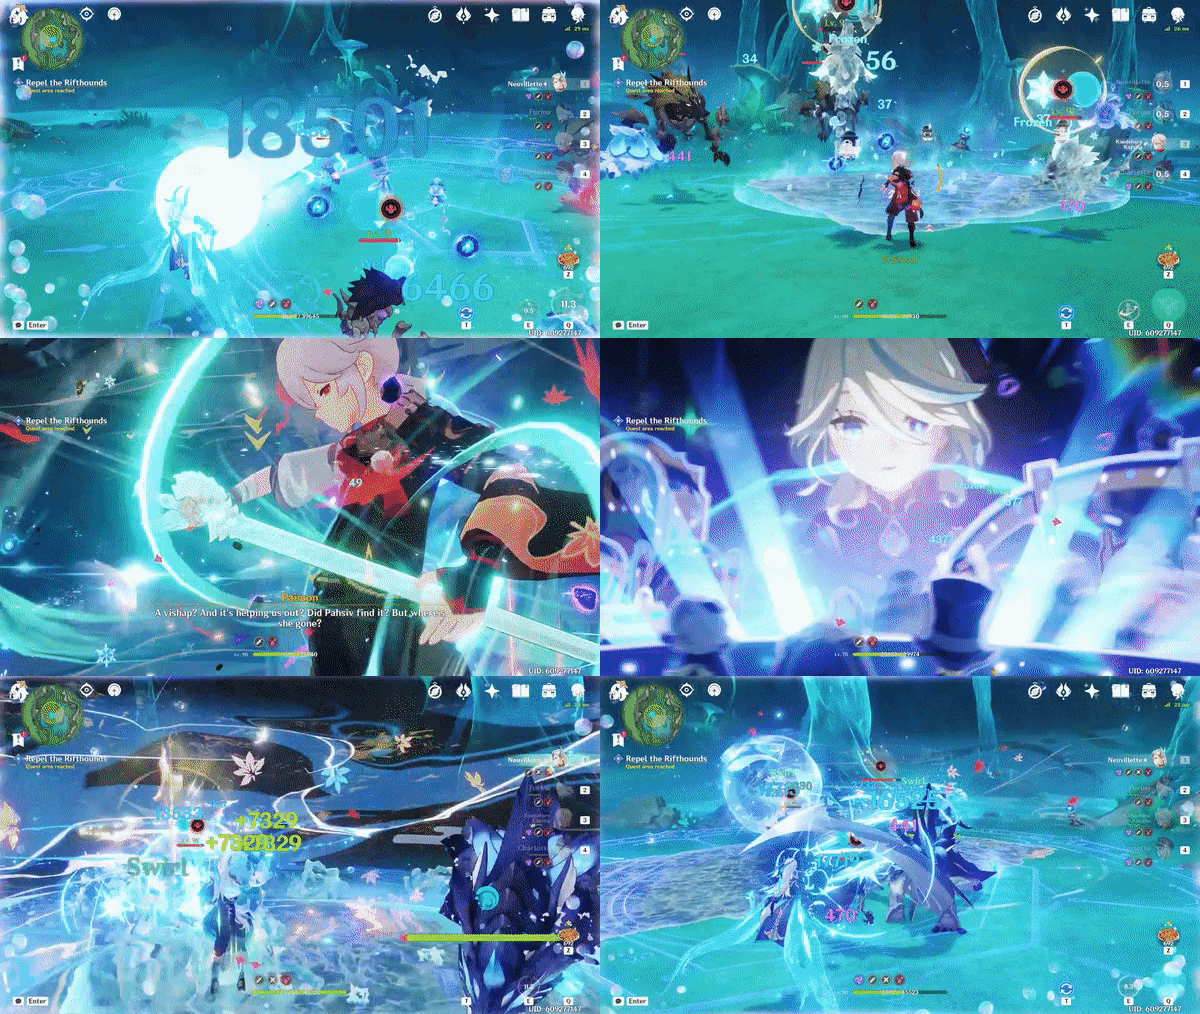
15. Push one of the Dew Bubbles towards the farthest pipe showing a rune number of one.
16. Secondly, push the other Dew Bubble to sit directly in the middle between the other two pipes which share a rune number of two.
17. Finally, strike the Dew Bubble next to the pipe with rune number one, and then quickly run to the other Dew Bubble and strike it, activating the pipes in order.
Conclusion
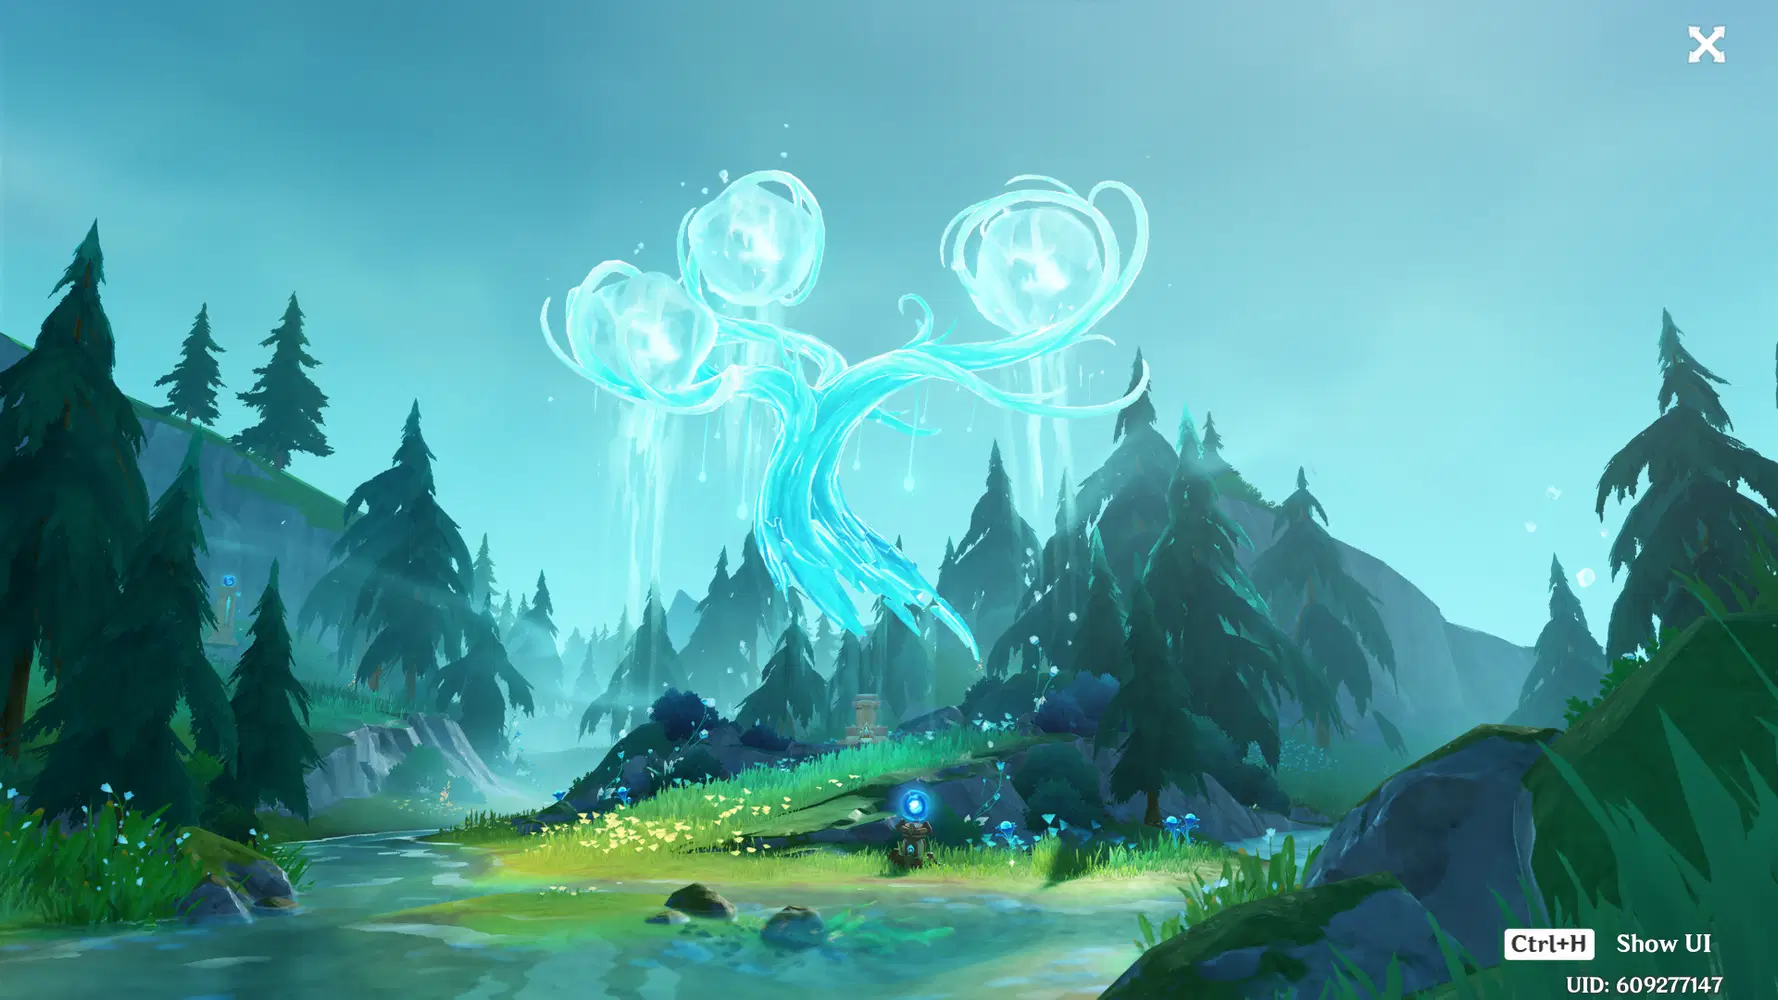
Completed Tree
18. Once all three of the Harmonious Reed Pipe puzzles are completed, you will notice that the tree has obtained three large bubbles in between its branches. This indicates you have finished each of the puzzles.
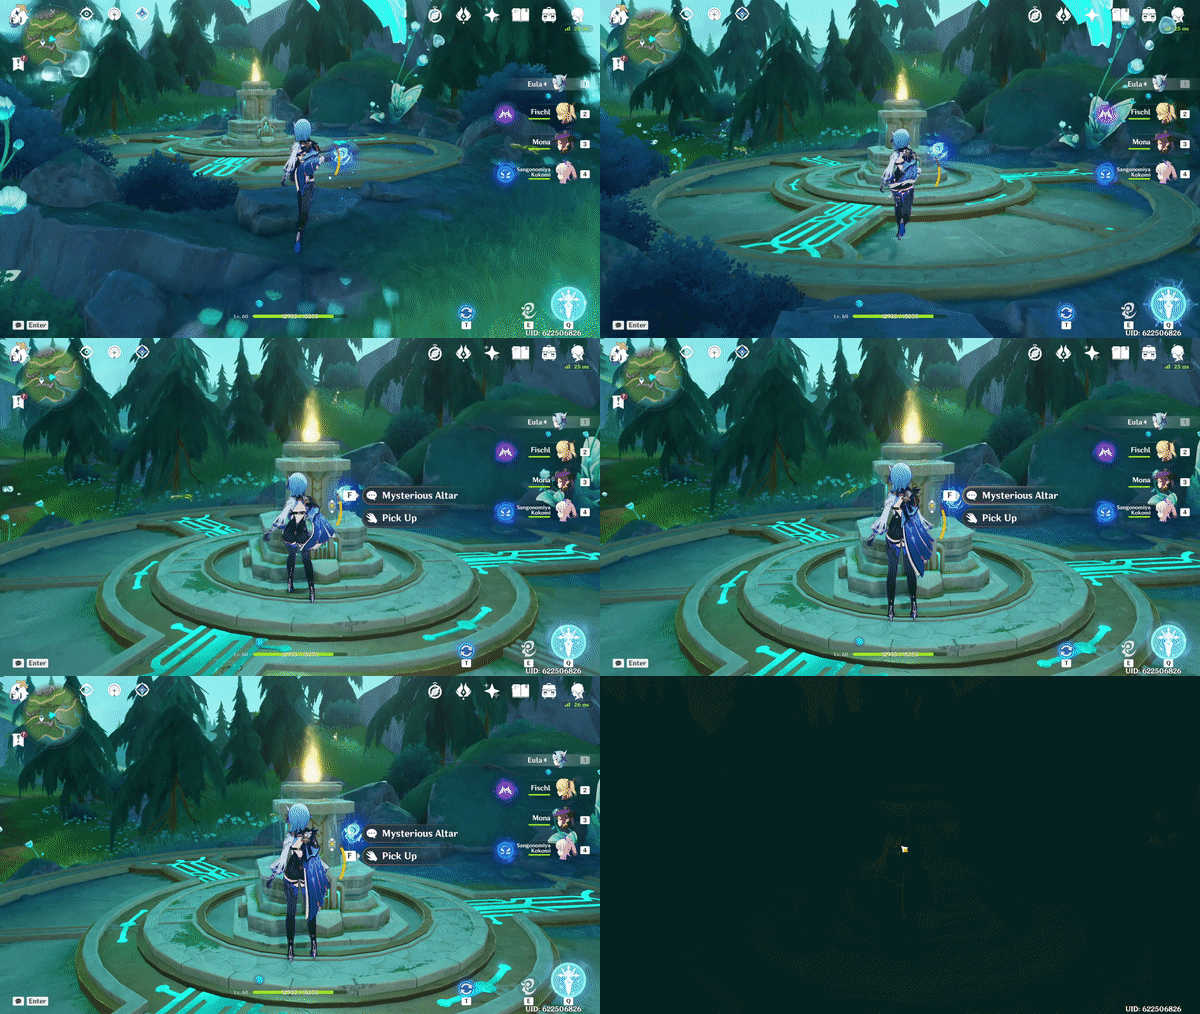
Item on top of the altar
19. Go up to the altar beneath the tree and pick up the item on top of it. You now have a Teardrop Key, a crucial item to this quest.
20. Speak with the melusine, Pahsiv, and gain access to two more of the quests needed to complete this World Quest. By completing all three of these quests, you will get the three Teardrop Keys that Pahsiv needs.
Wilting Weeping Willow
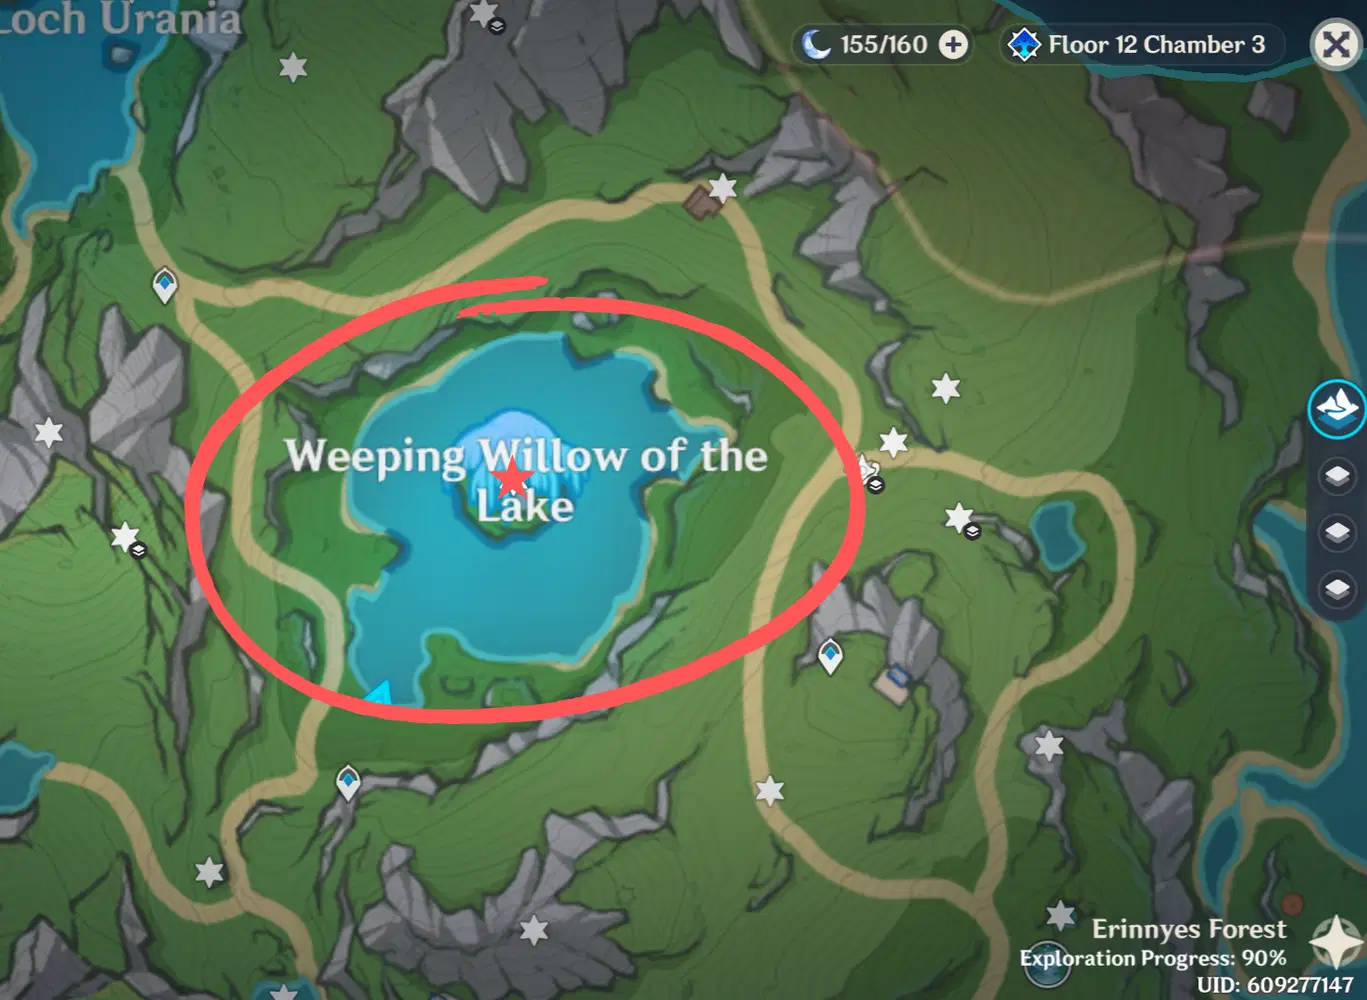
Puzzle Location
21. Go to the sub-area, Weeping Willow of the Lake, to begin the next quest.
22. Follow the quest navigation and swim under the Weeping Willow to find the puzzle you need to complete.
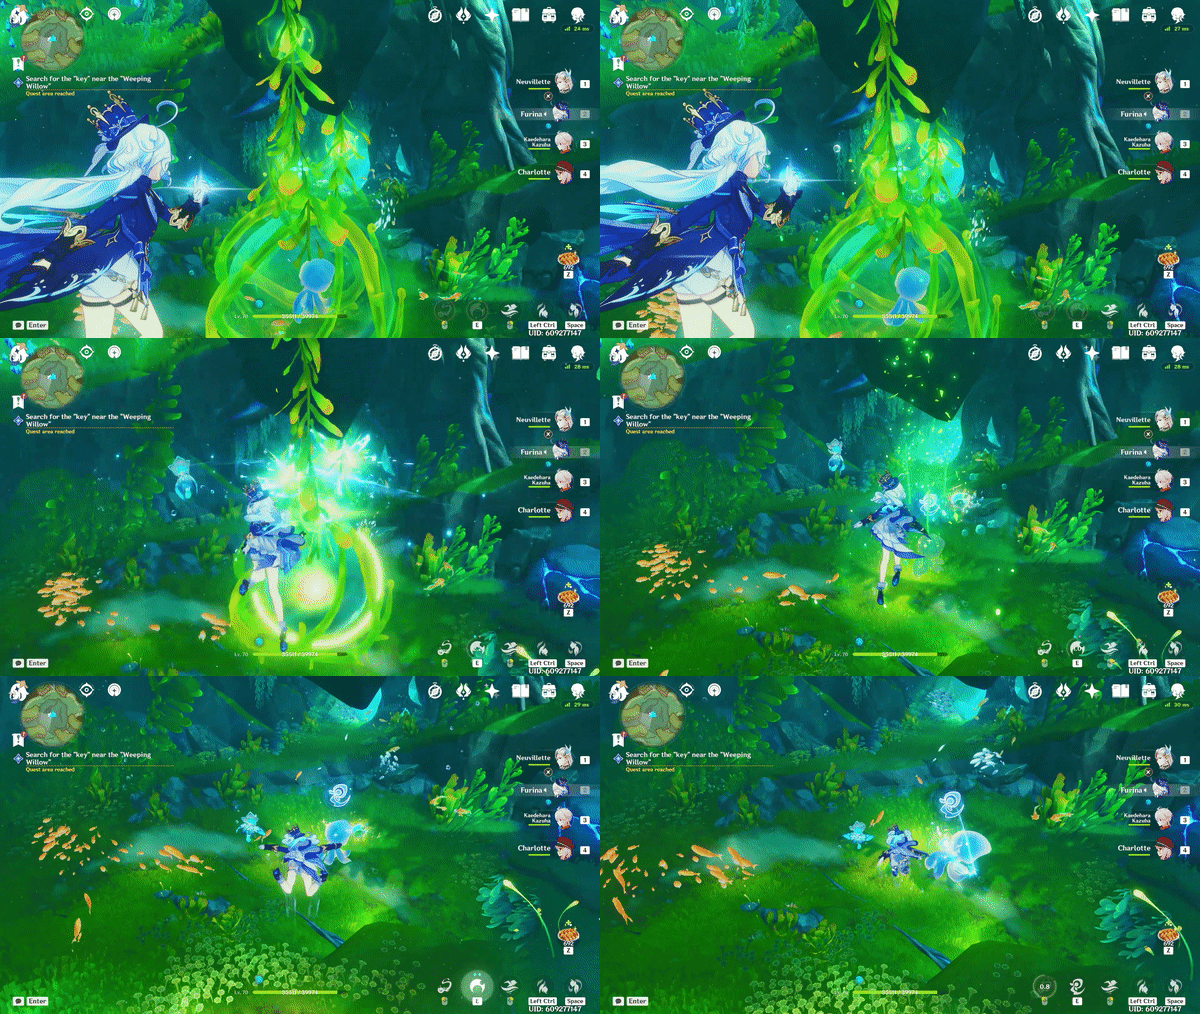
Cut down the Fontemer Seagrass
23. You will notice that the Xenochromatic Ball Octopus is trapped within the Fontemer Seagrass. Find the Xenochromatic Hunter Ray in the area to gain its ability and cut down the Seagrass. Make sure to time your shot correctly to hit all three spots at the same time.
24. Now that it is free, obtain the Xenochromatic Ball Octopus’ ability and swim further down towards the Harmonious Reed Pipe puzzle.
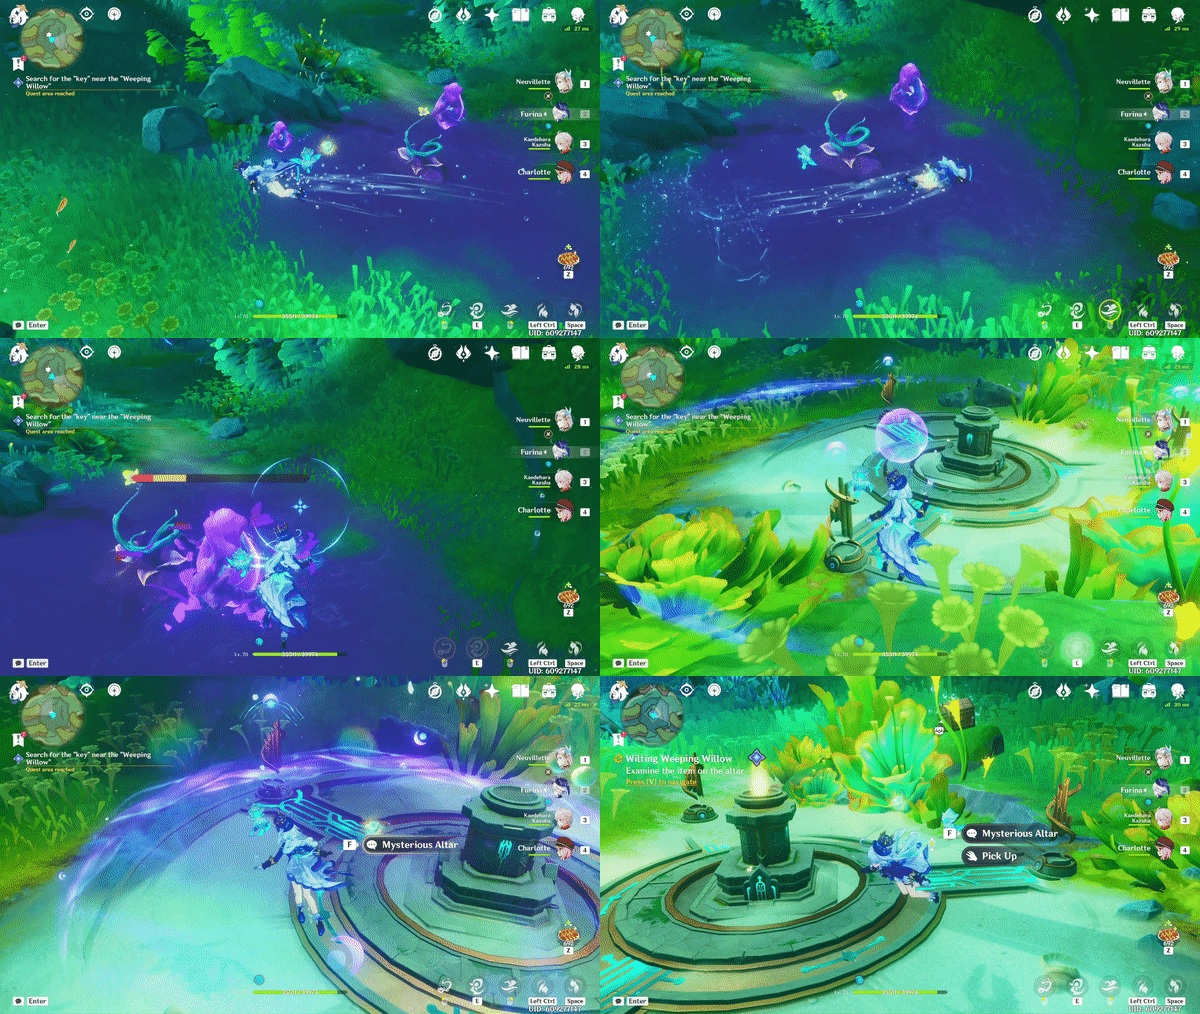
Complete the Harmonious Reed Pipe Puzzle
25. Cleanse the Contaminated Bacterial Mats to allow the Dew Bubble to form.
26. Push the Dew Bubble over to the puzzle area.
27. Strike the Dew Bubble after making sure that it is in between the two pipes with a rune number of one, as you want to activate them at the same time. As long as the AoE reaches the third pipe with a rune number of two, the puzzle should be completed.
28. Pick up the Teardrop Key on top of the altar and speak to Pahsiv. This will complete the second part of the quest!
Furious Mouth of the Spring
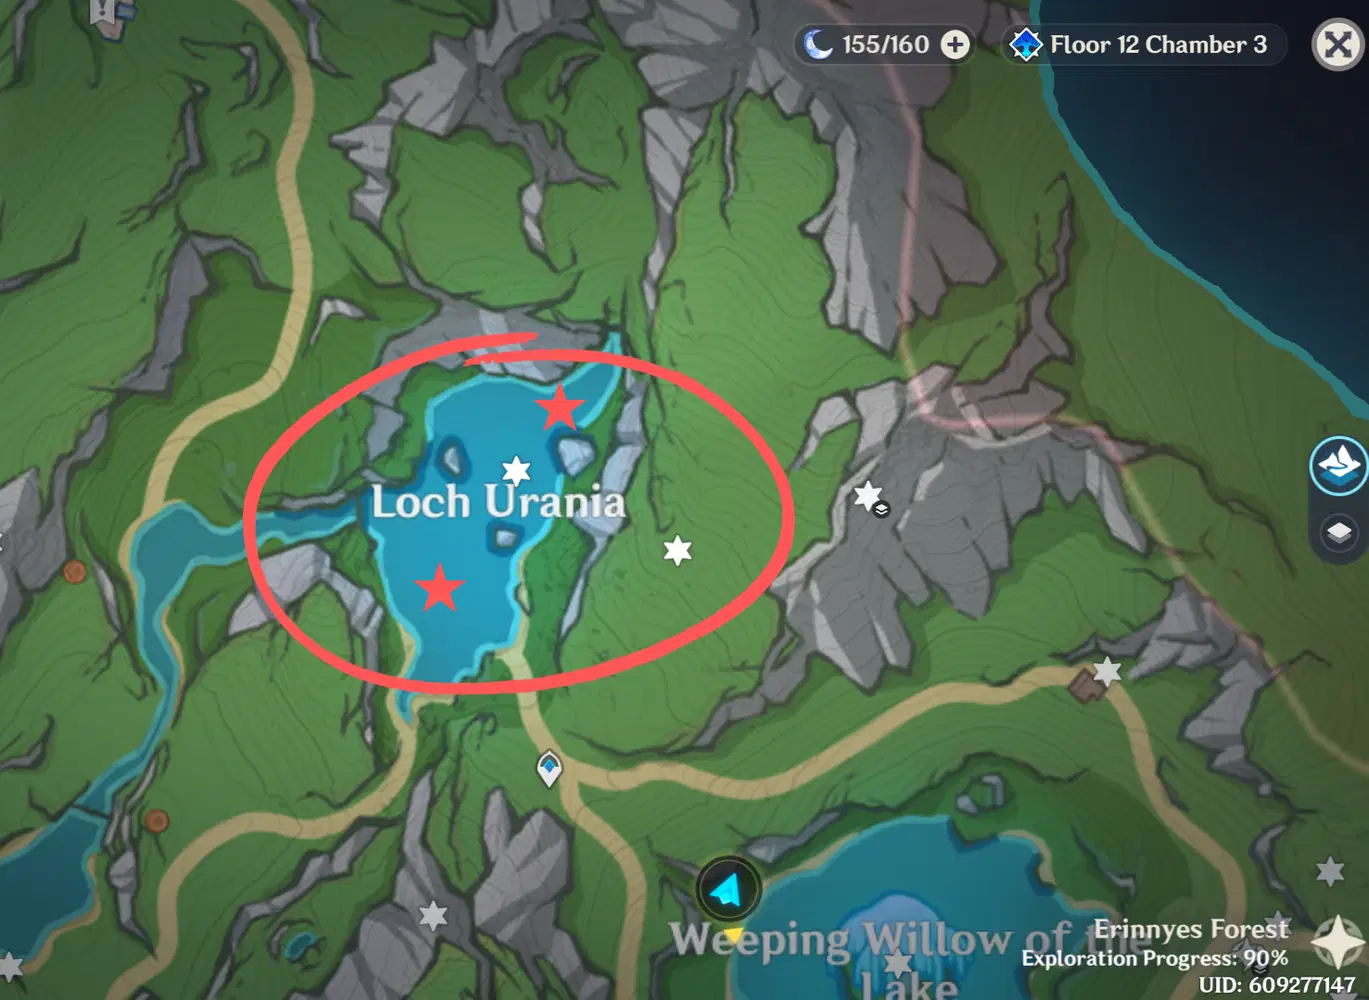
Puzzle Location on Both Side of the Lake
29. After completing the previous quest at the Weeping Willow of the Lake, unlock the chest that is spawned after completing the puzzle and a Xenochromatic Jellyfish will appear.
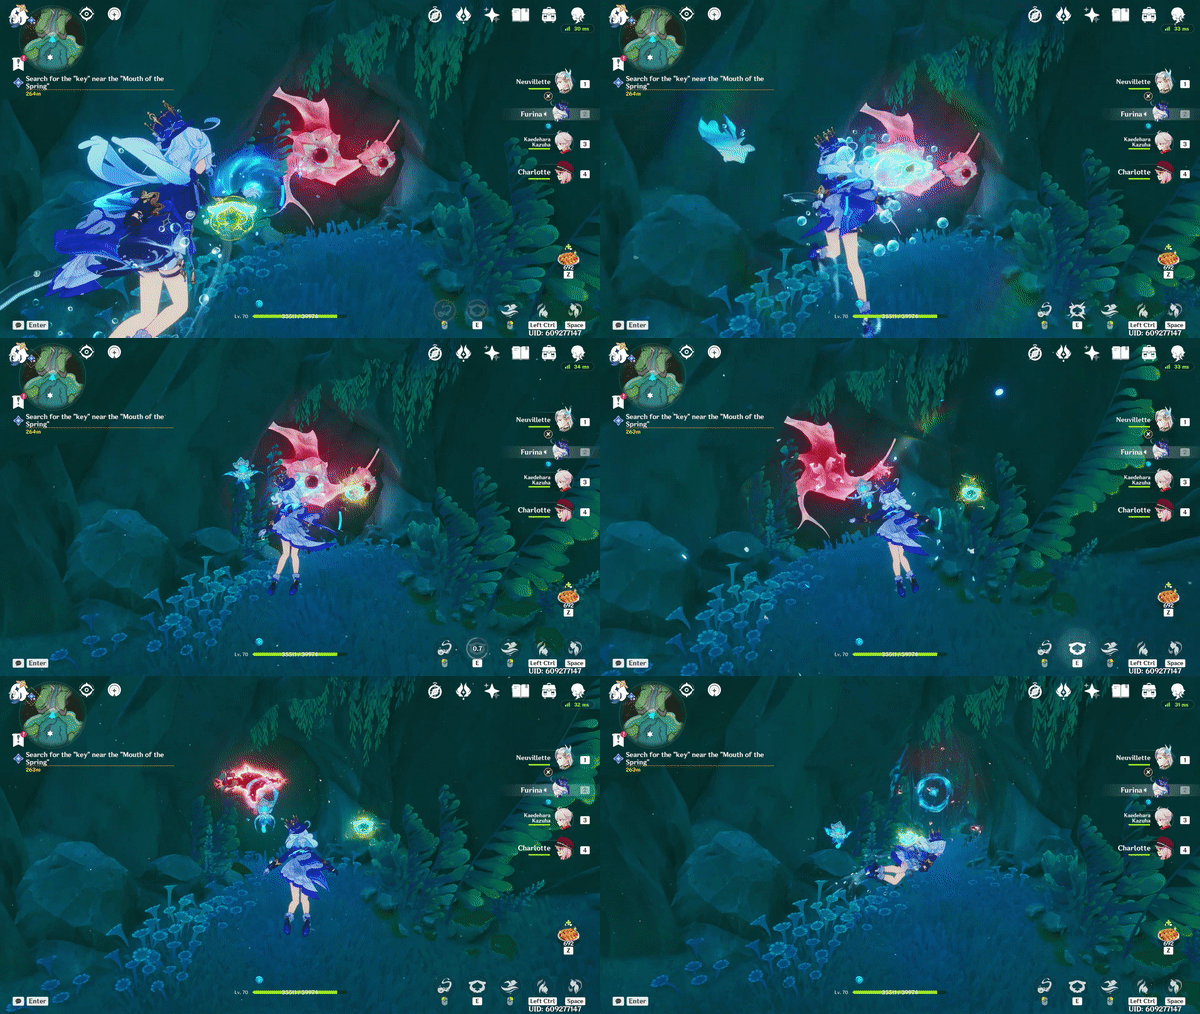
Destroy the Red Meanies
30. Obtain the Jellyfish’s ability and swim towards the rock covered in Red Meanies. Destroy it with the Jellyfish’s ability to open up a path that will take you directly to the sub-area, Loch Urania, the location of the final Teardrop Key.
31. Enter the hydro launcher and then continue swimming afterwards until you reach Loch Urania. You can teleport to a waypoint close to the location, but this underwater tunnel has a time trial and a hydroculus that you will want to grab.
32. Swim into Loch Urania and you will see Contaminated Bacterial Mats on both sides of the lake.
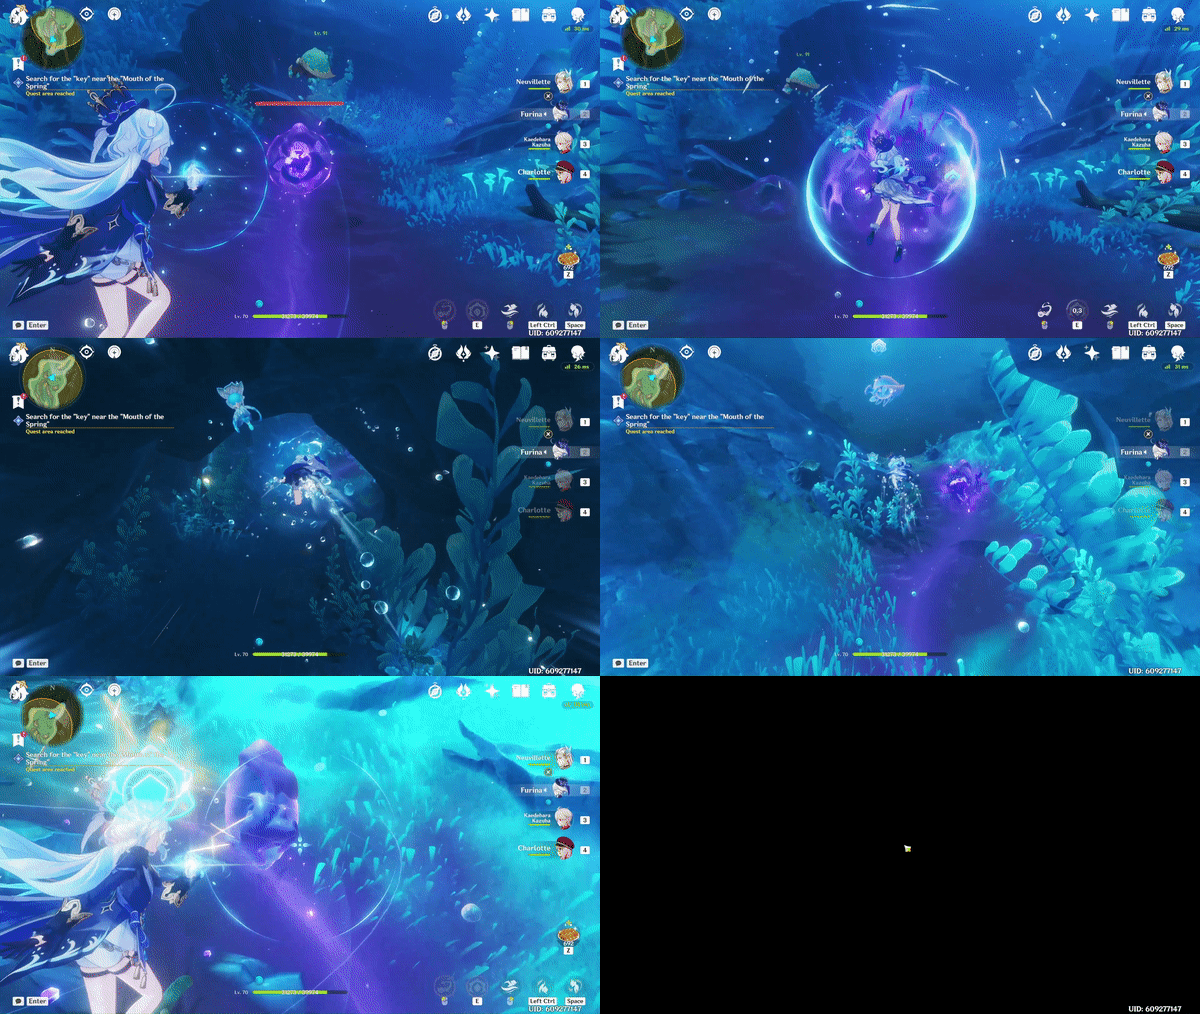
Cleansing 2/4 of the Contaminated Bacterial Mats
33. Obtain the Xenochromatic Armored Crab’s ability and cleanse the Contaminated Bacterial Mats. To do this, activate your ability, get hit by the shots launched by the Contaminated Bacterials Mats, and then shoot back at them after letting go of your shield ability in order to get rid of them. There are four Contaminated Bacterial Mats in the lake that you have to cleanse.
34. After the Contaminated Bacterial Mats have been cleansed, Loch Urania will be calmed, and the area containing the altar will be accessible. Now, interact with the altar.
35. Fight the Enraged Vishap until Pahsiv stops you.
36. The Vishap will give you the third Teardrop Key.
Within the Depths of Erinnyes
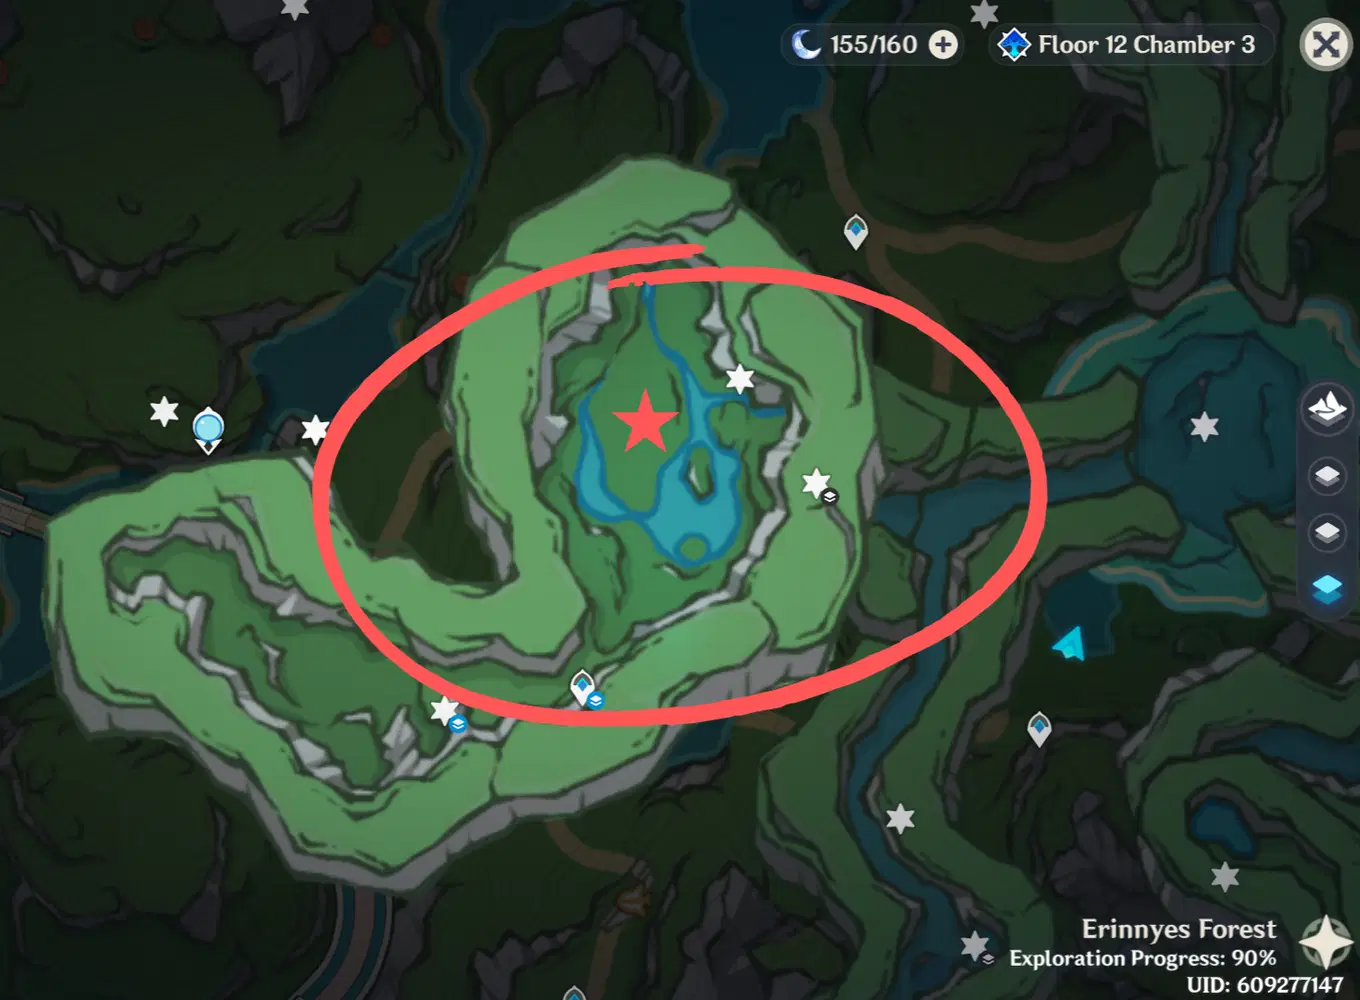
Puzzle Location (Access through the Quest)
37. Following Pahsiv’s instructions, go to the square where the fountain is located at Marcotte Station.
Placing the Teardrop Keys
38. Speak with Pahsiv and then place the three Teardrop Keys into their corresponding statues.
39. An entrance will be opened beneath the fountain. Jump down the hole to the water below.
40. Swim through the cavern until you reach the Roots of Erinnyes. Make sure to unlock the waypoint.
41. After speaking with Pahsiv again, walk further into the cavern to cleanse the Contaminated Bacterial Mats which are infecting the roots.
Round 1 of Cleansing the Contaminated Bacterial Mats
42. Obtain the Xenochromatic Ball Octopus’ ability and begin cleansing the small contaminants first, as the large contaminant is protected by a shield until the others are gone.
43. The Root-Consuming Tumor will not be destroyed easily. Pahsiv will enhance your abilities to allow you to cleanse the contaminants faster. Continue defeating the hordes of Contaminated Bacterial Mats as they pop up until you have finally destroyed the Root-Consuming Tumor.
Defeat the Rifthounds
44. Now, you have to fight through hordes of Rifthounds, with the help of our new Vishap friend.
45. After they have been defeated, the cavern will flood, and you will be pushed back to the surface near the Weeping Willow of the Lake.
46. Here, the Weeping Willow and the lake will be completely cleansed, and Pahsiv will bring you chests that she found.
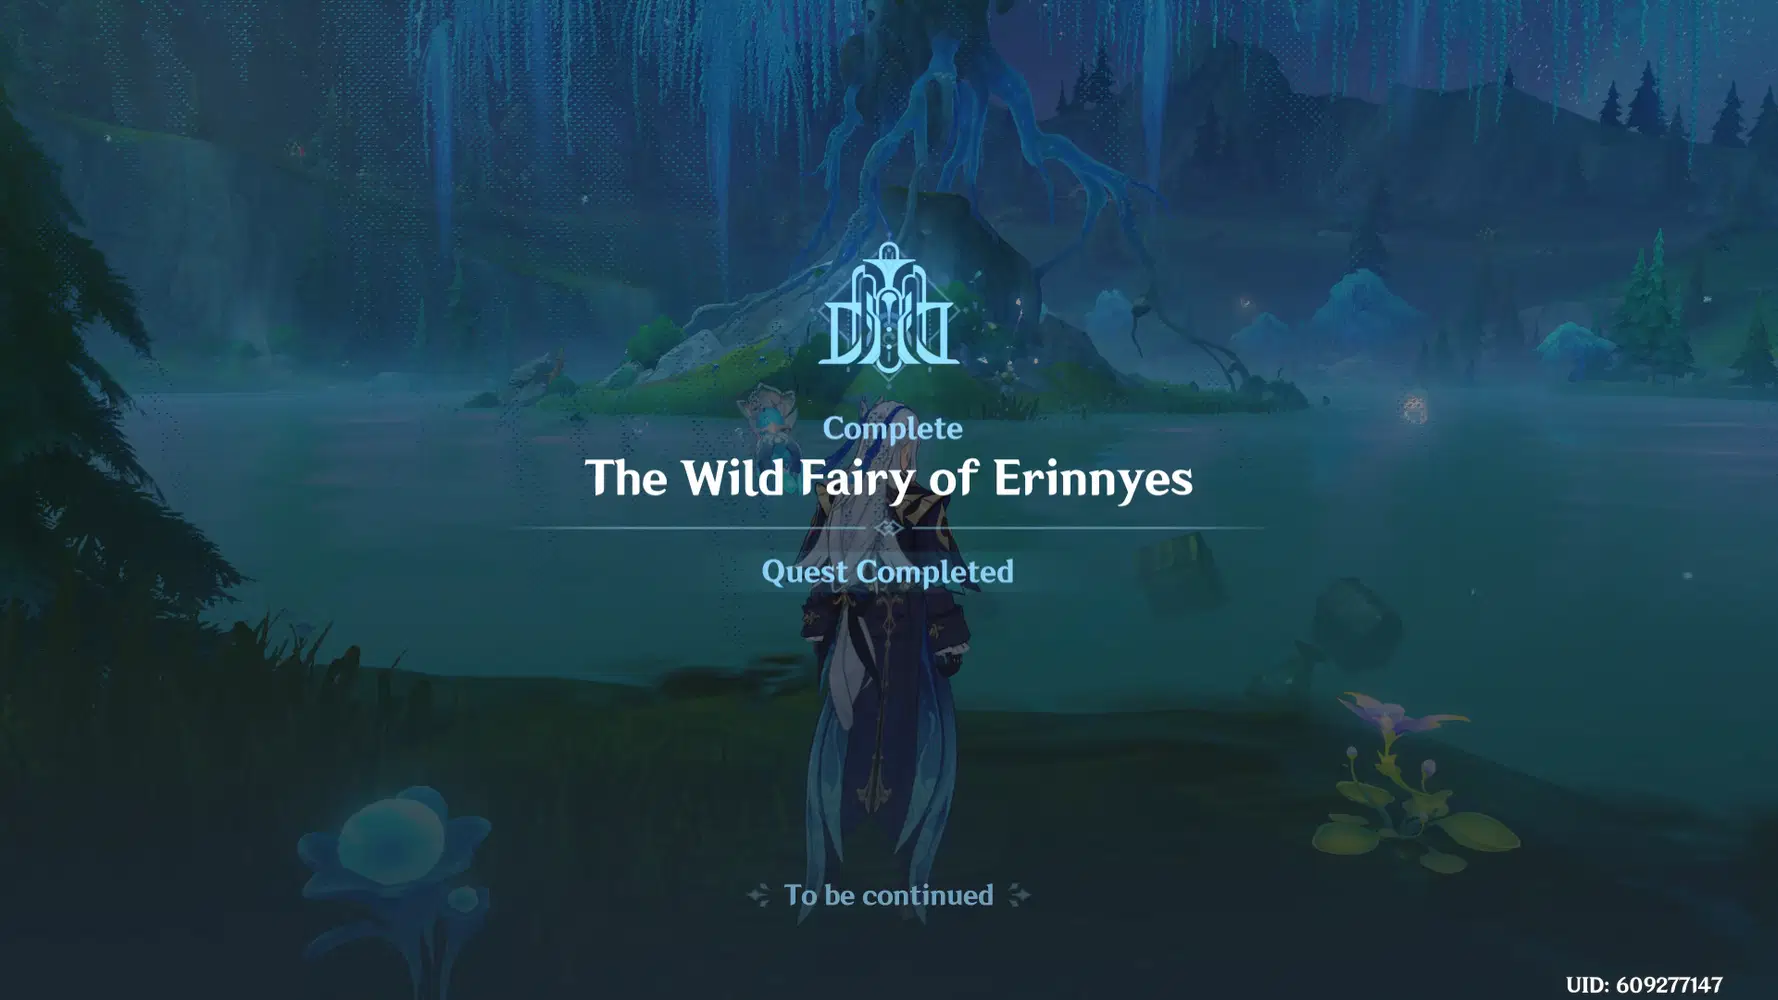
♦ This concludes the World Quest: The Wild Fairy of Erinnyes ♦
Quest Completed
Conclusion:
➥ Travelers, this marks the end of the World Quest: The Wild Fairy of Erinnyes guide! I hope this guide helped you complete the quest and gain all the rewards.
- Please refer back to this guide whenever you need more information on this World Quest.
-- -- --
♡ Please keep an eye out for any future guides & consider giving me a like and a follow if you enjoyed this guide! ♡

♦ Recent Guides ♦



⚛Check out my social media ~eweb's Carrd⚛




