Introduction
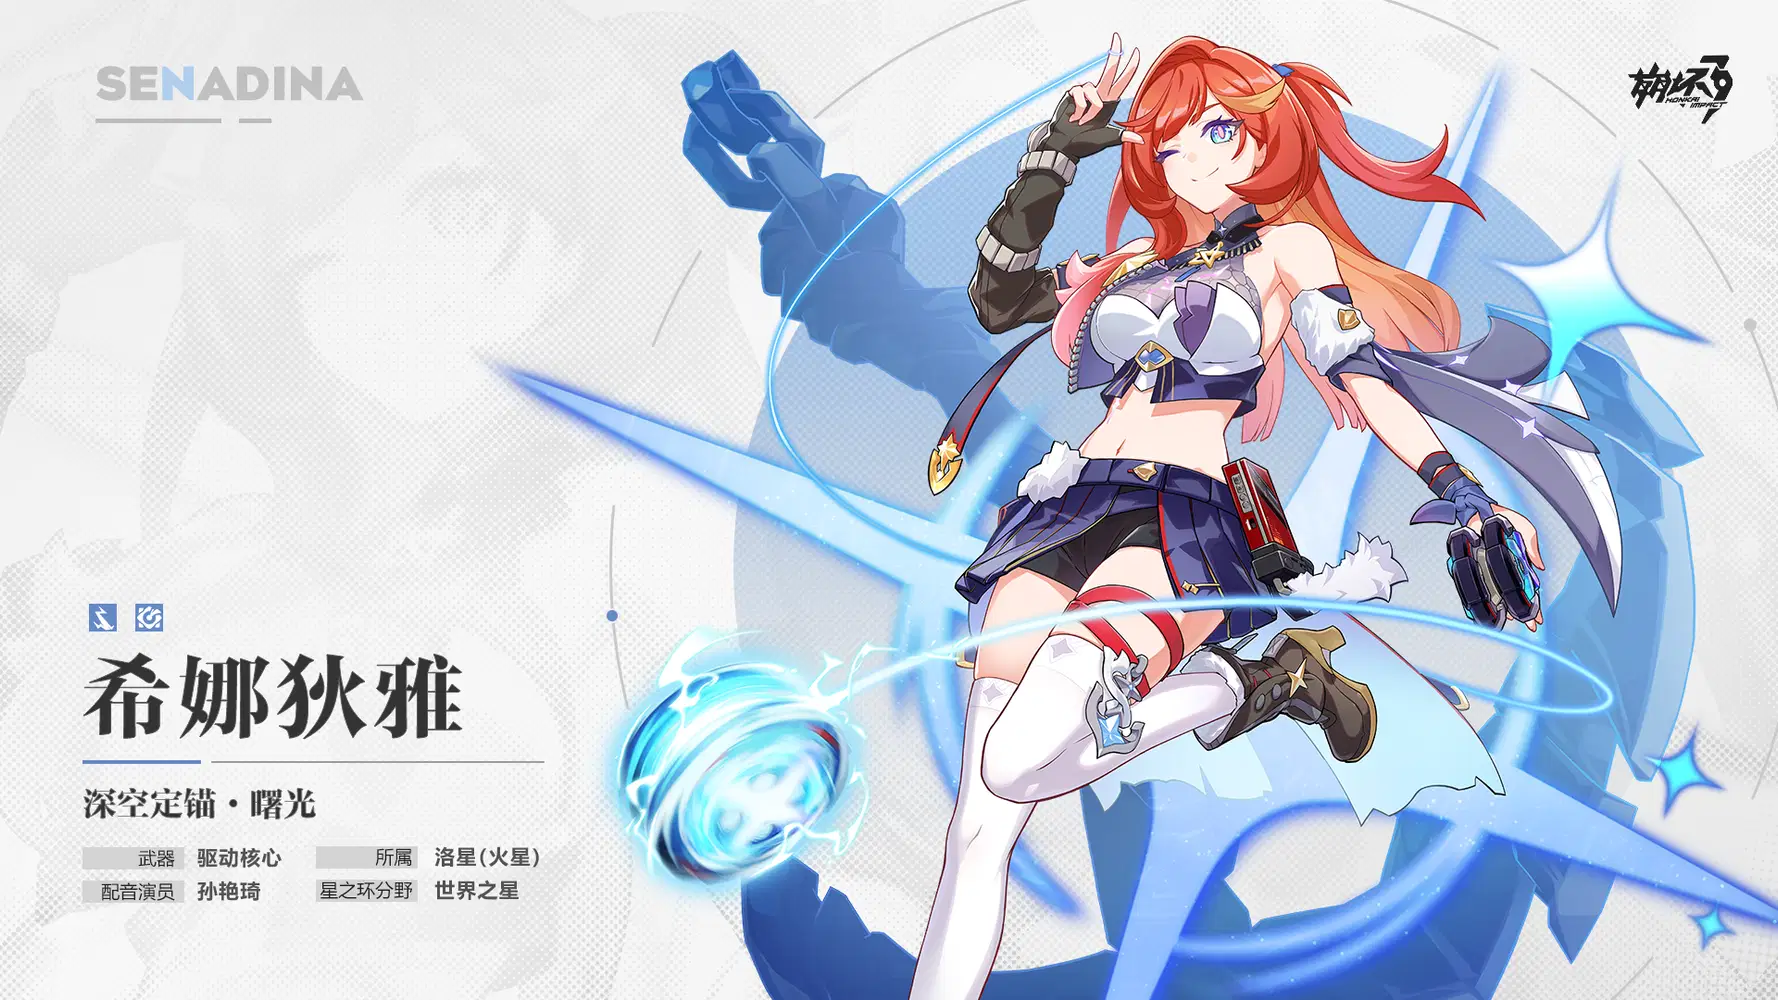
[Deepspace Anchor: First Light] is the new Senadina Battlesuit featured in version 7.3
Senadina is an S-rank Stardust melee Lightning DPS that is protected by the "Astral Ring: World Star" Specialization.
She uses a "Drive Core" yoyo in combat bringing a fun playstyle where she can attack enemies in the air and on the ground while linking enemies together causing them to take shared damage!
Senadina focuses on enhancing her weapon skill into powerful enhanced attacks.
Her Playstyle is similar to that of APHO 2 combat mixed with Herrscher of Flamescion combining to form a unique thrilling gameplay experience.
How to Obtain
After the v7.3 update and until 12:00, MAR 29, you are guaranteed to get her Battlesuit in 90 Expansion Supply drops.

Mechanics and Astral Ring
Instead of saying Deepspace Anchor: First Light each and every time...
I will be referring to her throughout this guide as Senadina or Sena to make it easier to understand and reduce the amount you need to read.
Thunderous Blazar -
As long as you aren't In "Overheat" you can gain a Thunderous Pulse by using QTE, the 4th SEQ of basic attack combo landing, or by entering Stellar Outburst. Thunderous Pulse lasts for 3 seconds and will enhance your weapon skill replacing it with Thunderous Strike. After using Thunderous Strike you will enter the Thunderous Blazar state for 8 seconds. After the Thunderous Blazar state ends you will enter Overheat for 12 seconds, during which you cannot gain any Thunderous Pulse.

Thunderous Blazar state

Overheat state
Entering Stellar Outburst however can clear the Overheat debuff letting you gain Thunderous Pulse again.
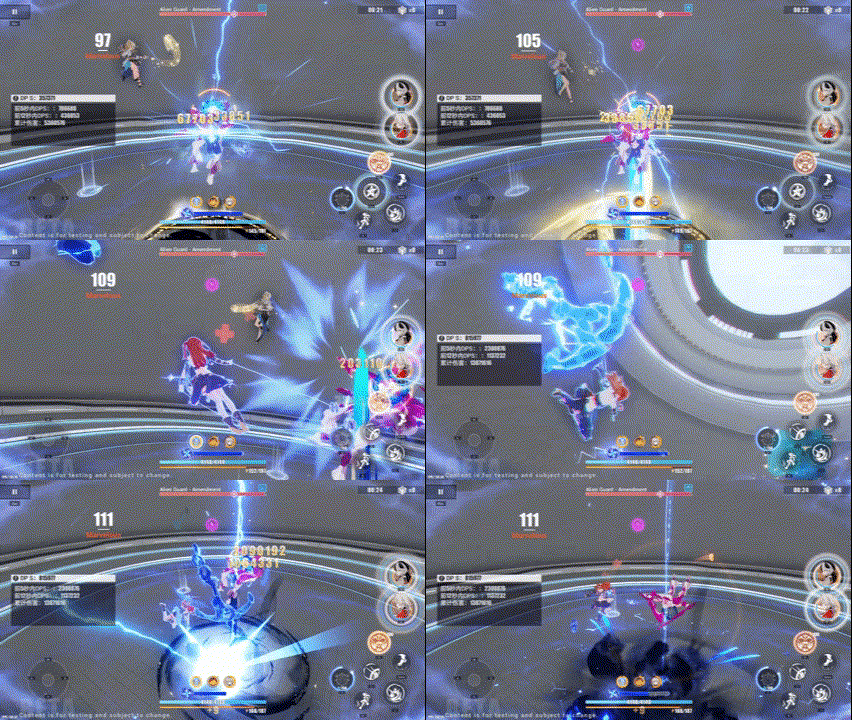
Resonance Attacks - A Special attack effect which activates Domain Resonance for the whole team.
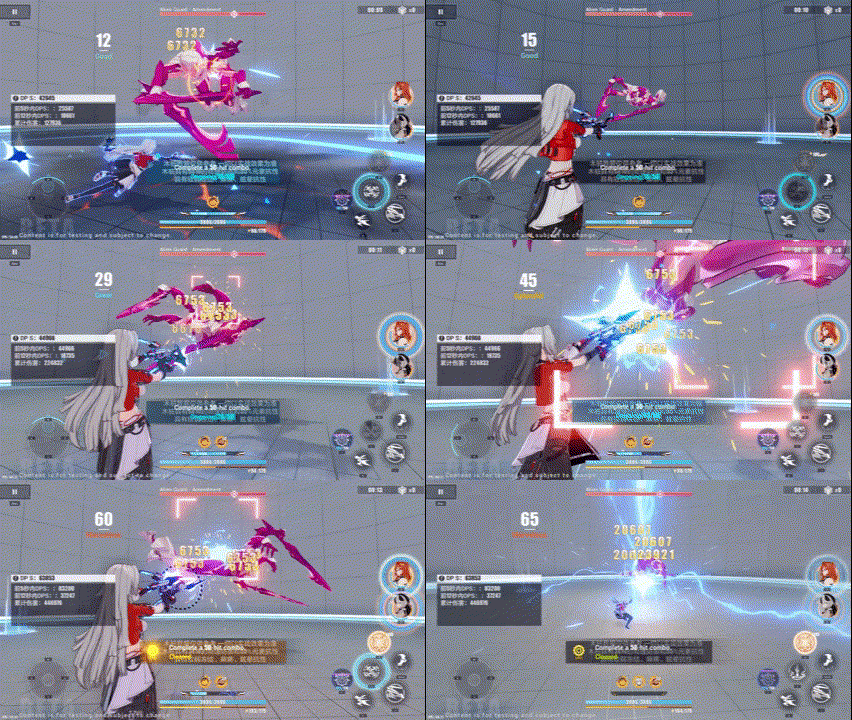
Helia Resonance Attack: Targeted Bombardment
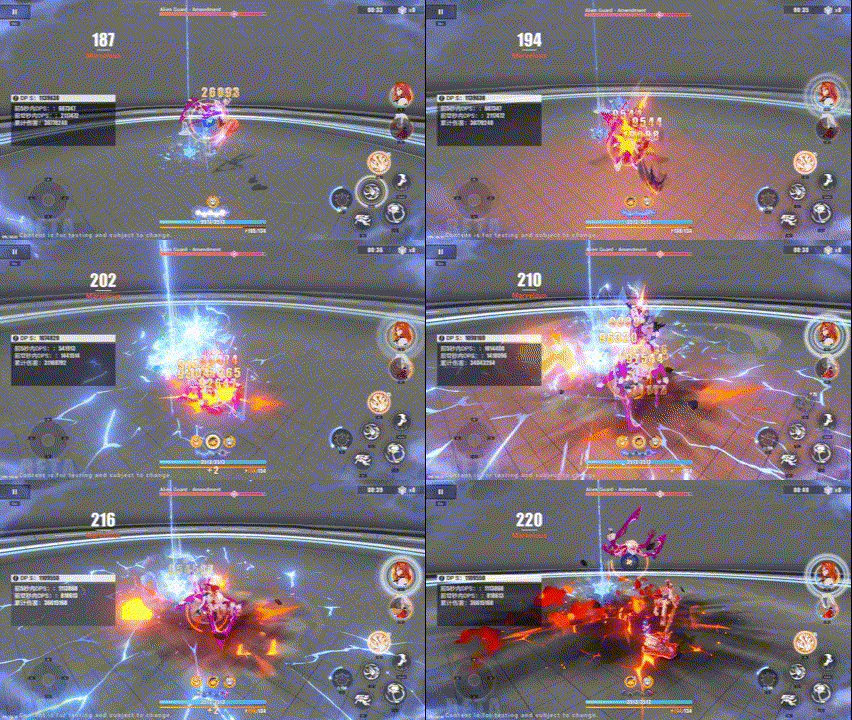
Coralie Resonance Attack: Hammering Feel
Astral Ring: World Star
Unleash Astral Ring's power and enhance the character.
The character is protected by Astral Ring: World Star. While Astral Ring is active the character's weapon skill deals 20% more Total DMG.
Lightning Flash Anchor
Upon entering Stellar Outburst state, Senadina will exit Thunderous Blazar, clear overheat, and gain Thunderous Pulse and 1 Quantum Mech Energy. During Stellar Outburst, Quantum Mech Energy will be consumed to upgrade Thunder In Clear Skies to Lightning Flash Anchor, which deals 1600% ATK of Lightning DMG (counts as Resonance ATK) and pulls nearby enemies.
During Stellar Outburst, the character gains 1 level of Ignore Interrupt. Use Thunderous Strike to gain Thunderous Pulse.
Upon entering Stellar Outburst state, unleash Stellar Assault to deal 400% ATK of Lightning DMG
Energy Masses
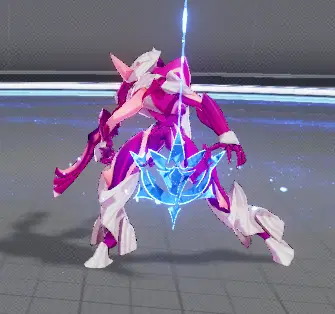
After Activating Astral Ring: World Star, Sena will leave Energy Masses with Domain Resonance Mark on the field. Domain Resonance Mark can be activated by any team member's Resonance Attack to generate an electromagnetic field that deals 800% ATK of Lightning DMG and restores 4 SP; CD: 1s. After being triggered 8 times or Stellar Outburst expires, the energy masses are destroyed. DMG from the electromagnetic field is considered as weapon skill DMG.
Helia also has Energy Masses during Stellar Outburst so you normally rotate Sena -> Helia -> Coralie to trigger the Resonance Attack of both teammates.
Gains Stellar Drain when Stellar Outburst ends. Outside Stellar Outburst state, Thunder in Clear Skies consumes Stellar Drain to restore 10 Astral Ring Intensity. Activating Astral Ring: World Star restores 10 bonus Astral Ring Intensity.
Start a battle with 1 Stellar Drain, which takes effect once per 10 minutes in open world.
During Stellar Outburst, enemies take 12% more Elemental DMG from Resonance, and all team members deal 12% more Total DMG with Resonance Attack.
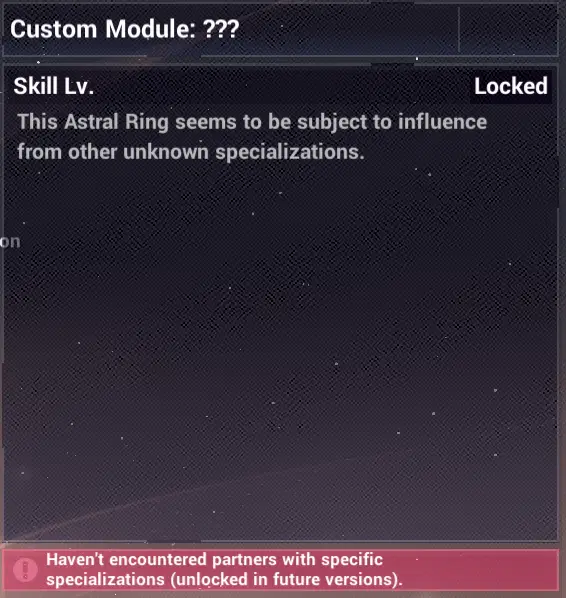
This will be unlocked in future updates.
Senadina also has a locked ability, we need to wait until future versions to get the details of this Astral Ring effect.
Notes:
-The timing of Astral Ring activation will largely depend on the situation, enemies present and boss mechanics. There is no specified time where you should use it.
-Triggering the Astral ring will reset her energy bar letting you use 4 enhanced weapon actives in a single rotation because after using it twice you can activate the Astral Ring and use it another two times.

Abilities
Leader Skill

Setting her as leader will activate the Astral Ring System.
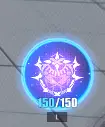
The ELF skill is also replaced with Stellar Outburst.
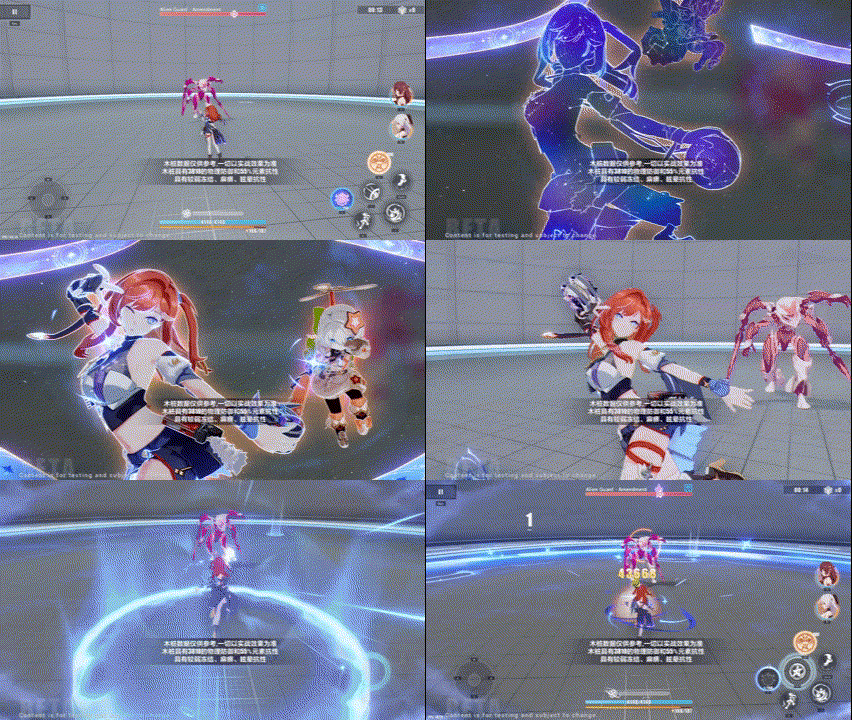
Activating Stellar Outburst
Leader Skill: When she is the leader, activates Astral Ring Specialization: World star.
Energy Requirement - 150; Duration 25 Seconds, cooldown 25 seconds.
Activate Astral Ring Specalization: World Star and unlock enhanced skill based on the number of team members with the Domain Resonance tag.
- When the team has 1 member with the Domain Resonance tag:
all weapon skills deal 20% more elemental damage outside Stellar Outburst state.
- When the team has 2 members with the Domain Resonance tag:
Domain Resonance Mark can be triggered 2 more times
- When the team has 3 members with the Domain Resonance tag:
Enemies take 20% more damage from Resonance (Independent)
Notes:
Alright so this may be a mouthful so I will try to summarize and simplify it.
She has a really strong Leader ability, using her as the leader changes not only the mechanics of herself but of the team as well by unlocking the Astral Ring system and changing the way you play.
This does come with the drawback of costing alot of energy that can only be restored by characters who use this system.
Because of those conditions her leader skill will only be used when she is paired with other Astral Ring characters, otherwise you would instead opt to use Eden as the leader and pair her with an ELF.
Passives
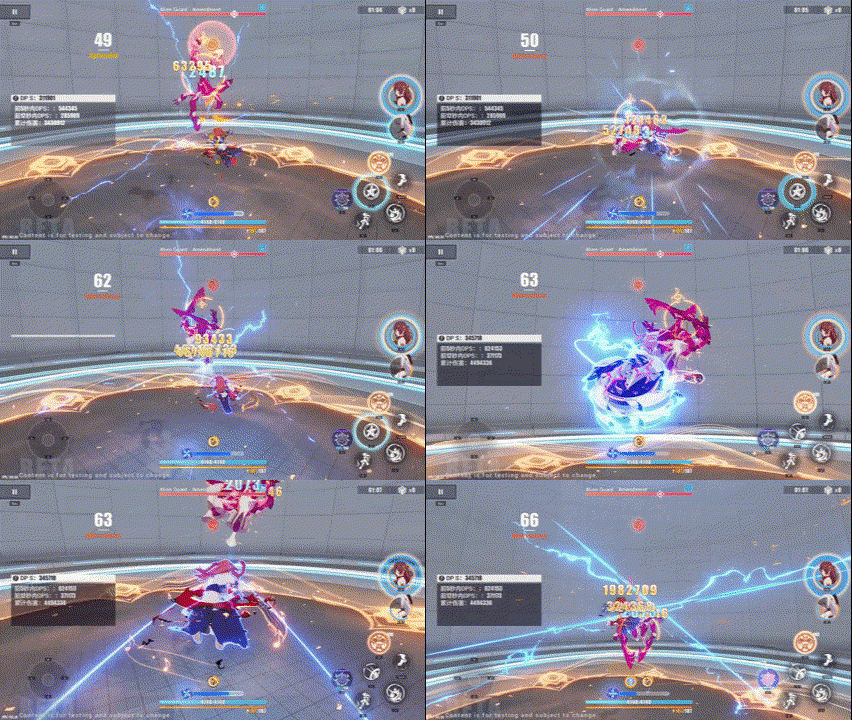
Consume Thunderous Pulse to enter Thunderous Blazar state and unlock Thunderous Strike.
Outside Overheat, after landing Basic ATK SEQ 4, QTE, or entering Stellar Outburst... Senadina will gain Thunderous Pulse for 3 seconds ( retriggering refreshes duration ) When she has this buff her weapon skill will be replaced with Thunderous Strike. After using Thunderous strike she will enter Thunderous Blazar state for 8 seconds.
During Thunderous Blazar her Thunderous Strike changes. After Thunderous Blazar ends she will enter Overheat for 12 seconds where she cannot gain any more Thunderous Pulse.
Sena will exit Thunderous Blazar and enter Overheat if she leaves the field.
Outside Stellar outburst state but in Thunderous Blazar state, weapon skills deal 20% more Lightning DMG and 10% more Total DMG. During Stellar Outburst Resonance deals 20% more Total DMG.
All team members enter an enhanced state, consume Stardust Remnants to deal 30% more damage against SD-type enemies' max hp ( exclusive ) When Senadina is on the field, hitting an SD-type enemy with "Thunder in Clear skies" or "Lightning Flash Anchor" will trigger Stardust Deconstruction and generate 1 stardust remnant.
While Astral Ring is inactive, Ultimate cooldown will be 20 seconds shorter.
Notes:
This one was quite detailed too, essentially...
After Senadina enters through QTE you can use weapon active to gain Thunderous Pulse, this will be the main method to enter her Thunderous Blazar state but it is also possible to do so through her 4th basic attack sequence.
You then gain enhanced abilities before having overheat similar to Herrscher of Flamescion.
Evasion
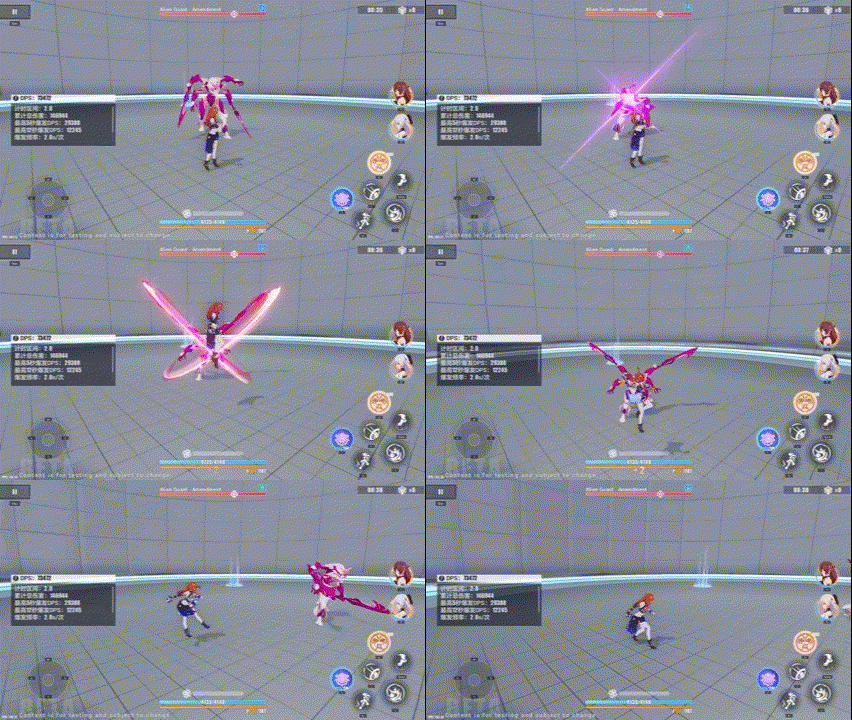
Showcasing the jump dodge and double evade
Evade or Jump to dodge enemy attacks, You can evade twice in a row on the ground and have up to one charge of evade or jump in the air. Jumping in the air resets the aerial evasion counter.
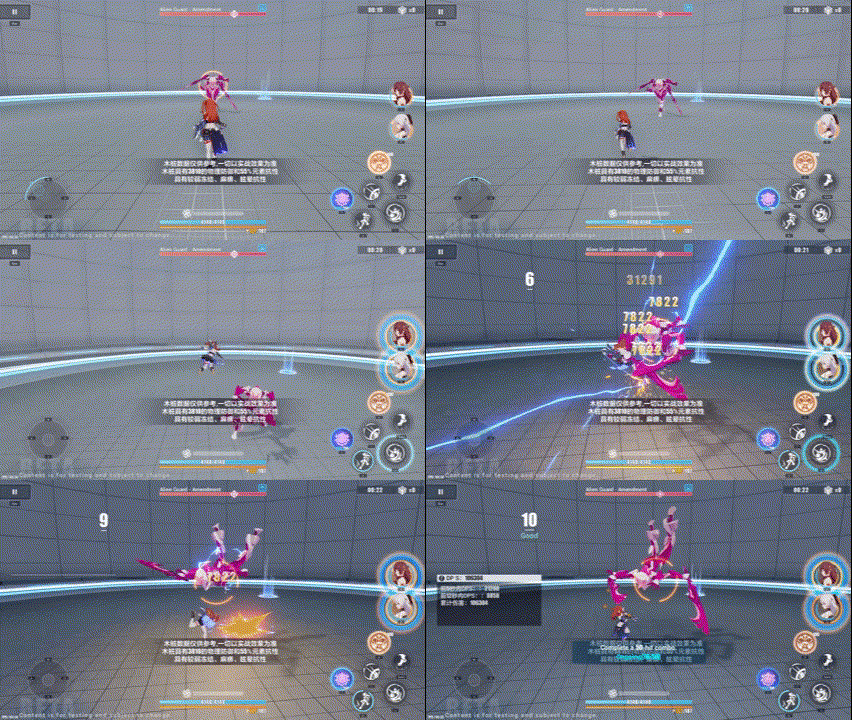
Evasion into Basic ATK SEQ 3
Ultimate Evasion skill triggers Global Time Fracture for 2 seconds. CD 15 seconds.
During evasion or slide if ultimate evasion has charges tap ATK to trigger the ultimate evasion skill and connect into Basic ATK SEQ 3.
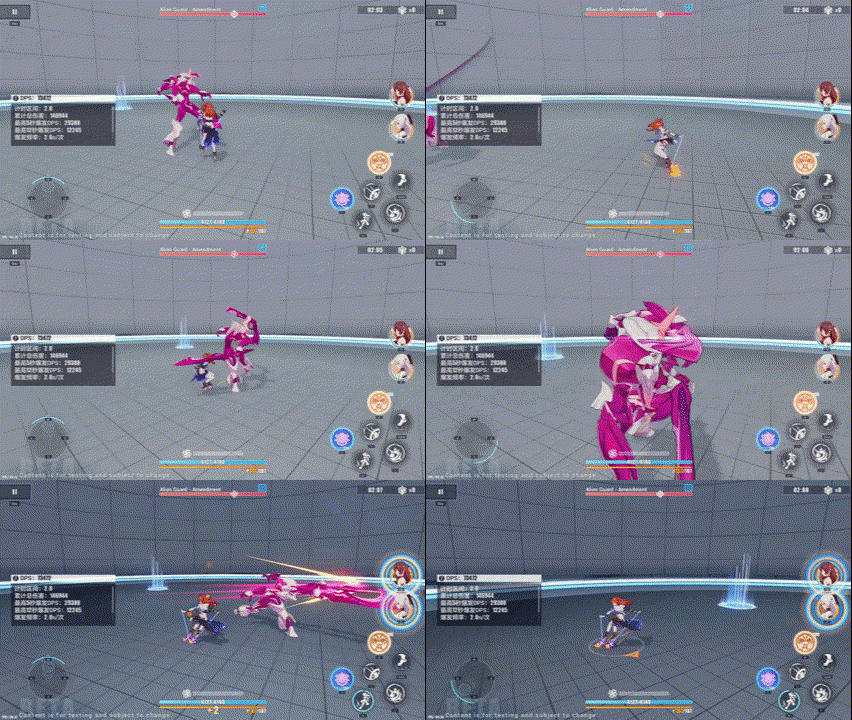
Senadina sliding + hit negation
Hold evade and a directional key to keep sliding. If you are hit in this state if Ultimate Evasion still has charges , negate this hit and trigger Ultimate evasion skill.
Using Thunder in Clear Skies and Lightning Flash Anchor resets the aerial evasion counter.
Notes:
Senadina's evasion skill lets you connect into the 3rd sequence of your basic attack.
This saves you time skipping the first and second sequence to fit more damage into your buff uptime.
Furthermore, most of the damage in her basic attack sequence is concentrated into the 3rd and 4th hits with higher damage multipliers. Taking advantage of this will help you deal the most damage in the shortest time frame.
Evade ATK can be used to gather the fallen stardust shards
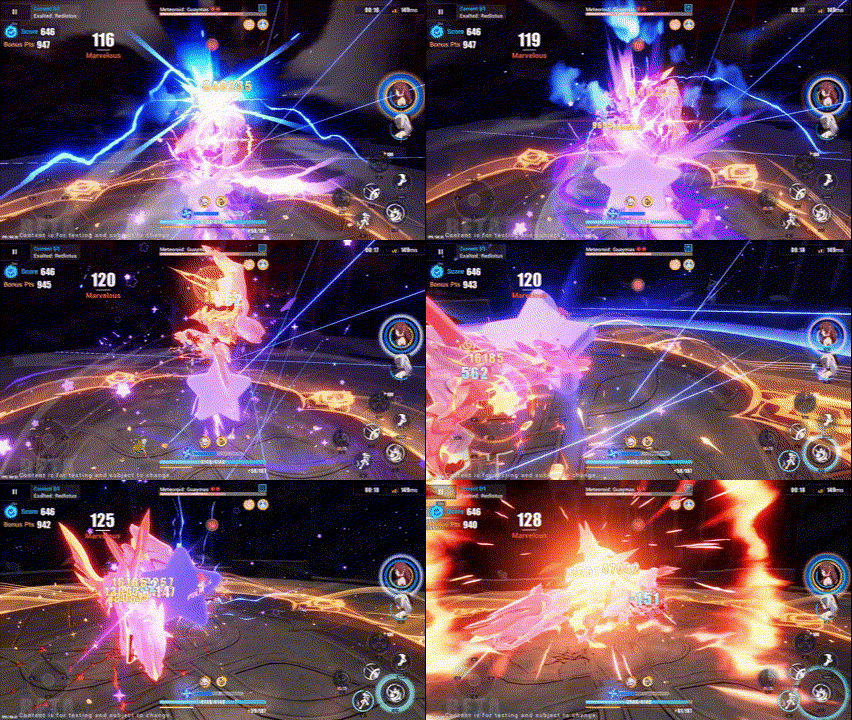
Evade + ATK
Holding Evade will trigger Slide: Triggers this cool animation where Sena slides on the ground and speeds up.
Combo Attack
Throughout Heaven and Earth, I Alone Am The Honored One
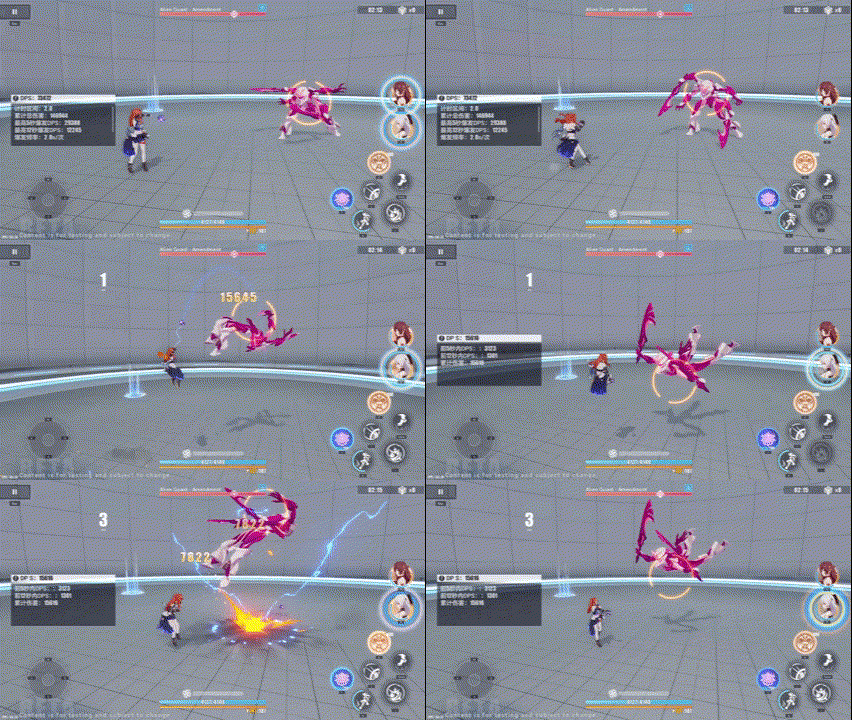
Sena Hold ATK
Hold ATK on the ground to perform an upward attack that knocks the enemy airborne. Hold ATK in midair to deal a downwards attack that knocks enemies to the ground.
For every Stardust Remnant obtained by a team member, Senadina gains a buff, stacking up to 15 times. Basic ATK SEQ 4 consumes all stacks and deals an additional 60% ATK of Lightning DMG for each stack consumed.
She starts battle with 30 more initial SP, takes effect once every 10 minutes on Part 2 open world. During Thunderous Blazar, enemies hit by Thunderous Strike are marked for 10 seconds ( retriggering refreshes duration ) where they take 20% more damage from her weapon skill.
While Astral Ring is active, When using Thunder in Clear Skies or Lightning flash Anchor, team members protected by Astral Ring World Star gain 12% elemental breach and a 25% Elemental DMG bonus for 25 seconds. Retriggering refreshes duration.
Notes:
Holding Basic attack can be used to get into the air instead of the jump button.
Enemies hit by her Thunderous strike will take more damage which is often utilized in her rotations.
Ultimate
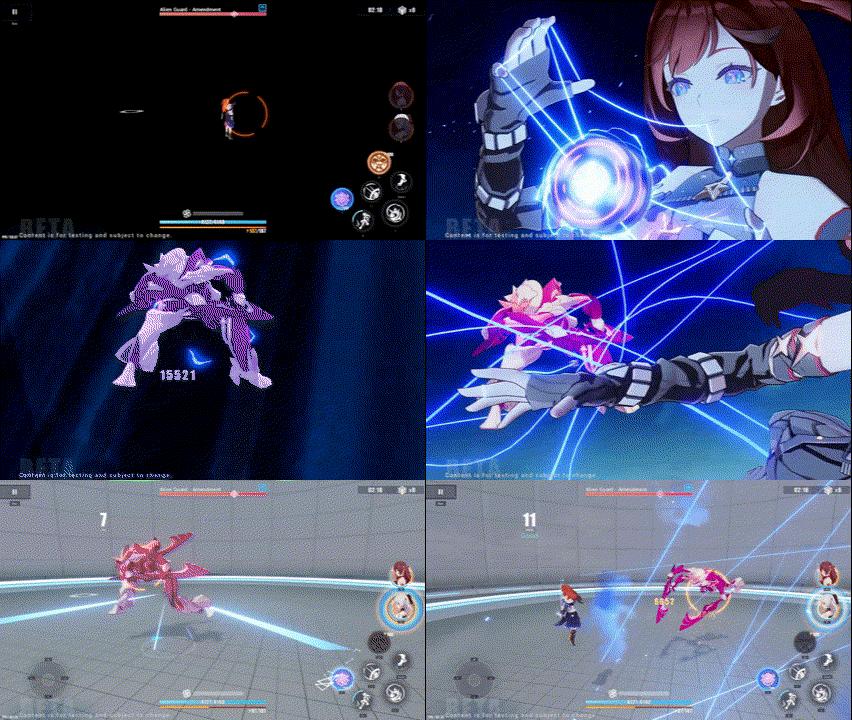
Her ultimate animation is really cool!
Senadina charges her drive core with lightning and weaves it between enemies, deals 2680% ATK of lightning damage.
During her animation she is invincible and "Time Frozen-Domain" is triggered to pause all skill timers and the stage timer.
Her ultimate costs 100 SP and has a 30 second cooldown.
Unlocking the sub skills will increase her Lightning DMG by 25% and her Lightning DMG from ultimate by 80%. Her Ultimate deals an additional 40.0% ATK of Lightning DMG and During Stellar Outburst her ultimate will deal 40% more Total DMG.
Basic Attack
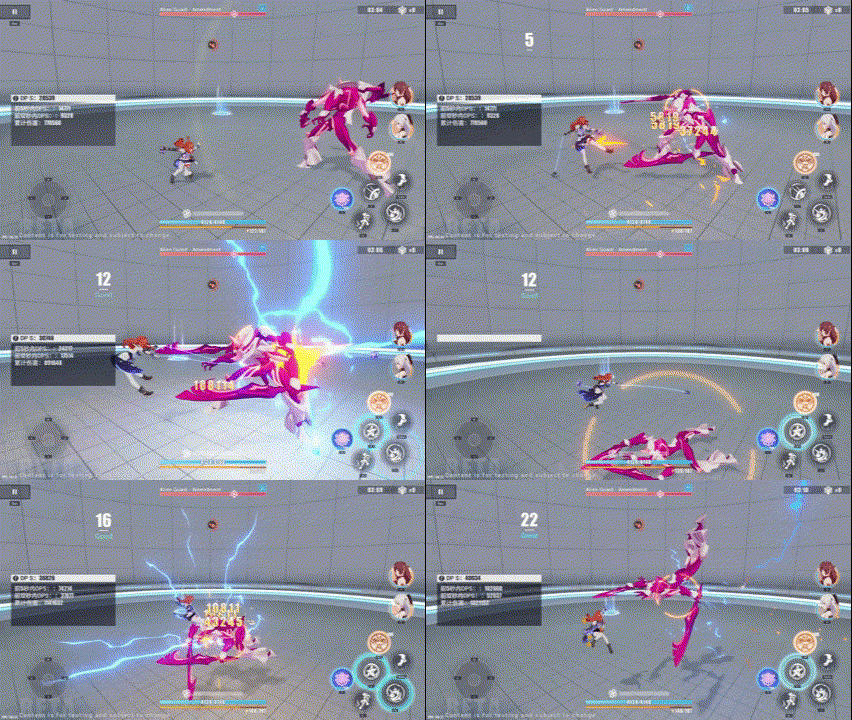
Sena's Basic ATK SEQ 1-4
Basic ATK's last hit restores 5 SP and shortens overheat by 1s.
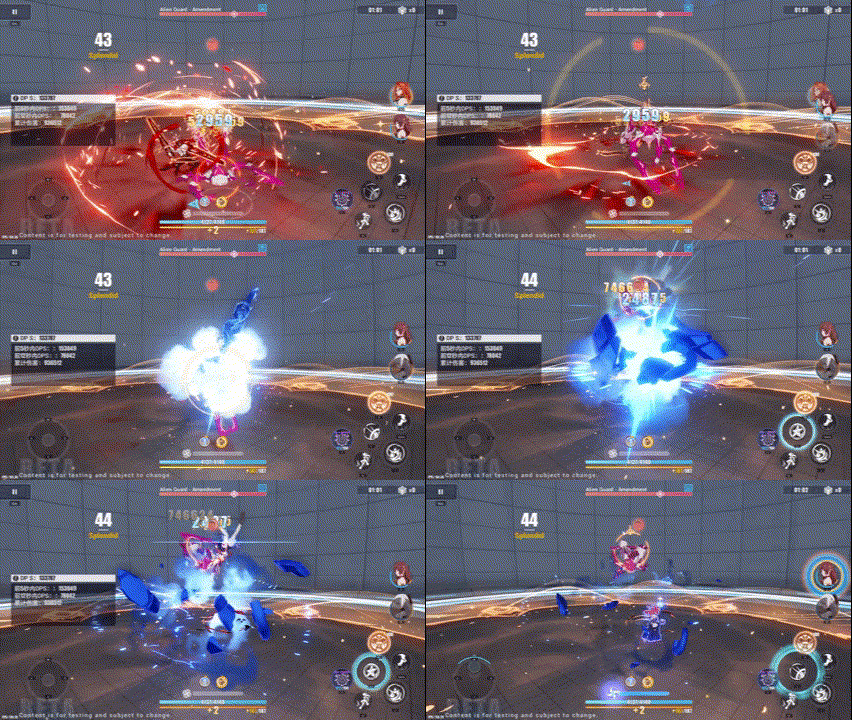
Senadina QTE
QTE - Triggered when the enemy is time-slowed, knocked airborne, or a teammate uses weapon skill.
Senadina rides the Anchor to the field and slams into the enemy with it. If it hits it will additionally shorten overheat by 4 seconds. If she's not in overheat she will gain Thunderous Pulse.
notes:
Senadina's basic attack sequence is faster in the air and the raw damage multiplier overall is almost the same so you are highly incentivized to perform your attacks in the air similar to Herrscher of Flamescion.
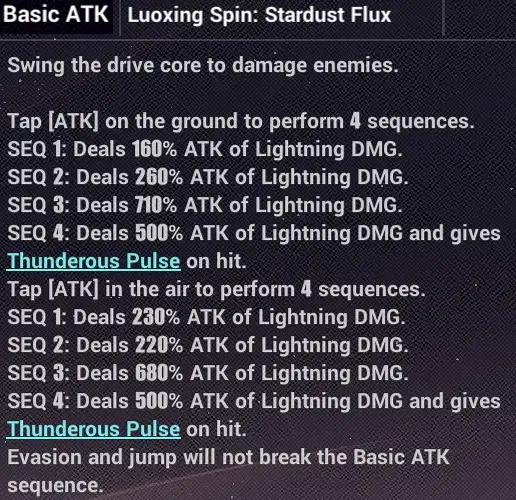
Basic ATK multipliers. Take note of the 3rd and 4th SEQ having most of the damage.
Weapon Skills
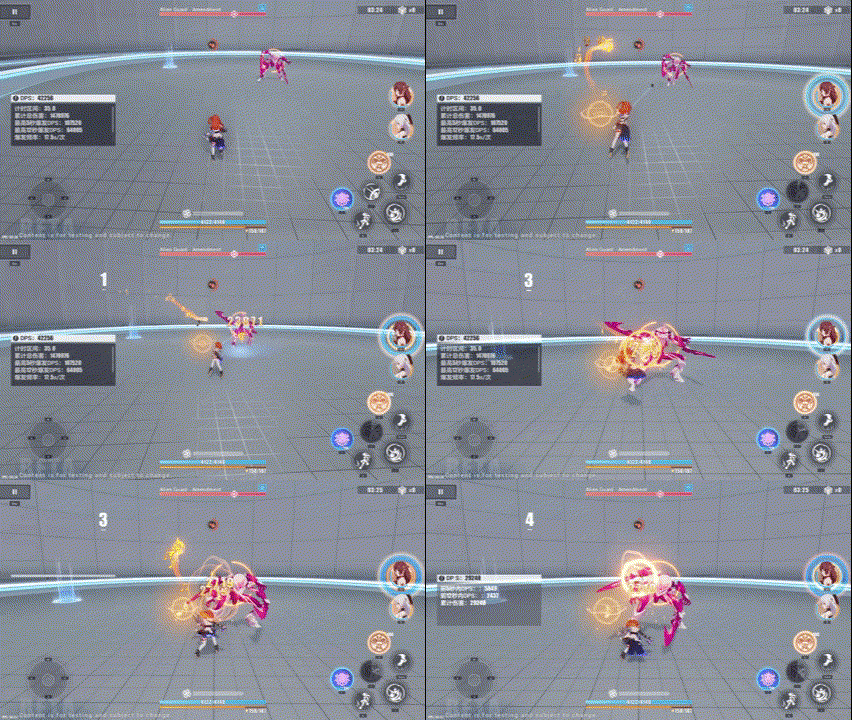
Sena Weapon Active as a gap closer
Quickly approach the enemy with the drive core and perform various yoyo tricks to attack.
Shoots the drive core at the enemy, dealing 50% ATK of Lightning DMG and pulling the character towards the target. 3s CD.
When Sena has Thunderous Pulse, the weapon skill will be replaced with Thunderous Strike.
When she is outside Thunderous Blazar state, the attack will deal 400% ATK of Lightning DMG, pull nearby enemies, and send her into Thunderous Blazar state. The ATK can be connected into Basic ATK SEQ 4 and gather stardust remnants.
When she is in Thunderous Blazar state if the attack hits it gives Thunderous Pulse again and replaces Thunderous Strike with Thunder in Clear Skies. Using Thunder in Clear skies reduces Thunderous Blazar duration by 2 seconds but exiting Thunderous Blazar will reset the duration. During Thunderous Blazar she will have increased Ignore Interrupt.
Thunderous Strike is considered a Combo ATK and stops Thunderous Blazar's timer. Jumping or evading will also pause its timer. Finally, during Thunderous Strike gain Iron body and take 30% less total DMG.
Thunder in Clear Skies or Lightning Flash Anchor will link up to 5 enemies it hits, 40% of the damage dealt by those attacks will also be passed onto other linked enemies (in the form of HP loss)
notes:
If you are on the ground or far away from an enemy you can tap the weapon active to throw her weapon hooking onto the enemy and quickly closing the distance, you can use this as a gap closer.
If you are in a scenario where you need to trigger the QTE of Luna or Eden which often happens at the start of a rotation, you can also tap the weapon active before switching to another character.
If she is too far to land the weapon active she will have this cute animation where she misses and falls to the ground.
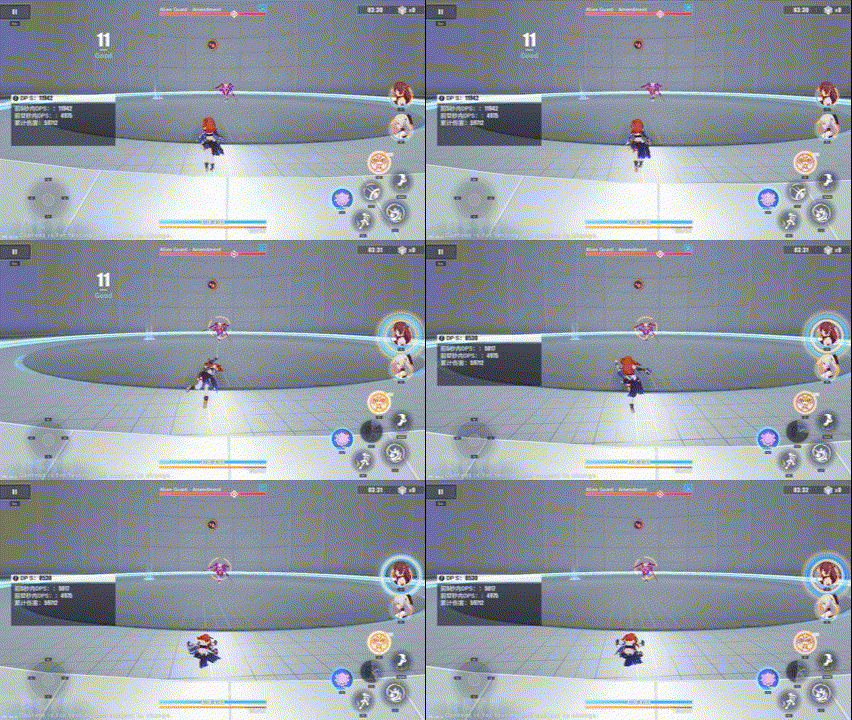
You aren't animation locked when this happens.
Skill Unlock Costs
Total ASM cost: 122
Total Coin cost: 4,393,950
Team Lineups
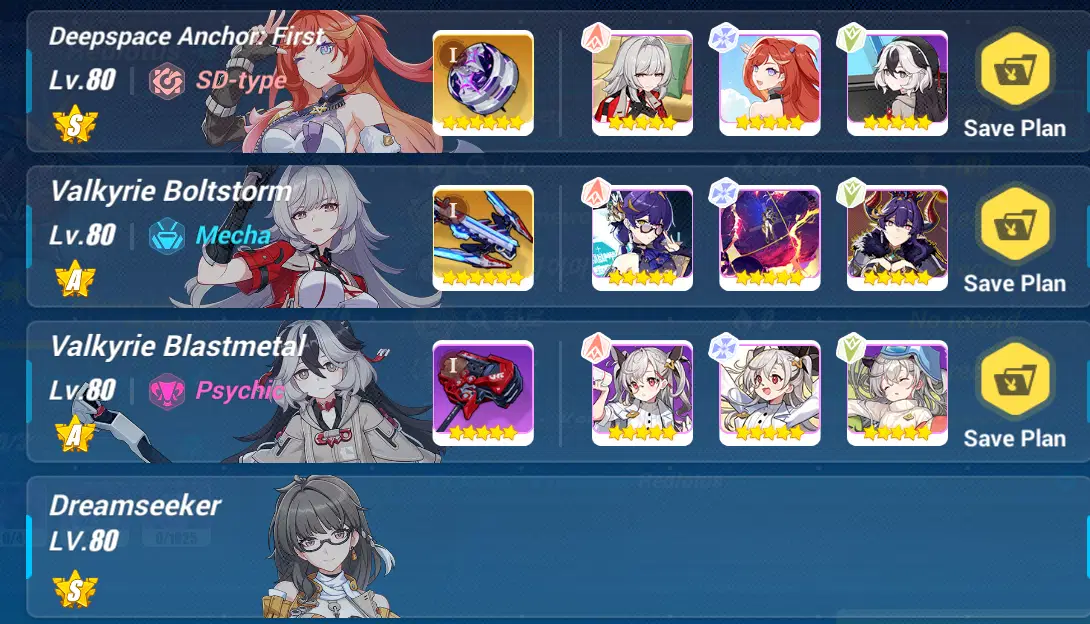
This is her Main team
This team is her main team and focuses on taking full advantage of the Astral Ring system.
In this team you play similar to APHO 2 where you rotate through the entire team dealing damage~
This team has way higher damage per rotation and DPS but lack of Time Fracture and longer rotations
This also allows you to use Dreamseeker or Songque.
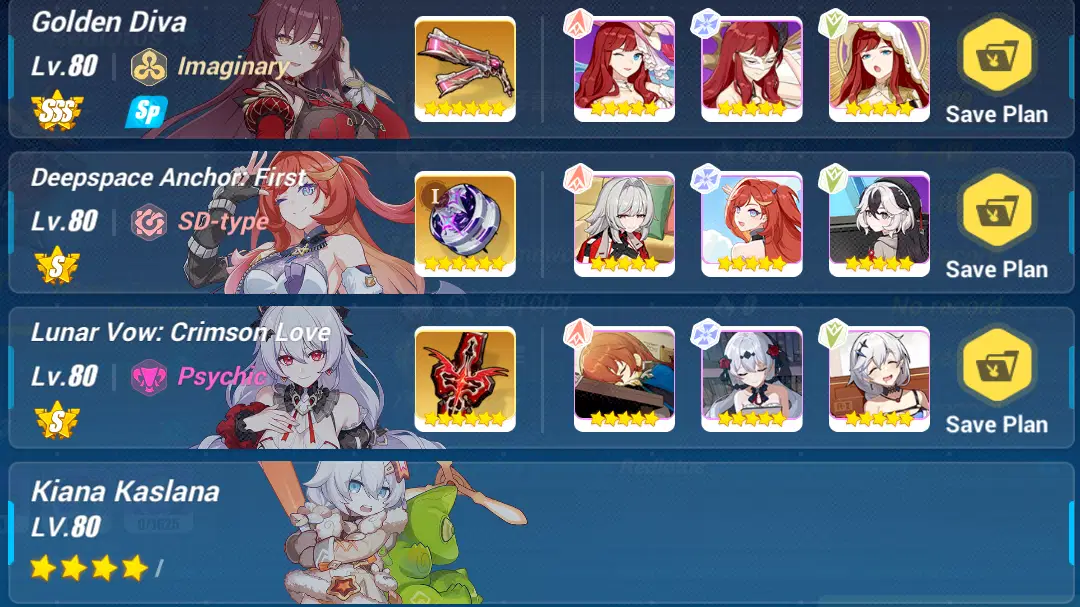
This can be better on certain bosses.
Because characters without Astral Ring cannot charge Astral Ring energy, you instead use Eden as the leader here and bring an ELF, with the best choice being Kiana ELF. In rare situations you can replace Eden with Herrscher of Truth.
This team lets you play her as if she was a P1 character. It has lower damage per rotation and DPS but the rotations are alot faster and due to Time Fracture it could potentially outperform at lower disturbances and especially in Memorial Arena.
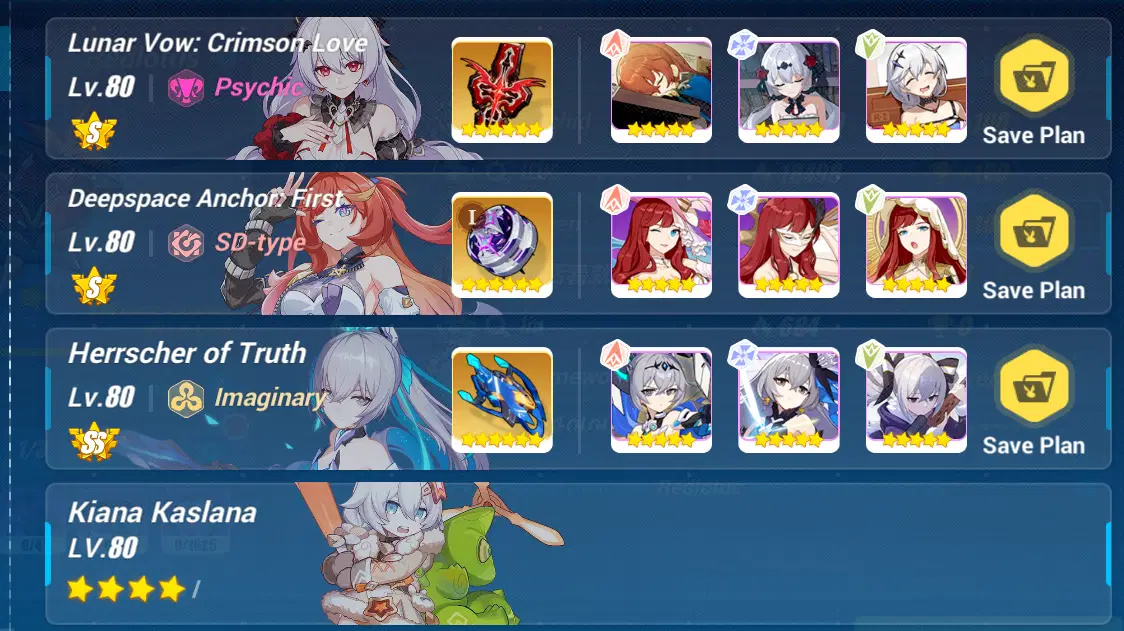
This is a niche team but still sometimes sees use
And finally, in this setup while rarely used it does work quite well on certain bosses where Eden doesn't do as well.
Because the breach buff doesn't stack it's very easy to have either Herrscher of Truth or Lunar Vow have their ultimate up.
How to play
Eden Luna Team Rotation Example
This is the rotation you will do when you have enough SP to do so, and there aren't any conflicting cooldowns.
- Switch to Sena, use Weapon active to trigger QTE of the party members.
- Switch to Luna, hold ATK then tap Weapon active to strengthen her buff, use ult if possible
- Switch to Eden and use ultimate
- Enter through QTE with Senadina, Use weapon active then attack
- Use Weapon active another two times then Ultimate
- Evade into the 3rd and 4th basic attack sequence then finish with weapon active into enhanced weapon active.
Video:
For a short rotation on Senadina you would do
- Rotate on Supports
- Sena QTE -> Weapon Active -> Attack
- Weapon Active x3
- Evade ATK x2 -> Weapon Active X3
Video:
If you have enough SP you can include ELF skill or Sena / Luna ultimate in the rotation, but you may also want to save it for a large rotation following this.
Notes:
Please keep in mind this is against a weird stardust enemy, not used for DPS comparison.

Helia Coralie Team Rotation Example
Notes:
In some situations it may be a DPS or score loss to use Coralie / Helia Ultimate
Likewise, sometimes you may want to have Coralie QTE off.
Extended Rotation:
- Senadina Weapon Active
- Helia QTE -> Helia Weapon Active until button flashes -> Weapon Active -> Helia Ult
- Coralie QTE -> Weapon Active x2 -> Ult
- Sena QTE -> Weapon Active -> ATK -> Weapon Active x2
- Sena ULT -> Evade + ATK -> ATK -> Weapon Active -> Weapon Active
- Activate Astral Ring on Sena due to the benefits
- Sena Weapon Active x3
- Helia QTE -> Weapon Active -> Weapon Active
- Coralie QTE Weapon Active x5
- Sena QTE Weapon Active x3
- Sena Evade + ATK -> ATK -> Weapon Active -> Weapon Active -> Ult
This is an extremely long rotation, and the time you should activate Astral Ring does greatly vary depending on the fight and the damage you are able to output. That being said, this is an example of an extended rotation in the instance you are fighting mobs or doing a multi stage fight ( which is quite often ) In which case you wouldn't want your damage to overflow and you end up overkilling the first phase and not having enough damage for the second phase.
In the video, I extended the above rotation even further to show what her gameplay could look like against mobs.
I also didn't activate her Astral Ring at the start of the fight since that would be quite unrealistic, you start off with 50 energy not 150.
Extended Rotation Video:
Delayed Rotation Video:
Short Rotation:
- Senadina Weapon Active
- Helia QTE -> Weapon active until it flashes -> Weapon Active
- Coralie QTE -> Weapon active x3
- Sena QTE -> Weapon Active -> ATK -> Weapon Active x2
- Sena Evade + ATK -> ATK -> Weapon Active x2
Note:
This is the shortened rotation without using any Ultimate or Astral Ring, it can be used for mobbing or saving energy to burst.
Video:
Songque Rotation Example:
- Switch to Coralie Jump Weapon Active
- Helia QTE Weapon Active until button flashes -> Weapon Active
- Sena QTE -> Weapon Active -> ATK -> Weapon Active x2
- Activate Astral Ring on Sena due to the benefits
- Sena Weapon Active x2 -> Evade + ATK -> ATK -> Weapon Active -> Weapon Active
- Helia QTE -> Weapon Active
- Coralie QTE -> Weapon Active X5
- Sena QTE -> Weapon Active x3 -> Ult -> Evade + ATK -> ATK -> Weapon Active -> Weapon Active
Note:
This rotation is exclusive to Songque and only works because she provides you with 20 additional Astral Ring Intensity.
Video:
Animation Cancel
She does have an animation cancel that could come in handy in some rotations as well.
It does mean you won't be able to use her ultimate at the end of the rotation as you did before which could end up reducing your overall damage. I didn't actually find this until the live server but thankfully I can provide a video still.
This is just one of many "It's situational" or "It depends" that Senadina has due to her system and mechanics.
Video:
Notes:
You don't want to use her ultimate before Thunder in Clear Skies unless you have extra damage in the rotation because of the following ability.
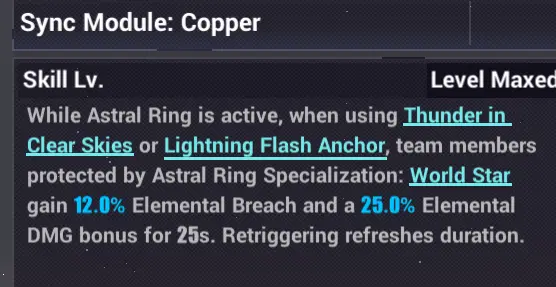
Sync Module: Copper
Weapon Comparisons
Red Star Thunderbolt: Breaking Dawn
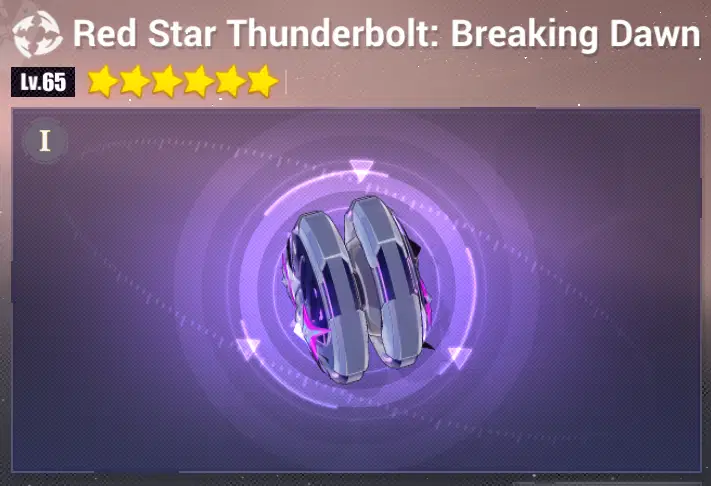
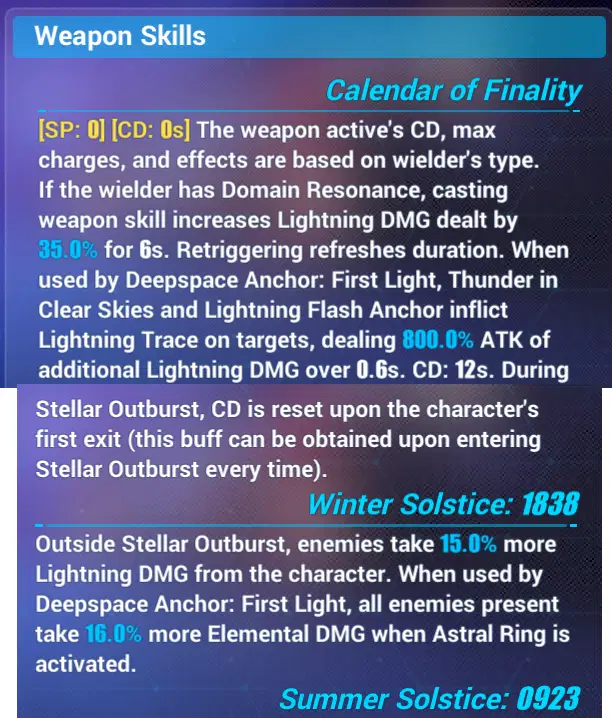
The passives provided not only increases her own damage output, but the damage done by her team due to the
"Winter Solstice" buff providing an all element debuff rather than being restricted to Lightning.
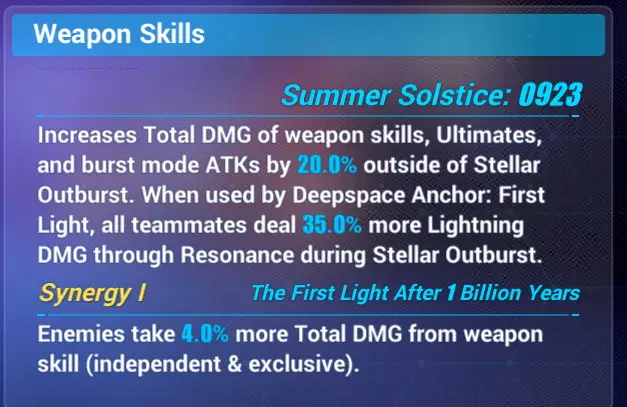
This passive increases the Total DMG of her weapon skills, ultimate and burst mode ATKs outside of Stellar Outburst.
The Synergy I passive causes enemies to take 4% more Total DMG from her weapon skill.
This effect is exclusive to her. Since most of her damage output is weapon skill it's quite nice of a bonus.
This is an independent multiplier so it does make a bigger difference than you would think, which will be covered in the "Weapon Synergy" section
Overall, her signature weapon is very important for her to obtain due to the following reasons.
- Increases user Lightning Damage by 35%
- Causes enemies to take more lightning damage
- Enemies take more elemental damage when Astral Ring is activated
- Enemies take 4% more Total DMG from weapon skill ( independent and exclusive )
- Lightning Trace additional damage
The Value of Pi
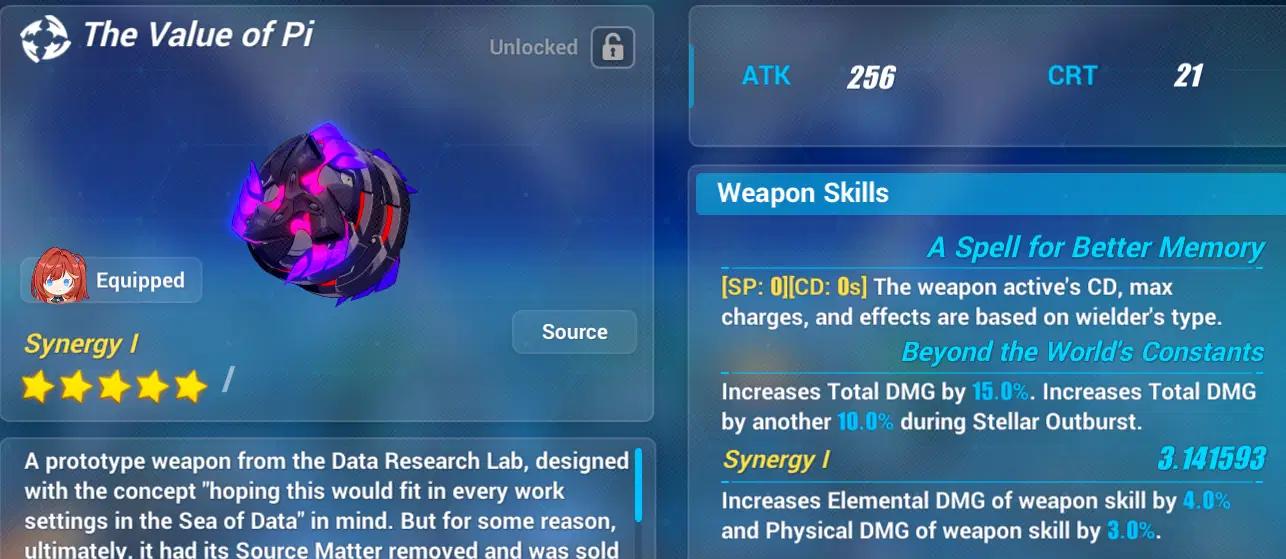
This weapon can be obtained from the Foundry for 150 AE Imaginon
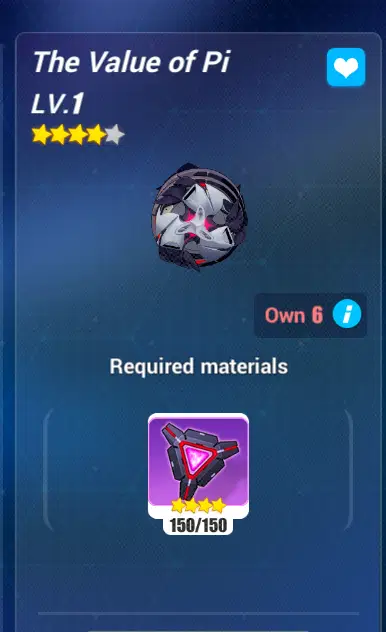
Although not having heavy synergy with this does work as an alternative for those who do not have her weapon.
This is simply a strong stat-stick with her able to take advantage of the passives seemingly tailored to her.
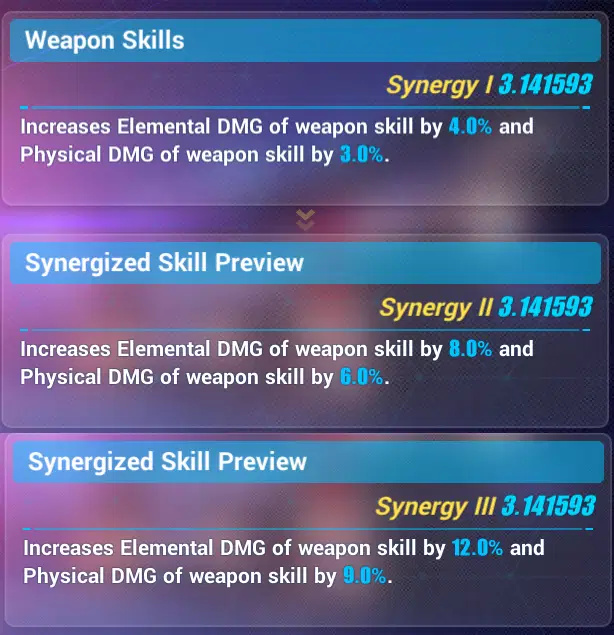
The weapon does have refines but if that's worth it can be questioned.
Alternative Weapon: Damage Comparison
Here I will be doing the same rotation aiming to compare the damage potential of her alternative weapon in the event you are unable to get her weapon from the Gacha. Please do keep in mind that this is simply a raw damage test and changing weapons may come along with some caveats not properly reflected in the video~
With that out of the way let's get right into testing!
Red Star Thunderbolt: Breaking Dawn:
The Value of Pi - Synergy 1:
The Value of Pi - Synergy 3:
Red Star Weapon Synergy
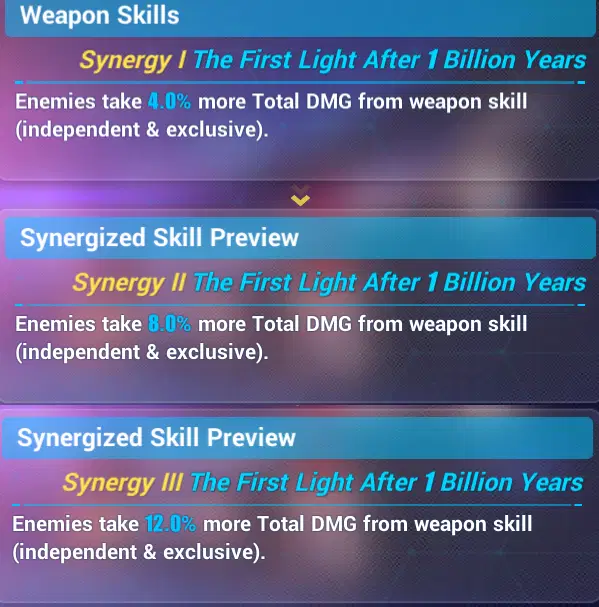
Weapon Synergy increases the Independent multiplier by 4% at a time, while it may not look like a gain at all most of Sena's damage output is considered weapon skills and it is an Independent multiplier after all.
Red star Refinement 2 Damage Test
Red star Refinement 3 Damage Test
Overall Damage Comparison.
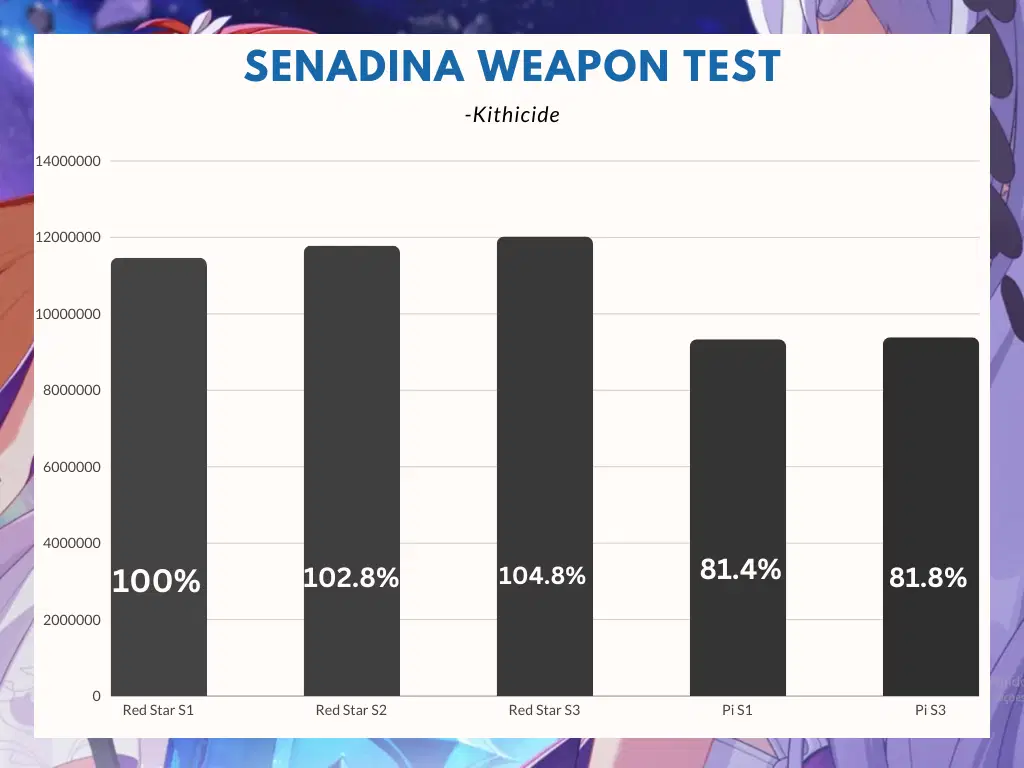
Keep in mind this is a raw damage test and may not reflect the score loss in live content
Red Star S1 - 11,466,688 Damage
Red Star S2 - 11,786,816 Danage
Red Star S3 - 12,025,600 Damage
Value Pi S1 - 9,336,192 Damage
Value Pi S3 - 9,387,300 Damage
Conclusion:
Her weapon is very good to aim for but if for some reason you can't get it she does a craftable option.
I would highly recommend pulling for her weapon, it's 60 max pulls!
Stigmata
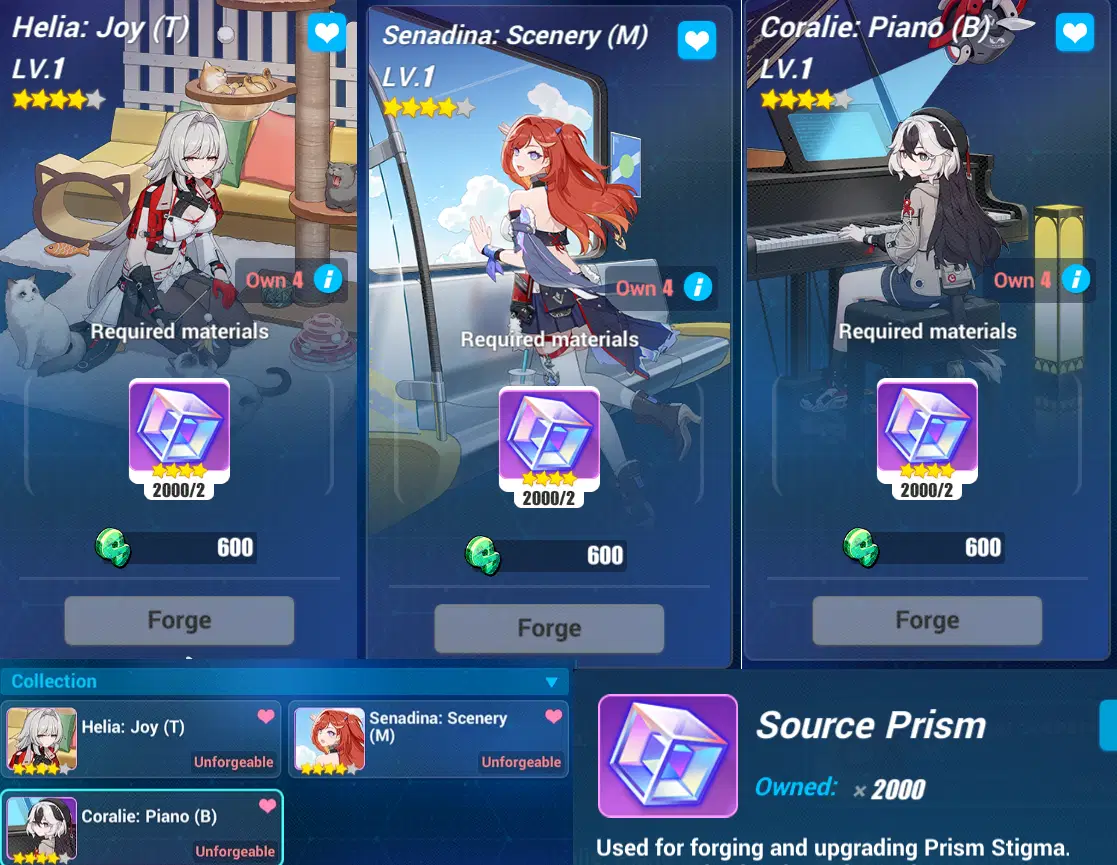
This means you only need to Gacha weapon!
All of Senadina stigmata will be craftable in the foundry for 600 Ether Fuel and 2 Source Prisms, you also obtain a box that provides you with one of her stigmata for free through login.
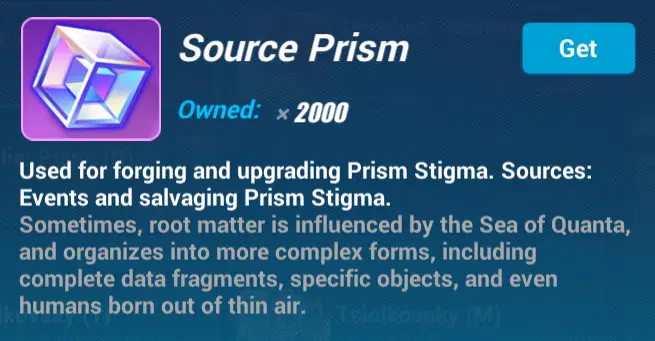
Source Prism
"During v7.3, the limited-time events and shop will be open for you to obtain a total of Source Prism x45.
During v7.3, the sources of obtaining Source Prisms and their quantities are shown below:"
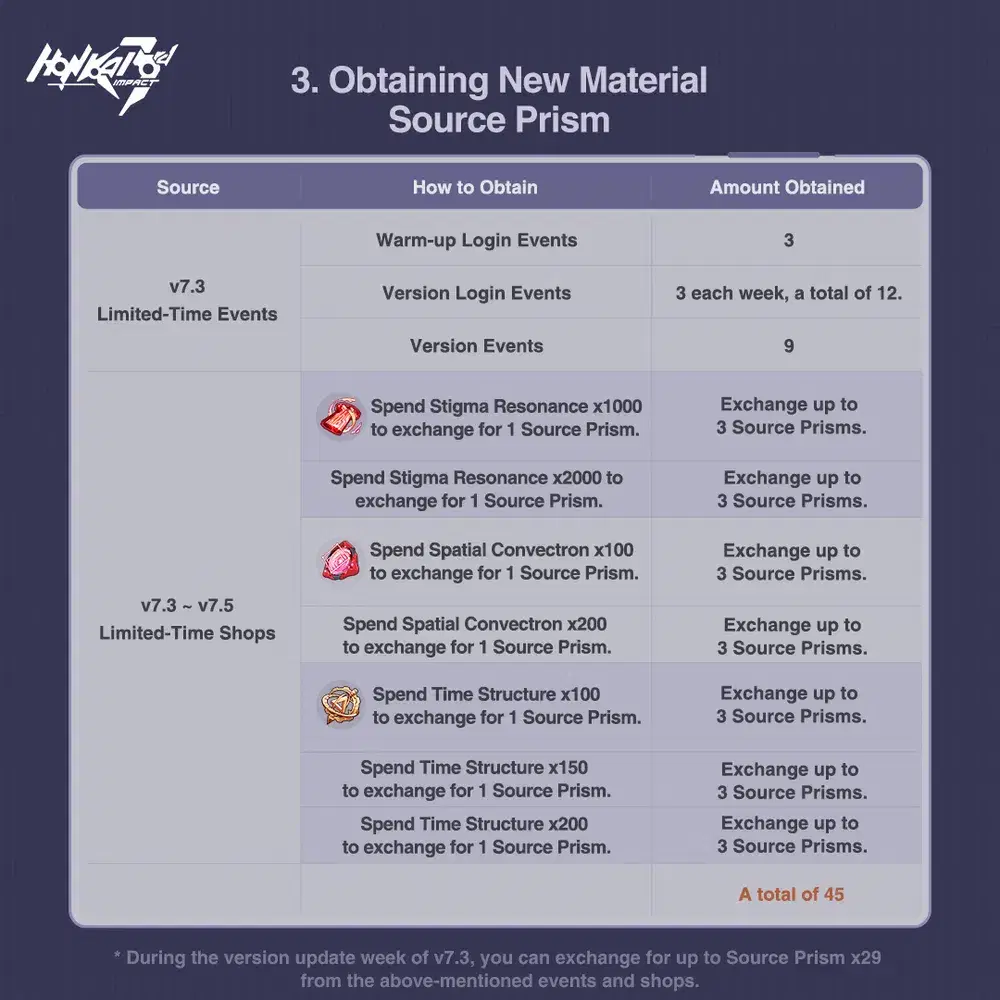
"Starting from v7.4, you can play login events and various events to get at least Stigma Option x1 and Source Prism x13 each version."
Thank You to Mihoyo for the source and information about Source Prisms
Perfect Morning Set Overview
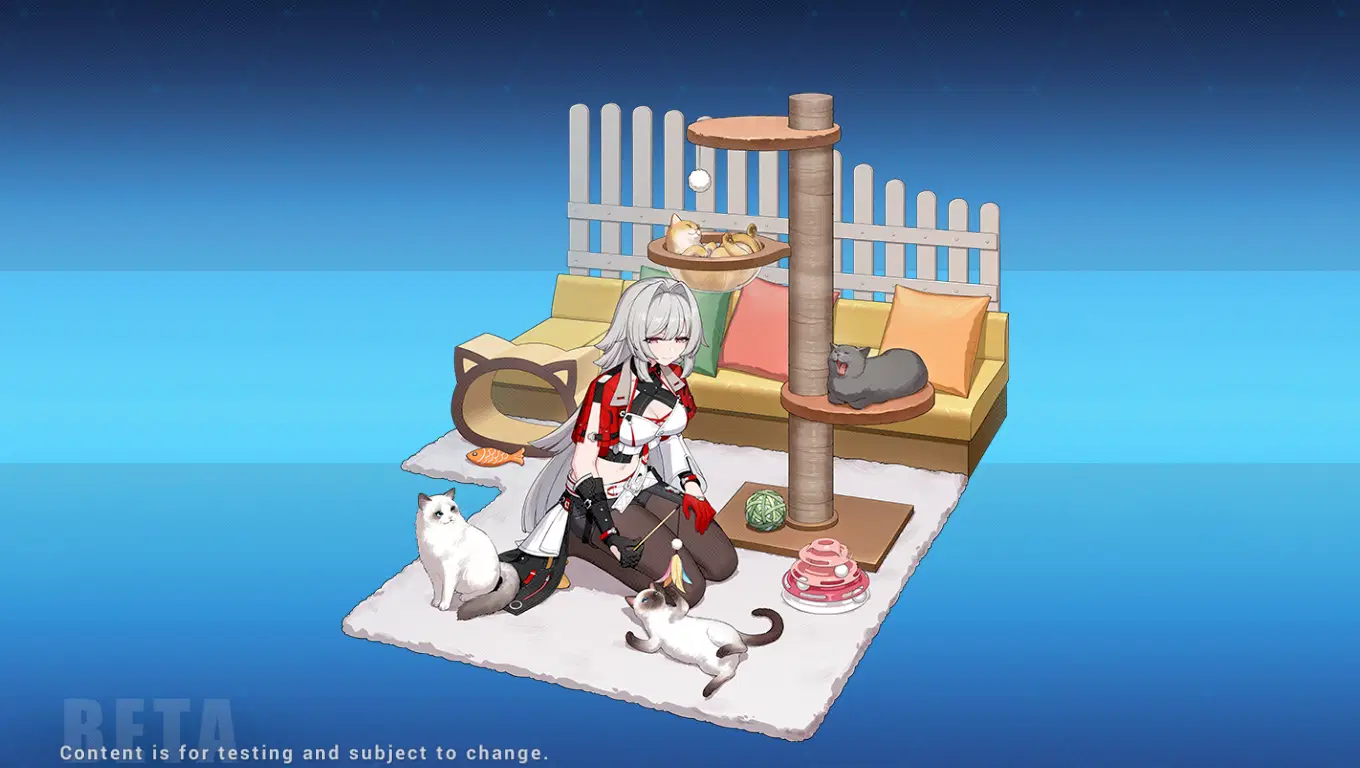
Helia: Joy (T)
Increases Total DMG by 20%. Senadina equip bonus: Increases Lightning DMG by 40%; After activating Astral Ring Specalization: World Star, increases the elemental DMG from characters with Domain resonance by 30% outside of Stellar Outburst.
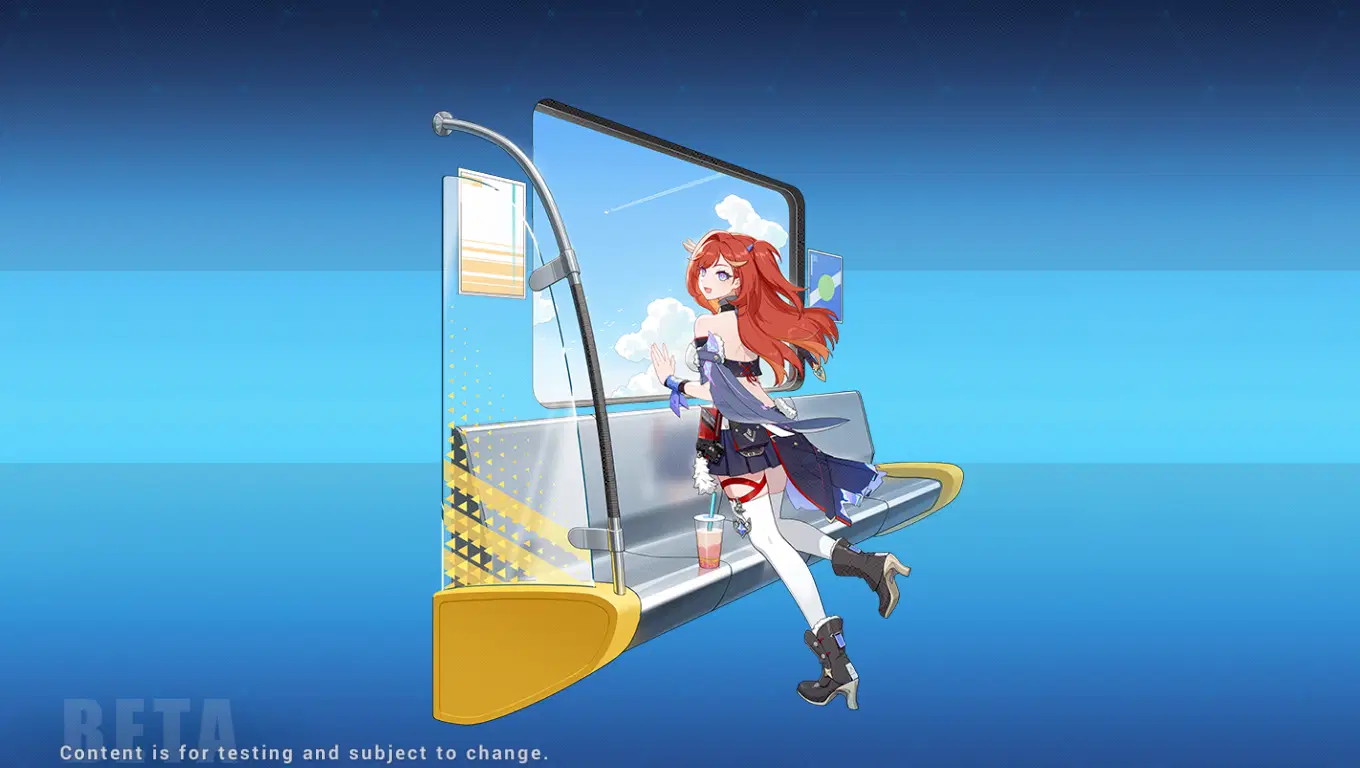
Senadina: Scenery (M)
Increases the teams Elemental DMG by 20% ( exclusive). Senadina equip bonus: Increases her Lightning DMG by 40%; While Astral Ring is active, if she consumes 30 or more SP at once on standby, the team's Total DMG and Elemental DMG increases by 25% permanently outside of Stellar Outburst ( cannot stack )
Notes:
Unfortunately this is poorly translated, it says it increases the teams elemental damage by 20% but it only applies to weapon active damage.
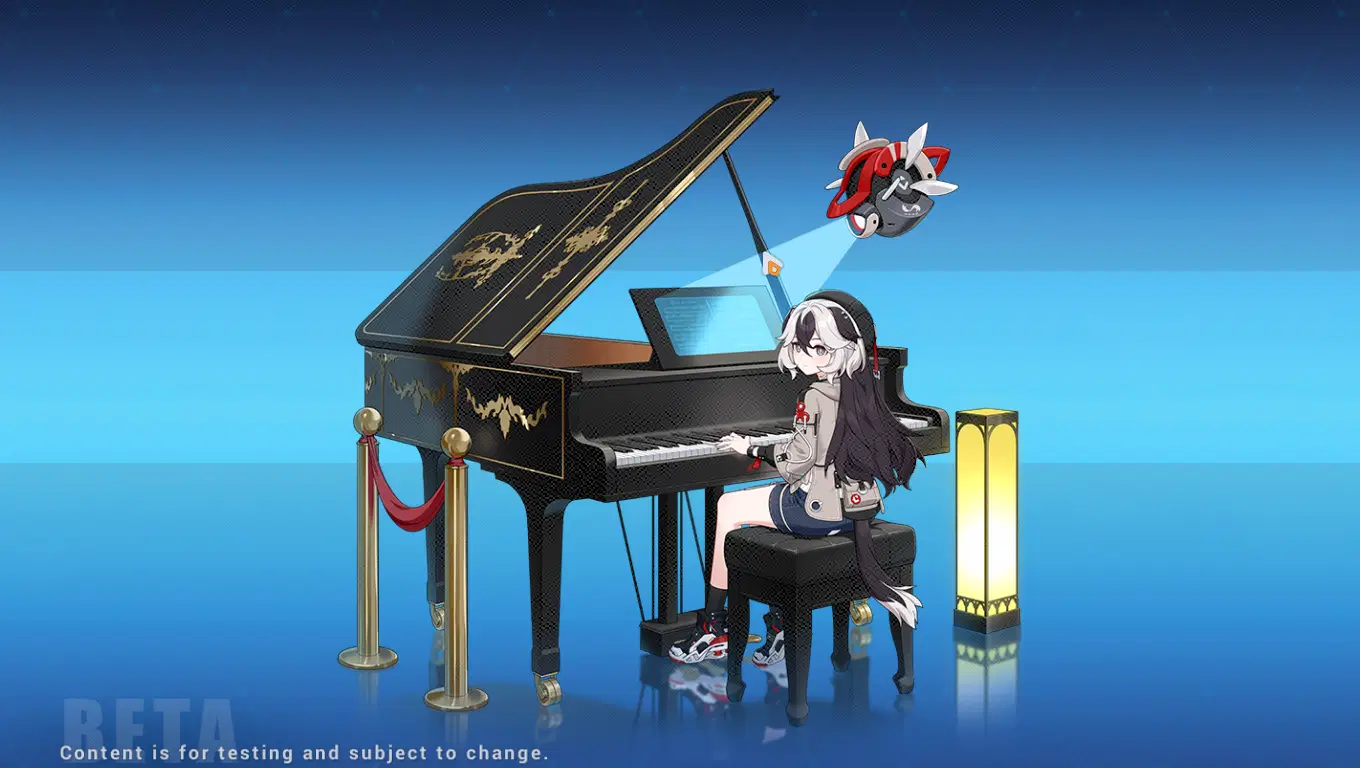
Coralie: Piano (B)
Increases weapon skill's Total DMG by 25%
Senadina Equip Bonus: Increases the Lightning DMG that enemies take from her by 20%; After activating Astral Ring Specalization: World Star, increases the Elemental DMG that enemies take from characters with Domain Resonance by 25% outside of Stellar Outburst.
2 Set Bonus
Increases Total DMG by 20%. When used by Senadina, the character deals 30% additional Lightning DMG when dealing DMG with a weapon skill. CD 2s. This effect's CD is reduced to 0.5s when triggered by Resonance. After activating Astral Ring Specalization: World Star, the Total DMG of characters with Domain Resonance in the team is increased by 25% outside of Stellar Outburst.
3 Set Bonus
All enemies take 10% more Total DMG from the character.
When used by Senadina, all enemies take 24% more Total DMG from the character and 25% more Total DMG from Resonance.
After activating Astral Ring, If the character consumes at least 30 SP on standby in one go, enemies take 15% more Total DMG and 15% more Elemental DMG for 30 seconds. Retriggering refreshes duration.
Her three set piece is extremely strong, if you are short on prisms I would highly recommend prioritizing crafting all 3 pieces before upgrading them. I speculate that the "If the character consumes at least 30 SP on standby in one go" will have some relevance in the future perhaps as a support?
Affix Choices.
6 ATK Damage Affixes - The general recommendation, this will apply to almost everyone reading this guide. This is pretty self explanatory but you would run All Six Attack lines to increase her damage, which will almost always be the best choice.
Stigmata Upgrade Priority.
Getting three pieces > Bottom > Top > Middle.
If you don't have enough resources you can hold off upgrading the middle stigmata piece which has the lowest damage gain to prioritize upgrading the Bottom and Top pieces.
In the event you don't have her Stigmata, you can use Handel TMB as a very good temporary until you transition into Perfect Morning set. If you don't already have Handel TMB I do not recommend chasing it because you could craft the entire Perfect Morning set instead.
Astral OP's and ELF comparison
Dreamseeker (S) - 28,074,816 Damage
Kiana ELF (4) - 30,724,544 Damage
Songque (S) - 29,827,520 Damage
Rank Up Guide
Note she is perfectly fine at S0, very strong even! But for those players who want to get something to push her to the extra mile, you have come to the right place.
I will focus on what she gains from her rankups and various breakpoints so you can push her to the higher level competitively.
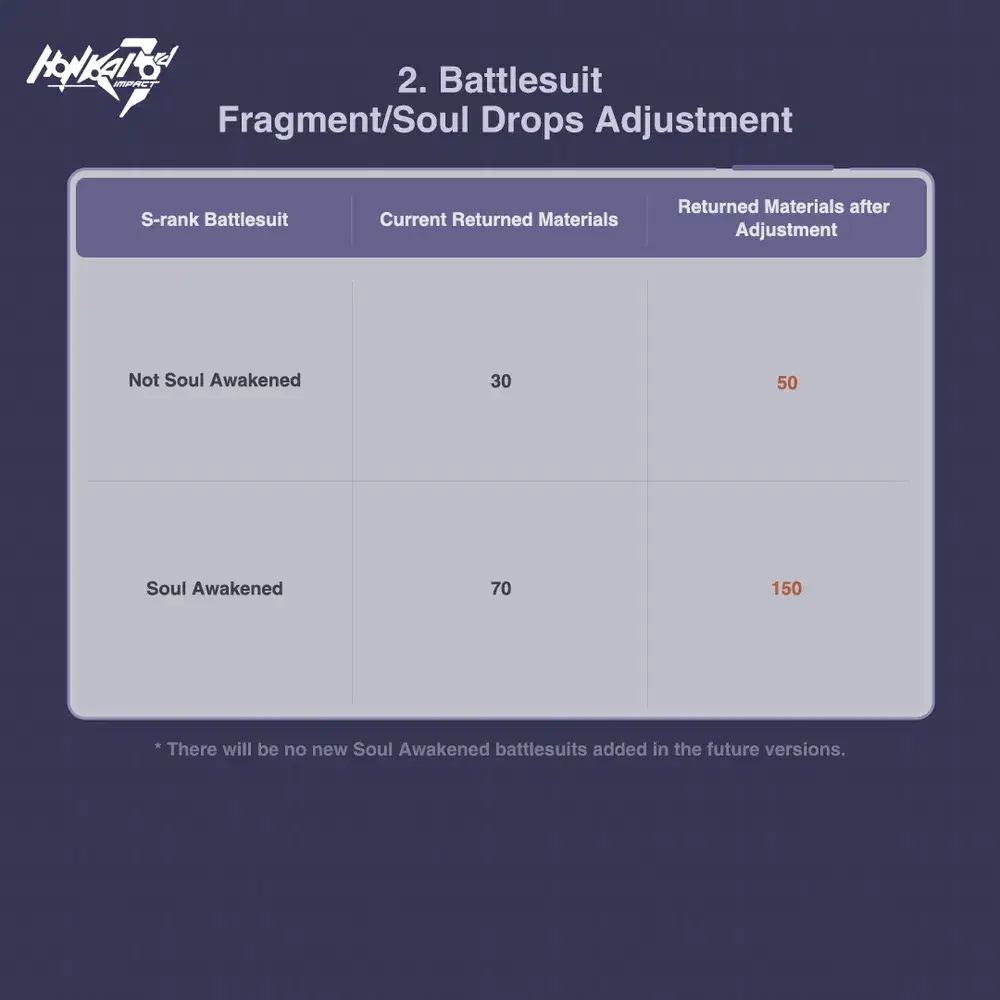
Information provided by Mihoyo
Thank you to Mihoyo for the source and information
Due to the rank up changes, Essentines have been removed and any copies will give you 50 fragments.
This means you will go from S0 -> S2 -> SS -> SS1 -> SS2 -> SS3 -> SSS
One Duplicate Sena ( S2 )
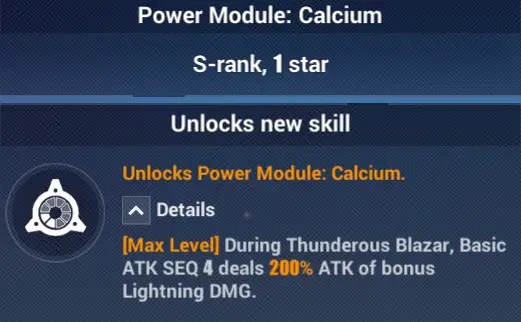
Sena's S1 rank-up
Her first rank-up boosts her Basic ATK SEQ 4 causing it to deal 200% ATK of bonus lightning DMG during Thunderous Blazar.
Since she needs to use said SEQ 4 before continuing on with her rotation this is an added boost that will be utilized rather frequently making it a good upgrade.
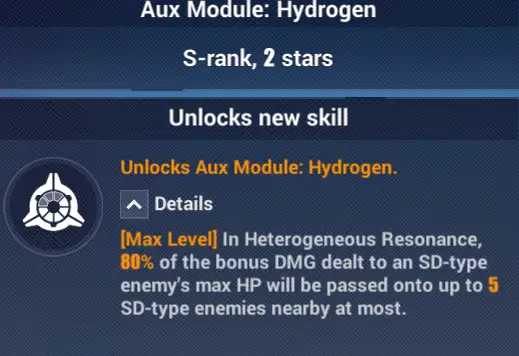
Sena's S2 rank-up
Heterogeneous Resonance: When you deal damage to a SD-type enemy while having Stardust Remnants you can deal additional damage to their max HP at the cost of said Stardust Remnants.
This skill may not seem like it's all that, but It's quite a noticeable increase on Stardust enemy mobs.
The main content designed for her has Stardust enemies so this is a considerable improvement over S0.
Two Duplicates of Sena ( SS )
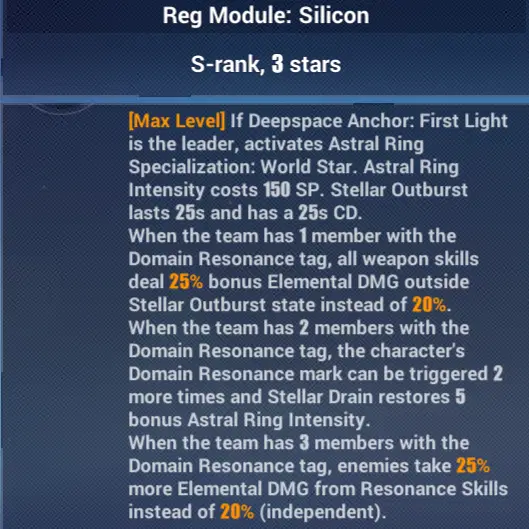
Sena's S3 rank-up ( Leader)
This rank-up boosts her leader skill so it will not have any effect if you are using Eden + Luna and use Eden leader.
While leader bonuses are not normally much to write home about I would say hers is actually amazing comparatively.
This causes enemies to take 5% more Elemental DMG from Resonance Skills while also being an Independent multiplier!
The only downside is this requires you to have 3 members with the Domain Resonance tag, which you should have regardless if you are using Senadina as the team leader so that's not a negative in the slightest.
While not the focal point, it also causes weapon skills to deal 5% bonus Elemental DMG outside Stellar Outburst.
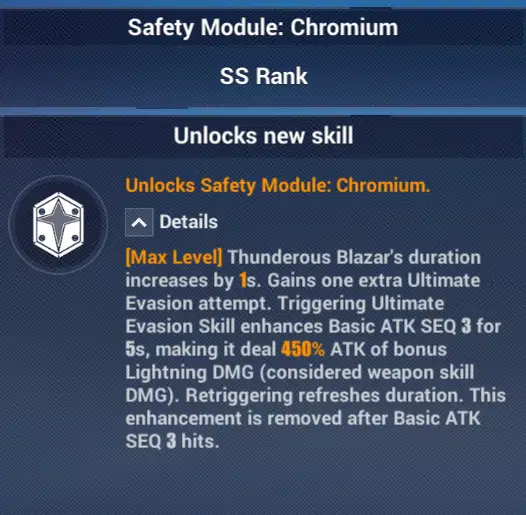
Sena's SS rank-up
Her SS rank-up Is similar to that of fenghuang of vicissitude having the potential to change the rotation and how you play her.
To break it down, first the duration of her Thunderous Blazar is increased from 8 seconds to 9 seconds.
She additionally gains an extra Ultimate Evasion charge giving her more opportunities to connect into SEQ 3.
Finally, it enhances her Basic ATK SEQ 3 making it deal more damage that's considered weapon skill DMG which she scales on.
This rank up is extremely strong and a proper reward for those willing to get an additional 2 duplicates of her!
from here on each duplicate is one rank up
SS1
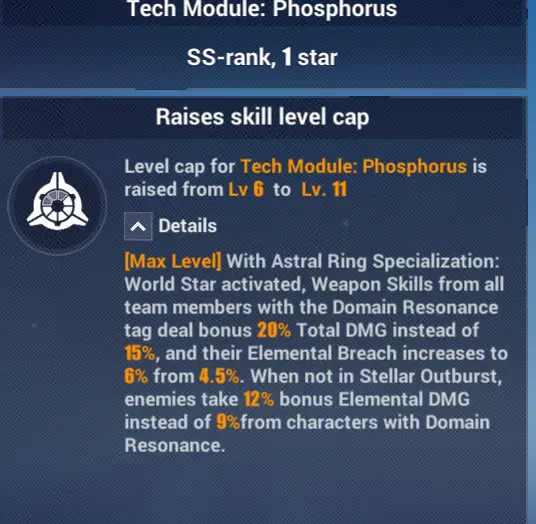
Sena's SS1 rank-up
Sena's SS1 rank-up improves the team with Domain Resonance while Astral Ring: World Star is activated.
Weapon skills deal 5% more bonus Total DMG
Elemental Breach increases by 1.5%
When not in Stellar Outburst , enemies take 3% bonus elemental DMG from characters with Domain Resonance.
These values are compared to the pre-existing levels to compare the gains.
This rank up isn't the best considering beforehand you were going from S0 -> S2 or S2 -> SS in one copy.
Comparing the gains to the price this isn't that strong of a rankup even with the Elemental Breach.
SS2
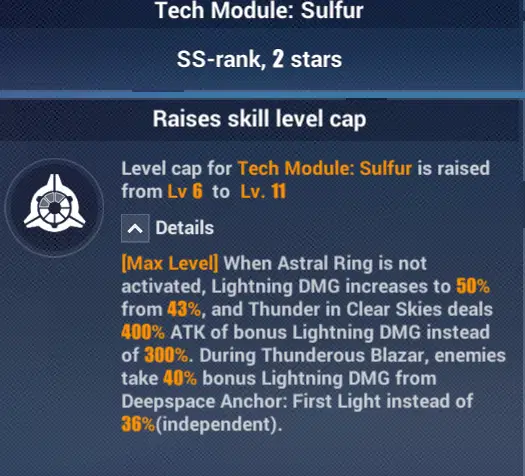
Sena's SS2 rank-up
Sena's SS2 rank-up
When Astral Ring is not activated she increases her Lightning DMG by 7%
Thunder in Clear skies deals 100% ATK of additional Lightning DMG.
During Thunderous Blazar, enemies take 4% more bonus damage from Sena (Independent).
These values are compared to the pre-existing levels to compare the gains.
This rank up is not that good in terms of cost to performance even with the slight Independent multiplier.
It honestly pales in comparison to what's gained at SS rank but that's to be expected when you compare 2 to 1.
I wouldn't recommend this unless you are going for SSS
SS3
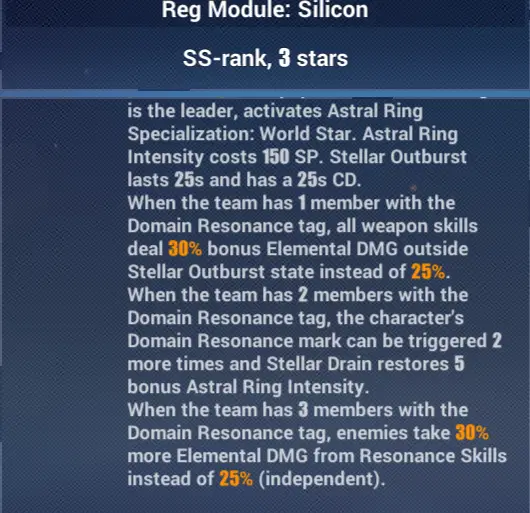
Sena's SS3 rank-up
This rank-up, being a leader skill and all is the same as the S3 rank up which causes enemies to take 5% more Elemental DMG from Resonance Skills while also being an Independent multiplier.
It also comes with the same requirement of having 3 members with the Domain Resonance tag.
Weapon skills deal 5% bonus Elemental DMG outside Stellar Outburst with the only requirement being Senadina set as leader.
While this was very good before, that was also because you got it while also getting SS which is even more amazing and one of if not her best rank-ups. It's still just as strong as it was before, but it now has decreased value for the same cost.
SSS
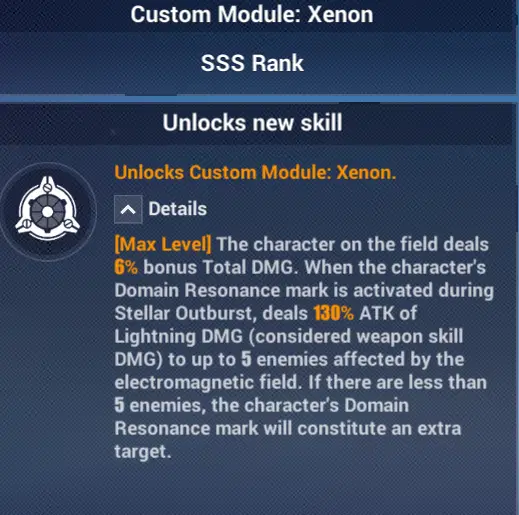
Sena's SSS and final rank-up
This rank up boosts the character on fields damage by 6% Total DMG.
When the character's Domain Resonance mark is activated during Stellar Outburst, it will deal 130% ATK of additional Lightning DMG ( this will be considered weapon skill DMG ) to up to 5 enemies affected by the electromagnetic field.
(Resonance Mark can be activated by any team member's Resonance Attack to generate an electromagnetic field)
If there are less than 5 enemies then the character's Domain resonance mark will be considered an extra target.
Sena's last and final rank-up. This one focuses on boosting her teams damage output when fighting multiple enemies.
It's a very potent rank up but it's true power is dependent on the stage it is being utilized in and if there are multiple enemies present. It still has good performance against 1 target though due to the Domain Resonance Mark mechanic.
Rank Damage Comparison
The same rotation was used across each field test and you may see the rotation~
S0
S2
Keep in mind, her S2 doesn't translate to DPS test well.
SS
SS1
SS2
SS3
SSS
Keep in mind that just like S2, this doesn't translate that well to DPS test. Even so, that's alotta damage!
Rank-up Infographic
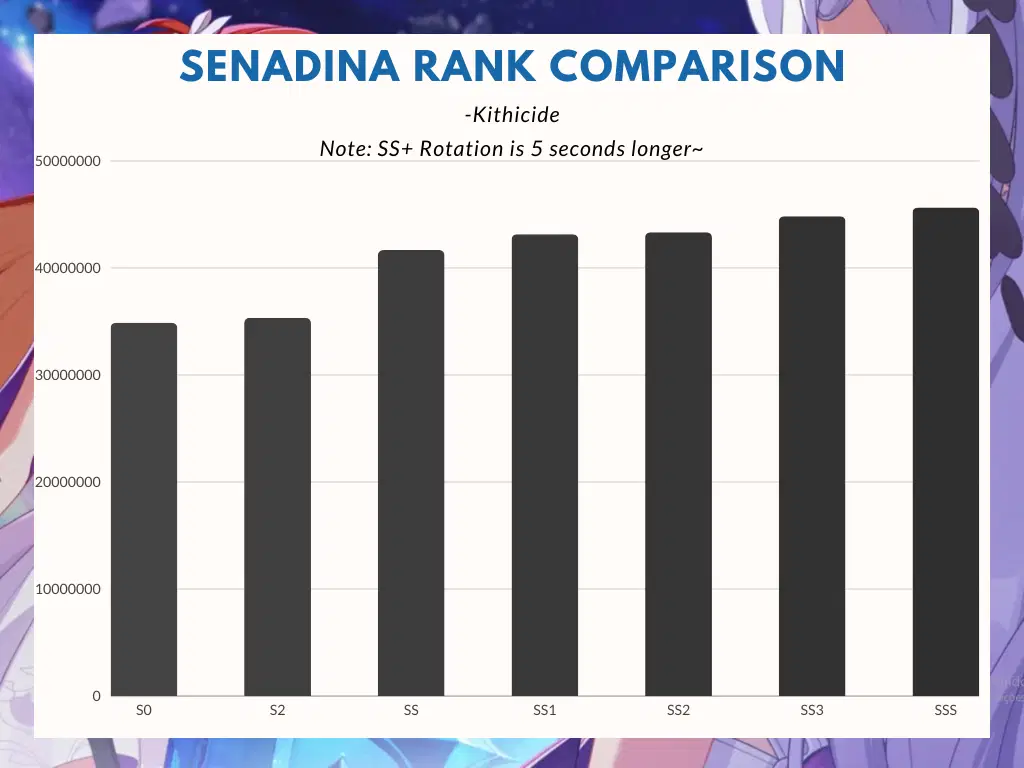
S2 / SS / SSS Are her large boosts! S2 and SSS don't reflect well in this ST test.
S0 - 34,883,824 Damage
S2 - 35,339,136 Damage
SS - 41,670,272 Damage
SS1 - 43,150,656 Damage
SS2 - 43,348,544 Damage
SS3 - 44,838,720 Damage
SSS - 45,646,272 Damage
Gameplay
This gameplay is not indicative of the maximum potential score, it is just for fun to showcase her playstyle.
Also keep in mind the gear used in trio is purposefully weakened without Valkyrie ranks~
Stats
The stats used throughout this guide, including the videos are recorded below.
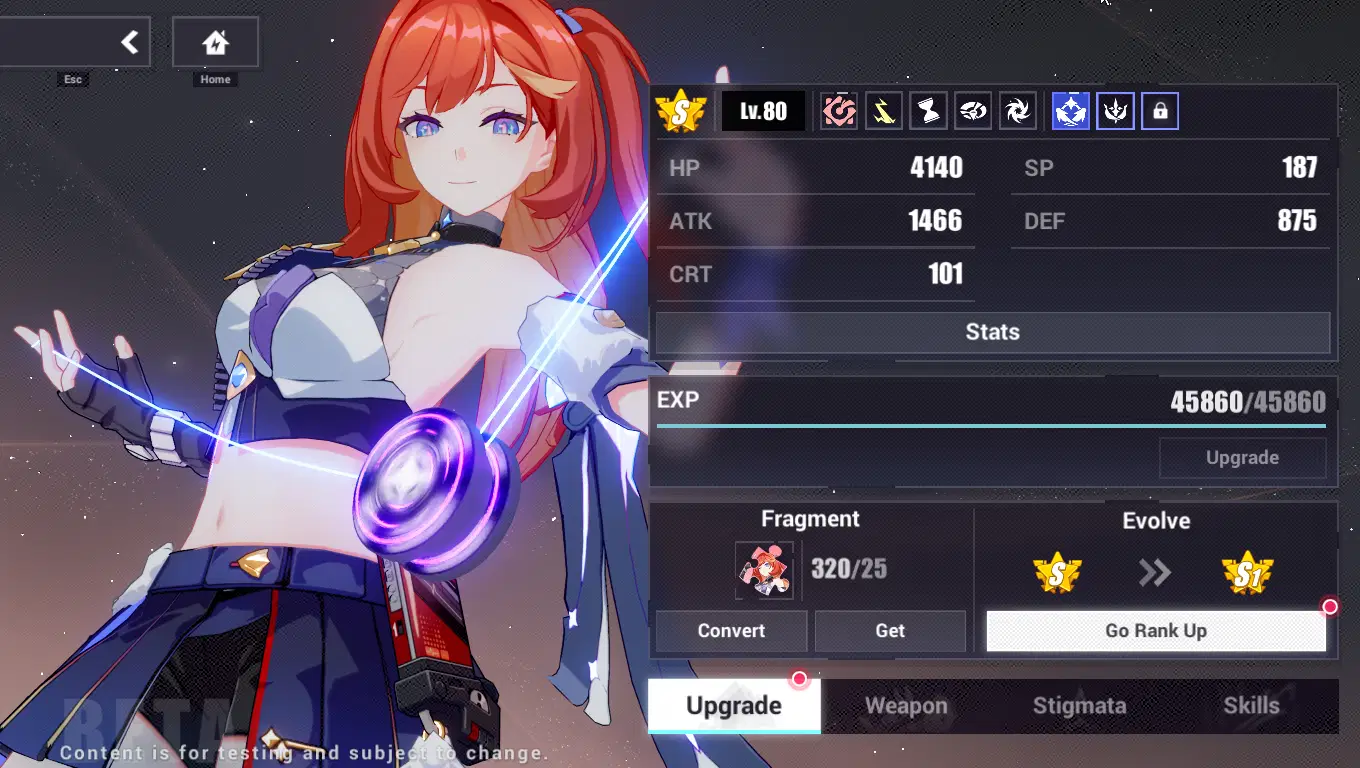
Senadina has ATK Affixes
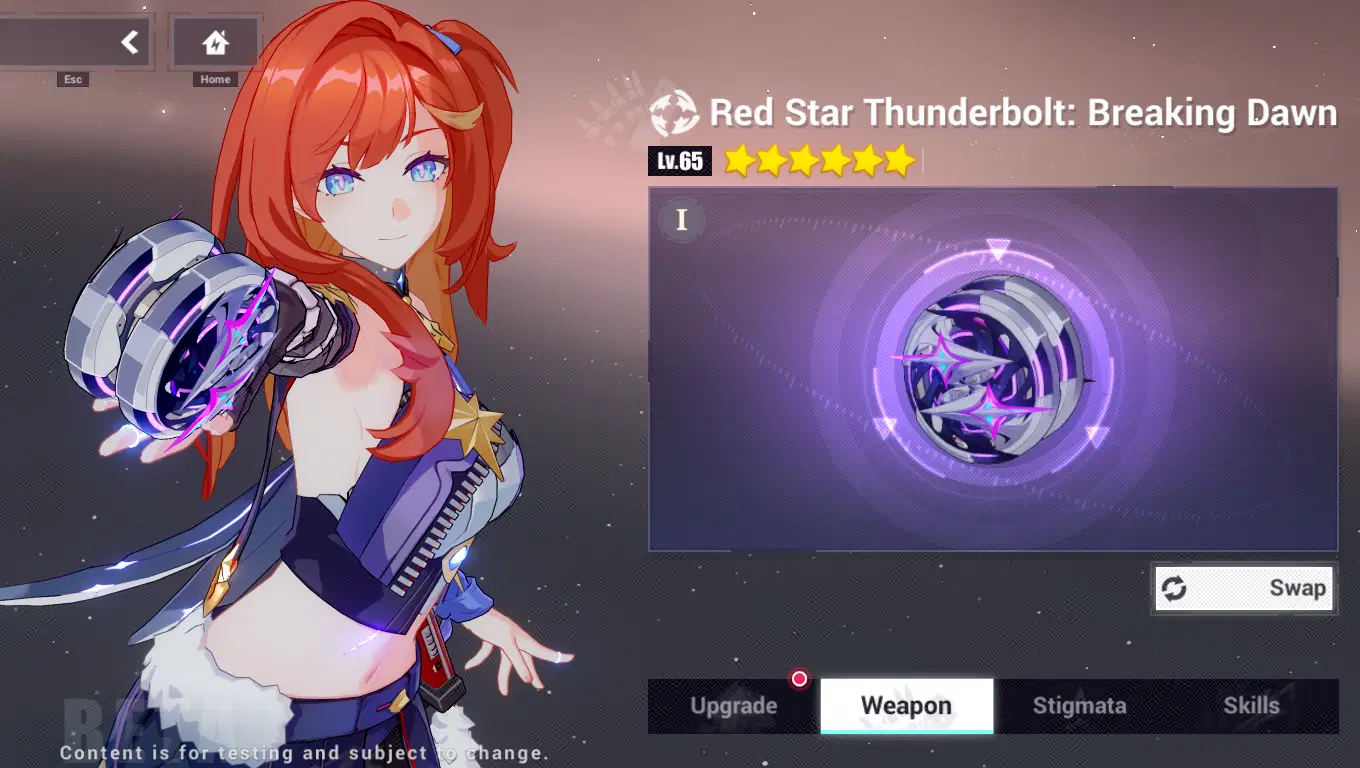
Senadina has 65 pri-arm without any added synergy.
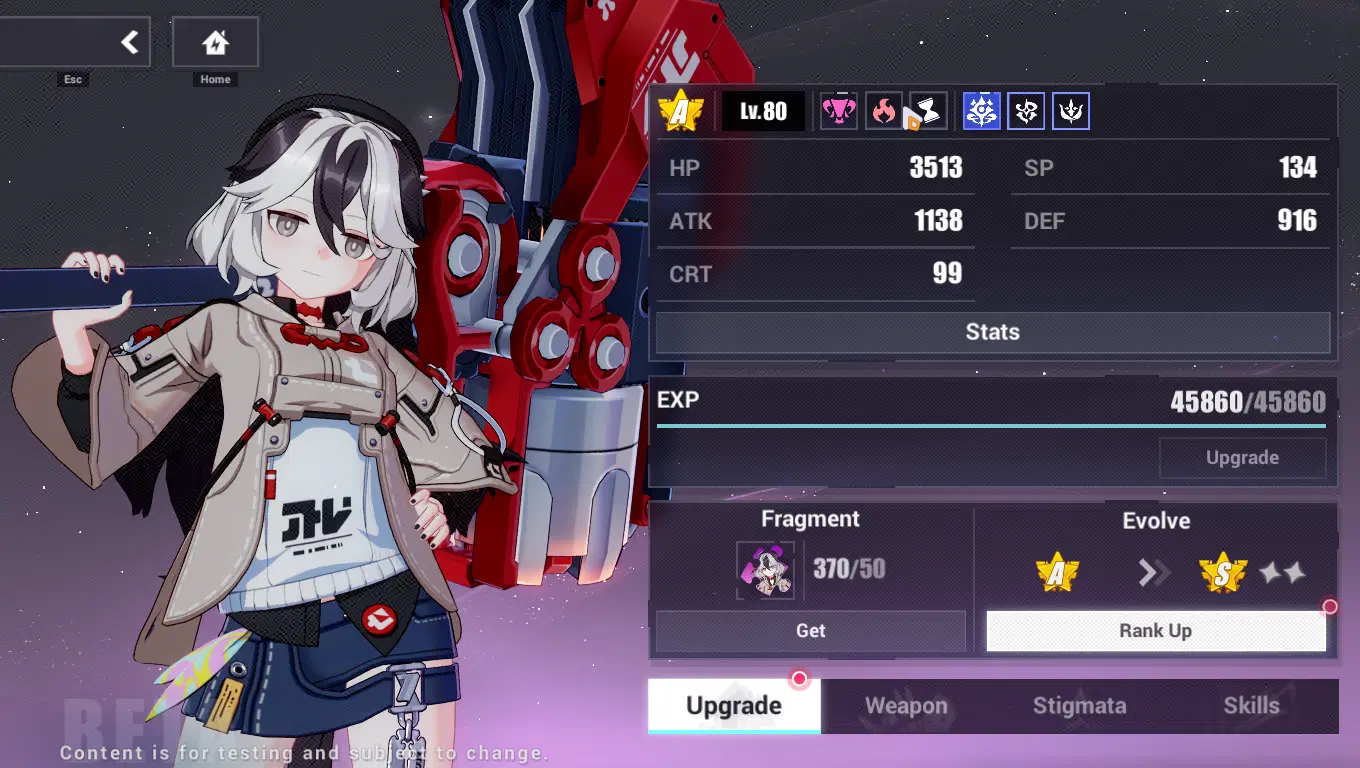
Coralie has ATK Affixes and is A rank.
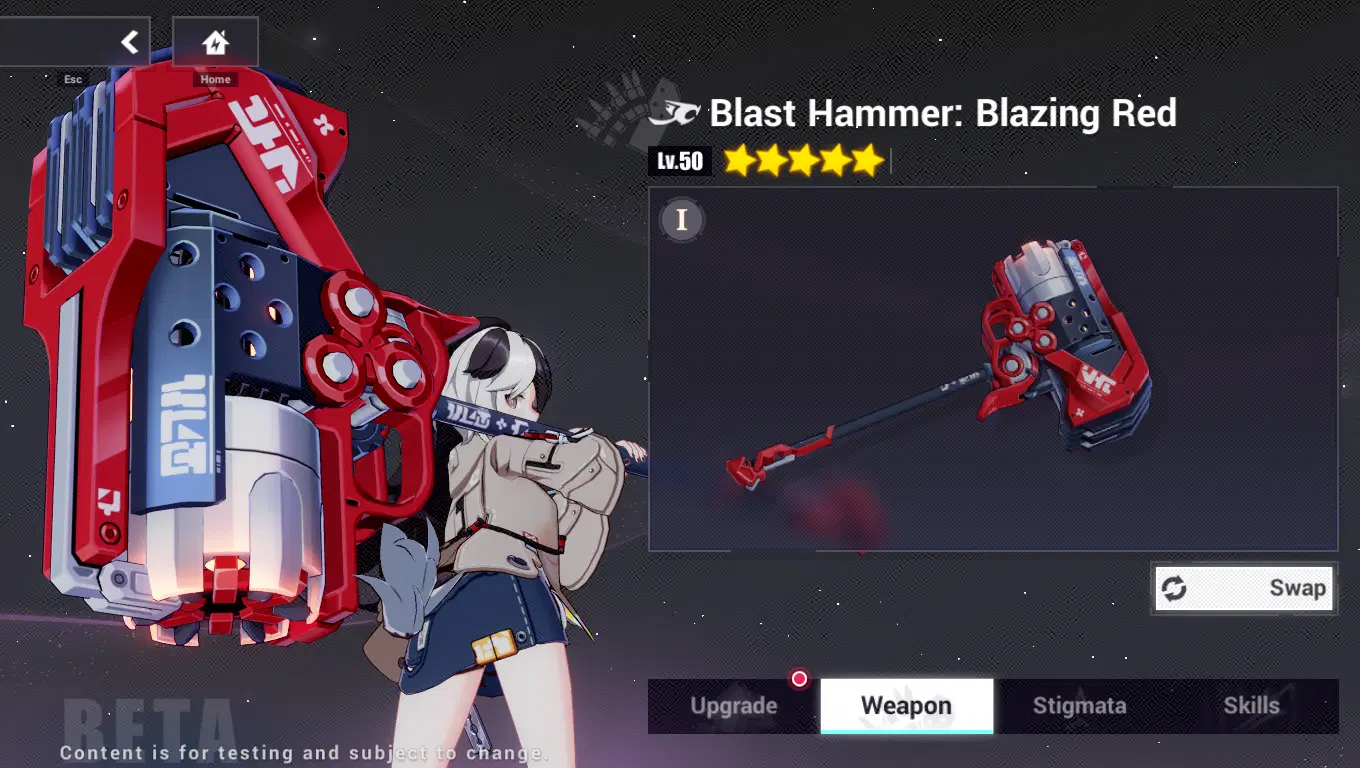
She has her free weapon with refinement 1
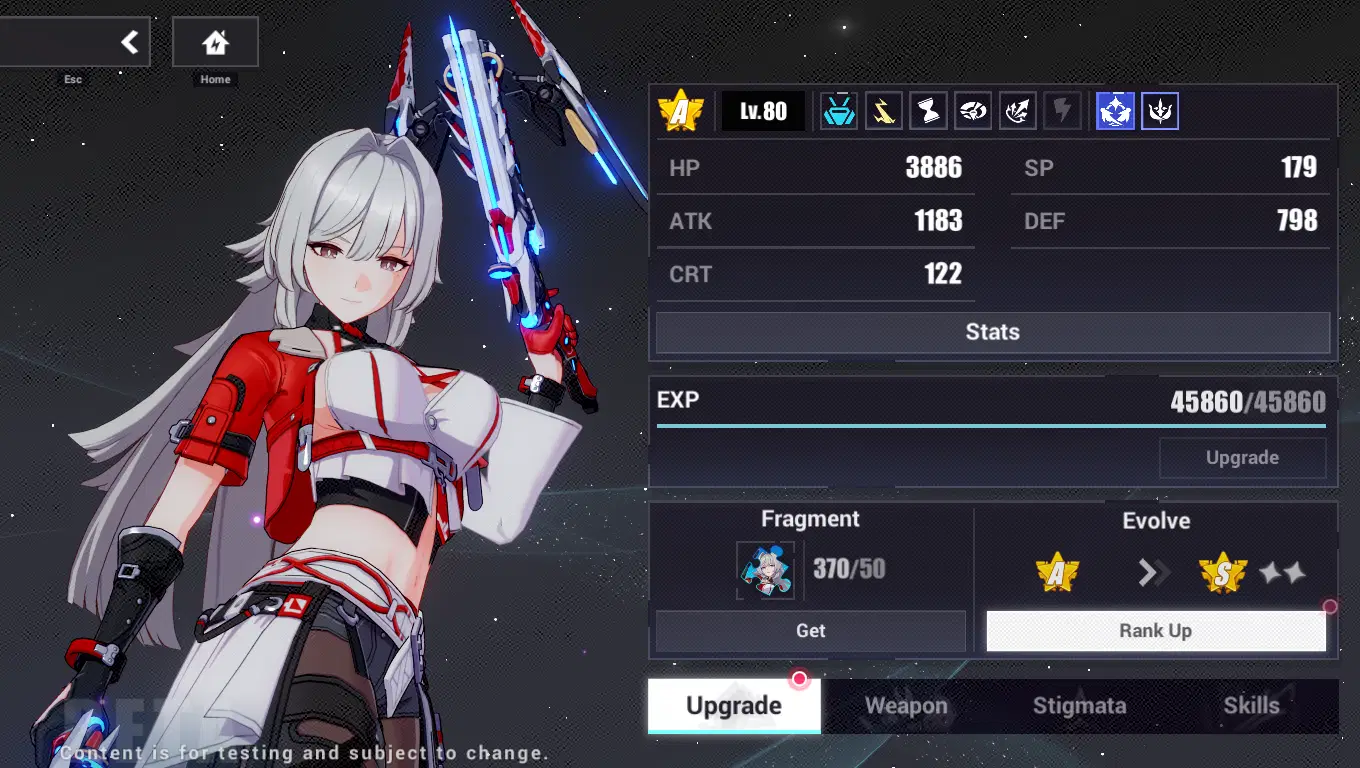
Helia Has ATK Affixes and is A rank.
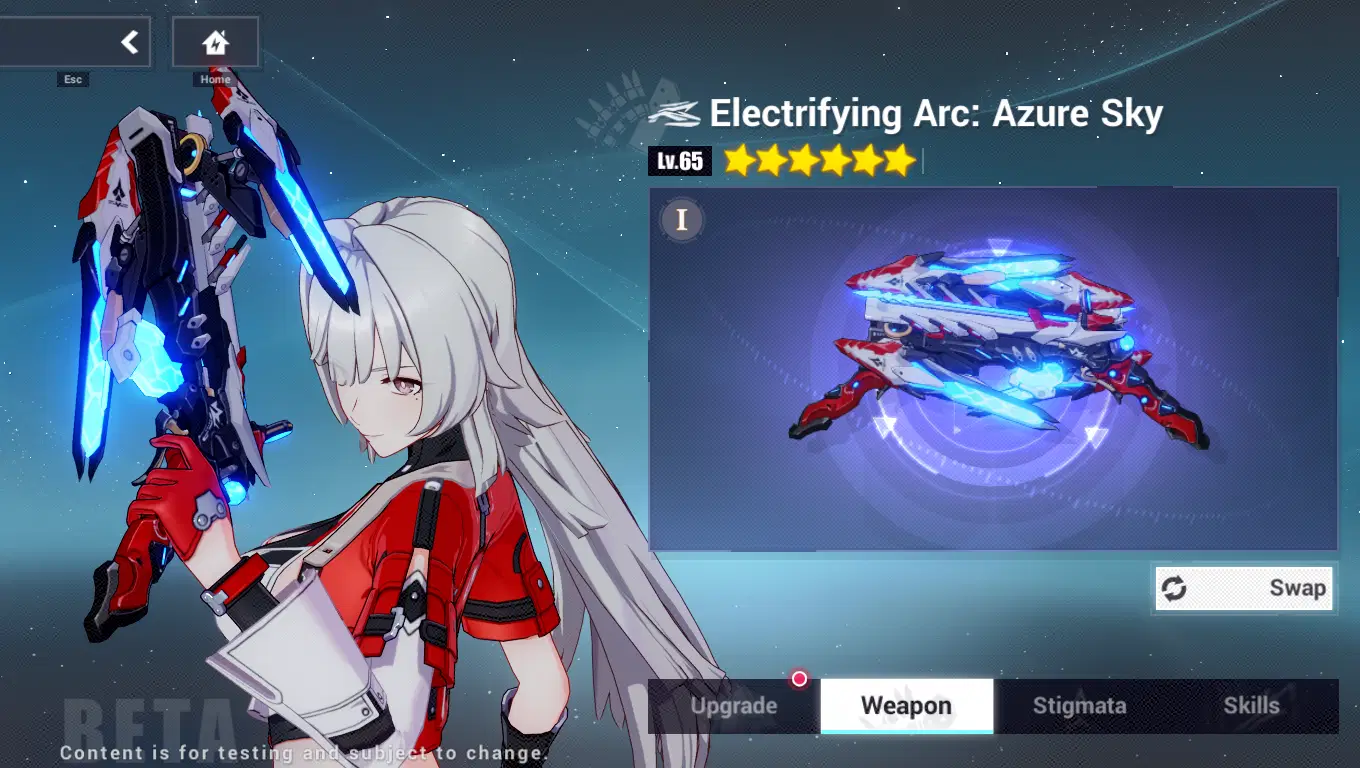
She has her Gacha pri-arm and is refine 1.
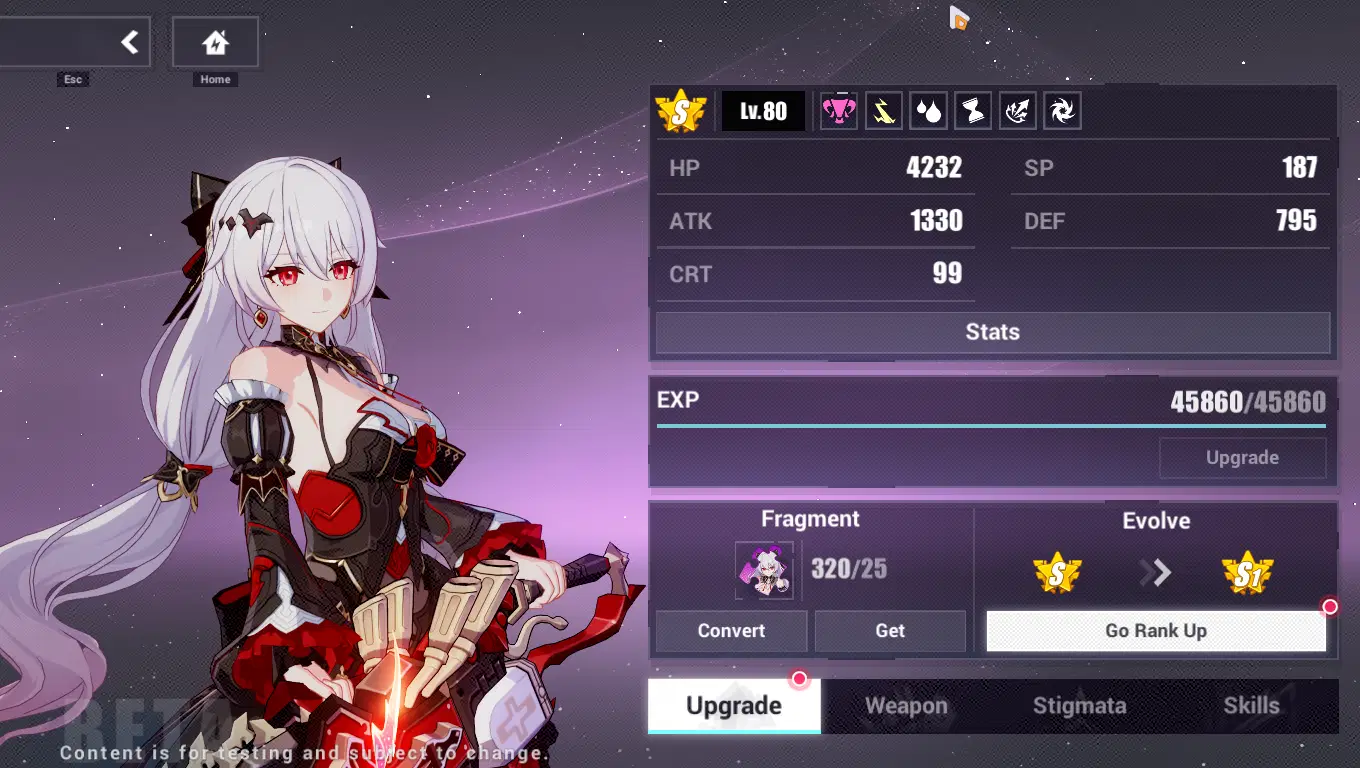
80~ Lightning DMG in Affix
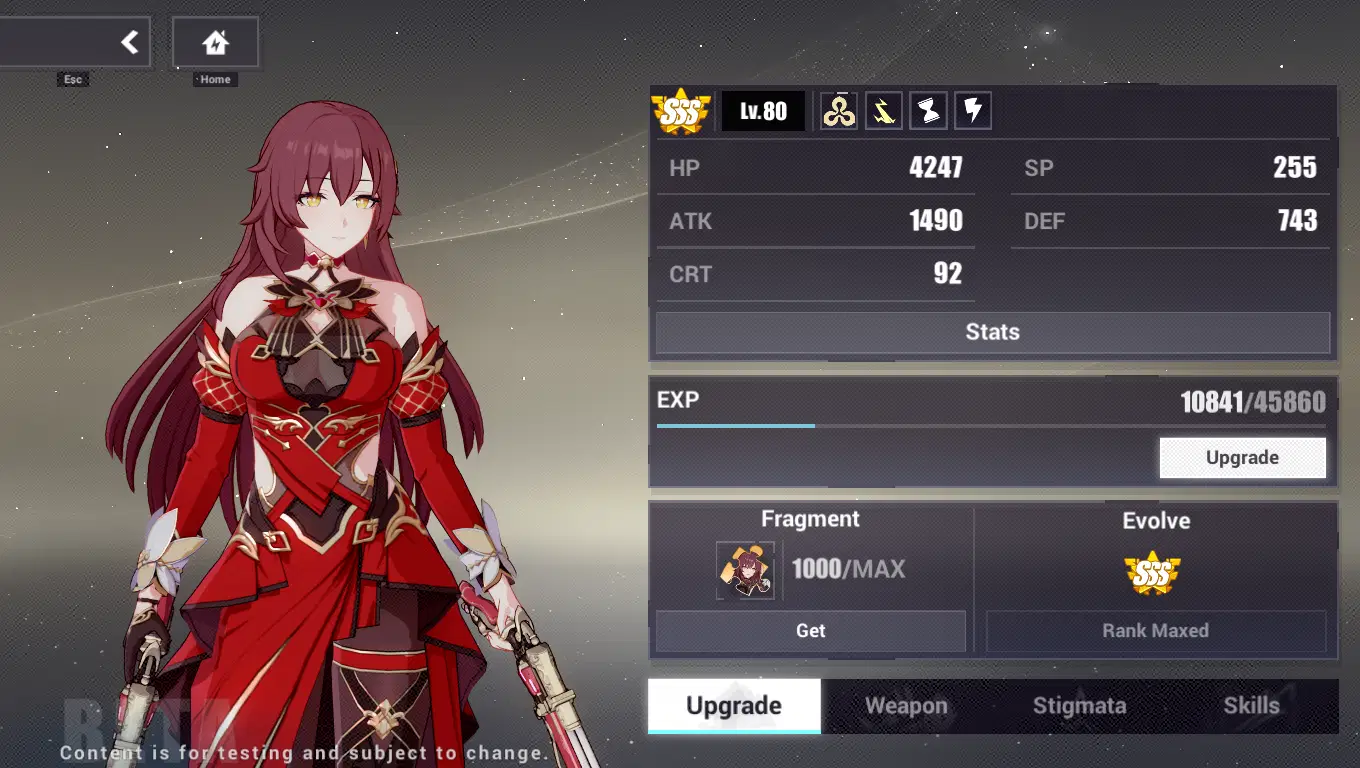
ATK affixes
Review~
Pros
- Extremely high DPS / DPR
- First S rank Stardust type, very strong on her bosses having the ability to easily gather stardust remnants.
- Has various support options, you can either run her with Luna + Eden or Helia + Coralie
- Very cheap to new players who can run Helia + Coralie
- Extremely fun to play
- Very good for the relative value
- Might end up being able to support future P2 characters in the future due to having breach She also has a locked ability that we know nothing about as of right now.
- Amazing fluid rotations, not at all reliant on the ultimate of her or her teammates.
- She has the new Jumping mechanic.
Cons
- Weird hitbox when it comes to AoE
- Low Ignore Interrupt
- Lacking Timestop in trio team
- Helia and Coralie will cost alot of Asterite
- If you didn't plan beforehand you may run into a lack of Source Prisms causing you to keep your Stigmata at a low level.
My Thoughts
I consider Senadina a very valuable pull, not only is she the first S rank Stardust DPS but she's also projected to get even better due to the parts of her kit she can't fully take advantage of yet. She is capable of providing her entire team with breach, and since Coralie's entire gear set is provided to you free it won't cost much to pull Sena + Her Weapon + Helia weapon and you have a fully geared team!
I recommend pulling her if you are a new player, since this would be the fastest way to get a fully geared team that will be strong enough to carry you in late game abyss content.
I also recommend pulling her if you are a competitive player since she is amazing at covering any Stardust boss.
You can't go wrong with investing into her and her teams amazing playstyle that's similar to APHO 2 gameplay and certainly one of the most fun teams in the game.
For a General Pull recommendation for this patch, I would do the following.
Senadina -> Senadina Weapon -> Helia Weapon.
Closing
That's all for this guide~ I hope this helped!
Thanks to everyone that follows or leaves a like I really appreciate it!
If you have any questions feel free to message me here or on discord "Kithicide"