


Good Morning/Afternoon/Evening everyone!
I have returned once again with another build guide for you all to use!
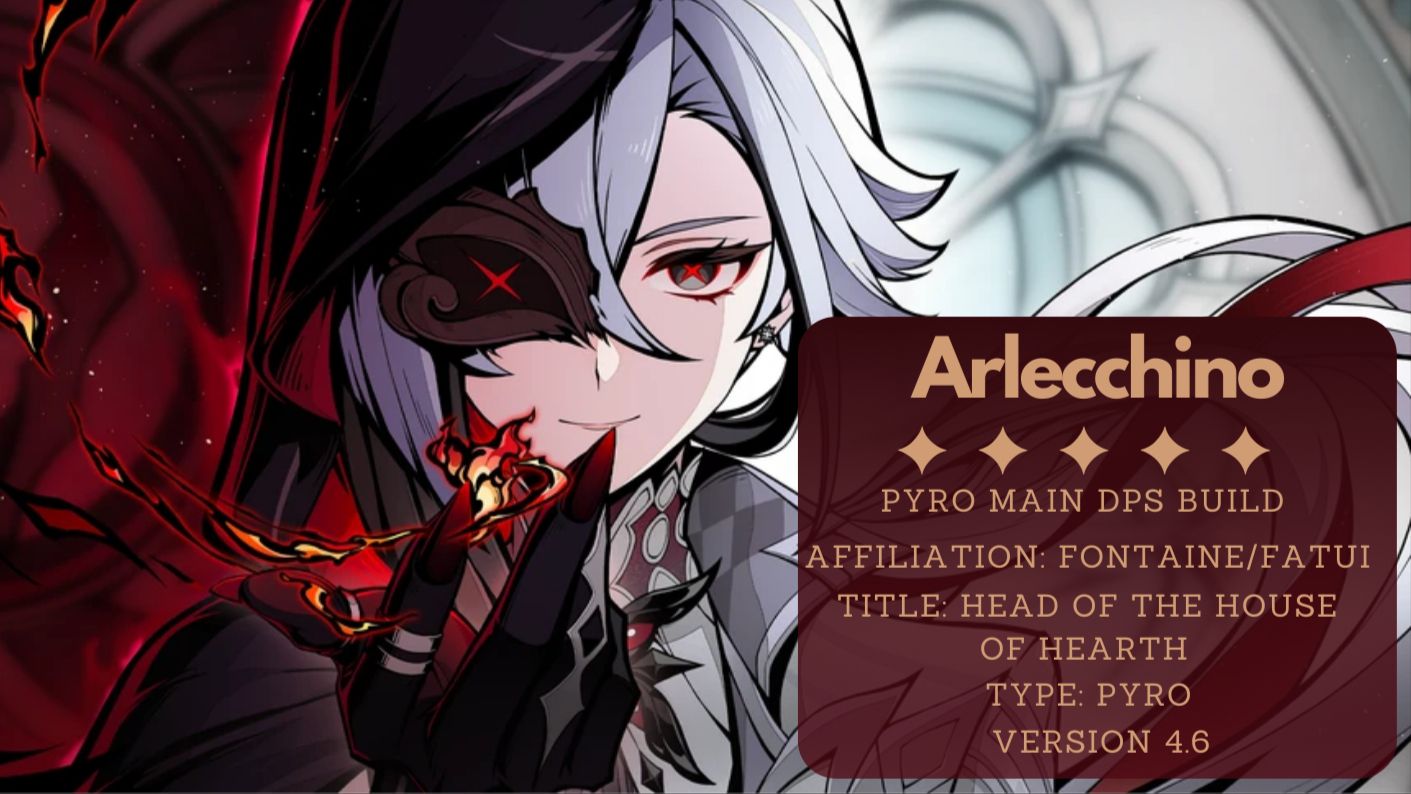
This time we are going over our Mad Knave!

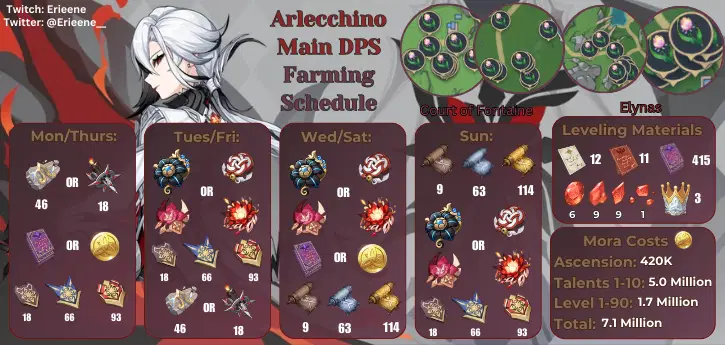
Materials
Build Guide
Skill Kit
Normal Attack

Normal Attack

Charged Attack

Plunging Attack

High-Speed Movement

Invitation to a Beheading
Normal Attack
Performs up to 6 consecutive spear strikes.
Charged Attack
Consumes a fixed amount of Stamina, dashing toward a nearby opponent and cleaving once.
Continuously holding this button will cause Arlecchino to consume Stamina and engage in up to 5s of high-speed movement.
Plunging Attack
Plunges from mid-air to strike the ground below, damaging opponents along the path and dealing AoE DMG upon impact.
Masque of the Red Death
When Arlecchino has a Bond of Life equal to or greater than 30% of her Max HP, she will enter the "Masque of the Red Death" state, where her Normal, Charged, and Plunging Attacks will be converted to deal Pyro DMG. This cannot be overridden.
When in the "Masque of the Red Death" state, Arlecchino's Normal Attacks will deal extra DMG to opponents on hit that scales off her ATK multiplied by a certain ratio of her current Bond of Life percentage. This will consume 7.5% of said current Bond of Life. Her Bond of Life can be consumed this way every 0.03s. When her Bond of Life is consumed in this manner, All Is Ash's CD will decrease by 0.8s.
Talent Level 1
Masque of the Red Death Increase: 120.4%
Charged Attack DMG: 90.8%
Charged Attack Stamina Cost: 25
High-Speed Movement Stamina Cost: 40.0/s
Plunging Attack: 63.9%
Low/High Plunge Damage: 127.8%/159.7%
Talent Level 10
Masque of the Red Death Increase: 238.0%
Charged Attack DMG: 179.5%
Charged Attack Stamina Cost: 25
High-Speed Movement Stamina Cost: 40.0/s
Plunging Attack: 126.4%
Low/High Plunge Damage: 252.7%/315.6%
Skill

All is Ash

All is Ash
Summons forth Balemoon Bloodfire, dealing Pyro DMG to multiple nearby opponents and performing a dash-cleave against one of them, dealing AoE Pyro DMG.
Opponents hit by the aforementioned attack will have a Blood-Debt Directive applied to them.
Blood-Debt Directive
· Lasts 30s. Every 5s, it will deal 1 instance of Pyro DMG to the opponent. Max 2 instances. This DMG will be considered Elemental Skill DMG.
· When Arlecchino uses a Charged Attack or her Elemental Burst, Balemoon Rising, she will absorb and clear nearby Blood-Debt Directives. Each Directive absorbed grants her a Bond of Life worth 65% of her Max HP.
· The maximum value of the Bond of Life she can be granted through Blood-Debt Directives within 35s after using her Elemental Skill is 145% of her Max HP. Using the Elemental Skill again during this duration will restart the count on duration and the limit on the value of Bond of Life she may gain from Blood-Debt Directives.
Talent Level 1
Spike DMG: 14.8%
Cleave DMG: 133.6%
Blood-Debt Directive DMG: 31.8%
CD: 30.0s
Talent Level 10
Spike DMG: 26.7%
Cleave DMG: 240.4%
Blood-Debt Directive DMG: 57.2%
CD: 30.0s
Burst
Burst

Balemoon Rising
Arlecchino's great wing of Balemoon Bloodfire beats as she absorbs and clears Blood-Debt Directives around her. She deals AoE Pyro DMG before clearing the CD of All Is Ash and healing herself. The healing is based on her Bond of Life value and ATK.
Talent Level 1
Skill DMG: 370.4%
Amount of HP Restored: 150.0% Bond of Life + 150.0% ATK
CD: 15.0s
Energy Cost: 60
Talent Level 10
Skill DMG: 666.7%
Amount of HP Restored: 150.0% Bond of Life + 150.0% ATK
CD: 15.0s
Energy Cost: 60
Passive Talent 1

Agony Alone May be Repaid
Blood-Debt Directives have the following characteristics:
· Arlecchino will be granted a Bond of Life worth 130% of her Max HP when an opponent to which she herself applied a Directive is defeated.
· 5s after a Directive is applied, it will be upgraded to a Blood-Debt Due. When absorbed, it will instead grant Arlecchino a Bond of Life worth 130%.
A Bond of Life created in the aforementioned ways cannot exceed the original limit on the value of Bonds of Life obtained through All Is Ash.
Passive Talent 2

Strength Alone Can Defend
Arlecchino gains 1% All Elemental and Physical RES for every 100 ATK she has in excess of 1,000. The maximum RES increase she can gain this way for each is 20%.
Utility Passive

The Balemoon Alone May Know
While in combat, Arlecchino gains a 40% Pyro DMG Bonus and can only be healed through Balemoon Rising.
Skill Kit Summary
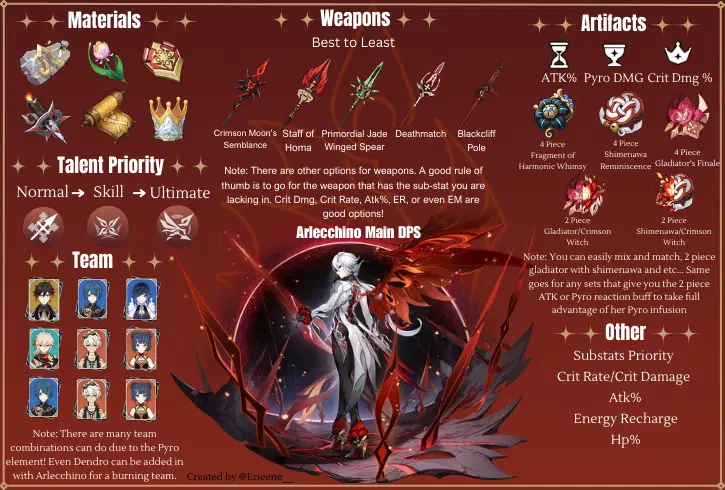
Now that we have her entire kit laid out nicely we can see what kind of kit she holds. Specifically what stats she needs when it comes to her artifacts and the kind of rotation you want to do!
So her entire kit is ATK Scaling which means the requirement of an ATK Sands and with how little her Elemental Burst costs, one can focus on getting a high enough Crit Rate/DMG with a little Elemental Mastery and Energy Recharge on the side.
As for her rotation when she is on field you want to use her Elemental Skill to get everyone with a mark. After going through the rotation of supports, when back on her this is where you focus on using Normal Attacks. If her Pyro Infusion ends that is when you will activate the Elemental Burst and even get a bit of healing!
But do keep in mind that her burst is not used as often, but only for when her heal goes too low (Pyro Infusion ends when below 30% of her HP and so using the Burst to reset the E is perfect here!) You'll also allows yourself to have higher stacks of Bond of Life in the next rotation if you forgo using the Burst for later, allowing the stacks to grow even more!
Additional Note: Enhanced markings would increase the Bond of Life effect, with 2 marks giving 130% This is important to keep note of as the maximum Bond of Life Effect is 145%. So in certain situations depending on how many enemies are around, one can go for the enhanced marks, or just have the regular ones.
Constellations

All Reprisals and Arrears, Mine to Bear...
Masque of the Red Death is further enhanced, the value of the increase is 100%. Additionally, Arlecchino's interruption resistance is increased when she performs Normal or Charged Attacks while affected by the Masque of the Red Death.

All Rewards and Retribution, Mine to Bestow...
Blood-Debt Directives are now already Blood-Debt Due when first applied.
When Arlecchino absorbs such a Due, she unleashes Balemoon Bloodfire in front of her, dealing 900% of her ATK as AoE Pyro DMG and increasing her All Elemental RES and Physical RES by 20% for 15s. This effect can trigger once every 10s.
You must first unlock the Passive Talent "Agony Alone May Be Repaid."

You Shall Become a New Member of Our Family...
Increases the Level of Normal Attack: Invitation to a Beheading by 3.
Maximum upgrade level is 15.

You Shall Love and Protect Each Other Henceforth...
When Arlecchino successfully absorbs a Blood-Debt Directive, Balemoon Rising's CD will decrease by 2s and 15 Elemental Energy will be restored to her. This effect can occur once every 10s.

For Alone, We Are as Good as Dead...
Increases the Level of Balemoon Rising by 3.
Maximum upgrade level is 15.

From This Day On, We Shall Delight in New Life Together
The DMG of Balemoon Rising is increased by Arlecchino's ATK multiplied by 700% of Arlecchino's current Bond of Life percentage.
For 20s after Arlecchino uses All Is Ash, both her Normal Attacks and Elemental Burst gain 10% increased CRIT Rate and 70% increased CRIT DMG. This effect can be triggered up to once every 15s.
Noteworthy Constellations
C1: All Reprisals and Arrears, Mine to Bear...
Increases her resistance of when in the midst of an attack combo, makes it less of a requirement to have a shielder with her.
C2: All Rewards and Retribution, Mine to Bestow
Increases her DMG output when it comes to her AoE Pyro DMG and increases Elemental and Physical RES even further.
C6: From this Day On,We Shall Delight in New Life Together
Massively increases her Crit Rate, Crit DMG when it comes to her Normal and Elemental Burst DMG. Her ATK is multiplied by her Bond of Life Percentage explosively.
Artifacts

Fragment of Harmonic Whimsy
2 Piece: Increases ATK by 18%
4 Piece: When the value of a Bond of Life increases or decreases, this character deals 18% increased DMG for 6s. Max 3 stacks.

Shimenawa's Reminiscence
2 Piece: Increases ATK by 18%
4 Piece: When casting an Elemental Skill, if the character has 15 or more Energy, they lose 15 Energy, and Normal/Charged/Plunging Attack DMG is increased by 50% for 10s. This effect will not trigger again during that duration.

Gladiator's Finale
2 Piece: ATK +18%.
4 Piece: If the wielder of this artifact set uses a Sword, Claymore or Polearm, increases their Normal Attack DMG by 35%.

Crimson Witch of Flames
2 Piece: Increases Pyro DMG Bonus by 15%
4 Piece: Increases Overload, Burning, and Burgeon Dmg by 40%. Increases the Vaporize and Melt Dmg by 15%. Using Elemental Skill increases the 2-piece set bonus by 50% of its starting value for 10s. Max 3 stacks
Important Note: Shimenewa is good to use on Arlecchino if you have her C1, as that would help with her uptime and rotation. This would allow then the player to take full advantage of the full 10s buff time the set gives instead of the 5s. One can also go 2 Piece Crimson Witch with either Gladiator's Finale or Shimenawa's Reminiscence, taking advantage of the 2 Piece effect from each artifact set.
Weapons Pros & Cons
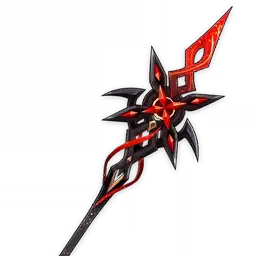
Crimson's Moon Semblance
Base Attack: 674
Secondary Attribute: 22.1% Crit Rate
Grants a Bond of Life equal to 25% of Max HP when a Charged Attack hits an opponent. This effect can be triggered up to once every 14s. In addition, when the equipping character has a Bond of Life, they gain a 12%/16%/20%/24%/28% DMG Bonus; if the value of the Bond of Life is greater than or equal to 30% of Max HP, then gain an additional 24%/32%/40%/48%/56% DMG Bonus.
Pros: Her best-in-slot weapon that fits her entire skill kit and is especially created for her. With the incorporation of Bond of Life, her DMG is further increased.
Cons: 5 Star Weapon that is on the Weapon Banner and can be costly to low spending or free to play players.
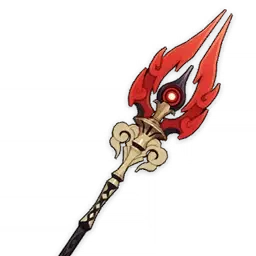
Staff of Homa
Base Attack: 608
Secondary Attribute: 66.2% Crit DMG
HP increased by 20%/25%/30%/35%/40%. Additionally, provides an ATK Bonus based on 0.8%/1%/1.2%/1.4%/1.6% of the wielder's Max HP. When the wielder's HP is less than 50%, this ATK Bonus is increased by an additional 1%/1.2%/1.4%/1.6%/1.8% of Max HP.
Pros: Massive Crit DMG Substat and has a HP based passive that increases her ATK and even has a mechanic when heal is below 50%.
Cons: Cons: 5 Star Weapon that is on the Weapon Banner and can be costly to low spending or free to play players. Has no incorporation of her kit like her signature weapon.
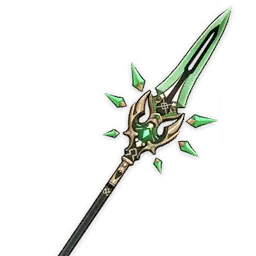
Primordial Jade Winged-Spear
Base Attack: 674
Secondary Attribute: 22.1% Crit Rate
On hit, increases ATK by 3.2%/3.9%/4.6%/5.3%/6% for 6s. Max 7 stacks. This effect can only occur once every 0.3s. While in possession of the maximum possible stacks, DMG dealt is increased by 12%/15%/18%/21%/24%.
Pros: Crit Rate Attribute, has ATK passive stacks that also increase her DMG output depending on stacks and also has its own stacking passive. Easier to grab due to being a standard weapon, and for long time players may have a copy and even refinements.
Cons: 5 Star Weapon, requires a certain amount of time playing to have and is purely based on chance.
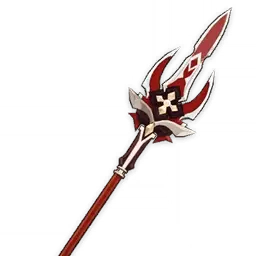
Deathmatch
Base Attack: 454
Secondary Attribute: 36.8% Crit Rate
If there are at least 2 opponents nearby, ATK is increased by 16%/20%/24%/28%/32% and DEF is increased by 16%/20%/24%/28%/32%. If there are fewer than 2 opponents nearby, ATK is increased by 24%/30%/36%/42%/48%.
Pros: Crit Rate substat, increases ATK and DEF based on enemies surrounding player. Has further stacking increase when fewer enemies are on the field. Easier to grab refinements than a 5 star weapon.
Cons: Battle Pass Weapon, not free to play friendly
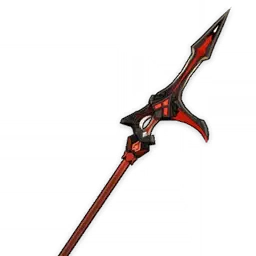
Blackcliff Pole
Base Attack: 510
Secondary Attribute: 55.1% Crit DMG
After defeating an enemy, ATK is increased by 12%/15%/18%/21%/24% for 30s. This effect has a maximum of 3 stacks, and the duration of each stack is independent of the others.
Pros: Crit DMG substat, increases ATK and has a stack effect that can be independent from each stacks.
Cons: Requires Star Glitter, store rotation, and harder to get refinements of.

Ballad of the Fjords
Base Attack: 510
Secondary Attribute: 27.6% Crit Rate
When there are at least 3 different Elemental Types in your party, Elemental Mastery will be increased by 120/150/180/210/240.
Pros: Crit Rate Substat, increases EM which makes it perfect for a reaction based Arlecchino.
Cons: Battle Pass Weapon, not free to play friendly
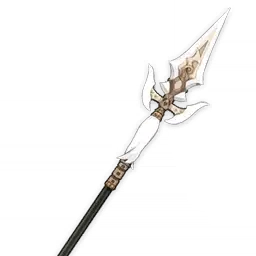
White Tassle
Base Attack: 401
Secondary Attribute: 23.4% Crit Rate
Increases Normal Attack DMG by 24%/30%/36%/42%/48%.
Pros: Crit Rate Substat, easy to have and max refined. Very player friendly and holds a passive that benefits her scaling.
Cons: Loss on damage due to base attack and being a 3 star weapon.
Team Set Up
Vaporize Team
Zhongli, Yelan, Xingque
Zhongli: Impressive Shield that scales off of HP and will ensure Arlecchino will not be getting interrupted while doing her attacks.
Yelan: Amazing Hydro Application that is triggered when the on field party member is doing Normal Attacks
Xingque: A 4 star version of Yelan that also has great Hydro Application. Has minor healing and defensive capabilities when it comes to his Rain Swords. If C6 even better application and with a Sacrifical Sword that is R5, energy will not be an issue.
Mono Pyro Team
Kazuha/Sucrose/Lynette, Bennett, Xiangling
Sucrose/Kazuha/Lynette: They can assist in gathering enemies together, and both characters have the passive of increasing the damage you do against the enemies depending on the element swirled. It'd be good to give them EM and the VV 4-piece set to reduce the enemy's defense against the swirled element.
Bennett: Buffs those who stand in his Burst their Attack. Also heals enemies and if you are one of the few who activated his C6 he infuses the active character's weapon with Pyro.
Note: Benette's Buff only scales off his base attack which is done through leveling and giving him a high base attack weapon.
Xiangling: Great Pyro application against enemies and when Pyronado is around the active character, their Pyro DMG is increased by 15% (C6 required)
Burning Team
Xiangling, Thoma/Bennett, and Nahida/Baizhu/Collei/Yayao
Bennett: Buffs those who stand in his Burst their Attack. Also heals enemies and if you are one of the few who activated his C6 he infuses the active character's weapon with Pyro.
Note: Benette's Buff only scales off his base attack which is done through leveling and giving him a high base attack weapon.
Xiangling: Great Pyro application against enemies and when Pyronado is around the active character, their Pyro DMG is increased by 15% (C6 required)
Thoma: A character that gets on slept on quite a lot, but Thoma's skill of Blazing Barrier can be quite useful! If the character on field gets attacked with Pyro the shield refreshes and the shield strength increases! (First ascension passive of his) and with his off-field Pyro application perfect for the team!
Baizhu: Same reason as Thoma where his shield would be great, healing and dendro application included! For the burning status one needs to have Dendro on the team.
Nahida: Her E skill would help prolong the Dendro application placed on the enemies, being the perfect person to apply the Burning status. Best part is that she doesn't have to be on the field as much!
Collei: A more free-to-play option than Nahida, that can still do amazing in this Burning team comp! Her E skill applying Dendro and burst for a field of Dendro for Arlecchino to stay in!
Yaoyao: A more free to play option compared to Baizhu, can do amazing healing when in a pinch and amazing Dendro application wth her burst. Consistency of that Dendro application will be the difficult part.
Very Important Note: With the Burning team comp you still have to consider who would be using Deepwood Memories, Gilded Dreams or Unfinished Reverie! For example I would put a off field support character on Unfinished Reverie, but keep Nahida on the Deepwood Memories set cause of the passive! So this is something that has to be kept in mind of when building this team!
Gameplay Tips
Vaporize Team
Zhongli, Yelan, Xingque, Arlecchino
- If close to the enemies use Arlecchino's skill to mark the enemies otherwise get close with Yelan Skill
- Yelan Skill to apply Hydro onto enemies before using her burst
- Xingque skill and burst
- Use Zhongli's Burst if available, and activate Shield to prevent interruption
- Switch to Arlecchino and focus on Charge Attack
- Use Arlecchino's burst only when infusion has ended
- Rinse and repeat
Resources Used
Genshin Hoyowiki
Genshin Fandom Wiki
Genshin Twitter



