Imaginarium Theater
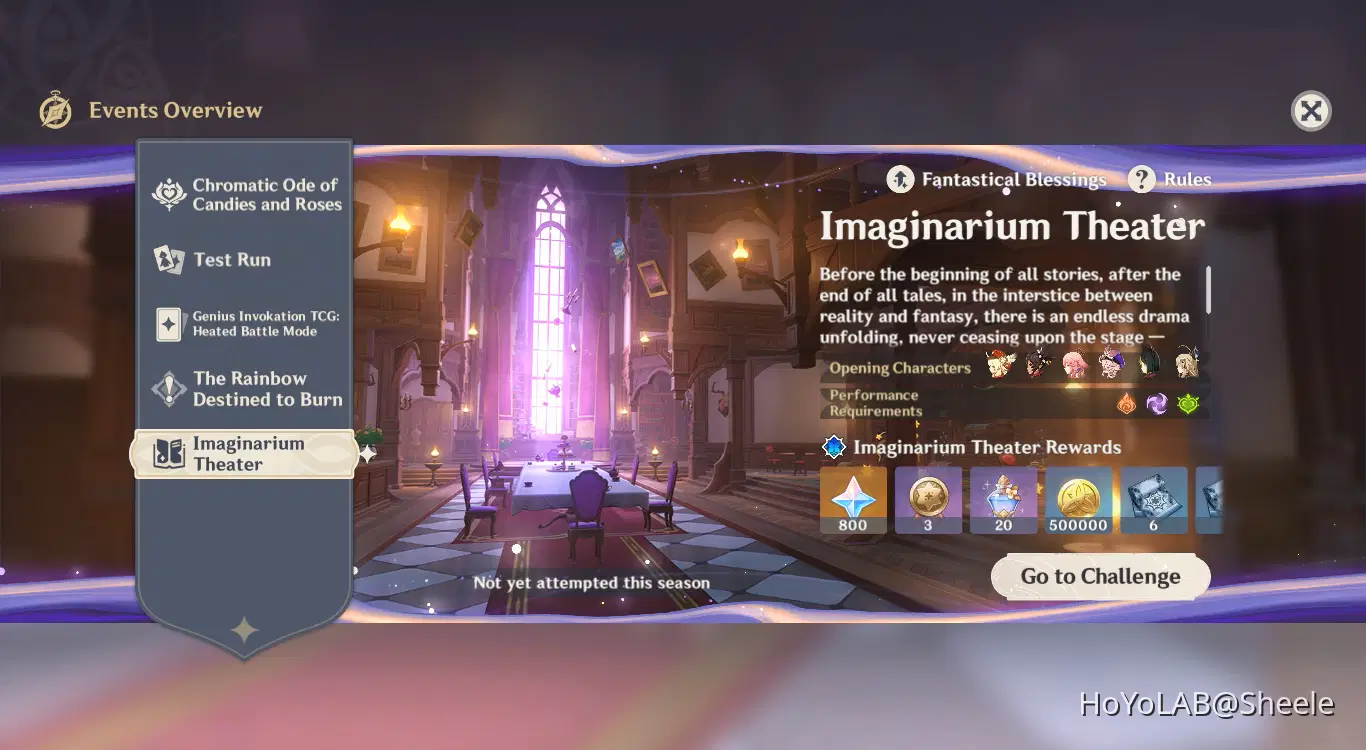
Location
Knights of Favonius Headquarters, Mondstadt City, Starfell Valley, Mondstadt
Requirements to Perform in Visionary Mode
- Minimum Adventure Rank Level 35
- Complete the World Quest Unbegun, Unending Story.
- Add at least 22 characters to start the show
- Character has reached Lv. 70
- Add up to 26 characters. For each extra character added, you will obtain the corresponding buffs when performances start
Event Period
Season 5: November 1, 2024 ~ December 1, 2024
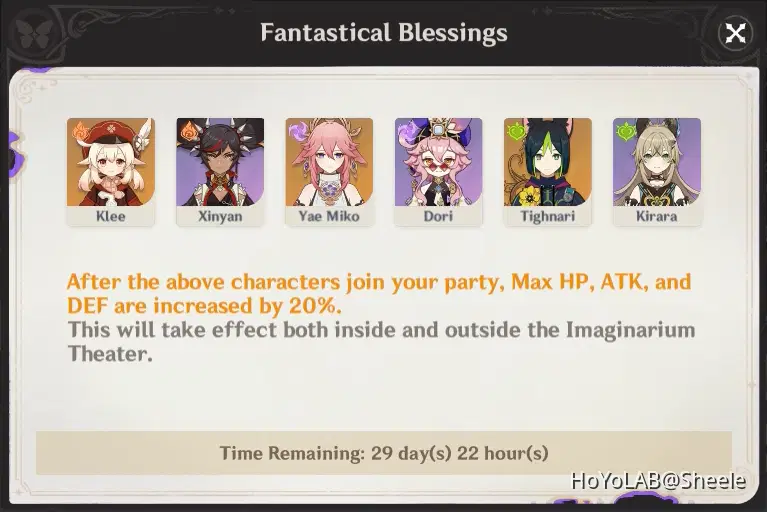
Fantastical Blessings
After unlocking the Imaginarium Theater, the Fantastical Blessings available will refresh each season offering buffs for the Opening Characters.
These buffs will be effective both during Imaginarium Theater challenges and in your adventures outside the theater.
Season Rules
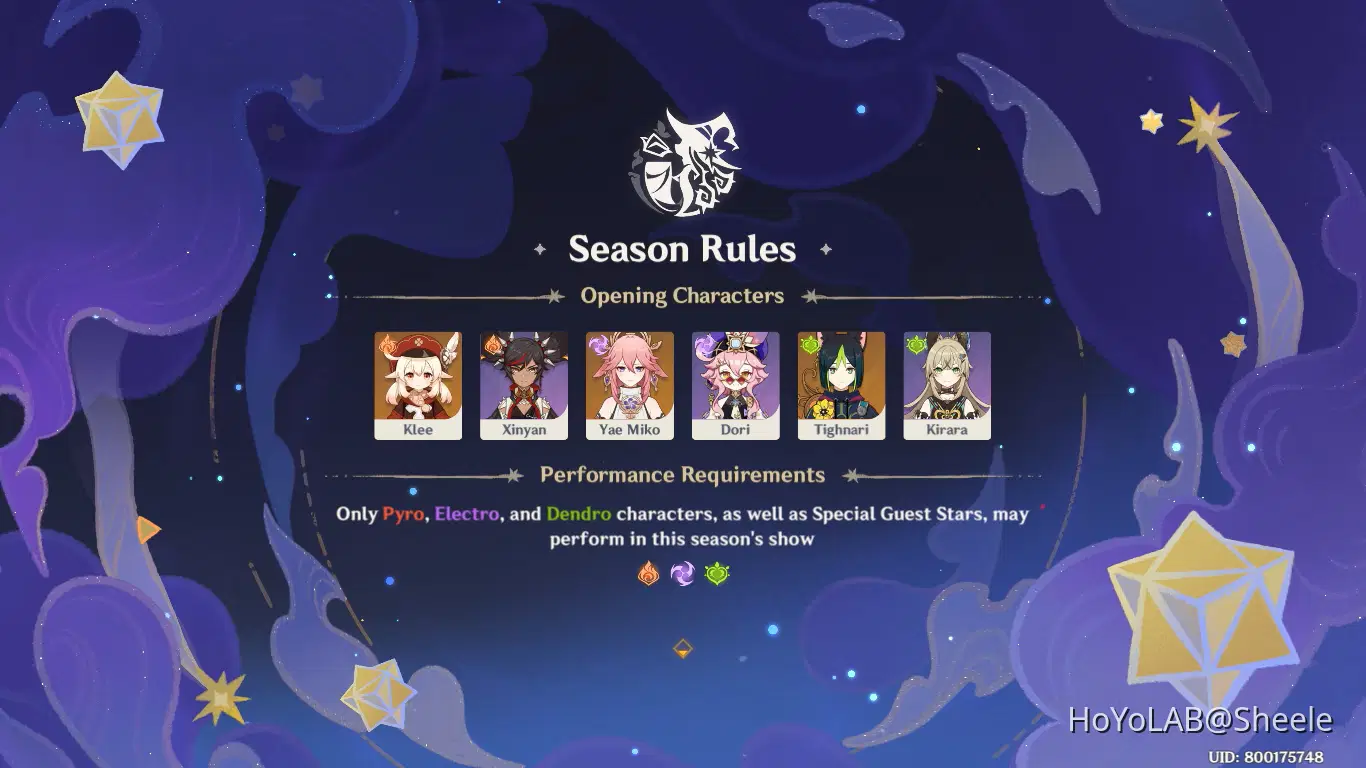
Only Pyro, Electro, and Dendro characters, as well as Special Guest Stars, may perform in this season's show.
But, you can also use the main character (Aether / Lumine) by resonating with the Statue of the Seven Dendro or Electro.
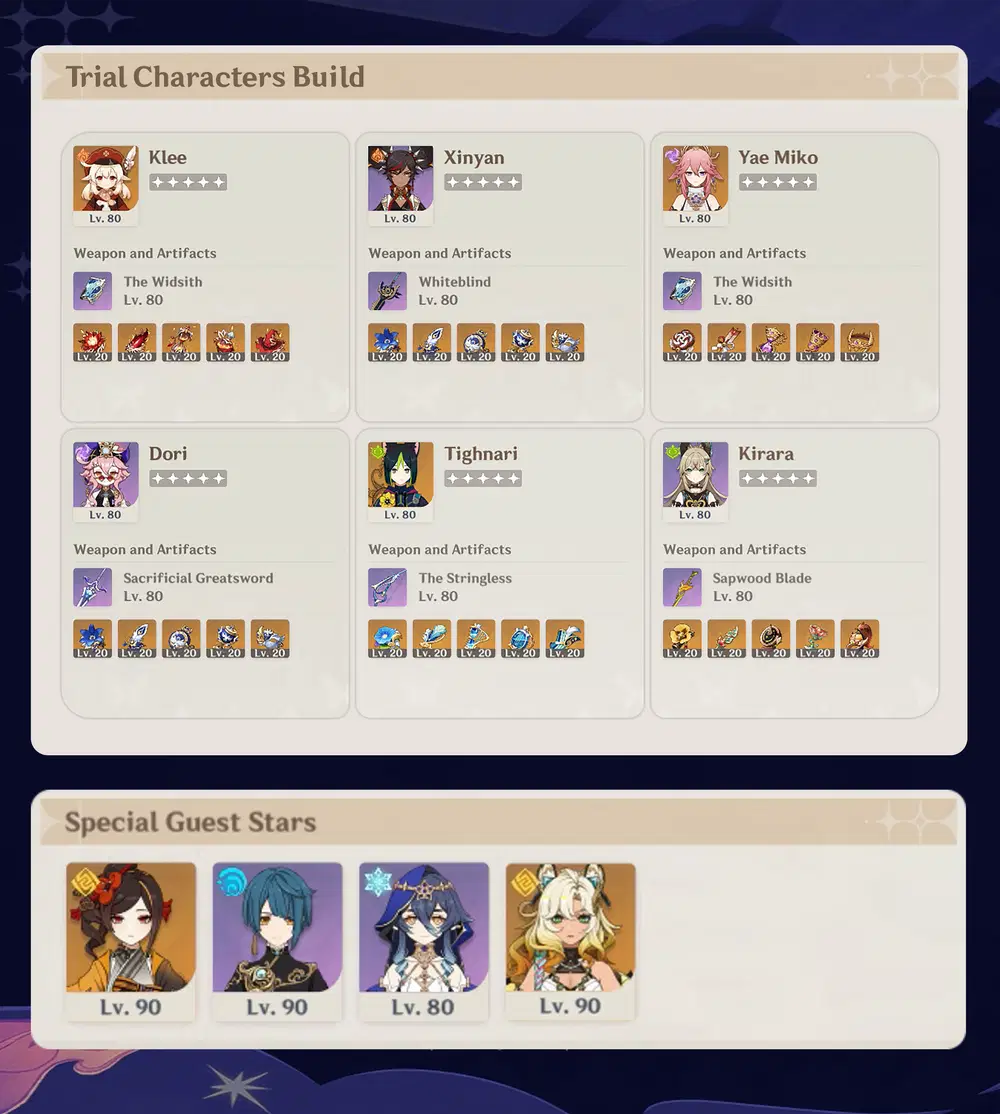
During the Imaginarium Theater, Travelers can use Trial and Special Guest Stars characters to complete each Act.
Here are the builds for the Trial Characters and Special Guest Stars characters list that can be invited to the team.

✧ ACT 1 ✧
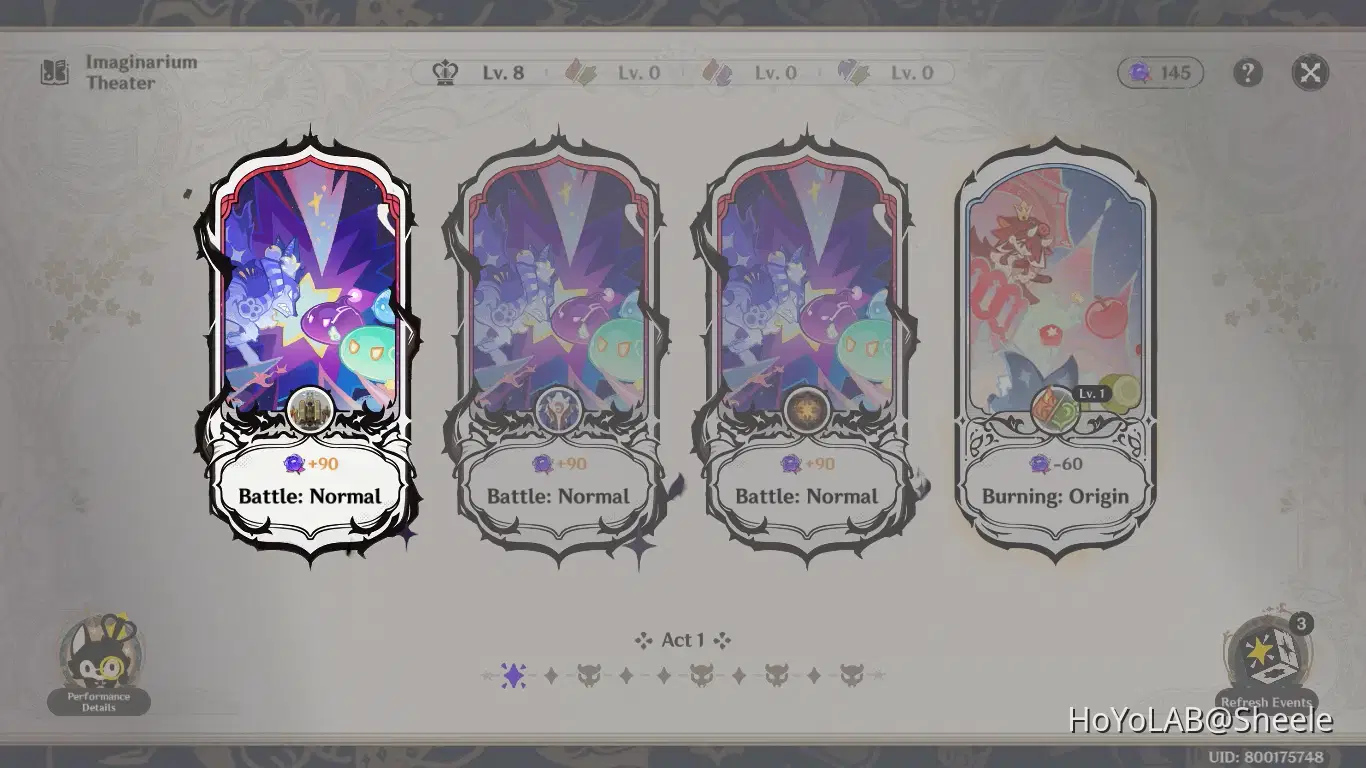
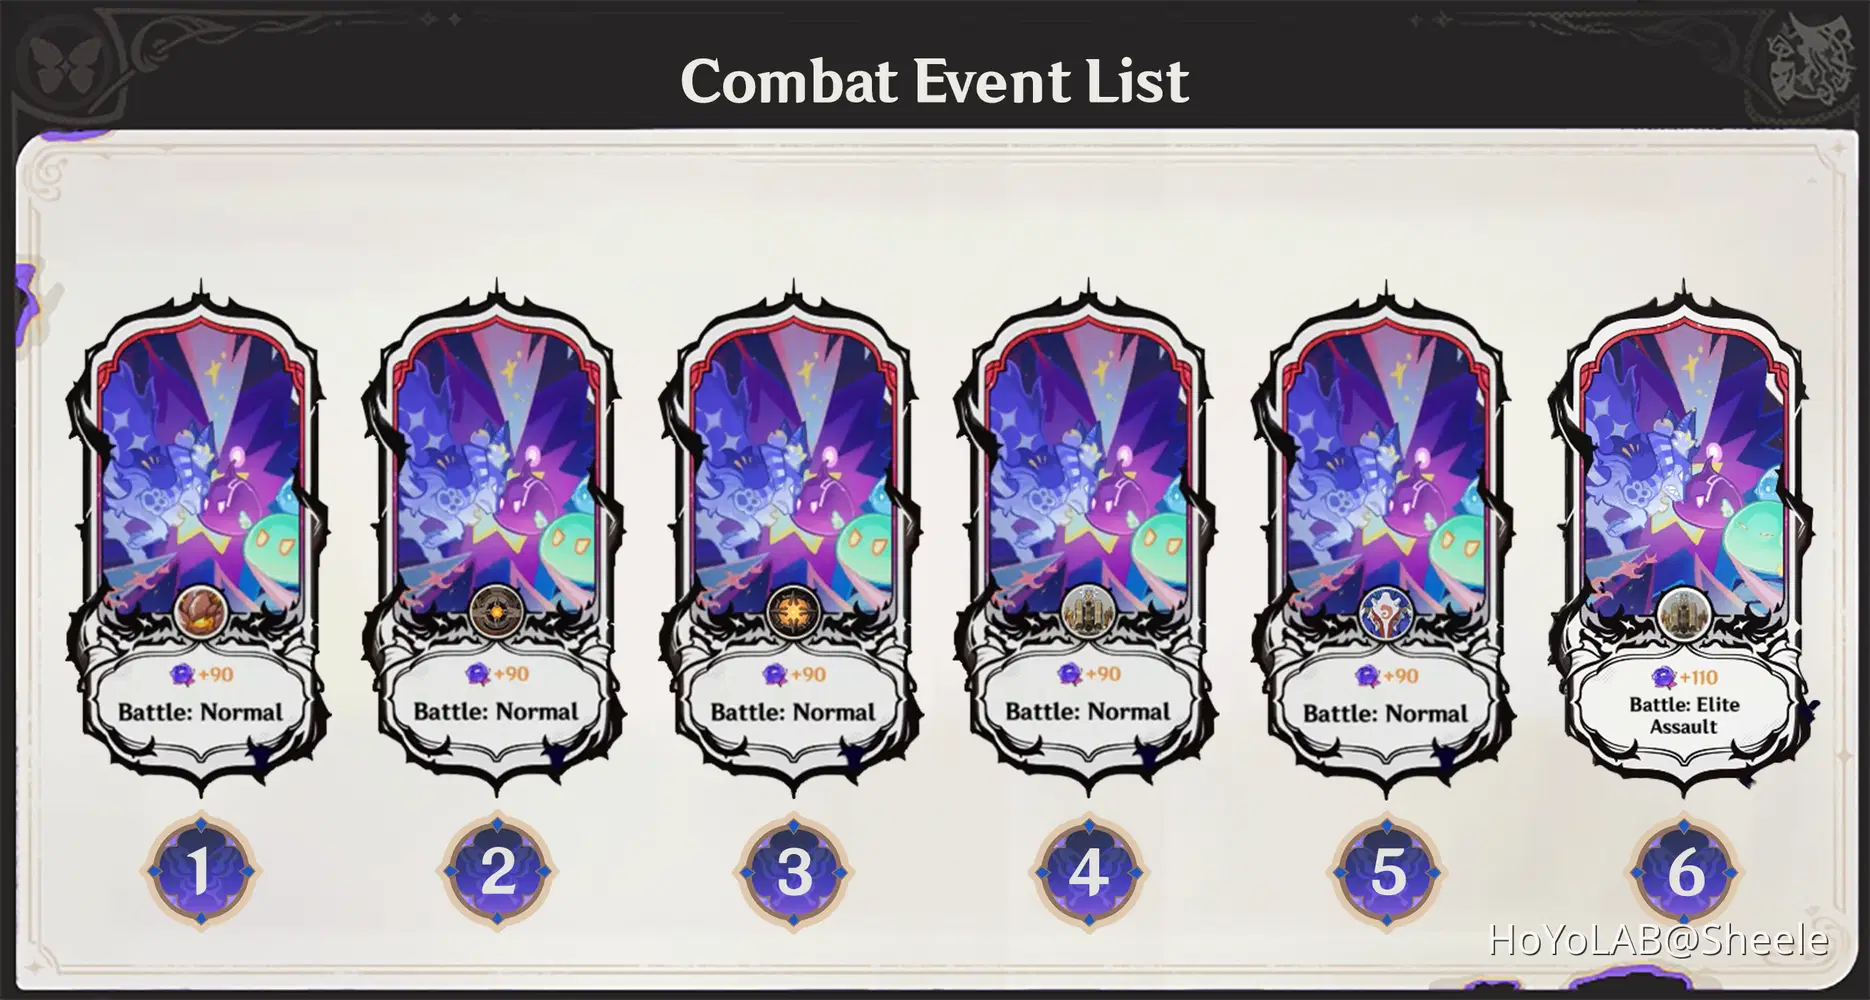
"Description"
1. Icon: Eroding Avatar of Lava [Battle: Normal] ⭐Recommended Choice⭐
Battle Tips: x3 Eroding Avatar of Lava will appear, monsters' lava can deal Pyro DMG. Use Pyro attacks to trigger the Overburn state, making the monster easier to defeat.
Team Recommendations: Overloded = Klee (Trial), Xinyan (Trial), Yae Miko (Trial) & Dori (Trial)
2. Icon: Ruin Drake: Earthguard [Battle: Normal] ⭐Recommended Choice⭐
Battle Tips: First, Ruin Grader will appear. After you defeat it, Ruin Drake: Earthguard will appear. Use a team with Overloaded reaction to make it easier to defeat enemies with Automatons type.
Team Recommendations: Overloaded = Klee (Trial), Xinyan (Trial), Yae Miko (Trial) & Dori (Trial)
3. Icon: Ruin Guard [Battle: Normal]
Battle Tips: First, Ruin Scout, Ruin Destroyer & Ruin Defender will appear, and attack together so be aware of the attack indicator. Next x2 Ruin Defender & Ruin Guard appear, do your best combo and defeat them, Teams with Overloaded reactions are very effective to defeat them.
Team Recommendations: Overloaded = Klee (Trial), Xinyan (Trial), Yae Miko (Trial) & Dori (Trial)
4. Icon: Construction Specialist Mek [Battle: Normal]
Battle Tips: x5 Recon Log Mek will appear and attack you together, then x3 Geological Survey Mek and Construction Specialist Mek will appear, focus your attacks on Construction Specialist Mek and be careful of his spinning attacks.
Team Recommendations: Overloaded = Klee (Trial), Xinyan (Trial), Yae Miko (Trial) & Dori (Trial)
5. Icon: Hydro Hilichurl Rogue [Battle: Normal]
Battle Tips: First, x4 Wooden Shield Hilichurl Guard & x2 Wooden Shieldwall Mitachurl will appear, attacking together and approaching you. Next x2 Wooden Shieldwall Mitachurl & x1 Hydro Samachurl will appear, focus on defeating the Hydro Samachurl first while avoiding attacks from the Wooden Shieldwall Mitachurl. Last x1 Hydro Hilichurl Rogue will appear, defeat it as soon as possible to meet the star requirements. Teams with Overloaded reactions are very effective in destroying their shields, and AoE attacks are also very useful here.
Team Recommendations: Overloded = Klee (Trial), Xinyan (Trial), Yae Miko (Trial) & Dori (Trial)
6. Icon: Construction Specialist Mek [Battle: Elite Assault]
Battle Tips: x3 Ruin Destroyer & Ruin Grader will appear first, focus your attacks on Ruin Grader by attacking its weak points, and be careful of the area attacks carried out by Ruin Destroyer, it is recommended to use Shielder to minimize the damage from this attack. Next x2 Assault Specialist Mek & Construction Specialist Mek will appear, focus your attacks on Construction Specialist Mek because Assault Specialist Mek will approach you, using AoE attacks is highly recommended here. Defeat all enemies within 90 seconds to get a star.
Team Recommendations: Overloaded / Specific Character: Shielder & AoE attack
"Act 1 - Battle: Elite Assault Gameplay"
✧ ACT 2 ✧
"Description"
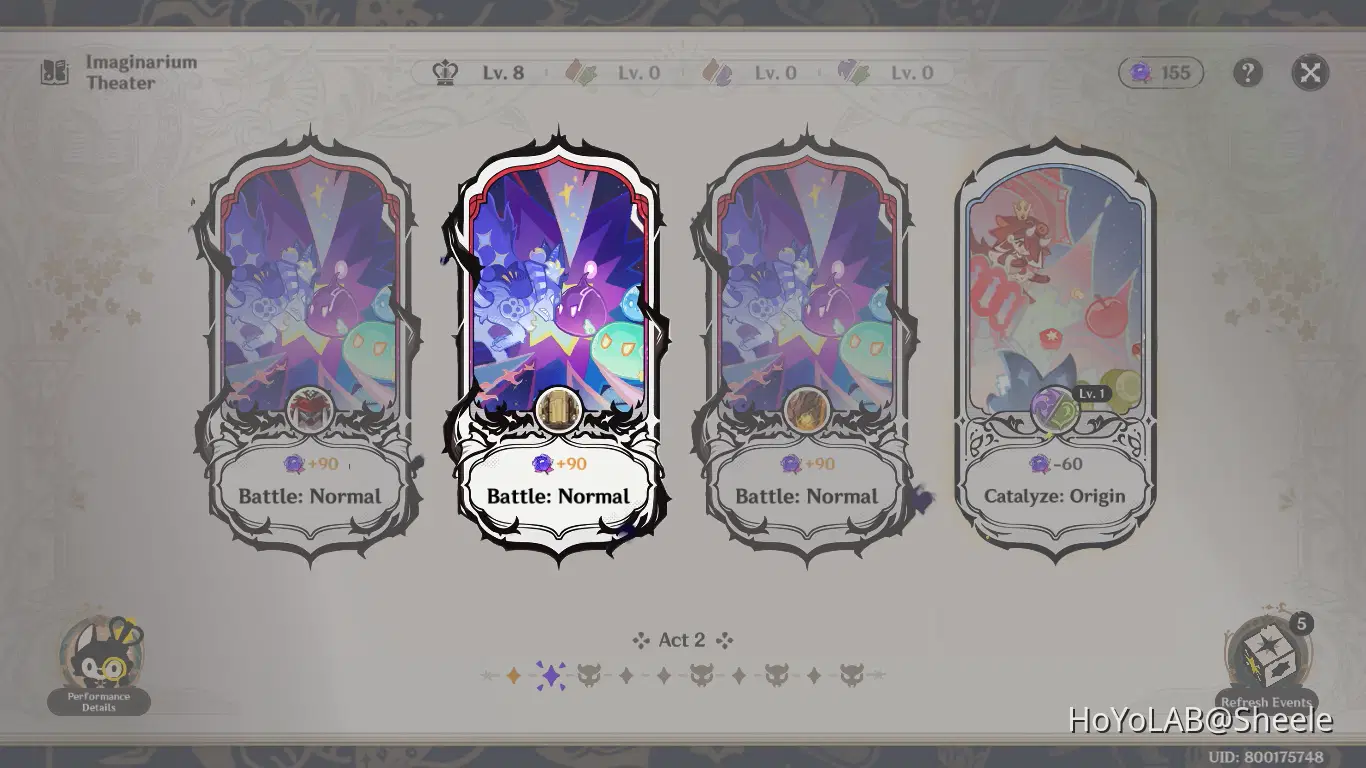
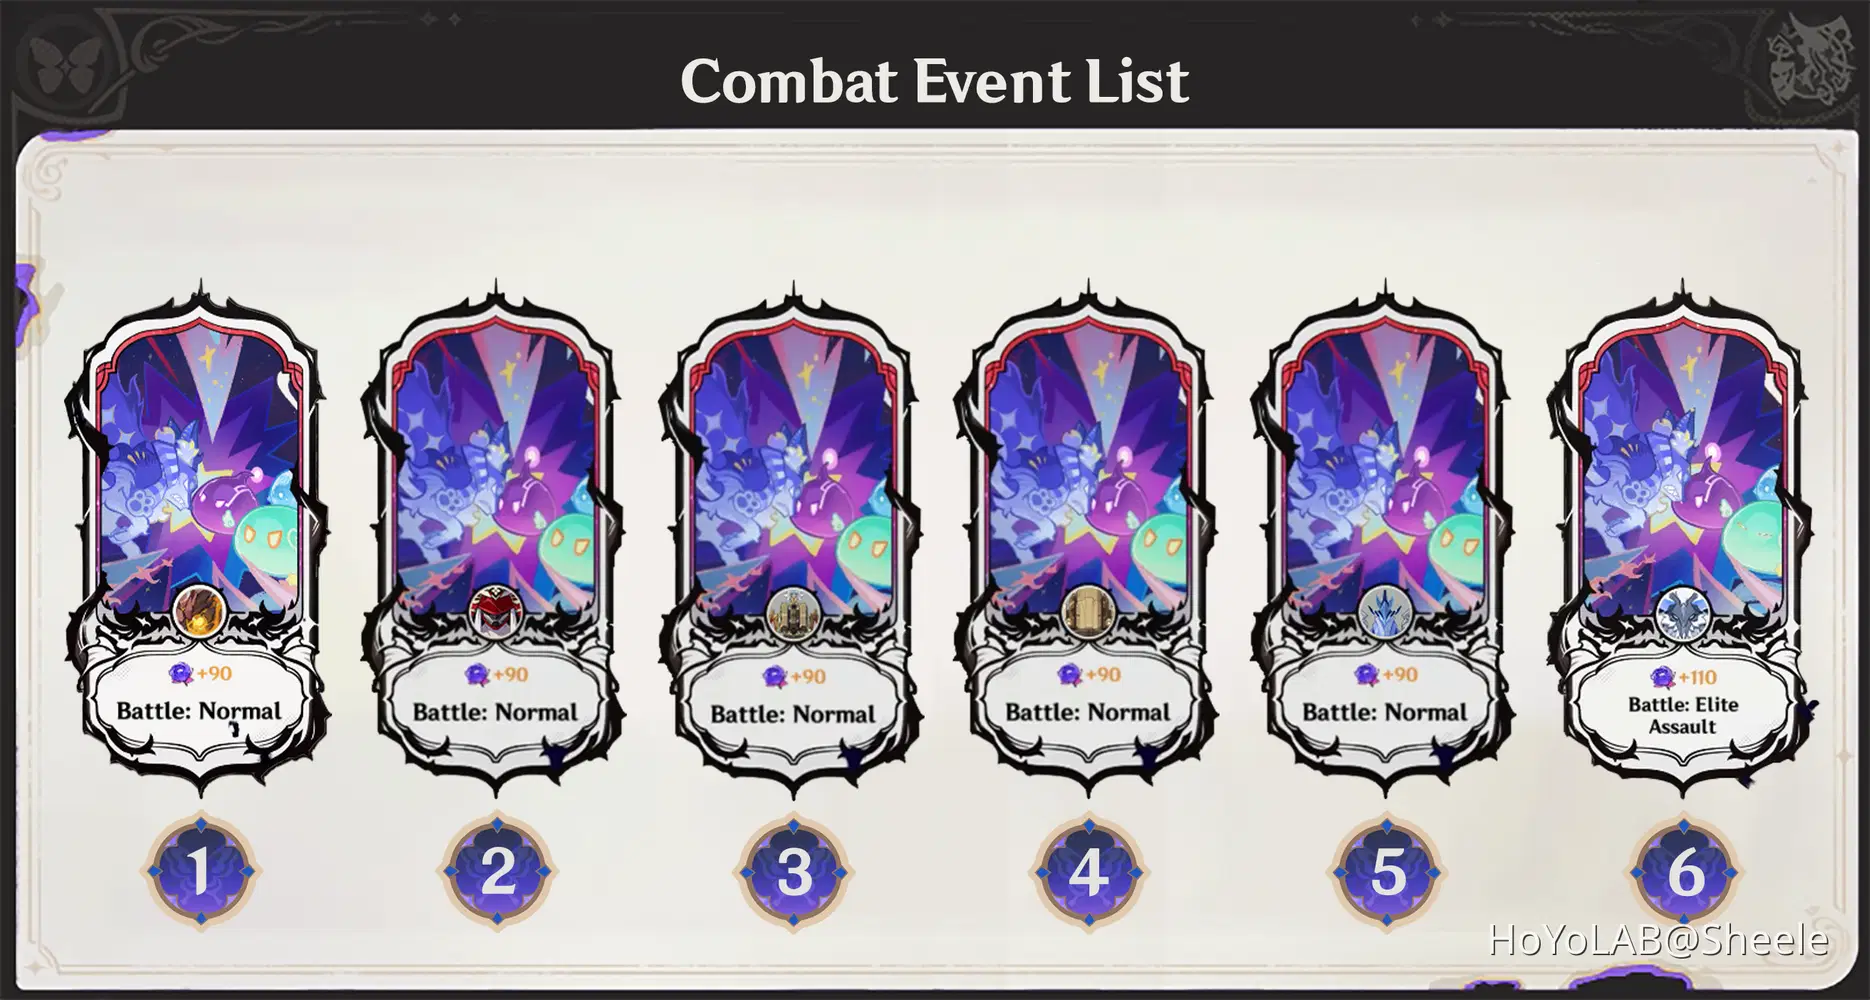
1. Icon: Fluid Avatar of Lava [Battle: Normal] ⭐Recommended Choice⭐
Battle Tips: x2 Eroding Avatar of Lava will appear, monsters' lava can deal Pyro DMG. Use Pyro attacks to trigger the Overburn state, making the monster easier to defeat.
Team Recommendations: Overloaded / Hyperbloom / Specific Character: Xingqiu
2. Icon: Kairagi: Fiery Might [Battle: Normal] ⭐Recommended Choice⭐
Battle Tips: There are 3 Waves, the first wave x3 Nobushi & Treasure Hoarder, the second wave x3 Nobushi and Eremite, the third wave x2 Kairagi will appear. Please note that you need to defeat the Kairagi together so that the other Kairagi will not recover their HP. Because there are quite a lot of enemies, make sure you build each character well.
Team Recommendations: Overloaded
3. Icon: Construction Specialist Mek [Battle: Normal] ⭐Recommended Choice⭐
Battle Tips: x 5 Recon Log Mek will appear first, use AoE attacks to defeat them quickly. Next Construction Specialist Mek and Annihilation Specialist Mek will appear, focus your attacks on Construction Specialist Mek and be careful of their projectile attacks. For Annihilation Specialist Mek will approach you and do Hydro attacks so be careful because their Combo can freeze you.
Team Recommendations: Overloaded / Specific Character: AoE attack
4. Icon: Nimble Harvester Mek [Battle: Normal] ⭐Recommended Choice⭐
Battle Tips: x2 Nimble Harvester Mek, x2 Recon Log Mek and Geological Survey Mek will appear and attack you together, use AoE attacks to defeat them effectively. Next Construction Specialist Mek & Annihilation Specialist Mek will appear, focus on attacking Annihilation Specialist Mek first because Construction Specialist Mek will come towards you, and be careful of his spinning attack.
Team Recommendations: Overloaded / Specific Character: AoE attack
5. Icon: Flow-Inverted Wayob Manifestation [Battle: Normal]
Battle Tips: x3 Koholasaurus will appear, attacking with water shots. After defeating them Flow-Inverted Wayob Manifestation will appear. It is recommended to use Dendro characters to destroy Wayob's Shield quickly.
Team Recommendations: Hyperbloom / Burgeon / Specific Character: Dendro
6. Icon: Frostarm Lawachurl [Battle: Elite Assault]
Battle Tips: Hydro Hilichurl Rogue & Anemo Hilichurl Rogue will appear together; both can summon slimes and cause trouble during the fight. Hydro Hilichurl Rogue summons Hydro Slime that can shoot Water Bubbles and can trap you, defeat the slime to make Hydro Hilichurl Rogue knock down. Anemo Hilichurl Rogue summons Anemo Slime to fly and attack from the air temporarily, defeat the slime to make Anemo Hilichurl Rogue knock down. For attack priority I recommend defeating Hydro Hilichurl Rogue first.
After defeating the Hilichurl Rogue, x2 Frostarm Lawachurl will appear and attack together. Focus your attacks on one of them, use AoE Pyro attacks to break their defense and defeat them.
Team Recommendations: Overloaded / Mono Pyro / Burgeon / Burning / Specific Character: Shielder
"Act 2 - Battle: Elite Assault Gameplay"
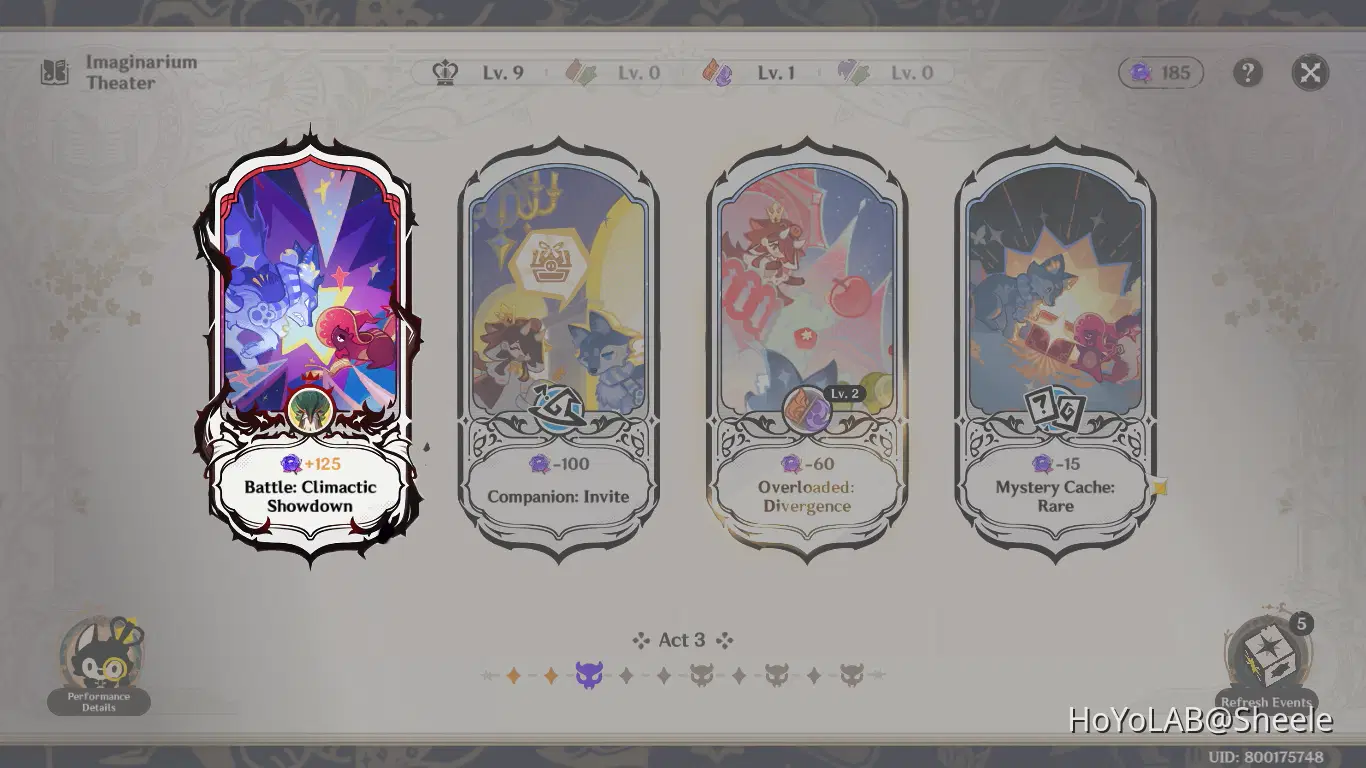
✧ ACT 3 ✧ (Boss)
"Battle Strategy"
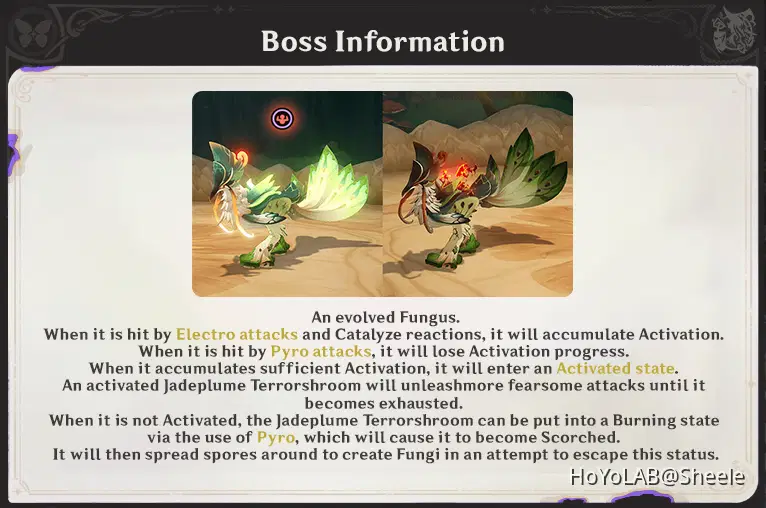
- For your information, the Boss has high resistance to Dendro so it is not recommended that you use a DPS character with Dendro Element to fight.
- It is recommended to use a team with Pyro and Electro Elements. If you are forced to bring a Dendro character, use as a support for heal or shield.
- Example of the team I use to Defeat the Boss:
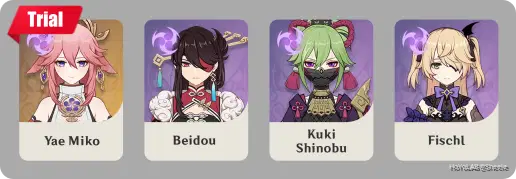
With the team I use this can trigger Aggravated or Quicken reactions, because Boss has the basic element of Dendro.
➥ Yae Miko (Trial) as the main DPS with Electro element, can deliver quick attacks that rapidly fill the boss's Gauge, causing the boss to enter a weakness state.
➥ Beidou as Sub DPS, provides additional Electro damage to Boss and increases the character's resistance to interruption, and decreases DMG taken.
➥ Kuki Shinobu as Healer and provides additional Electro damage to Boss.
➥ Fischl as Sub DPS and provides additional Electro damage to Boss.
"Character Build"
Because I used Yae MIko Trial, so I didn't include Her here
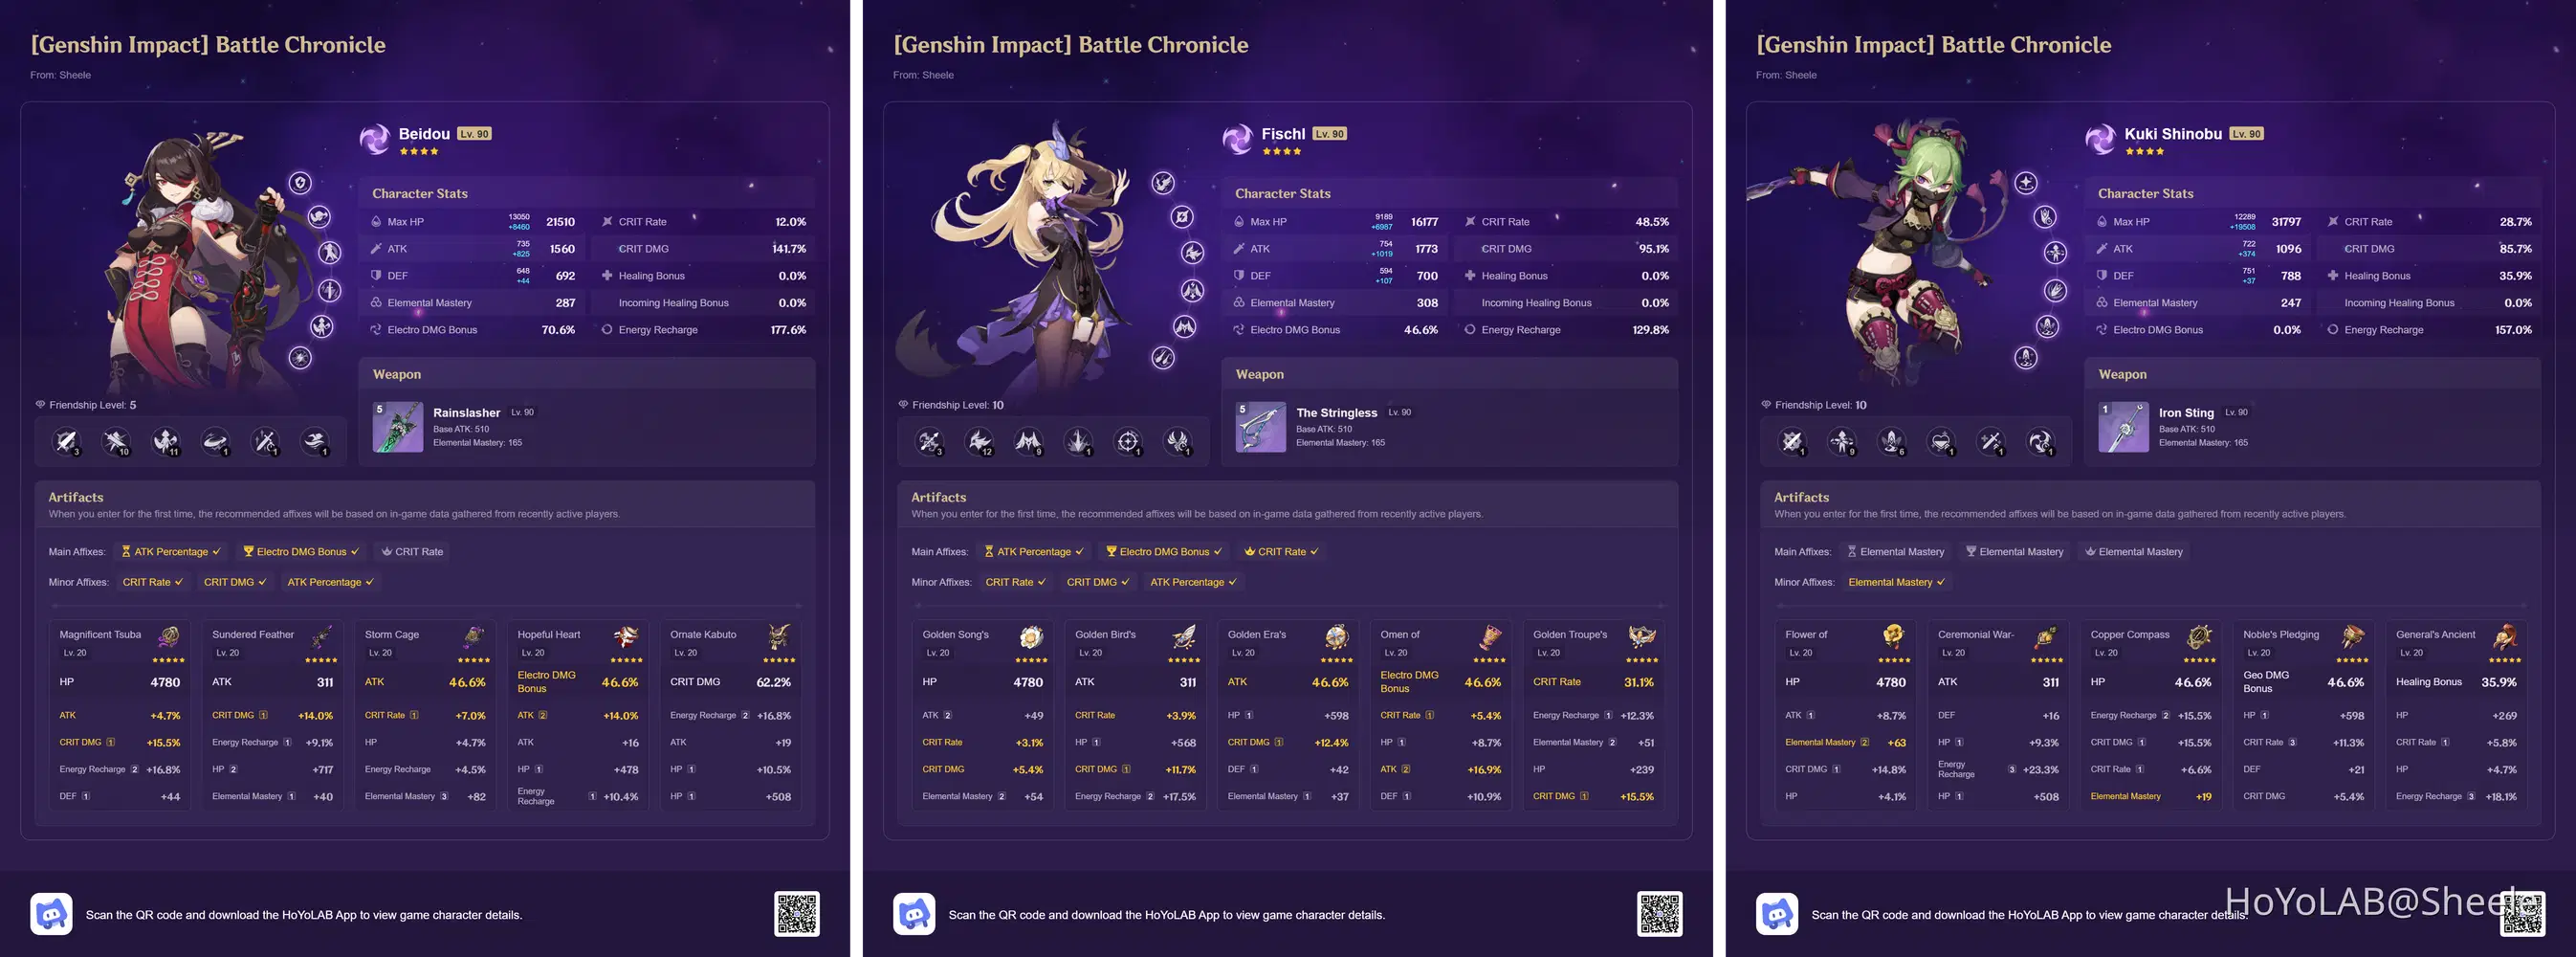
"Battle Info"
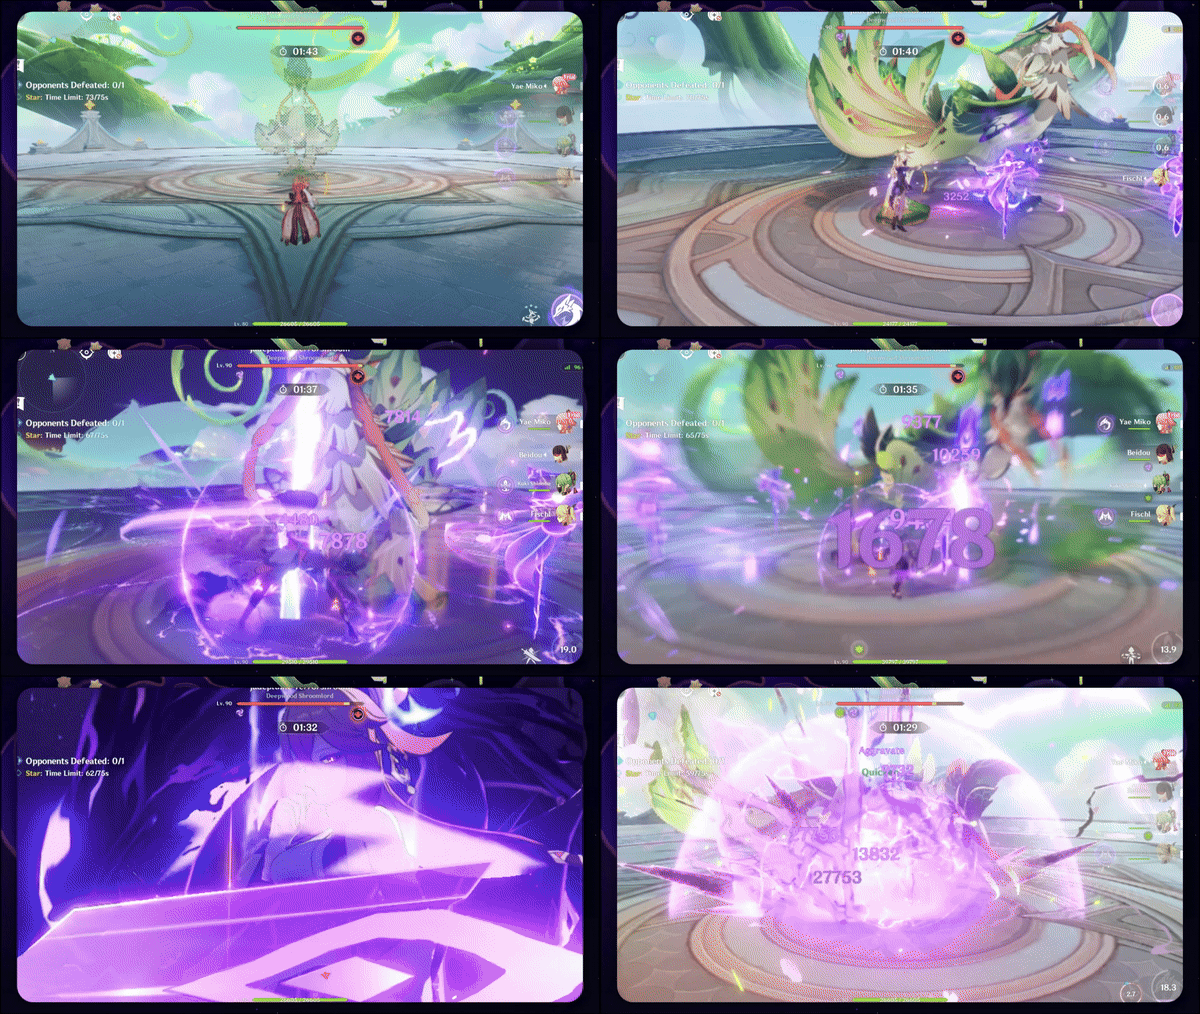
When the battle begins your first target is to fill the boss's gauge to make Boss enter the Activated State. When the Boss enters the Activated State, Boss will be more aggressive in doing attacks, so be careful. Just wait until the boss is tired / enters the weak state and do your best combo attacks to defeat the Boss. Use Electro Attacks to fill the Boss's Gauge faster.
✧ ACT 4 ✧
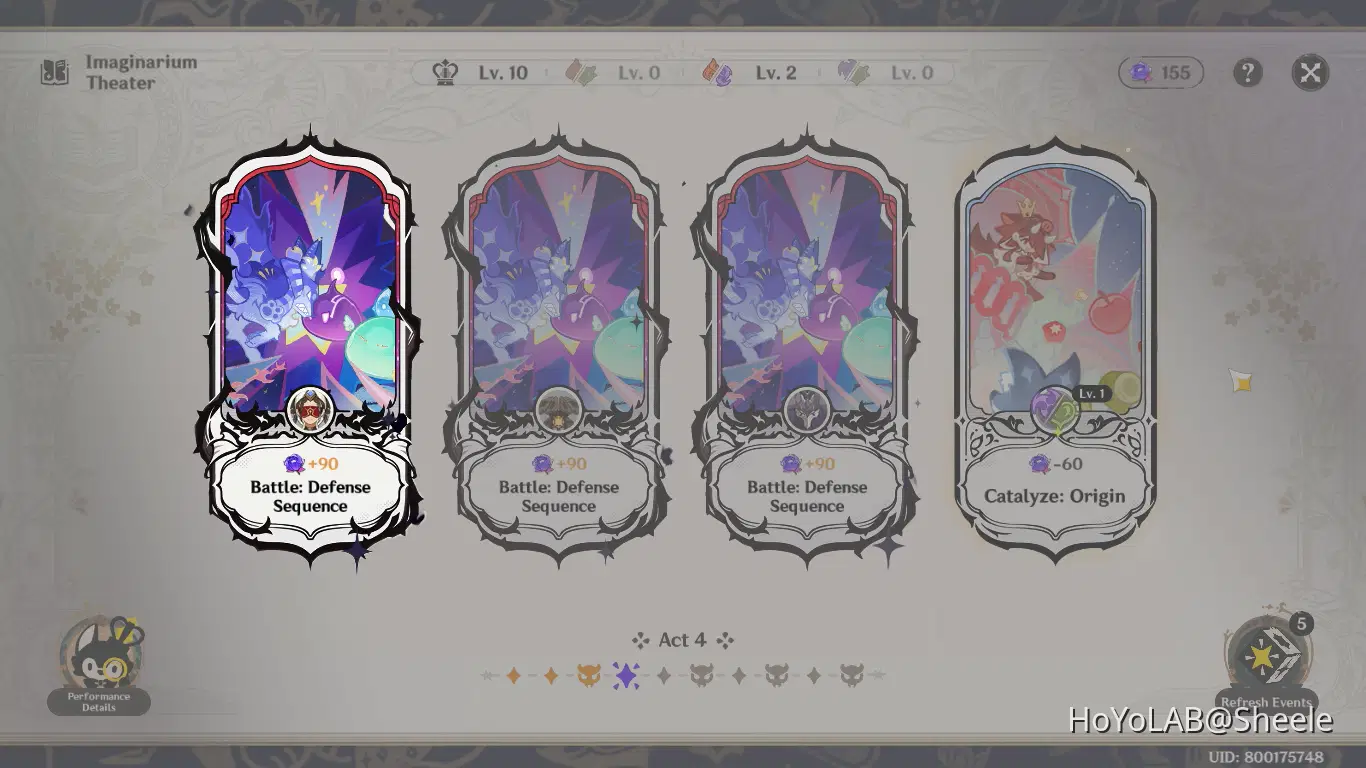
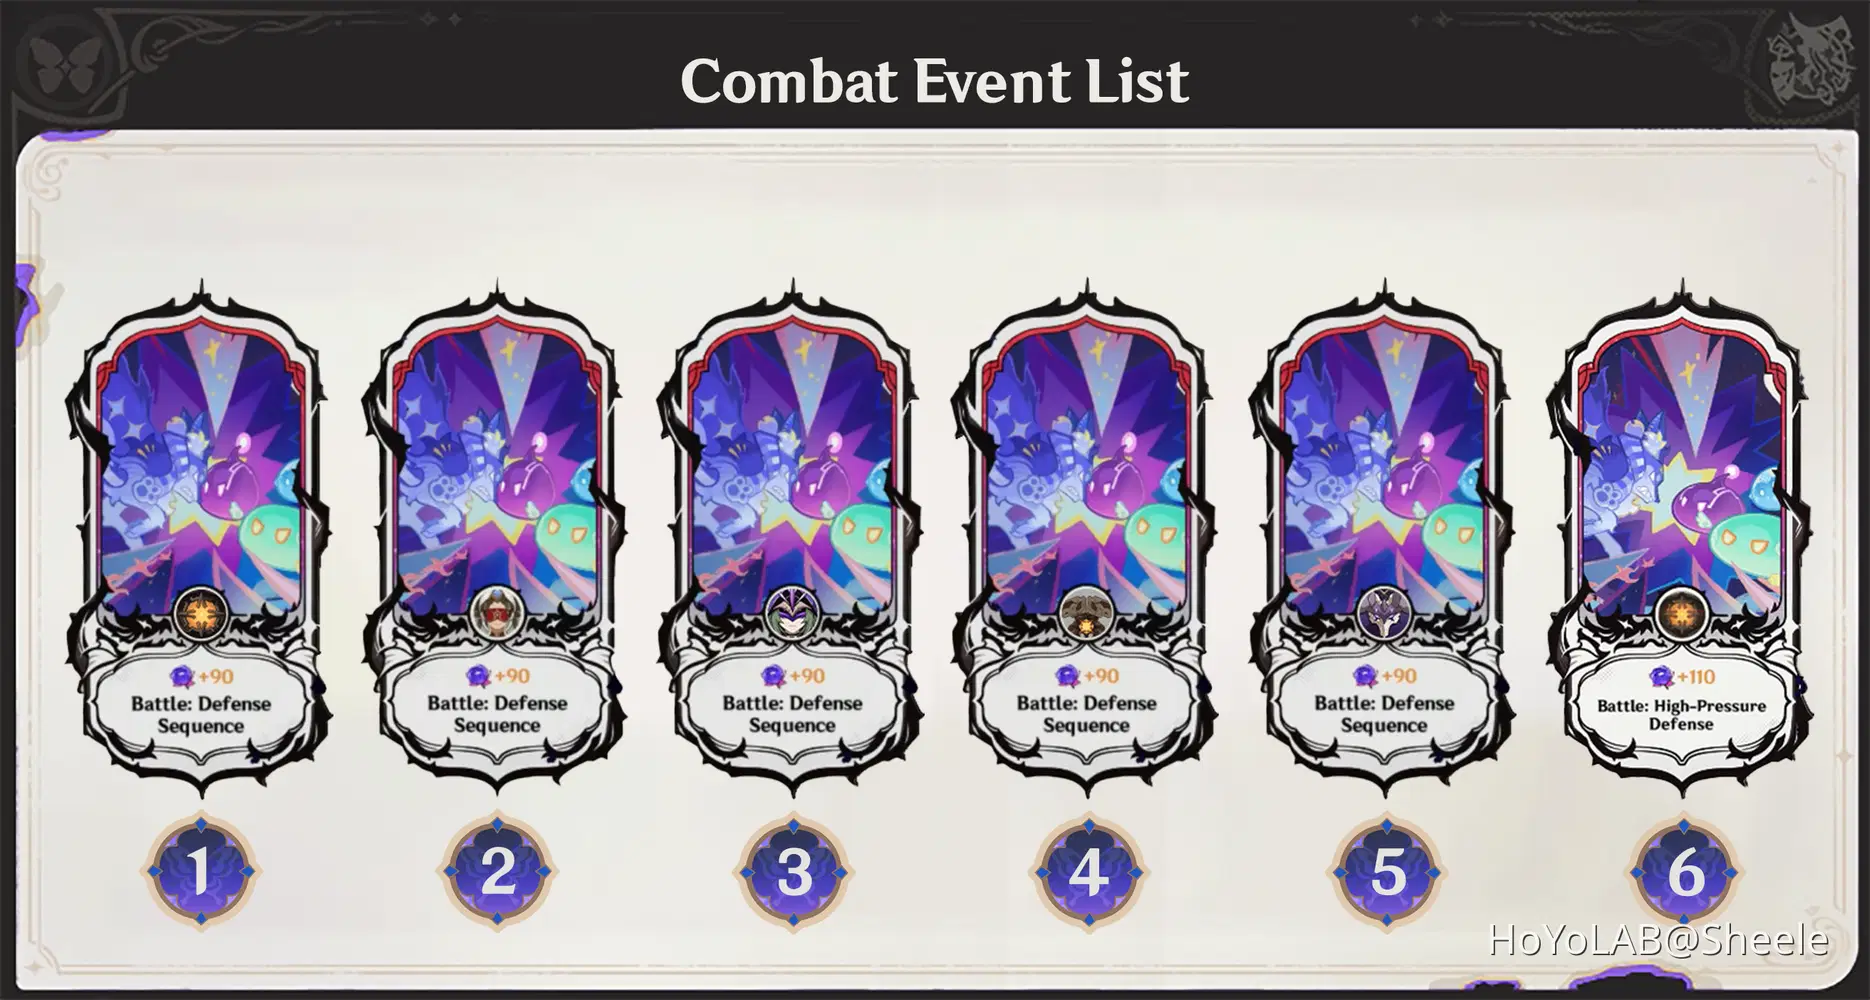
"Description"
1. Icon: Ruin Guard [Battle: Defense Sequence] ⭐Recommended Choice⭐
Battle Tips: 1 Ruin Guard will appear, just carry out an attack to divert him from Ley Line Monolith. When you defeat Ruin Guard, 1 other Ruin Guard will appear on a different side. Every time you defeat the Ruin Guard the challenge time will be 15 seconds.
Team Recommendations: Overloaded / Burning / Burgeon / Frozen Specific Character: Layla & Xingqiu
2. Icon: Eremite Desert Clearwater [Battle: Defense Sequence] ⭐Recommended Choice⭐
Battle Tips: Eremites will attack Ley Line Monolith in pairs, each time you defeat an Eremites the challenge duration will be decrease by 15 seconds. Use AoE attacks to make it easier for you to attract opponents and deal damage.
Team Recommendations: Overloaded / Hyperbloom / Specific Character: Nahida / Frozen Specific Character: Layla & Xingqiu
3. Icon: Fatui Electro Cicin Mage [Battle: Defense Sequence] ⭐Recommended Choice⭐
Battle Tips: Fatui Skirmisher - Hydrogunner Legionnaire & Fatui Skirmisher - Cryogunner Legionnaire will appear and attack together, although their movements are slow, but they can provide a combination attack that freezes you. The first priority is to defeat Fatui Skirmisher - Hydrogunner Legionnaire so that he cannot heal his teammates. The two Cicin Mage will appear after you defeat one of the Fatui Skirmishers, in the order that Fatui Electro Cicin Mage will appear first.
Team Recommendations: Overloaded / Burgeon / Burning / Specific Character: AoE attack
4. Icon: Ruin Defender [Battle: Defense Sequence]
Battle Tips: Ruin Defender, Ruin Cruiser, Ruin Scout & Ruin Destroyer will appear to attack the Monolith Ley line. x2 Enemies will appear at the beginning and when the enemy is defeated new enemies will appear until the challenge ends. Special attention is needed when Ruin Destroyer appears because it can provide area attacks.
Team Recommendations: Overloaded / Hyperbloom / Specific Character: AoE attack
5. Icon: Thunderhelm Lawachurl [Battle: Defense Sequence]
Battle Tips: First Thunderhelm Lawachurl, and x2 Mitachurls will appear. Mitachurls will focus on attacking the Monolith while Thunderhelm Lawachurls will attack your character. When the enemy is defeated Frostarm Lawachurl will appear. The Lawachurls have quite a brutal attack pattern so be careful it is highly recommended to use your best character here.
Team Recommendations: Mono Pyro / Burning / Overloaded / Specific Character: AoE attack
6. Icon: Ruin Guard [Battle: High-Pressure Defense]
Battle Tips: First Ruin Scout & Ruin Destroyer will appear, and attack Ley Line Monolith prioritize your attacks to Ruin Destroyer because can give high damage. Next Ruin Destroyer & Ruin Defender appear followed by Ruin Guard, the main priority is defeat Ruin Defender and Ruin Guard first. Then x2 Ruin Cruiser and Ruin Grader wait to appear, the automatons will take turns appearing until the challenge duration is over. Every time you defeat an enemy the challenge duration will be decrease by 15 seconds. Use strong AoE attacks to eliminate all enemies easily, has an extreme level challenge so don't try it unless you have a character that is really well built.
Team Recommendations: Overloaded / Hyperbloom / Specific Character: AoE attack / Shielder
"Act 4 - Battle: High-Pressure Defense"
✧ ACT 5 ✧
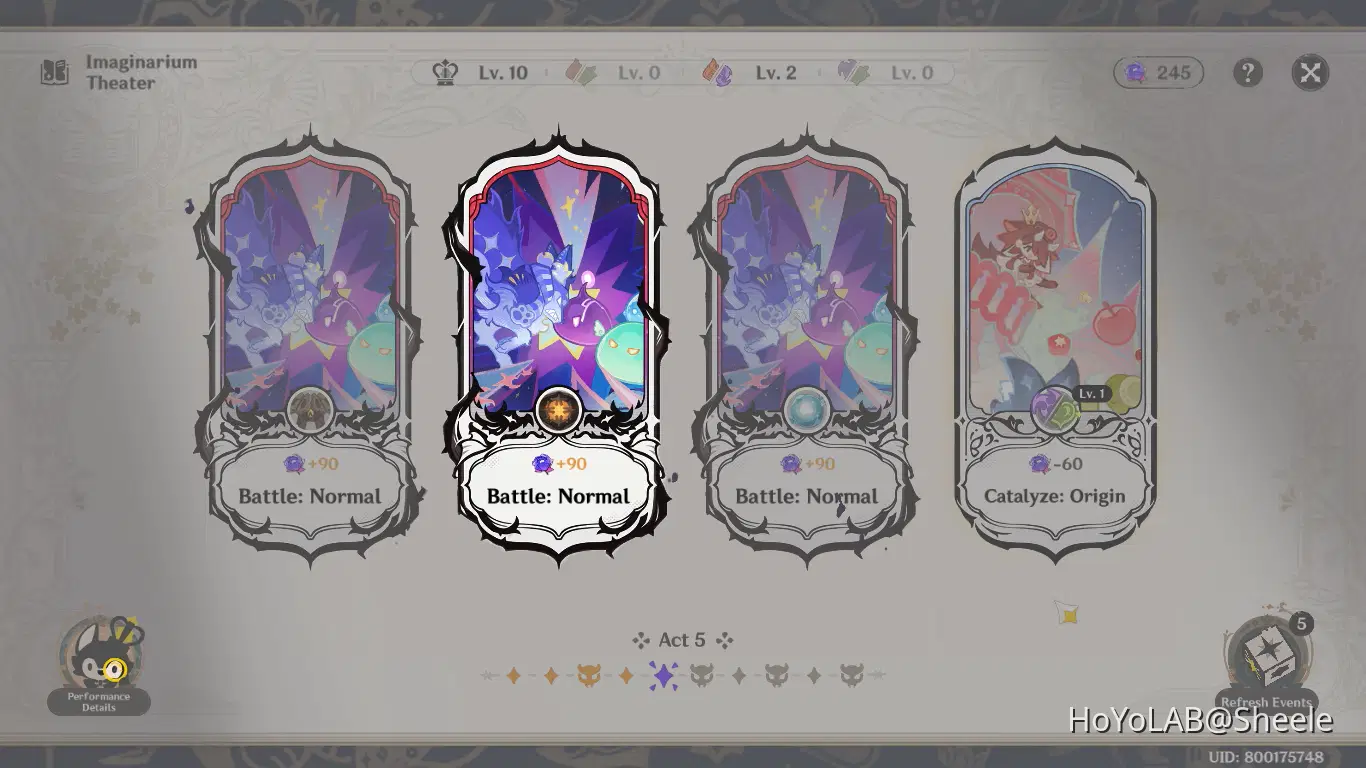
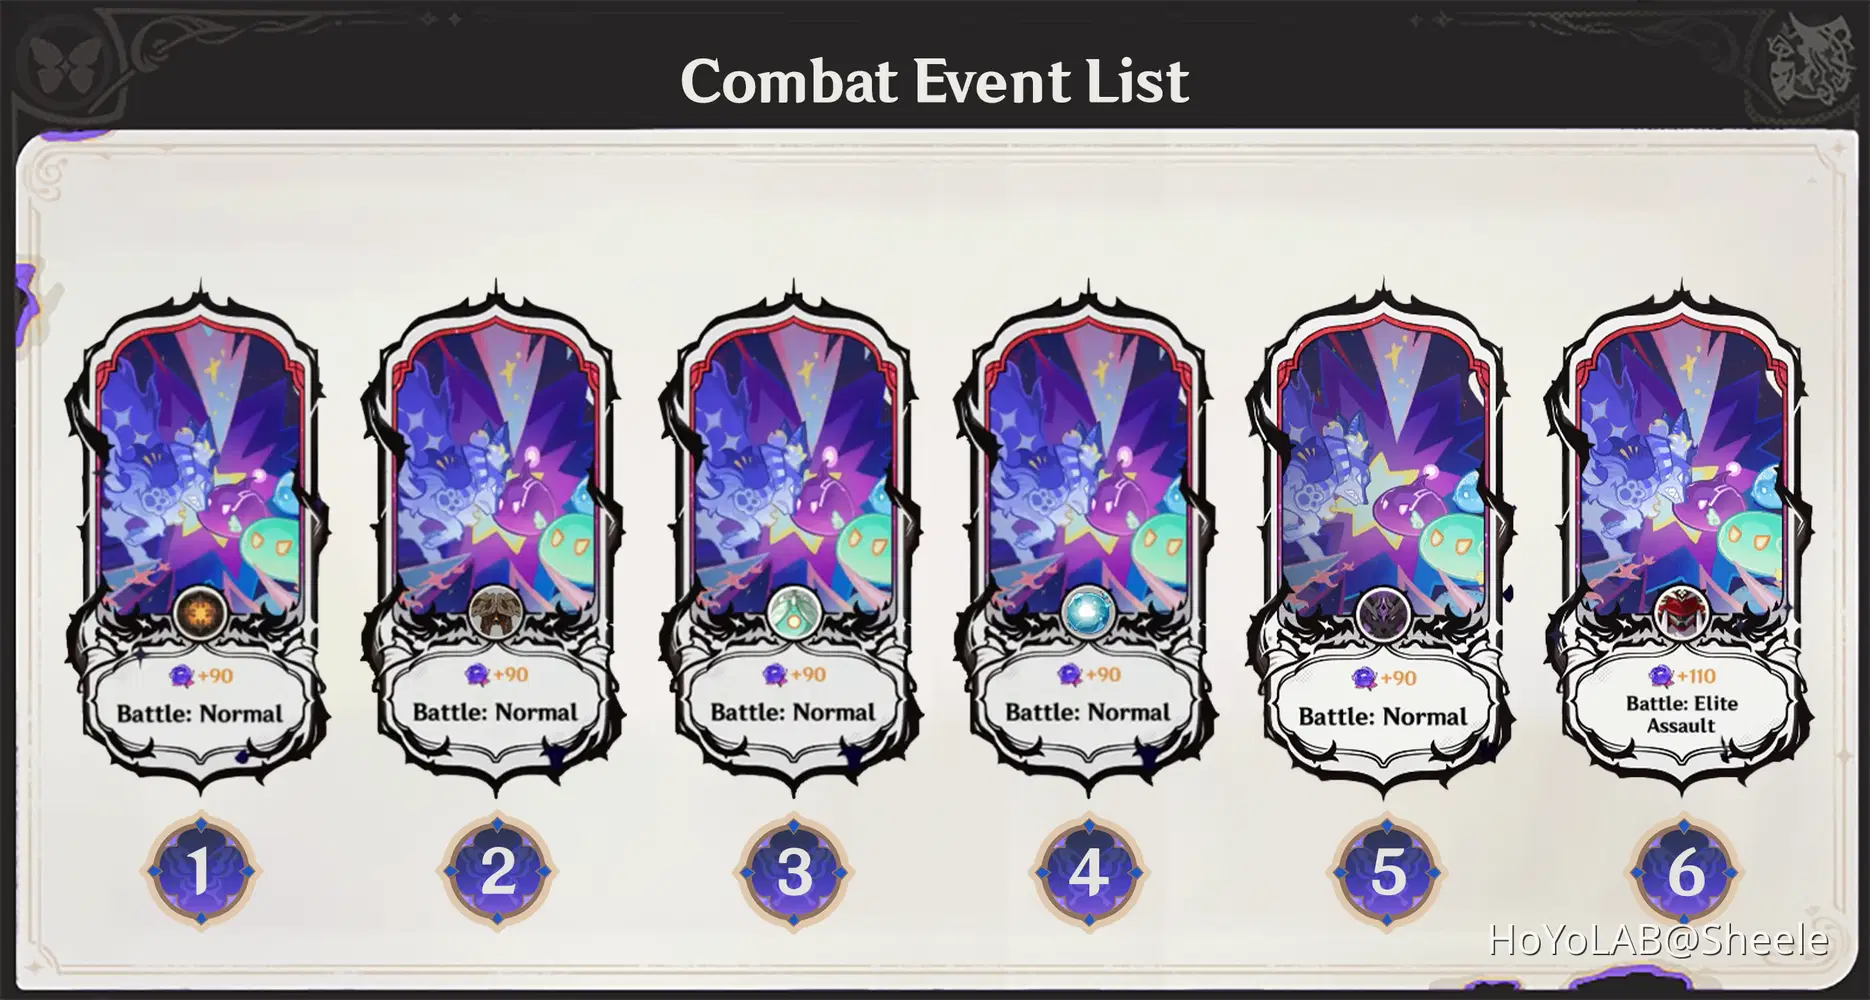
"Description"
1. Icon: Ruin Guard [Battle: Normal] ⭐Recommended Choice⭐
Battle Tips: First x2 Ruin Guard will appear and attack together, after you defeat them x2 Ruin Grader will appear, reach the target of defeating 5 enemies to get a Star. Use Overloaded Team to defeat enemies with Automatons Type easily.
Team Recommendations: Overloaded
2. Icon: Ruin Scout [Battle: Normal] ⭐Recommended Choice⭐
Battle Tips: The enemies will appear in the following order: First x2 Ruin Scout doesn't have much attack and movement so it's easy to defeat. Next x2 Ruin Cruiser can shoot Energy Balls so be careful not to get close to it. Next x2 Ruin Destroyer can give area attacks near it, so be careful if giving attacks from close range. Lastly x2 Ruin Defender can issue a shield, attack from behind to give damage.
Team Recommendations: Overloaded / Specific Character: AoE Attack
3. Icon: Anemo Specter [Battle: Normal]
Battle Tips: x2 Geo Specter & Hydro Specter will appear and attack together, another specter will appear when you defeat one of them. Defeat a total of 21 Specters to get a star. AoE attacks are highly recommended here.
Team Recommendations: Hyperbloom / Electro-charged / Overloaded / Specific Character: Nahida / Yae Miko
4. Icon: Hydro Mimic [Battle: Normal]
Battle Tips: x3 Hydro Mimic Boar will appear together, when you defeat them, another mimic will appear. There is a mimic that will explode in each cycle and cause hydro damage. Defeat a total of 24 enemies to get stars
Team Recommendations: Overloaded / Mono Electro / Mono Pyro / Specific Character: Nahida / Yae Miko
5. Icon: Thundercraven Rifthound [Battle: Normal]z
Battle Tips: x6 Thundercraven Rifthound Whelp will appear first and attack together, after defeating all x2 Thundercraven Rifthound will appear. Using Electro AoE attacks is a good decision and always pay attention to your Health Bar.
Team Recommendations: Mono Electro / Overloaded / Aggravate / Specific Character: Healer
6. Icon: Kairagi: Fiery Might [Battle: Elite Assault]
Battle Tips: Kairagi: Fiery Might and x2 Nobushi will appear and attack together, when you have defeated them Kairagi: Dancing Thunderd and another x2 Nobush will appear. Be careful of the enemy's Pyro and Electro attacks as they can cause Overloaded reactions and knock you away, so it is recommended to use shields and AoE attacks to defeat them easily.
Team Recommendations: Overloaded / Hyperbloom / Burgeon / Specific Character: AoE Attack & Shielder
"Act 5 - Battle: Elite Assault Gameplay"
✧ ACT 6 ✧ (Boss)
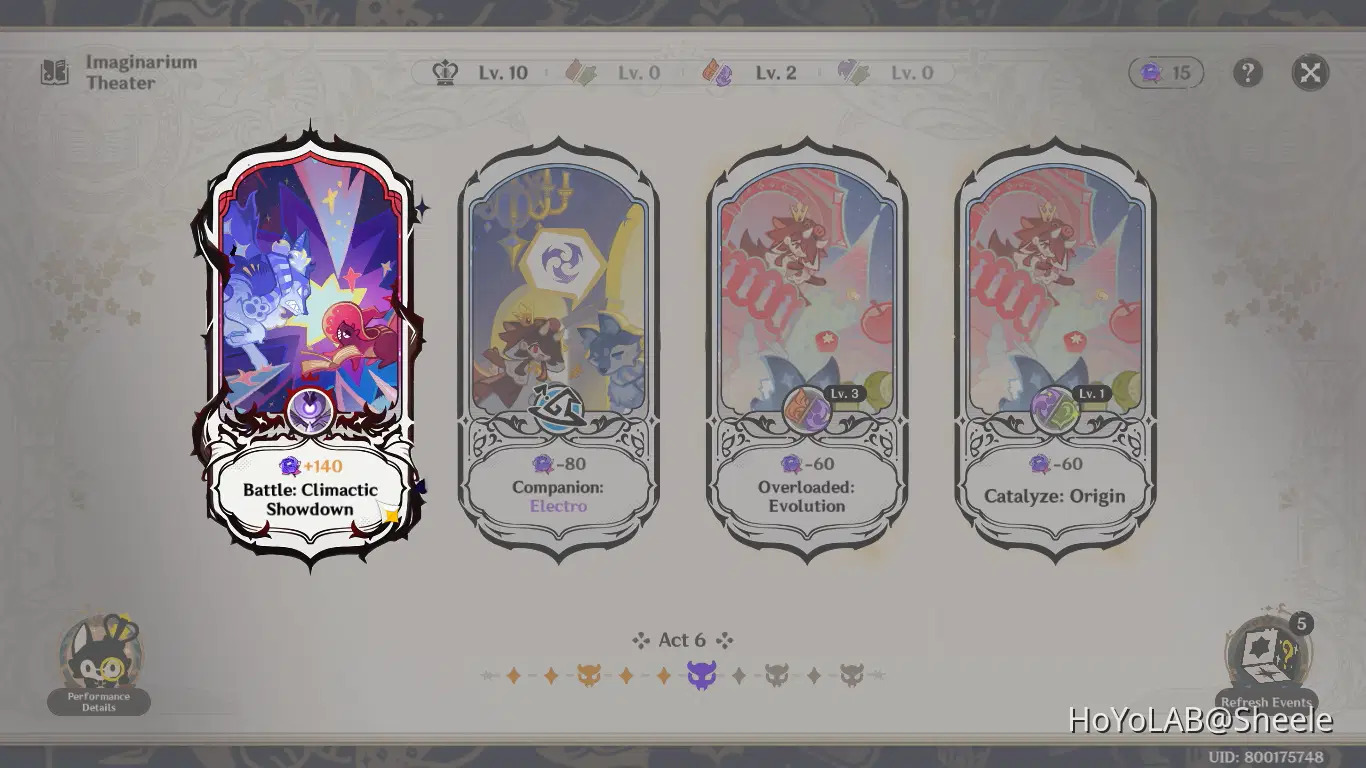
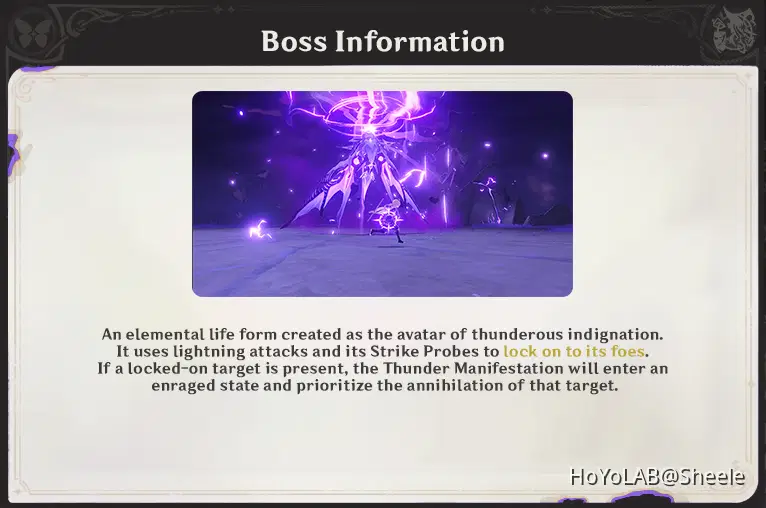
"Battle Strategy"
- For your information, this Boss is immune to Electro attacks, so it is not recommended to fight it with an Electro team. Use Pyro or Dendro Team Composition to deal effective damage.
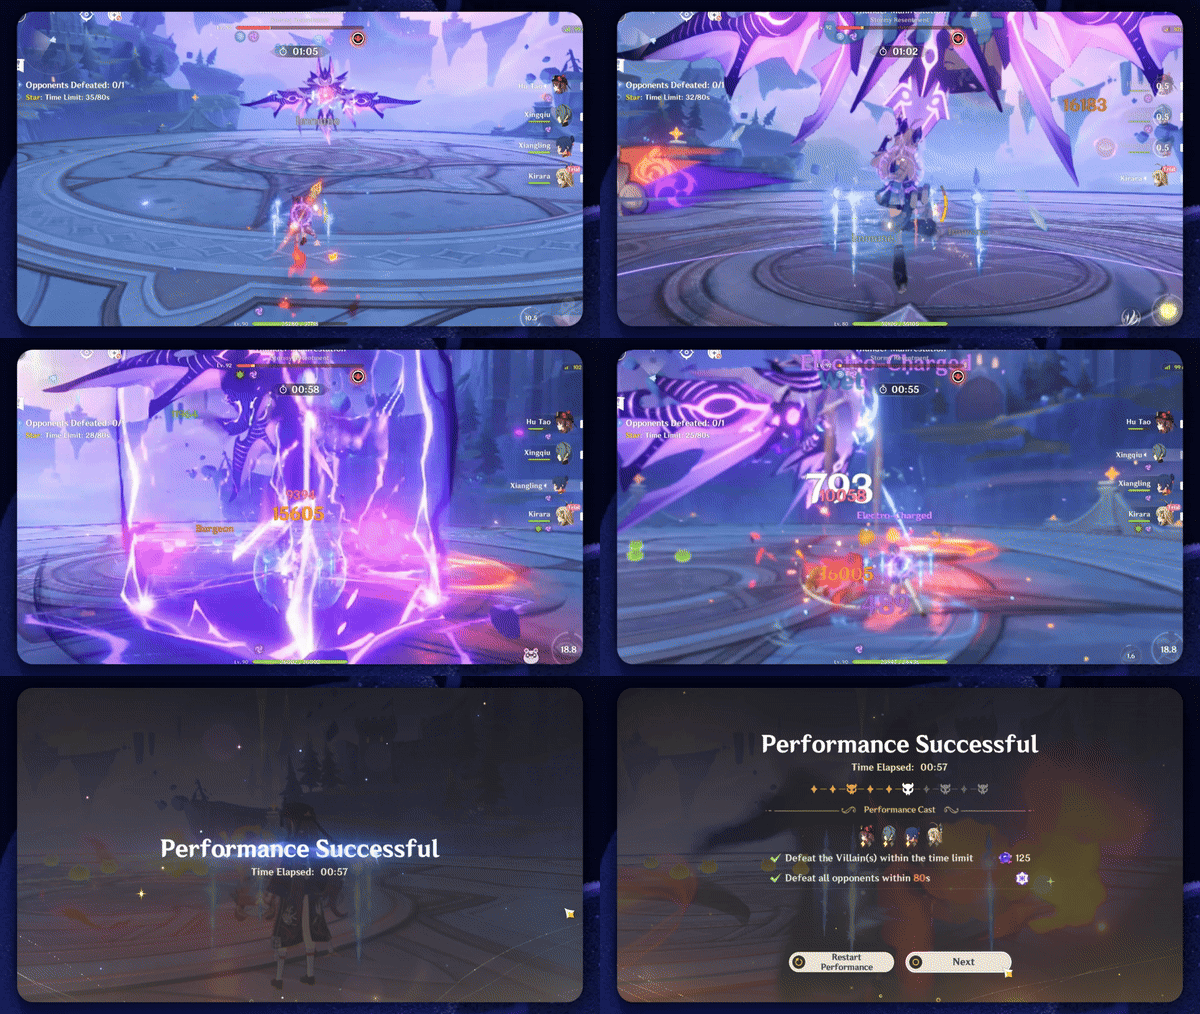
- Example of the team I use to Defeat the Boss:
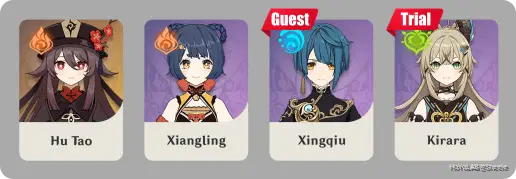
With the team I use this can trigger Vaporize and Burgeon reactions.
➥ Hu Tao, as the main DPS with Pyro element, delivers a Pyro attack to trigger a reaction.
➥ Xiangling, as Sub DPS, provides additional Pyro damage to Boss.
➥ Xingqiu (Special Guest Star) as Sub DPS and provides additional Hydro damage to Boss.
➥ Kirara (Trial) as Support Shielder, to protect team from Boss attack.
"Character Build"
Because I used Kirara Trial, so I didn't include Her here
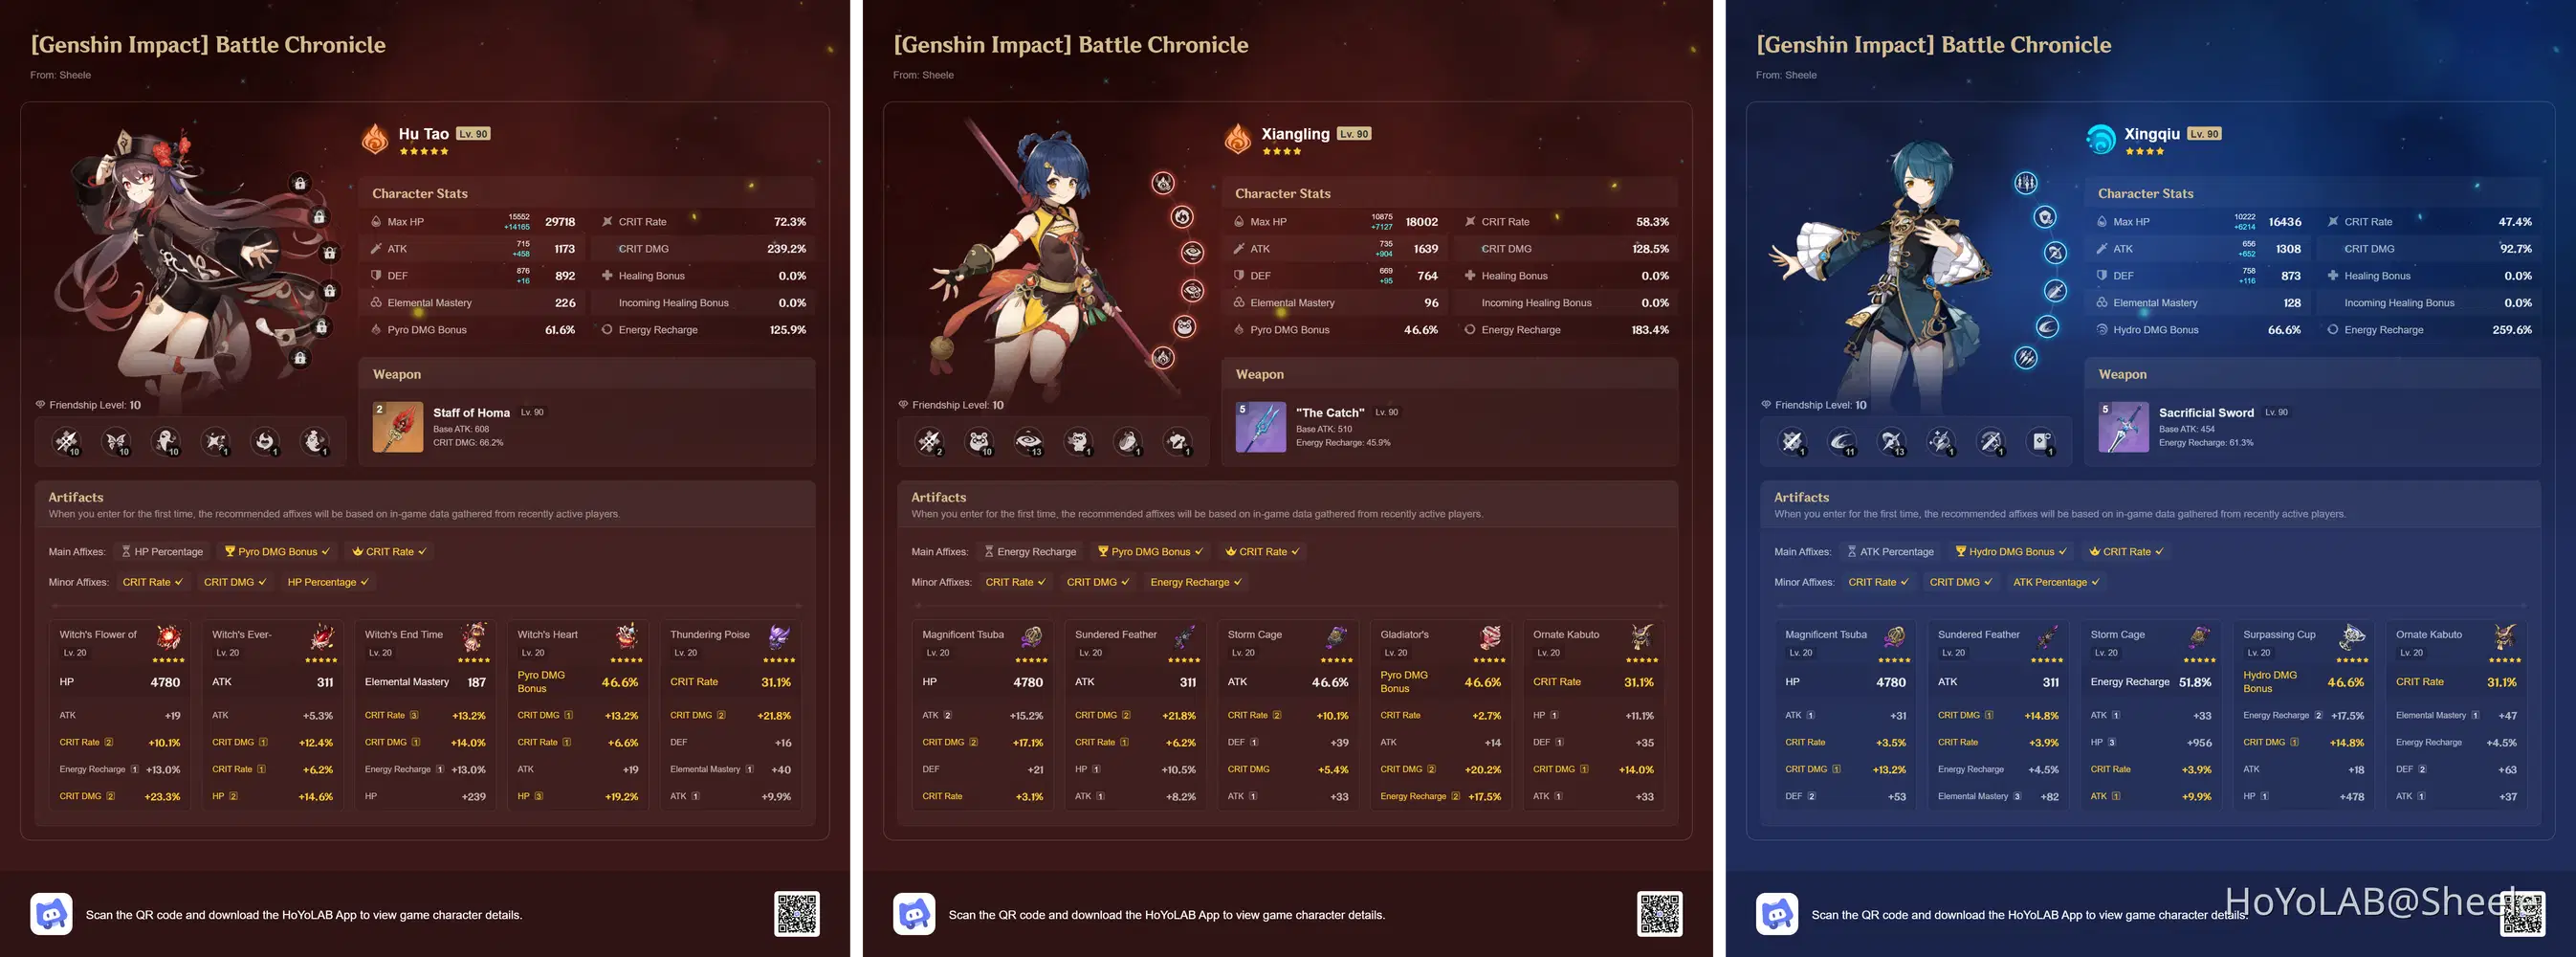
"Battle Info"
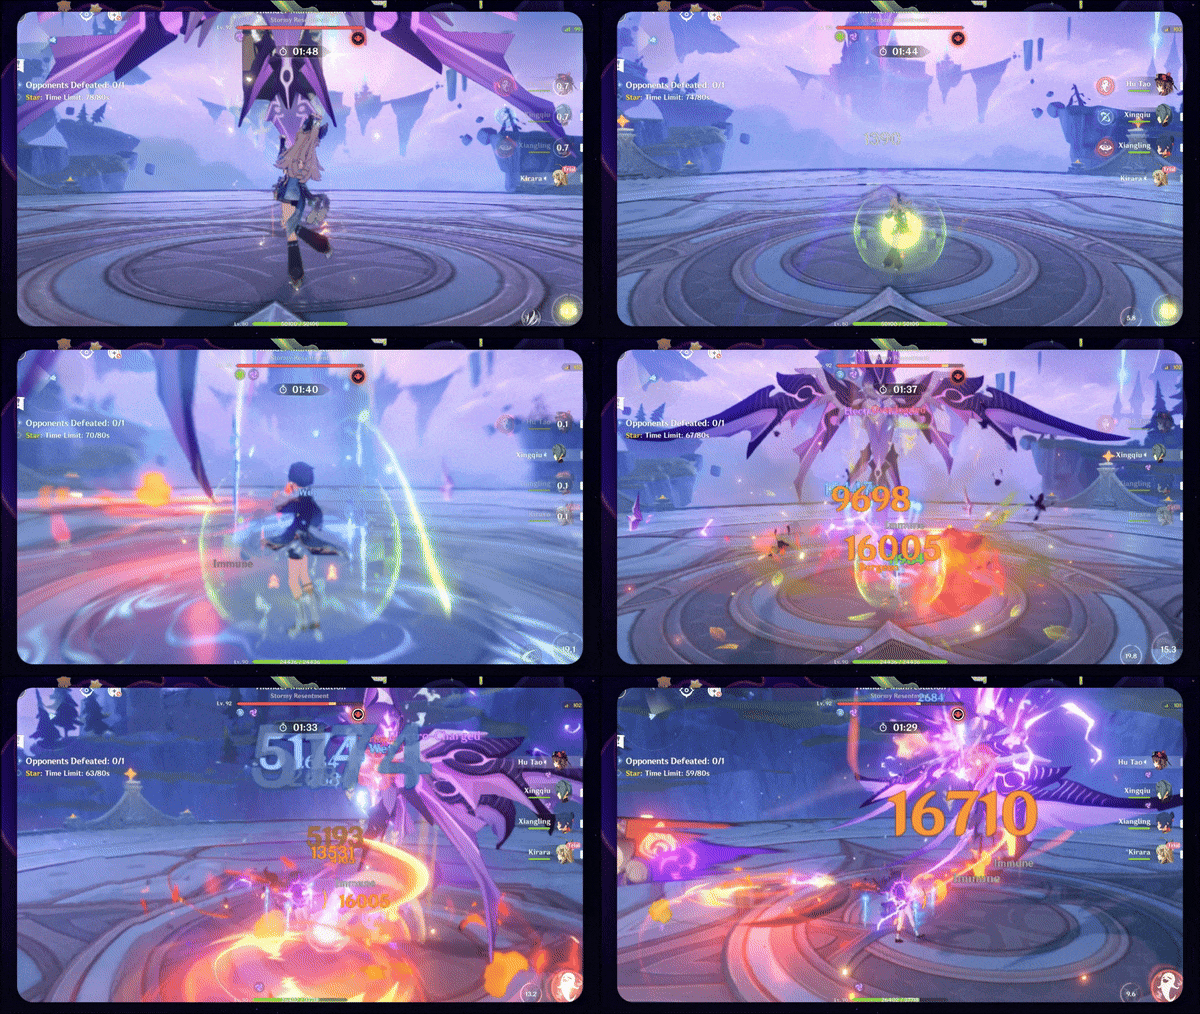
Boss frequently teleports and moves nimbly, so ensure your attacks are efficient to maintain stamina. Boss has a "Fury" gauge that increases when your characters get hit by its lightning or shockwaves, and when "Fury" gauge full, the boss performs stronger attacks. Each time the boss attacks, it deals Electro DMG, with an attack indicator appearing as a warning; stay alert and avoid the indicator to minimize damage.
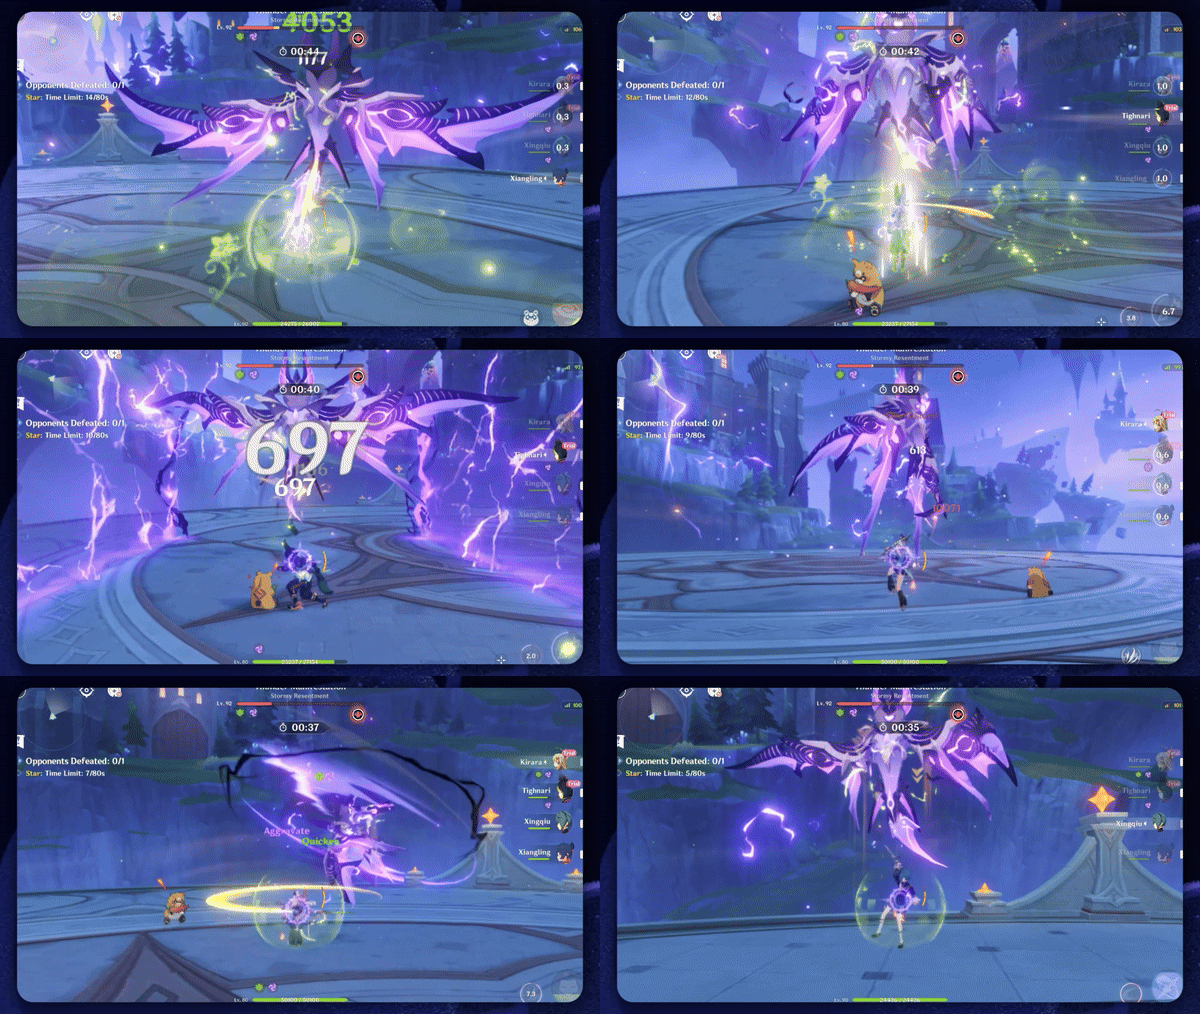
Boss releases electric walls from the right and left sides, immediately dodge by passing through them before the energy walls merge and deal damage, or you can use a shield to minimize damage.
Boss marks you and brings up an attack indicator and then casts an electro prison, you can avoid it by running when the attack indicator appears. However, I would recommend using a shield and continuing to deal damage to the Boss, because you are racing against the challenge duration.
✧ ACT 7 ✧
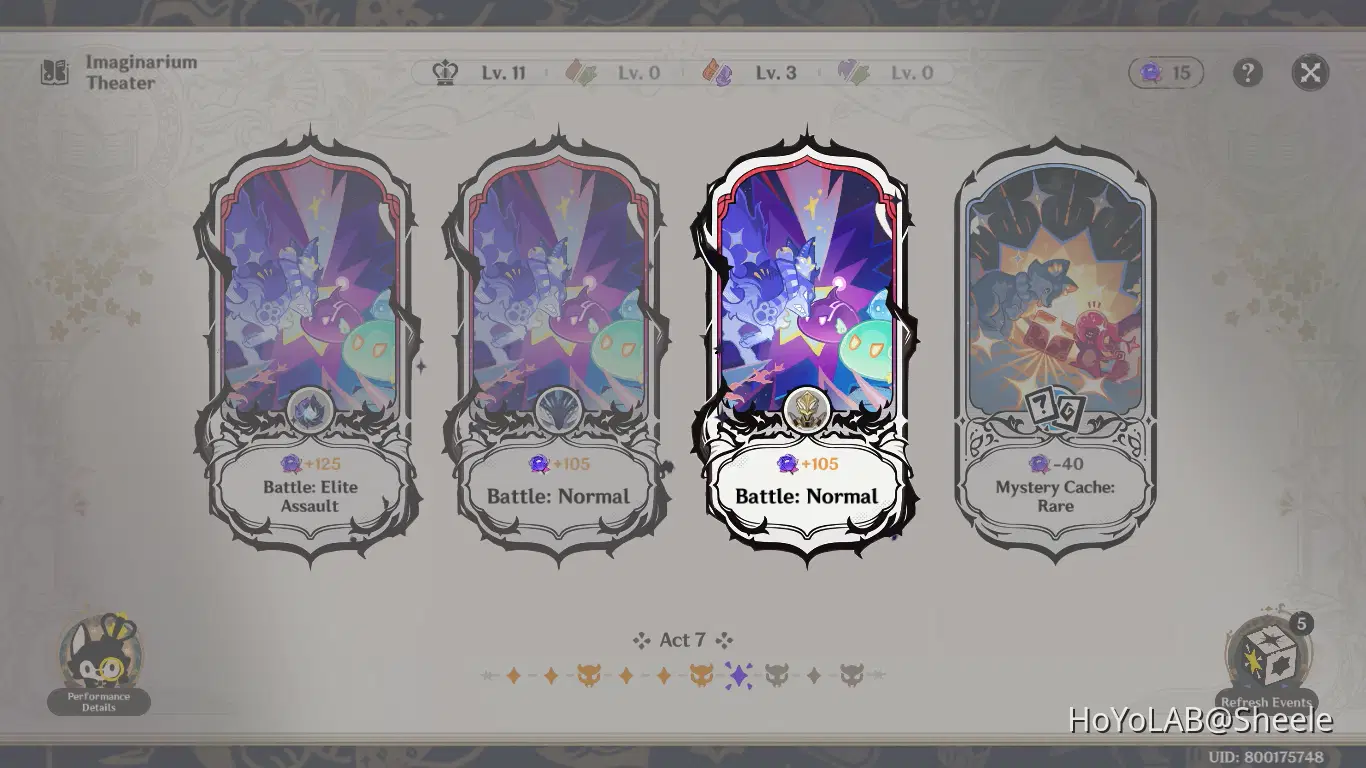
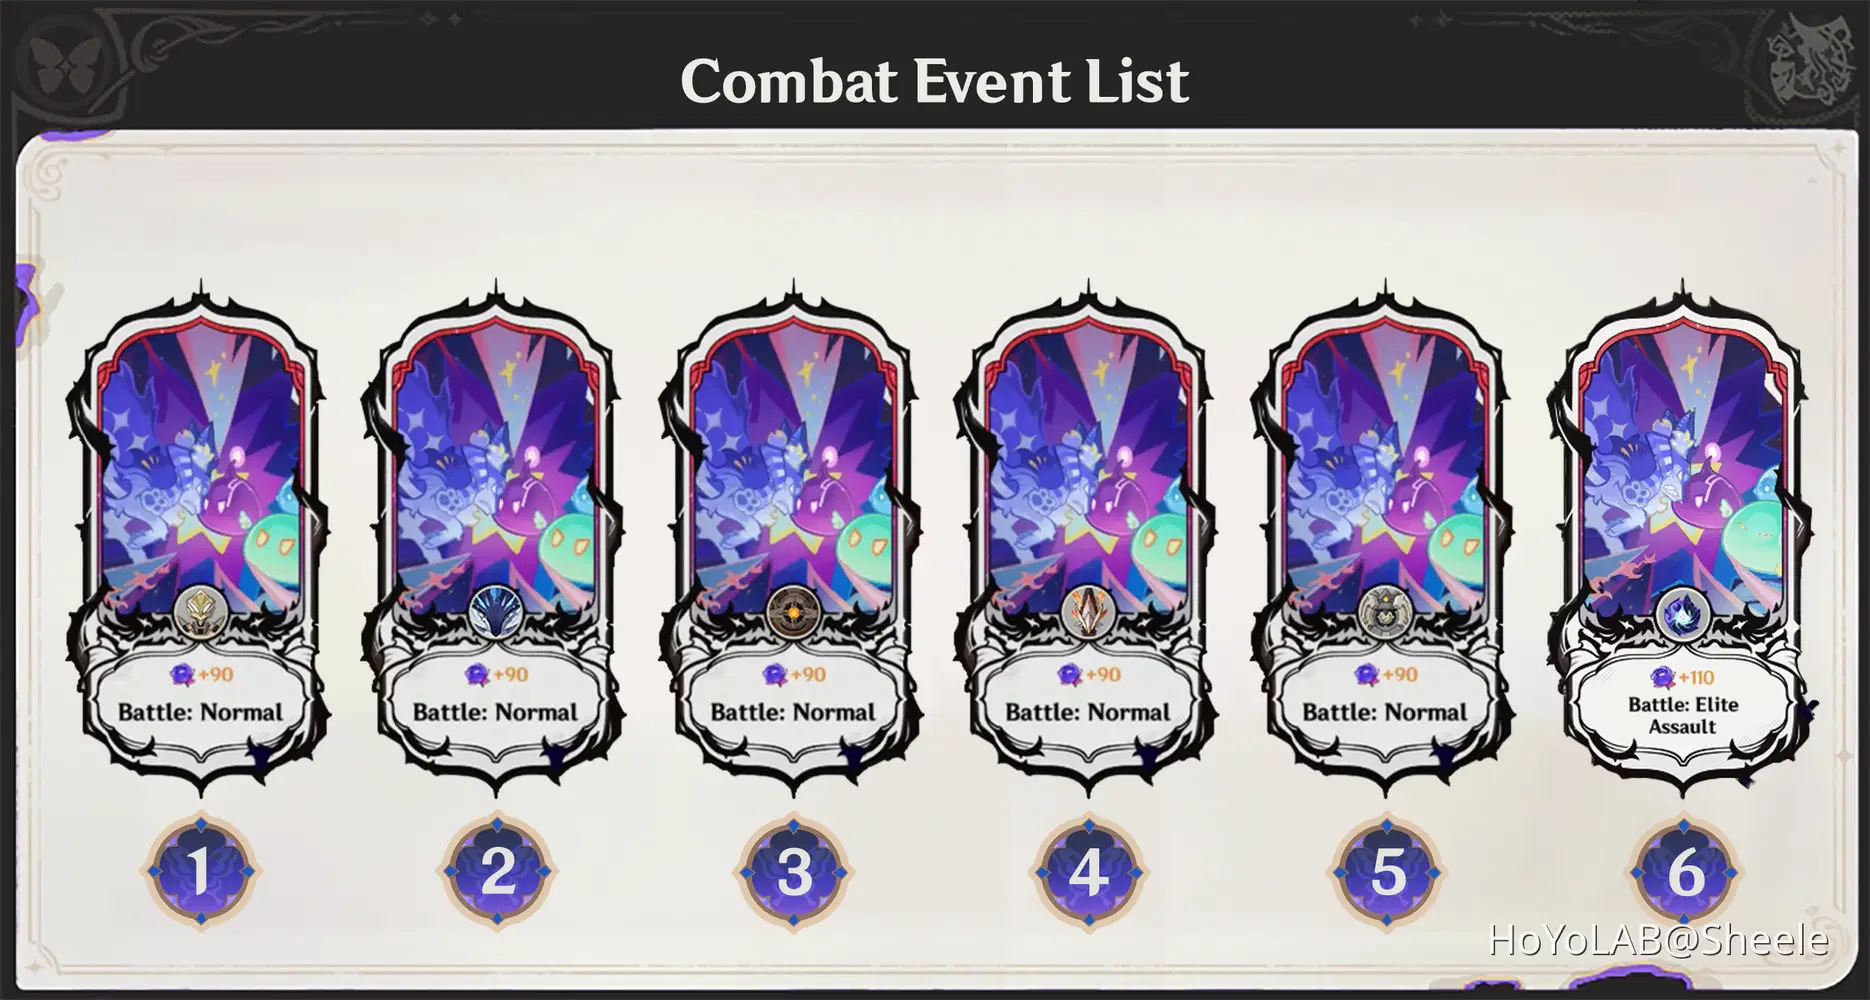
"Description"
1. Icon: Assault Specialist Mek [Battle: Normal] ⭐Recommended Choice⭐
Battle Tips: Annihilation Specialist Mek, Arithmetic Enhancer Mek & Assault Specialist Mek will appear first, use AoE attacks to defeat them effectively. Next Annihilation Specialist Mek, Arithmetic Enhancer Mek & Suppression Specialist Mek will appear, defeat them like before. Defeat a total of 6 enemies within 80 second to complete the challenge and get star.
Team Recommendations: Overloaded / Hyperbloom / Aggravate / Specific Character: Nahida
2. Icon: Primordial Bathysmal Vishap [Battle: Normal]
Battle Tips: Rimebiter Bathysmal Vishap & Bolteater Bathysmal Vishap will appear first, can deal Cryo and Electro DMG. After defeating them, x2 Primordial Bathysmal Vishap appears, be careful of area attacks can deal Hydro DMG. To defeat them, it is recommended to use a team that can deal AoE damage.
Team Recommendations: Hyperbloom / Burgeon Team / Specific Character: Nahida
3. Icon: Ruin Drake: Skywatch [Battle: Normal]
Battle Tips: x2 Ruin Hunter Will Appear first and attack you together, use an area attack to defeat them. Next to x2 Ruin Drake: Skywatch will appear far apart, defeat them with a combination of your team. I recommend focusing on one of them so that the other approaches you later.
Team Recommendations: Hyperbloom / Overloaded / Specific Character: Bow users / Nahida / AoE Attack
4. Icon: Consecrated Red Vulture [Battle: Normal]
Battle Tips: Consecrated Red Vulture & Consecrated Scorpion appear together, carrying out continuous attacks so it is recommended that you use a shielder character so that you don't get knocked away. Don't forget to destroy Energy Blocks when appear to weaken Consecrated Red Vulture & Consecrated Scorpion.
Team Recommendations: Overloaded / Hyperbloom / Specific Character: Shielder
5. Icon: Secret Source Automaton: Hunter-Seeker [Battle: Normal]
Battle Tips: x3 Shadowy Husk will appear first, use area attacks to defeat them easily, be careful of enemy combination attacks because they can freeze you. Shadowy Husk: Standard Bearer can give Pyro Shield to teammates, so defeat him first. Shadowy Husk: Defender can attack from a distance and cause Cryo DMG, so it is the second priority to defeat. Shadowy Husk: Line Breaker who attacks from a close-range causes Hydro DMG.
Next, Secret Source Automaton: Hunter-Seeker appears, it is recommended to attack him from behind, always pay attention to the attack indicator, and immediately dodge when he releases his shield because it can push you and cause DMG.
Team Recommendations: Burgeon / Overloaded / Hyperbloom / Burning / Specific Character: Xilonen
6. Icon: Tenebrous Mimesis - Crackling Axe Mitachurl [Battle: Elite Assault]
Battle Tips: Tenebrous Mimesis - Crackling Axe Mitachurl & x2 Blazing Axe Mitachurl will appear and attack you together, prioritize your attacks on Tenebrous Mimesis - Crackling Axe Mitachurl I recommend using Burgeon's composition or using Xilonen to fill the gauge of Tenebrous Mimesis - Crackling Axe Mitachurl to make it weak so it is easy to defeat.
Next Tenebrous Mimesis: Tepetlisaurus and x2 Tenebrous Mimesis: Tepetlisaurus will appear, prioritize your attacks on Tenebrous Mimesis: Tepetlisaurus and do the same attacks as before. Defeat all enemies within 70 seconds to get a Star.
Team Recommendations: Burgeon / Burning / Specific Character: Xilonen
"Act 7 - Battle: Elite Assault Gameplay"
✧ ACT 8 ✧ (Boss)
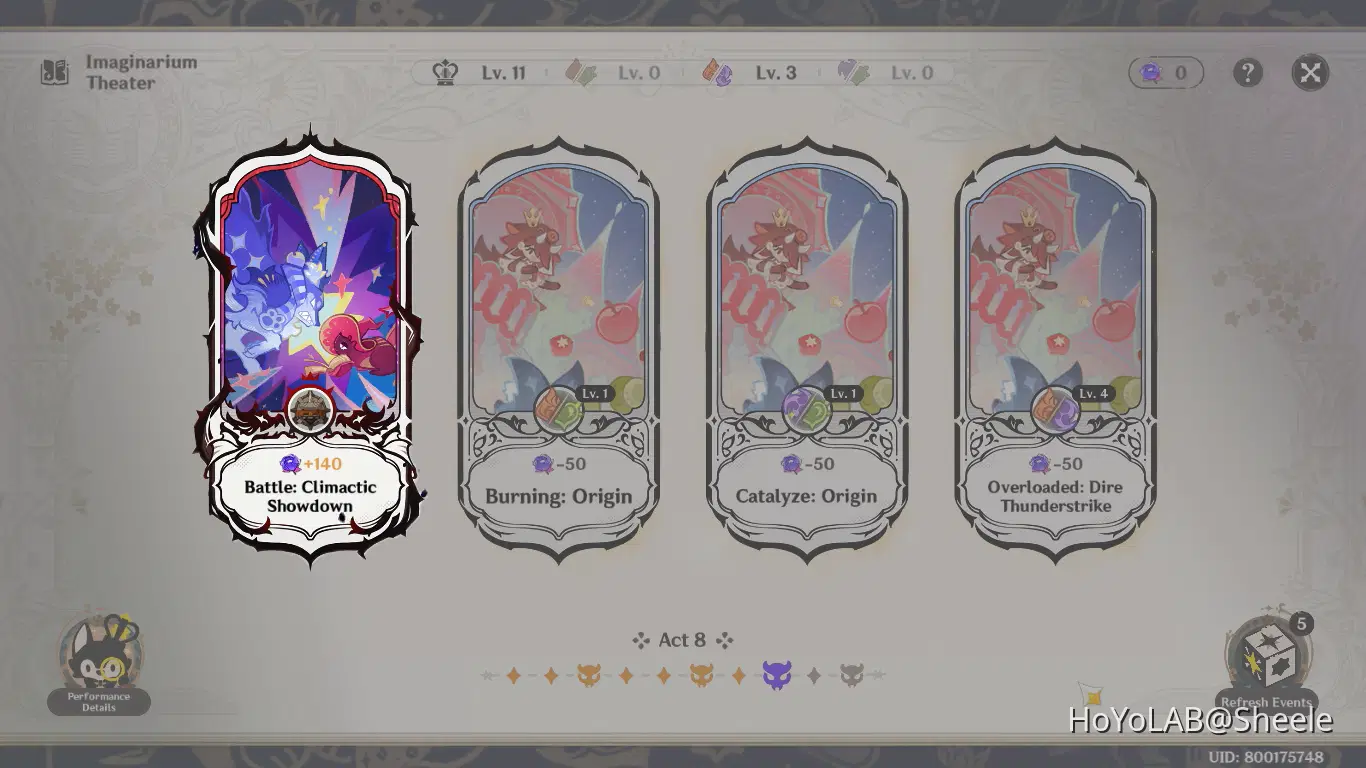
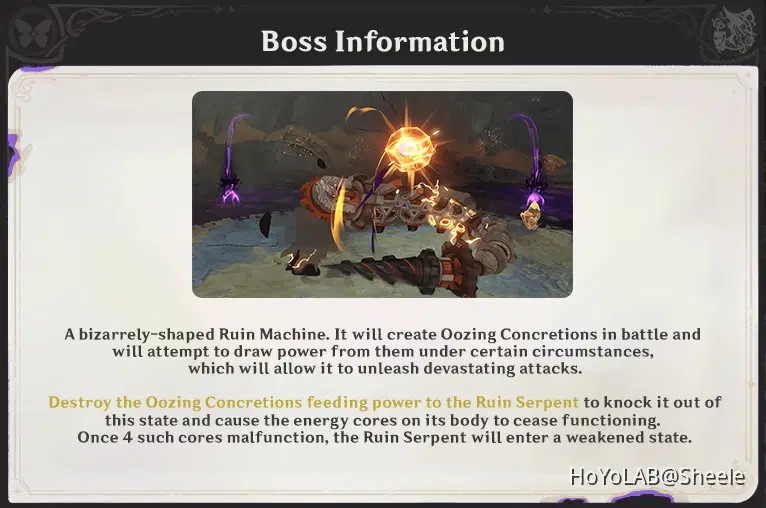
"Battle Strategy"
- This boss has a type of move set that wastes time in battle. Use a team composition with AoE attacks, because it will be more effective in dealing damage, or use a team with characters who can deal damage quickly.
- Example of the team I use to Defeat the Boss:
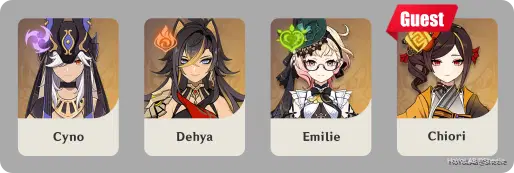
With the team I use this can trigger Overloaded, Burning, Aggravate, Quicken, Spread and Crystallize reactions.
➥ Cyno as the main DPS with Electro element, delivers an Electro attack to trigger a reaction.
➥ Dehya as Sub DPS, provides additional Pyro damage to Boss.
➥ Emilie as Sub DPS and provides additional Dendro damage to Boss and to help trigger the Burning, Aggravate, Quicken or Spread reactions.
➥ Chiori (Special Guest Star) as Sub DPS, provides additional Geo damage to Boss, triggers the Crystallize reaction to provide a shield to the team.
"Character Build"
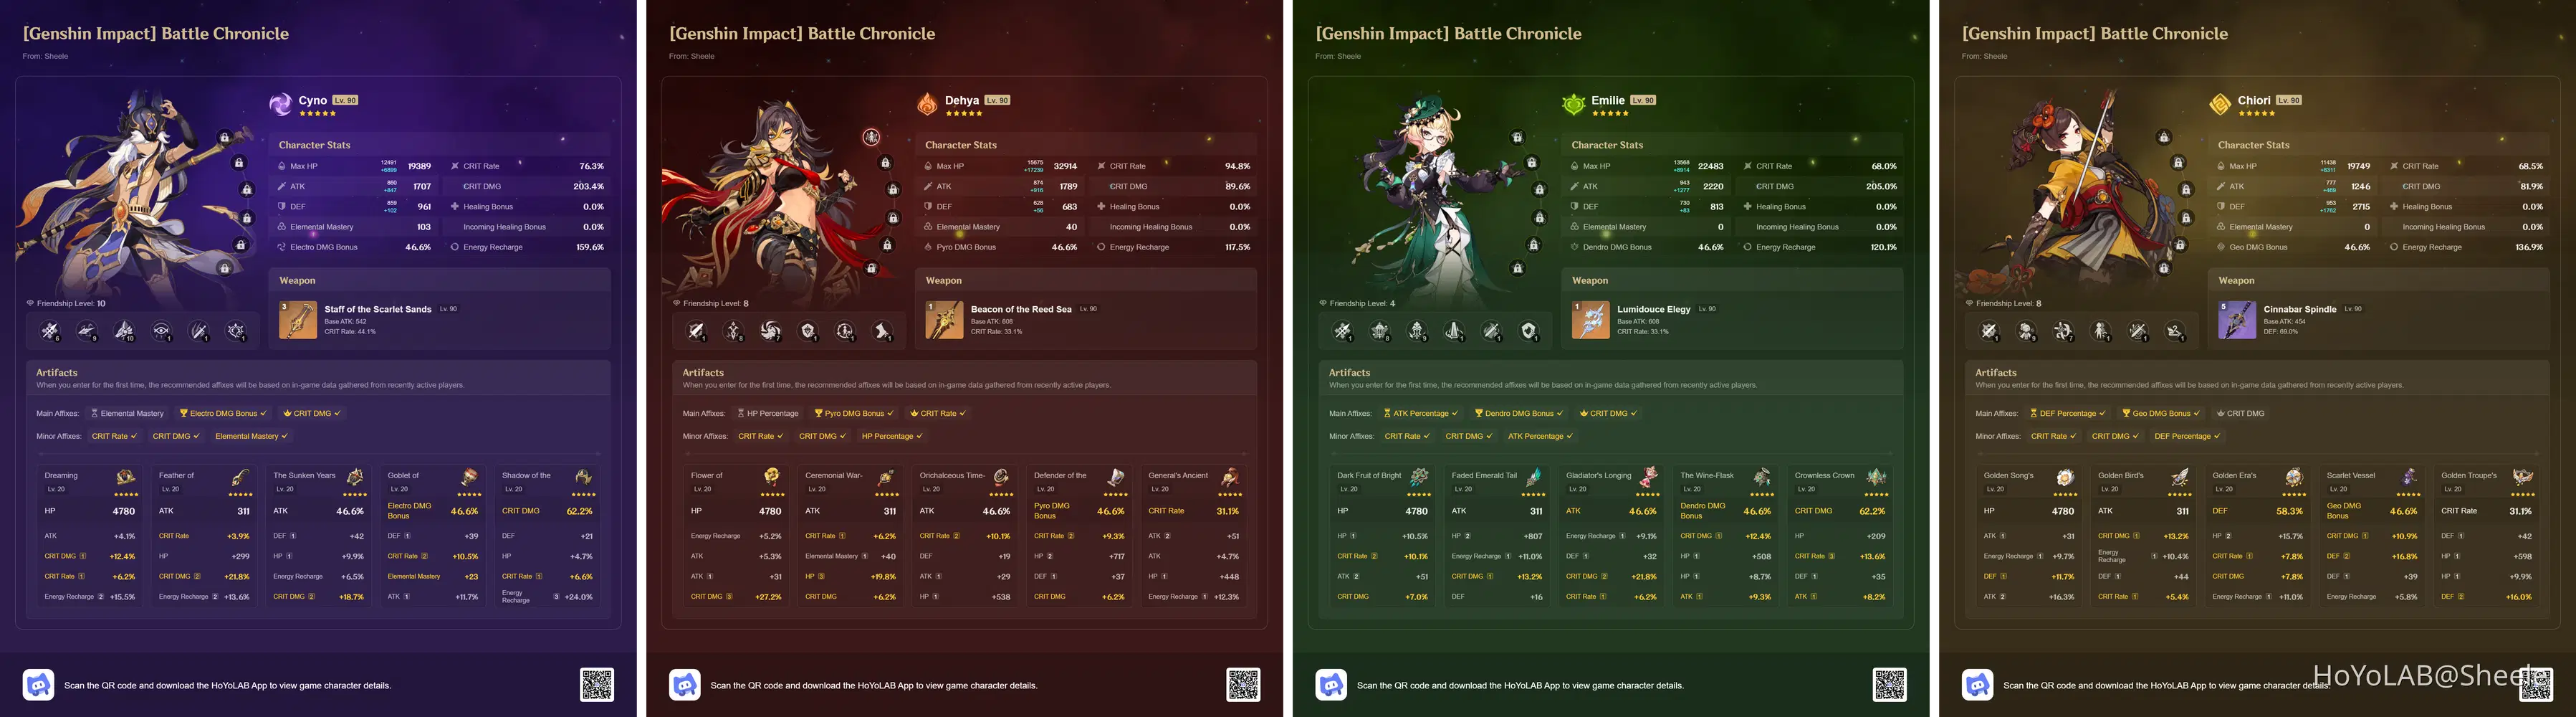
"Battle Info"
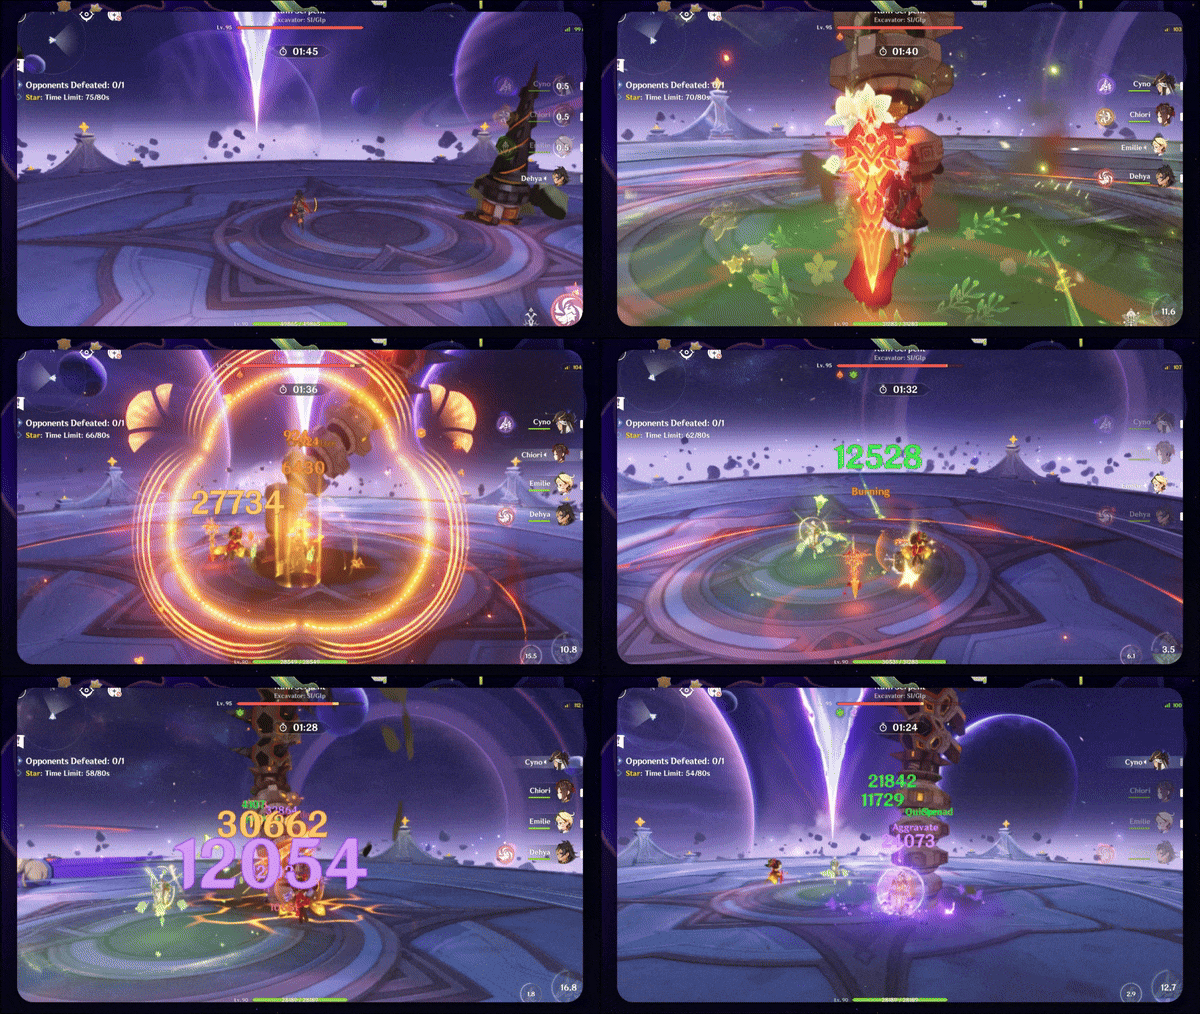
Defeating this Boss is quite time consuming because of the movement that digs into the ground, so make sure you attack effectively and efficiently so that the damage you give can be fully received by the Boss.
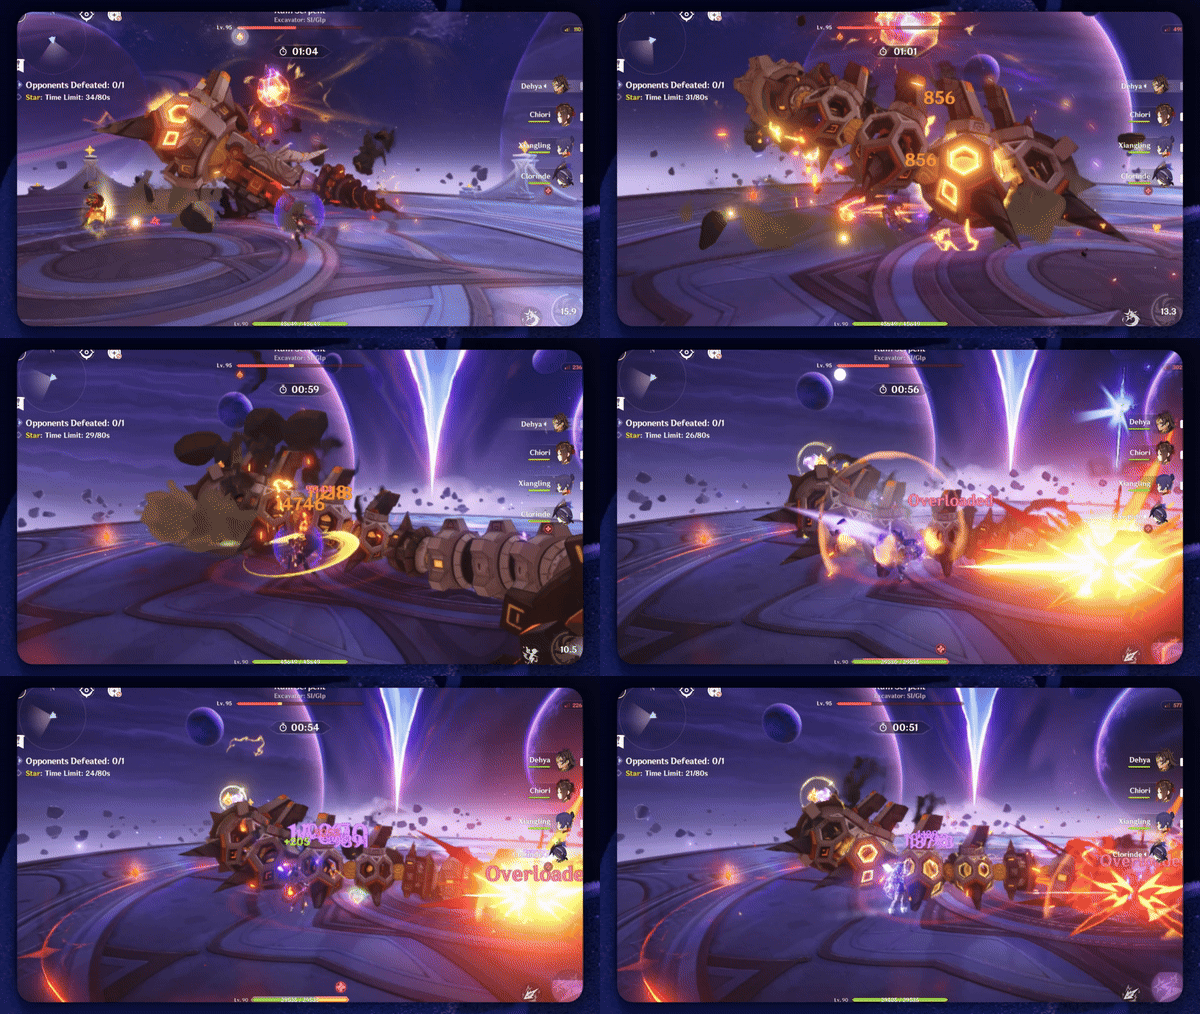
Then when the boss collects Energy by spinning around, attack its weak point to make the Boss enter weaken mode and that will make it easier for you to give damage. The boss's weak point is the shining part in the middle of the boss's body.
✧ ACT 9 ✧
"Description"
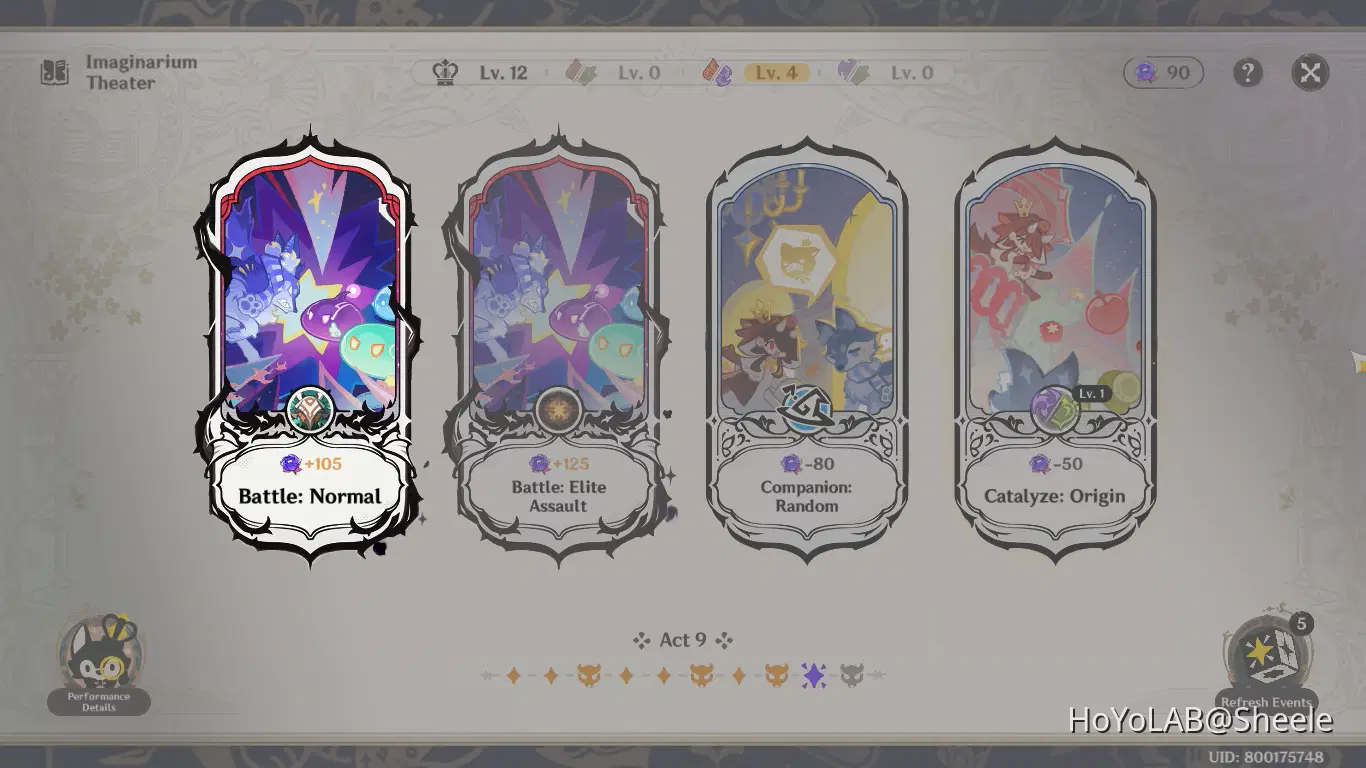
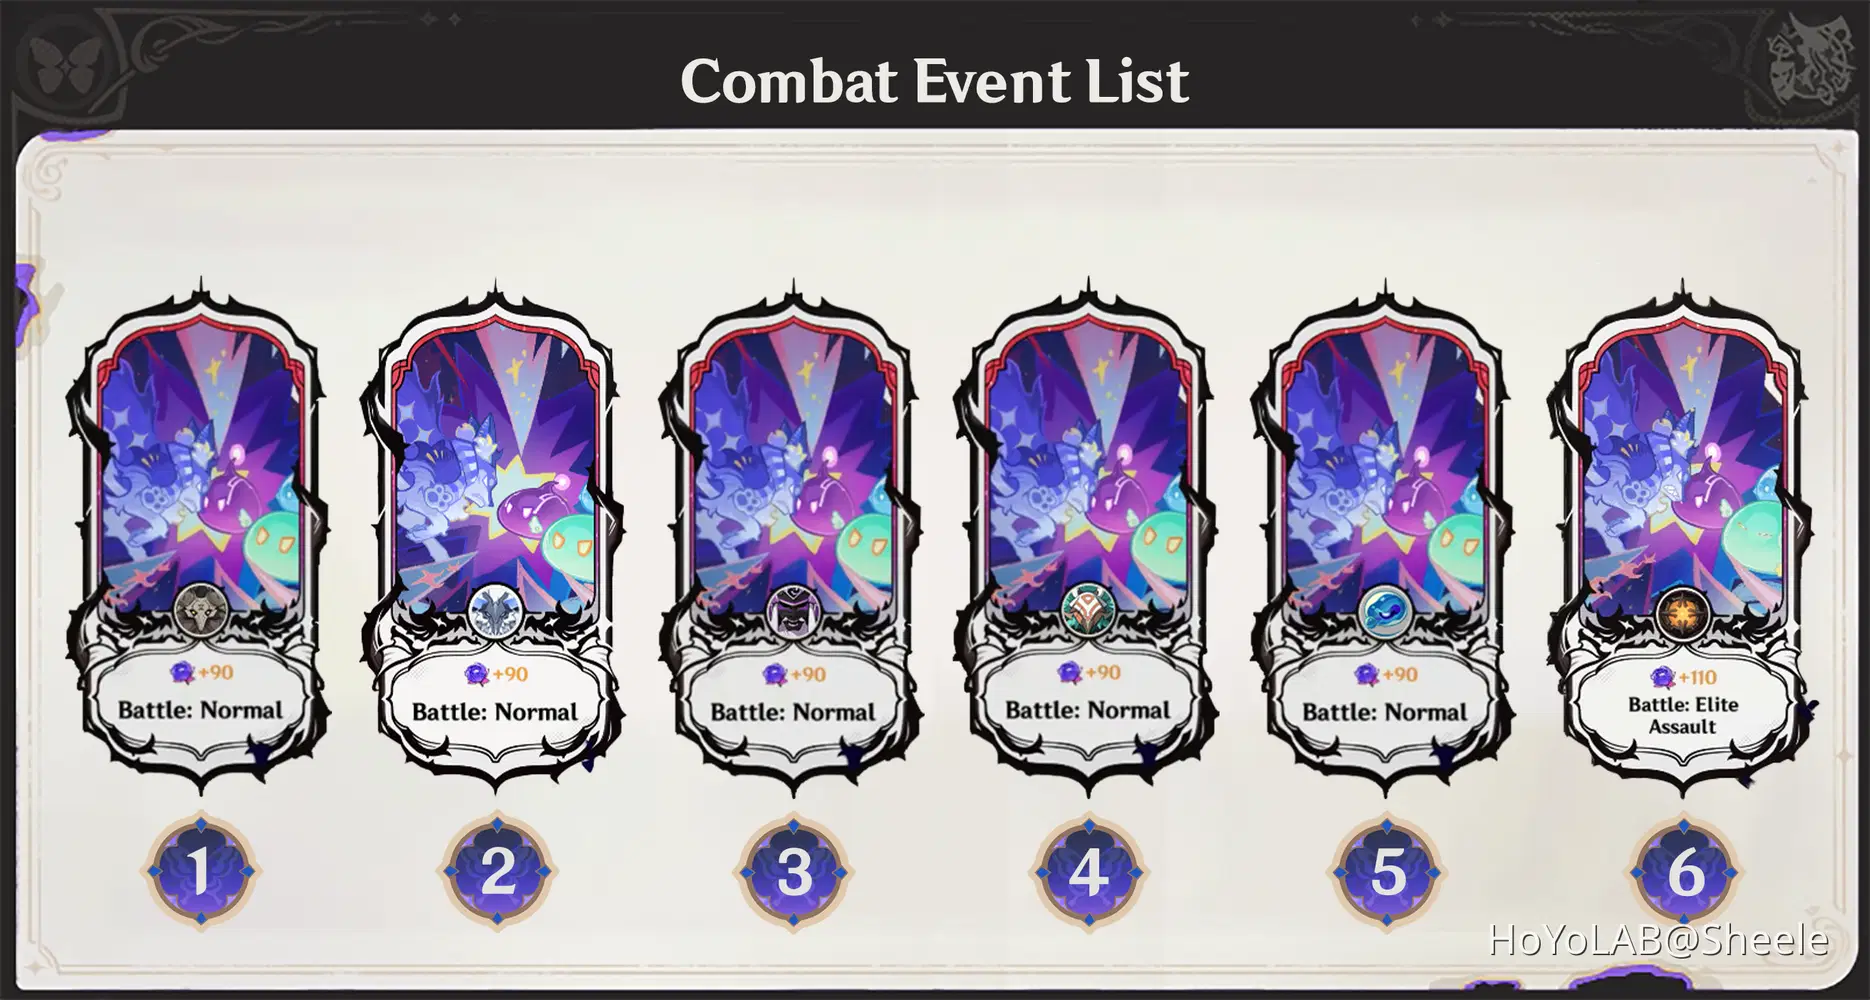
1. Icon: Stonehide Lawachurl [Battle: Normal] ⭐Recommended Choice⭐
Battle Tips: Stonehide Lawachurl and the Hilichurls will appear together, you only need to focus on defeating Stonehide Lawachurl using strong attacks from Overloaded reactions / Attacks from Claymore users or using Chiori to destroy Stonehide Lawachurl's shield.
Example team: Overloaded / Specific Character: Claymore users / Chiori
2. Icon: Frostarm Lawachurl [Battle: Normal] ⭐Recommended Choice⭐
Battle Tips: Frostarm Lawachurl and the Hilichurls will appear together, you only need to focus on defeating Stonehide Lawachurl use Pyro attacks to destroy the Cryo shield of the Frostarm Lawachurl.
Team Recommendations: Overloaded / Mono Pyro / Burning / Specific Character: Shielder
3. Icon: Kairagi: Dancing Thunder [Battle: Normal]
Battle Tips: First, Kairagi: Dancing Thunder & x2 Nobushi will appear and attack together, focus is to defeat Kairagi: Dancing Thunder first. When he was defeated Kairagi: Fiery Might will appear, then defeat him. Defeat a total of 3 Kairagi within 80 second to complete the challenge and get star.
Team Recommendations: Overloaded / Burgeon / Hyperbloom / Specific Character: Nahida & Shielder
4. Icon: Anemo Hilichurl Rogue [Battle: Normal]
Battle Tips: First x2 Hilichurls, x1 Samachurl and x1 Hydro Hilichurl Rogue will appear, just focus on defeating the Hydro Hilichurl Rogue and if possible, defeat the Samachurl that appears because this can give you problems in the fight. Every enemy that is defeated will give rise to another enemy, either a Hilicchurl or a Samachurl. When Hydro Hilichurl Rogue is defeated then Anemo Hilichurl Rogue will appear and focus on defeating him. Defeat at least 3 Anemo Hilichurl Rogue within 80 seconds to get a star and continue the challenge.
Team Recommendations: Burgeon / Hyperbloom / Aggravate / Specific Character: Nahida, Shielder & AoE attack
5. Icon: Tainted Water-Spouting Phantasm [Battle: Normal]
Battle Tips: x3 Hydro Mimic Boar & Tainted Water-Spouting Phantasm will appear first and attack together, focus on defeating Tainted Water-Spouting Phantasm first. Every mimic that is defeated will appear another mimic and when Tainted Water-Spouting Phantasm is defeated by Tainted Water-Splitting Phantasm will appear. Use AoE attacks to defeat them effectively.
Team Recommendations: Overloaded / Mono Pyro / Mono Electro / Specific Character: Nahida & Shielder
6. Icon: Ruin Guard [Battle: Elite Assault]
Battle Tips: First Wave x2 Ruin Destroyer, Ruin Scout & Ruin Drake: Skywatch prioritize your attacks on Ruin Drake: Skywatch as Bounty target. Second Wave x2 Ruin Cruiser, Ruin Defender & Ruin Drake: Earthguard prioritize your attacks on Ruin Drake: Earthguard as Bounty target. Third Wave x2 Ruin Cruiser, Ruin Scout & Ruin Grader prioritize your attacks on Ruin Grader as Bounty target. Fourth Wave x3 Ruin Cruiser & Ruin Guard prioritize your attacks on Ruin Guard as Bounty target. Make sure your character has a good enough build here, use AoE attacks and Shielder for more advantage. Defeat at least 2 Bounty targets within 65 seconds to get a star.
Team Recommendations: Overloaded / Hyperbloom / Burgeon / Specific Character: AoE attack Shielder
"Act 9 - Battle: Elite Assault Gameplay"
✧ ACT 10 ✧ (Boss)
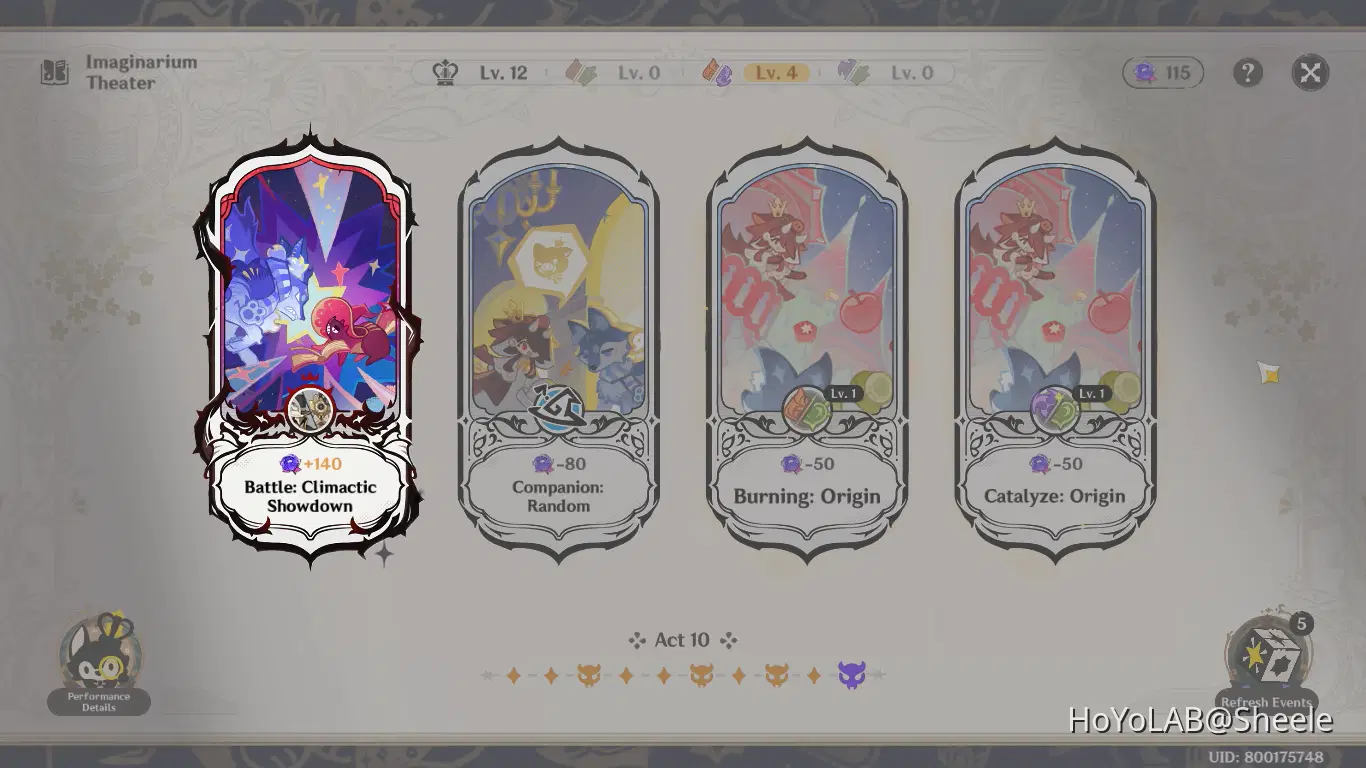
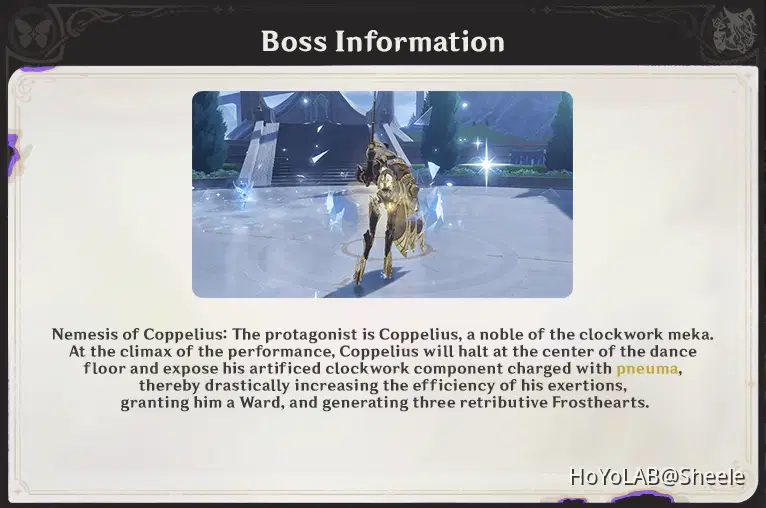
"Battle Strategy"
- The boss can activate the Cryo shield so it is recommended to use the Pyro team so you can destroy the shield quickly. Using a character with Shield ability is also a good consideration because it can minimize consecutive damage from Boss.
- Example of the team I use to Defeat the Boss:

With the team I use this can trigger Vaporize reactions and and destroy the boss's shield quickly.
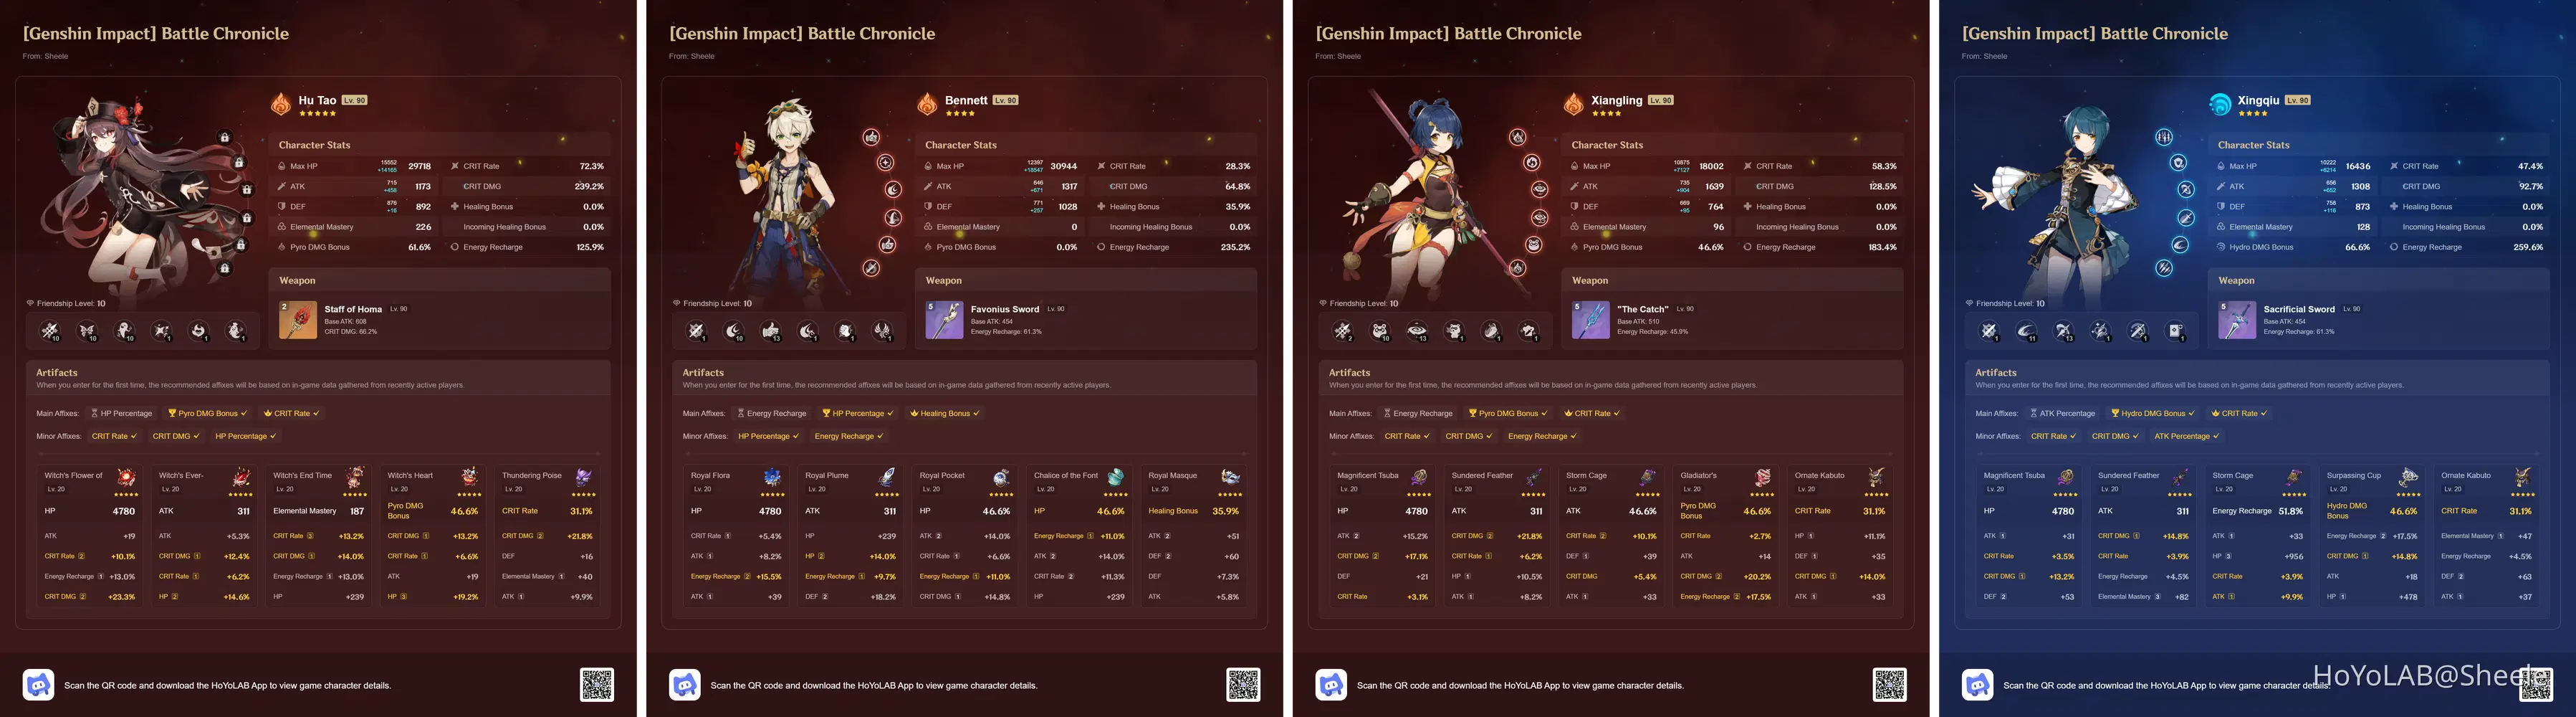
➥ Hu Tao, as the main DPS with Pyro element, delivers a Pyro attack to trigger a reaction.
➥ Bennett, as Support Buffer & Healer, provides additional Pyro damage to destroy Boss Shield.
➥ Xiangling, as Sub DPS, provides additional Pyro damage to Boss to destroy Boss Shield.
➥ Xingqiu (Special Guest Star) as Sub DPS and provides additional Hydro damage to Boss.
"Character Build"
"Battle Info"
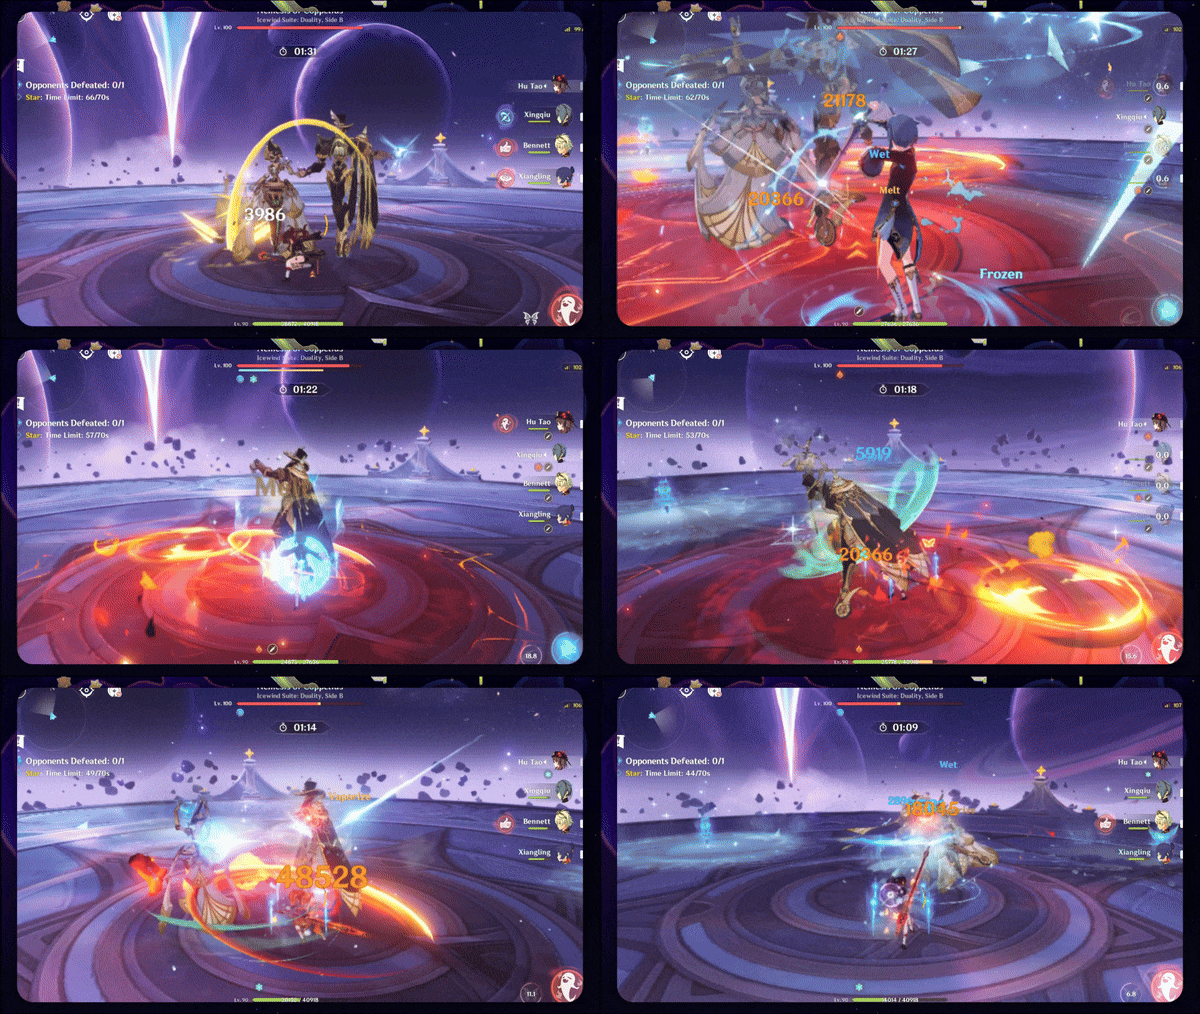
The Boss will do a spinning combo attack that can cause quite a lot of damage. Focus your attacks on the Boss in the middle while avoiding attacks from the Boss spinning around you. When the Cryo Shield appears, immediately destroy it with a Pyro attack, then do your best Combo to defeat the Boss.
Cast List
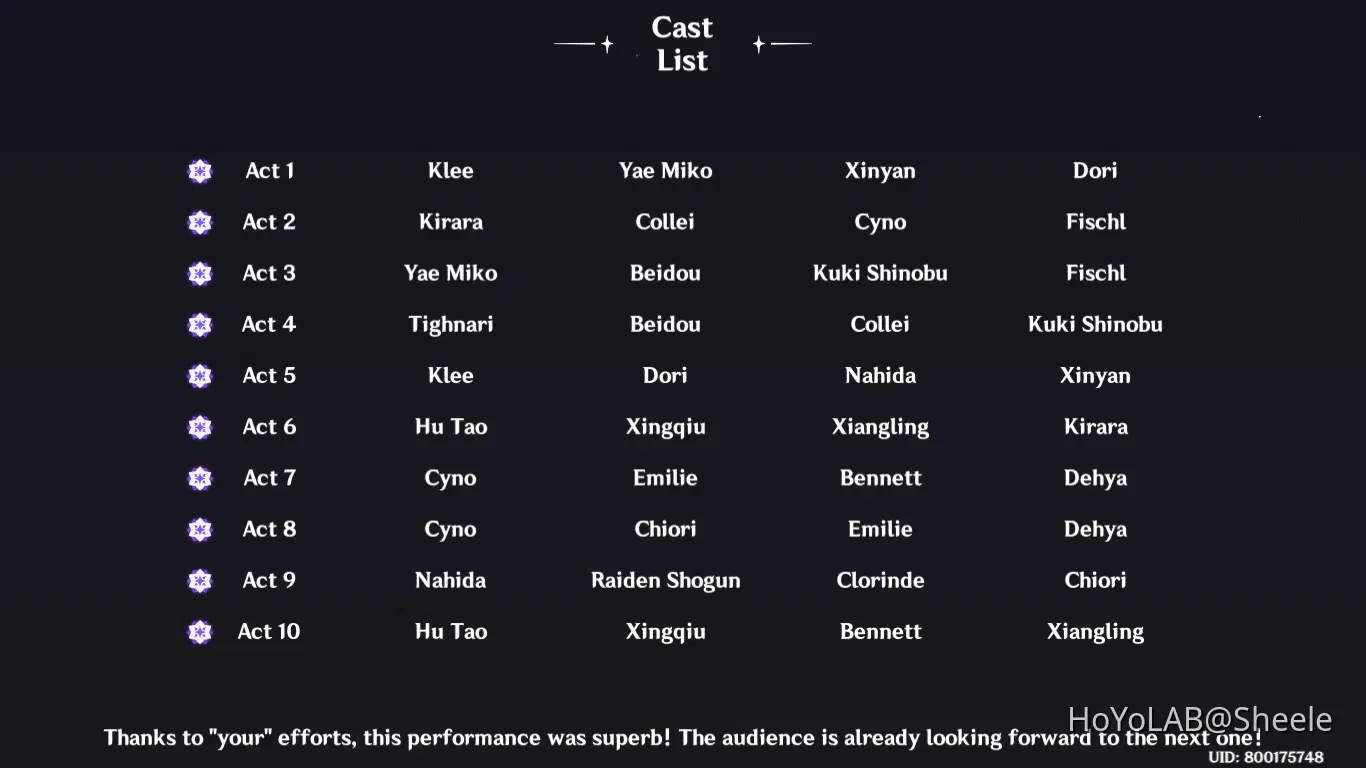
Full Gameplay
In this game play I use all the Trial characters
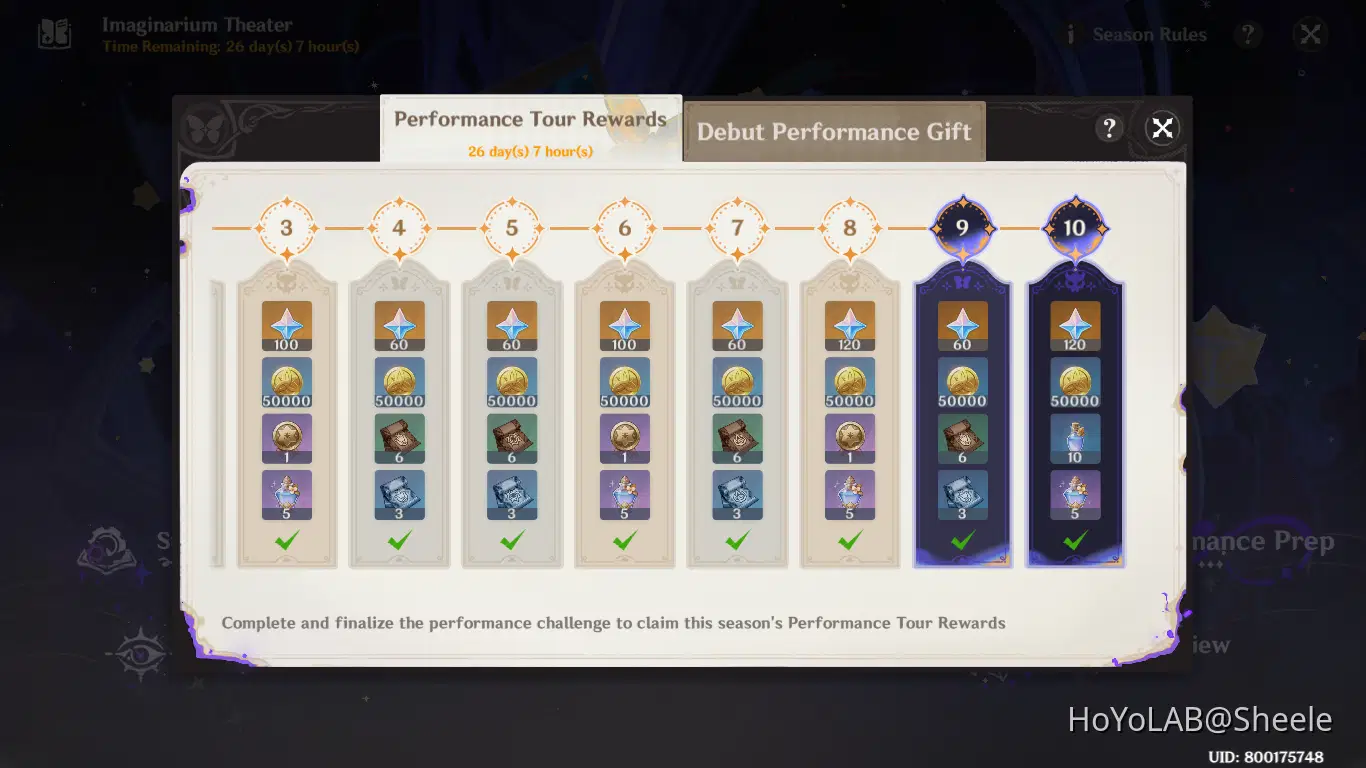
Rewards
Don't forget to Claim your rewards after completing a Challenge
New Thespian Tricks (Photo Pose) in this Season
Eula - Candace - Gorou - Kaedehara Kazuha
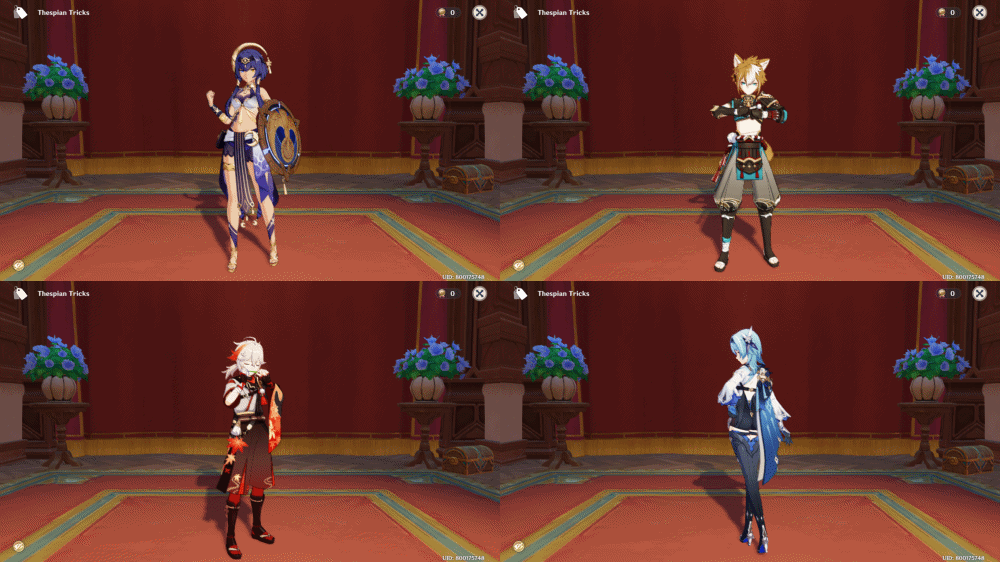
Talk to Wolfy and exchange Toy Medals for Thespian Tricks
Polling