


I recommend to read this guide in dark mode.
Hello and welcome to this Ba-Dum! Fiery Wishing Star - Kiana Kaslana Elysian Realm Guide! We should wish the flamechasers a happy new year too~
Click here to see a collection of all my guides!

Note: This guide is based on the BETA. Officially released content might differ slightly.

✦ Table of contents ✦
Kiana's skills explained
Special Adjustments
Fortune Drum Build
Stellar Snake Build
Build Comparison
Summary
Closing statement
✦ Kiana's skills explained ✦
To make it easier I will explain skills relevant for her Elysian Realm gameplay. If you want a full Guide on Kiana, here you go:

- Special Bar: Fortune -
Kiana has a bar above her HP bar showing her current Fortune.
It starts at 0 and caps at 240.
Fortune is gained by hitting Basic ATKs, Weapon Skills or Combo ATKs.
It is used to launch her Enhanced Weapon Skill.
Visuals:

0 Fortune

120 Fortune
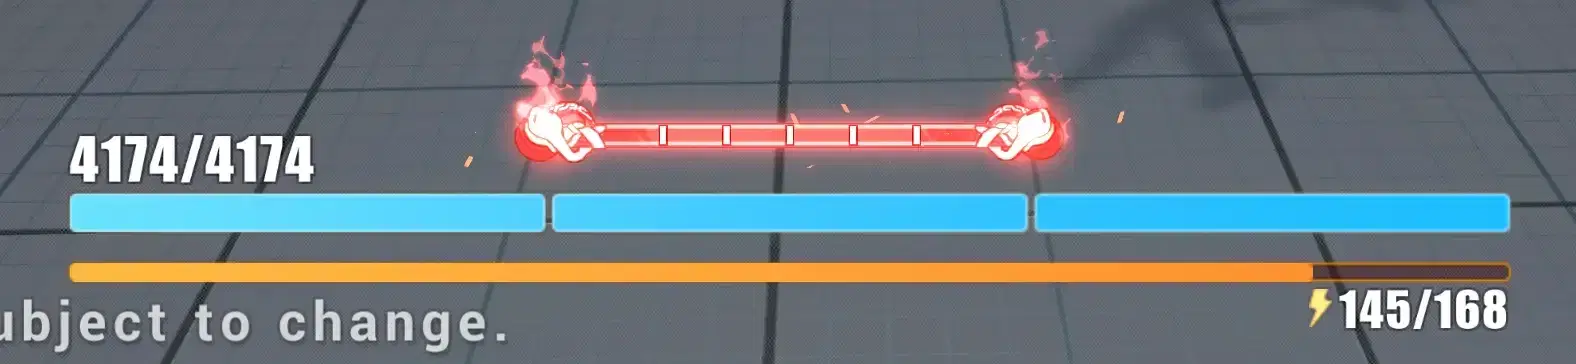
240 Fortune
- Passion Mark -
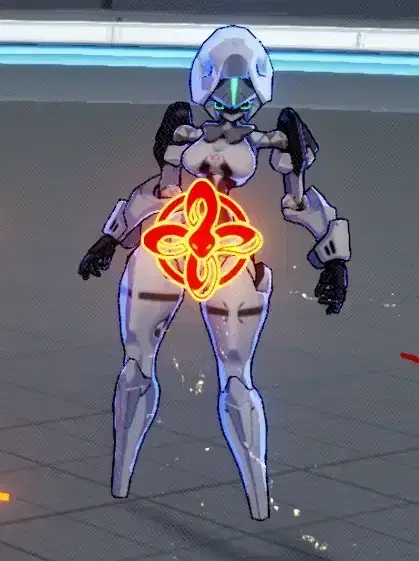
Hitting enemies with Basic ATK SEQ 4 or Stellar Outburst inflicts a Passion Mark.
Hitting an enemy with a Passion Mark with her Enhanced Weapon Skill causes the Passion Mark to explode to deal additional Fire DMG.
- Enhanced Weapon Skill -
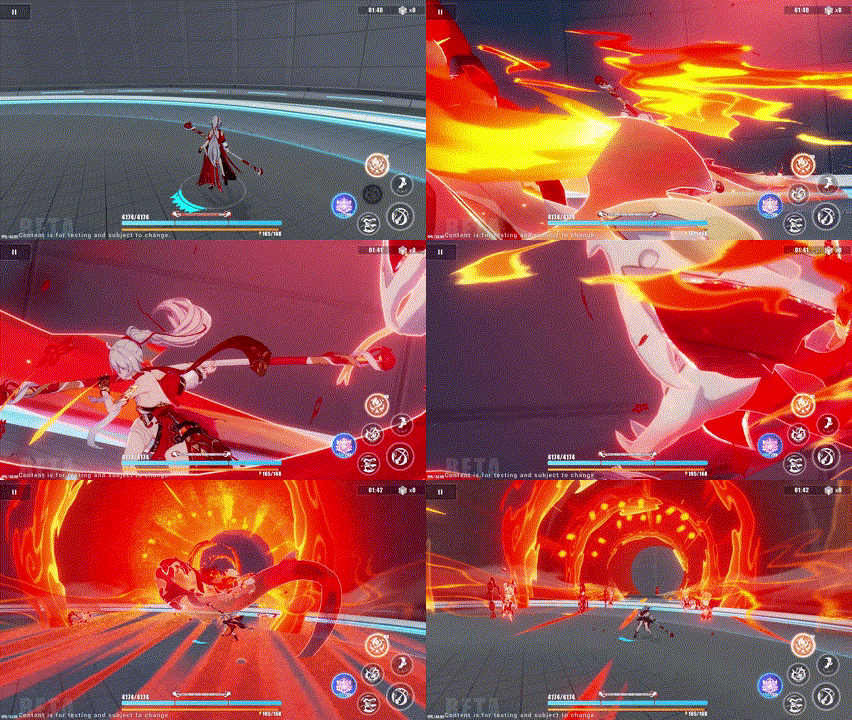
At max Fortune hold [WA] to use Kiana's Special Weapon Skill.
When hitting enemy with a Passion Mark it deals additional DMG.
- Stellar Outburst -
Tap the AstralOP Ultimate to enter Stellar Outburst for 1s.
Astral Ring Intensity: 200 | CD: 1s + 40s
After entering Stellar Outburst you can use Kiana's Stellar Shift (Special QTE).
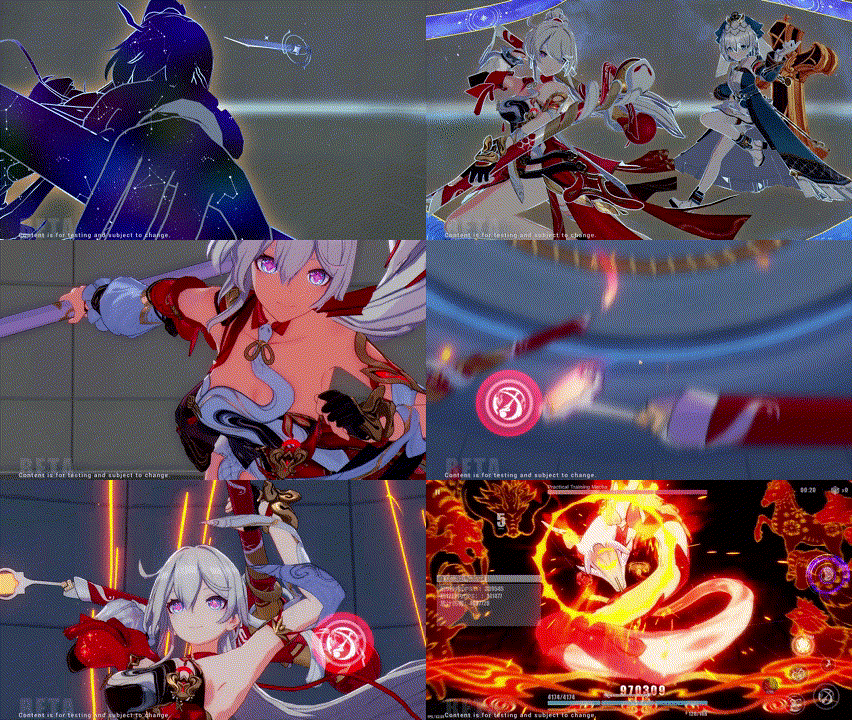
After using her Stellar Shift Kiana enters Merriment state for 8s which is considered a Stellar Outburst. During that time Kiana gains double the Fortune.
Using an Enhanced Weapon skill cancels this state.
✦ Special Adjustments ✦
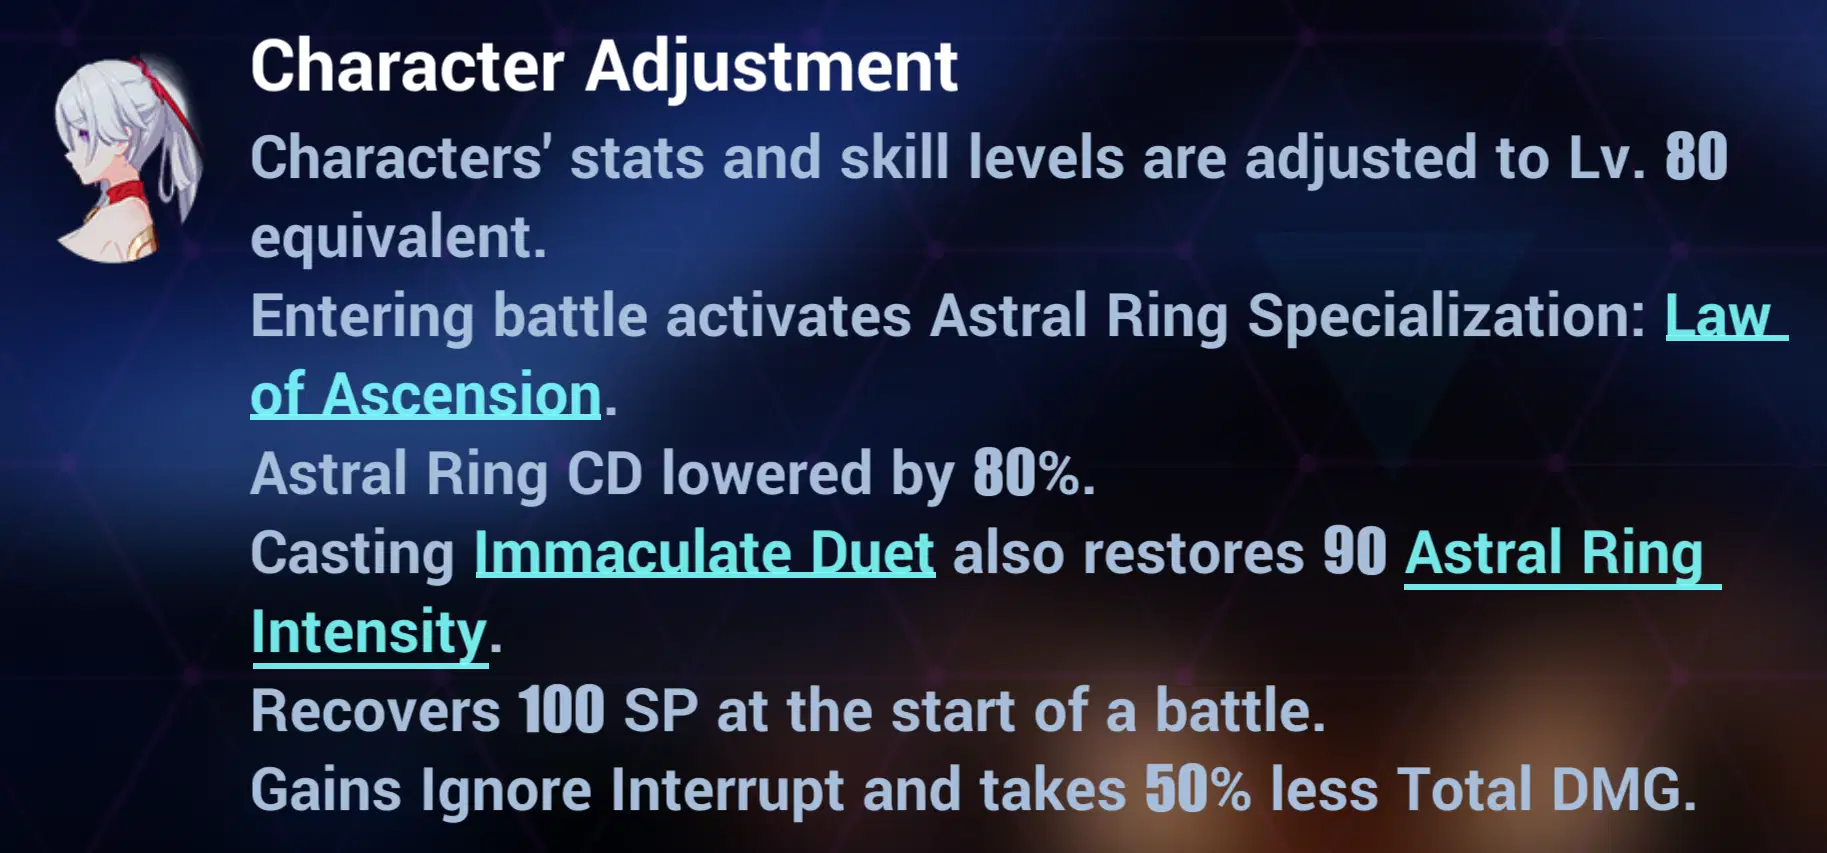
Summary: Kiana gets Instant Ultimate upon entering and more Stellar Outbursts.
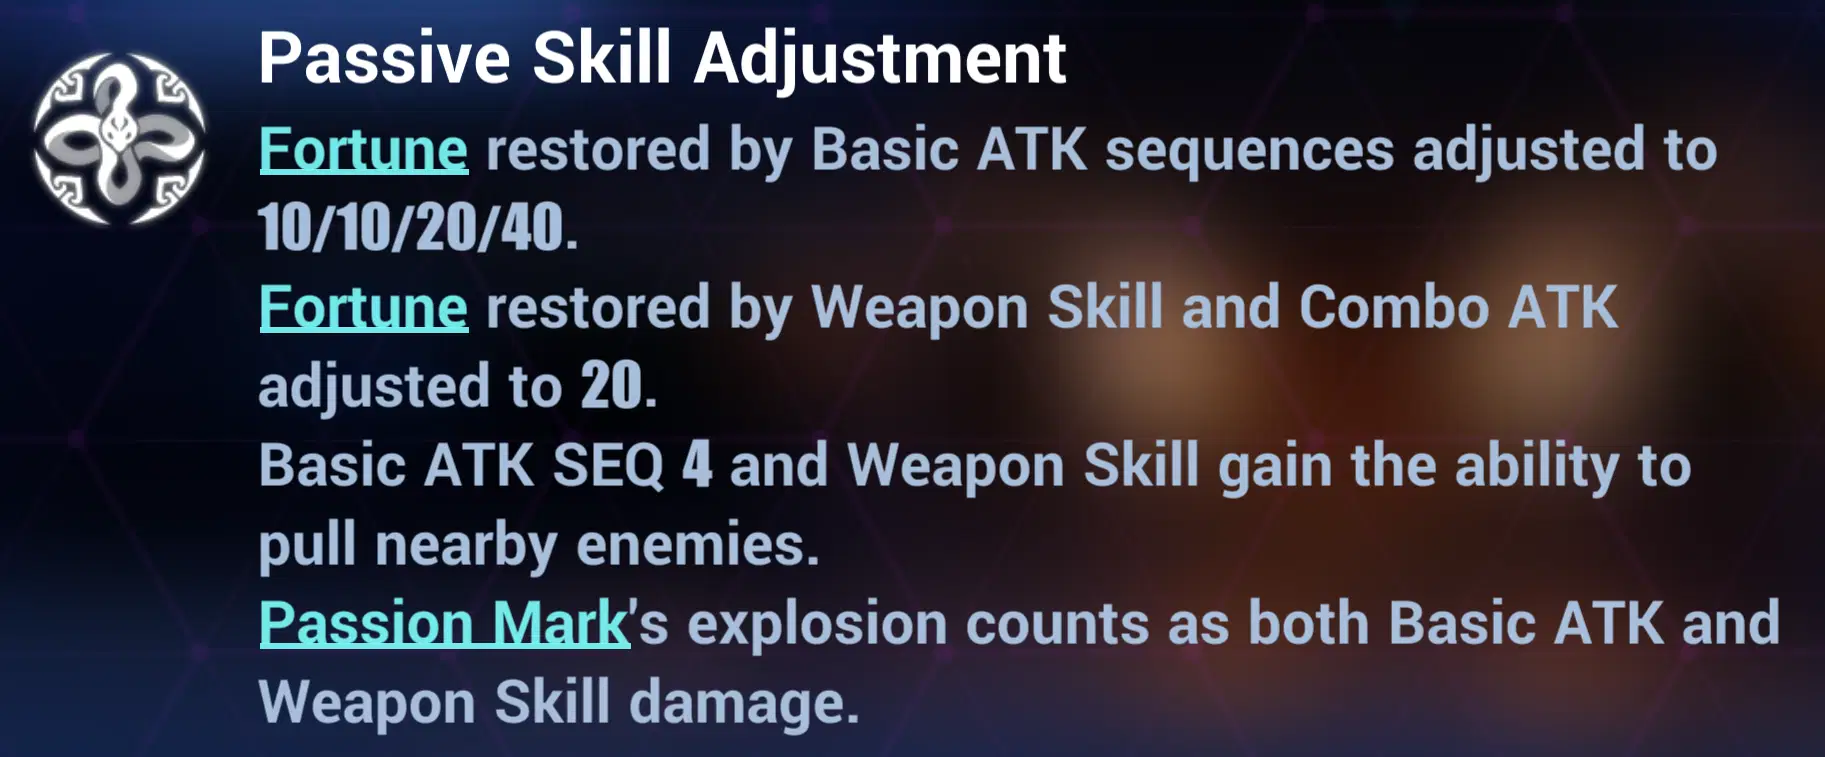
Really just adjustments to make sure she works as intended.

✦ Fortune Drum Build ✦

✧ Rotation ✧
Ultimate ➔ Jump until all drums were used ➔ REPEAT
Relevant notes:
✧ Use her Weapon Skill once before her first Ultimate to make sure it gets buffed by Weapon specific buffs
✧ Signets ✧
🟄 Ego Signets
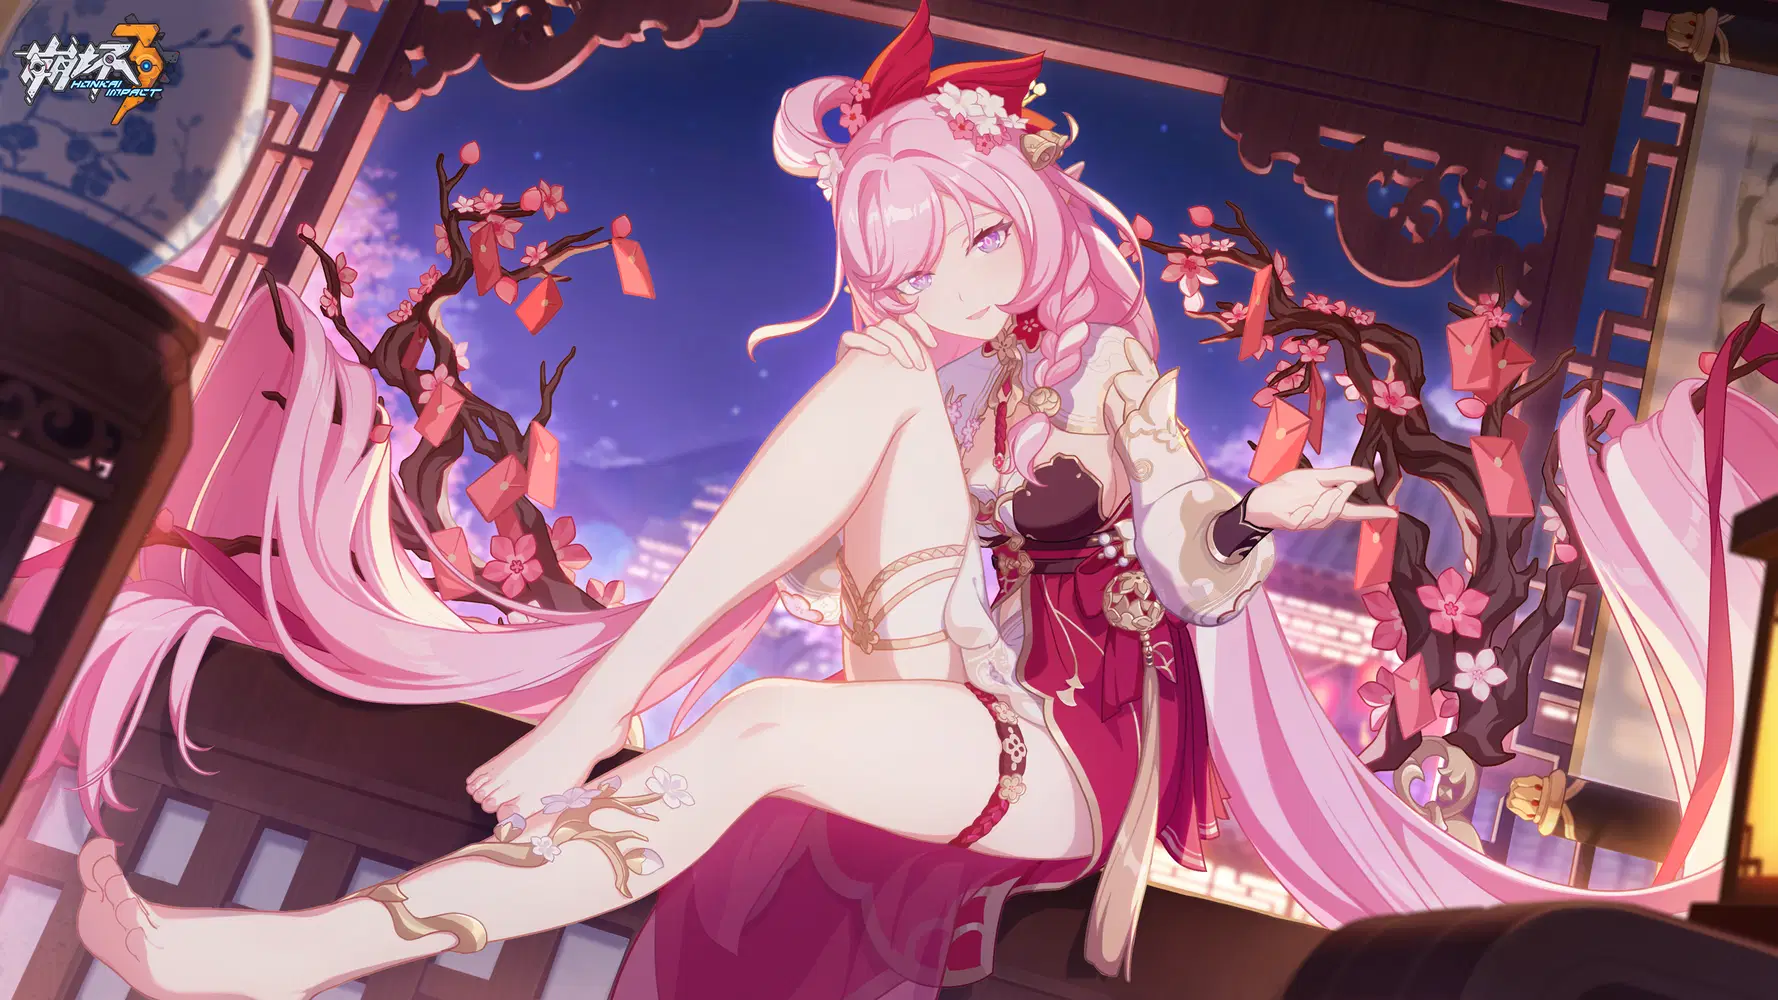
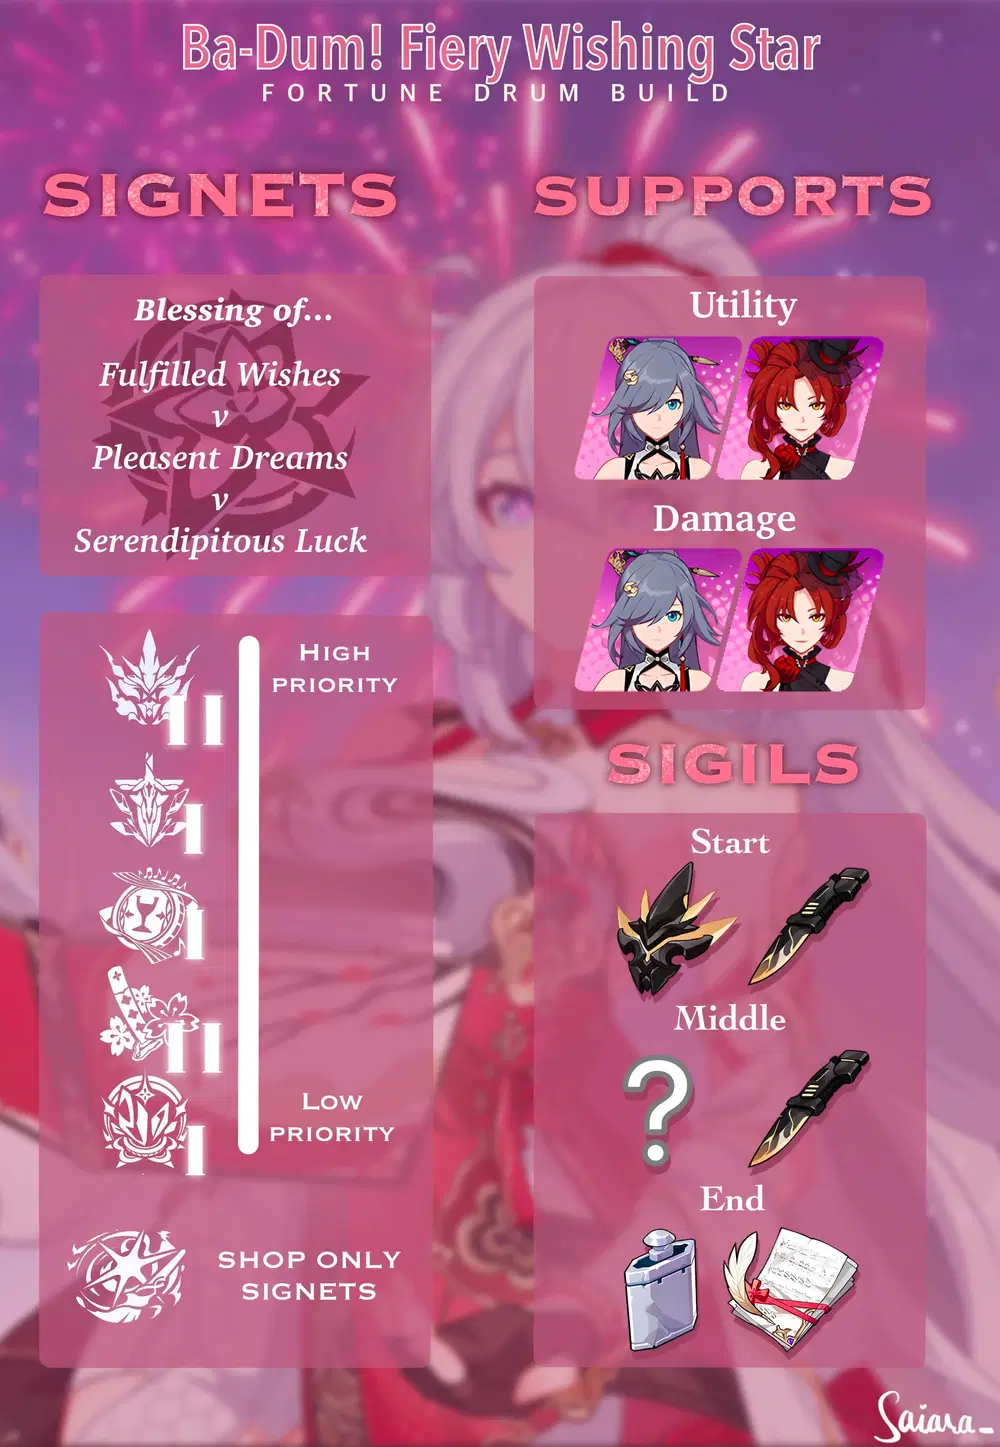
Start: Blessing of Fulfilled Wishes
Recommended: Blessing of Pleasant Dreams
Optional: Blessing of Serendipitous Luck
Summary of their effects on Kiana's kit:
✧ Ultimate spawns 9 Fortune Drums (Fulfilled Wishes)
✧ Jumping uses those Fortune Drums to deal big DMG (Fulfilled WIshes)
🟄 General Signets
How the Signets are listed
To help you understand the Signet priorities, here's a summary of how the Signets are listed:
Signet of [Signet name] - flamechaser
First priority Signet
Second priority Signet
Third priority Signet
(Fourth priority Signet)
Nexus Signet (core 1 / 2)
First priority Enhanced
Second priority Enhanced
Third priority Enhanced
(Note:...)
Signets mentioned earlier are generally a higher priority than Signets mentioned later.
Signets that aren't necessary for the Nexus Signet to function properly with (optional) and add a short explanation behind the Signets in case you don't know the names (Total DMG / SP regeneration / ... )
High priority Signets
Signet of Decimation - Kalpas
Blade, Grave, and Scar (Total DMG)
Bone, Blood, and Ribbon (Physical DMG)
Path, Misfortune, and Written Fate (Max HP)
Desireless, Mindless, and Homeless (Total DMG vulnerability)
Core 2 - Soldiers, Scissors, Spoils, and Slaughter
Notes: ✧ At high DMG take Core 1 instead and get the Enhanced Signets [Burden, Difficulty, and Calamity] and [Man, Mask, and Contract].
✧ If taking Core 1 drain HP with Blood Rose in Shop floors. Entering the Shop interface resets support's CD.
Signet of Deliverance - Kevin
Artifact of the Inhibitor (Elemental Breach)
Goblet of the Fiver (Total DMG)
Brant of the Undead (Elemental DMG)
Rochet of the Pilgrim (SP regeneration) (optional)
Core 1 - Blade of the Deliverer
Crusade of the Deliverer (Final Battle buff increased)
Low priority Signets

Signet of Gold - Eden
Recitatif of Creeks (Physical DMG)
Recitatif of Eden (Total DMG)
Recitatif of Fine Jade (Initial and max SP)
Core 1 - Aria of Gold

Signet of Setsuna - Sakura
Bountiful Blossom: Koyo (Total DMG vulnerability)
Bountiful Blossom: Botan (Total DMG)
Bountiful Blossom: Ayame (SP regeneration)
Core 2 - Setsuna Blade: Yasha
Notes: ✧ In the first half of 8.1 Setsunagets a +2 buff, can take her earlier during that
✧ Sakura can be replaced by Mobius 1

Signet of Reverie - Pardofelis
Motto of Meow (Total DMG)
Back-Curled Tail (Physical DMG)
Neighborhoot Chatters (max HP/SP)
Core 1 - Empty Dreams, Self, Set, and Joy
Notes: ✧ When getting a Signet providing additional coins in the first Shop you can grab it
✧ In the second half of 8.1 Reverie gets a +2 buff, can take her earlier during that
Shop only Signets

Signet of Stars - Griseo
Red & Hot
Yellow & Warm
Black & Dark (Elemental DMG)
Note: Upgrade Red & Hot to +3 if possible
✧ Supports ✧
Full run: Azure Emperya / Blood Rose

✧ Remembrance Sigils ✧
Start: Mad King's Mask / An Old Pal's Legacy
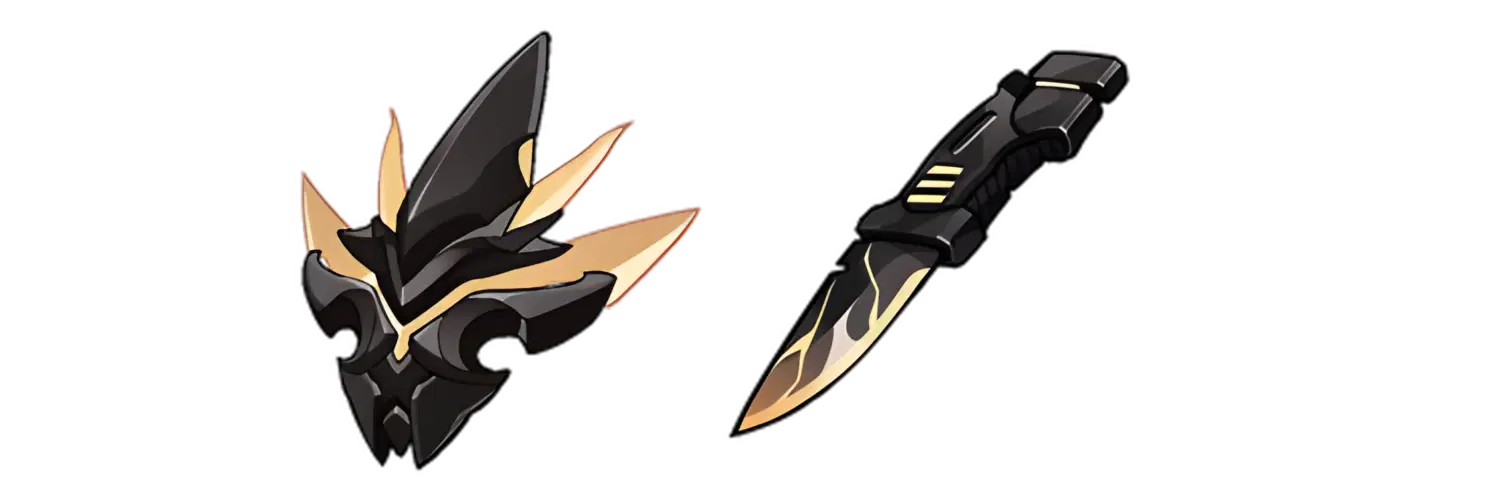
Middle: ??? / An Old Pal's Legacy
*the General Sigil should be the Sigil increasing the spawn rate of the Signets you're currently looking for

End: Tin Flask / Dreamful Gold

✧ Video example ✧
✦ Stellar Snake Build ✦
✧ Rotation ✧
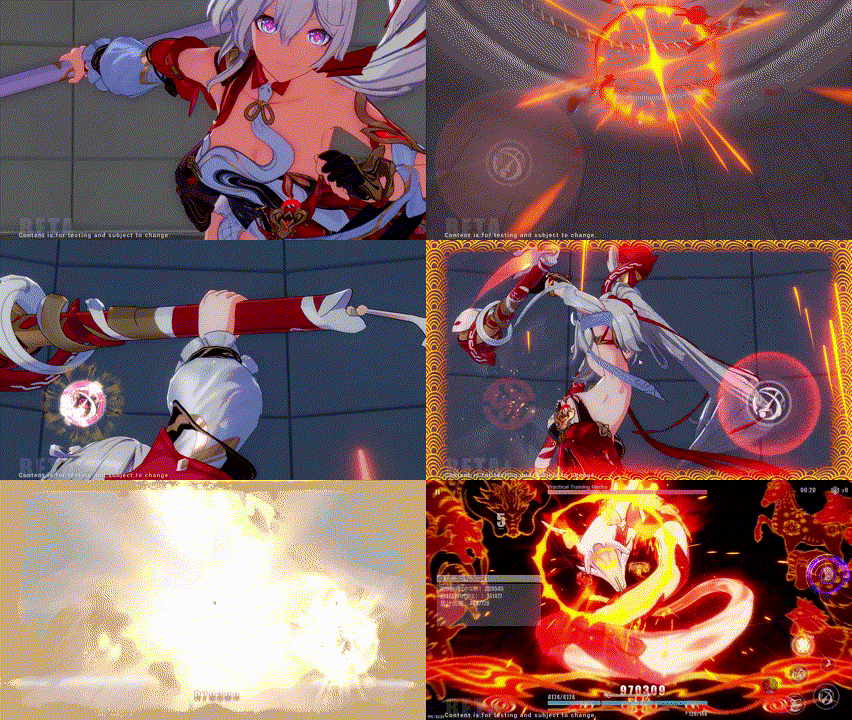
Stellar Outburst ➔ Stellar Shift ➔ Basic ATKs until her Bar is full ➔ Special Weapon Skill ➔ Basic ATKs until her Bar is full ➔ Special Weapon Skill ➔ REPEAT
✧ Signets ✧
🟄 Ego Signets

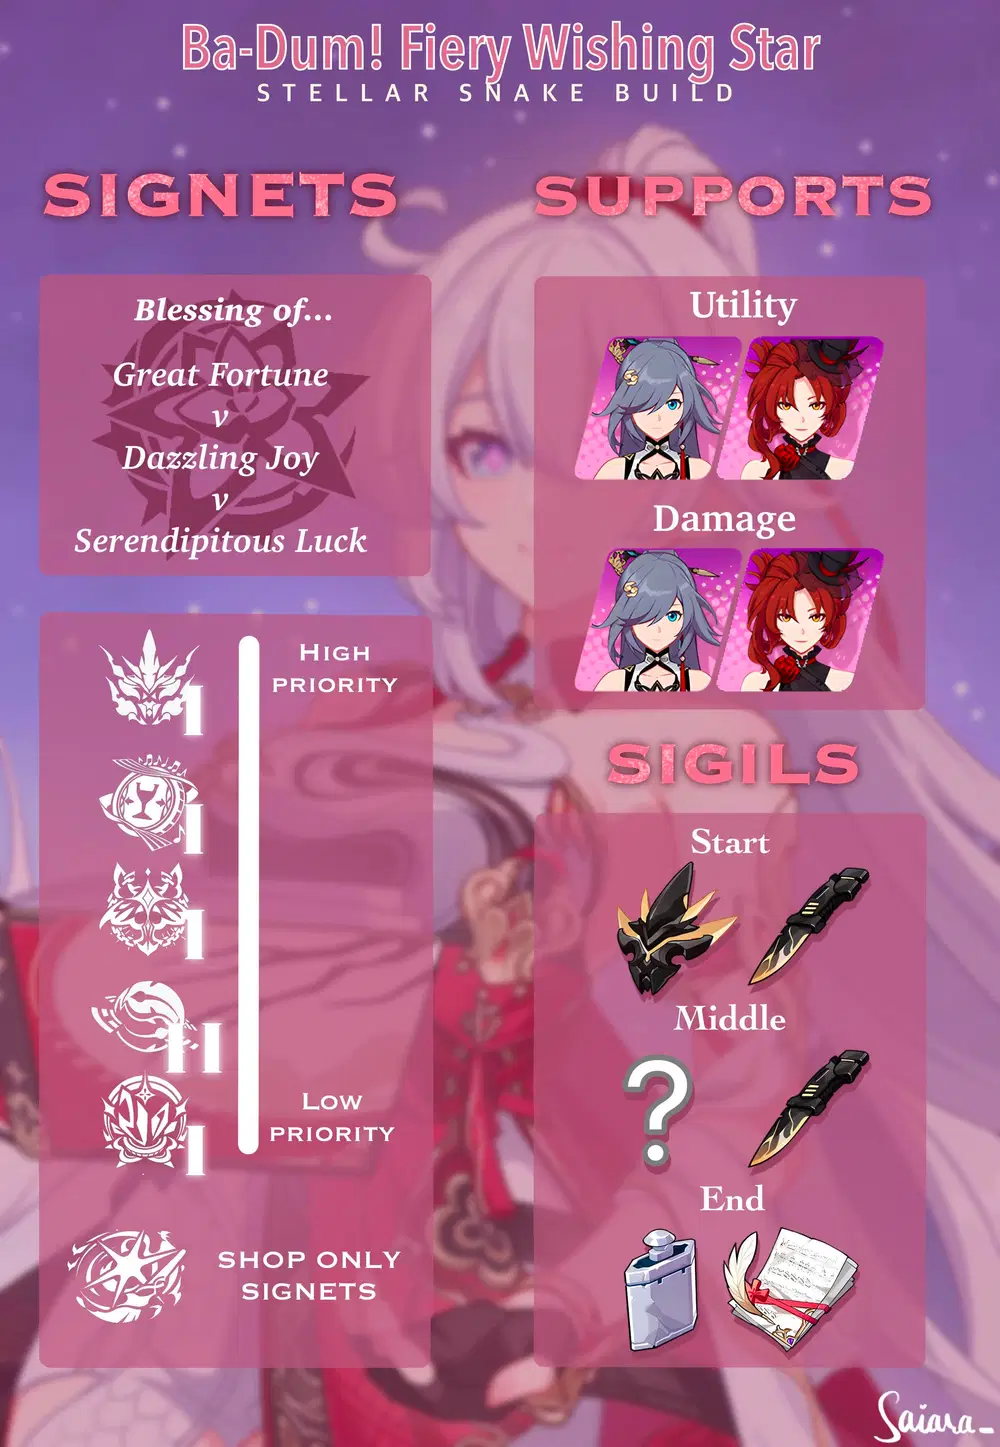
Start: Blessing of Great Fortune
Recommended: Blessing of Dazzling Joy
Optional: Blessing of Serendipitous Luck
Summary of their effects on Kiana's kit:
✧ After Stellar Shift her Basic ATK starts from SEQ 3 (Great Fortune)
✧ Basic ATK and Weapon Skills provide more Combo hit count (Dazzling Joy)
🟄 General Signets
High priority Signets
Signet of Decimation - Kalpas
Blade, Grave, and Scar (Total DMG)
Bone, Blood, and Ribbon (Physical DMG)
Path, Misfortune, and Written Fate (Max HP)
Desireless, Mindless, and Homeless (Total DMG vulnerability)
Core 1 - Fight, Struggle, and Decimation
Burden, Difficulty, and Calamity (Blood Boil costs HP)
Man, Mask, and Contract (Total DMG)
Notes: ✧ If you struggle surviving with Kalpas 1 you can get Fu Hua 2. If that doesn't help either you can skip the core, but that will result in a significant DMG loss.
✧ Drain HP with Blood Rose in Shop floors. Entering the Shop interface resets support's CD.
Signet of Gold - Eden
Recitatif of Creeks (Physical DMG)
Recitatif of Eden (Total DMG)
Recitatif of Fine Jade (Initial and max SP)
Core 1 - Aria of Gold
Low priority Signets

Signet of Discipline - Aponia
First, No Betrayal (Basic ATK)
Third, No Brutality (SP regeneration)
Sixth, No Decadence (QTE prevents decreasing)
Core 1 - You Shall Be Subject to Discipline

Signet of Vicissitude - Fu Hua
Old Dreams Again (Elemental Breach)
Long Trip (Total DMG)
Dark Garb No More (Elemental DMG)
Core 2 - Suffering Mass
Broken Dreams (+20 stacks)
Notes: ✧ Once getting the first Fu Hua Signet, try to complete the core as fast as possible, her Signets barely function without the Nexus.
✧ Avoid going into Hua portals for Broken Dreams, all other possible Signets are bad, making it a pretty big risk

Signet of Reverie - Pardofelis
Motto of Meow (Total DMG)
Back-Curled Tail (Physical DMG)
Neighborhoot Chatters (max HP/SP)
Core 1 - Empty Dreams, Self, Set, and Joy
Notes: ✧ When getting a Signet providing additional coins in the first Shop you can grab it
✧ In the second half of 8.1 Reverie gets a +2 buff, can take her earlier during that
Shop only Signets

Signet of Stars - Griseo
Red & Hot
Note: Upgrade Red & Hot to +3 if possible
✧ Supports ✧
Full run: Azure Emperya / Blood Rose

✧ Remembrance Sigils ✧
Start: Mad King's Mask / An Old Pal's Legacy
Middle: ??? / An Old Pal's Legacy
*the General Sigil should be the Sigil increasing the spawn rate of the Signets you're currently looking for
End: Tin Flask / Dreamful Gold
✧ Video examples ✧
✦ Build Comparison ✦
Overall both are at a very similar level, so let's look at the benefits of both~
Why would I use the Fortune Drum Build?
✧ I mean why wouldn't you wanna jump on Drums?
✧ It's very simple to play
✧ It has better survival abilities due to the Ultimate heal and permanent jumping
Why would I use the Stellar Snake Build?
✧ it is less dependent on the second Ego than the Drum build
✧ At low gears it felt stronger
✦ Summary ✦
✧ Fortune Drum Build ✧

✧ Stellar Snake Build ✧
✦ Closing Statement ✦
She's a pretty strong Valkyrie in Elysian Realm and was fun to play for me:)
I hope you'll have fun too~ 
Anyway I'd like to share this nice easter egg
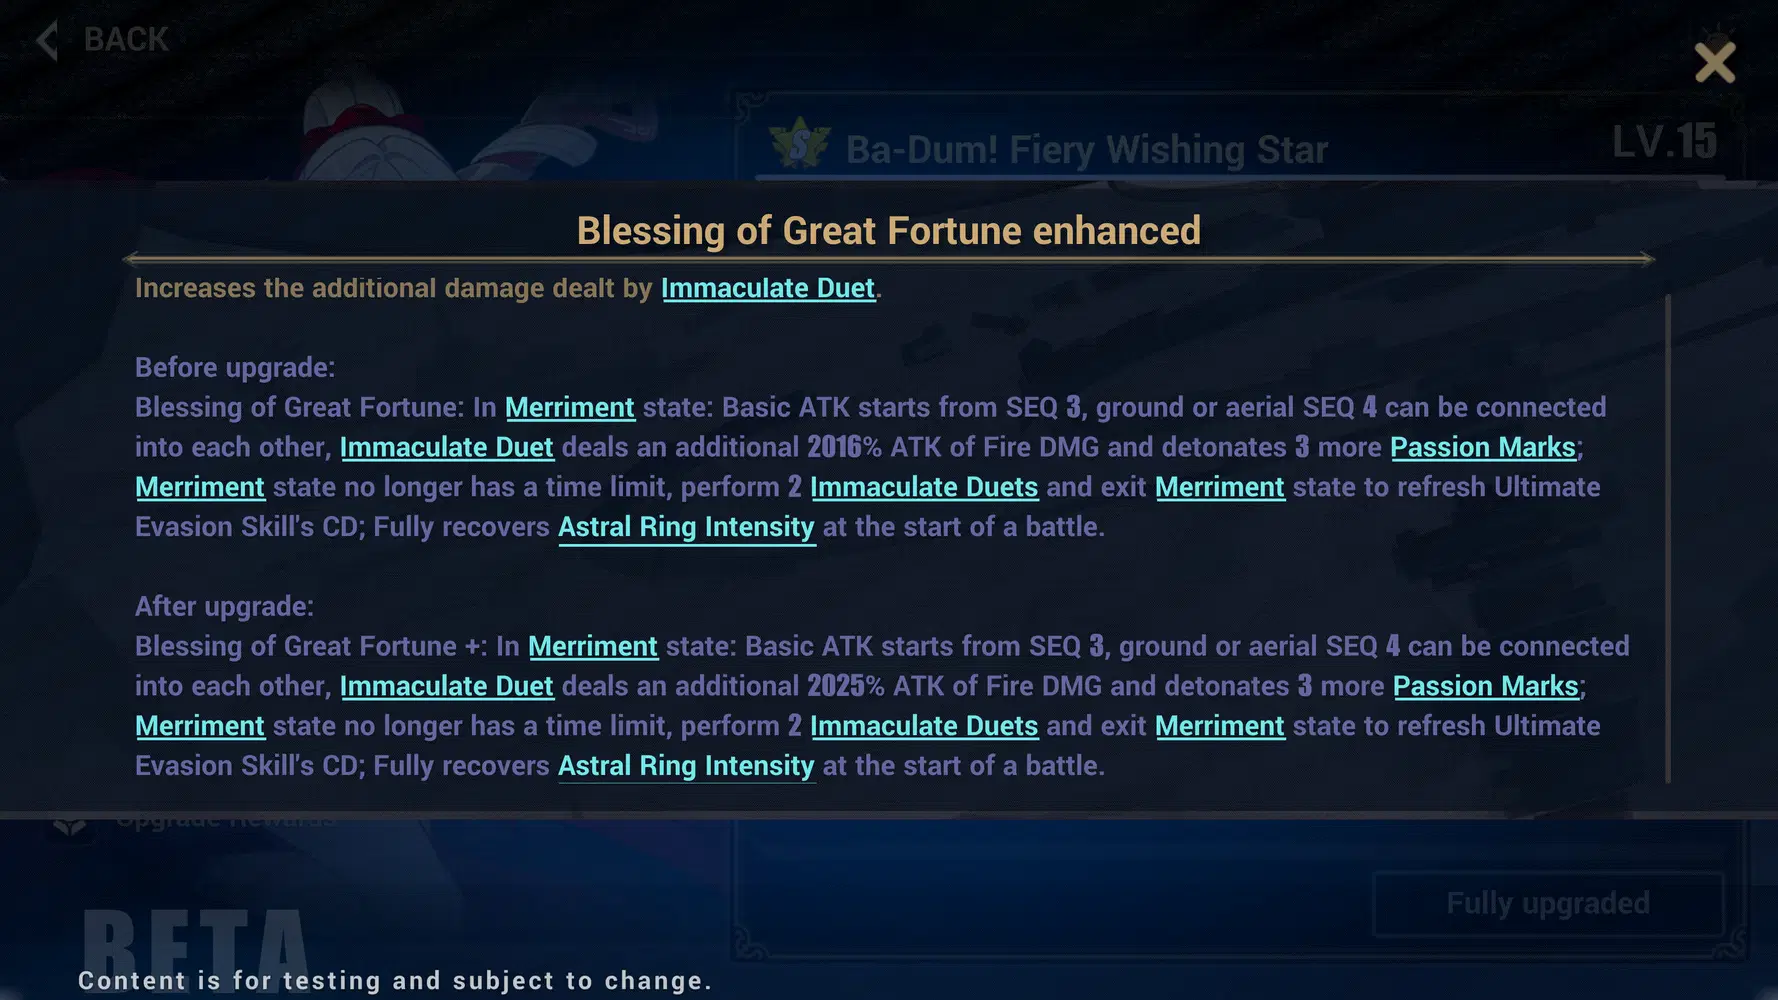
(2016% > 2025% cause HI3 released in 2016 and Kiana is the CNY valk of 2025)
Credits
- Thanks to Cyxo and Alpaca for the pictures of Valkyrie icons and such!
- Thanks to my friend Rikutakuto for doing the cover design for me! Check her out:>
- Love to Inari

That's it, I hope I was able to help you!
Have a great day and fun with Kiana
EU/UID: 203184518




