


Heading: How to Upgrade Equipment in Your RPG part2
Before we begin: This section builds upon the Data-Driven Equipment Generation system established in Part 1. If you haven’t set up your base Dictionary and Struct logic yet, please[Click Here to refer to Part 1] to ensure your system is ready for these advanced features.
In Part 2, we will dive deeper into advanced equipment mechanics, focusing on:
- Unique Affix Effects: How to implement special combat mechanics and passive triggers that go beyond simple stat boosts.
- Equipment Leveling System: Developing a progression logic to handle experience points (EXP), level caps, and dynamic attribute scaling as items level up.
4.Special Entry Effects
Entries are an essential component of high-tier equipment. They allow you to add attributes that are otherwise difficult to obtain or carry high values. Furthermore, entries can provide unique effects such as attack procs, passive skills, or functional conversions. Due to space constraints, we will focus on practical, high-impact effects rather than overly complex implementations.
Even relatively simple entries, when combined effectively, can produce outstanding gameplay results.
4.1 Underlying Implementation Principles:
- Graph Mapping via Entries: Entries allow us to assign specific Node Graphs to a Character Entity. Once an entry is active, its associated node graph runs on the character, enabling the system to listen for events such as Attacks, Elemental Reactions, Taking Damage, or Healing. This provides the creative space needed to implement custom logic. Our two example entries are built entirely on this principle.
- Statuses: Entries allow for the application of Statuses upon activation. While Status Node Graphs can achieve similar results, they present a challenge: statuses are typically cleared when a character falls (is defeated), requiring additional lifecycle management. This increases complexity compared to standard node graphs. In this guide, we will use Statuses exclusively to handle time-limited attribute changes.
Next, we will demonstrate how to create two specific types of Special Entry Effects and integrate them into your equipment:
- Thorns Effect (Simple Event Handling)
- Stacking Attack Damage (Simple Status Handling)
4.2 Effect Implementation
4.2.1 Thorns Effect:
Create an Entity Node Graph and use "when attacked" as the triggering event.
Note: It is recommended to add a branch to check if the Attacker is Not Equal to Self, as certain Elemental Reactions can cause self-damage. To simplify this process, we will directly use the HP Loss as the damage source. In a practical production environment, however, you should create an entity as an Ability Unit and trigger damage by sending signals to it. This approach is more flexible and allows for diverse Elemental Types.
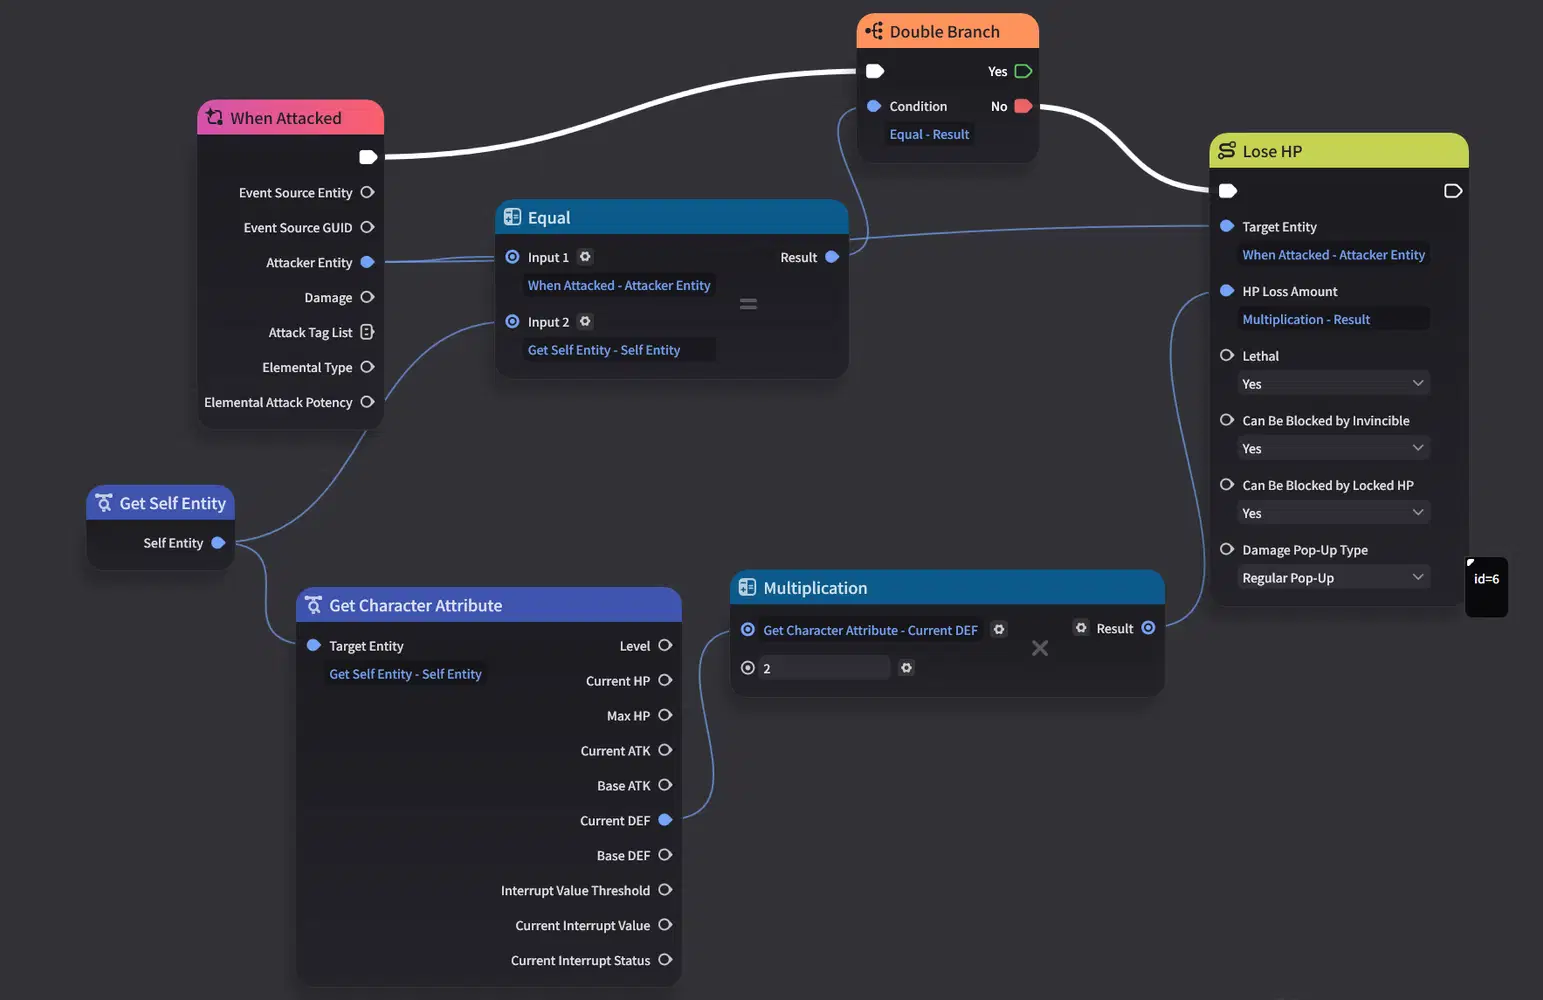
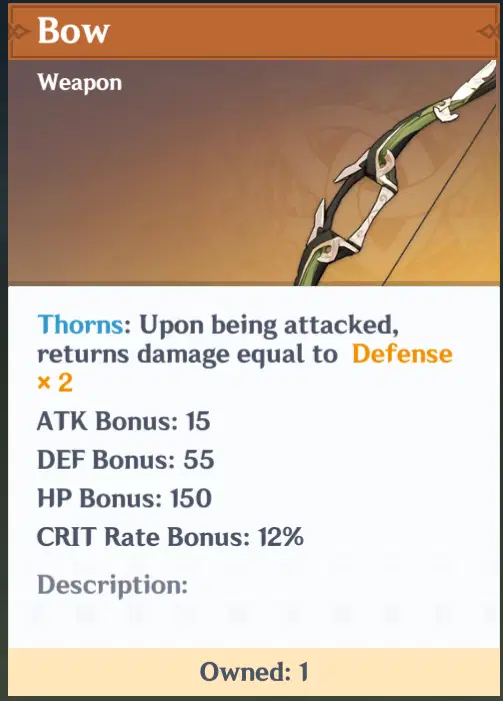
Add an Entry, assign the Node Graph, and update the description. With these steps, the process is complete. You can now add it directly to your equipment, and it will function correctly.
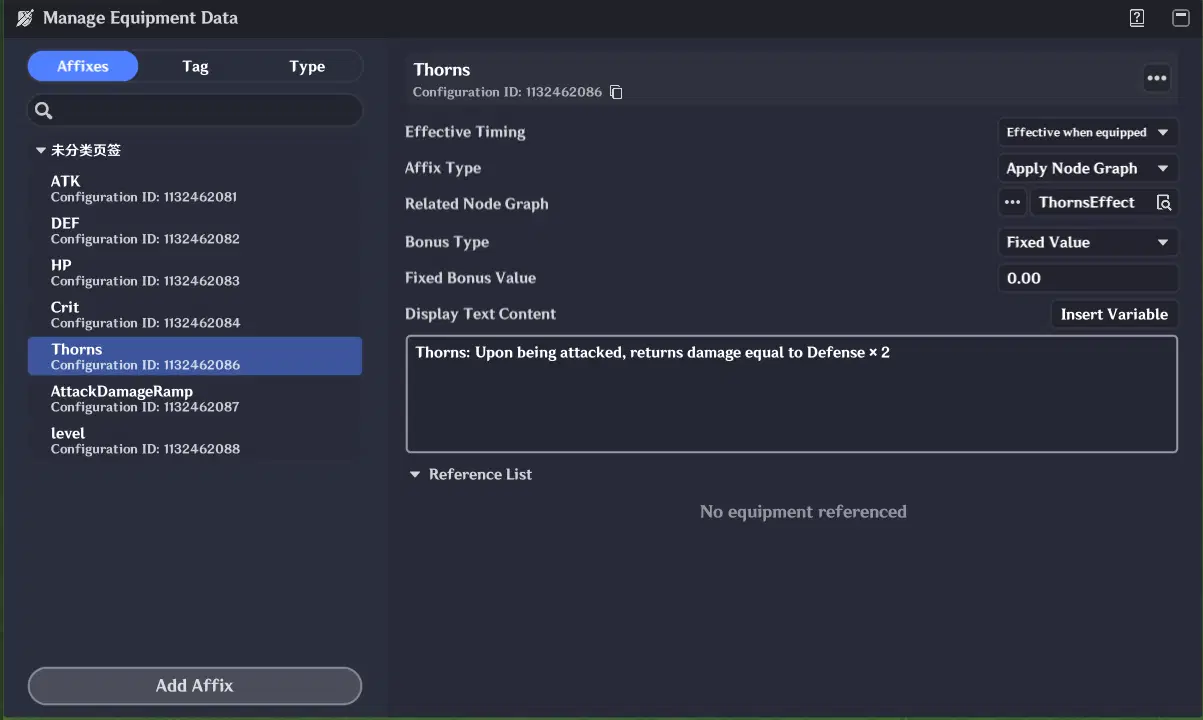
4.2.2 Stacking Attack Damage:
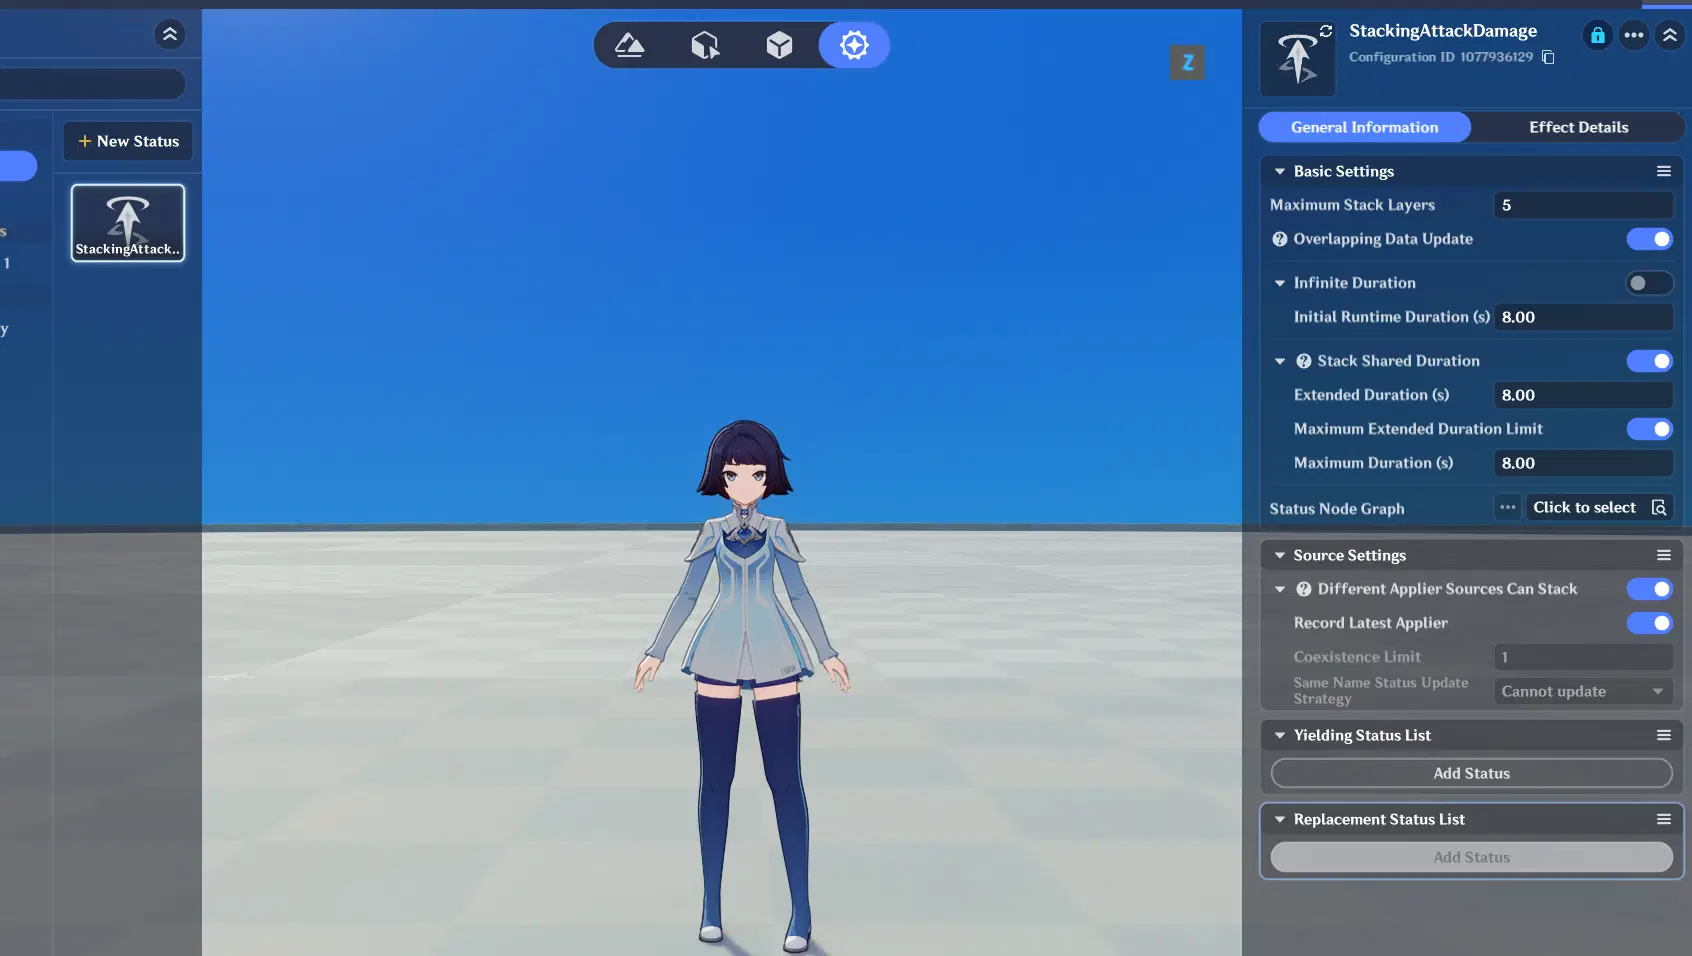
The stacking damage effect primarily uses "when Attack Hit" as the trigger event. Each time an attack hits, apply one stack of a Status to the self. By configuring the status's Damage Adjustment, Max Stacks, and Duration, you can achieve the desired effect.
Add a Status: Note that Stack Shared Duration should generally be enabled so that the effect persists as you continue to add stacks. Additionally, you should enable the Maximum Extended Duration Limit to prevent the status from lasting indefinitely until the end of the game.
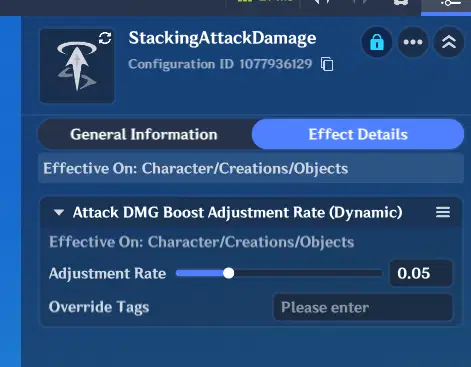
In Effect Details, add an Incoming DMG Bonus Adjustment and set it to 5% (which is 0.05) for now.
Next, create the Node Graph: Use On Attack Hit as the event source, then apply the Status to self.
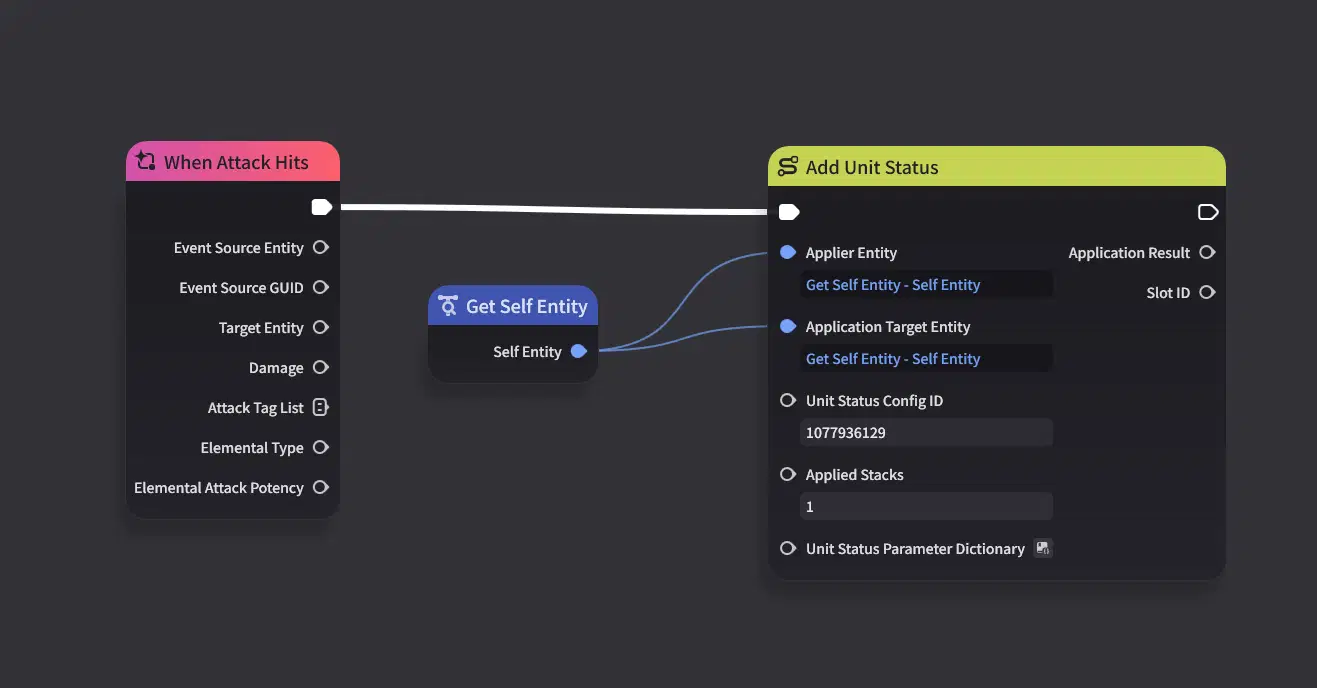
Next, add the Entry and assign the corresponding Node Graph.
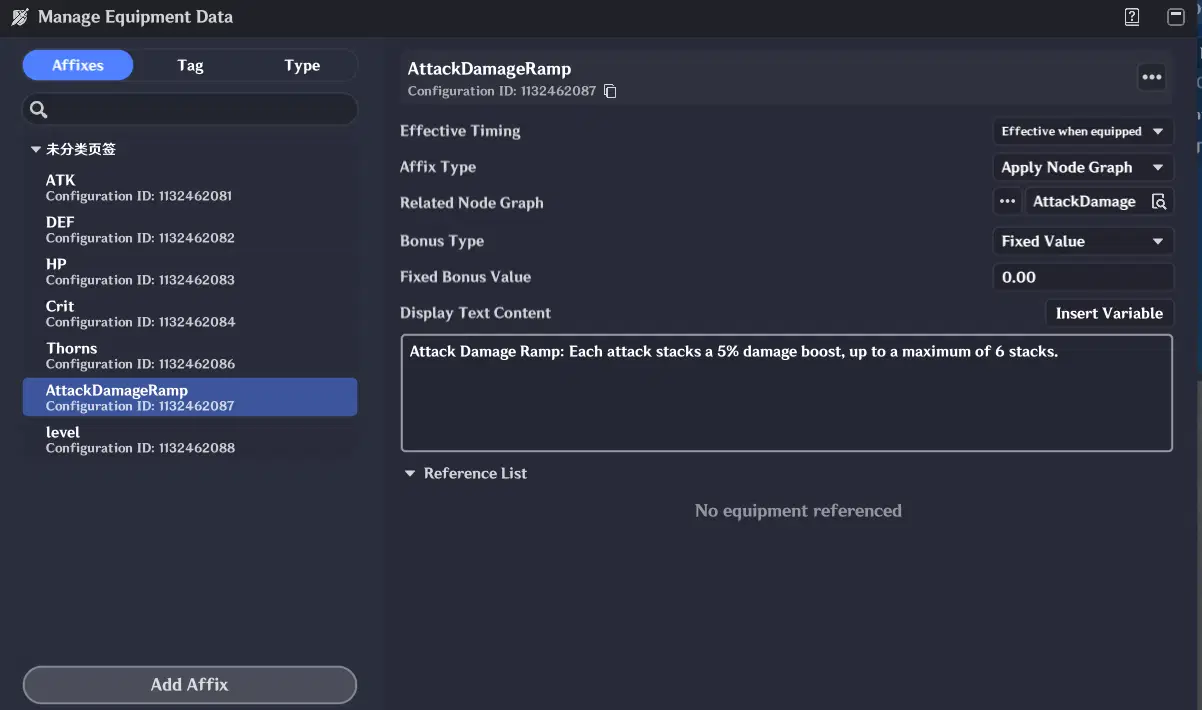
With these two effects finalized, we will now proceed to use the Configuration to make them active within our equipment.
4.3 Adding Entry Configurations
This time, we will again use a Dictionary [Configuration ID, Configuration ID] to configure the entry bindings. The data will be stored on the previously mentioned entity.
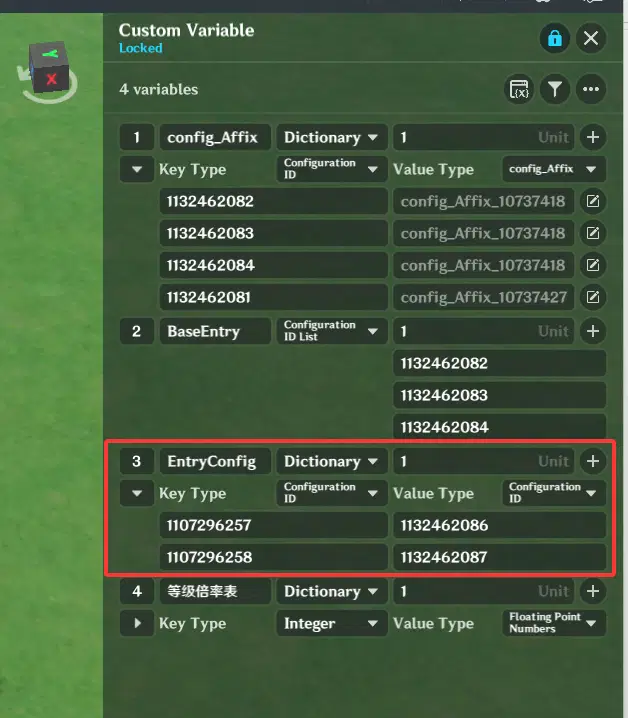
Modifying the Node Graph
Simply add the Entry after the equipment is initialized, and this part is complete. The fact that only minimal changes are required demonstrates the benefits of our previously designed architecture and node encapsulation.
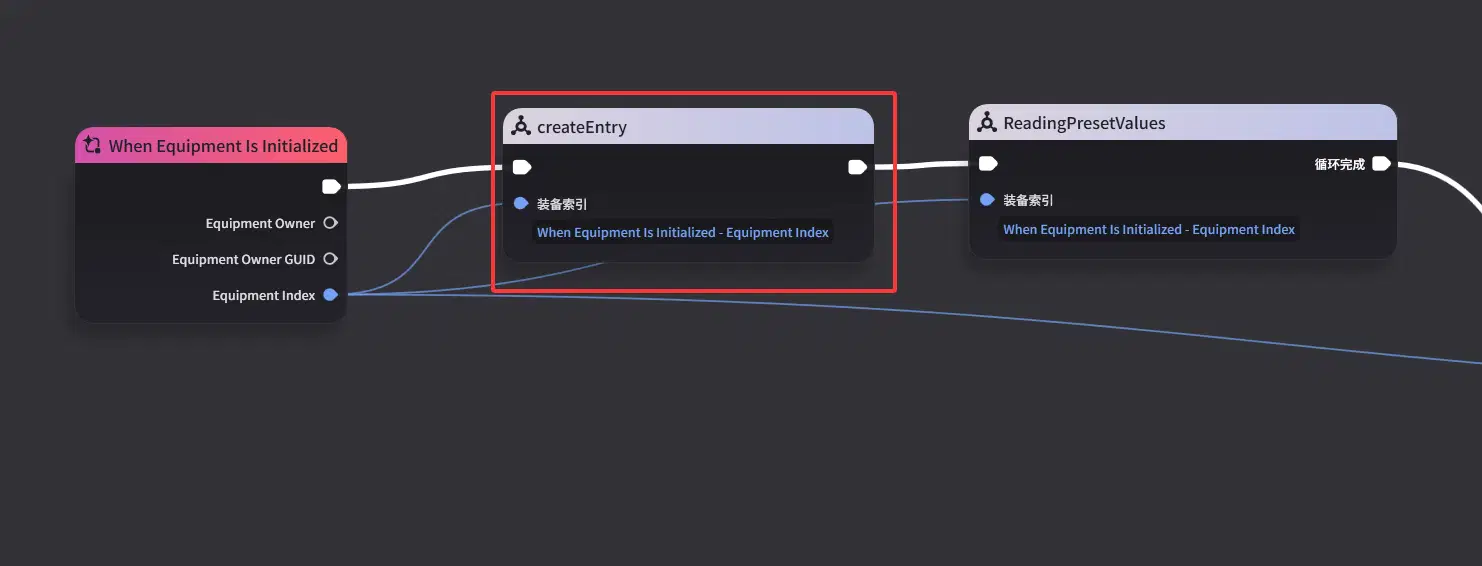
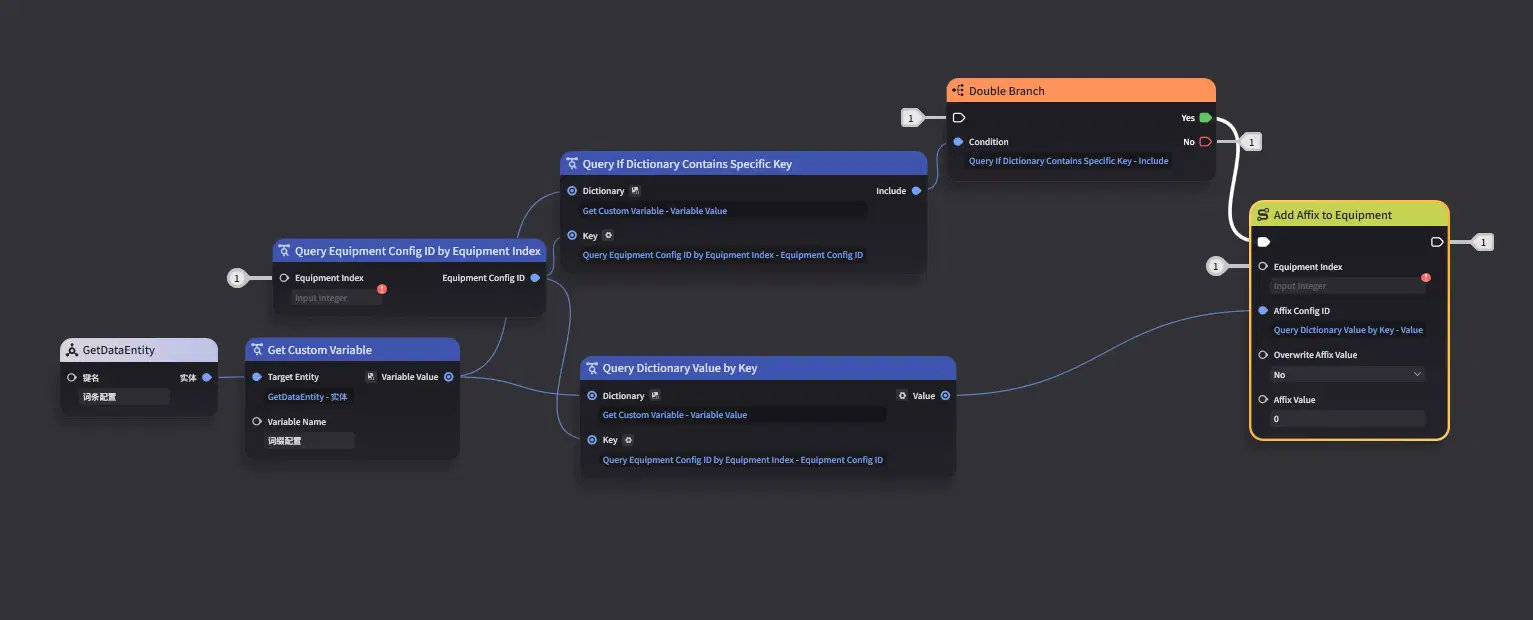
Testing the Effects Again
Ps: Entries also support color and size tags. Try experimenting with them to make your equipment entries look even better!
5.Implementing Levels and Level Distribution
5.1 Level Display and Core Principles
In our design, Level is treated as an Attribute. However, this specific attribute is used solely for display purposes and does not contain any equipment stats. Let's start by adding a new attribute called "Level."
Equipment Level Distribution Logic:
Within the editor, it is not possible to directly assign a level during distribution. When giving equipment to a player, the only parameter we can control is which specific piece of equipment is issued via the Configuration ID.
To distribute levels effectively, we rely on Sequential Event Processing:
- When Equipment A is issued, followed by Equipment B, the system will always execute the initialization of A first, then the initialization of B.
- Based on this principle, we simply add a "Level List" to the Character Entity.
- Every time equipment is issued, a level data point is appended to the end of this list.
- During equipment initialization, the system retrieves the first available value from the head of the list and removes it.
This mechanism ensures the orderly distribution of levels.
Now, let’s move on to the implementation.
5.2 Equipment Level Design
In this equipment system, we apply different scaling multipliers based on the Equipment Level. We have also introduced an additional multiplier control for specific Attributes to balance their strength across different levels. (For example, it is reasonable for an Attack attribute to scale by 30x at Level 50, but CRIT Rate clearly cannot be scaled with such raw multipliers).
Consequently, we need to introduce a Level Multiplier Coefficient within the Attribute Configuration Structure. The specific calculation formula is:
(Level Multiplier - 1) * Level Multiplier Coefficient + 1
- When the coefficient equals 1, the attribute scales at the standard main rate.
- Values greater than 1 or less than 1 can be used to fine-tune the power scaling of specific attributes.
Additionally, a new configuration item has been introduced: Equipment Level Multiplier. Following our previous workflow, let's add this to the configuration entity.
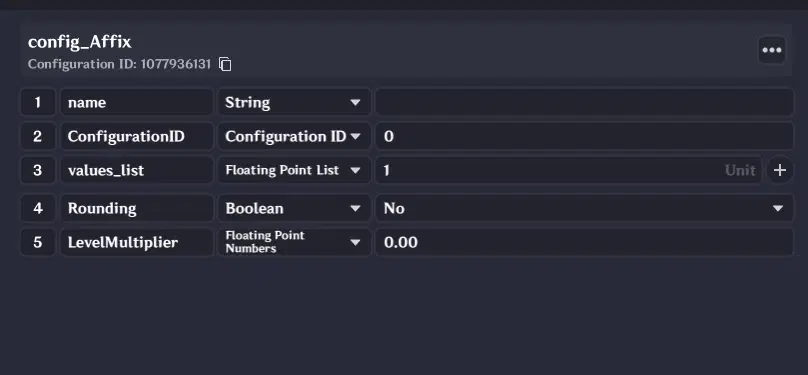
Final Implementation Steps:
- Write the required levels into the Character Custom Variable List.
- During Equipment Initialization, retrieve the first value from the list and delete it immediately after acquisition.
- Apply the multiplier processing based on the Equipment Level before writing the attributes.
- Finalize the data write-in for the equipment.
5.3 Level Granting
Based on the previously analyzed steps, pre-create a custom variable for the Level List on the character.
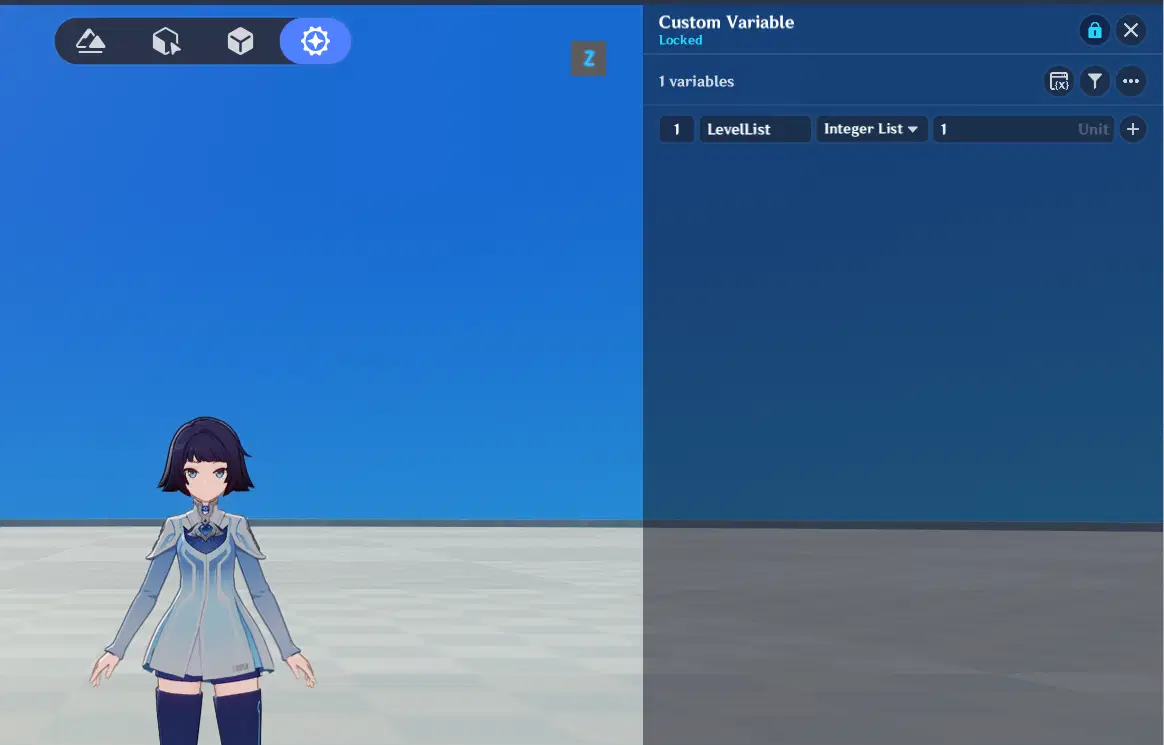
In the Level Granting section, simply add the required levels to the list and add the equipment to the Inventory simultaneously. As for the Level Acquisition part, it should be retrieved during initialization. Implementation begins now.
First, add a tab to facilitate the granting of different levels of equipment via tabs.
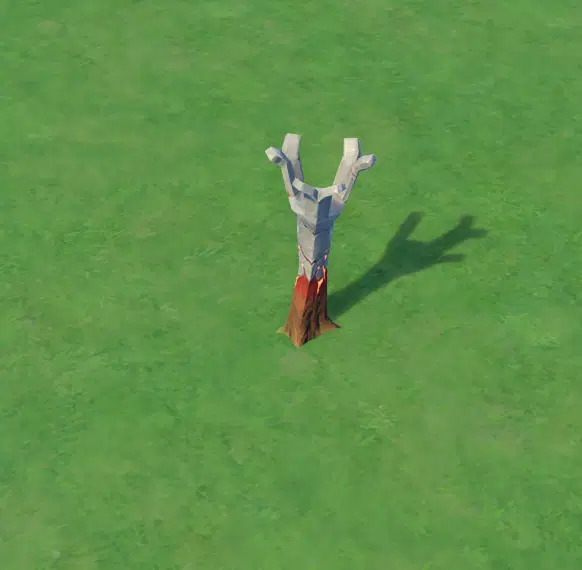
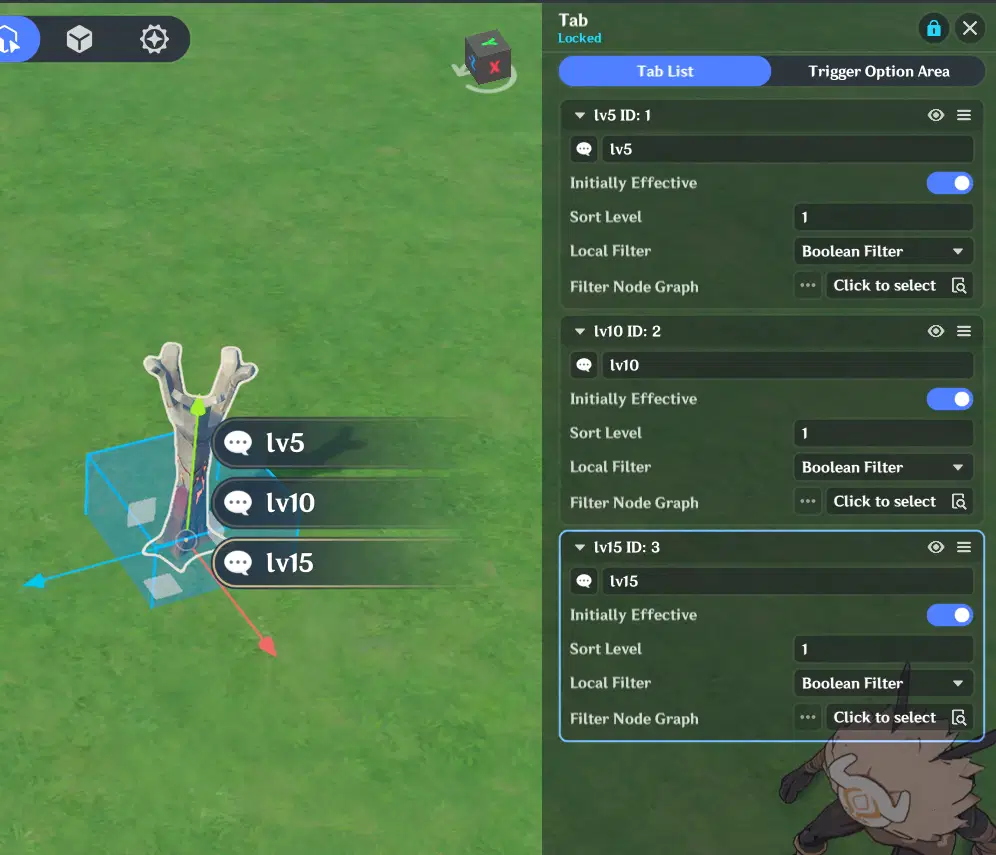
Create a new Entity Node Graph to handle equipment distribution via tabs.
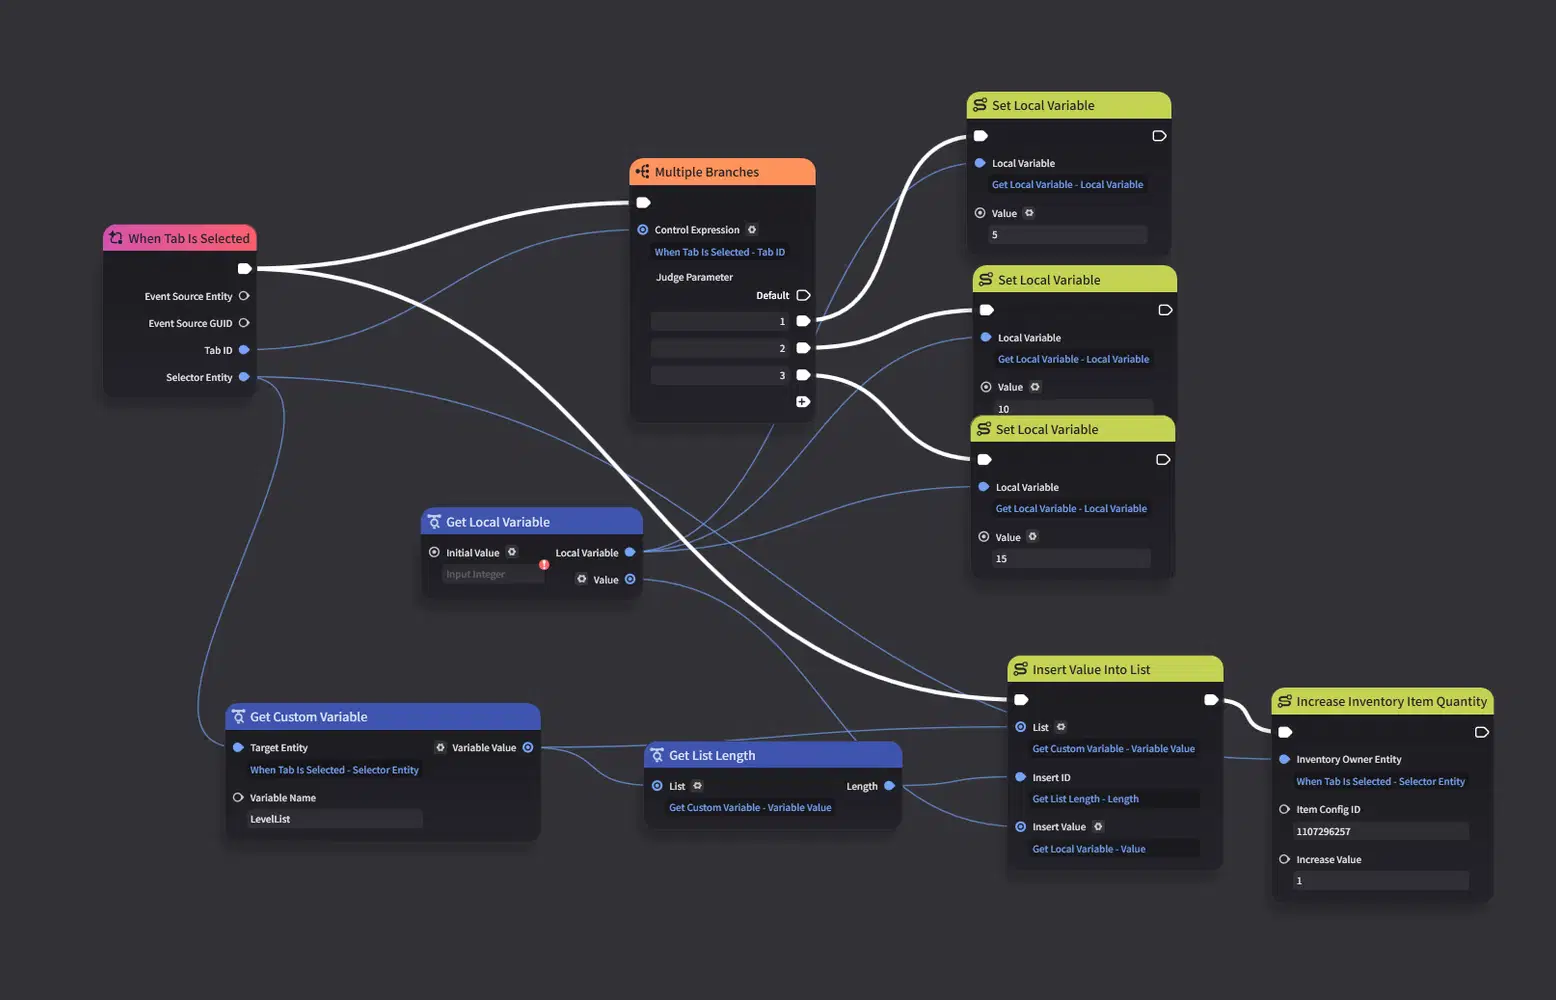
Next, handle level acquisition within the Equipment Node Graph.
5.4 Level Acquisition
This time, the level will be retrieved at the very beginning to ensure visual consistency, making sure the level is always the first entry and displayed at the top of the equipment.
Then, begin the level acquisition. When the Level List is empty, a minimum level of 5 will be used as a fallback.
The Equipment Node Graph is also attached to the character entity, so you can directly use "Self" to retrieve the character entity.
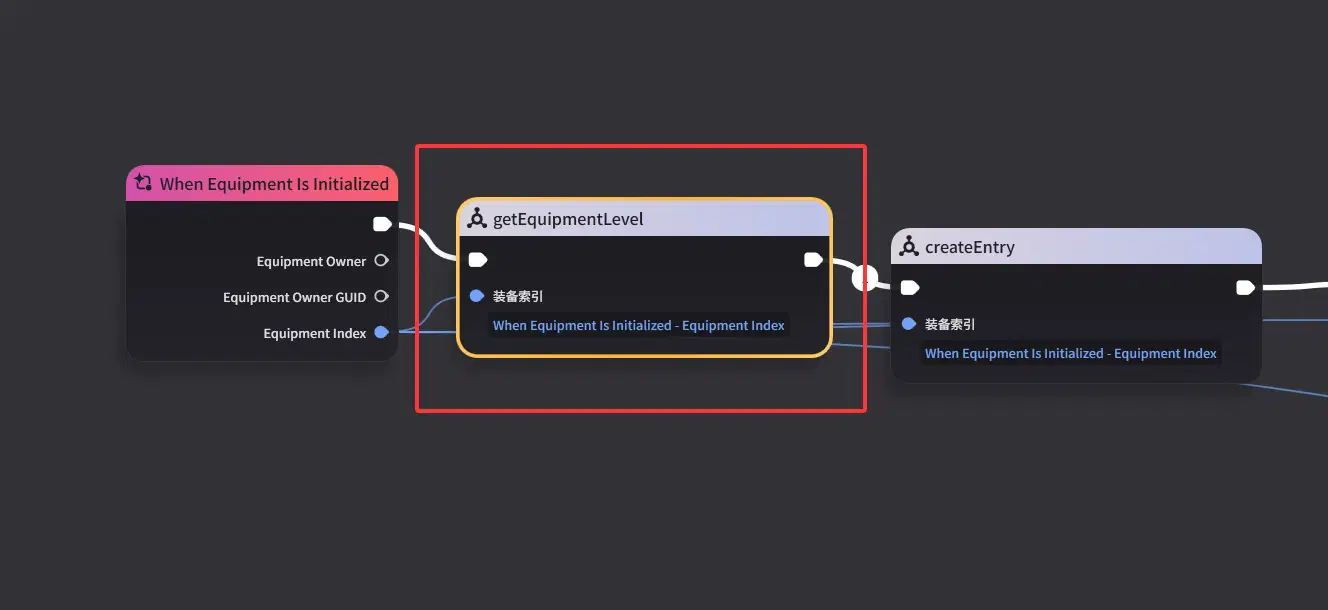
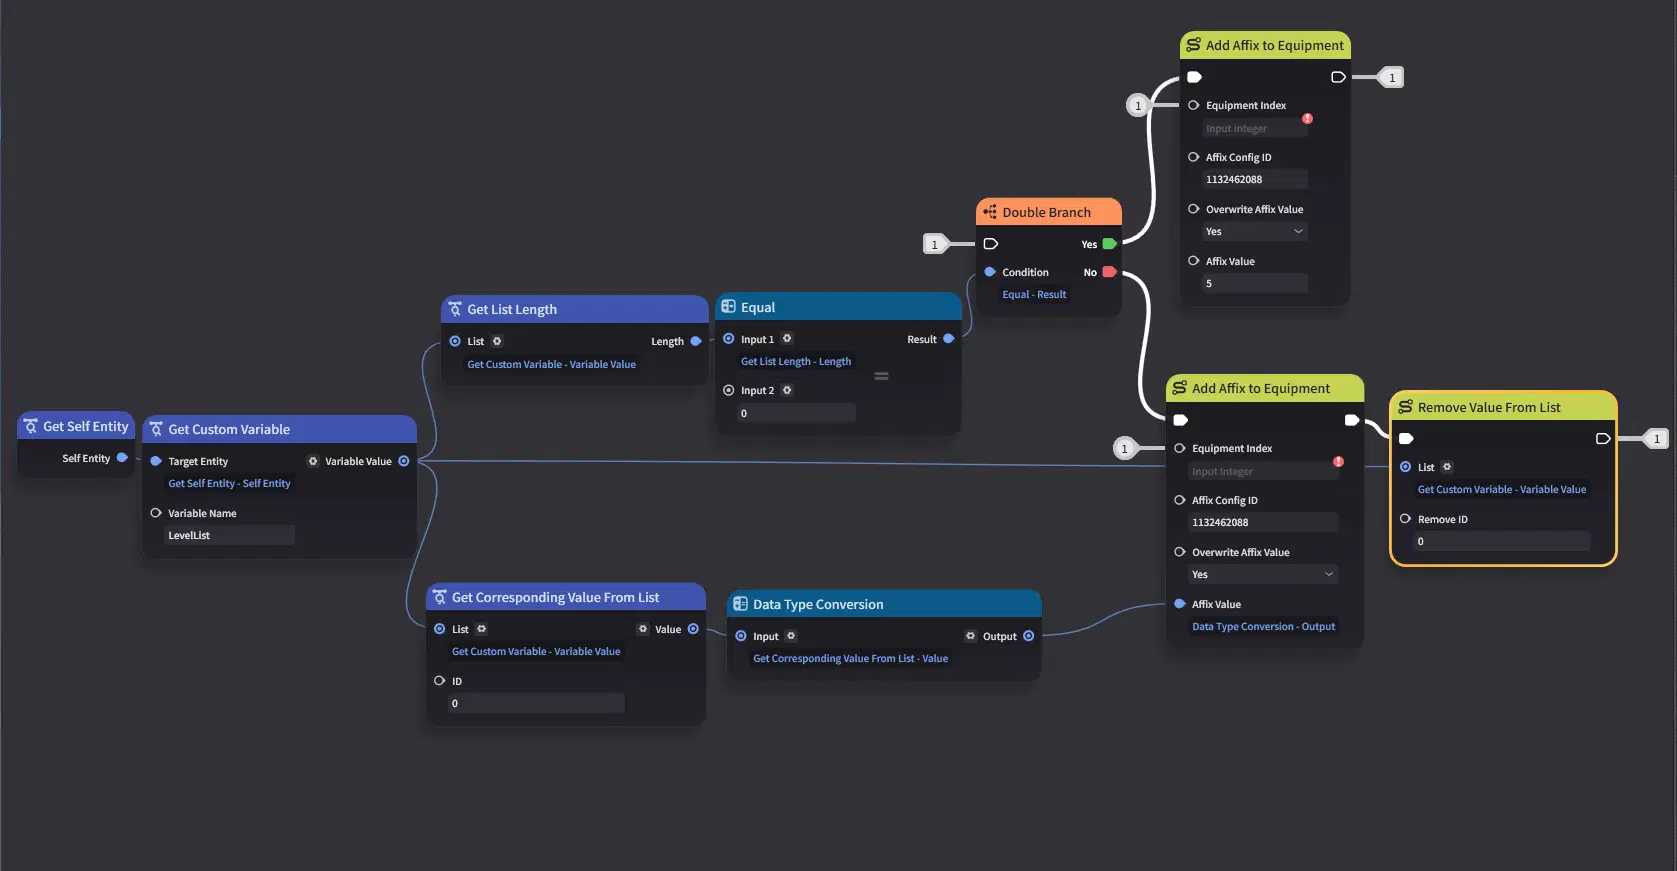
Start the testing phase. Now, the corresponding level of equipment can be successfully granted through the tabs.
5.5 Level Attribute Multiplier Processing
Next, for the numerical part, some modifications are required to support the Level Multiplier. The values for the current equipment are already stored in the temporary value dictionary; you simply need to calculate the multiplied values before adding them to complete the multiplier processing.
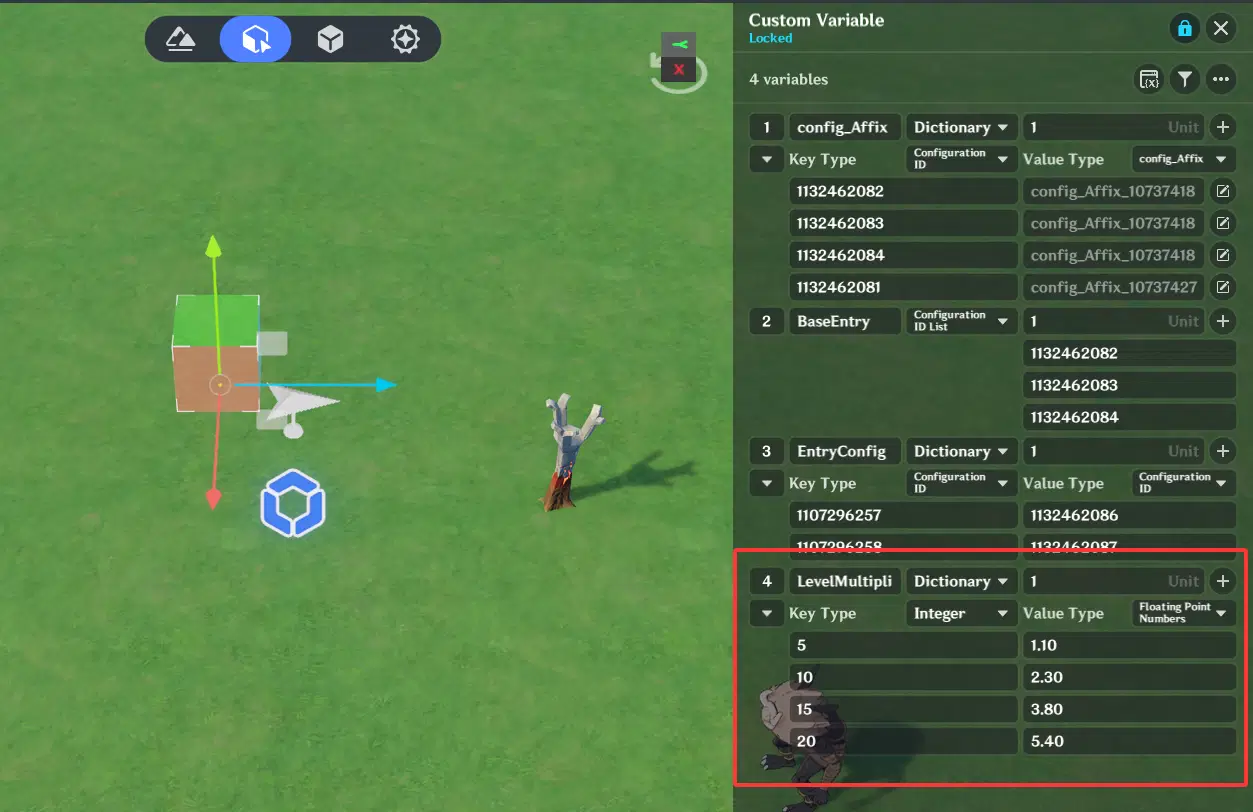
First, retrieve the configured multiplier. Since the level has already been written into the entries and set as the first entry, you only need to get the entry value to query the multiplier.
Store it in a local variable for later use.
Implement the calculation based on the previous formula and replace the original values.
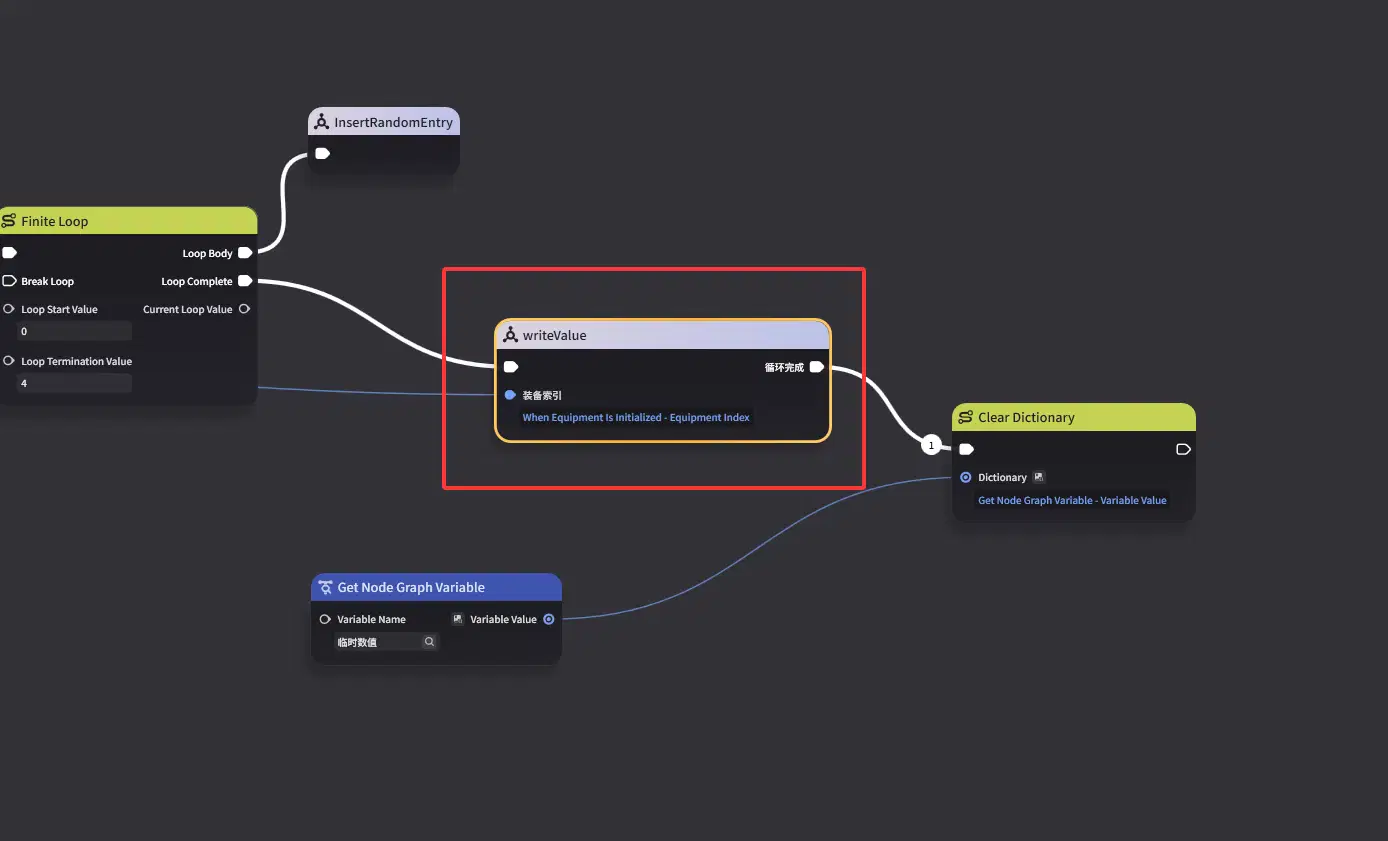
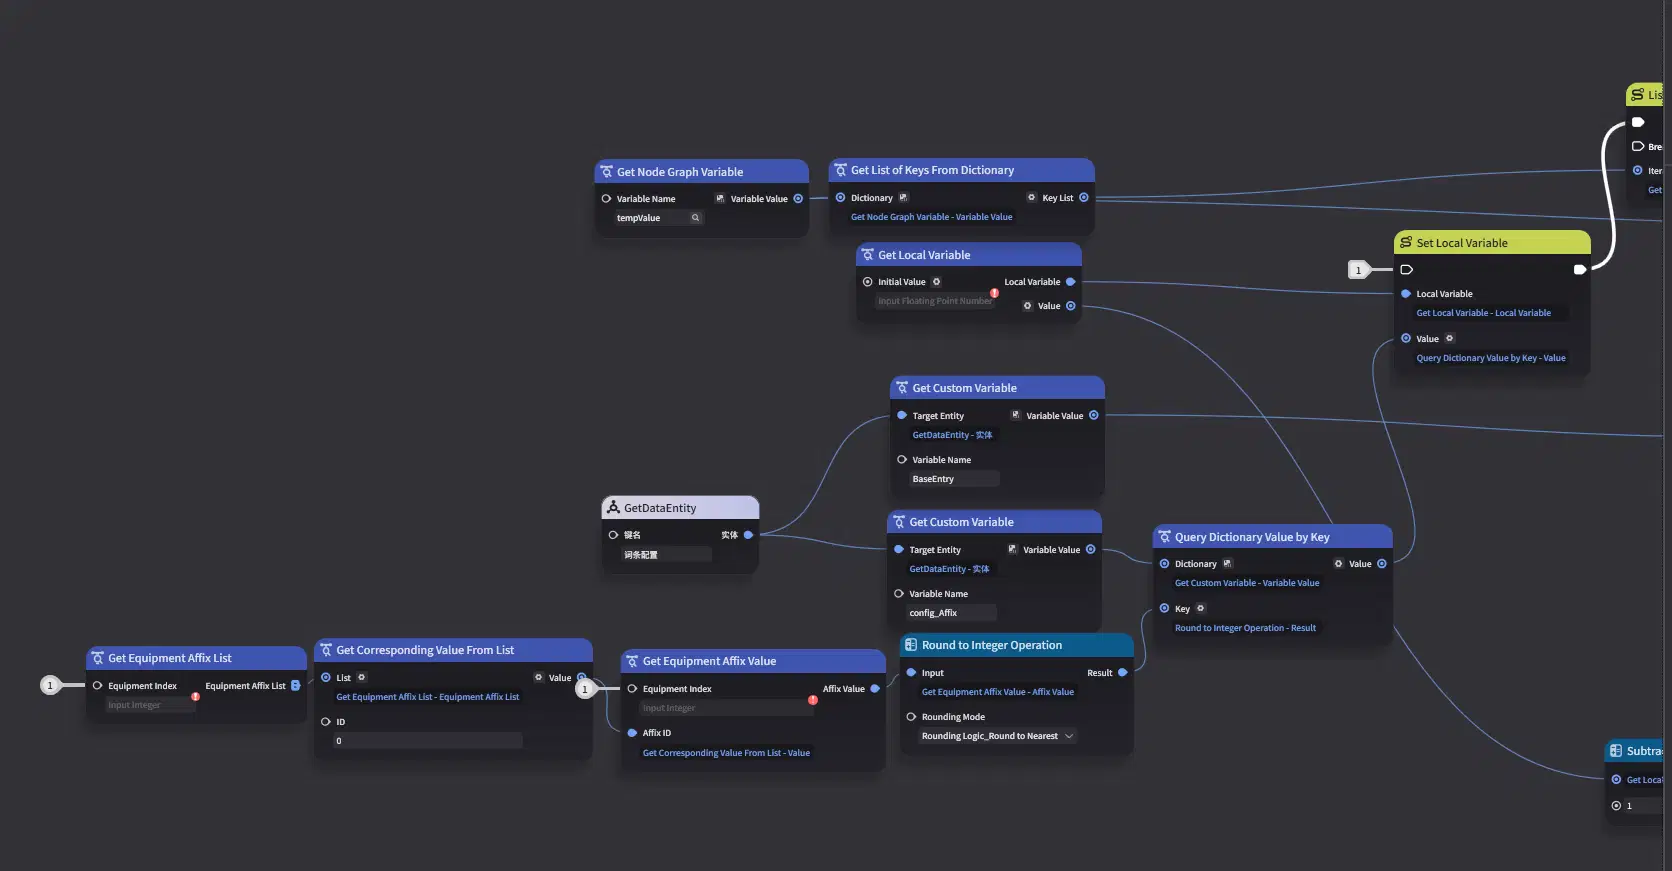
Save and take a look at the equipment. Now, equipment with higher levels possesses higher numerical values.


