Keep in mind that the team example is merely that, an example. After all, you need to take different artifacts and weapons to the calculation. You don't have to follow my team comp and use the characters that you are more comfortable with and completely built. In fact, do share your lineup in the comment section! It may help other Travelers who also struggle in creating a comp.
If you want to skip to the comment section, go look at the Table of Contents and click on the last point~ 

Blessing of the Abyssal Moon

While the active character is inside a Polestar Field, when they deal DMG to opponents, their attacks will unleash a shockwave at the opponent's position that deals True DMG. This can trigger once every 4s.
Floor 12
Ley Line Disorder

Team Recommendations
Abyss Showcase
Team Recommendations for the First Half

- Recommended to bring a single target DPS and teammates that can deal AoE damage.
- Pyro/Cryo/Dendro element is good here if you don't have a Stellar team since you need these elements to destroy the shield on 12-2.
- But the best would be Stellar reaction as the bosses in 12-2 and 12-3 can be defeated much faster with Stellar reactions. But it's not a must (don't forget the Leyline buff though).
Team Recommendations for the Second Half

- Recommended to bring a single target DPS (yes, one more time) because all wave only has 1 enemy.
- All the bosses in this half requires a Pyro character, so it is a must! The next one is Electro for the remaining element for 12-2. If you have a strong Cryo, no need for Electro.
- It's recommended to bring a sustain for this half because 12-1 and 12-3 is pretty dangerous to go sustainless, unless you're a pro in evasion.
- For the Secret Source enemy in 12-3, Natlan character is the best for them, but it is not a must. Just bring a character that can reduce RES and you should be good even without a Natlan character.
Enemies Lineup Overview

Floor 12 Chamber 1
First Half

All enemies here have 70% Physical RES
- In the first wave, there will be multiple Ruin Cruiser and Ruin Scout. At most, there can only be at most 2 Ruin Cruiser 1 Ruin Scout at a time. Once you defeat any of the enemy, the next one will spawn until all 12 are out.
- Make sure to try and gather them at one place or these enemies will use some attacks that will make them move away from you - making you waste time chasing after them. If you don't bring any CC, use AoE DPS attack here to ensure all enemies will have their HP chipped away.

- Each of them also have a weak point whenever they use their best skill (and you can tell by the shining orb inside their body). Should you aim at the weak point? Depends on your team: If you think its best if the enemies don't move, attack their core (as it will paralyze them for a few seconds). But if you feel like it's not worth the time and you may get staggered by another Ruin enemy when you're trying to focus on one Ruin enemy, then it's better to ignore the weak point and just brute force!

All enemy here has 70% Physical RES
- In the second wave, there is a single Perpetual Mechanical Array. Yes, they give us 12 mobs before dishing out the boss. The best option is is a single-target Elemental DPS to obliterate this one. Remember that this boss has a 70% Physical Resistance.
- Most of its attacks are really easy to dodge and doesn't deal that much damage, so I believe you can handle it just fine. The one important thing to note is when the boss' HP reaches below 50% (around 35-40% HP), it will enter Defensive Mode, be immune to any attacks, and summon four Ruin Sentinels: Scout, Defender, Destroyer, and Cruiser.
- Remember to NOT attack the boss when it enters the Defensive Mode as it will become invisible. You especially don't want to accidentally use your Ultimate during this time.

- Attack only the highlighted Sentinel (even better if you can bait the highlighted Sentinel to get near the boss)! Do not attack any other because it will be a very waste of your time.
- Once you defeat the highlighted Sentinel, the big boss will be paralyzed for around ~20 seconds and its RES will be reduced to -40% to all elements. This is the perfect time to use all your Skills and Bursts. When the boss recovers from the paralyzed state, it will become invincible for a few seconds before resetting its state and using its normal attack patterns again.
Second Half

This enemy has Normal RES
- In the first wave, we have a single Construction Specialist Mek. It's just like any other mobs, but you can weaken it by using Pneuma attacks (as this enemy is Ousia type). One of the dangerous attack it has is the spinning Pyro attacks as it can knockback your characters, so having a shield is a good option. But if the damage output is strong enough to take the Meka down quickly, it doesn't matter.

This enemy has 70% Anemo and Cryo RES
- There is only one wave here and it’s the 'Icewind Suite' Coppelius version. The one you will be facing is Coppelius, the male counterpart that deals Anemo DMG.
- At the start of the battle, it will immediately enter the Climax state and summon a Cryo shield.
- Coppelius is a Pneuma-type and can be paralyzed by Ousia characters like Navia and Furina (but only during its Climax). All of its attacks are a combination of Anemo and Cryo DMG, and you should be able to avoid them like usual in the open world or tank them with a shield.

- The one you need to focus on is the Coppelius's Climax. Coppelia and Coppelius will move to the center of the arena and initiate Climax: Create 3 Retributive Frosthearts that will periodically unleash blasts, dealing Cryo DMG. Those Frosthearts can't be destroyed so ignore it and focus on the Coppelius.
- During the Climax, Coppelius will gain a Cryo shield. The shield can be damaged normally using Elemental Reactions (weakest to Pyro), but will also immediately break upon being hit by an Ousia attack. Hitting Coppelius with 3 Ousia attacks during a single Climax will interrupt the Climax and stun them for a short period of time.

- Note that while you're focusing on Coppelius, Coppelia that is dancing around the Retributive Frosthearts will attack you usign wind blades. It will be easier to ignore it if you bring a shield. But if you don't, try to face Coppelia so you can see when the wind blade is coming and you can dodge it while focusing on Coppelius.
Floor 12 Chamber 2
First Half

This enemy has 30% Pyro RES
- In the first wave, we have a single Chimeric Horned Bear. This one can be considered a normal mob so you should not struggle too much on this wave.
- It will apply Pyro to its horn after charging it at the start of the battle, and you can interrupt this charging by using any Stellar-Glimmer reaction on it.

This enemy has a 50% Anemo and Electro RES
- In the second wave, we have the new enemy - Chimeric Winged Lion. Right from the start, it will have an Electro shield. Use the element of Pyro, Cryo, or Dendro to quickly destroy it.
- After the shield is destroyed, the boss will be paralyzed for 13 seconds, and all of its RES will be reduced to 70%. This means its the perfect time to unleash everything you have!
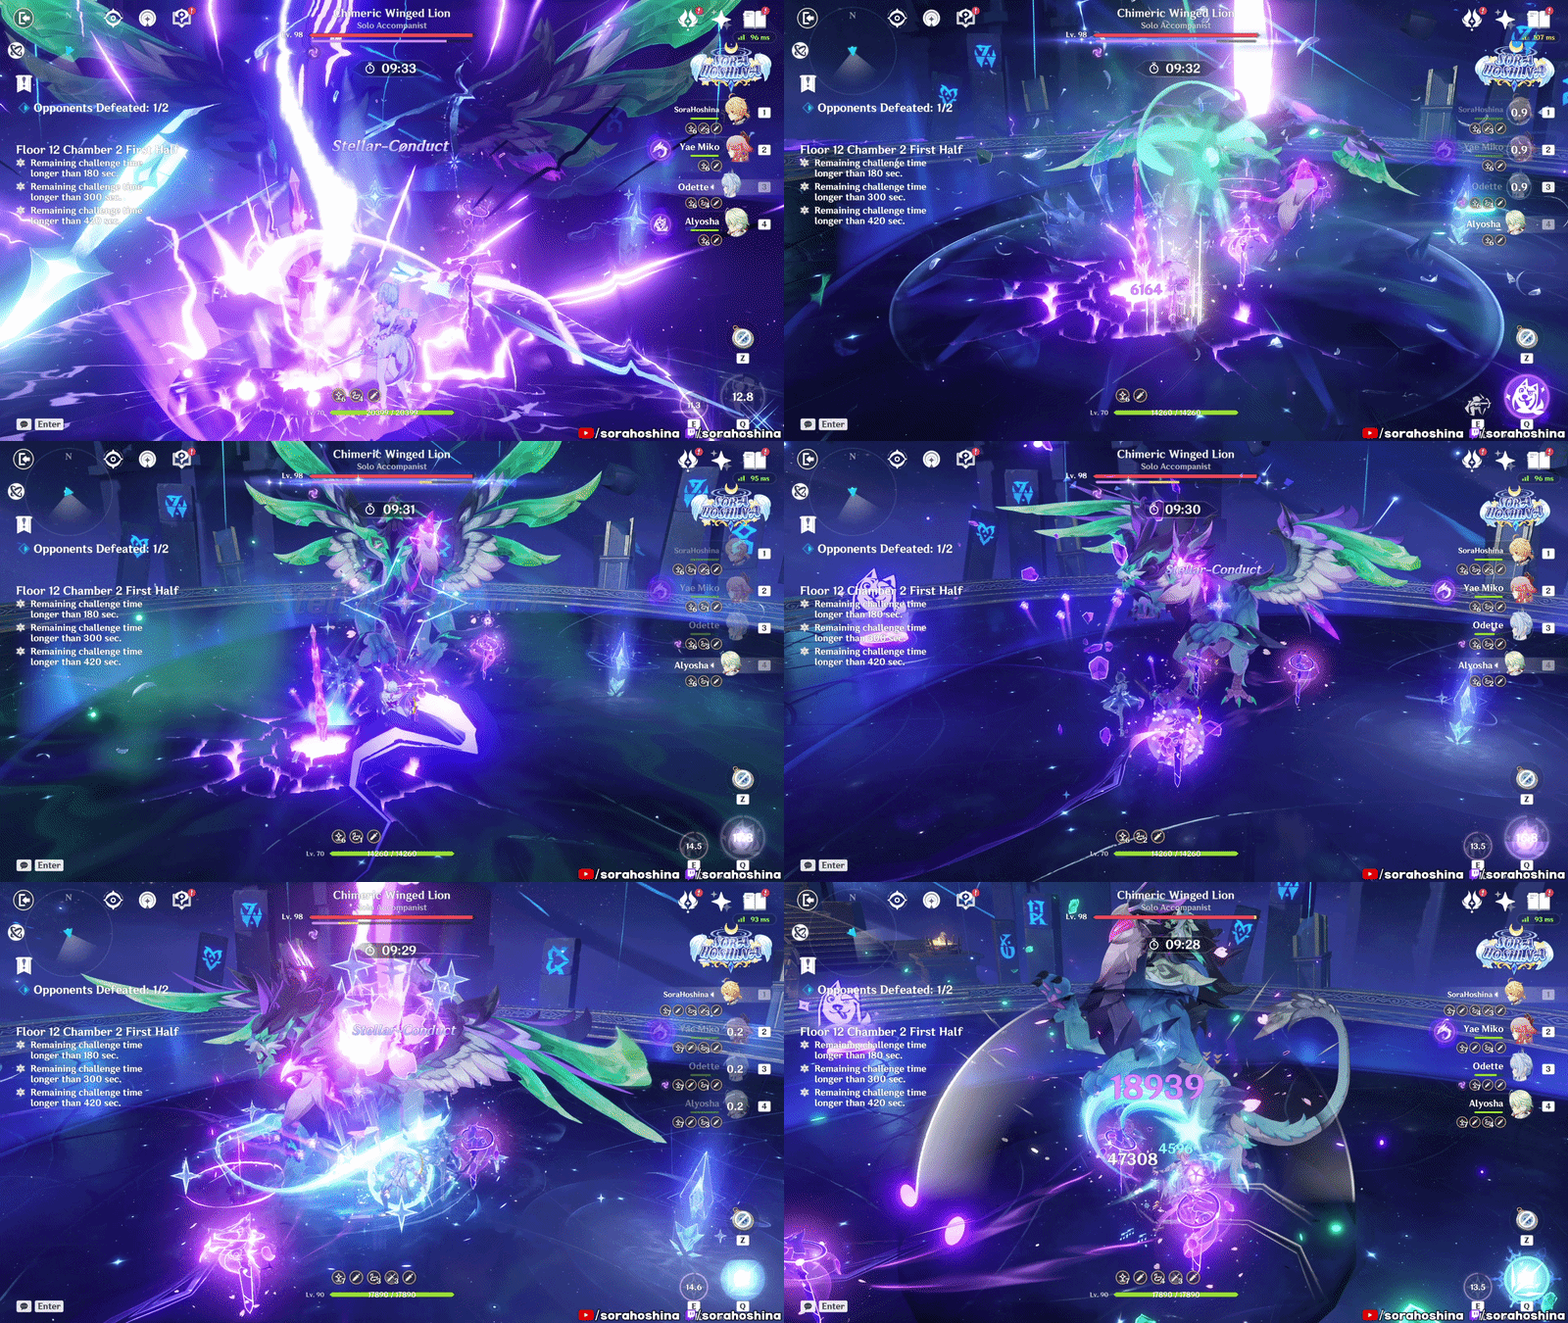
- If you use a Stellar reaction on the shield, 40% of the shield will explode, and 6 Electro particles will spawn for you to take. So if you have Cryo MC, it's worth building them for the Cryo Stellar reactions!
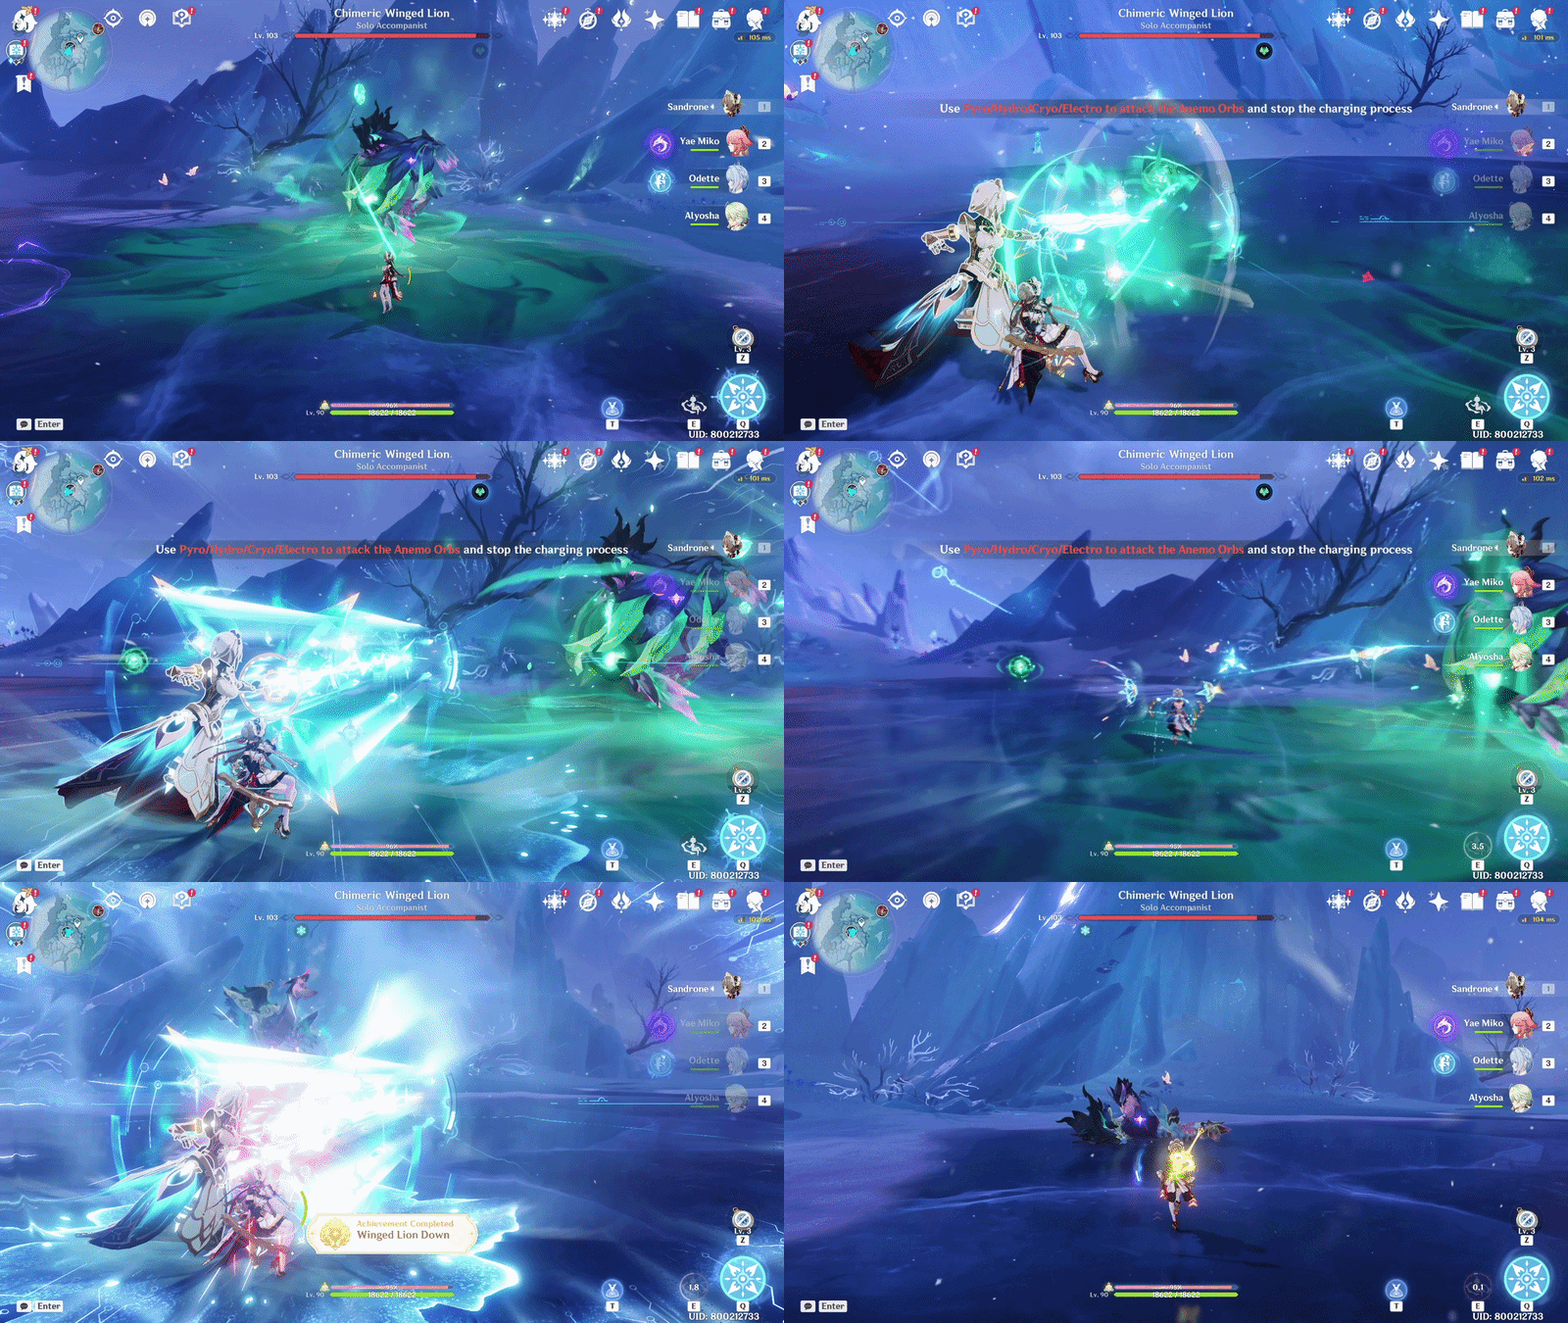
- The next attack you should be wary of is the 5 Anemo orbs. After absorbing 3, it will fill the bar and the boss will continue attacking you. Destroying 3 or more of these orbs with PHEC elements (Pyro/Hydro/Electro/Cryo) will paralyze the boss.
- If you use Stellar reaction on the boss, it will instantly destroy all the Anemo orbs, paralyze the boss, reduce 15% of its health, and generate 6 Anemo particles for you. Sounds super good right? Time to invest in Stellar team~
Second Half

This enemy has Normal RES
- In the first wave, there is a single boss - Iniquitous Baptist. The one you will be facing has Pyro + Cryo + Electro elements and can create a shield of each element periodically (in the order Pyro shield > Cryo shield > Electro shield).
- Unfortunately, you really need to bring lots of elements here to destroy its elemental shield and create a sufficient window to deal damage. If his shield is not down, he's really tough and received reduce damage (he actually received no damage at all, at least for me). The most effective elements against each shield are:
- Pyro is weak against Hydro
- Cryo is weak against Pyro
- Electro is weak against Dendro/Pyro /Cryo
- The Pyro and Cryo shield last for 30 seconds. While for the Electro shield, if it is not broken within 25 seconds, it will release an AoE shockwave damage.

You can see its paralyzed for a brief moment
- Every time each of the elemental shields is down, you will gain a few seconds' windows (around 3 seconds) to deal damage as the Baptist will stand there paralyzed. After that few seconds end, it will then create the next elemental shield.
- This will be repeated until all 3 elementals have their shield down for good before it paralyzes the boss for a longer duration (around 13 seconds). This is the best moment to unleash absolutely everything before it can come back up and start the shield swap rotation again.

This enemy is immune to Cryo
- In the second wave, there is a single Cryo Abyss Mage. Let's be positive and think that the game is trying to give us an easy wave here for us to gather Energy for the Ultimate in the next chamber.
- As its own name mentioned, it has a Cryo shield and immune to Cryo. Use Electro or Pyro to break the shield and once its down, brute force it. Don't forget to gather the Energies~
Floor 12 Chamber 3
First Half
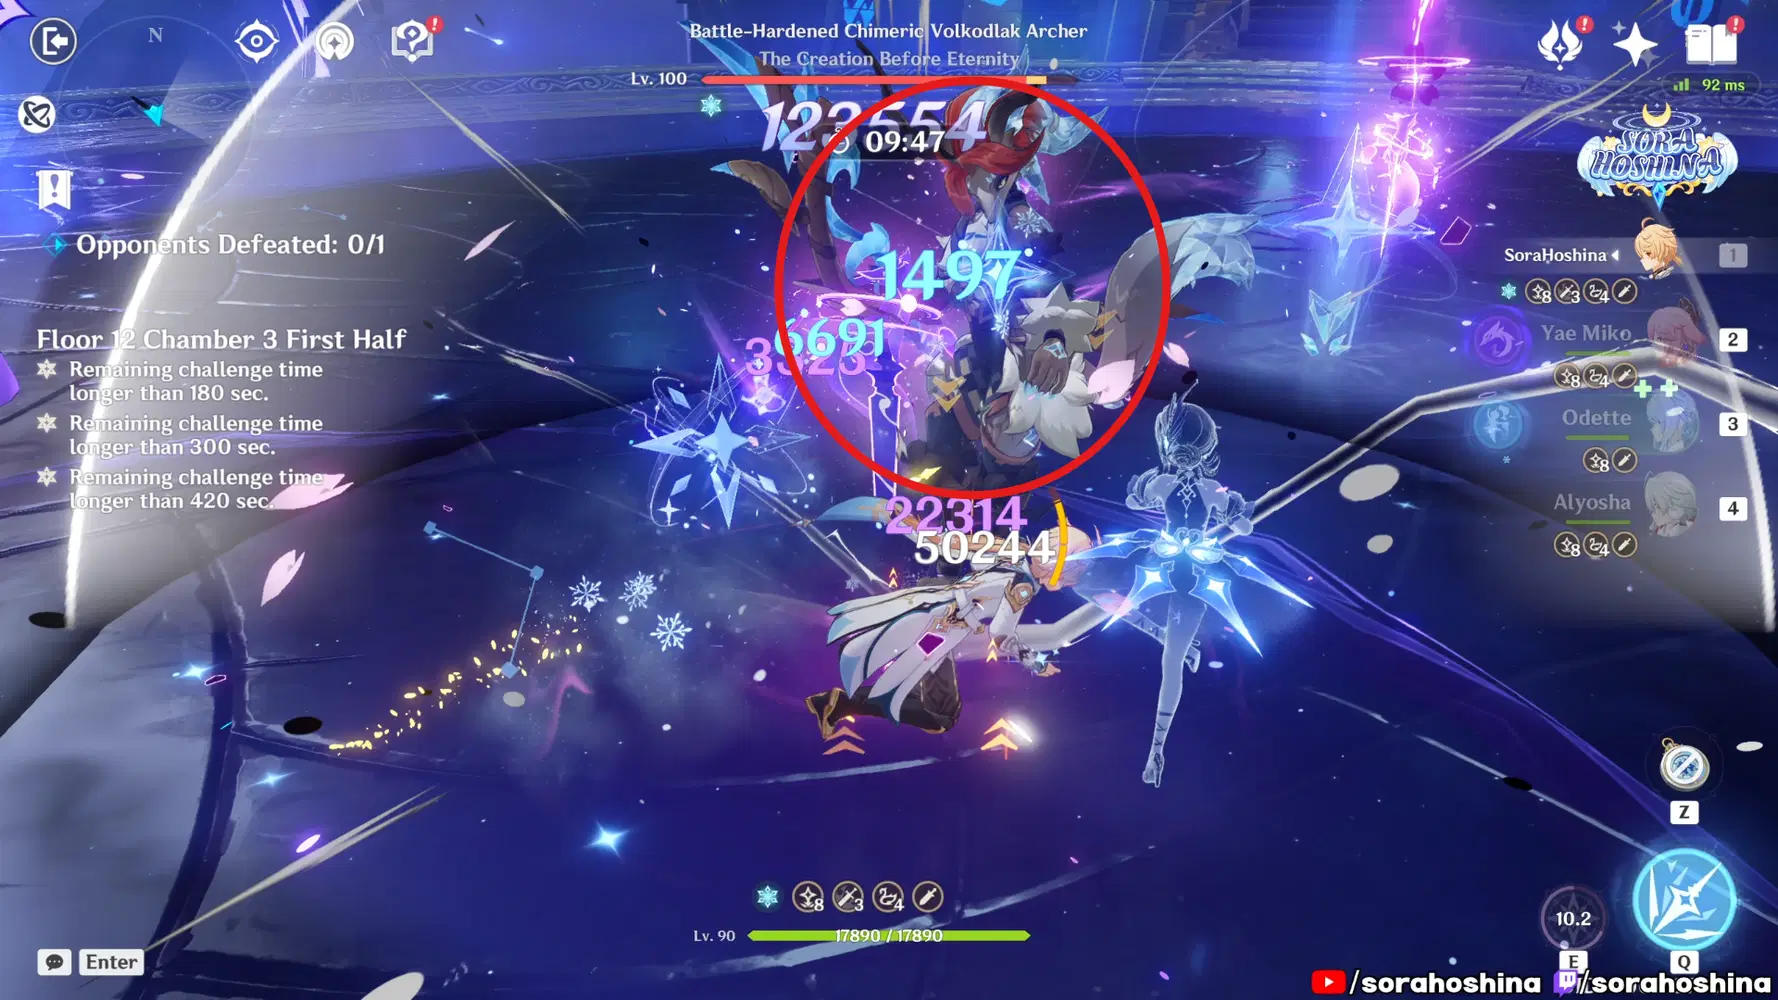
This enemy has 40% RES to Cryo, Dendro, and Geo. While -20% Pyro RES.
- There is only one enemy here and its the new Local Legend - Furiosa (Battle-Hardened Chimeric Volkodlak Archer).
- It's best to bring a character that can reduce the enemy's RES like the VV artifact set.
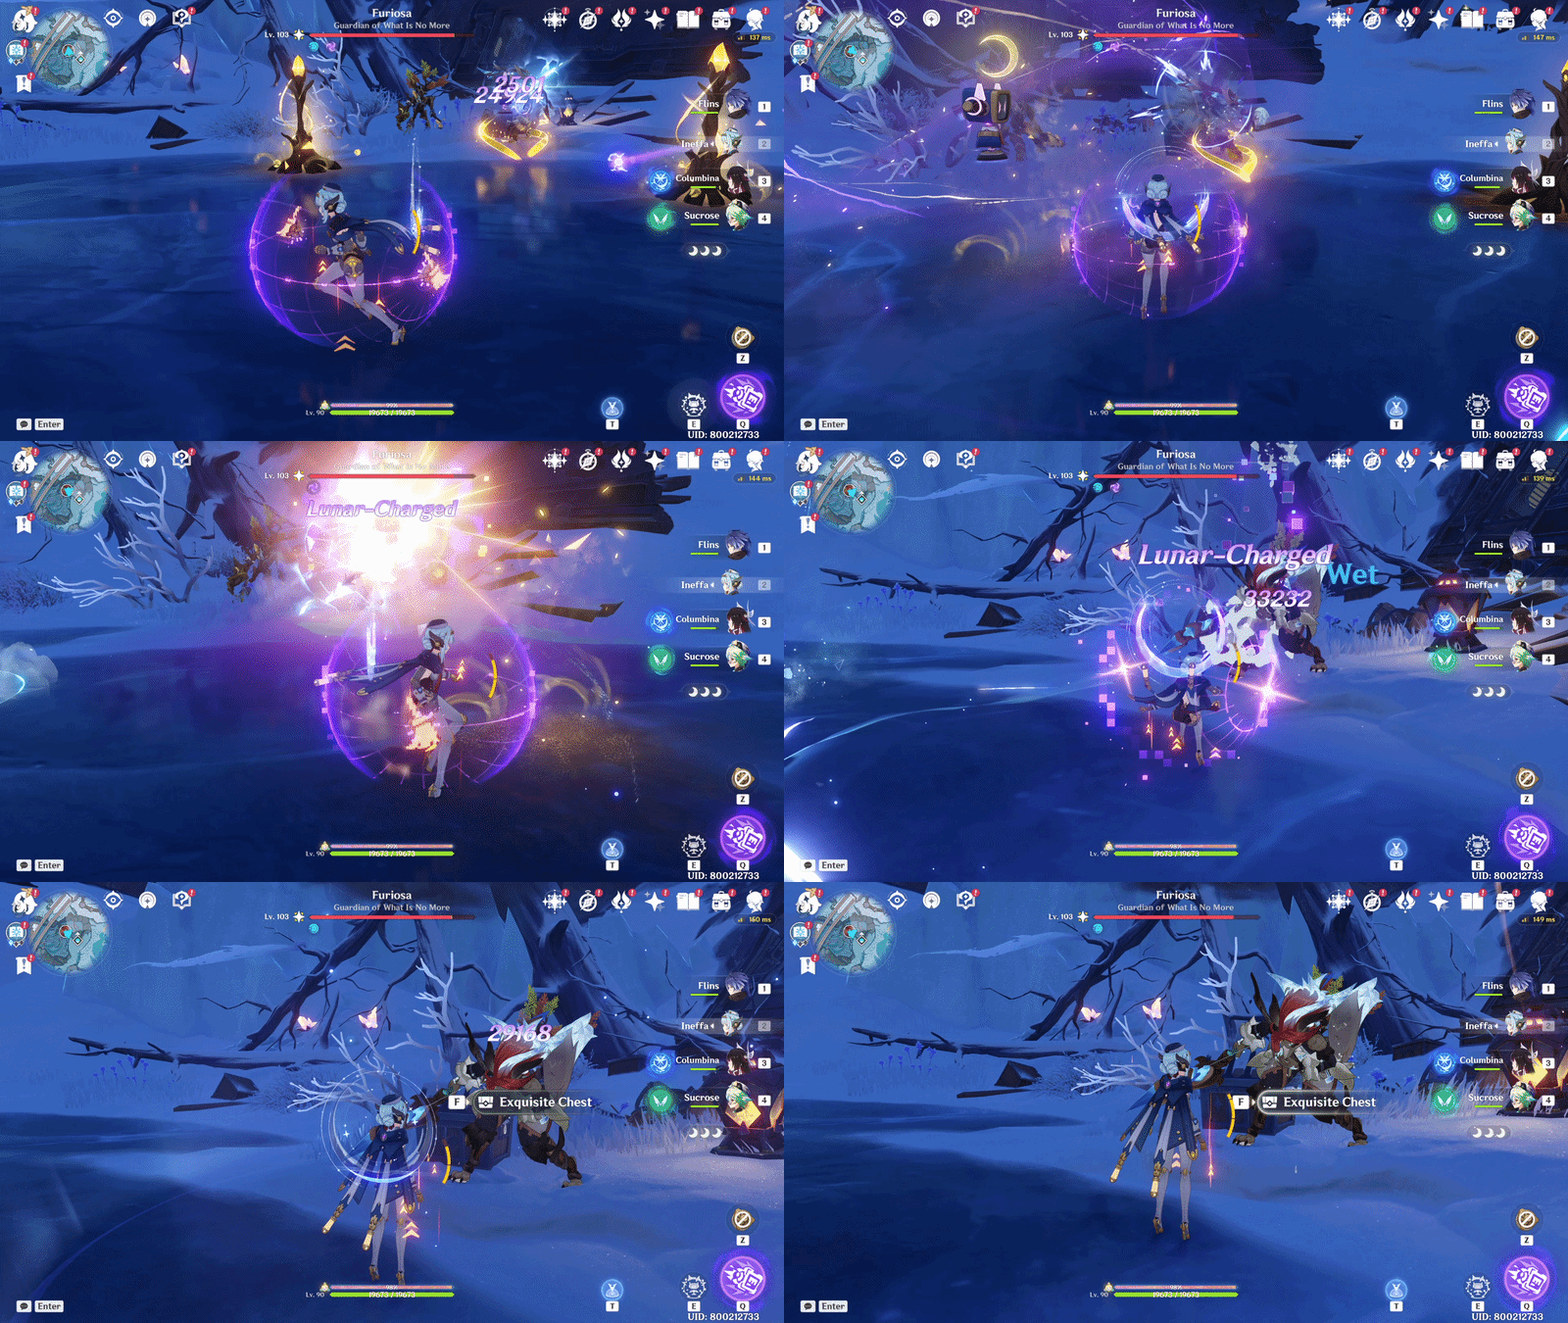
- Furiosa core mechanic is summoning Hindering Roots. The first skill is when she summons 2 Hindering Roots while attacking you with arrow rain. You can stop these attacks by destroying the roots (you have 10 seconds to destroy them). It's pretty weak so use any attacks to destroy the root.
- The second one is when she *****ws on the ground and there will be only 1 Hindering Root. She will emerge very quickly (after 2 seconds), so try to use ranged attacks or characters with fast movements, or multiple off-field Sub-DPS to attack it.
- Once the Hidnering Roots are broken, the boss will be paralyzed for 13 seconds, and its all resistances will be reduced by 50%.
Second Half

This enemy has a 50% RES to all Elements. In weakened/laser state, it has 10% RES to all Elements
- The first wave feature one Secret Source Automaton: Hunter-Seeker. This Automaton can deal with both melee and ranged attacks. Personally, I find their attacks are very easy to avoid because they almost always has an indicator on where the attacks are going.

- If you bring a Natlan character in this stage, the Automaton can unleash one extra skill. You can see the icon on top of their HP, those are the Adaptive Countermeasures. When the Natlan character is in Nightsoul's Blessing state, the robot will accumulate the Adaptive Countermeasures, and when it's full, it will unleash a bigger laser attack that follows the direction of your character.
- That big attack comes with a big price where, while the special cluster laser is being unleashed and for an additional 4 seconds afterward, the Hunter-Seeker's RES to all DMG is reduced by 40%. Honestly, it's a big win because the laser is pretty easy to avoid and you can deal higher damage to the enemy afterward.

This enemy has 70% Dendro RES
- The second wave is the Gluttonous Yumkasaur Mountain King. It has 70% Dendro RES, so try not to use Dendro DPS against this boss. This big boy mostly has a melee skill set, so try not to stray far away from it, unless you have a ranged DPS. If you do get too far away from it, the boss may use its tongue to swing itself to your location.

- One of the two skills you need to be wary of is the Belly Spin (not an official name), where it will rapidly spin on top of its belly while approaching you. The damage itself is not astronomically high, but your character will be thrown back if you don't have a shield set up beforehand.

- Another skill set is when the Yumkasaur summons Flamegranates on the ground. What you need to do here is light up the Flamegranates with Pyro when you see them. It will explode on the floor if Yumkasaur doesn't devour it in time, and it will explode inside the boss' mouth if it manages to eat it beforehand. If all 3 Flamegranates explode, Kongamato will also be paralyzed for a longer period of time.
- If you didn't burn all Flamegranates in time and the boss managed to devour them, it would deal damage based on how many Flamegranates it ate. EX: If the Yumkasaur manages to eat 3, the first 2 will be used as ammo as it will spit the ignited Flamegranates, and the last one will be converted to an energy beam.
- Each time the boss eat a Flamegranates, it will take damage equal to 5% of its max HP. If the Flamegranates explode before the boss can eat it, the explosion will also deal significant damage. It will apply Pyro on the boss, and you can use Cryo (or other reaction) to trigger more damage!
Click Here to Skip the Guide and go right to the Comment Section
This is only for the table of contents, so the people at the top of the post can skip the guide and go to the comment section.