Hello Travelers! This guide will help analyze Stygian Onslaught bosses' mechanics, the recommended teams, and tips on how to defeat them! 💕

Chimeric Winged Lion
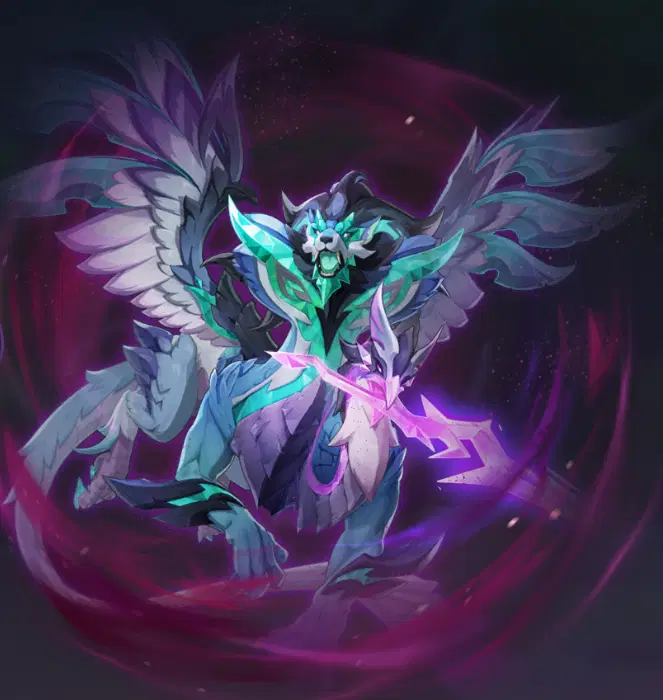
This enemy has a 50% Anemo and Electro RES
|| Boss Advantages
- At the start of battle, the Nemesis will generate an Electro Ward to protect itself. When the Nemesis channels Anemo power into its Electro greatsword, placing it under the effect of Radiance: Stellar Glimmer will interrupt its attack and damage its Ward. Once the Ward is broken through Elemental Reactions, the Nemesis will stop attacking due to exhaustion and become paralyzed.
- During battle, the Nemesis will circle rapidly and attack by firing Gale Bolts. After it finishes circling, it will continuously draw in and absorb Anemo Orbs on the field. Anemo Orbs can be destroyed with Hydro/Pyro/Electro/Cryo DMG. You can also place the Nemesis under the effect of Radiance: Stellar Glimmer to prevent it from absorbing Anemo Orbs. If the Nemesis fails to absorb enough Anemo Orbs, it will become paralyzed.
|| Basic Strategy (Difficulty 4)
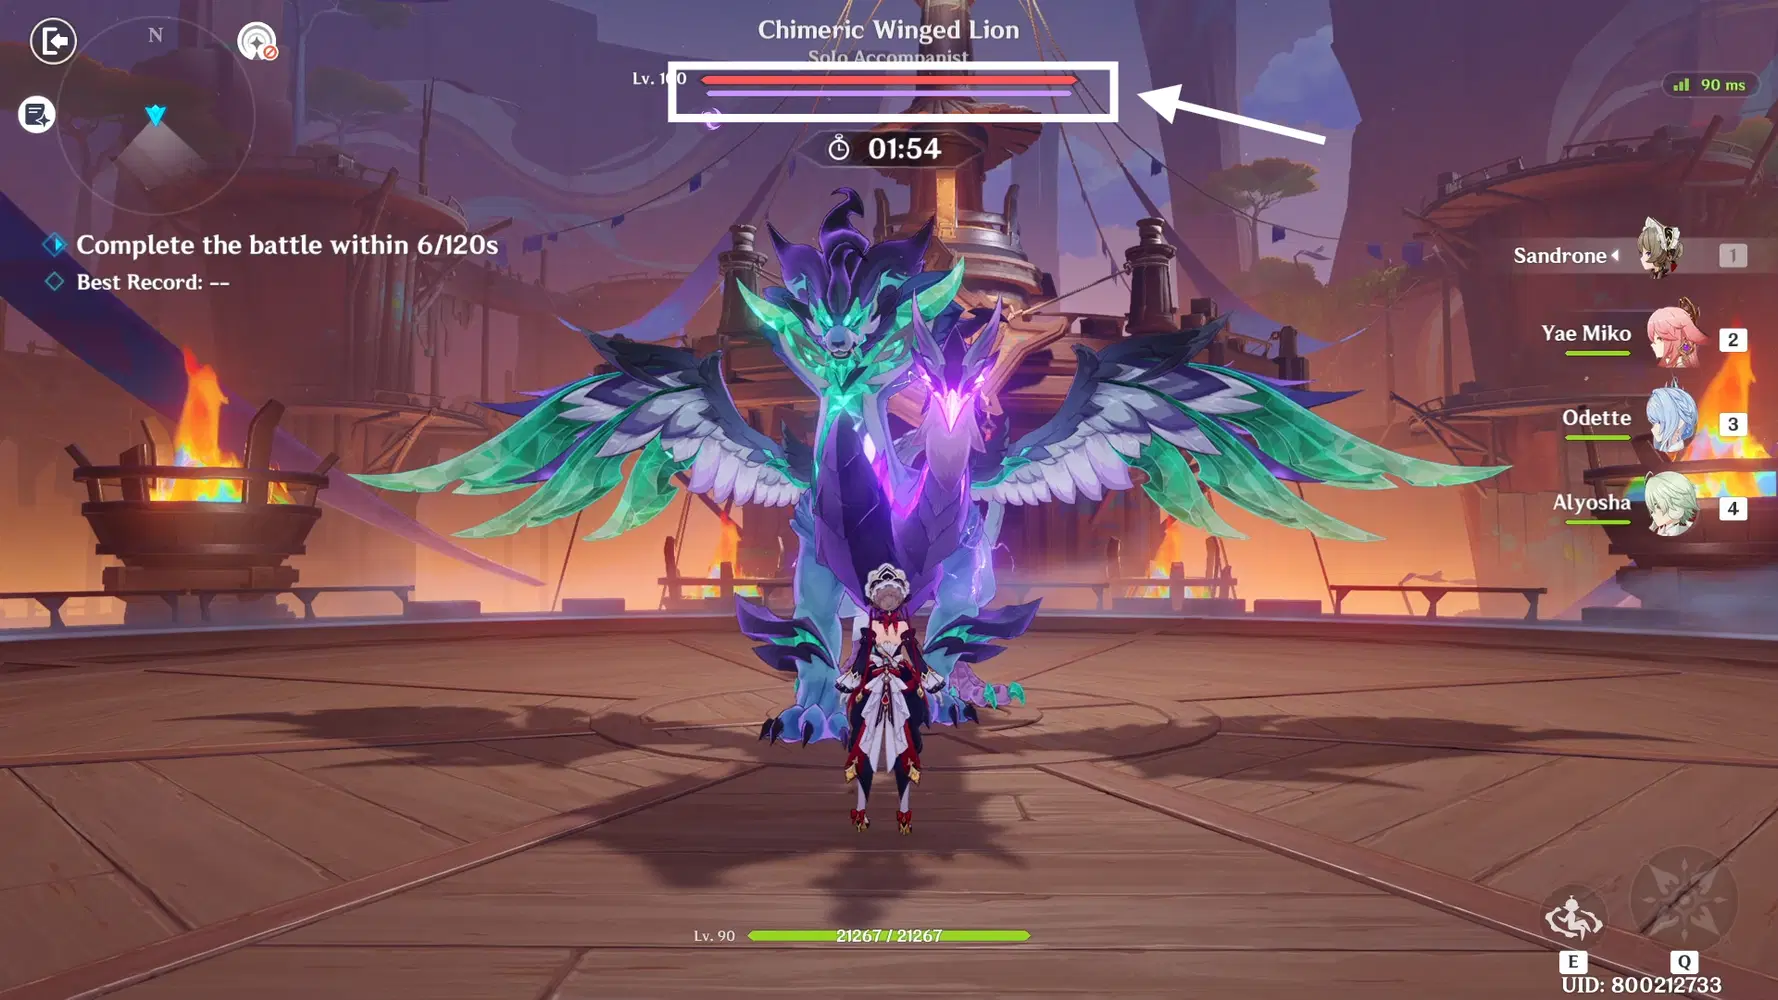
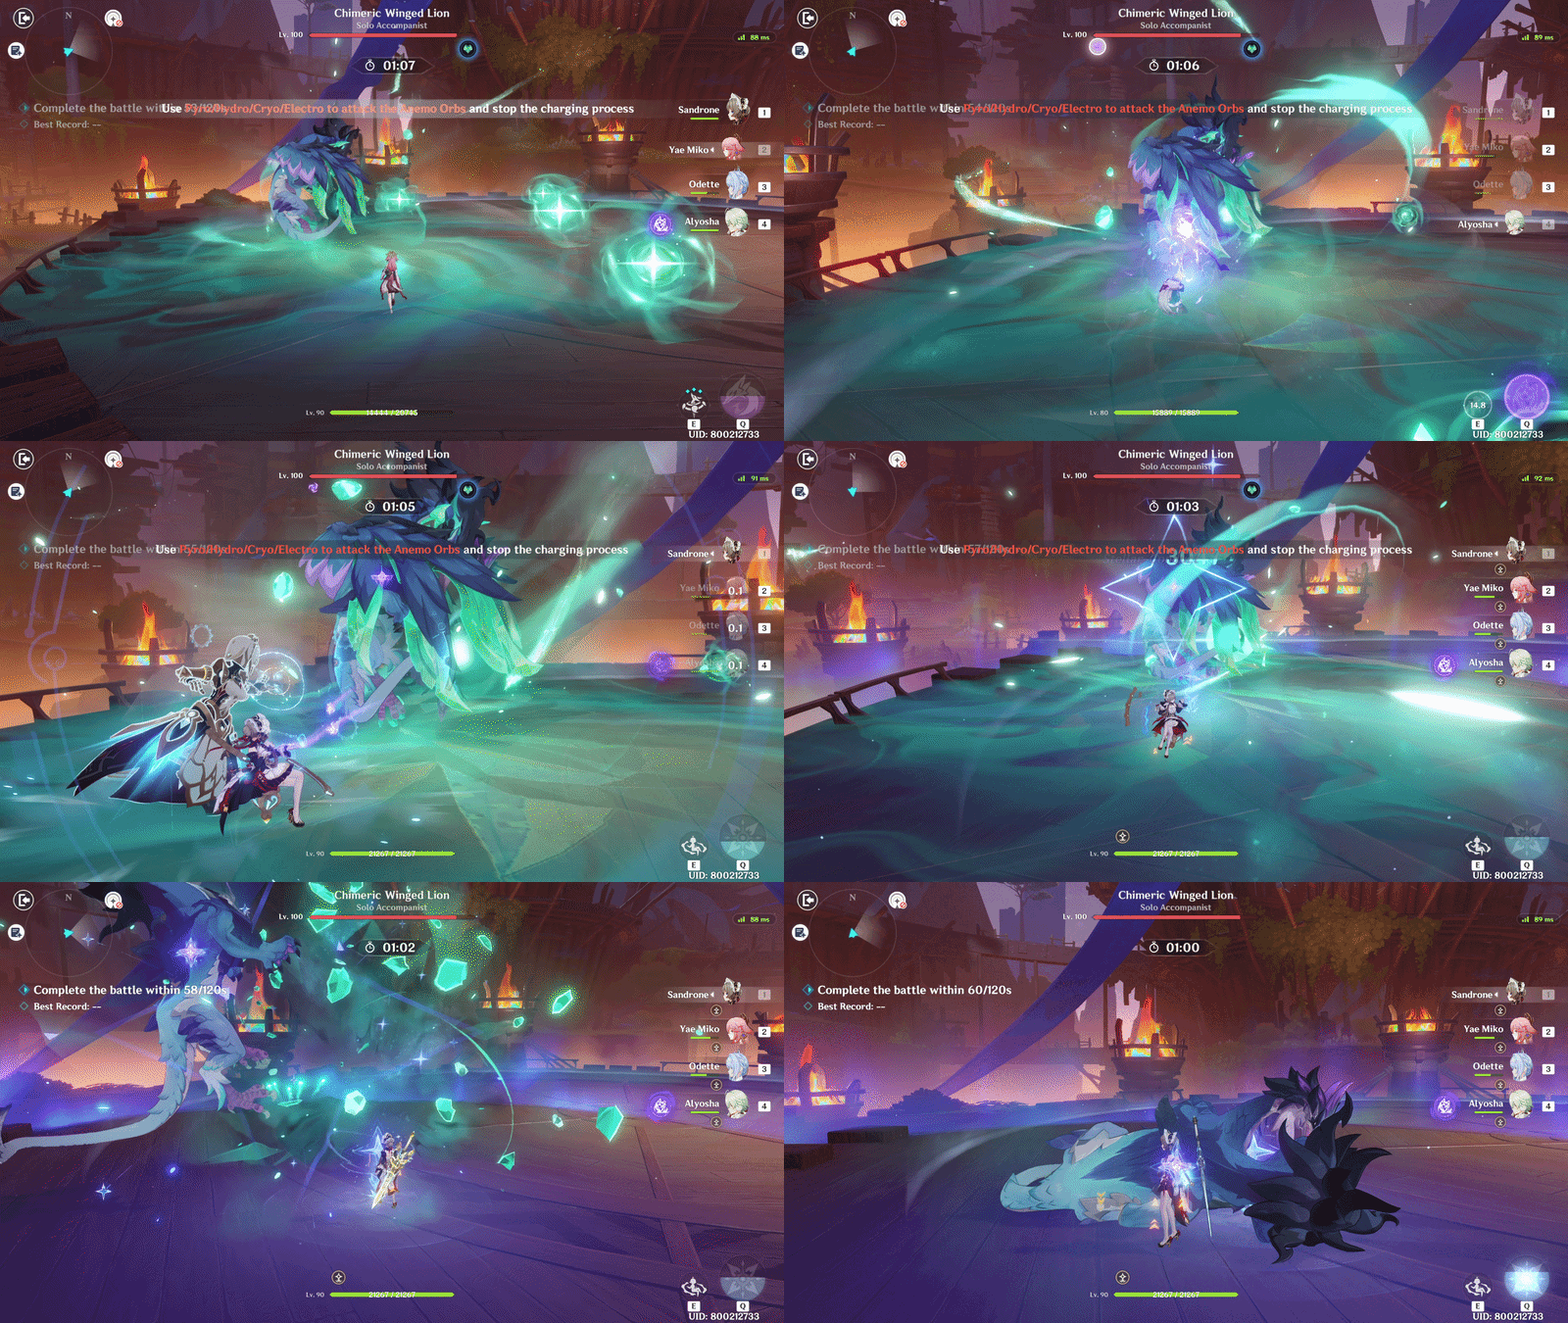
- This boss's first attack pattern is the Electro attack. It will start the battle by deploying a 12 gauge unit of Electro shield. The best element to destroy this shield are Pyro, Cryo, and Dendro.
- After the shield is broken, the boss will become paralyzed for 13 seconds, and all resistances are reduced by 70%.
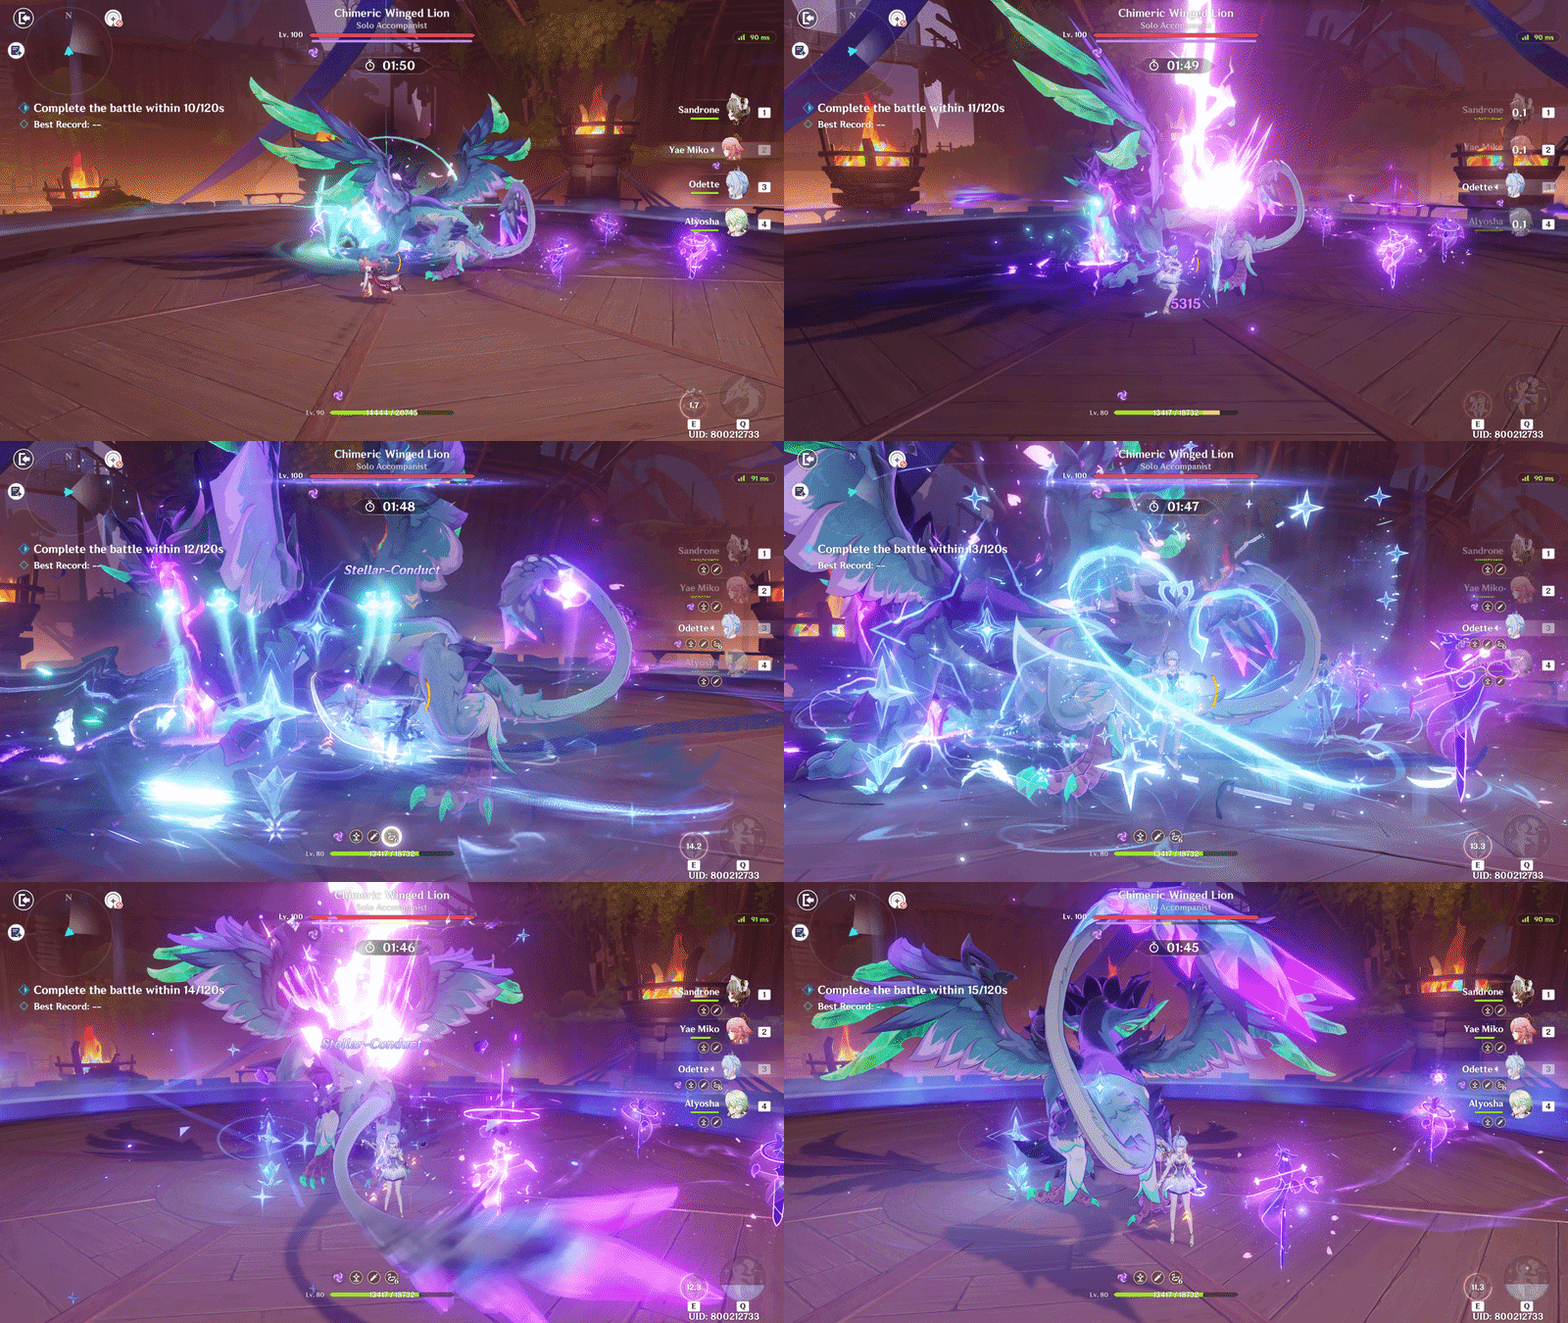
Take a look at the Electro shield in this GIF
- While using the recommended elements above are good, the best option is to use a Stellar-Glimmer reaction. If the enemy is affected by Stellar reaction, 40% of that Electro shield will be destroyed instantly, while also generating 6 Electro Energy Particles.
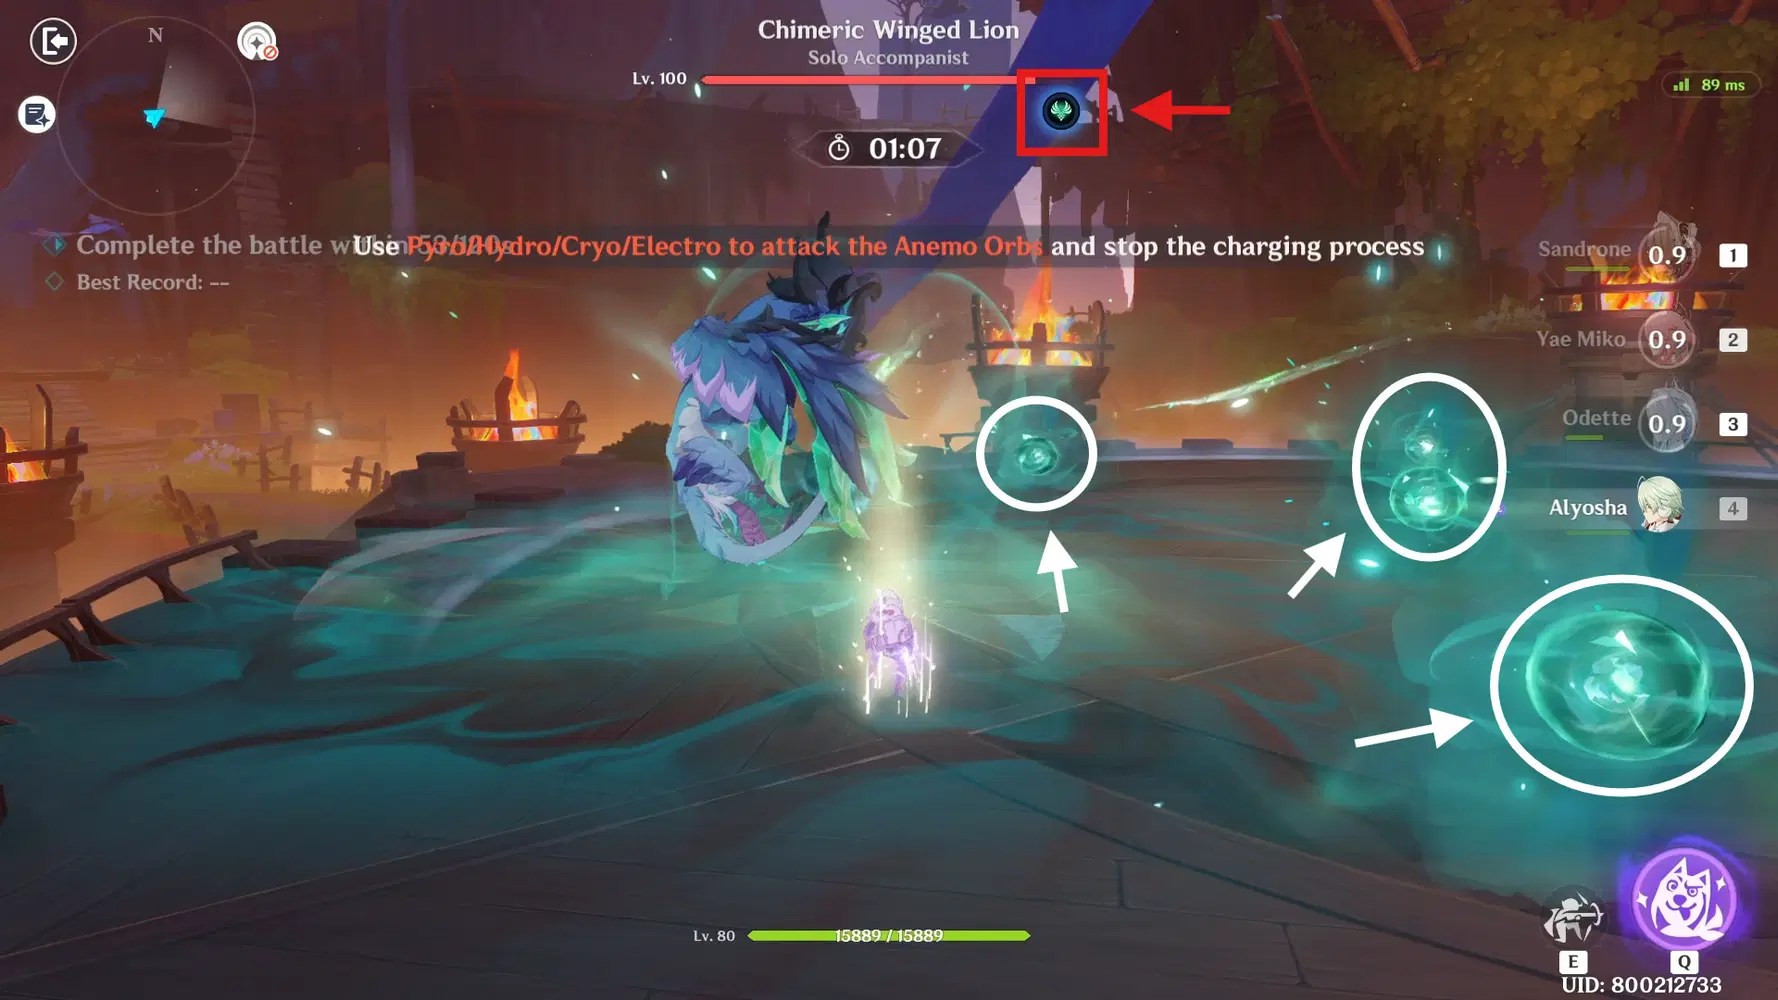
- The second attack pattern is the Anemo attack. One of the skill is the boss will summon 5 Anemo Orbs. It will absorb the Orbs and once the Anemo bar (underneath its HP bar) is full, it will continue attacking you.
- Destroy at least 3 of these Anemo Orbs with any of the PHEC elements (Pyro, Hydro, Electro, Cryo) and it will paralyze the boss for 13 seconds.
- Similar to the Electro attack pattern, if you use Stellar-Glimmer reaction on the boss when the Anemo Orbs exist, you can instantly cancelled this attack, paralyze the boss, and generate 6 Anemo Energy Particles.
|| Special Mechanics (Difficulty 5 & 6)
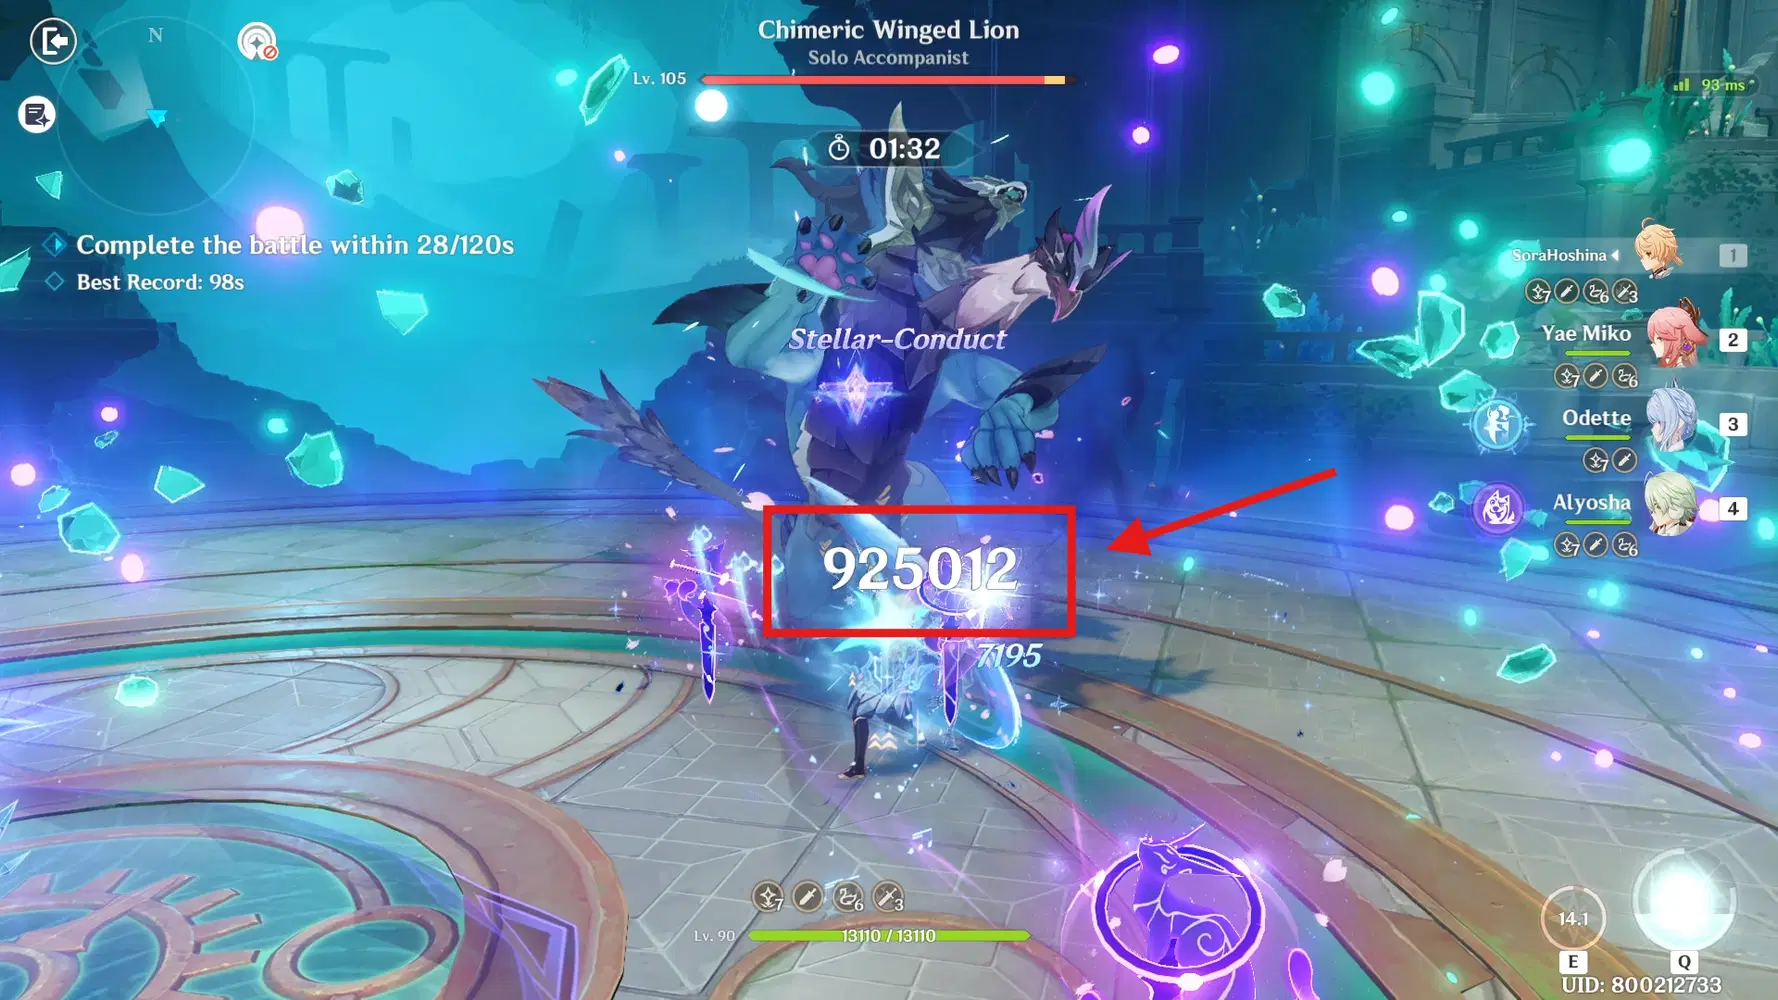
The backlash damage is the Physical damage
- Its HP and DMG will be increased significantly, the amount of Electro shield will be increased to 40 gauge unit of Electro Shield.
- When the Electro shield is broken, the monster will take a backlash damage according to the damage taken by the shield when its up, which is 100% of Stellar reaction damage + 30% of other damage, not exceeding 80% of the boss' total HP.
- When this boss is paralyzed after the shield is broken & the Anemo Orbs is destroyed, Cryo and Anemo RES will be reduced to -120%, while all other resistances are reduced to -60%.
|| Recommended Teams
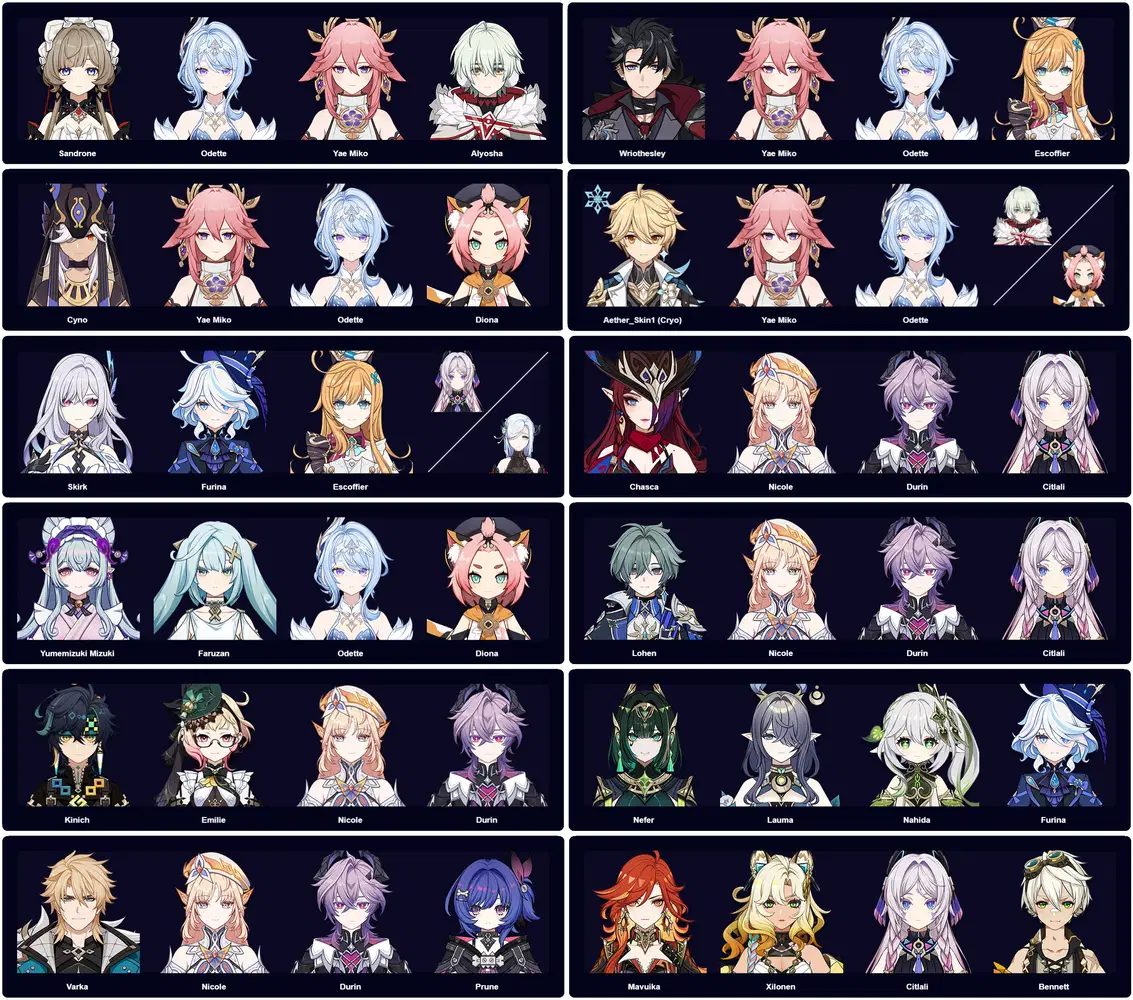
- It's recommended to use Pyro, Cryo, and Dendro elements to break the shield. In addition, bringing a character that can deal ranged attacks is nice as the boss will fly around in some of their attack patterns.
- If you have the Stellar-Glimmer reaction team - Stellar Conduct or Stellar Swirl - it is much better to use this team as you will have an easier time destorying the Electro shield and Anemo Orbs. If you want to try difficulty 5 and 6, definitely use Stellar team!
- Above are the examples of the teams. If you completed the stage with other teams, please share in the comment so it will help other Travelers! ❤️
Veteran Wind Operative

This enemy has a 50% Anemo RES and -20% Physical RES
|| Boss Advantages
- Consumes HP in combat to use "Hunt Down": When this hits, restores a percentage of her own HP and attaches a Bond of Life to the character hit. While Bond of Life is active, the affected character will take continuous DMG. Characters with Bond of Life attached will take increased DMG from this attack.
|| Basic Strategy (Difficulty 4)
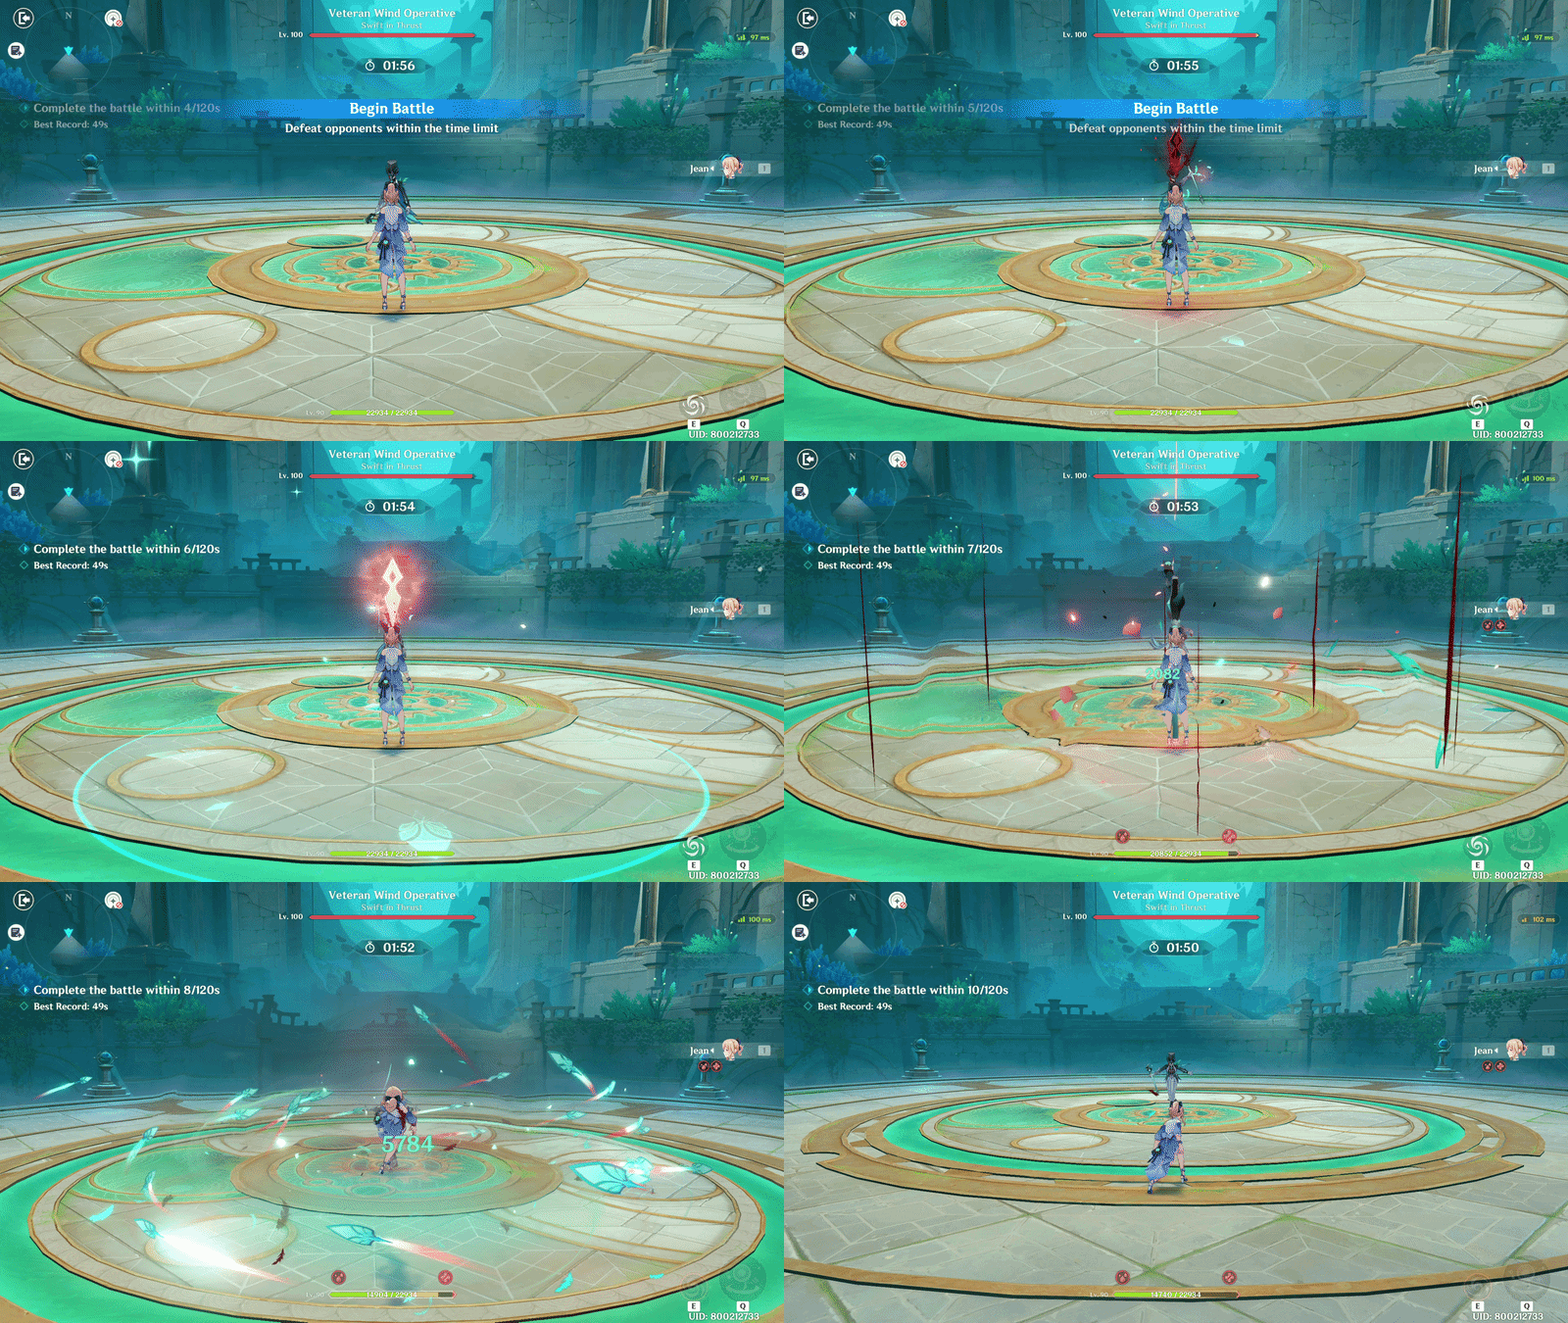
- One of her notable skill is she will consumes a small amount of her own HP to apply Bond of Life to your character, followed by a powerful attacks.
- Characters hit by this attack (and BoL) will be experiencing a bleeding effect (HP will keep going down slowly) until the BoL is removed. Therefore, bring a healer if you believe you need a sustain for the battle.
- Whenever you see the Anemo circle AoE on the ground, immediately stops attacking and focus on dodging the incoming Bond of Life curse. You will can enjoy that free damage from her consuming her own HP (although it's not much).
- Be careful when you want to use Elemental Burst as the boss can sometimes teleport from her original location, so you might miss the Burst.
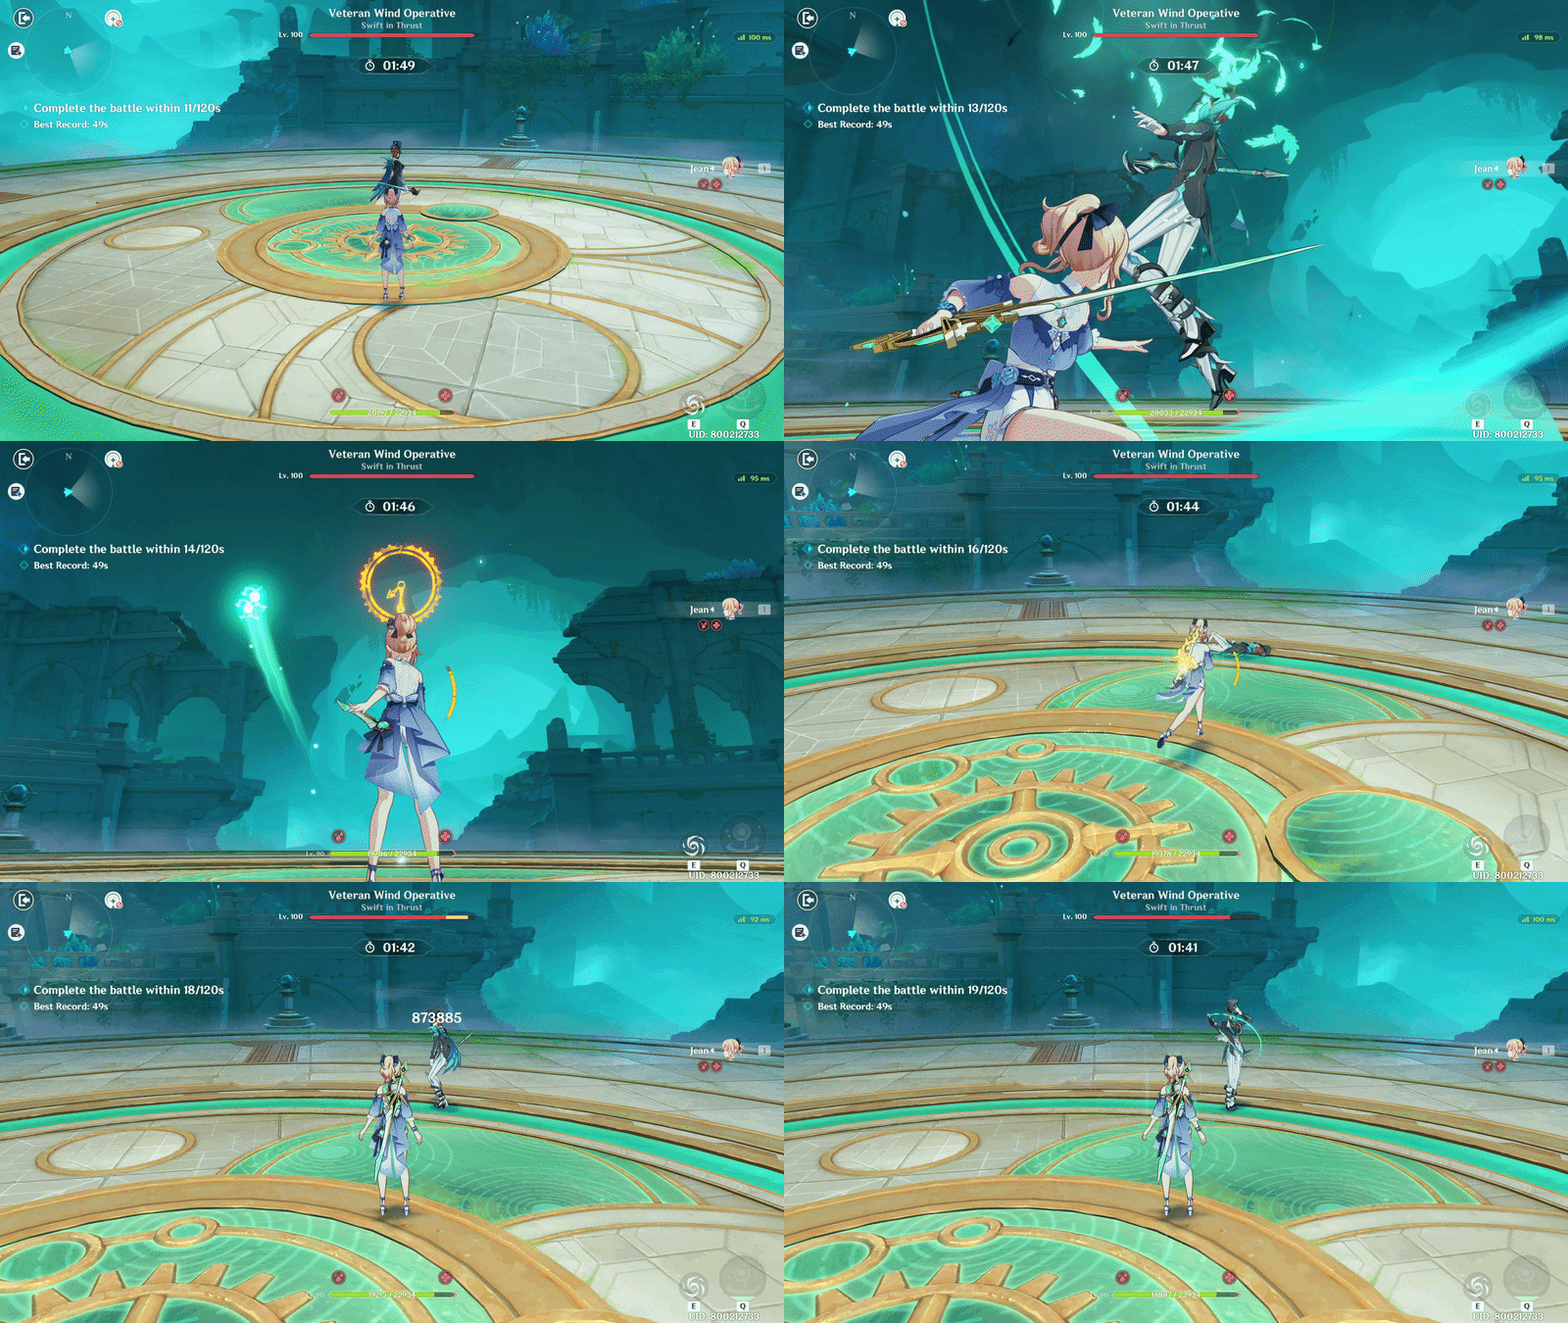
- Cheat strategy: This boss can be lifted up by Crowd Control such as Jean or Venti to inflict fall damage. As such, those who have Jean can easily win this battle! Remember that this only works in difficulty 4 and below!
- How to do it? For Jean, simply hold her Skill, and adjust your camera to look at the highest point before releasing the Skill to launch the boss and let it feels the fall damage.
|| Special Mechanics (Difficulty 5 & 6)
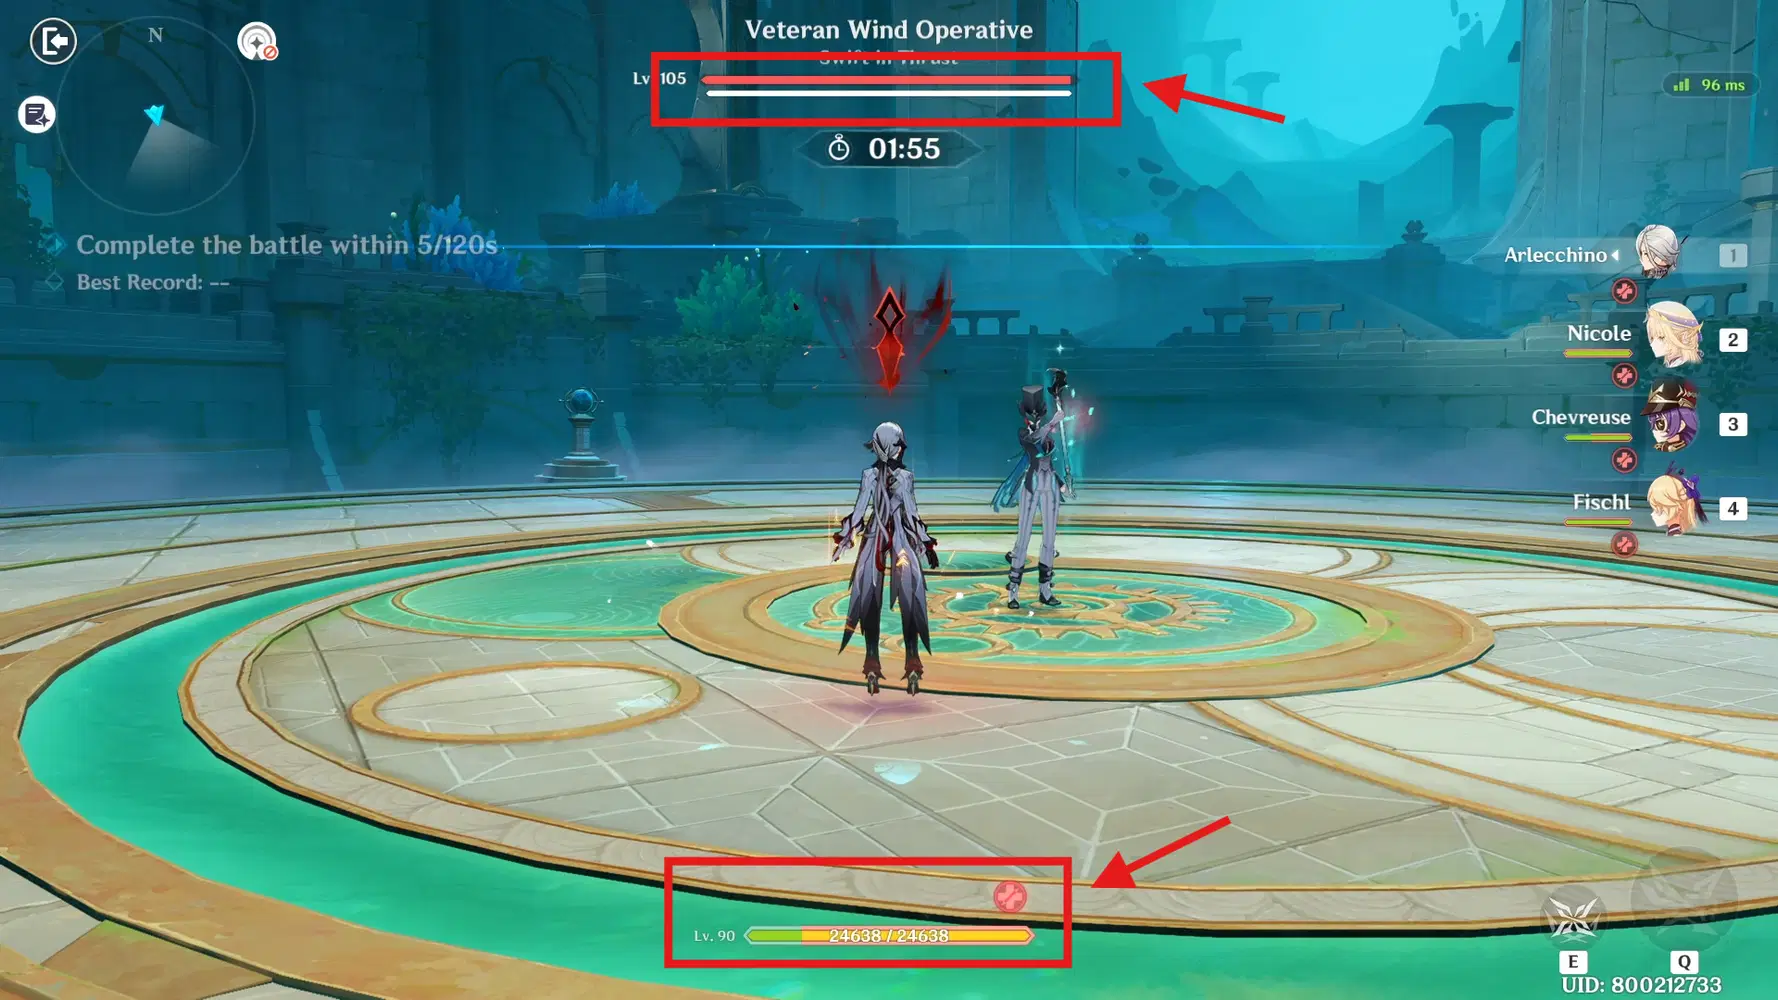
- Remember the cheat strategy? Yeah, it doesn't work anymore starting at difficulty 5 and above. This is because the boss will get heavier, so you can't lift her up anymore.
- At the start of the battle, the boss will activate a shield equal to 22.5% of its own HP. During the shield's duration, it will continuously apply Bond of Life to your character.
- In addition, the Bond of Life cannot be completely removed even through healing, so it's best if you bring along a DPS that can take advantage of that BoL instead, like Arlecchino or Clorinde.
- Characters who relies on HP being up and down (like Neuvillette, Lyney, etc) will have a hard time clearing this challenge because of the BoL curse.
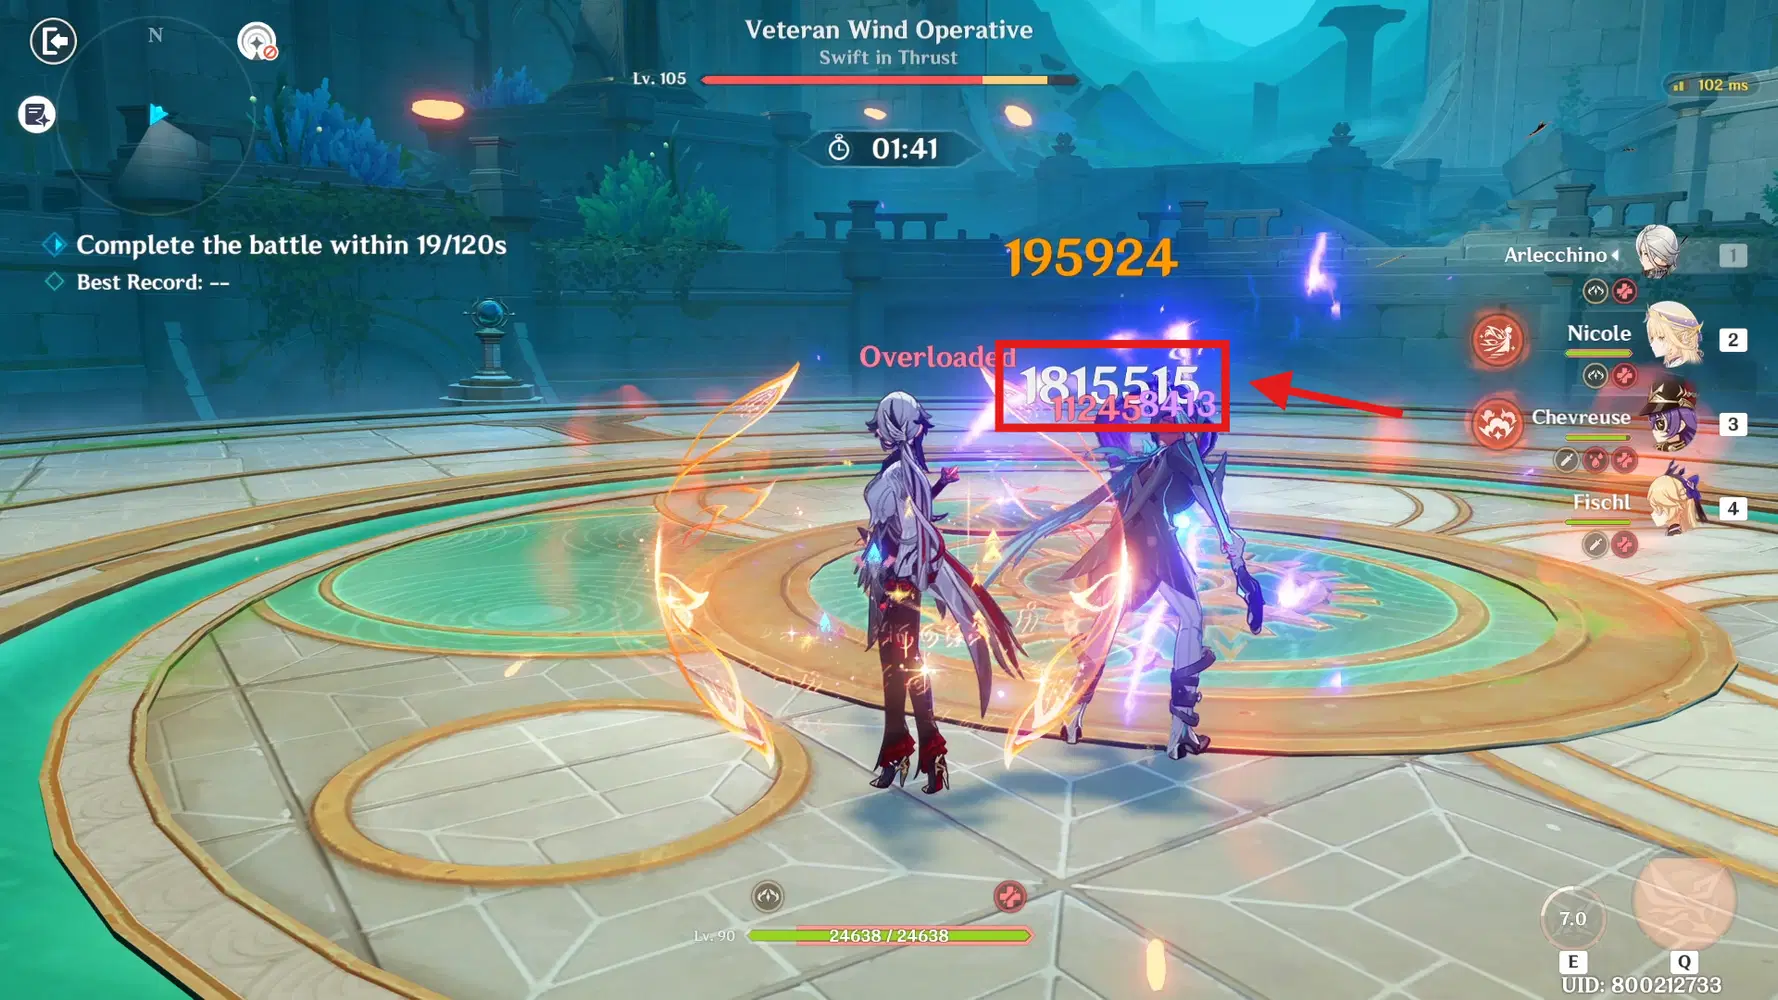
She will lose a LOT of HP
- After the shield is broken, the boss will lose 22.5% of its HP and be briefly paralyzed, before regaining the shield shortly afterward.
|| Recommended Teams
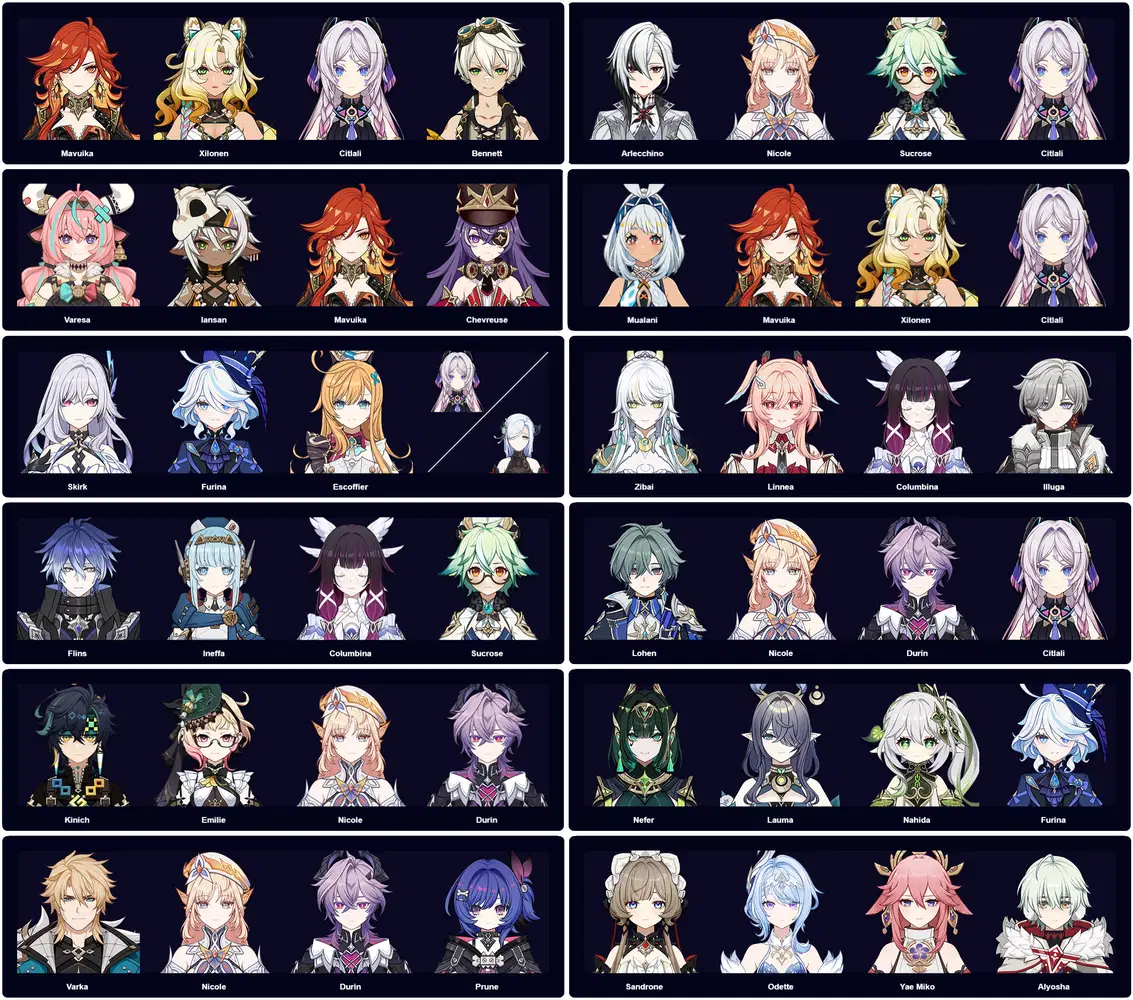
- At lower difficulty (Difficulty 4 and below), you can go solo with just Jean as she can inflict a lot and consistent fall damage to the boss. She can also heal herself if needed. But again, only on the difficulty 4 and below.
- Starting at difficulty 5, or if you don't have Jean for the lower difficulty, it's best to bring a single-target DPS.
- There are no restrictions for this boss except for the DPS that needs HP fluctuations for their damage (aka Neuvillette and others).
- In addition, since you can't heal the Bond of Life completely on difficulty 5, it's best to bring along a shielder for sustain.
- Above are the examples of the teams. If you completed the stage with other teams, please share in the comment so it will help other Travelers! ❤️
Knuckle Duckle

This enemy has Normal RES
|| Boss Advantages
- In battle, this Nemesis enters Duckstruction Mode, in which its aggression increases. It also generates a Ward for itself that increases all RES and summons the Stamping Devices.
- Stamping devices are fairly resistant to all DMG except Electro DMG. Deal Electro-Charged or Lunar-Charged DMG repeatedly, or deal enough damage to destroy them to disrupt these devices. Disrupted stamping devices will go out of control, crash into the Knuckle Duckle, and deal a certain amount of damage to its Ward. By destroying the Nemesis's Ward this way, you can cause it to exit Duckstruction Mode and become incapacitated from Overloaded.
|| Basic Strategy (Difficulty 4)
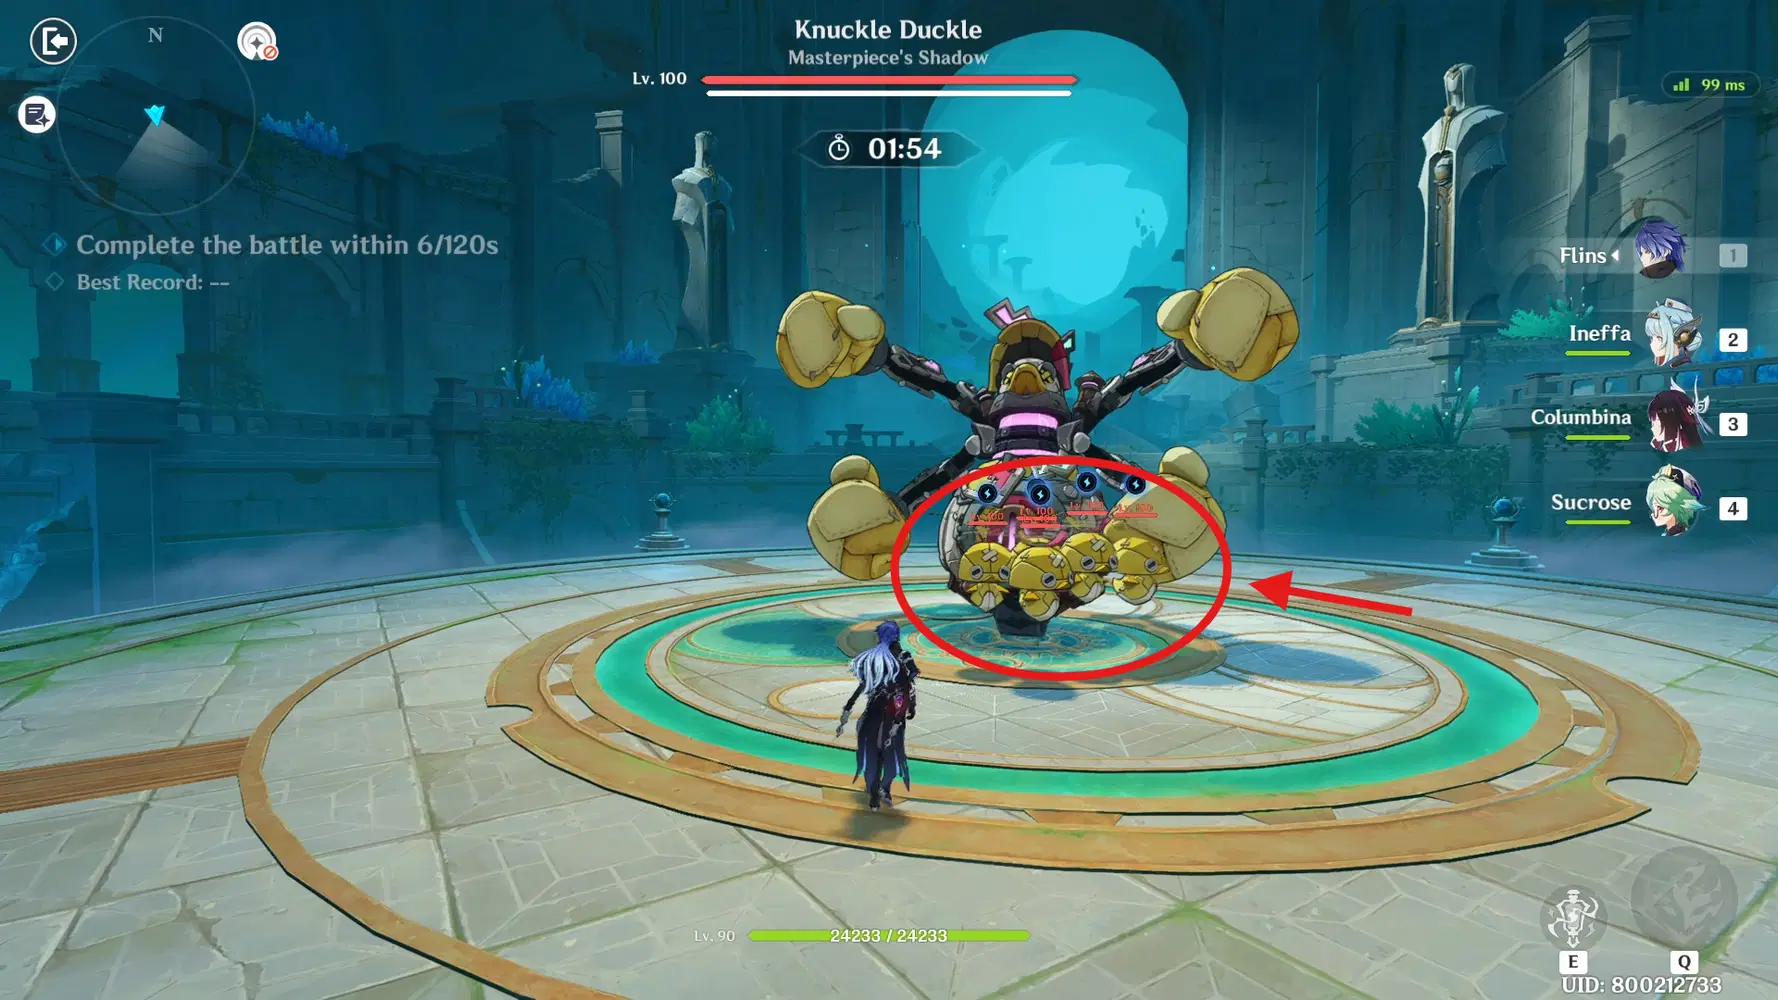
- At the start of the battle, the boss will deploys a shield and summons the Stamping Devices (let's call them ducklings), this boss' all resistances will become 150%. While the ducklings will have a normal Electro RES (10% only) and 150% to all other RES. In other words, it's useless to attack the boss. Instead, focus on the many ducklings on the arena.
- Not to mention that while being shielded, the boss will still deal quite a powerful attacks so while you're focusing on attacking the ducklings, you also need to pay attention to the boss' movement to avoid the incoming attacks, unless you bring a shielder.
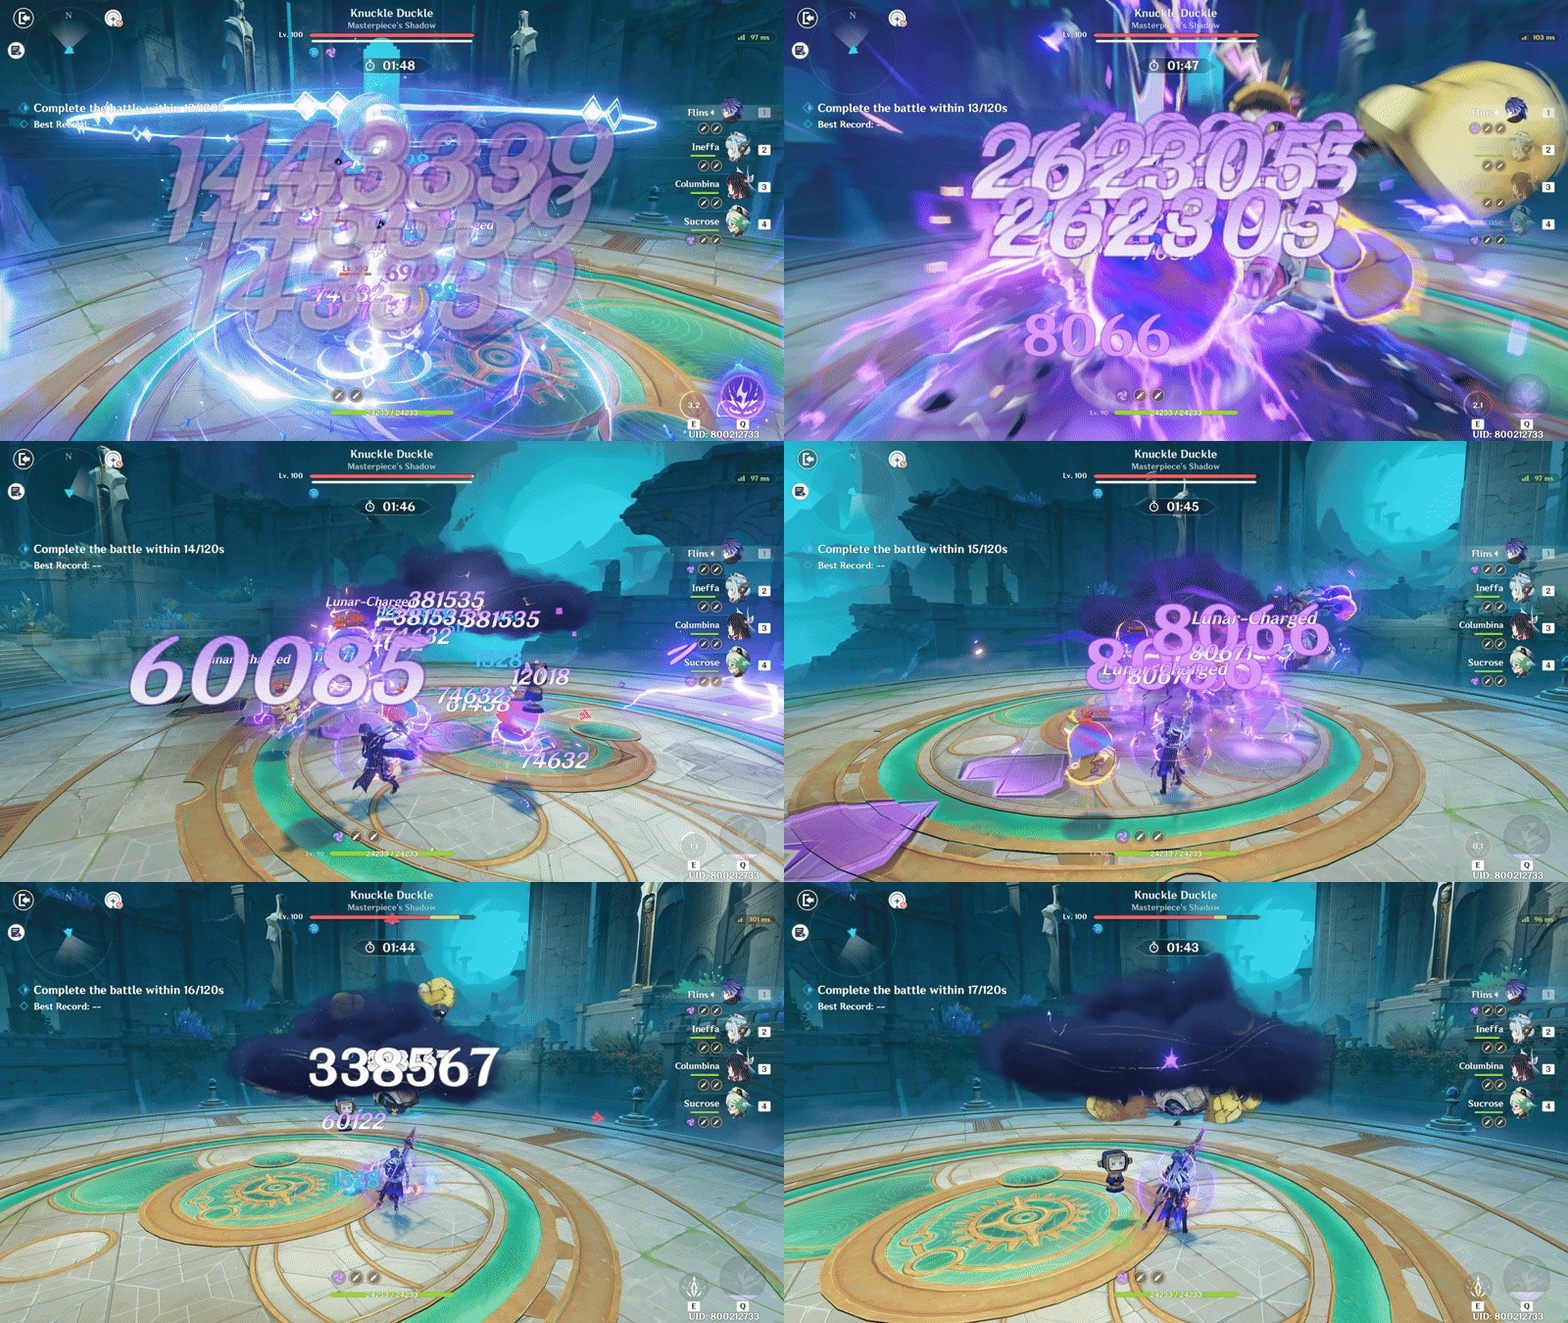
- There are 5 ducklings in total, each with 26% of the boss' original HP. They can be defeated by dealing damage or by being Lunar-Charged/Electro-Charged.
- Each time a duck is defeated, 5% of the boss' original HP will be deducted.
- Defeating all the ducklings will paralyze the boss for 12 seconds and reduce all of its RES to -50%, so unleash everything you have during this window.
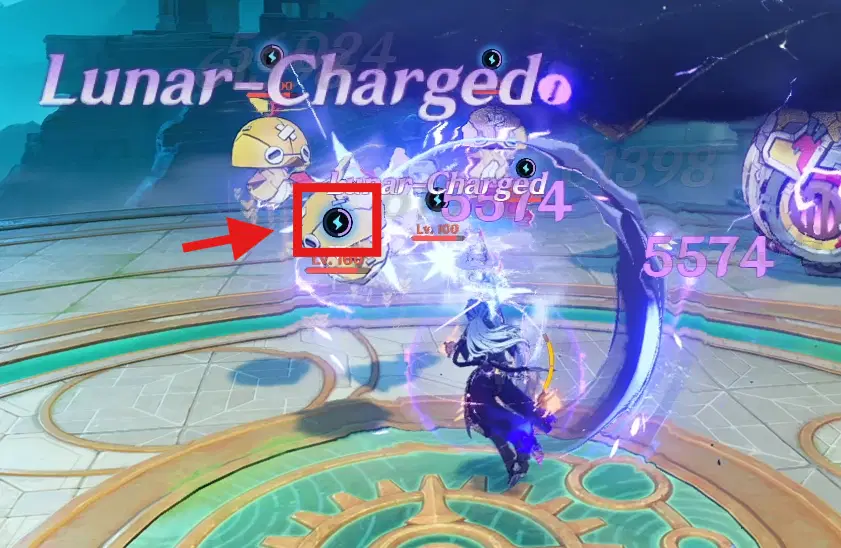
- Now how does the ducklings work? You need to trigger Lunar-Charged/Electro-Charged 10 times to fill the Electro bar above their HP and then they will be defeated.
- Remember that (in difficulty 4) these ducklings are only weak to Electro. So if you don't have an Electro-Charged team, you'll have to focus on Electro damage team (like Overload reaction). But their HP are high, so it will not be easy unless your DPS is highly invested.
|| Special Mechanics (Difficulty 5 & 6)
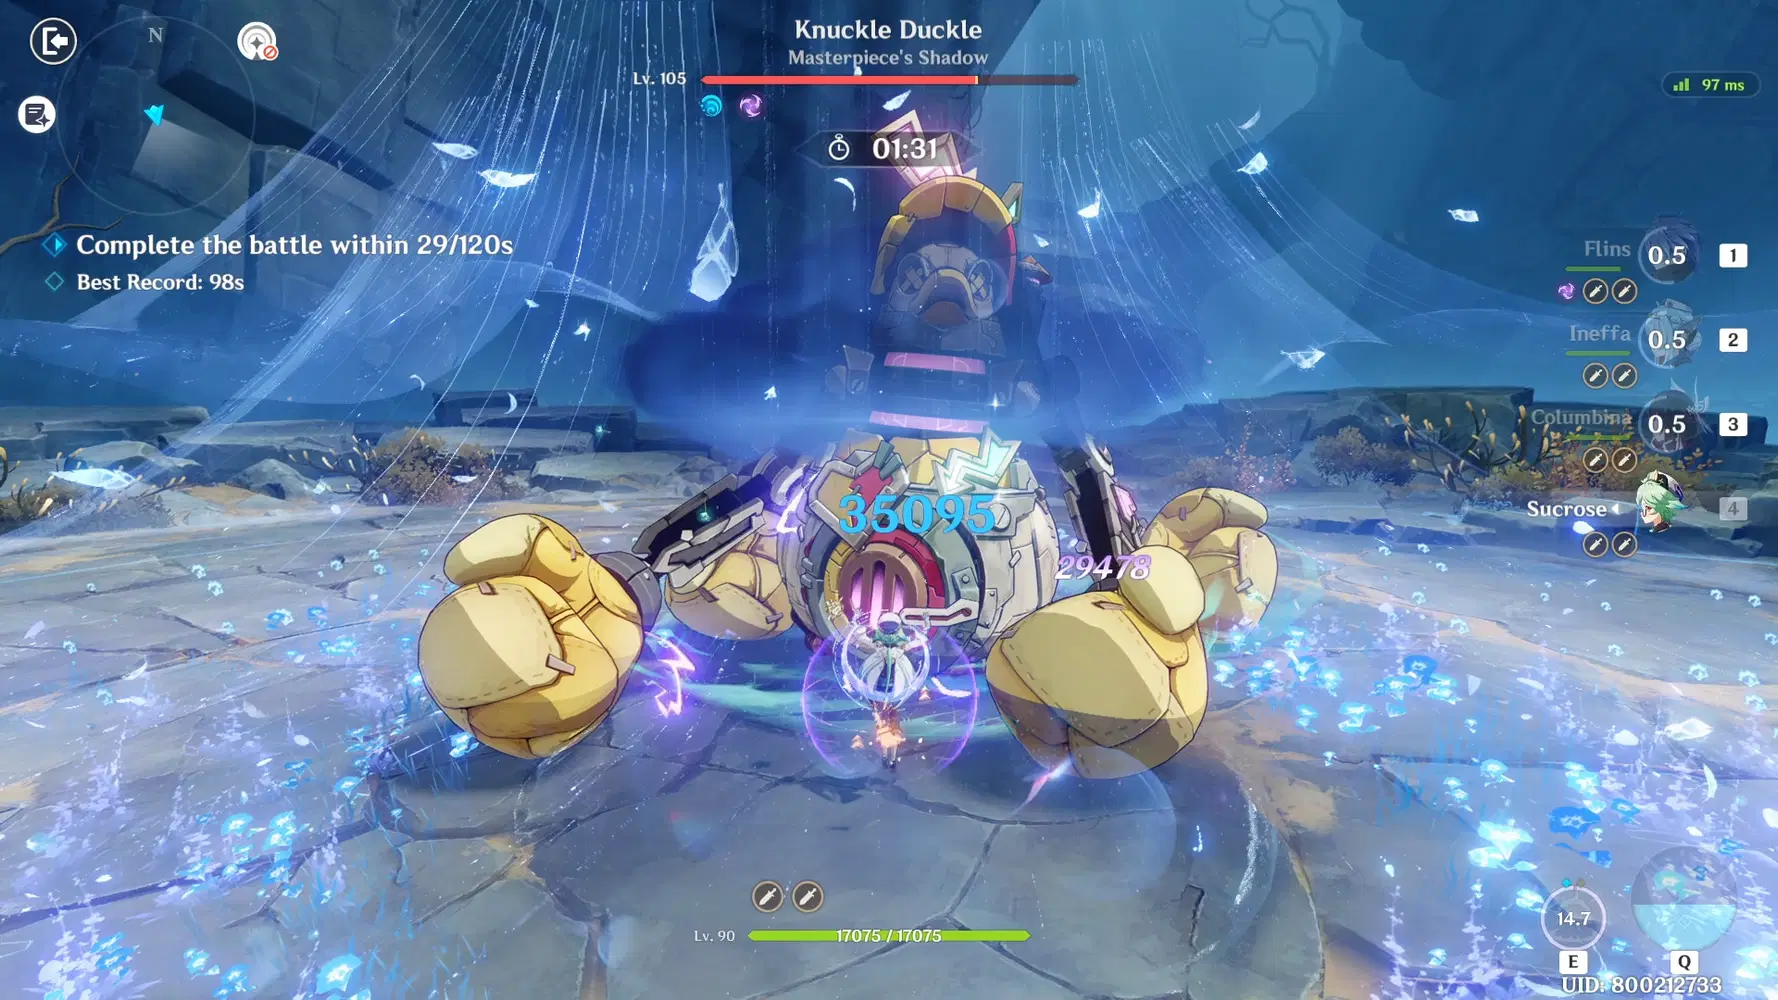
- The usual, it will have an increased HP and ATK damage. Then the most important part: After summoning the ducklings from the start of the battle, the boss' All RES will increase to 220%, but the ducklings' All RES are only 10%.
- In other words, aside from Electro, other elements can also brute force the ducklings, provided that the output is sufficient.
- After the ducklings are defeated, they will deal damage to the boss based on 20% of the damage they take. Each duckling can deduct up to 5% of the boss' HP.
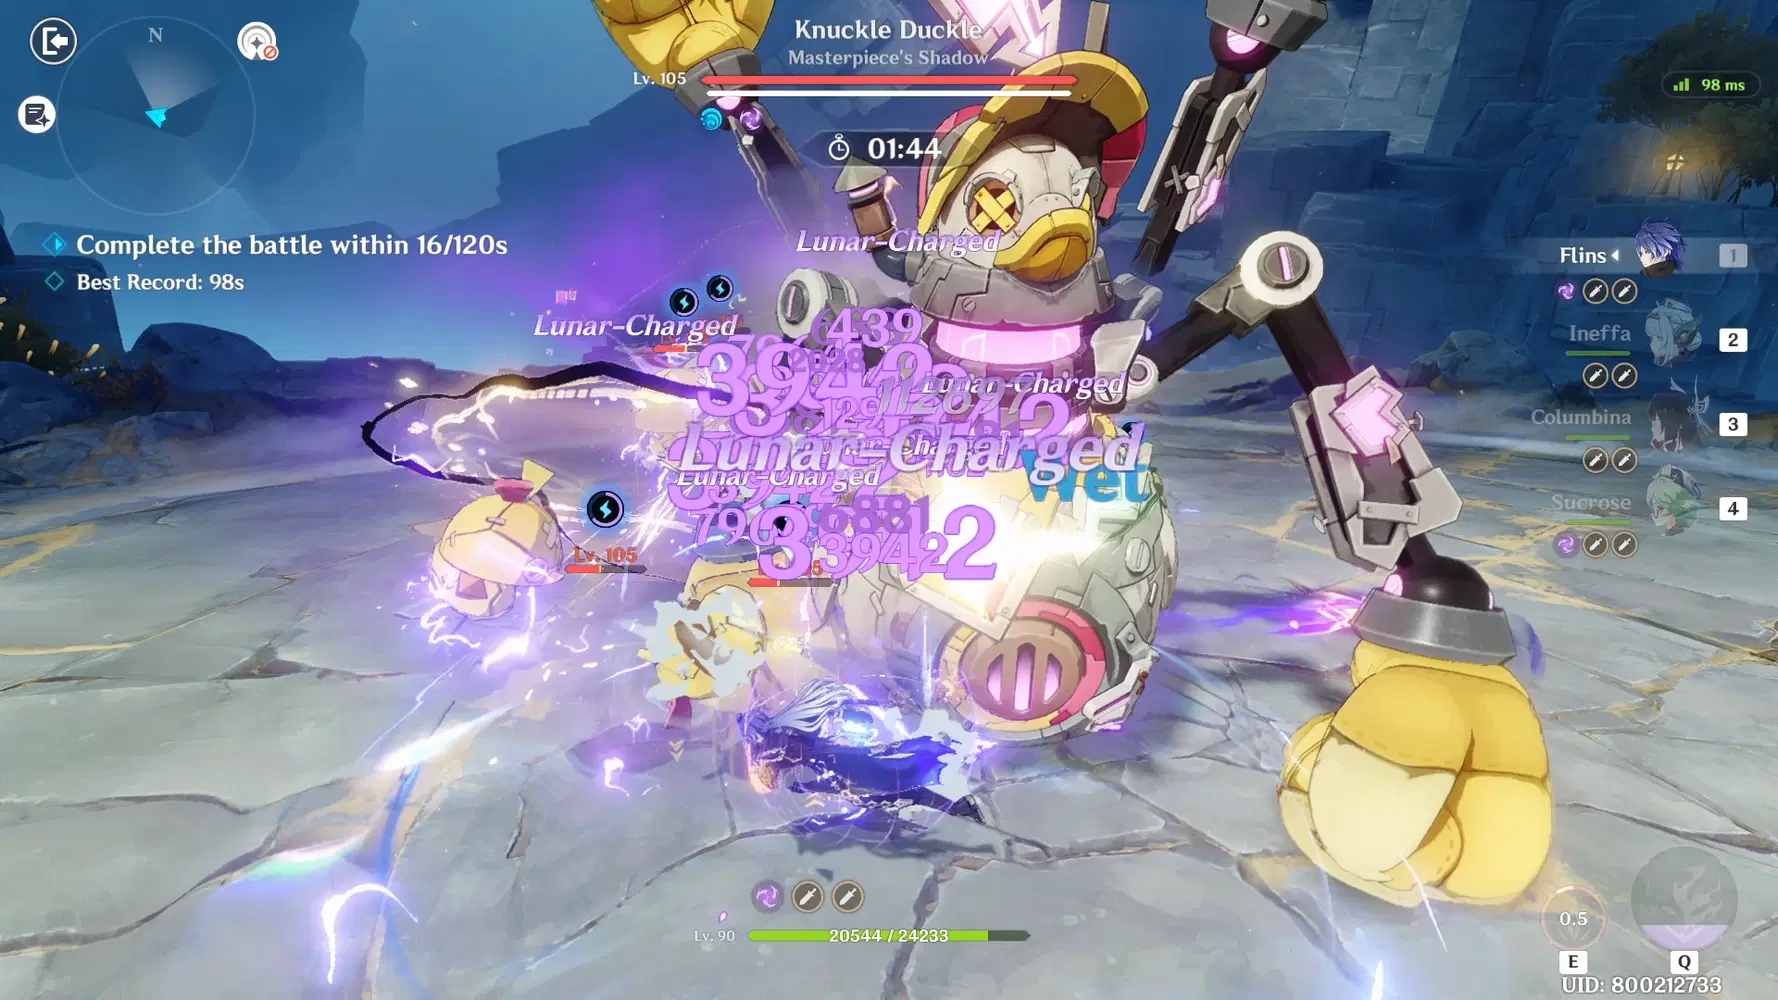
- The duckling takes 150% more damage from Lunar-Charge/Electro-Charge reactions. After 20 Lunar-Charge/Electro-Charge reactions, the duckling will be defeated.
- Furthermore, after the boss recovers from its paralyzed state, other resistances return to its base 10% , but the Electro RES remains unchanged at -50% , which is more beneficial to Electro DPS characters.
|| Recommended Teams
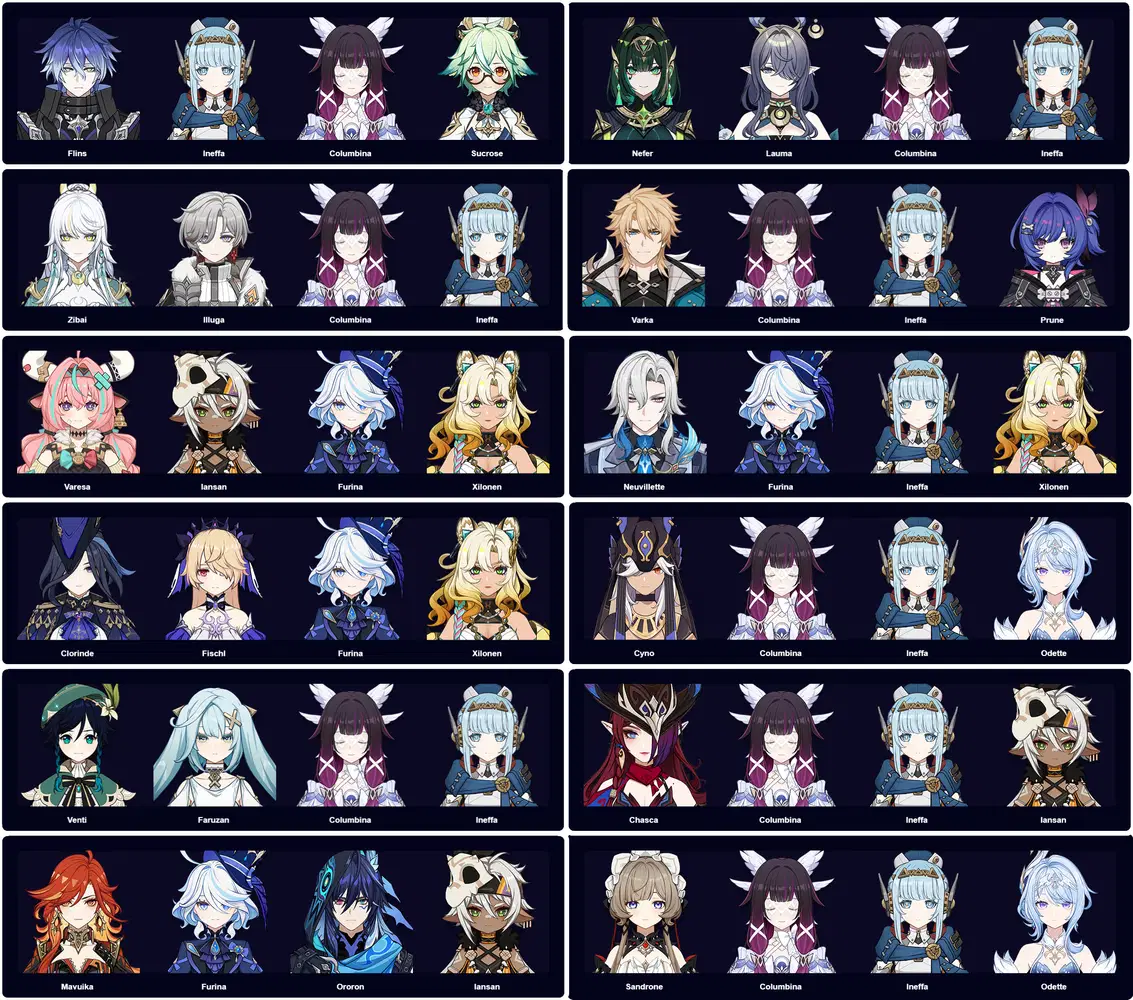
- It is recommended to use teams that can deal Lunar-Charged or Electro-Charged since other teams may take a long time to finish the challenge unless significantly invested.
- Although ignoring the mechanics and using brute force is an option, it is highly not recommended at all, unless you have C6 of said DPS.
- Above are the examples of the teams. If you completed the stage with other teams, please share in the comment so it will help other Travelers! ❤️
Video Showcase of Stygian Onslaught Battle
|| Fearless Difficulty
|| Dire Difficulty
You've reached the end of this guide, thank you for reading! ❤️