Great Expeditionist - Event Challenge Guide
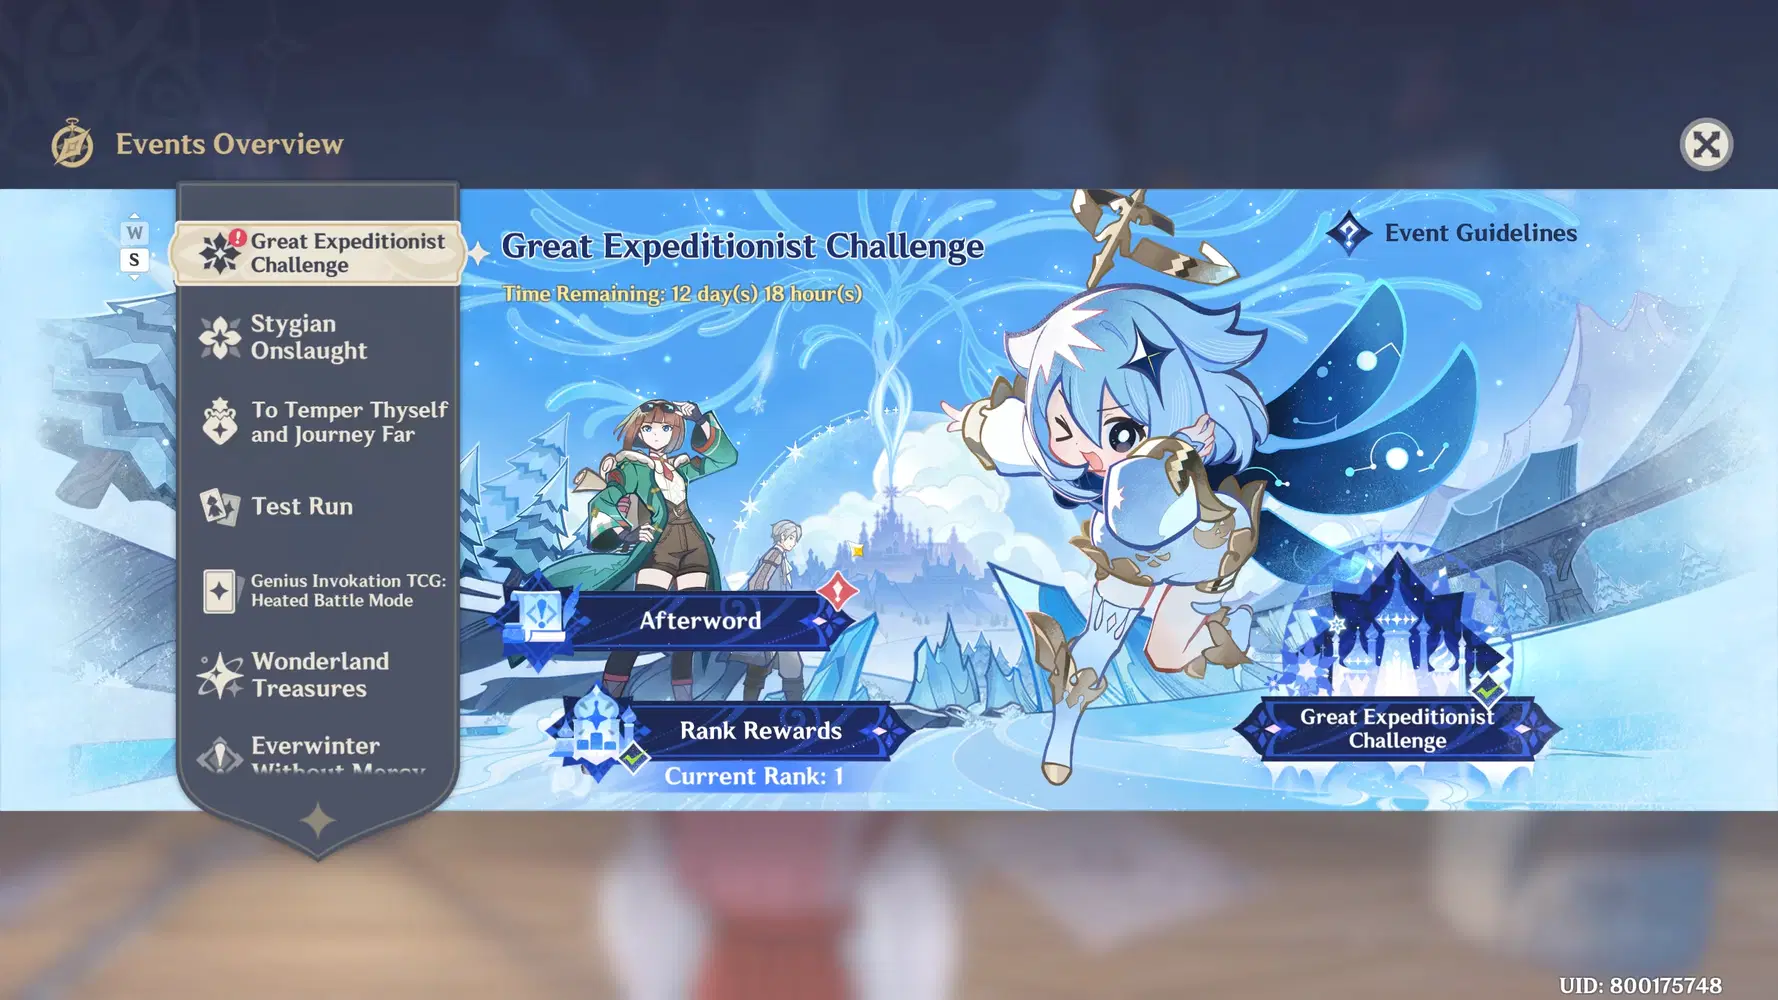
Main Event Page
Event Details
- Event Duration: 2026.08.28 - 2026.09.14
- Requirements :
- Adventure Rank 20 or above
- Complete Archon Quest Prologue: Act III "Song of the Dragon and Freedom"
- Complete the "Gunfire in the Silent Lands" quest of the Archon Quest Chapter VII: Act I "Everwinter Without Mercy."
- Complete Archon Quest Chapter VII: Act II "Wraith's Nocturne" first to get the best experience from this event.
- Event Location: West of The Korolevskiy Theater - Snezhnaya
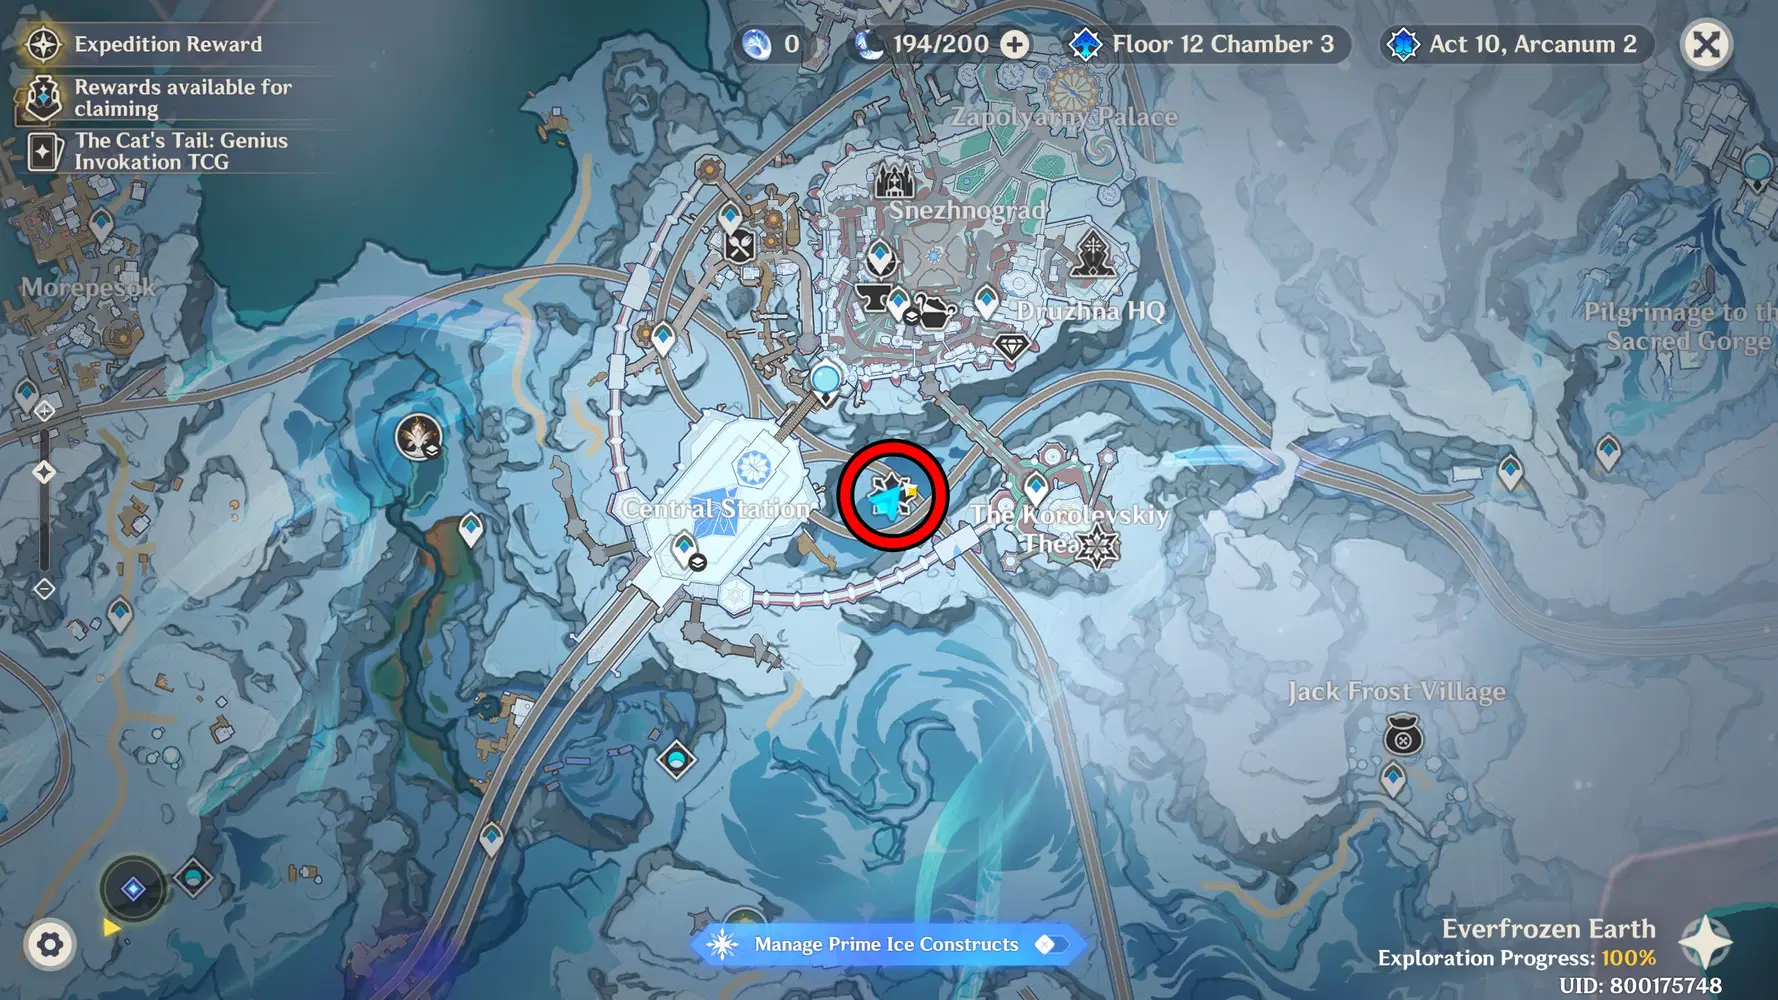
Event Location
Complete the event's opening dialogue to unlock the event stage.
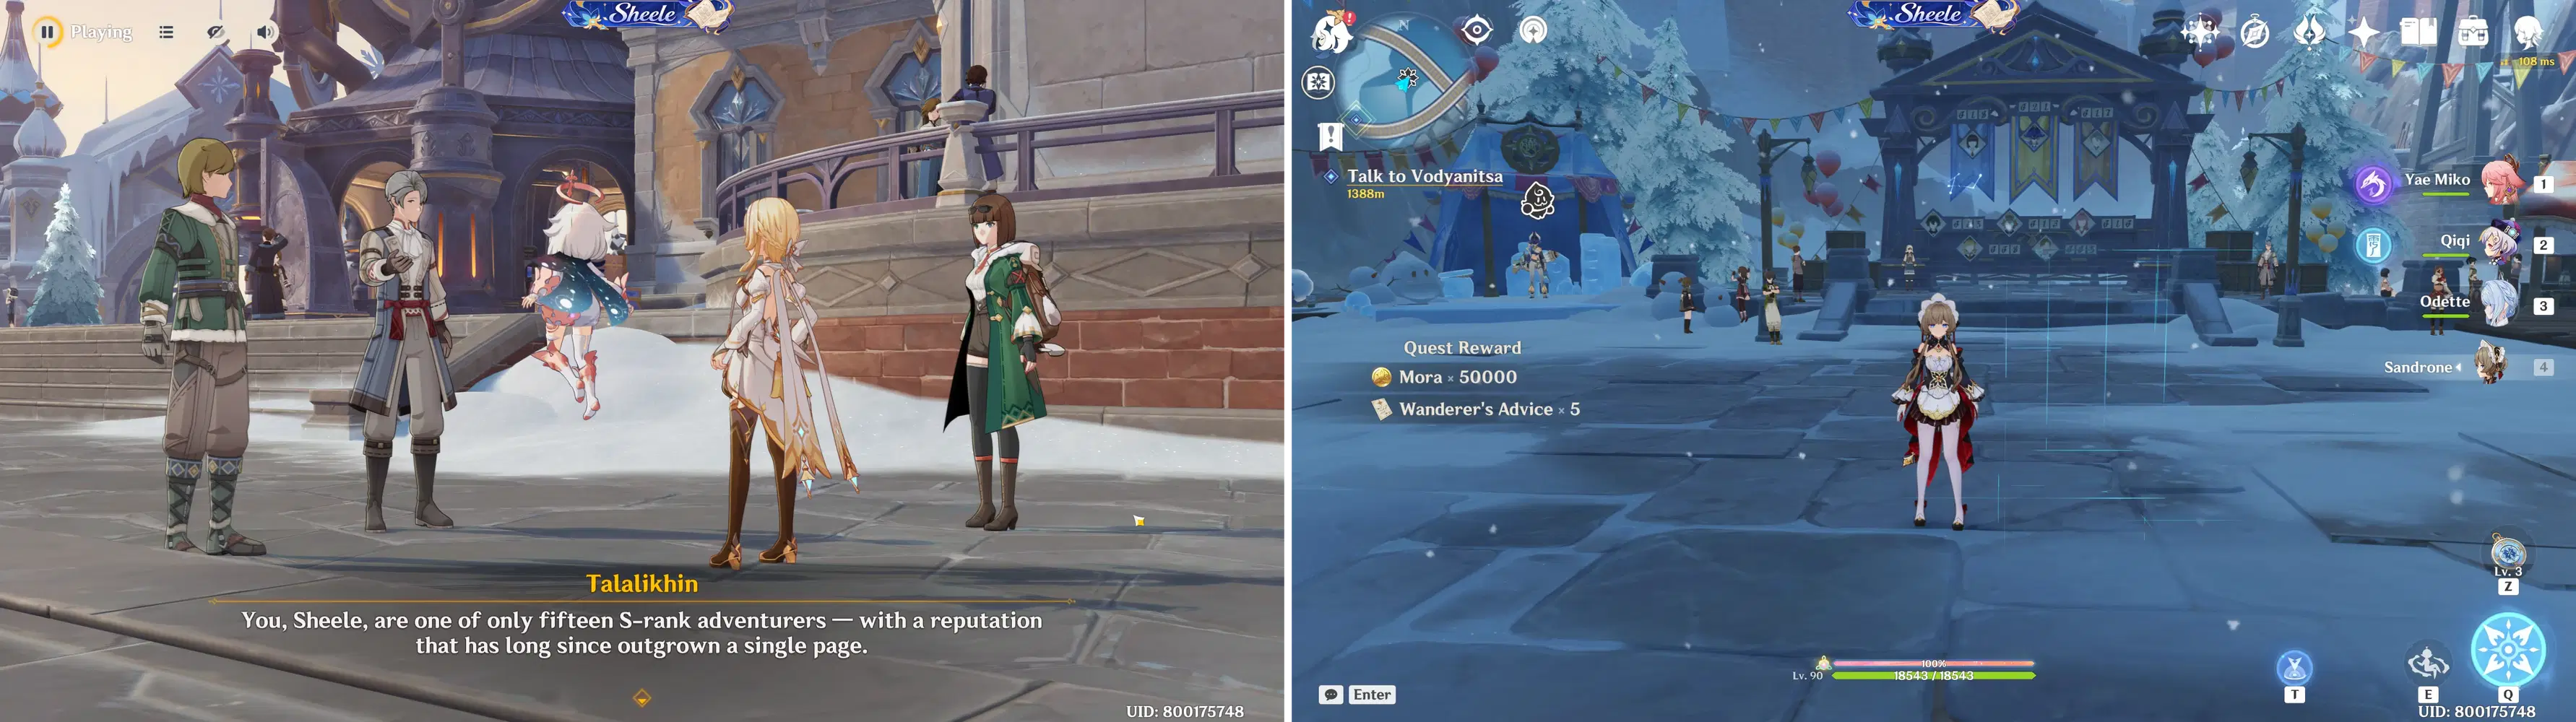
Event Prolog & Event Stage
Open the event menu to access the available challenge menus.
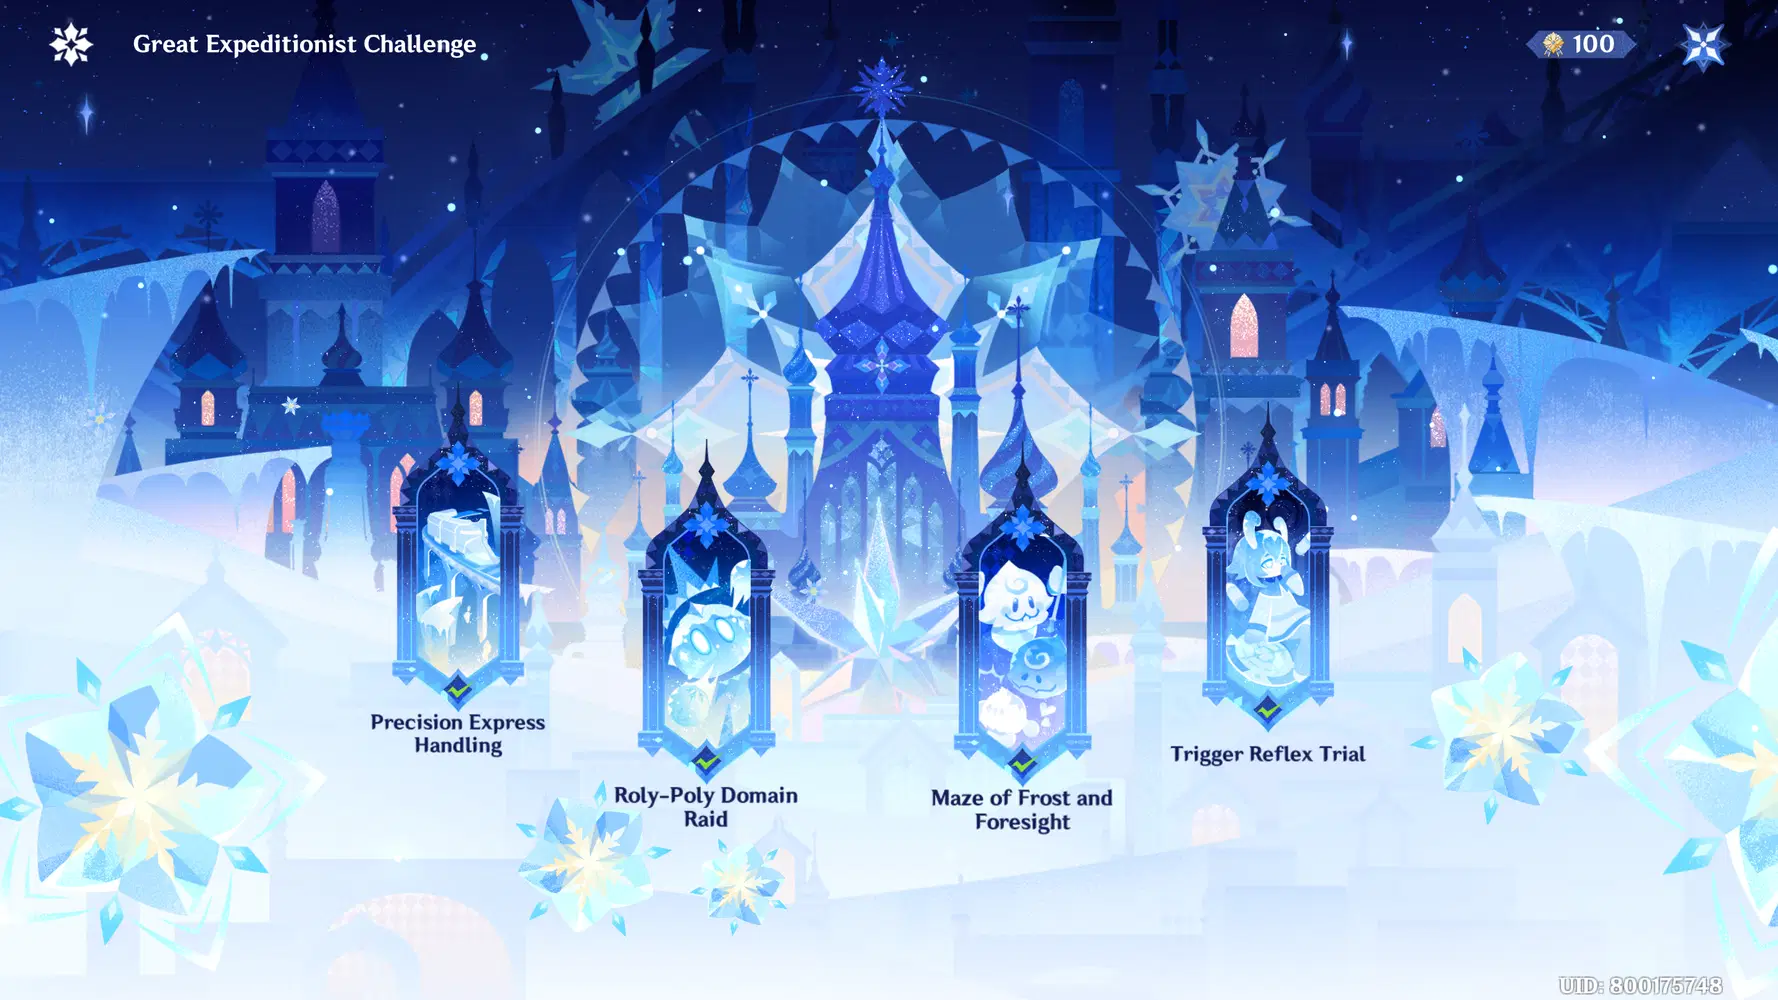
Event Challenge Menu
Event Summary
- The event features four unique game modes: Precision Express Handling, Roly-Poly Domain Raid, Maze of Frost and Foresight, and Trigger Reflex Trial.
- In Precision Express Handling, take control of a train and follow the given instructions to navigate it safely to the designated station before time runs out.
- In Roly-Poly Domain Raid, engage in combat to increase your Snowball Level, then take control of snowballs during the Snowball Phase to defeat enemies.
- In Maze of Frost and Foresight, utilize Prime Ice Constructs and different mechanisms to discover suitable routes and guide the Jack Frosts to their destination.
- In Trigger Reflex Trial, use firearms to hit as many targets as possible within the time limit. The more targets you knock down, the higher your score.
- Participating in these challenges awards Tournament Points, which contribute to your event ranking. Achieve the required rank to invite "Kätzlein Cocktail" Diona (Cryo) to your roster. Additional rewards include Primogems, a Crown of Insight, and other valuable items.

Precision Express Handling
Precision Express Handling is one of the game modes featured in the Great Expeditionist Challenge event. The mode becomes available after completing the event World Quest Adventurers of Teyvat: Grand Showdown! Once unlocked, you can access it by speaking with Rika at the designated location.
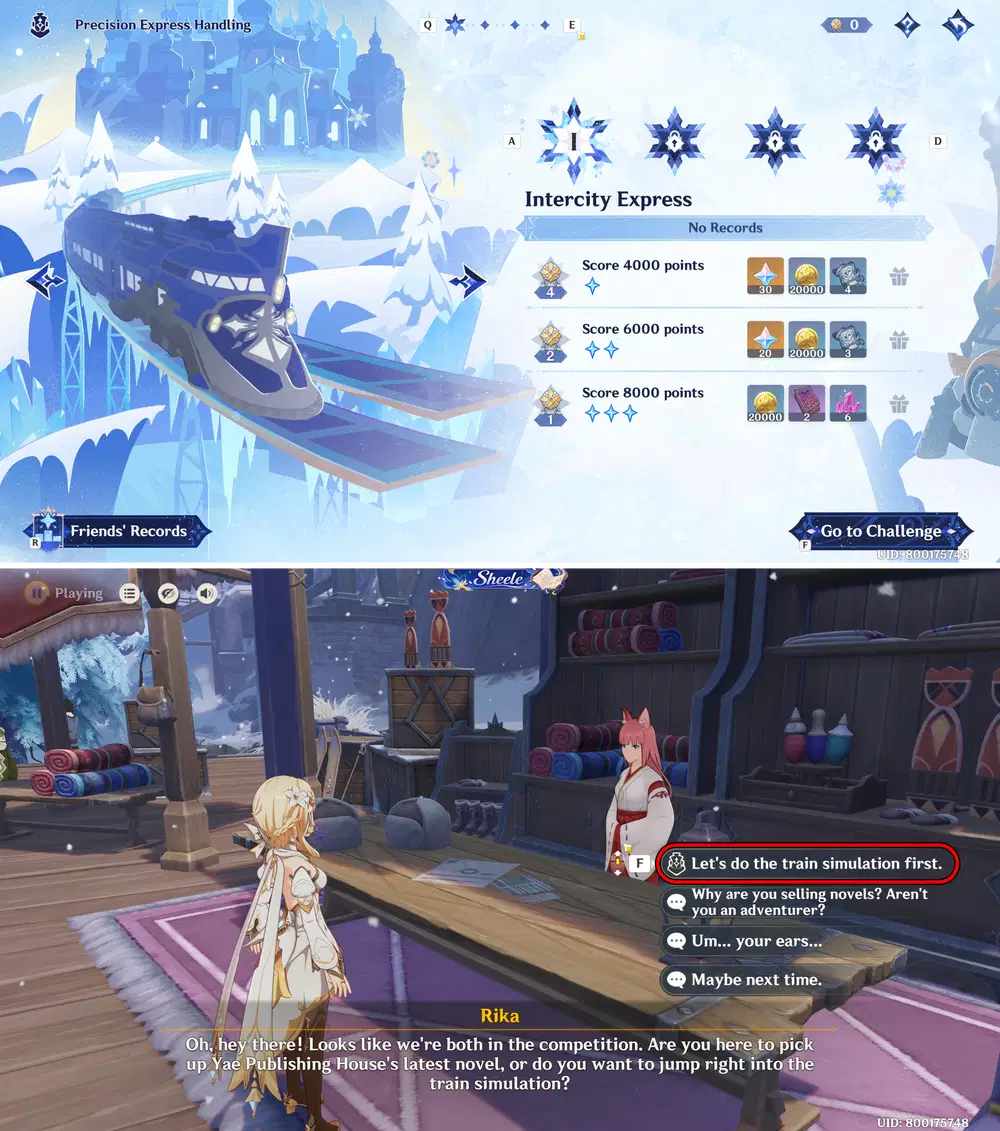
Precision Express Handling Event
Gameplay Tutorial
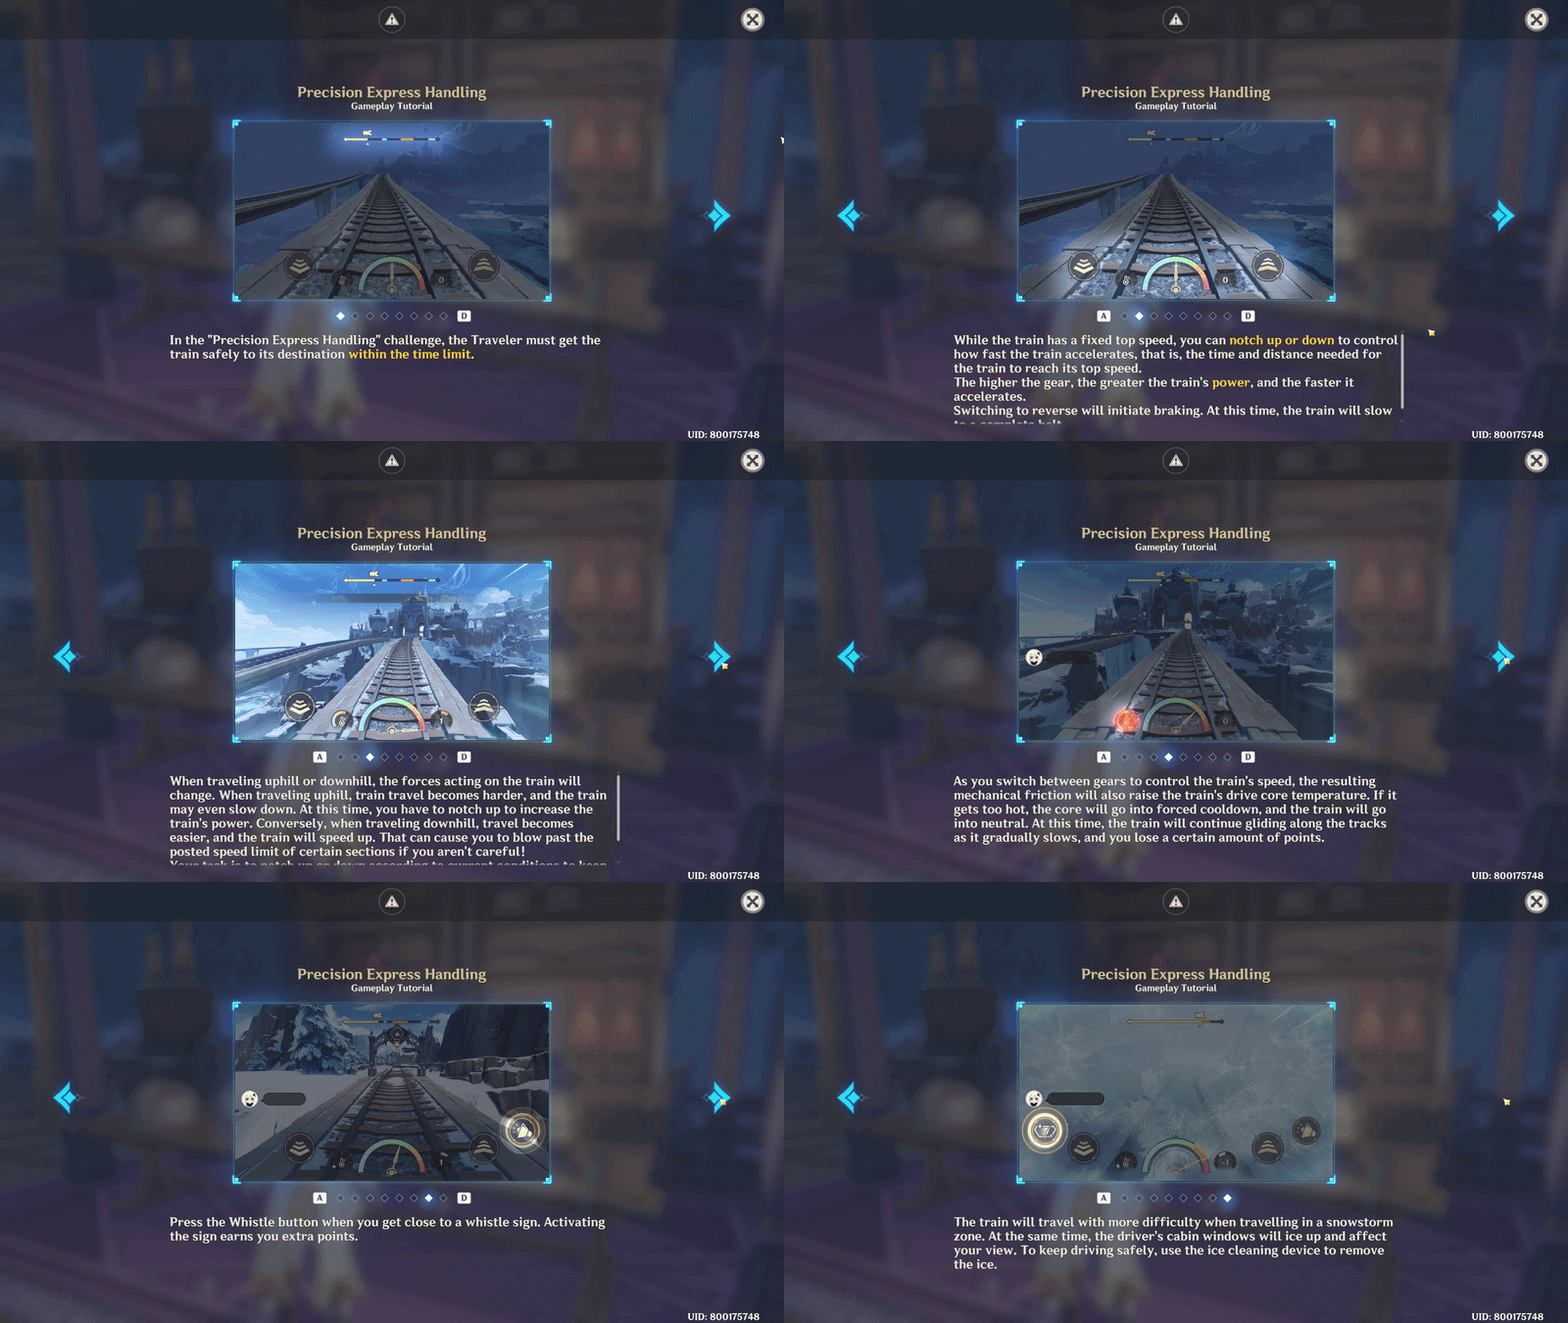
✦ Challenge I: Intercity Express
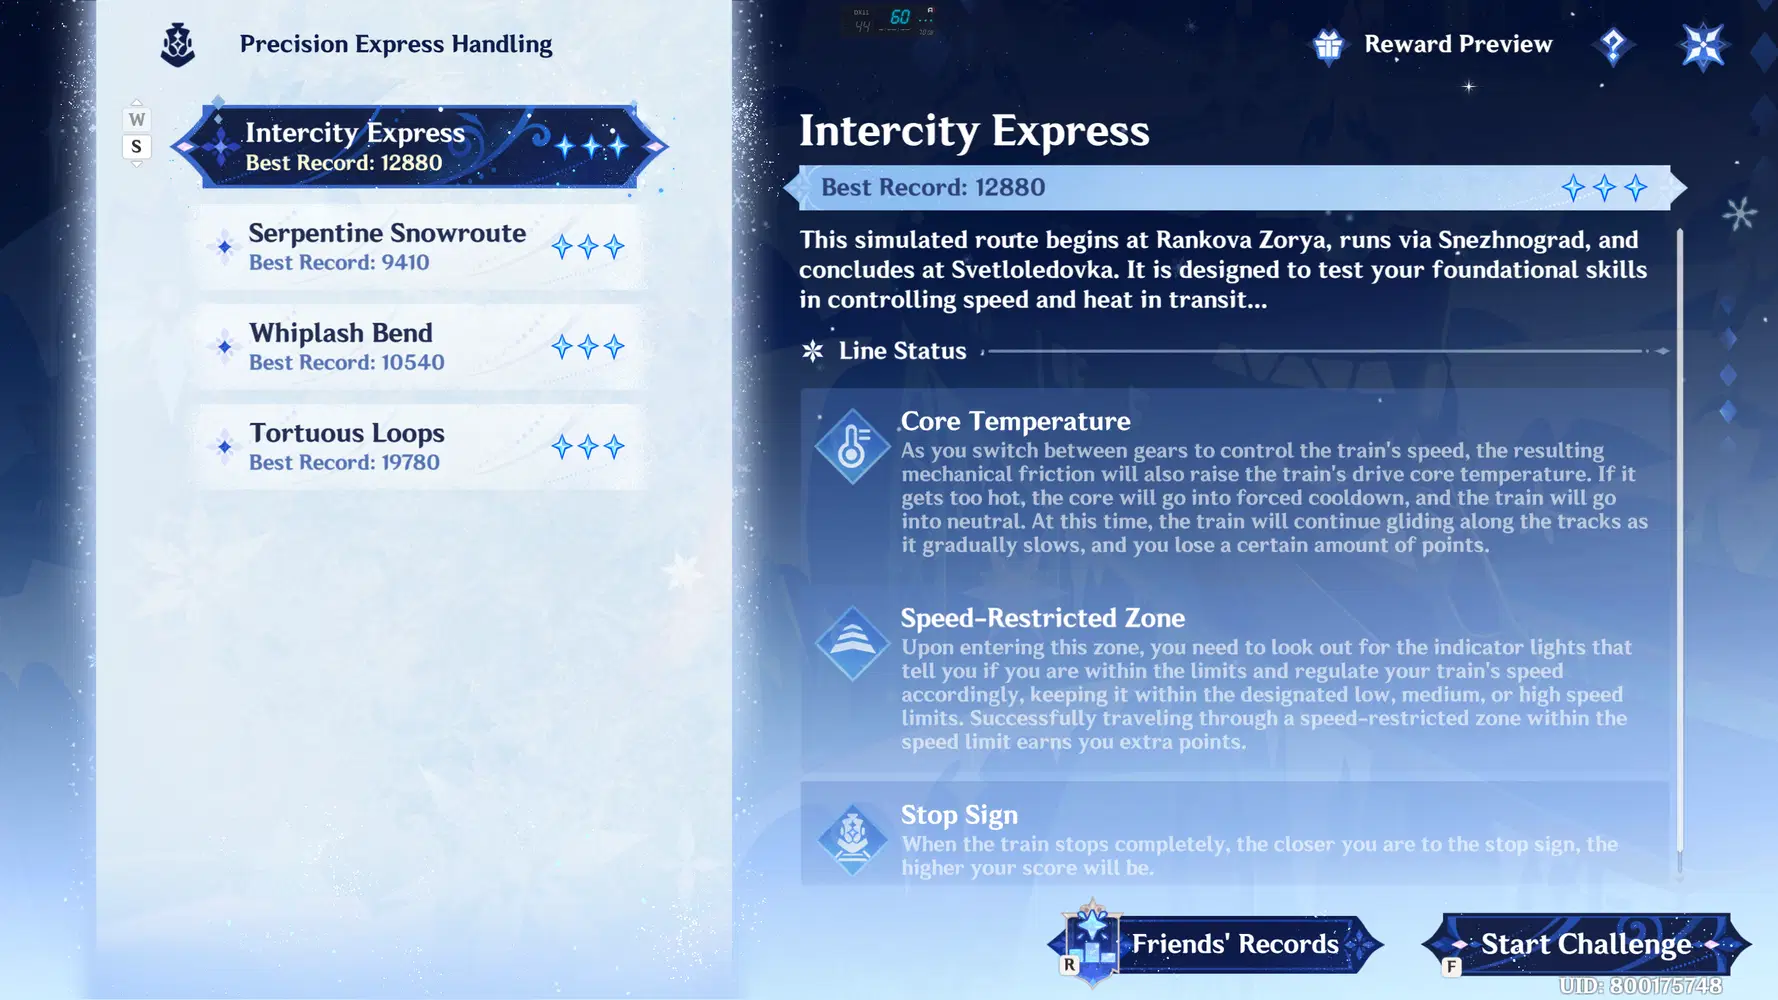
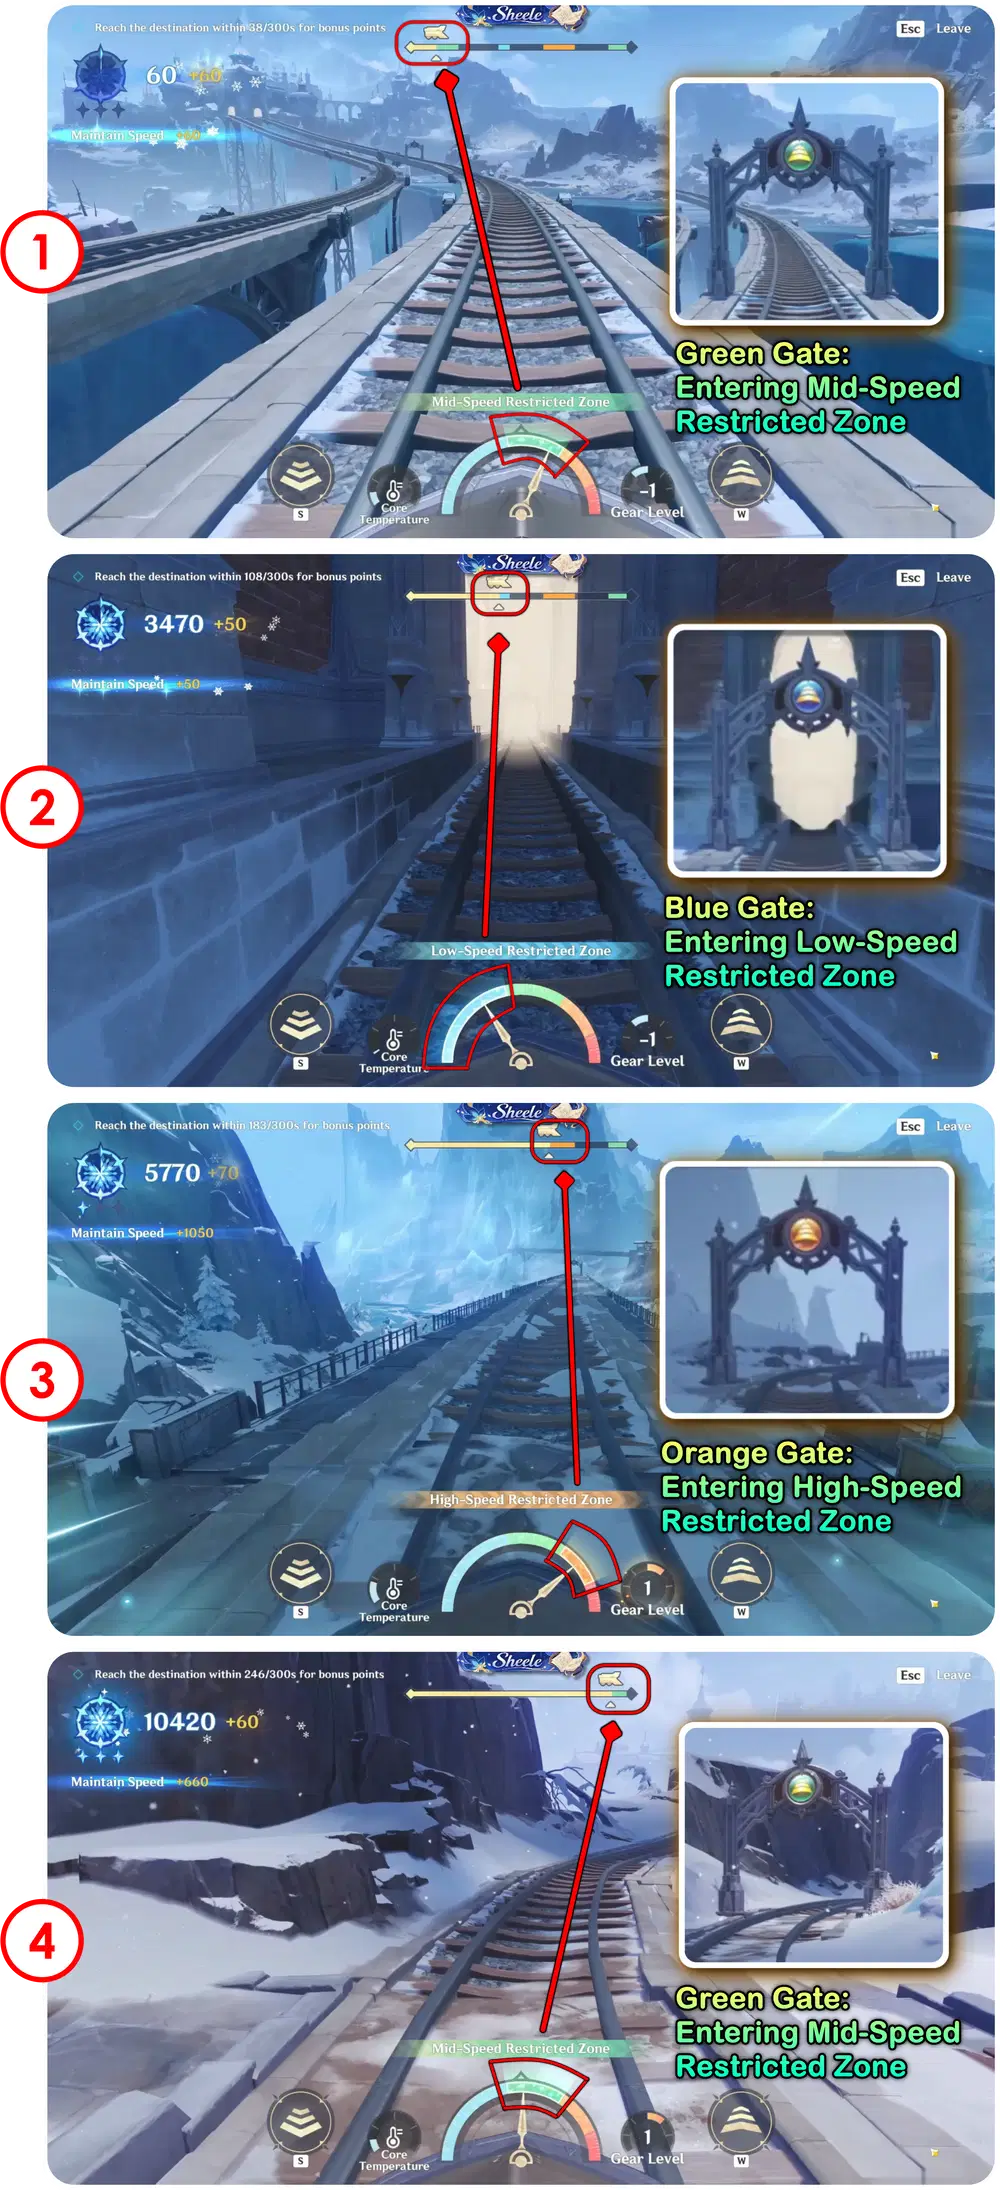
Stage Details:
The first challenge is relatively easy, as it serves as an introduction to the gameplay mechanics. There are four sections that you need to pay attention to throughout the route.
1. Section 1 – Mid Speed: The train enters a Green Zone, requiring you to maintain a medium speed for a moderate duration.
2. Section 2 – Low Speed: During the middle part of the route, the train enters a Blue Zone. Reduce the train's speed and maintain it within the low-speed range.
3. Section 3 – High Speed: The train then enters an Orange Zone, where you need to increase your speed. This section lasts for a relatively long period, so maintain the required high speed throughout.
4. Section 4 – Mid Speed: Near the end of the route, the train enters another Green Zone. Reduce the speed back to the medium range as you approach the final station.
Tip: Pay close attention to the color of each gate and adjust your speed before entering the corresponding section.
✦ Challenge II: Serpentine Snowroute
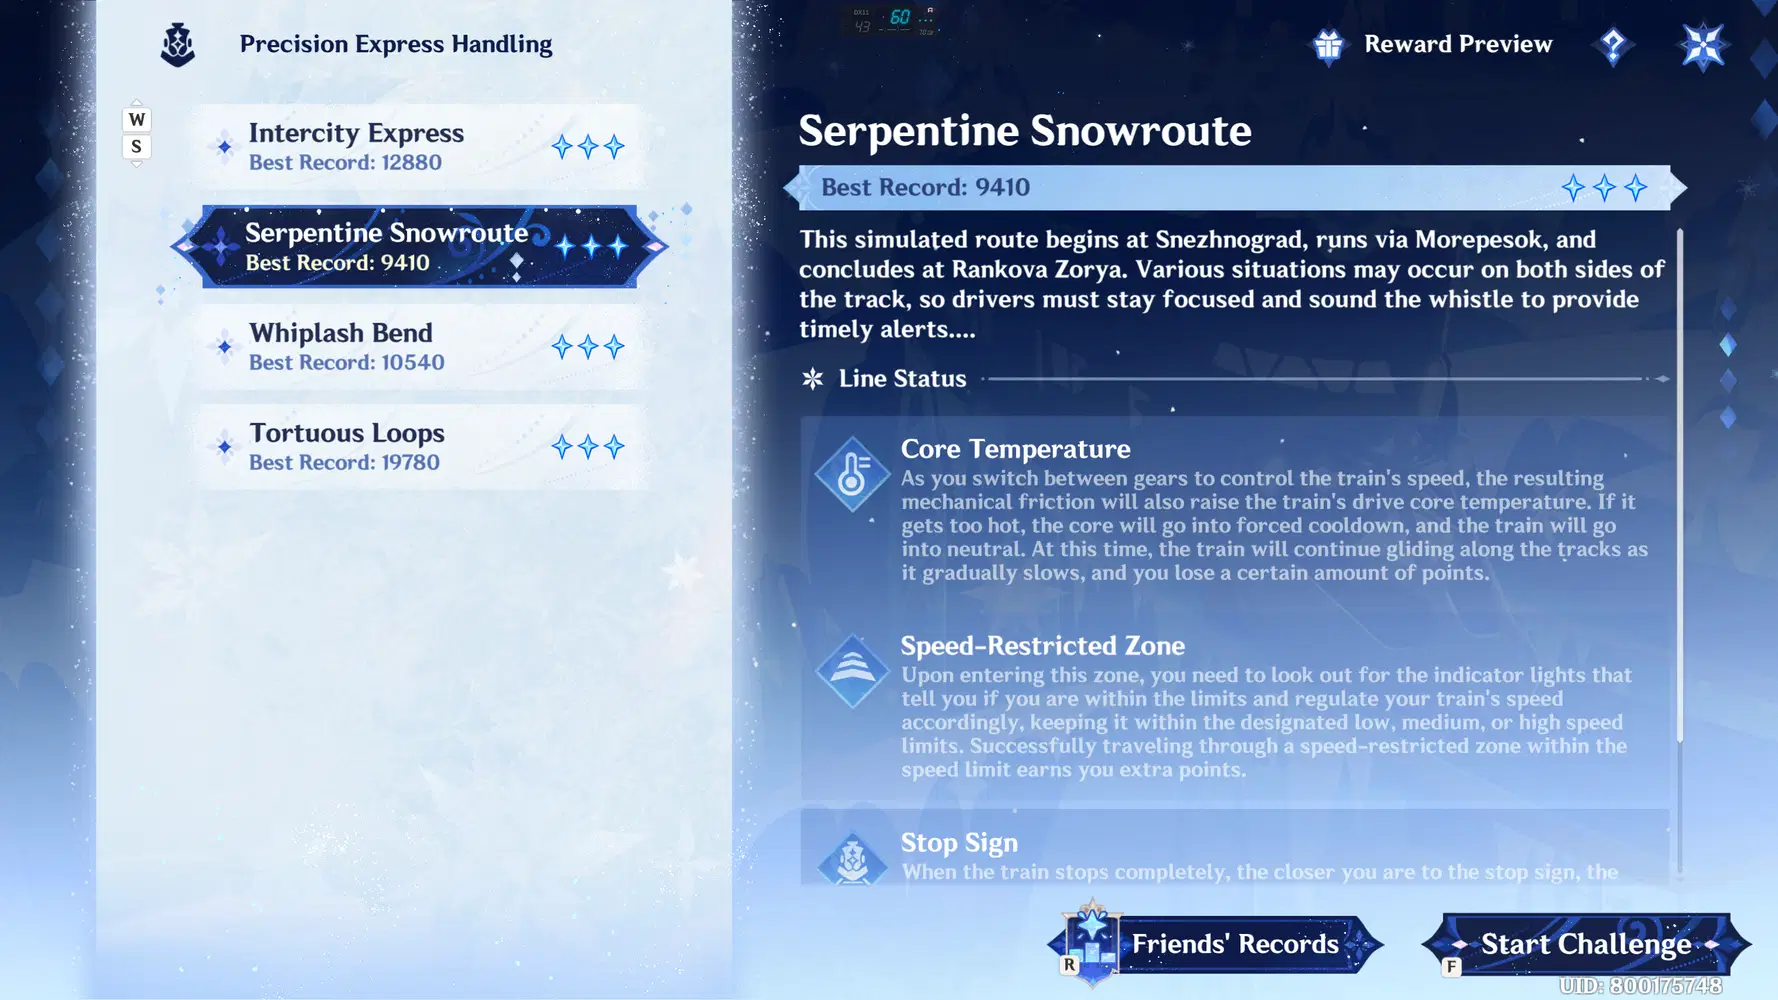
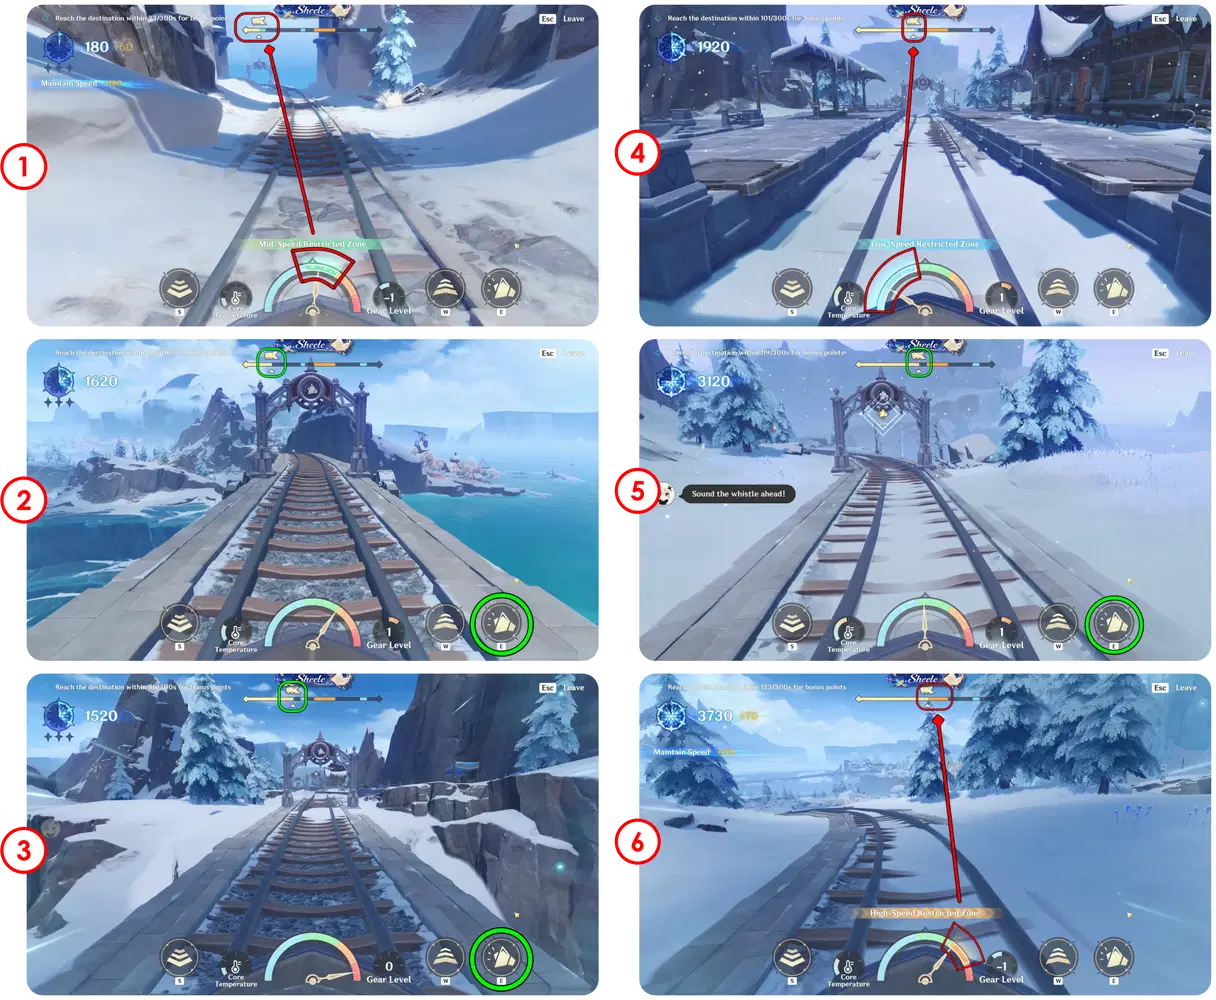
Stage Details:
The second challenge introduces a new mechanic: Bell Gates. When the train passes through a Bell Gate and rings the bell, you will receive additional score. There are three sections that you need to pay attention to throughout the route.
1. Section 1 – Mid Speed: Set the train's speed to the medium range as you enter the Green Zone.
2. There will be a Bell Gate within this section that you can pass through to earn additional score.
3. As you approach the second section, another Bell Gate will appear.
4. Section 2 – Low Speed: Enter the Blue Zone and reduce the train's speed to the low range. This section has a relatively short duration, so adjust your speed quickly.
5. Near the end of this section, there will be another Bell Gate. Make sure to pass through it to trigger the bell and gain additional score.
6. Section 3 – High Speed: After leaving the second section, increase the train's speed and enter the Orange Zone at high speed. Maintain the required speed as you continue toward the next section.
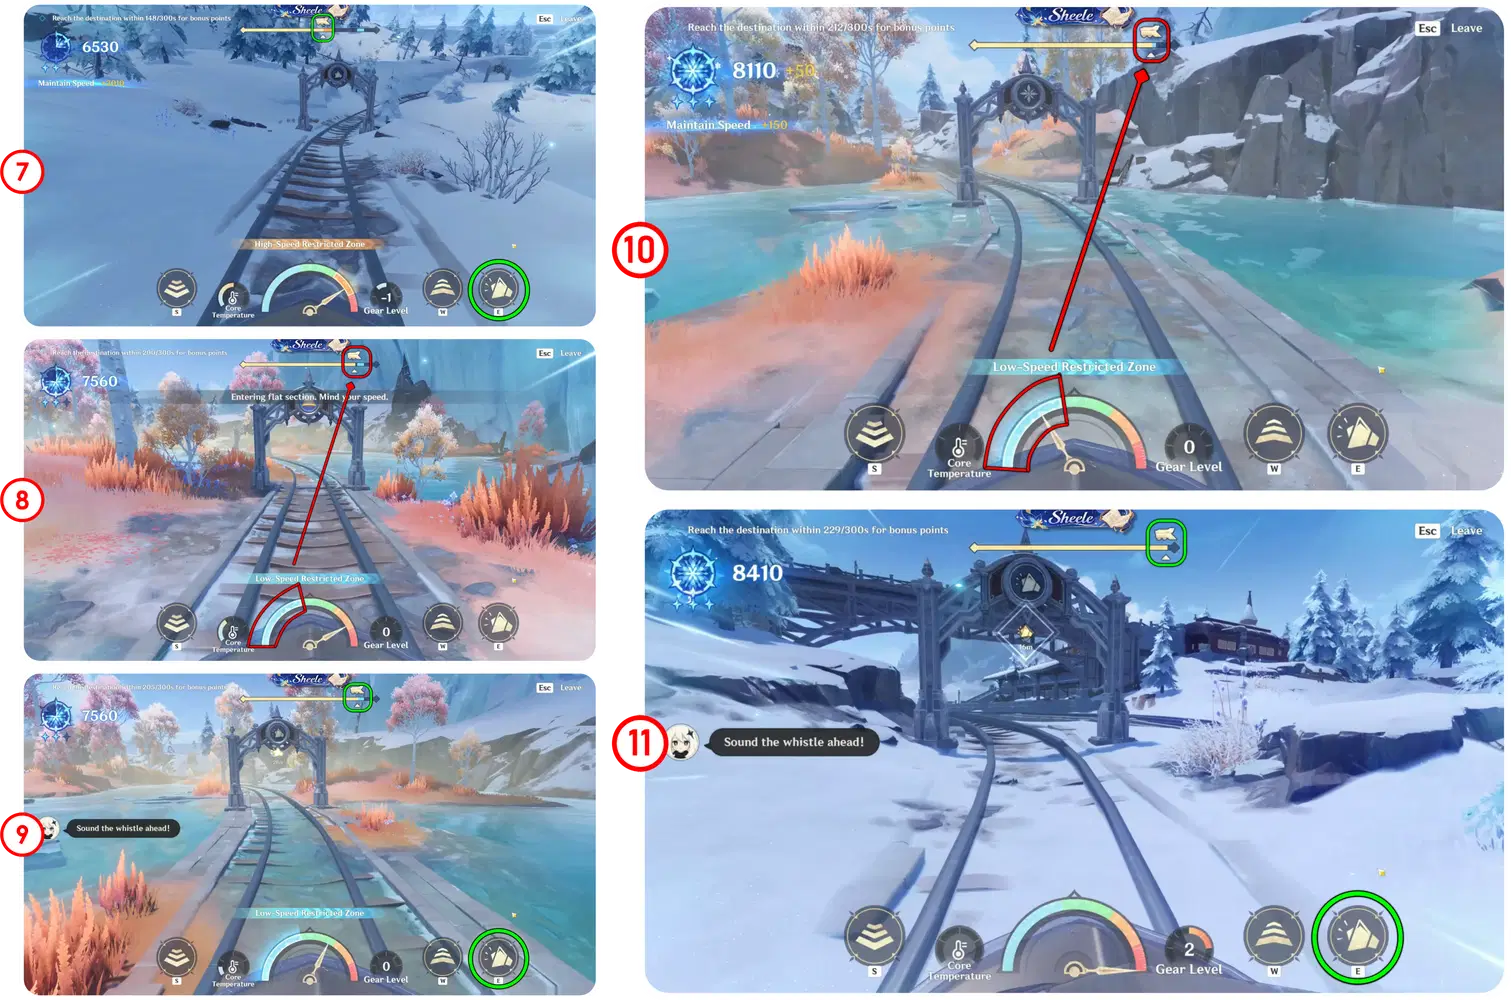
7. A Bell Gate can be found within this section 3. Make sure to pass through it to ring the bell and earn additional score.
8. Section 4 – Blue Zone: Enter the next section at low speed. This section has a relatively short duration, so reduce your speed quickly before entering.
9. Another Bell Gate can be found within Section 4. Pass through it to trigger the bell and gain additional score.
10. Blue Zone After leaving Section 4, stabilize the train's gear at the low-speed position and maintain it as you approach the final part of the route.
11. Near the end of the route, there is another Bell Gate. Make sure to pass through it to ring the bell and maximize your score.
Tip: Keep an eye out for the Bell Gates and make sure to pass through them to maximize your score. At the same time, adjust your train's speed according to the color of each zone.
✦ Challenge III: Whiplash Bend
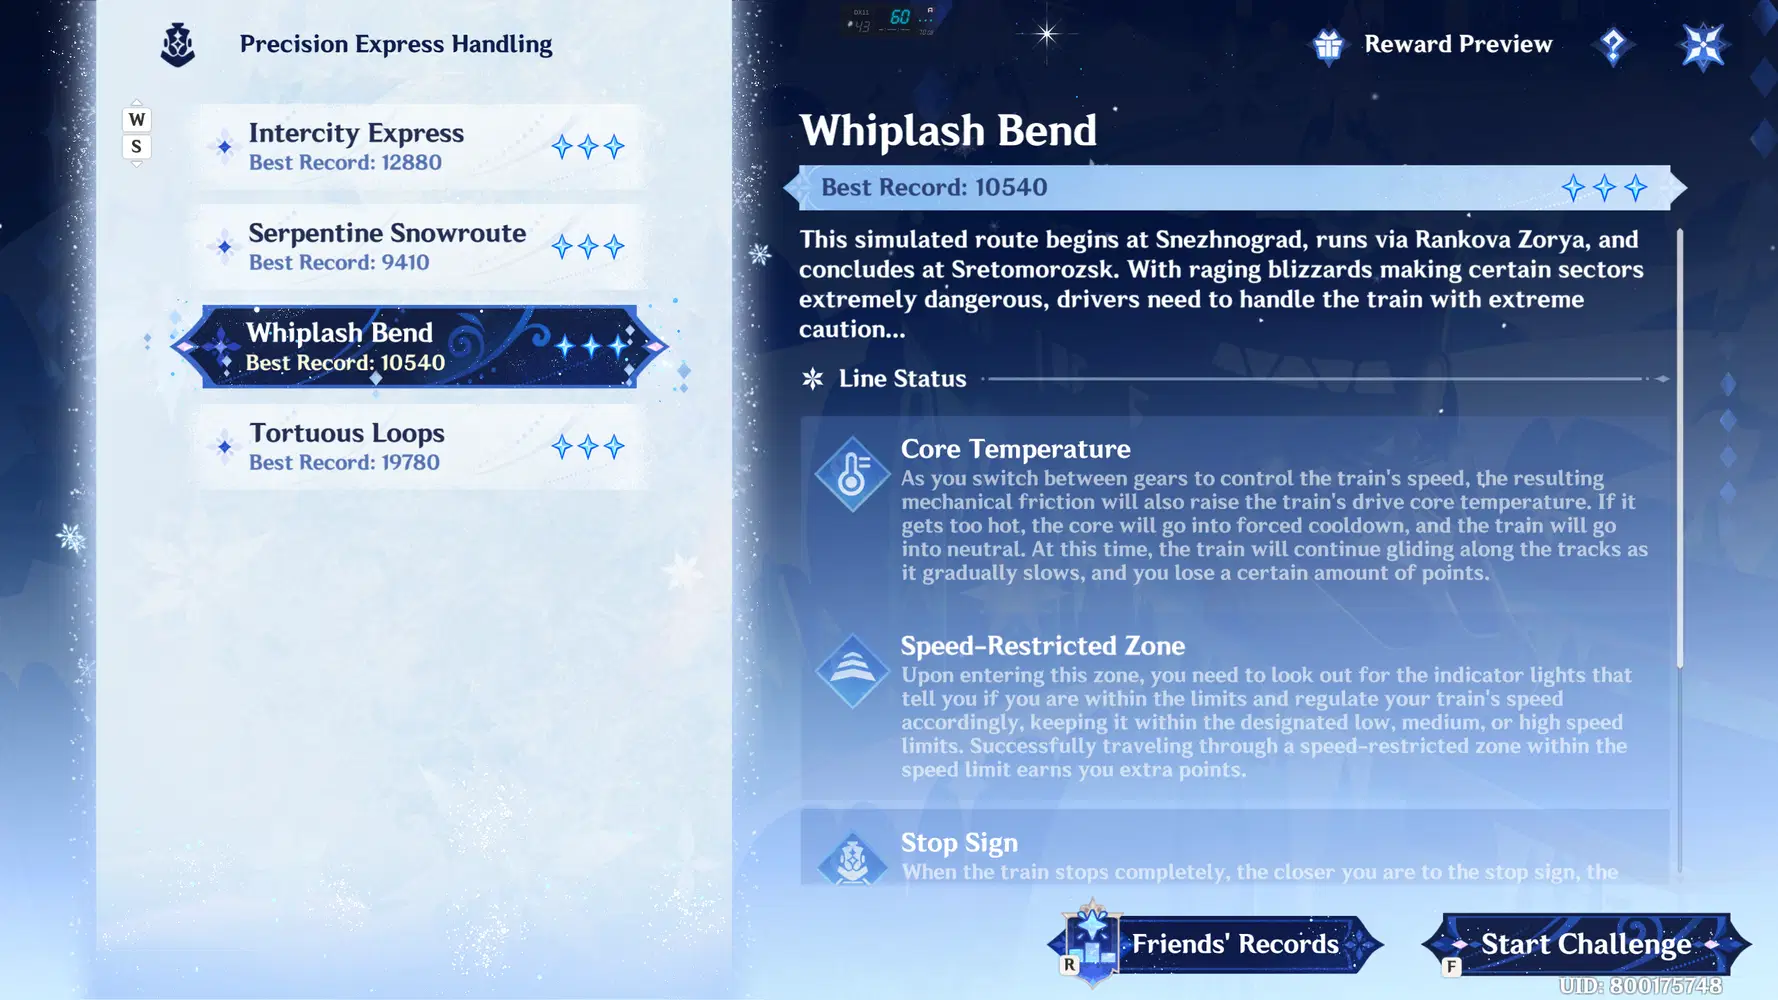
Stage Details:
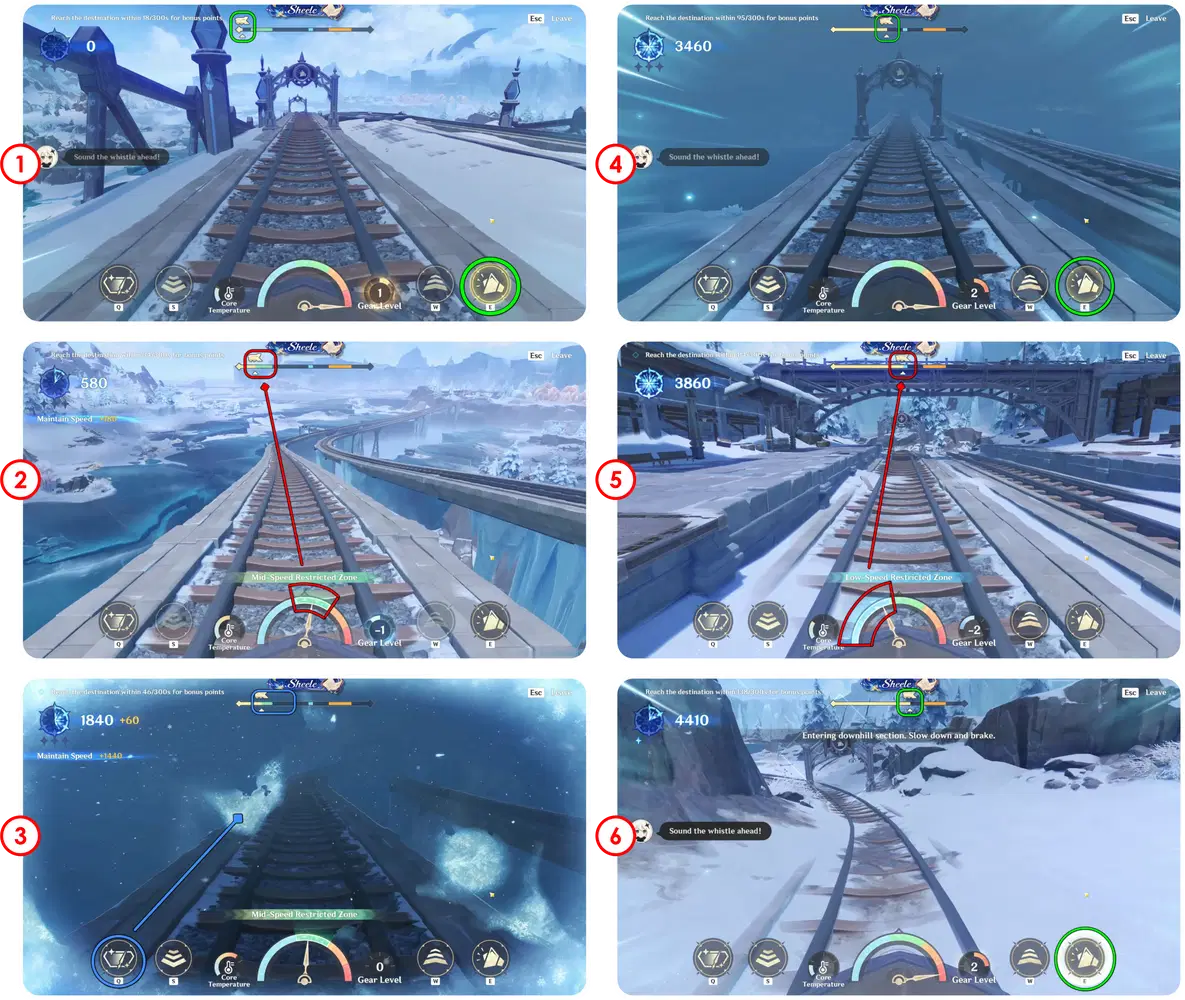
The third challenge introduces a new mechanic: the Train Wiper. When entering a cold zone, cold air or ice will accumulate on the train's windshield and obstruct your vision. Use the Train Mirror mechanic to clear the frost and restore visibility.
1. Starting Point – Bell Gate: After departing from the station, you will encounter a Bell Gate near the beginning of the route. Pass through it to ring the bell and earn additional score.
2. Section 1 – Mid Speed: Enter the Green Zone and maintain the train's speed within the medium range.
3. Cold Air Mechanic: While still in the Green Zone, cold air will begin to accumulate on the windshield and obstruct your vision. Use the Train Wiper mechanic to clear the frost and maintain clear visibility.
4. Bell Gate: As you approach Section 2, you will encounter another Bell Gate. Pass through it to ring the bell and gain additional score.
5. Section 2 – Low Speed: Enter the Blue Zone and reduce the train's speed to the low range as you approach the station.
6. Leaving the Station – Bell Gate: After departing from the station, another Bell Gate will appear. Make sure to pass through it to trigger the bell and earn additional score.
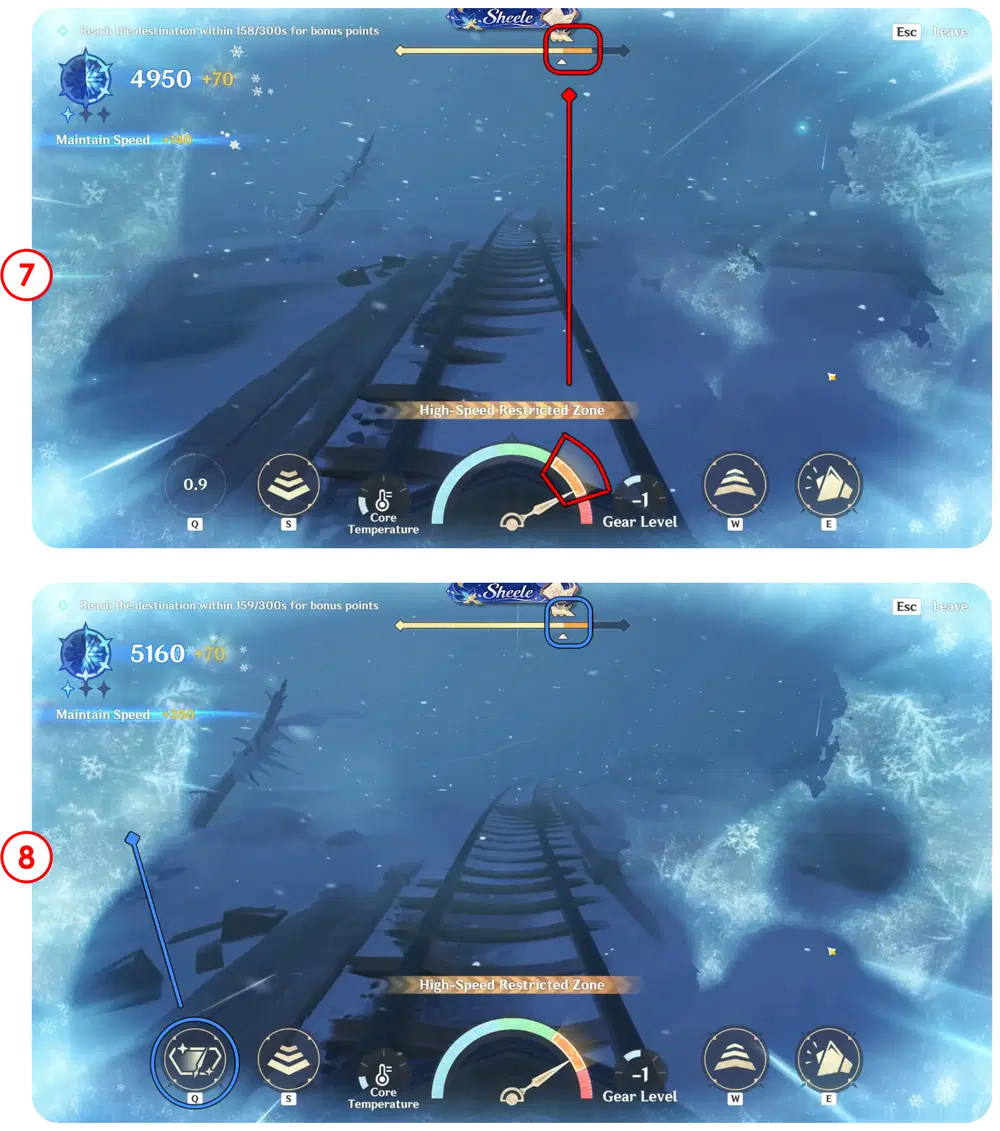
7. Section 3 – High Speed: Enter the Orange Zone at high speed and maintain the required speed throughout the section.
8. Cold Air Mechanic: Cold air will appear again in this zone, causing frost to accumulate on the windshield and obstruct your vision. Use the Train Wiper mechanic to clear the frost, then continue driving until you reach the final stop.
Tip: Use the Train Wiper whenever frost accumulates on the windshield to clear your vision and maintain a clear view of the track.
✦ Challenge IV: Tortuous Loops
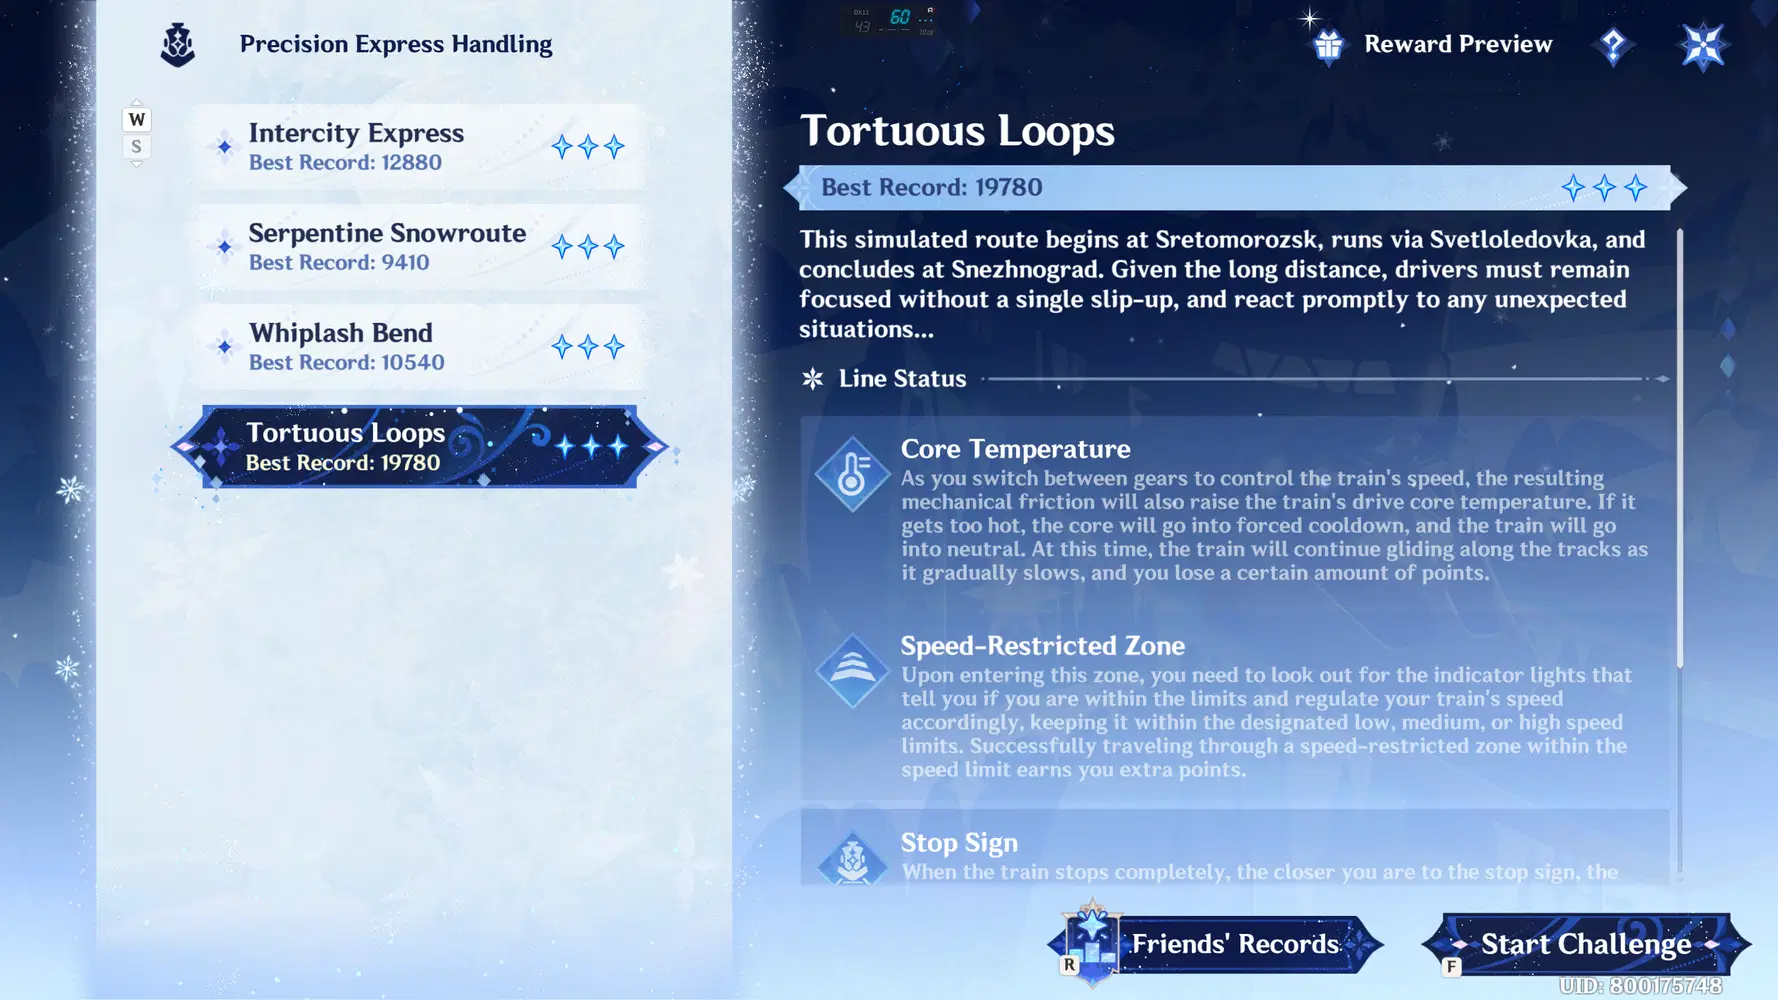
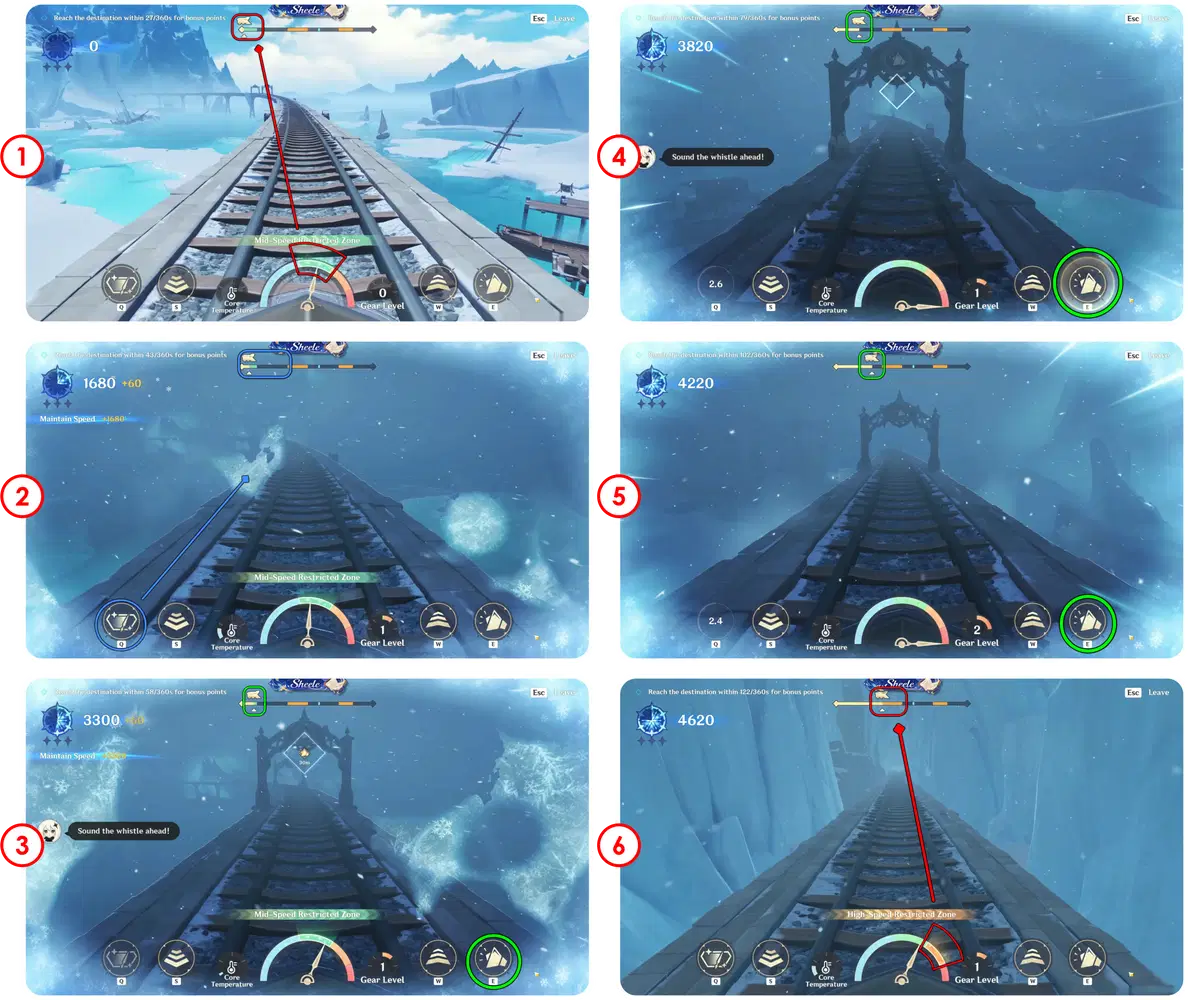
Stage Details:
The fourth challenge is the final stage of Precision Express Handling. This challenge combines the mechanics introduced in the previous stages, requiring you to carefully manage the train's speed, use the Train Wiper, and pass through multiple Bell Gates.
1. Section 1 – Mid Speed: At the beginning of the route, accelerate the train toward the first section and maintain medium speed as you enter the Green Zone.
2. While traveling through the Green Zone, cold air will appear and cause frost to accumulate on the windshield. Use the Train Wiper to clear it and maintain a clear view of the track.
3. Near the end of the Green Zone, you will encounter a Bell Gate. Pass through it to ring the bell and earn additional score.
4. Continue driving through the route and you will encounter another Bell Gate. Make sure to pass through it to gain additional score.
5. As you approach the Orange Zone leading toward Section 2, another Bell Gate will appear. Pass through it to trigger the bell and earn additional score.
6. Section 2 – High Speed: Enter Section 2 Orange Zone and increase the train's speed to the high-speed range. Maintain high speed as you continue through the section.
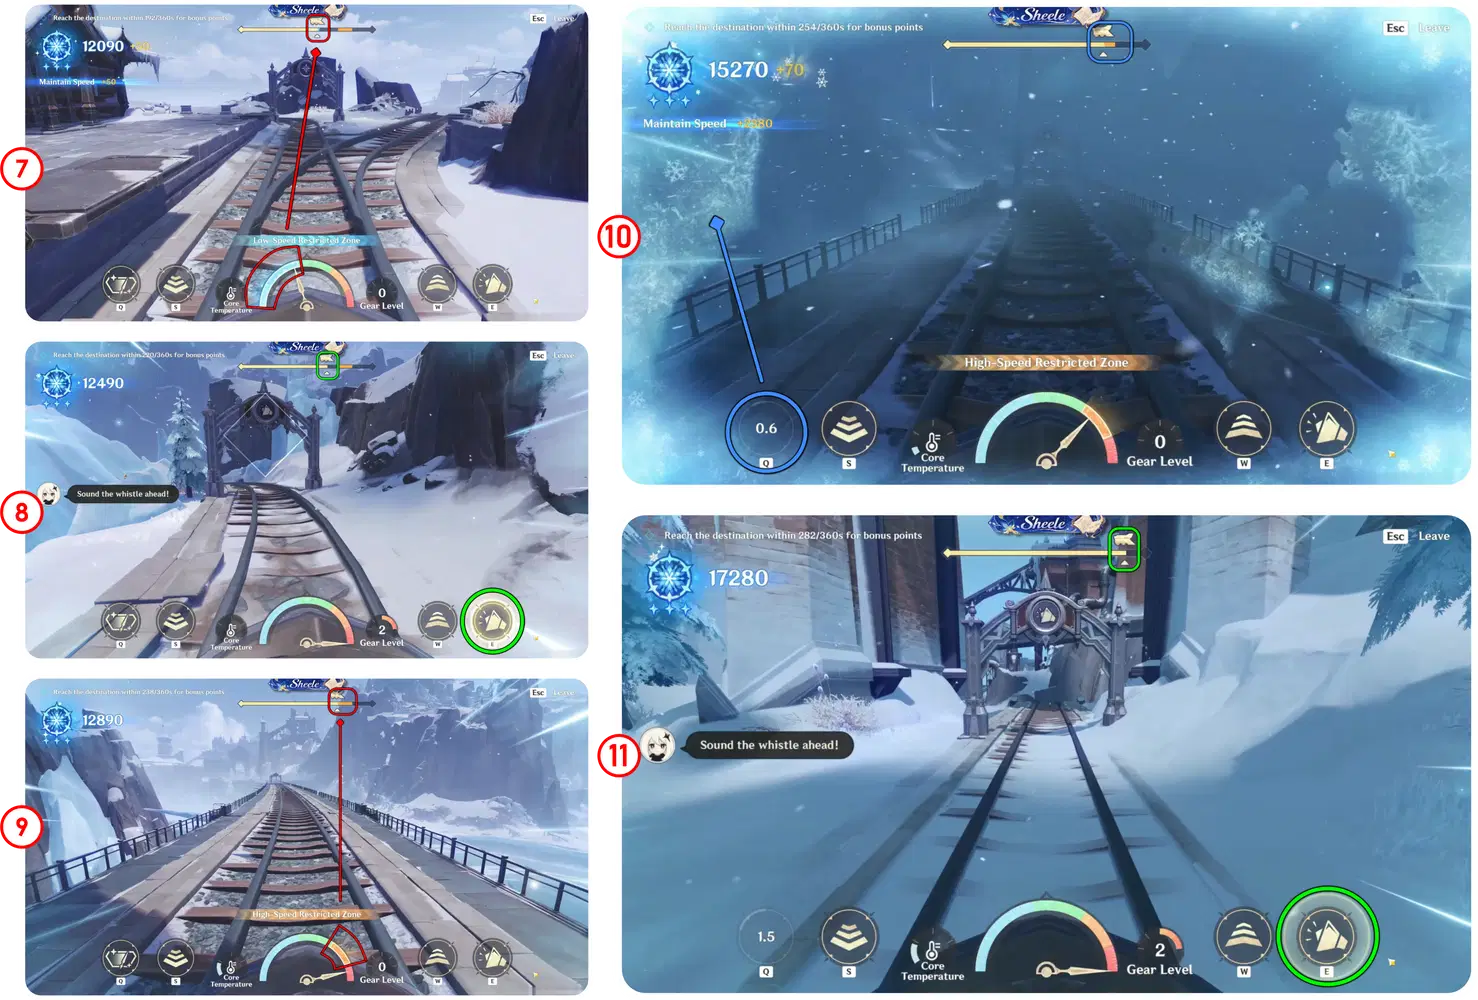
7. Section 3 – Low Speed: Continue along the route until you reach Section 3. Reduce the train's speed to the lowest range as you enter the Blue Zone.
8. Near the end of Section 3, you will encounter another Bell Gate. Pass through it to ring the bell and earn additional score.
9. Section 4 – High Speed: After leaving Section 3, accelerate the train to full speed and enter Section 4 Orange Zone.
10. Cold air will appear again in Section 4, causing frost to accumulate on the windshield. Use the Train Wiper to clear the frost and maintain clear visibility.
11. As you approach the final station, you will encounter one last Bell Gate. Pass through it to ring the bell and earn additional score.
Tip: Keep an eye on the speed zones, use the Train Wiper whenever frost blocks your vision, and pass through every Bell Gate to maximize your score.
Video Gameplay
Roly-Poly Domain Raid
Roly-Poly Domain Raid is one of the game modes available in the Great Expeditionist Challenge event. This mode is unlocked after completing the event World Quest Adventurers of Teyvat: Grand Showdown! Once unlocked, you can enter the game mode by talking to Lan at the designated location.
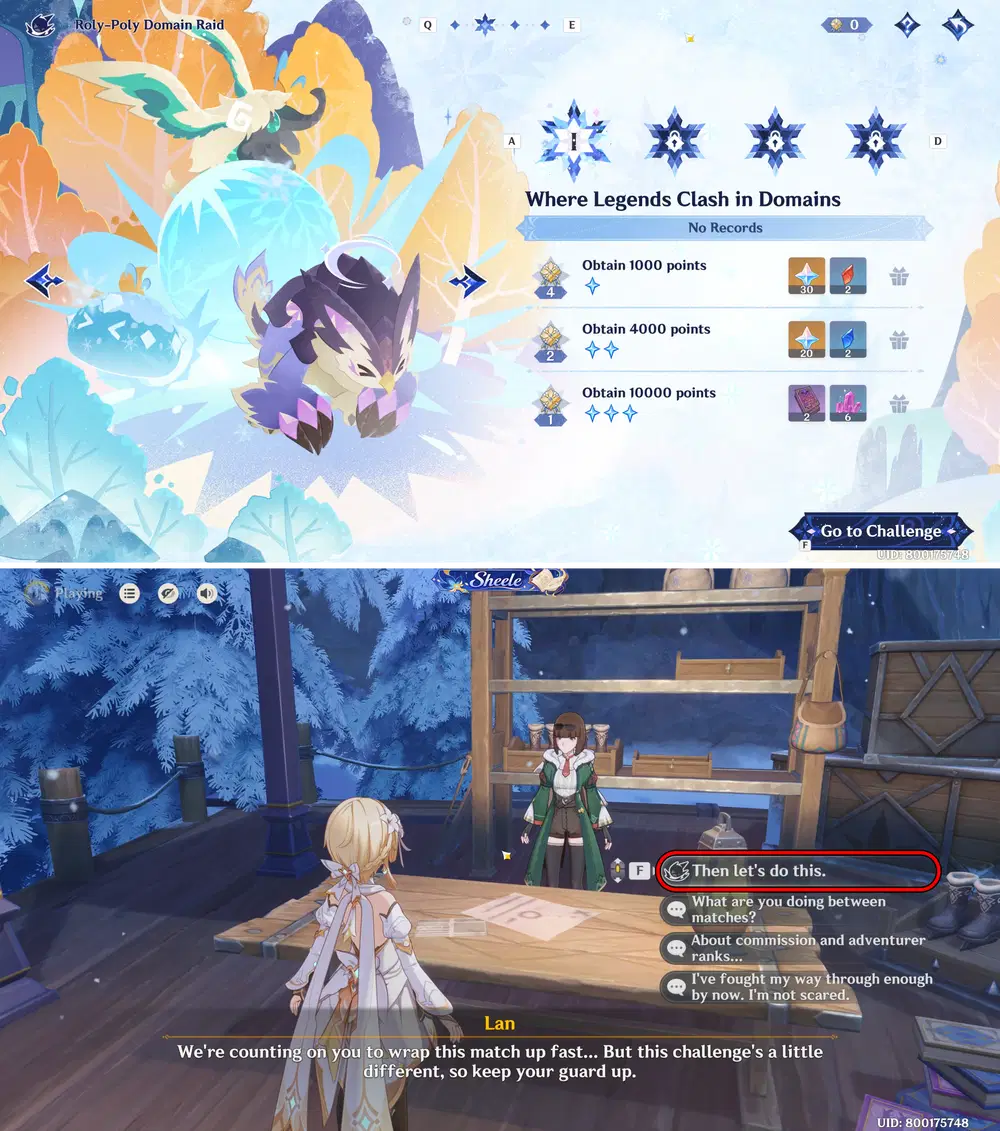
Roly-Poly Domain Raid Event
Gameplay Tutorial
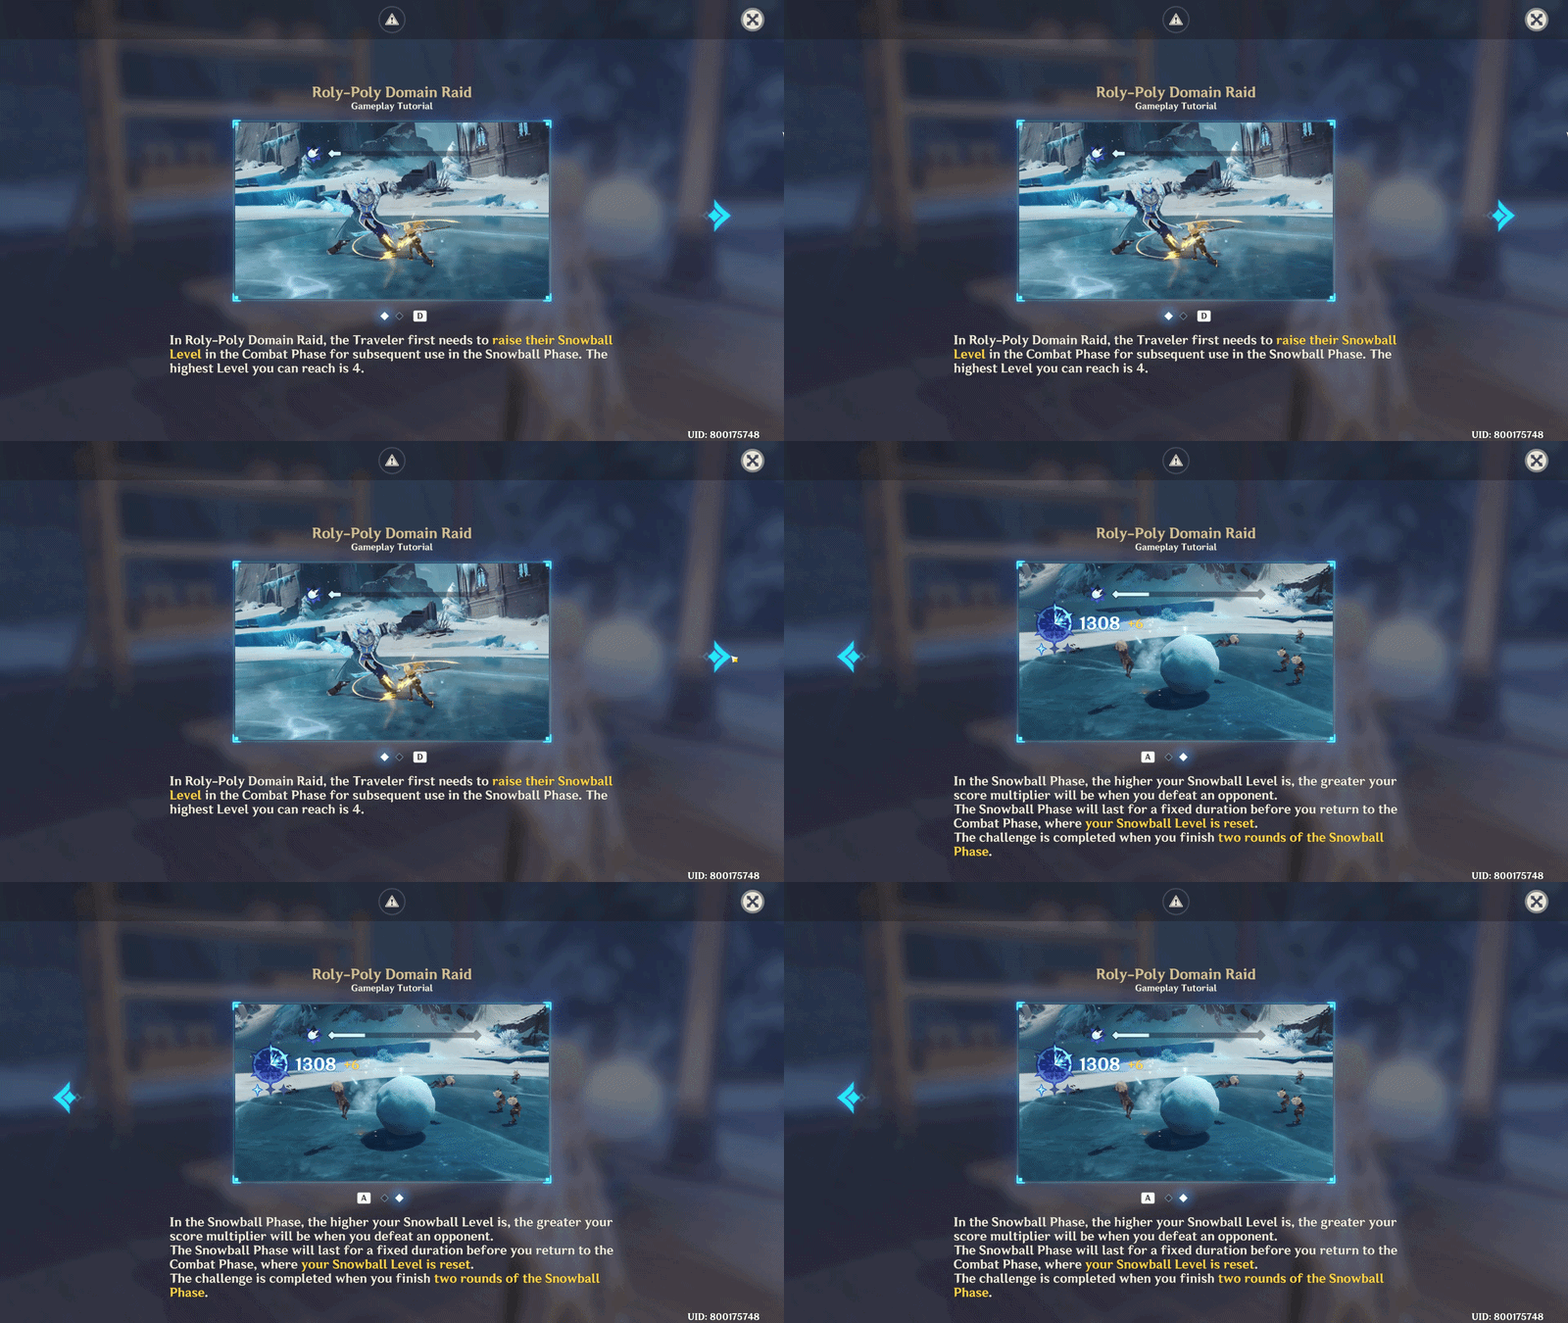
✦ Challenge I: Where Legends Clash in Domains
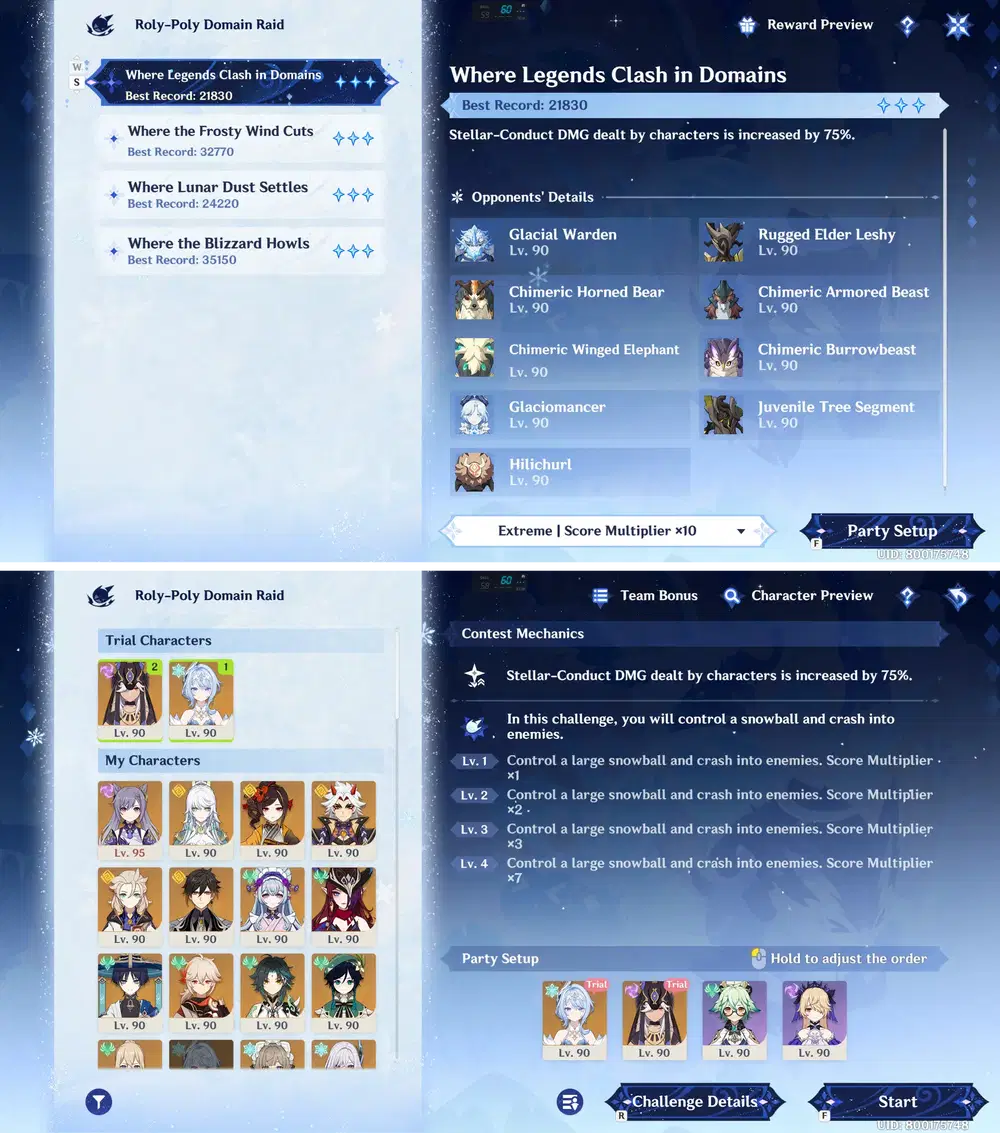
Challenge I & Party Setup
Stage Details:
For the first challenge, I used the Odette – Cyno – Sucrose – Fischl team composition.
For the attack rotation, use Fischl’s Elemental Skill → Odette’s Elemental Skill & Elemental Burst → Sucrose’s Elemental Burst & Elemental Skill → Cyno’s Elemental Burst, Elemental Skill, and Normal Attacks.
In this rotation, Cyno serves as the main on-field DPS, while the other characters provide additional damage and support.Trigger the Stellar-Conduct reaction for greater damage.
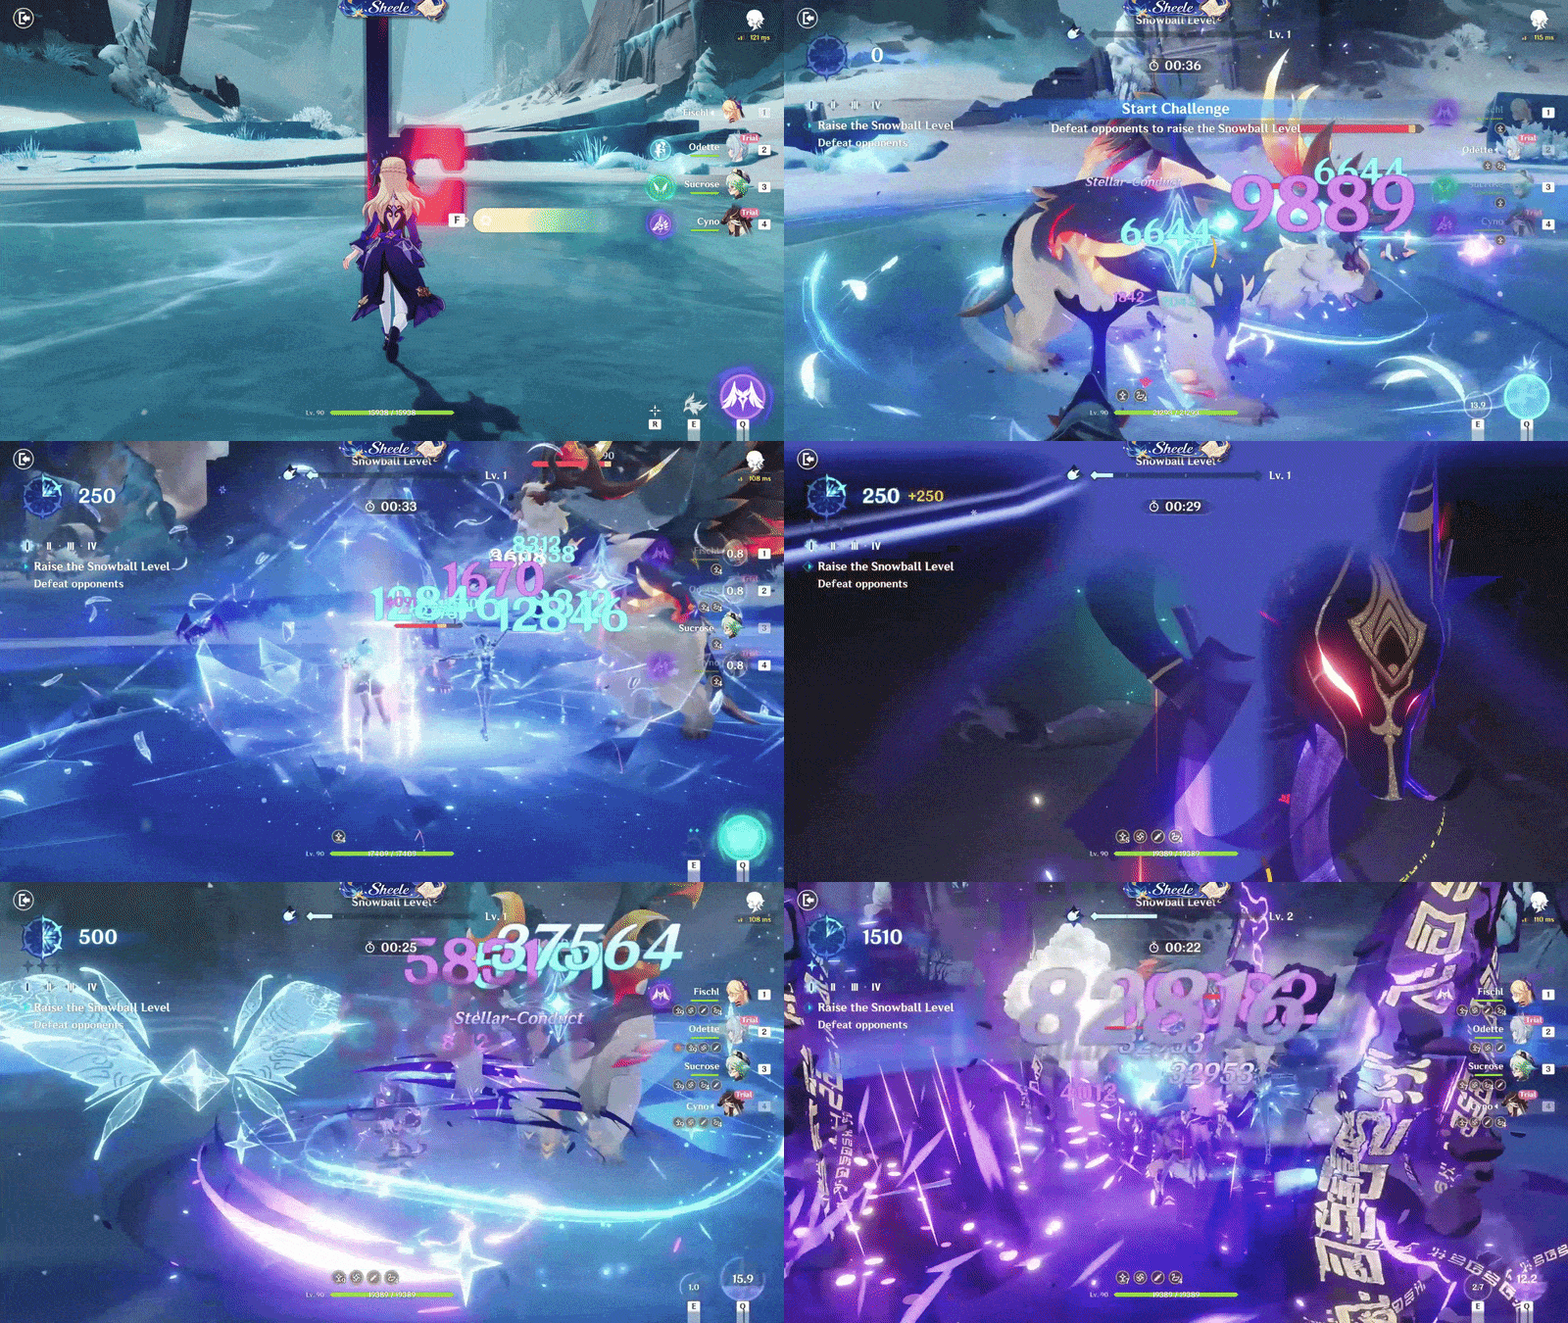
Challenge I: Attack Rotation
In the Snowball Stage, Hilichurls will spawn relatively far apart from each other. Use the Snowball to roll into and hit all of them.
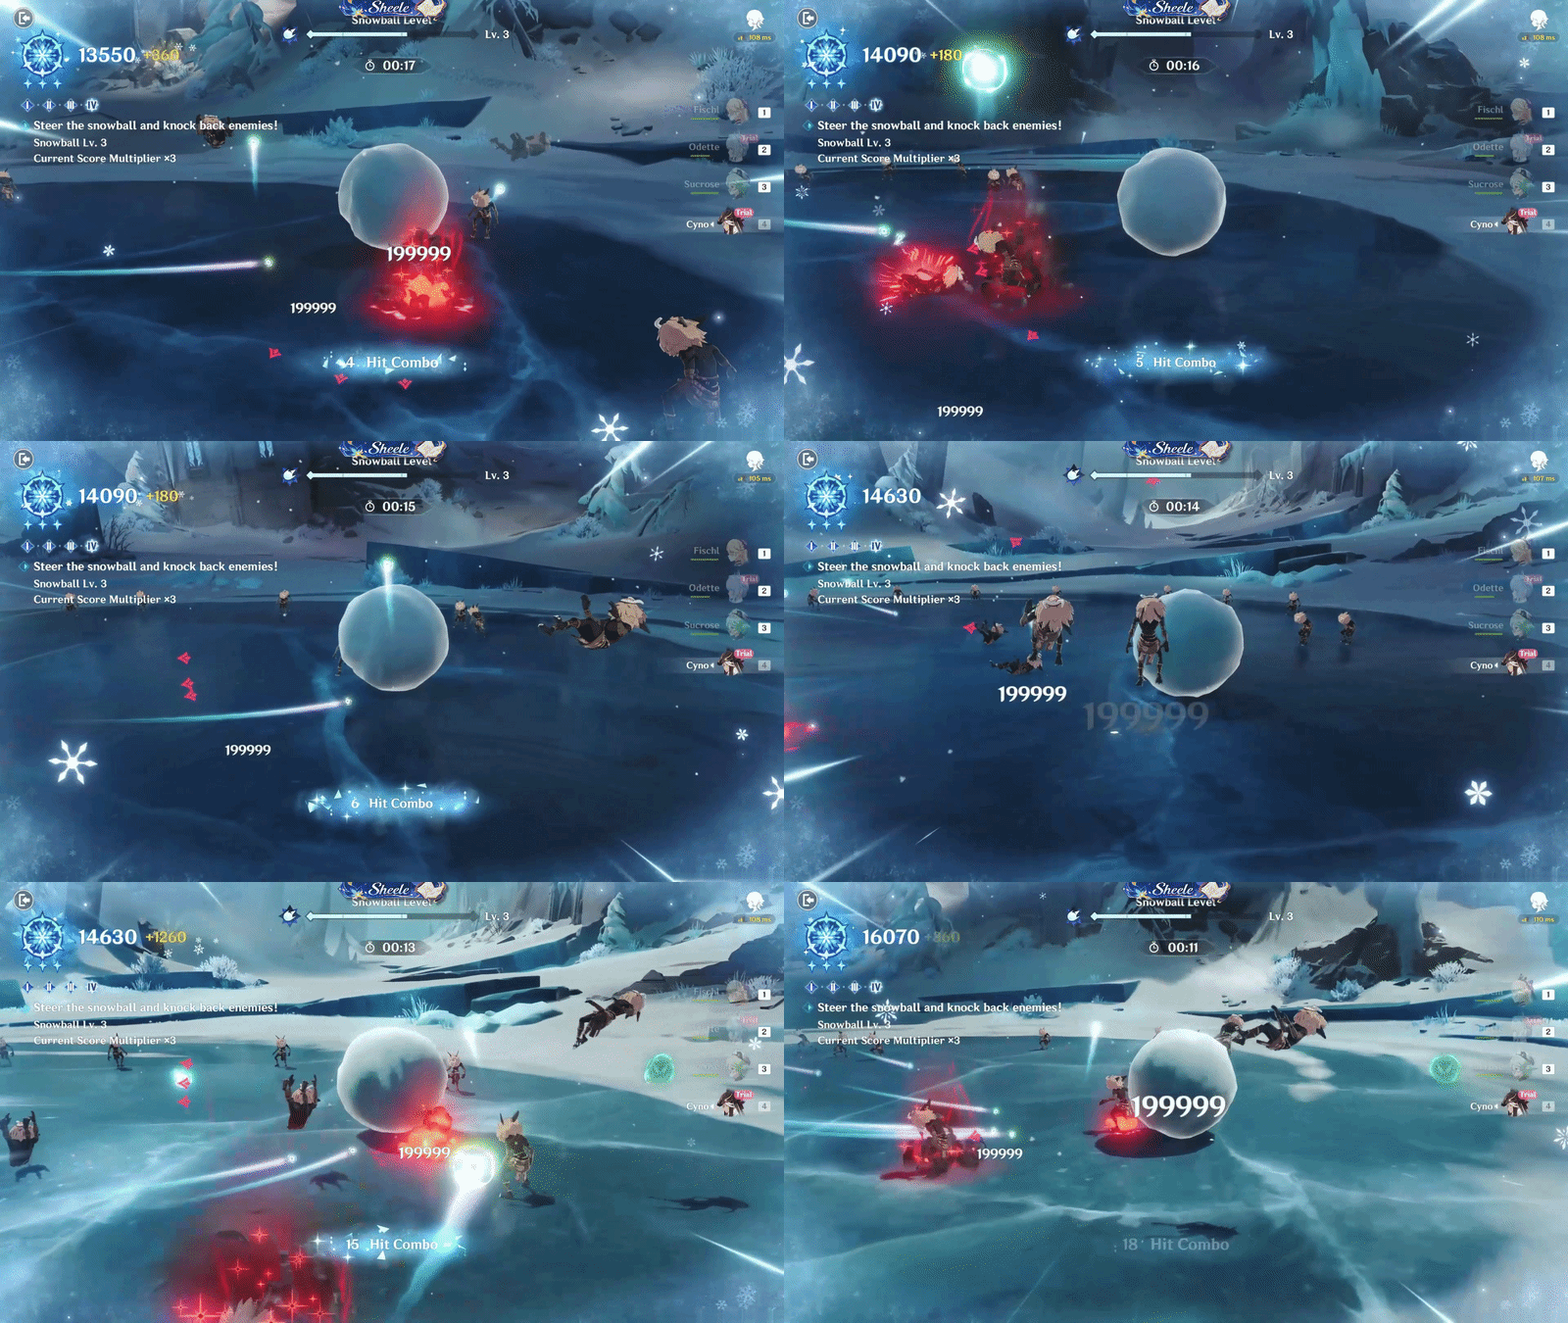
Challenge I: Snowball Stage
✦ Challenge II: Where the Frosty Wind Cuts
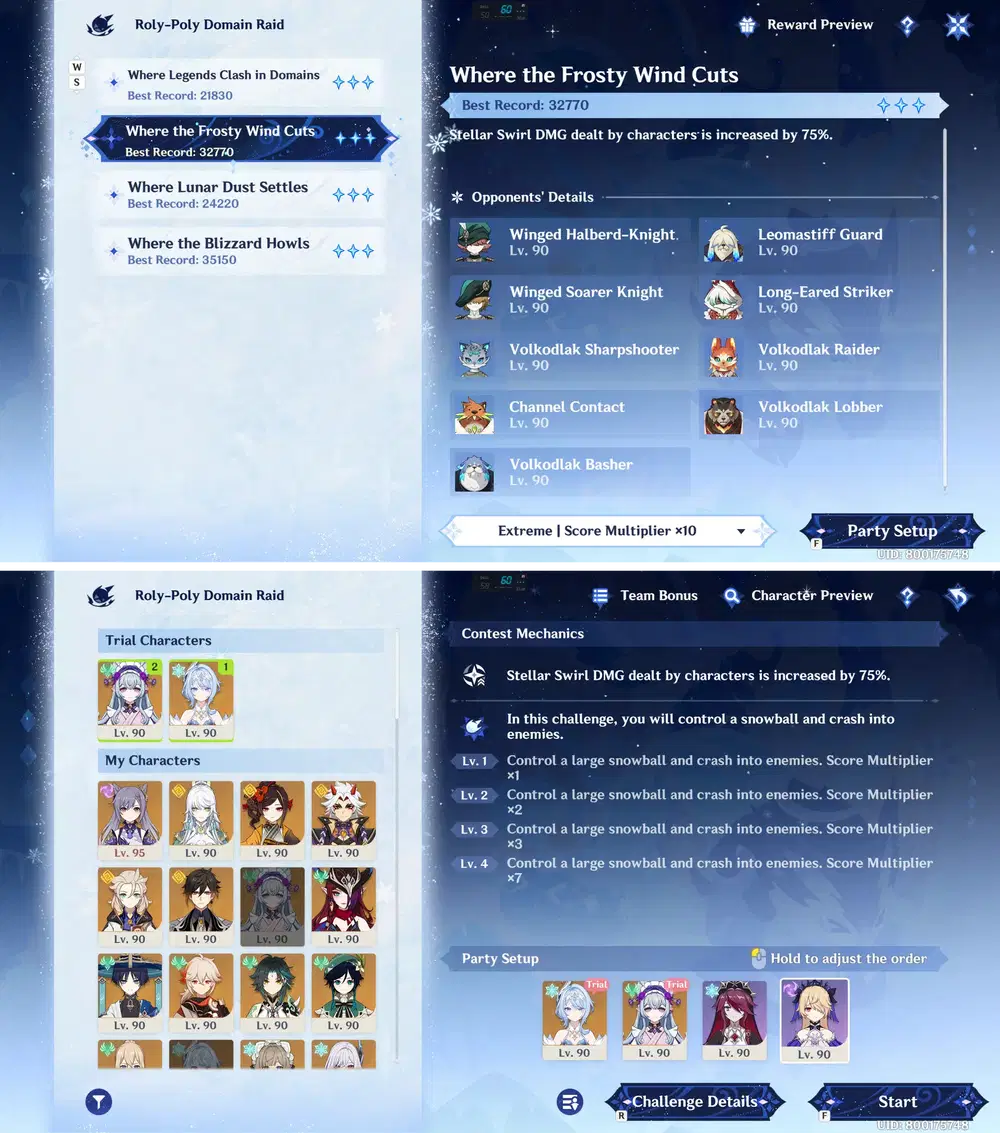
Challenge II & Party Setup
Stage Details:
For the second challenge, I used the Odette – Yumemizuki Mizuki – Rosaria – Fischl team composition.
For the attack rotation, start with Fischl’s Elemental Skill → Rosaria’s Elemental Burst & Elemental Skill → Odette’s Elemental Skill → Yumemizuki Mizuki’s Elemental Skill & Elemental Burst.
Use Yumemizuki Mizuki as the on-field character to trigger the Stellar Swirl reaction and increase overall damage.
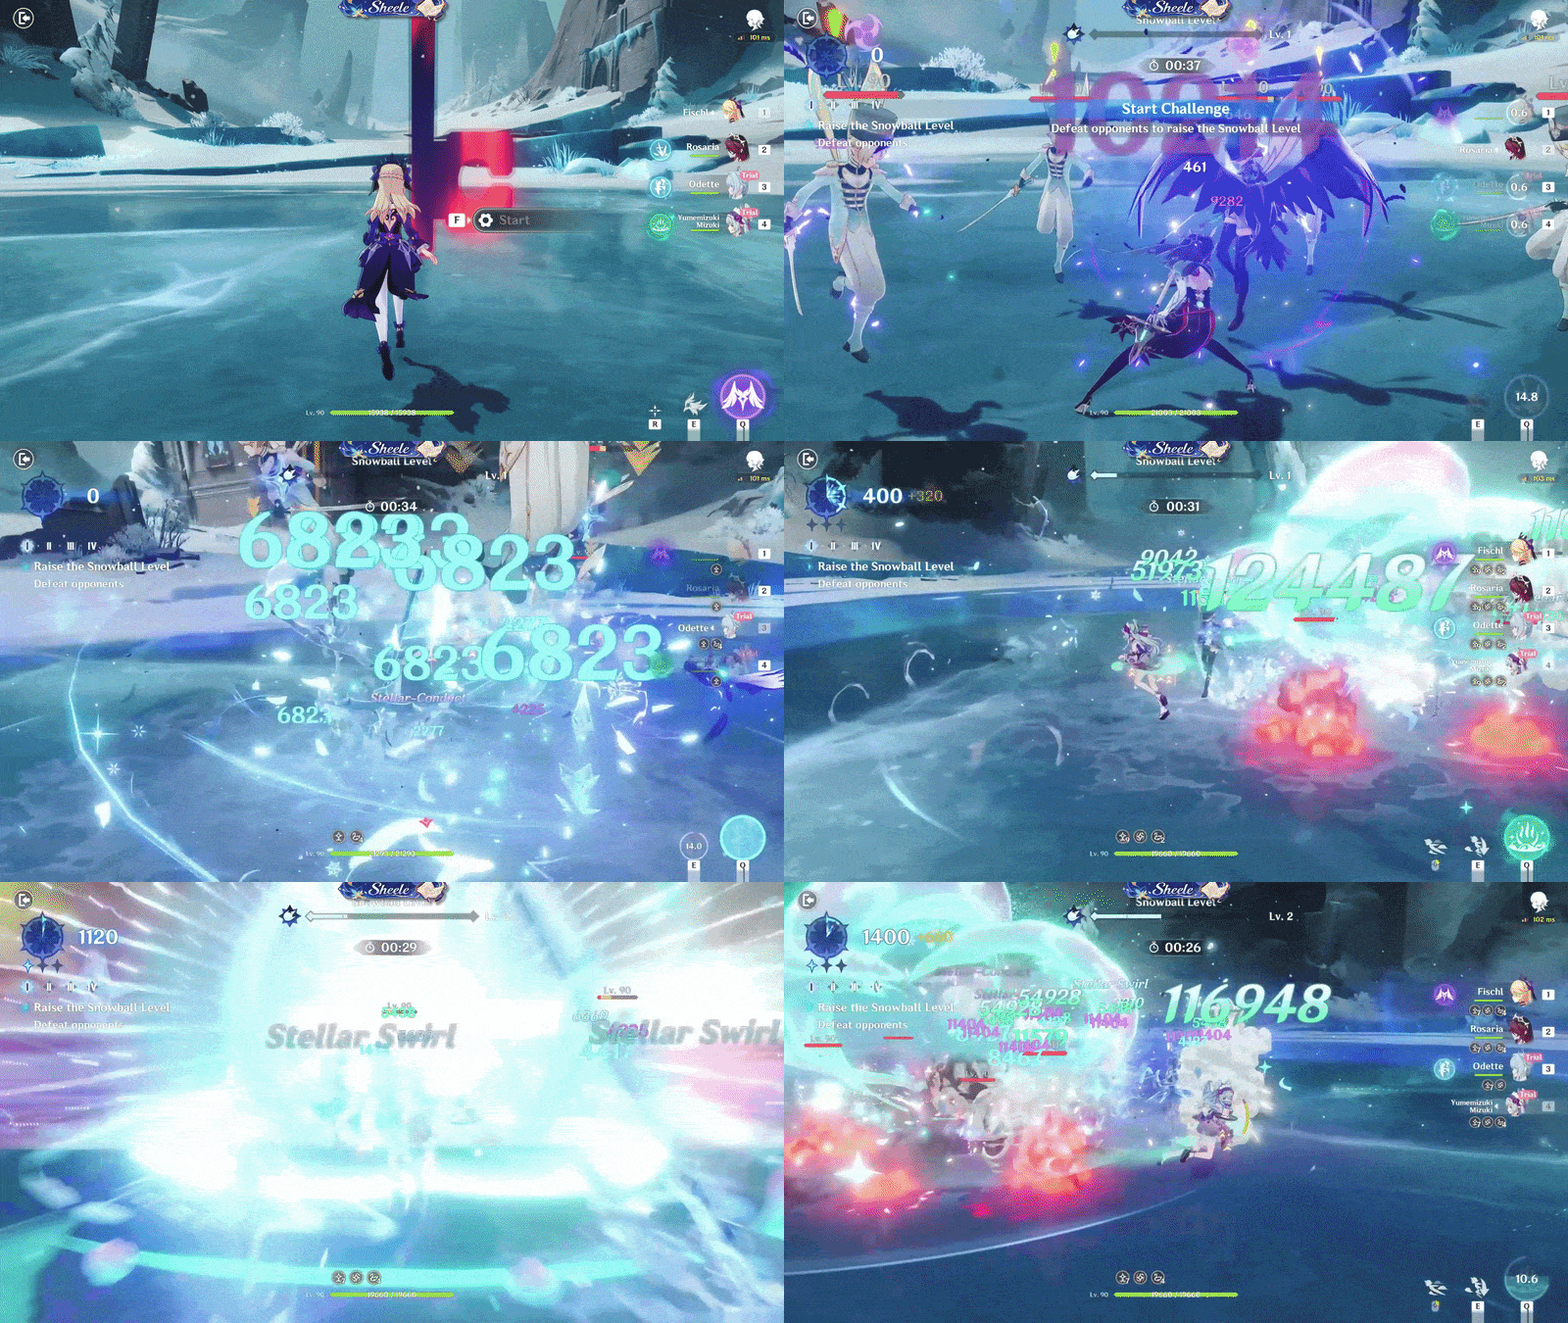
Challenge II: Attack Rotation
In the Snowball stage, some enemies appear in groups, making it quite easy to maneuver the snowball, crash into them, and rack up a score.
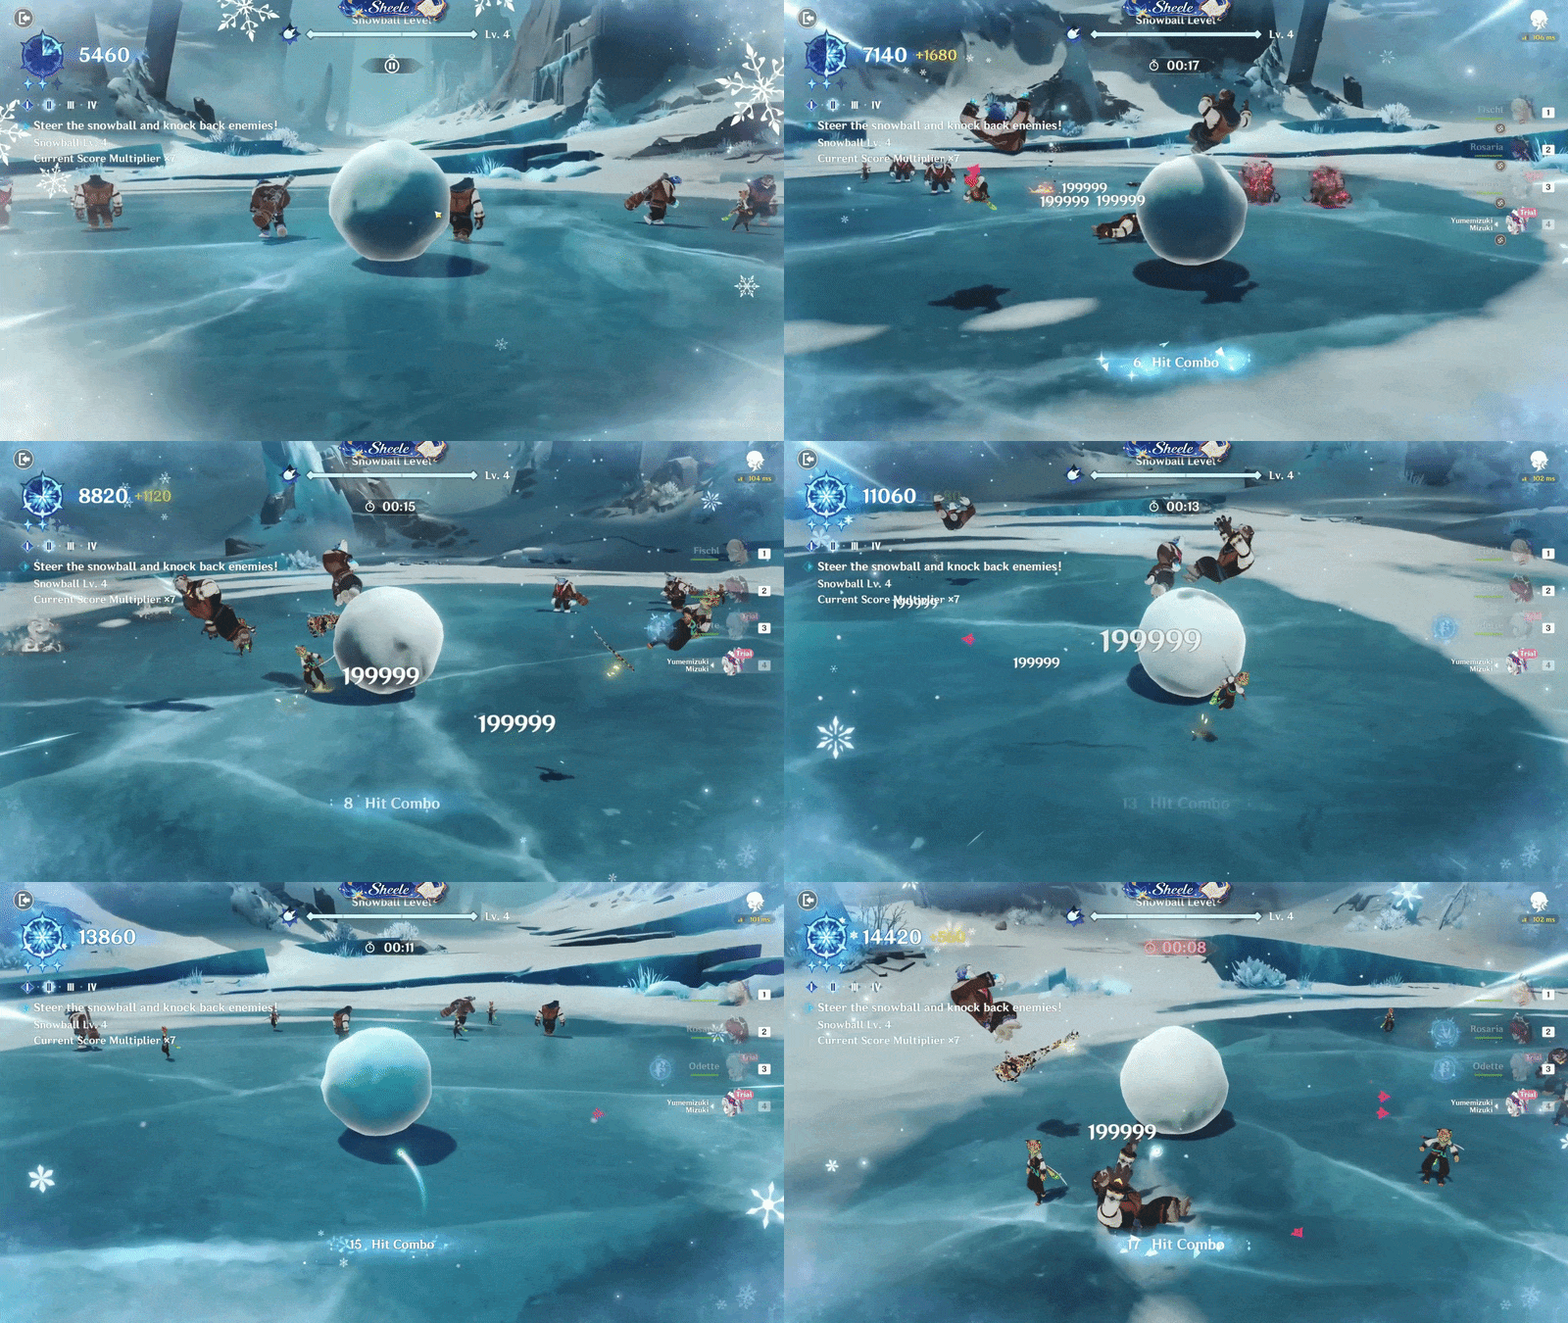
Challenge II: Snowball Stage
✦ Challenge III: Where Lunar Dust Settles
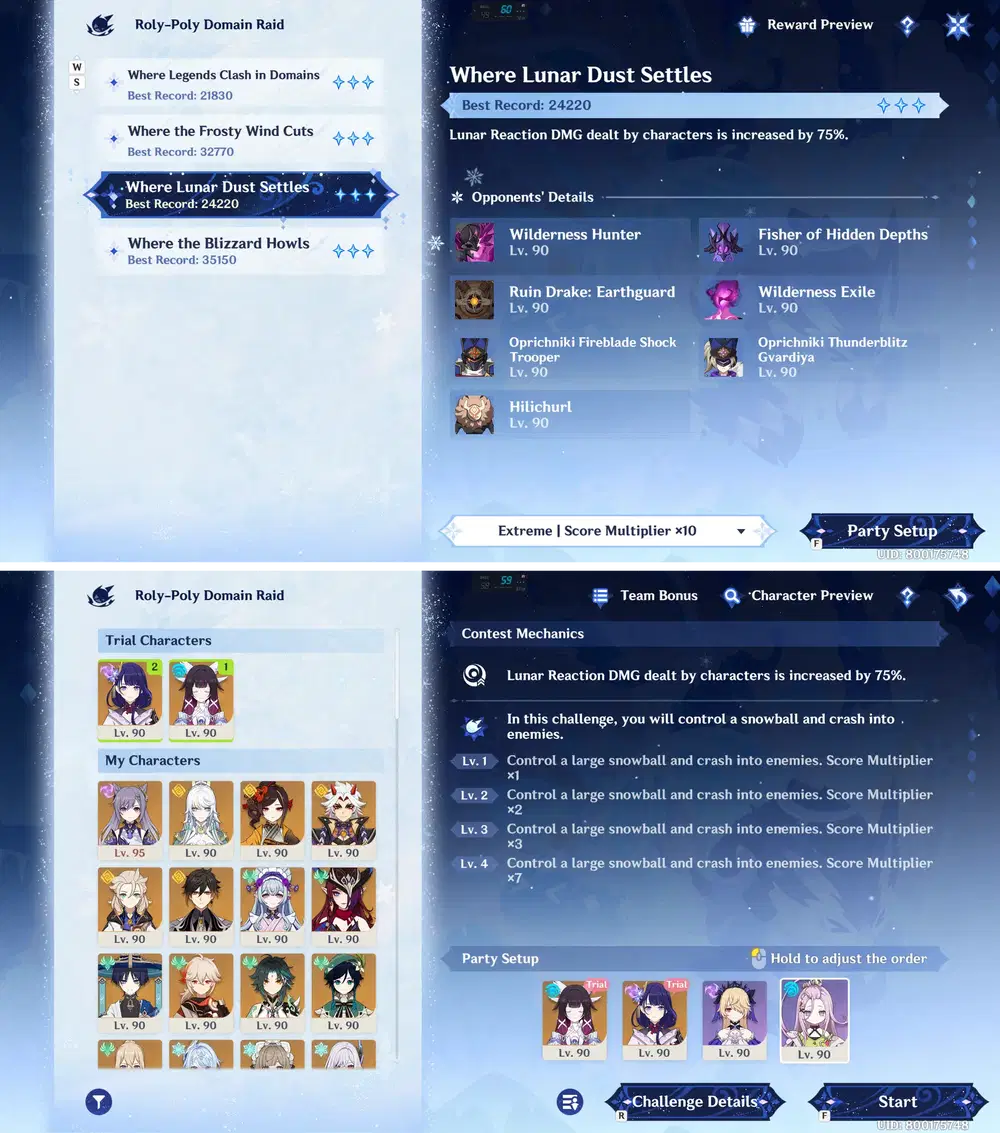
Challenge III & Party Setup
Stage Details:
For the third challenge, I used the Columbina – Raiden Shogun – Fischl – Aino team composition.
For the attack rotation, start with Fischl’s Elemental Skill → Aino’s Elemental Skill & Elemental Burst → Columbina’s Elemental Burst & Elemental Skill → Raiden Shogun’s Elemental Burst, Elemental Skill, and Normal Attacks.
Use Raiden Shogun as the on-field character to deal the main damage while her Elemental Burst is active.
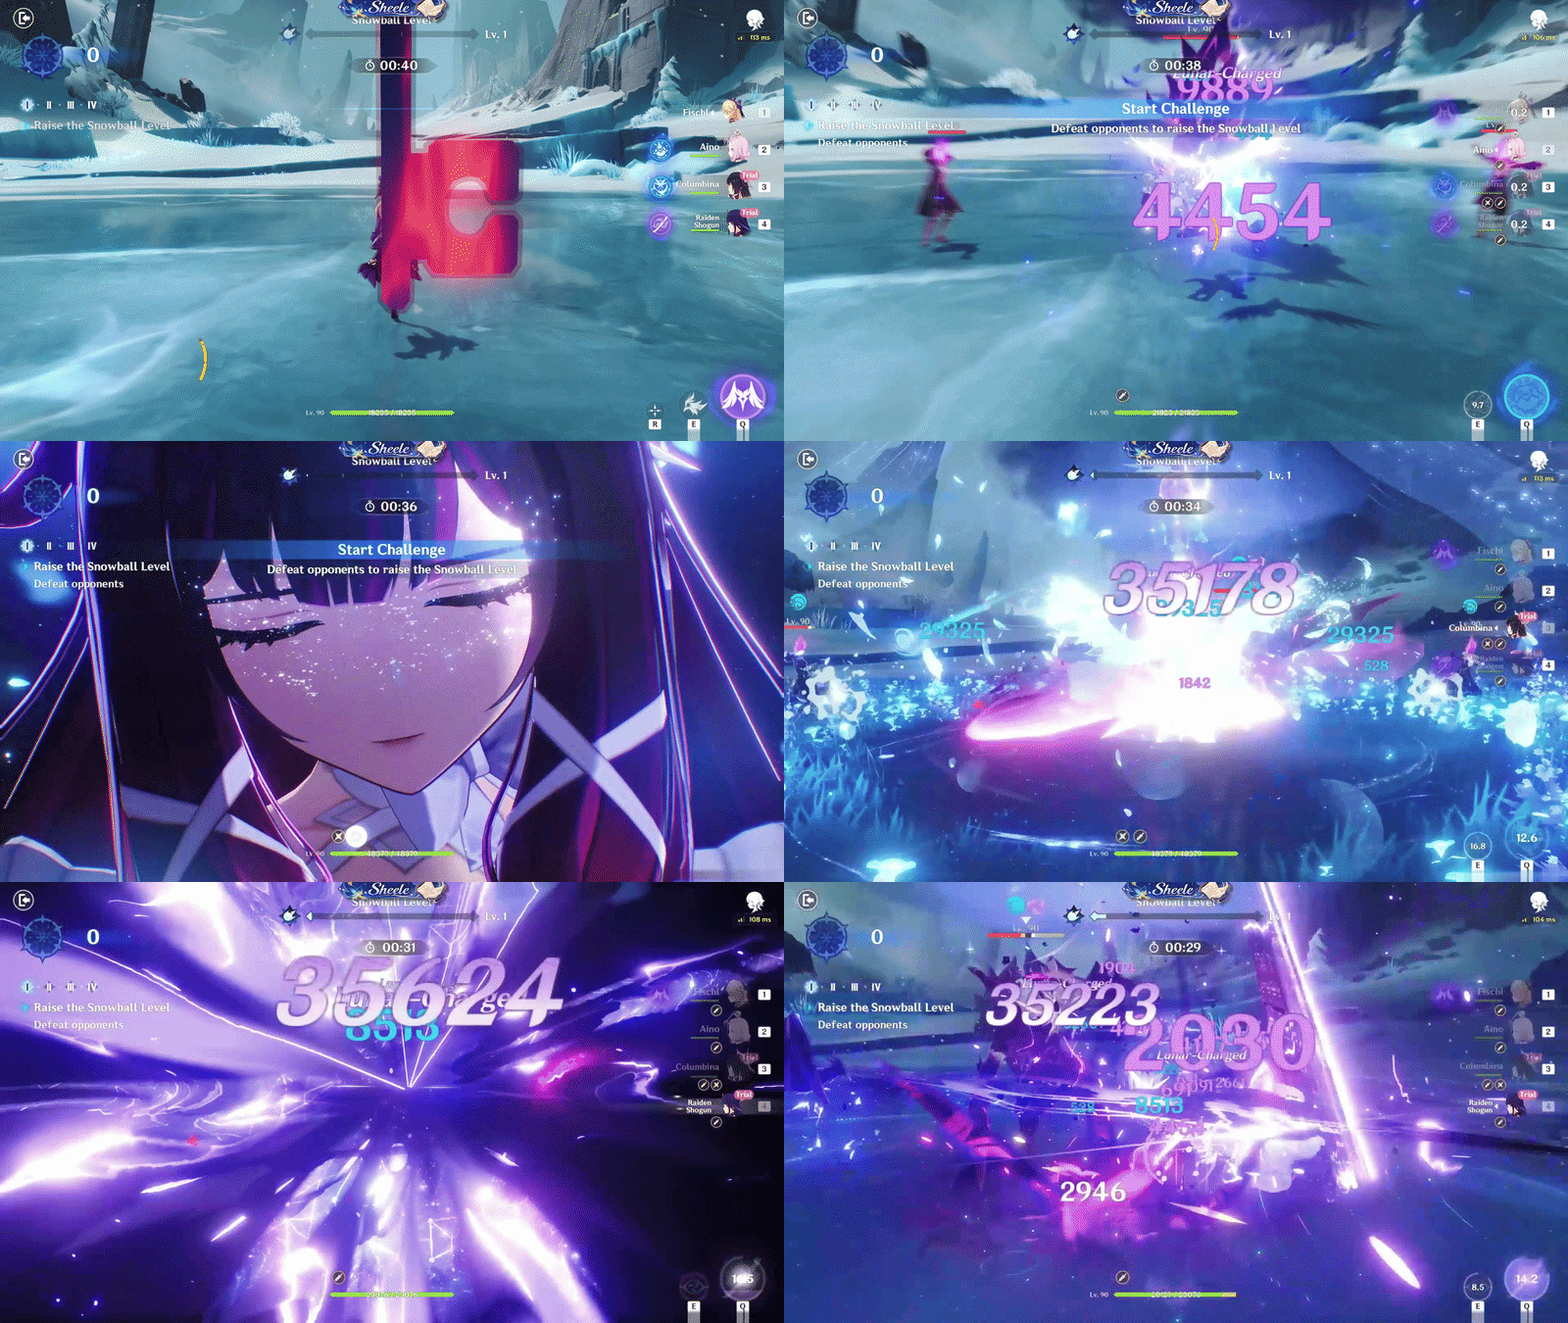
Challenge III: Attack Rotation
In the Snowball Stage, Hilichurls will spawn in groups and appear in curved formations around the arena. You will need to make smooth turns and adjust your movement to hit all of them with the Snowball.
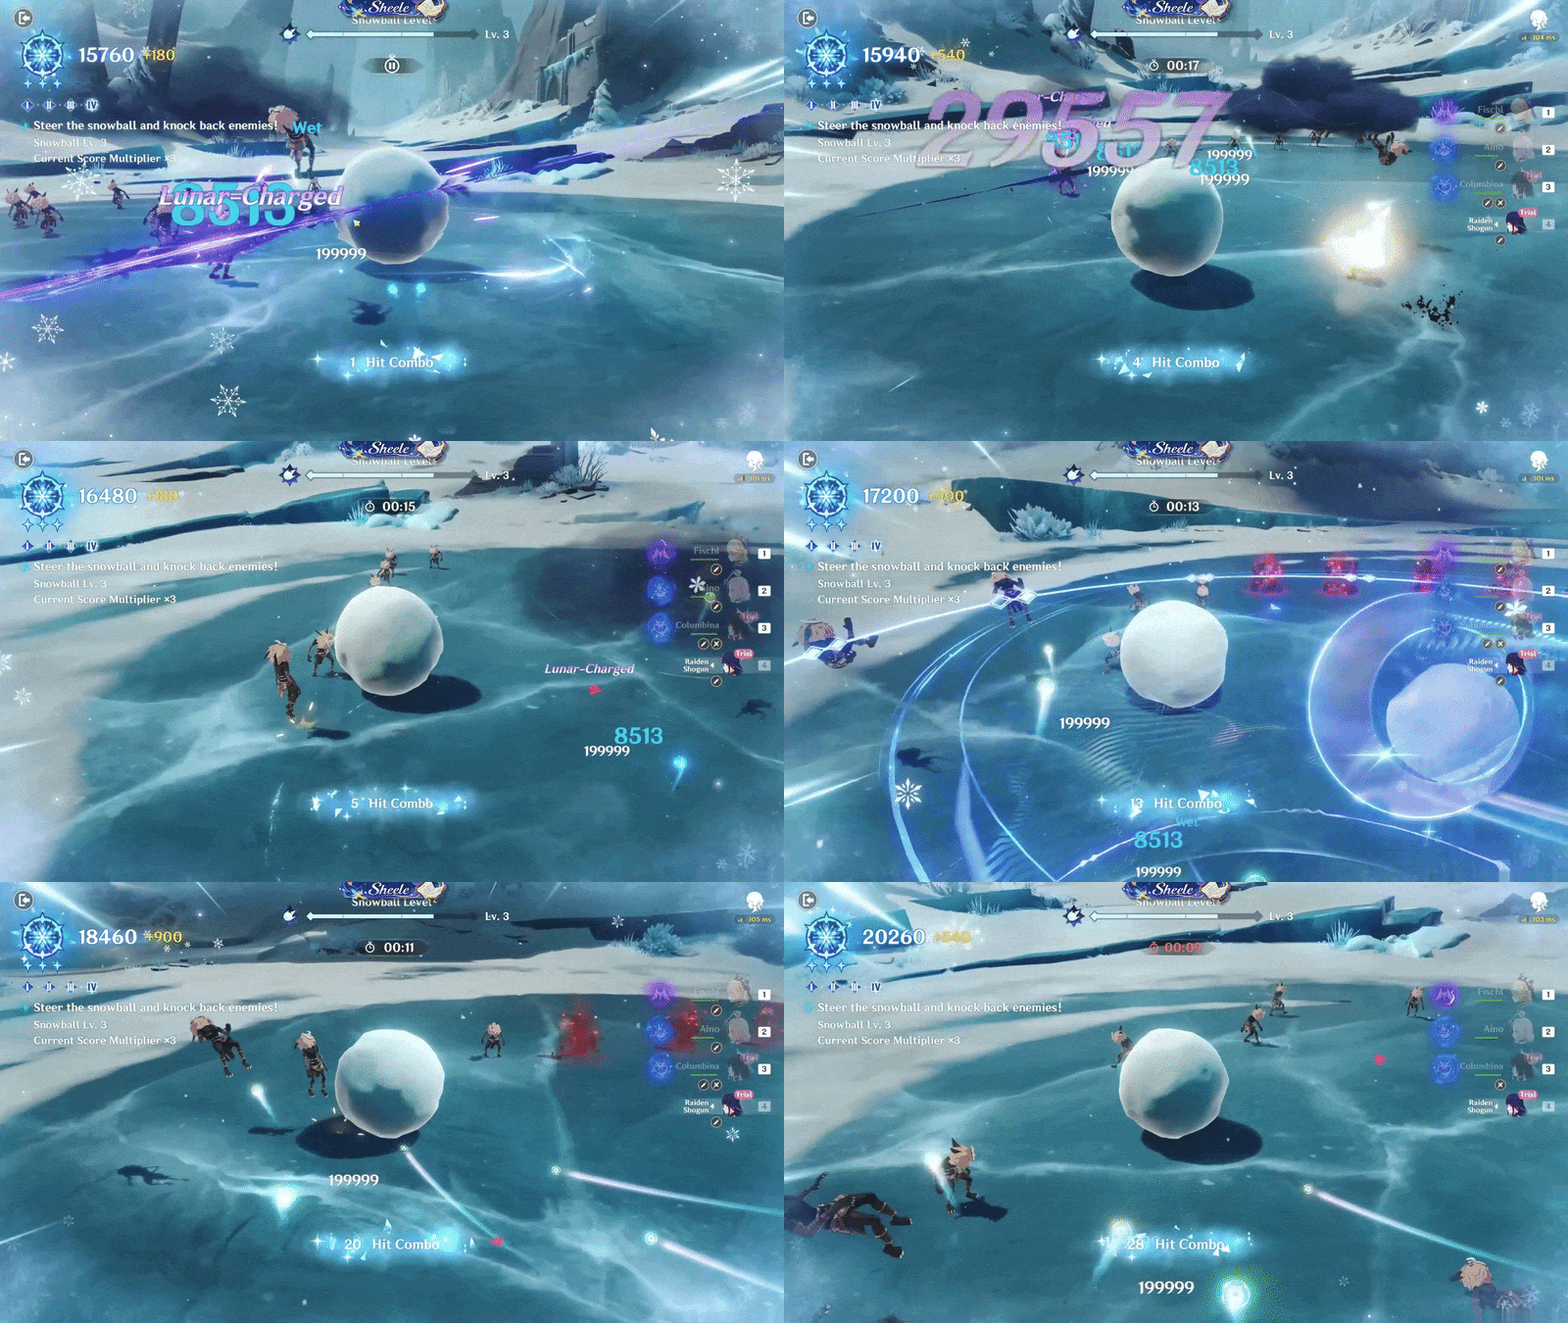
Challenge III: Snowball Stage
✦ Challenge IV: Where the Blizzard Howls
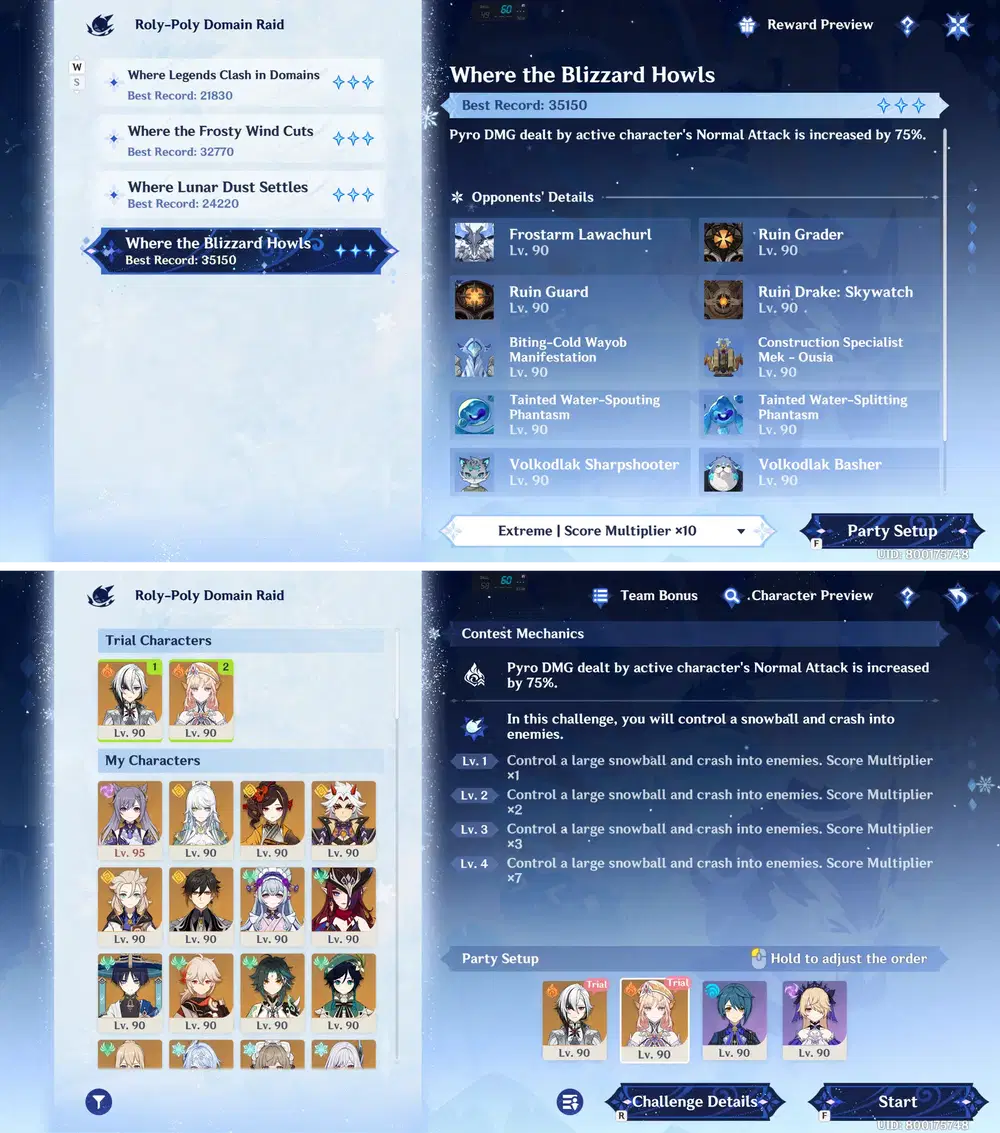
Challenge IV & Party Setup
Stage Details:
For the final challenge, I used the Arlecchino – Nicole – Xingqiu – Fischl team composition.
For the attack rotation, start with Xingqiu’s Elemental Burst & Elemental Skill → Fischl’s Elemental Skill → Nicole’s Elemental Skill & Elemental Burst → Arlecchino’s Elemental Skill & Normal Attacks.
Use Arlecchino as the on-field character while the Balemoon status is active, as it allows her to deal Pyro damage to opponents and maximize her damage output.
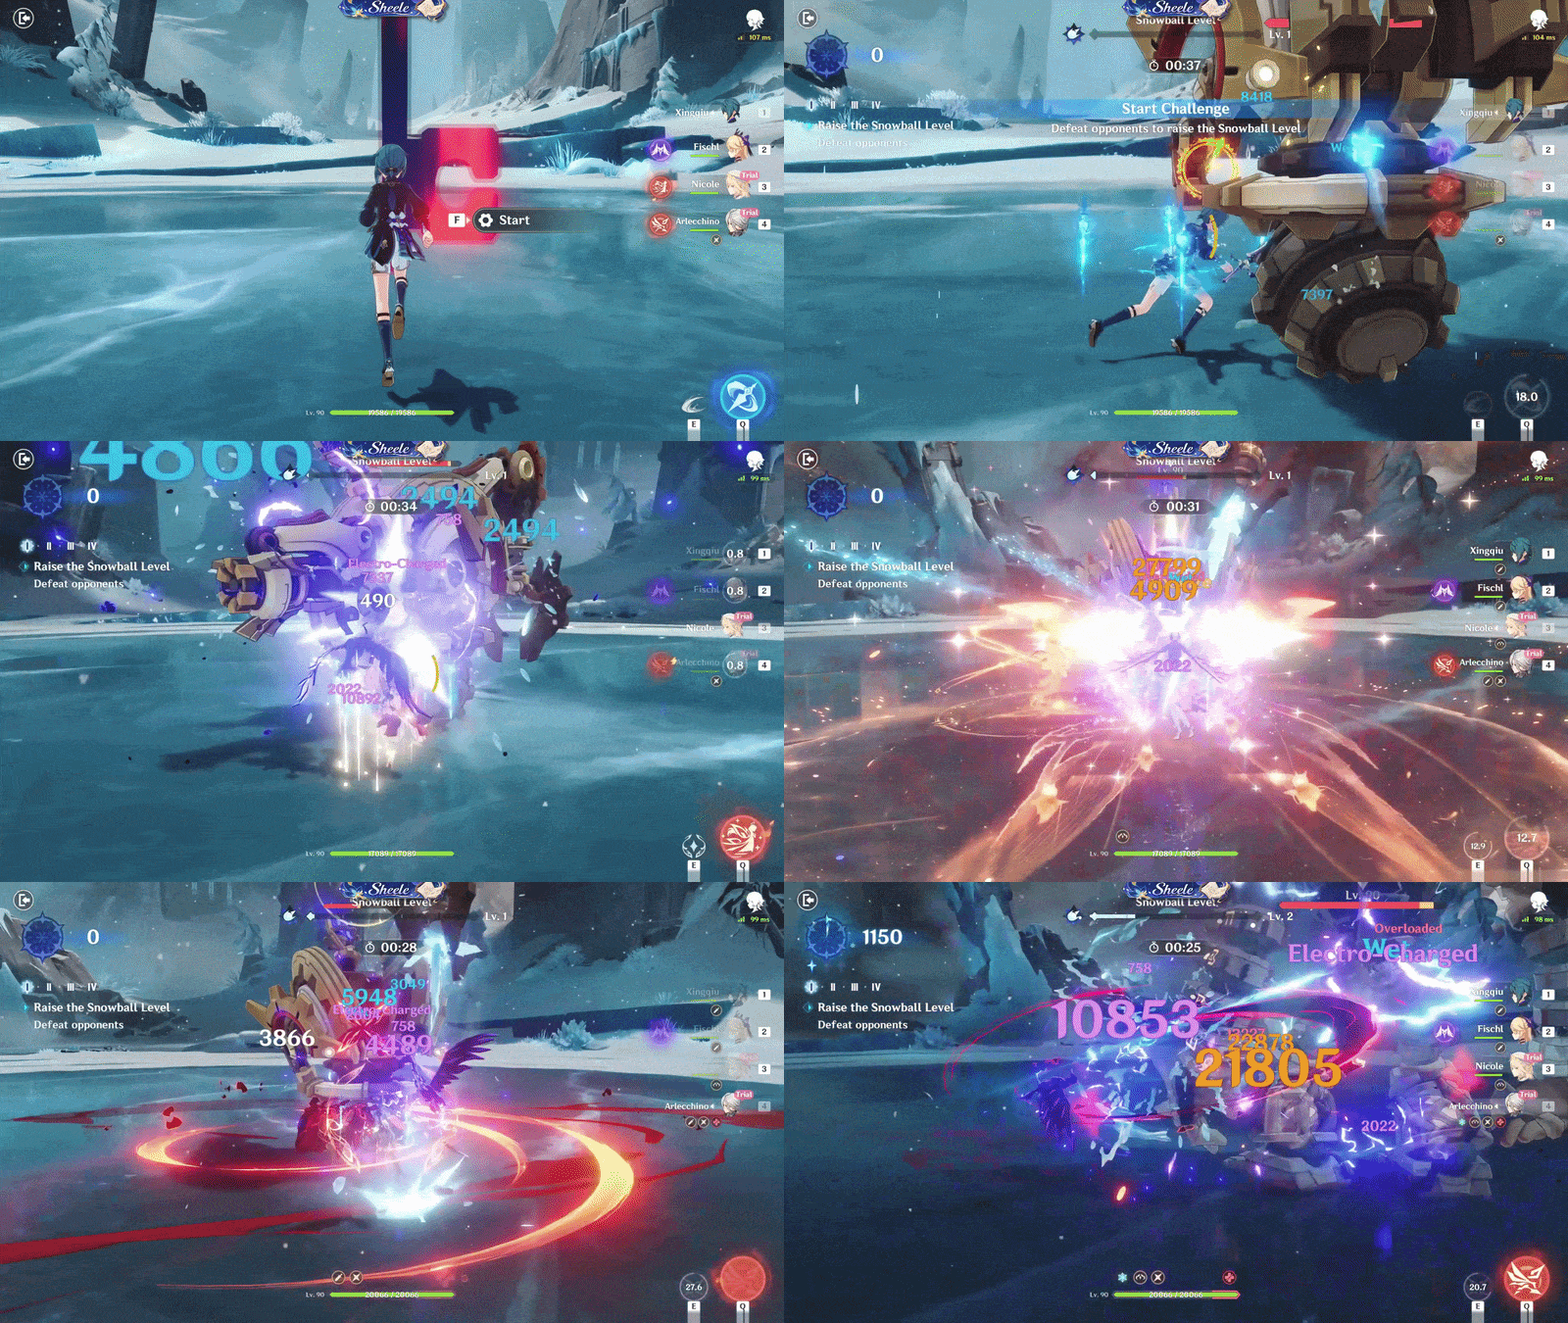
Challenge IV: Attack Rotation
In the Snowball Stage, enemies will spawn in groups, so carefully maneuver the Snowball through the arena to hit as many enemies as possible.
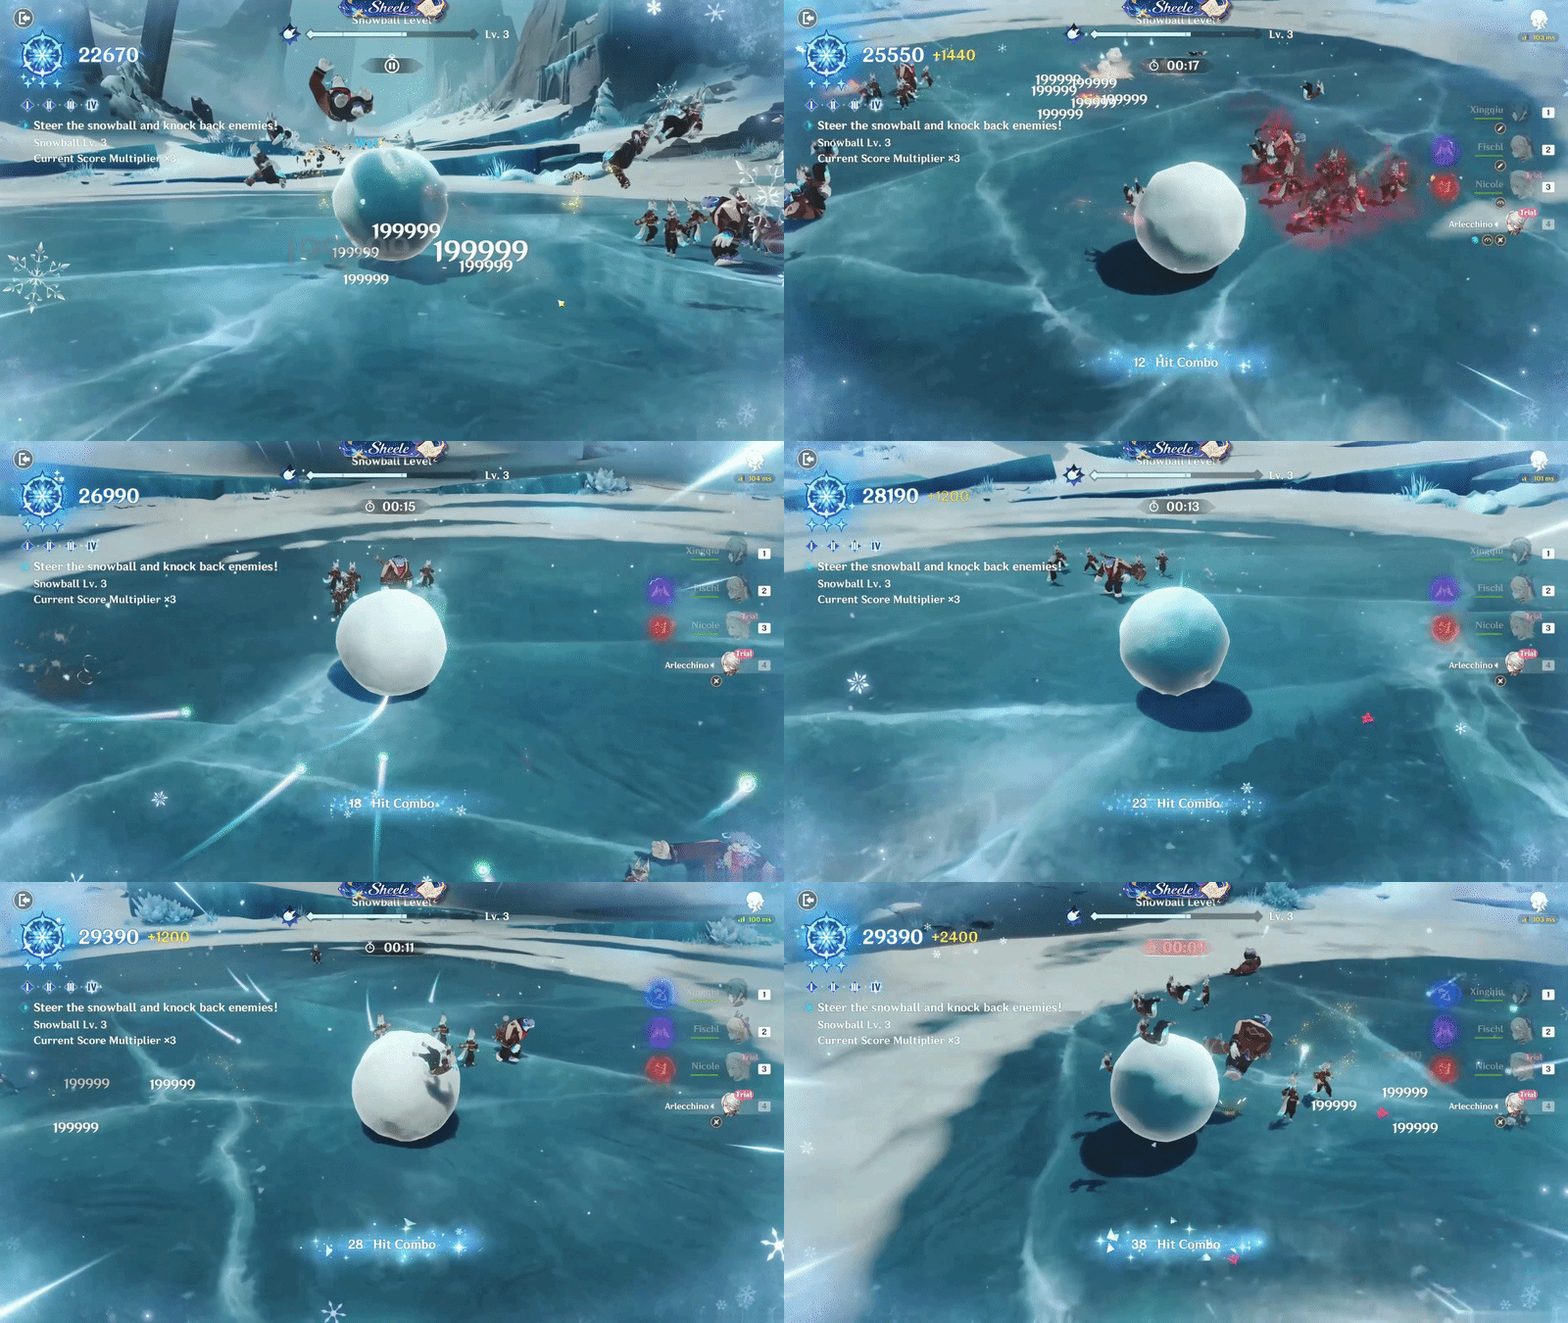
Challenge IV: Snowball Stage
Video Gameplay
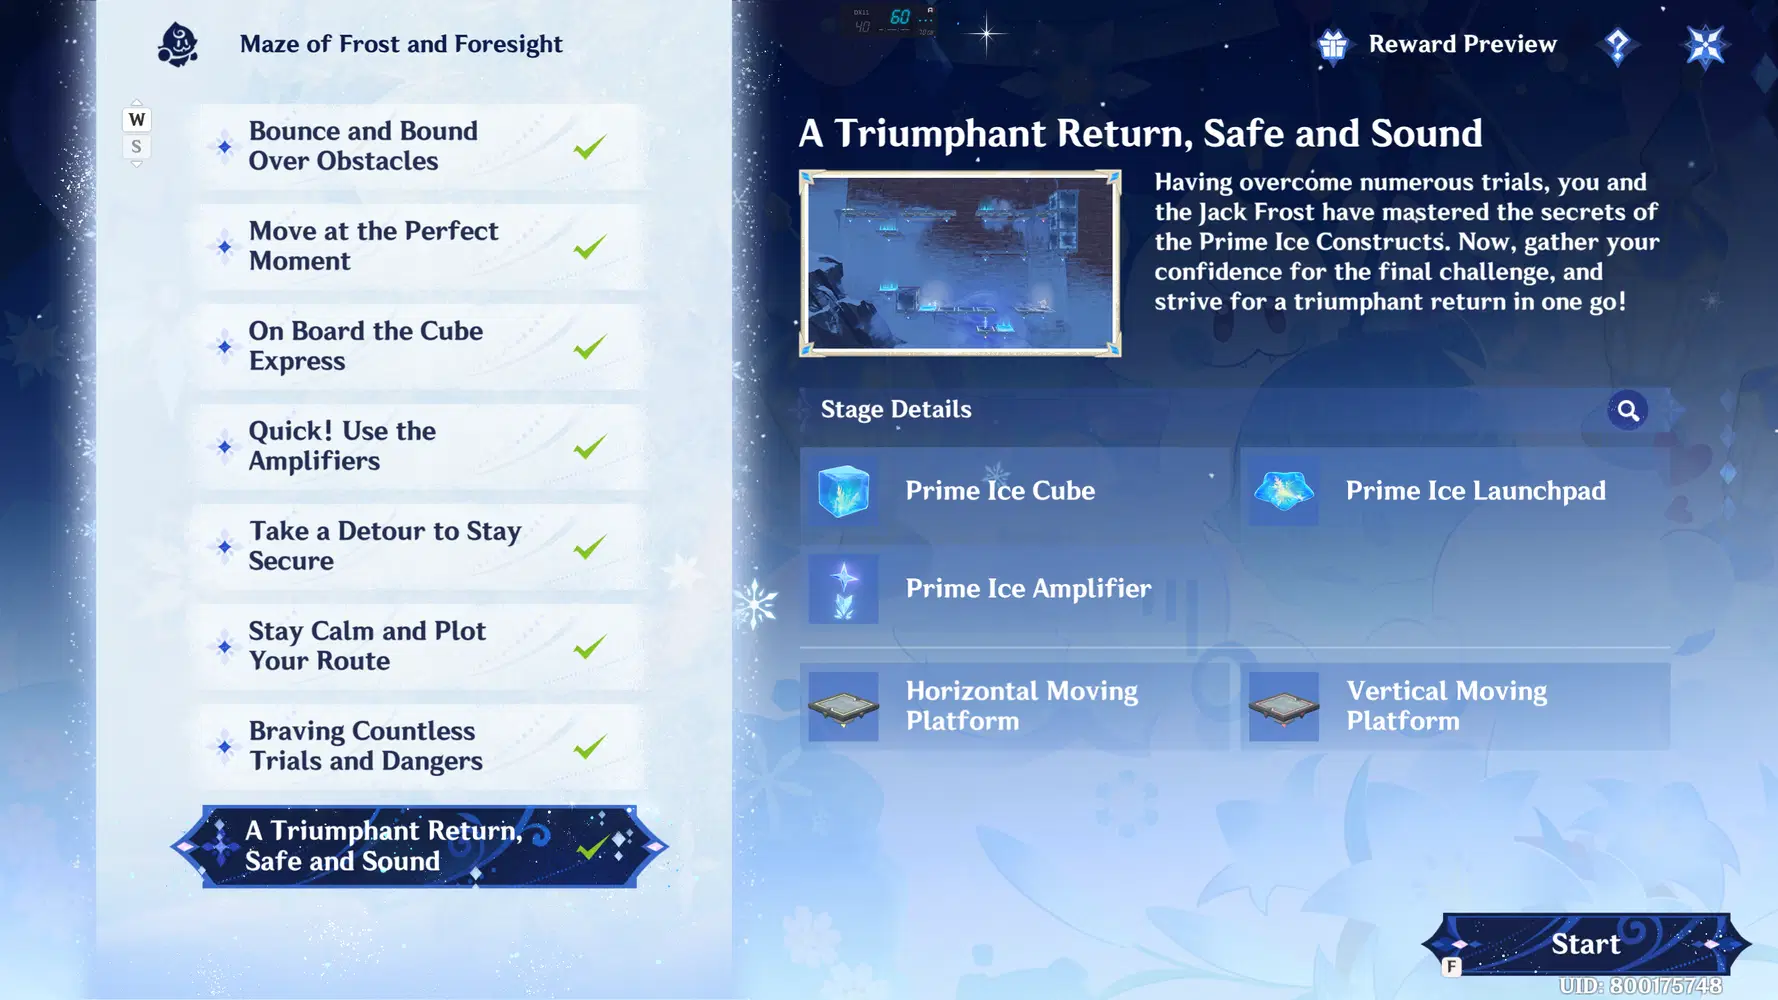
Maze of Frost and Foresight
Maze of Frost and Foresight is one of the game modes featured in the Great Expeditionist Challenge event. You can unlock this mode by completing the event World Quest Adventurers of Teyvat: Grand Showdown! After unlocking it, speak with Liliuo at the designated location to access the game mode.
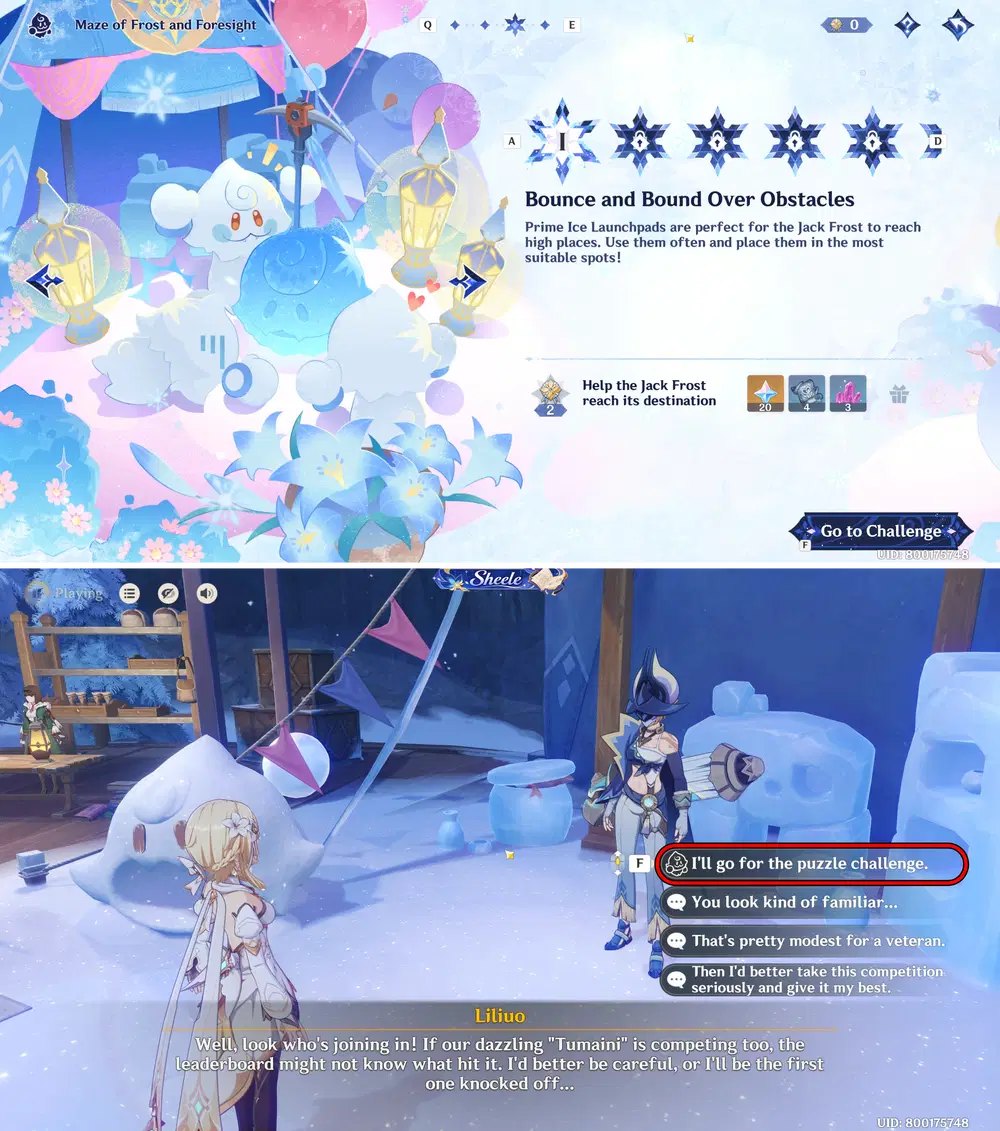
Maze of Frost and Foresight Event
Gameplay Tutorial
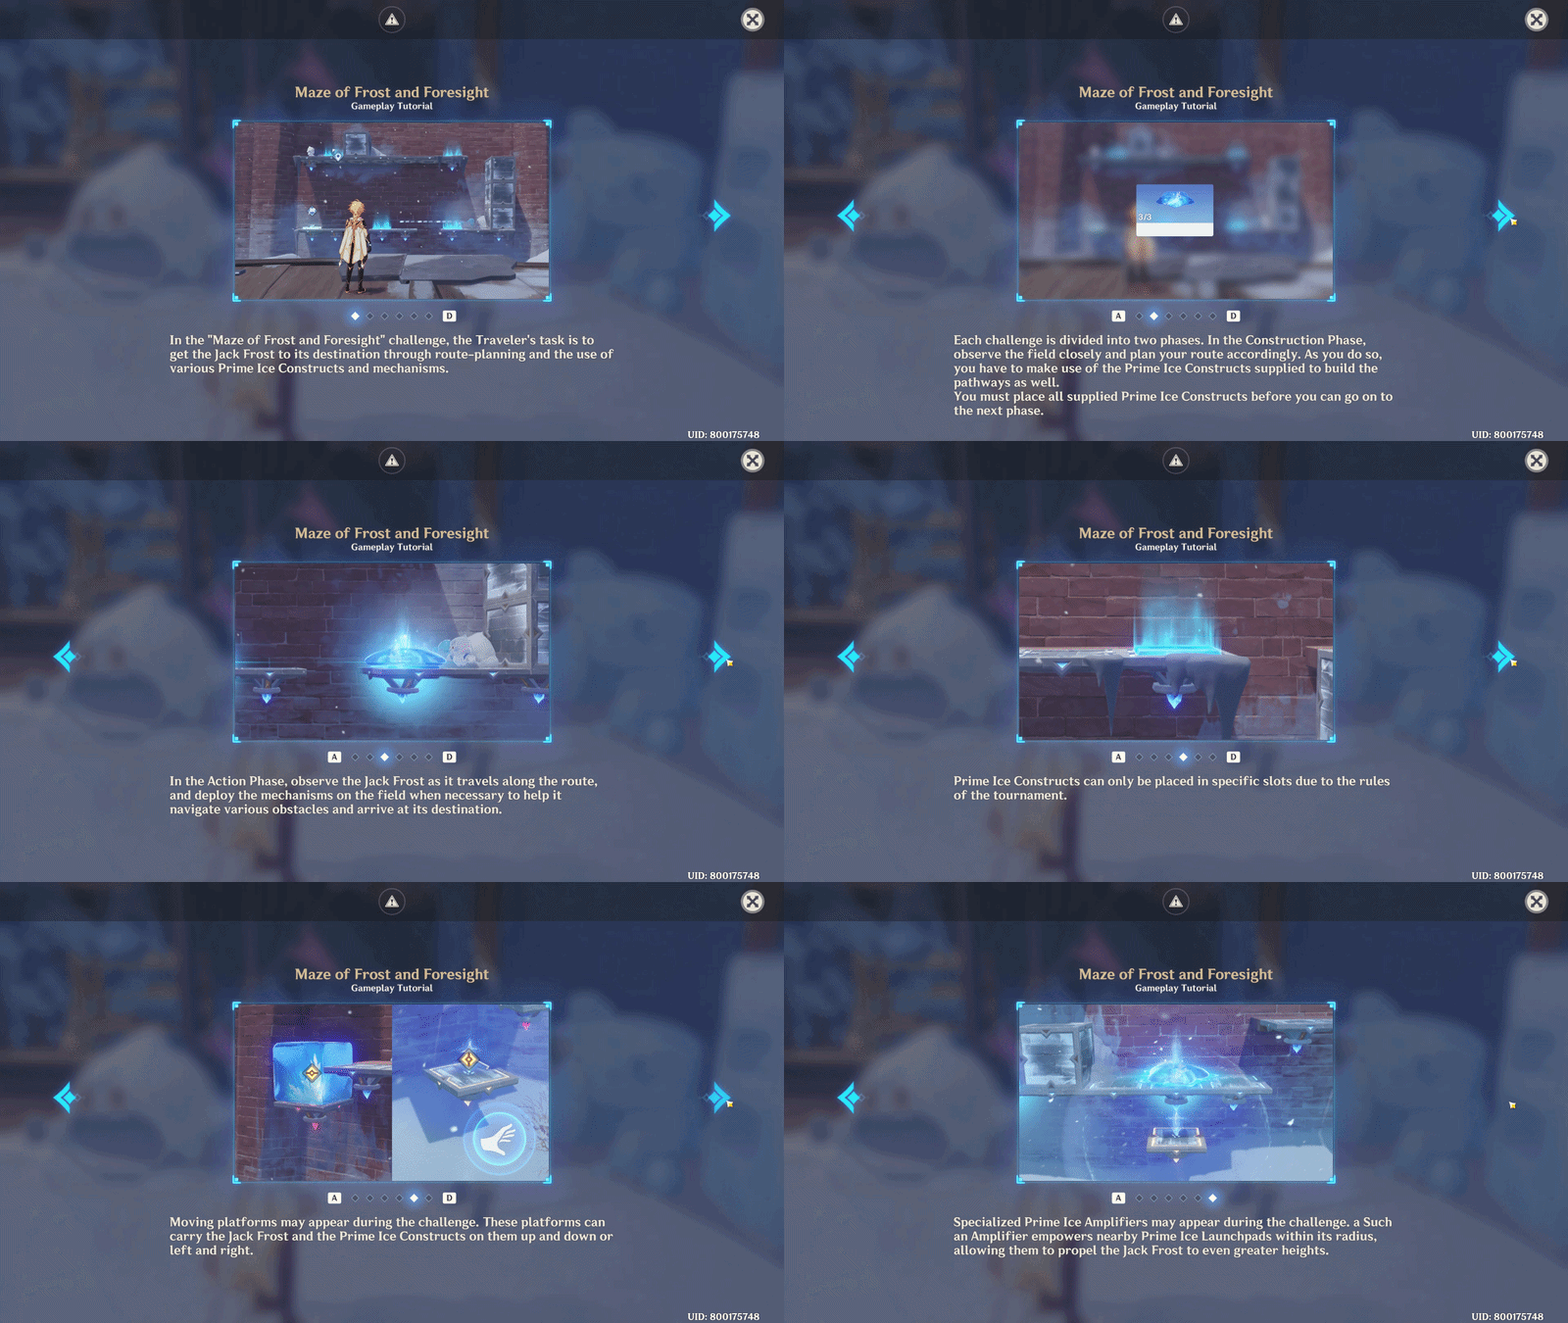
✦ Challenge I: Bounce and Bound Over Obstacles
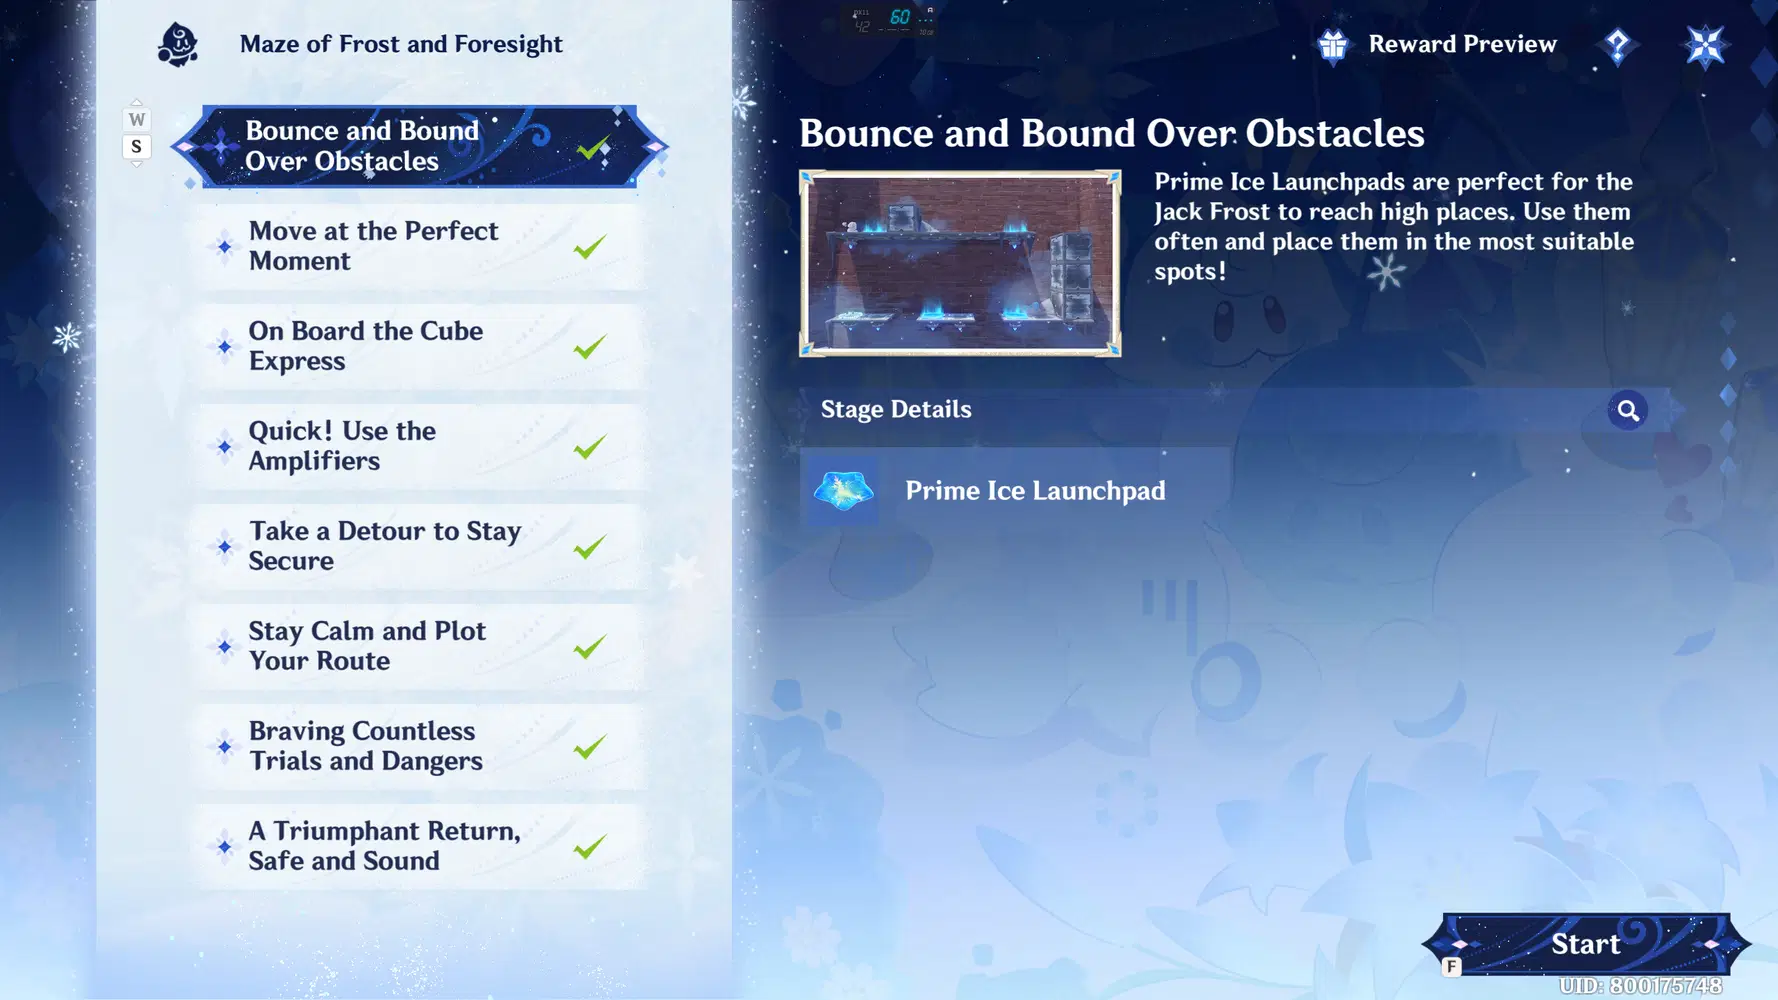
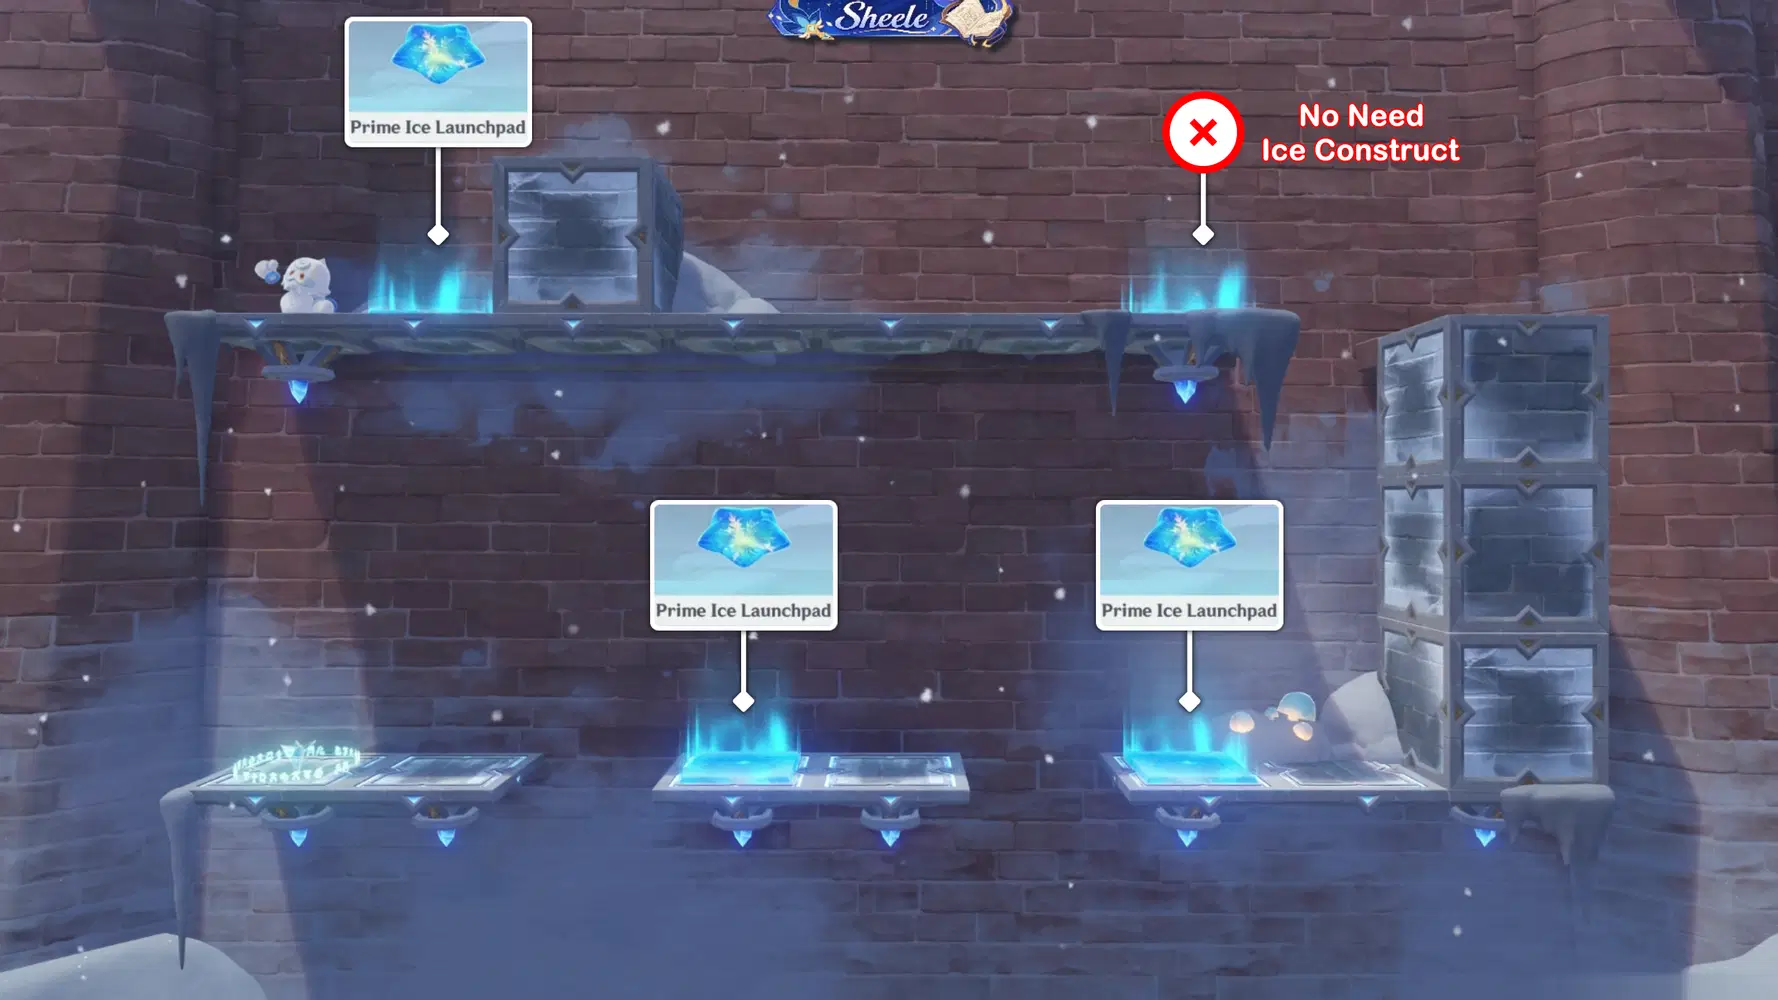
Challenge I: Ice Construct Placement
Stage Details:
For the first challenge, place the Prime Ice Launchpad in the same position as shown in the image above.
When the Act begins, Jack Frost will move from the starting point toward the right, jump over the boxes, and continue downward. He will then jump across the gap and proceed to the finish line.
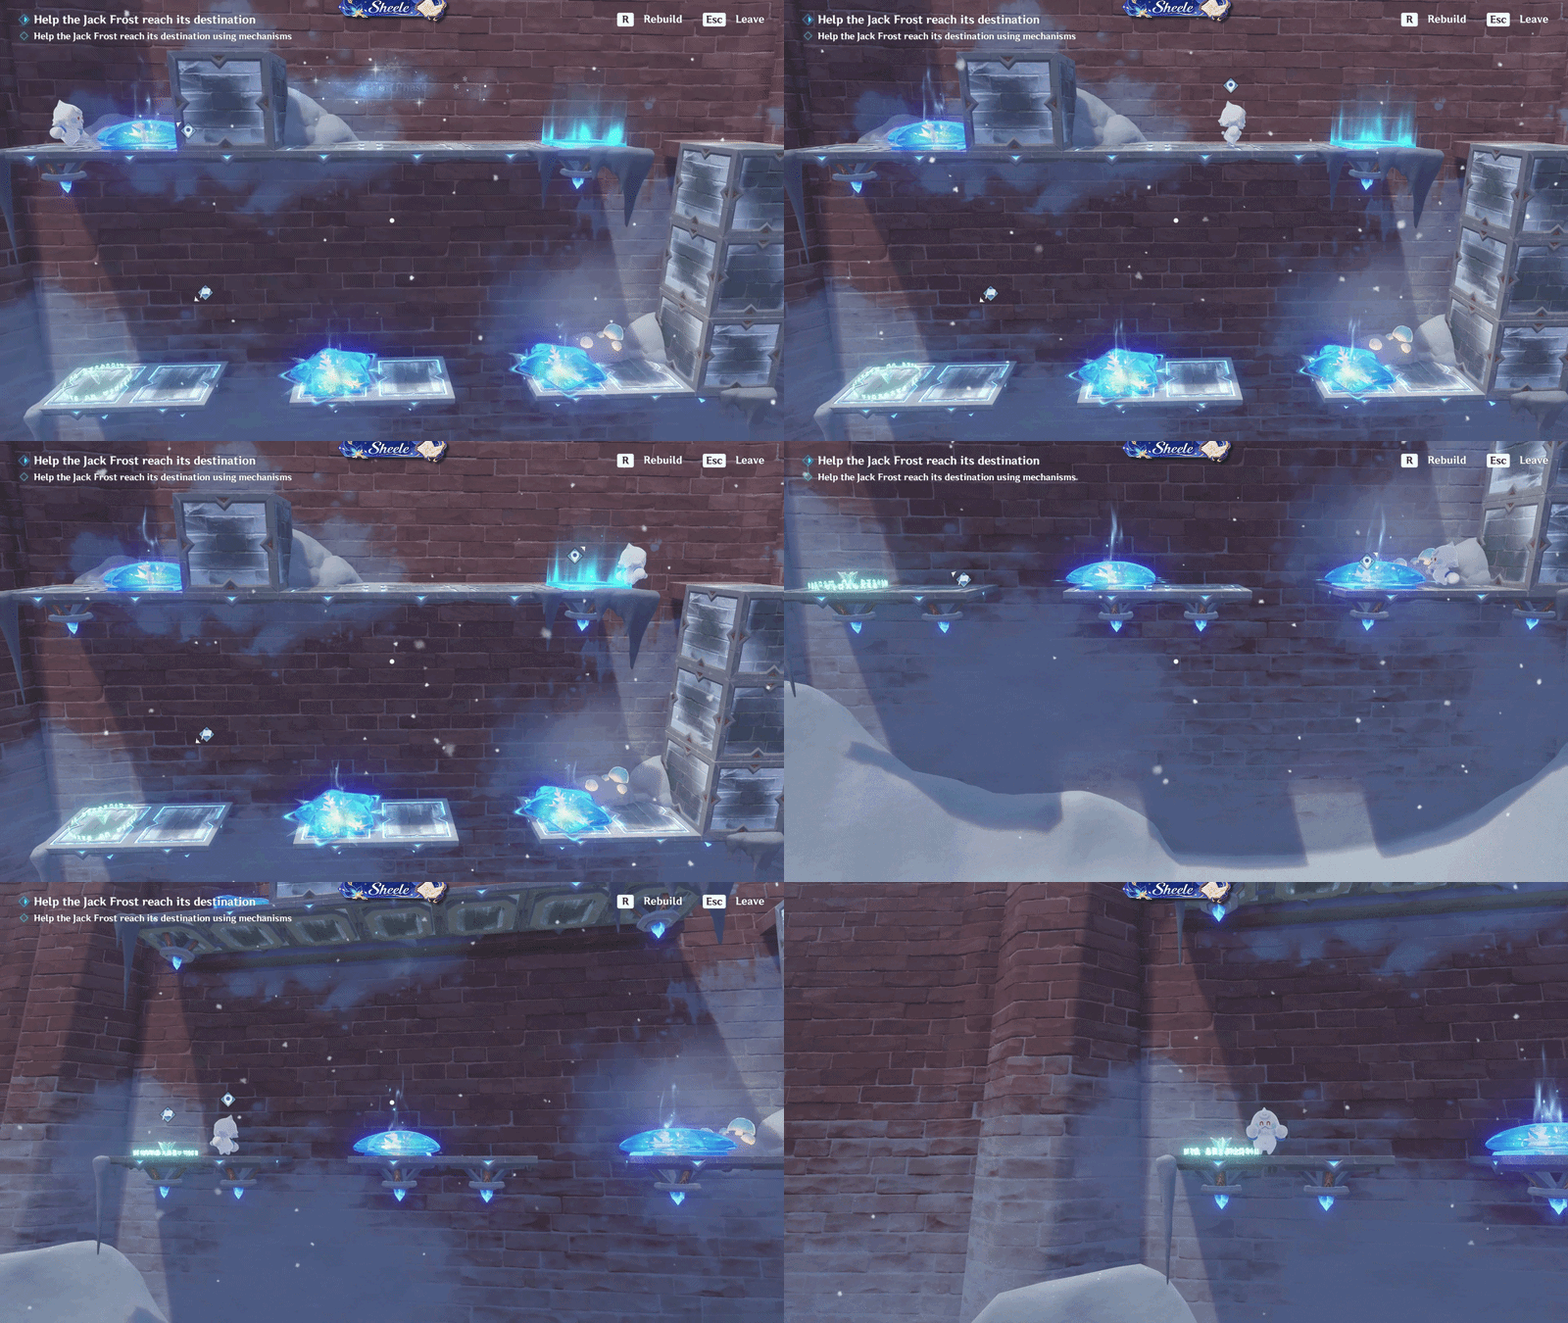
Challenge I: Jack Frost Movement
✦ Challenge II: Move at the Perfect Moment
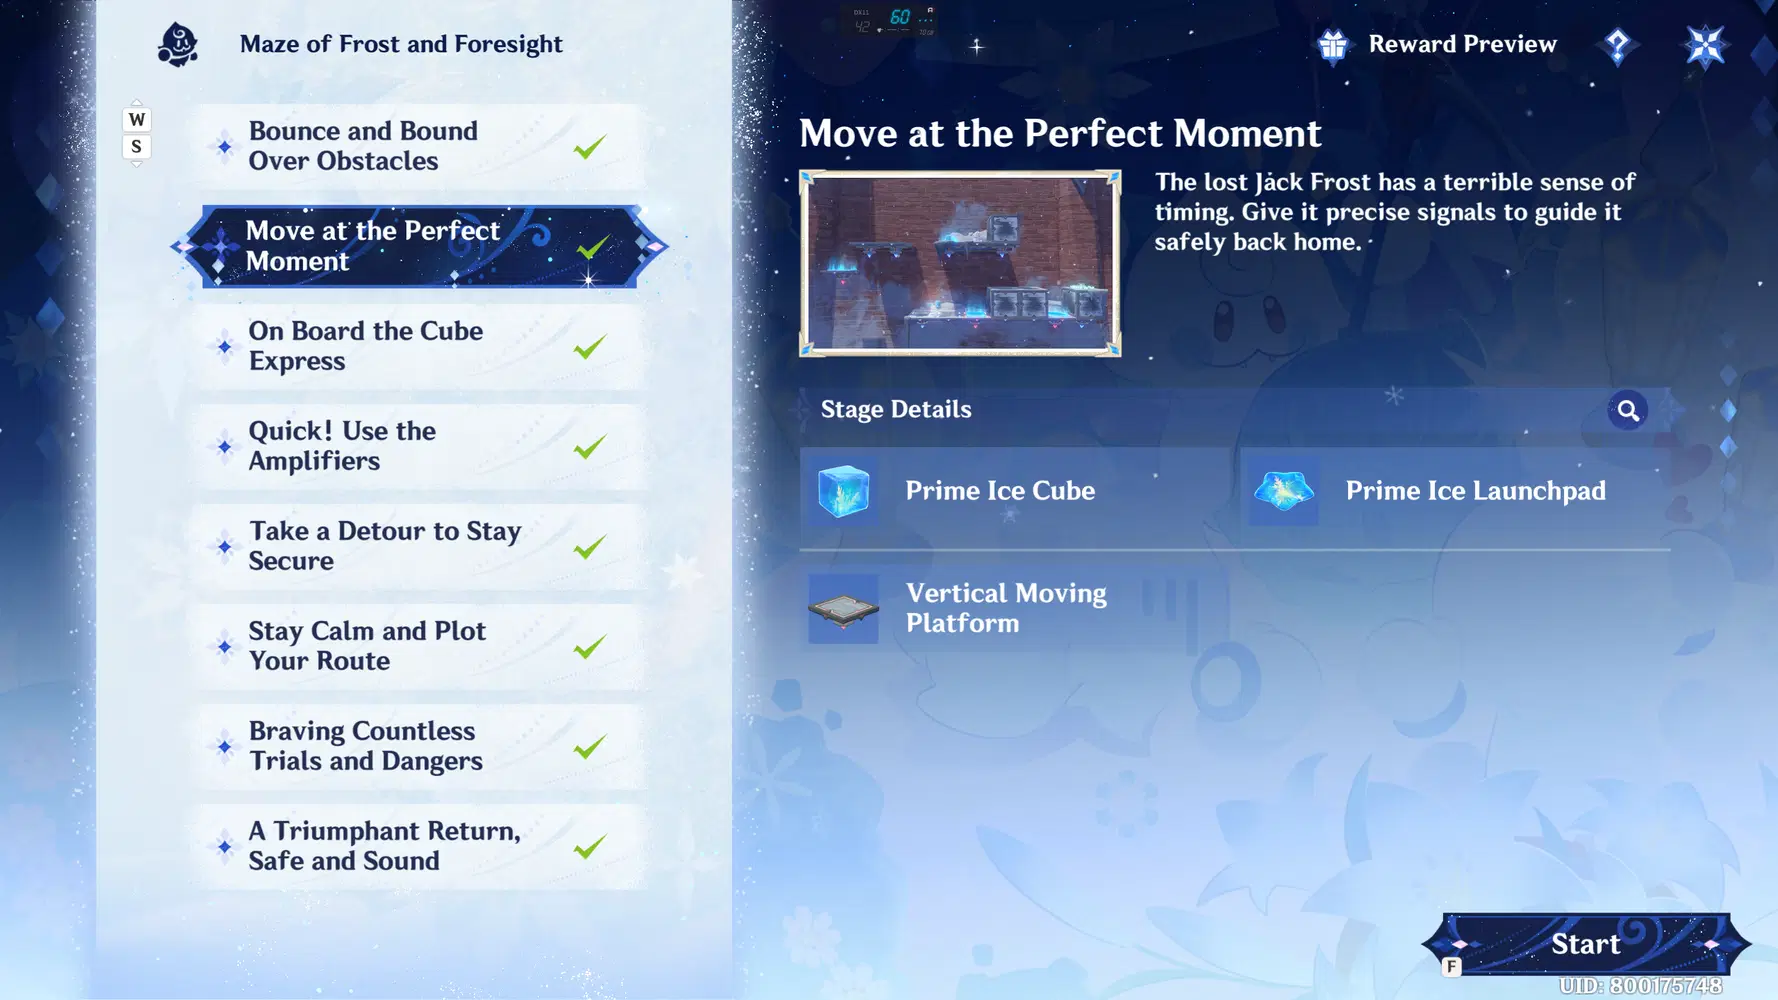
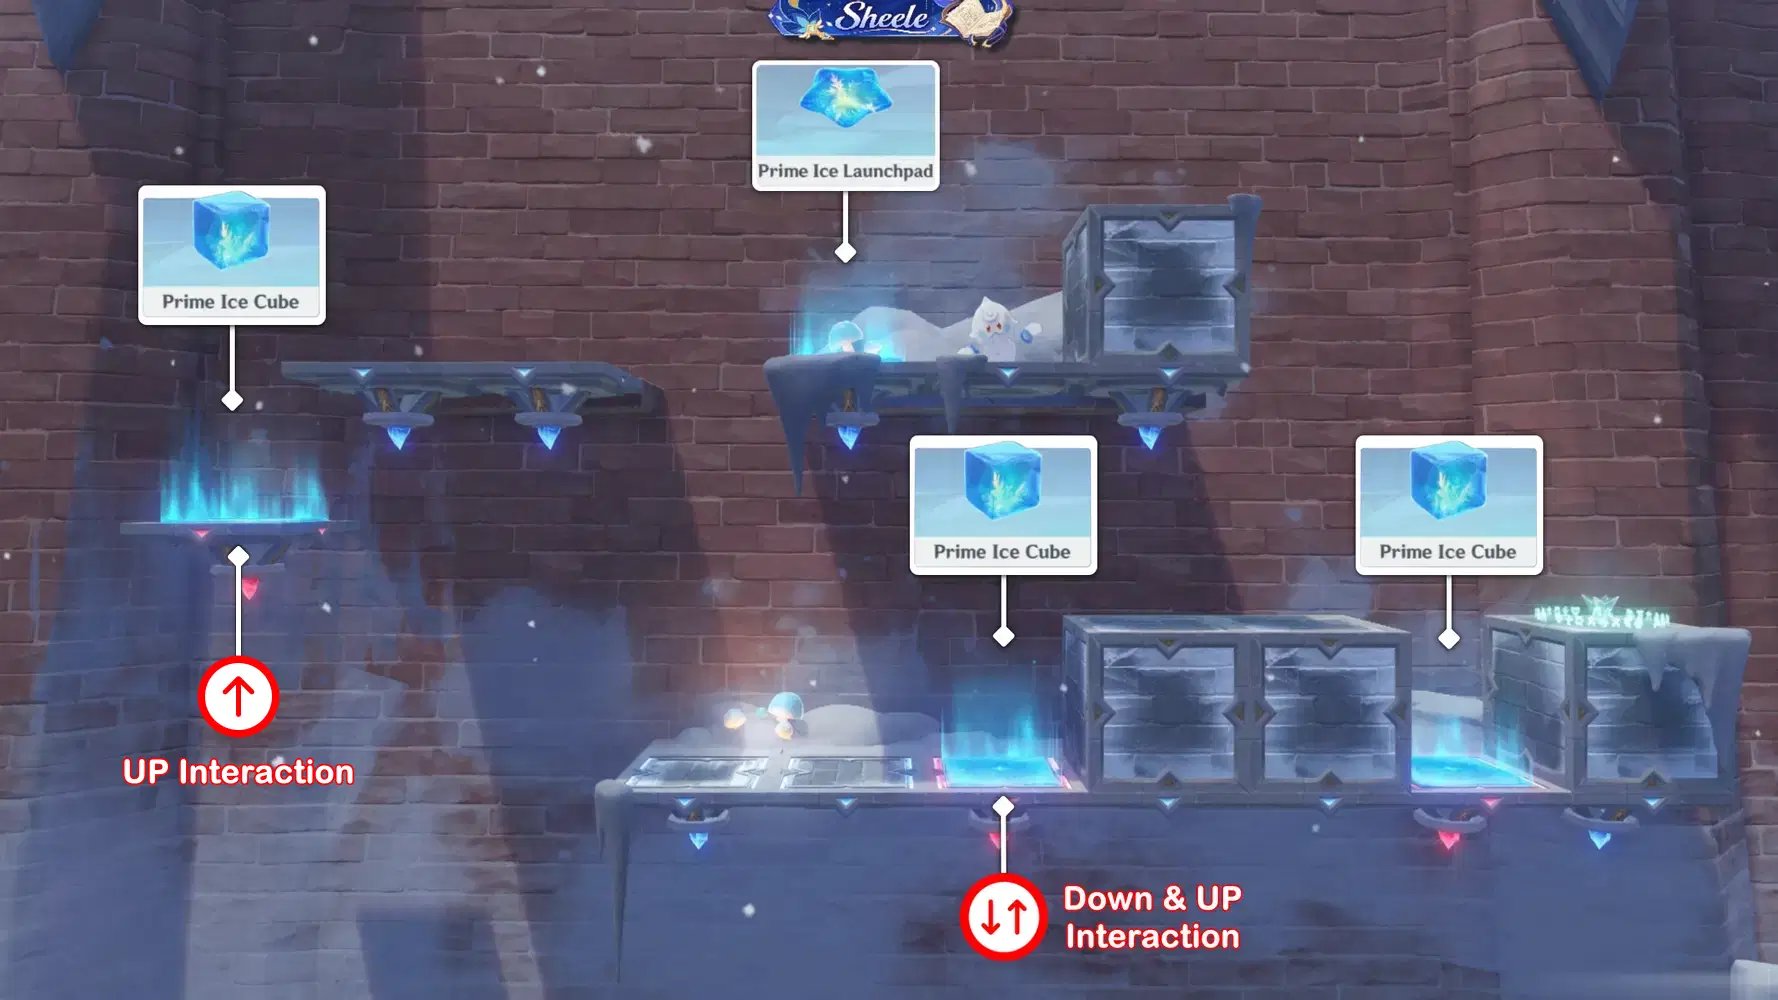
Challenge II: Ice Construct Placement
Stage Details:
Place all Ice Constructs according to the positions shown in the image.
From the Start Point, Jack Frost will move to the left, then jump and interact with the platform on the left, causing him to change direction. He will then fall to the lower area.
When Jack Frost is directly above the platform below, interact with it to make it move to the top of the box. Jack Frost will then move to the right toward the Finish Line.
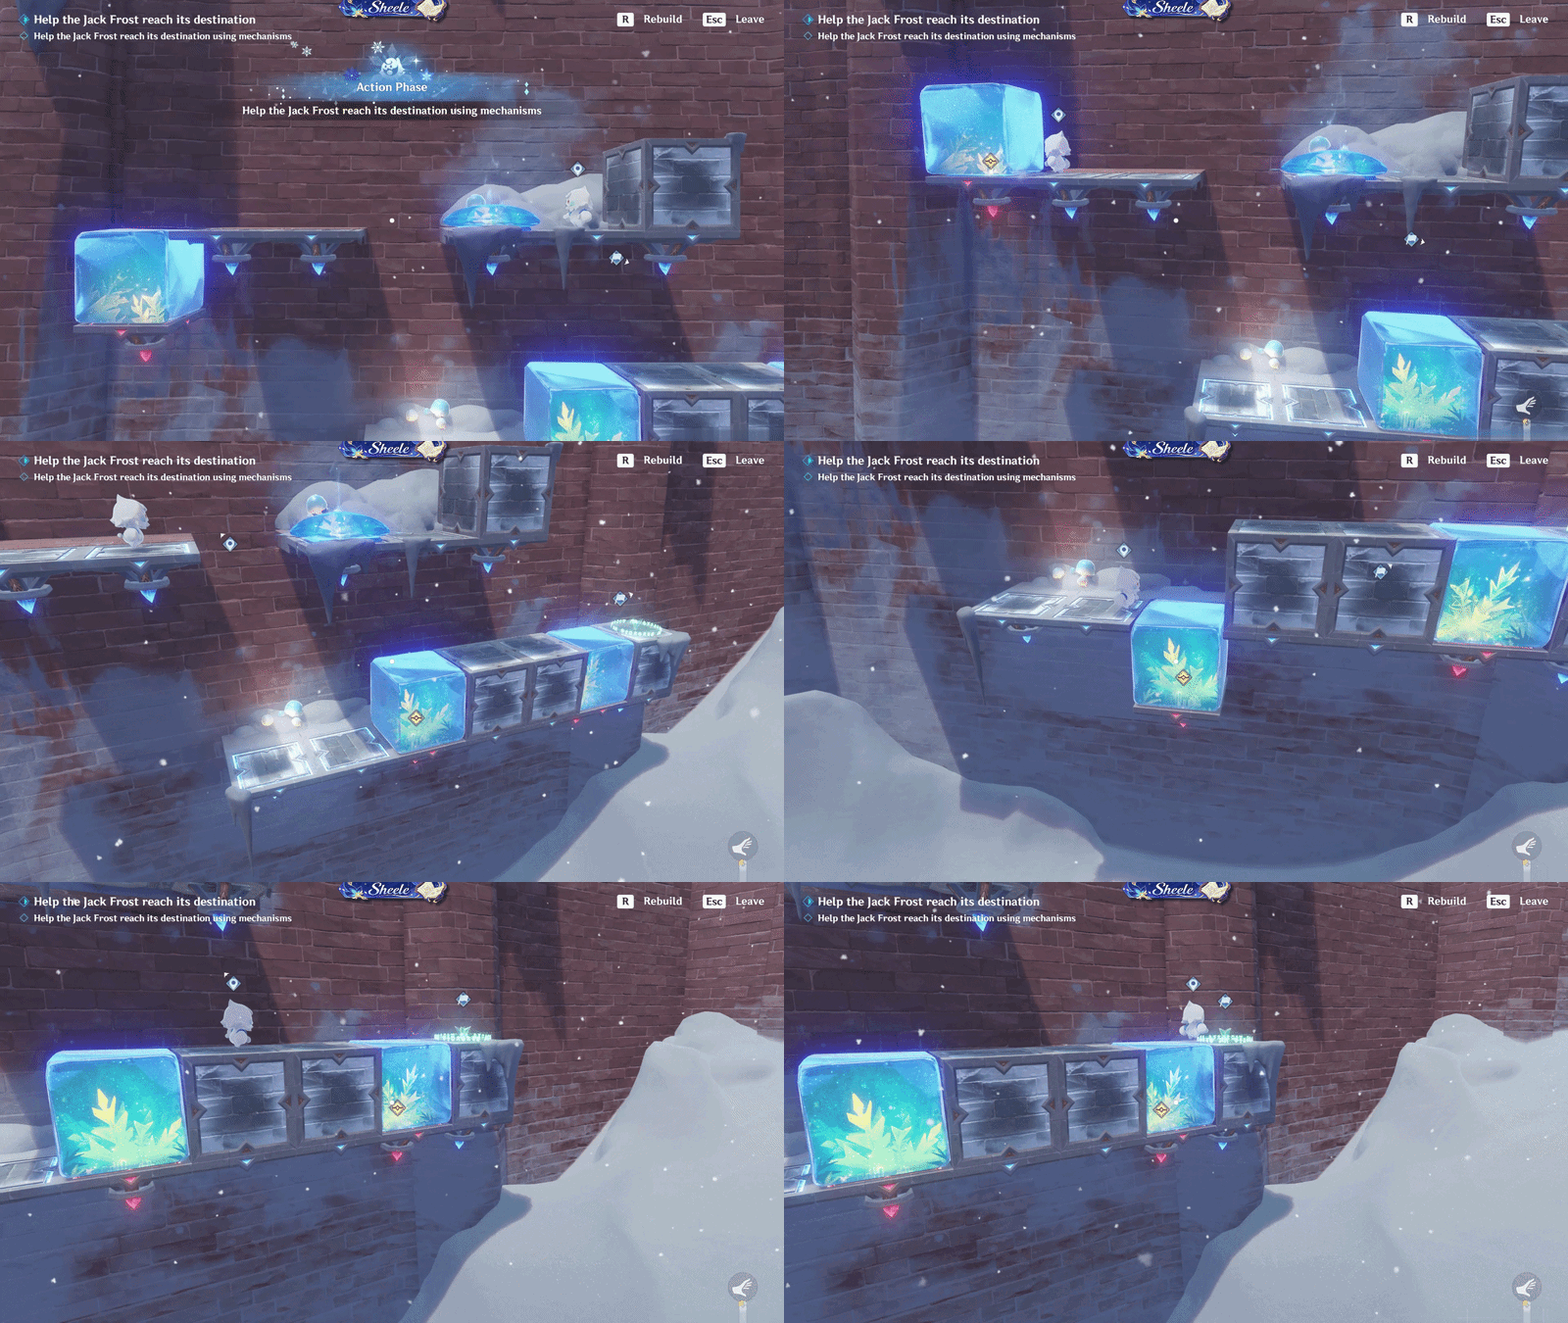
Challenge II: Jack Frost Movement
✦ Challenge III: On Board the Cube Express
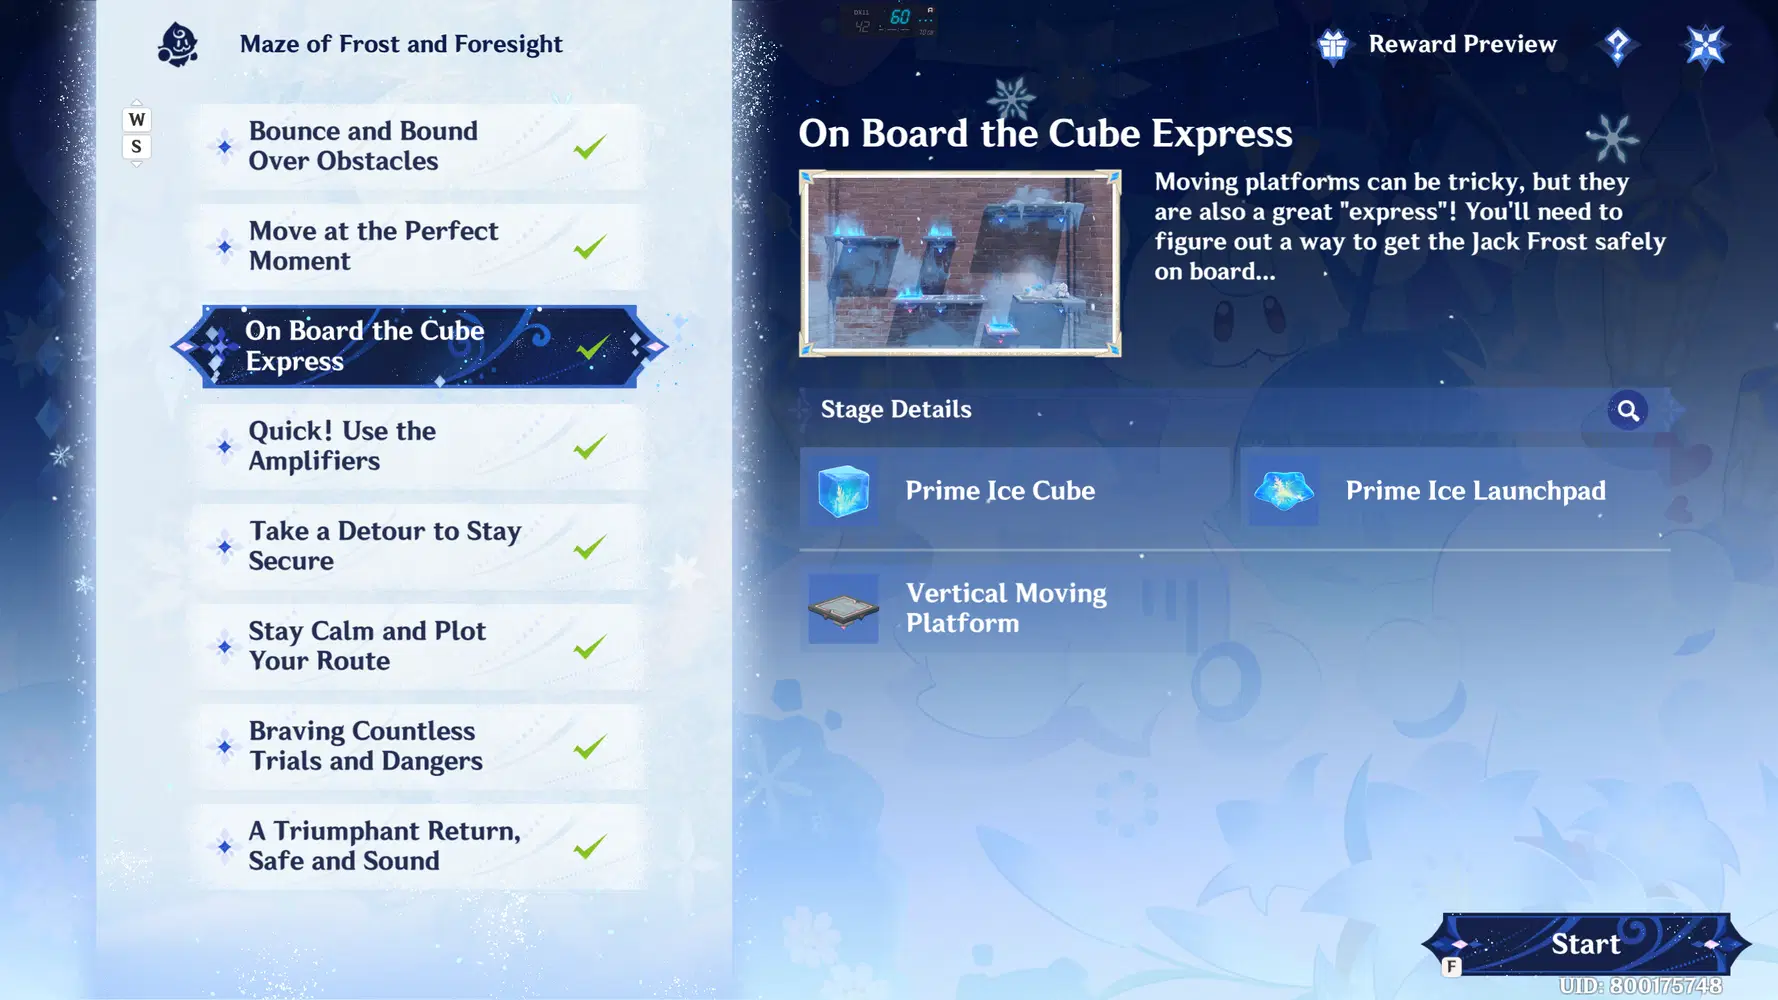
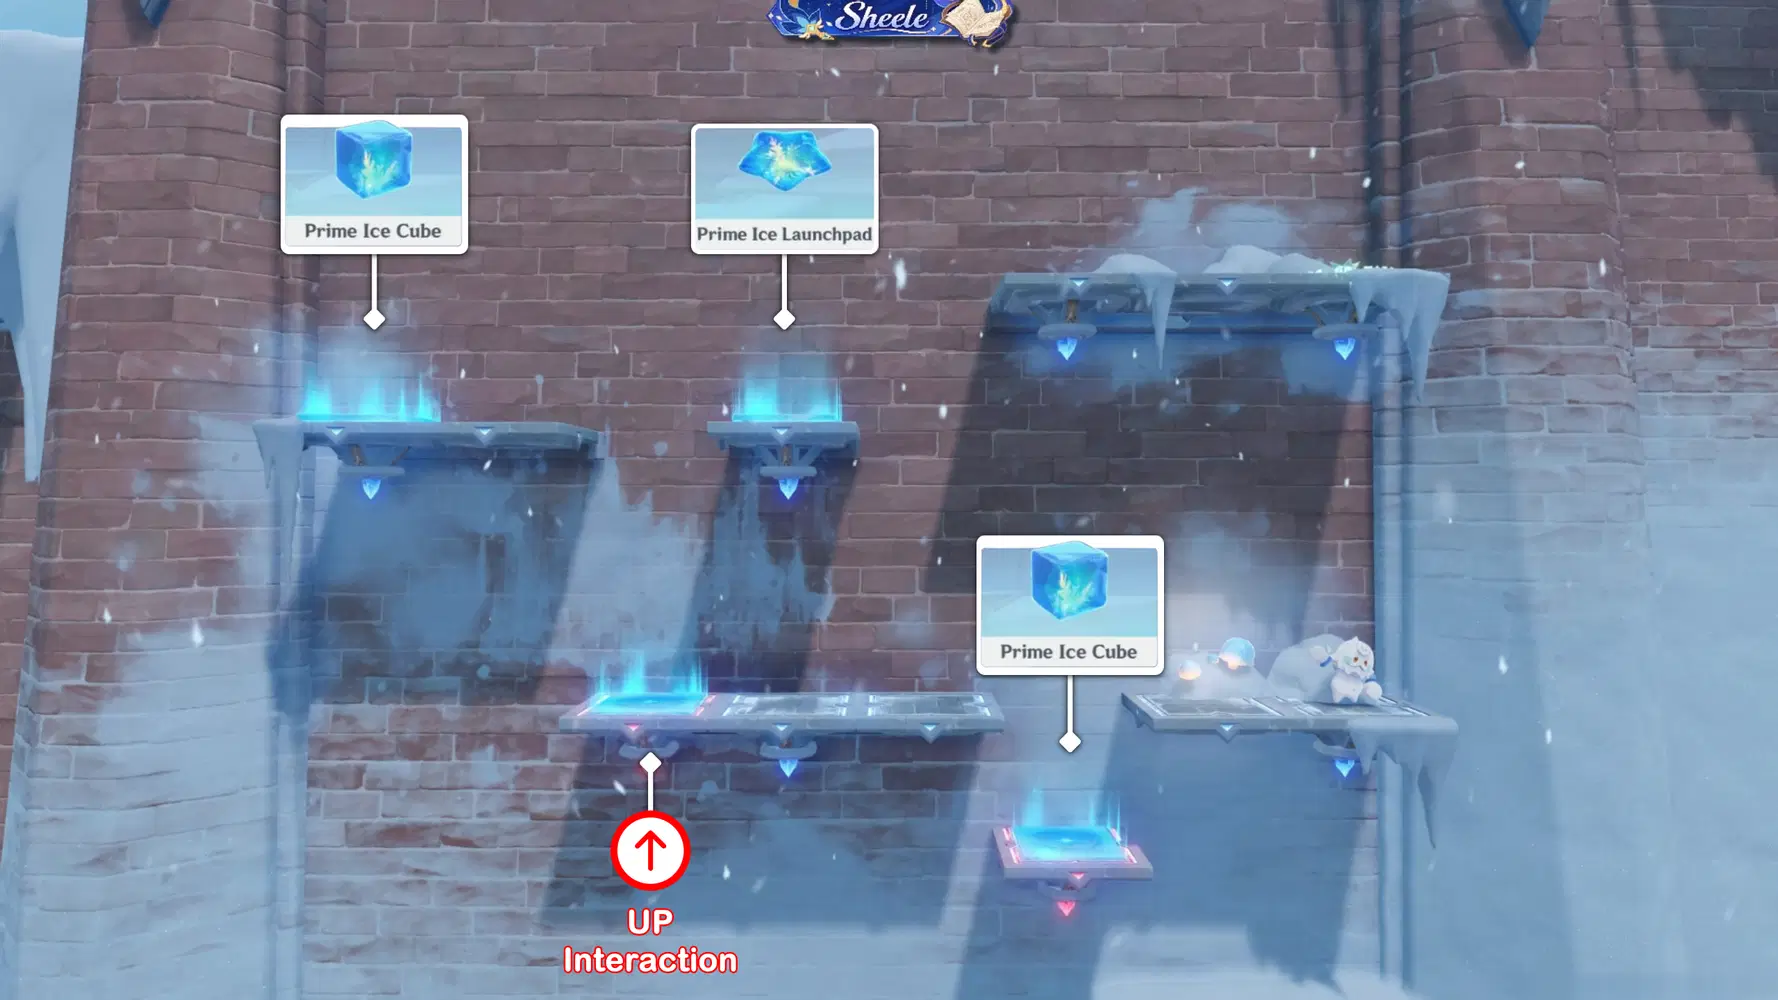
Challenge III: Ice Construct Placement
Stage Details:
Place all Ice Constructs according to the positions shown in the image.
From the Start Point, Jack Frost will move to the left. When he is above the platform, move the platform upward to redirect him and guide him along the route toward the Finish Line.
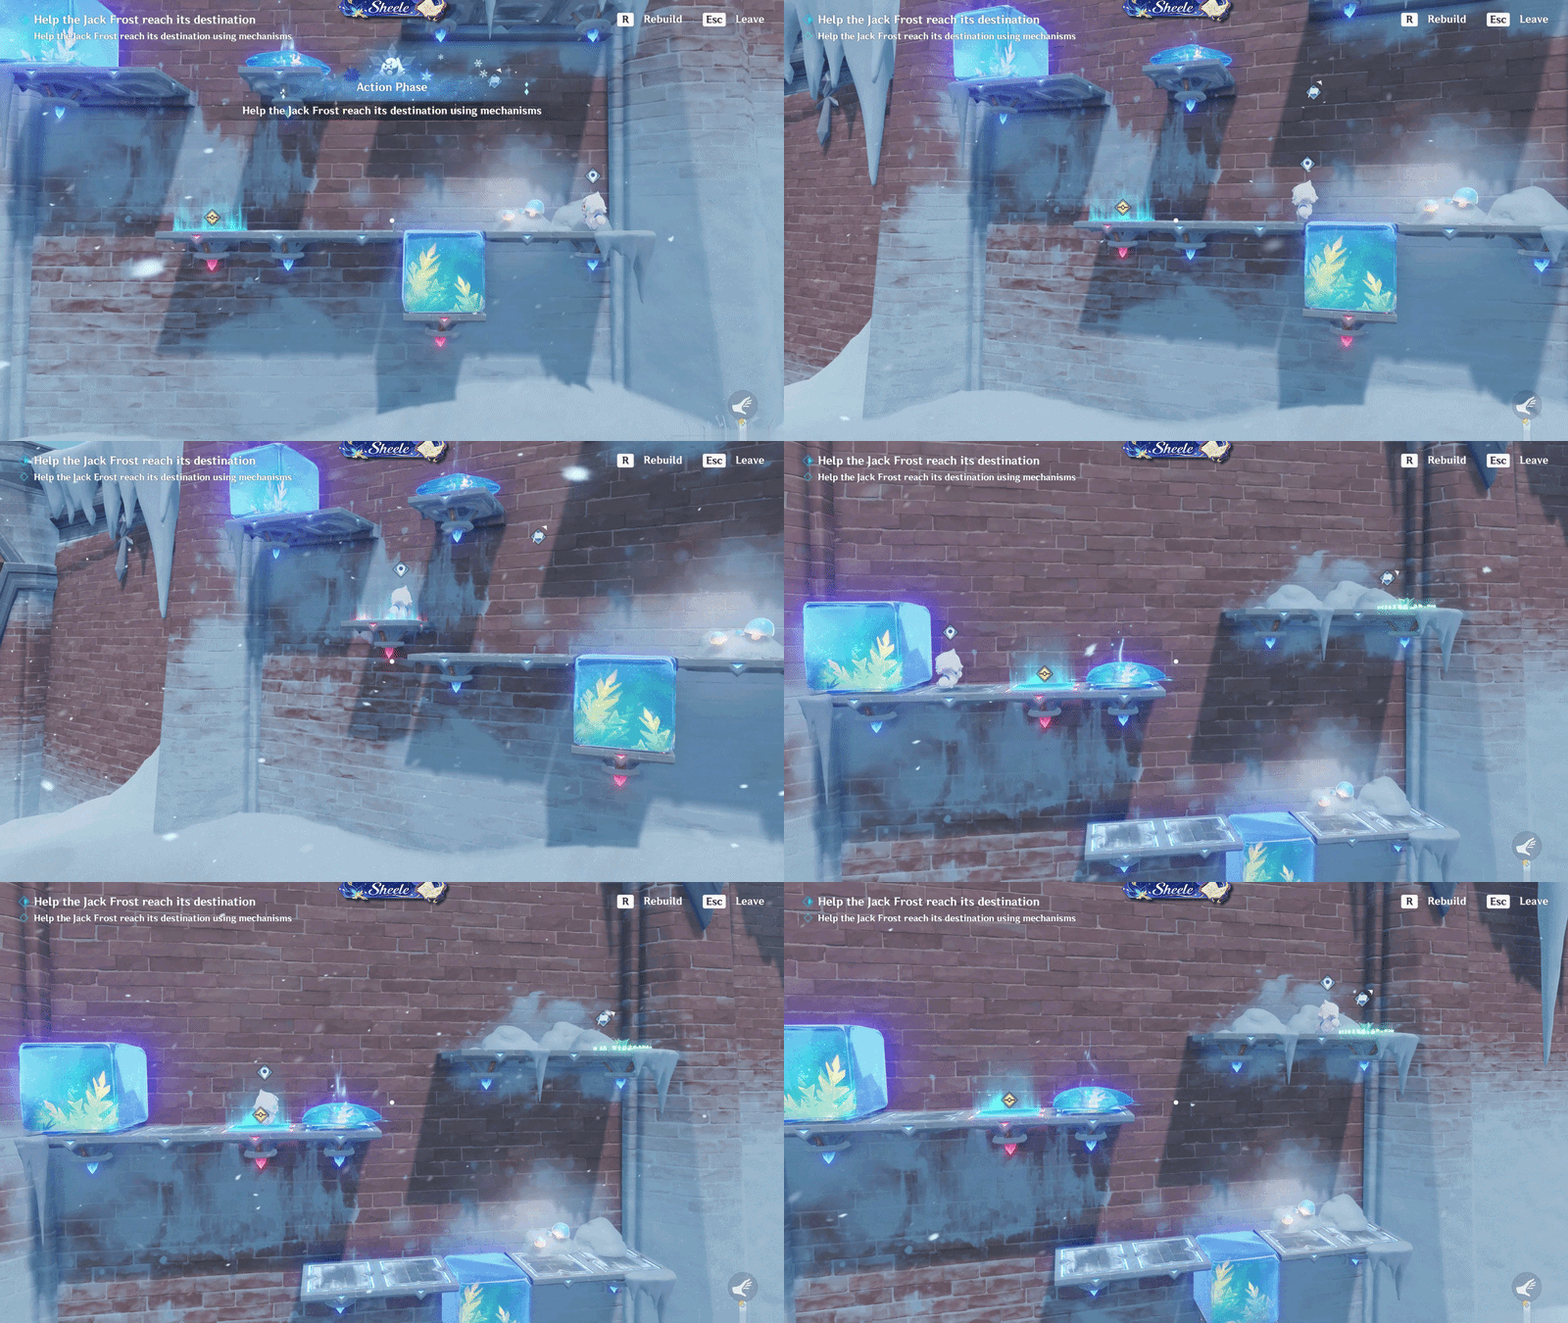
Challenge III: Jack Frost Movement
✦ Challenge IV: Quick! Use the Aplifiers
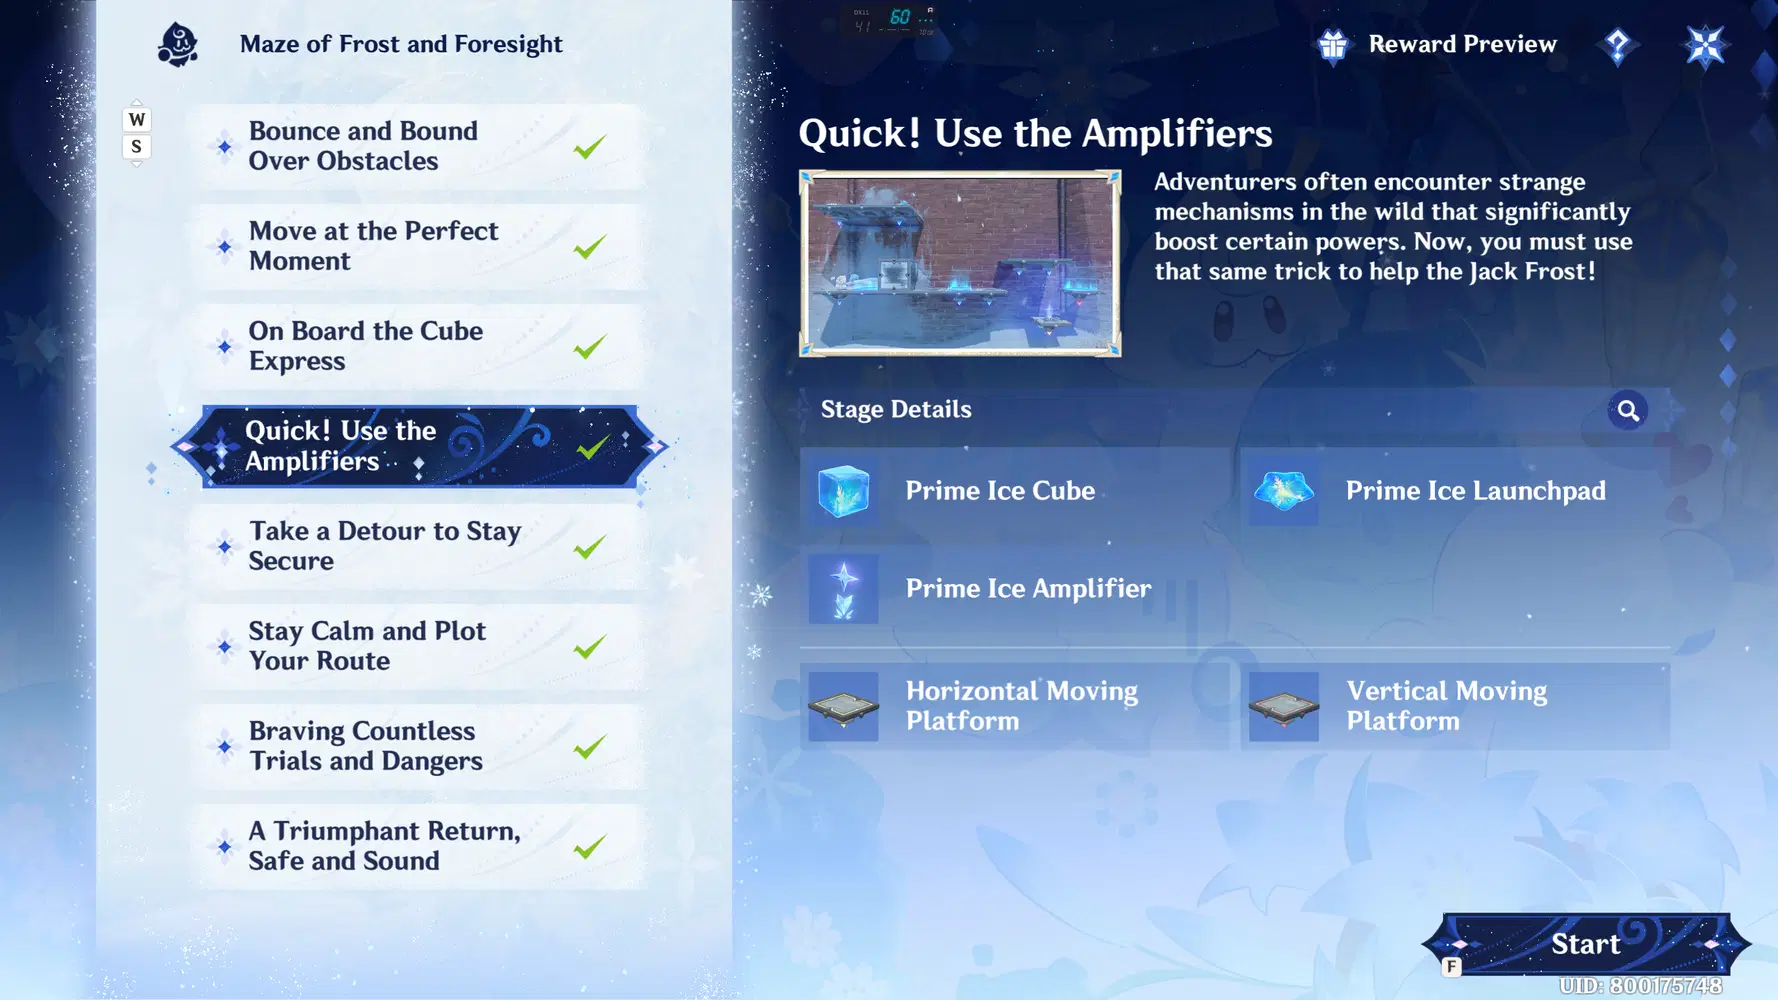
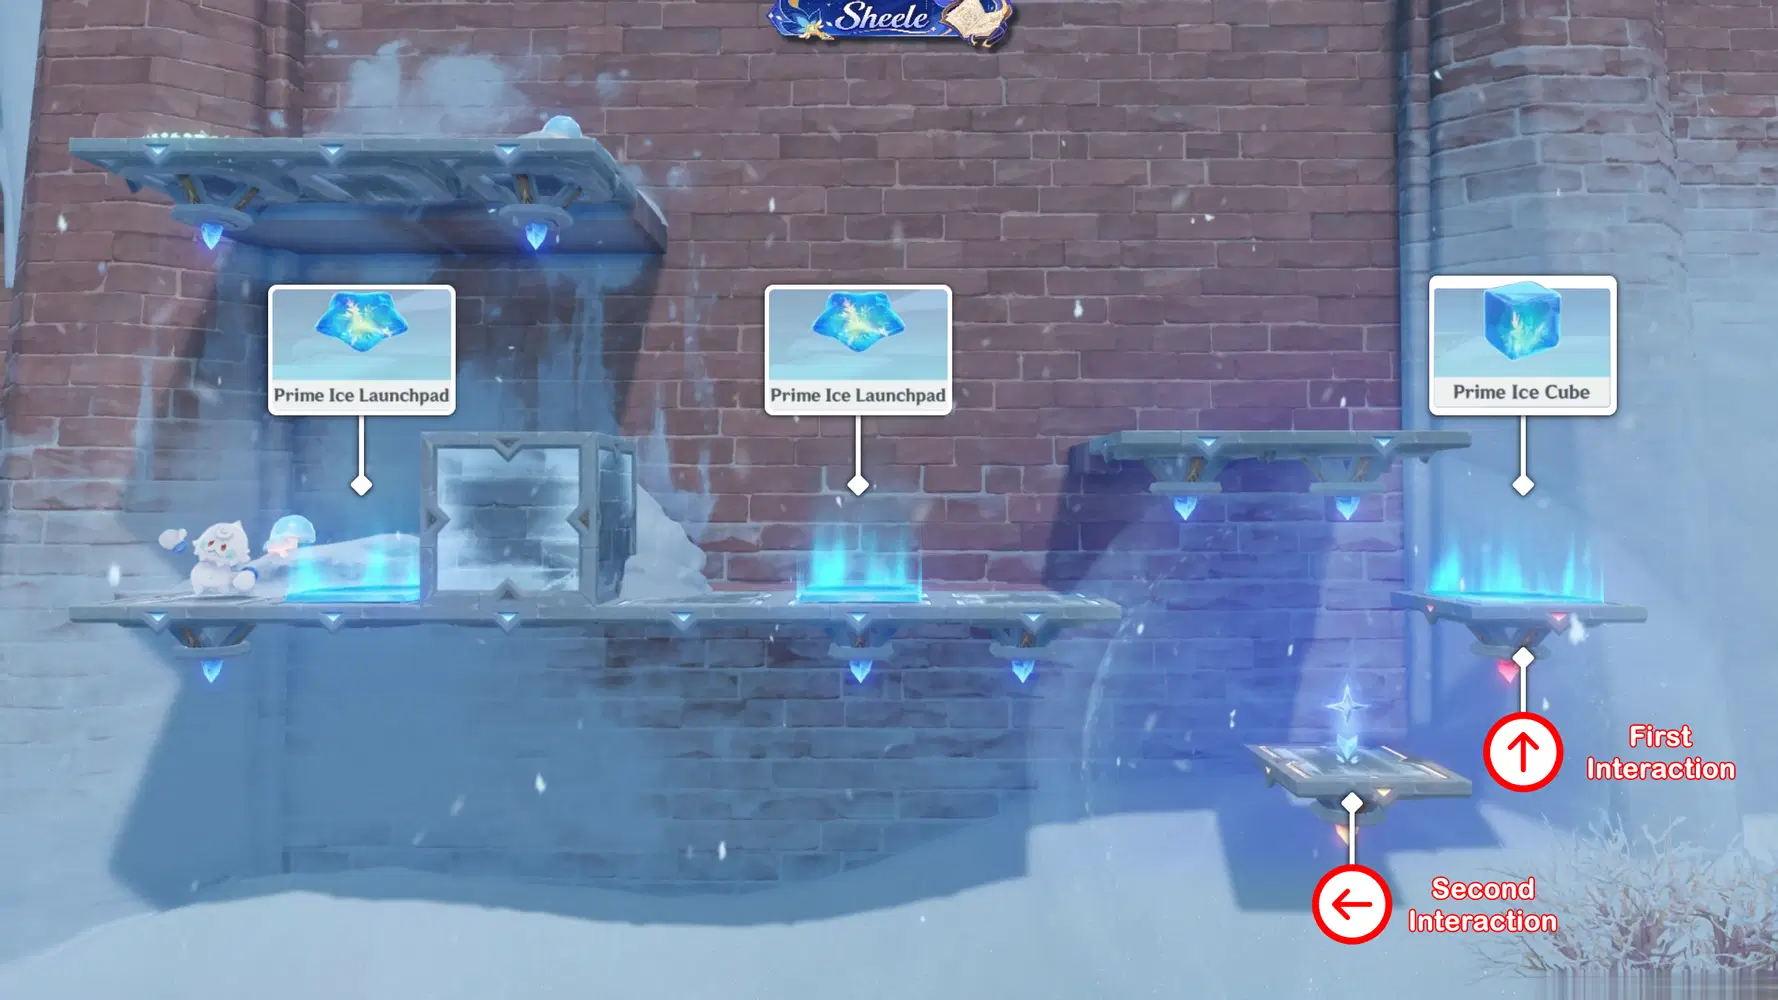
Challenge IV: Ice Construct Placement
Stage Details:
Place all Ice Constructs according to the positions shown in the image.
From the Start Point, Jack Frost will jump toward the right. Interact with the first platform to change Jack Frost’s direction.
Then, interact with the second platform to bring the Prime Ice Amplifier closer to the Prime Ice Launchpad, allowing Jack Frost to jump higher and reach the Finish Line.
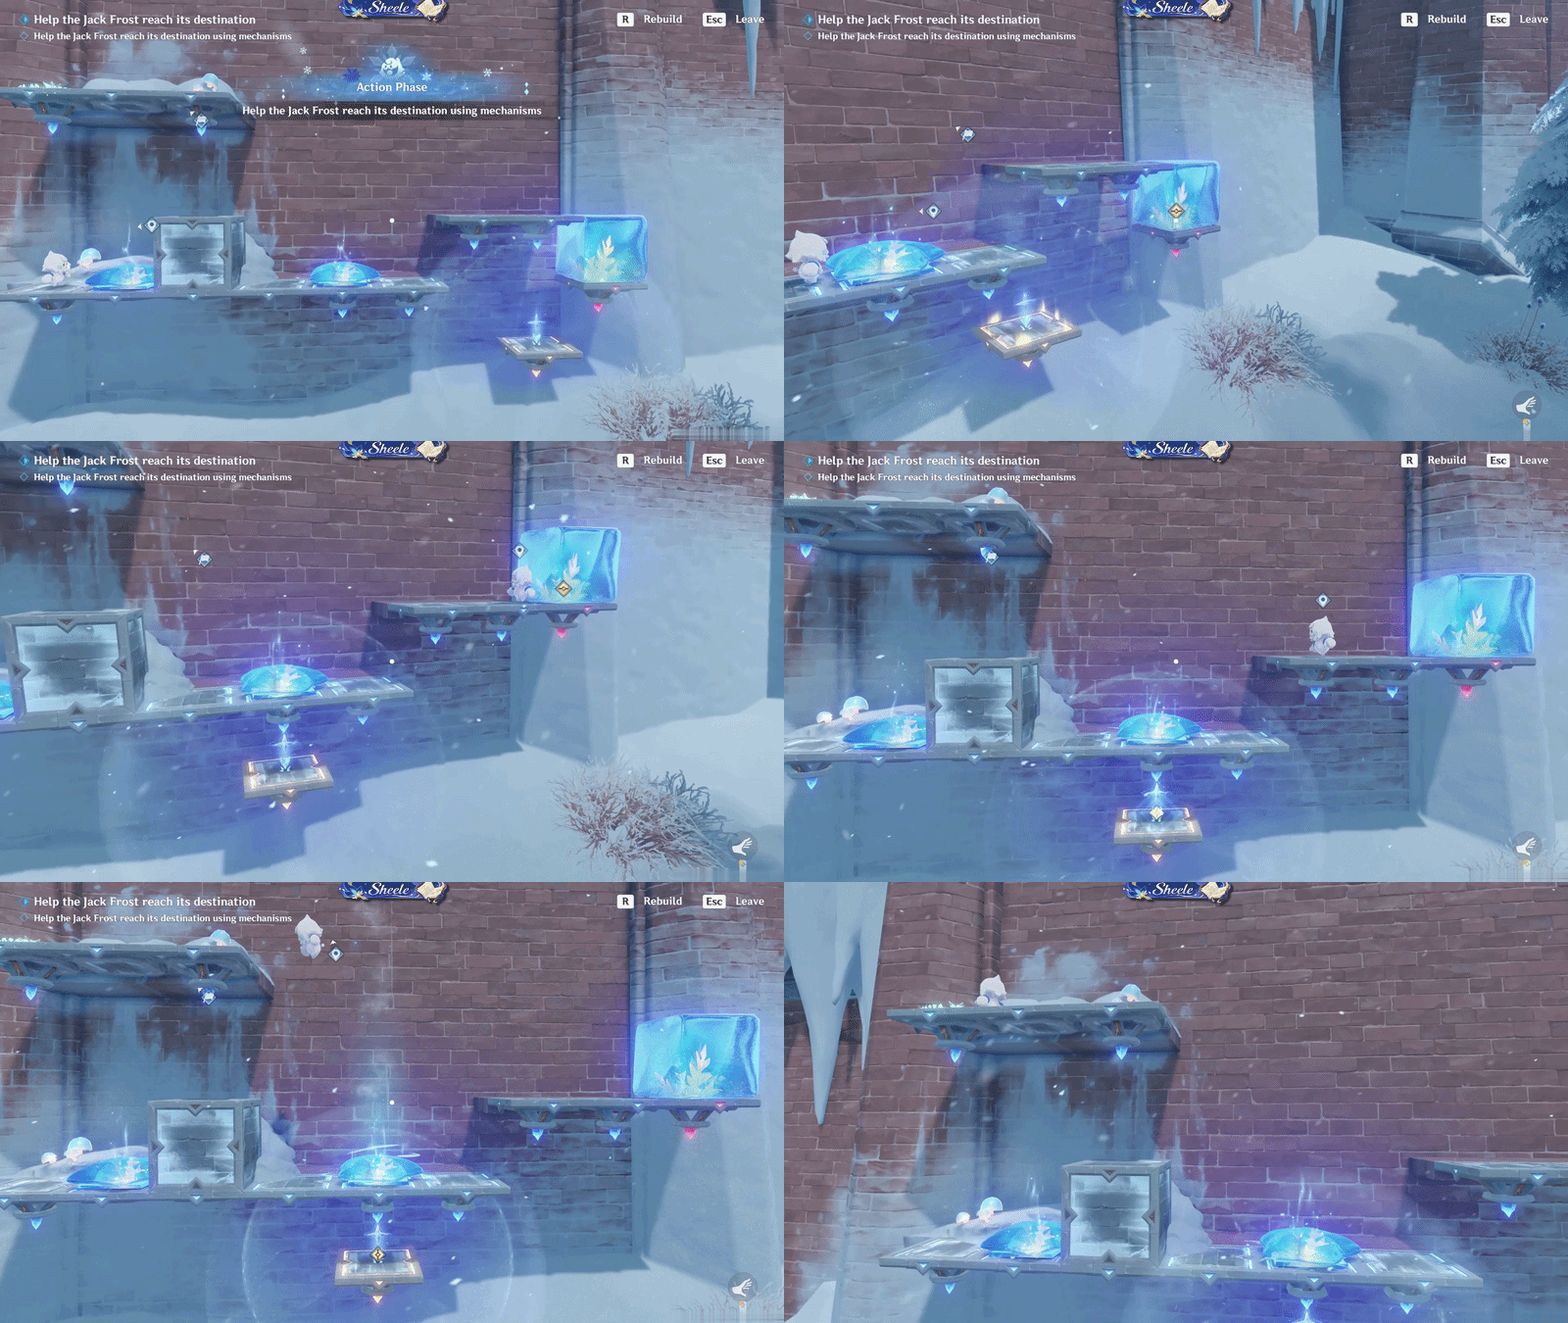
Challenge IV: Jack Frost Movement
✦ Challenge V: Take a Detour to Stay Secure
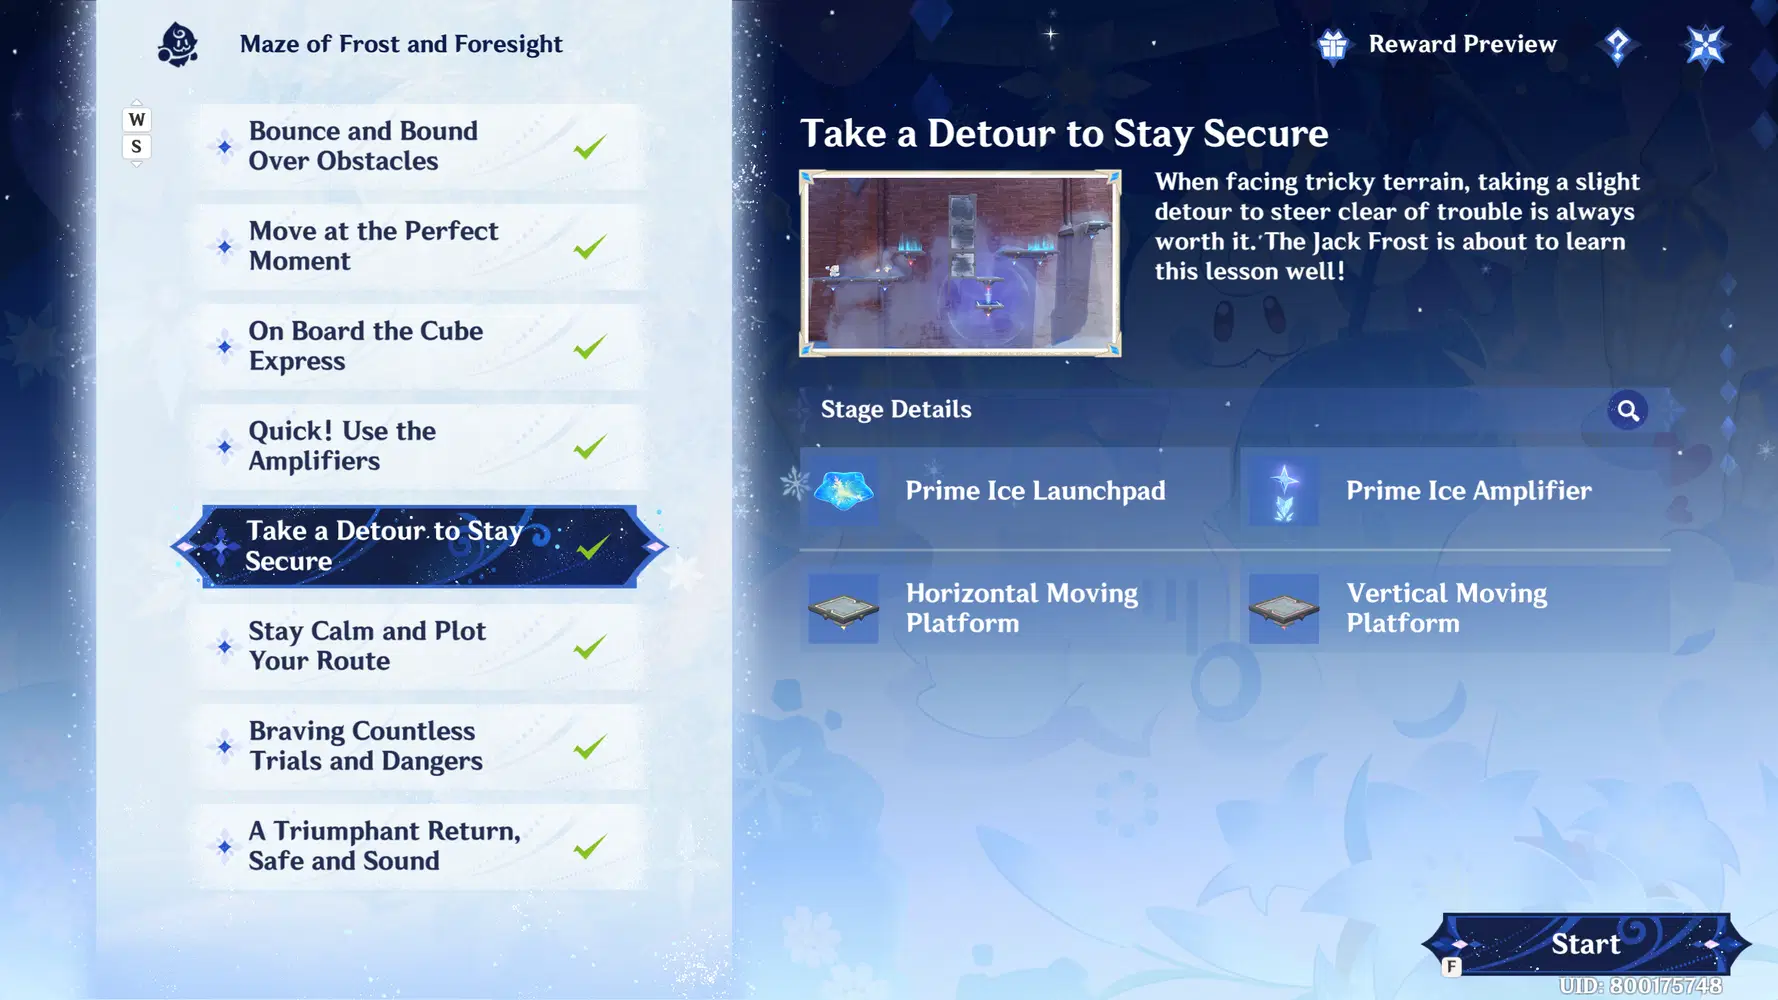
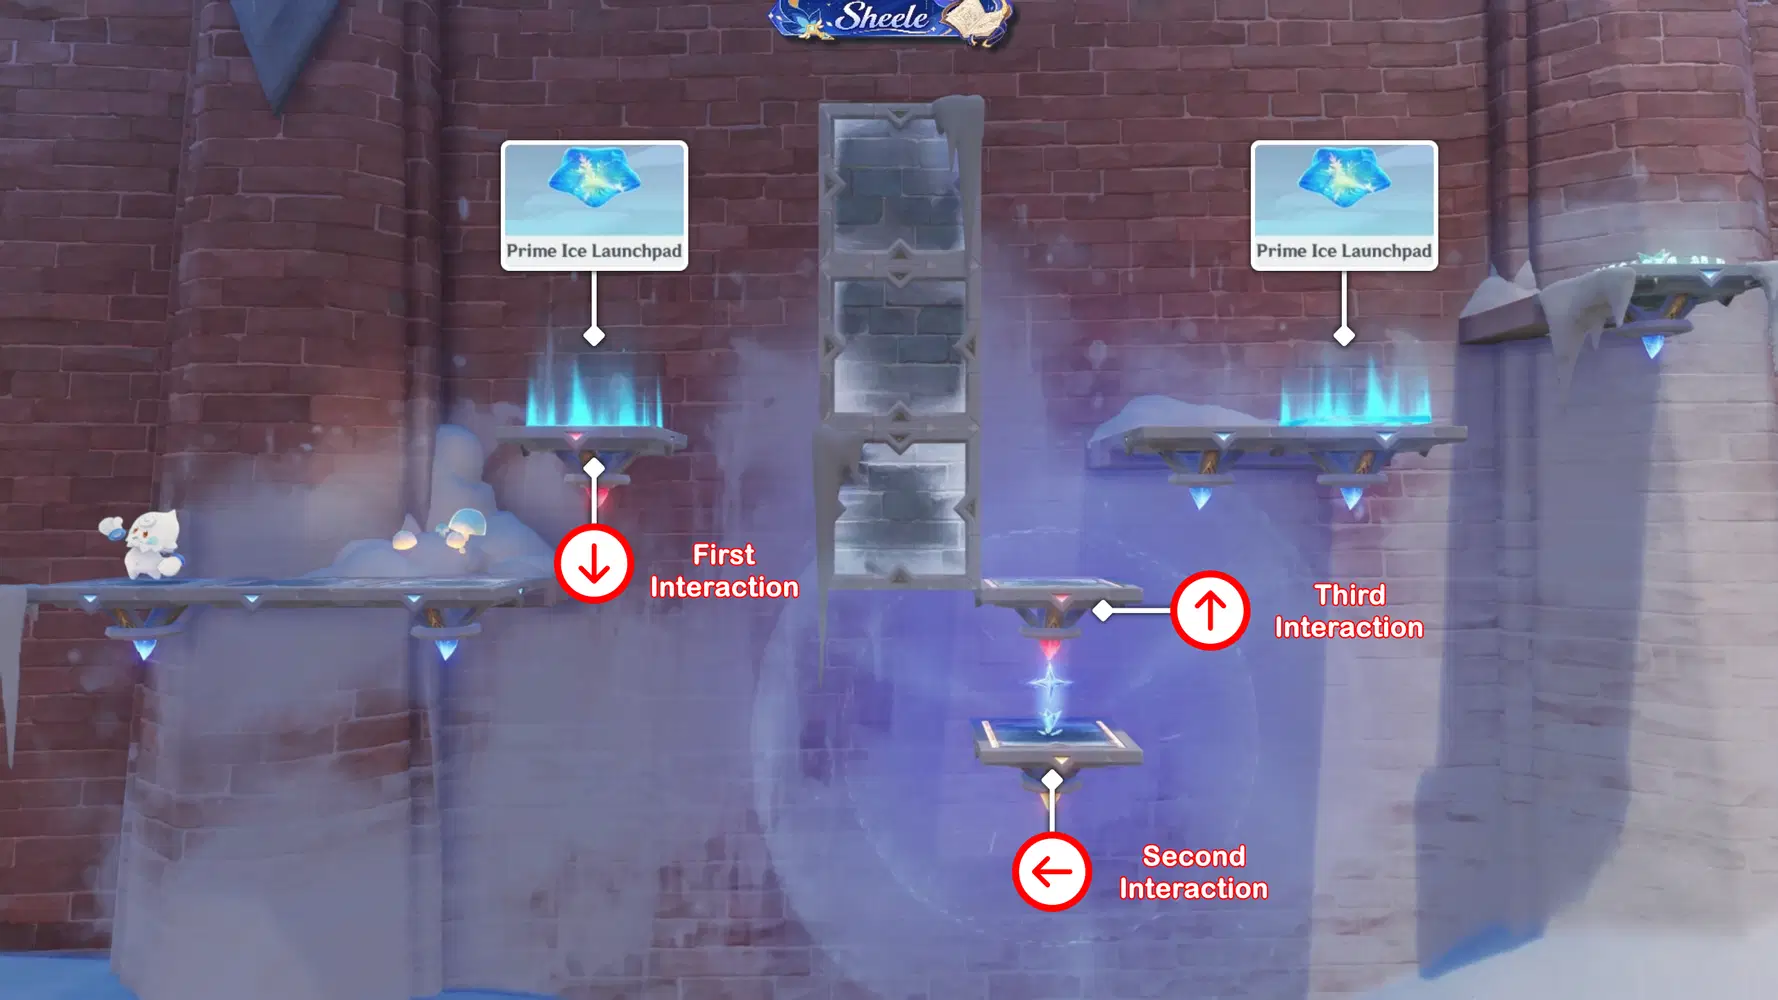
Challenge V: Ice Construct Placement
Stage Details:
Place all Ice Constructs according to the positions shown in the image.
From the starting point, Jack Frost will move to the right. Lower the platform so Jack Frost can reach it to jump, then slide the platform to use the Prime Ice Amplifier, allowing him to jump higher and land on the platform positioned to the right.
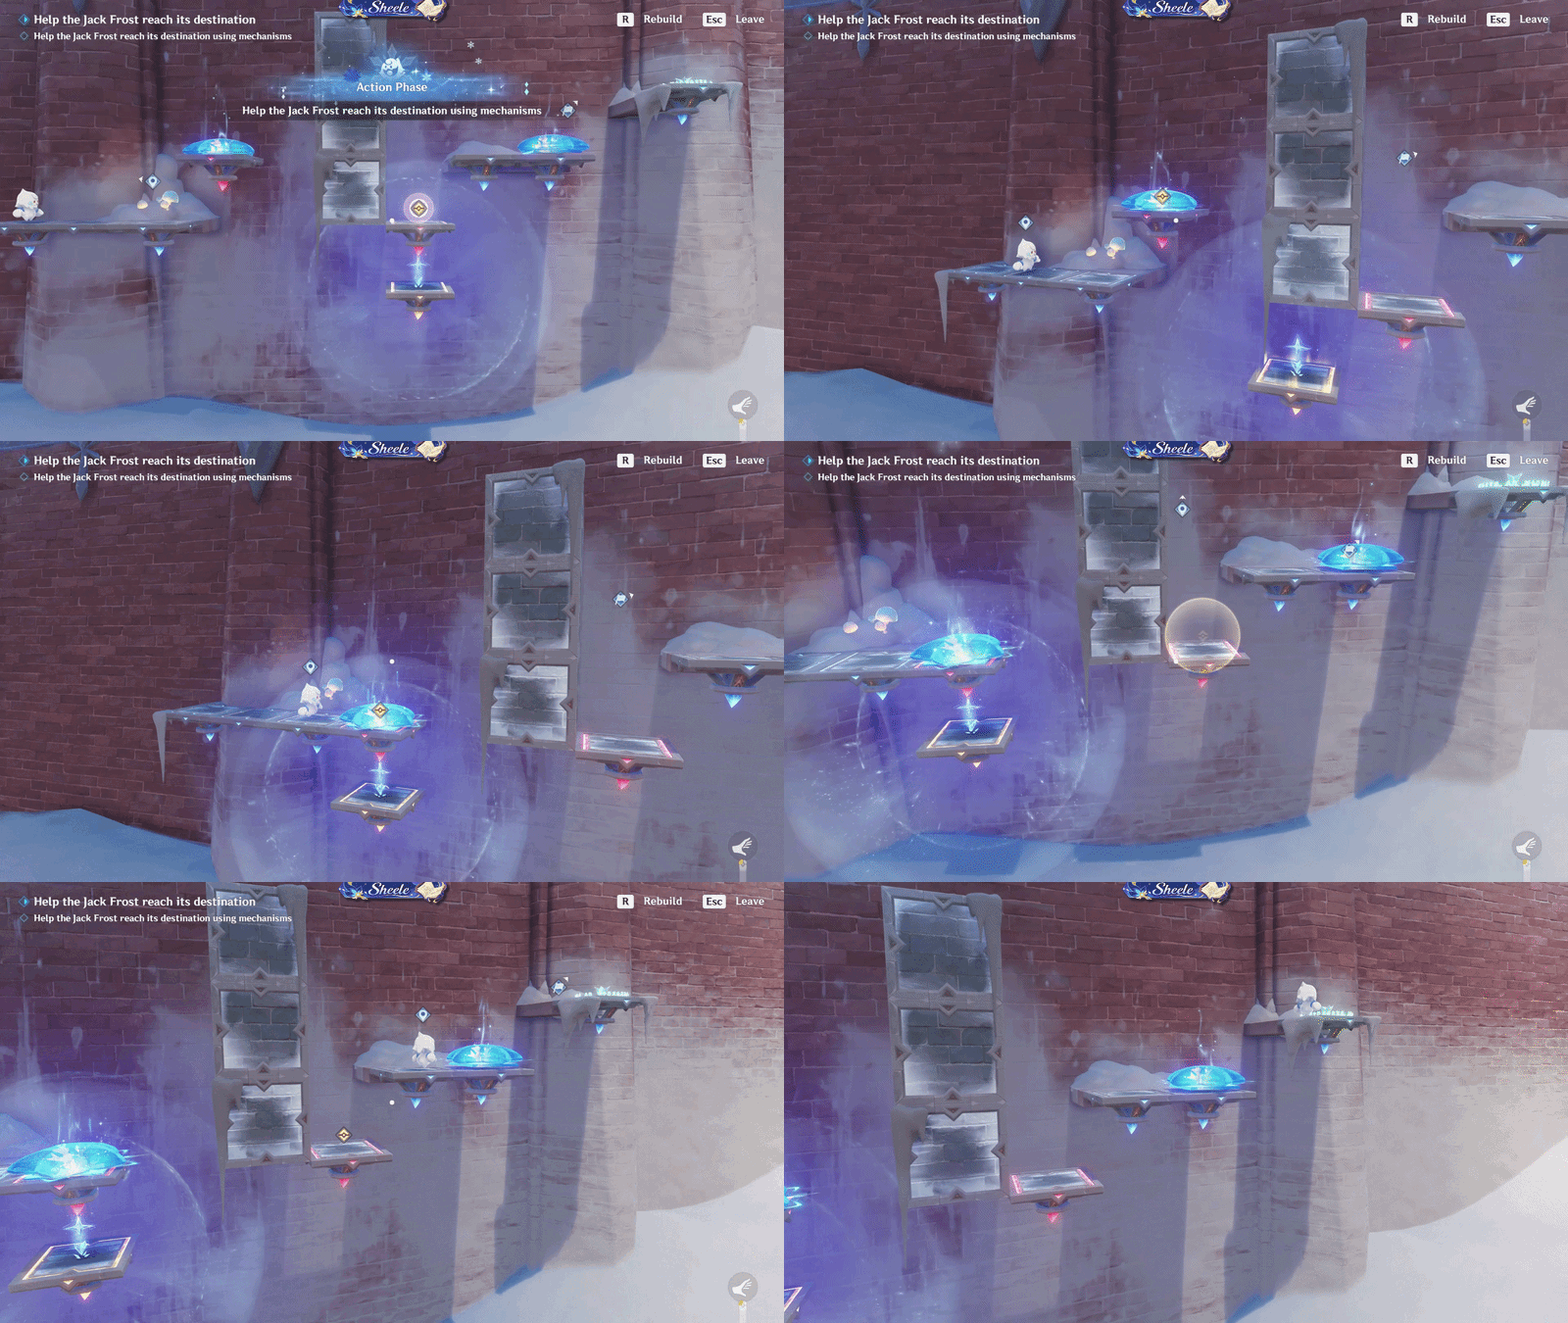
Challenge V: Jack Frost Movement
✦ Challenge VI: Stay Calm and Plot Your Route
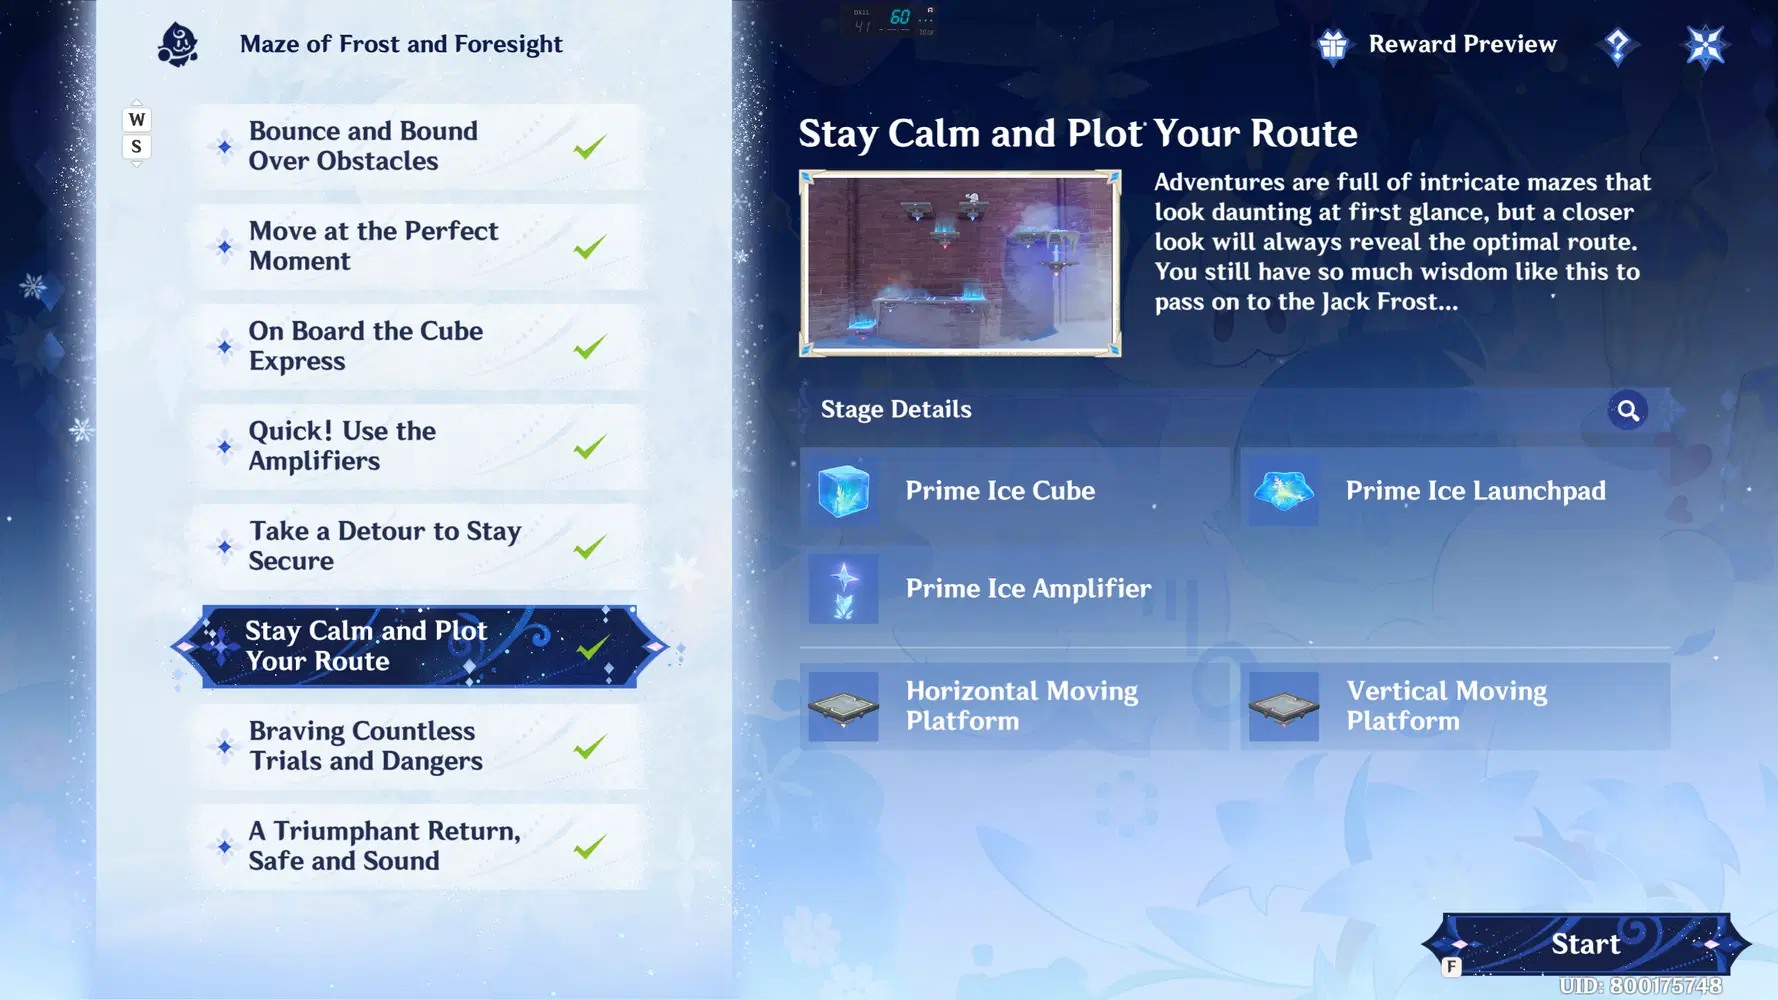
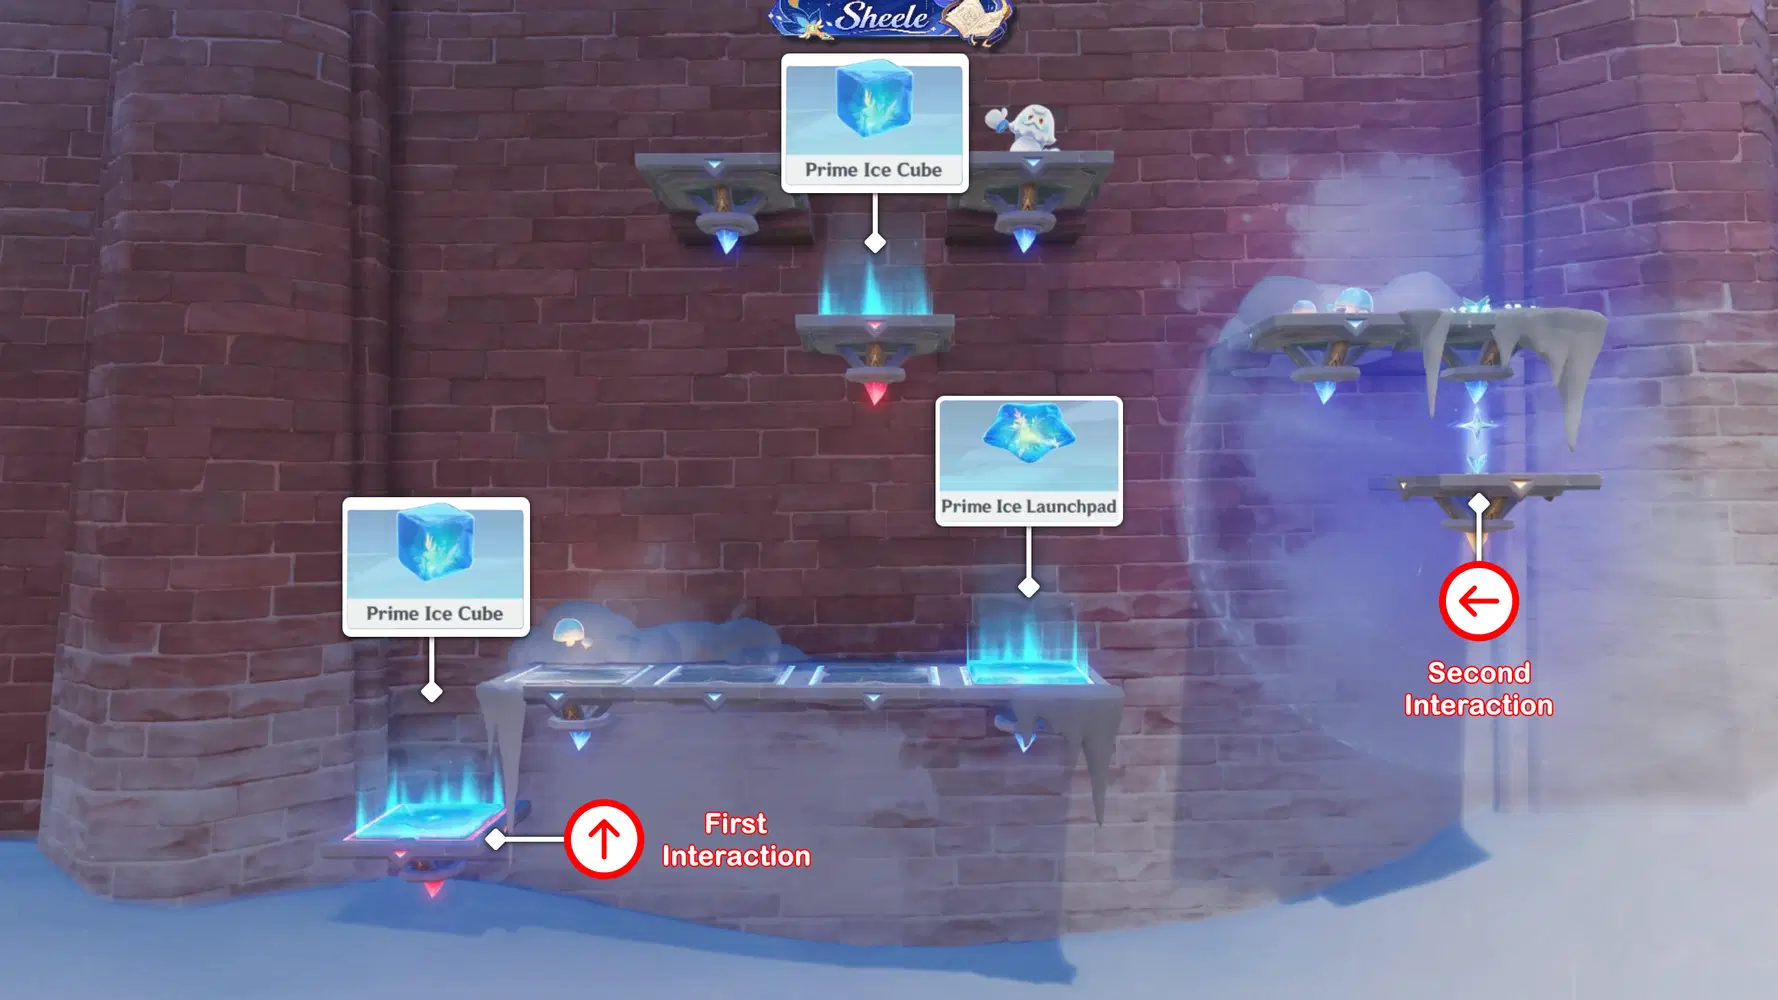
Challenge VI: Ice Construct Placement
Stage Details:
Place all Ice Constructs according to the positions shown in the image.
From the Start position, Jack Frost will move to the left and then fall. To change his direction, move the platform up to make him crash into the Ice Construct, then slide the Prime Ice Amplifier platform to make Jack Frost jump higher.
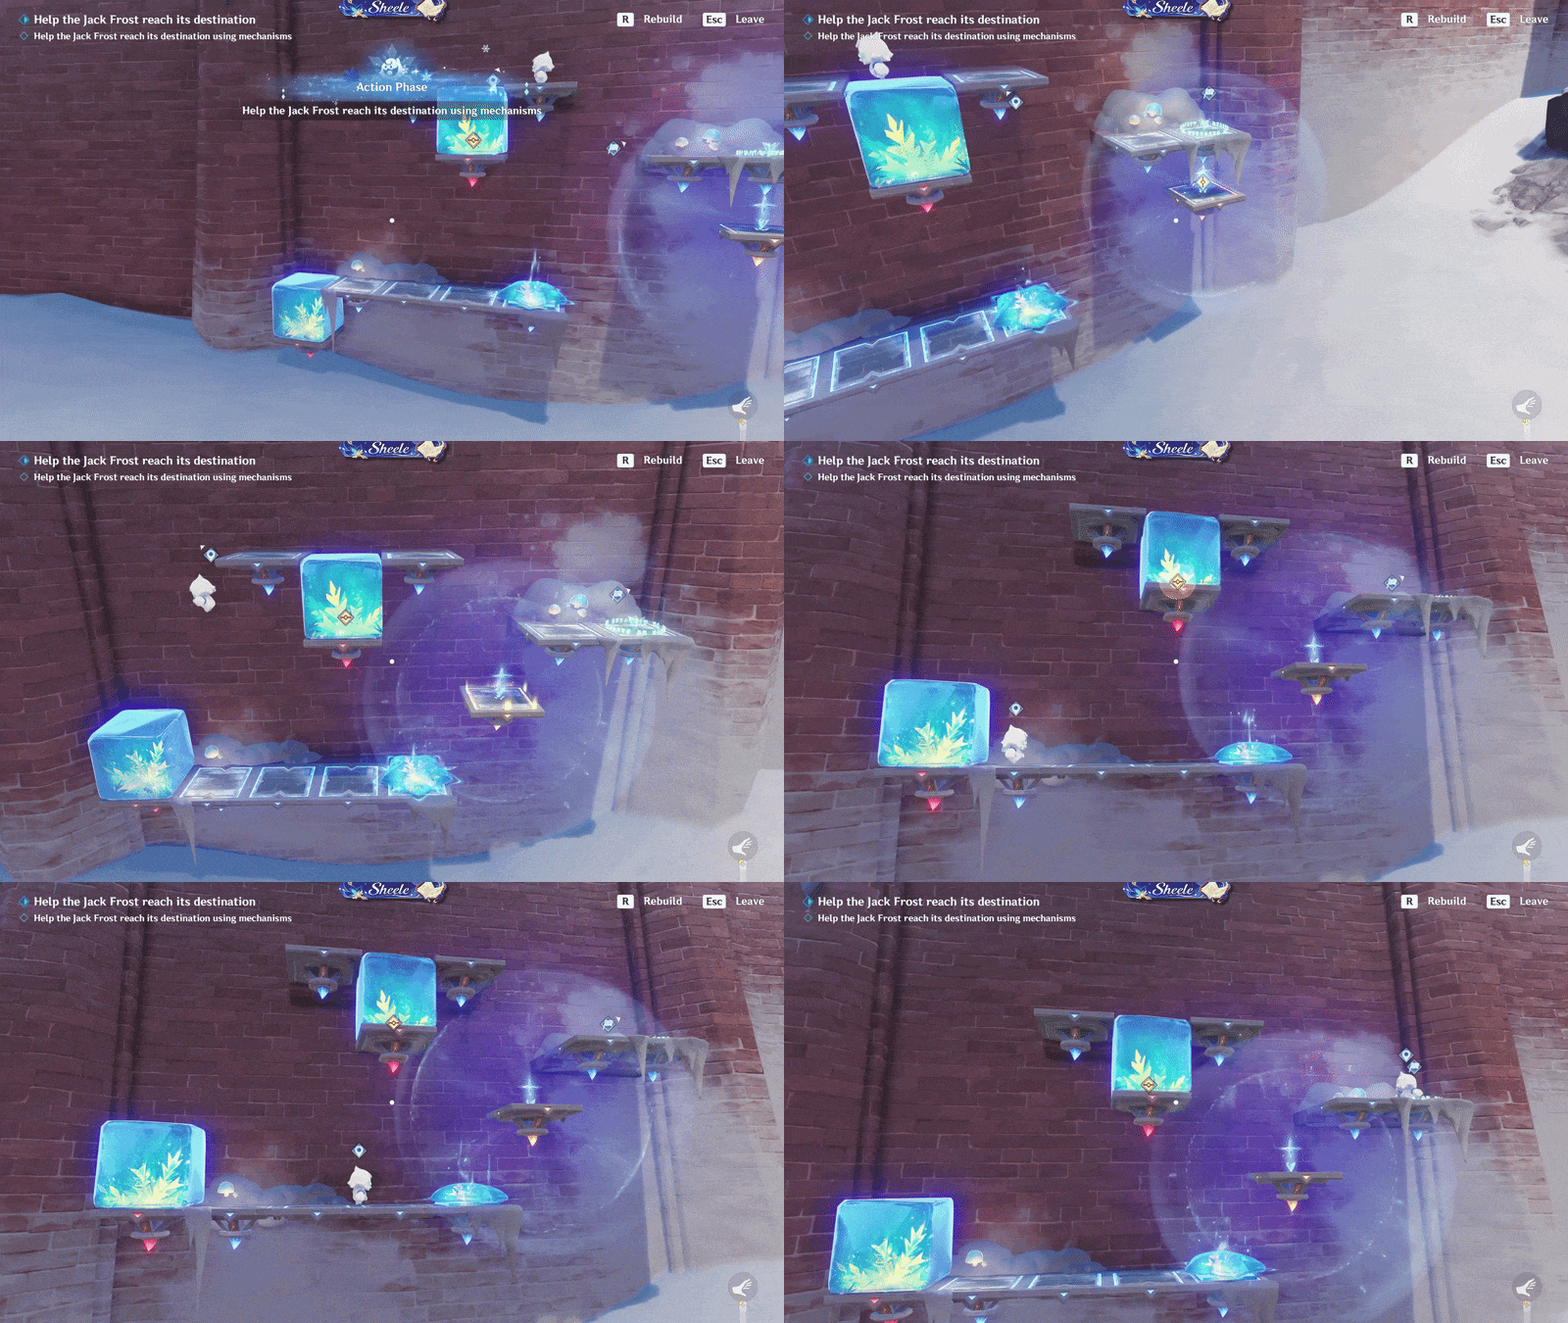
Challenge VI: Jack Frost Movement
✦ Challenge VII: Braving Countless Trials and Dangers
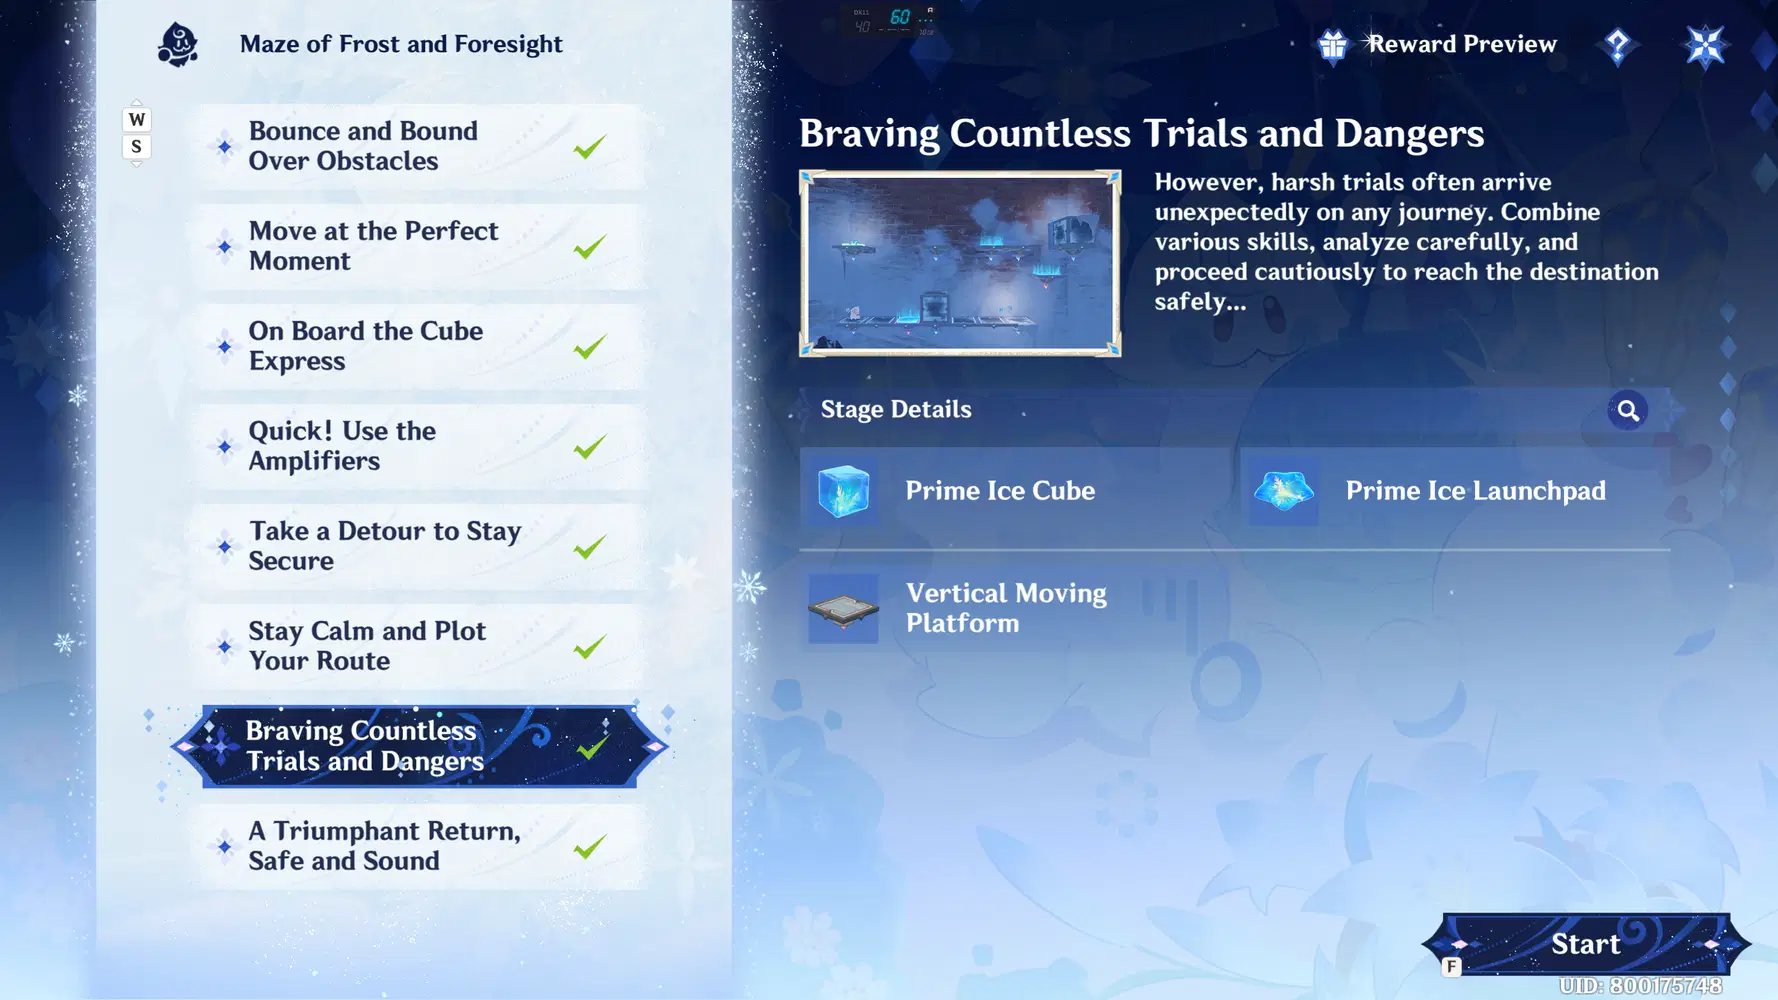
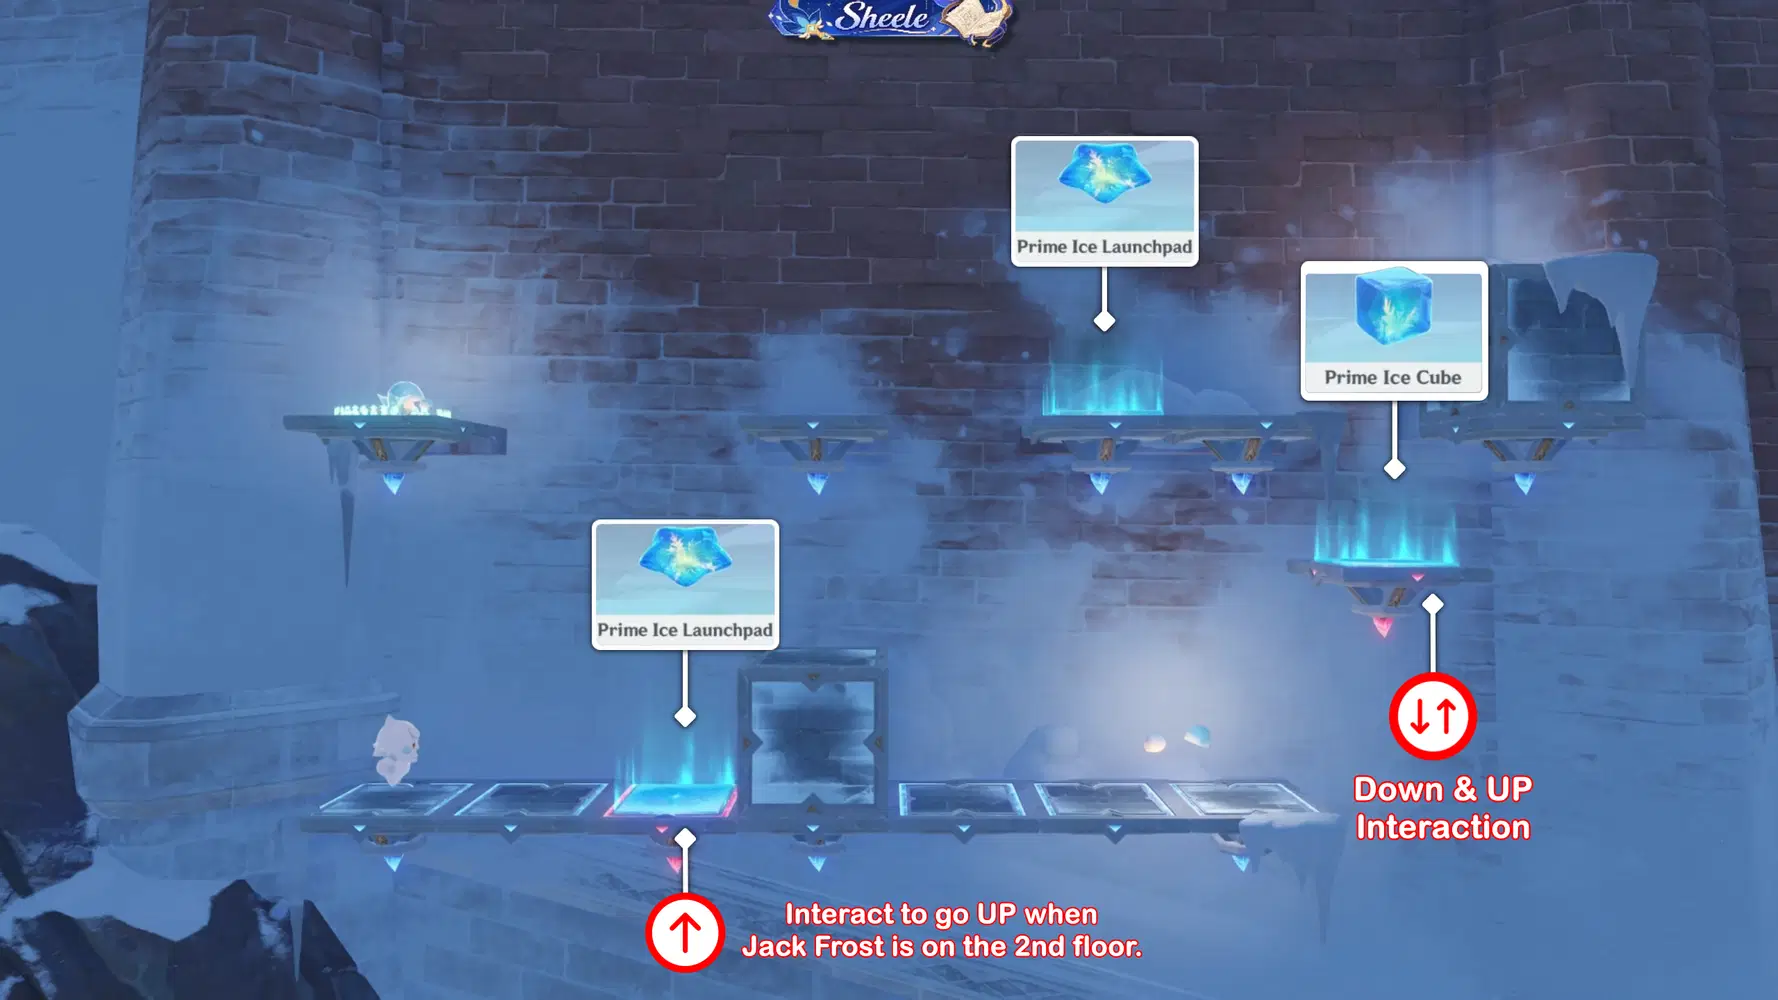
Challenge VII: Ice Construct Placement
Stage Details:
Place all Ice Constructs according to the positions shown in the image.
From the Start position, Jack Frost will move to the right and jump over the crate. Lower the platform with the Ice Construct on the right side, then raise it back up to move him to the next area. Jack Frost will then move left through the gap; before he reaches the end, use the platform with the Prime Launchpad at the beginning to cross the final gap to the finish line.
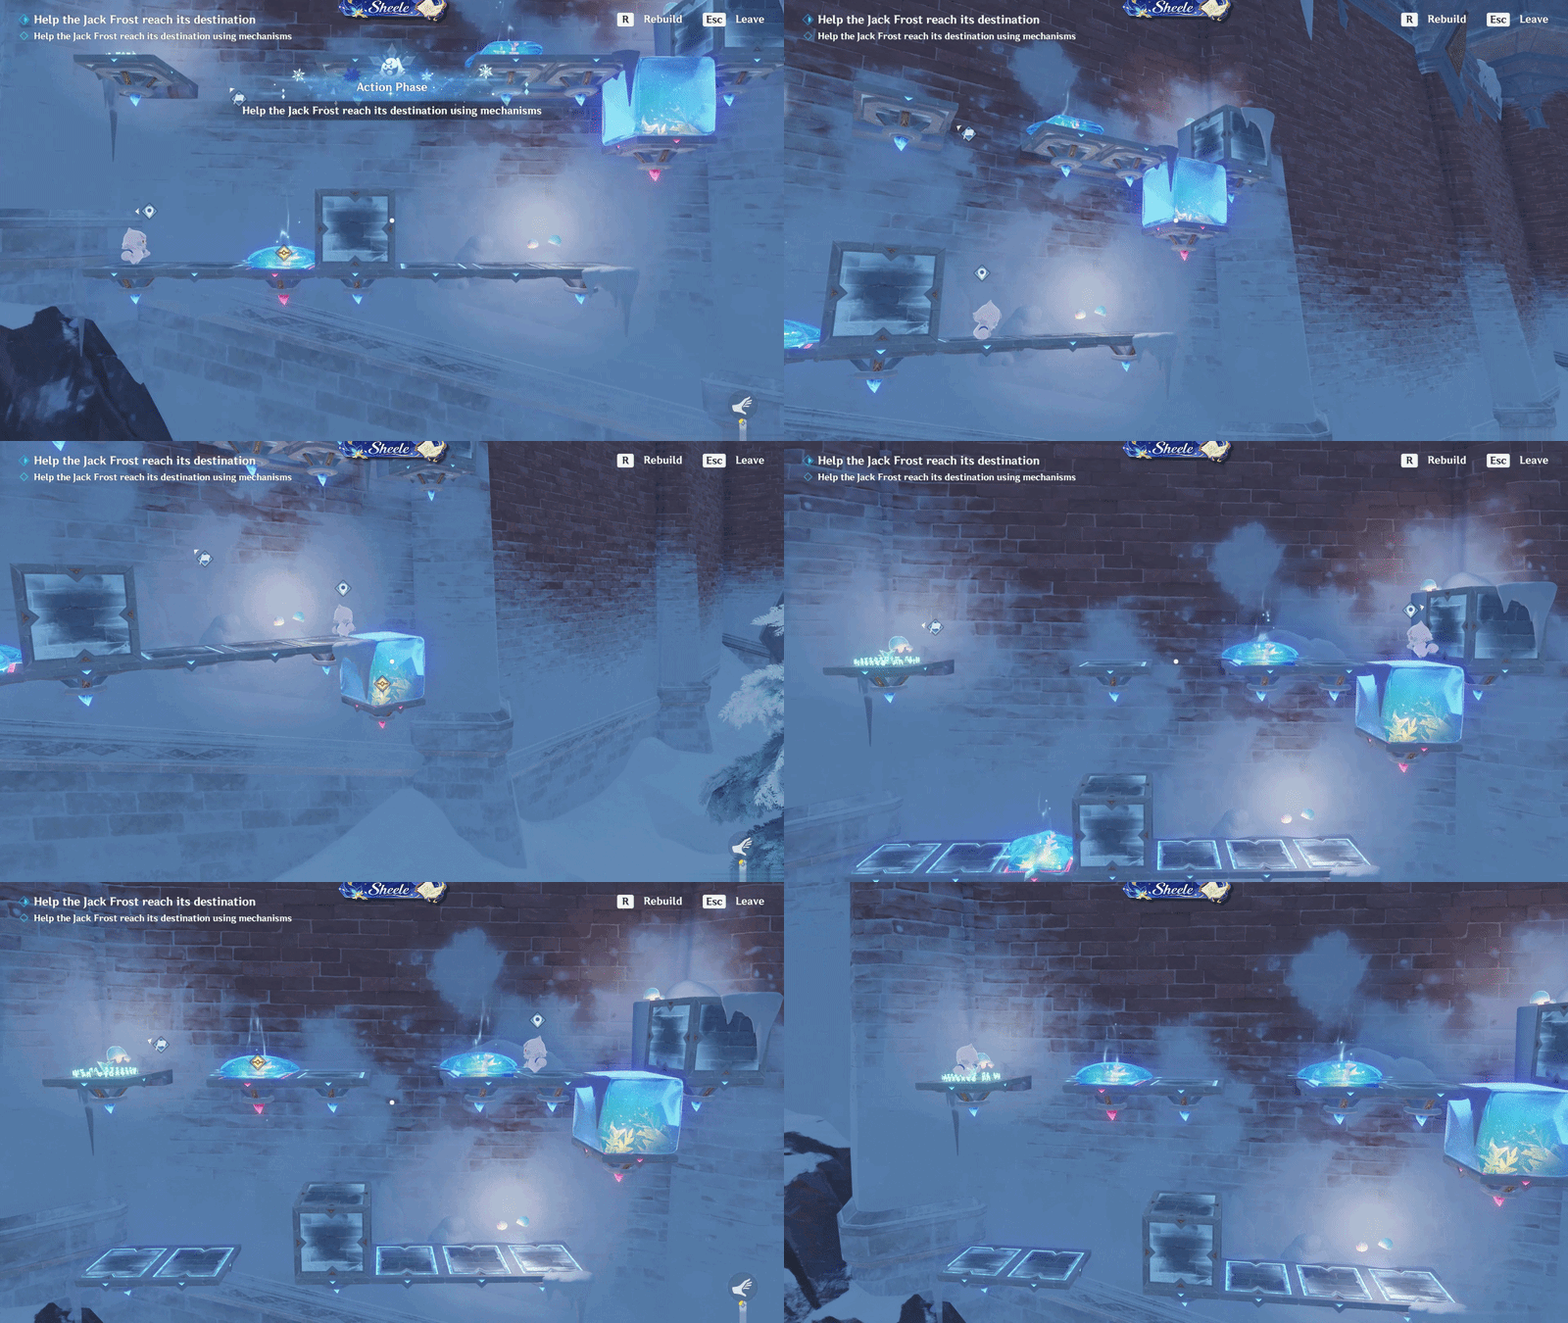
Challenge VII: Jack Frost Movement
✦ Challenge VIII: Where the Blizzard Howls
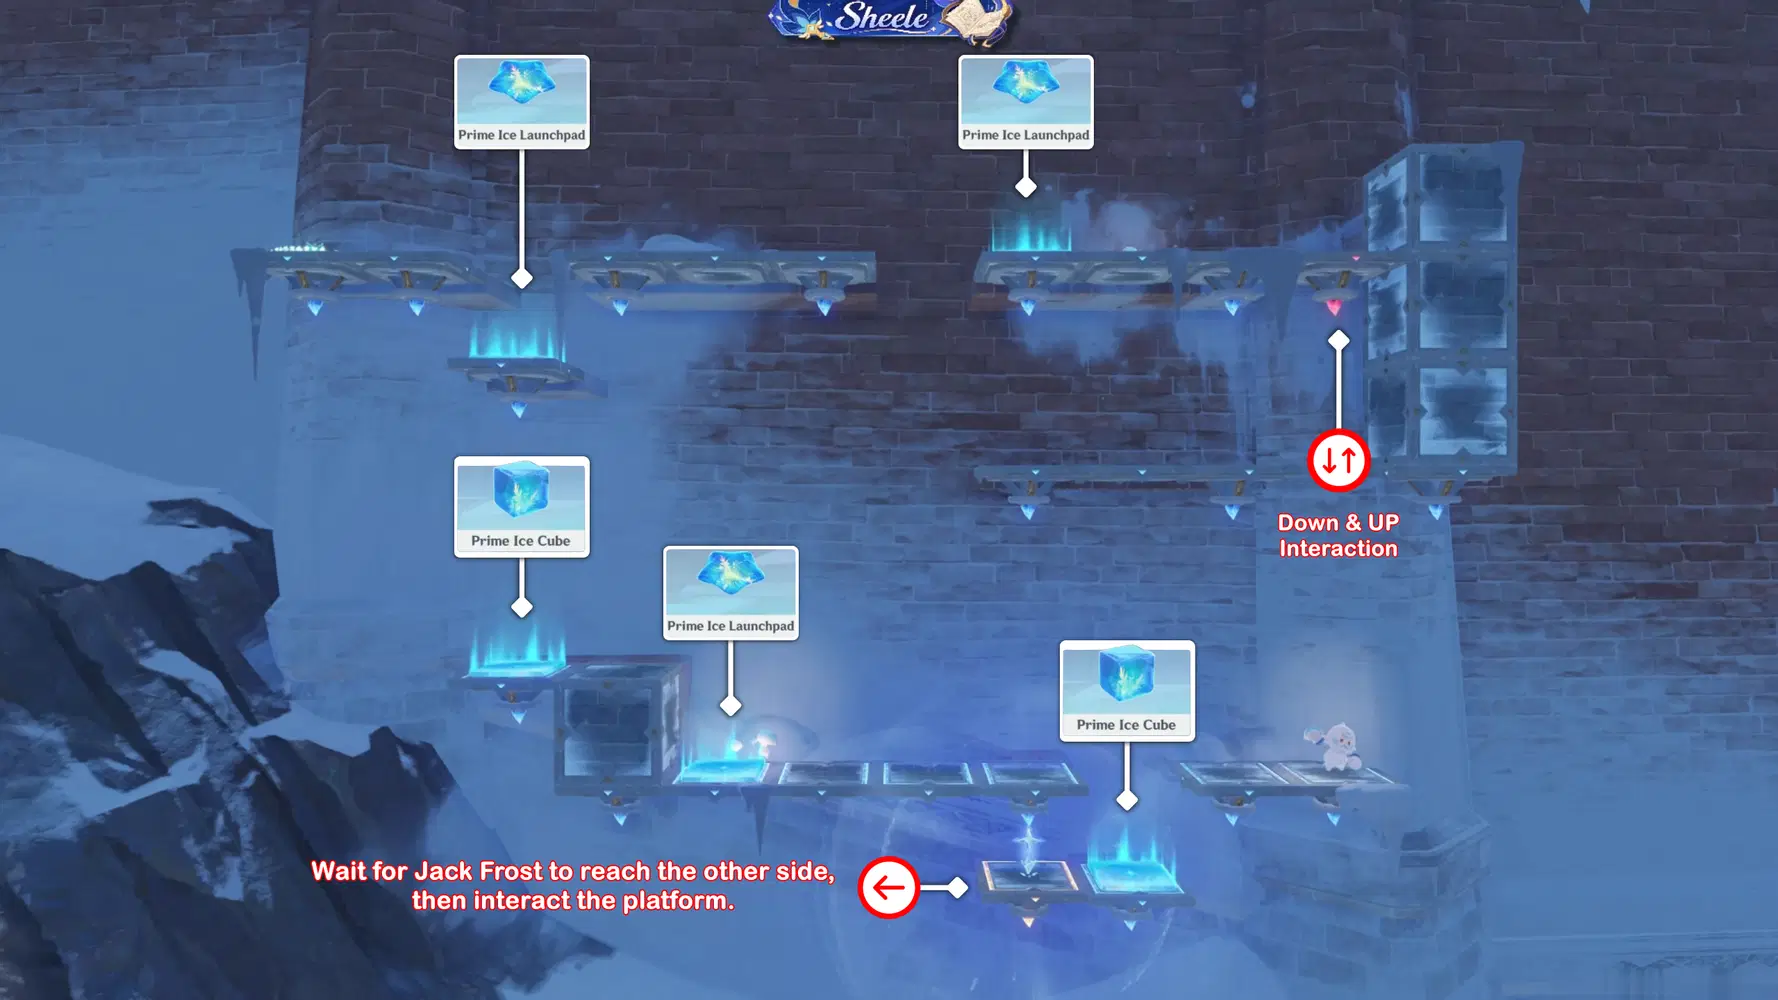
Challenge VIII: Ice Construct Placement
Stage Details:
Place all Ice Constructs according to the positions shown in the image.
From the starting position, Jack Frost will move to the left and jump to a higher area using the Prime Ice Amplifier. Then, use the platform on the right side to move him to the third floor/area. Jack Frost will cross the gap before heading to the finish line.
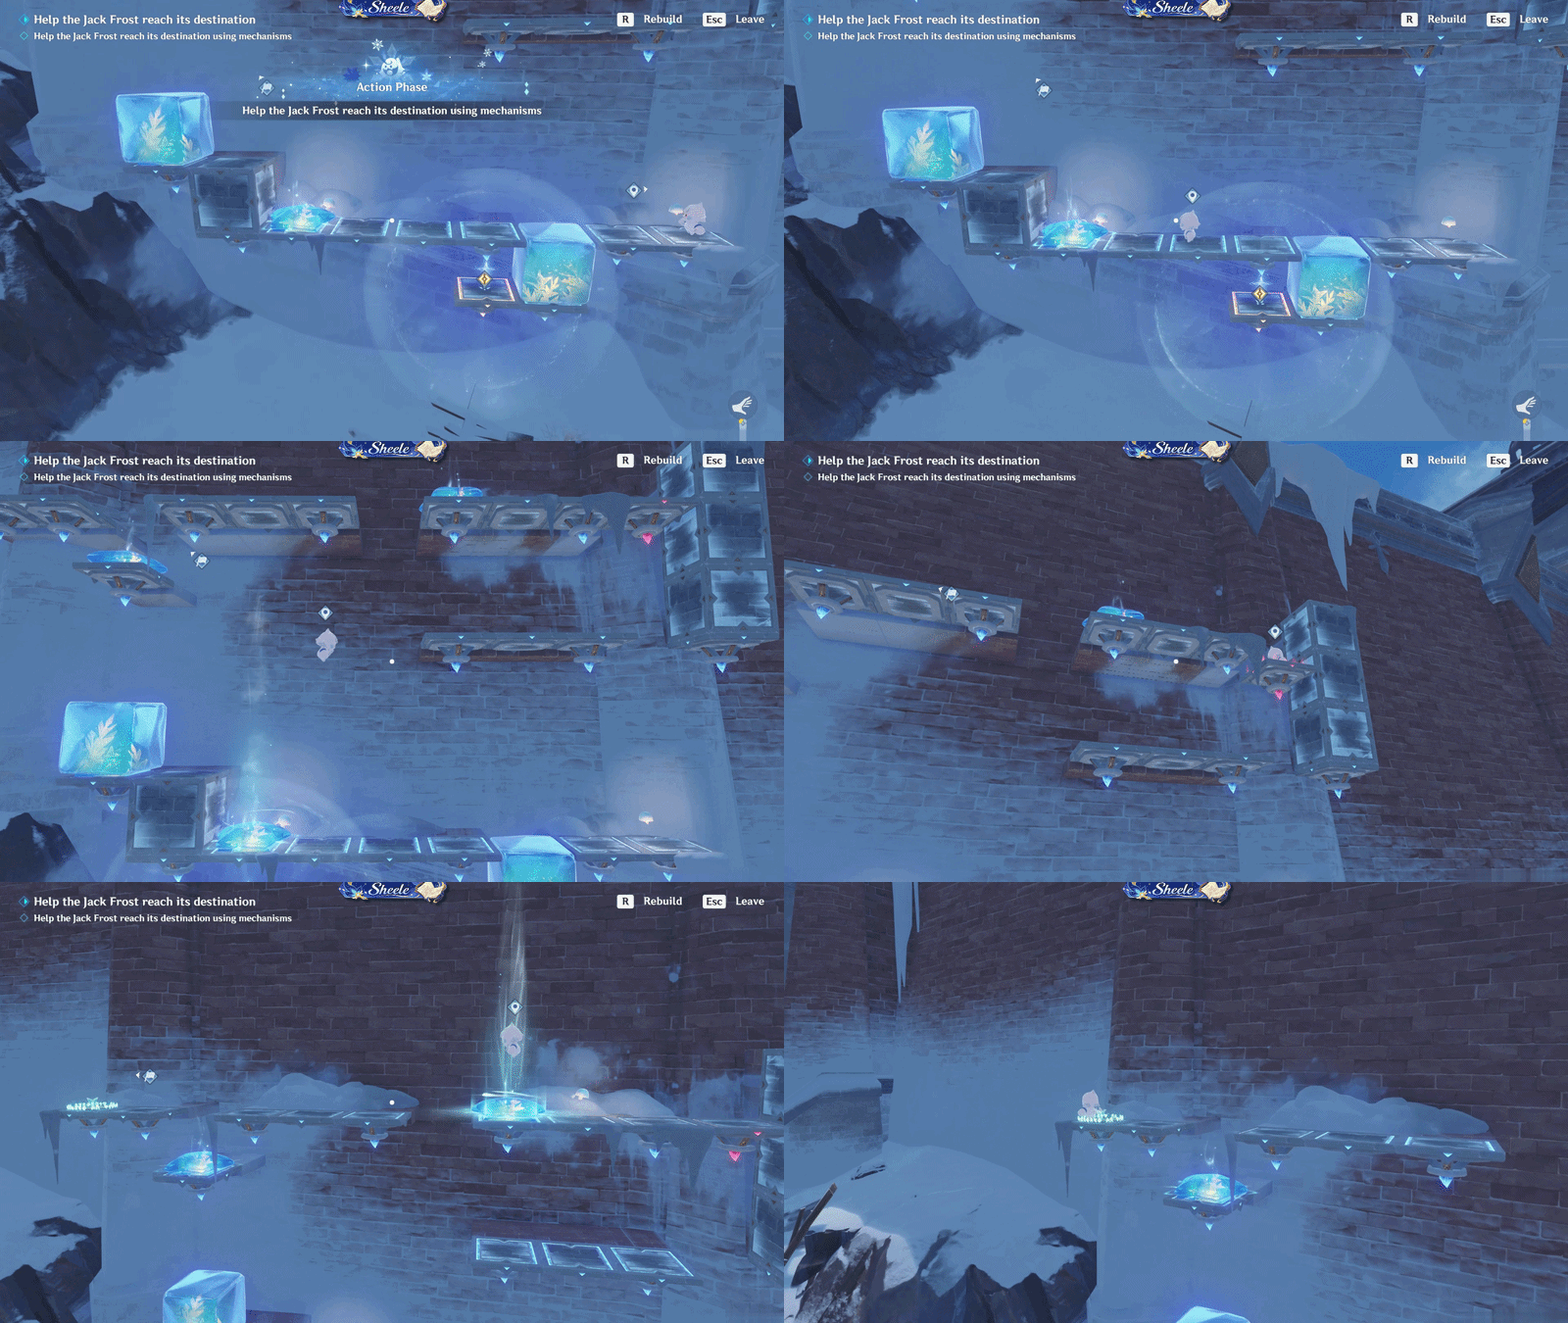
Challenge VIII: Jack Frost Movement
Video Gameplay
Trigger Reflex Trial
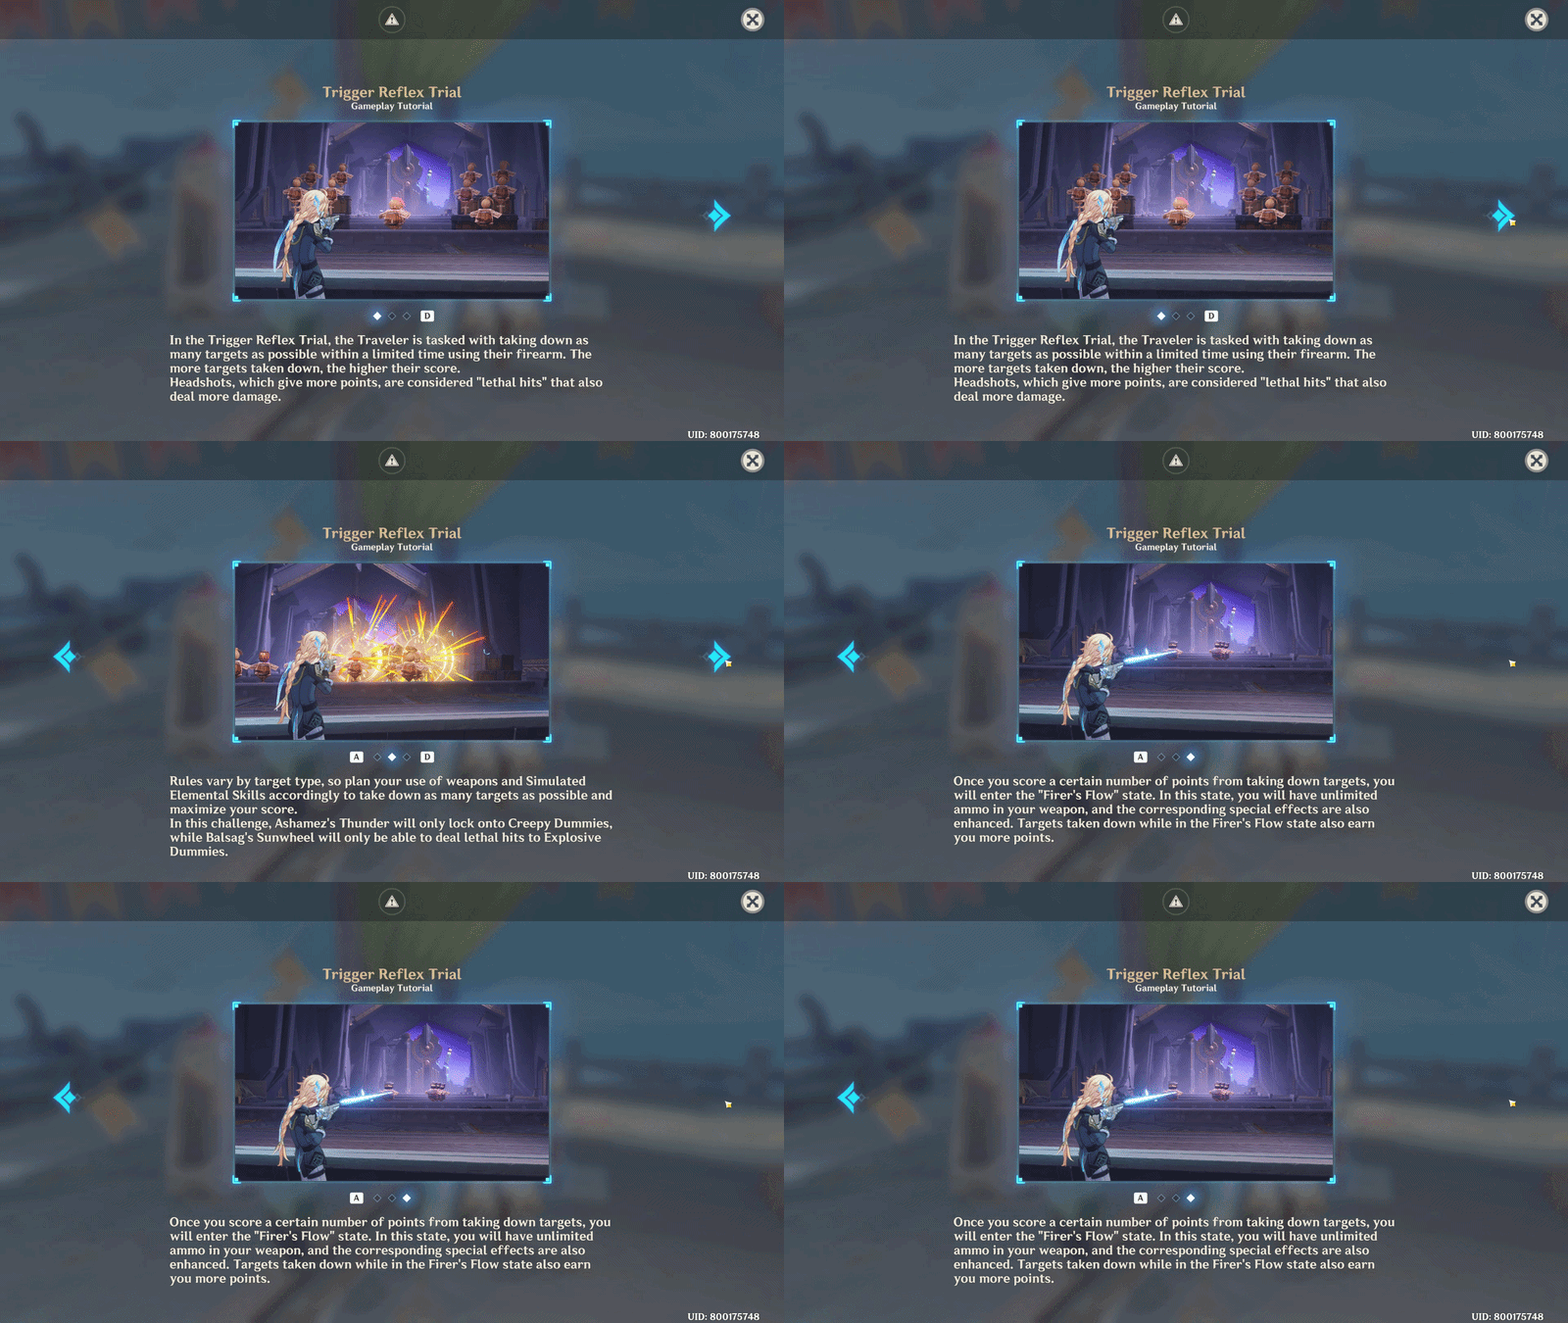
Trigger Reflex Trial is one of the game modes featured in the Great Expeditionist Challenge event. This mode becomes available after completing the event World Quest Adventurers of Teyvat: Grand Showdown! Once unlocked, you can access it by speaking with Nadia at the designated location.
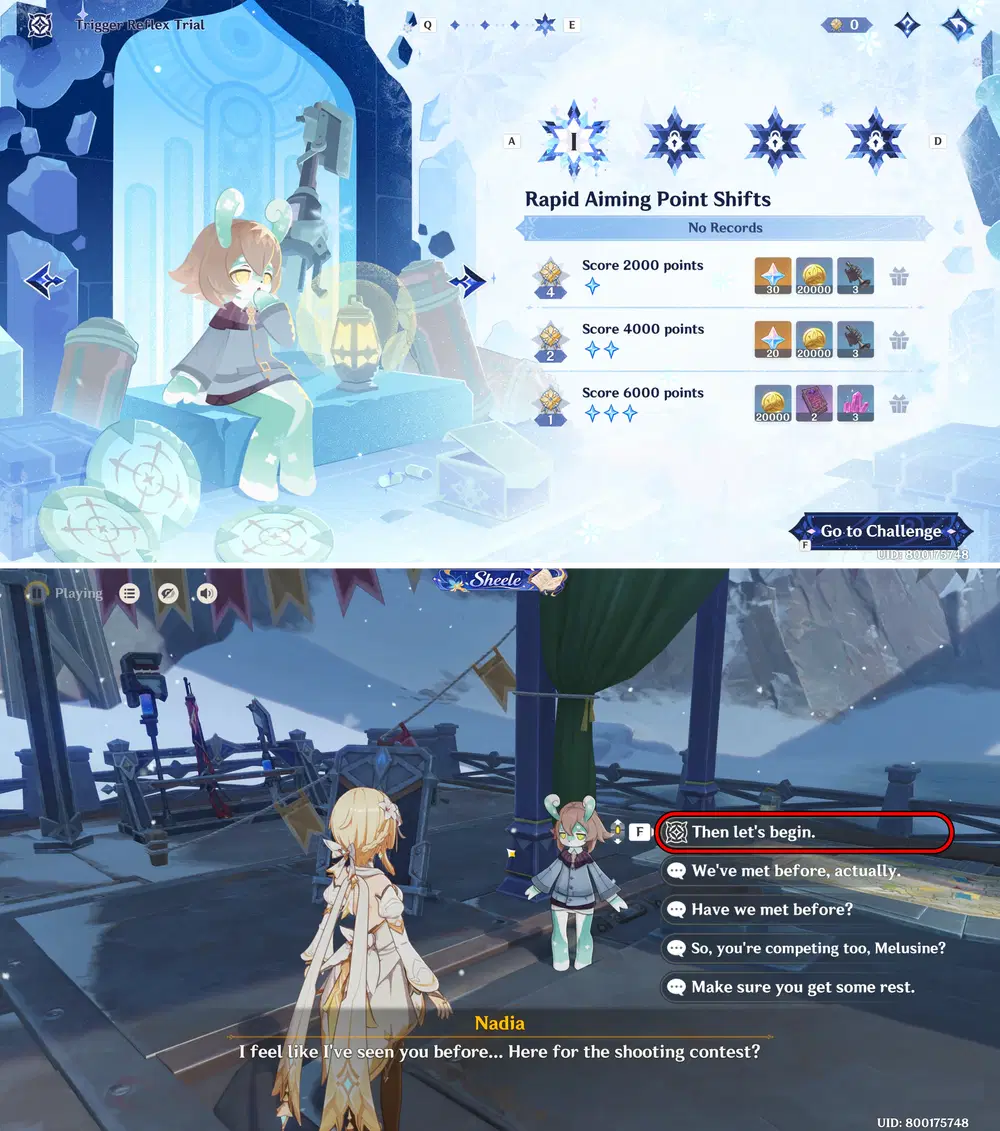
Trigger Reflex Trial Event
Gameplay Tutorial
✦ Challenge I: Rapid Aiming Point Shifts
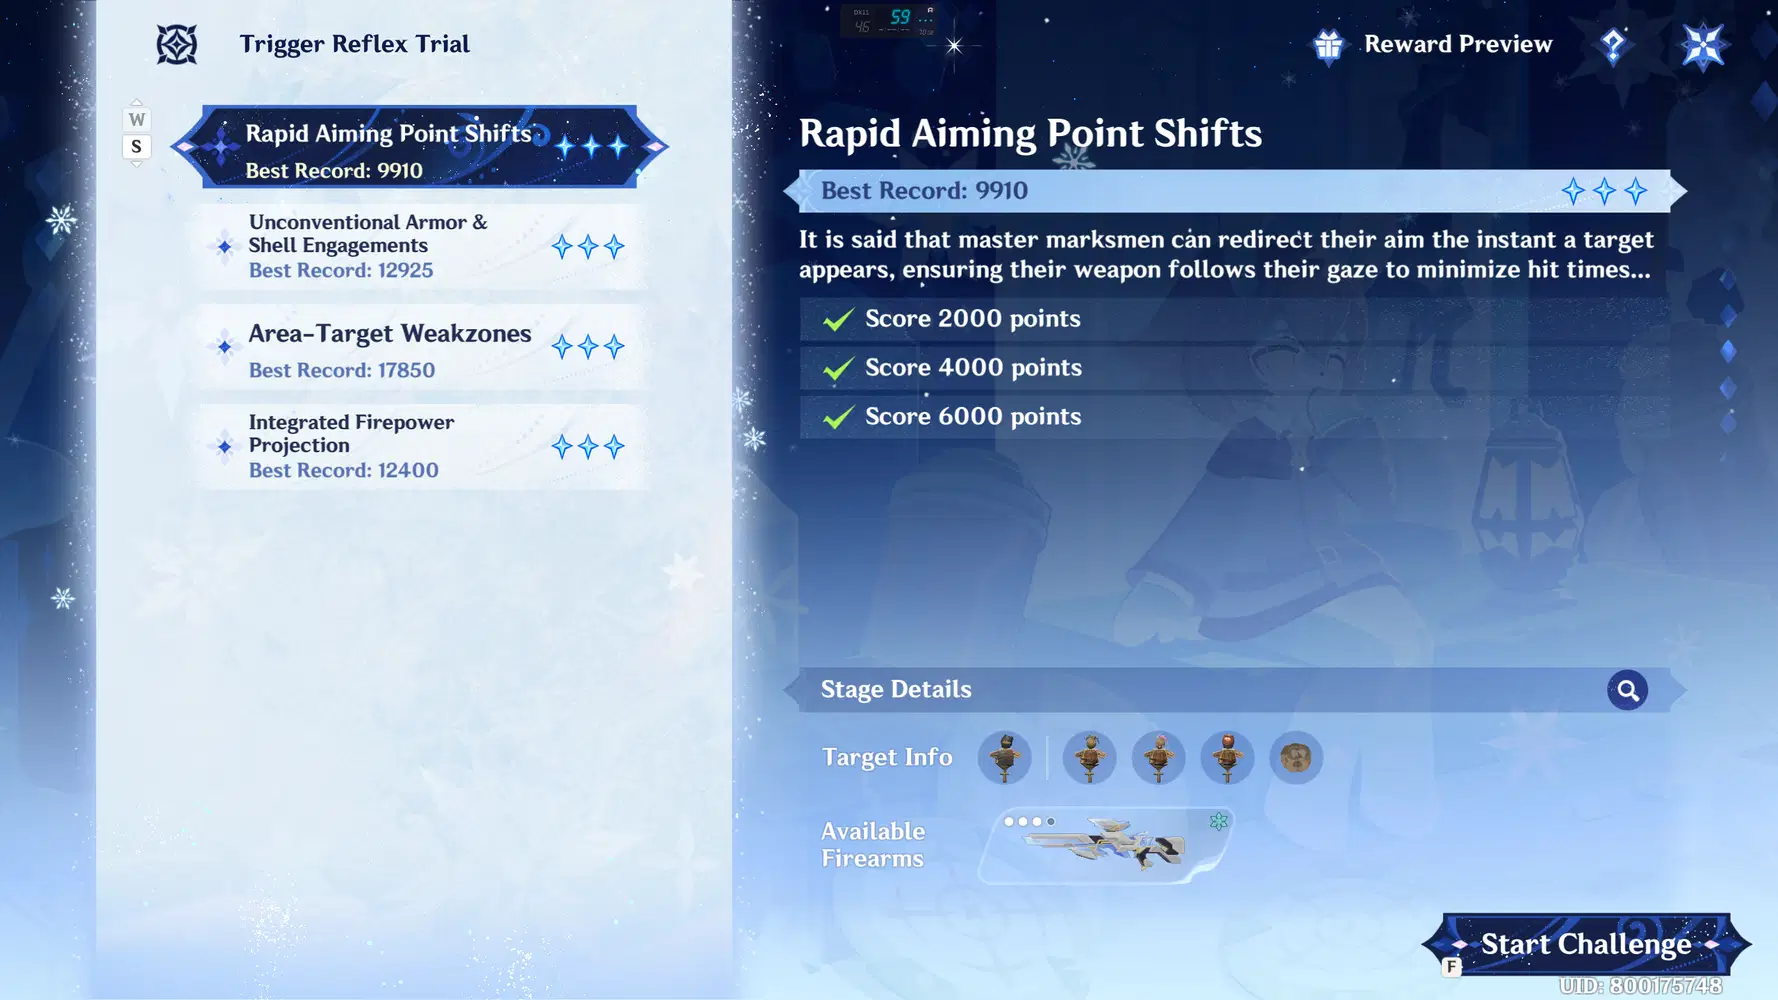
Challenge I
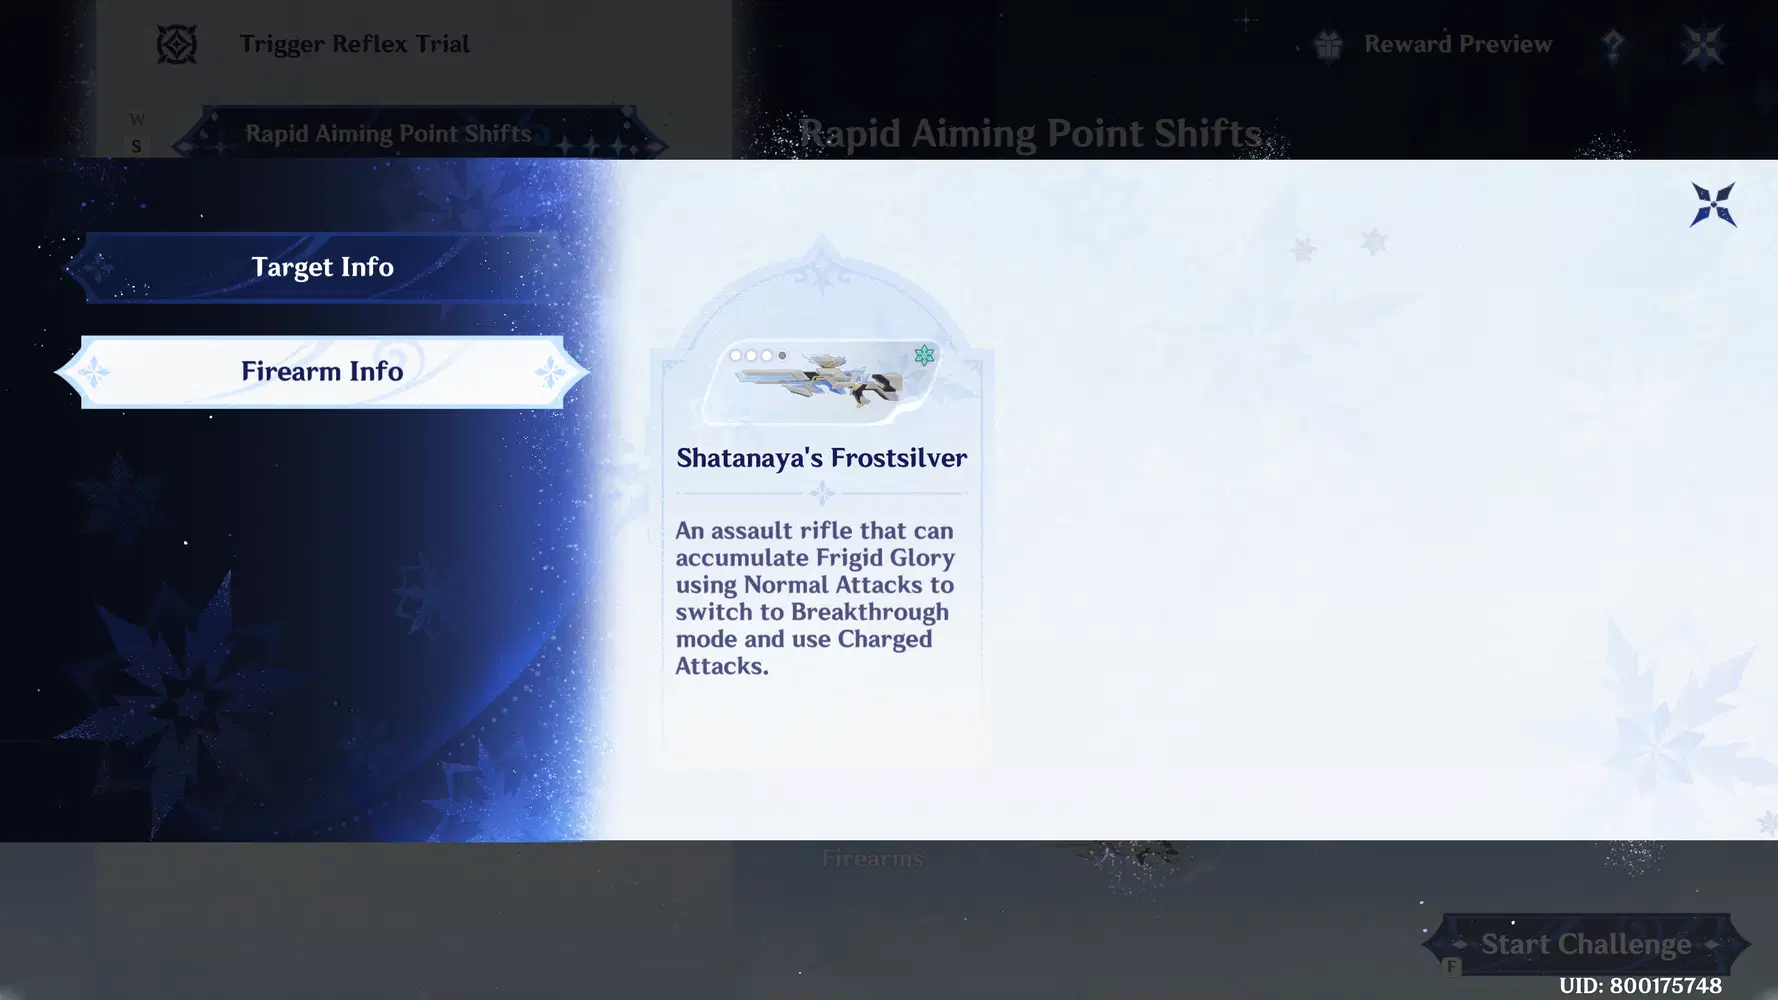
Weapon: Shatanaya's Frostsilver
Stage Details:
Aim and shoot at the targets, aiming for headshots whenever possible. In this challenge, several obstacles will interfere with your line of sight; avoid shooting these obstacles, as doing so will obstruct your vision.
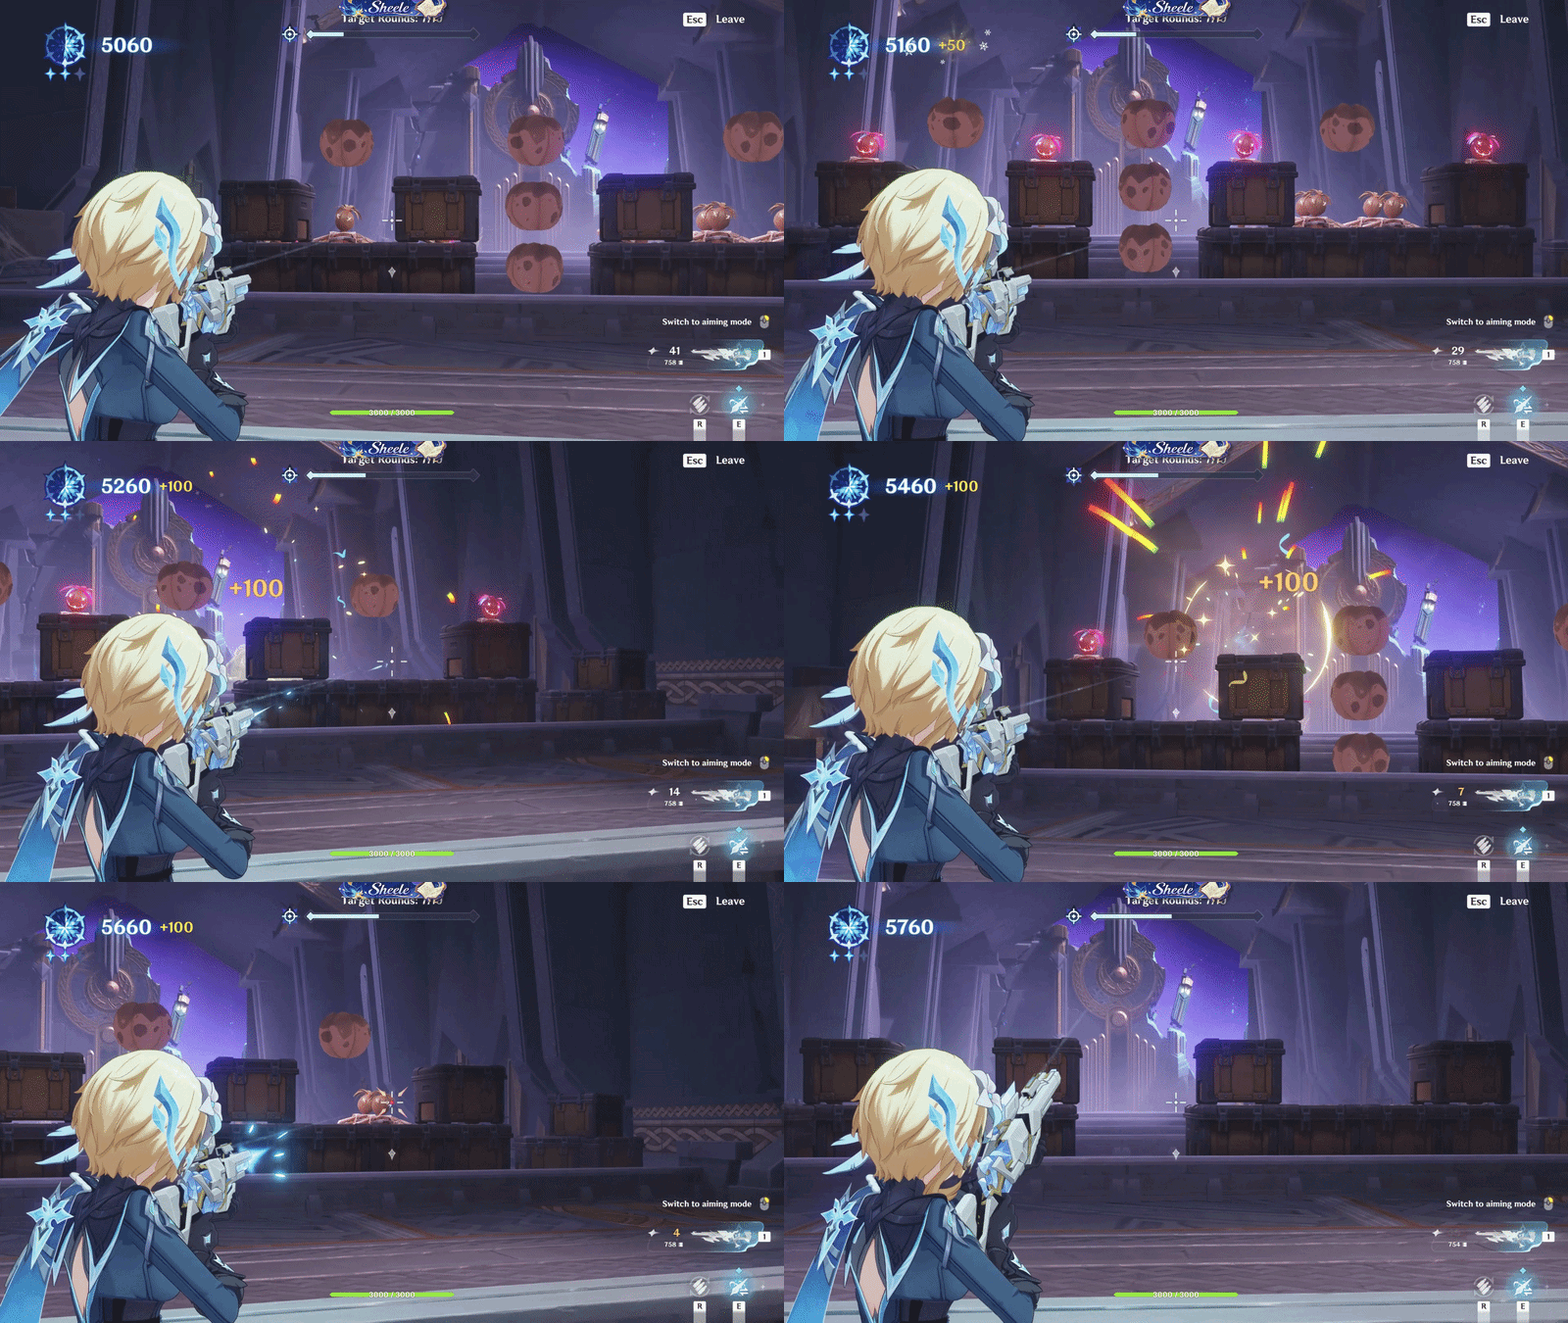
Aim and shoot the targets, avoid shooting obstacles.
✦ Challenge II: Unconventional Armor & Shell Engagements
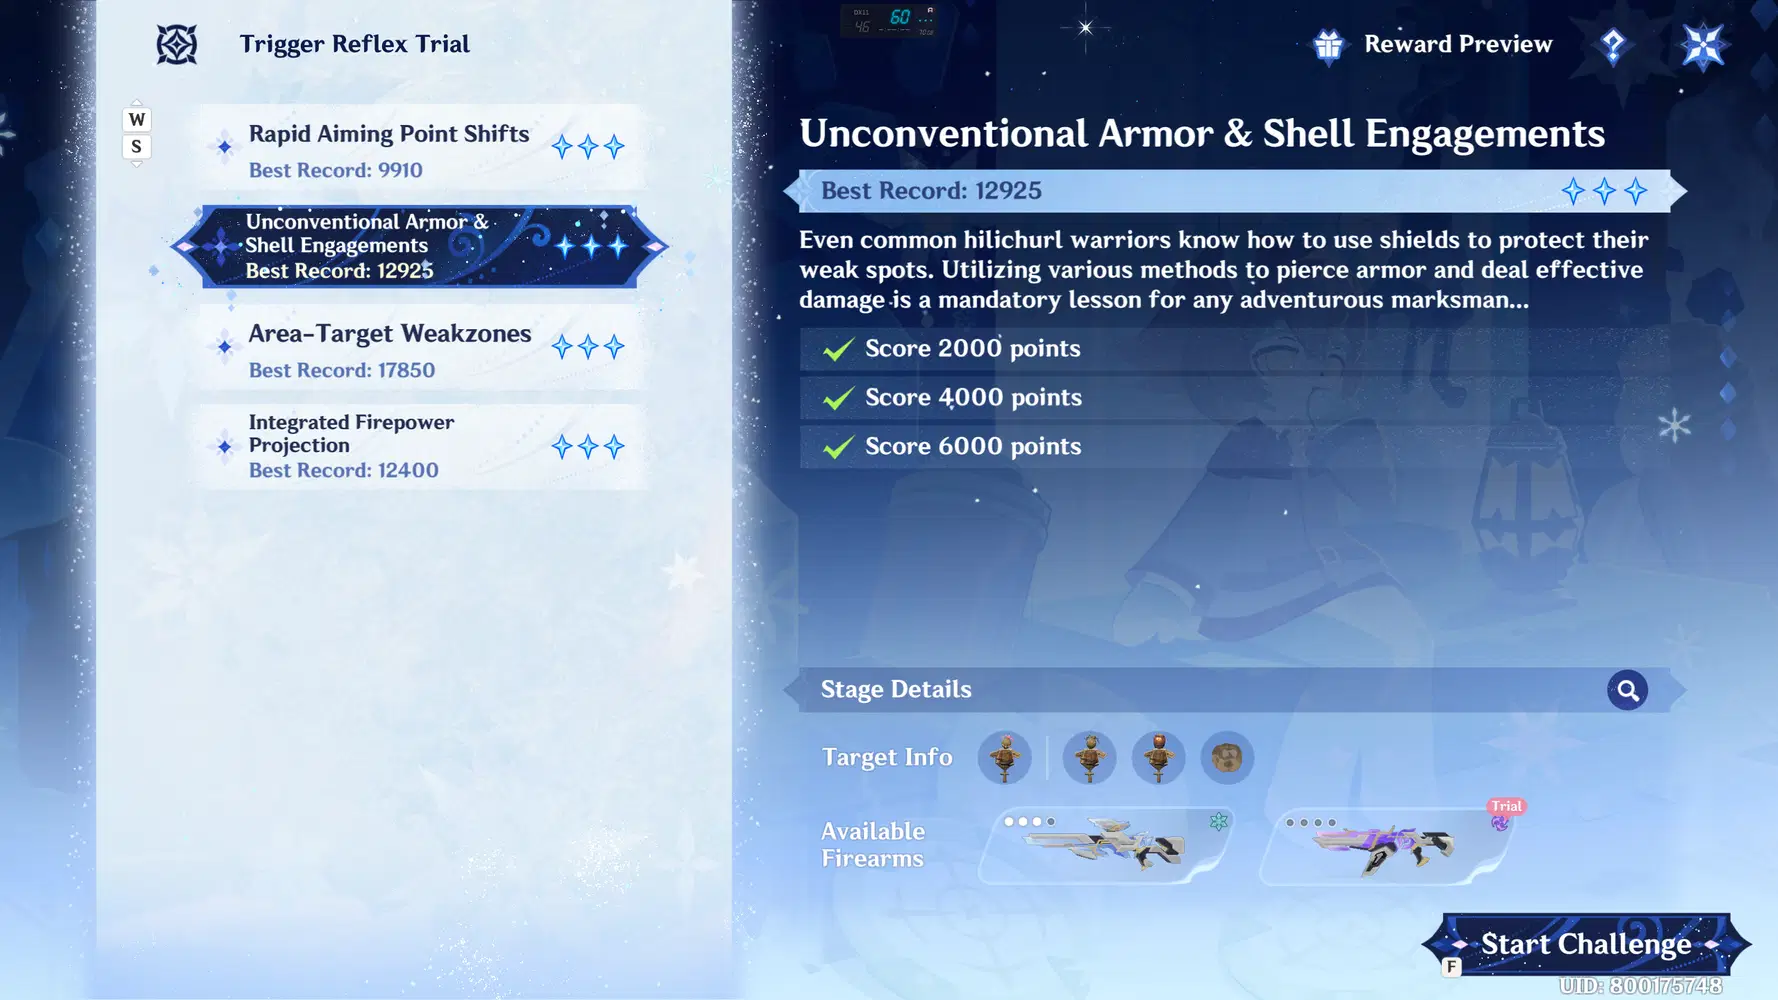
Challenge II
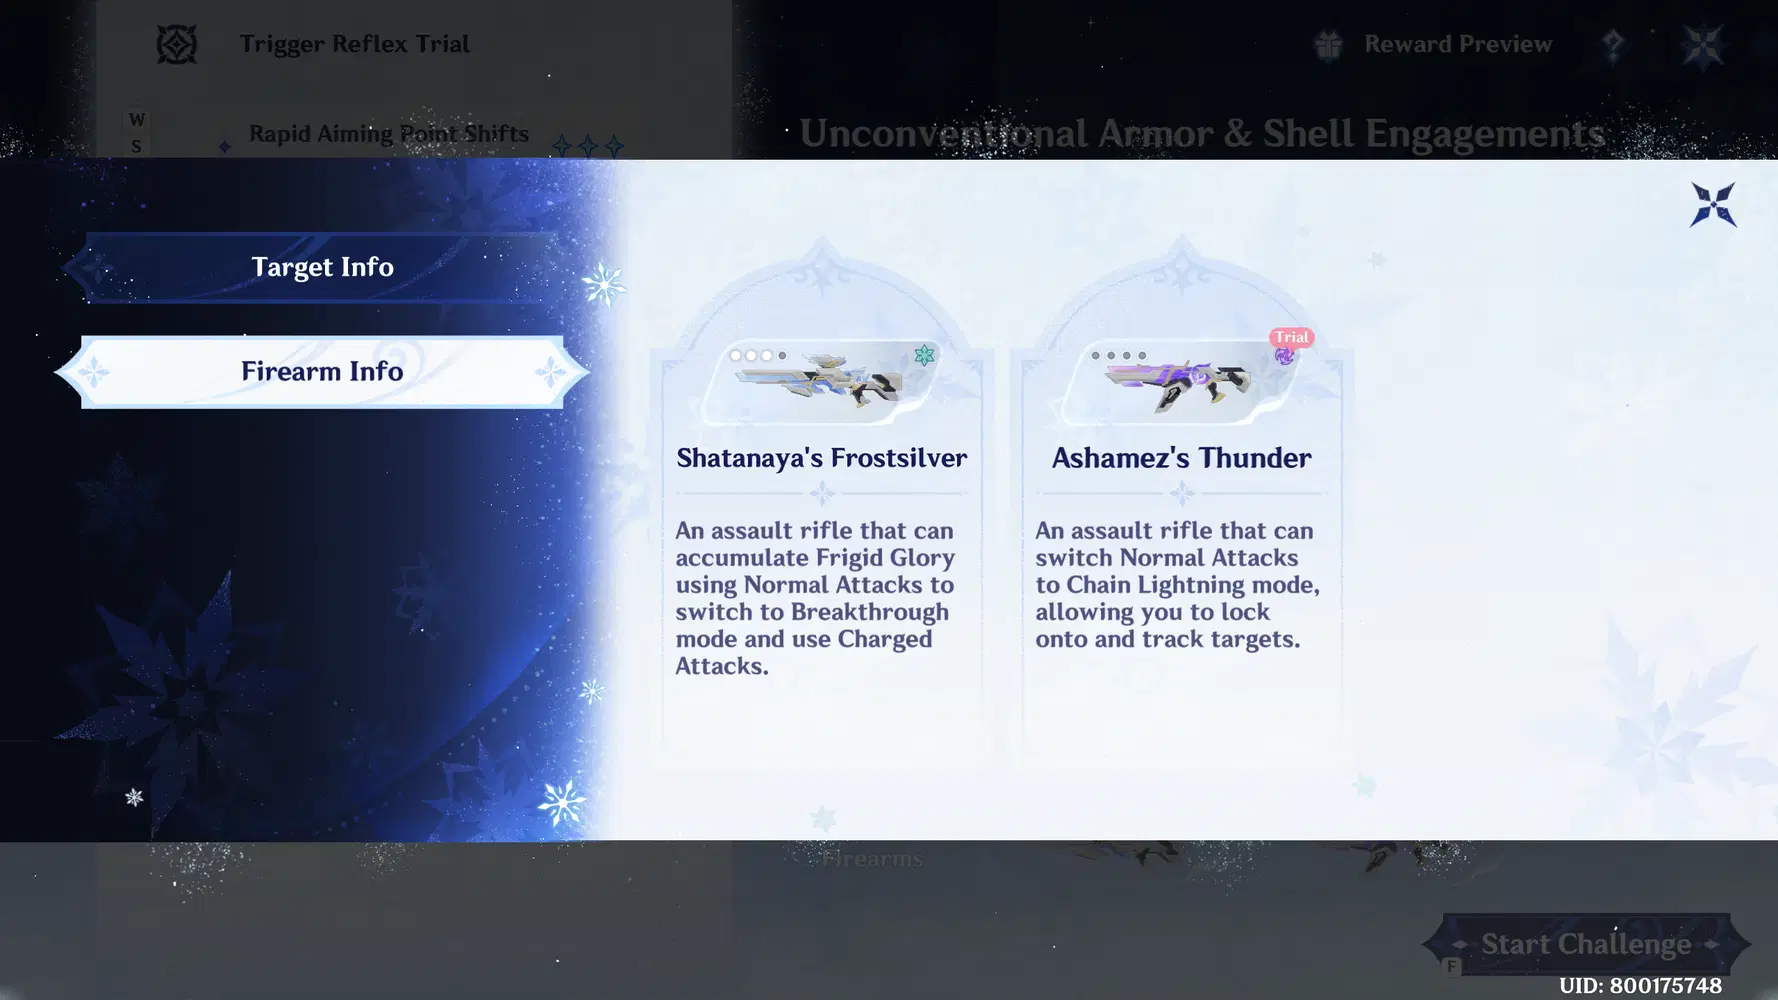
Weapon: Shatanaya's Frostsilver & Ashamez's Thunder
Stage Details:
In this challenge, you gain a new weapon Ashamez's Thunder, this weapon have ability with a unique projectile behavior. Use this weapon to strike large groups of appearing targets but avoid using it in tight areas filled with obstacles.
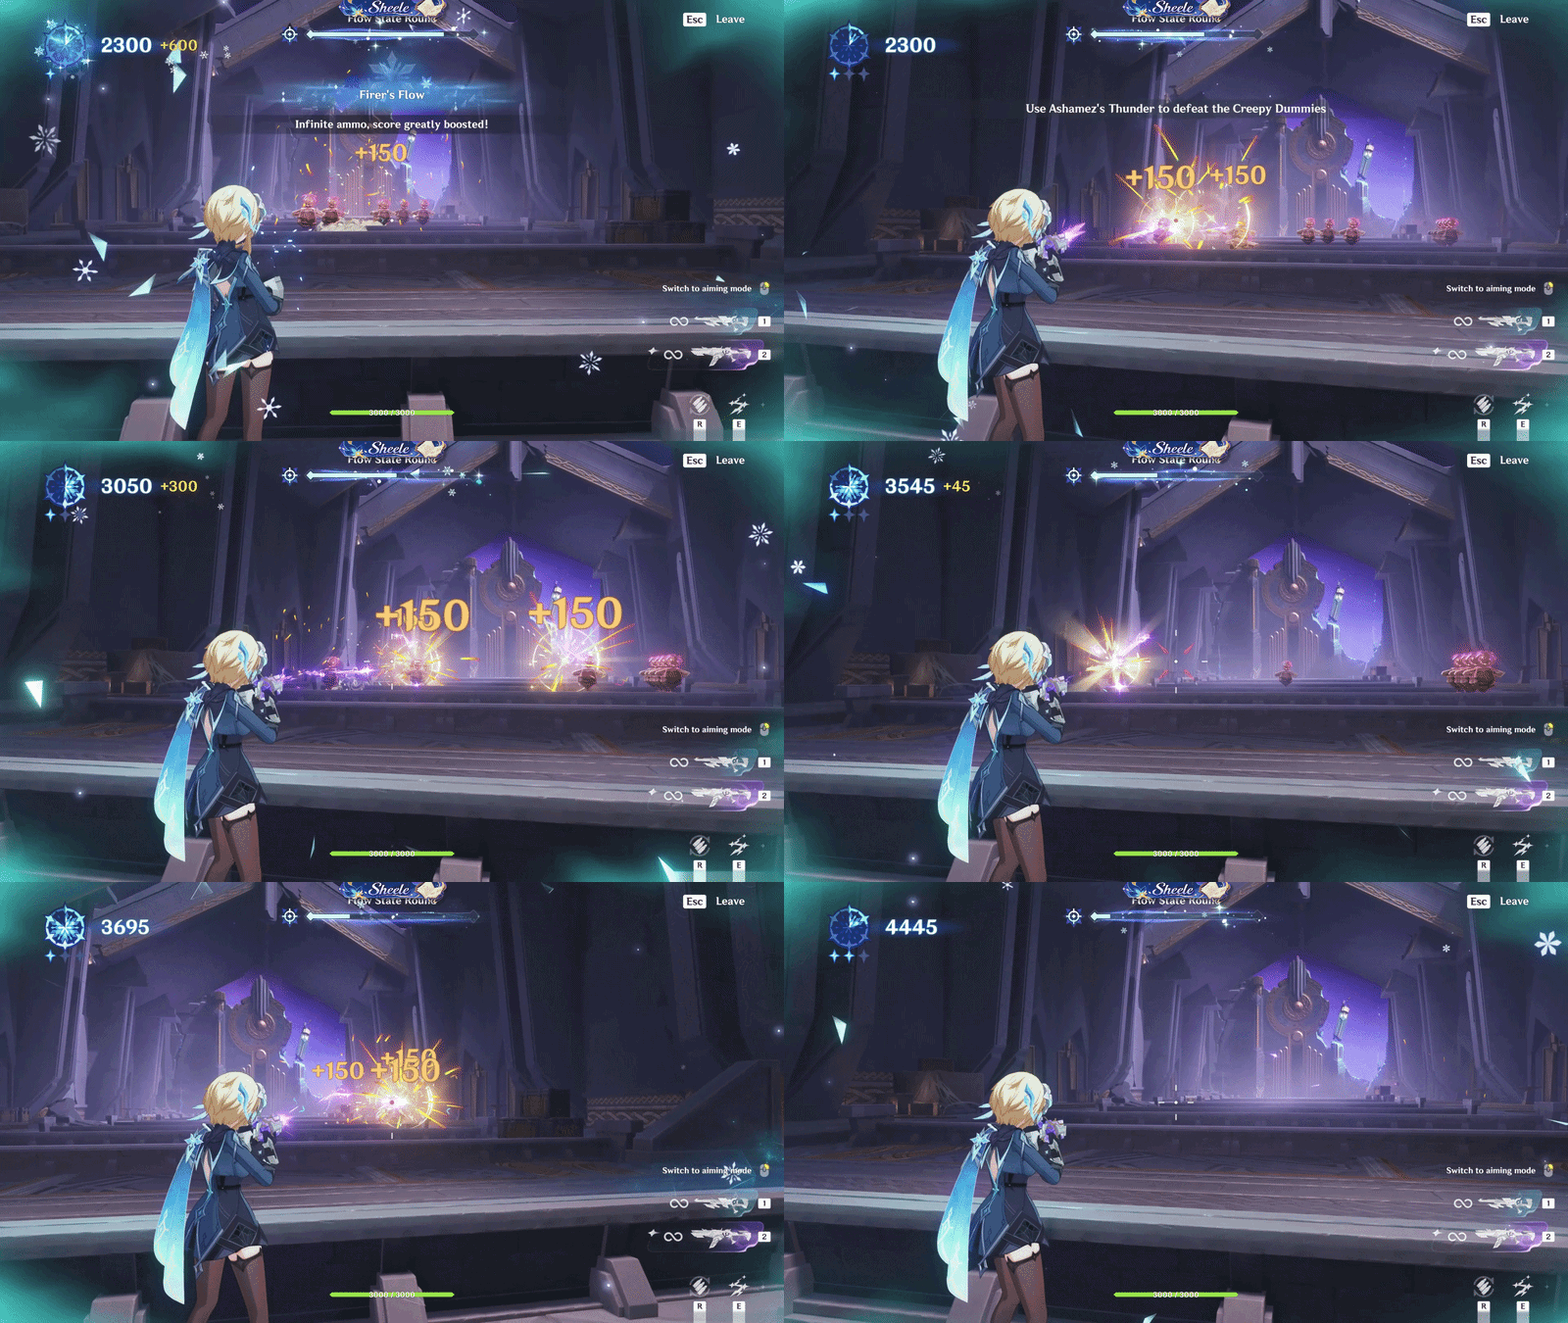
Ashamez's Thunder (Electric Shoot)
✦ Challenge III: Area-Target Weakzones
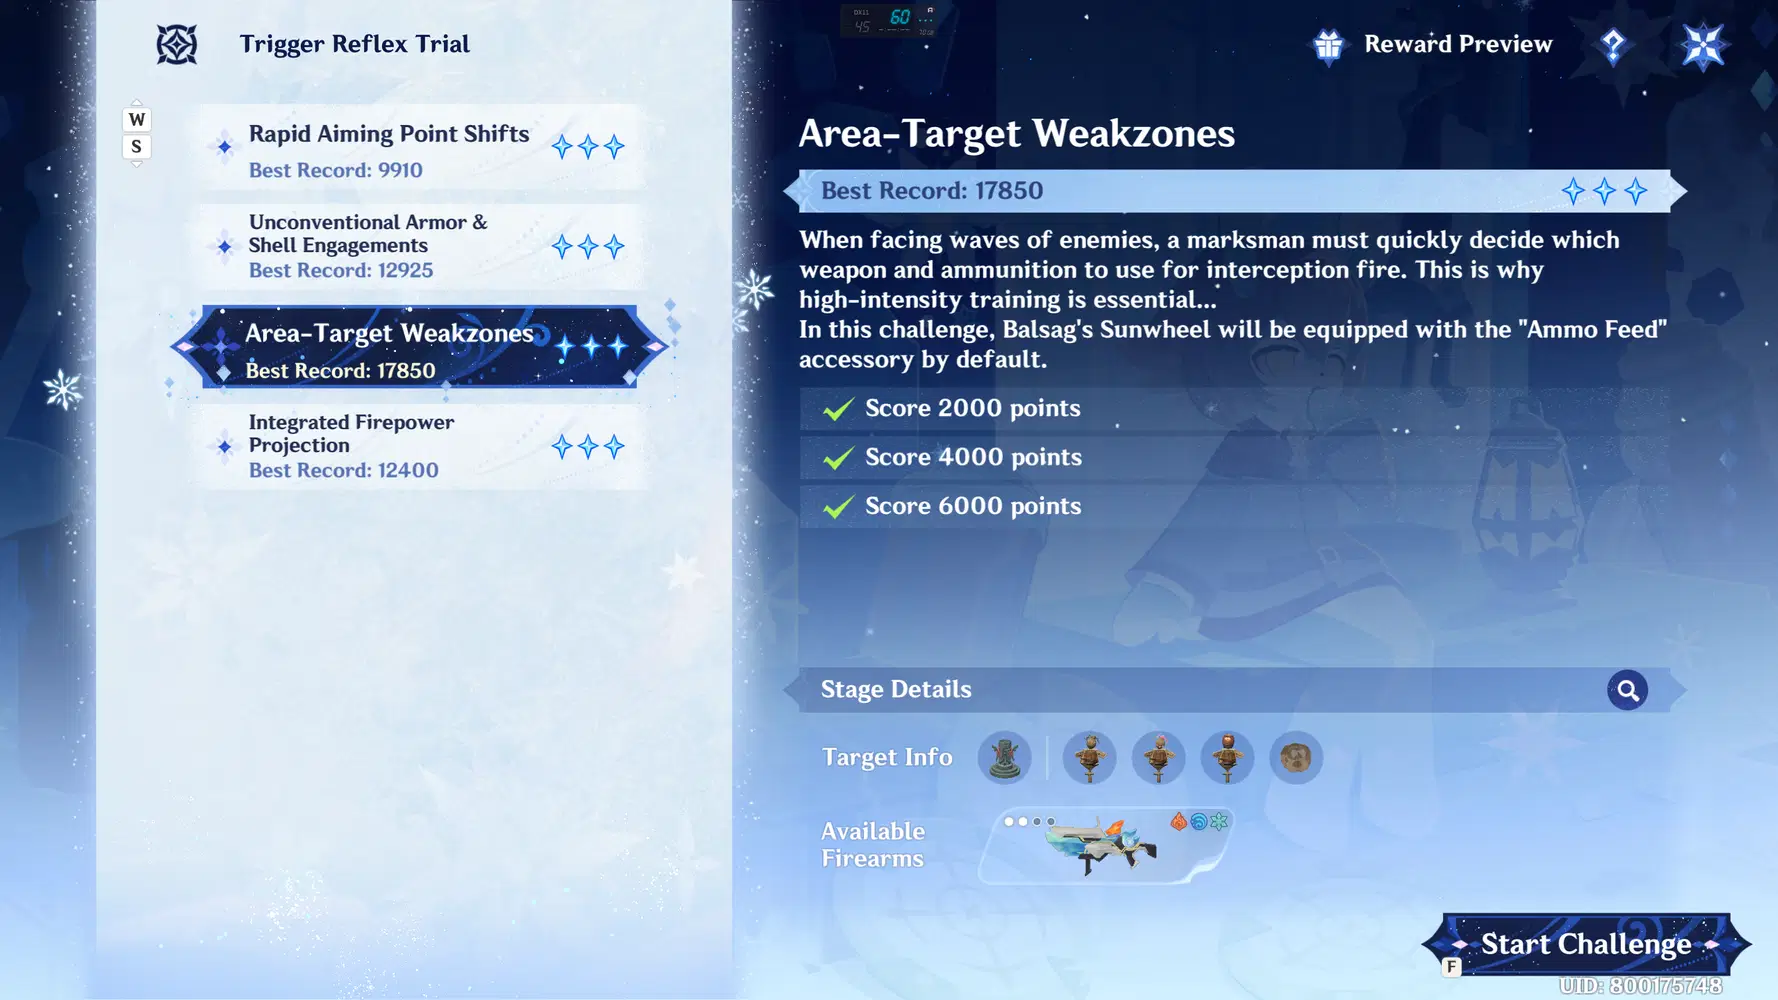
Challenge III
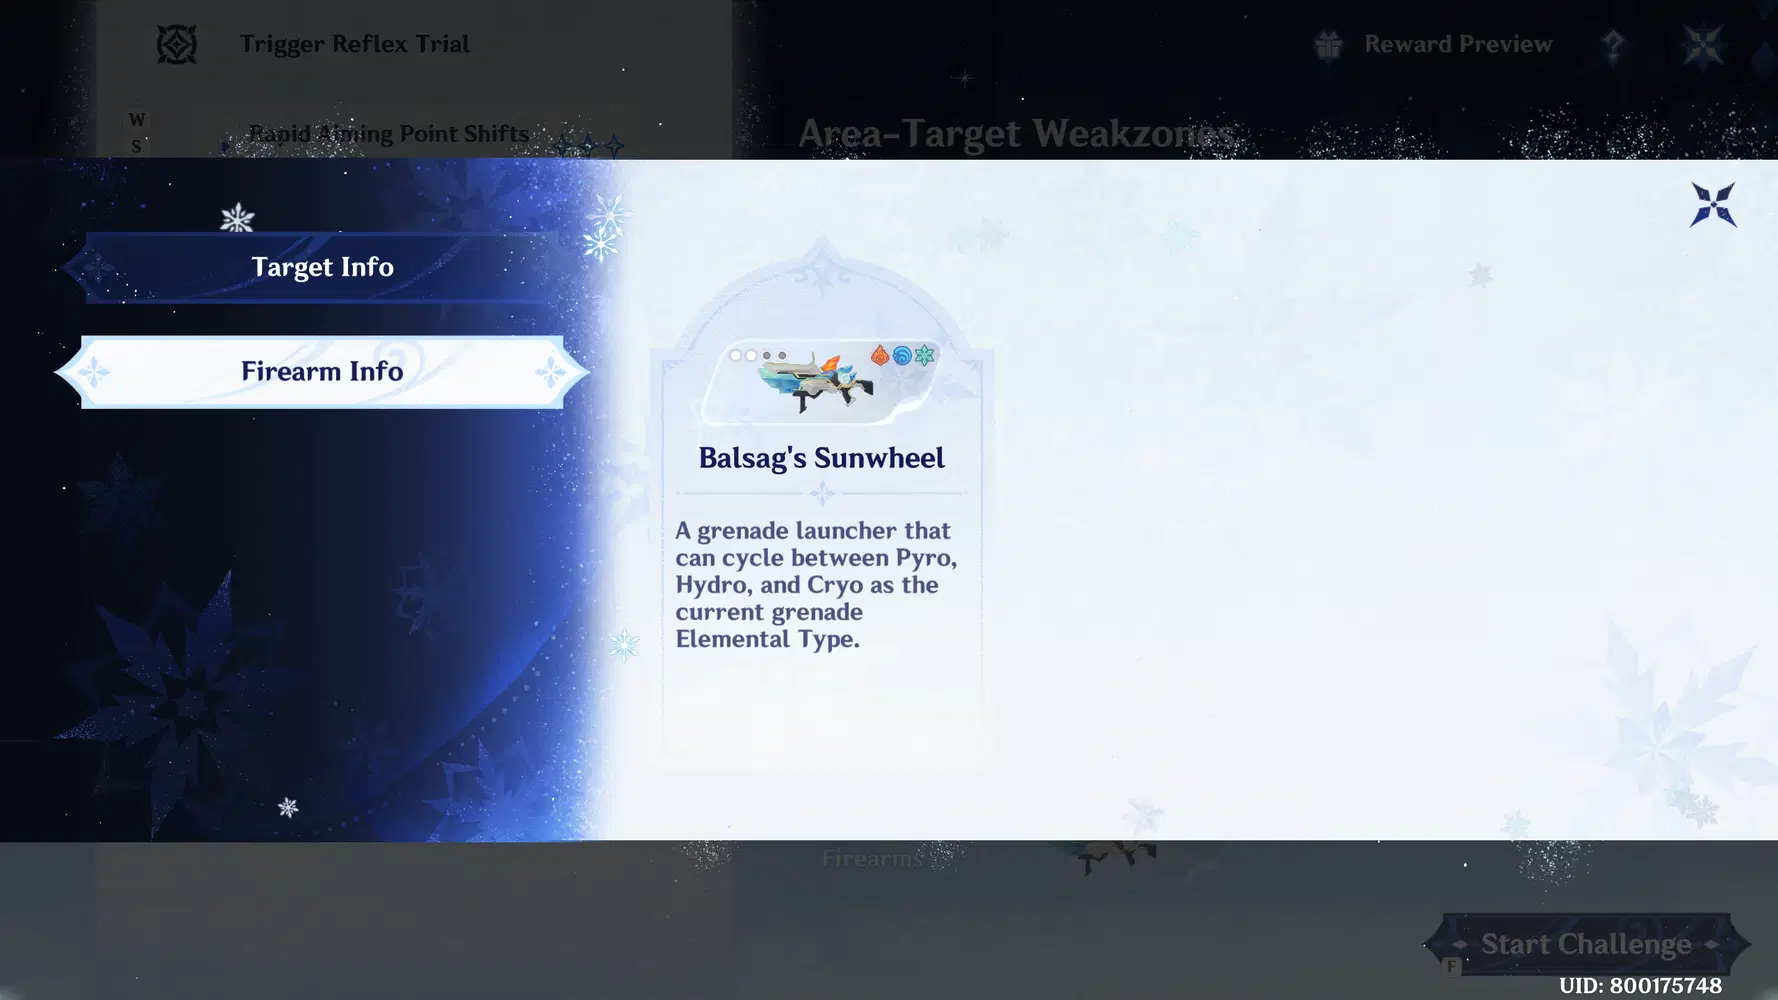
Weapon: Balsag's Sunwheel
Stage Details:
In this stage, you get a new weapon Balsag's Sunwheel, with AoE/splash attacks similar to a shotgun. You can also switch the weapon's element, so make sure to keep this in mind when Elemental Statues appear. Target and shoot enemies with bombs to trigger a wider area of effect.
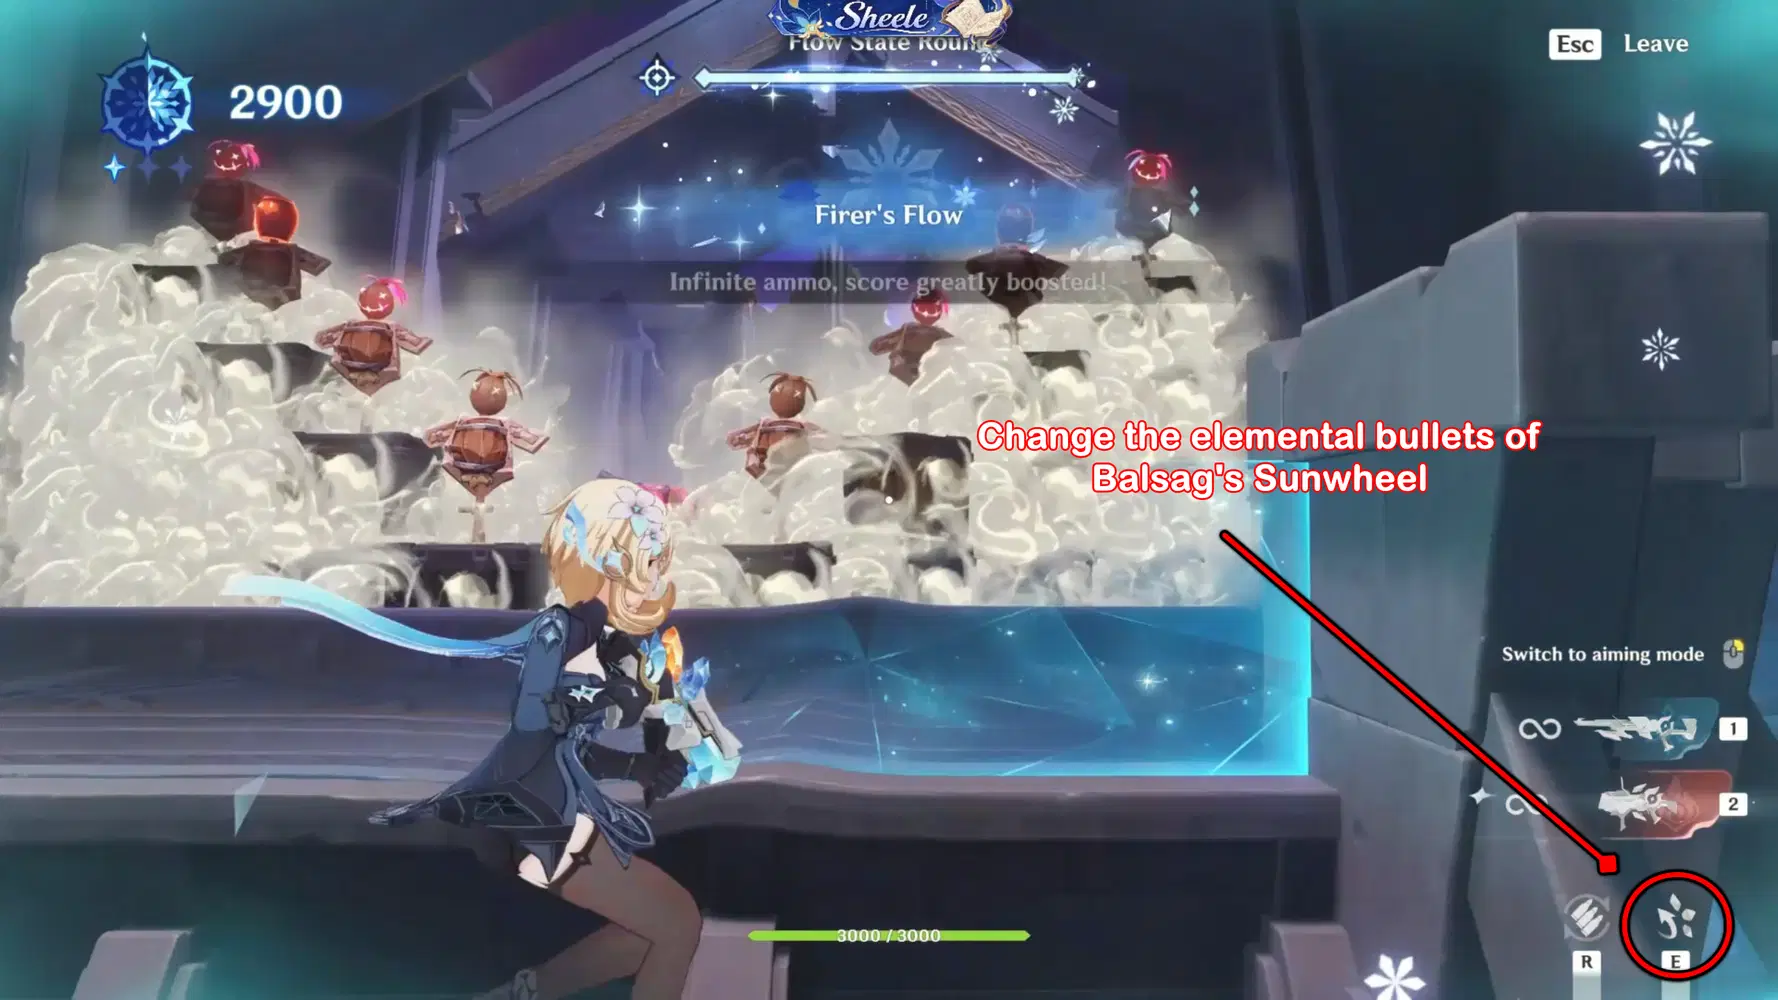
Press E, to Change the elemental bullets of Balsag's Sunwheel
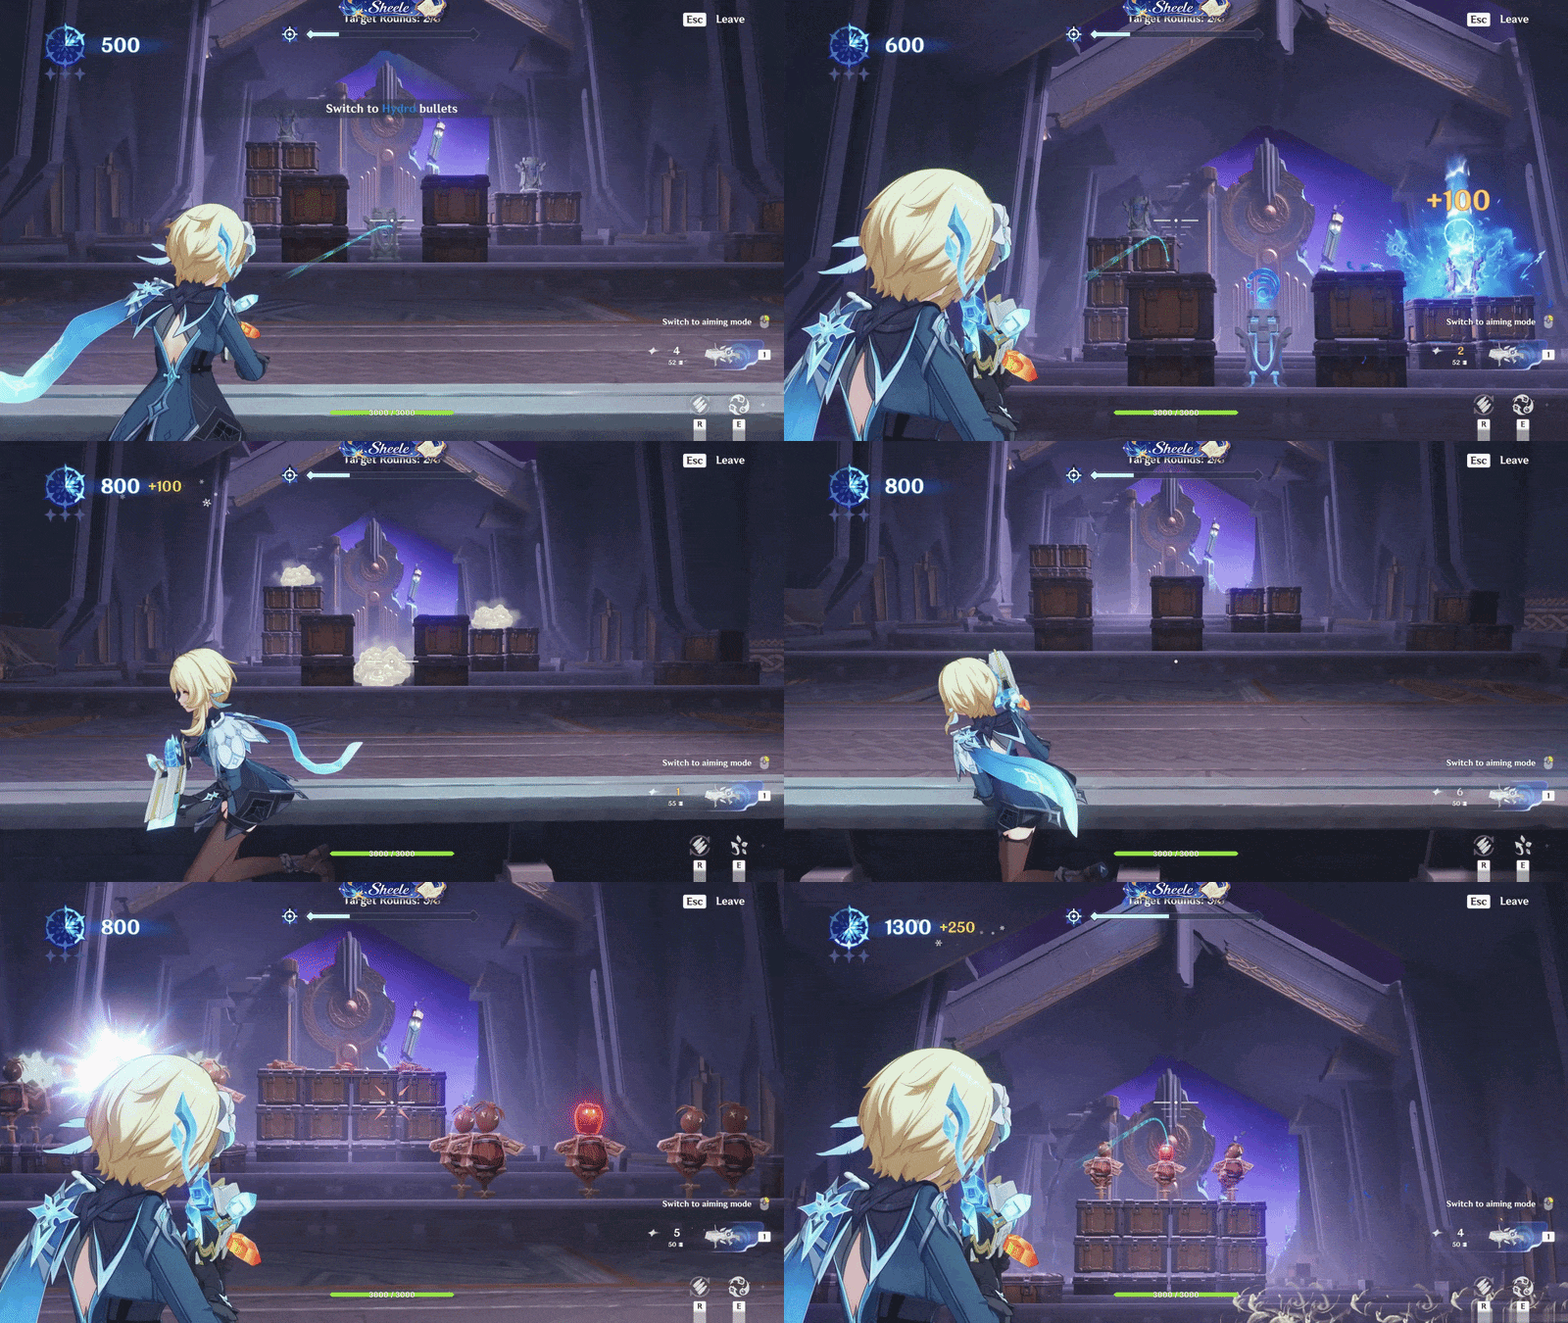
AoE Explosive Shot to Elemental Statue
✦ Challenge IV: Integrated Firepower Projection
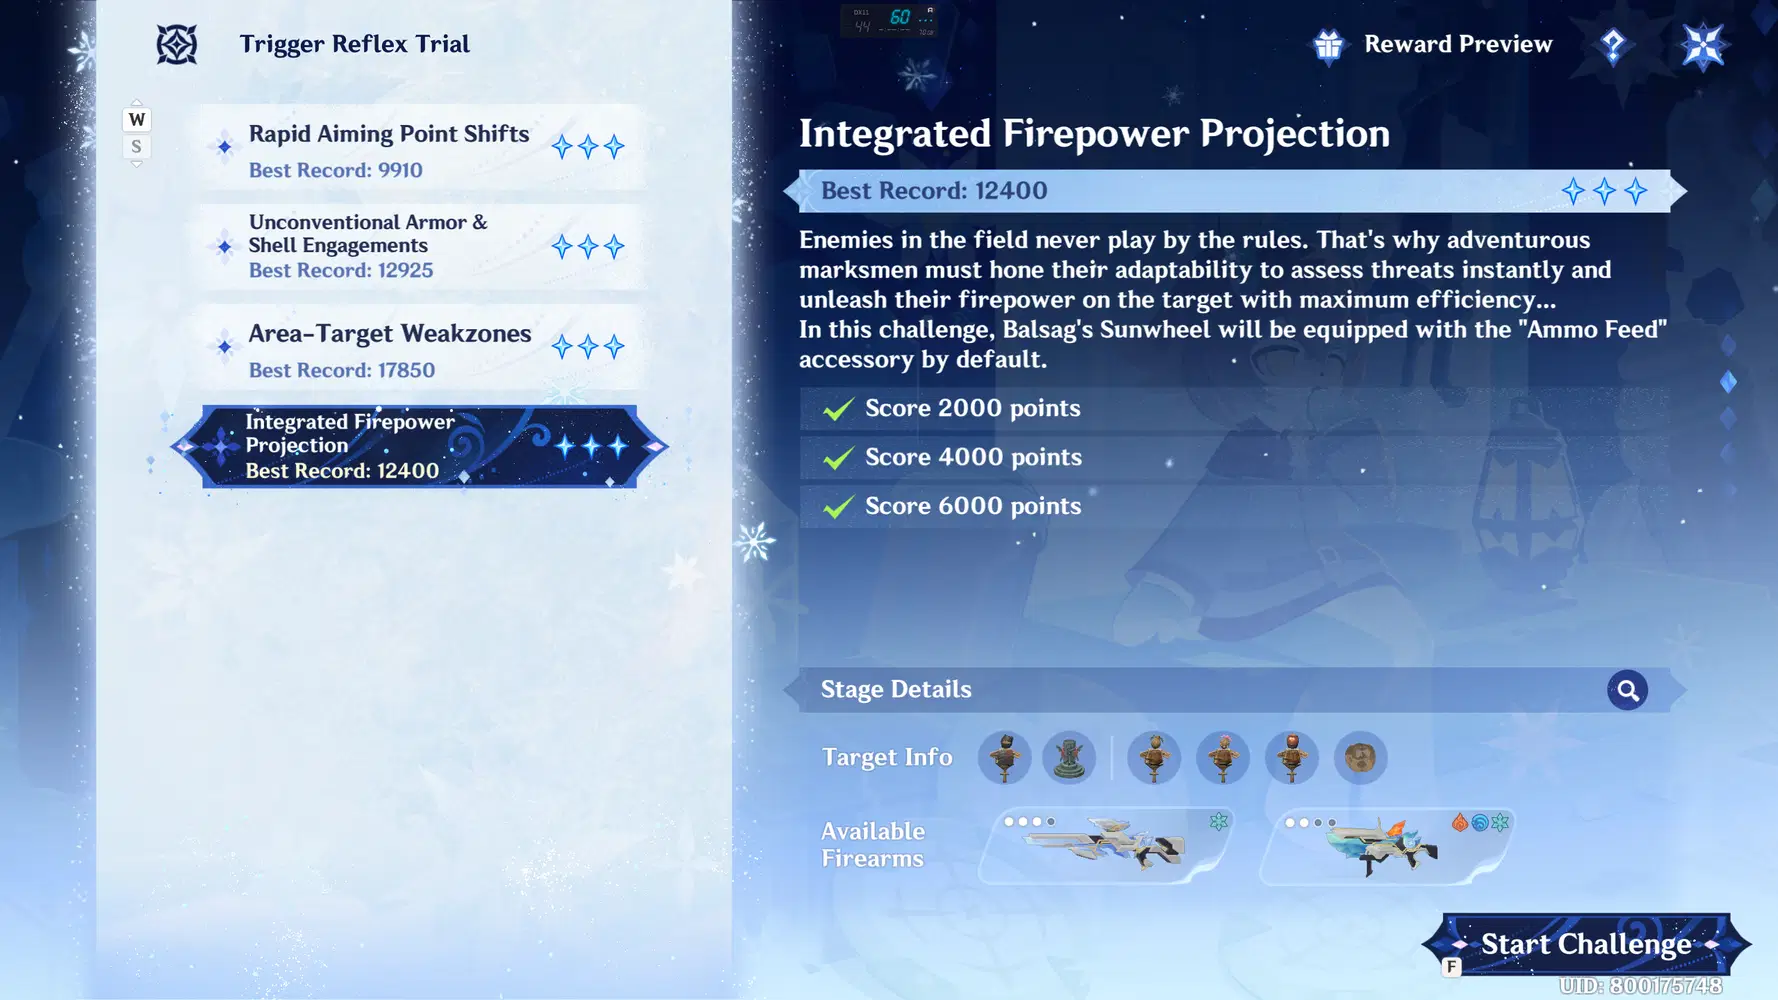
Challenge IV
Stage Details:
In this challenge, both single-target and splash-damage weapons are provided. This challenge focuses on precision when aiming at targets; additionally, you need to wisely choose the right type of weapon based on the appearing target.
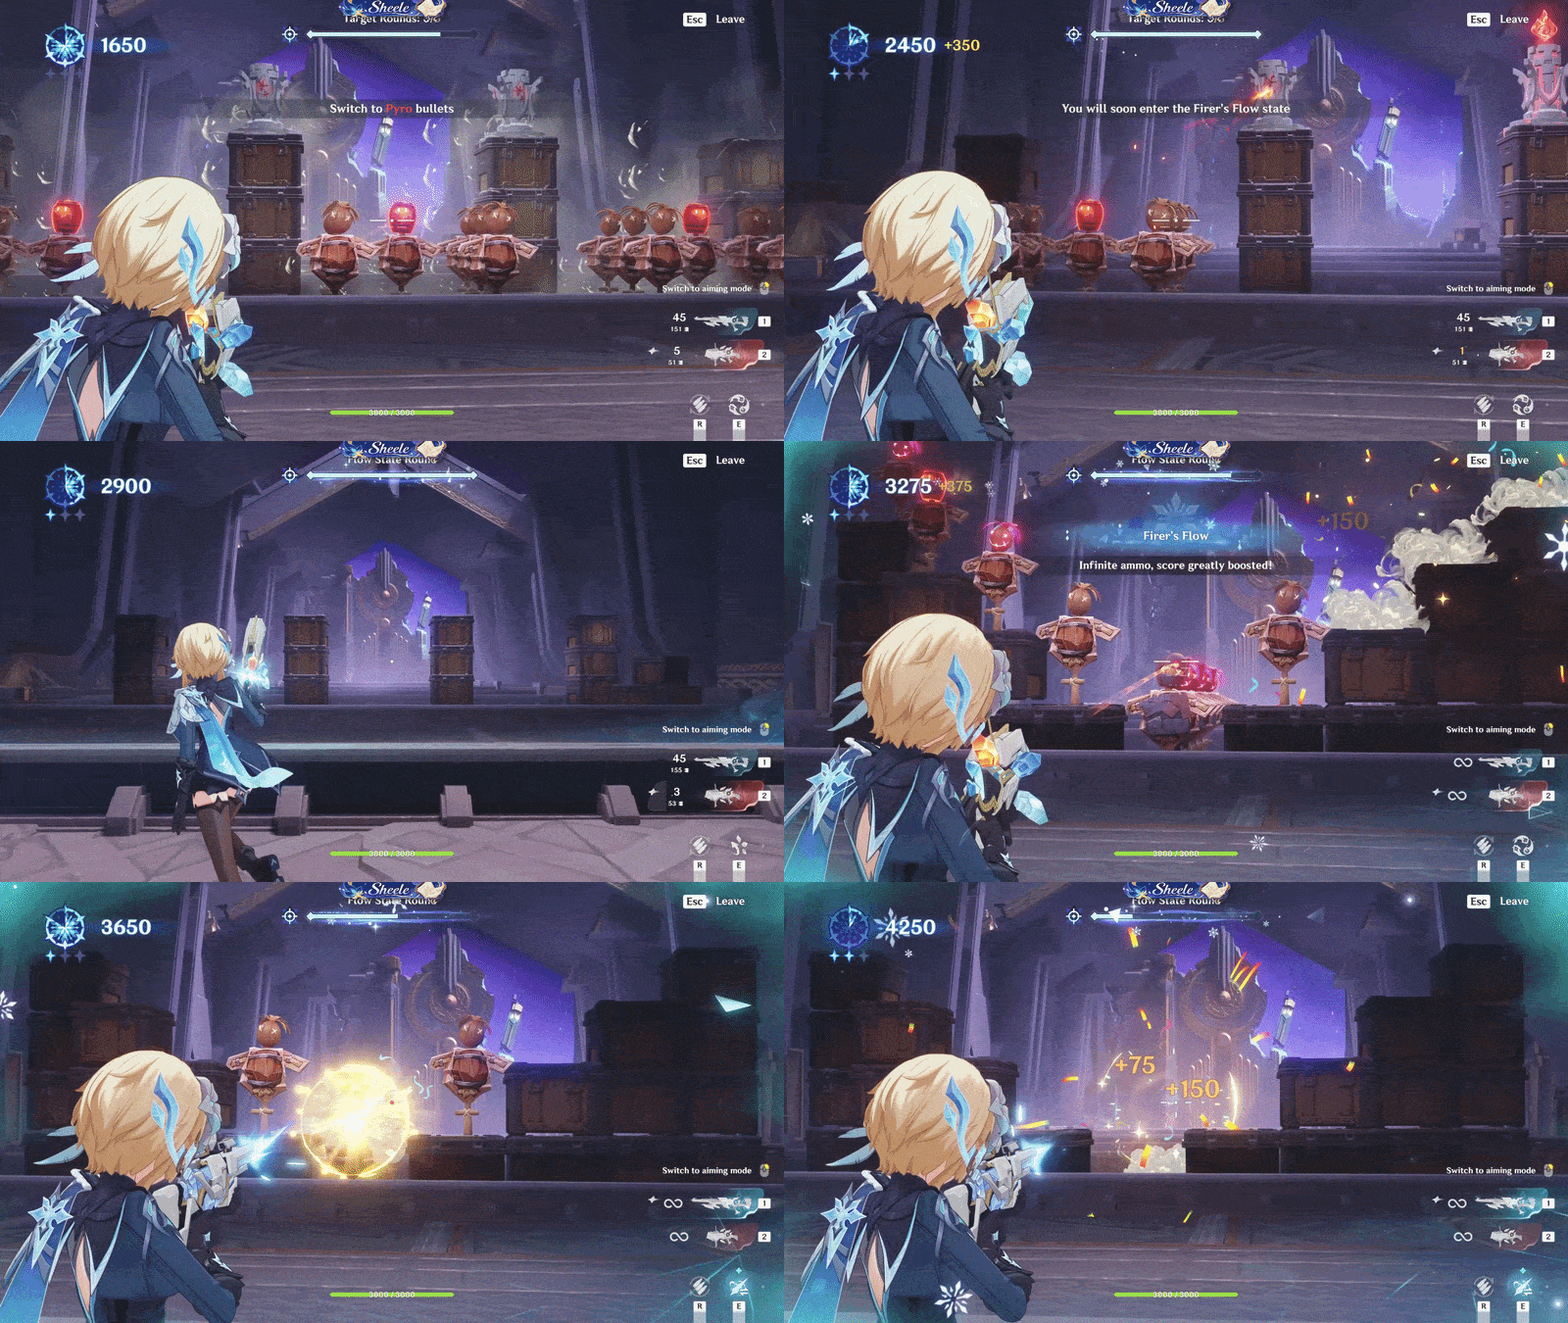
Agility and Shooting Accuracy
Video Gameplay
Main Event Reward
After completing all the challenges and reaching the target score to top the leaderboard, you can claim all the available rewards.
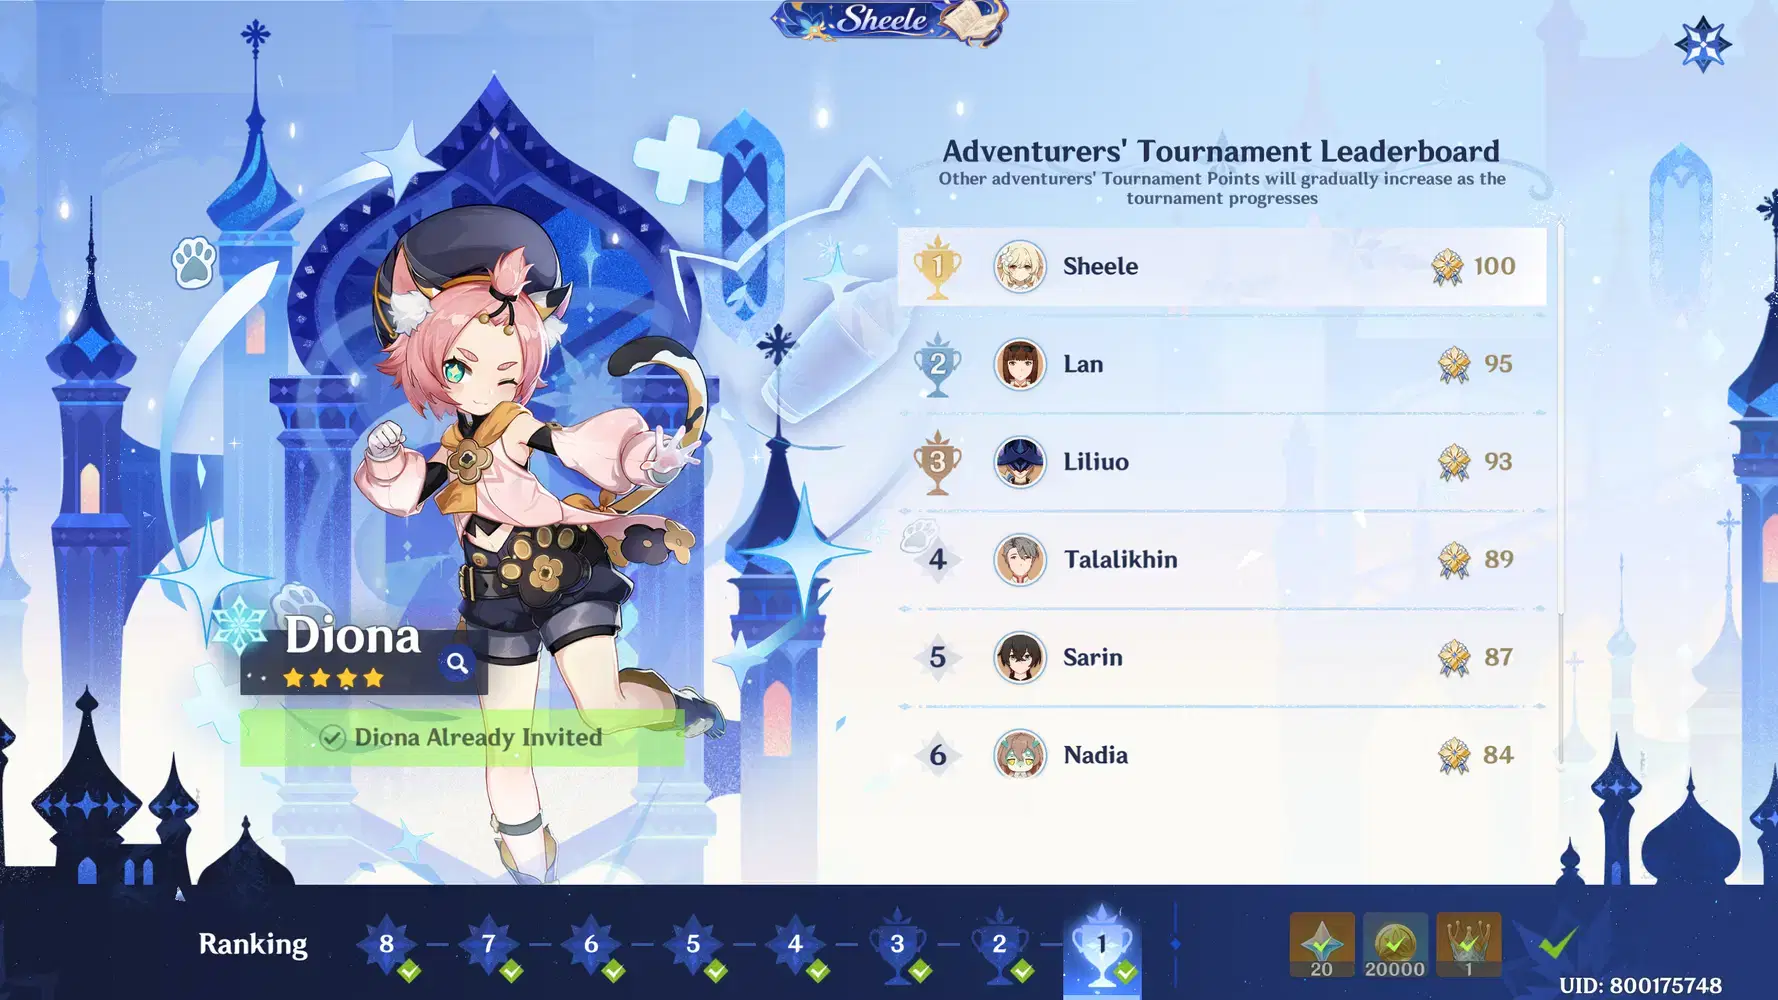
Main Event Reward Page