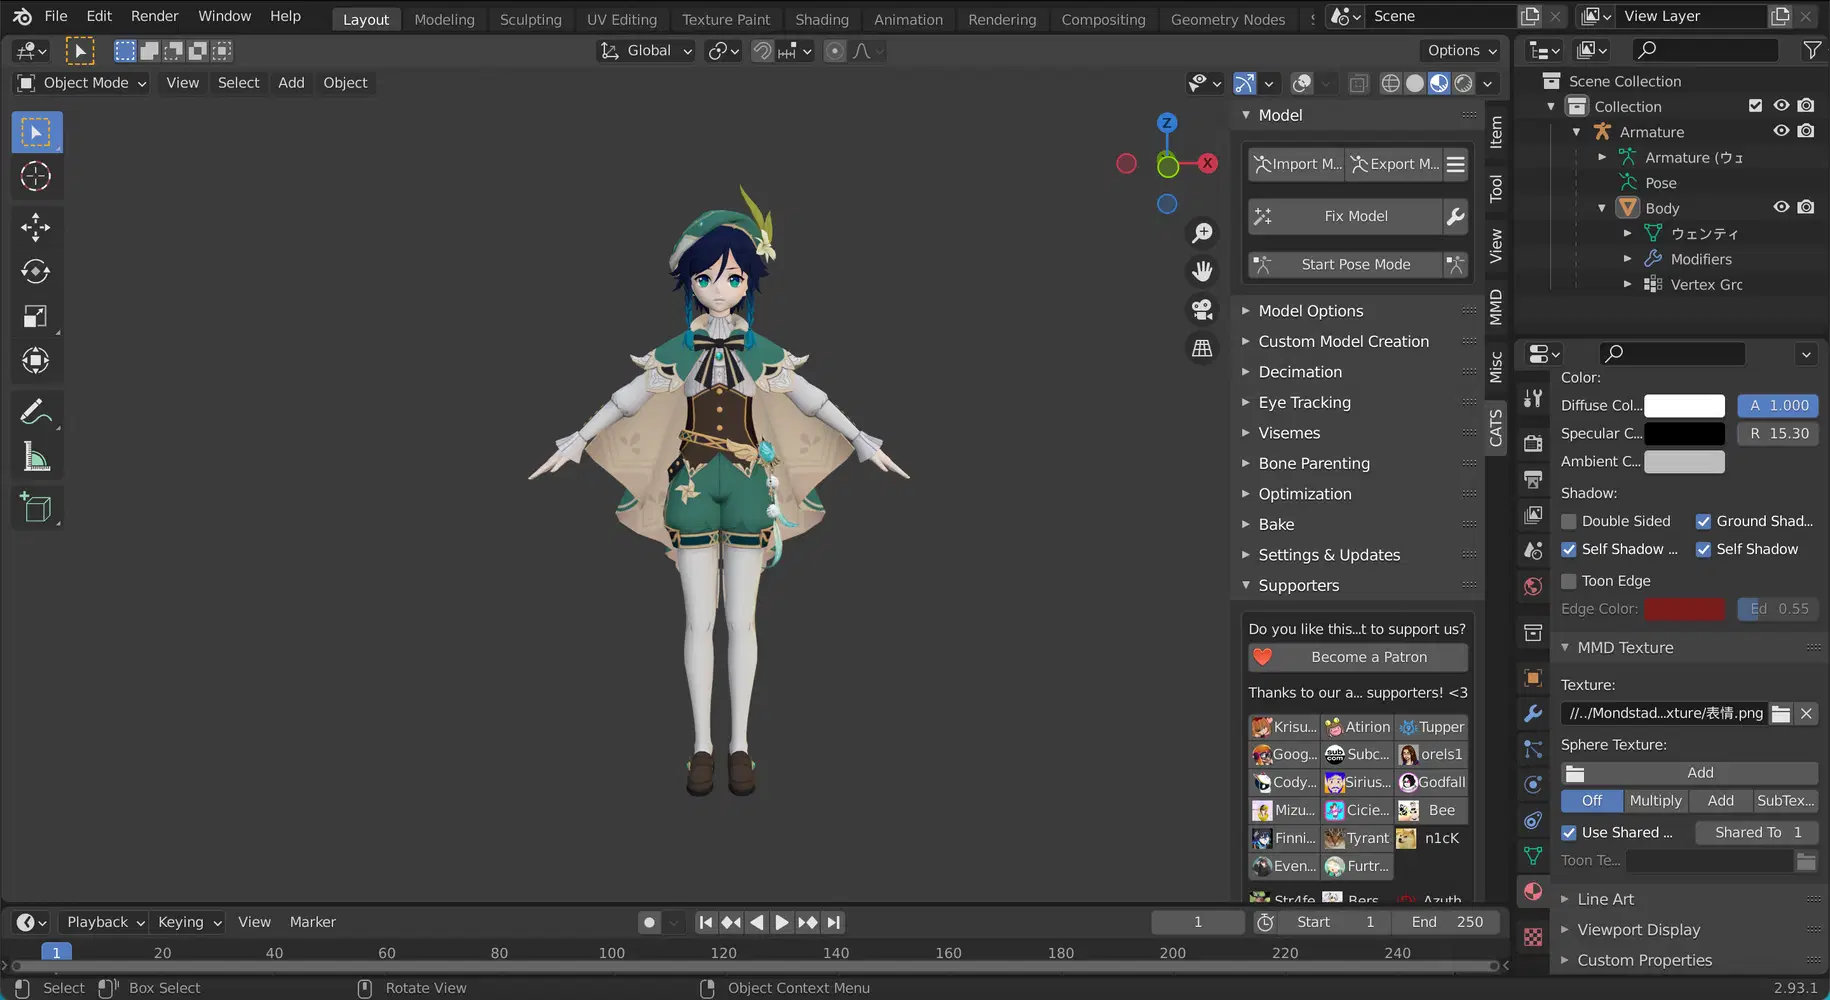
For the people who don't know how to import the Genshin models, here's a guide to help! I will be using the application Blender in this guide (note: Blender is not the only app) You will also need to download some add-ons in Blender, I will provide the link. So, enjoy~

1. Download the model you want to use.
Here's a link to the post where I have the models: https://www.hoyolab.com/genshin/article/627614 (link 8 is a little different so I'll be using 1-7 in this guide)
I also found some new models you can find them on my hoyolab account, it's posted there.
2. Download WinZip
(If your model is downloaded as a .pmx file already, you can skip this step, if it's a zip file, you have to do this step)
https://winzip.en.softonic.com/mac/download (for mac)
https://www.winzip.com/en/download/winzip/ (for pc)
Open WinZip, you should see something like this:
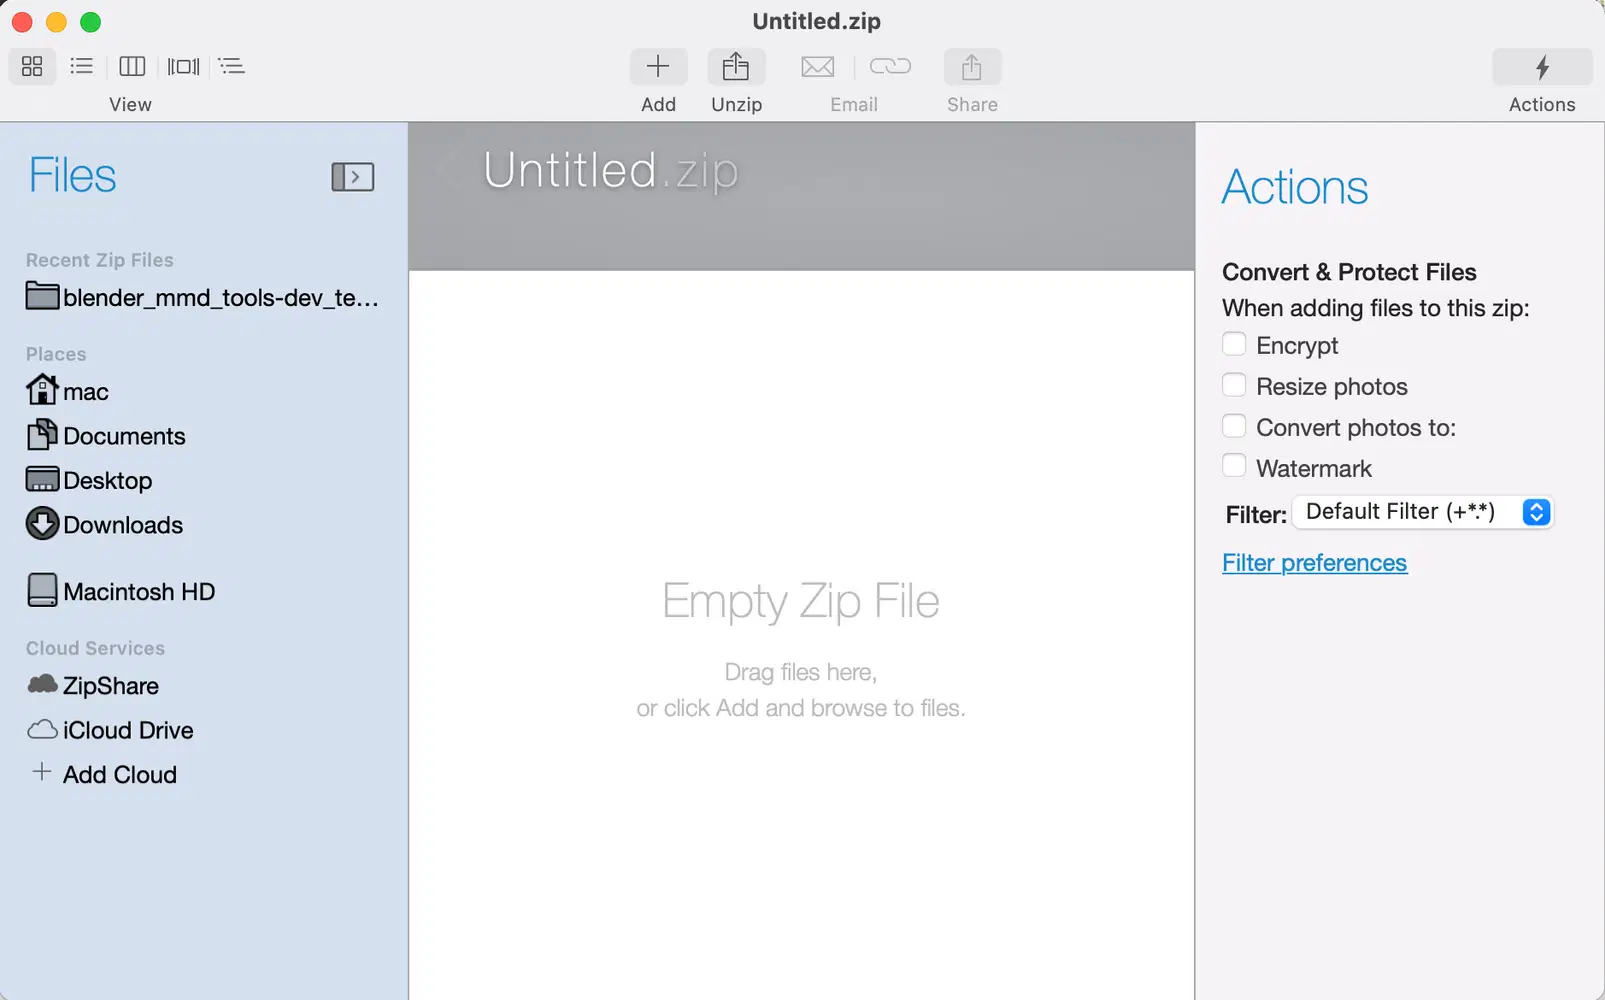
Drag the zip file into WinZip or just double click on your zip file, you should get these files. (I'm using Tartaglia's model in this example)
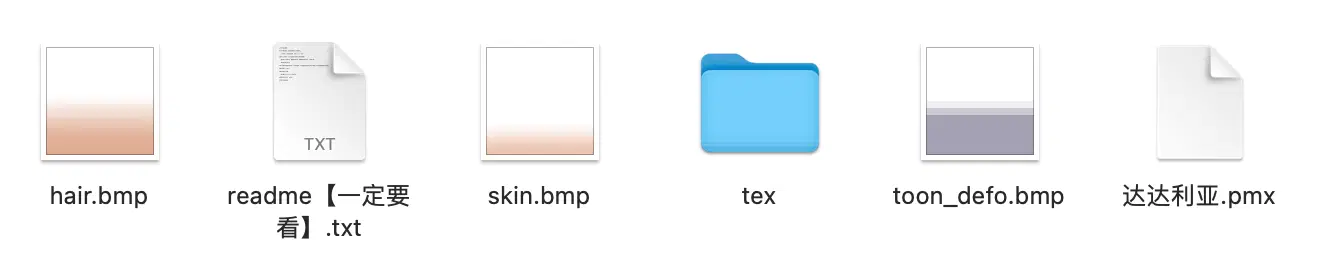
Now, your files are all set.
3. Download CATS add-on
Link: https://github.com/GiveMeAllYourCats/cats-blender-plugin
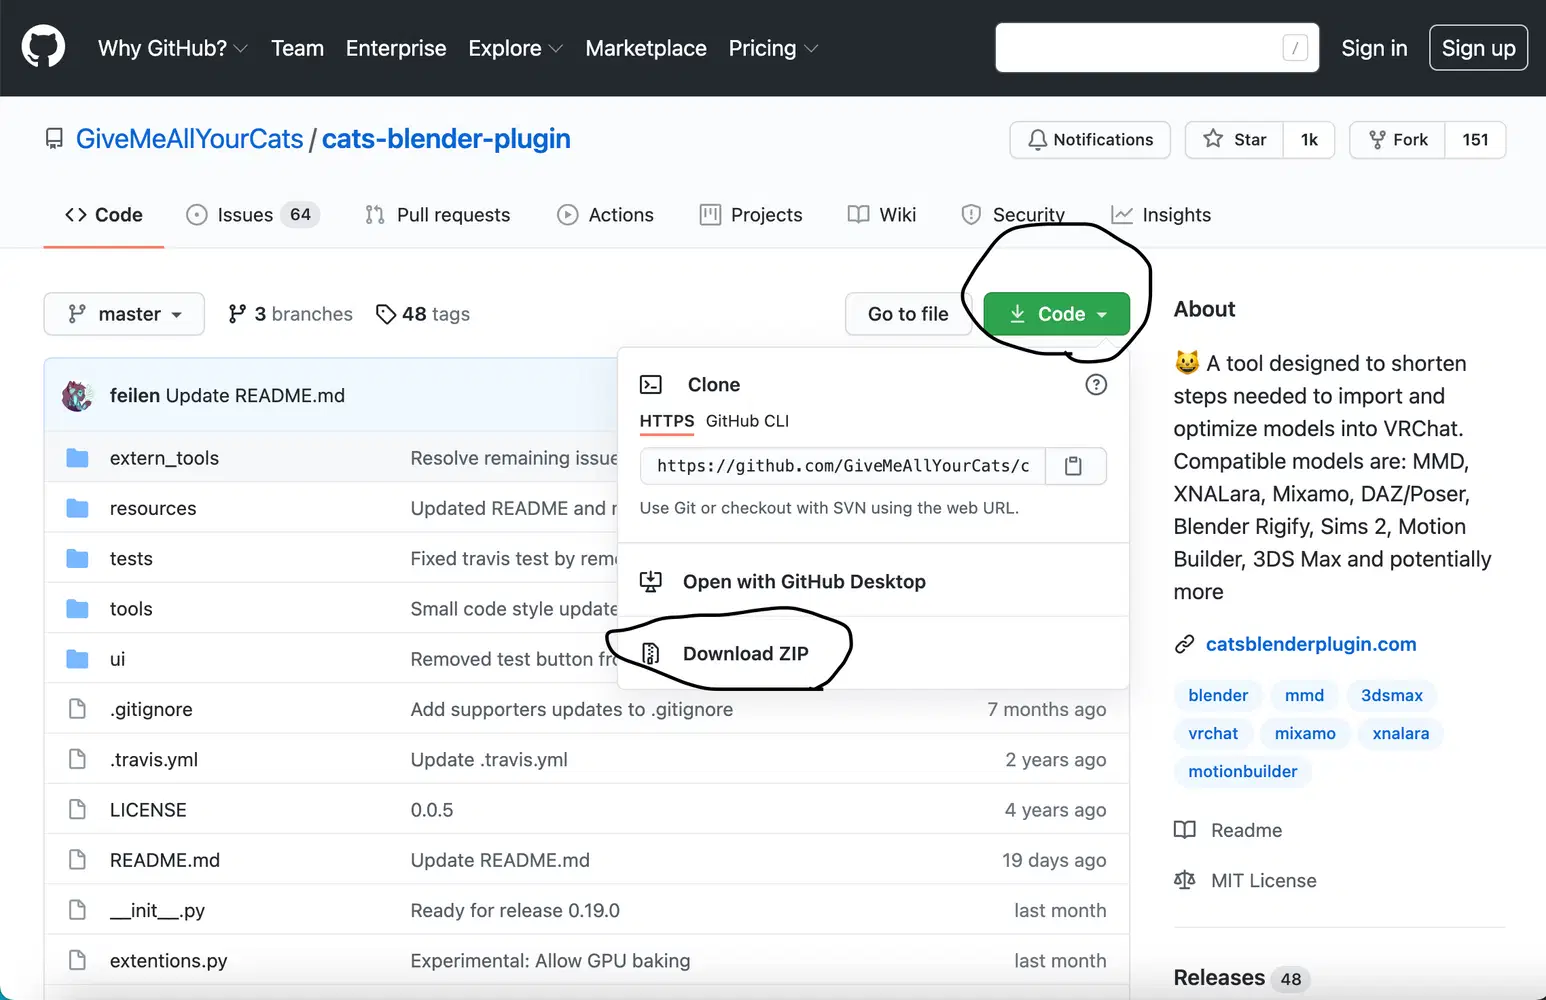
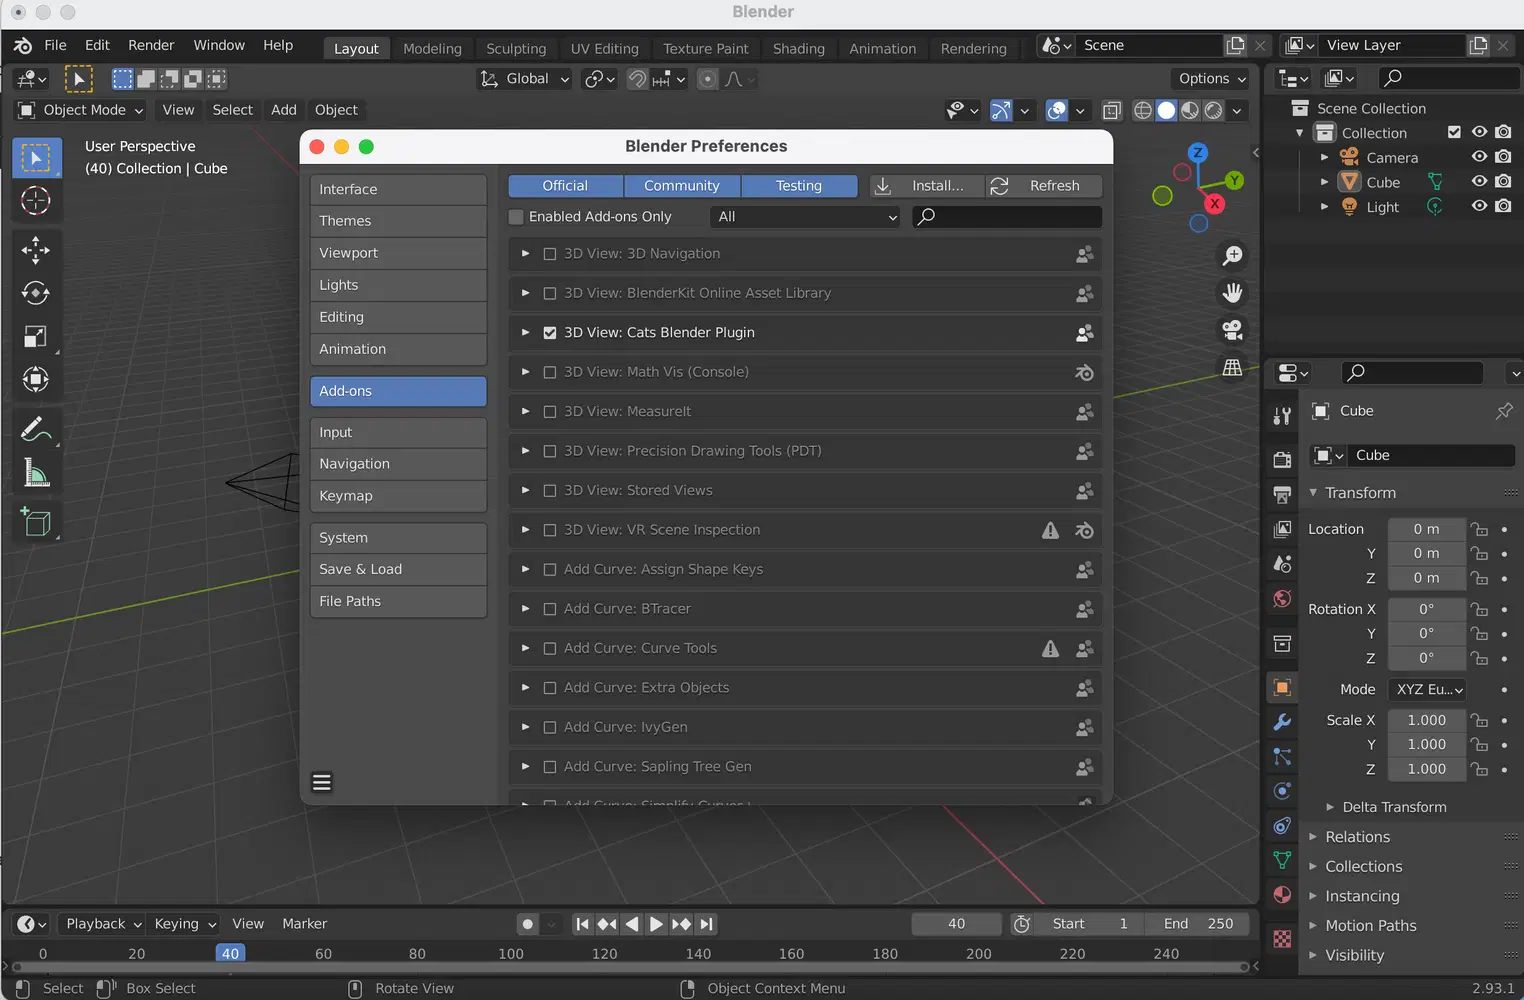
Click on "Code", then "download ZIP". Next open Blender, click on "Edit" (It's on the top left of your screen), then "Preferences" (on the very bottom of the edit menu), you should then see this:
Click on "Install", then find your zip file.
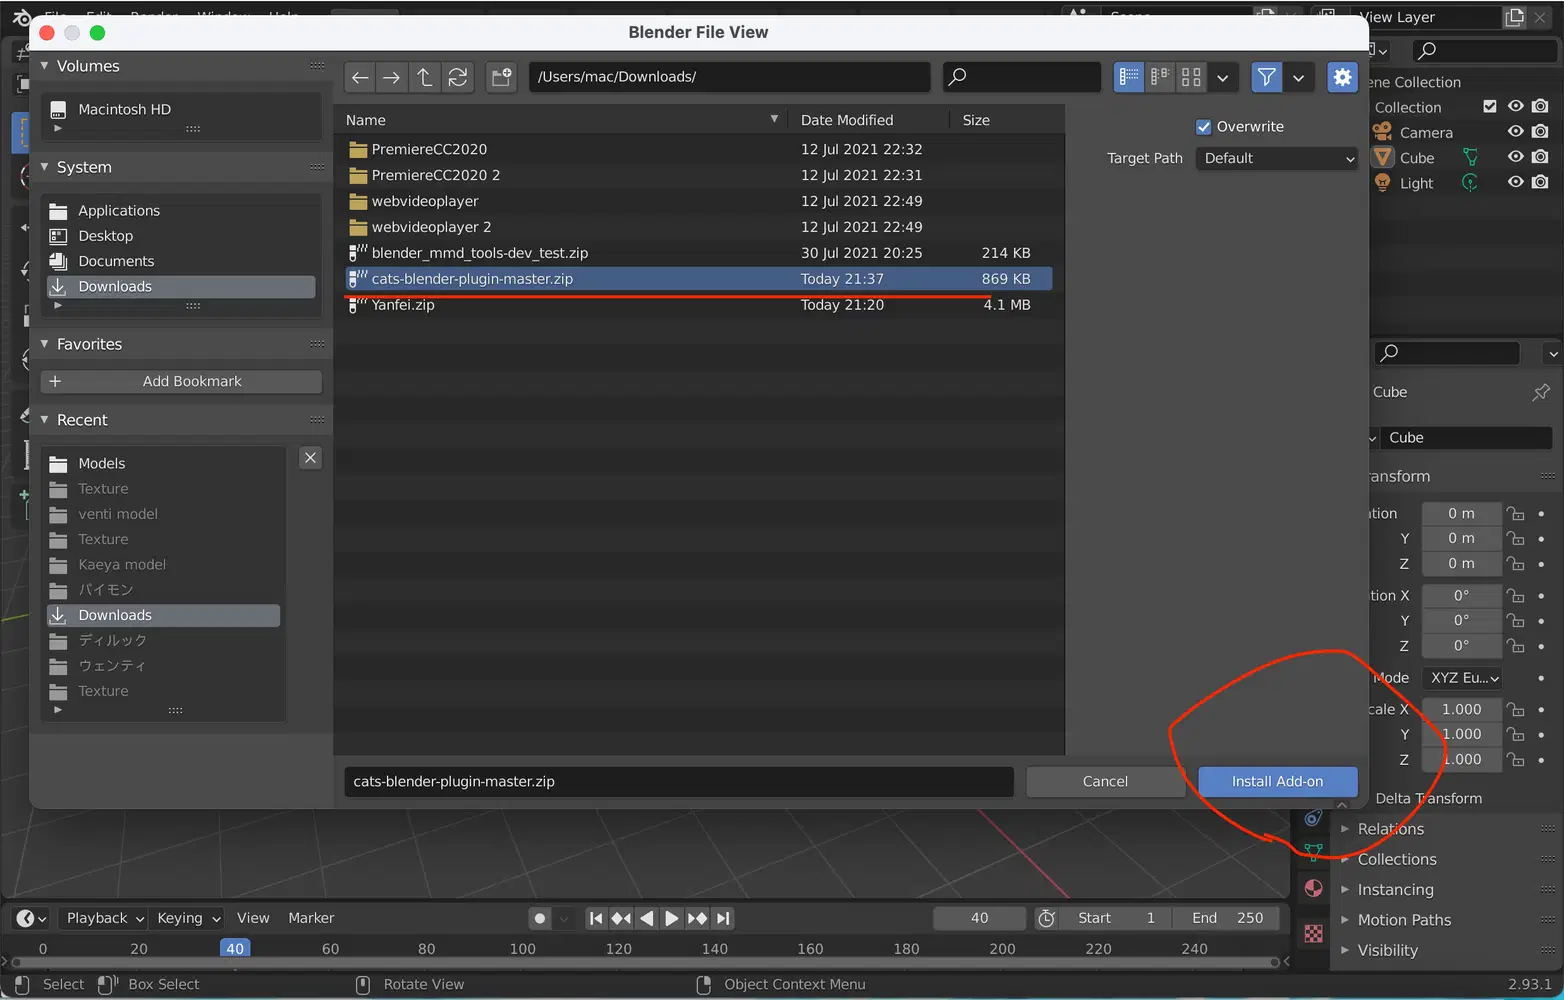
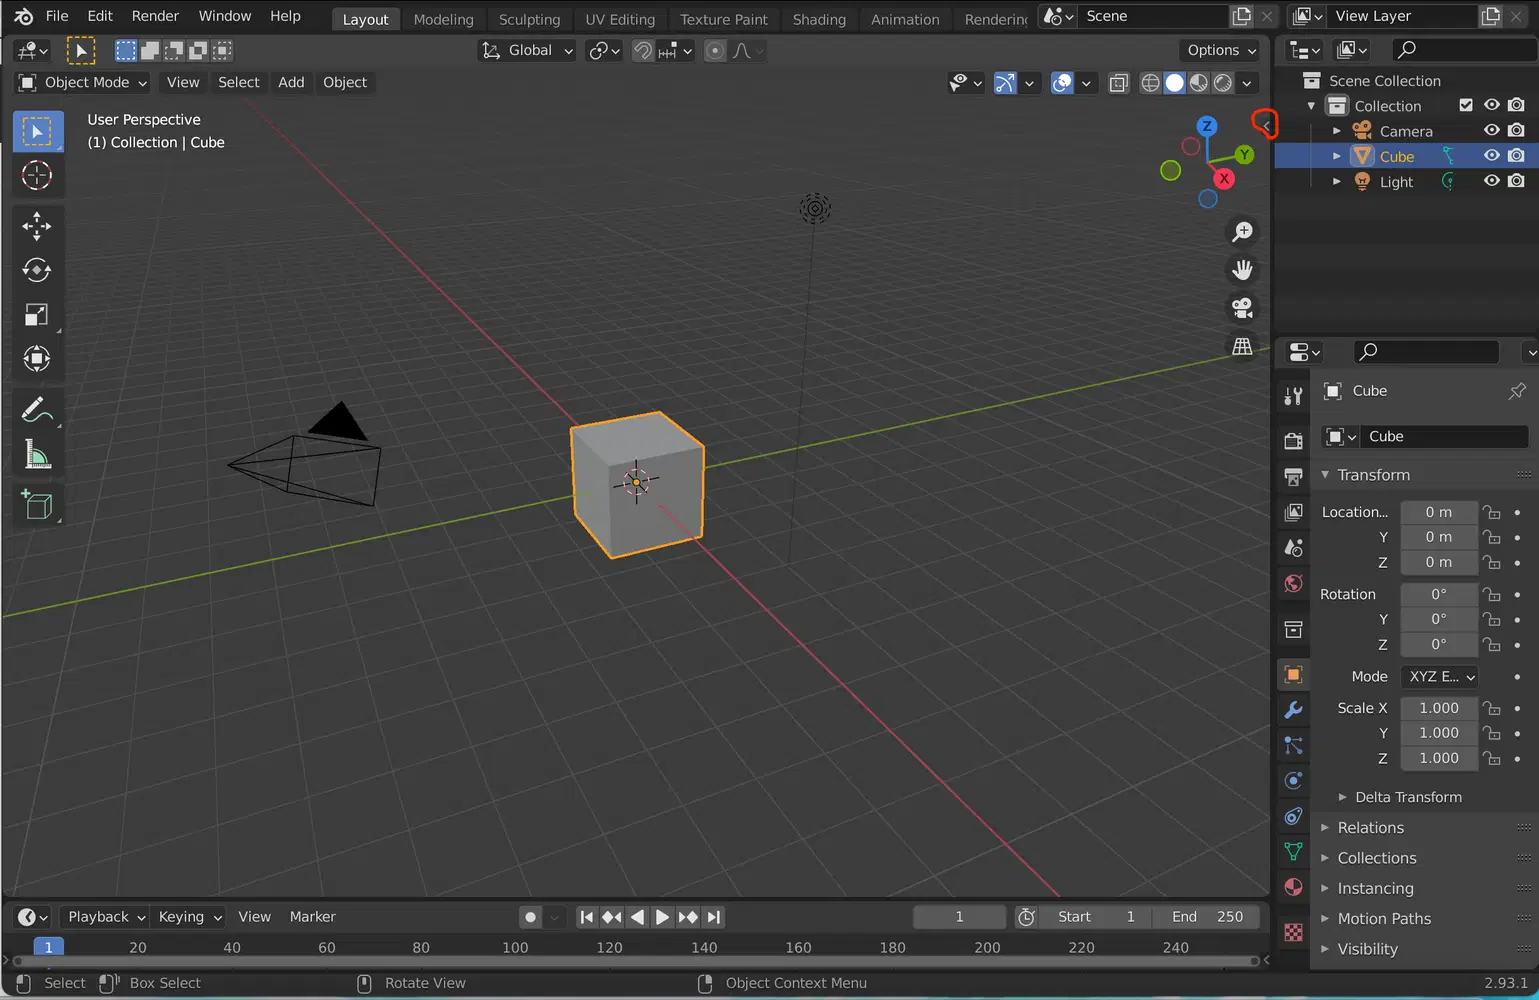
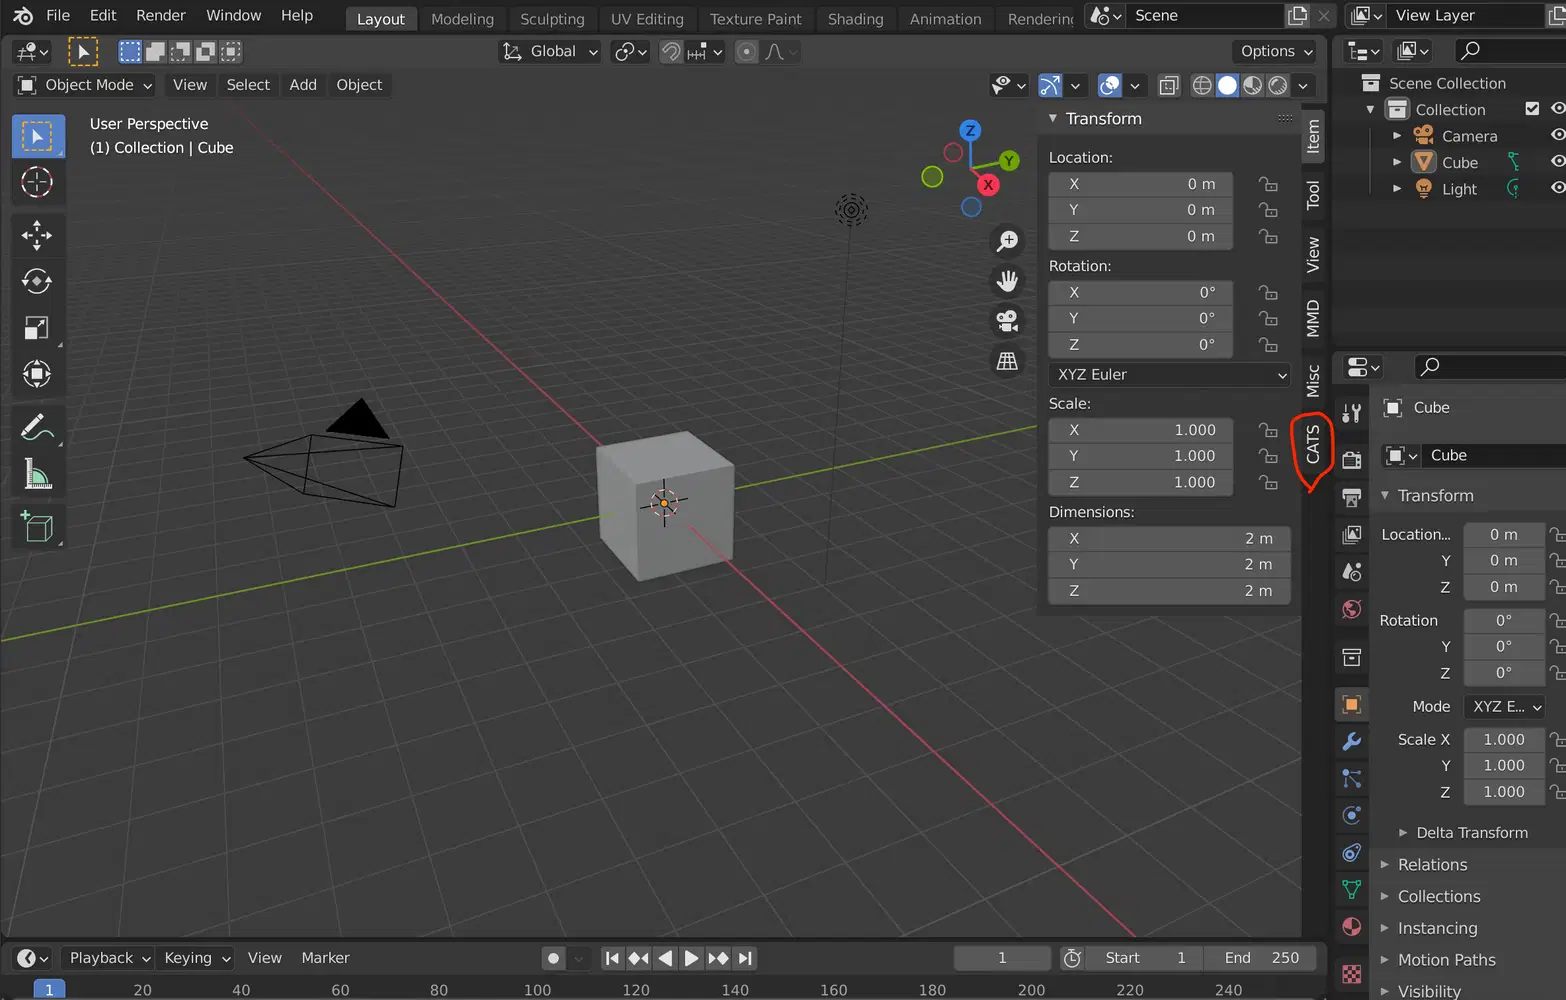
Select your file and click on "Install Add-on". It should be installed now! You should be able to see it by clicking this small arrow (circled in red):
Now you can see the CATS add-on shown.
3. Import the model
After doing all that we can finally import our model! Yay~
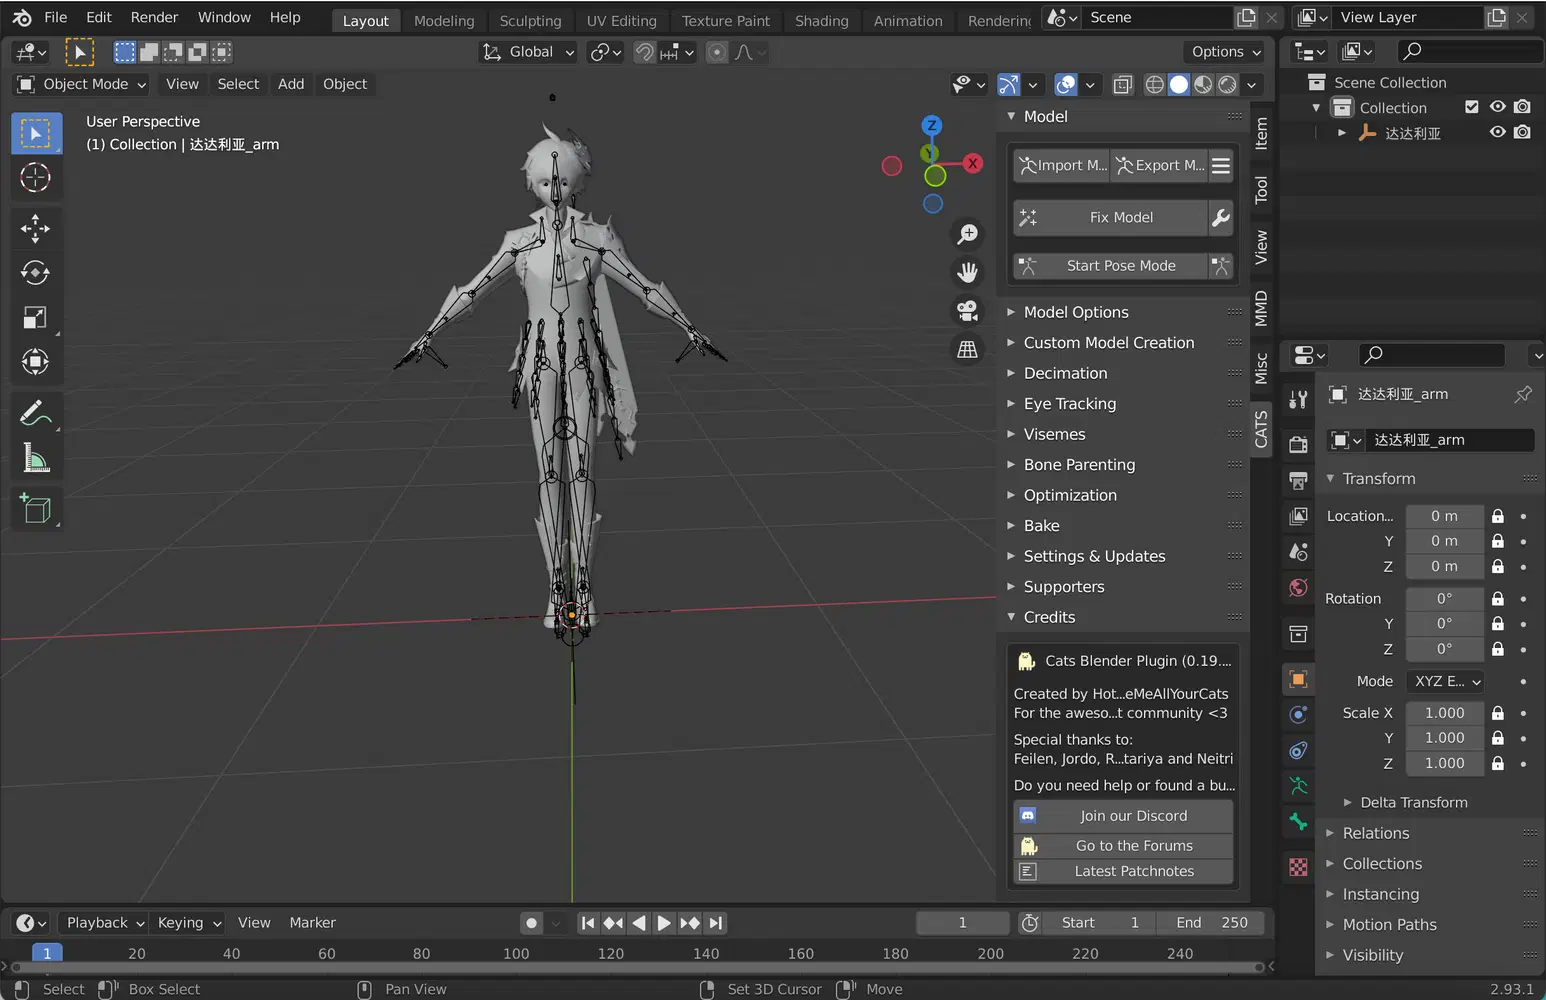
Click on the CATS add-on, then select "Import Model"
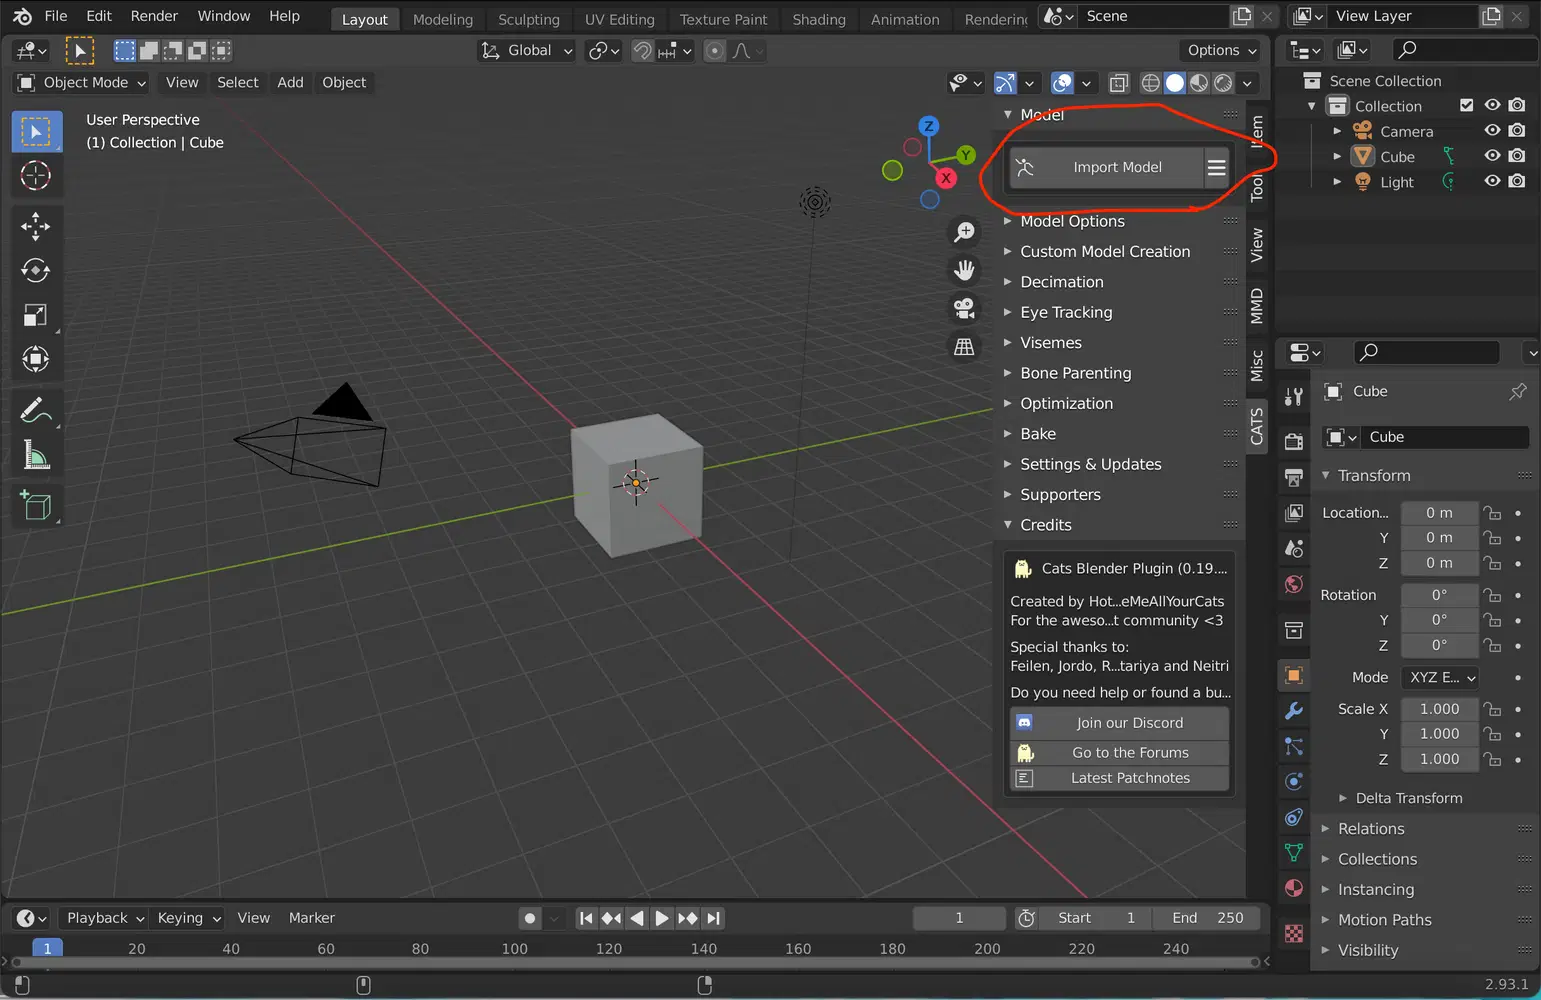
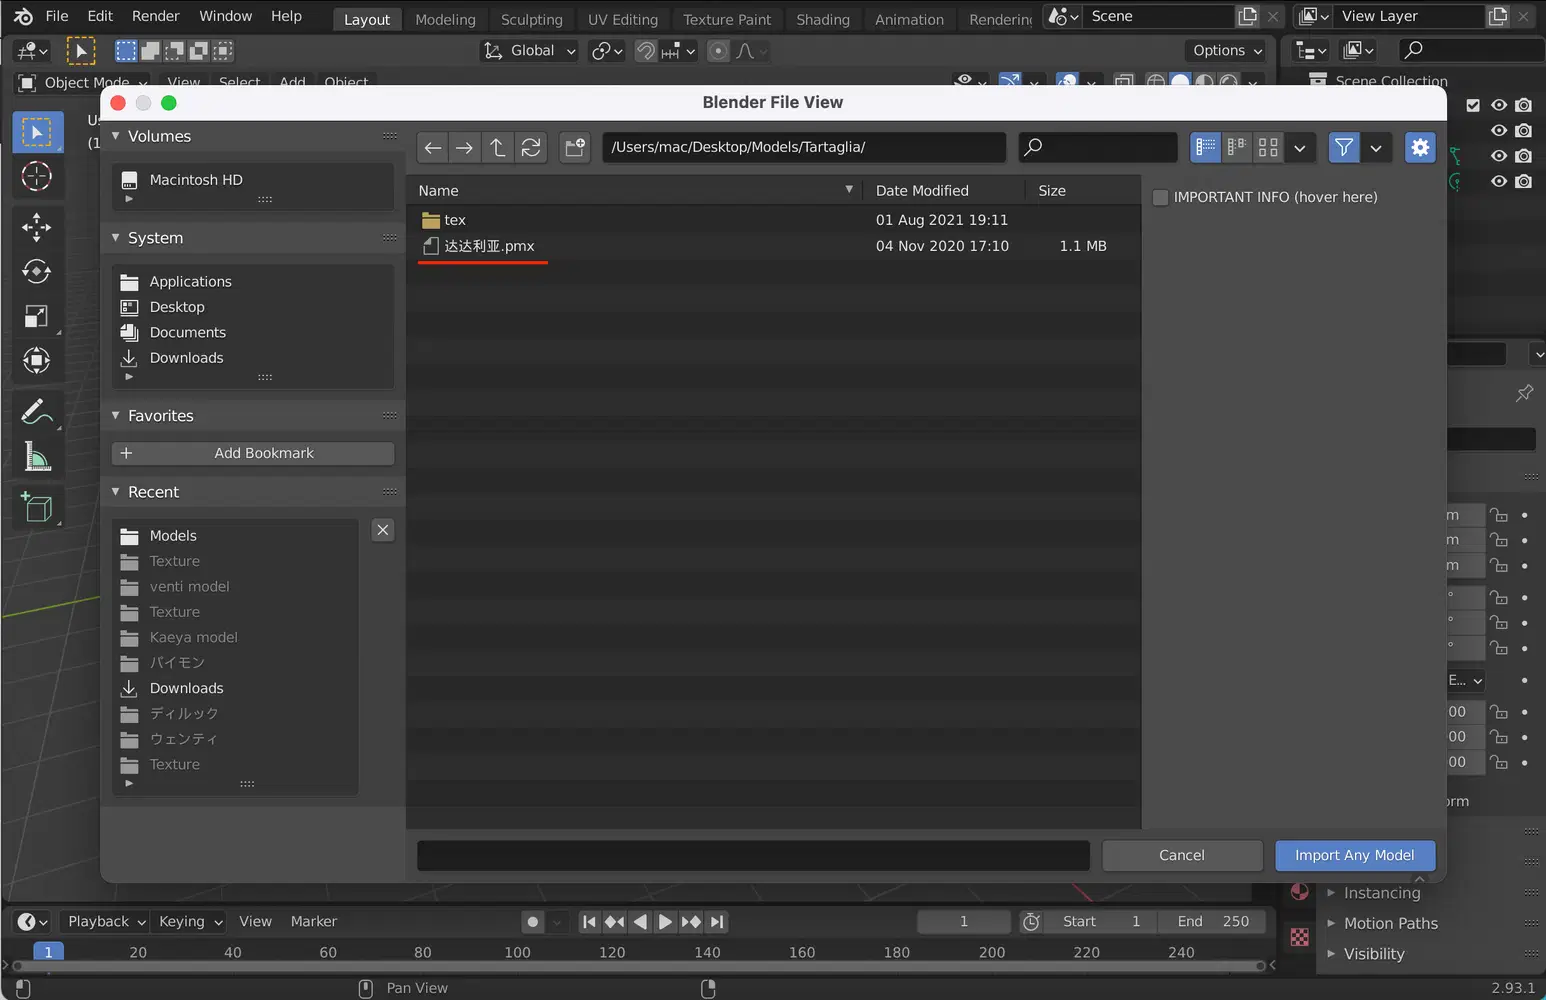
A menu like the one above will pop out, Find the file containing your model. After that, the character will appear! Finally, click on "Fix Model" and your model will be complete!
4. Coloring your model
(You can skip this part if your model automatically has color, if yours doesn't, this step will teach you how to color it~)
After fixing your model, you might notice that parts of your model is pink, or has no color, so, we are gonna fix that. (I'm gonna use Venti in this example because the Tartaglia one already has color.)
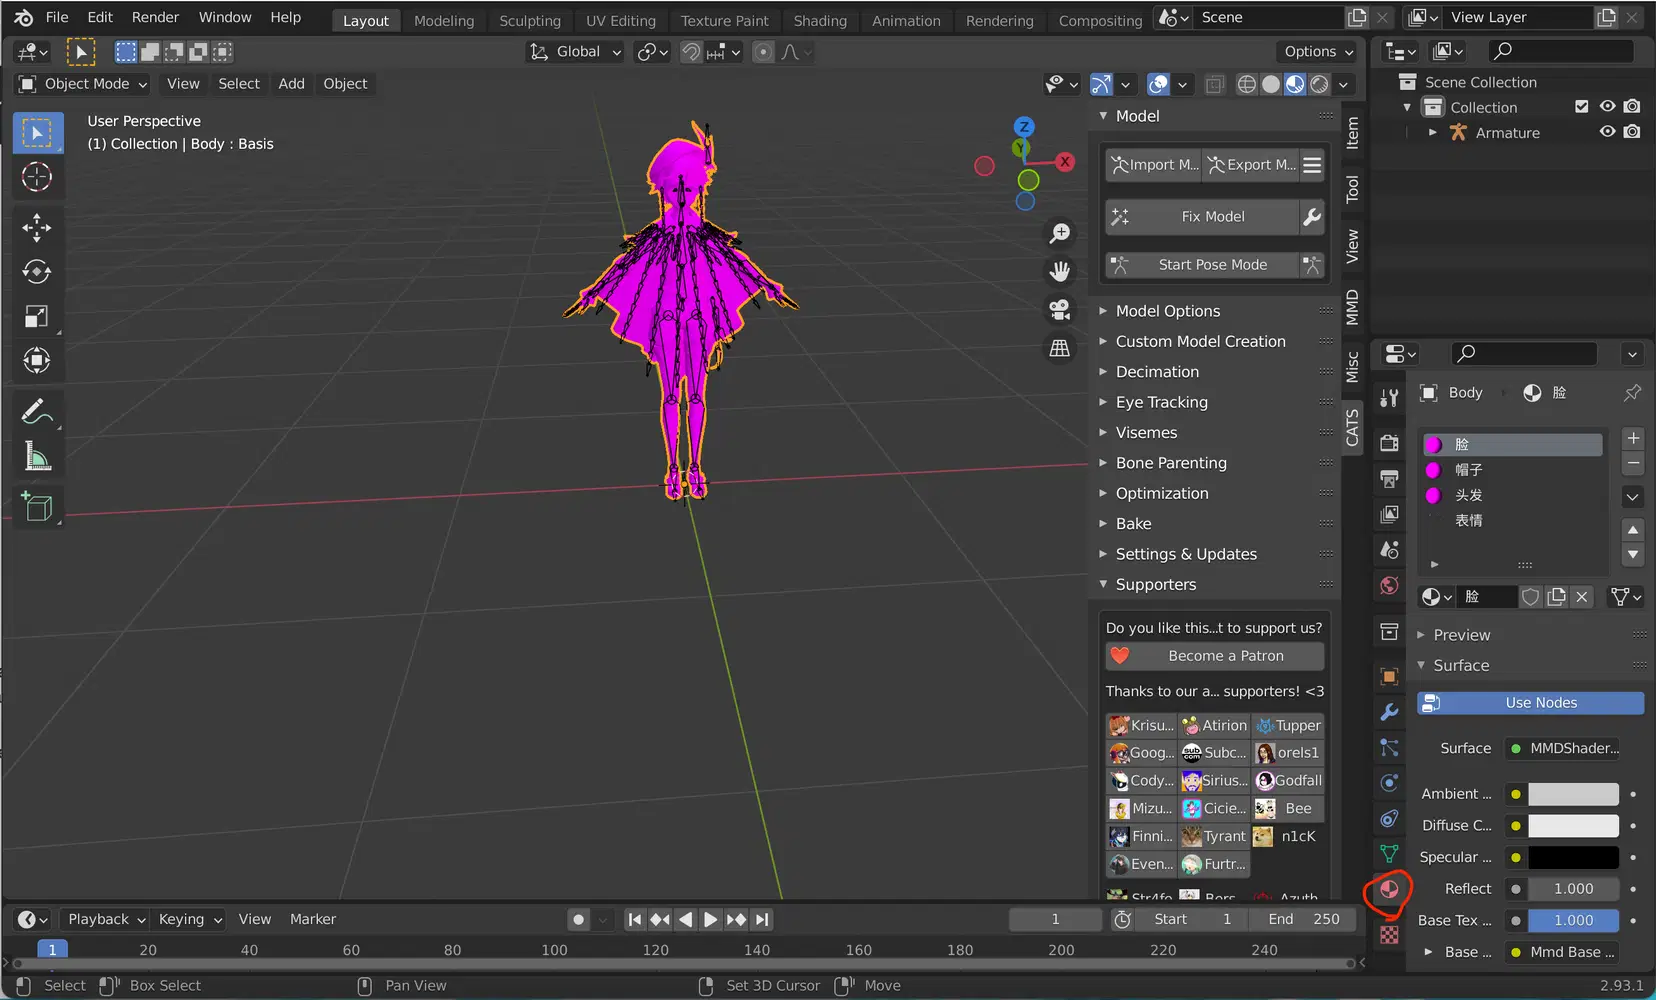
Select your character, when it's selected, it will have an orange outline. Then, click the small checkered sphere on the bottom right. A menu showing the body part textures will appear.
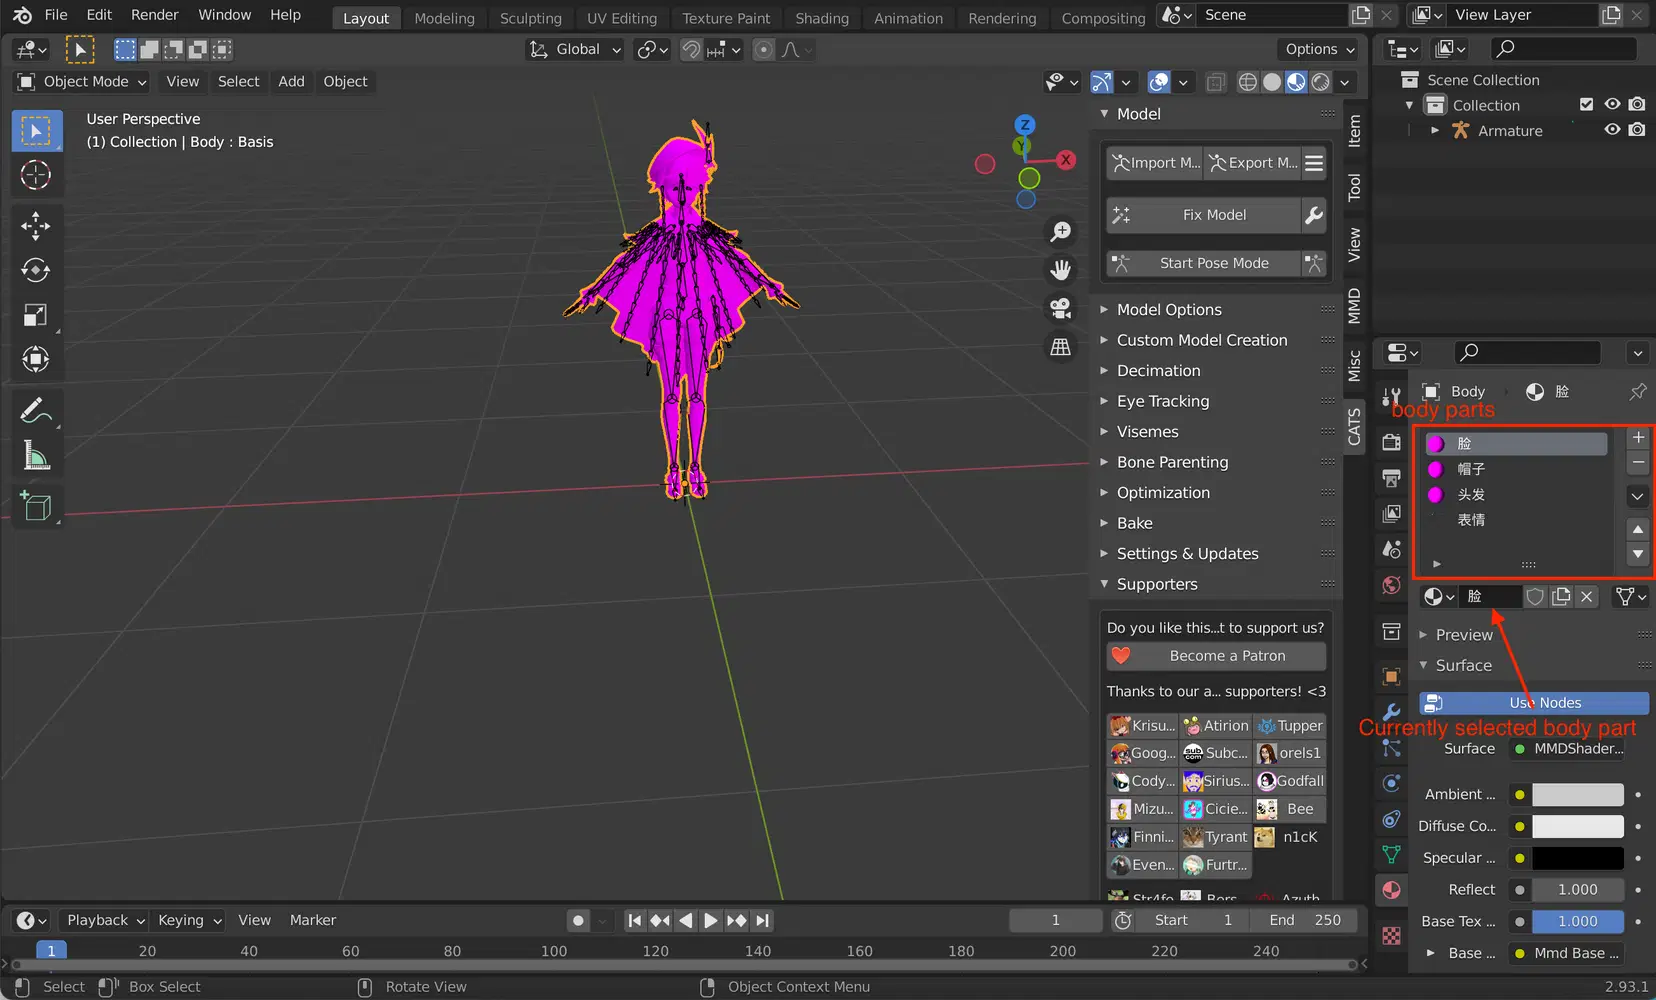
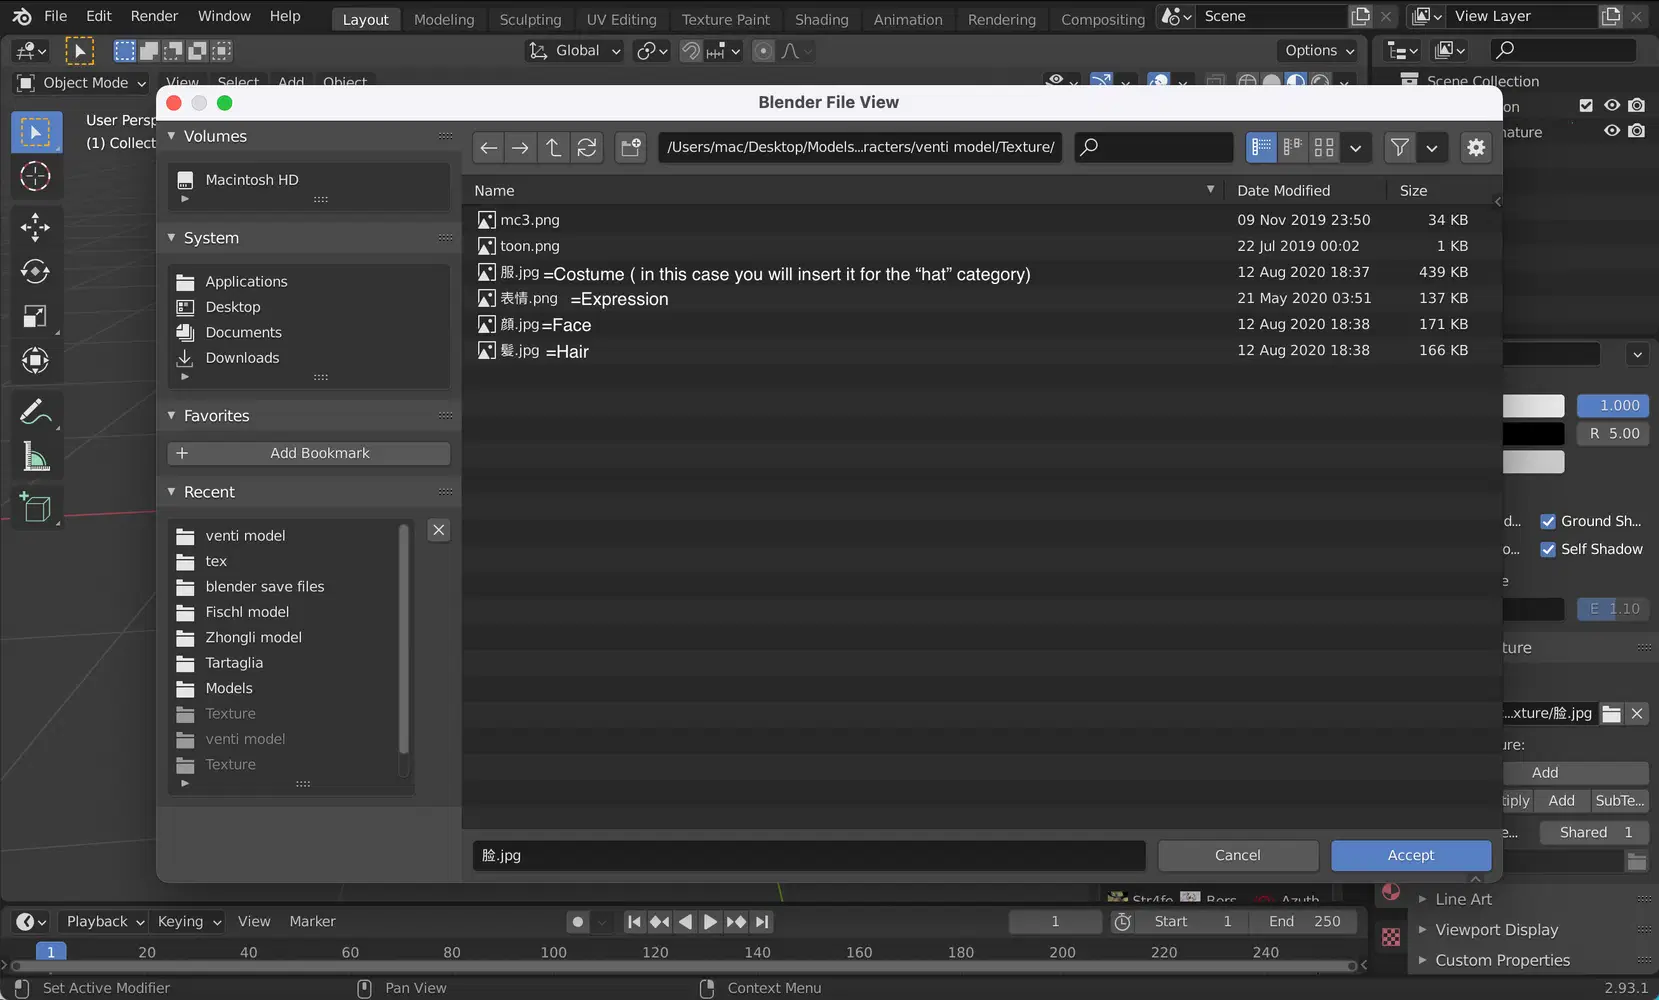
1. 脸=face 2. 帽子=hat(insert costume here) 3. 头发=hair 4. 表情=expression
(Venti's hat is an exception in the texture names because usually the costume will be named "衣服".)
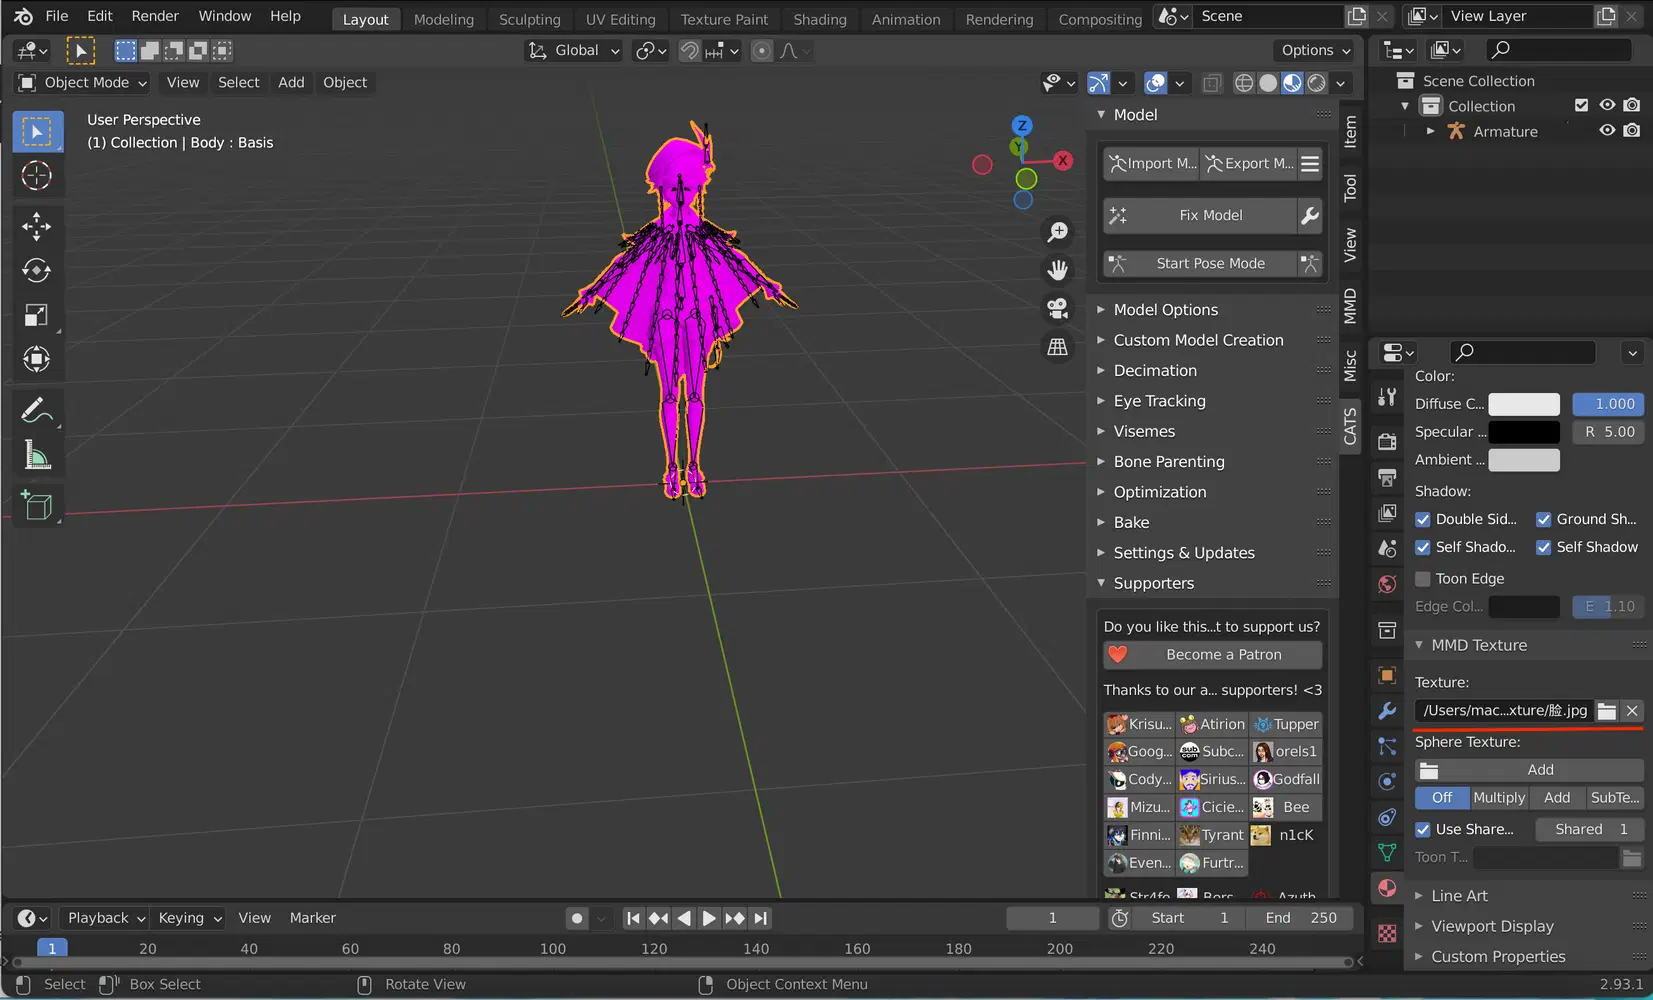
Now that we know which is which, we can add the textures. Select a body part to color and the scroll down. We have to look for the part where it shows "MMD Texture" (underlined in red)
Click on the small file icon beside it, and you'll get to choose the texture. The file with the texture comes should come with the download, it is named either "tex" or "Texture".
Open the file, and you will see the different textures shown (now it's in Japanese). The textures are generally named like this, although there can be exceptions, so you might have to experiment a little with other characters, the good part is that even if you insert the wrong texture, you can always change it~ Do the same for the other body parts, and then you'll have a fully colored character! We are finally done!!!
Hope you enjoyed this guide, have fun with your models~
[emoji]
Also, I have a guide on how to change the expressions of the characters you import, here'e the link if you are interested!
https://www.hoyolab.com/article/3613179