Introduction
Are you still wondering about how to use Mona Burst? Can Mona burst crit? What does Mona burst do? Who is the trigger for Mona Burst? What does Mona burst scale of? How to do Mona Burst combo?
In this article, I will explain about those questions, especially about how Mona’s elemental burst work.
If you prefer dark mode, you can also check this guide here
Content
This is the thing that I will cover;
(You can click the underlined text to get there immediately).
|| Mona Elemental Burst Explanation:
Stellaris Phantasm
Illusory Bubble
Omen
Freezing Omen Trick
|| Mona Burst Damage Scaling:
Attributes that counts
Who is the trigger
|| Types of burst combo:
Nuke – Vaporize comp
Permafreeze comp
Electrocharged comp
Video Guide
This 1 min video will sums up about Mona's burst mechanic.
Mona Elemental Burst Explanation
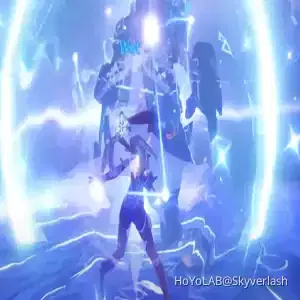
“Stellaris Phantasm” is the name for Mona’s Elemental Burst. When you use this burst, Mona will do 2 things:
Illusory Bubble,
Omen
In summary, Illusory Bubble is Mona burst damage, while Omen is the effect/debuff that will increase your damage
(as long as Omen is still active).
During this burst animation, Mona will apply wet to the enemies. Remember, during this burst animation, there will be no damage yet.
(Read about Illusory Bubble for damage explanation)
Illusory Bubble
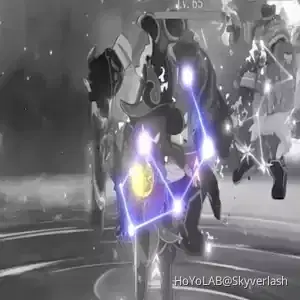
When you use Mona burst (that burst animation), you will not see the damage immediately. Instead, you will see this “constellation” effect that was placed in the enemy’s body. You might be familiar with the terms “Mona’s bubble“. That constellation effect is the “bubble”.
When the bubble is popped, then you will see the burst damage. You can pop the bubble by attacking the enemies. Just hit them once, and it’ll pop.
*The bubble will also pop if you let it be for 8 seconds.
When the bubble popped, this attack will apply wet to the enemies again.
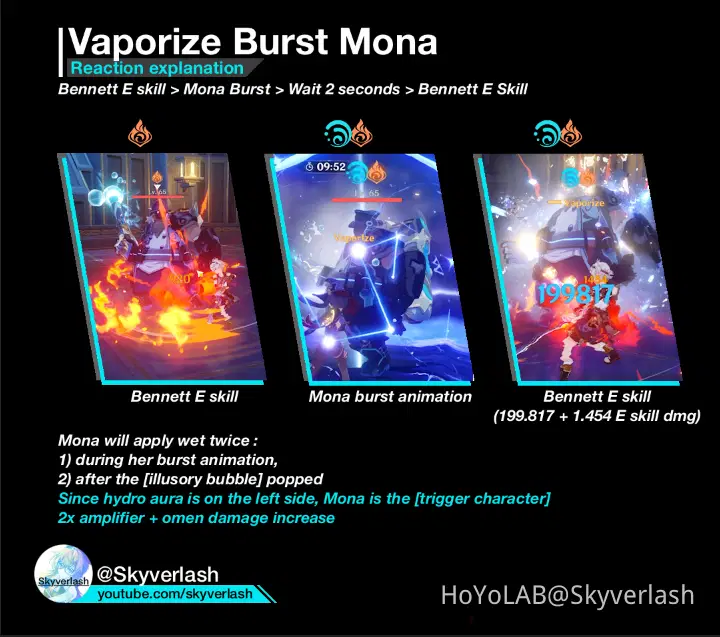
So in summary, Mona will apply wet twice. The first one is during her burst animation, and the second one after the bubble popped.
Omen
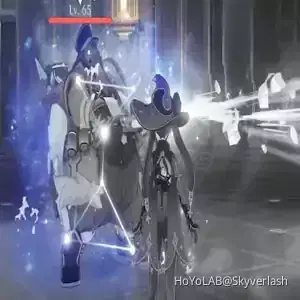
After Mona cast her burst, you will also see this “stary aura” behind the enemies. This is the indicator for omen.
Omen’s role is to raise your damage output, and this will be very useful for permafreeze comp and electrocharged comp too.
When Mona cast her burst, omen will immediately activate together with illusory bubble. The duration for omen is 5 seconds (this timer count when the bubble is popped). That means if you let the bubble popped itself after 8 seconds, omen will be activated for 13 seconds.
Freezing Omen Trick
Remember the part where Mona will apply wet during her animation burst and it won’t deal any damage at all? There is a neat trick where we can benefit from this wet application with a cryo element.
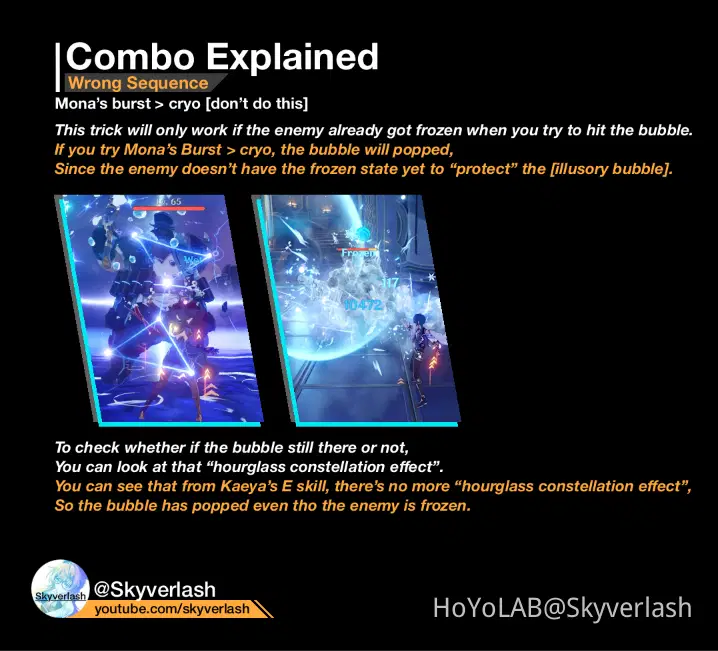
When you apply cryo and then use Mona’s burst, then the enemy will be frozen. If the enemies are frozen and have Mona’s Bubble, it actually “protect” the bubble from being popped.
So any attack that doesn’t remove the frozen state (sword user, polearm user, archer normal attack, cryo attack, hydro attack):
|| will deal damage to the enemies,
|| not popping the bubble,
|| while still benefiting the omen debuff.
If you want to benefit from this freezing omen trick, the keyword here is “the enemy must be frozen when they have Mona’s Illusory Bubble“. Because if they’re not frozen, any attack that hits the bubble will immediately pop the bubble.
|| In a simplified version, just follow this combo:
|| Cryo attack > Mona burst > any attack that doesn’t remove the frozen state
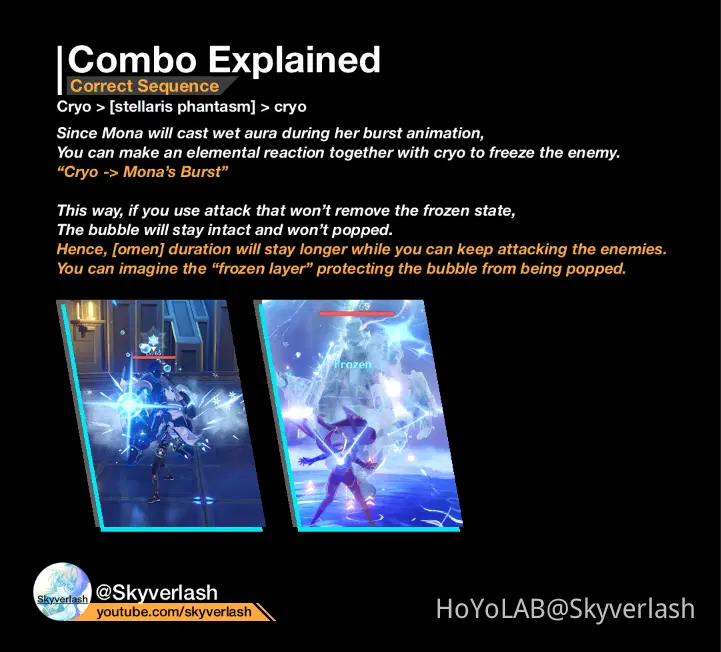
If you do Mona burst > then cryo attack, the enemies are not frozen. So, the bubble will immediately pop after you used the cryo attack. So never do this sequence (that mona burst > cryo one) if you want to benefit the extended omen duration using this freezing omen trick.
Attributes That Counts
Since the bubble damage is part of Mona’s burst skill, then the damage will rely on Mona’s attribute. Yes, Mona’s burst can crit too.
This is the attribute that affects Mona’s burst damage:
|| Attack
|| Critical Damage (Crit Rate will affect whether if Mona’s burst crit or not)
|| Hydro damage bonus
|| Energy Recharge (because from Mona’s passive it will converted to Hydro bonus too)
|| Elemental Mastery (if you trigger elemental reaction when popping the bubble)
|| Level
If you shred (reduce) the enemy’s resistance (like from Viridescent Venerer 4-set swirl or Zhongli shield for example), it will also increase Mona’s burst damage
Who Is The Trigger
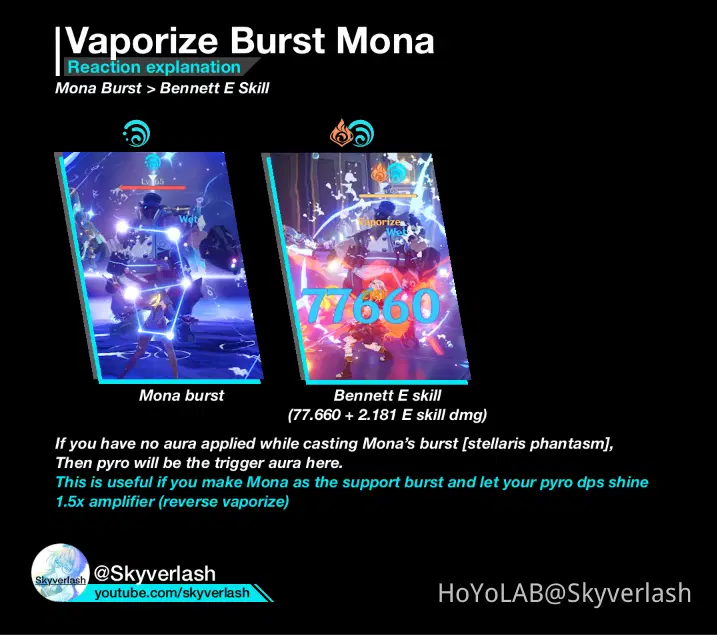
When talking about who is the trigger, this will affect the damage outcome. Because the character that triggered the elemental reaction will indicate who’s attribute the damage will rely on.
For example, Bennett E skill > Mona E skill.
In this combo, Mona is the trigger character, because she is the one that “triggered” the elemental reaction. And the vaporize reaction that happened here will entirely rely on Mona’s attribute.
This is where Mona’s first wet application (during the burst animation) is useful as an indicator about who is the trigger.
|| If there is any elemental reaction happening during the burst,
then Mona will be the trigger character (when you popped the bubble that will procs the elemental reaction)
|| But, if there is no elemental reaction happening during the burst animation,
then Mona WILL NOT be the trigger character when you popped the bubble that procs an elemental reaction.
Types of Burst Combo
Mona can be pair for either vaporize team comp, permafreeze team comp or even electrocharged team comp.
For vaporize team comp,
Mona will be the main dps in your team. So, you will need to invest a ton of Crit DMG, Crit Rate, ATK%, Hydro DMG bonus and Elemental Mastery too.
In this team, you can use:
|| Mona (main DPS)
|| Bennett (for pyro aura & ATK buff)
|| Sucrose (for Resistance Shred & Elemental Mastery buff)
Combo:
Hydro aura > Sucrose E skill (hydro swirl) > Bennett Burst > Mona Burst > wait 2 seconds > Bennett E skill
As for permafreeze team comp,
Mona can act as the support, since in frozen reaction, you won’t get additional damage from triggering this frozen reaction. Both electrocharged and permafreeze comp, your team will rely more on omen debuff compared to Mona’s bubble damage itself. It would be better for Mona to invest a ton of ER for both permafreeze and electrocharged comp here so that your Mona can spam her burst most of the times.
In this team, you can use:
|| Ganyu / Ayaka / Kaeya / Rosaria [or any other cryo chars except Chongyun] (main DPS)
|| Diona (for battery burst)
|| Venti / Sucrose / Kazuha (Venti is highly recommended here)
|| Mona
Combo:
Any Cryo character burst / E skill > Venti burst > Mona burst (can pair with her E skill too here) > main DPS normal / charged attack
For permafreeze, the combo is actually very flexible. You can infuse Venti / Sucrose / Kazuha burst with hydro instead of cryo too. Just make sure the enemy already has cryo aura before Mona cast her burst, so you can benefit from the freezing omen trick.
As for electrocharged team comp,
Mona can act as both the main dps here, or the support too. All you need to do is keep spamming the hydro attack and electro attack from your team to the enemies while benefiting the omen extra damage debuff.
In this team, you can use:
|| Mona (main DPS or support)
|| Fischl / Beidou / Lisa / Raiden / any electro characters (if Mona is the support, then 1 of the electro chars here can be the main DPS)
|| Another electro characters
|| Sucrose / Venti / Kazuha
Combo:
Any Anemo character burst > Mona burst (can use Mona E skill afterwards too) > any electro character burst/skill
For electrocharged, the combo is very flexible too. The main point here is to cast Mona’s burst, then go unga bunga with electro attack and keep triggering the electrocharged attack.
Closing
After reading this post, I truly hope you now understand about how Mona Elemental Burst Works.
If you have questions related to Mona, including her combo, how to build her, what artifact you should use, what team you should use, and many more, feel free to ask from the comment here!
I’ll try my best to answer that question too.

My Guides Archive [Click Me]
≿—═ | ༻✧༺ | ═—≾
In-Depth - Thorough - Clean
≿—═ | ༺❀༻ | ═—≾

And that's it! I truly hope you find this guide useful
My job's done here~
I'm Skyverlash, and I really appreciate all the likes and comment!
You can follow me on my youtube channel, discord serverand hoyolabtoo