




Greetings Chests Hunters!
Last but not least is the luxurious chest portion of my Sumeru Desert chest guides. There are a total of 12 Luxurious Chests found in the desert.
For those who are looking for guides on the other types of Sumeru Desert chests, check out the link below:
Max Counts / All Chests for Sumeru Desert
This makes a total of 173 Luxurious Chests in the game. If you have higher than this number, you can check out the link below explaining bugs in the battle chronicle chest count.
Chest Bugs for Battle Chronicle
Guide Notes / Suggestions
1. Much of the Sumeru Desert exploration is locked behind quests, so I would highly suggest completing the Golden Slumber, Old Notes and New Friends, and Afratu's Dilema World Quests before conducting your chest sweeps
2. Missable Chest(s): Encore (Chest 1), Invisible Path (Chest 12)
3. Use Ctrl-F if you are looking for specific types of chests. I will be using the following key terms to make this easier:
Seelie
Quest
Primal Ember
Totem
Shrine of the Depths
Map
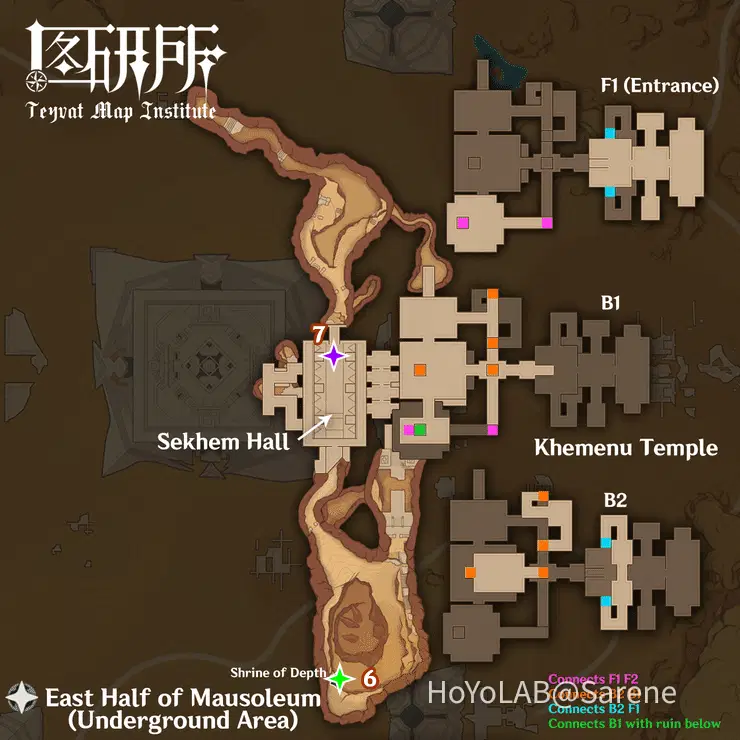
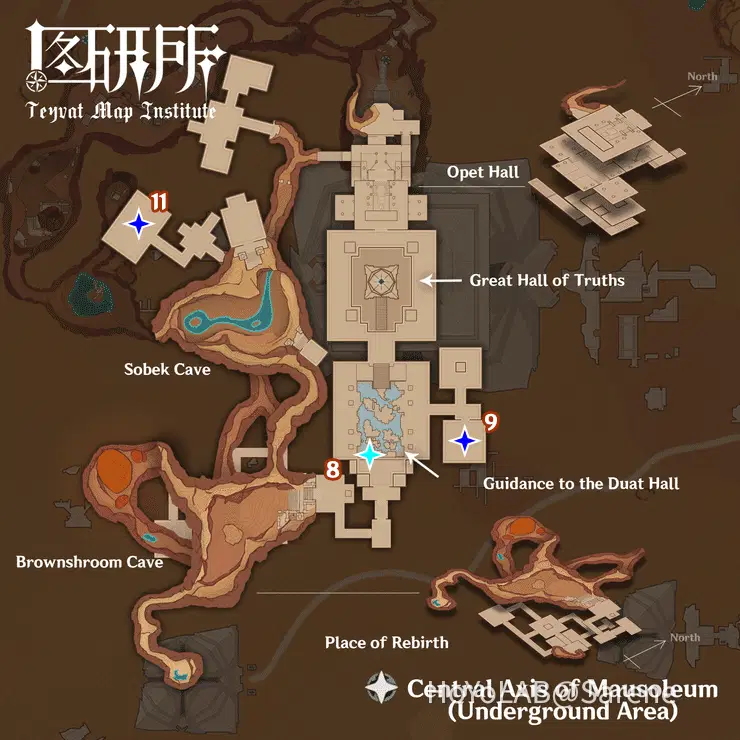
See the underground Map created by Teyvat Map Institute (提瓦特图研所 on Bilibili) corresponding with the underground chests if you get lost. They were kind enough to allow me to use their map for my guides. You can check out their other amazing maps here.
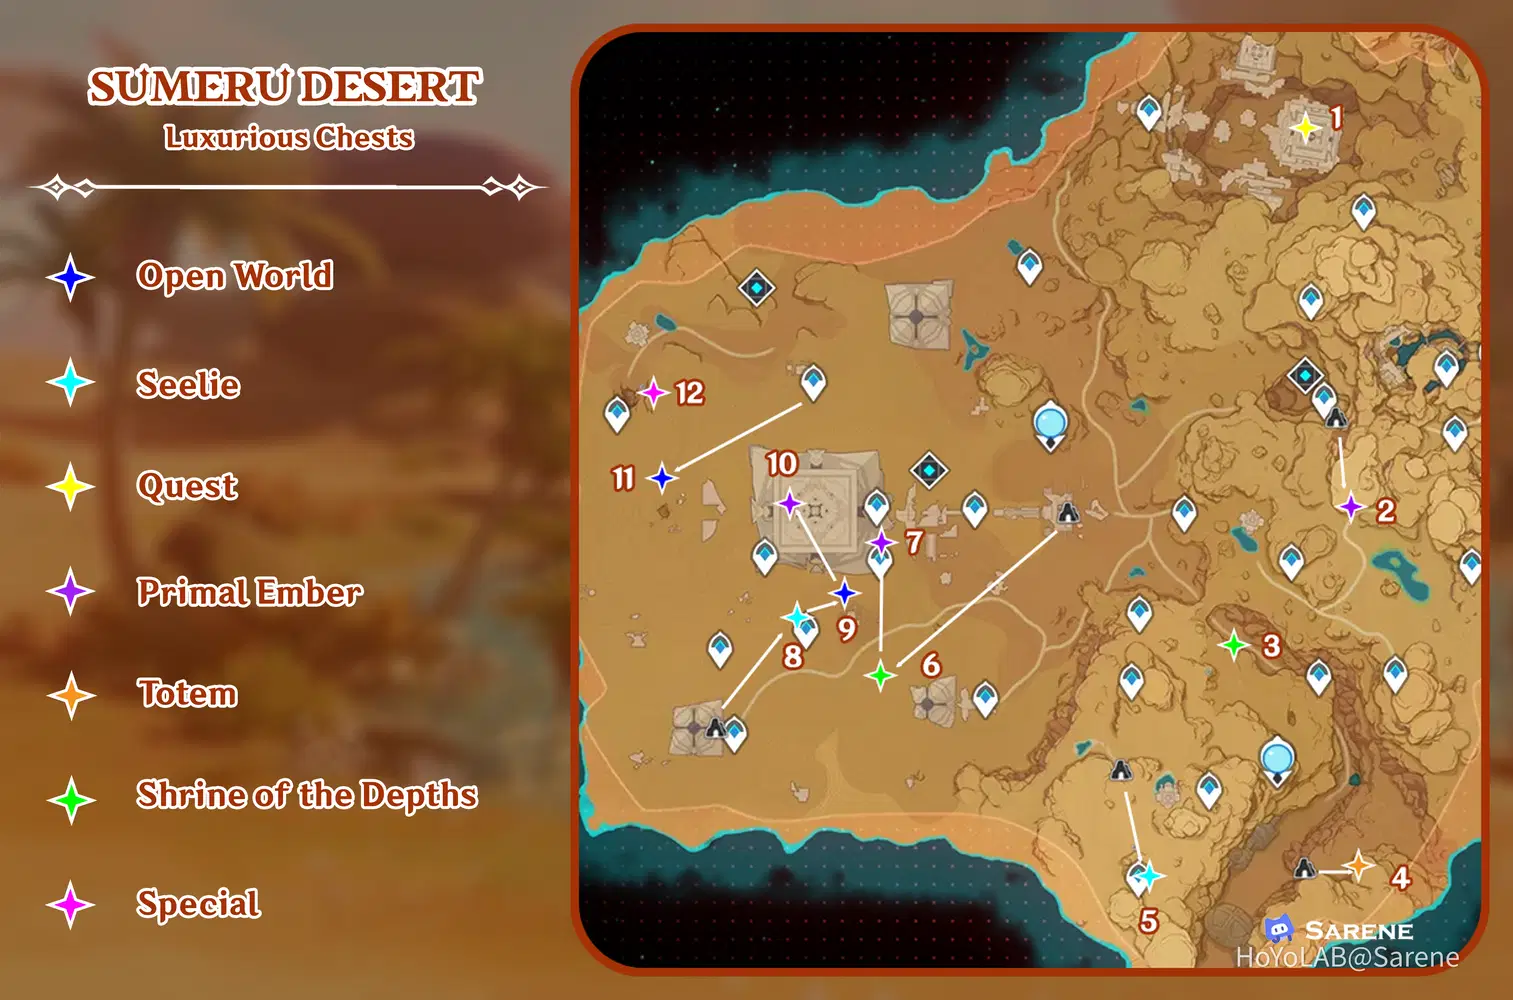
1 - 2
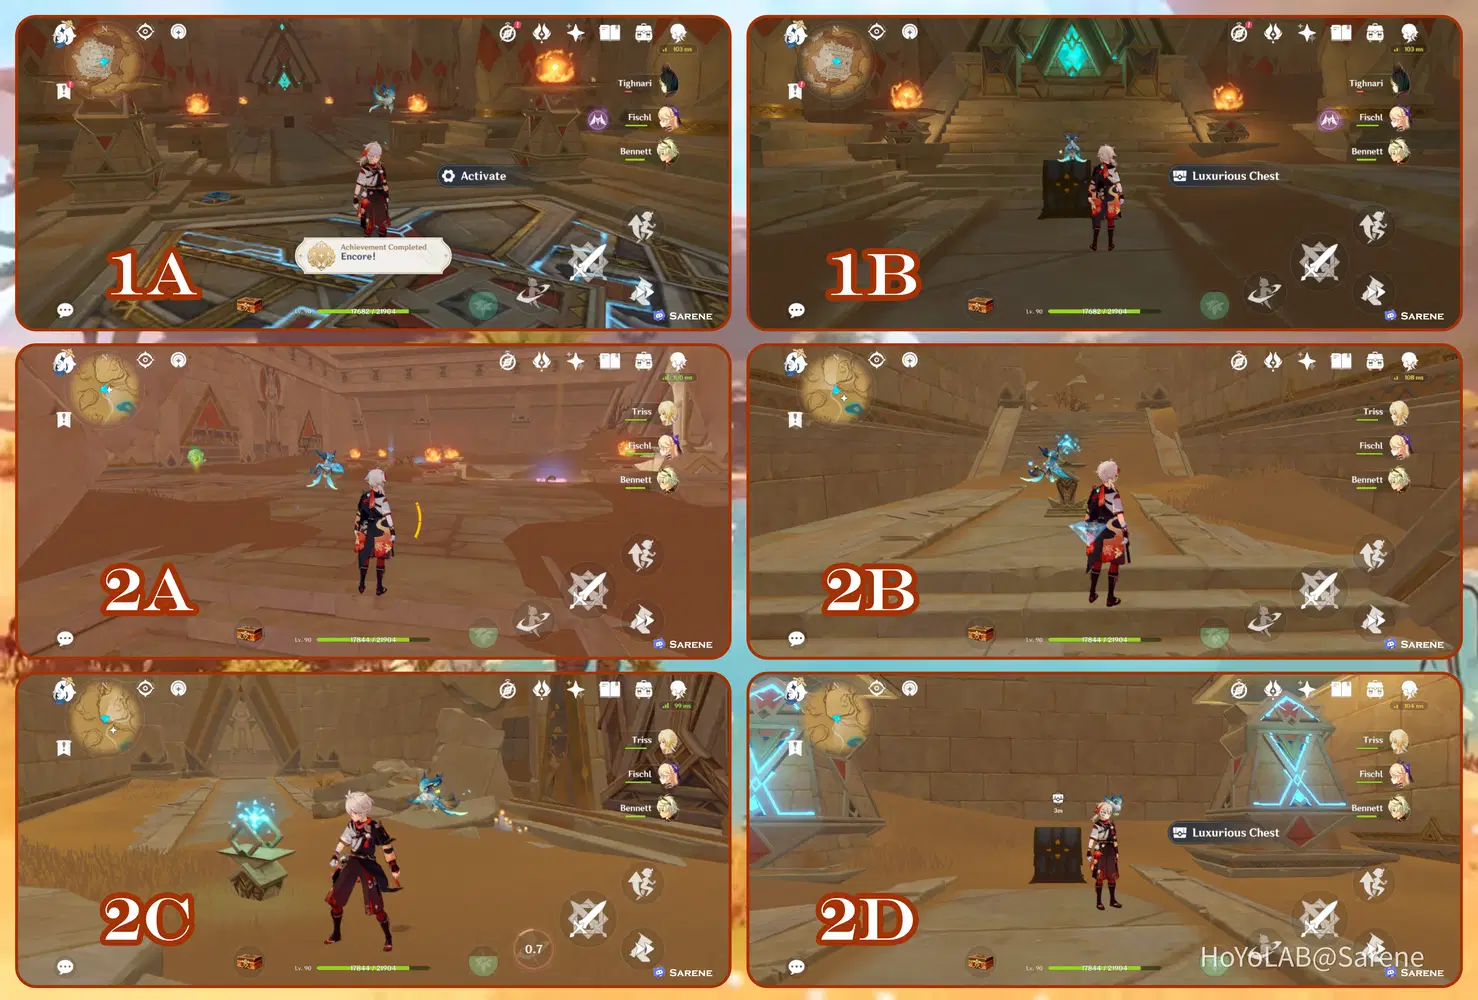
1. This chest is only available after completing the Golden Slumber World Quest. Return to the throne and you will receive the achievement Encore along with the Luxurious chest.
2. The first Primal Ember is located at the bottom of the elevator under the Dendroculous seen in 2A. Follow the Primal Ember to its torch. Then open the door to find the next Primal Ember (2C) and lead it to its torch to obtain the chest.

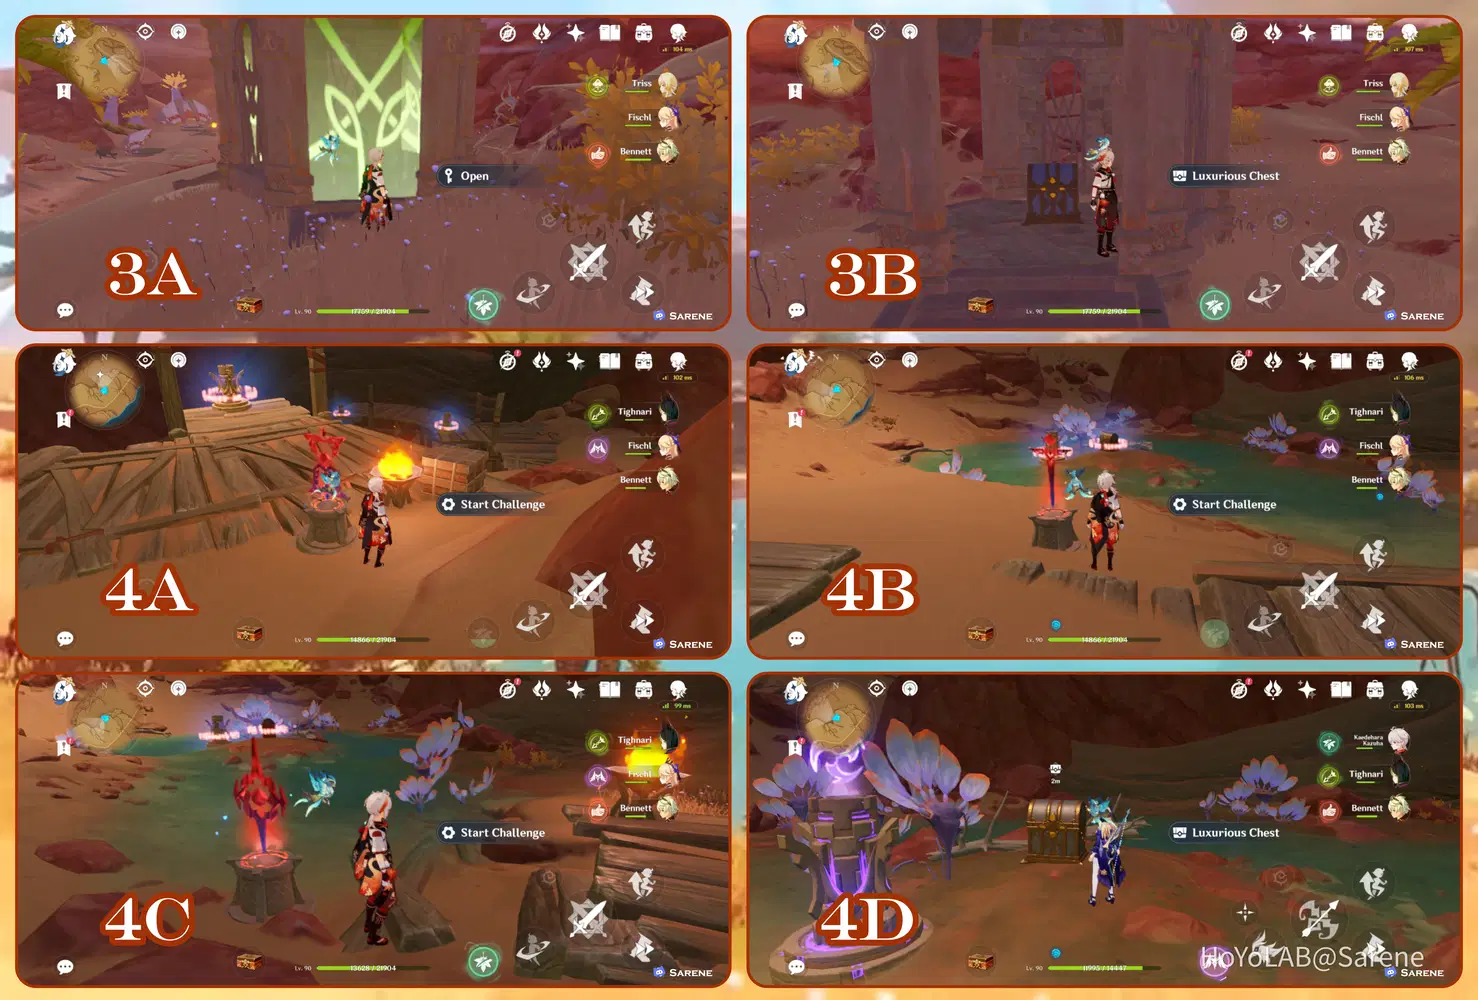
3 - 4
3. Unlock the Shrine of Depths
4. Complete the 3 Time Trial Challenges. Then light the Totems to obtain the chest.
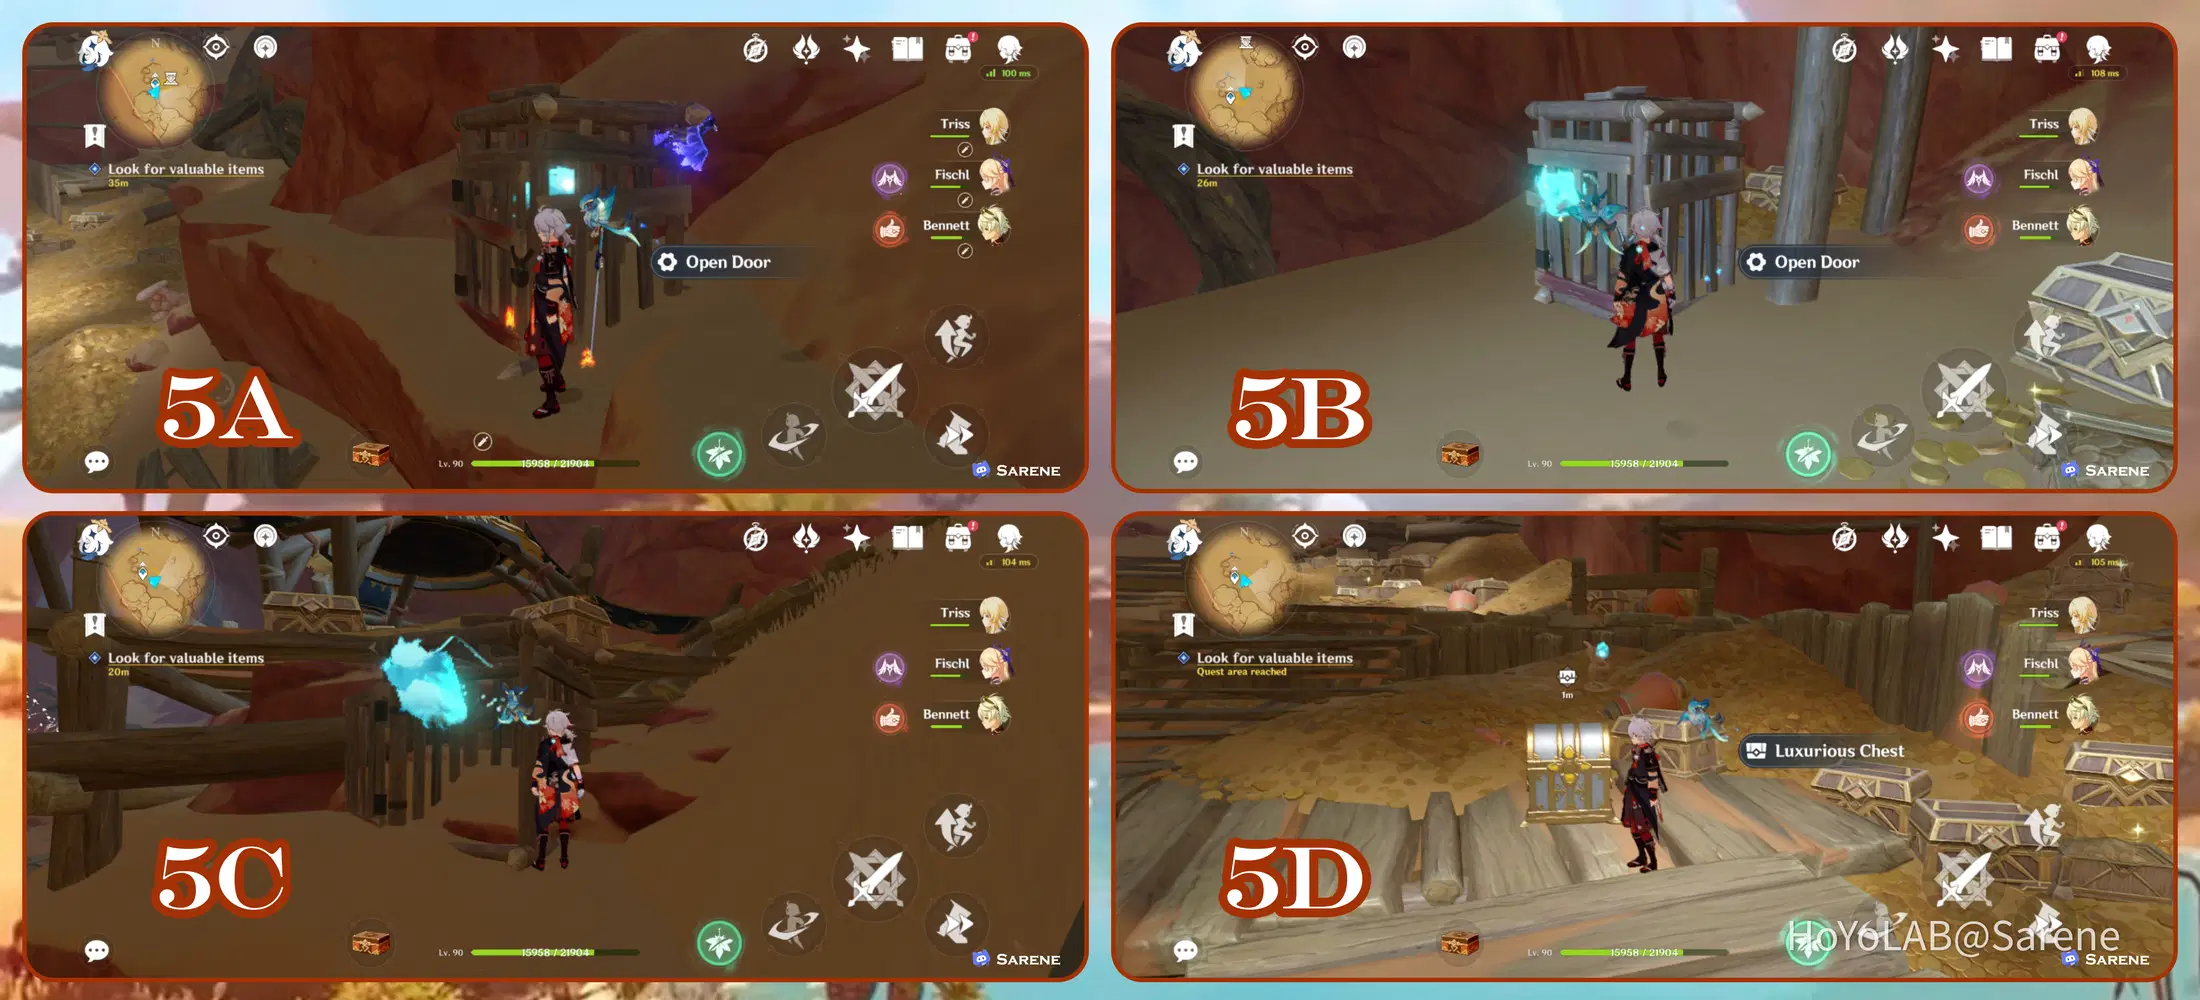
5
5. Free the Seelies from their cages and follow them to their courts
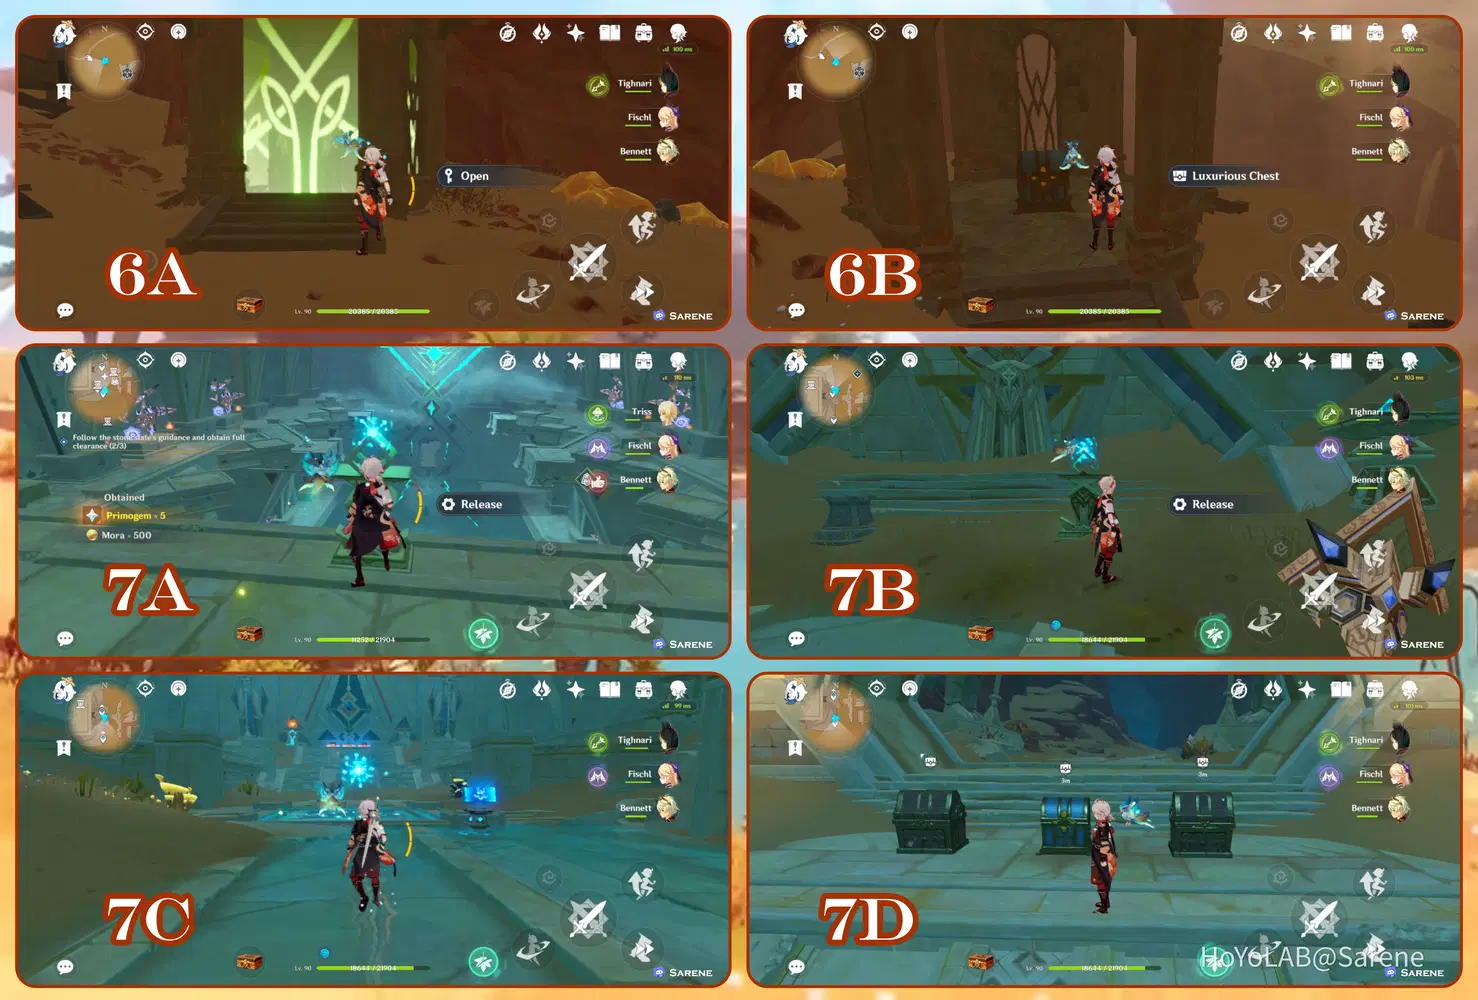
6 - 7
6. Unlock the Shrine of Depths
7. Follow the Primal Embers to their torches. The first one is at the entrance of Sekham Hall. The second is next to the Time Trial Challenge.
8 - 9
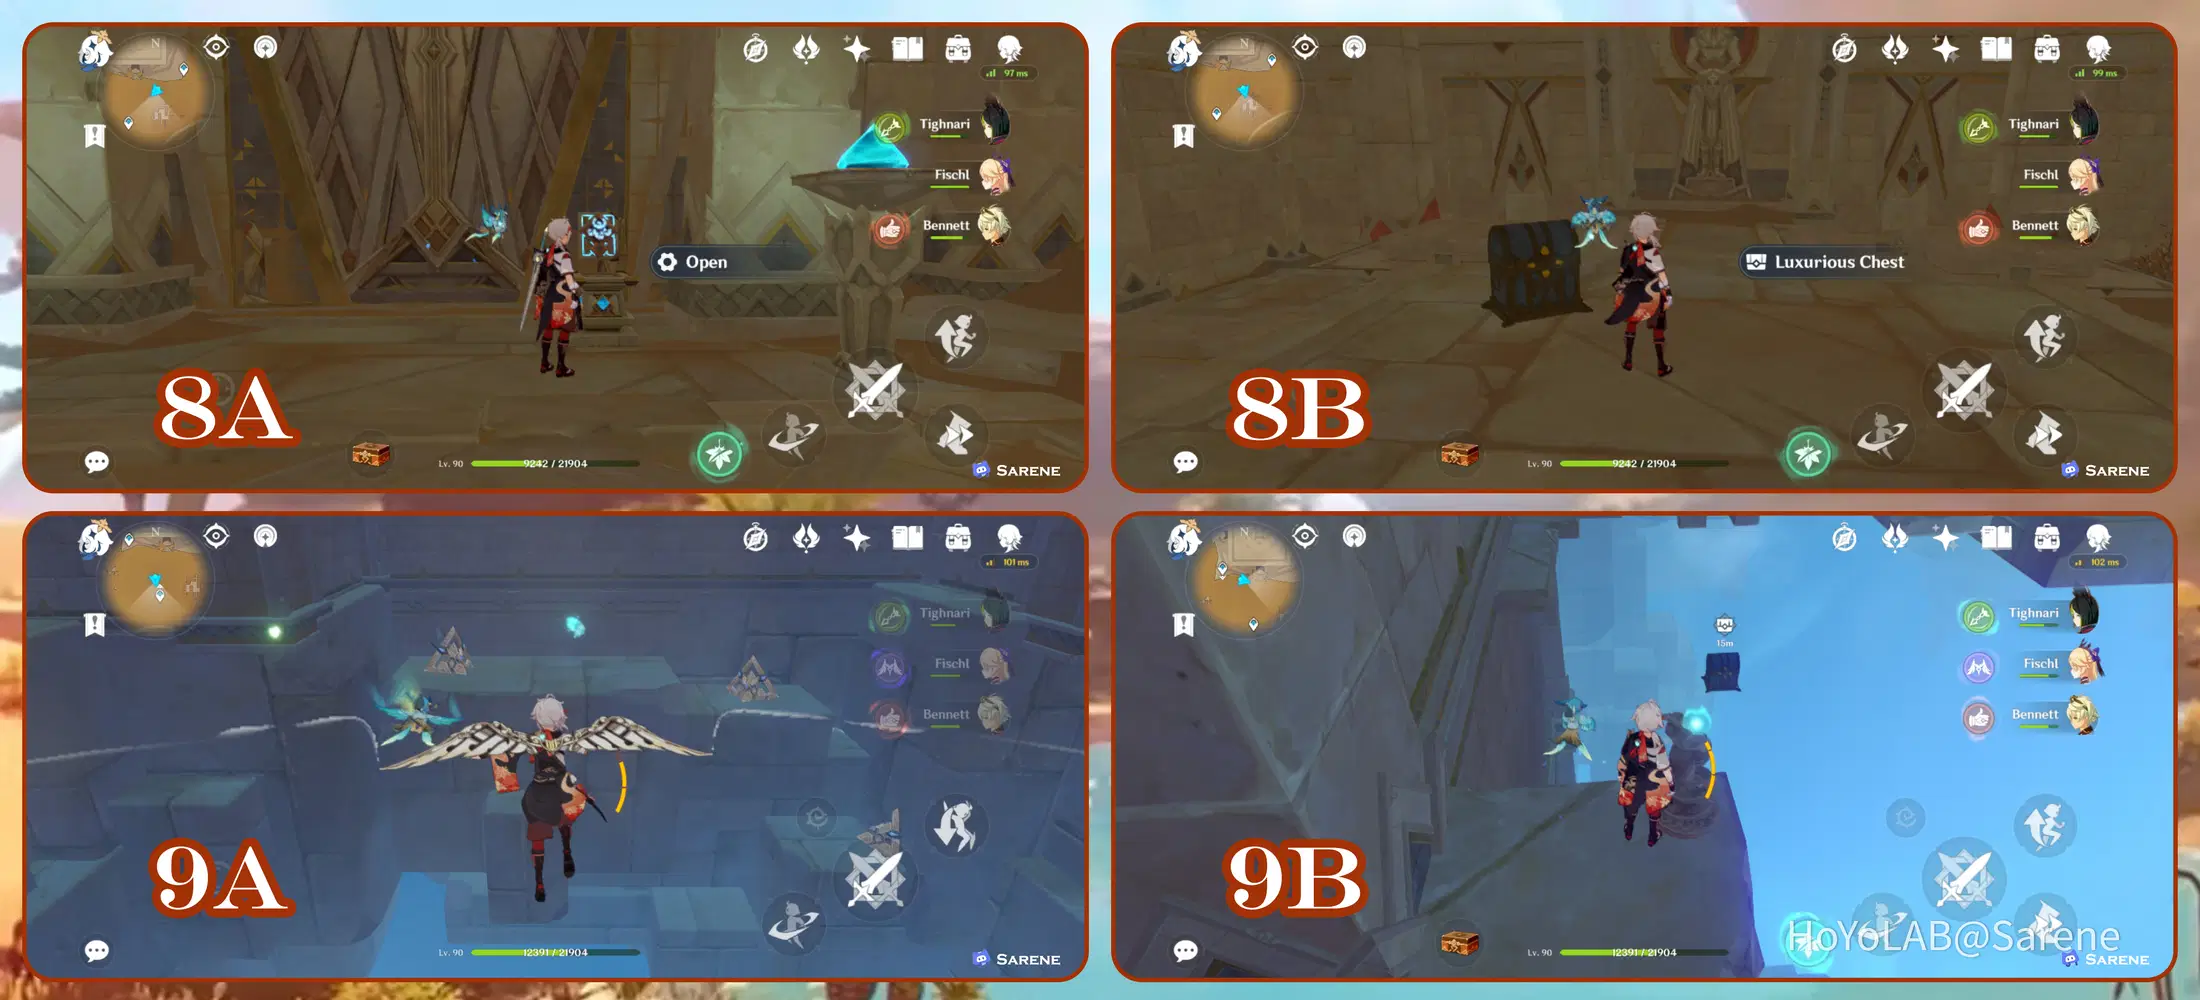
8. Unlock the door on the East Side of Duat Hall after obtaining full clearance. The chest will be in the room.
9. Follow the Seelie to its court using the invisible path. You can also just glide down from the platforms above.
10
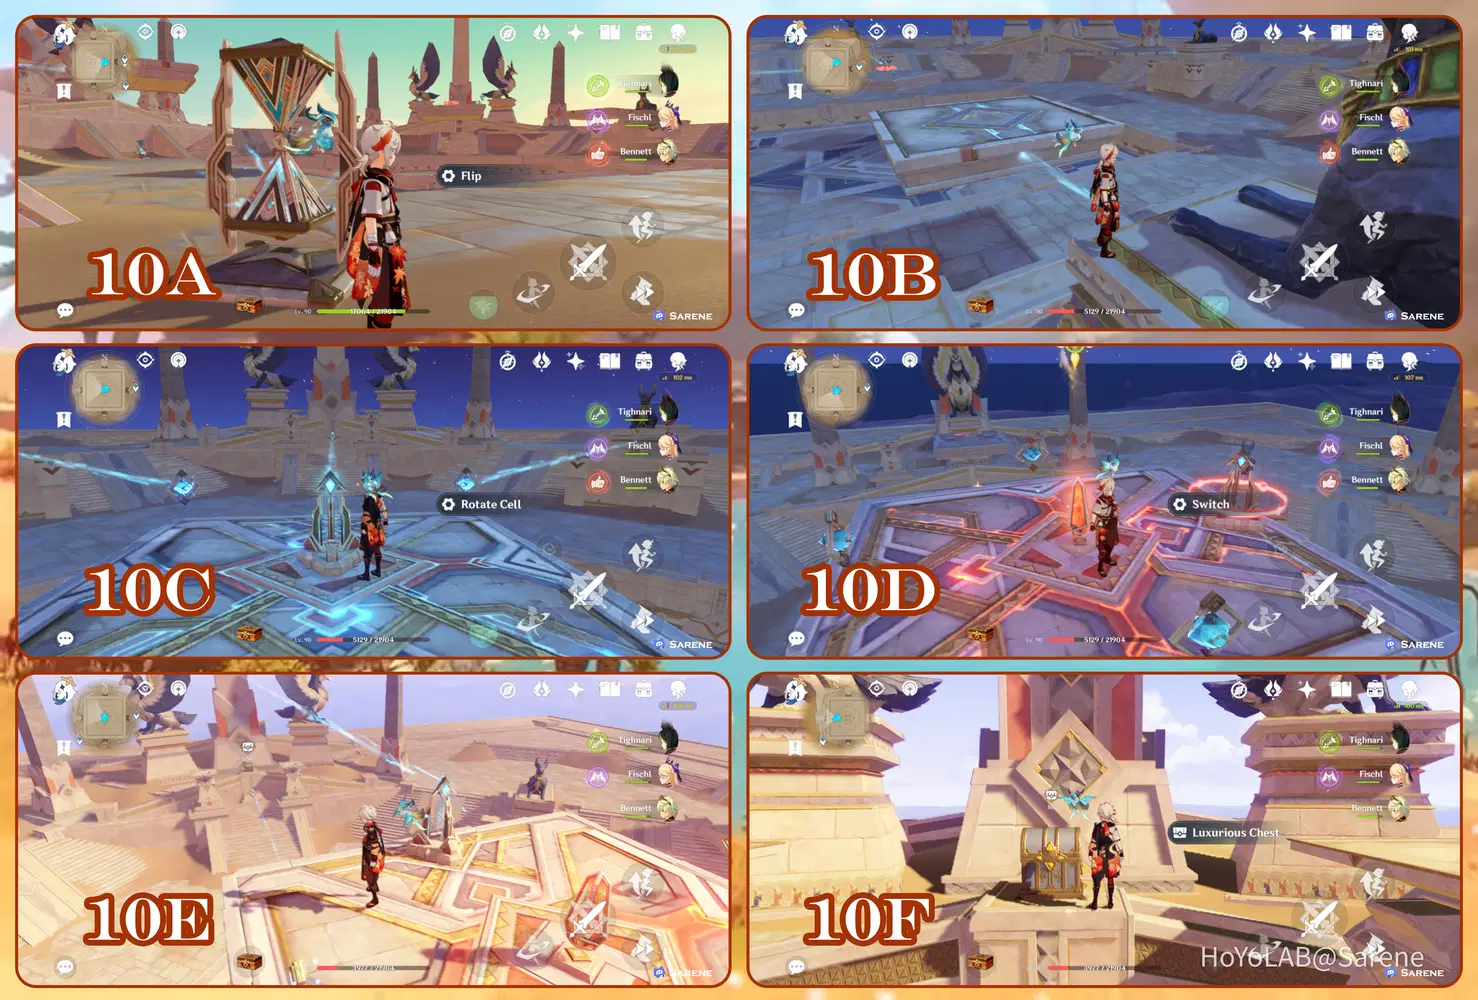
10. This area becomes accessible through the Dual Evidence World Quest. The Goal is to Rotate the 2 Everlight Cells in the center. Flip the Sandglass to make Four-Leaf Sigils appear to travel quickly between the Everlight Cells.
Stand on the Illusory Keystones (10B) to reconnect the Everlight Cells connecting to the bottom platform. This should unlock the first Everlight Cell in the center (10C).
Then use the Four-Leaf Sigils to reach the top platform and switch the Prism to red so that only 1 floating platform is moving (10D). Then connect the Everlight Vells as fast as you can to the top to unlock the center Everlight Cell. This part may take a few tries.
Finally, connect the Everlight Cell to the statue to reveal the chest.
11 - 12
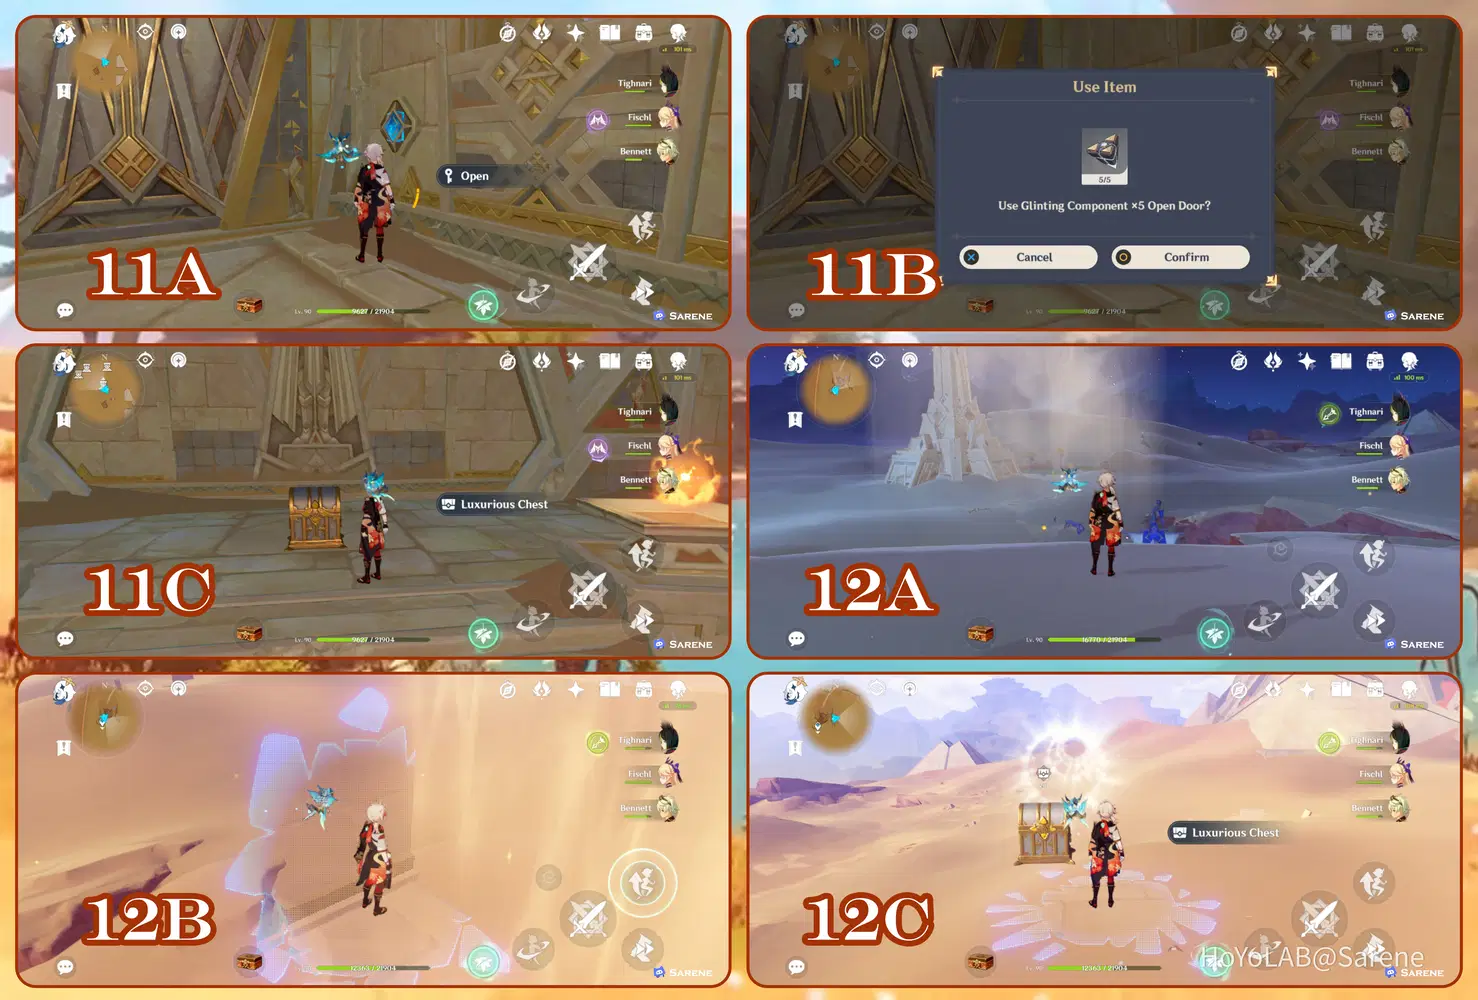
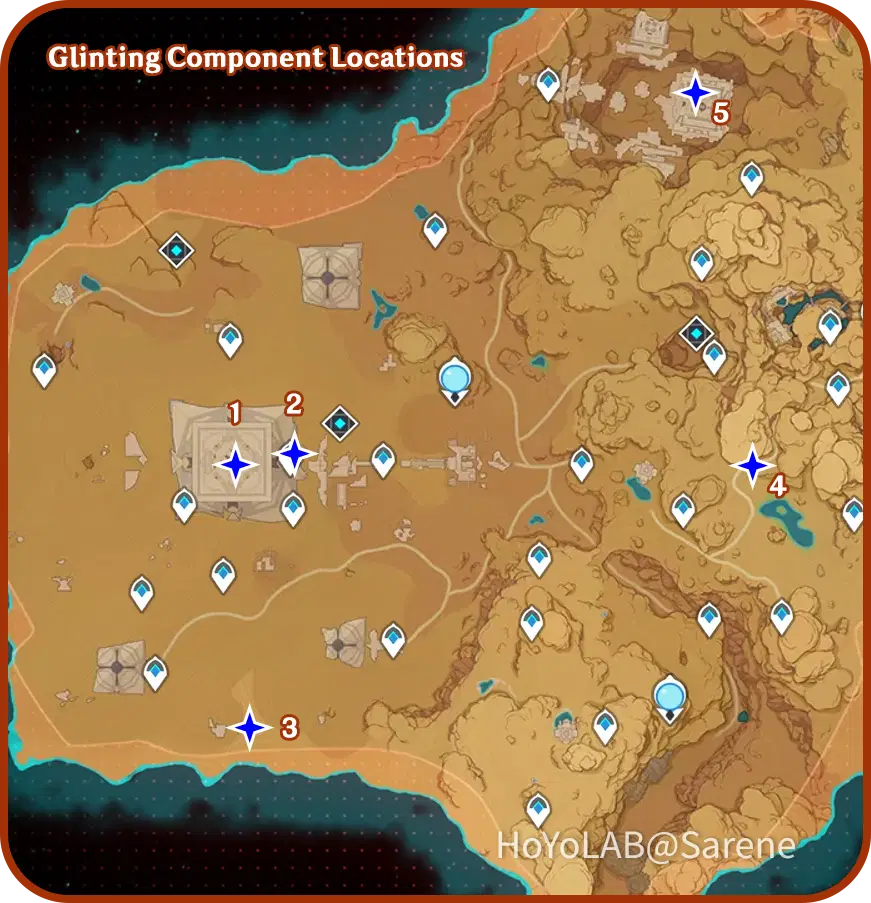
11. Collect all 5 Glinting Component by defeating the Primal Constructs marked in the map below. Use them to open the door and the chest will be inside. (Use the underground map for chests 8 - 9 if you can't find the location of the door)
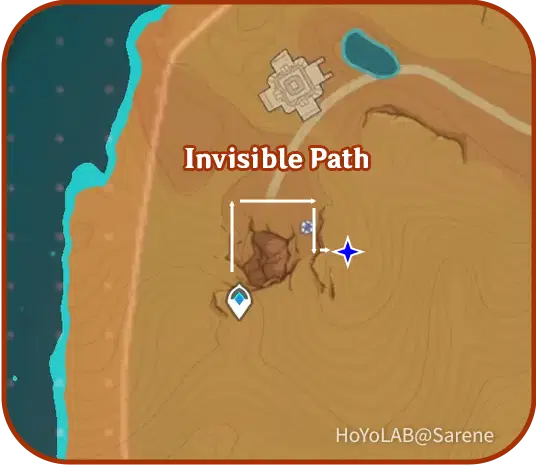
12. Use the wind current near the Teleport Waypoint to glide to the invisible path. Head North, then East, then South, and finally East again to spawn the Luxurious chest. See the map below if you aren't sure which direction to take.
Now you should have all the Luxurious Chests in the Sumeru Desert! And with that, all the Sumeru Desert Chest Guides are complete! Thanks for reading and feel free to leave a comment below if you have any questions.

Wishing you the best with your exploration!




