


Good Morning/Afternoon/Evening everyone!
This guide took a bit longer to create due to my busy schedule. I had someone request a farming schedule and have included it in the guide!
Let's give a warm welcome to our lovely worldwide ginger Childe!

Materials

Childe Material Guide
Farming Schedule
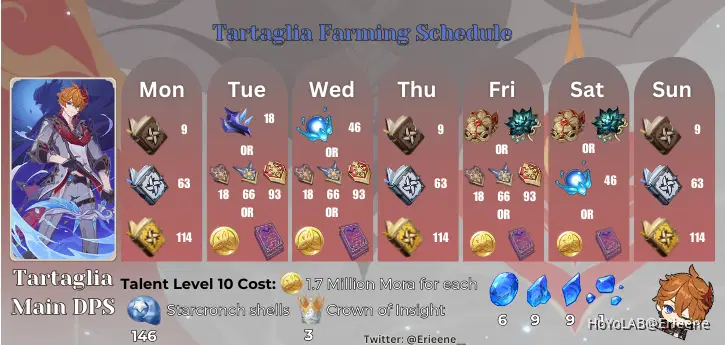
Farming Schedule Sheet
Skill Kit
Normal Attack

Cutting Torrent

Cutting Torrent Normal Attack

Cutting Torrent Charged Attack
Note: The charge attack is seen applying the Riptide Status onto the enemy
Normal Attack: Cutting Torrent
Normal Attack
Perform up to 6 consecutive shots with a bow.
Charged Attack
Perform a more precise Aimed Shot with increased DMG.
While aiming, the power of Hydro will accumulate on the arrowhead. An arrow fully charged with the torrent will deal Hydro DMG and apply the Riptide status.
Riptide
Opponents affected by Riptide will suffer from AoE Hydro DMG effects when attacked by Tartaglia in various ways. DMG dealt in this way is considered Normal Attack DMG.
· Riptide Flash: A fully-charged Aimed Shot that hits an opponent affected by Riptide deals consecutive bouts of AoE DMG. Can occur once every 0.7s.
· Riptide Burst: Defeating an opponent affected by Riptide creates a Hydro burst that inflicts the Riptide status on nearby opponents' hit.
Plunging Attack
Fires off a shower of arrows in mid-air before falling and striking the ground, dealing AoE DMG upon impact.
When Tartaglia is in Foul Legacy: Raging Tide's Melee Stance, he cannot perform a plunging attack.
Note: More often than not Childe will be used in his Riptide stance more to apply hydro on enemies or to have the Riptide status be placed upon an enemy.
Talent Level 1:
Aimed Shot: 43.9%
Fully Charged Aimed Shot: 124%
Riptide Flash DMG: 12.4% x 3
Riptide Burst DMG: 62.0%
Riptide Duration: 10s
Talent Level 11:
Aimed Shot: 92.8%
Fully Charged Aimed Shot: 236%
Riptide Flash DMG: 23.6% x 3
Riptide Burst DMG: 117.8%
Riptide Duration: 10s
Skill

Foul Legacy: Raging Tide

Switching/Exiting out of Melee Stance

Meele Stance activated and Normal Attacks
Unleashes a set of weaponry made of pure water, dealing Hydro DMG to surrounding opponents and entering Melee Stance.
In this Stance, Tartaglia's Normal and Charged Attacks are converted to Hydro DMG that cannot be overridden by any other elemental infusion and change as follows:
Normal Attack
Perform up to 6 consecutive Hydro strikes.
Charged Attack
Consumes a certain amount of Stamina to unleash a cross slash, dealing Hydro DMG.
Riptide Slash
Hitting an opponent affected by Riptide with a melee attack unleashes a Riptide Slash that deals AoE Hydro DMG. DMG dealt in this way is considered Elemental Skill DMG, and can only occur once every 1.5s.
After 30s, or when the ability is unleashed again, this skill will end. Tartaglia will return to his Ranged Stance and this ability will enter CD. The longer Tartaglia stays in his Melee Stance, the longer the CD.
If the return to a ranged stance occurs automatically after 30s, the CD is even longer.
Talent Level 1:
Stance Change DMG: 72%
Charged Attack DMG: 60.2% + 72.0%
Riptide Slash: 60%
Max Duration: 30.0s
Preemptive CD: 6.0 - 36.0s
Max CD: 45s
Talent Level 10:
Stance Change DMG: 130%
Charged Attack DMG: 119.0% + 142.3%
Riptide Slash: 119%
Max Duration: 30.0s
Preemptive CD: 6.0 - 36.0s
Max CD: 45s
Burst

Havoc: Obliteration

Ranged Stance Burst
Note: Applies Riptide to the enemies within range of the burst

Meele Stance Burst
Ranged Stance: Flash of Havoc
Swiftly fires a Hydro-imbued magic arrow, dealing AoE Hydro DMG and applying the Riptide status.
Returns a portion of its Energy Cost after use.
Melee Stance: Light of Obliteration
Performs a slash with a large AoE, dealing massive Hydro DMG to all surrounding opponents, which triggers Riptide Blast.
Riptide Blast
When the obliterating waters hit an opponent affected by Riptide, it clears their Riptide status and triggers a Hydro Explosion that deals AoE Hydro DMG.
DMG dealt in this way is considered Elemental Burst DMG.
Talent Level 1:
Skill DMG Melee: 464%
Skill DMG Ranged: 378%
Riptide Blast DMG: 120%
Energy Return (Ranged): 20
CD: 15.0s
Energy Cost: 60
Talent Level 10:
Skill DMG Melee: 835%
Skill DMG Ranged: 681%
Riptide Blast DMG: 216%
Energy Return (Ranged): 20
CD: 15.0s
Energy Cost: 60
Passive Talent 1

Never Ending
Extends Riptide duration by 8s.
Passive Talent 2

Sword Of Torrents
When Tartaglia is in Foul Legacy: Raging Tide's Melee Stance, on dealing a CRIT hit, Normal and Charged Attacks apply the Riptide status effect to opponents.
Utility Passive

Mastery of Weaponry
Increases your own party members' Normal Attack Level by 1.
Skill Kit Summary (Important!)
We can see here that Childe is a very strong applicator when it comes to Hydro and with his Riptide mark acting similar to Nahida’s marking, you can use a Dendro character to create Bloom reactions. He also does amazing in a Vaporize team where if you have an enemy marked with the Riptide status, do his burst and when that enemy dies, the Riptide status will get transferred over to the enemy beside it. Add in a grouping party member, and you will have an explosion effect occur.
Note: Now many people have difficulty understanding how his kit works, specifically the rotation timing if we consider his E skill and the cooldown for it. So here is an in-depth explanation about the rotation to use Childe to his max potential!
When using Childe’s E skill there will be a countdown happening internally that increases his E skill cooldown the longer one stays in his melee stance. So, the most effective amount of time one should stay playing as Childe is 12 seconds. One can stretch it to 15 seconds, but 12 is a sweet spot I found.
Now if one wants to know why 12 seconds, it is because his Skill cooldown will not be as long then, and when one does the support rotation before landing on Childe his skill will be back up for use. For example, Bennett Burst, Kazuha Burst, Skil, Xiangling Burst and Skill before switching over to Childe will take approximately the time it will take for his skill to be off cooldown.
Keeping in mind of the internal cooldown when it comes to his Skill one can choose which Artifact might be more suitable for the role he is fulfilling in the Team Set Up.
Constellations

Foul Legacy: Tide Withholder
Decreases the CD of Foul Legacy: Raging Tide by 20%

Foul Legacy: Understream
When opponents affected by Riptide are defeated, Tartaglia regenerates 4 Elemental Energy.

Abyssal Mayhem: Vortex of Turmoil
Increases the Level of Foul Legacy: Raging Tide by 3.
Maximum upgrade level is 15.

Abyssal Mayhem: Hydrospout
If Tartaglia is in Foul Legacy: Raging Tide's Melee Stance, triggers Riptide Slash against opponents on the field affected by Riptide every 4s, otherwise, triggers Riptide Flash.
Riptide Slashes and Riptide Flashes triggered by this Constellation effect are not subject to the time intervals that would typically apply to these two Riptide effects, nor do they have any effect on those time intervals.

Havoc: Formless Blade
Increases the Level of Havoc: Obliteration by 3.
Maximum upgrade level is 15.

Havoc: Annihilation
When Havoc: Obliteration is cast in Melee Stance, the CD of Foul Legacy: Raging Tide is reset.
This effect will only take place once Tartaglia returns to his Ranged Stance.
Artifacts
Main DPS
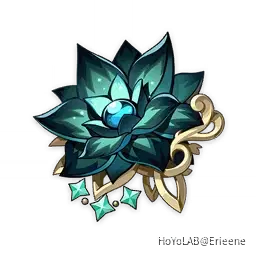
Nymph's Dream
2 Piece: Hydro DMG Bonus +15%
4 Piece: After Normal, Charged, and Plunging Attacks, Elemental Skills, and Elemental Bursts hit opponents, 1 stack of Mirrored Nymph will be triggered, lasting 8s. When under the effect of 1, 2, or 3 or more Mirrored Nymph stacks, ATK will be increased by 7%/16%/25%, and Hydro DMG Bonus will be increased by 4%/9%/15%. Mirrored Nymph stacks created by Normal, Charged, and Plunging Attacks, Elemental Skills, and Elemental Bursts exist independently.
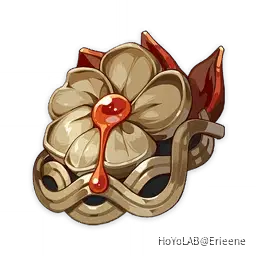
Heart of Depth
2 Piece: Hydro DMG Bonus +15%
4 Piece: After using Elemental Skill, increases Normal Attack and Charged Attack DMG by 30% for 15s.
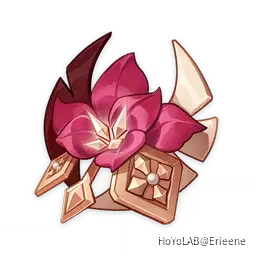
Gladiator's Finale
2 Piece: ATK +18%.
4 Piece: If the wielder of this artifact set uses a Sword, Claymore or Polearm, increases their Normal Attack DMG by 35%.
Support
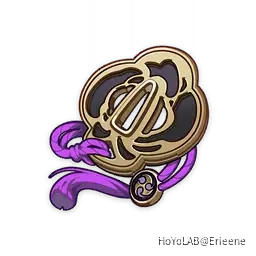
Emblem of Severed Fate
2 Piece: Energy Recharge +20%
4 Piece: Increases Elemental Burst DMG by 25% of Energy Recharge. A maximum of 75% bonus DMG can be obtained in this way.

Wanderer's Troupe
2 Piece: Increases Elemental Mastery by 80
4 Piece: Increases Charged Attack DMG by 35% if the character uses a Catalyst or Bow
Team Set Up
Gathering Unit
Kazuha/Sucrose/Venti
Kazuha: An amazing Anemo support who helps to gather enemies together and increases damage against the elements he swirls. If he is C2 increases the entire Party's EM by 200 when in his burst. Very useful when one wants to do big number reaction damage.
Sucrose: While she may not have a strong stagger ability like Kazuha, or sucking capabilities like Venti she makes it up for her coverage. Once she has her constellations Sucrose can buff party members' damage with Elemental mastery and being able to place down two of her skill ability allows for great reaction capabilities!
Venti: Has amazing gathering capabilities over a large range. Consistently applies damage to the respective element that has been swirled and can cause some stagger effect with his skill. The bit of wind current he offers with his hold skill is great for dodging attacks. Ultimate is perfect for triggering Childe's Riptide status effect with the Never Ending Passive.
Healer
Kuki/Jean/Qiqi/Barbara/Bennett
Kuki: Applies periodic electro to enemies while healing the active party member. Which allows the DPS of the team do reaction damage while getting some much needed healing.
Jean: She can also be a main DPS since her healing scales off of how much damage she does against an enemy. Her burst also has a cleansing effect, which means status like burning, and corrosion will be purified. Depending on what constellation your Jean is at, you can also have a speed buff be given to you.
Qiqi: Her healing is on the slower end compared to other healers, but she can heal large amounts with her Burst and her E skill. Just like Jean she can also heal depending on the amount of attack she has, and the heal applies to all party members so when in a pinch can definitely help out.
Bennette: Buffs those who stand in his Burst their Attack. Also heals enemies and if you are one of the few who activated his C6 he infuses the active character's weapon with Pyro.
Note: Bennett's Buff only scales off his base attack which is done through leveling and giving him a high base attack weapon.
Barbara: Her entire kit scales with HP, so she can be quite tough to take down against certain enemies. Her burst is great to use to bring every party member back up in health with a great range as well! Her hydro application can help with consistent vaporize damage or even act as a battery for Childe to get his burst back up sooner.
Buffer
Xiangling/Bennett/Nahida
Xiangling: Great Pyro application against enemies and when Pyronado is around the active character, their attack increases by 15% (C6 required)
Bennett: Buffs those who stand in his Burst their Attack. Also heals enemies and if you are one of the few who activated his C6 he infuses the active character's weapon with Pyro.
Note: Bennett's Buff only scales off his base attack which is done through leveling and giving him a high base attack weapon.
Nahida: Her utility passive and ultimate can help buff the damage of specific party members depending on what team composition is being used. Her consistent application of Dendro allows Childe to be the hydro applicator to do Bloom damage by creating Dendro Cores.
Gameplay Tips
Since this was quite a lot of information being shared, here’s a rotation that I use quite often!
Vaporize Team
Kazuha, Childe, Bennett, Xiangling
Note: Assuming that everyone has their burst-up
- Use Bennett’s Burst
- Use Kazuha’s Burst and Skill (Press, not hold!)
- Use Xiangling’s Burst, and place down Gouba
- Leave the burst zone, tap skill, enter and immediately Burst for the large damage!
- Repeat the cycle, and if Childe’s burst is not up, use his skill to apply riptide on the enemies.
I hope that this guide was useful and if there are any questions feel free to put them in the comments or stop by on Twitch!

Resources Used
Genshin Hoyowiki
Genshin Fandom Wiki



