



Hello Chest Hunters!
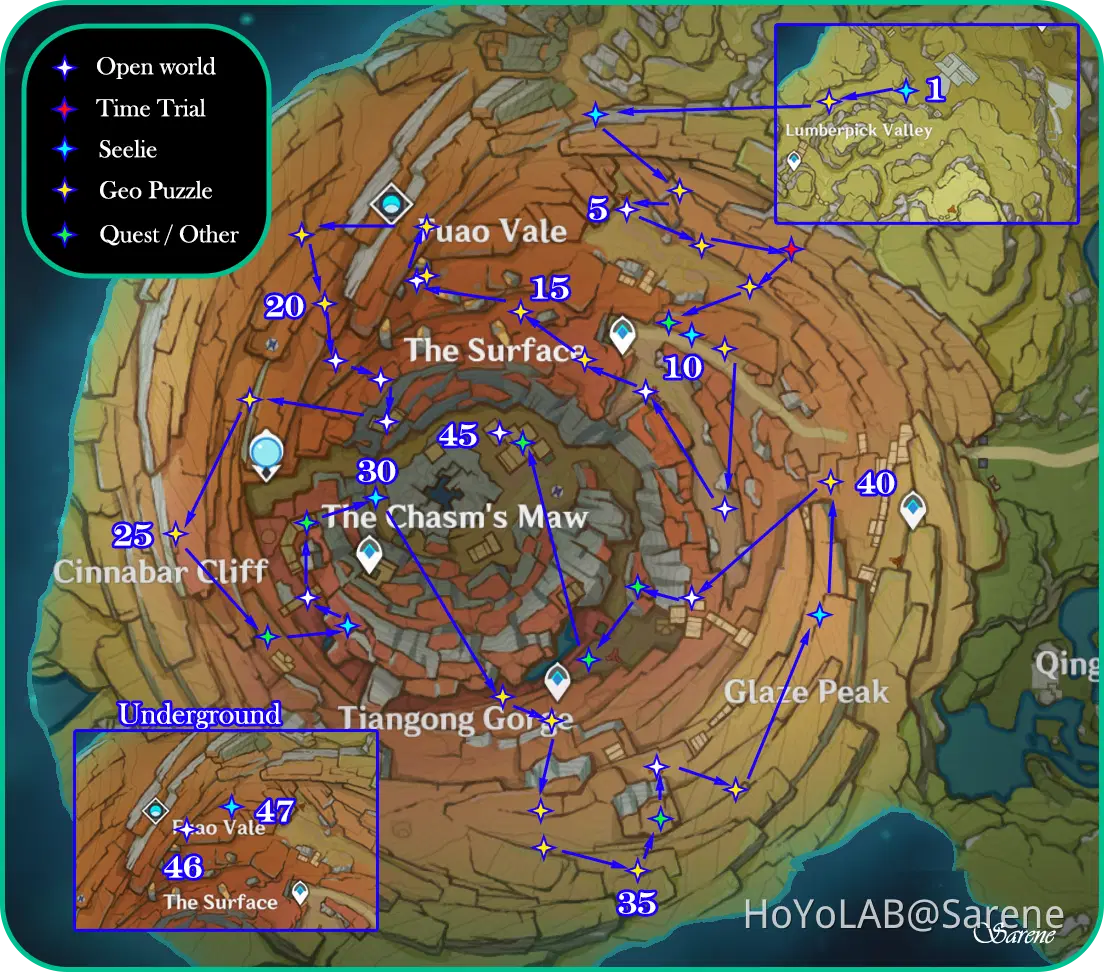
Here is the common chest portion of my Chasm chest guides. Many of the common chests are spawned from puzzles or oozing concentration, so they are NOT detectable by the treasure compass. If you are looking for guides on the other types of chests, click on the link below.
Max Counts / All Chests for The Chasm
This makes a total of 1678 Common Chests in the game. If you have higher than this number, you can check out the link below explaining bugs in the battle chronicle chest count.
Chest Bugs for Battle Chronicle
Guide Notes
Suggestions:
1. If you have already spammed the compass, only check the chests related to totems / pressure plates / balloon plants / mud chests since those cannot be detected by the compass.
You can use ctrl + f to search these terms to quickly jump to those specific chests.
2. If you already have the maximum count for seelies and time trials, you can skip those as well.
You can check this in your achievements with 36 (37 with bug) seelies and 20 time trials
3. If you have already completed all the quests, ignore all chests related to quests.
4. Stars mark where the seelie / time trial / puzzle starts, NOT the final location of the chest
Easily Missable Chests:
Chest 29 is spawned from breaking the box
Chest 42 is a dig chest
Chest 44 is spawned from breaking the boxes
Chest 71 is spawned from breaking the vases (depends on RNG for the chest to appear)
Chest 89 is spawned from burning the hay
The Chasm: Surface

1 - 2
1. Follow the Seelie to its Court
2. Complete the Unique Rock Puzzle
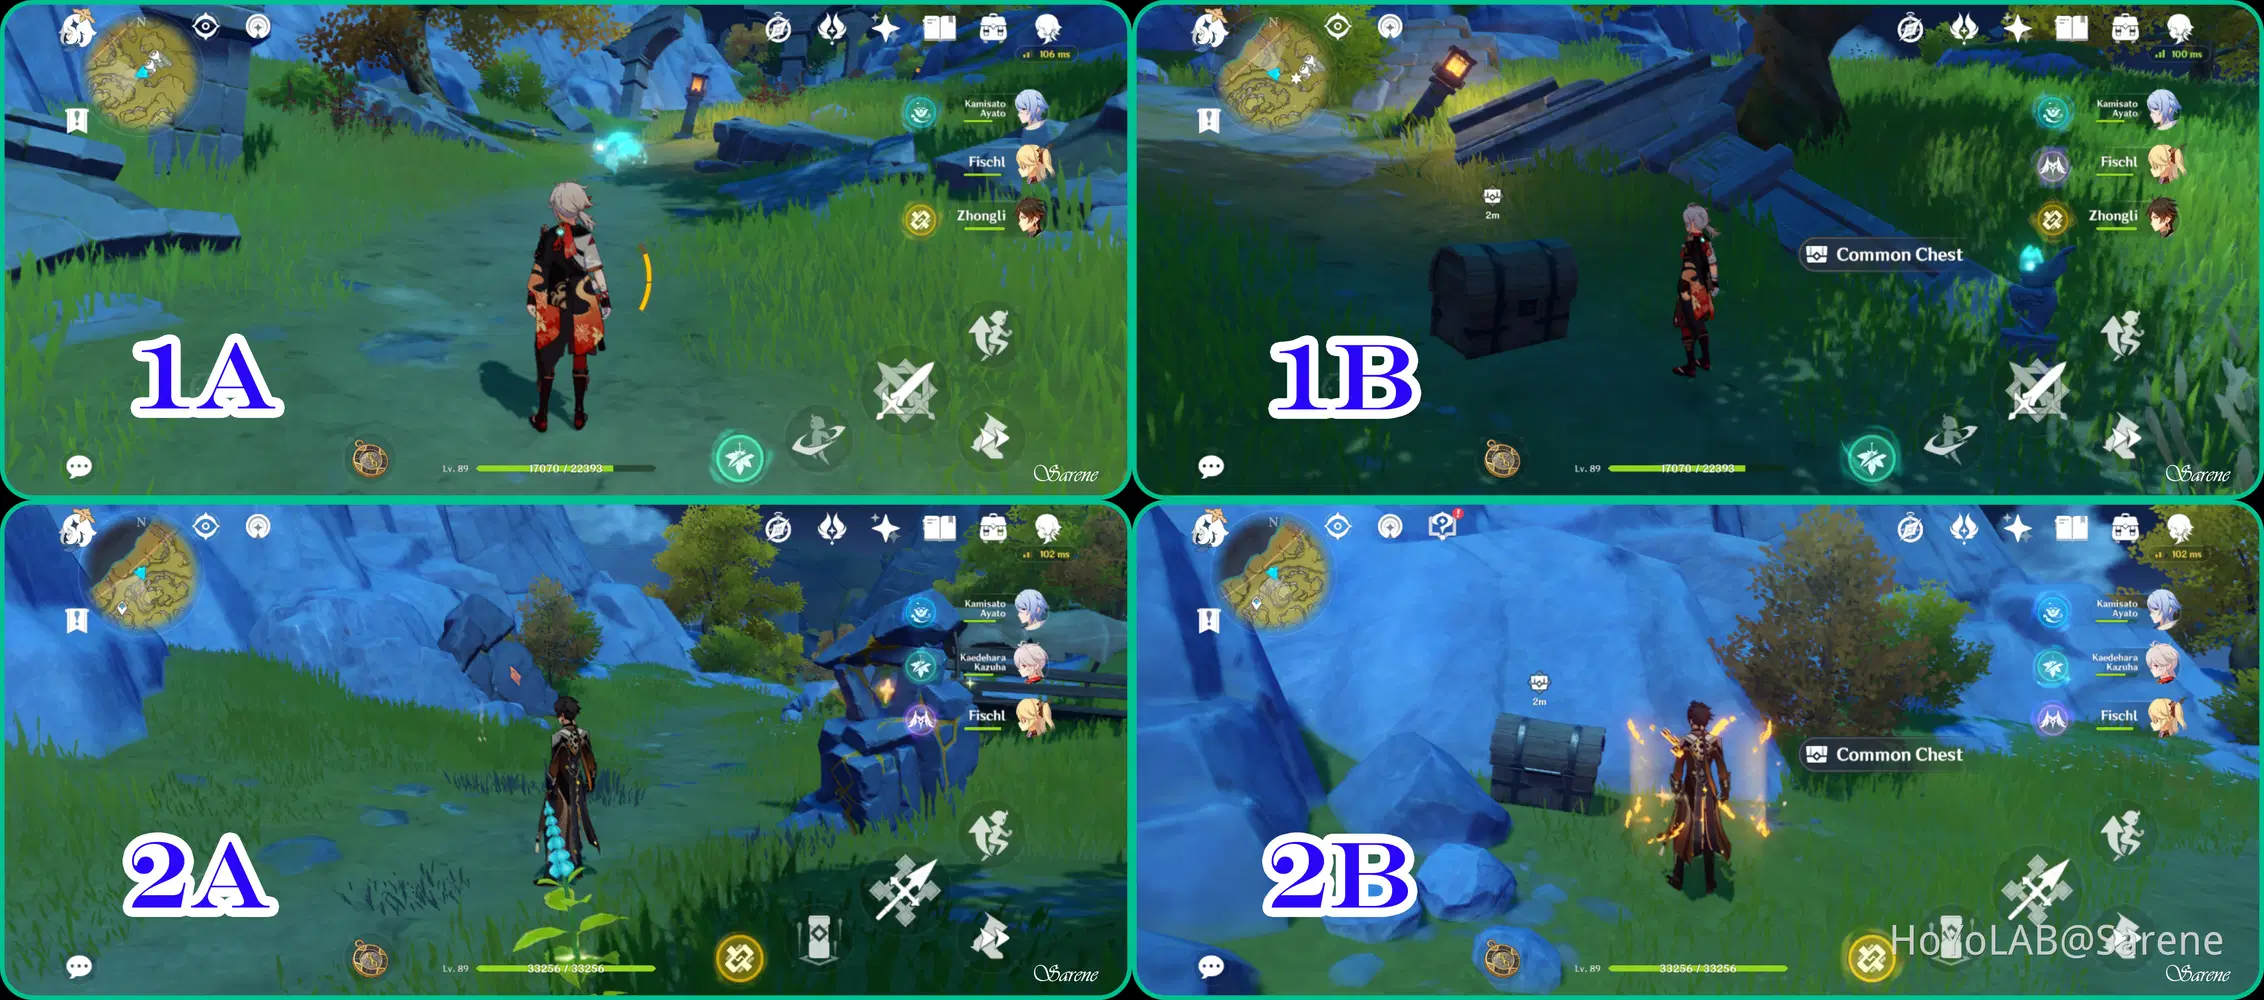

3
The Seelie court is hidden behind a Unique Rock. You will need to strike the nearby Unique Rock Pillar to reveal the Seelie Court.
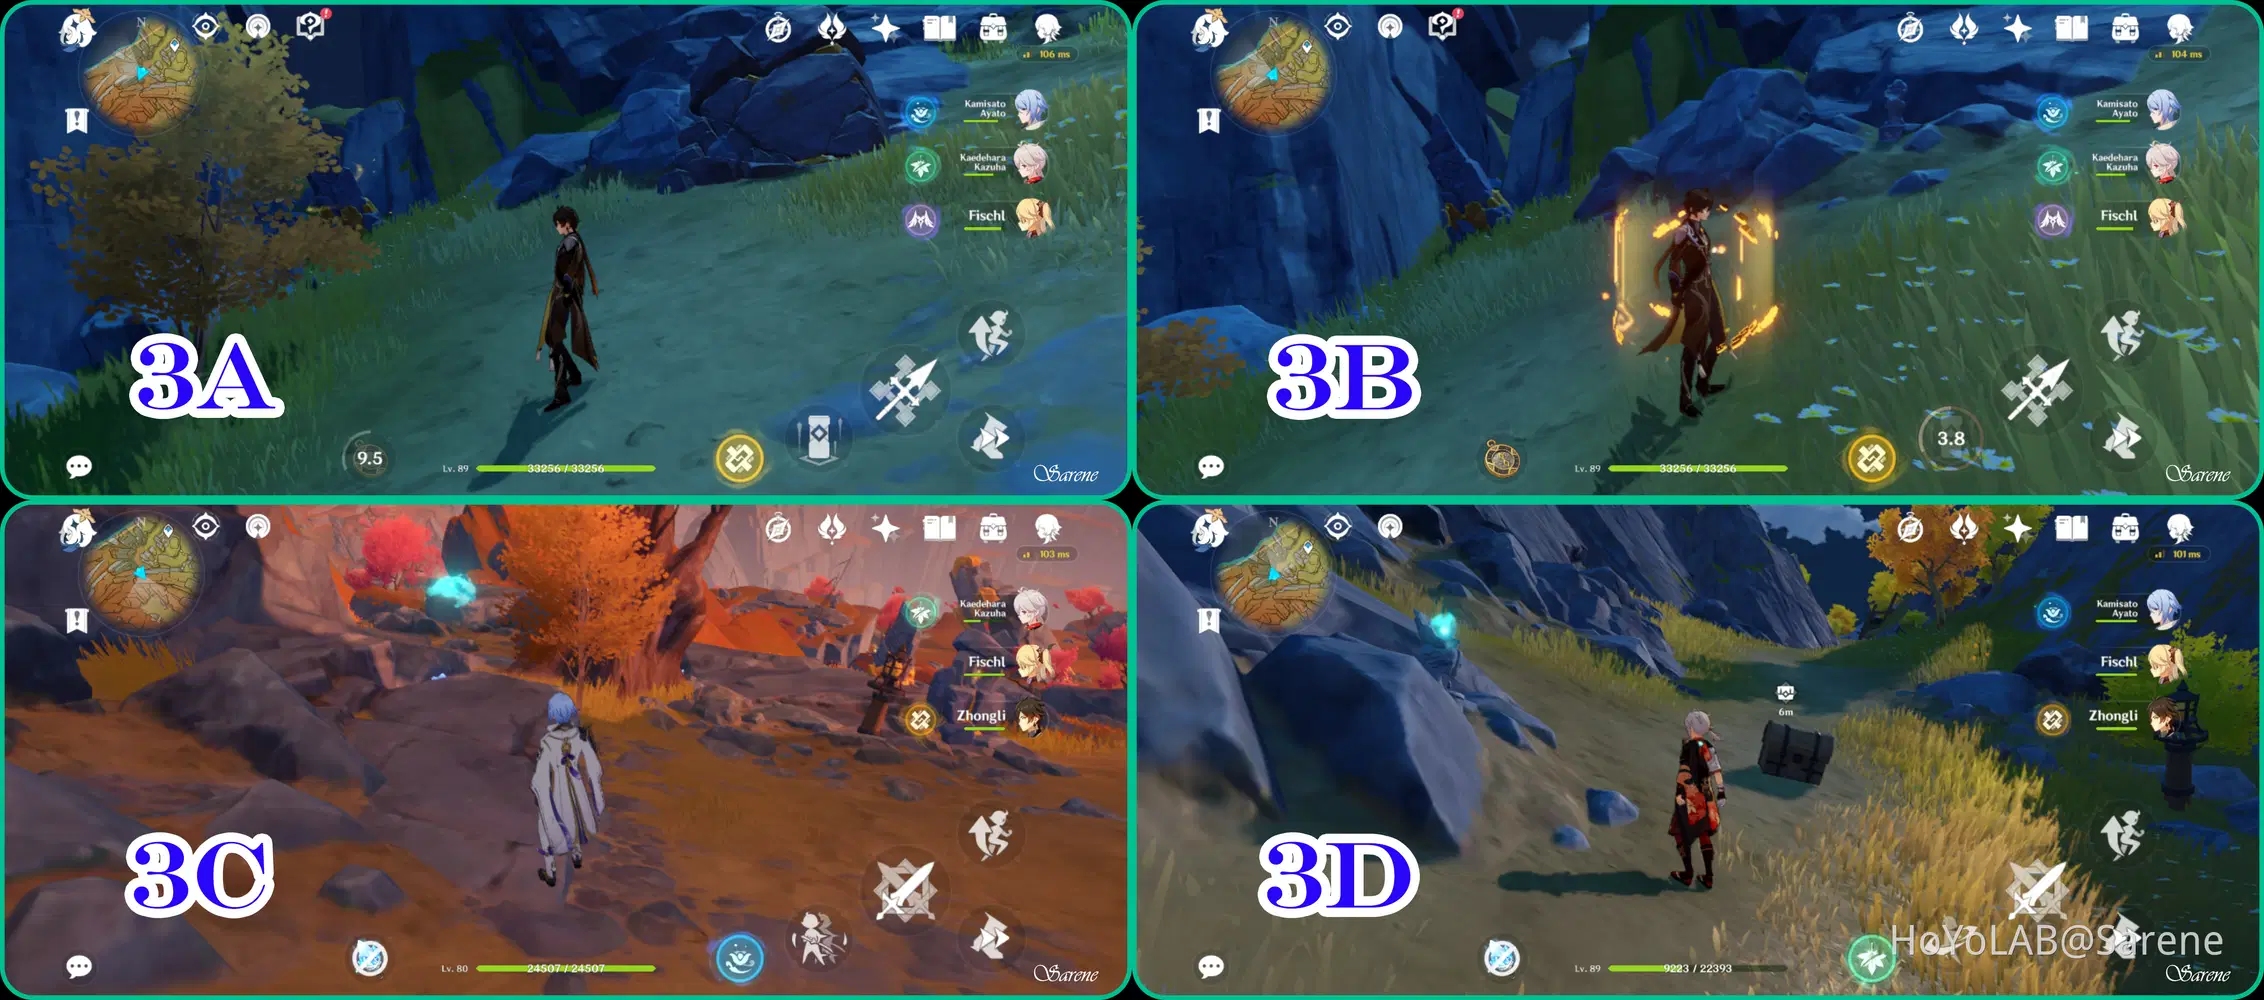
4 - 5
4. Solve the Unique Rock Puzzle
5. Defeat the Treasure Hoarder Camp
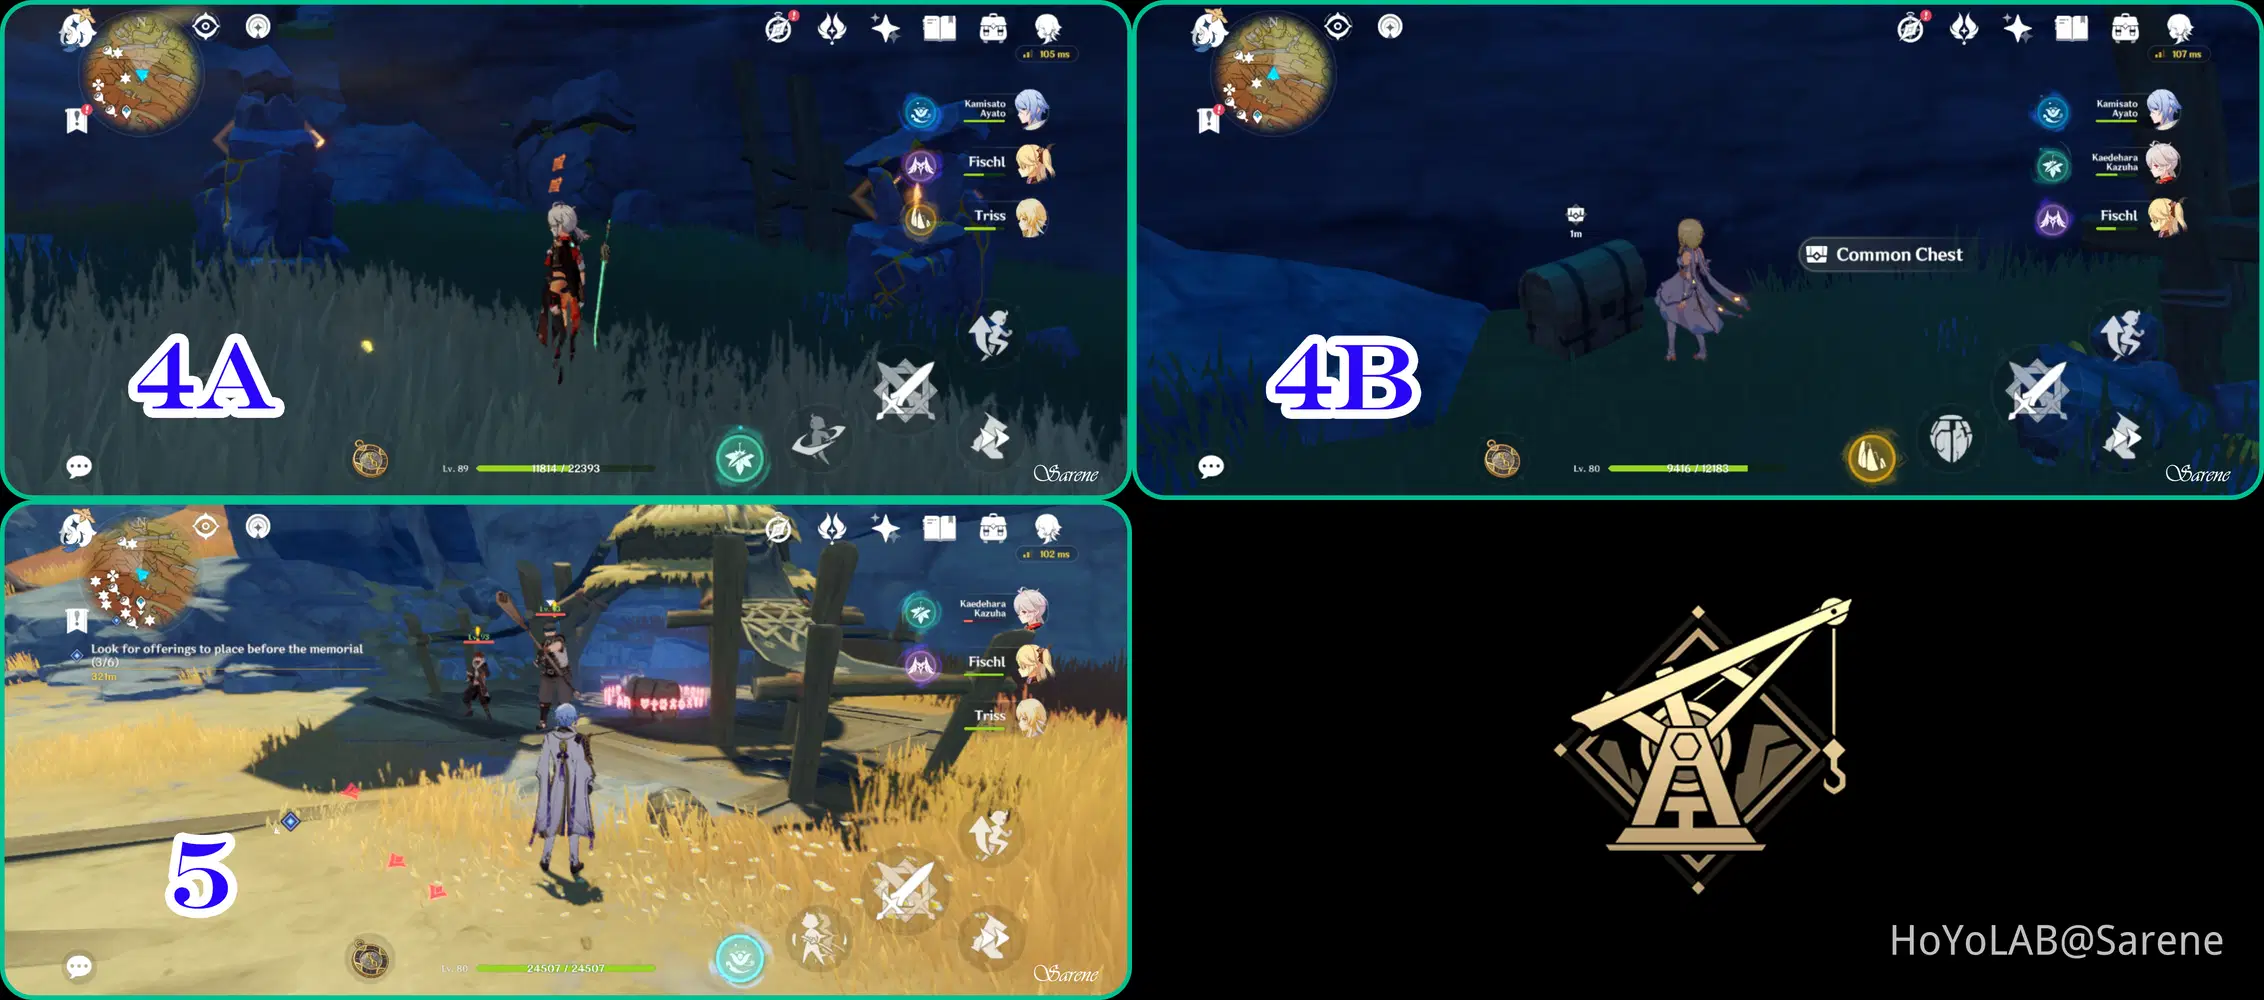
6 - 7
6. Complete the Pressure Puzzle
7. Complete the Time Trial Challenge
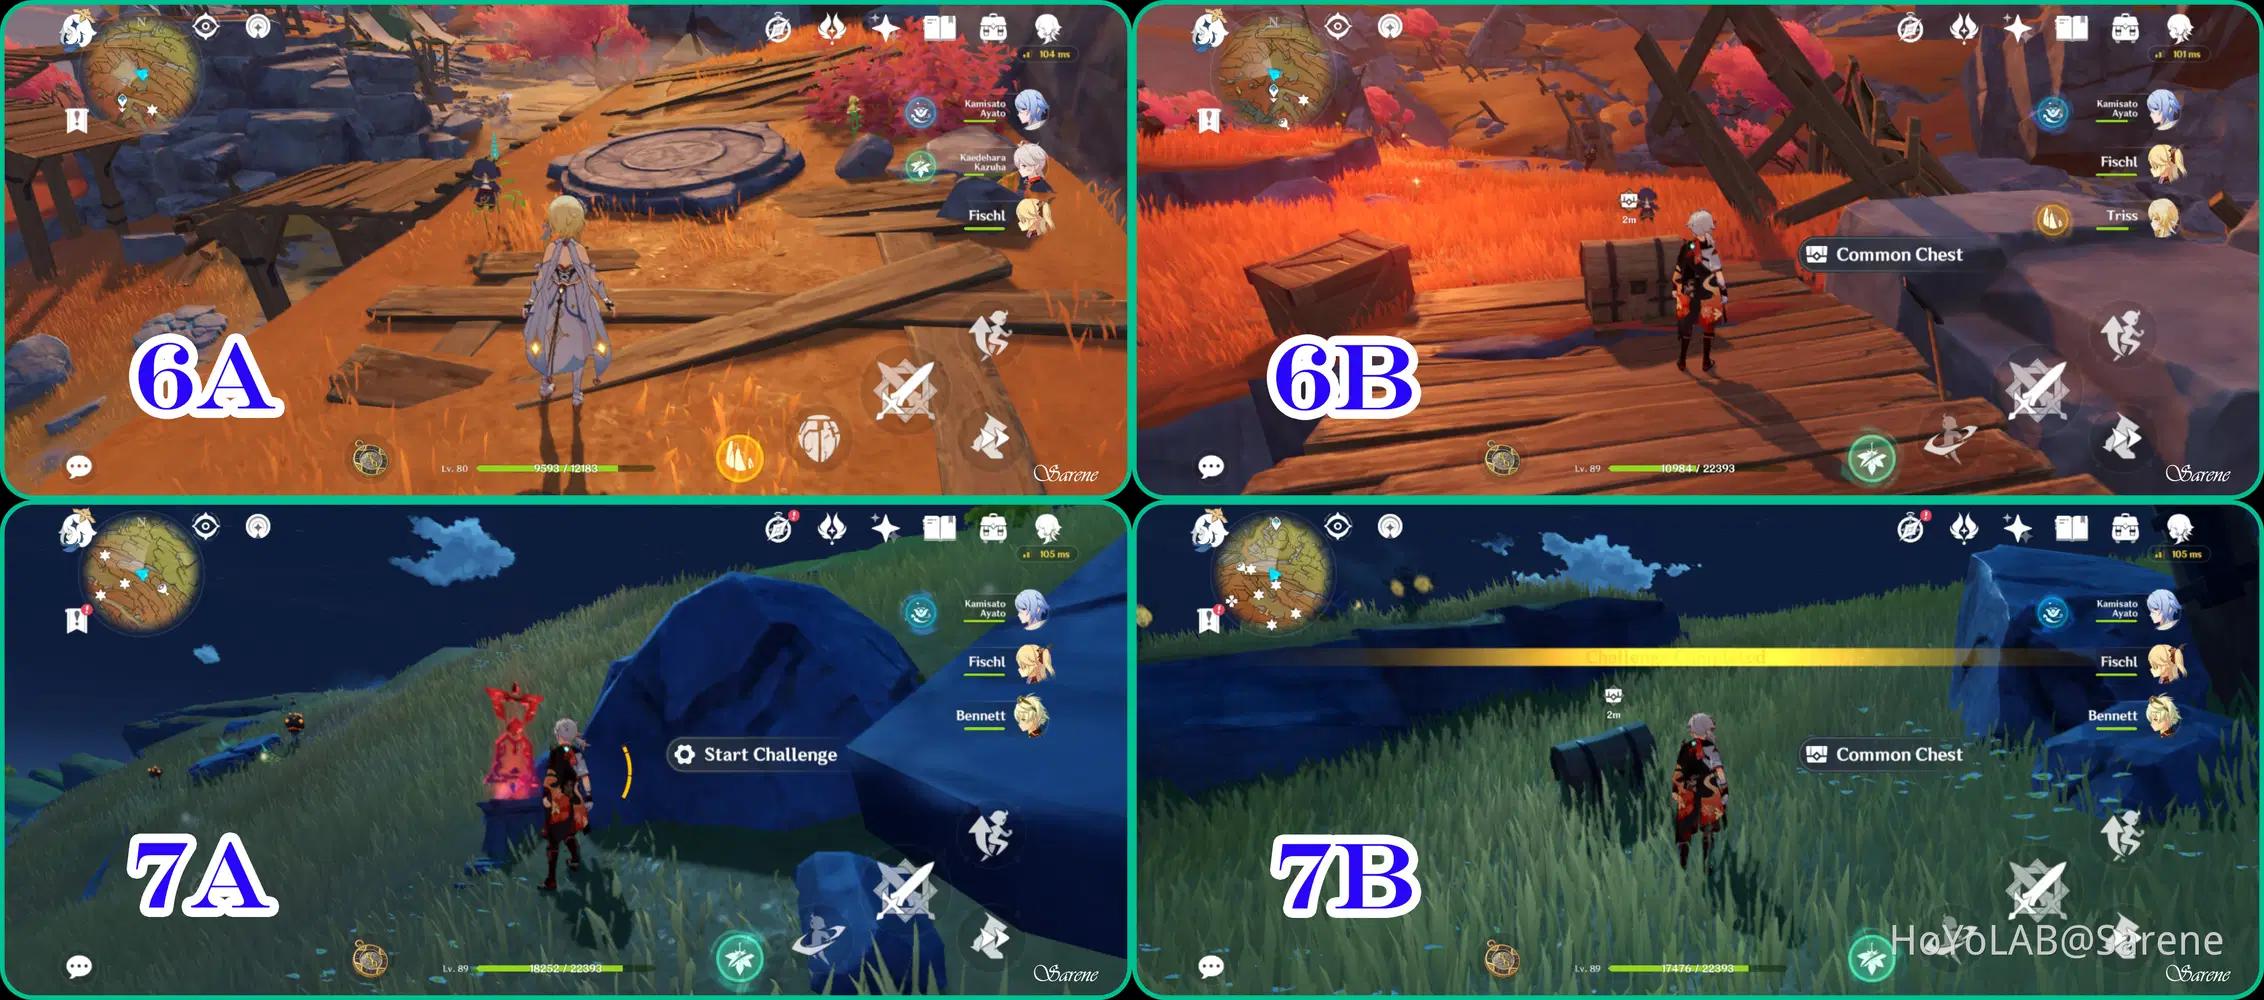
8 - 9
8. Complete the Unique Rock Puzzle
9. Complete the Balloon Plant Challenge
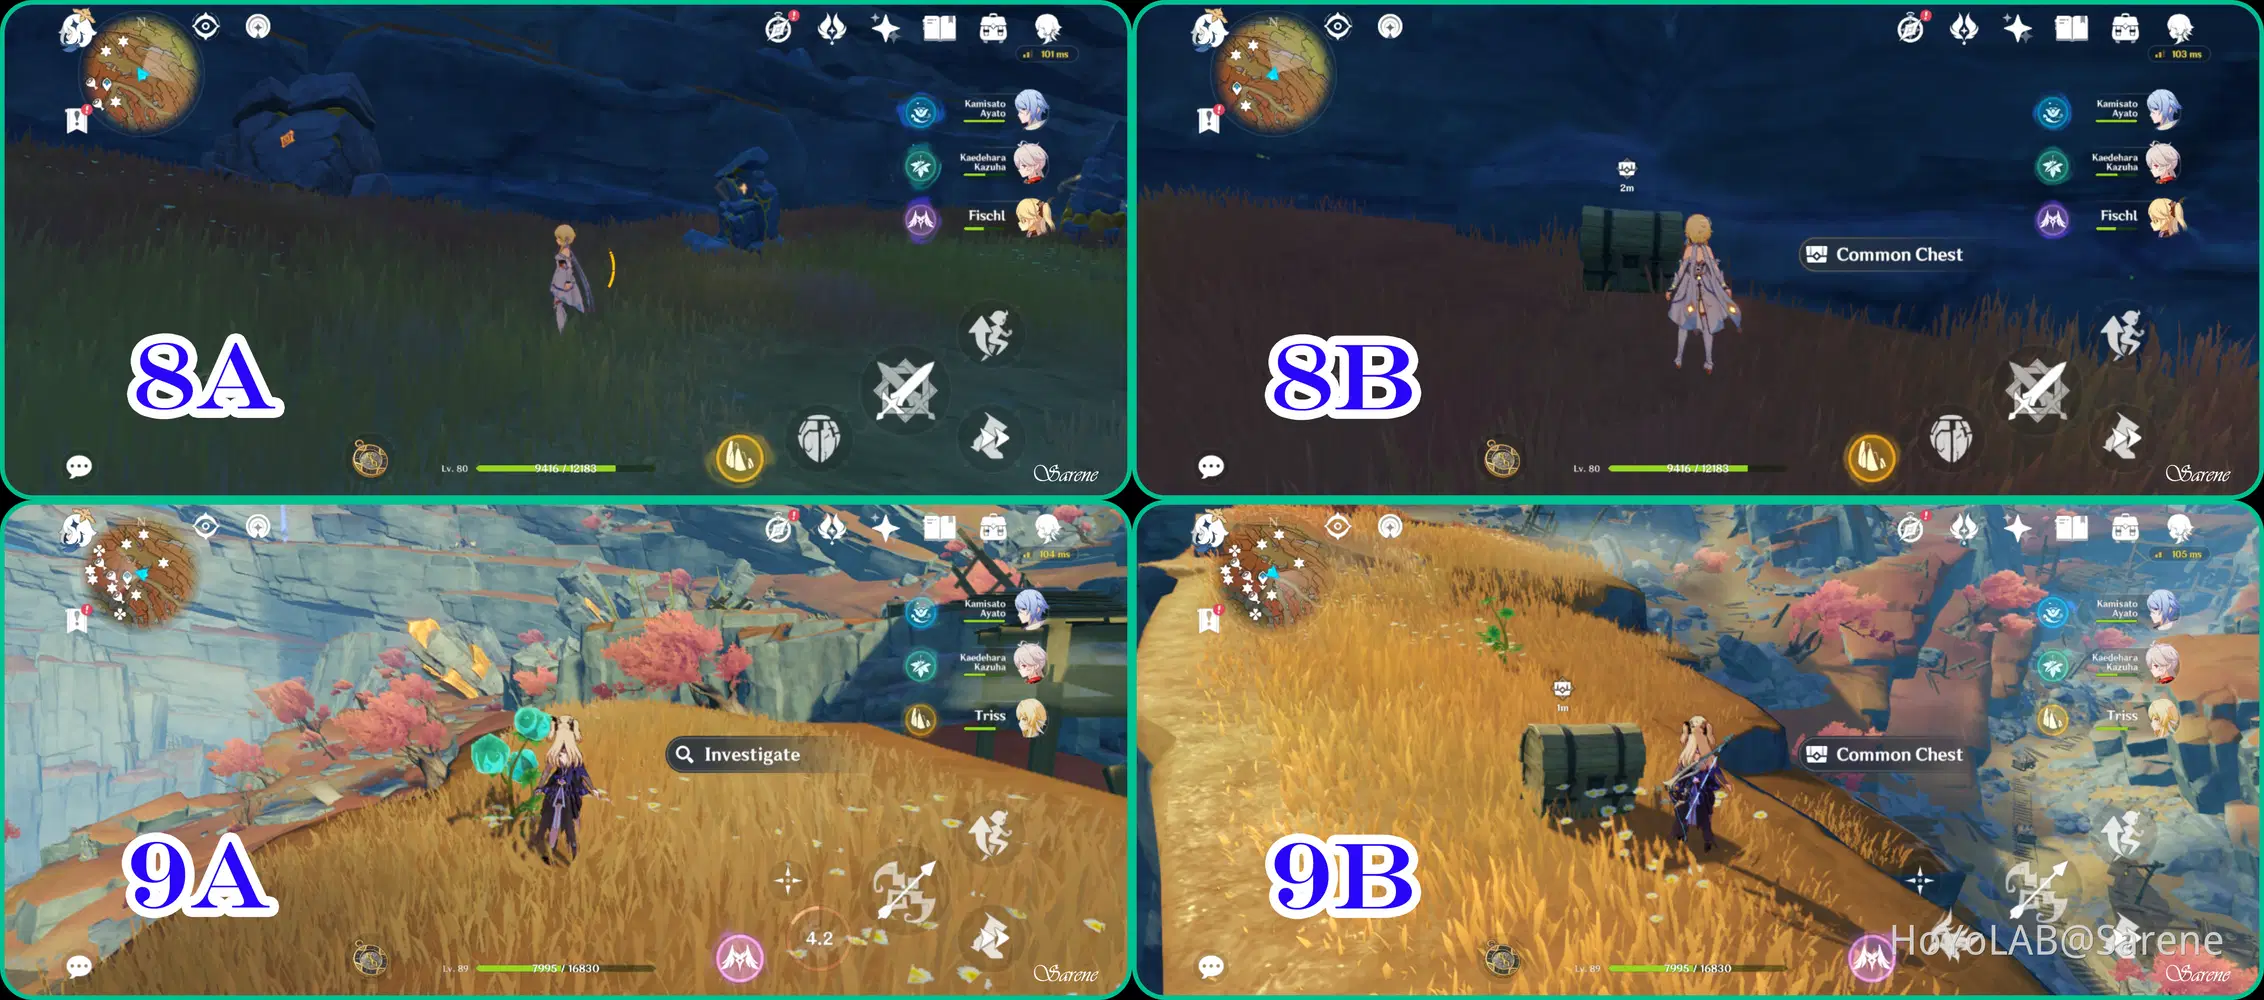
10 - 11
10. Follow the Seelie to its Court
11. Complete the Unique Rock Puzzle
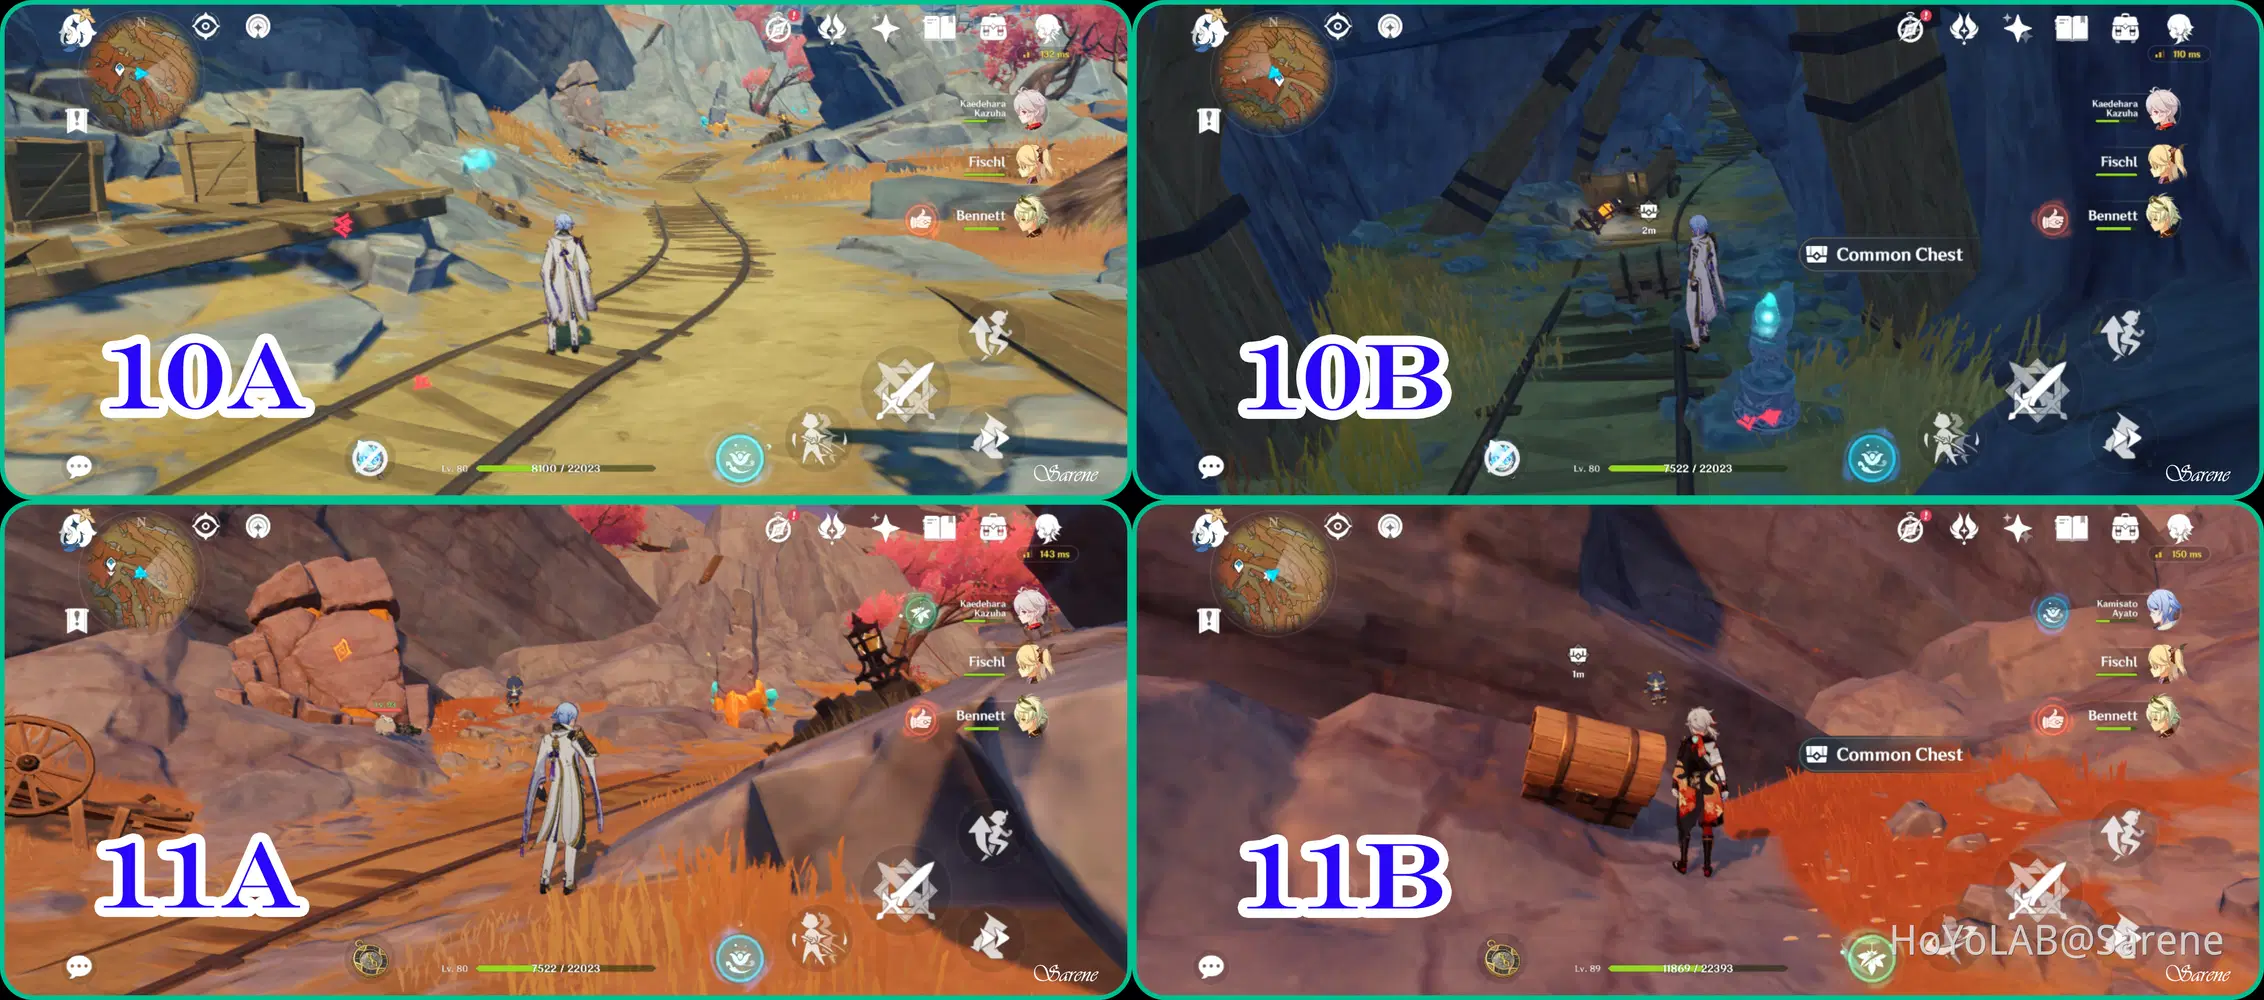
12 - 14
12. Defeat the Treasure Hoarder Camp
13. Defeat the Treasure Hoarder Camp
14. Complete the Unique Rock Puzzle
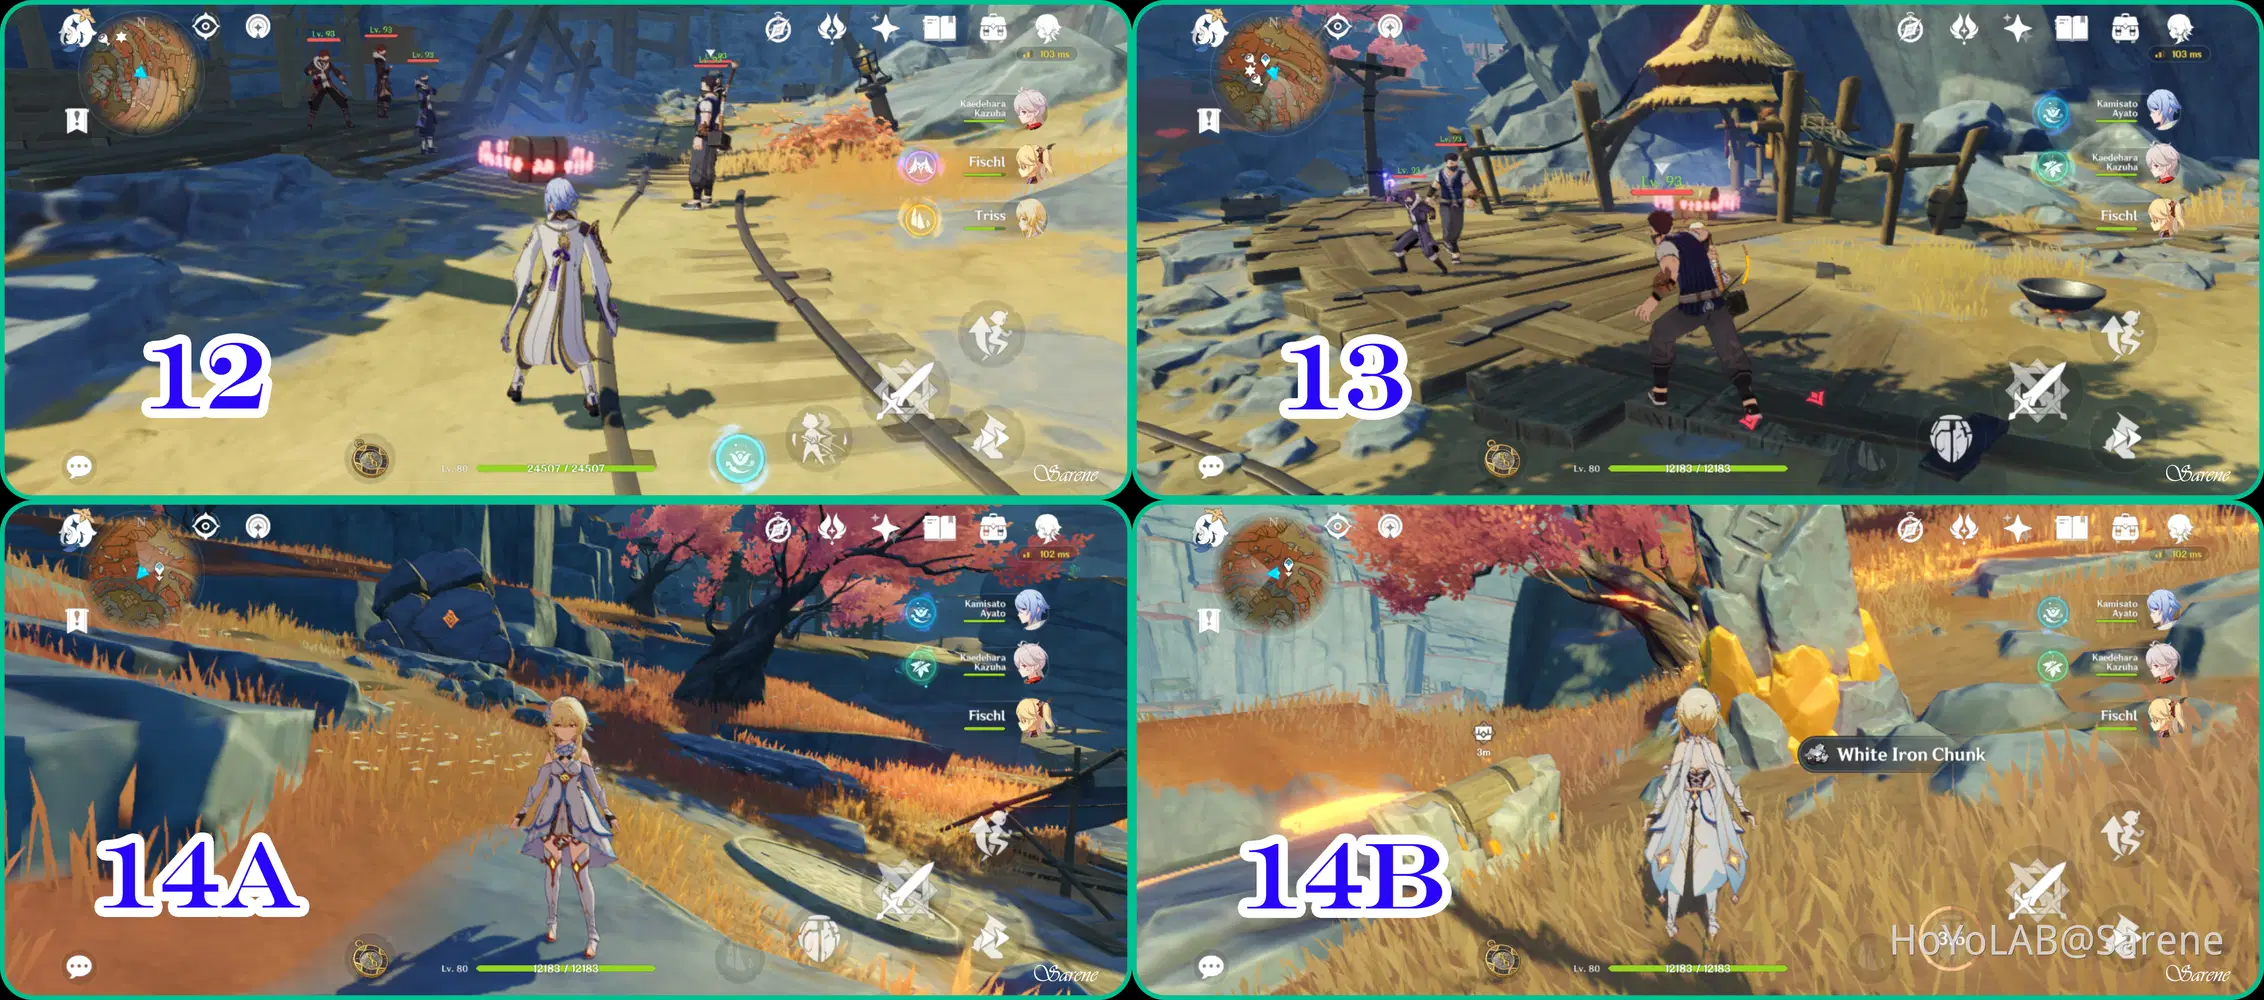
15 - 17
15. Complete the Unique Rock Puzzle
16. Defeat the Hilichurls
17. Complete the Pressure Plate Puzzle (located under chest 16)
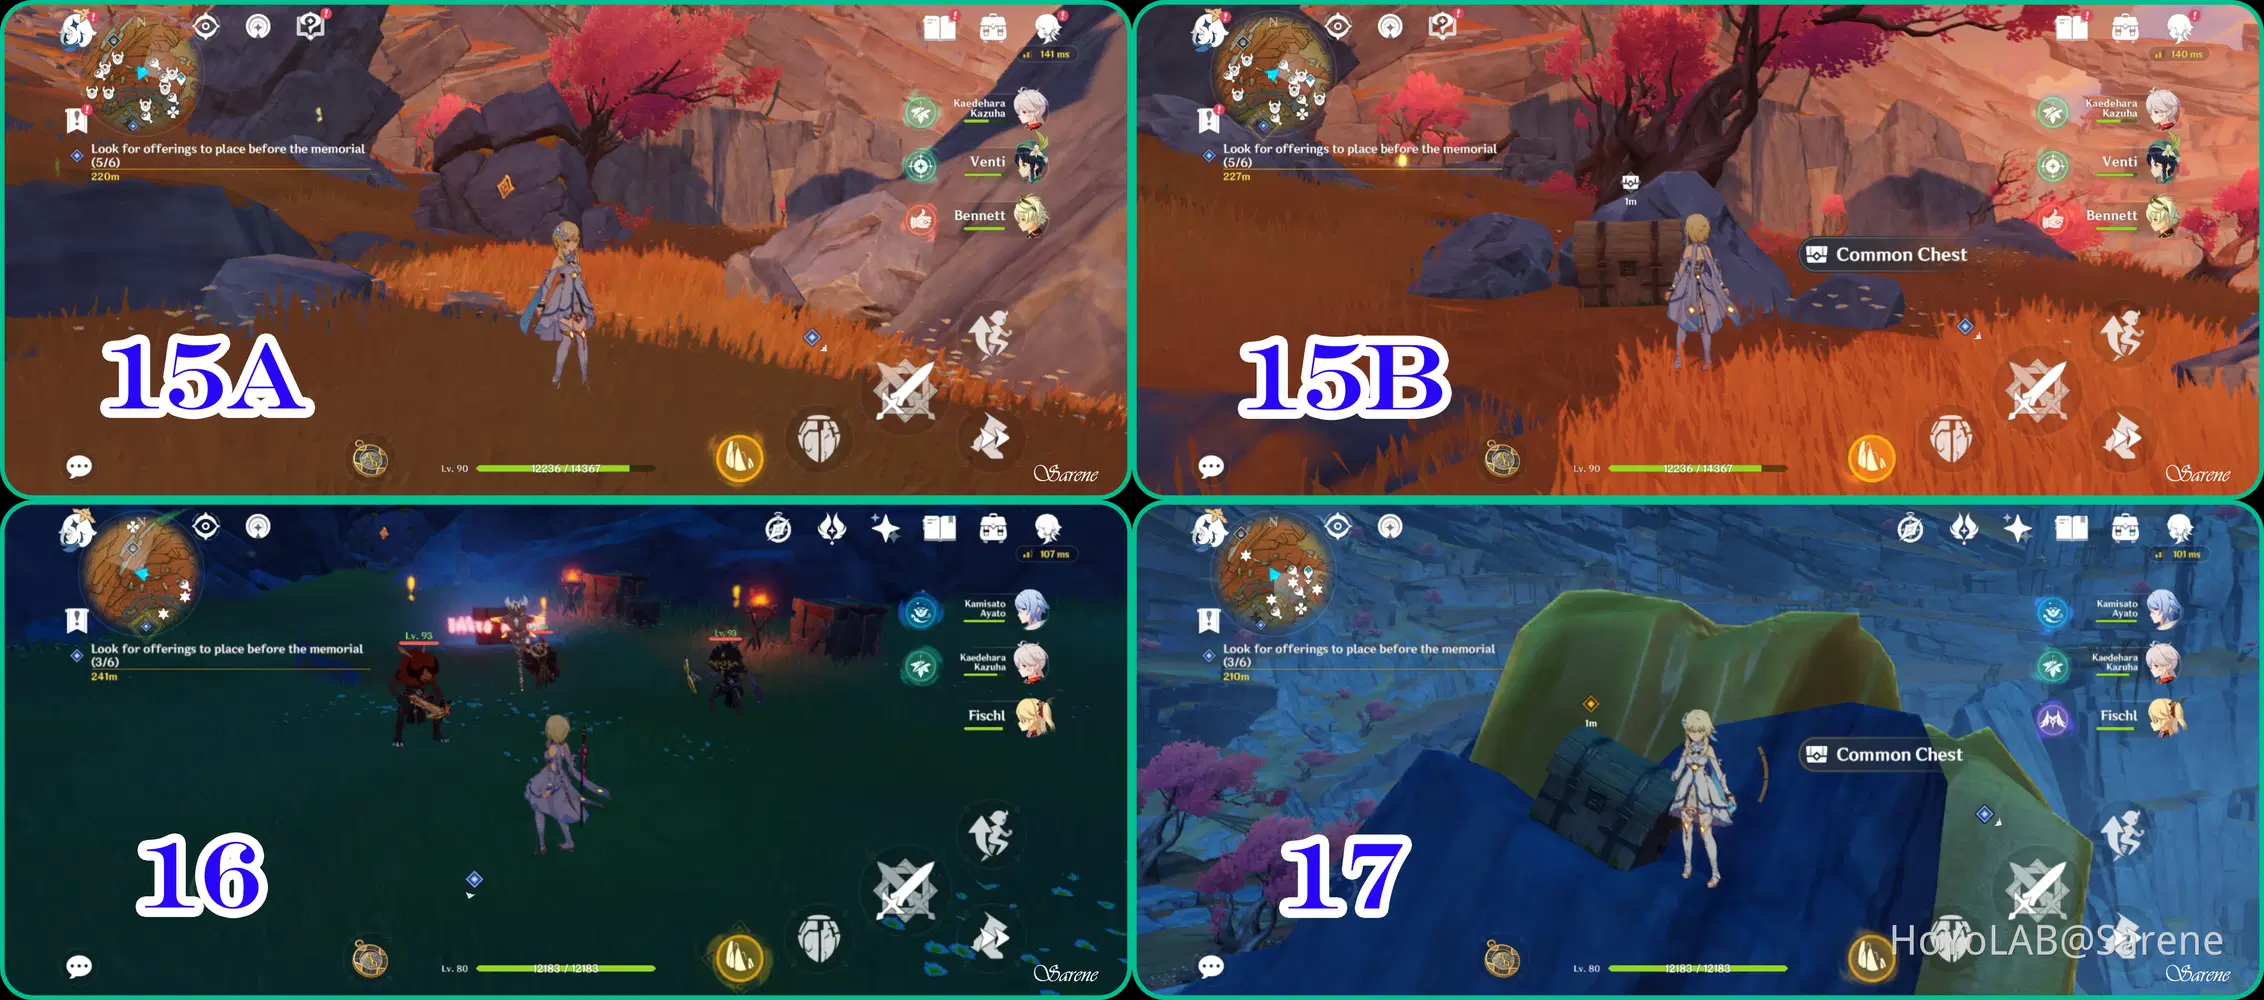
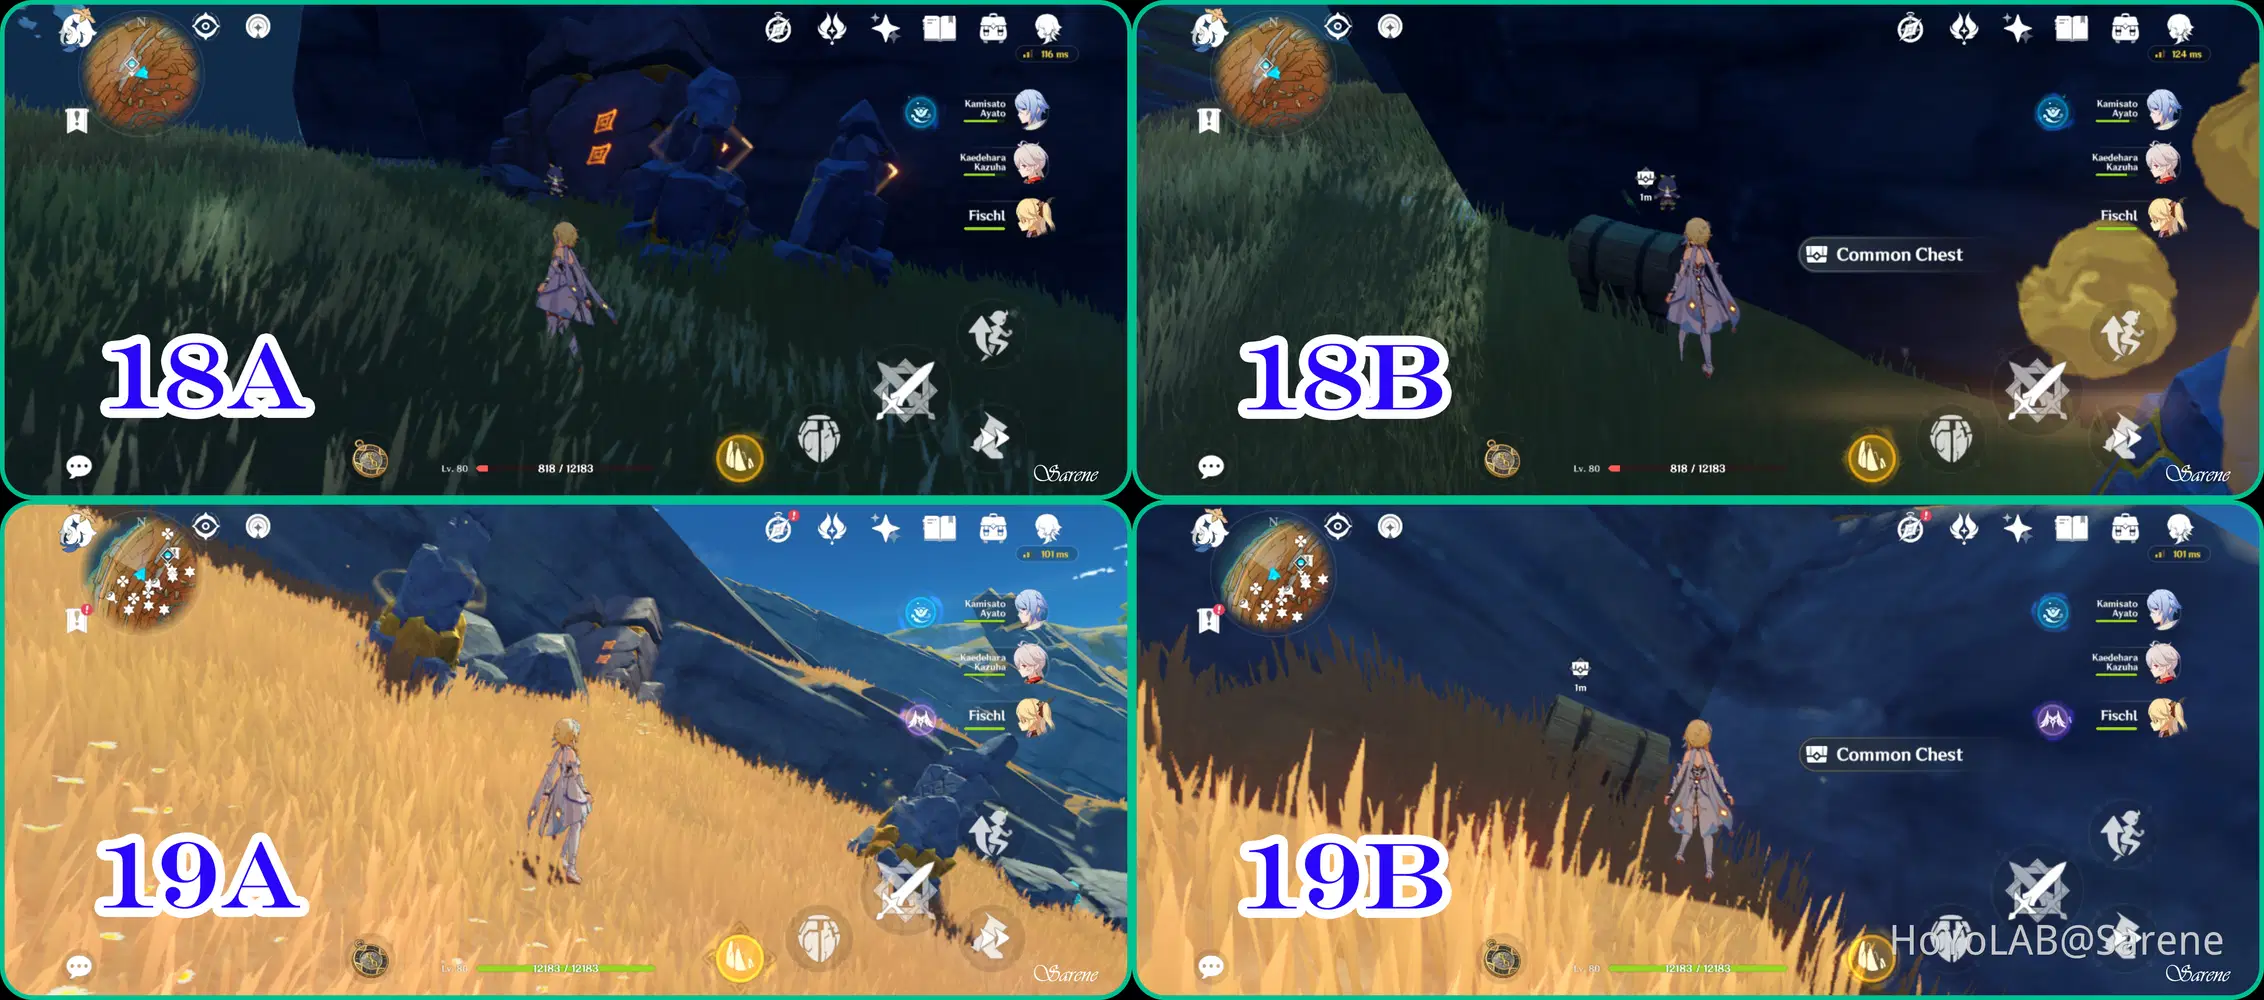
18 - 19
18. Complete the Unique Rock Puzzle
19. Complete the Unique Rock Puzzle
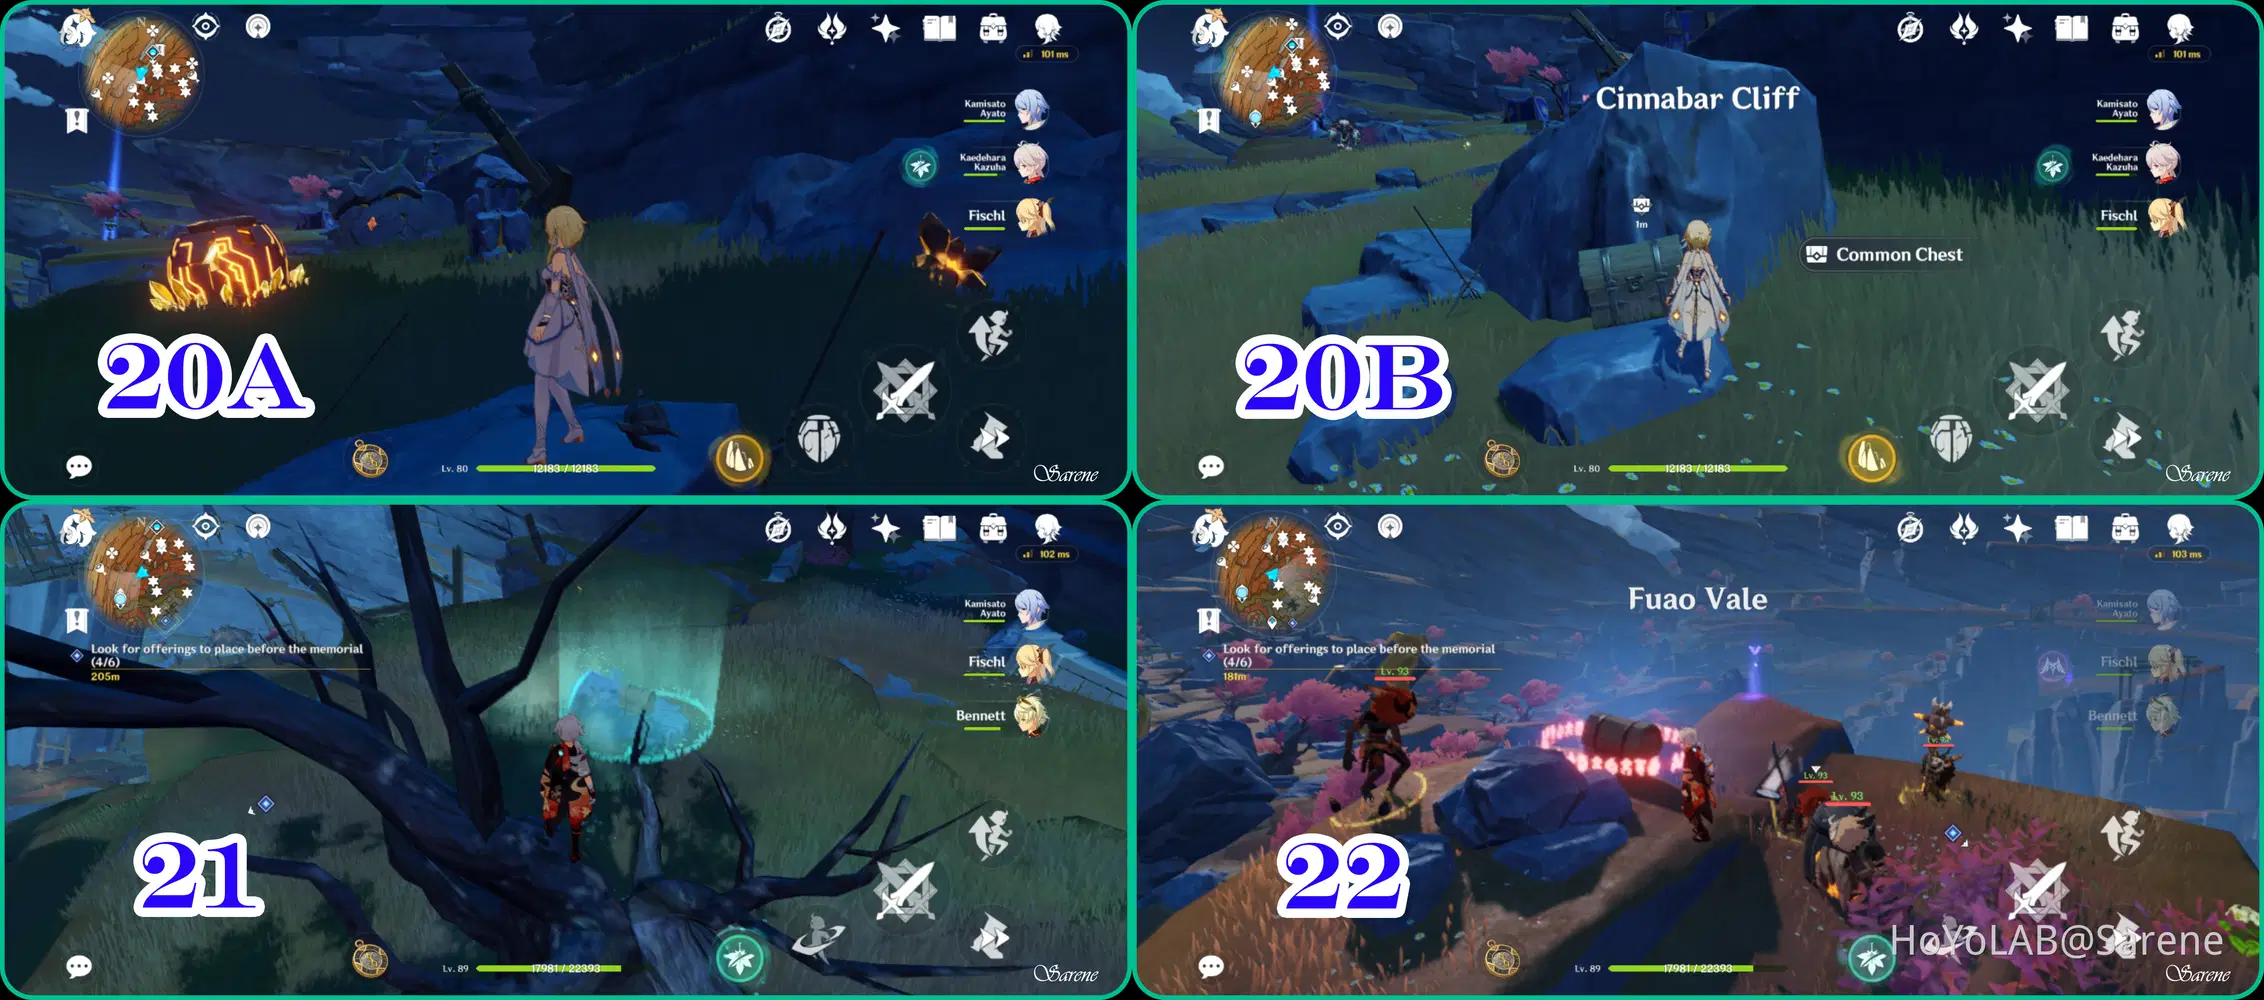
20 - 22
20. Complete the Unique Rock Puzzle
21. Glide down from a nearby tree or cliff
22. Defeat Hilicurls
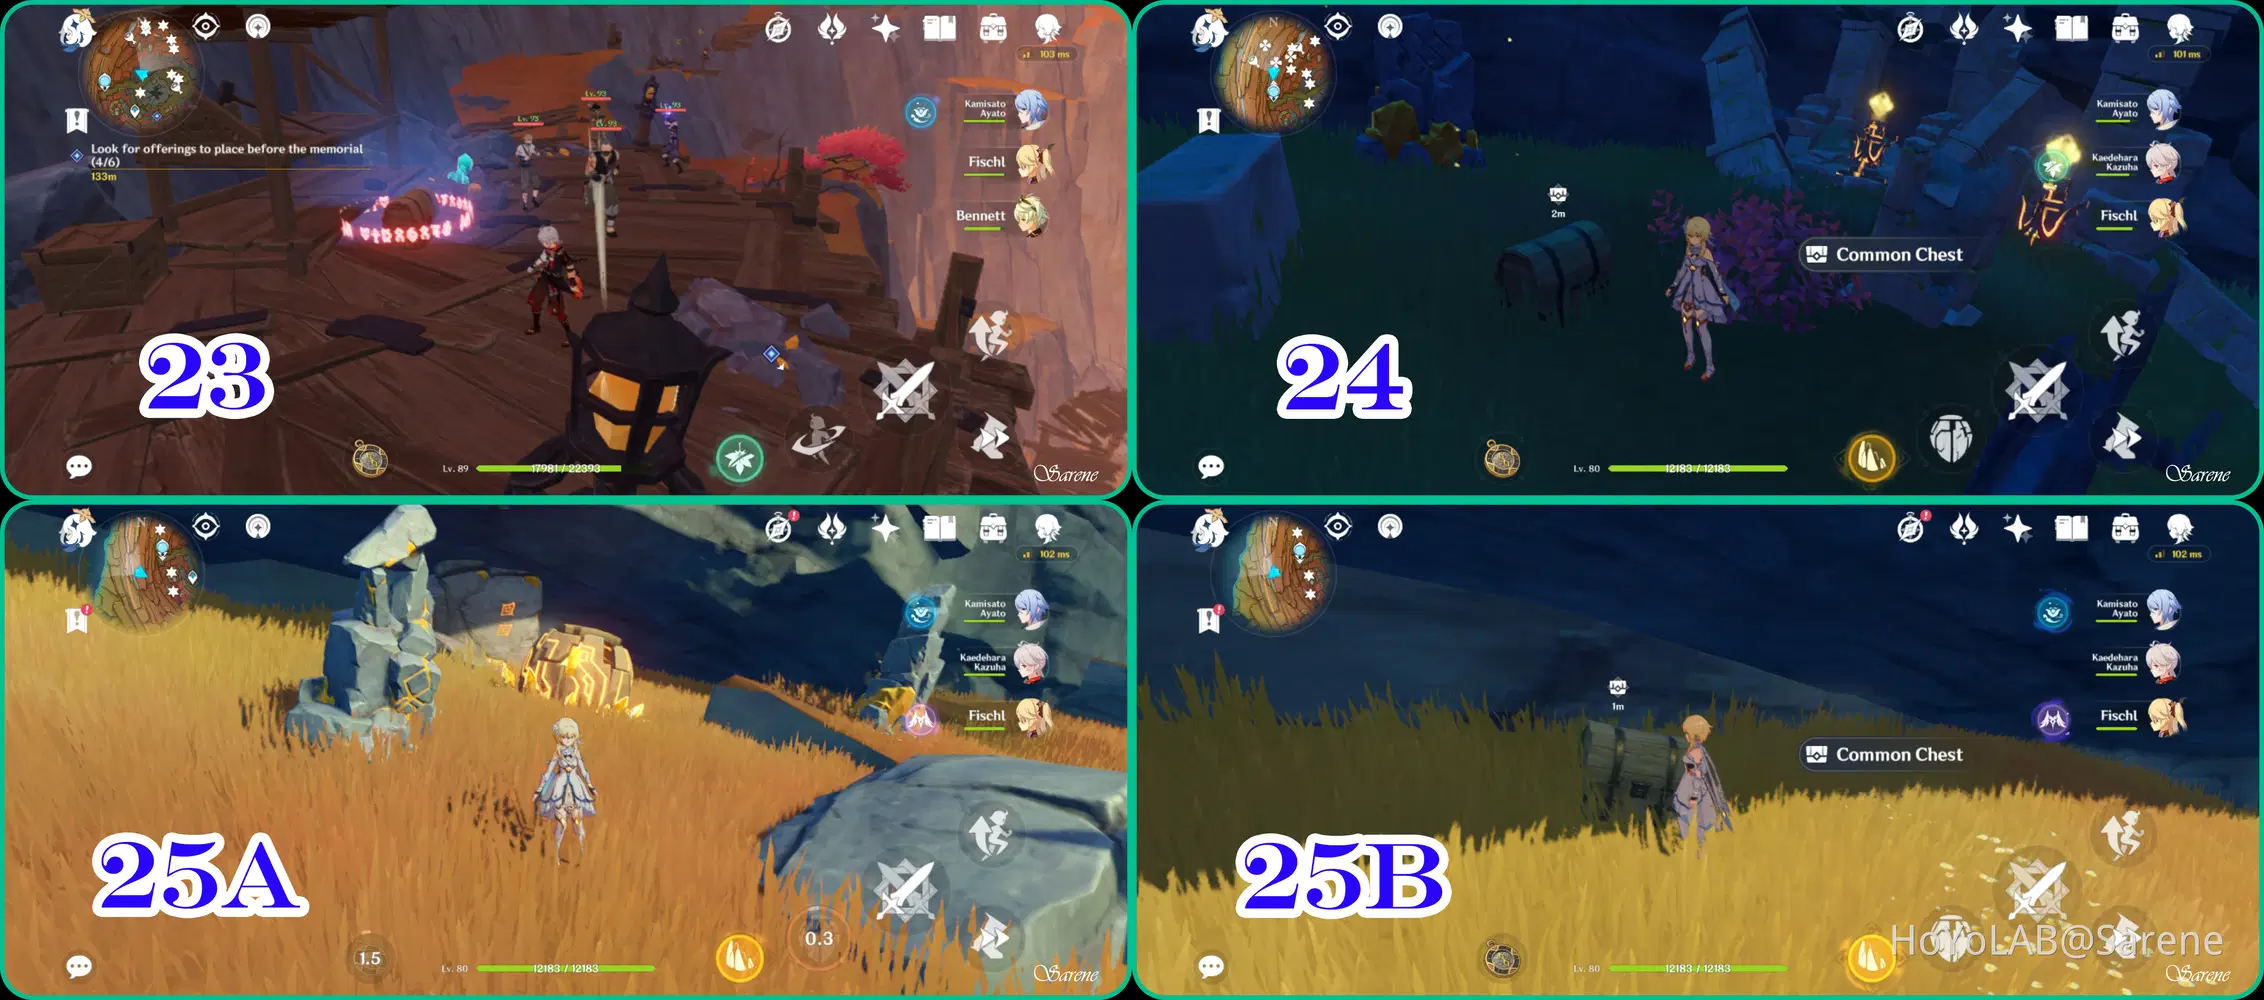
23 - 25
23. Defeat the Treasure Hoarder Camp
24. Strike the Unique Rock Pillar to light the Geo Totems
25. Complete the Unique Rock Puzzle
26
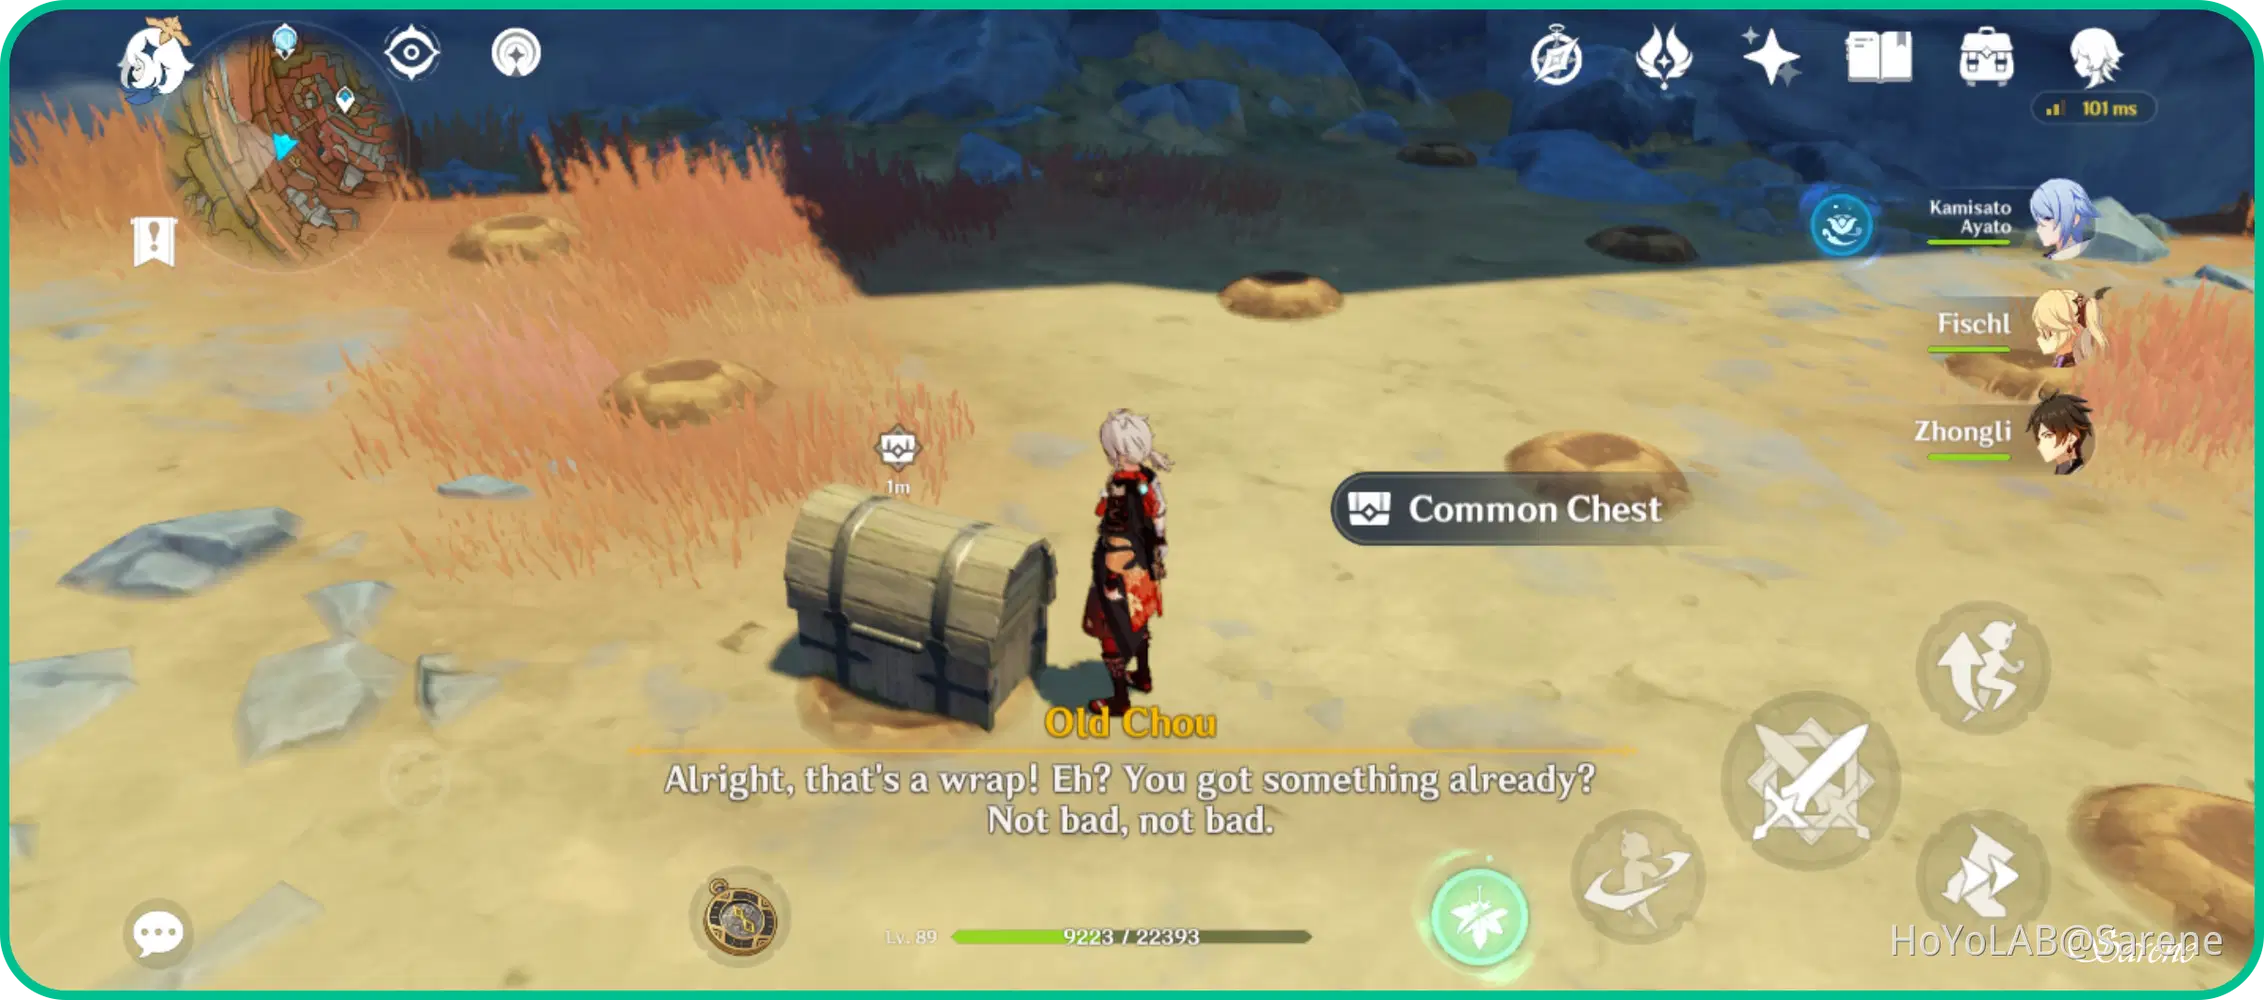
Locate the treasure in Old Chou's Treasure hunting game to obtain the Common Chest. You can continue playing to also obtain an exquisite and a precious chest.
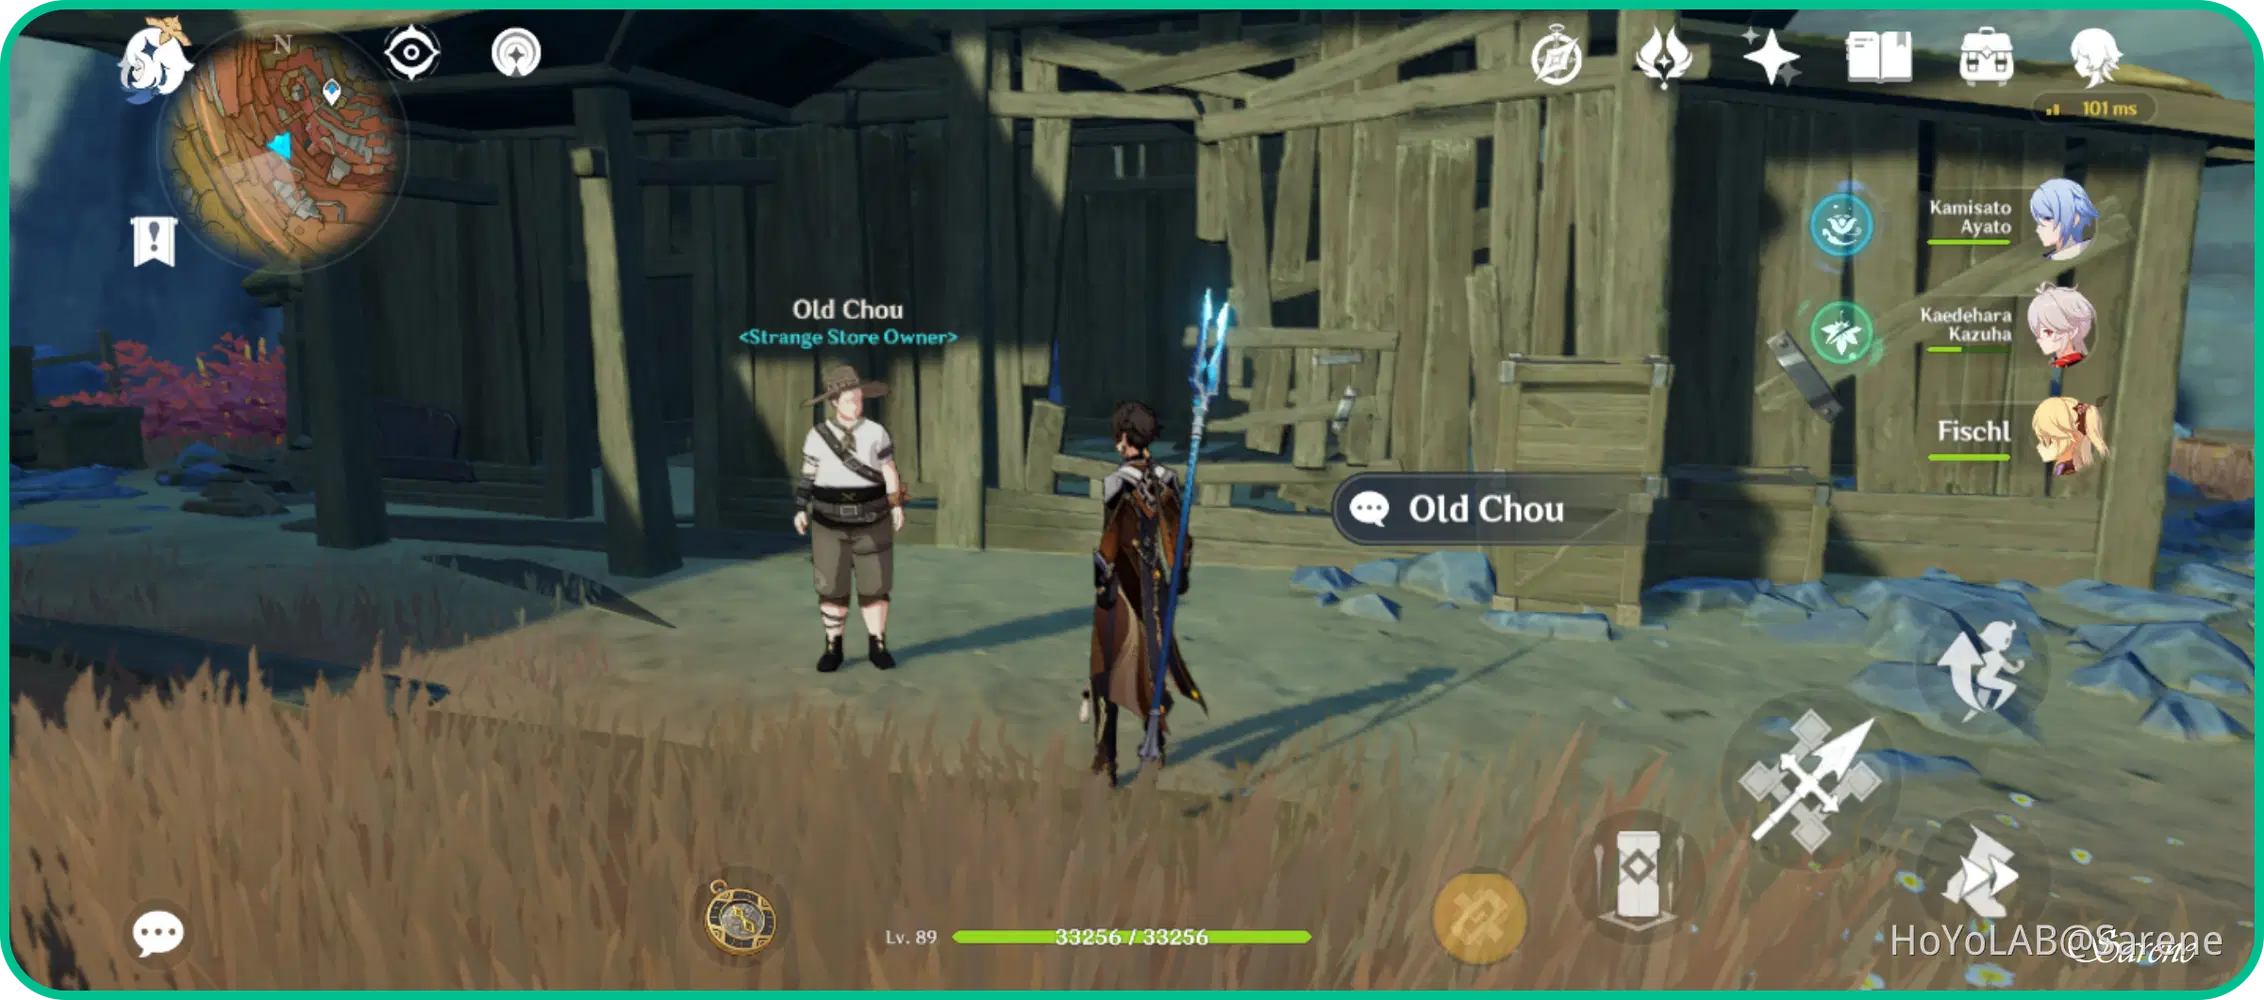
Treasure Hunting Tips:
1. Empty: No adjacent holes contain explosive barrels
2. Cabbage: 1 adjacent hole contains an explosive barrel
3. Iron Ore: 2 adjacent holes contain an explosive barrel
4. Treasure: 4 adjacent holes contain explosive barrels
Adjacent Holes: up, down, left, and right (not diagonal)
If you run out of tries, don't worry. Wait till reset the next day, and you can try again.
27 - 28
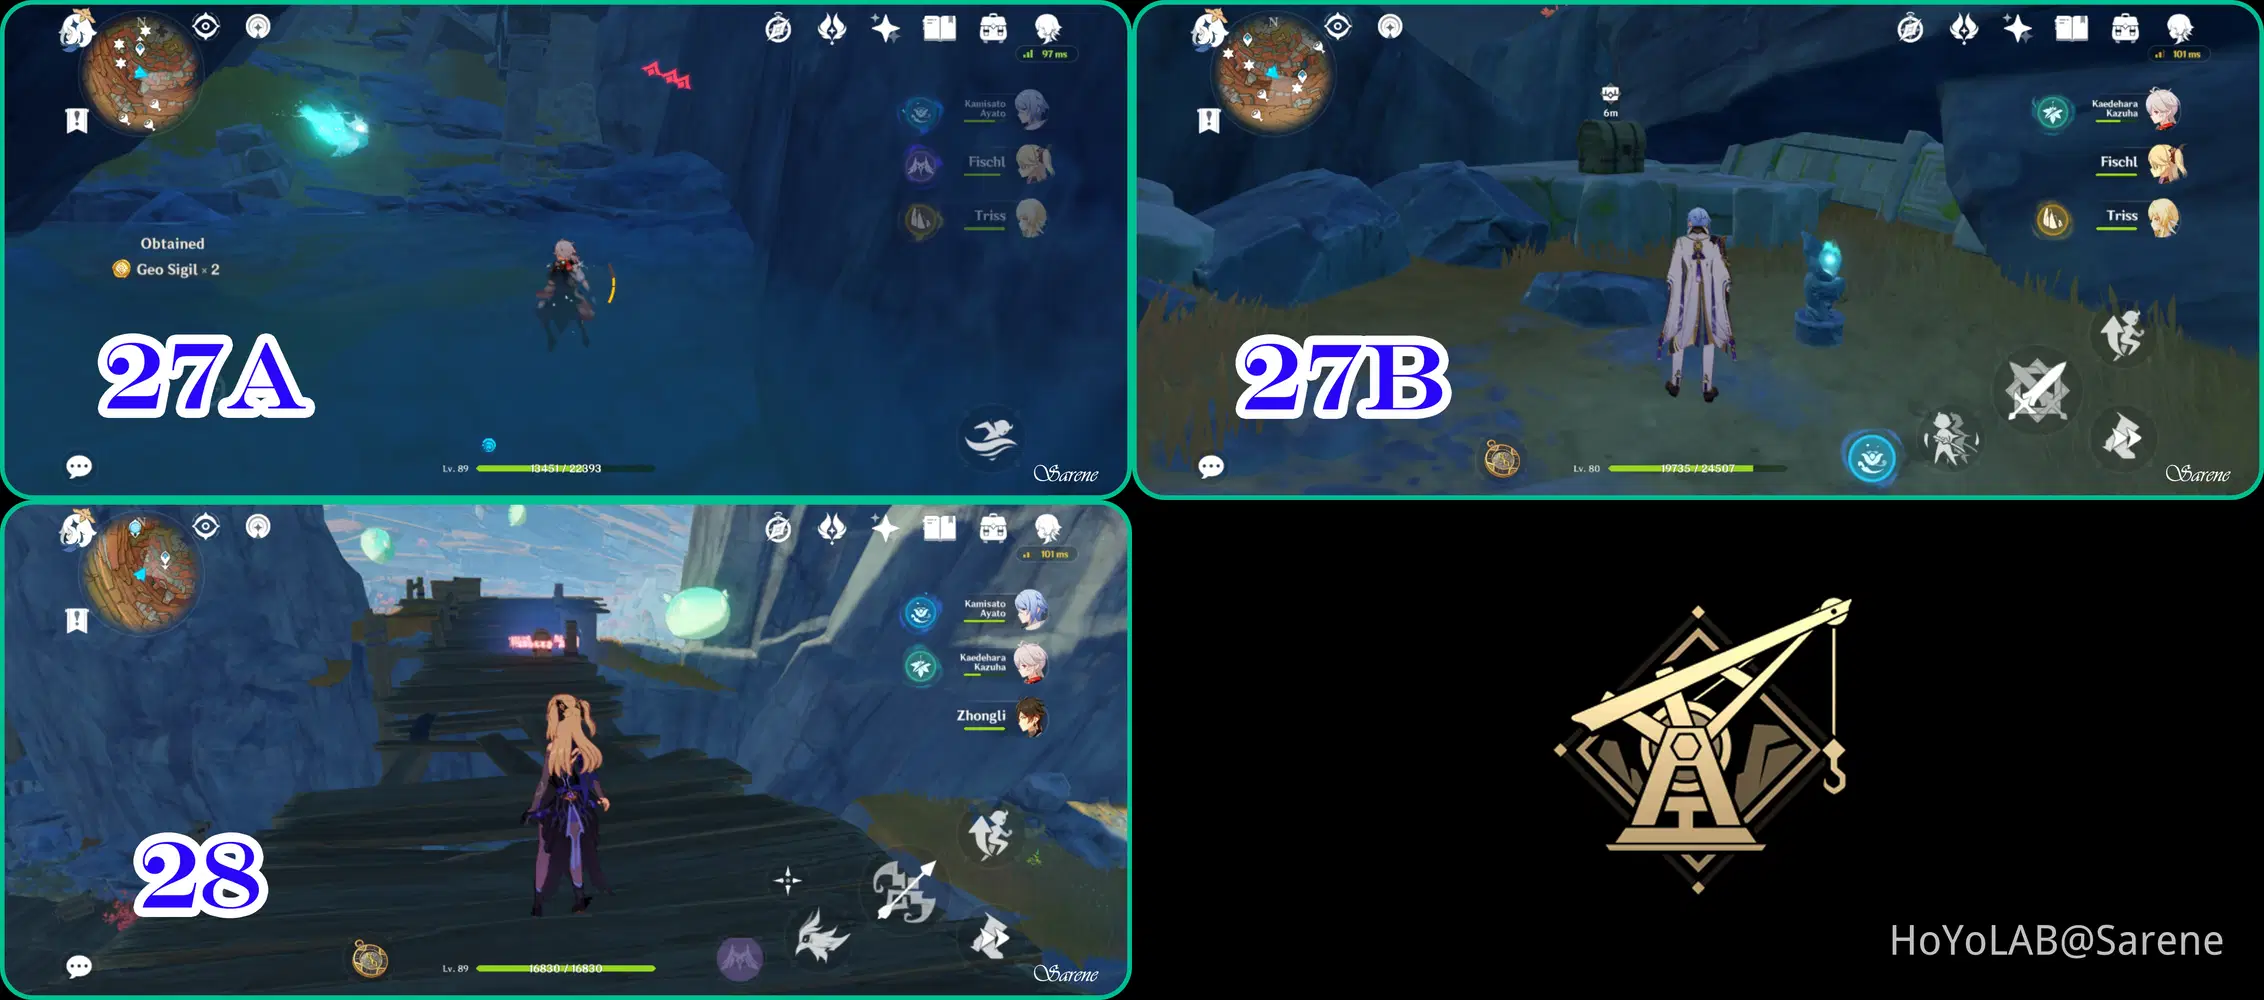
27. Follow the Seelie to its Court
28. Shoot down the Anemo Slimes
29 - 30
29. Destroy the box and defeat the Slimes
30. Follow the Seelie to its court

31 - 32
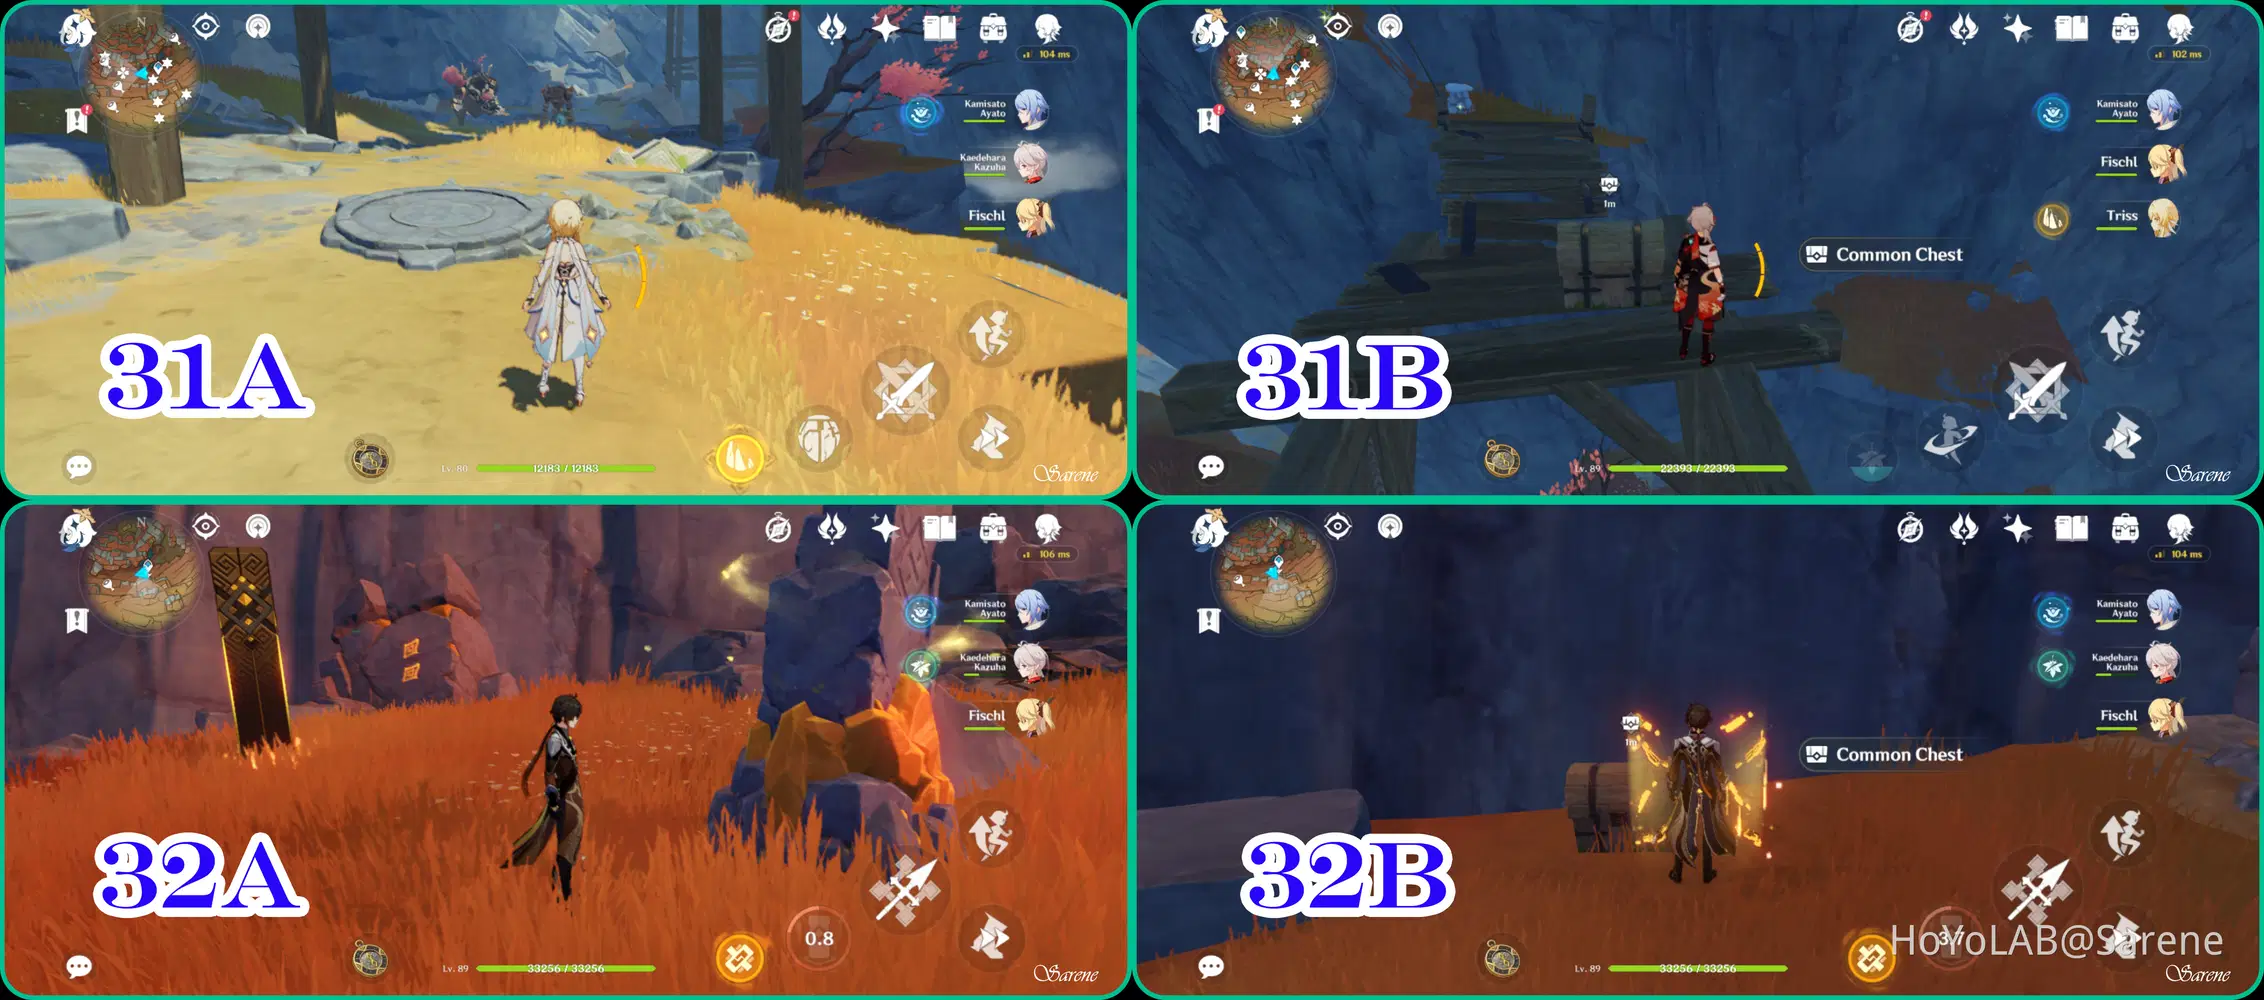
31. Complete the Pressure Plate Puzzle
32. Complete the Unique Rock Puzzle
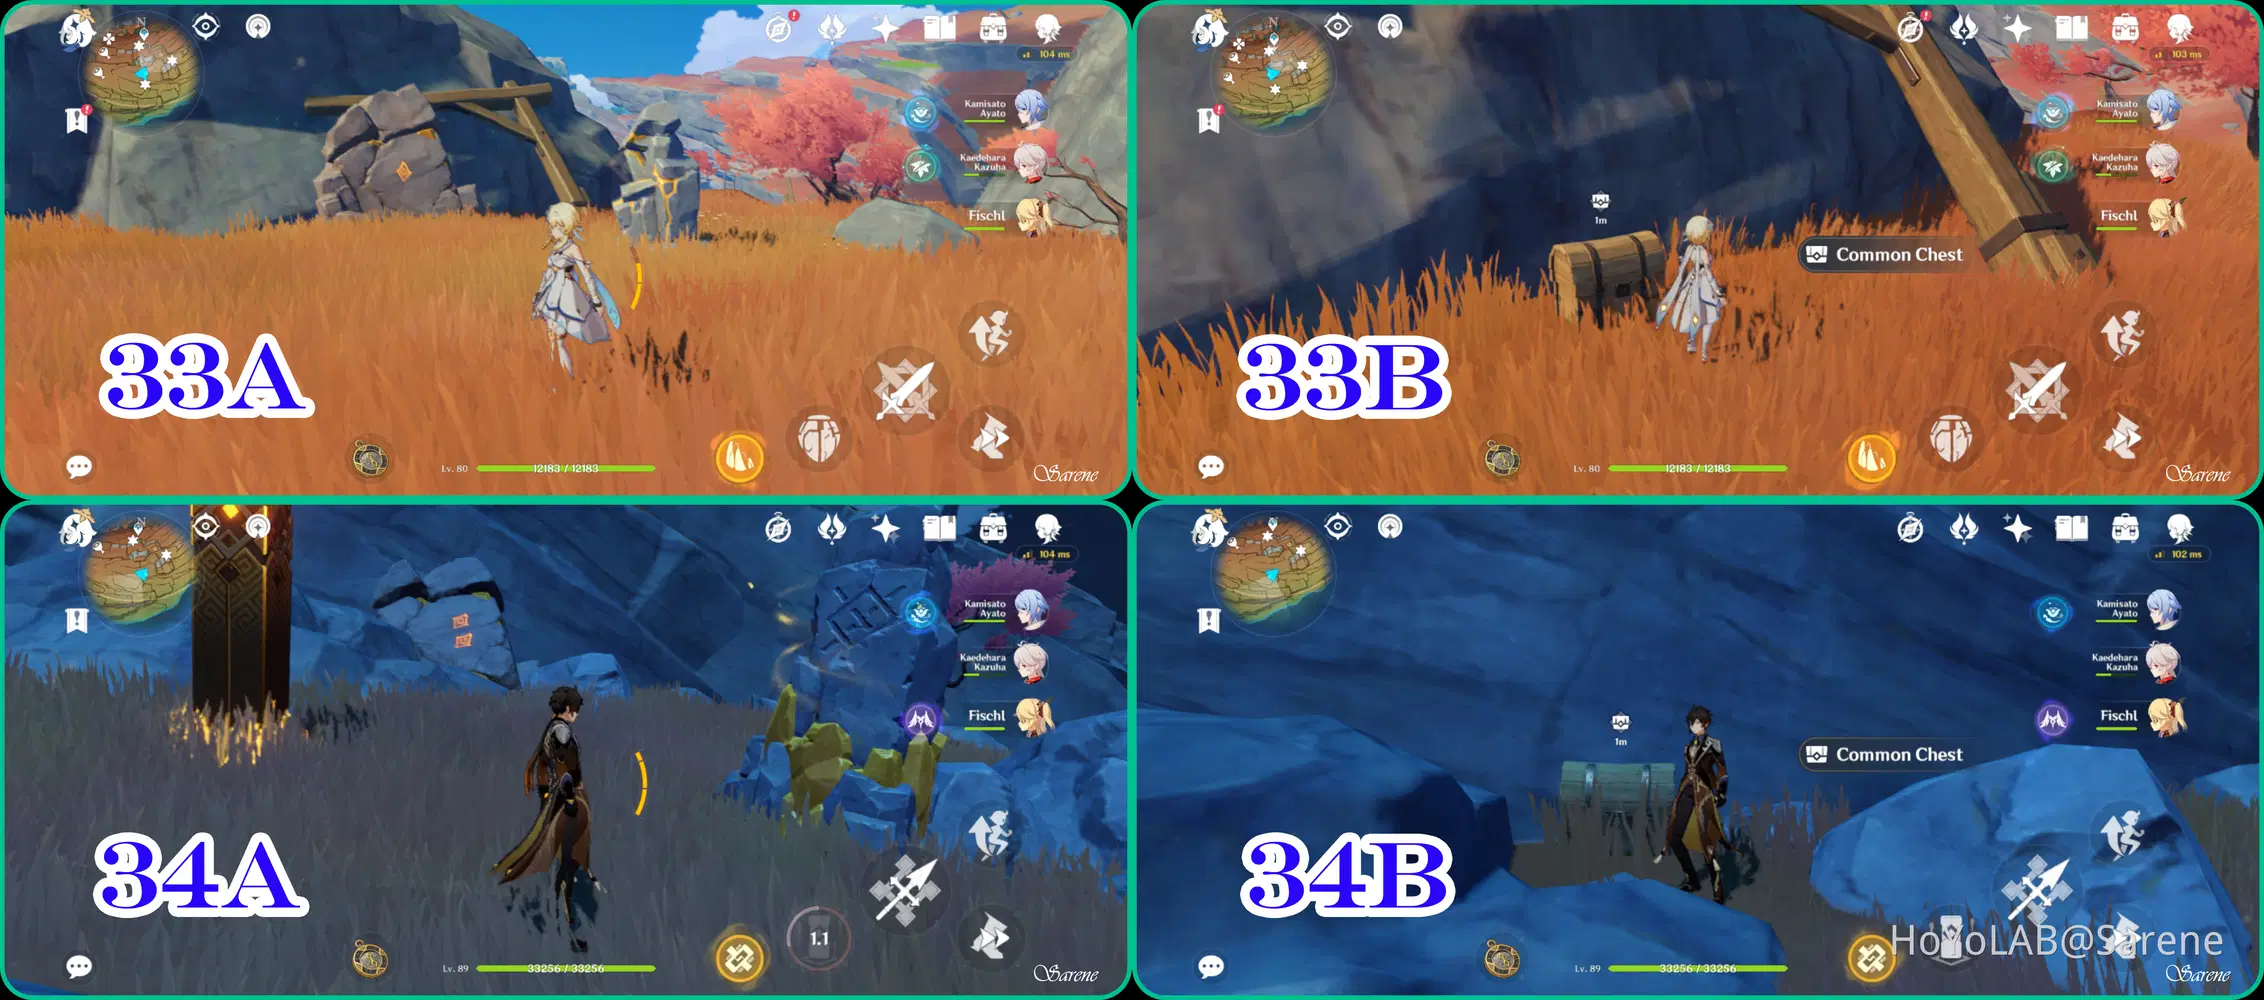
33 - 34
33. Complete the Unique Rock Puzzle
34. Complete the Unique Rock Puzzle
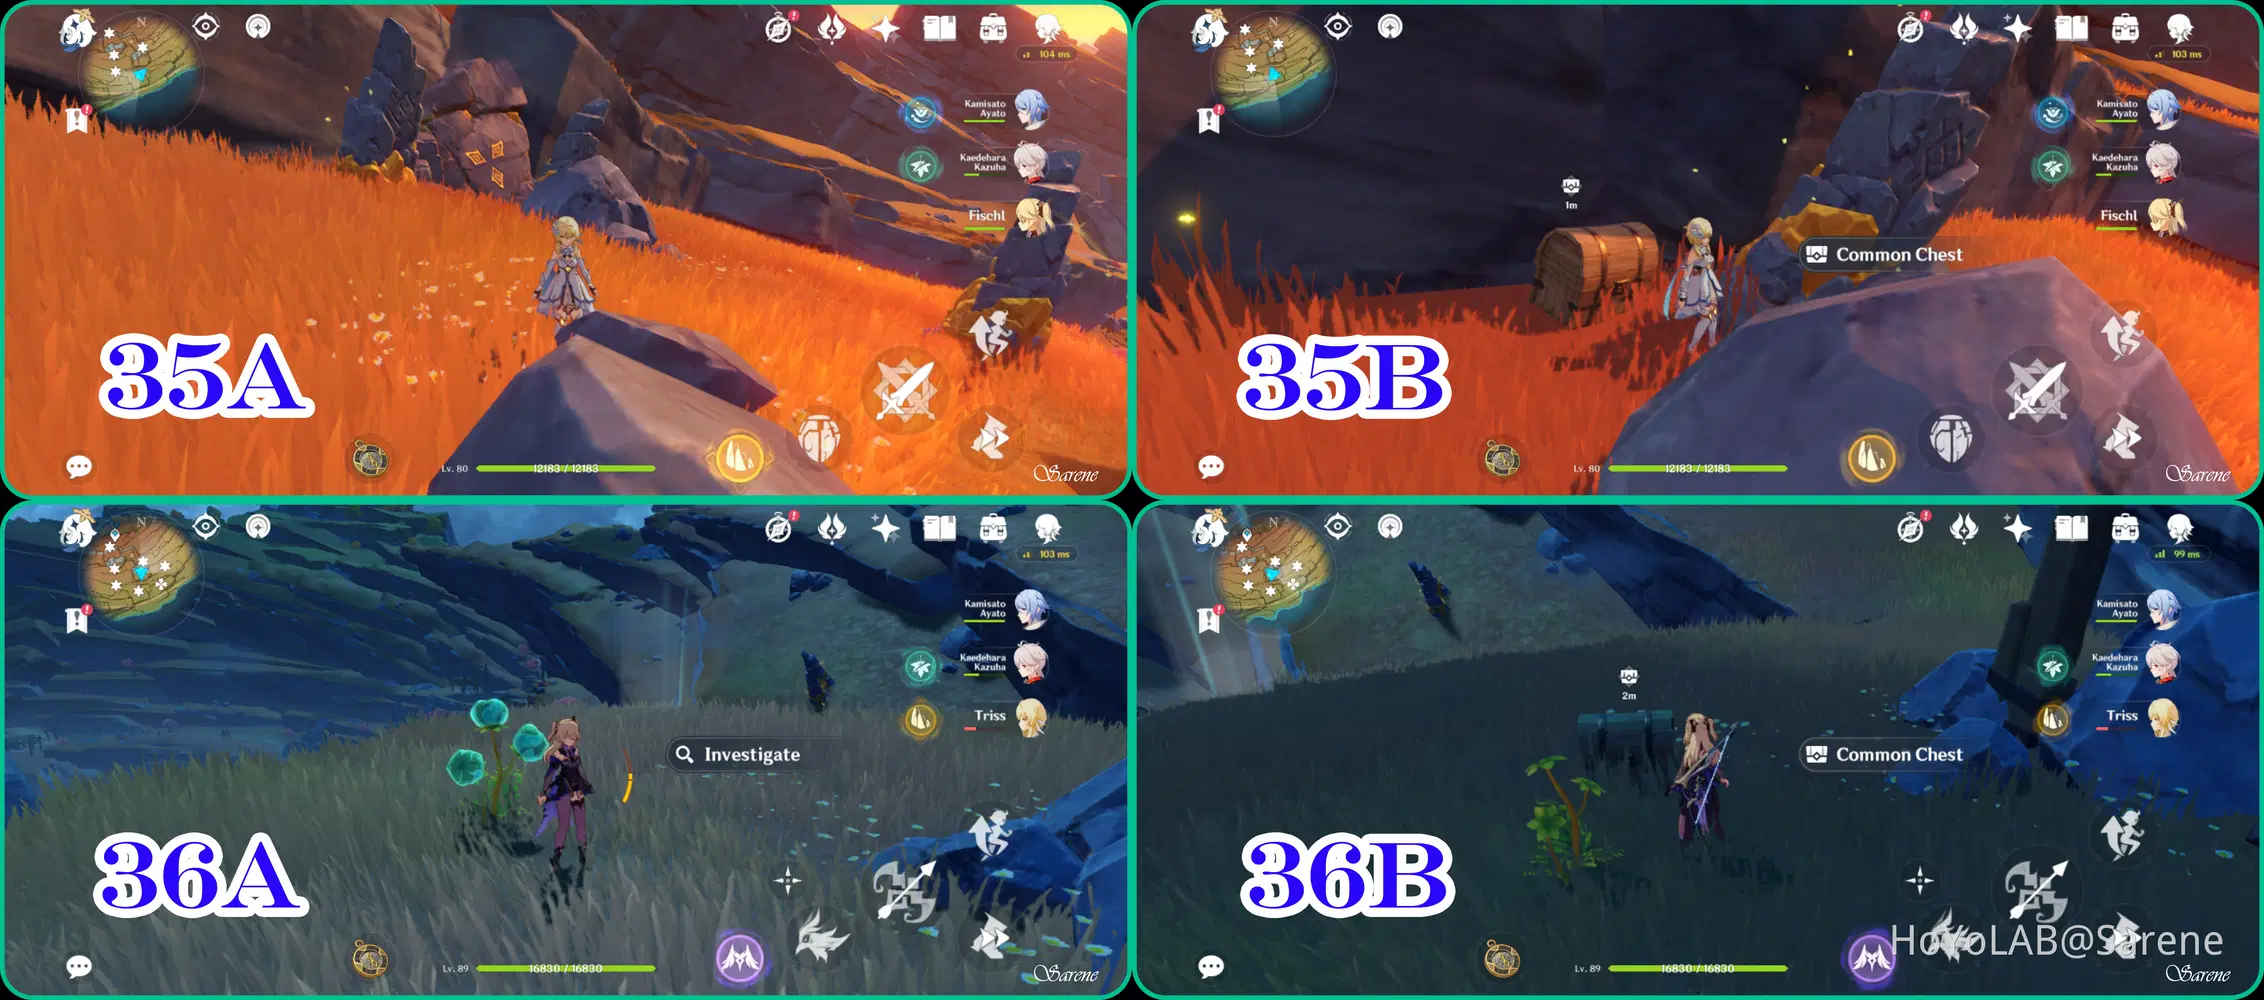
35 - 36
35. Complete the Unique Rock Puzzle
36. Complete the Balloon Plant Challenge
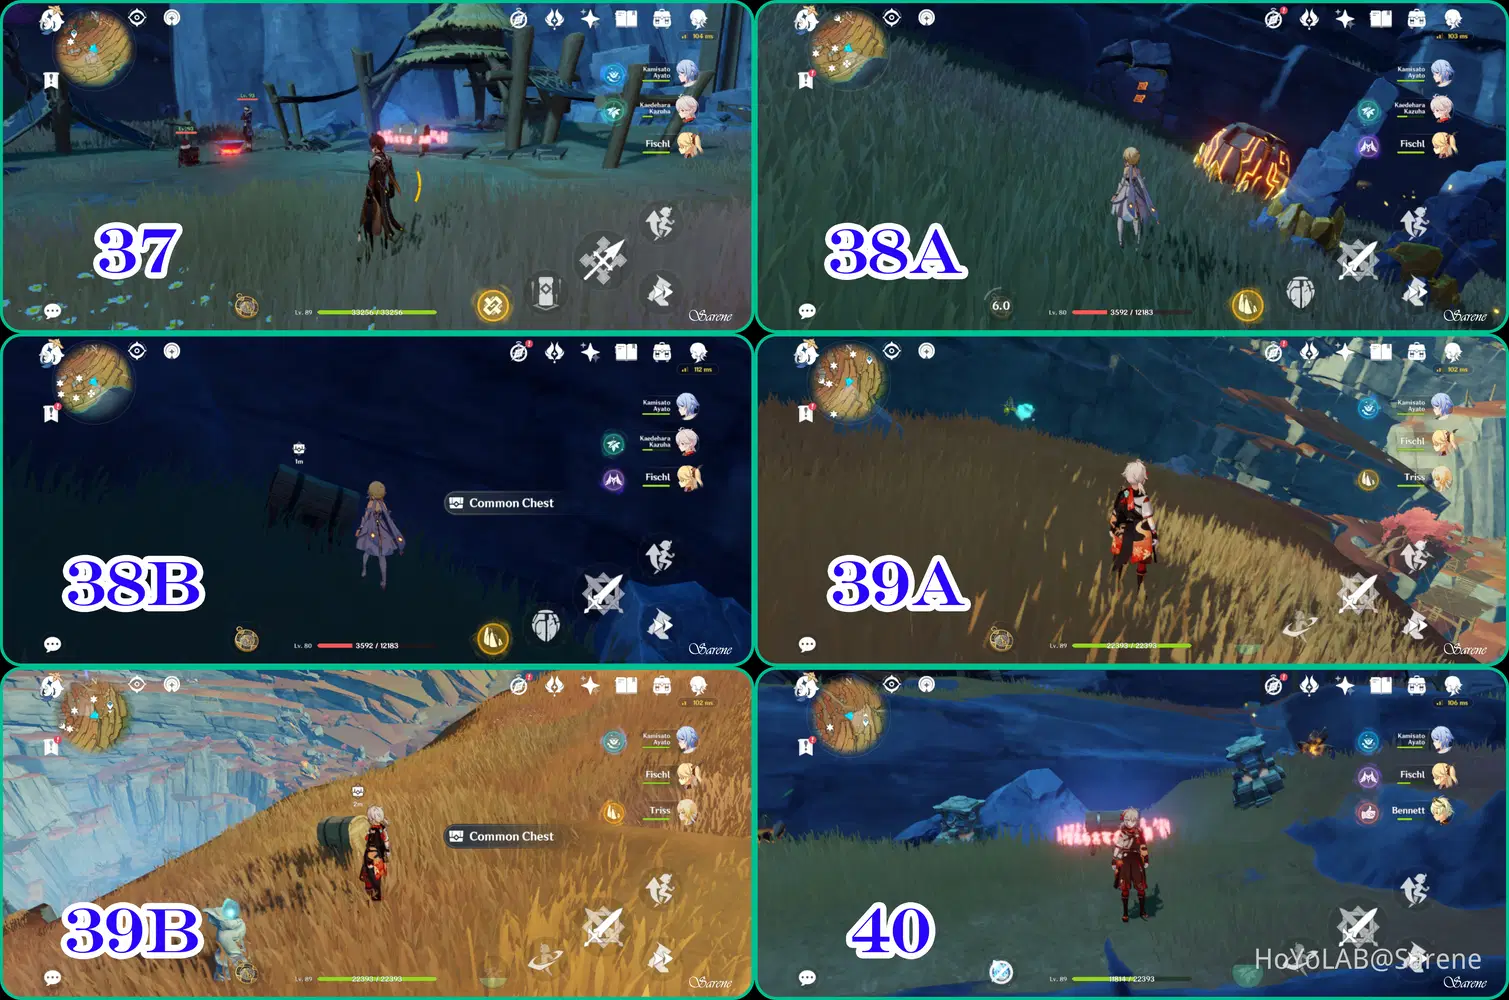
37 - 40
37. Defeat the Treasure Hoarder Camp
38. Complete the Unique Rock Puzzle
39. Follow the Seelie to its Court
40. Complete the Light Puzzle
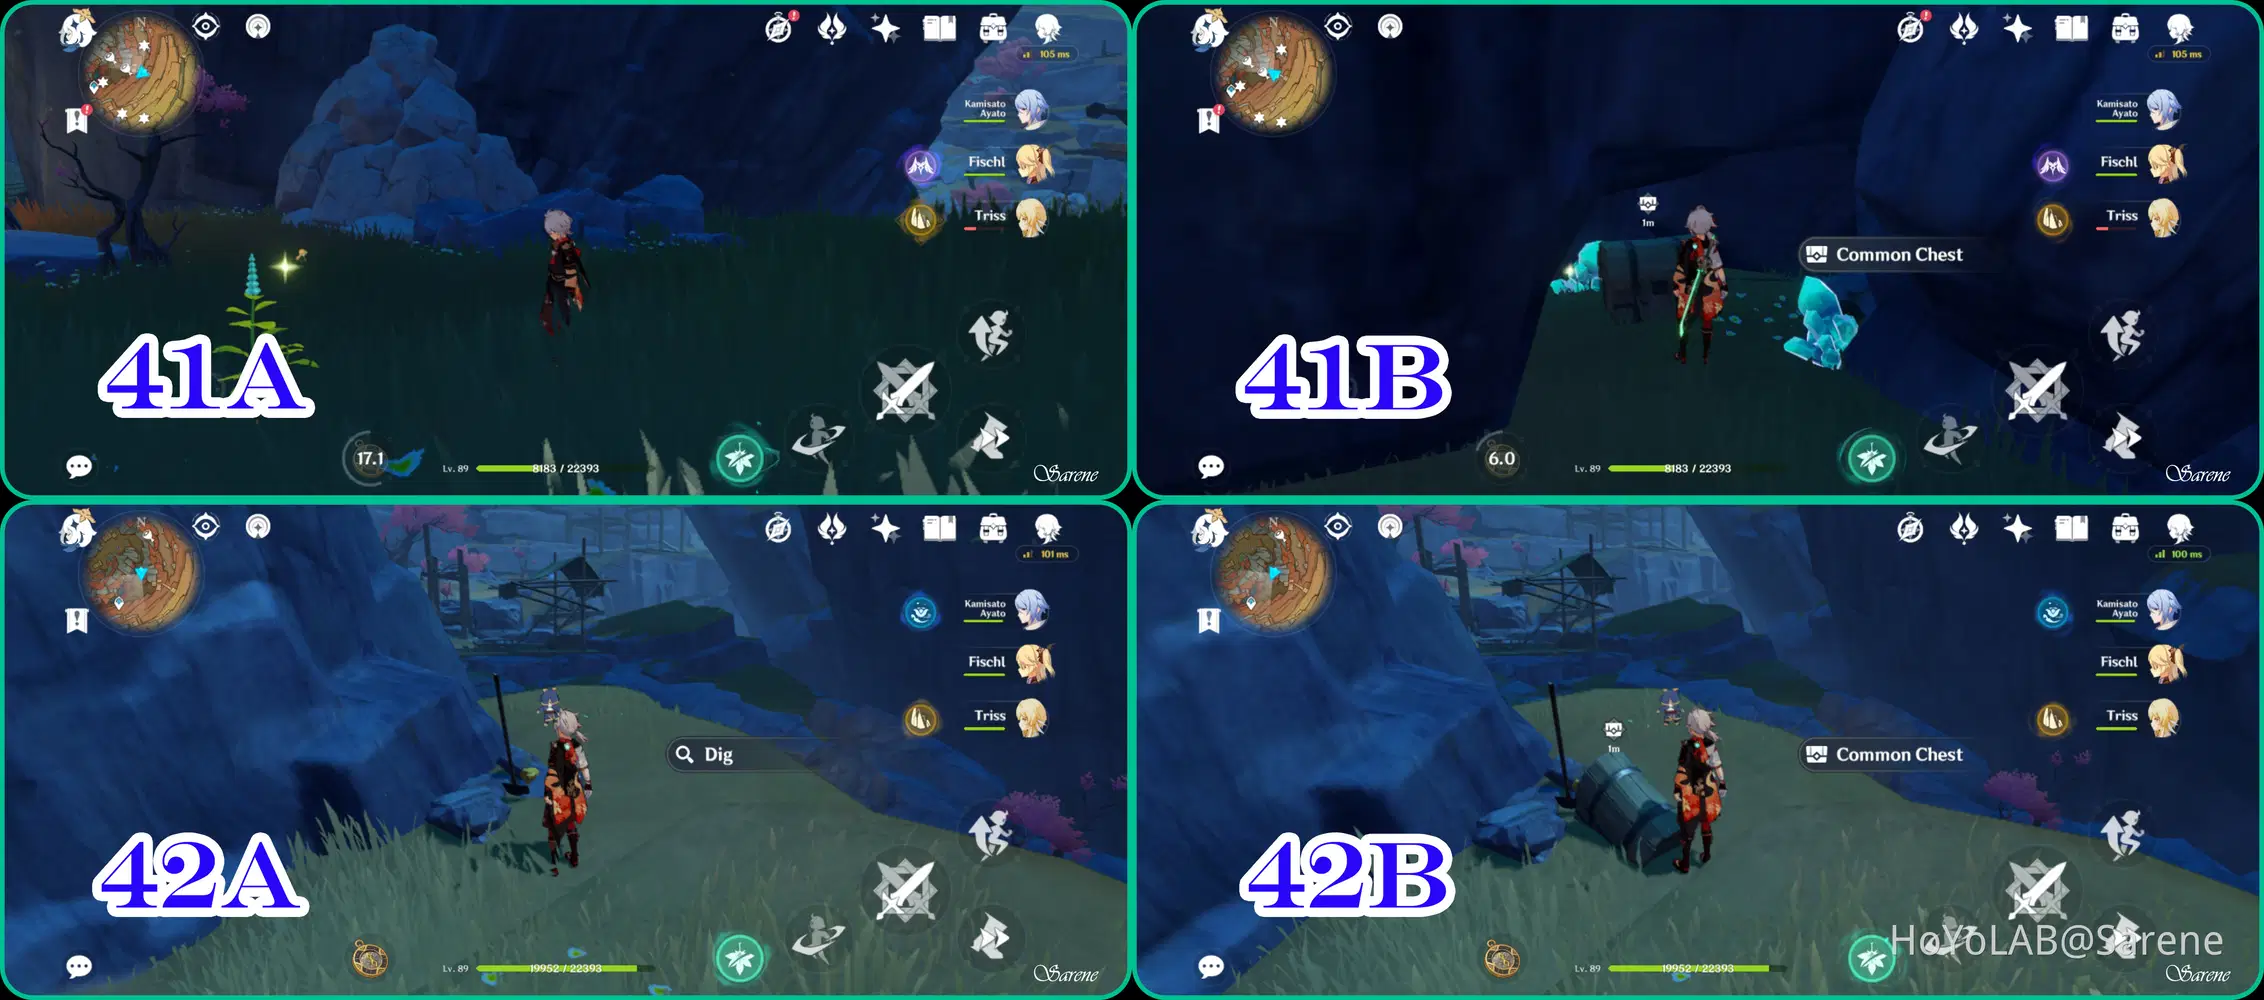
41 - 42
41. Destroy the breakable boulders to reveal the chest
42. Walk up to the shovel and select the Dig option
43 - 44
43. Complete the Balloon Plant Challenge
44. Destroy the boxes to spawn the chest
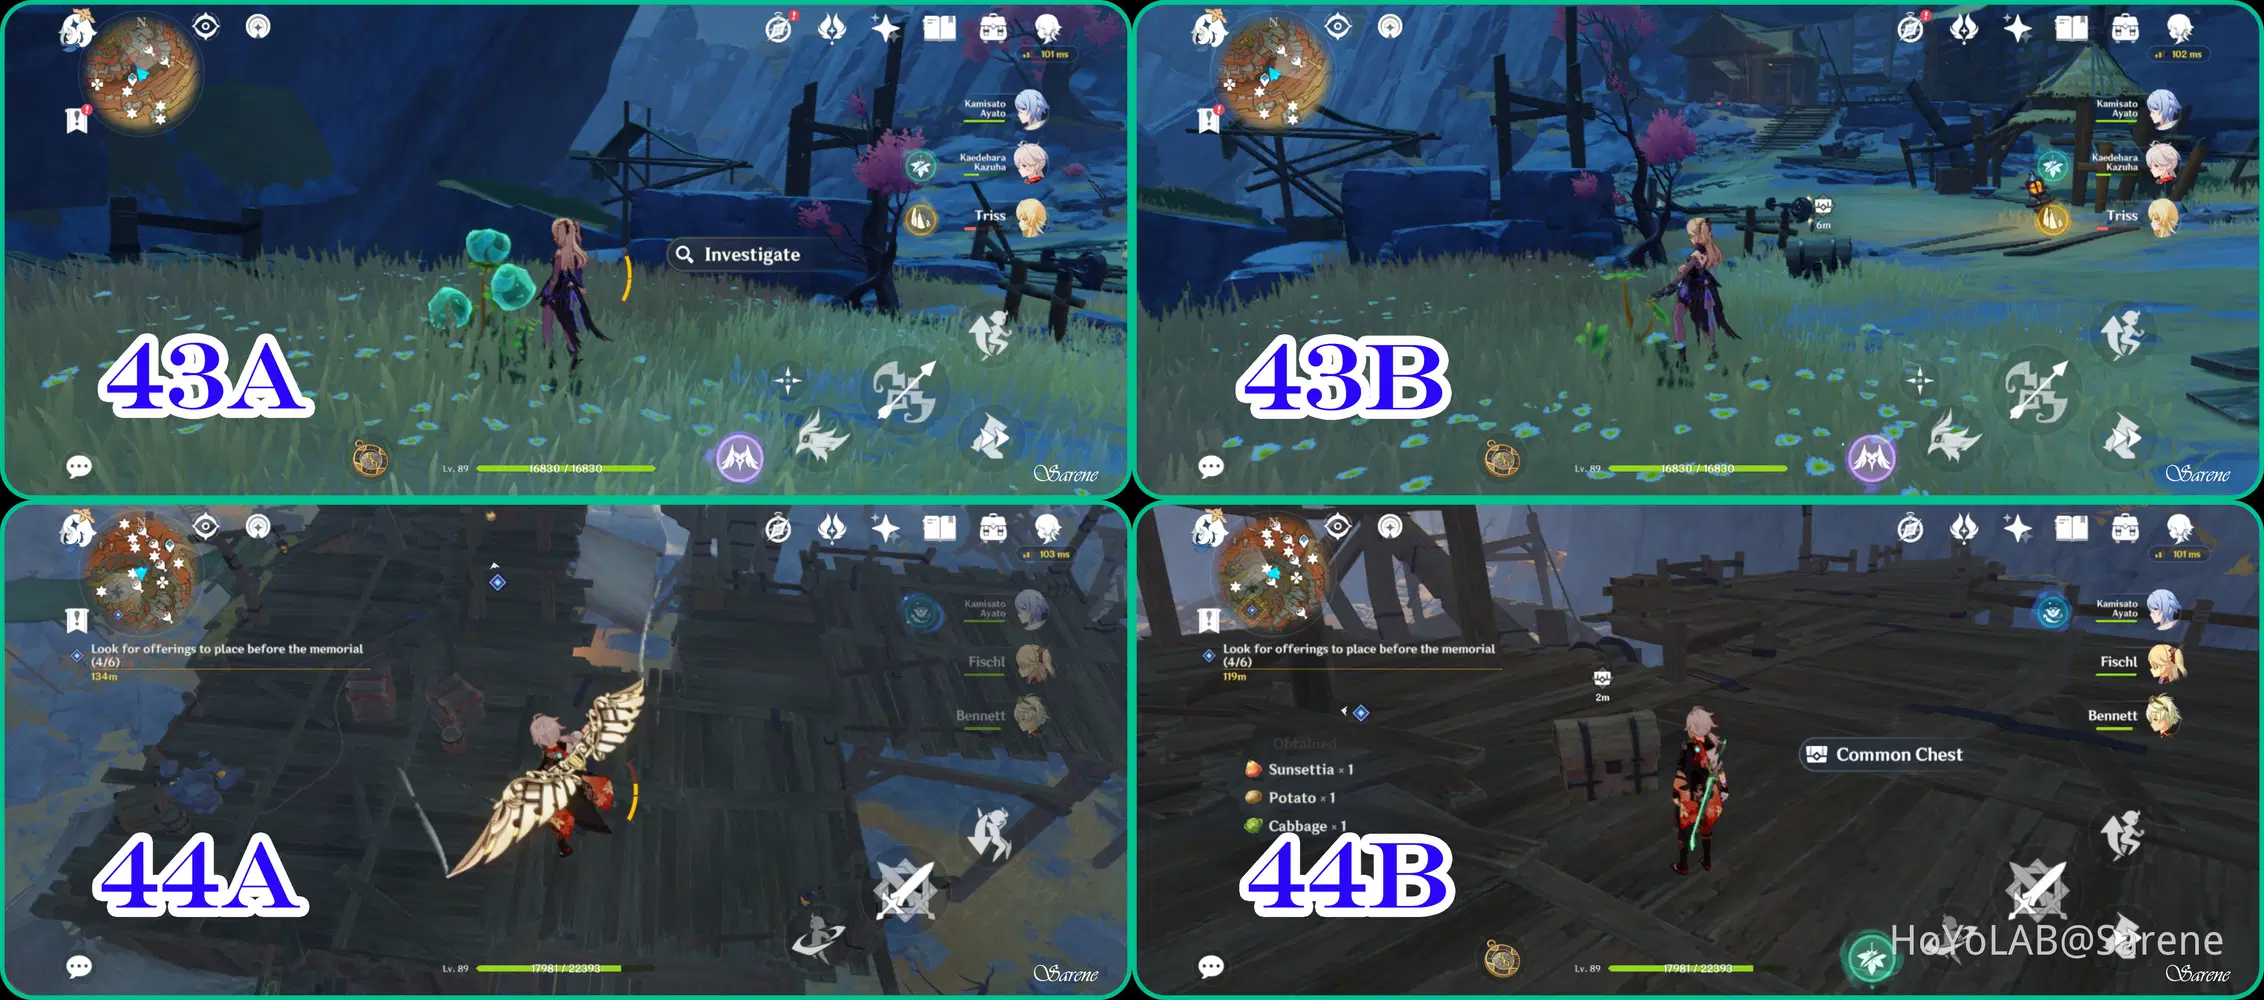
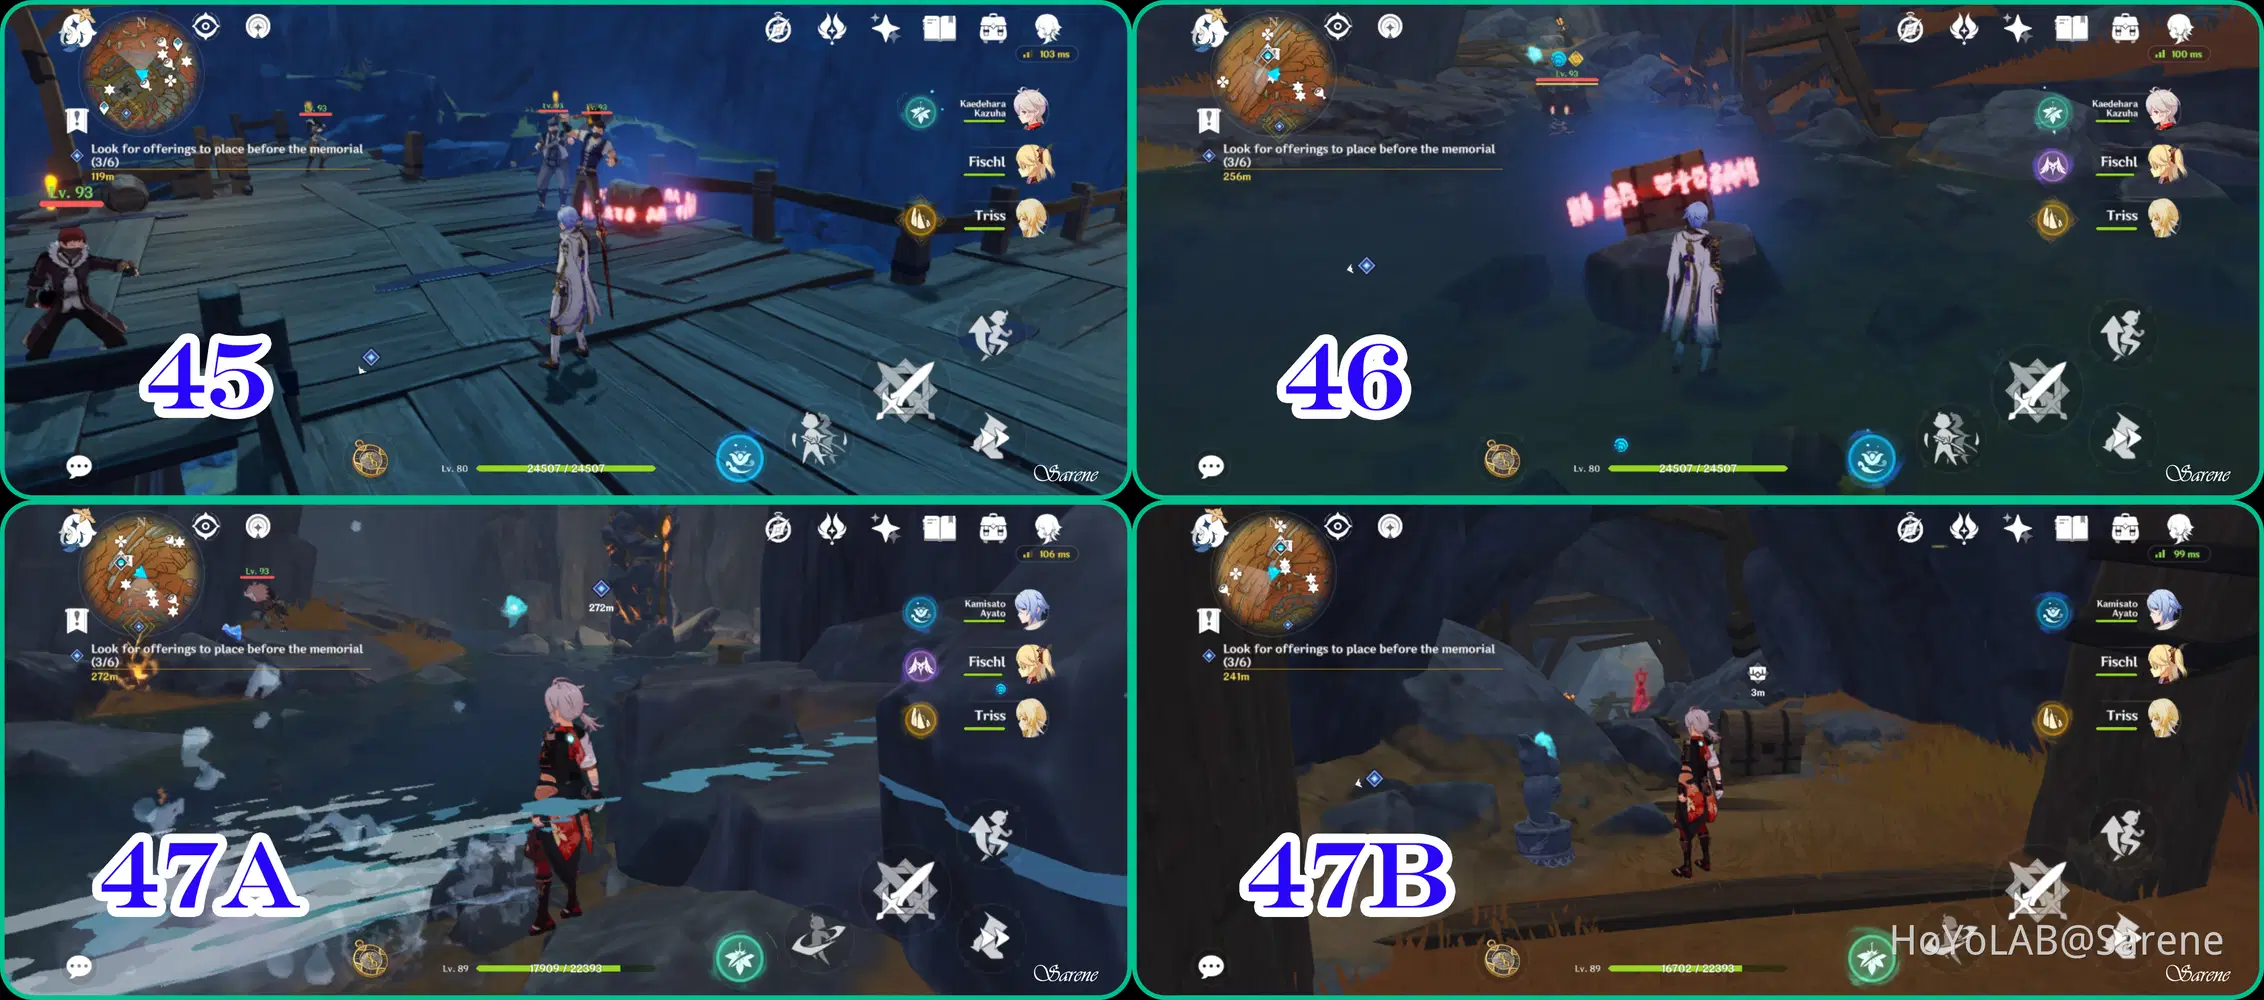
45 - 47
45. Defeat the Treasure Hoarders
46. Defeat the Slimes
47. Follow the Seelie to its Court
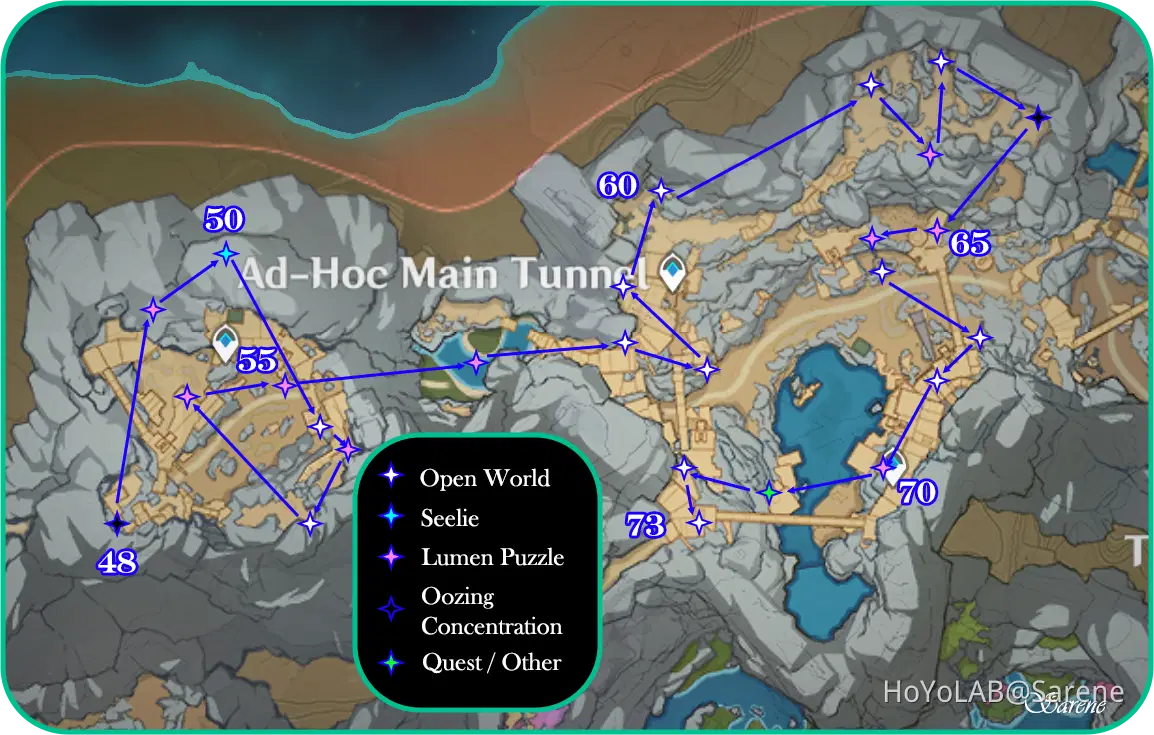
The Chasm: Underground
Ad-Hoc Main Tunnel
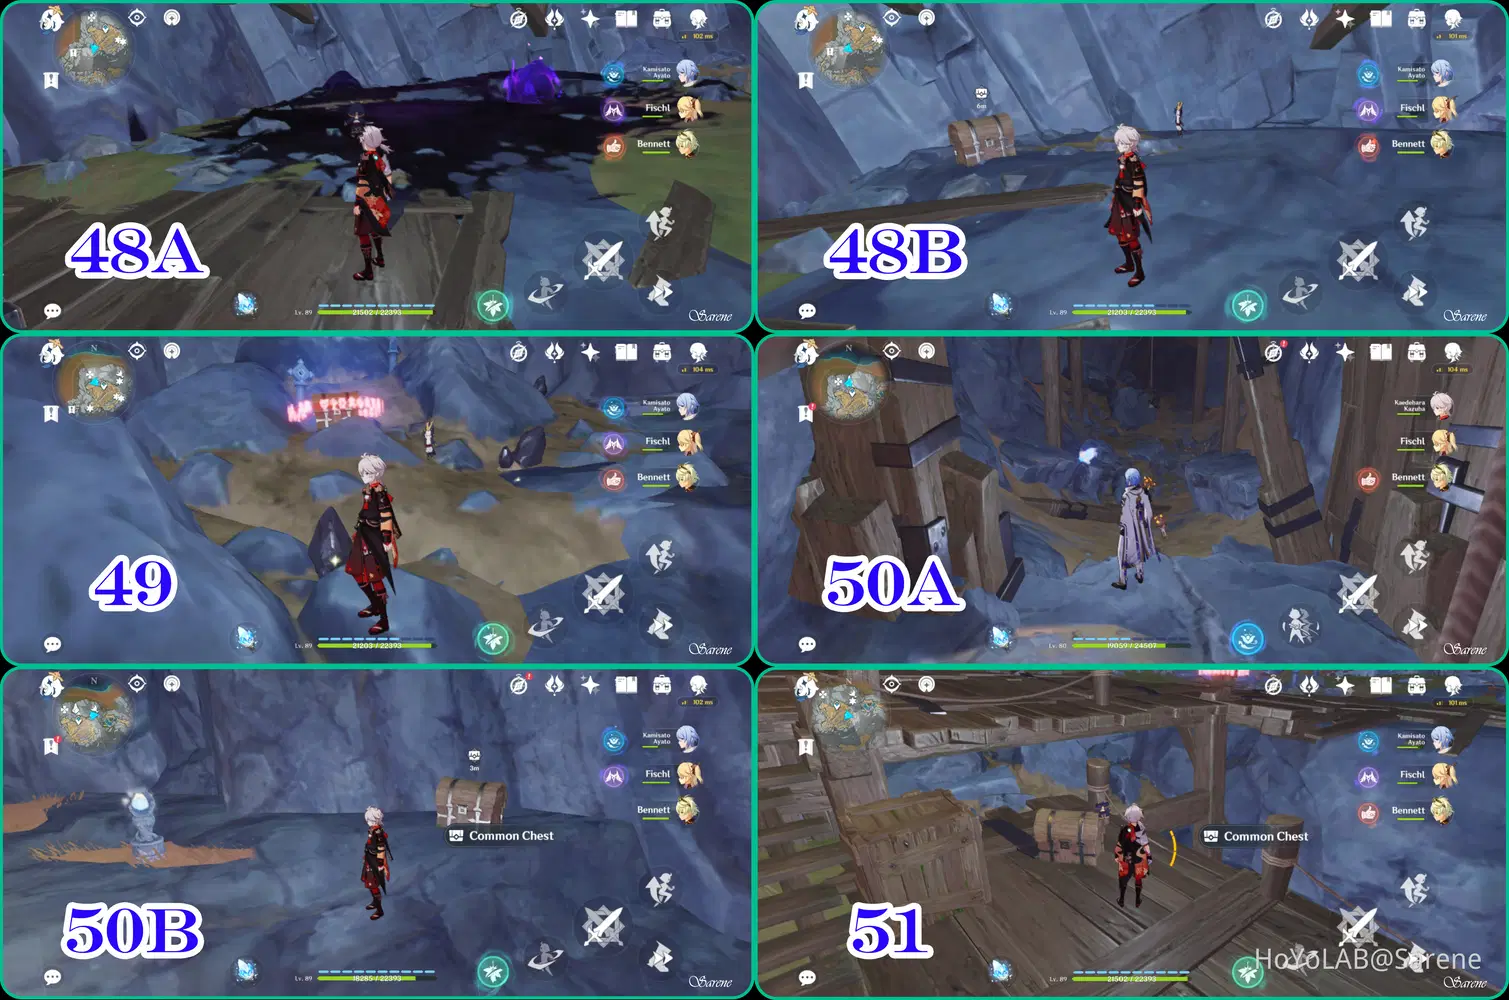
48 - 51
48. Requires level 2 Lumenstone Adjuvant to remove Oozing Concentration
49. Complete the Lumenstone Light Puzzle
50. Follow the Seelie to its Court
51. Found next to the stairs
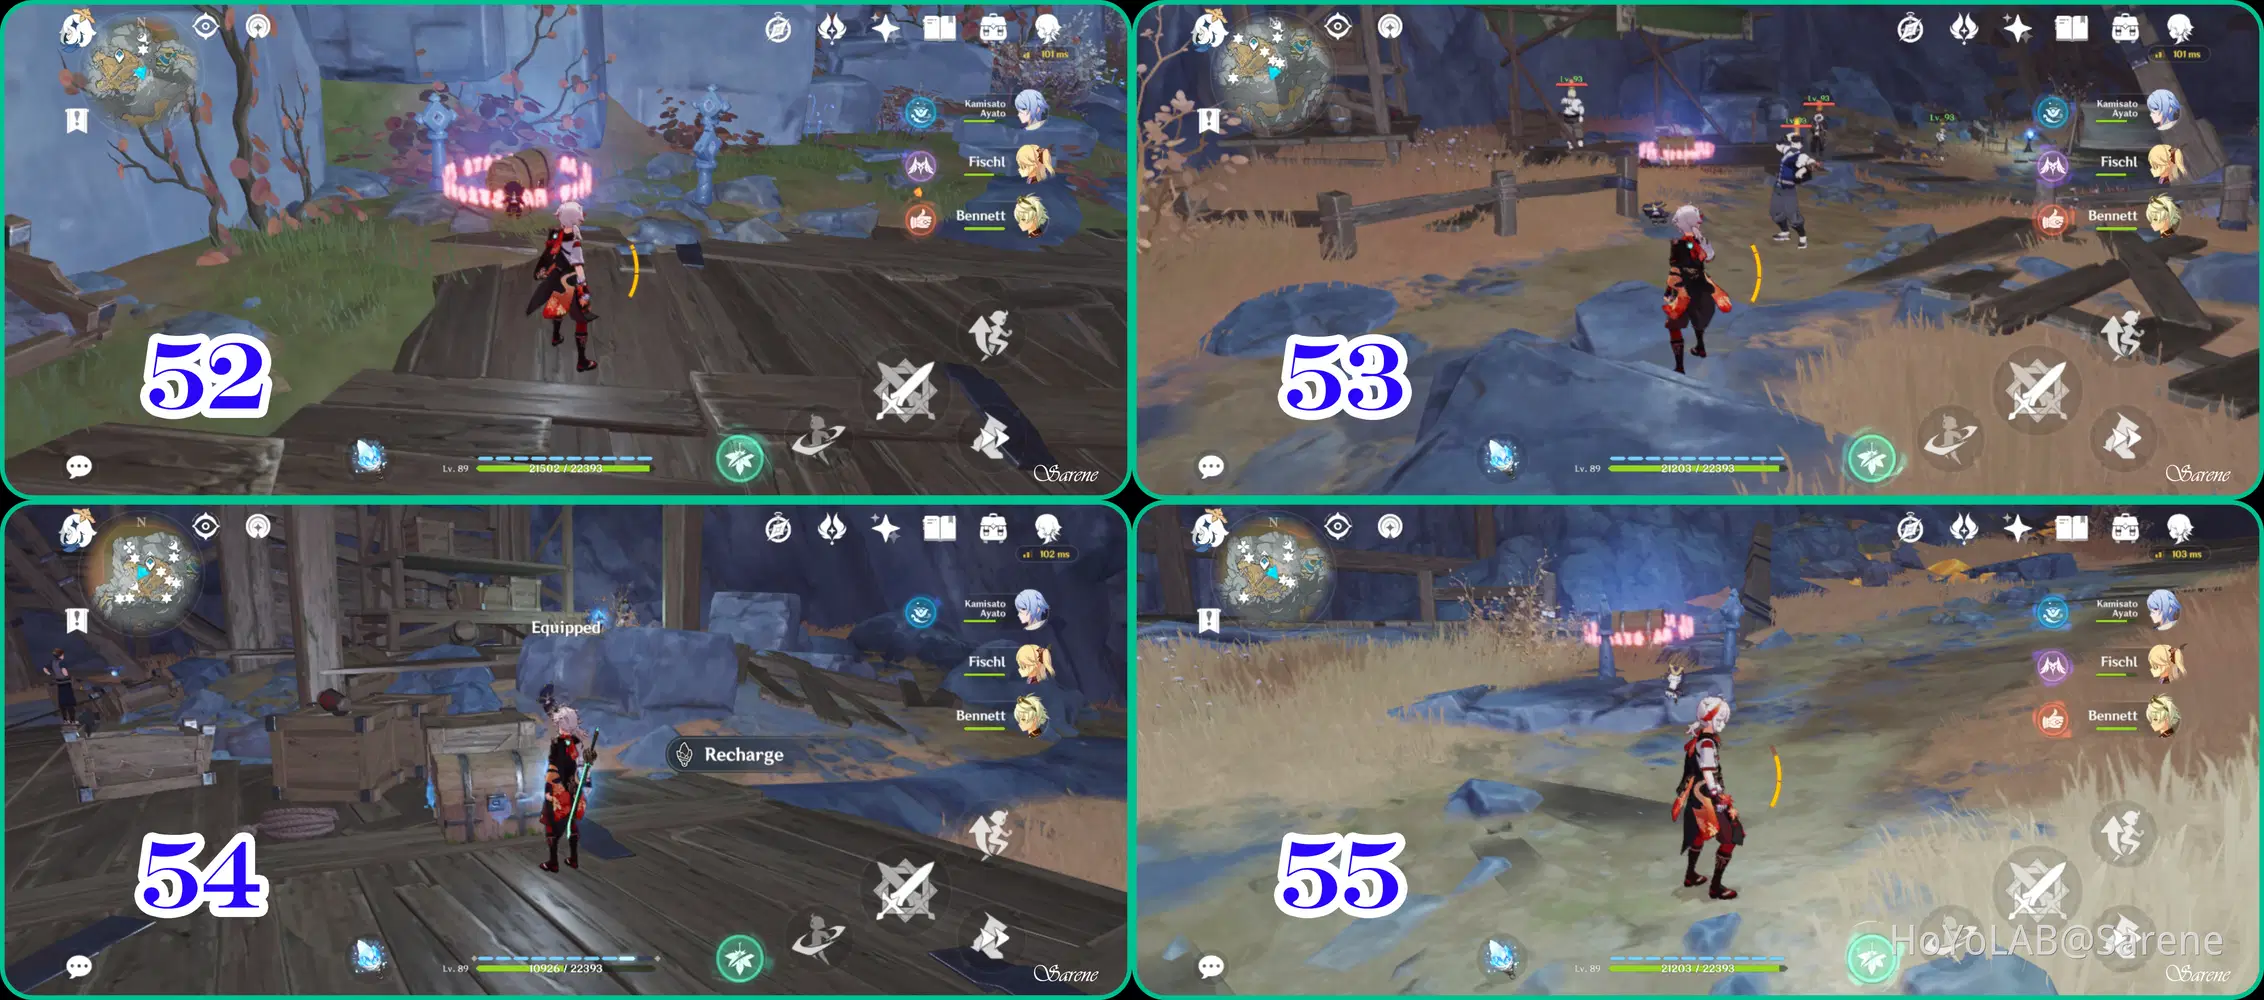
52 - 55
52. Complete the Lumenstone Light Puzzle
53. Defeat the Treasure Hoarder Camp.
54. Recharge the chest with the Lumenstone Adjuvant
55. Complete the Lumenstone Light Puzzle
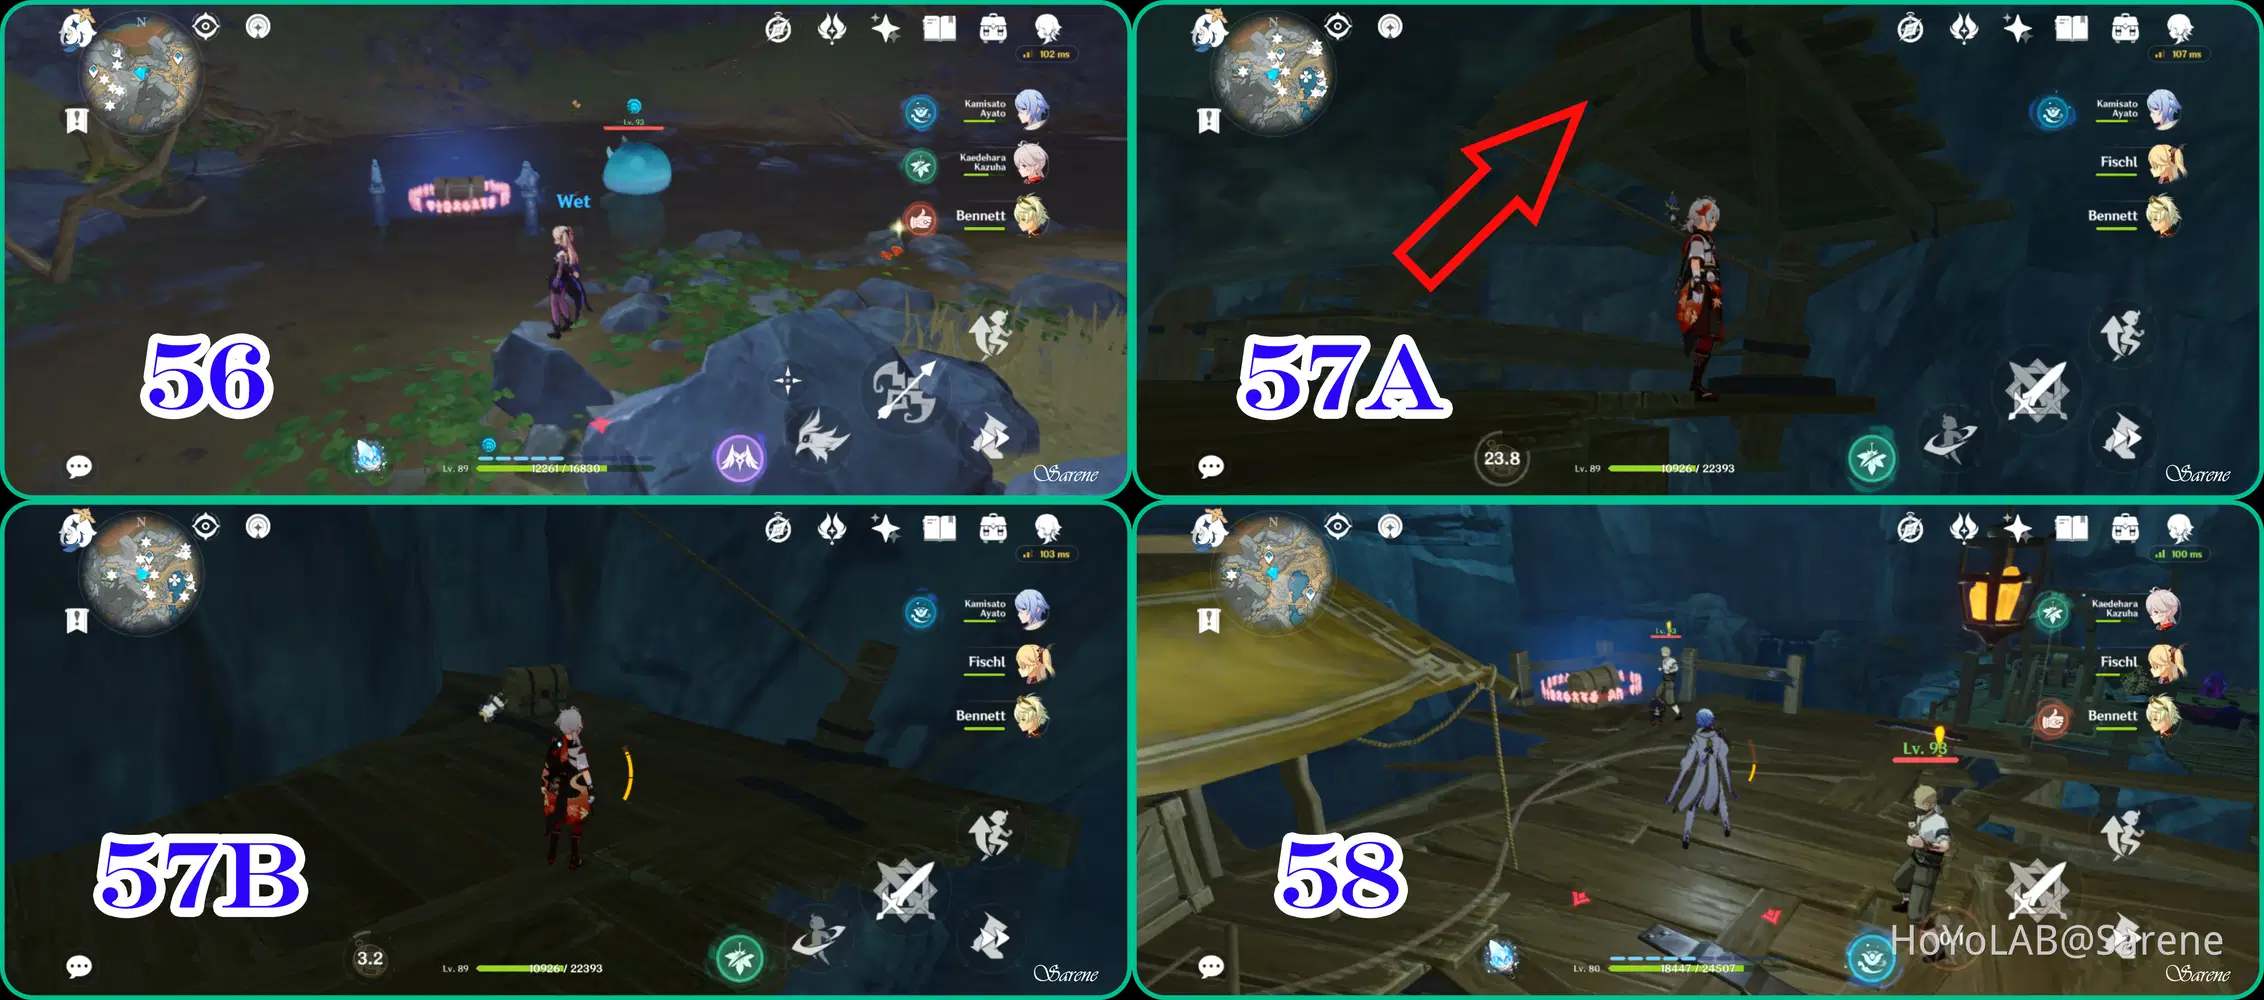
56 - 58
56. Complete the Lumenstone Light Puzzle
57. The chest is found on top of the rafters. You will have to do a bit of climbing
58. Defeat the Treasure Hoarder Camp
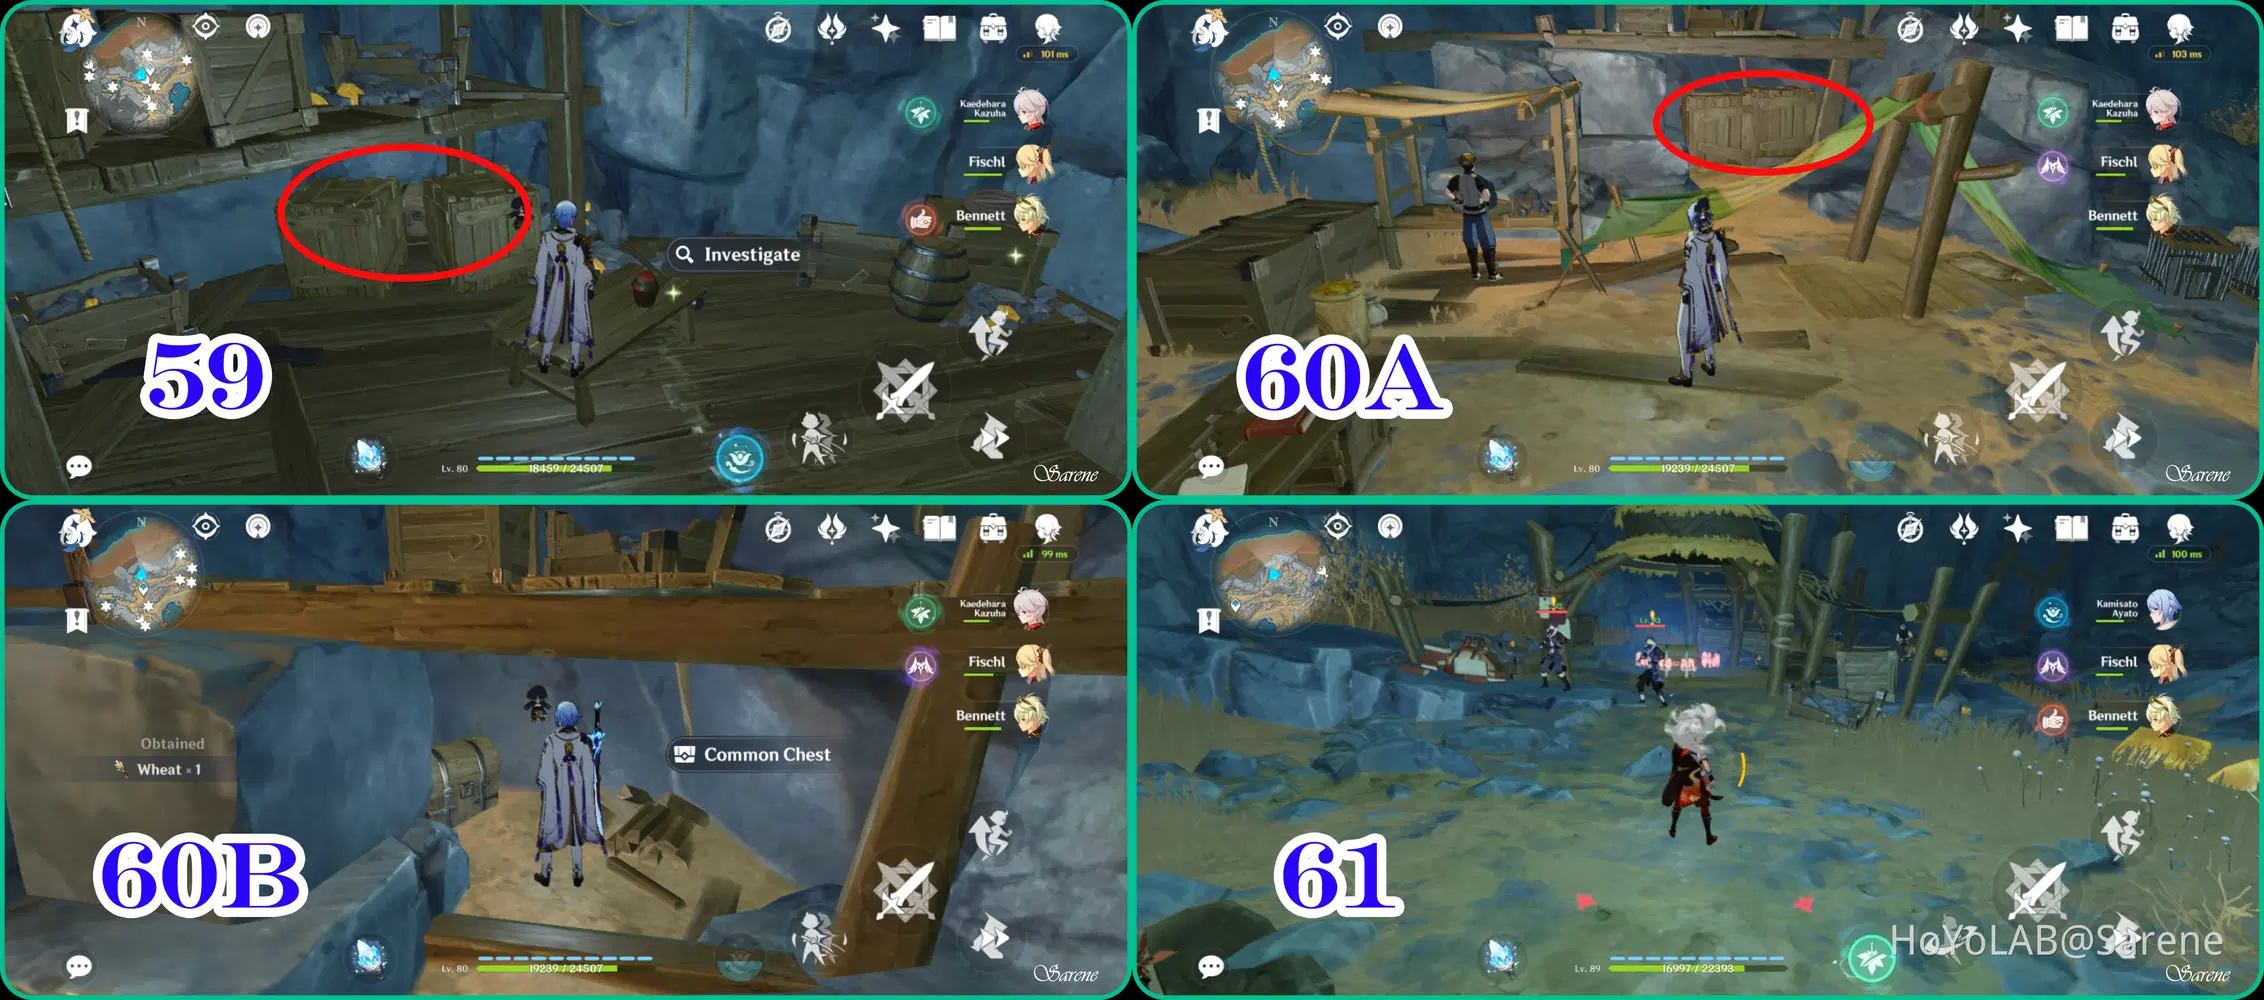
59 - 61
59. Chest is hidden behind crates
60. Also hidden behind crates
61. Defeat Treasure Hoarder Camp
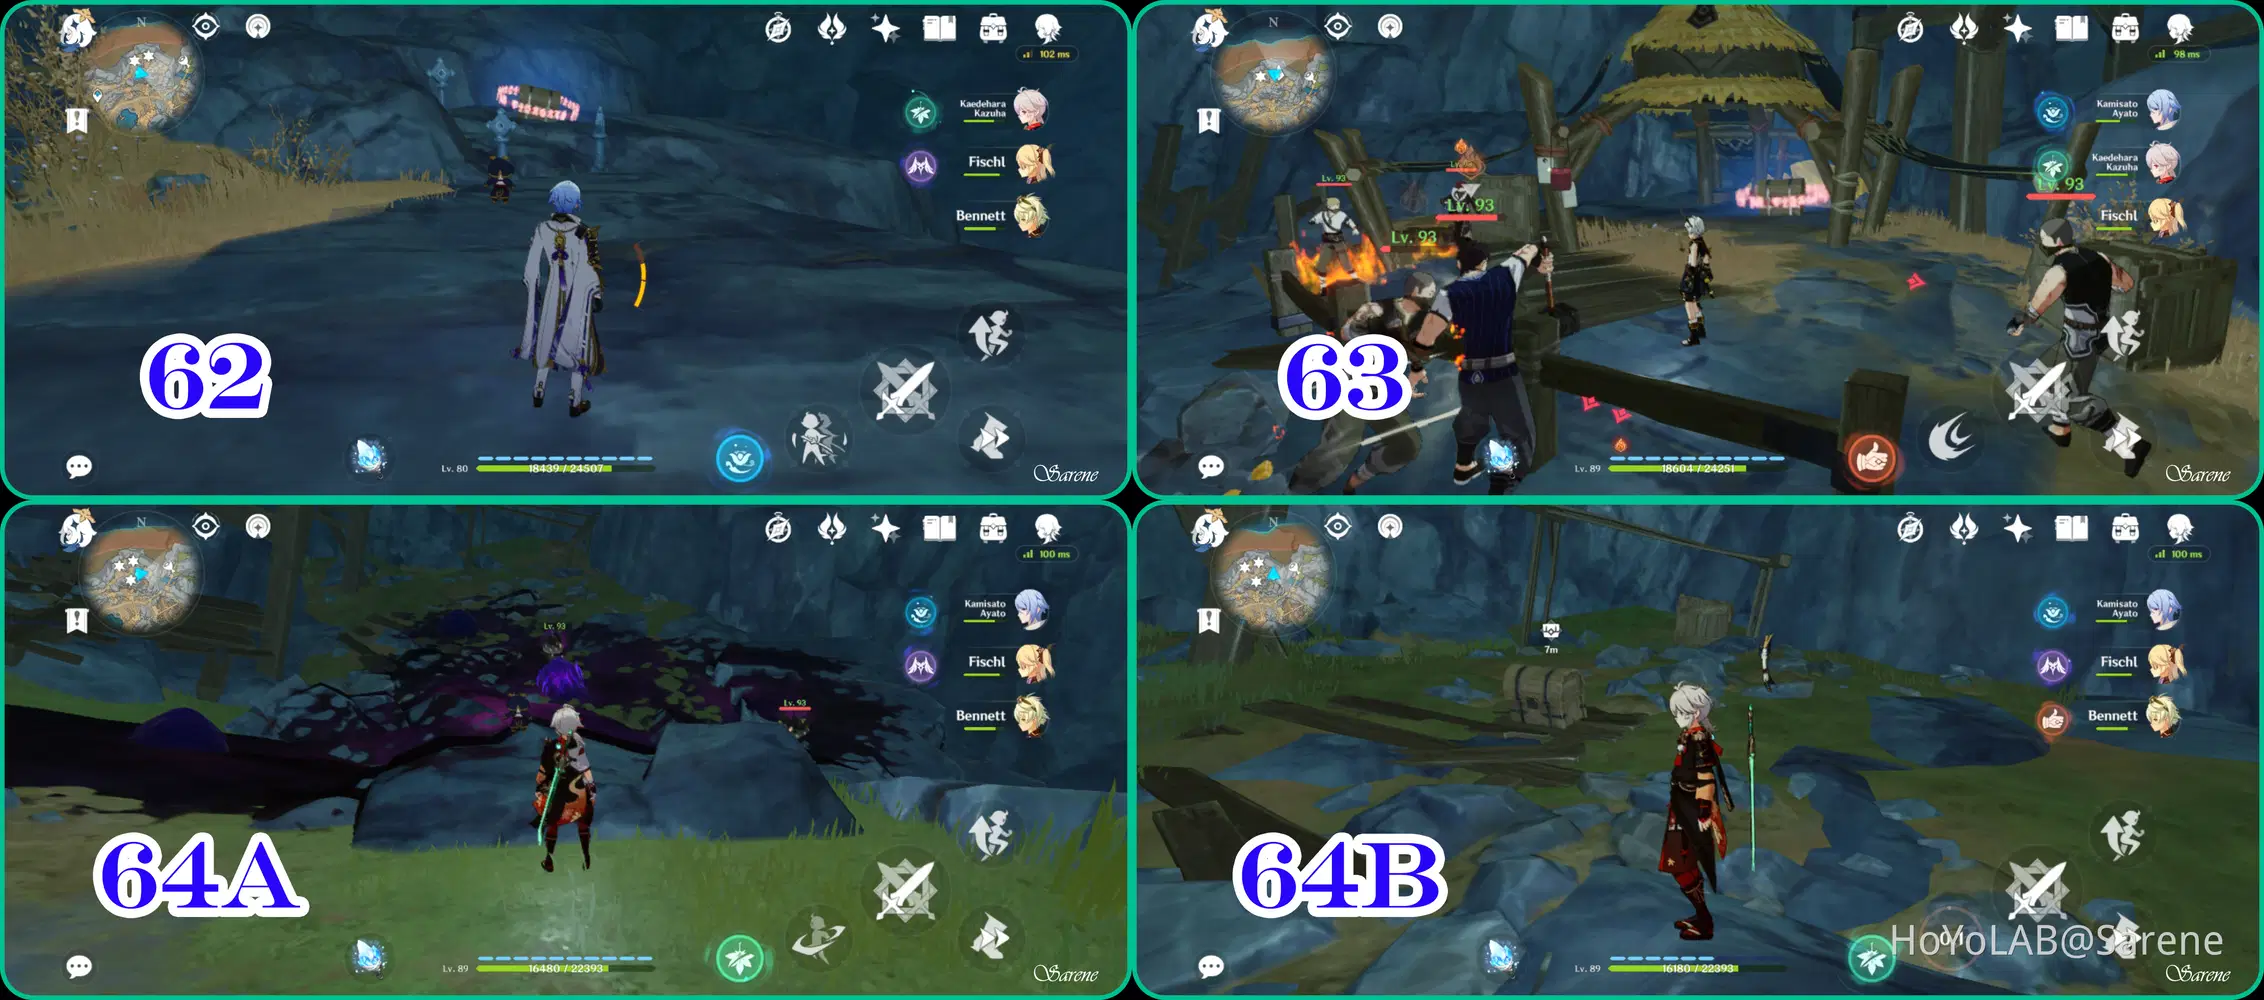
62 - 64
62. Complete the Lumenstone Light Puzzle
63. Defeat the Treasure Hoarder Camp.
64. Requires level 2 Lumenstone Adjuvant to remove Oozing Concentration
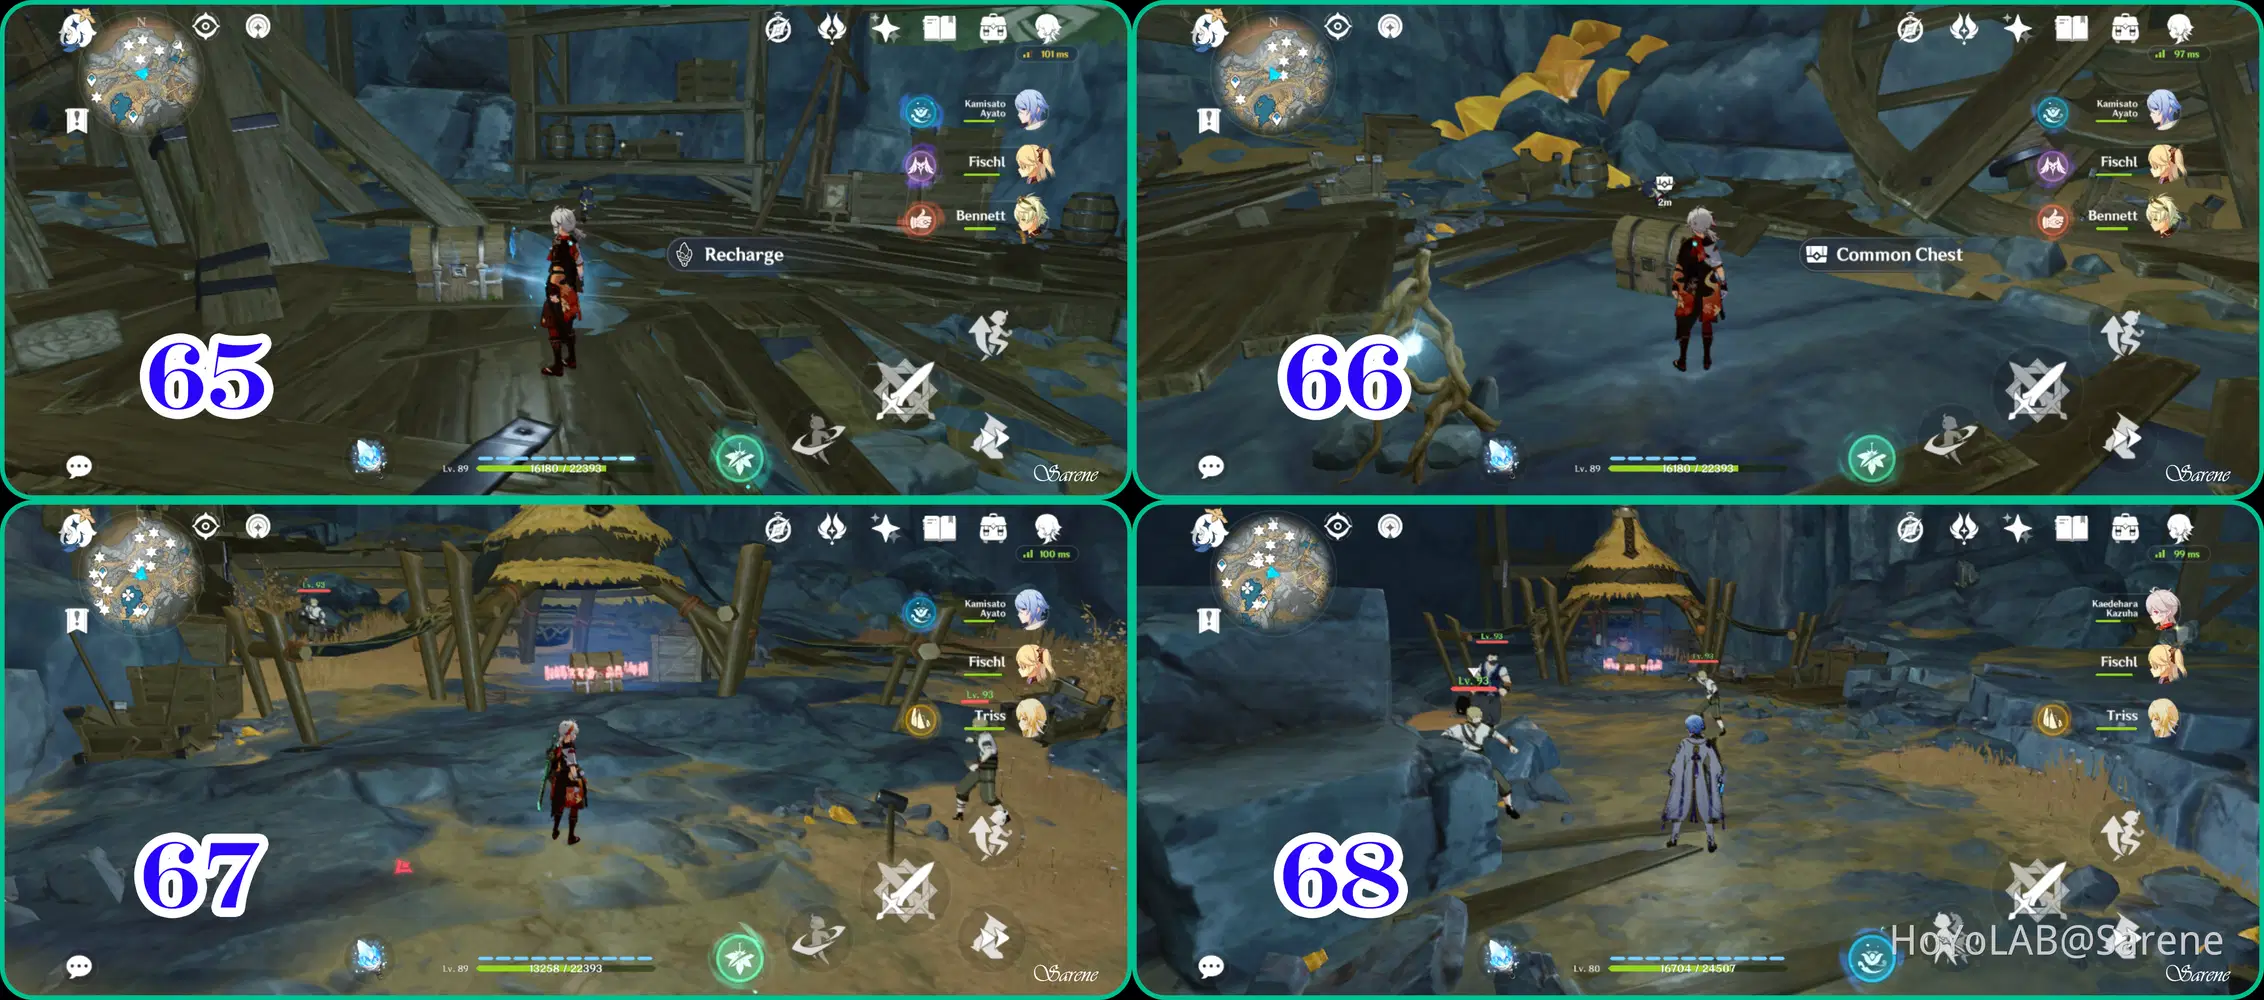
65 - 68
65. Recharge the chest using the Lumenstone Adjuvant
66. Recharge and complete the Lumenstone Puzzle
67. Defeat the Treasure Hoarder Camp
68. Defeat the Treasure Hoarder Camp
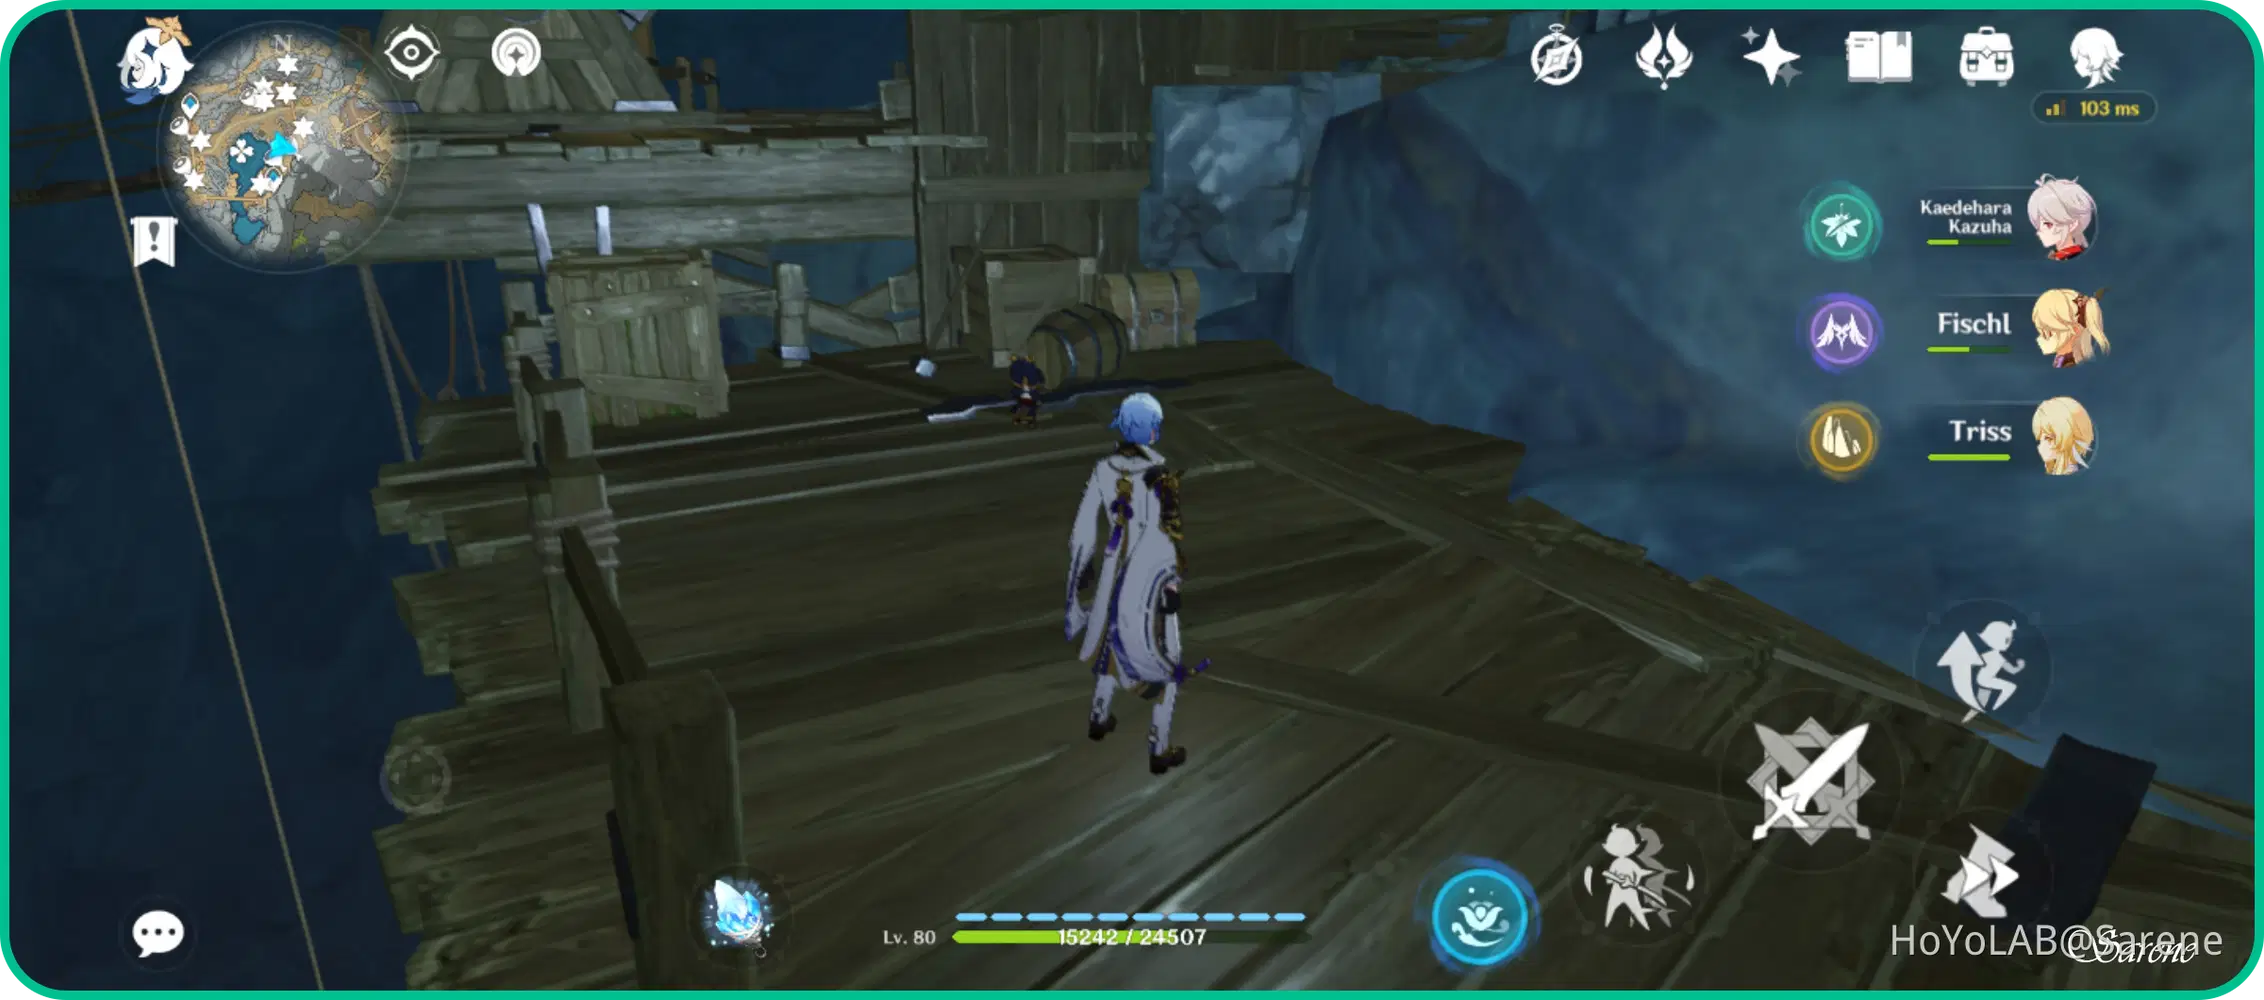
69
This chest is found in the corner on the level below the crane.
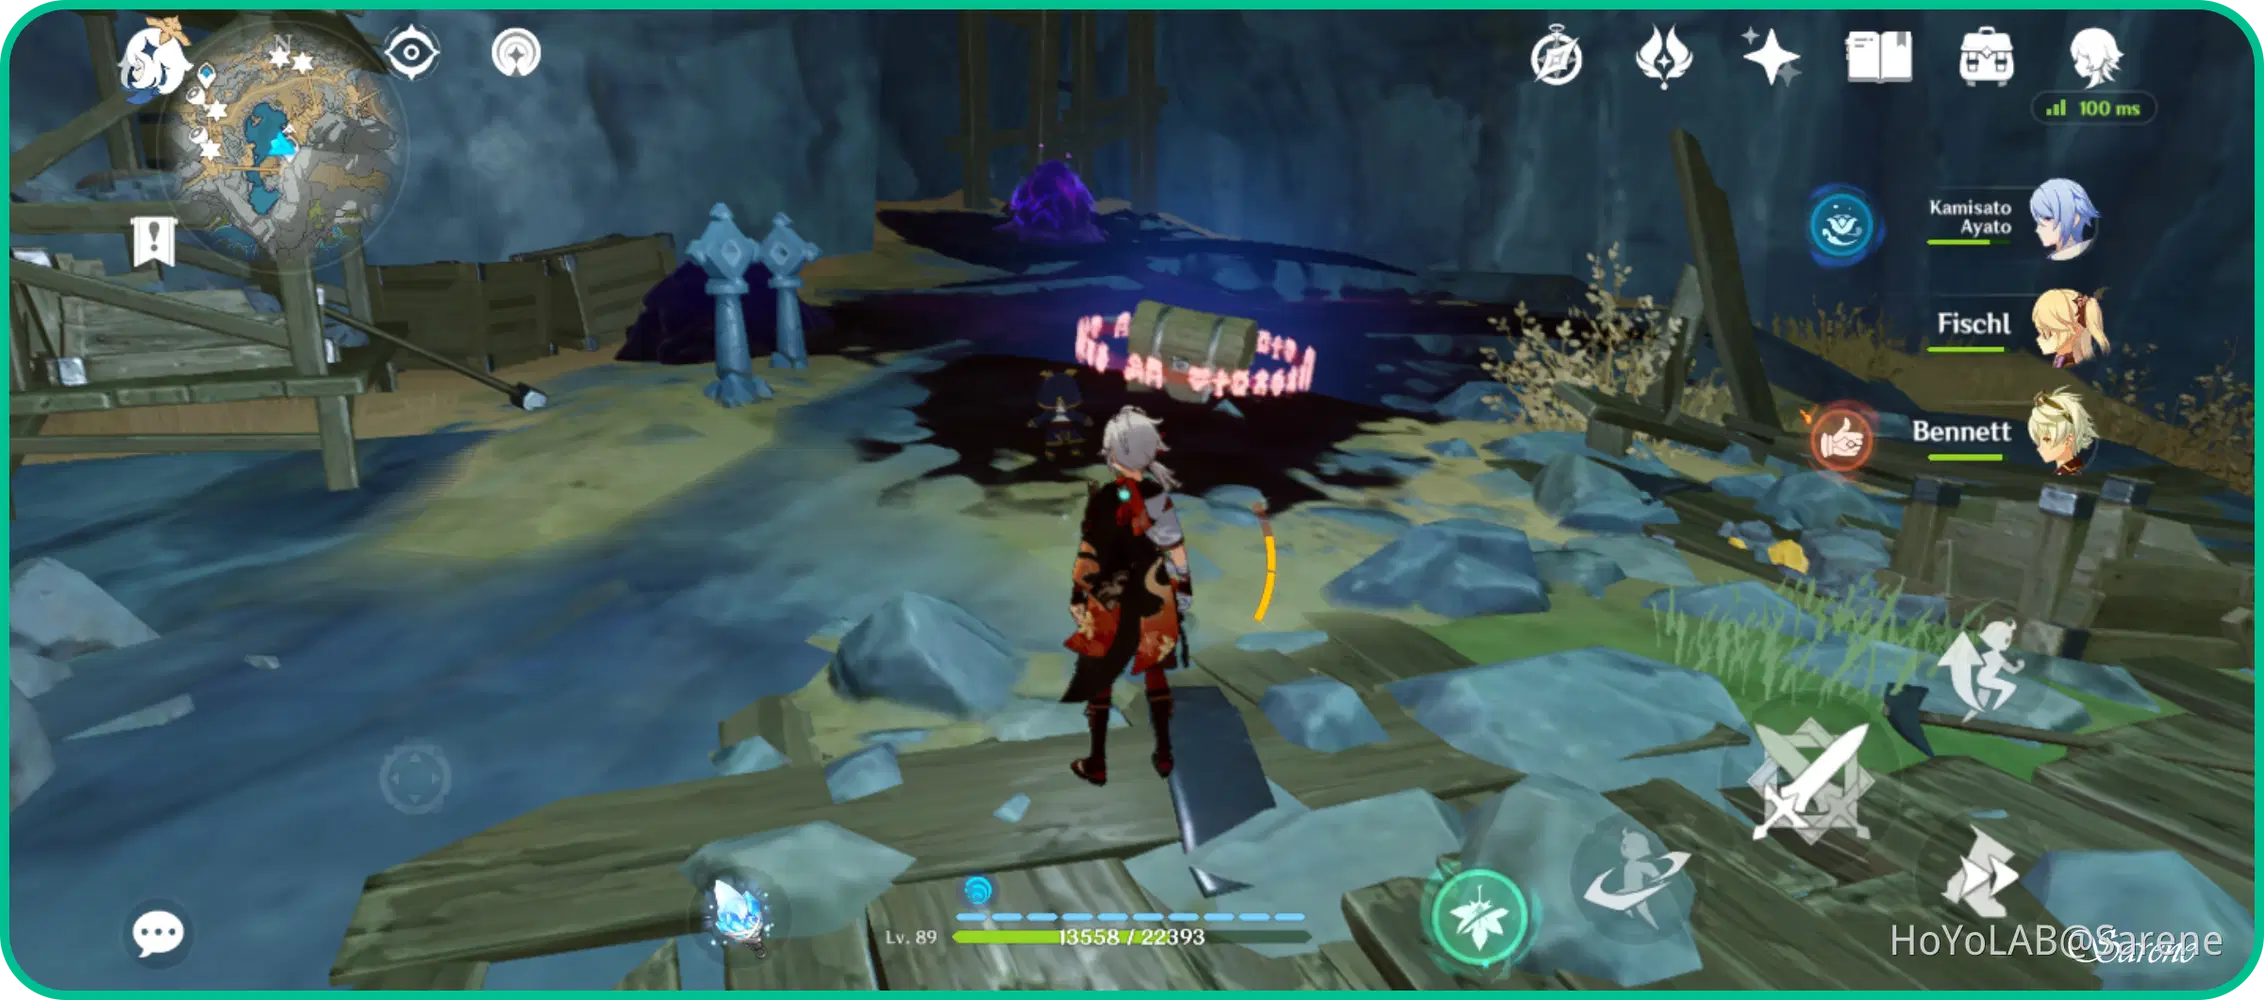
70
Complete the Lumenstone Light Puzzle
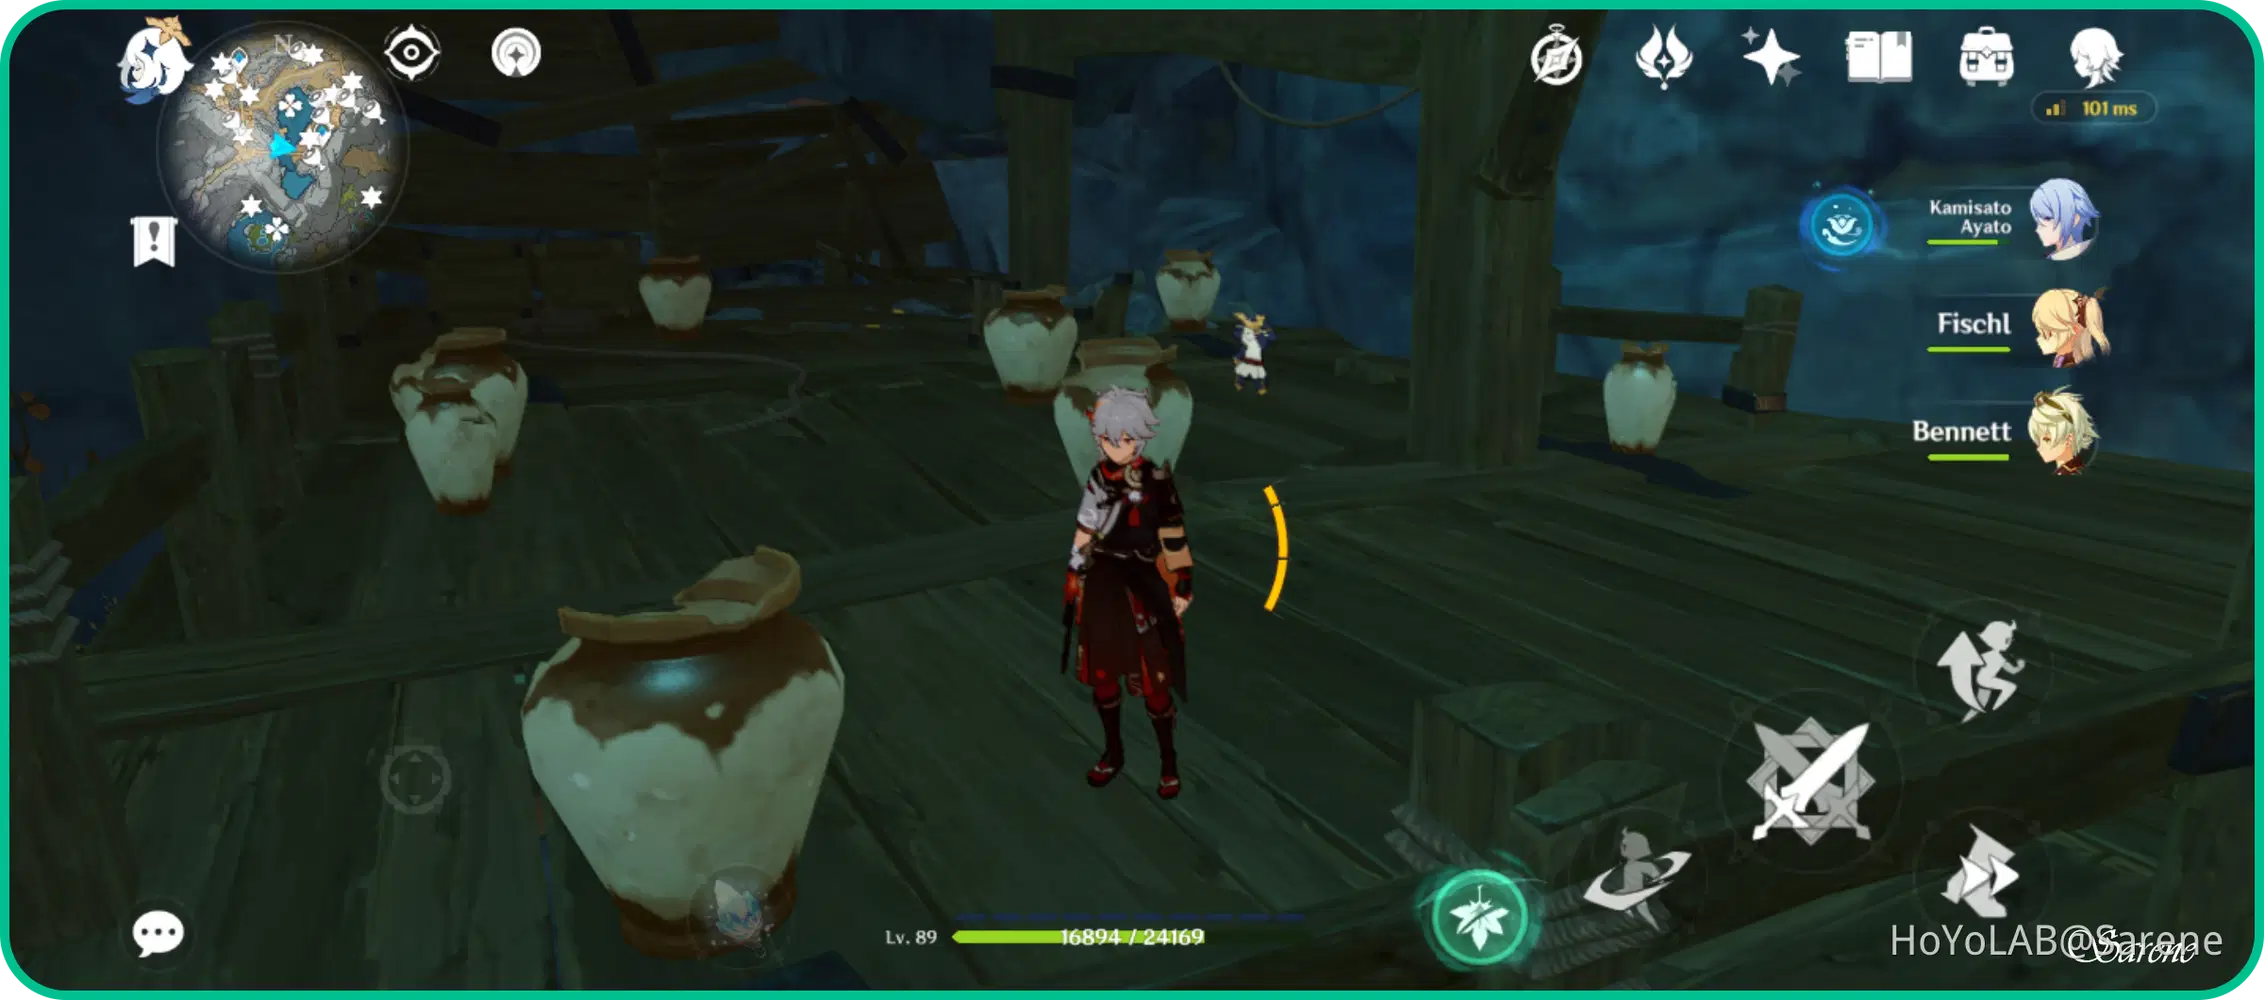
71
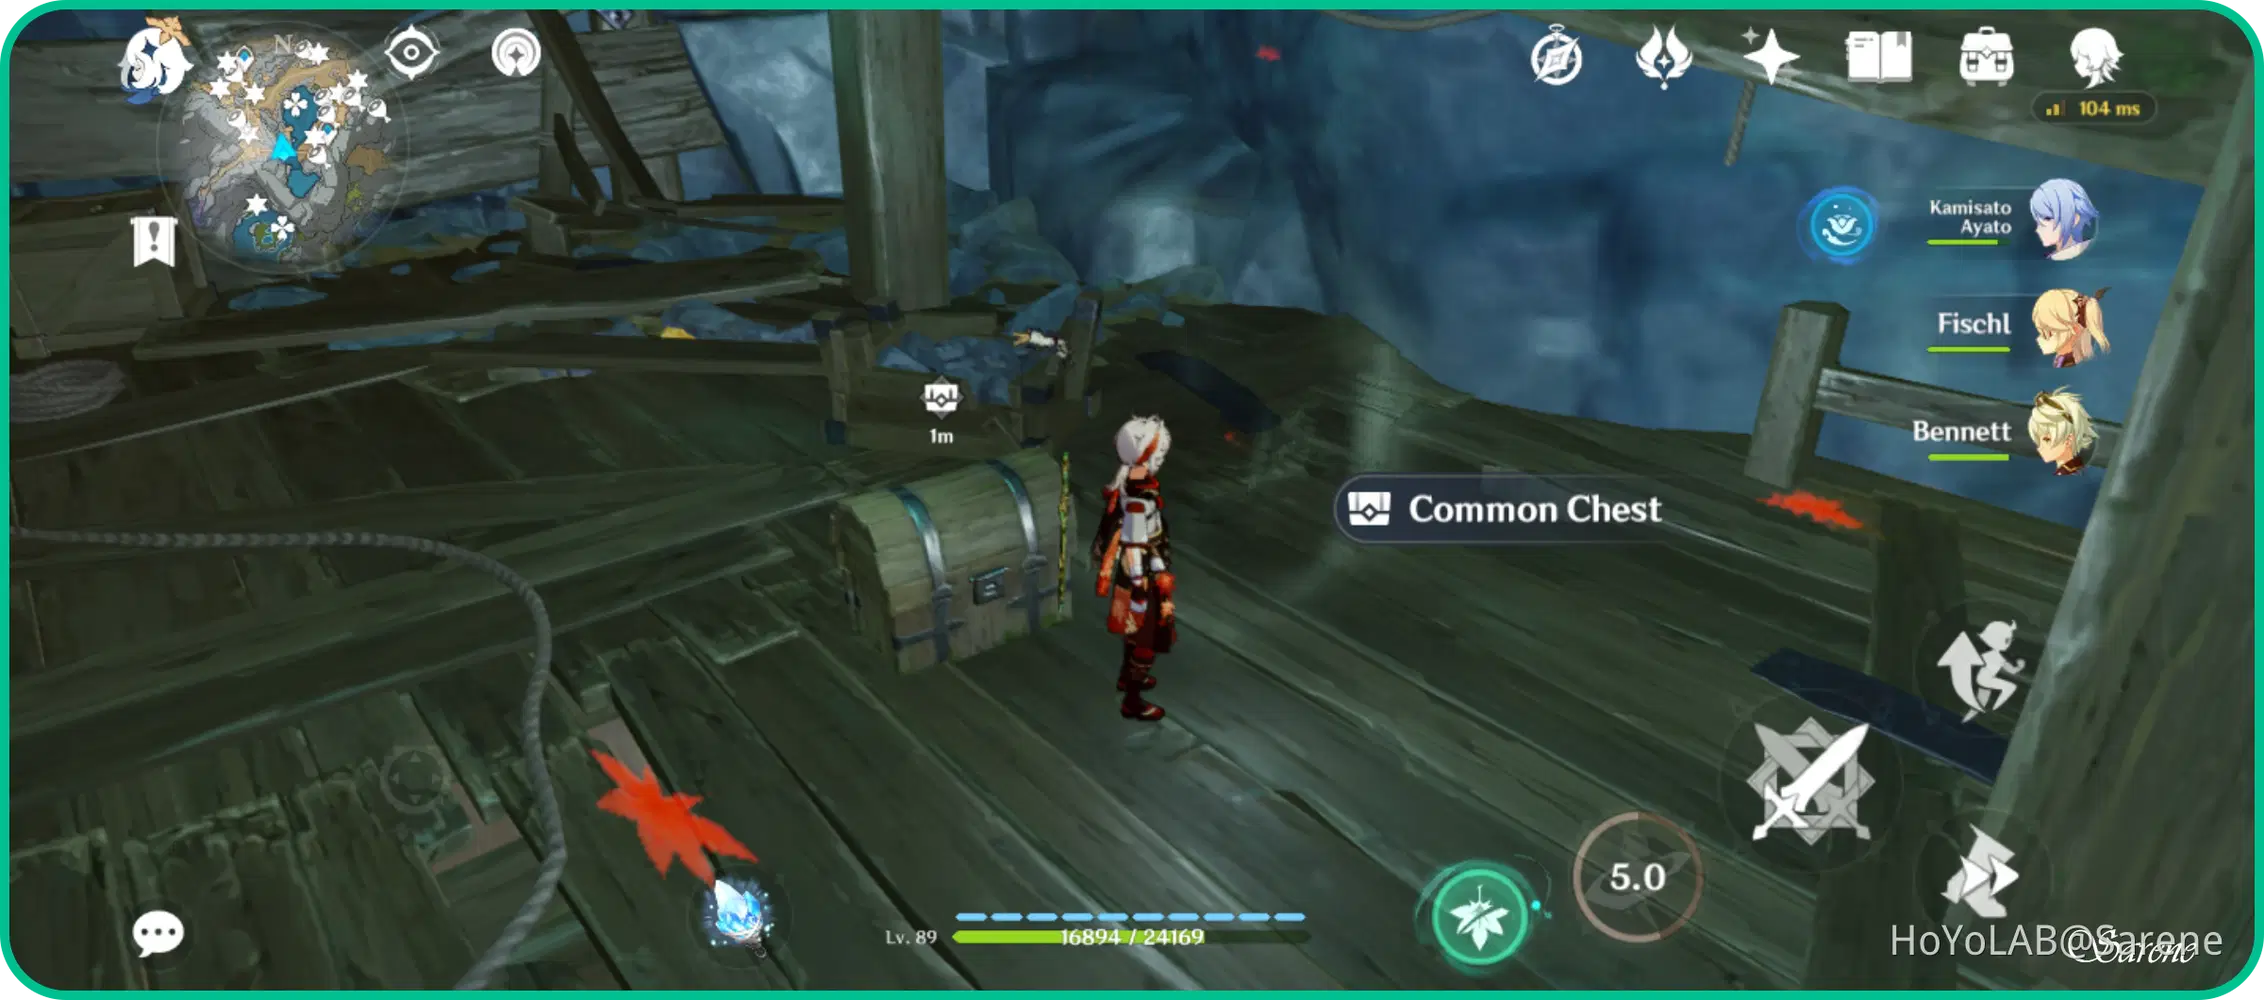
The appearance of this chest appears to be RNG like the Amber chests on Mt. Hulao. Some people have suggested the chest appears when the luckfly is present, but as you can see below, this did not occur in my case.
Confirmed Information:
✧ Vases respawn every 12 hrs. (2 tries per day)
✧ The order in which the vases are broken does not matter
✧ The only chest that matters is the center vase where the chest appears
✧ If no chest appears, either an electro or geo slime will appear
✧ Even after obtaining the chest, the vases will still respawn
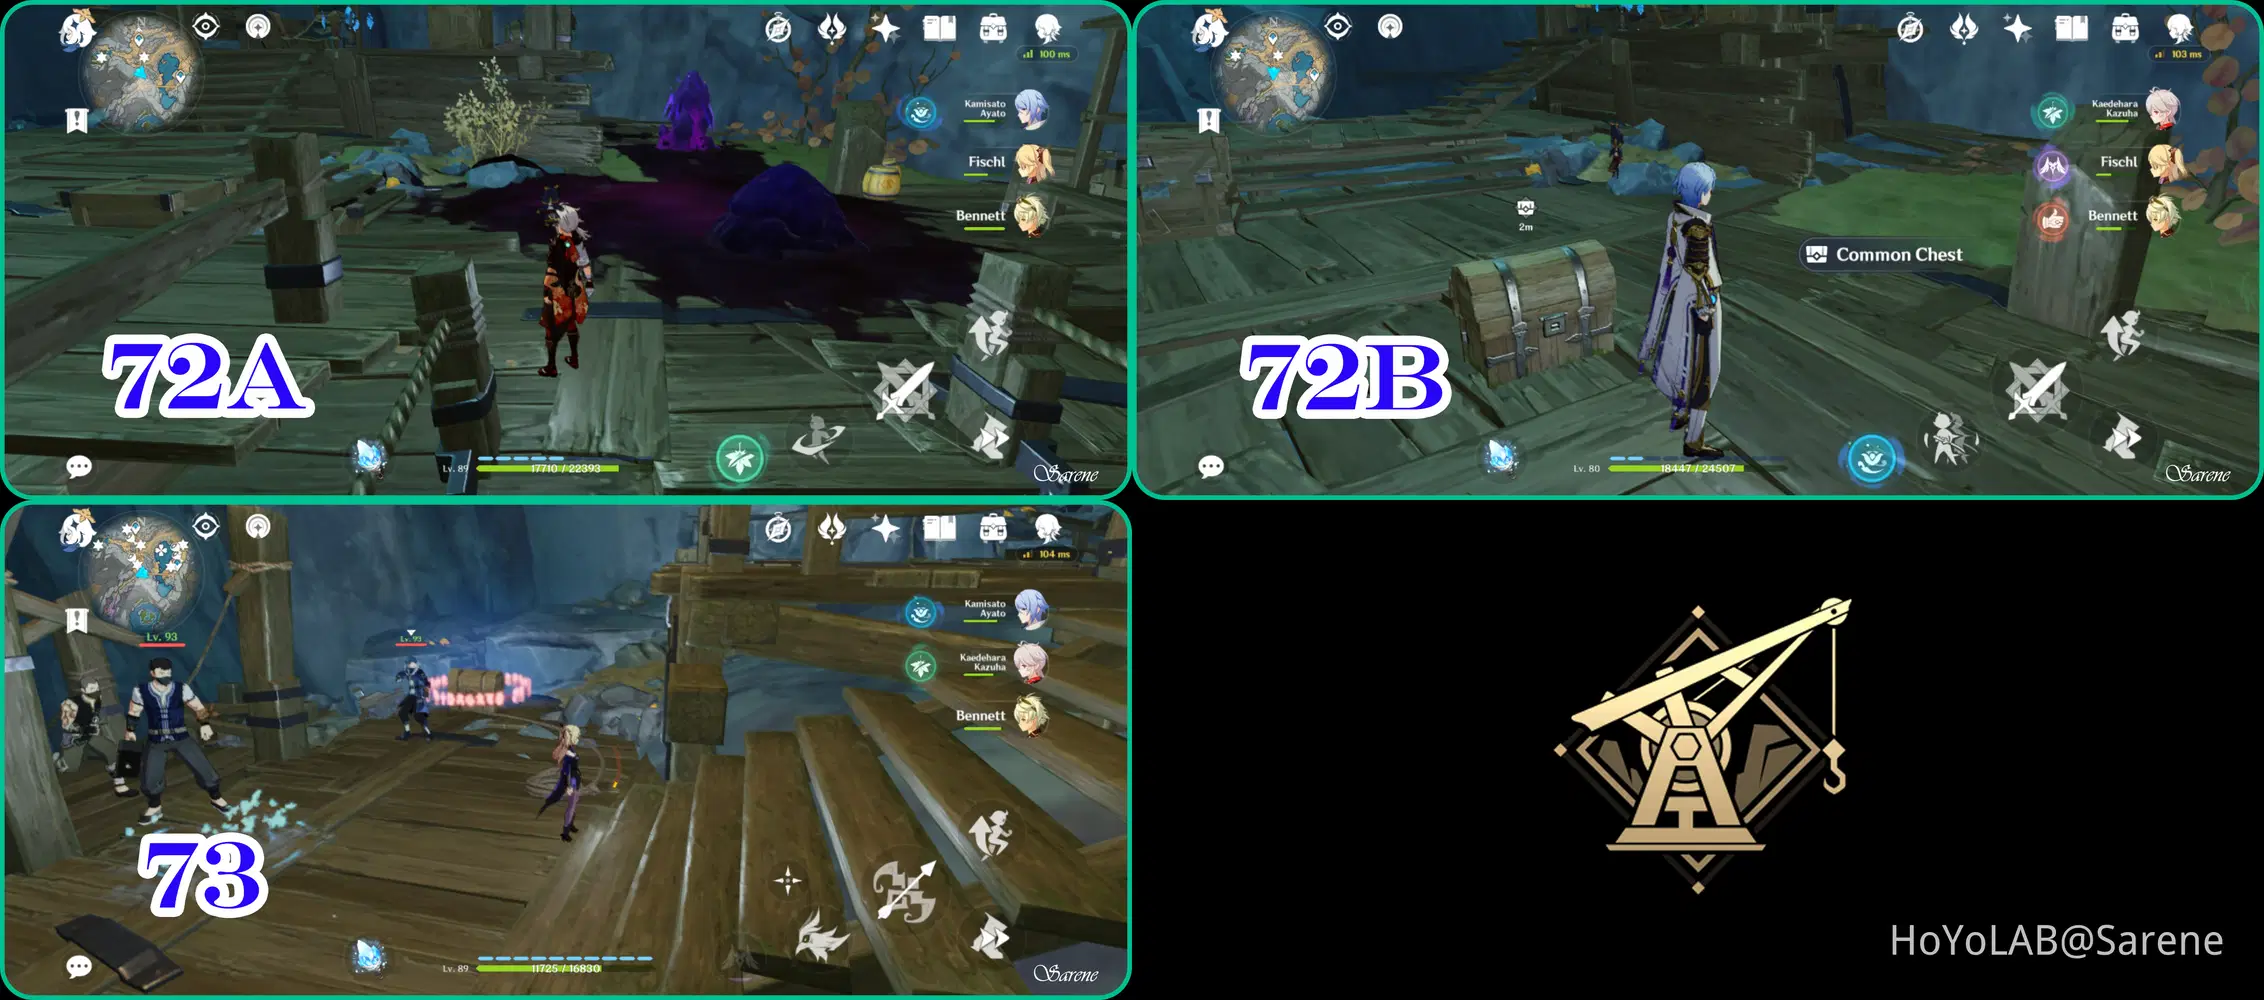
72 - 73
72. Requires level 6 Lumenstone Adjuvant to remove Oozing Concentration
73. Defeat the Treasure Hoarder Camp.
The Serpent's Cave
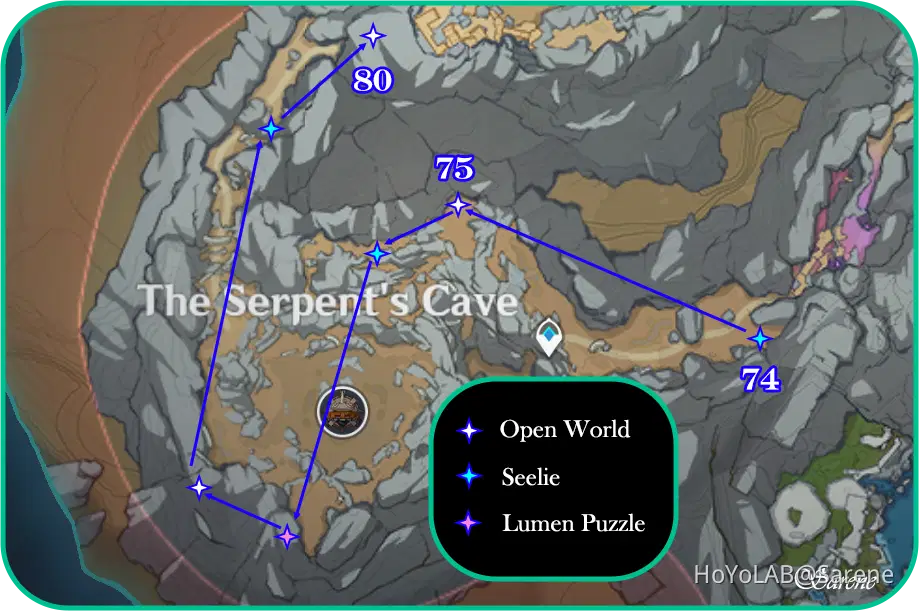
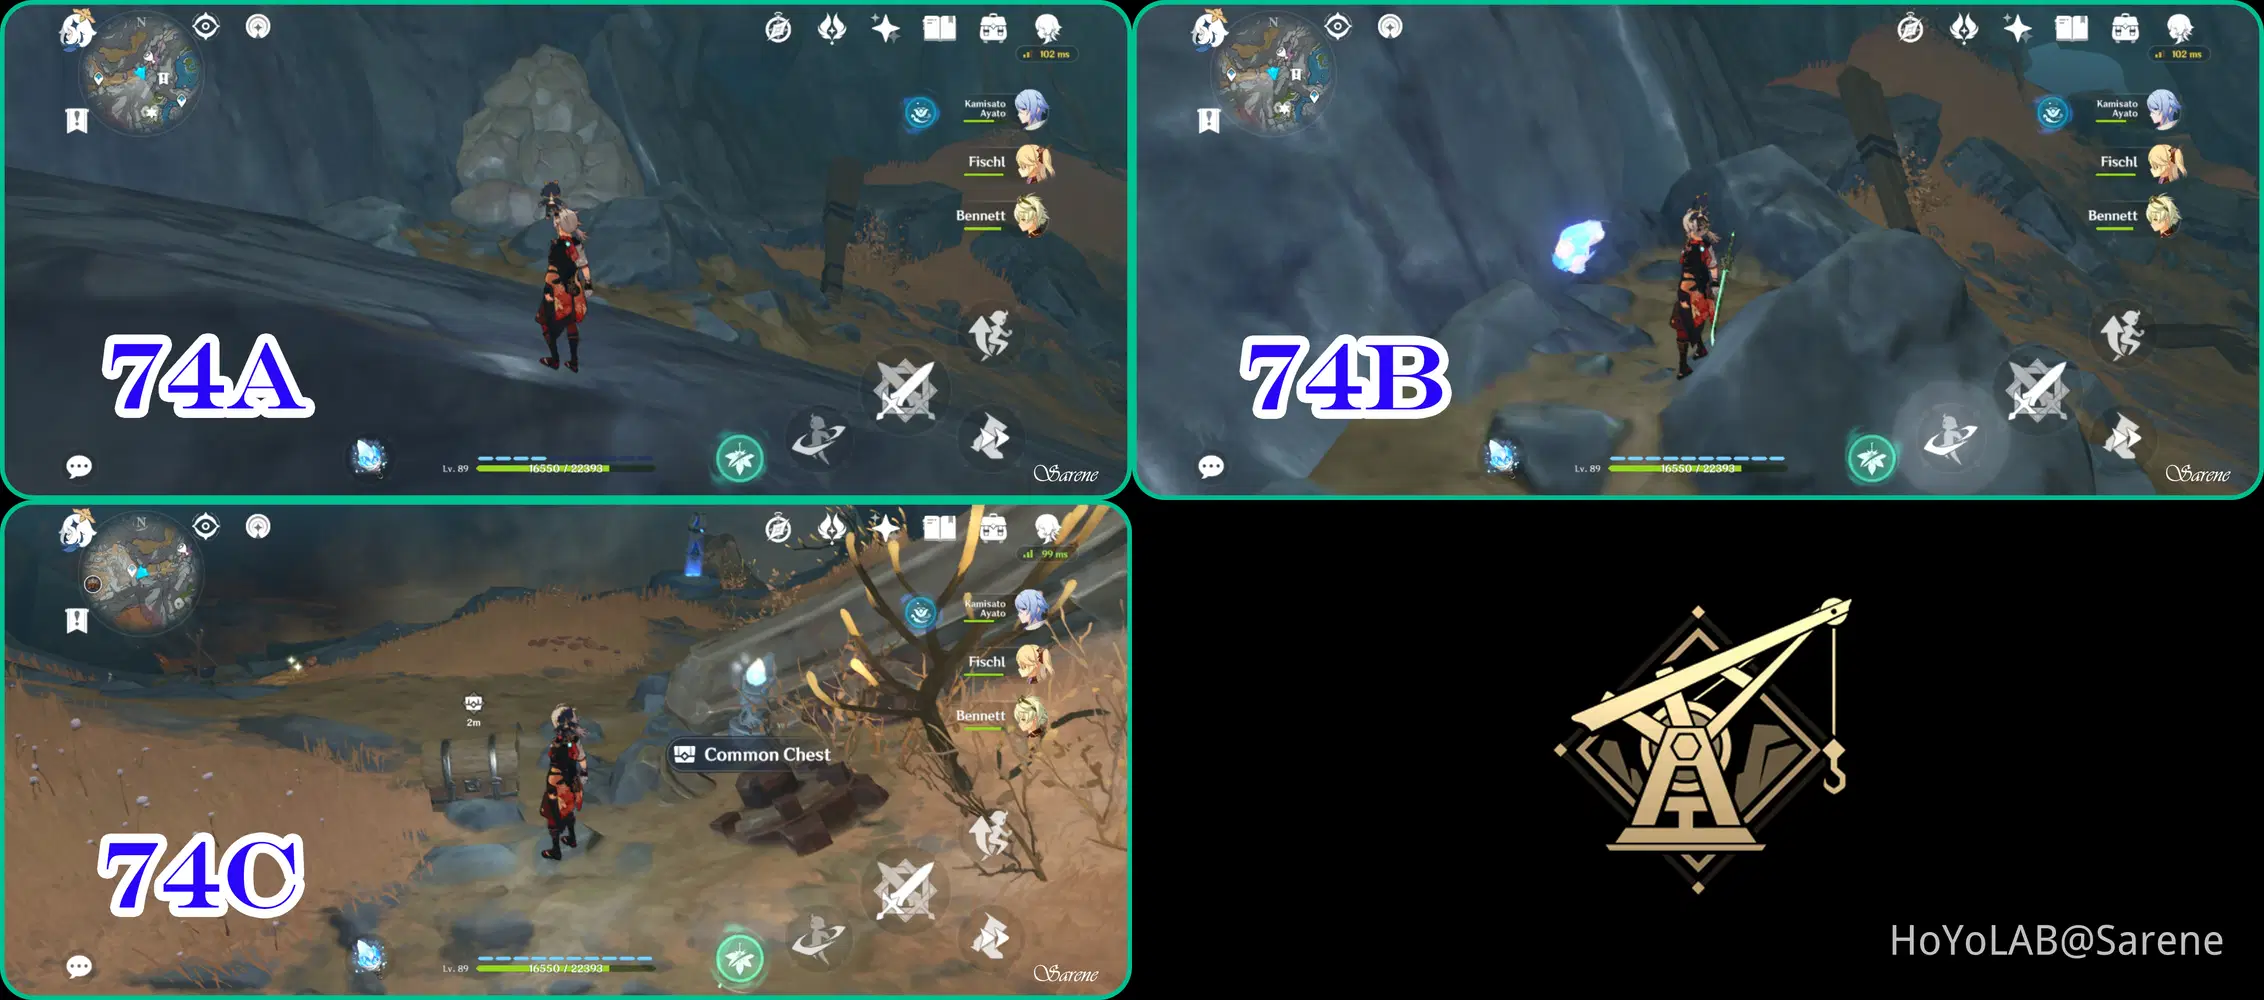
74
Destroy the rocks to release the Seelie. Then follow the Seelie to its Court.
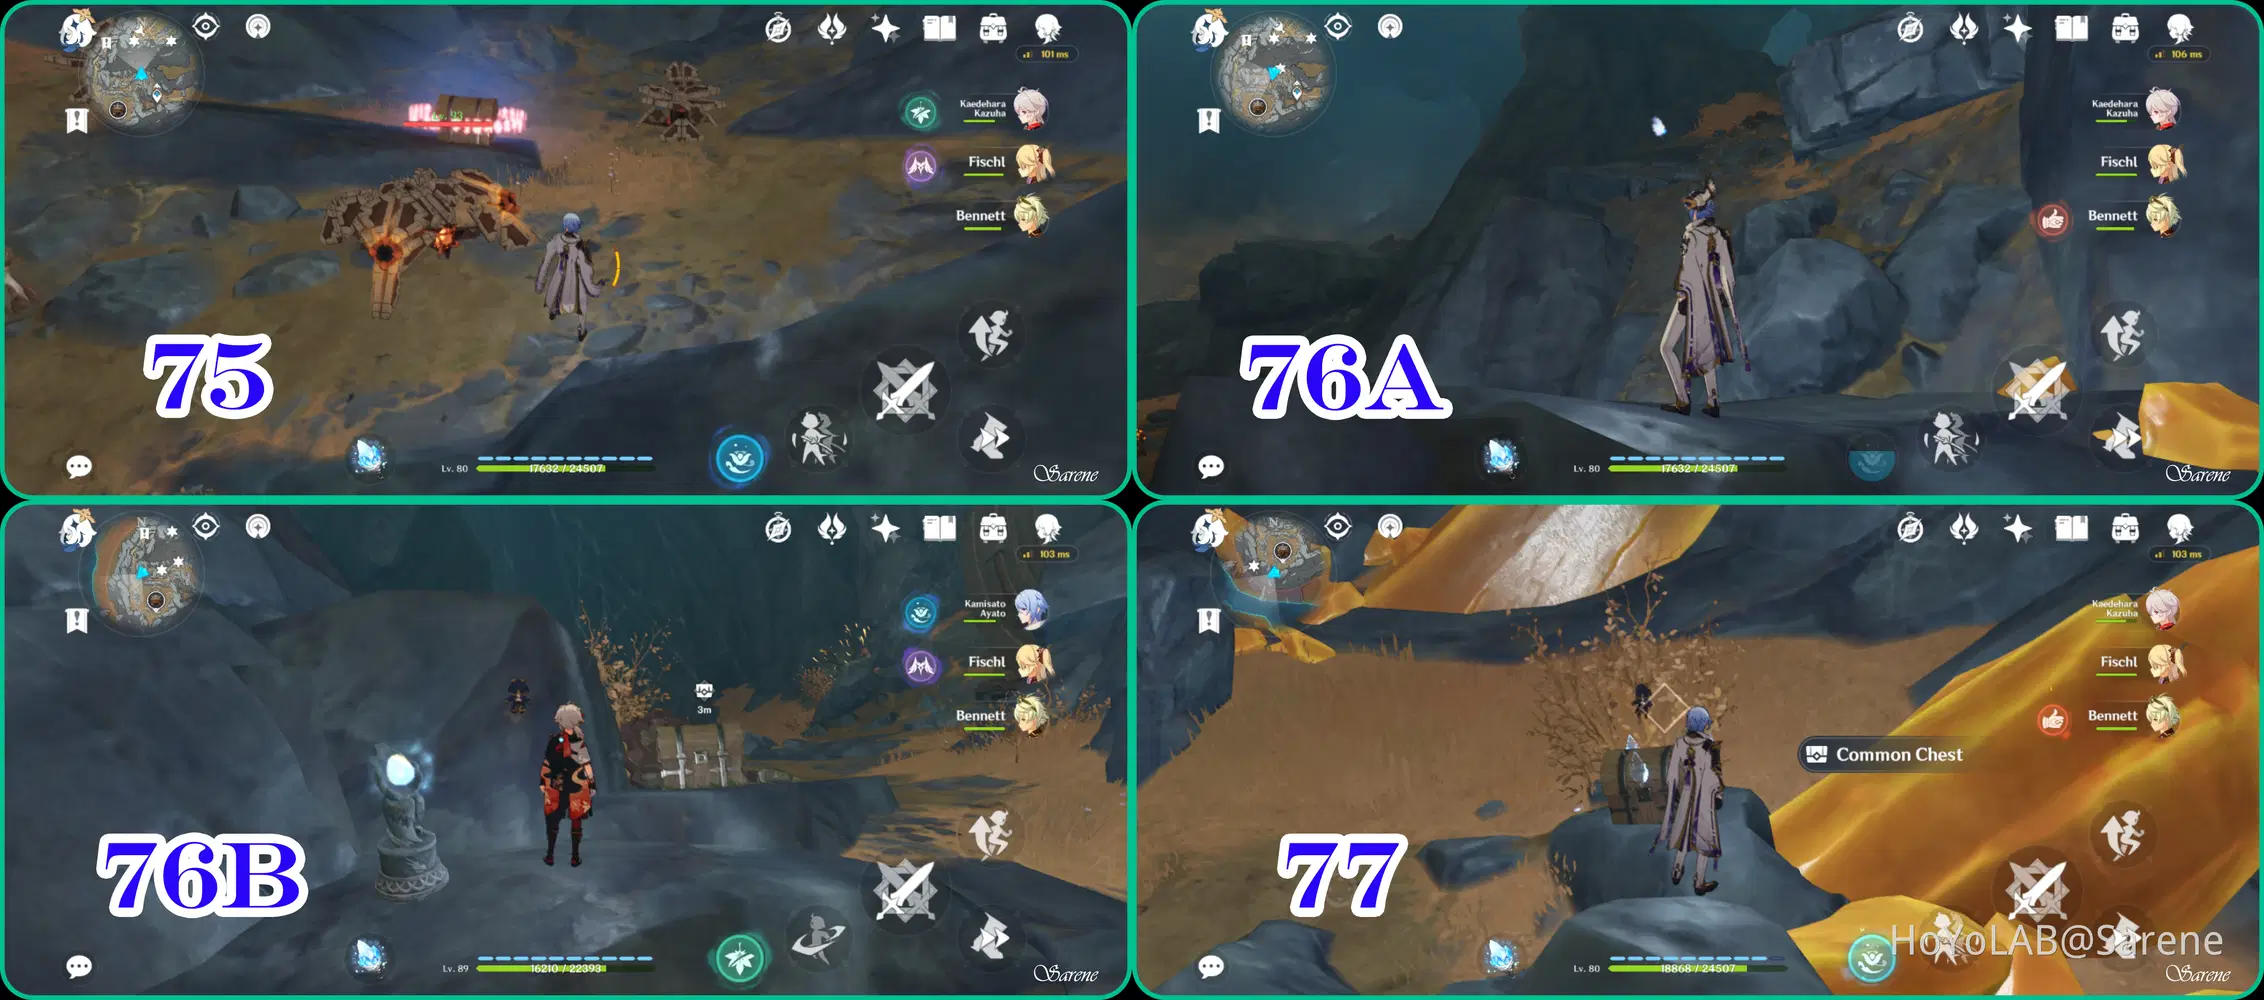
75 - 77
75. Defeat the Ruin Sentinels
76. Follow the Seelie to its Court
77. Recharge the chest with the Lumen Adjuvant
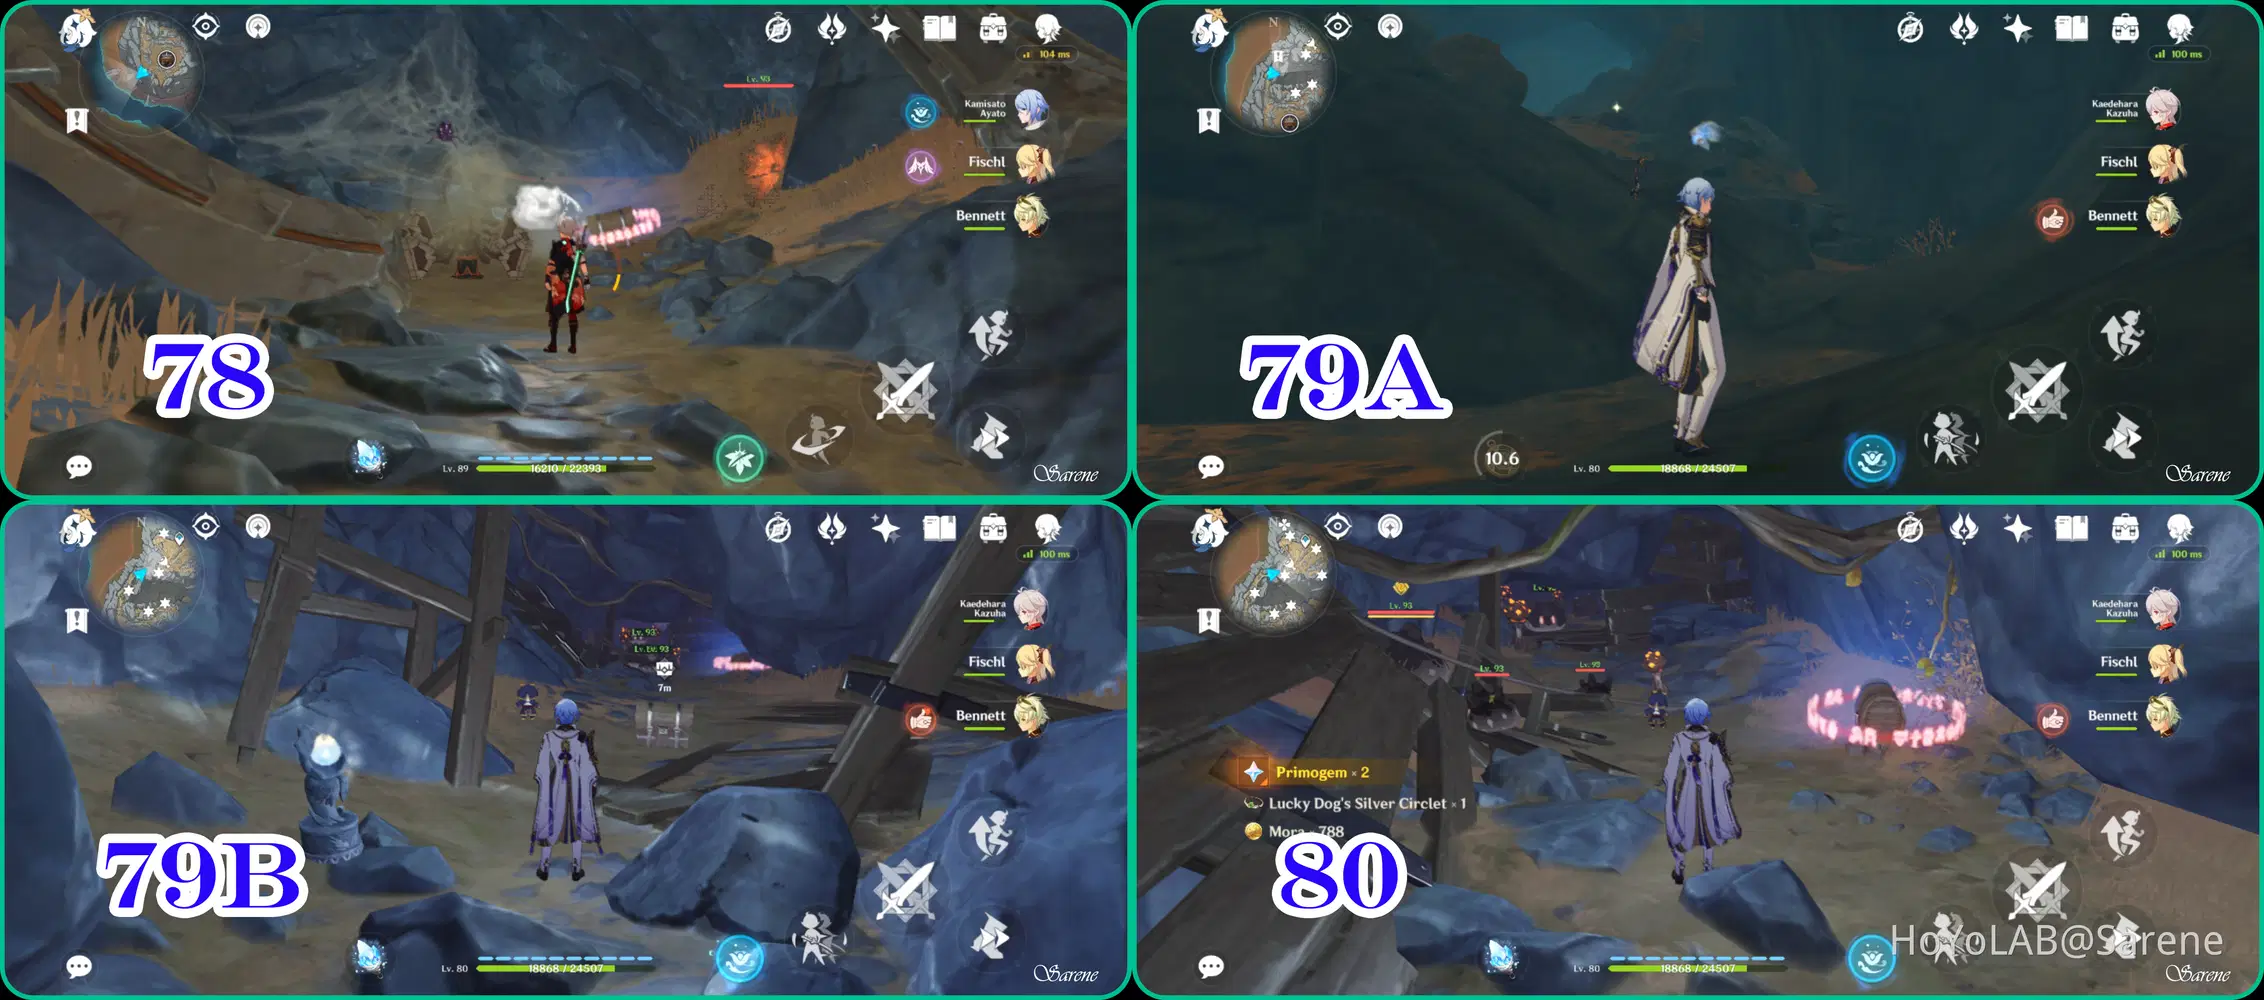
78 - 80
78. Defeat the Ruin Sentinels
79. Follow the Seelie to its Court
80. Defeat the Geo Slimes
The Chasm: Main Mining Area
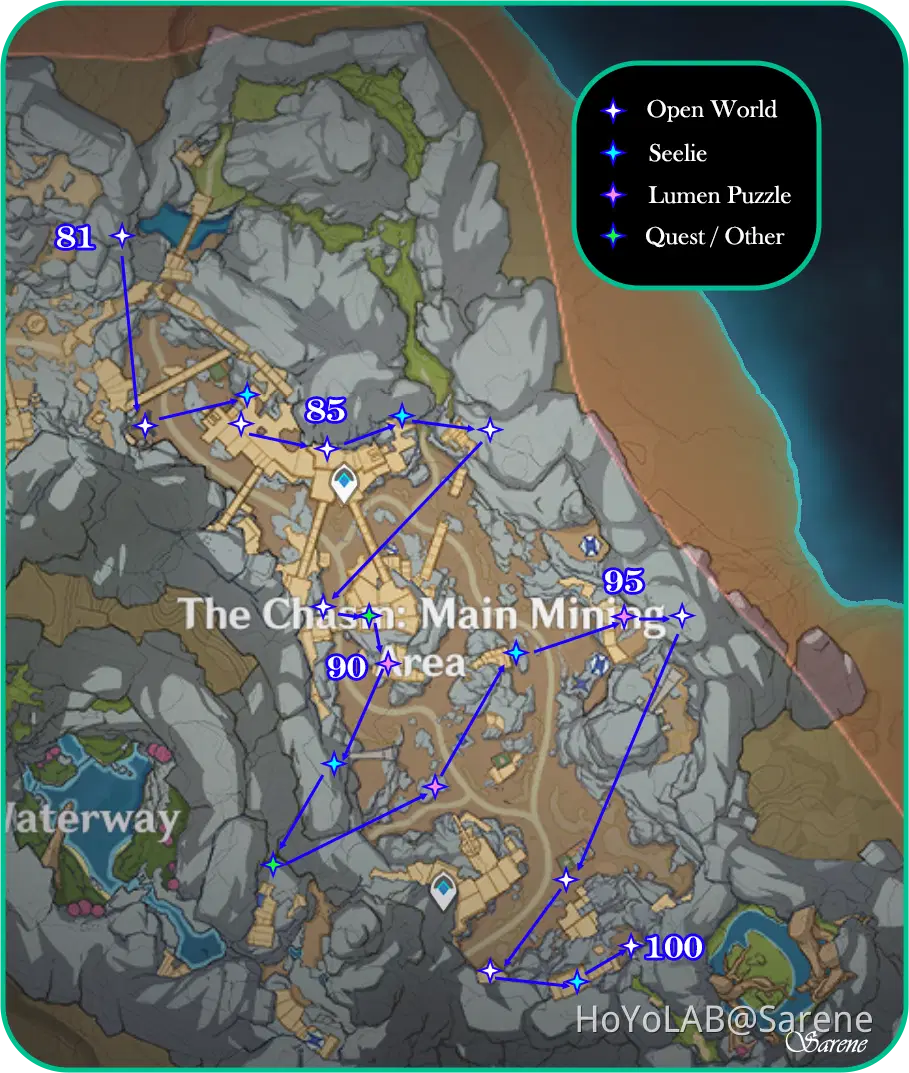
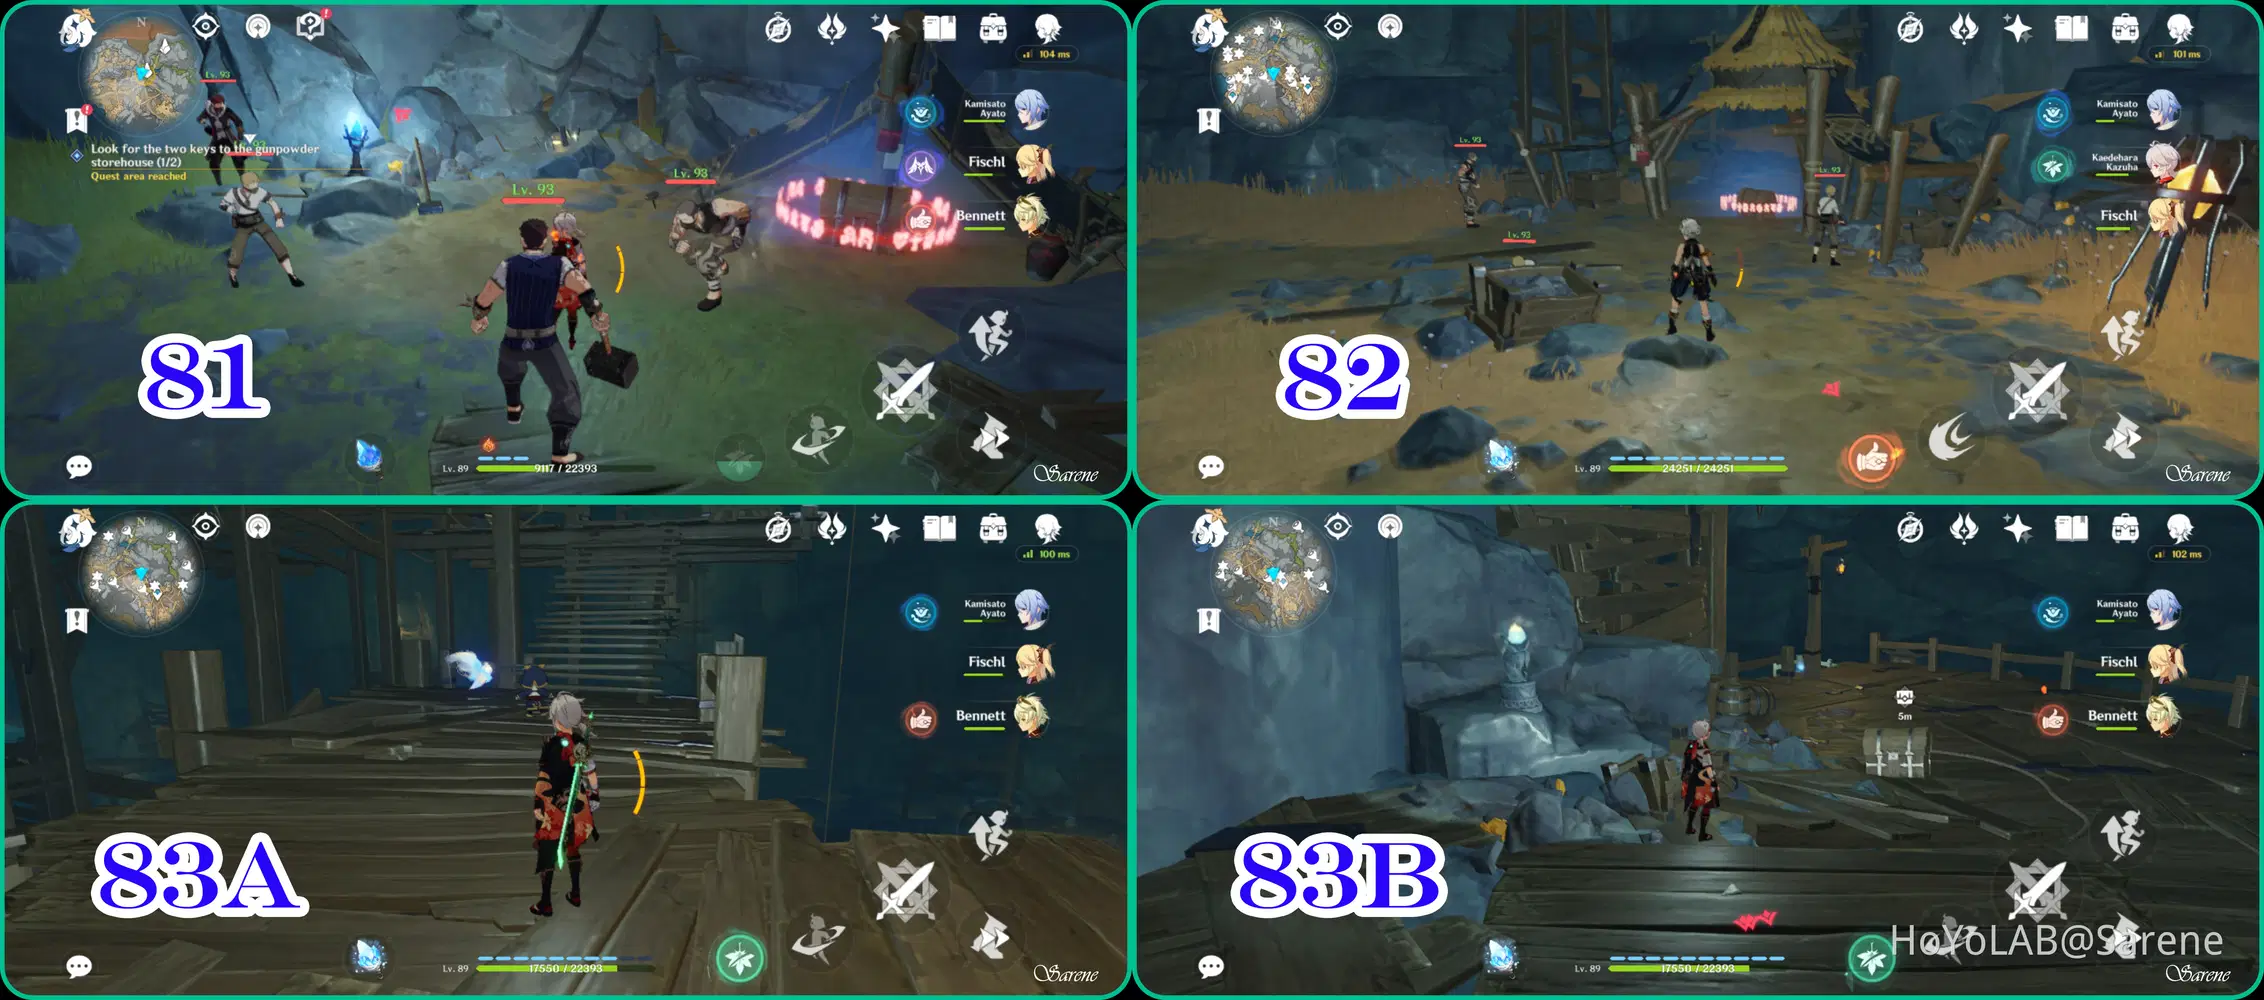
81 - 83
81. Defeat the Treasure Hoarder Camp
82. Defeat the Treasure Hoarder Camp.
83. Follow the Seelie to its Court
84 - 86
84. Defeat the Treasure Hoarders
85. Chest is hidden behind some crates
86. Follow the Seelie to its Court
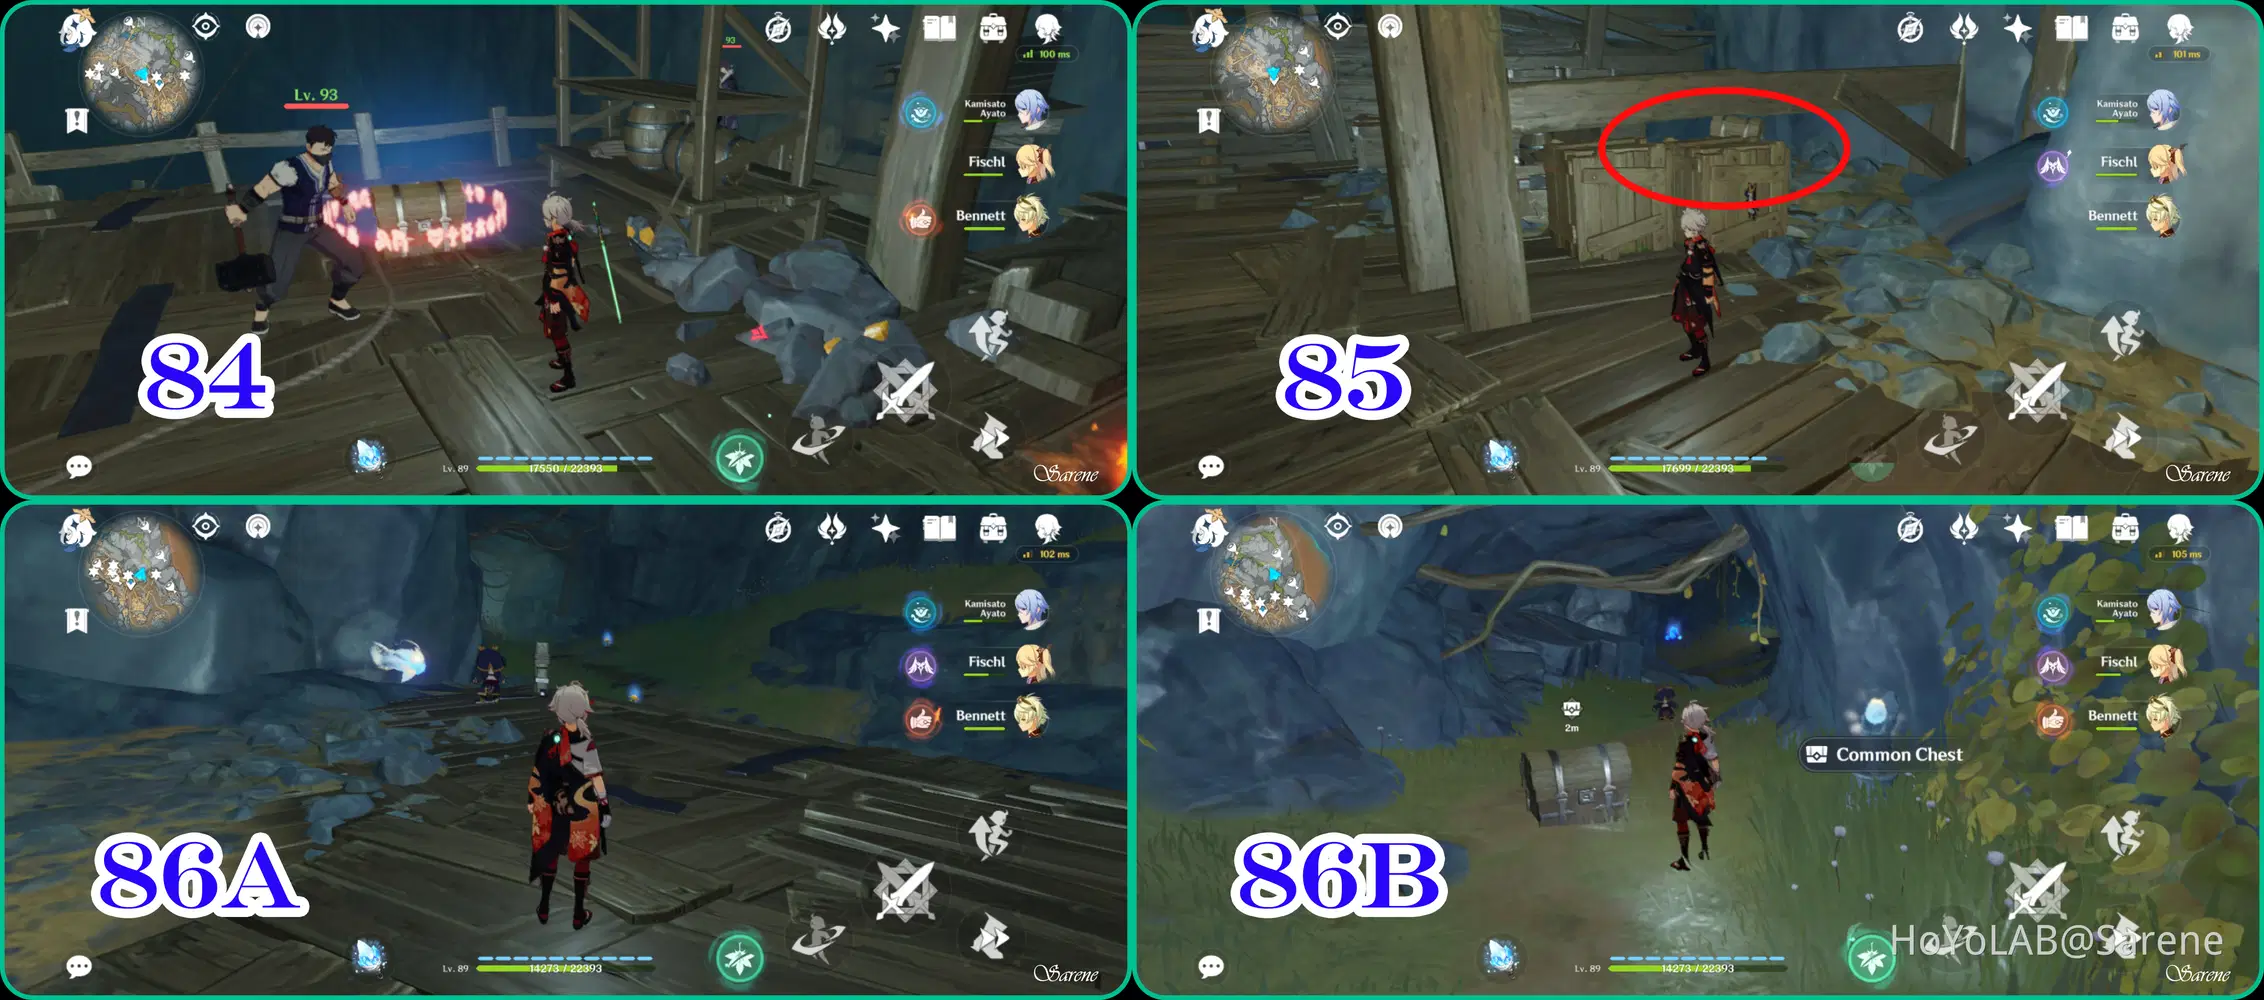
87 - 89
87. Defeat the Treasure Hoarder Camp
88. Defeat the Fatui Agent
89. Burn the Haystacks to spawn the chest
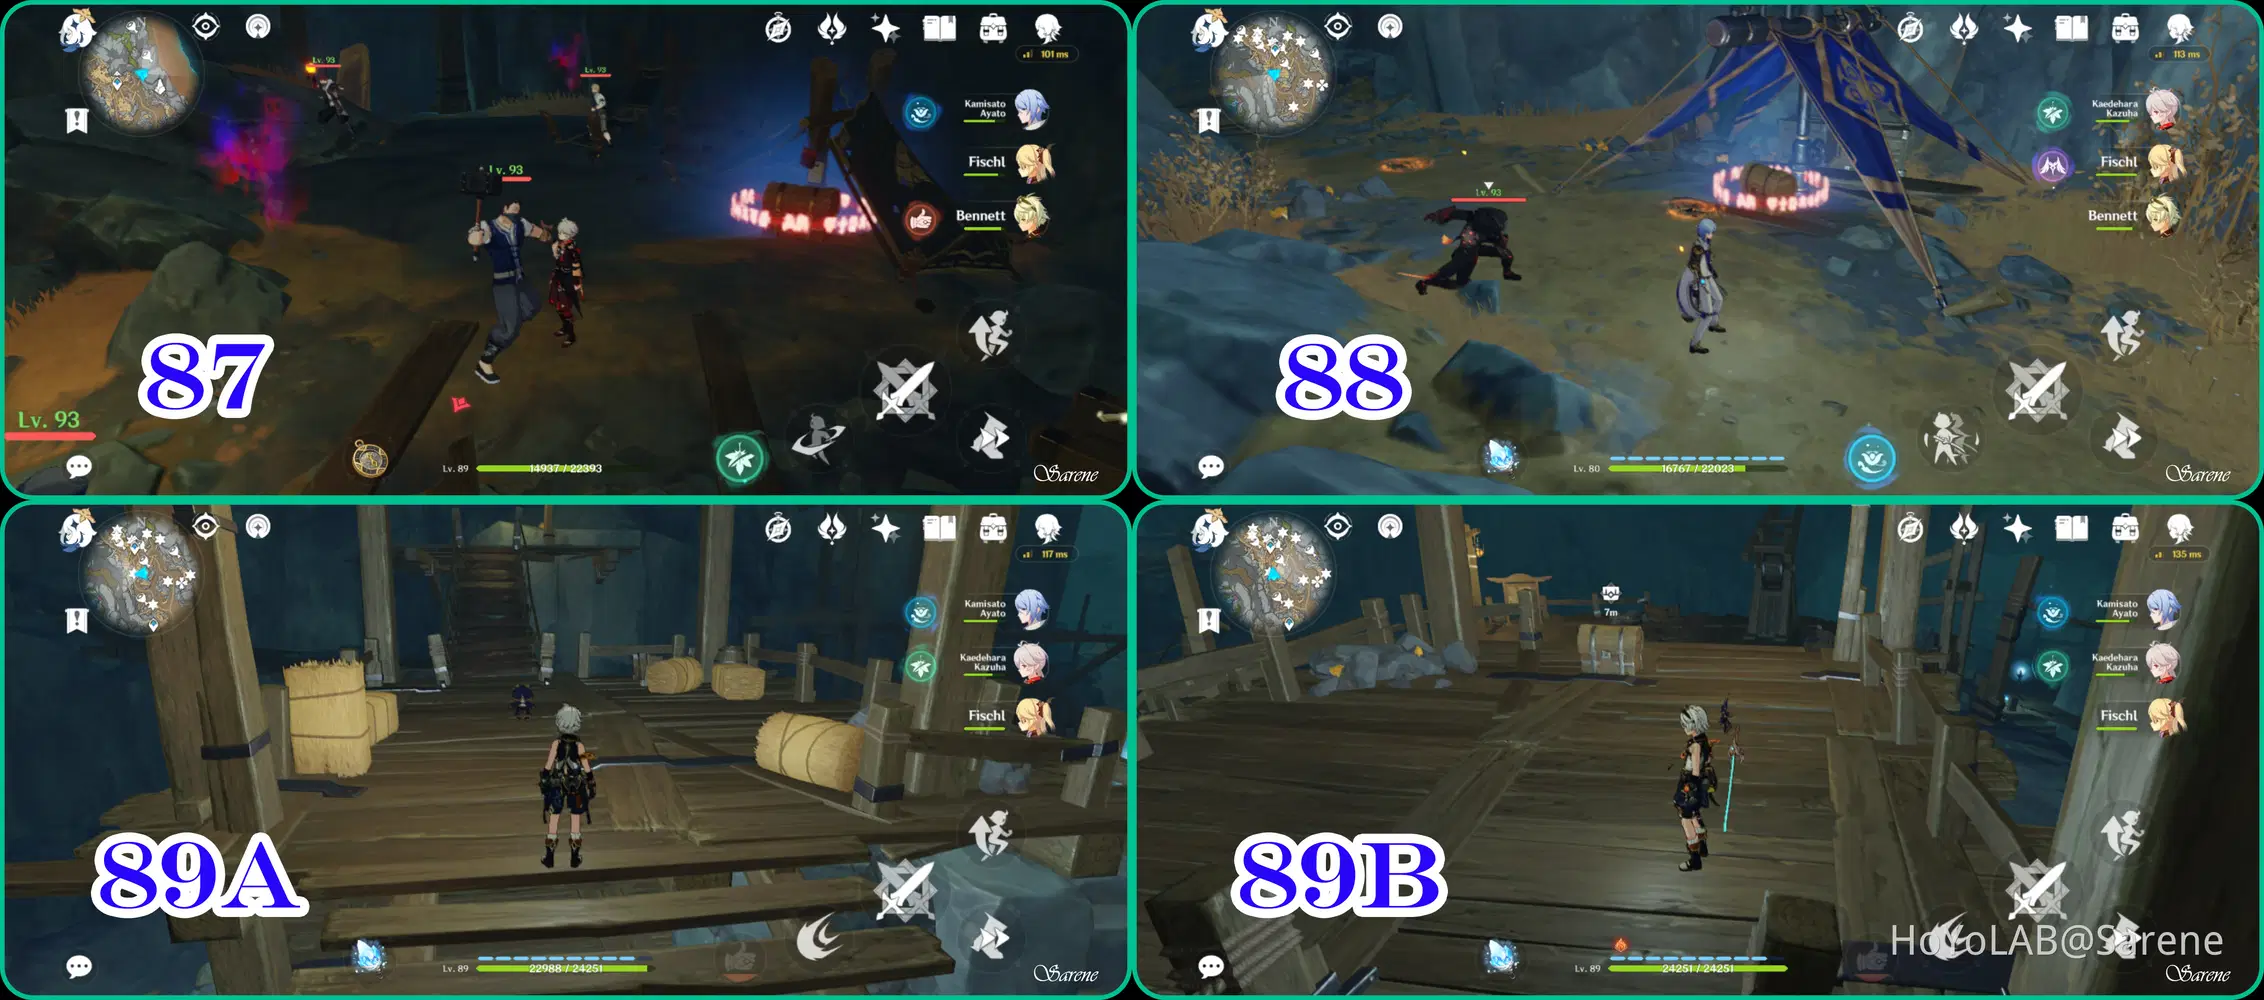
90 - 92
90. Recharge the chest with the Lumenstone Adjuvant
91. Follow the Seelie to its Court
92. This chest is part of the Archon Quest
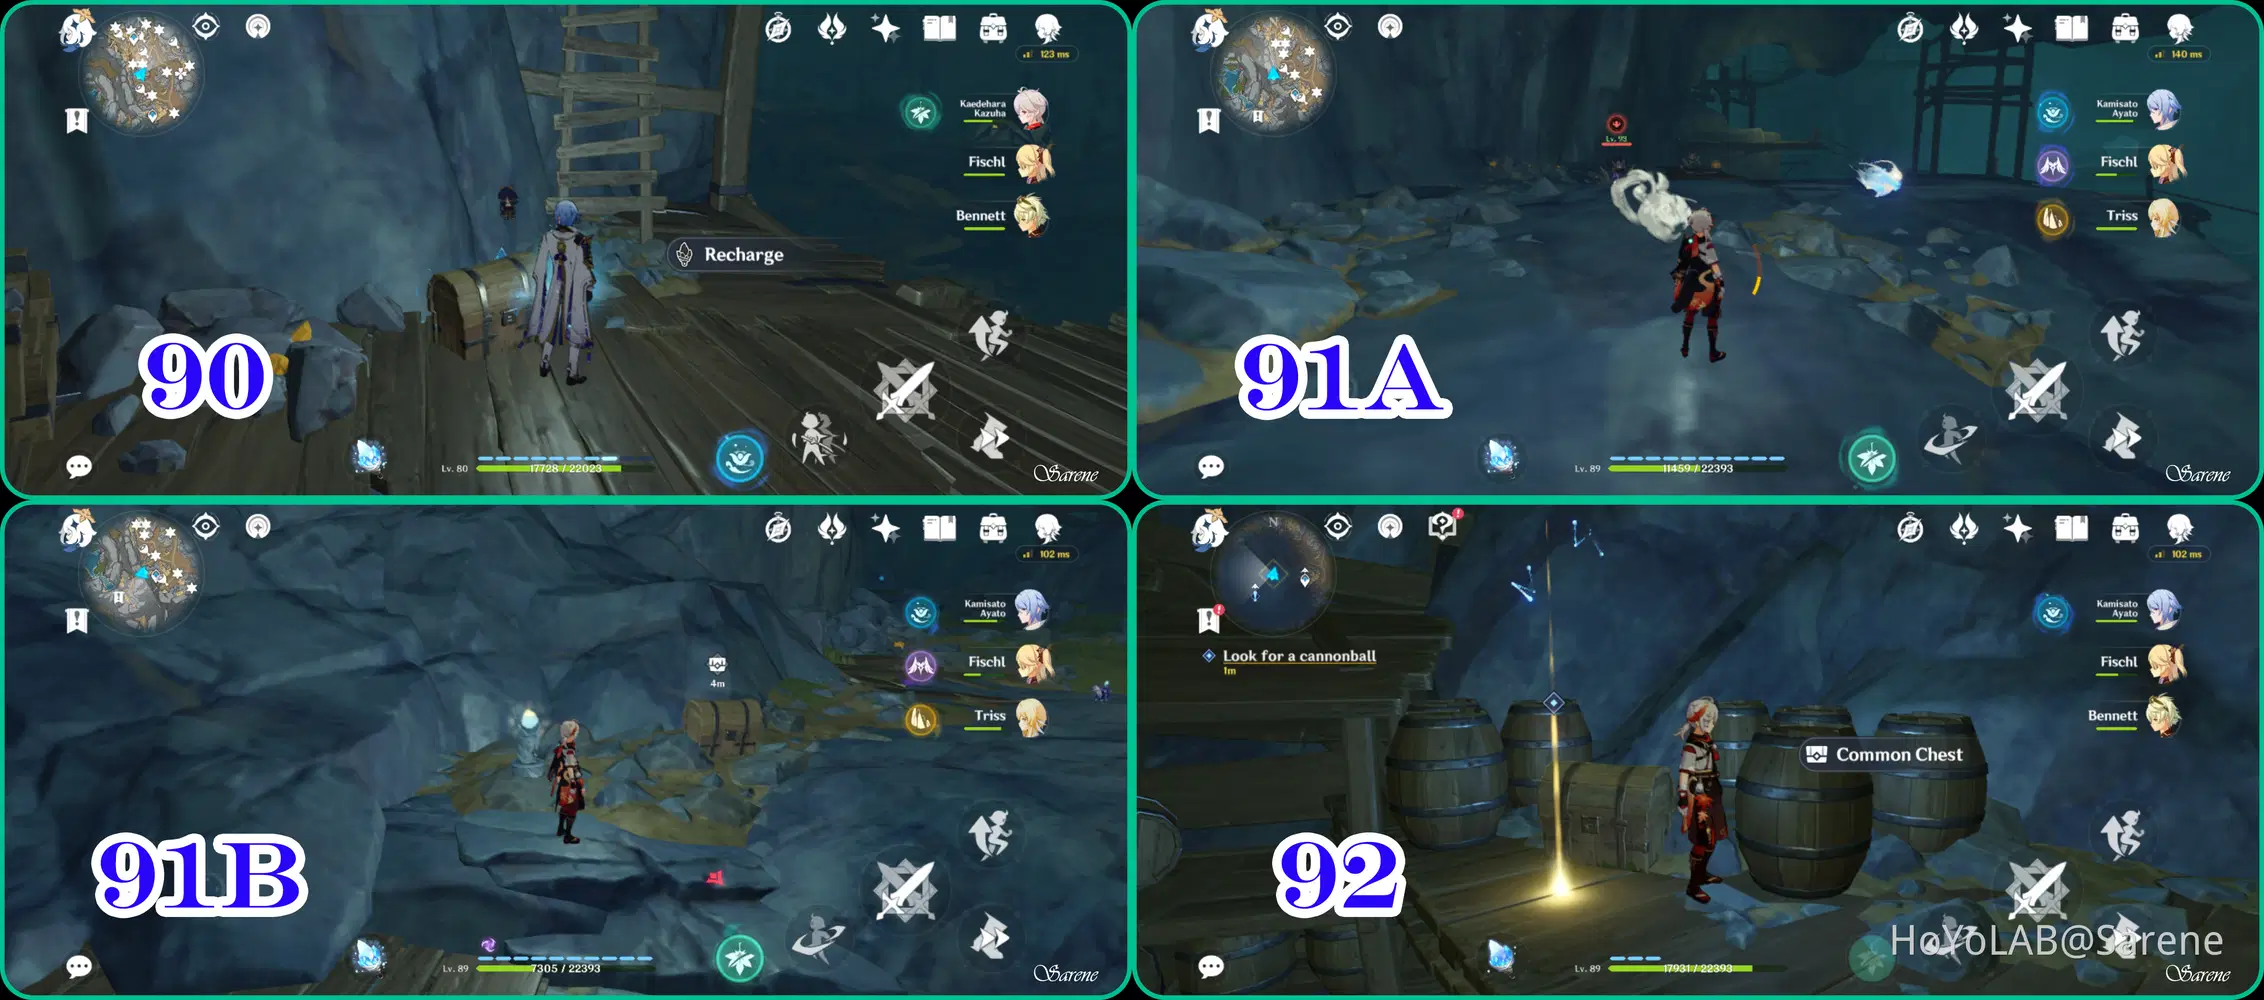
93 - 95
93. Complete the Lumenstone Light Puzzle
94. Follow the Seelie to its Court
95. Recharge and complete the Lumenstone Puzzle
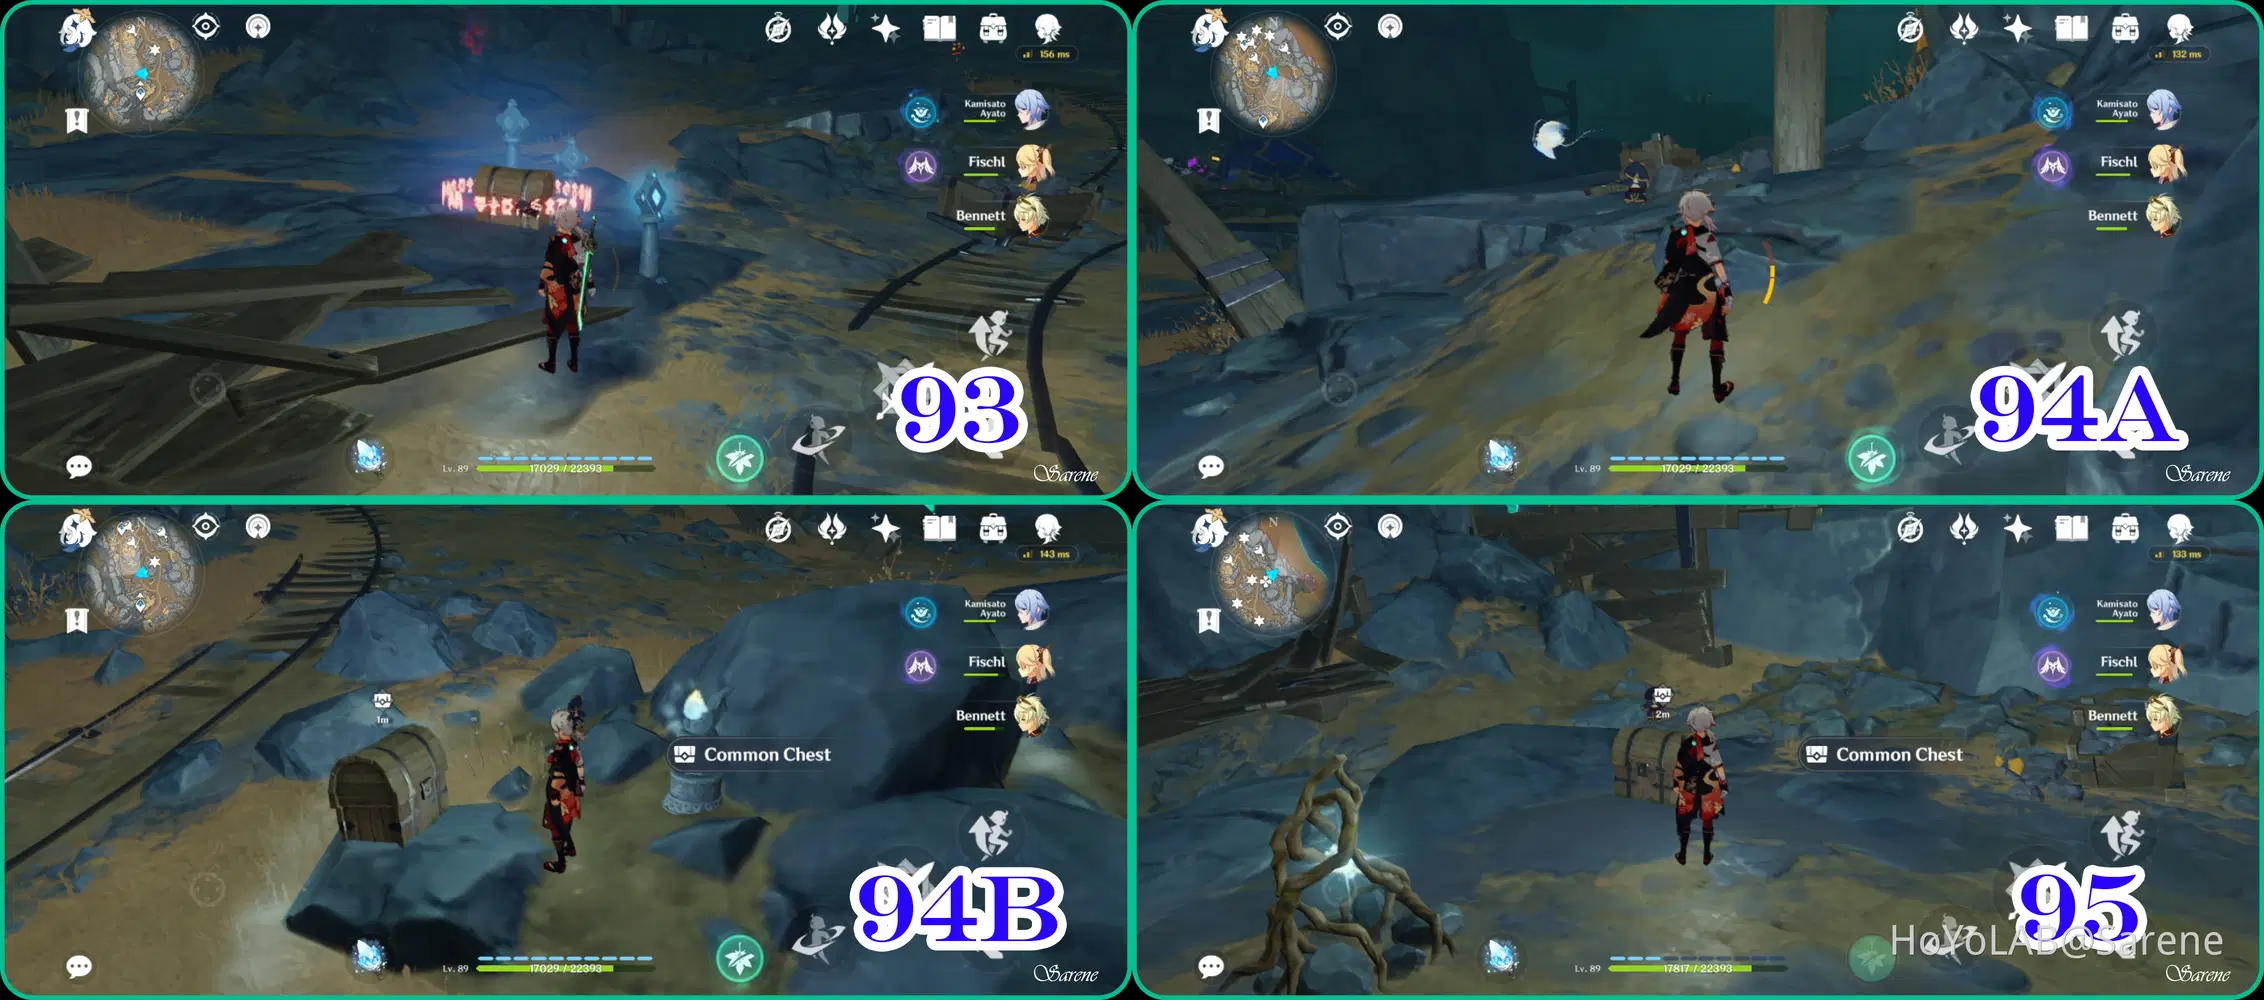
96 - 98
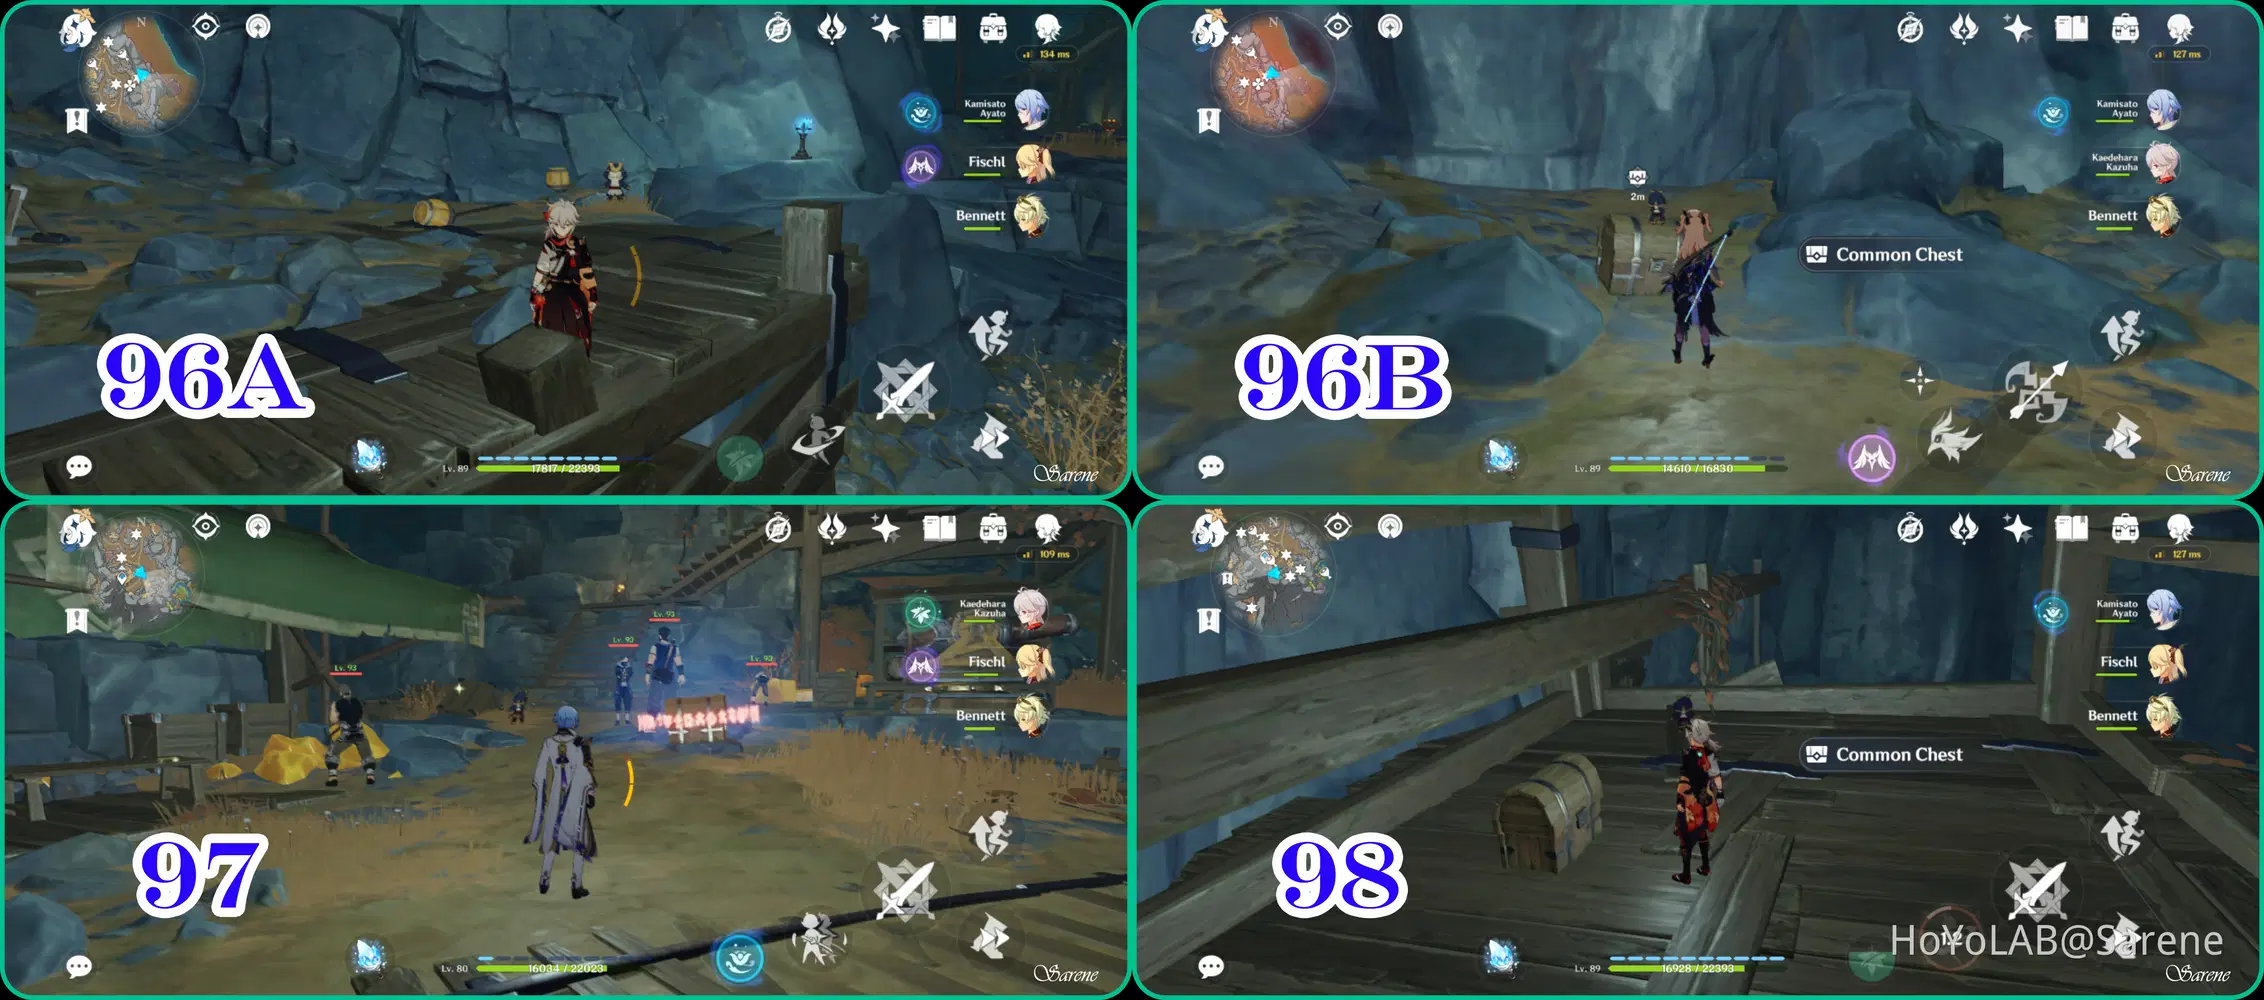
96. This chest is hidden behind a wall. Explode the barrels to destroy the wall.
97. Defeat the Treasure Hoarder Camp
98. Chest is found on the pathway
99 - 100
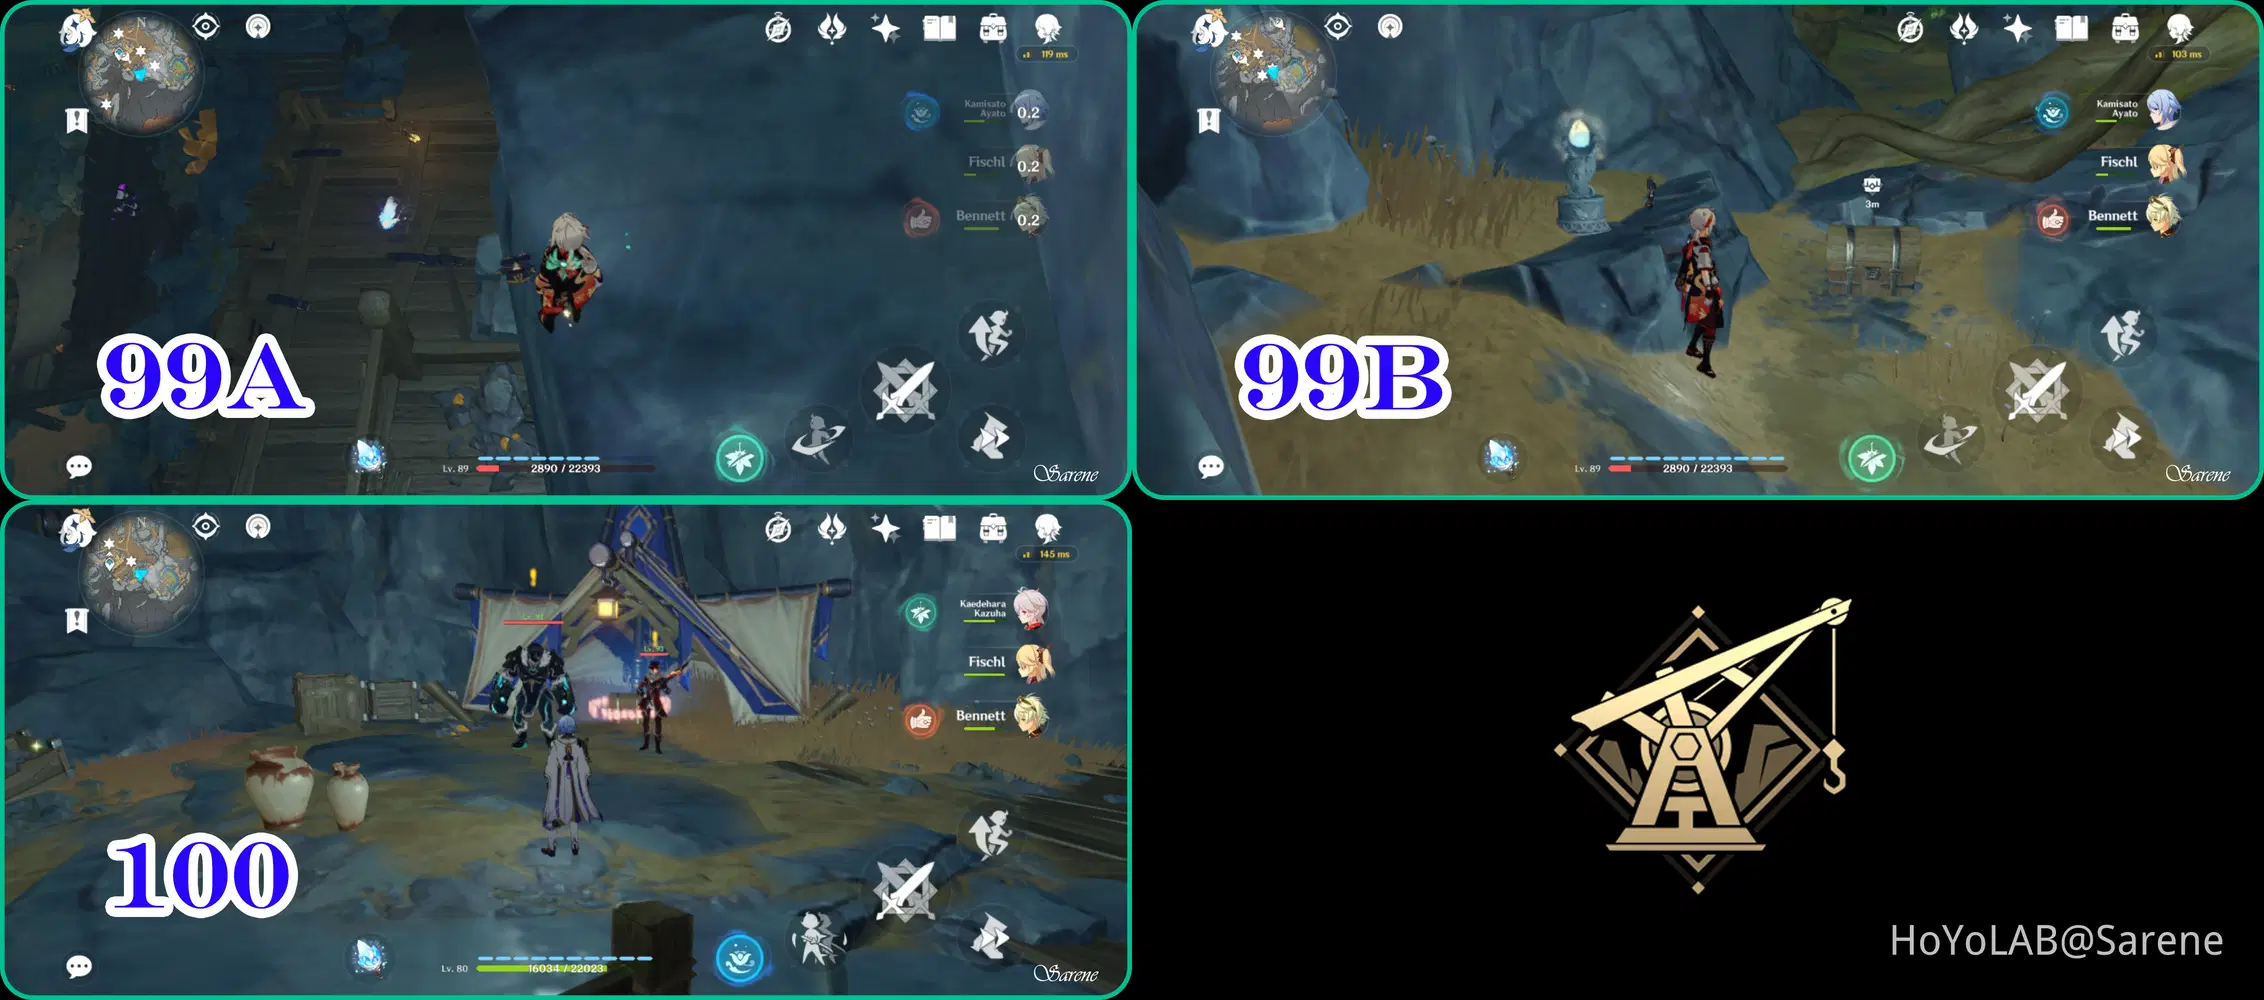
99. Follow the Seelie to its Court
100. Defeat the Fatui
Underground Waterway
101 - 102
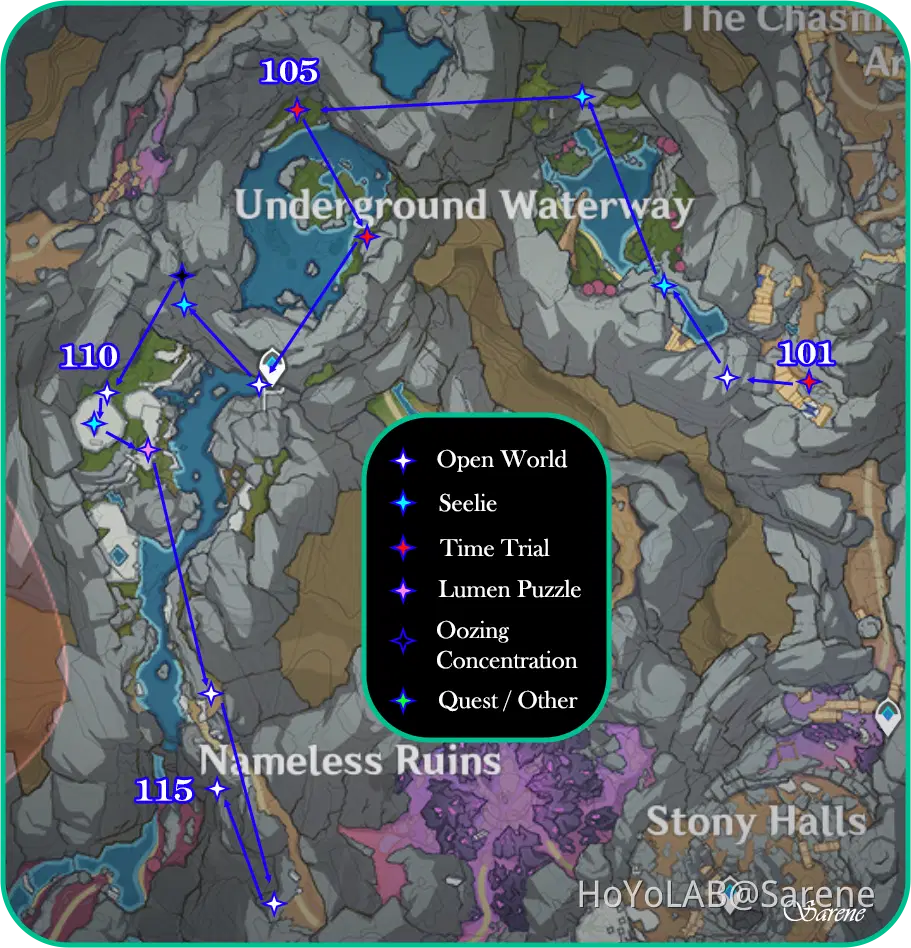
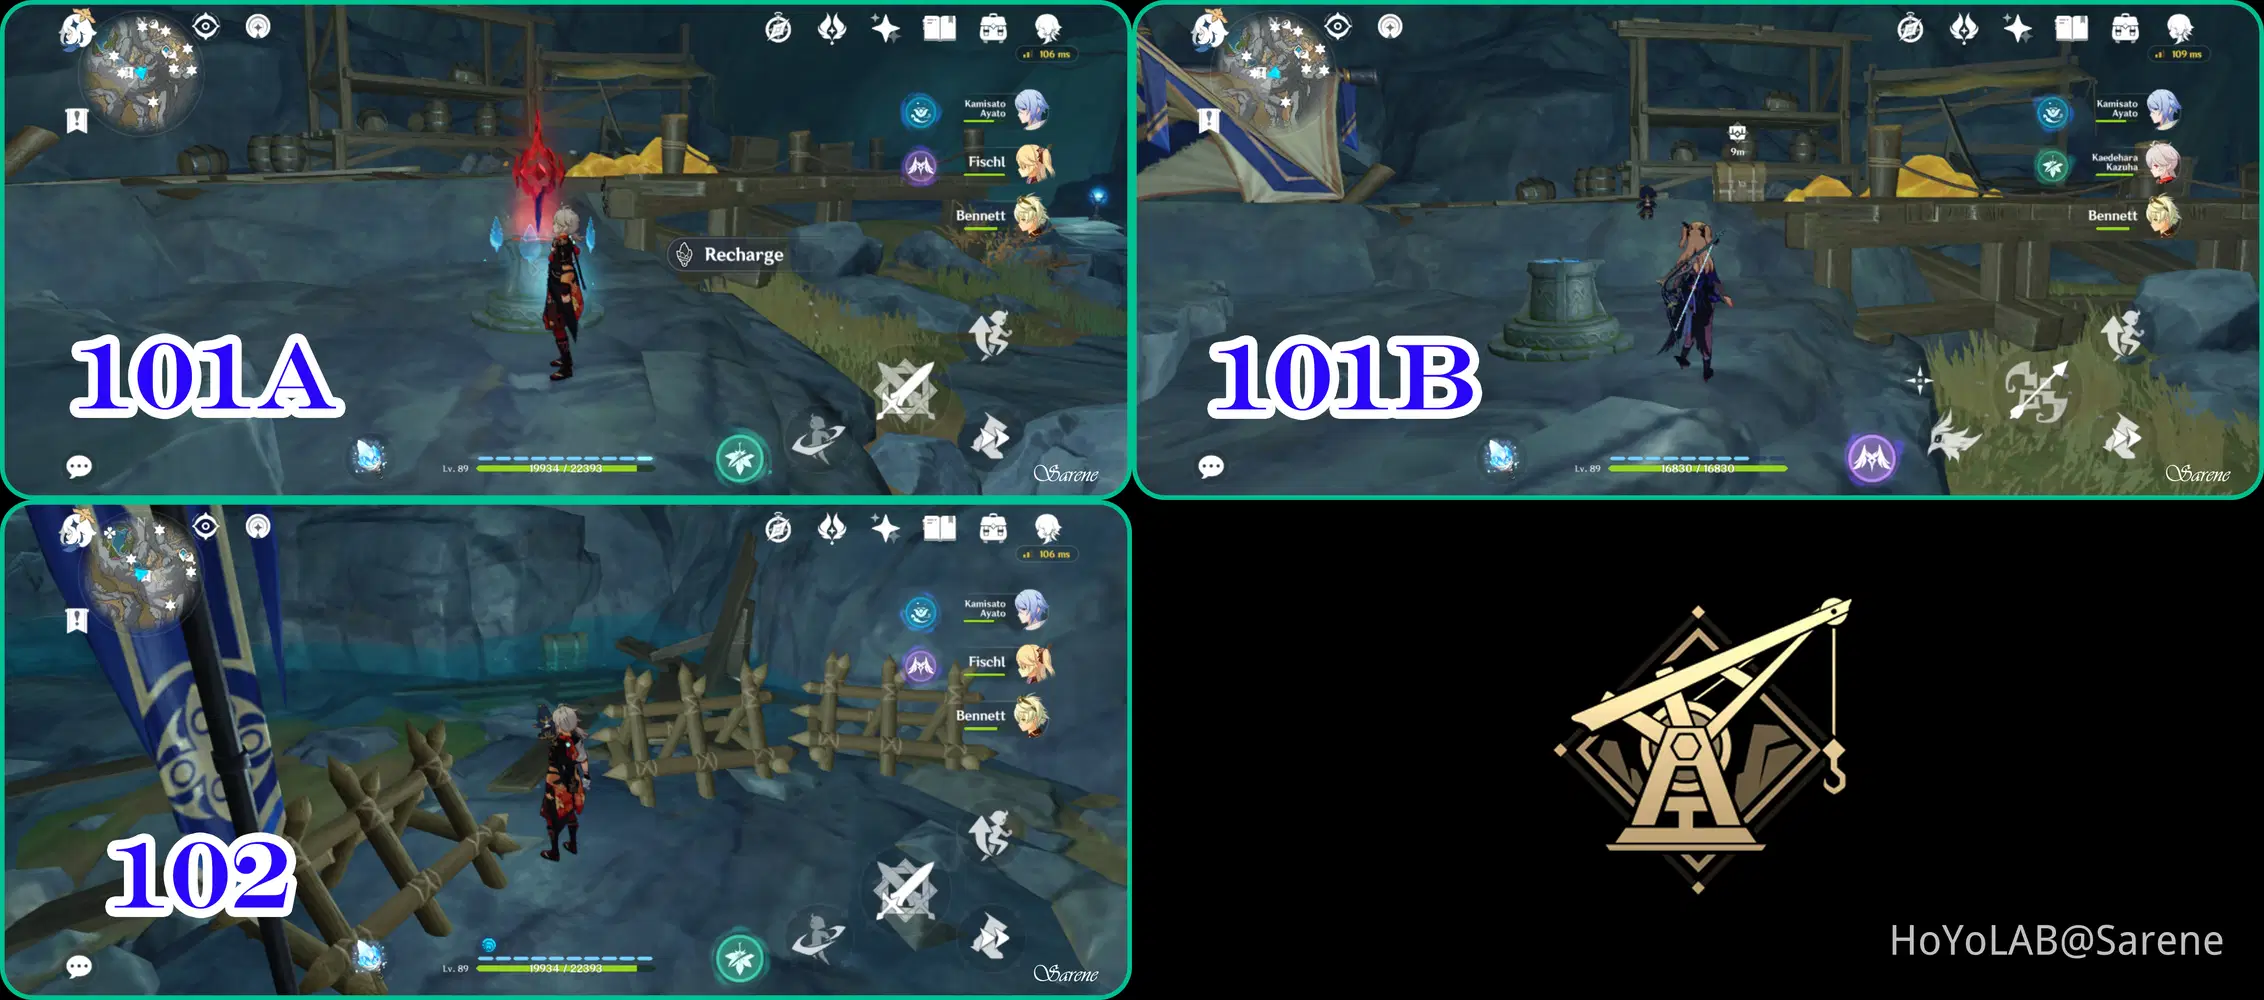
101. Complete Time Trial Challenge
102. Chest is found in the water
103 - 104
103. Follow the Seelie to its Court
104. Follow the Seelie to its Court
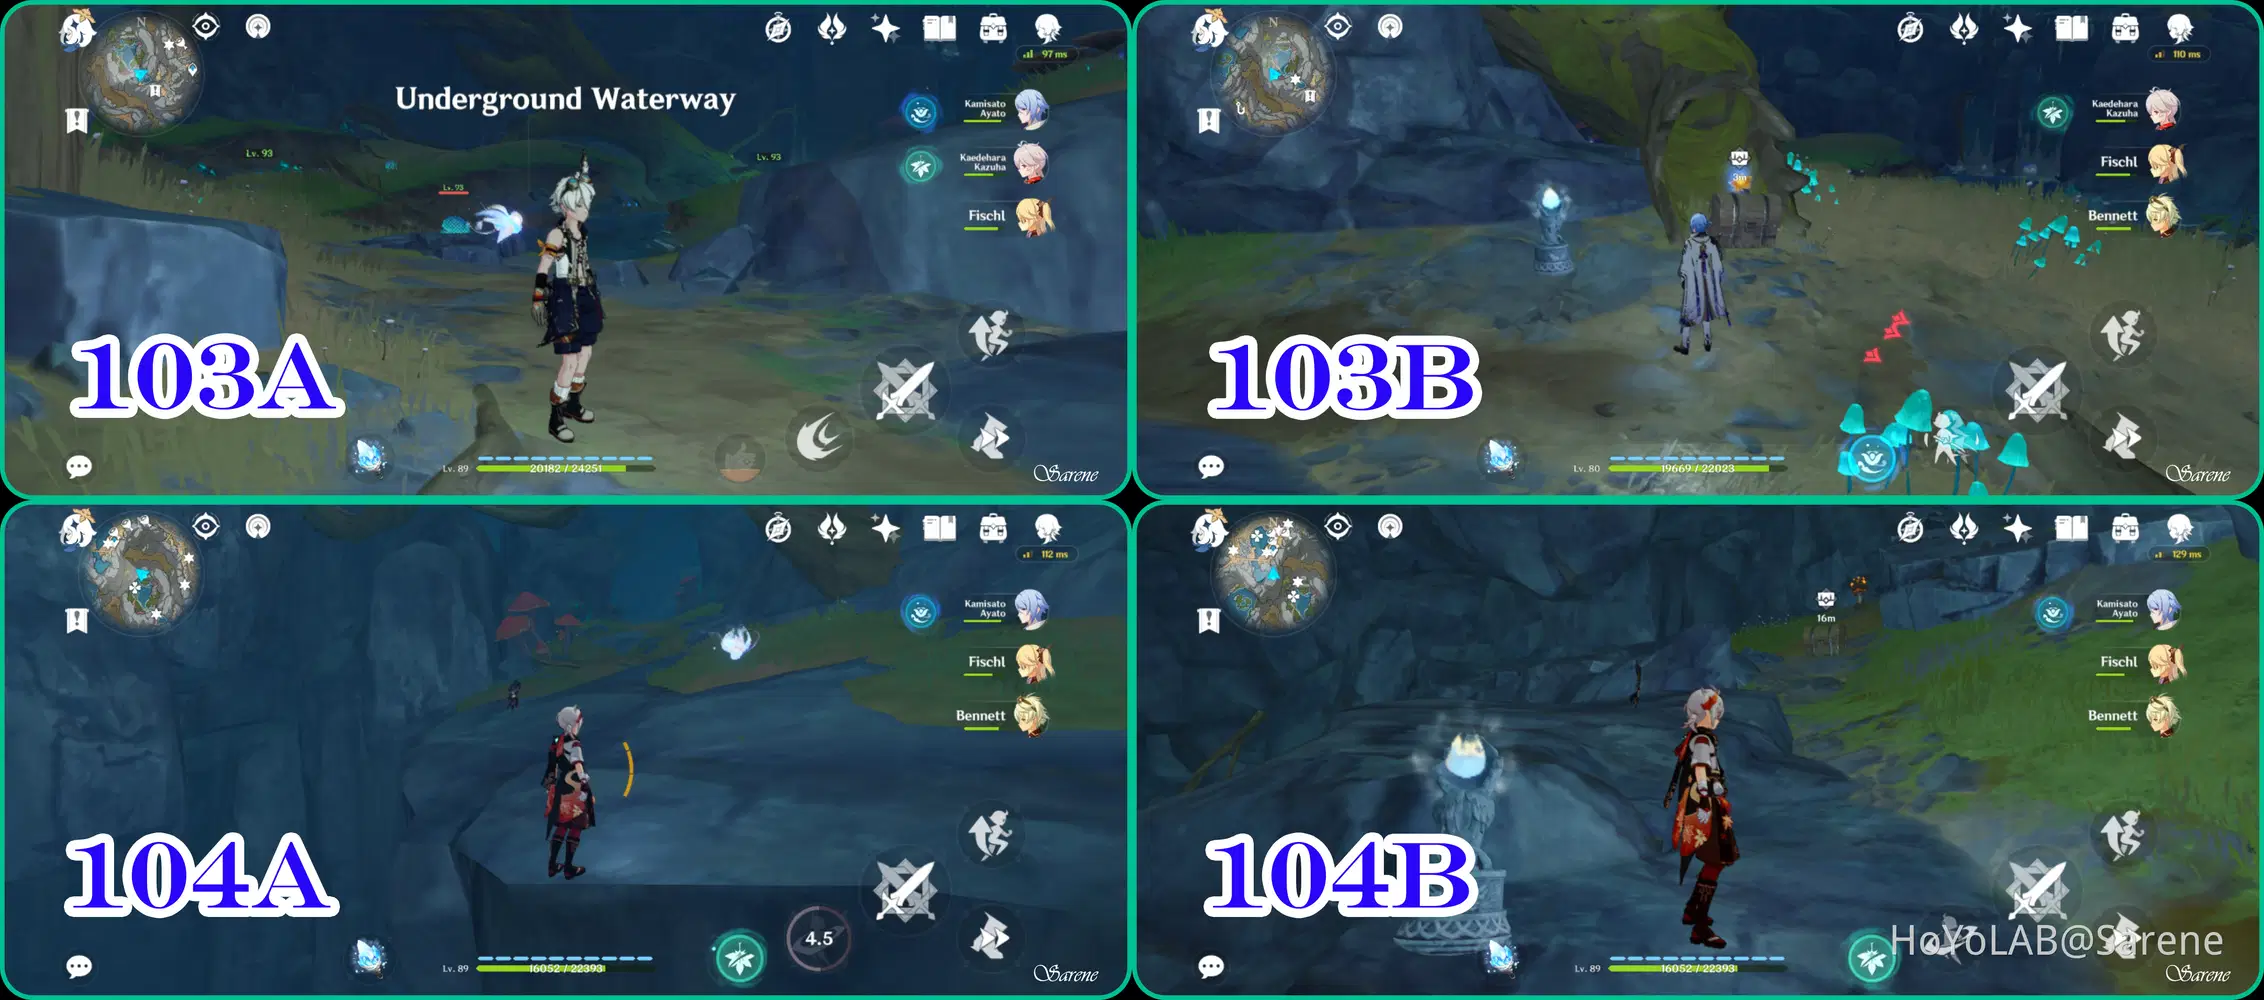
105 - 106
105. Complete the Time Trial Challenge
106. Complete the Time Trial Challenge
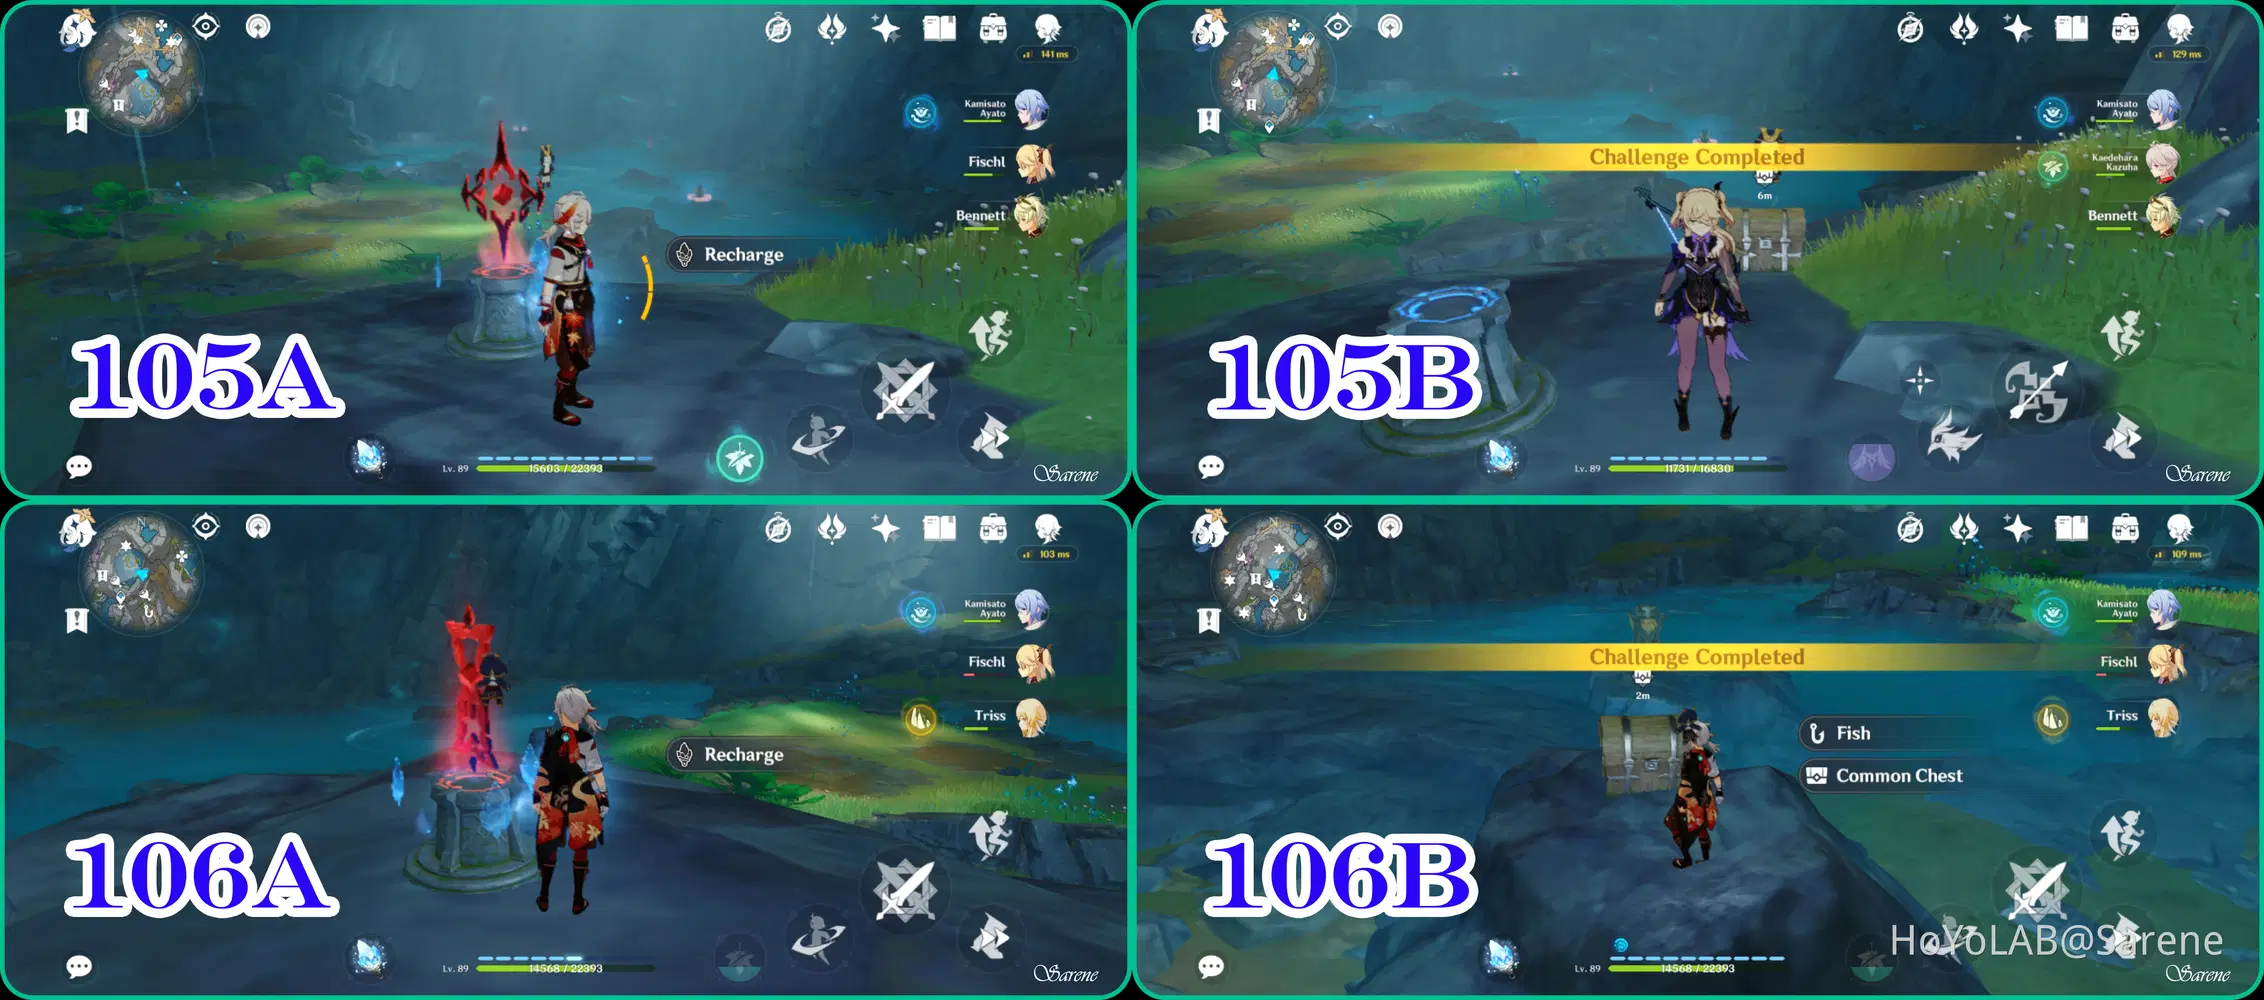
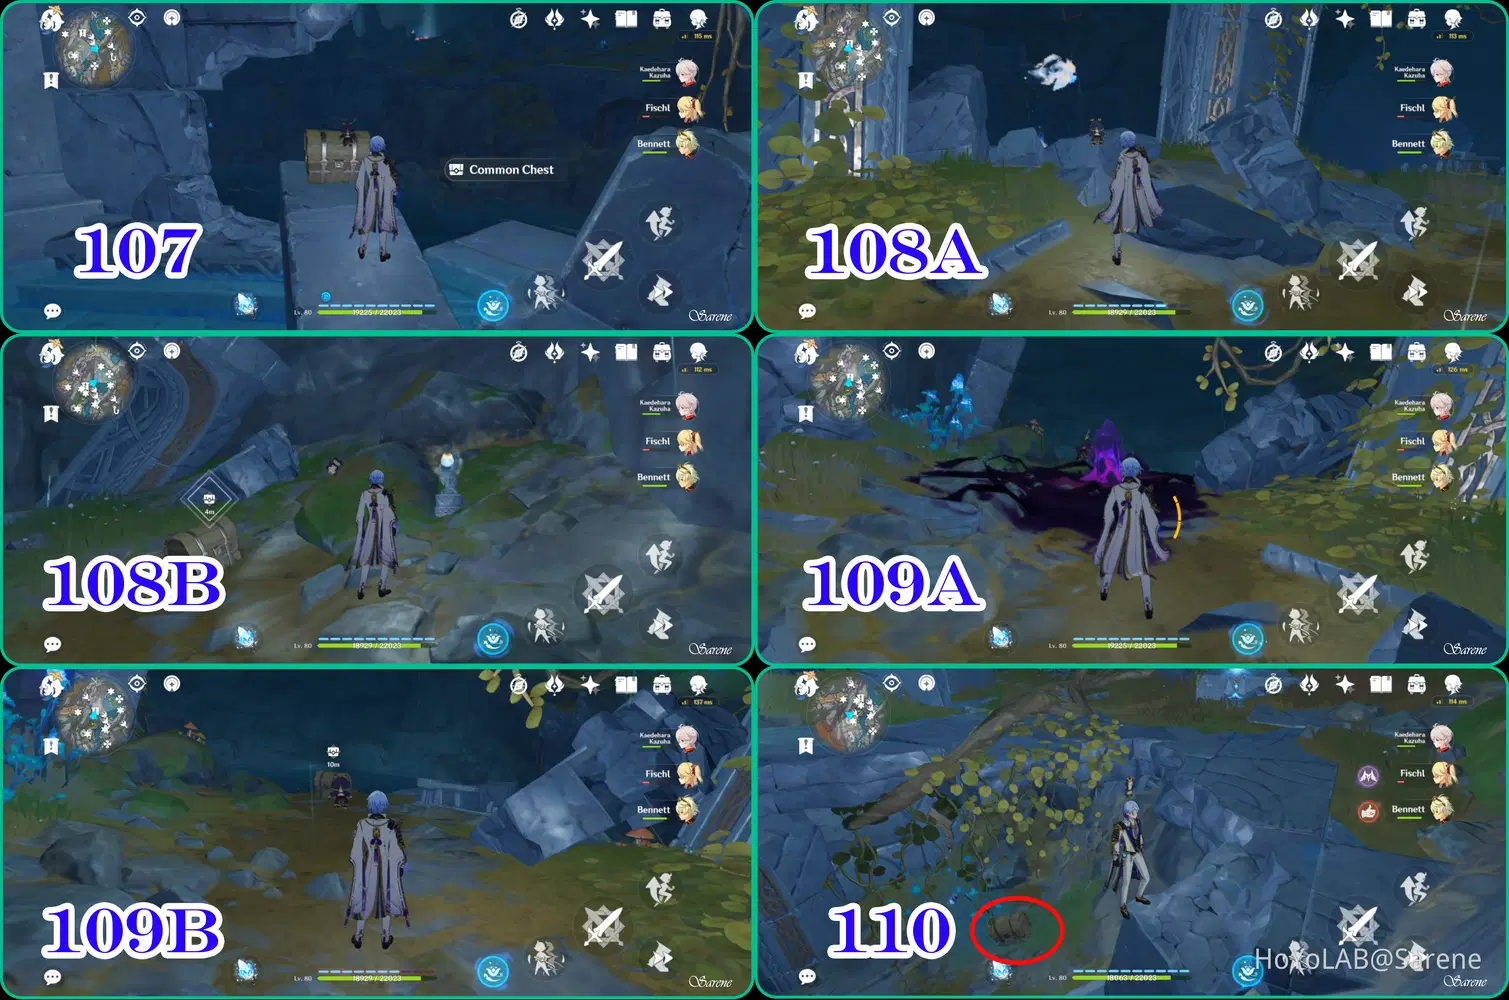
107 - 110
107. Found on the floor below the teleport
108. Follow the Seelie to its Court
109. Requires level 2 Lumenstone Adjuvant to remove Oozing Concentration
110. Found on the bottom floor of the ruins
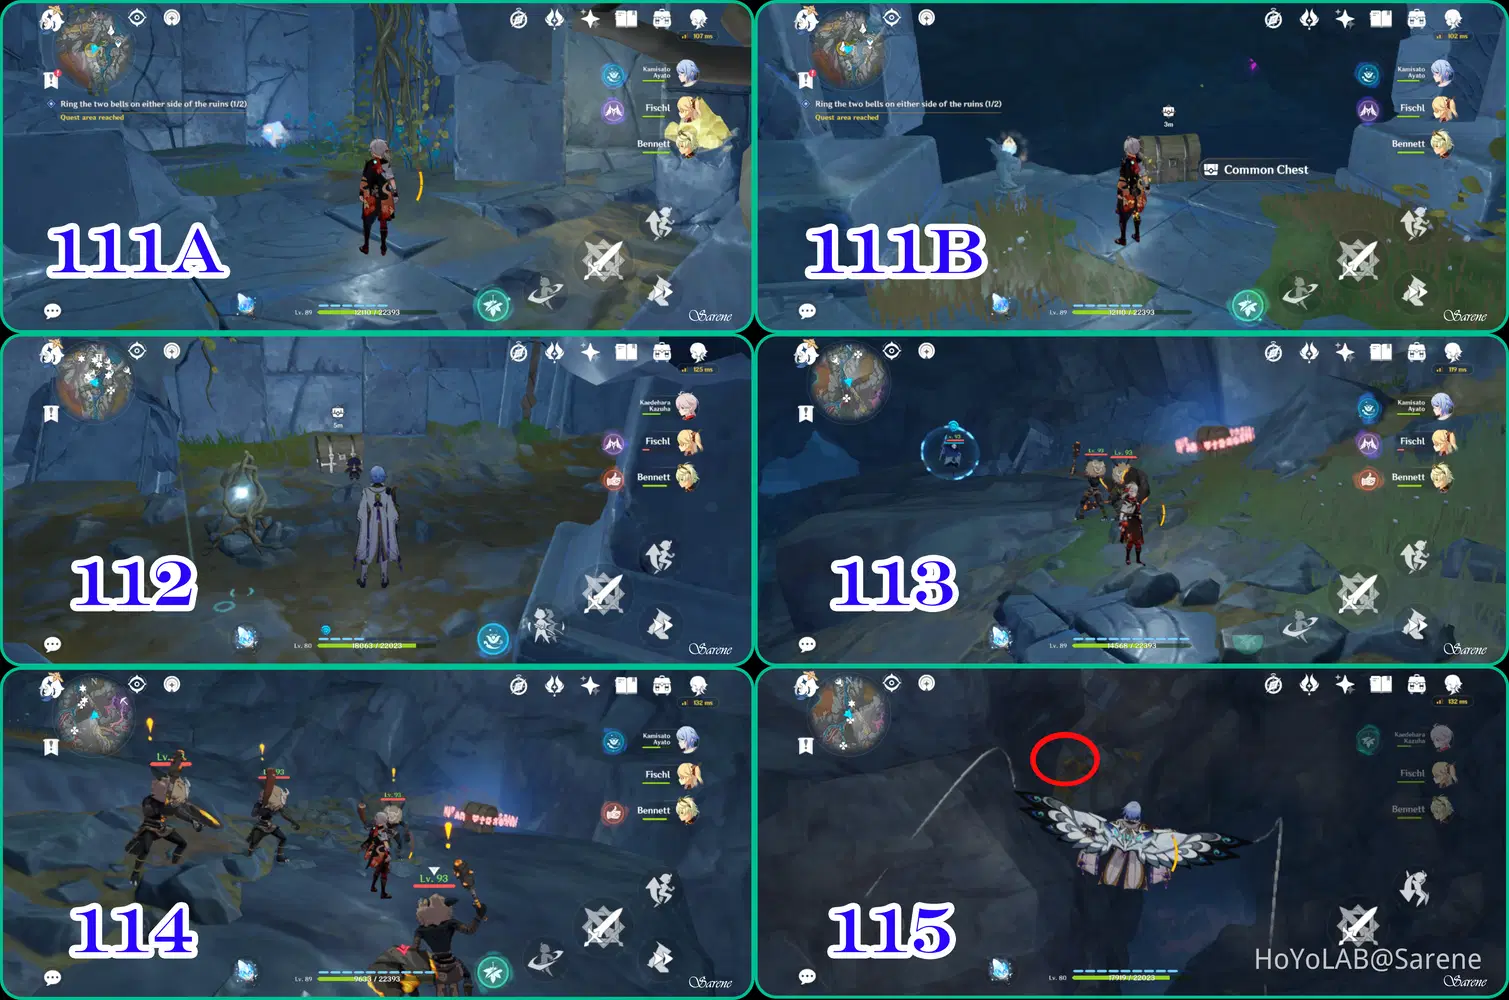
111 - 115
111. Follow the Seelie to its Court
112. Recharage and complete the Lumenstone Puzzle
113. Defeat the Hilichurls and Abyss Mage
114. Defeat the Hilichurls
115. Found on the side of the cliff as you glide down to The Glowing Narrows
Stony Halls / Nameless Ruins
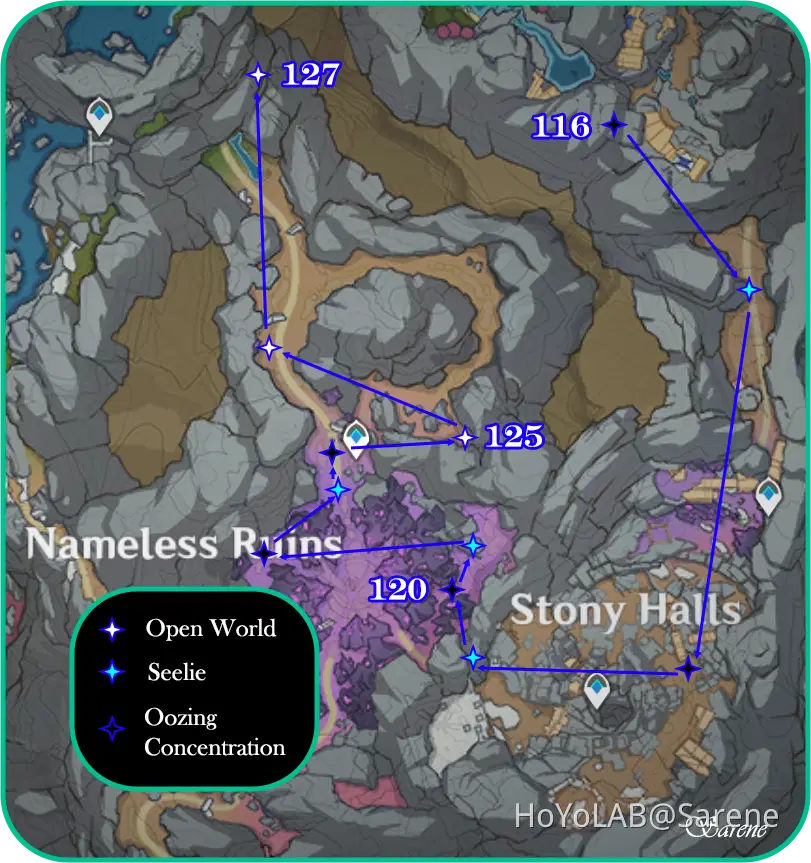
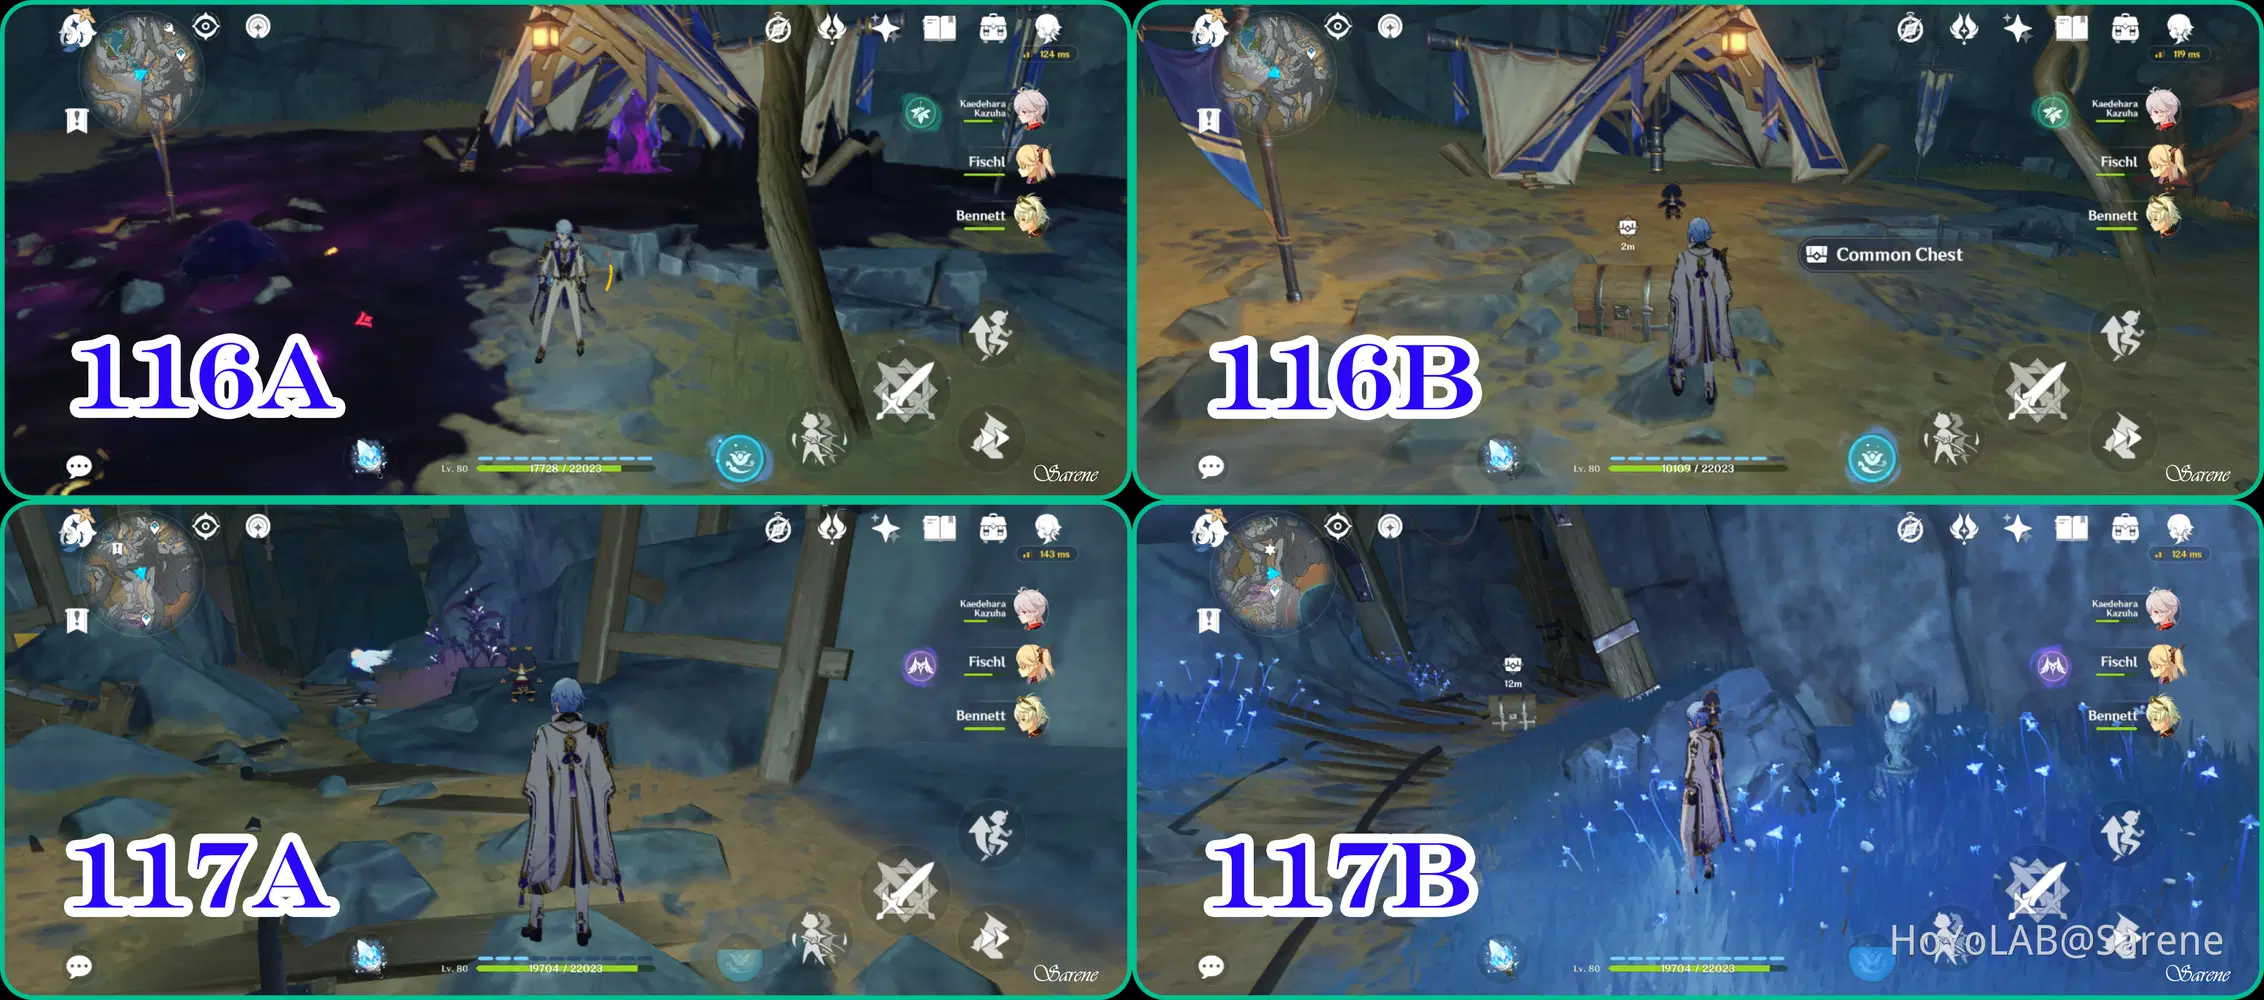
116 - 117
116. Requires level 6 Lumenstone Adjuvant to remove Oozing Concentration
117. Follow the Seelie to its Court
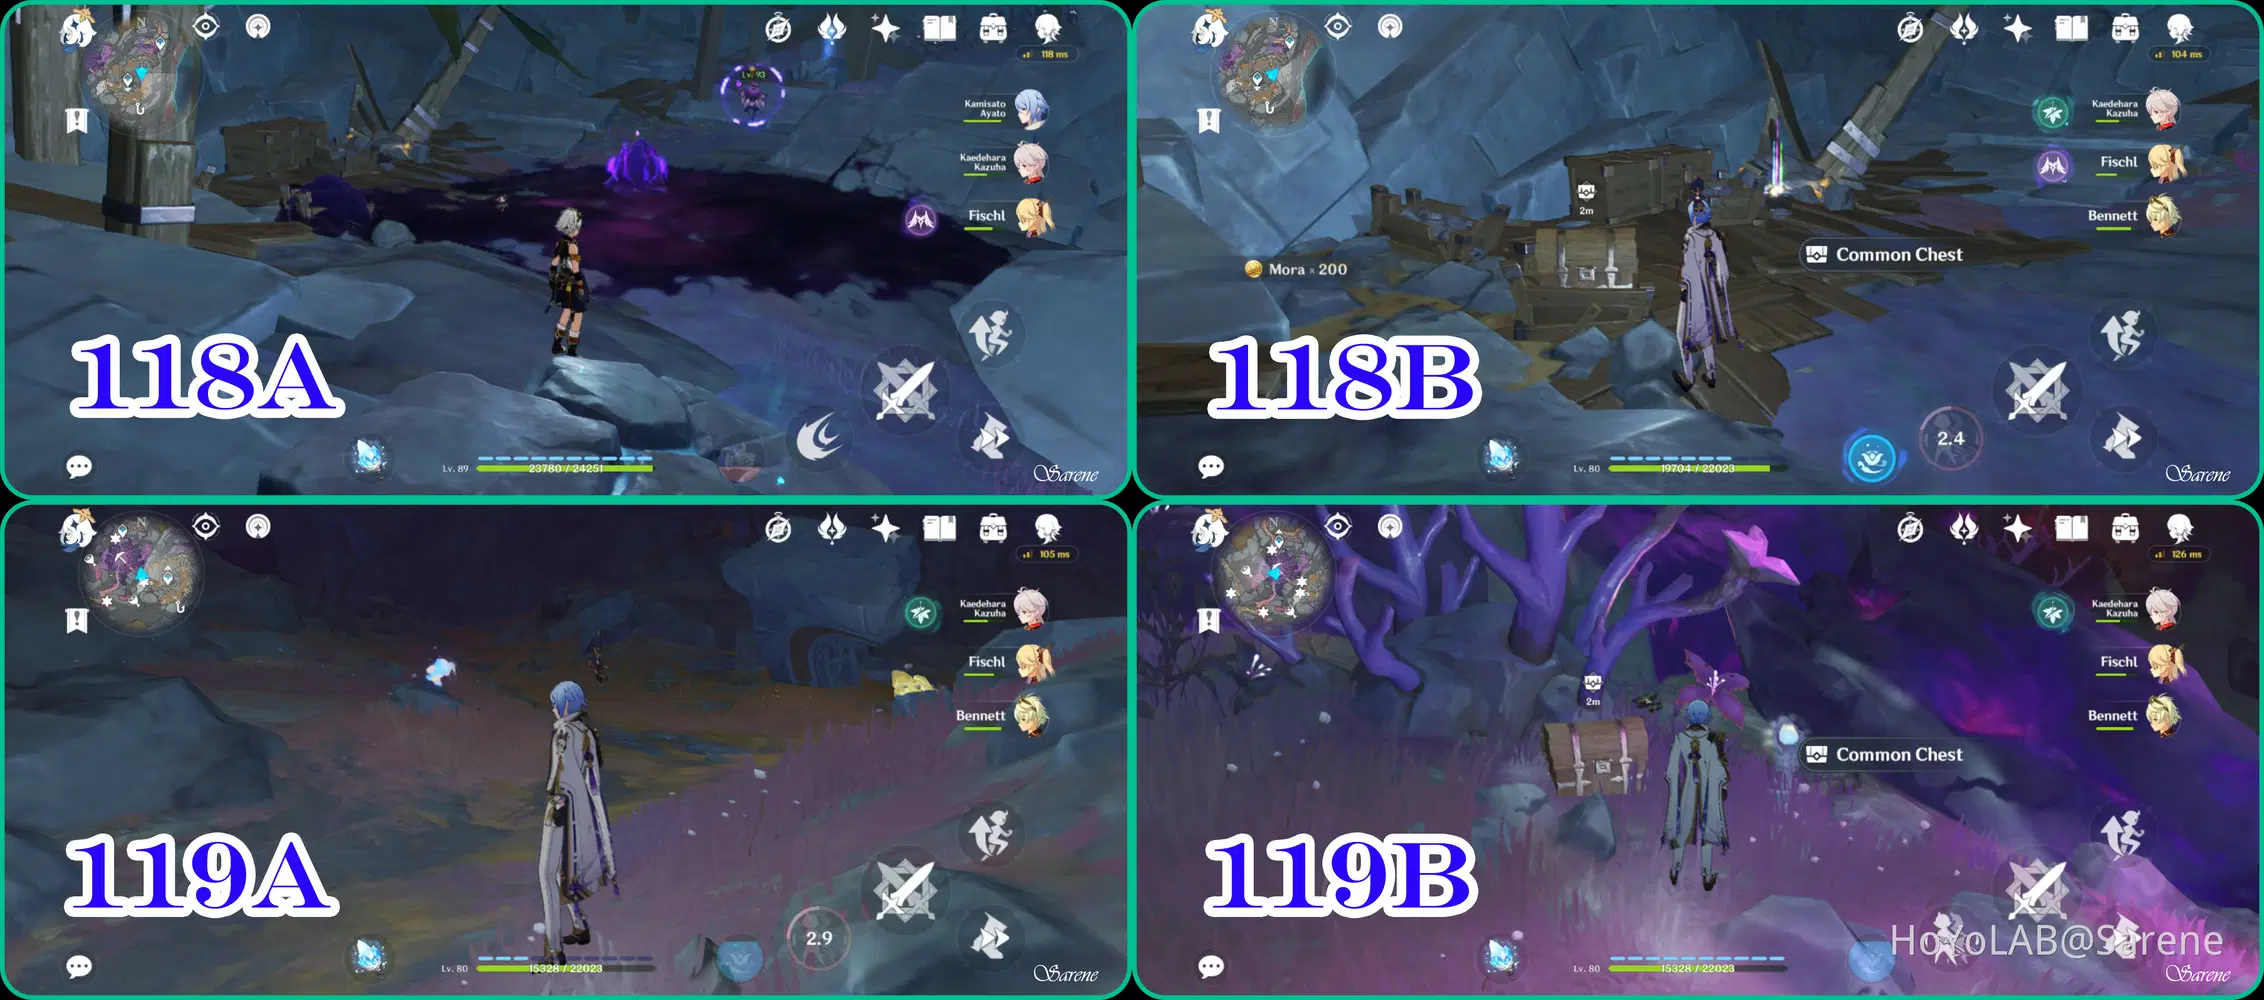
118 - 119
118. Requires level 2 Lumenstone Adjuvant to remove Oozing Concentration
119. Follow the Seelie to its Court
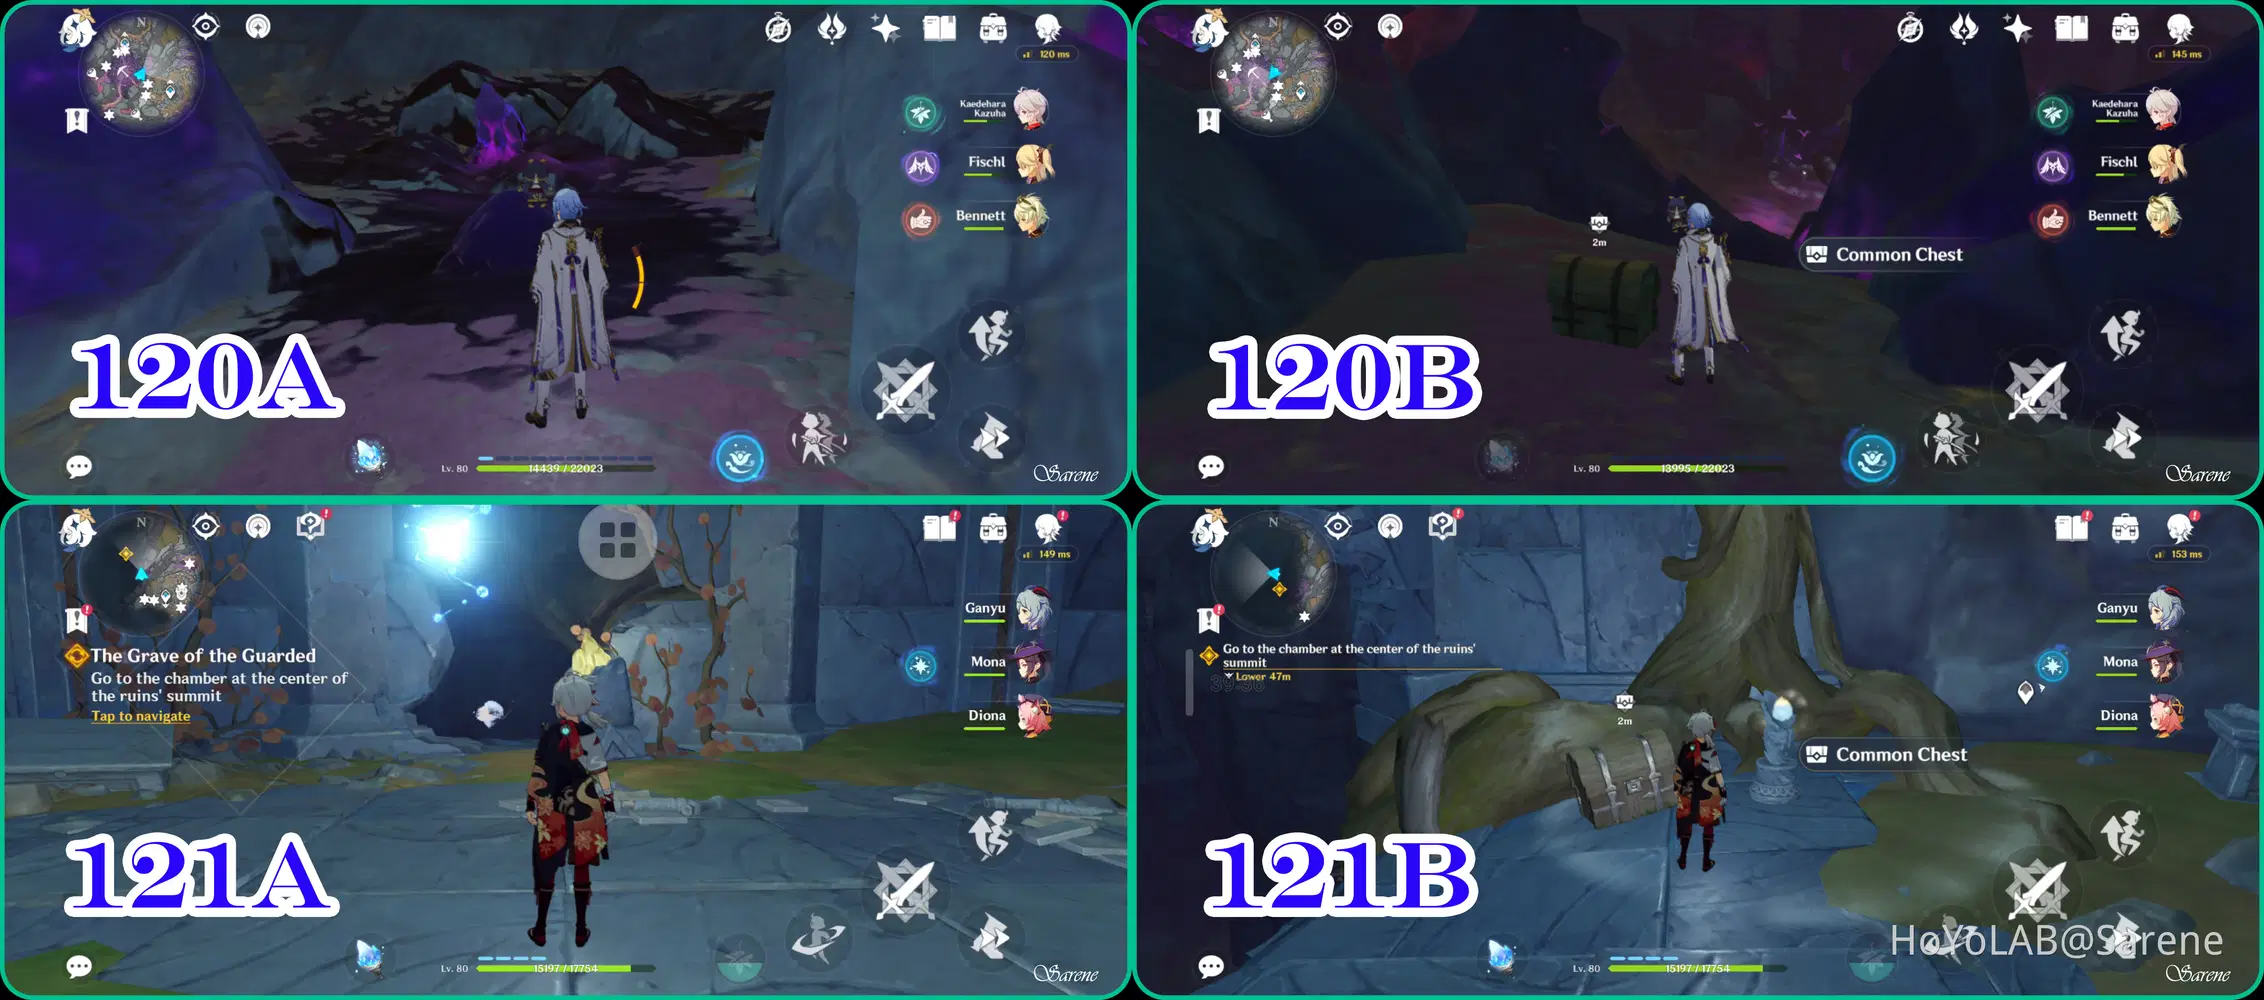
120 - 121
120. Requires level 6 Lumenstone Adjuvant to remove Oozing Concentration
121. Follow the Seelie to its Court (You'll encounter this Seelie during the Archon Quest)
122 - 123
122. Requires level 6 Lumenstone Adjuvant to remove Oozing Concentration
123. Follow the Seelie to its Court
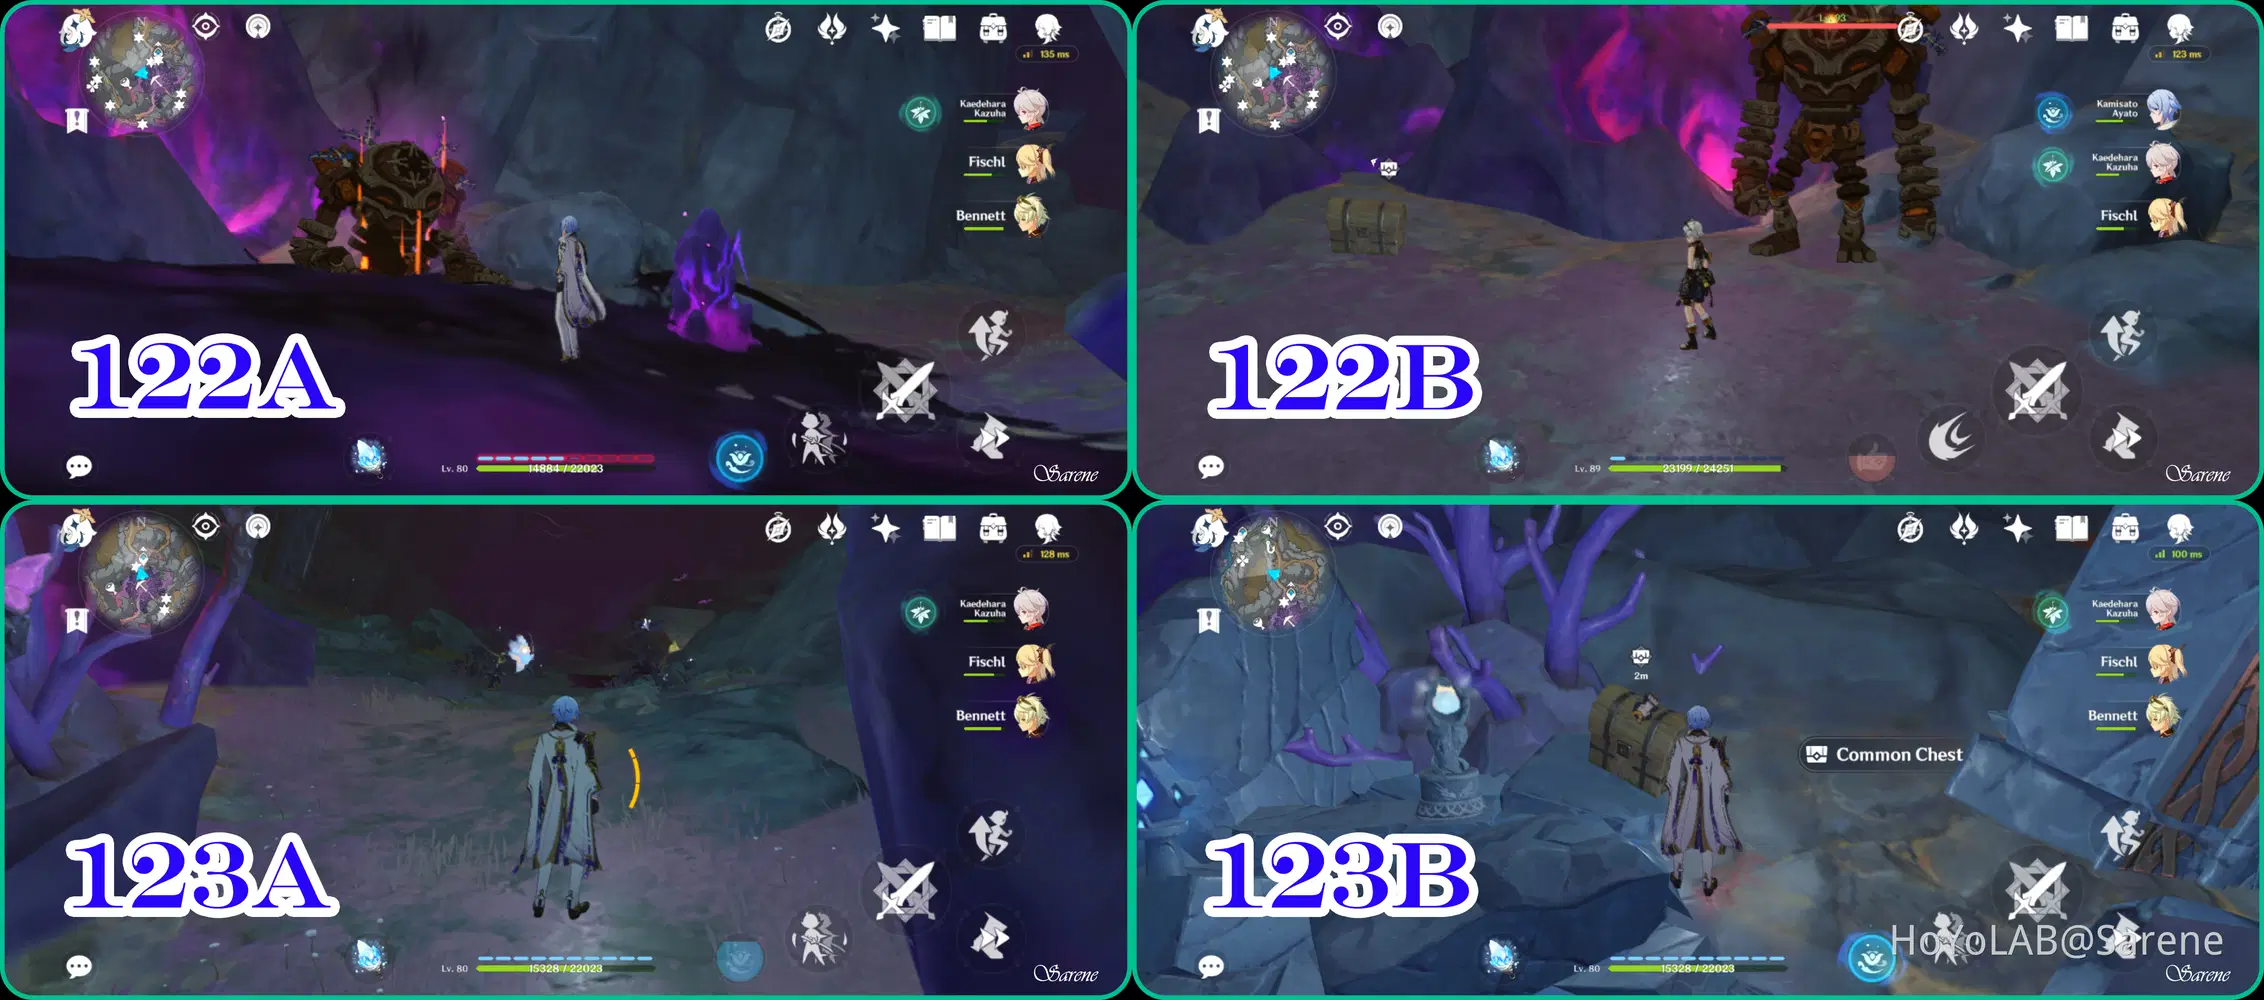
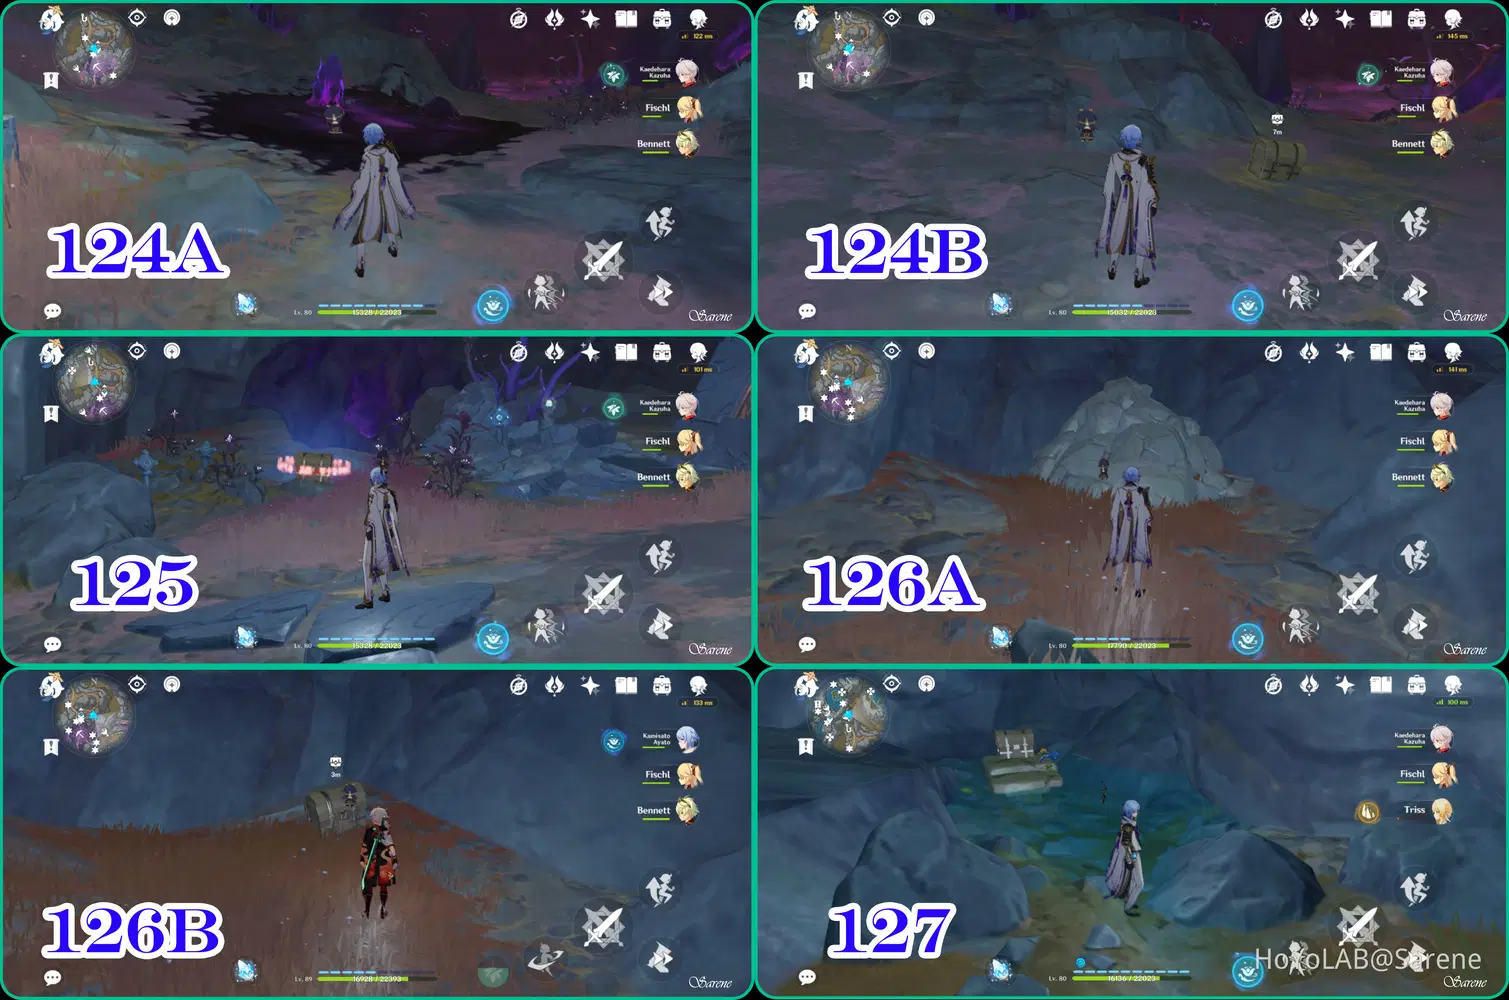
124 - 127
124. Requires level 6 Lumenstone Adjuvant to remove Oozing Concentration
125. Complete the Lumenstone Light Puzzle
126. Destroy the rocks to reveal the chest
127. Found in a passageway to the right if you are heading towards the Underground Waterway
Stony Halls / The Glowing Narrows
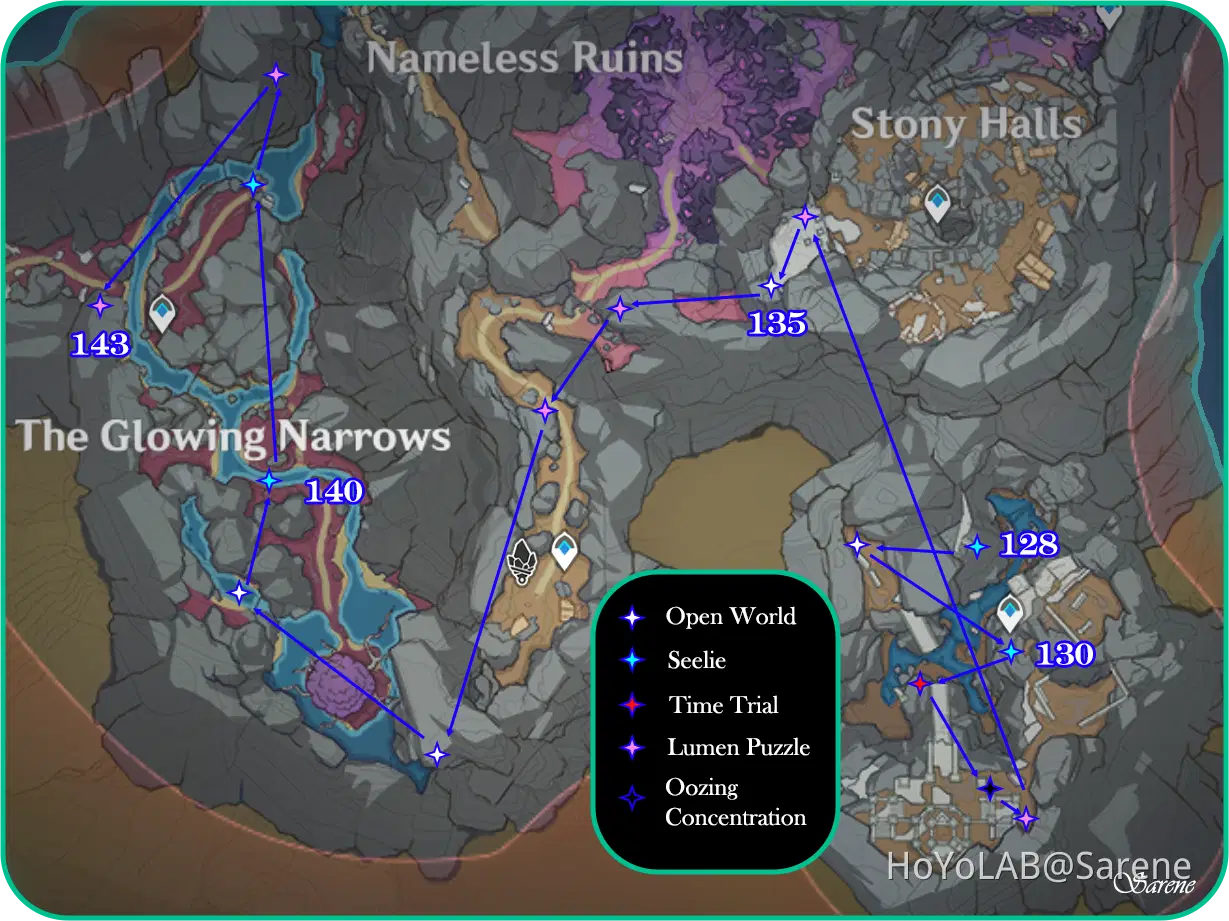
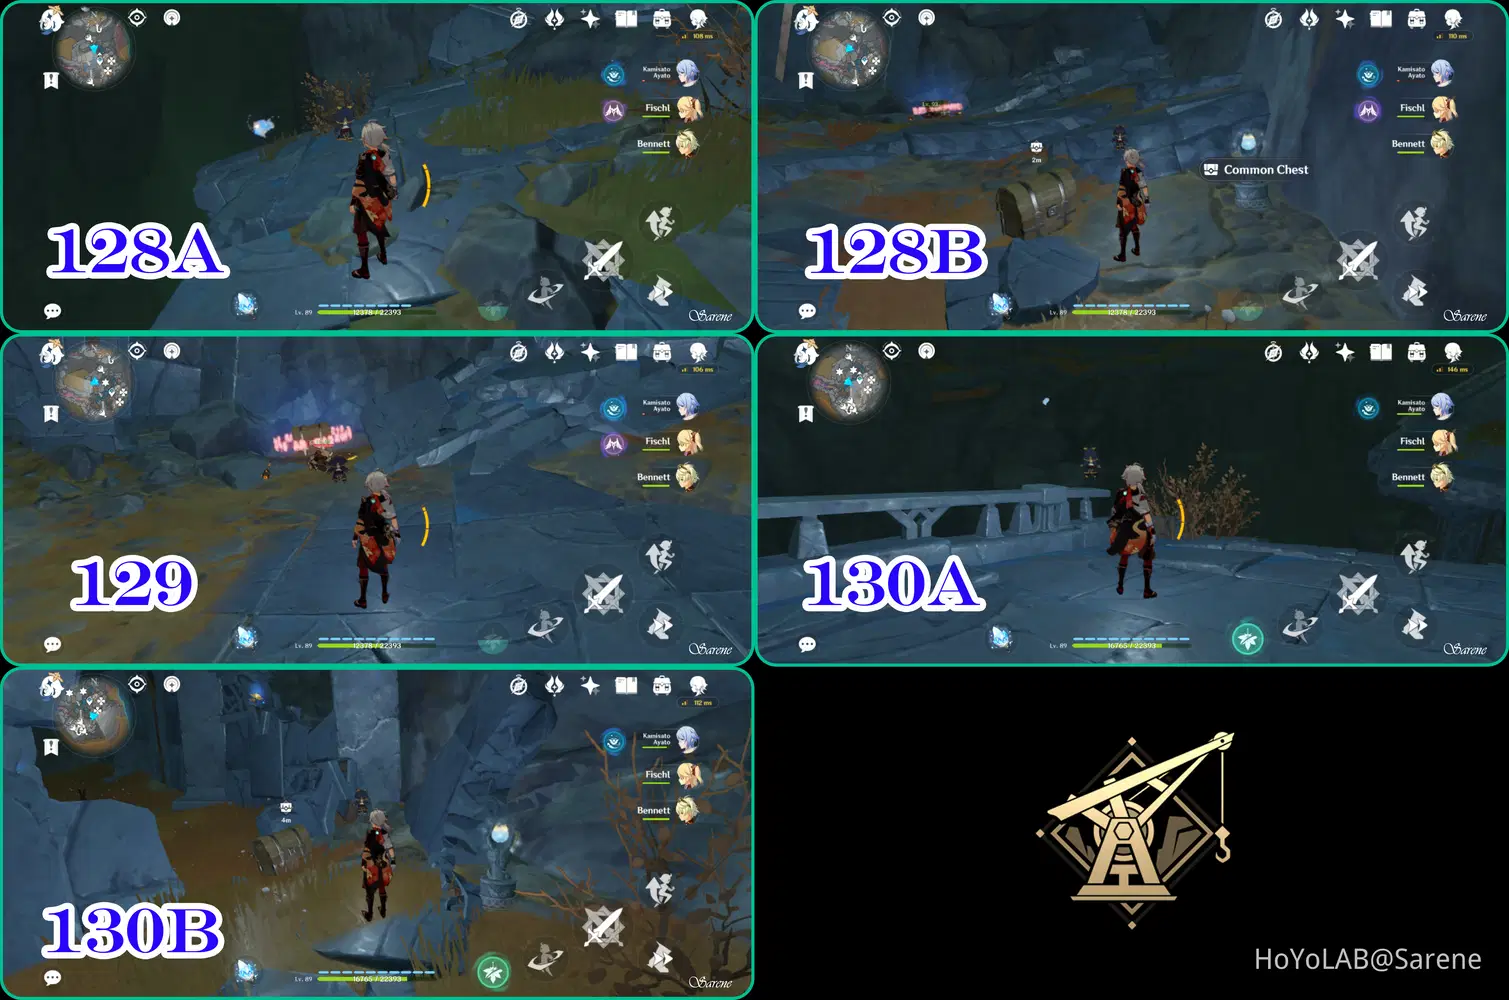
128 - 130
128. Follow the Seelie to its Court
129. Defeat the Hilichurls
130. Follow the Seelie to its Court
131 - 132
131. Complete the Time Trial Challenge
132. Requires level 6 Lumenstone Adjuvant to remove Oozing Concentration
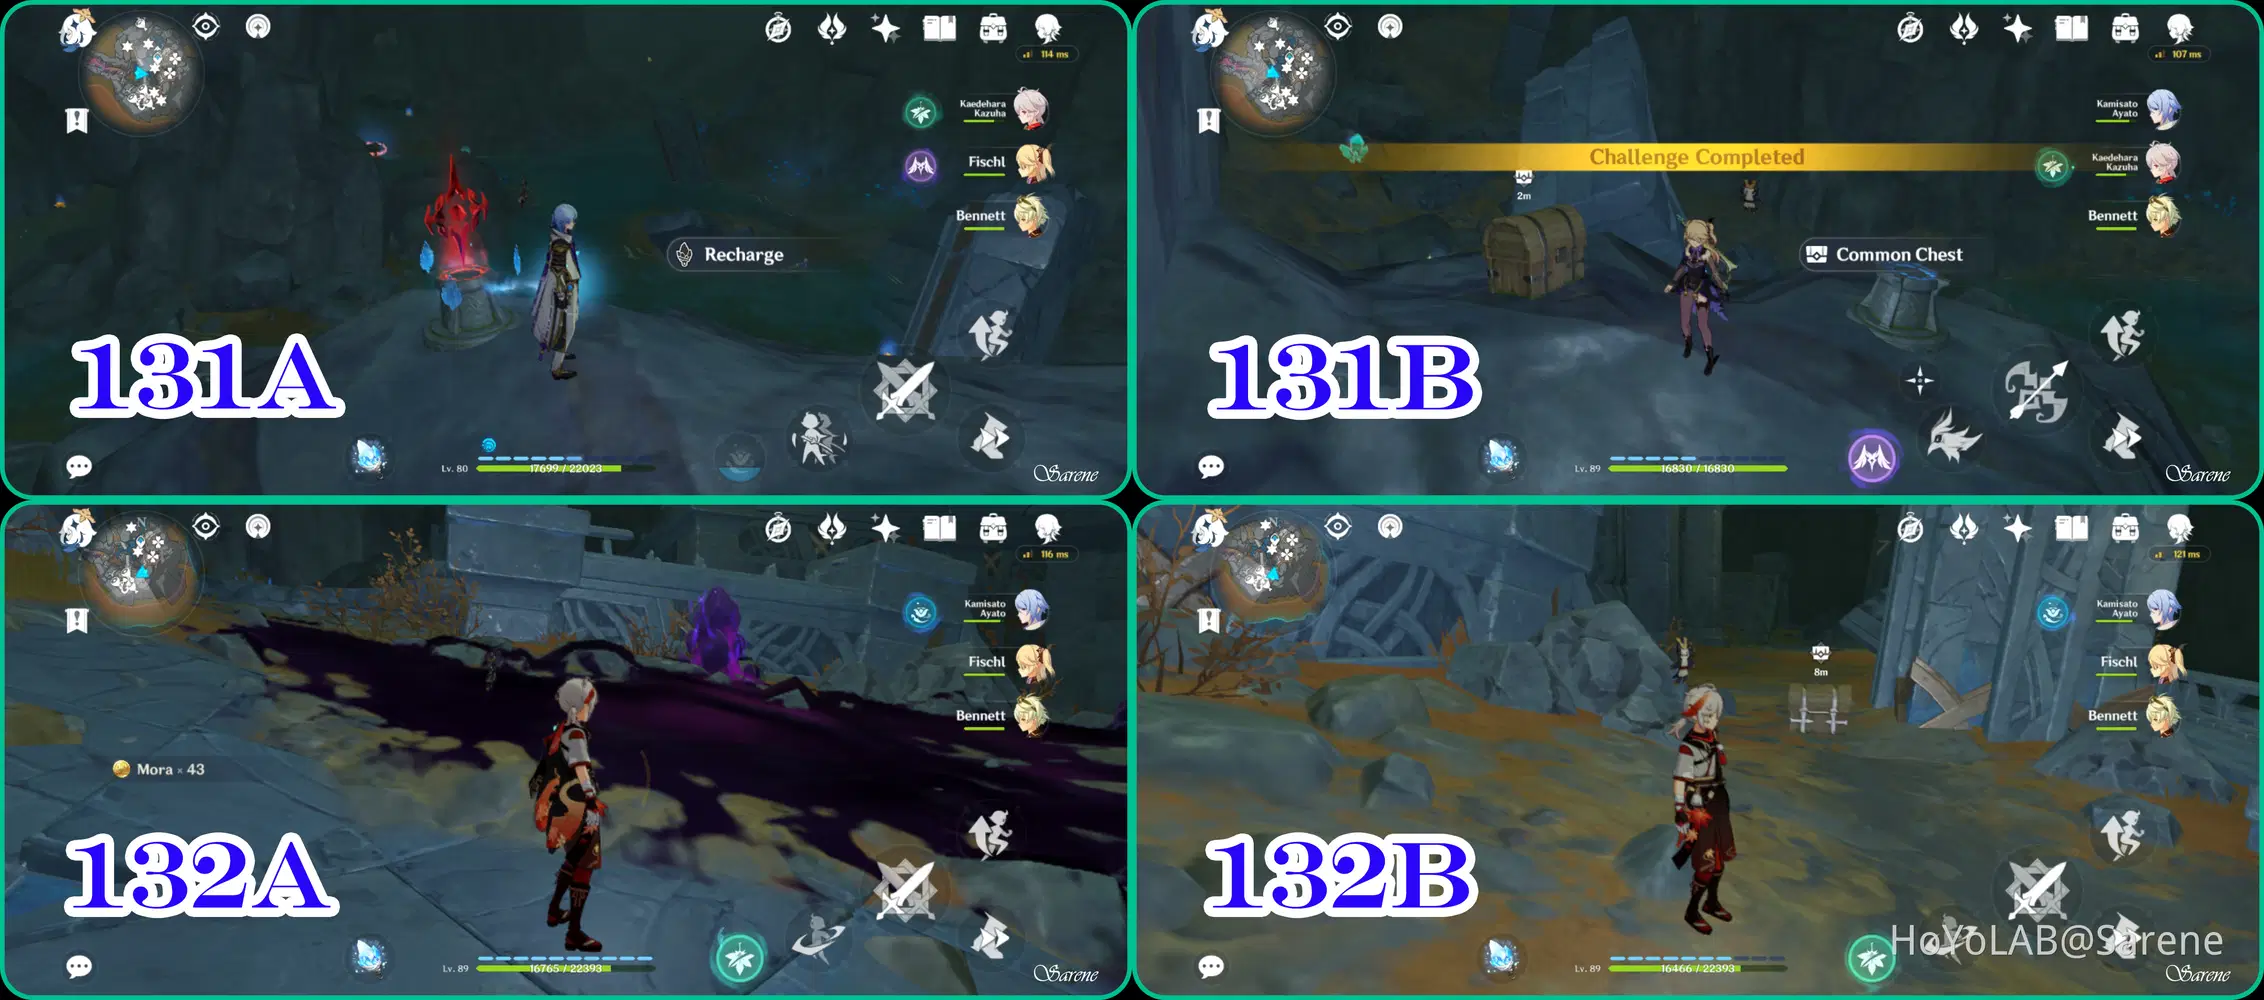
133 - 136
133. Recharge the chest using the Lumenstone Adjuvant
134. Recharge the chest using the Lumenstone Adjuvant
135. Defeat the Abyss Mage
136. Recharge and Complete the Lumenstone Puzzle
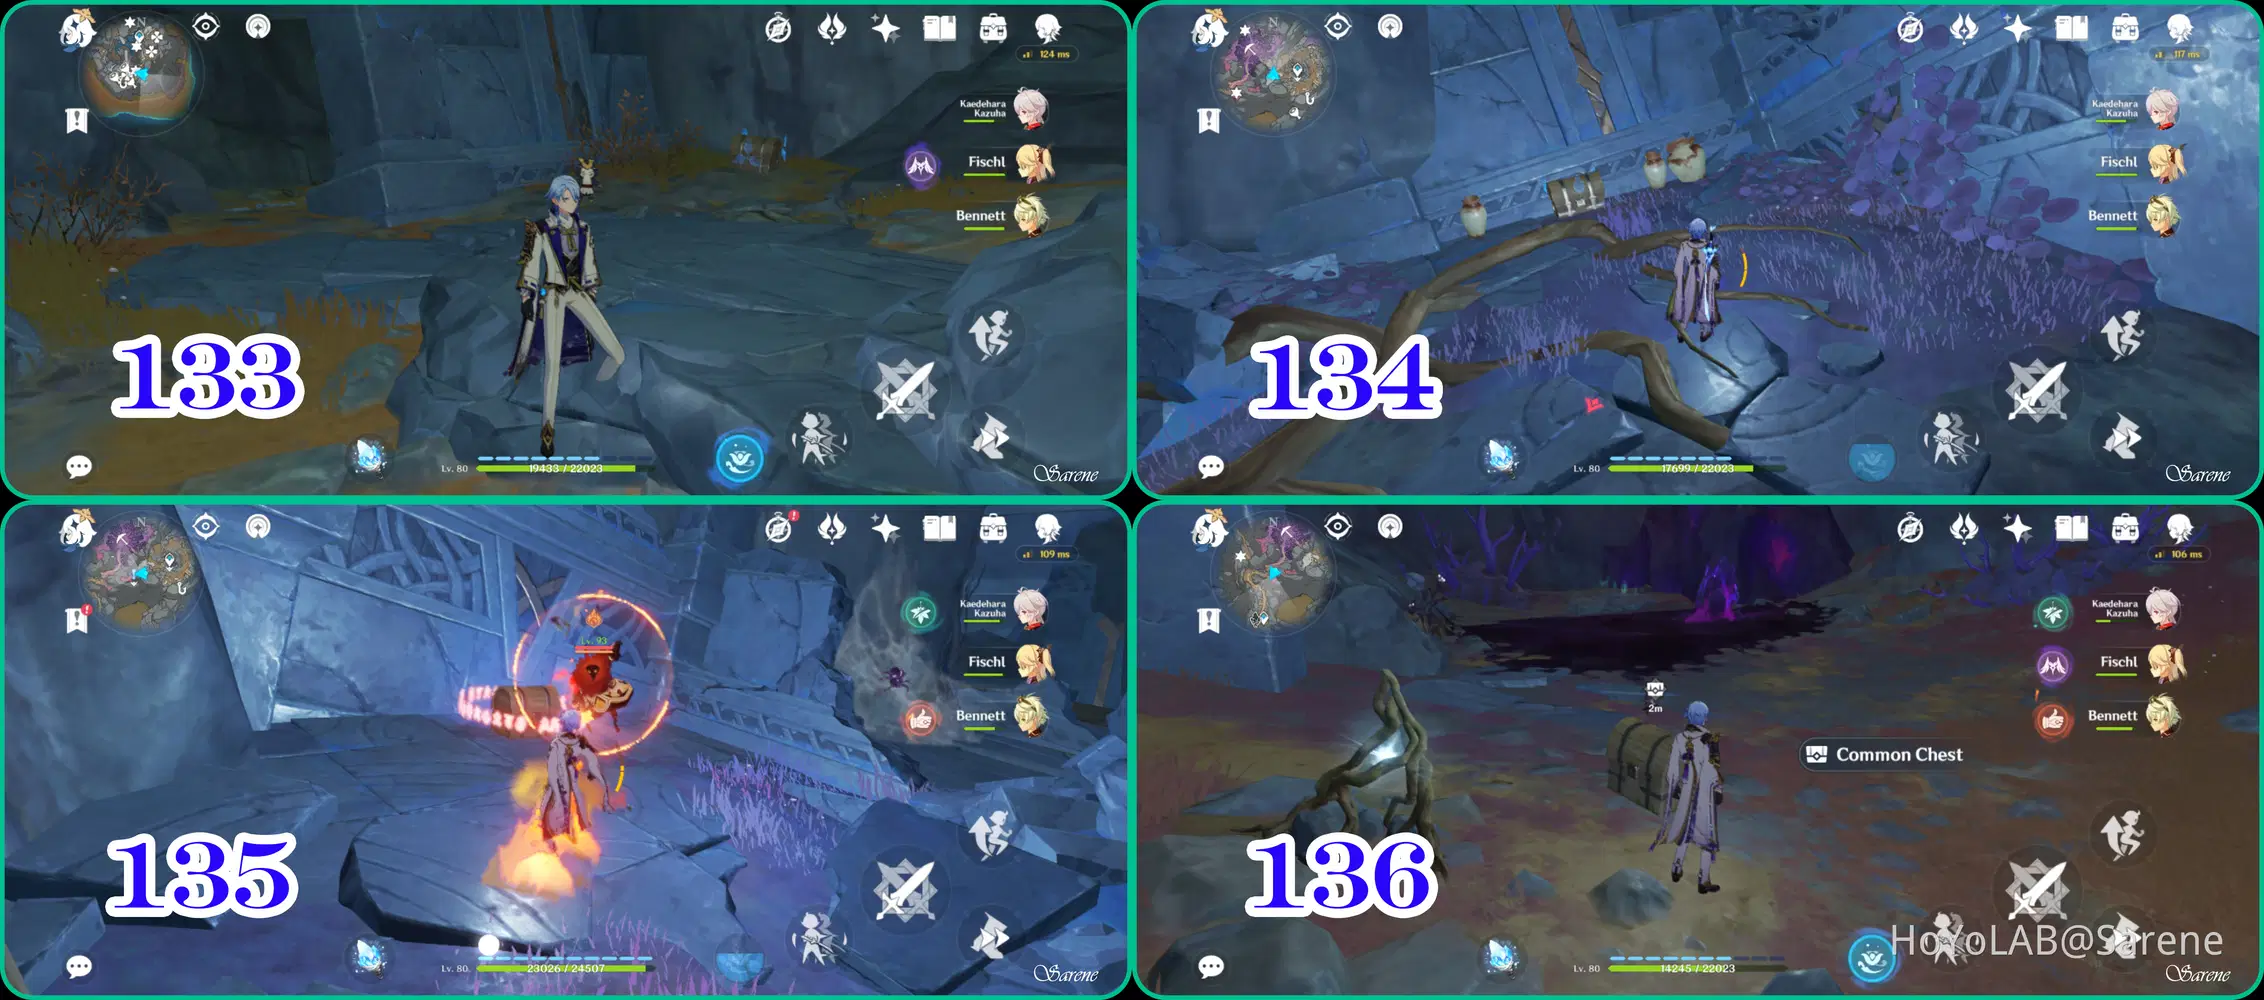
137 - 139
137. Recharge the chest using the Lumenstone Adjuvant
138. Defeat the Hydro Slimes
139. Defeat the Floating Hydro Fungus
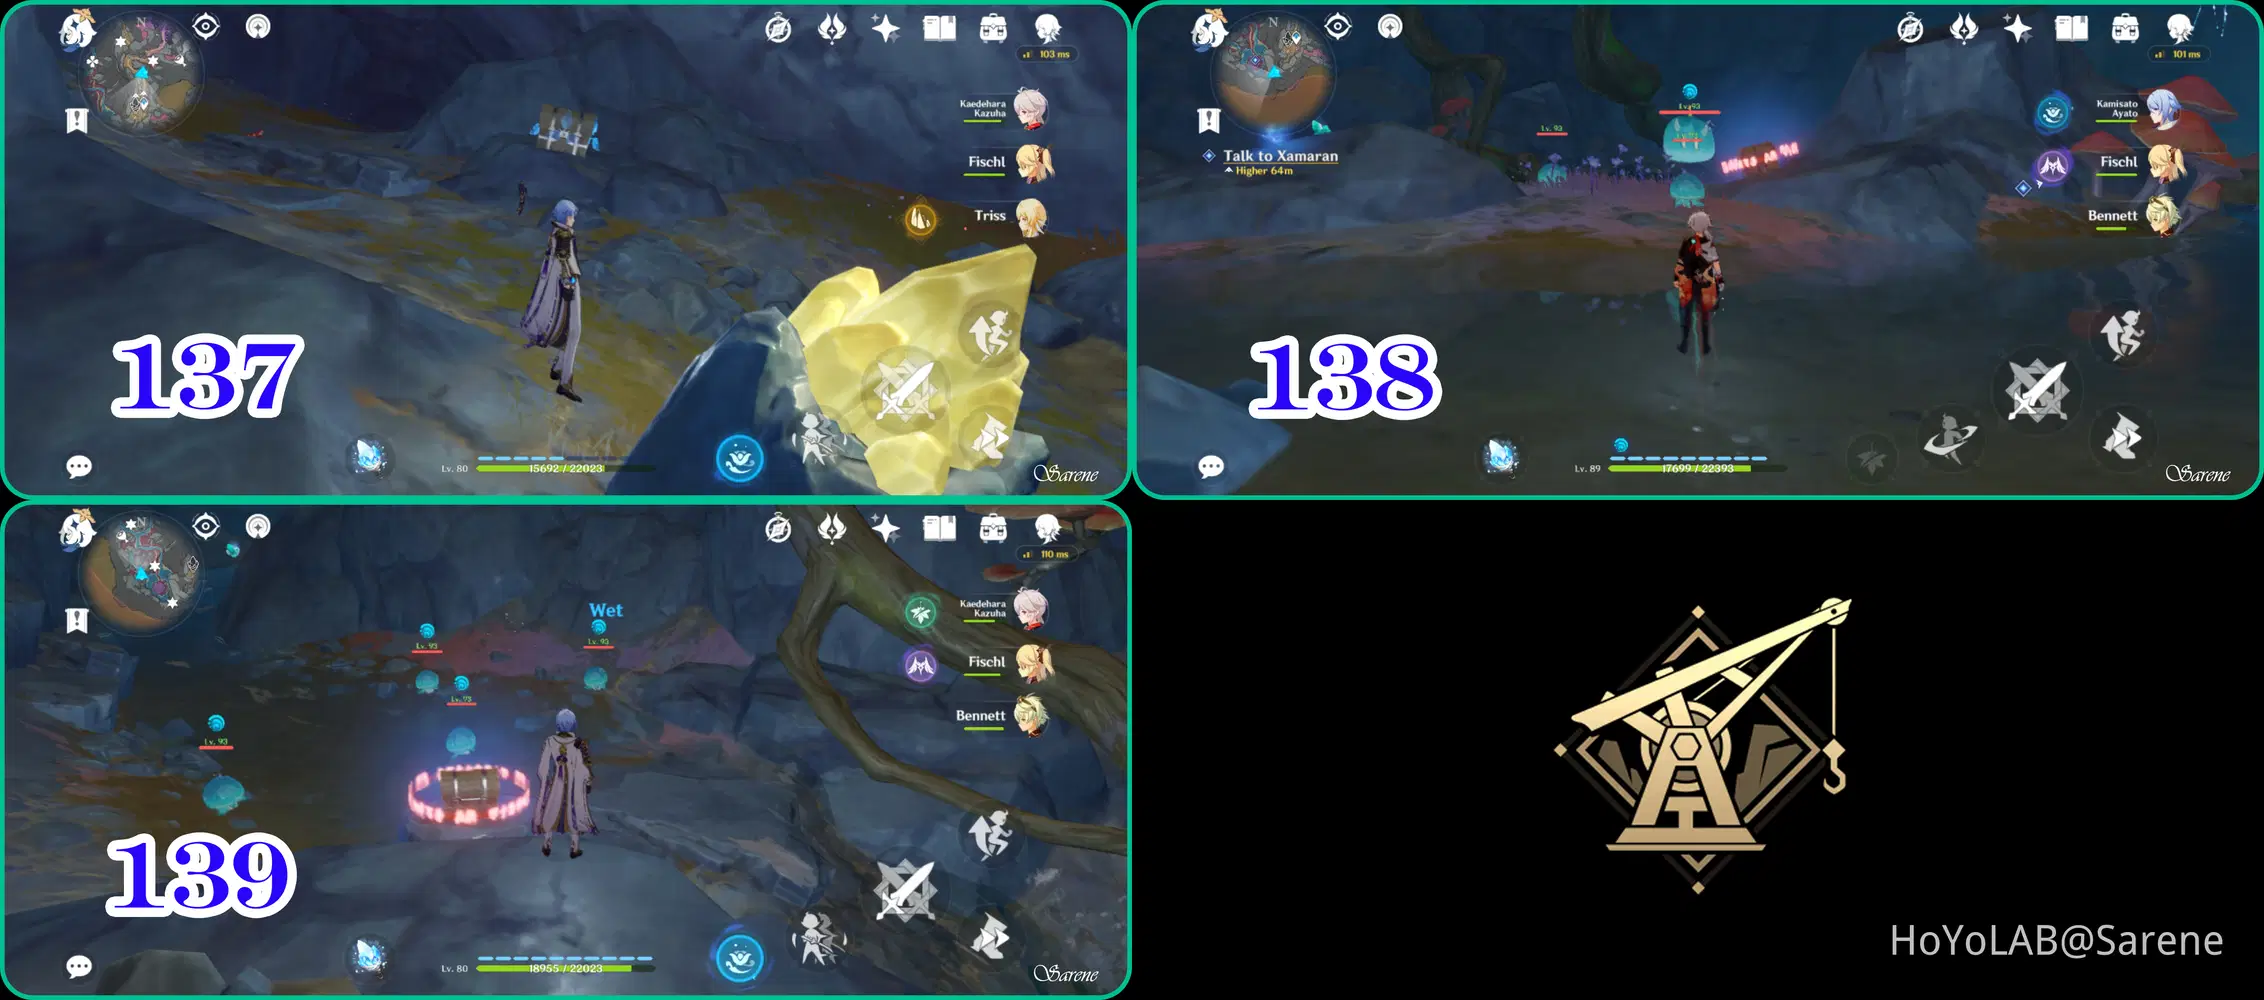
140 - 141
140. Follow the Seelie to its Court
141. Follow the Seelie to its Court
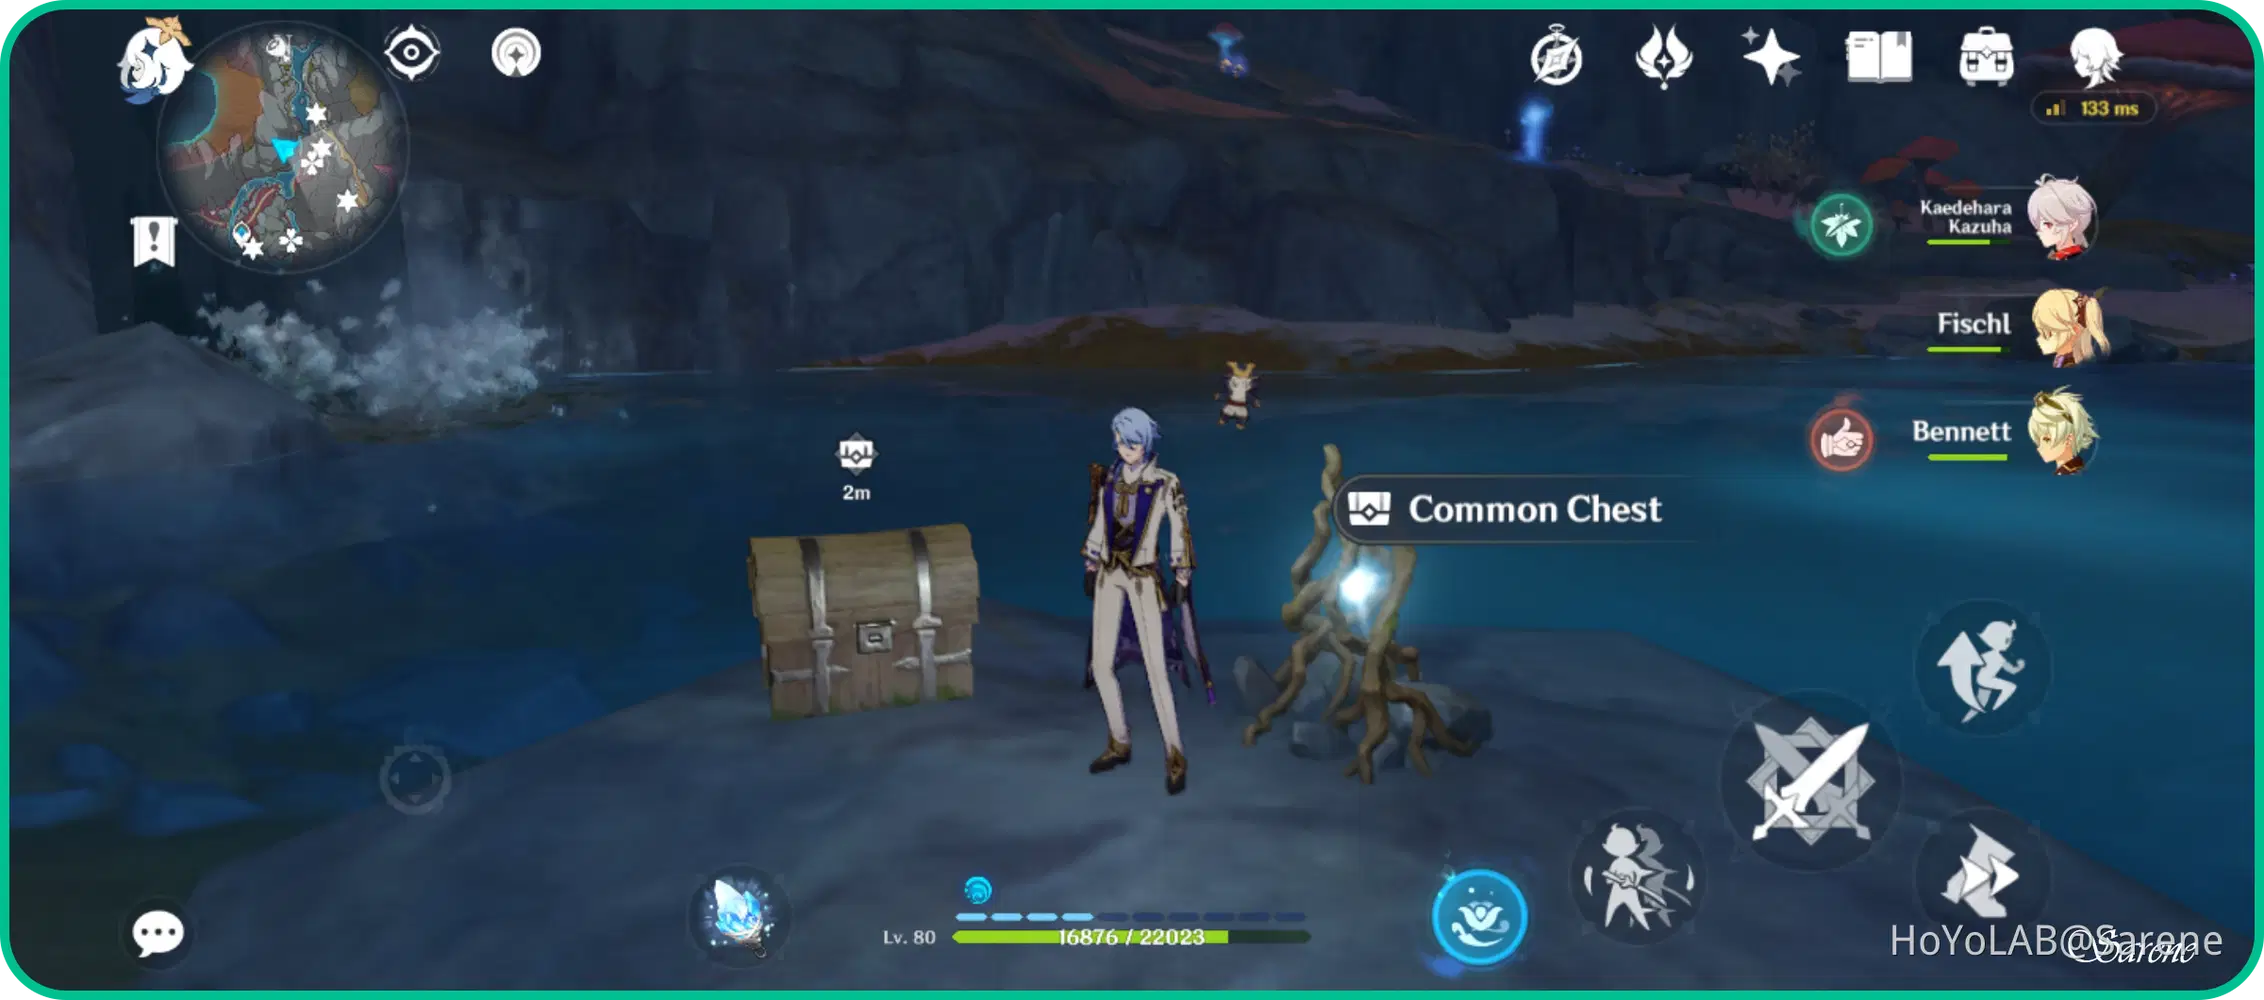
142
Recharge and complete the Lumenstone Puzzle
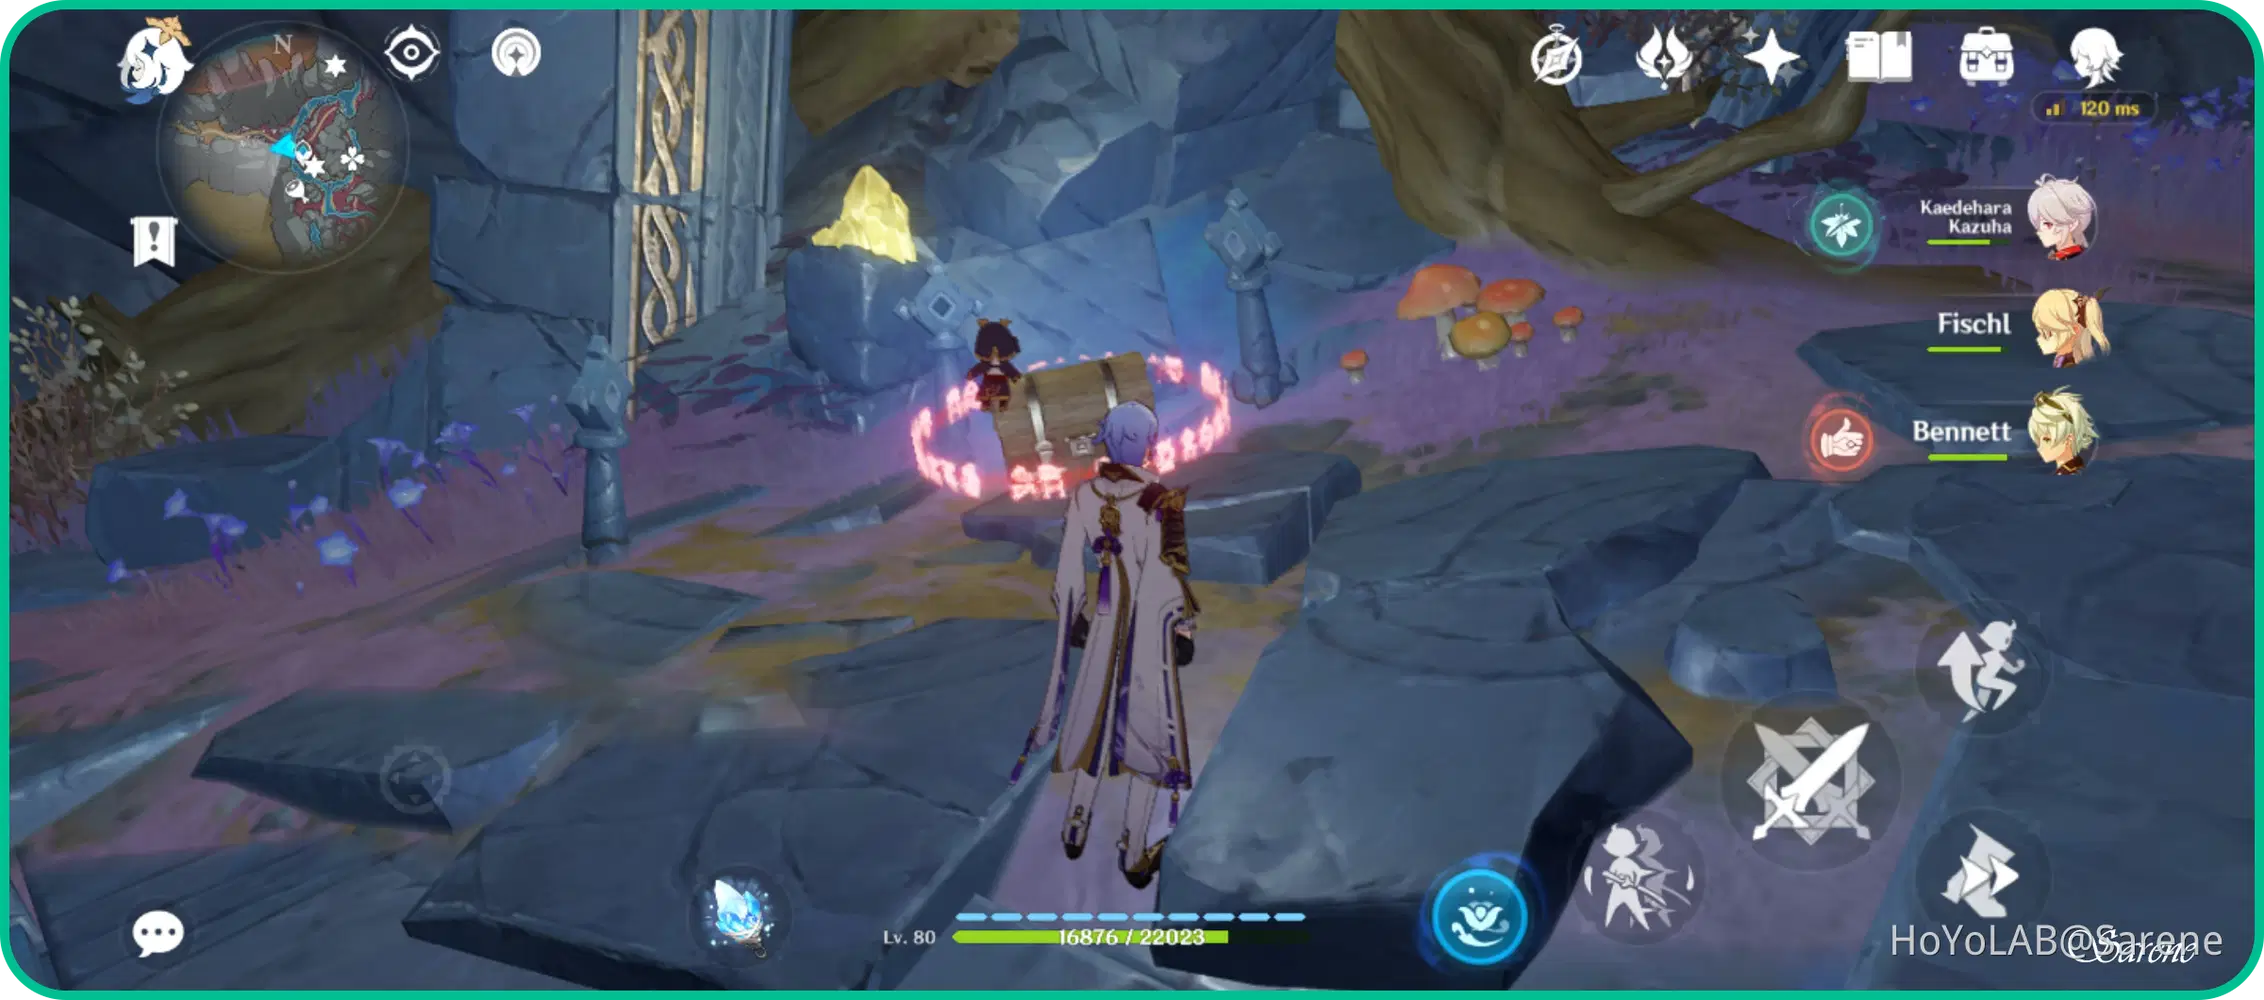
143
Complete the Lumenstone Light Puzzle
Pillar Cavern
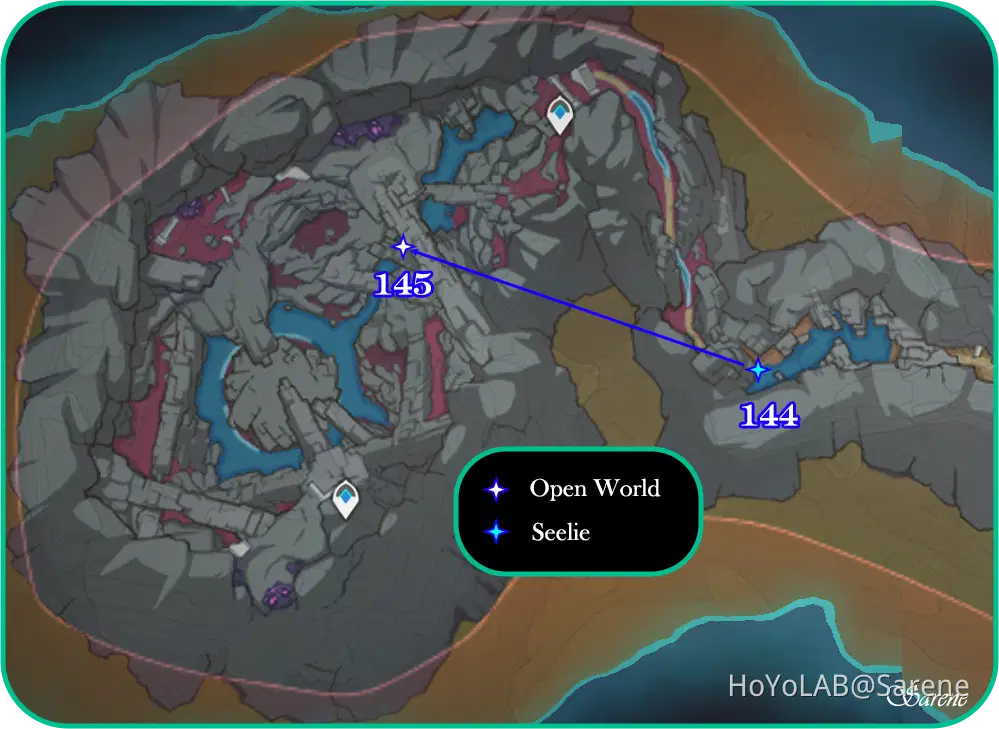
144 - 145
144. Follow the Seelie to its Court
145. The chest is found in the water
Now you should have all the chests from The Chasm! Thanks for reading and feel free to leave a comment below if you have any questions.

Hope your chasm exploration is going well!




