



Greetings Chests Hunters!
This is Part 1 of my Sumeru Desert Common Chest guide. There are a total of 201 Common Chests found in the desert. Due to the sheer amount of chests, the Sumeru Desert Common Chest guide is broken up into the following:
Part 1: Land of Lower Setekh: 1 - 71 (You are here!)
Part 2: Land of Upper Setekh: 72 - 111
Part 3: Hypostyle Desert: 112 - 201
For those who are looking for guides on the other types of Sumeru Desert chests, check out the link below:
Max Counts / All Chests for Sumeru Desert
This makes a total of 2373 Common Chests in the game. If you have higher than this number, you can check out the link below explaining bugs in the battle chronicle chest count.
Chest Bugs for Battle Chronicle
Guide Notes / Suggestions
1. Much of the Sumeru Desert exploration is locked behind quests, so I would highly suggest completing the Golden Slumber, Old Notes and New Friends, and Afratu's Dilema World Quests before conducting your chest sweeps
2. Missable Chest(s): Vase Chest (Common Chest 47)
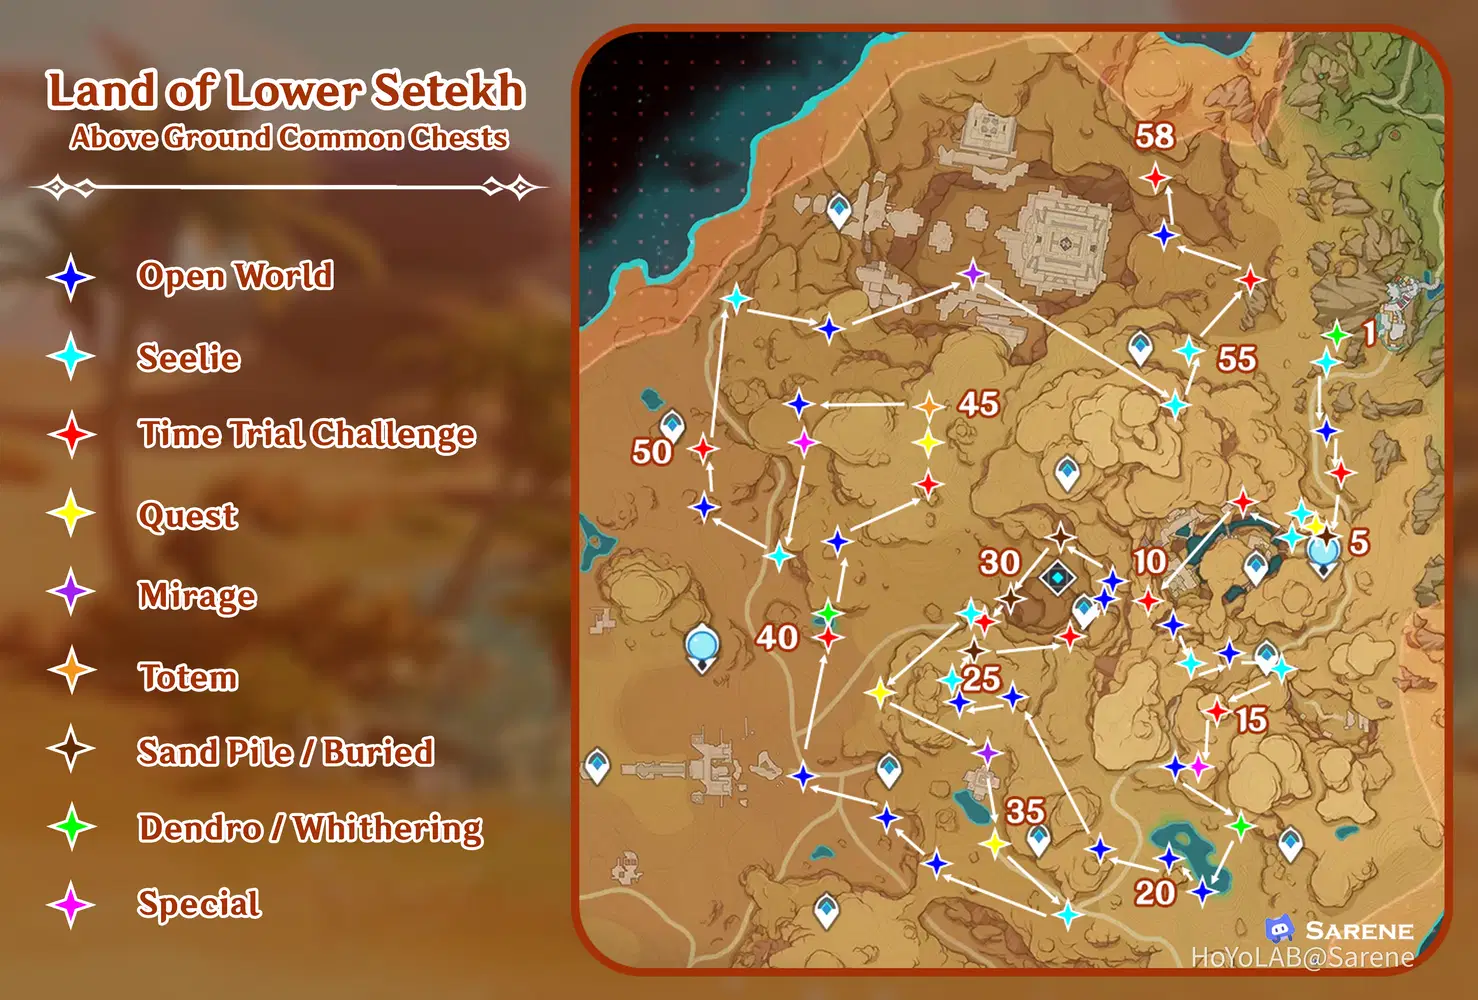
3. The guide below is divided into an Above Ground and Below Ground section to make it easier to locate the chests.
4. Use Ctrl-F if you are looking for specific types of chests. I will be using the following key terms to make this easier:
Seelie
Time Trial Challenge
Quest
Mirage
Totem
Sand Pile
Buried Chest
Dendrogranum
Tumor of the Whithering
Land of Lower Setekh - Above Ground
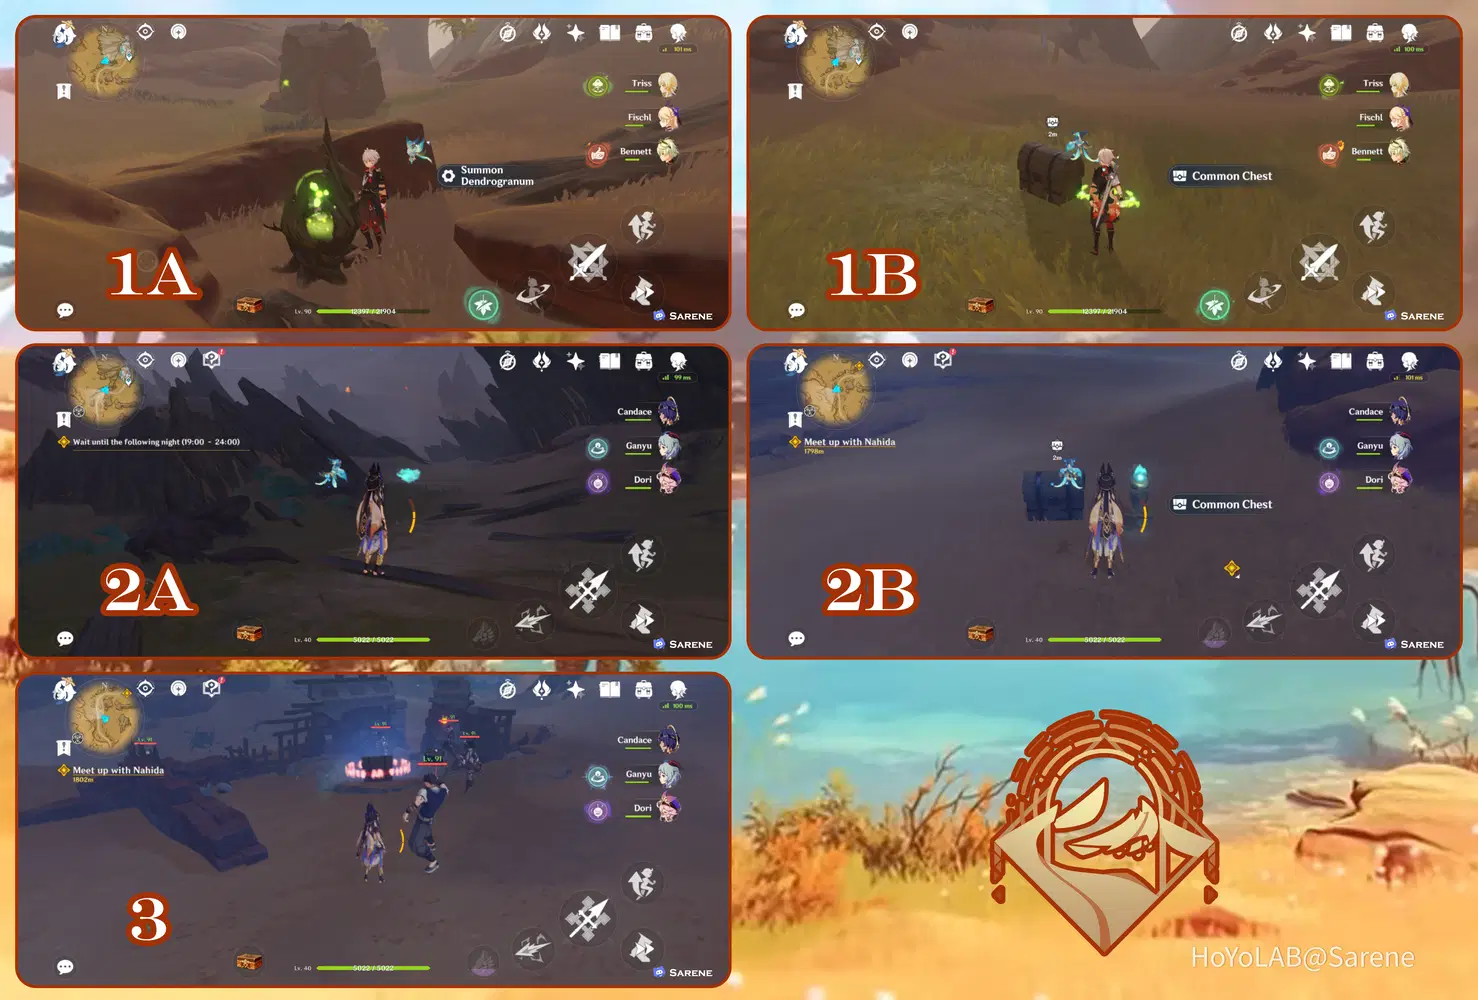
1 - 3
1. Use the Dendrogranum to break the boulder and spawn the chest
2. Follow the Seelie to its court
3. Defeat the treasure hoarders

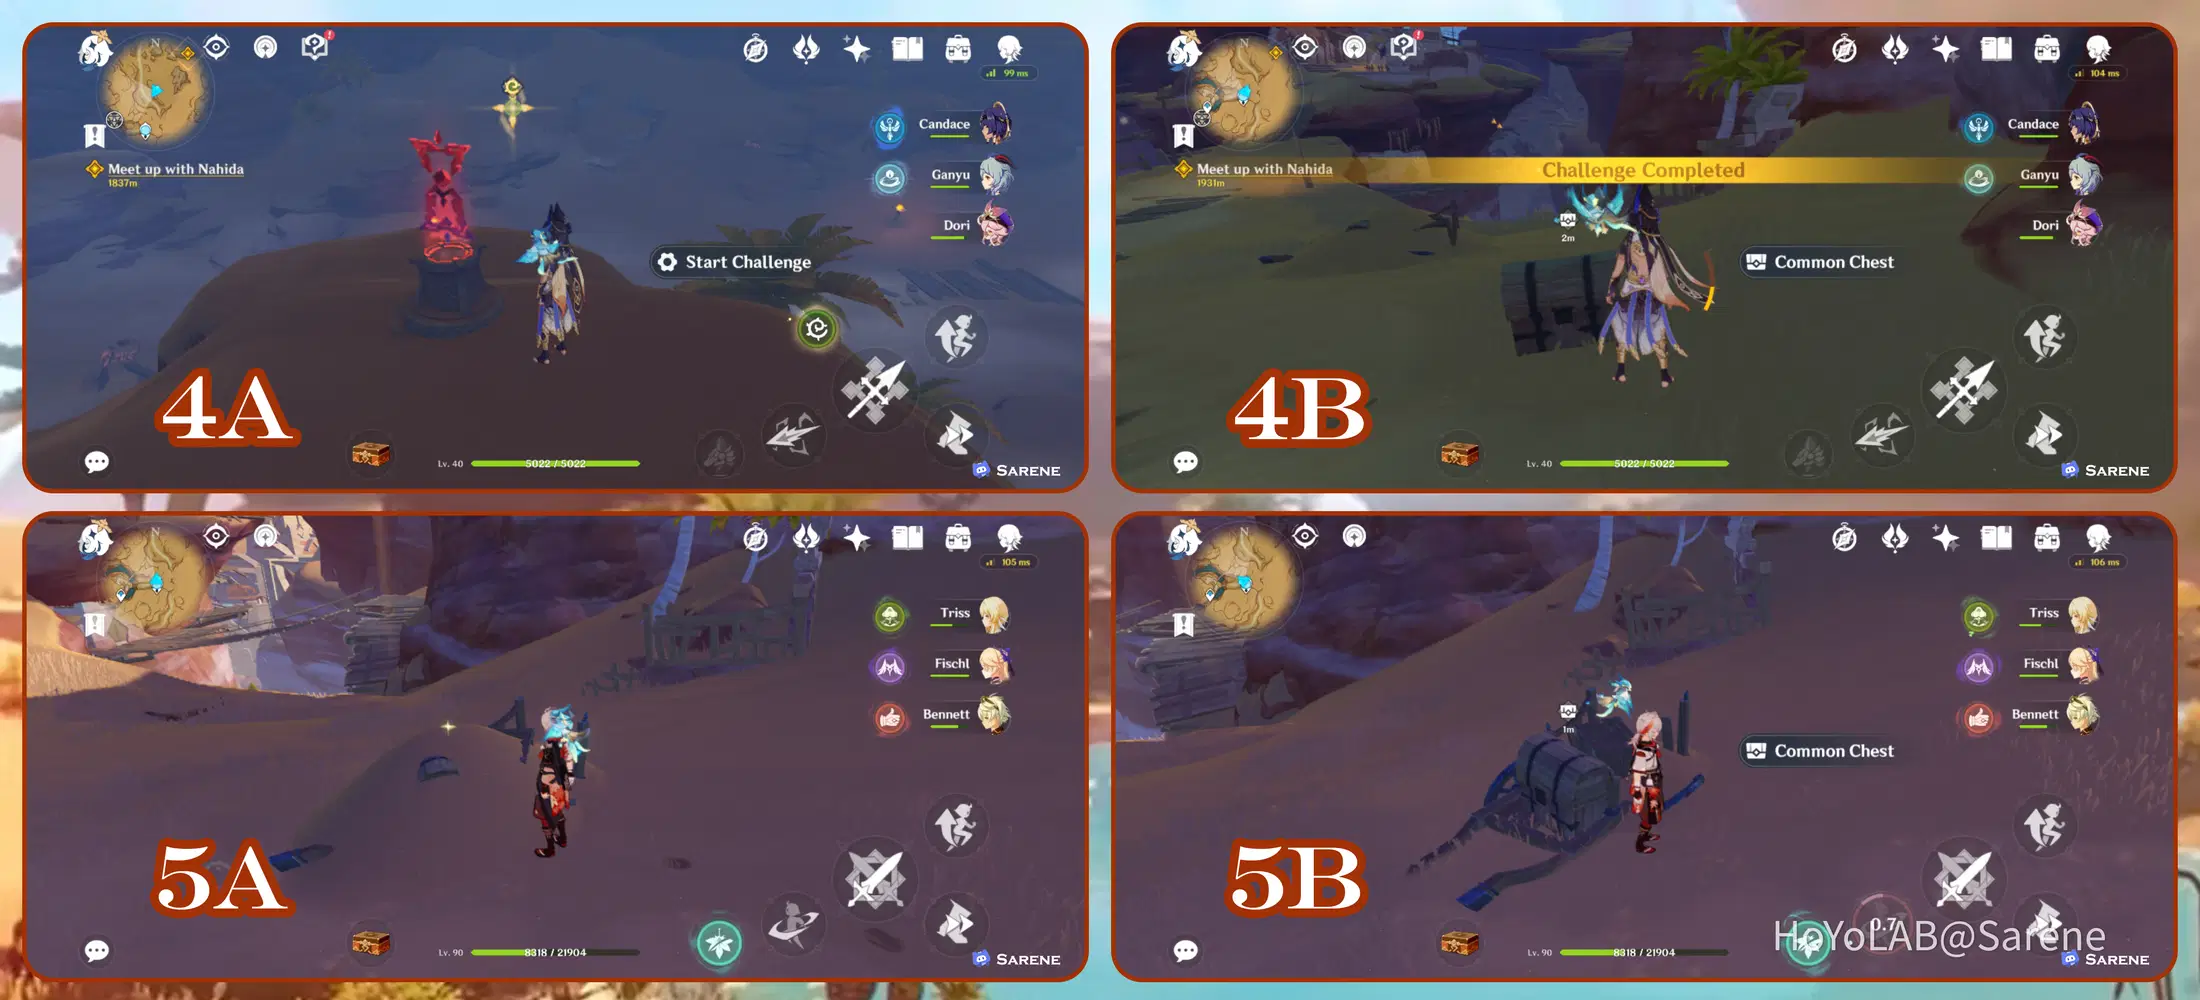
4 - 5
4. Complete the Time Trial Challenge
5. Use Anemo to reveal the chest under the Sand Pile
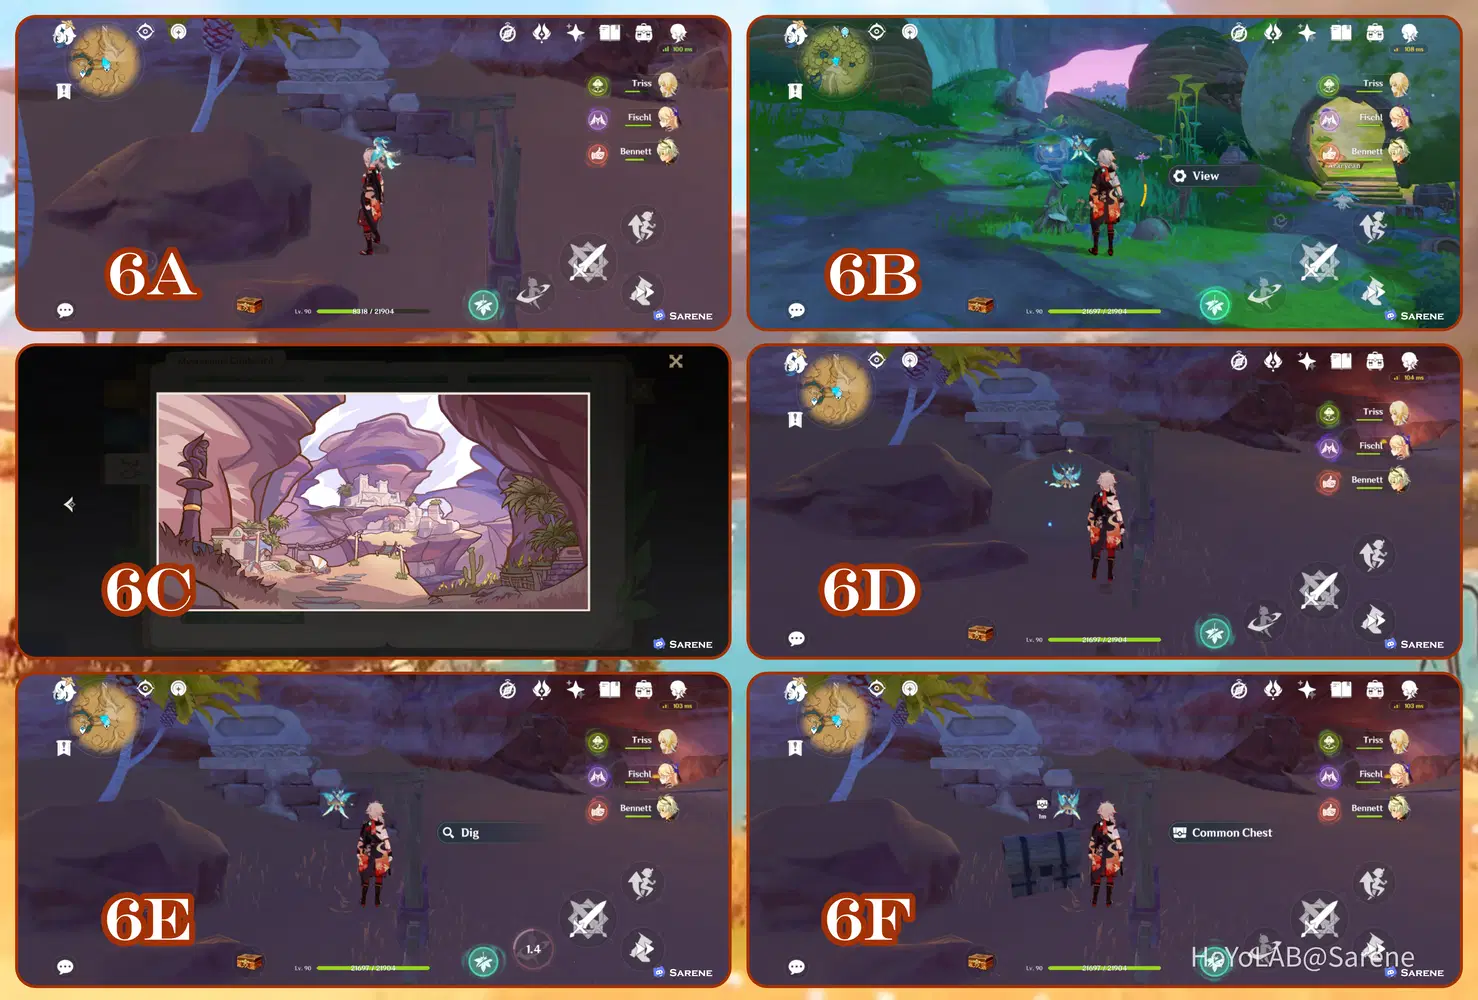
6
6. Mysterious Clipboard #11 This chest won't be available until after finding the new picture in the mailbox in ****nara from Static Views World Quest. After obtaining the picture. Return to the location and the chest will be hidden under the Sand Pile
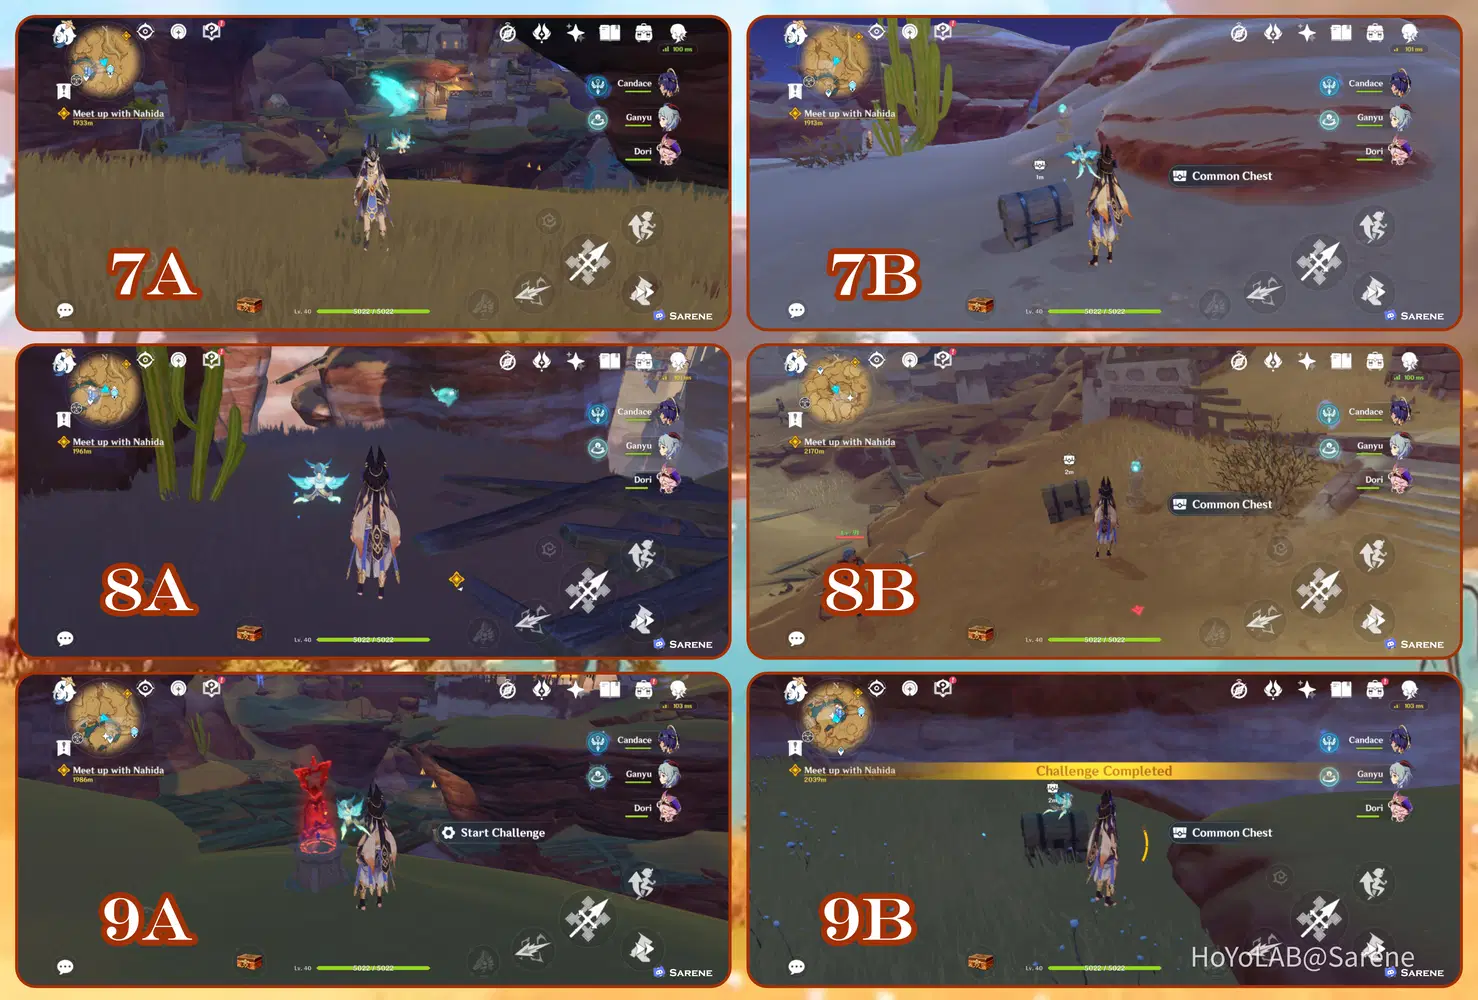
7 - 9
7. Follow the Seelie to its court
8. Follow the Seelie to its court
9. Complete the Time Trial Challenge
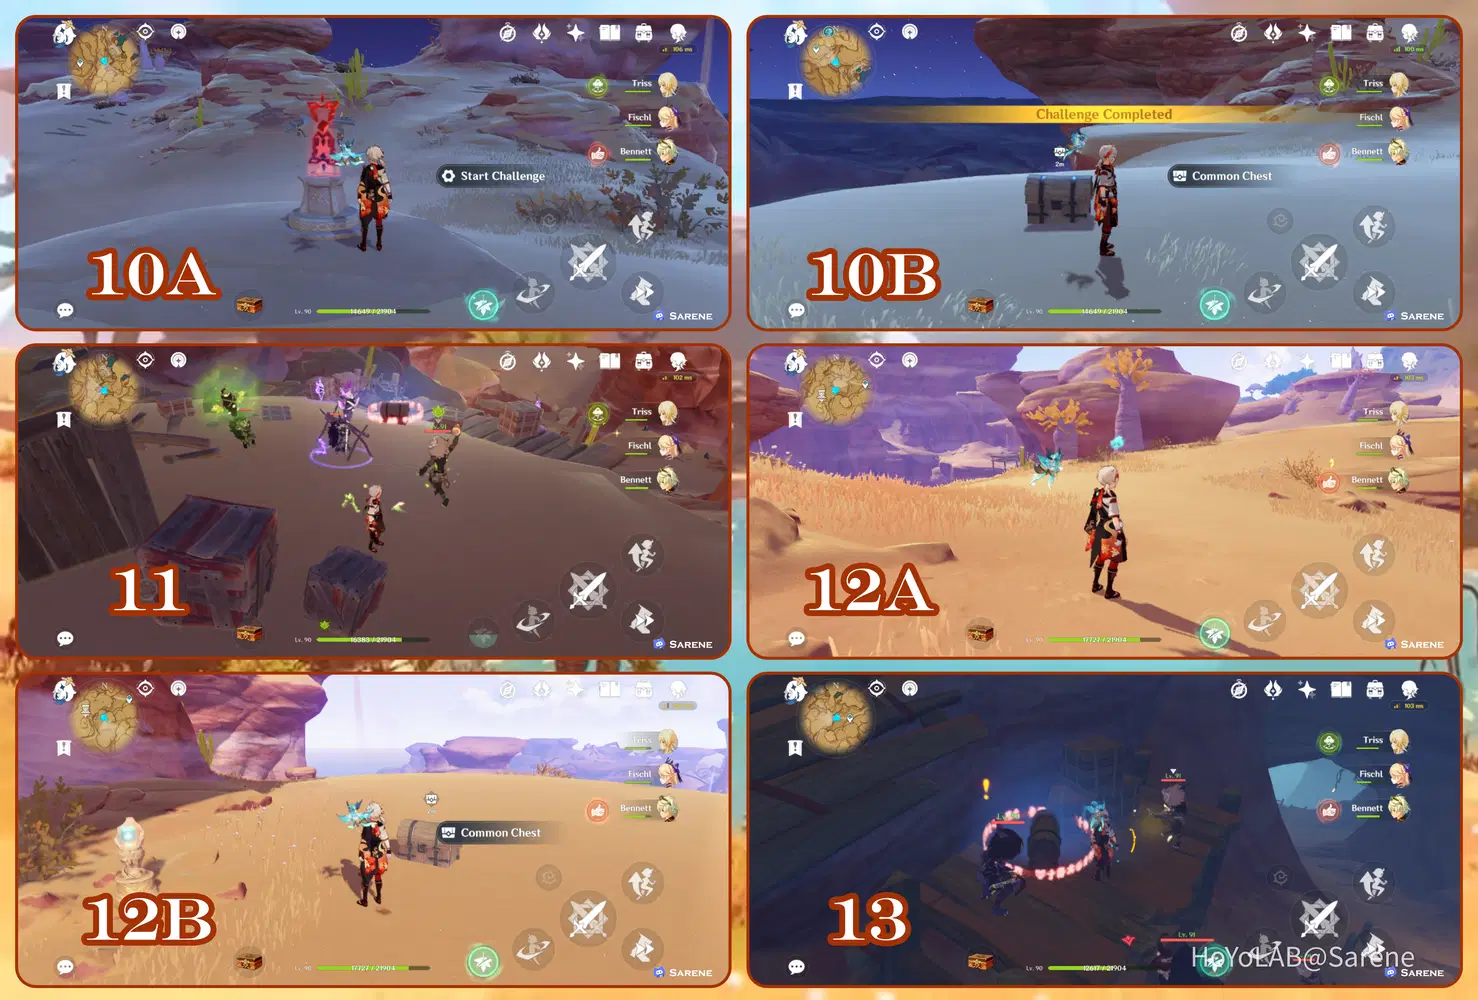
10 - 13
10. Complete the Time Trial Challenge
11. Defeat the Hilichurls
12. Follow the Seelie to its court
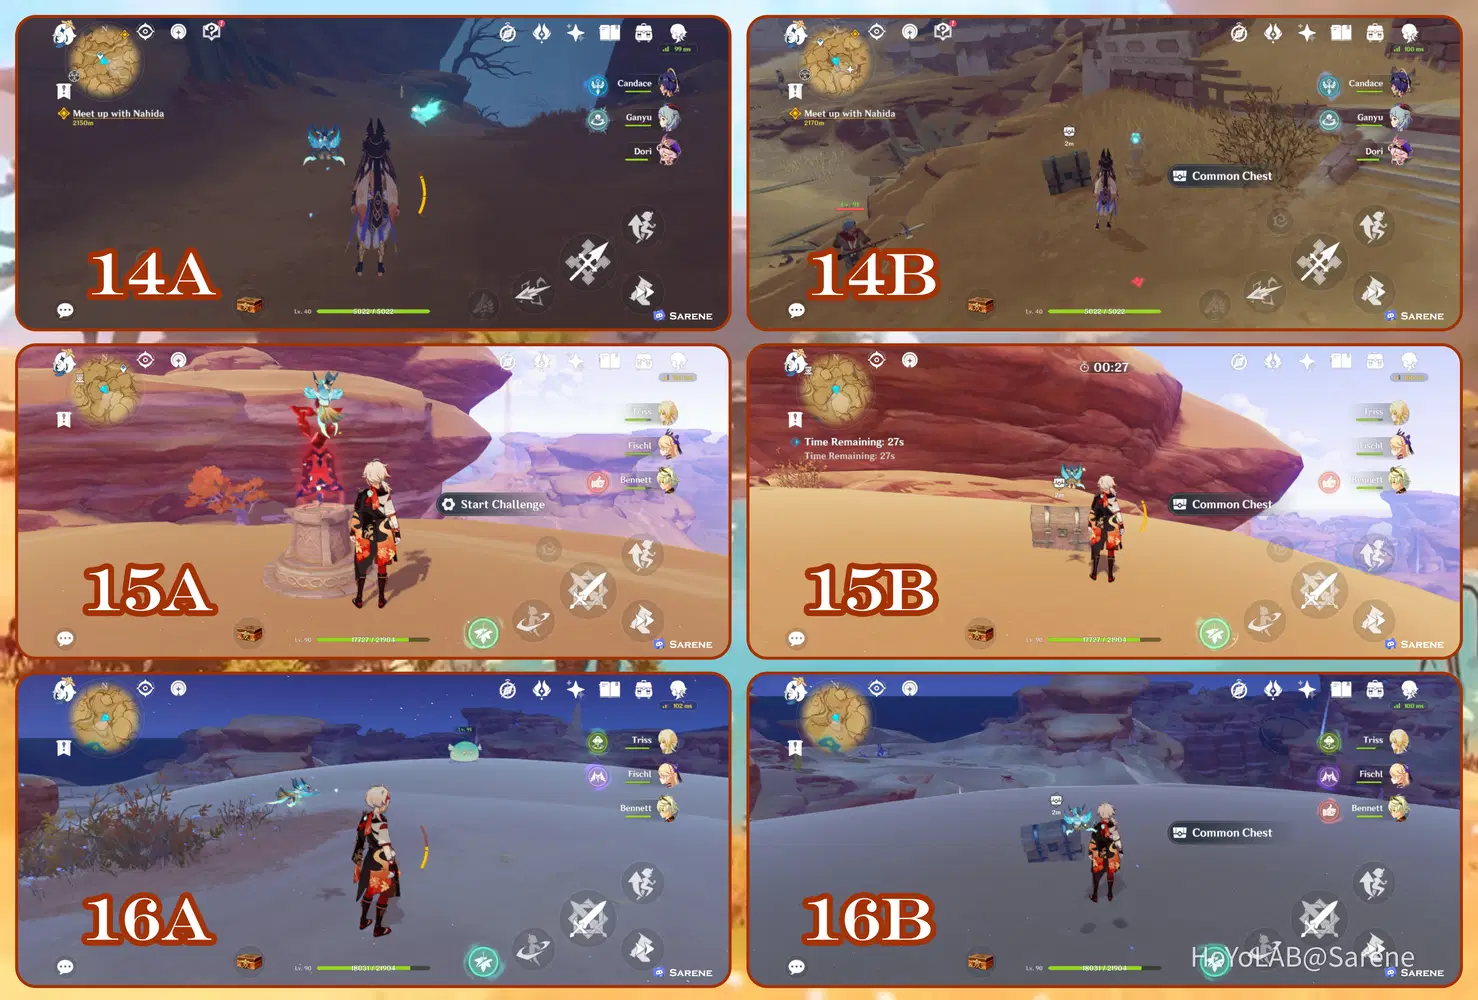
14 - 16
14. Follow the Seelie to its court
15. Complete the Time Trial Challenge
16. Defeat the Anemo Slimes
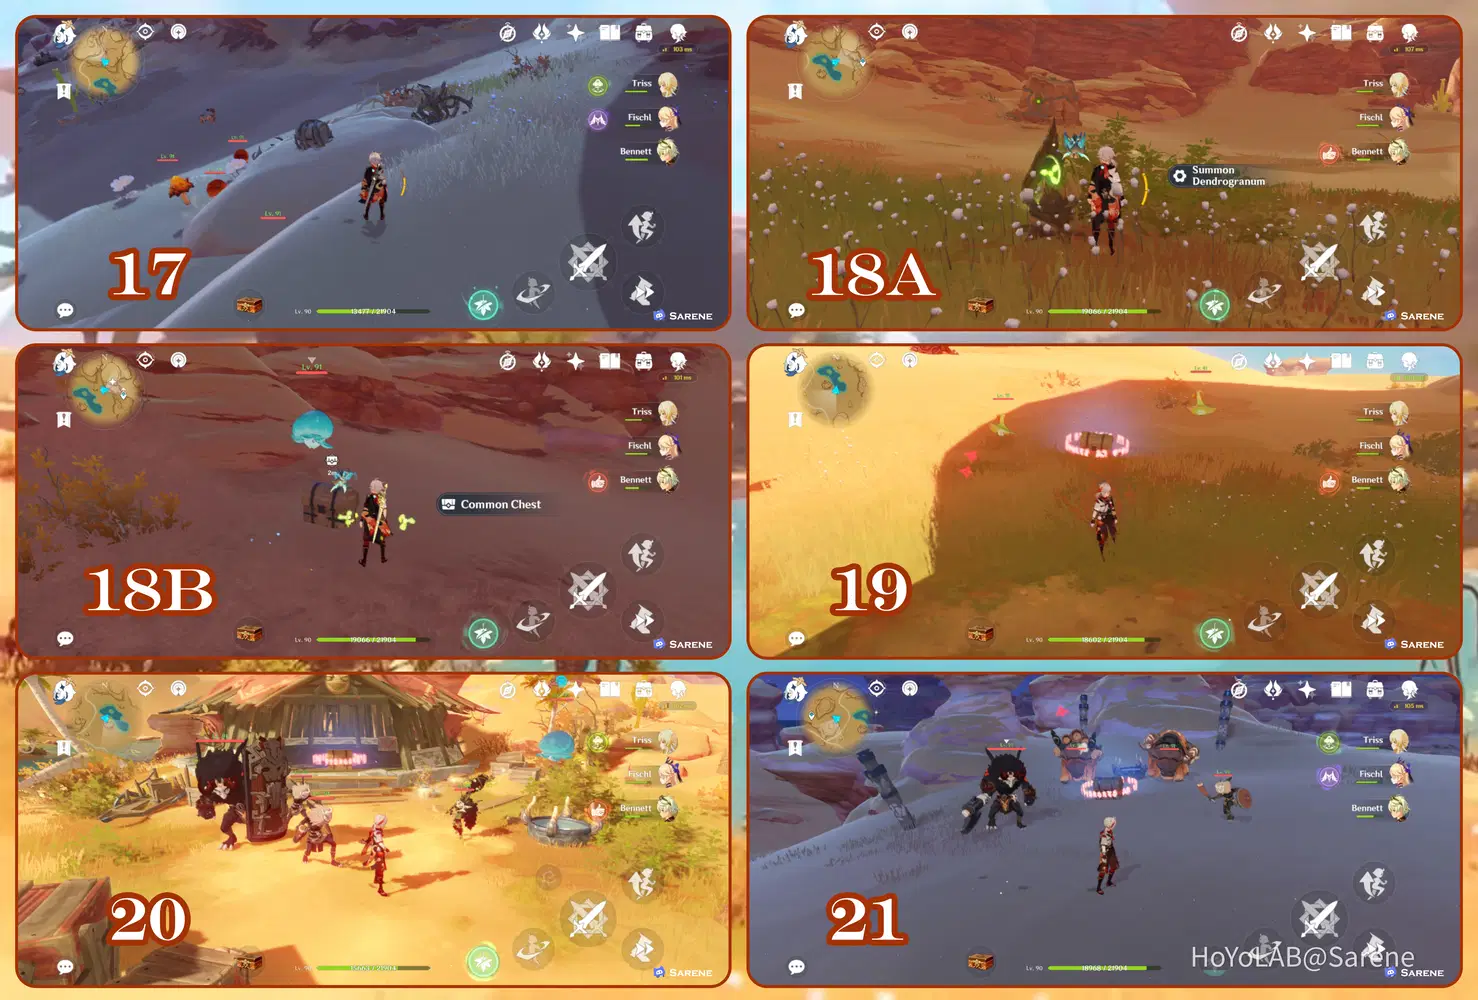
17 - 21
17. Use Pyro to remove the thorns surrounding the chest
18. Use the Dendrogranum to break the boulder and spawn the chest
19. Defeat the Fungi
20. Defeat the Hilichurl Camp
21. Defeat the Hilichurls
22 - 24
22. Defeat the Fungi
23. Defeat the Eremites
24. Follow the Seelie to its court
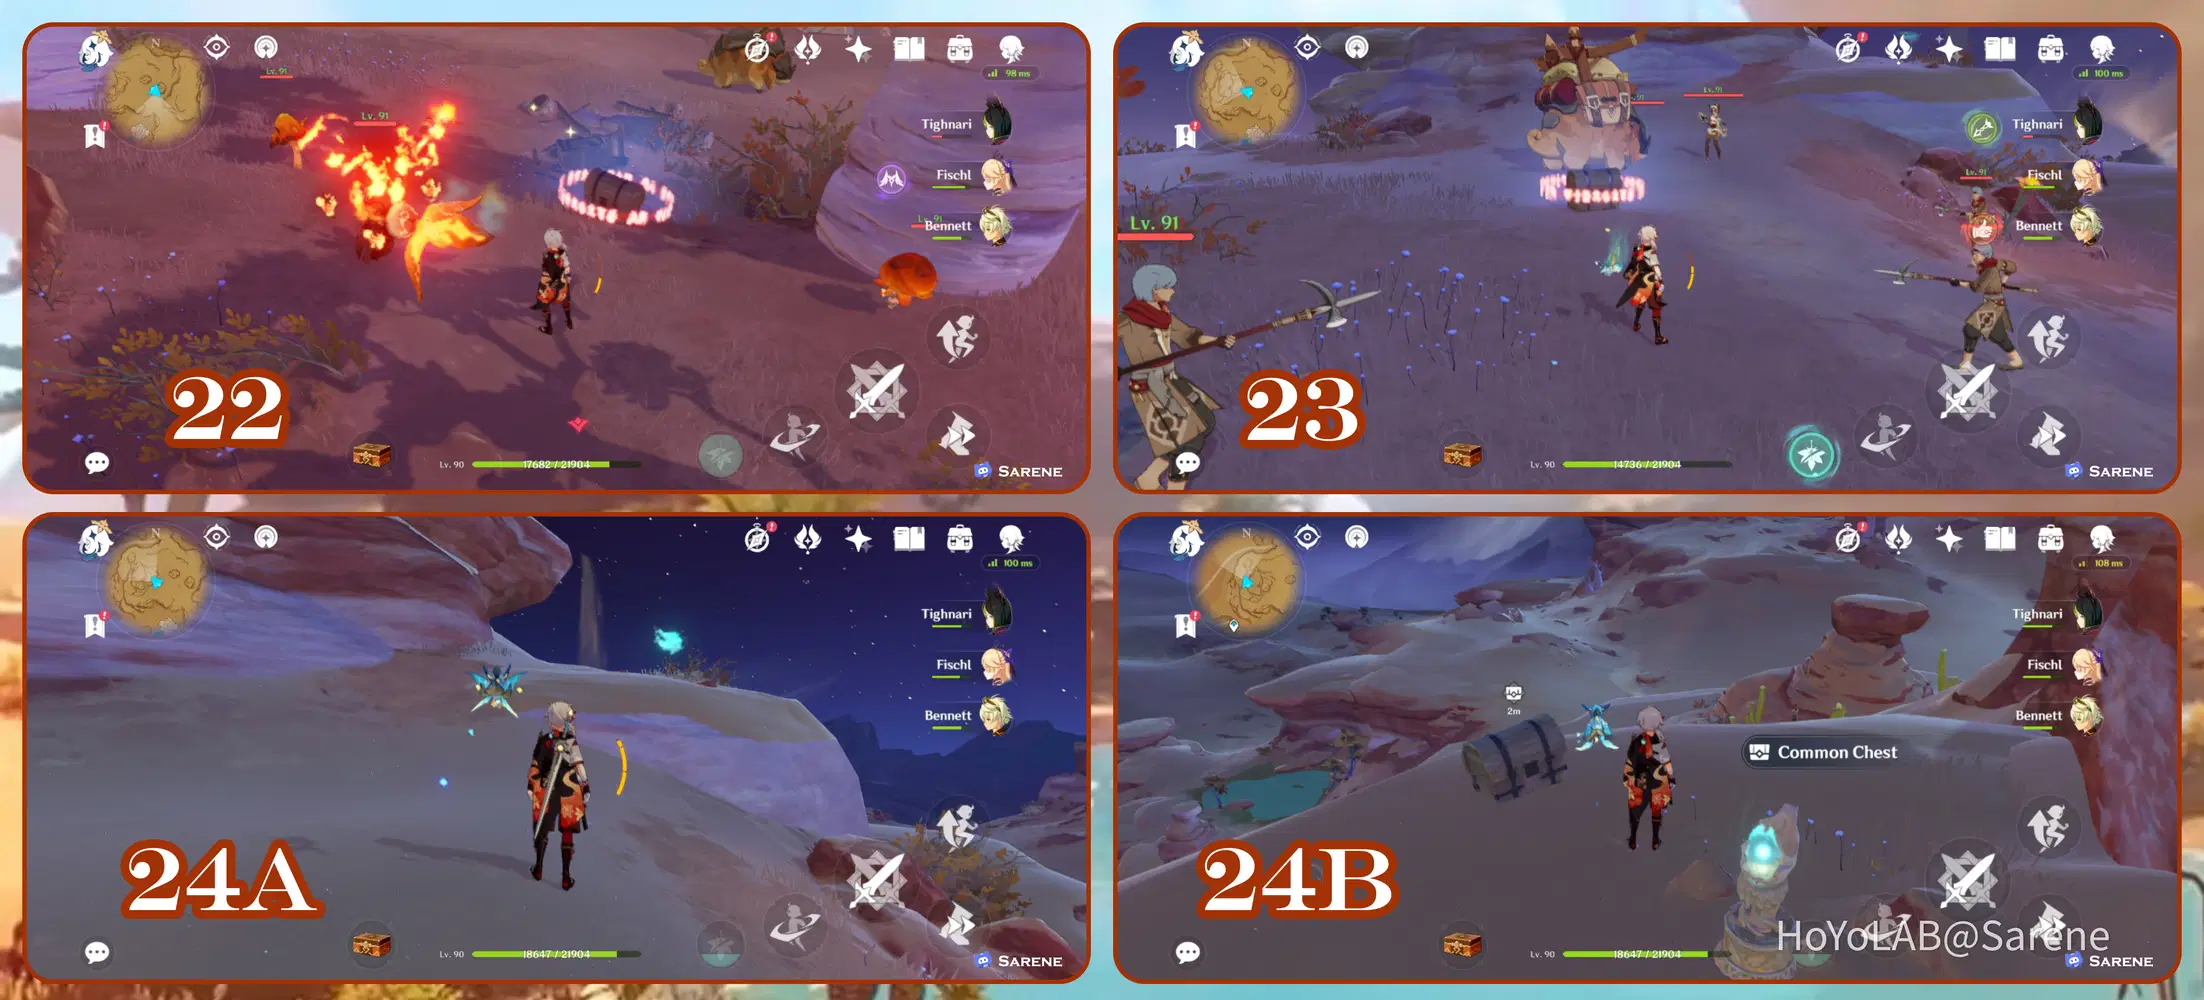
25 - 28
25. Use Anemo to reveal the chest under the Sand Piles
26. Complete the Time Trial Challenge
27. Use Pyro to remove the thorns surrounding the chest
28. Defeat the Fungi
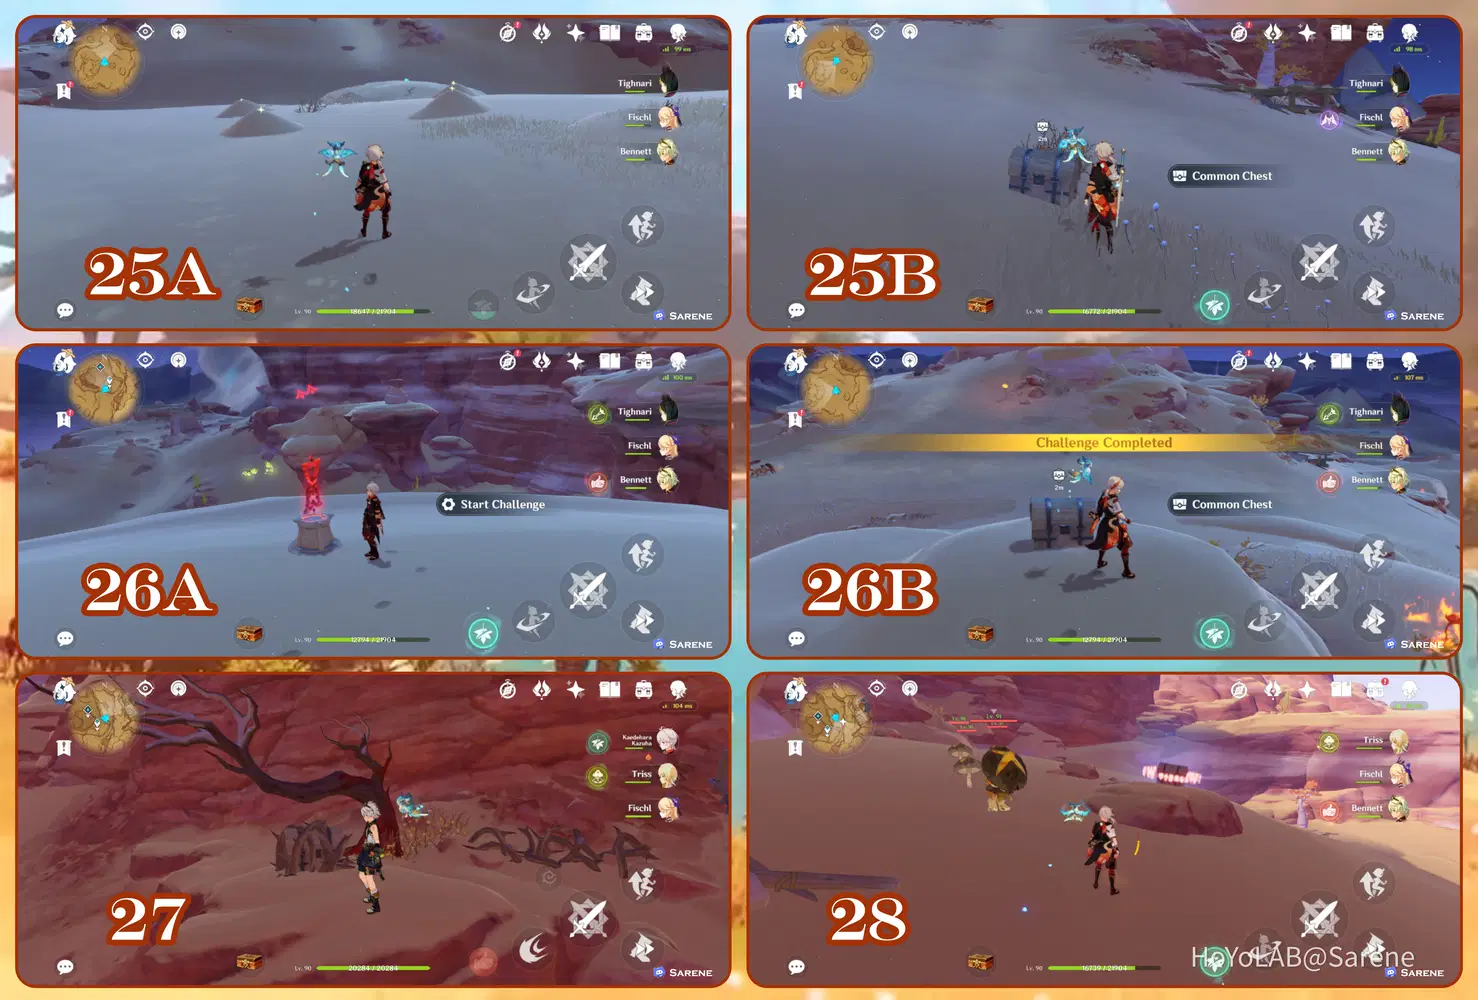
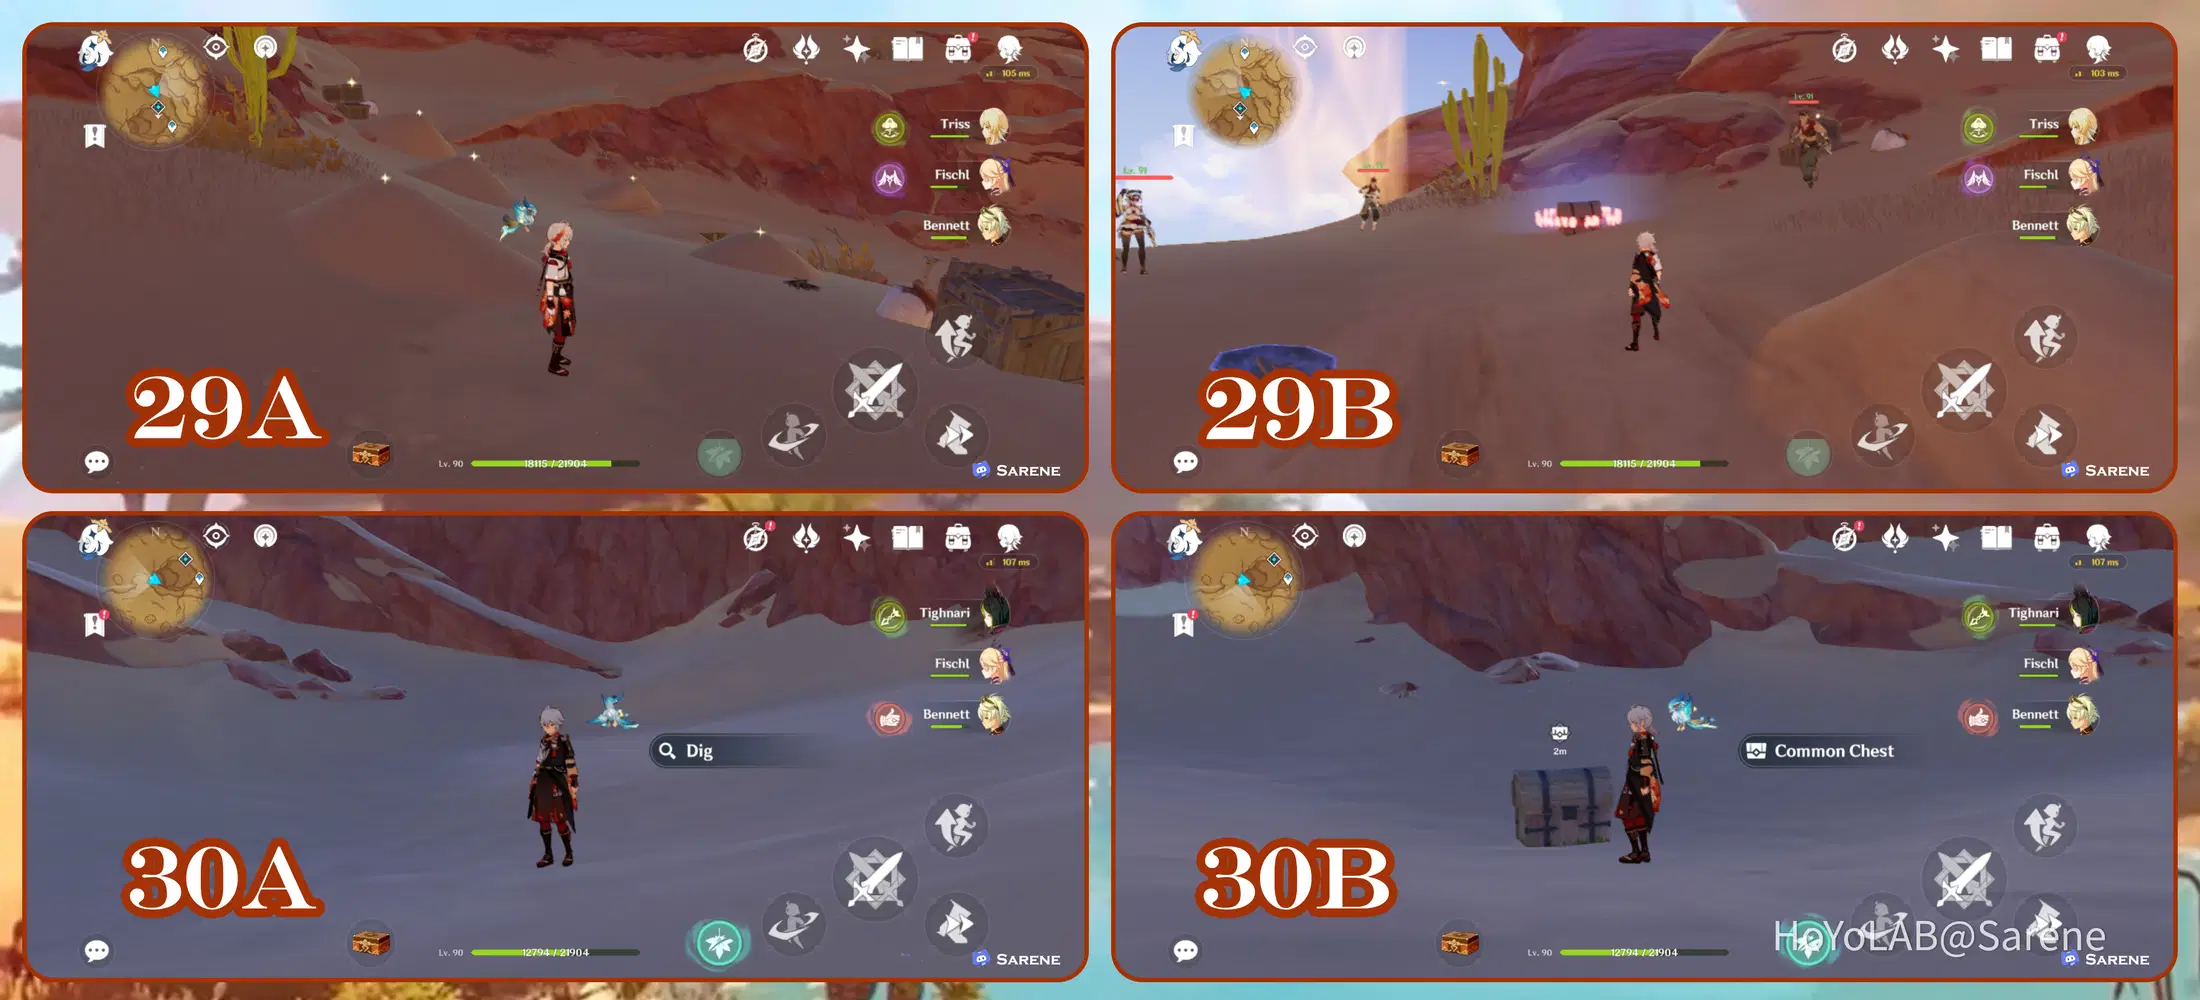
29 - 30
29. Use Anemo to reveal the chest hidden by the Sand Piles. Then defeat the Eremites
30. Go to the bottom of the pit to dig the Buried Chest
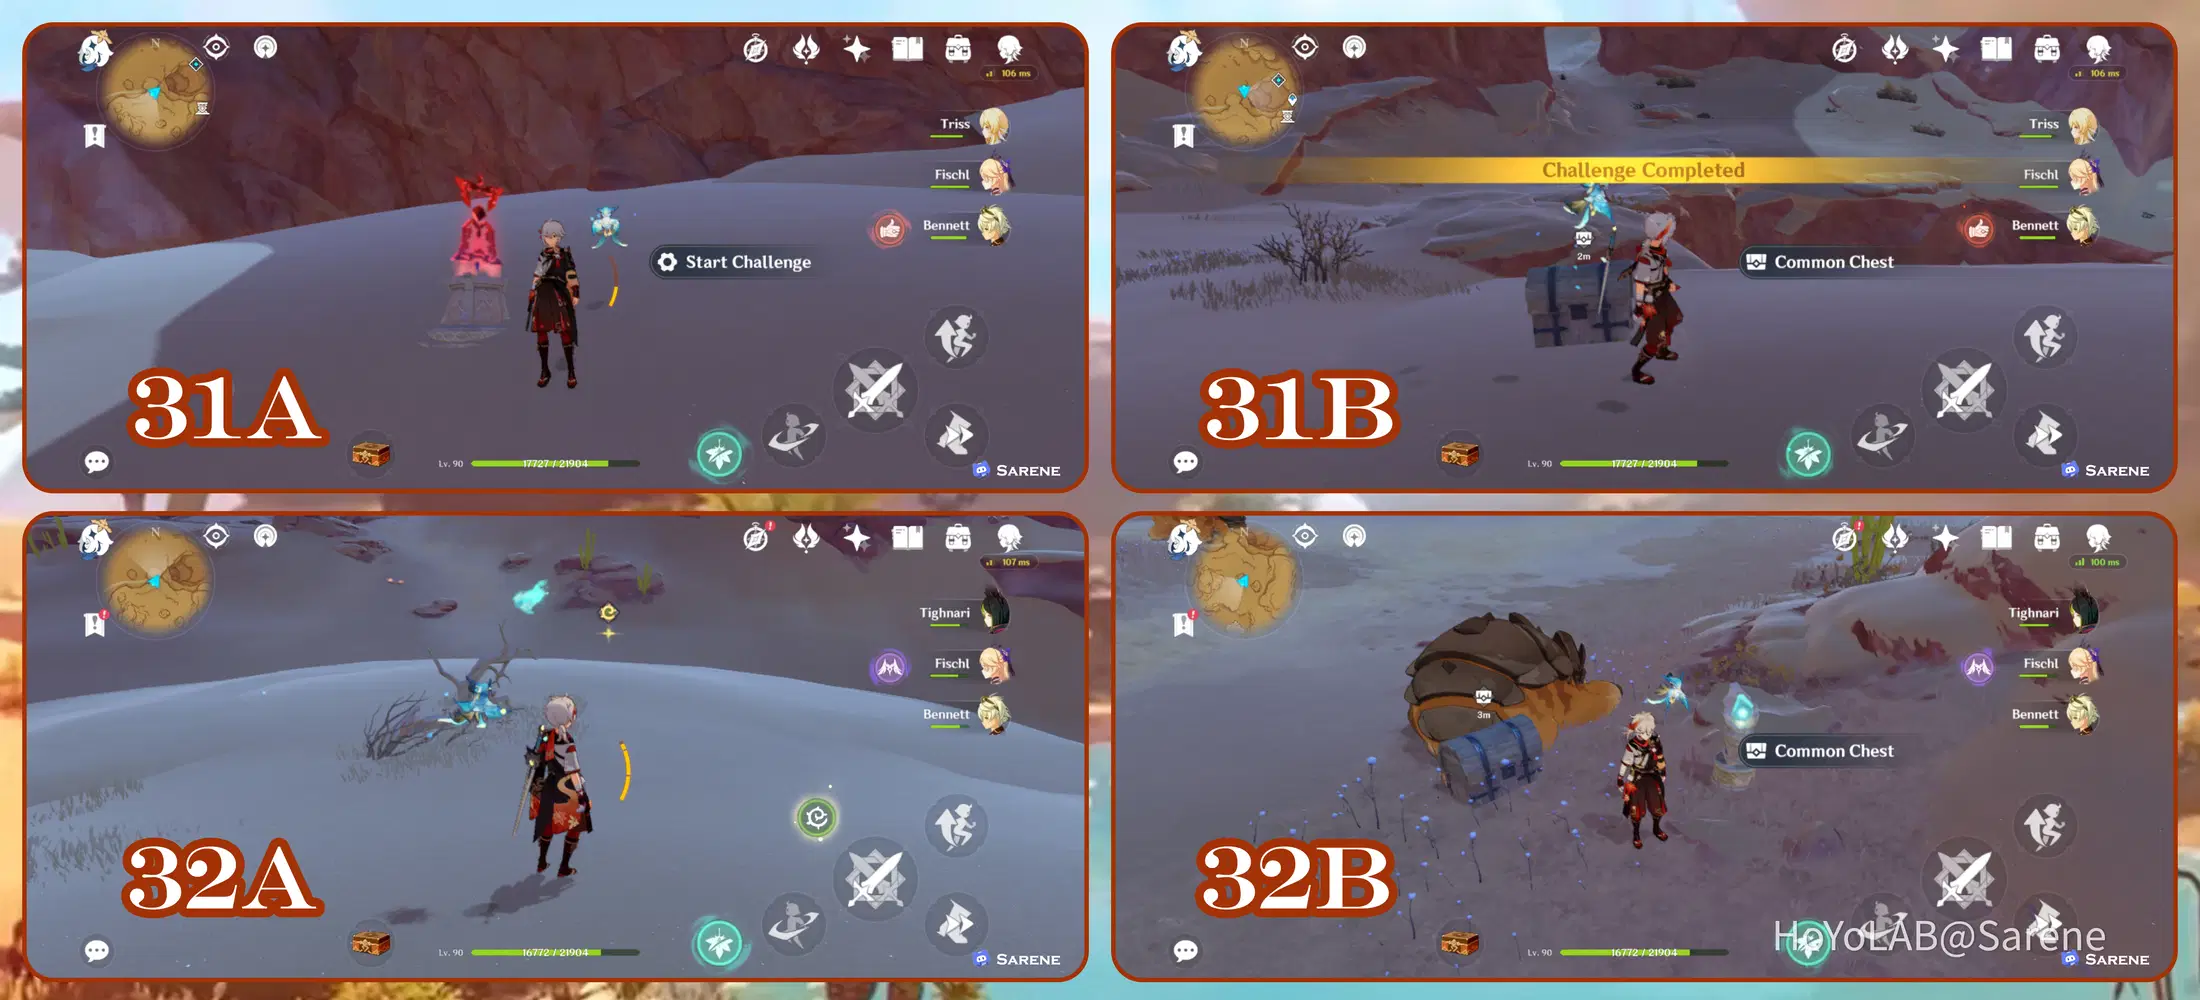
31 - 32
31. Complete the Time Trial Challenge
32. Follow the Seelie to its court
33 - 34
33. Mysterious Clipboard #12 This chest won't be available until after finding the new picture in the mailbox in ****nara from Static Views World Quest. After obtaining the picture. Return to the location and the chest will be hidden under the Sand Pile
34. Make sure the time is set to night (18:00 - 6:00). Touch the Mirages and defeat the enemies to spawn the chest
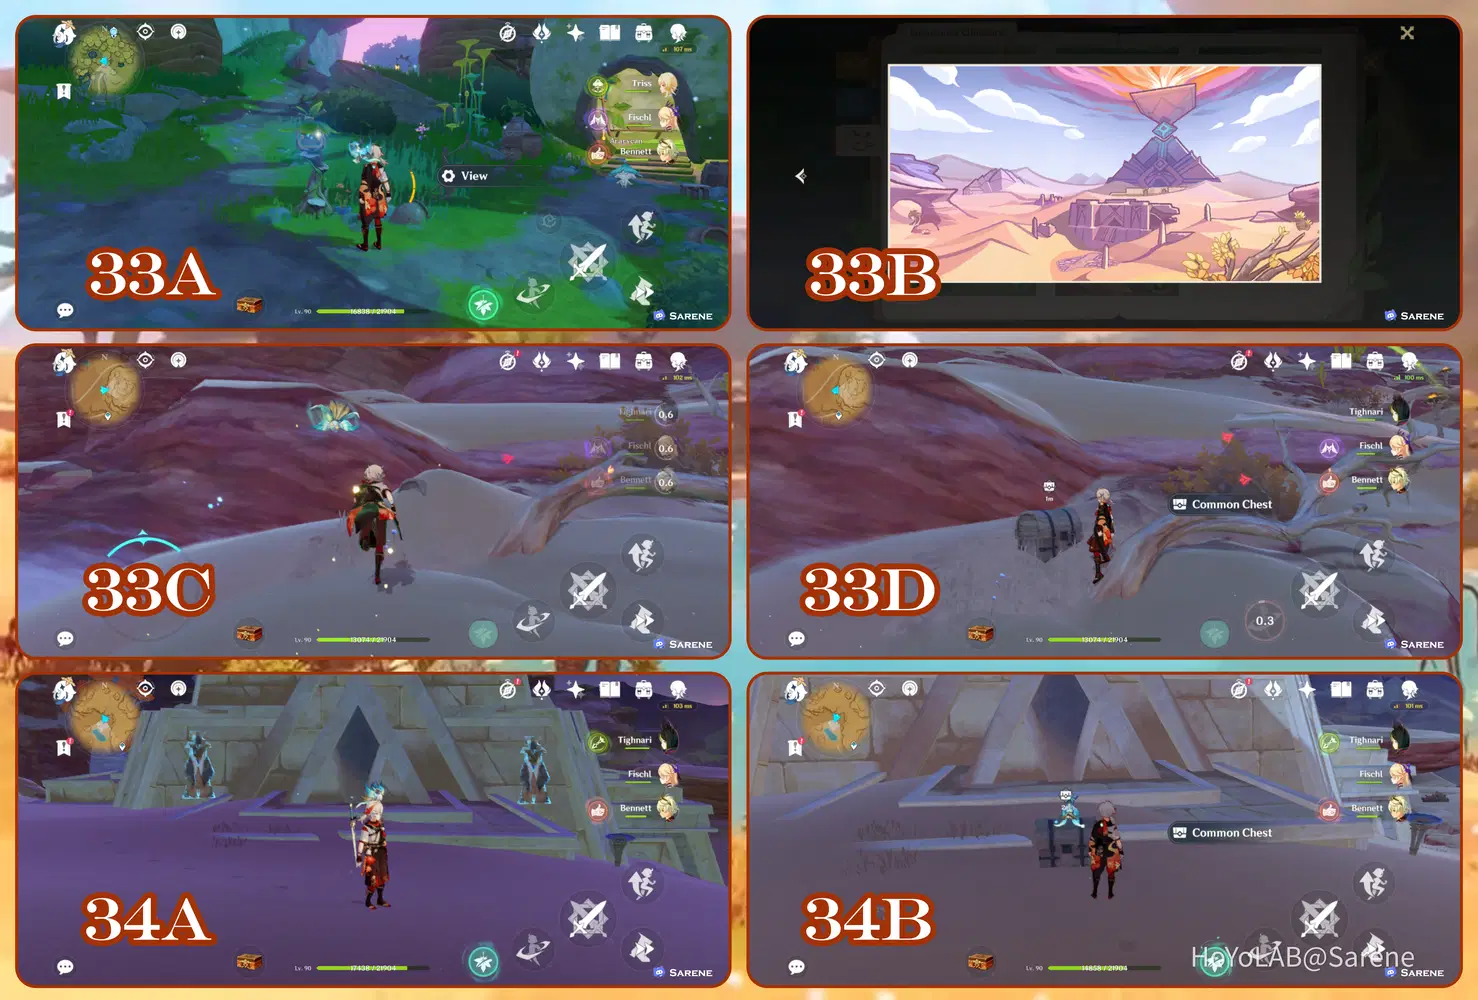
35 - 36
35. Mysterious Clipboard #13 This chest won't be available until after finding the new picture in the mailbox in ****nara from Static Views World Quest. After obtaining the picture. Return to the location and the chest will be hidden under the Sand Pile
36. Follow the Seelie to its court
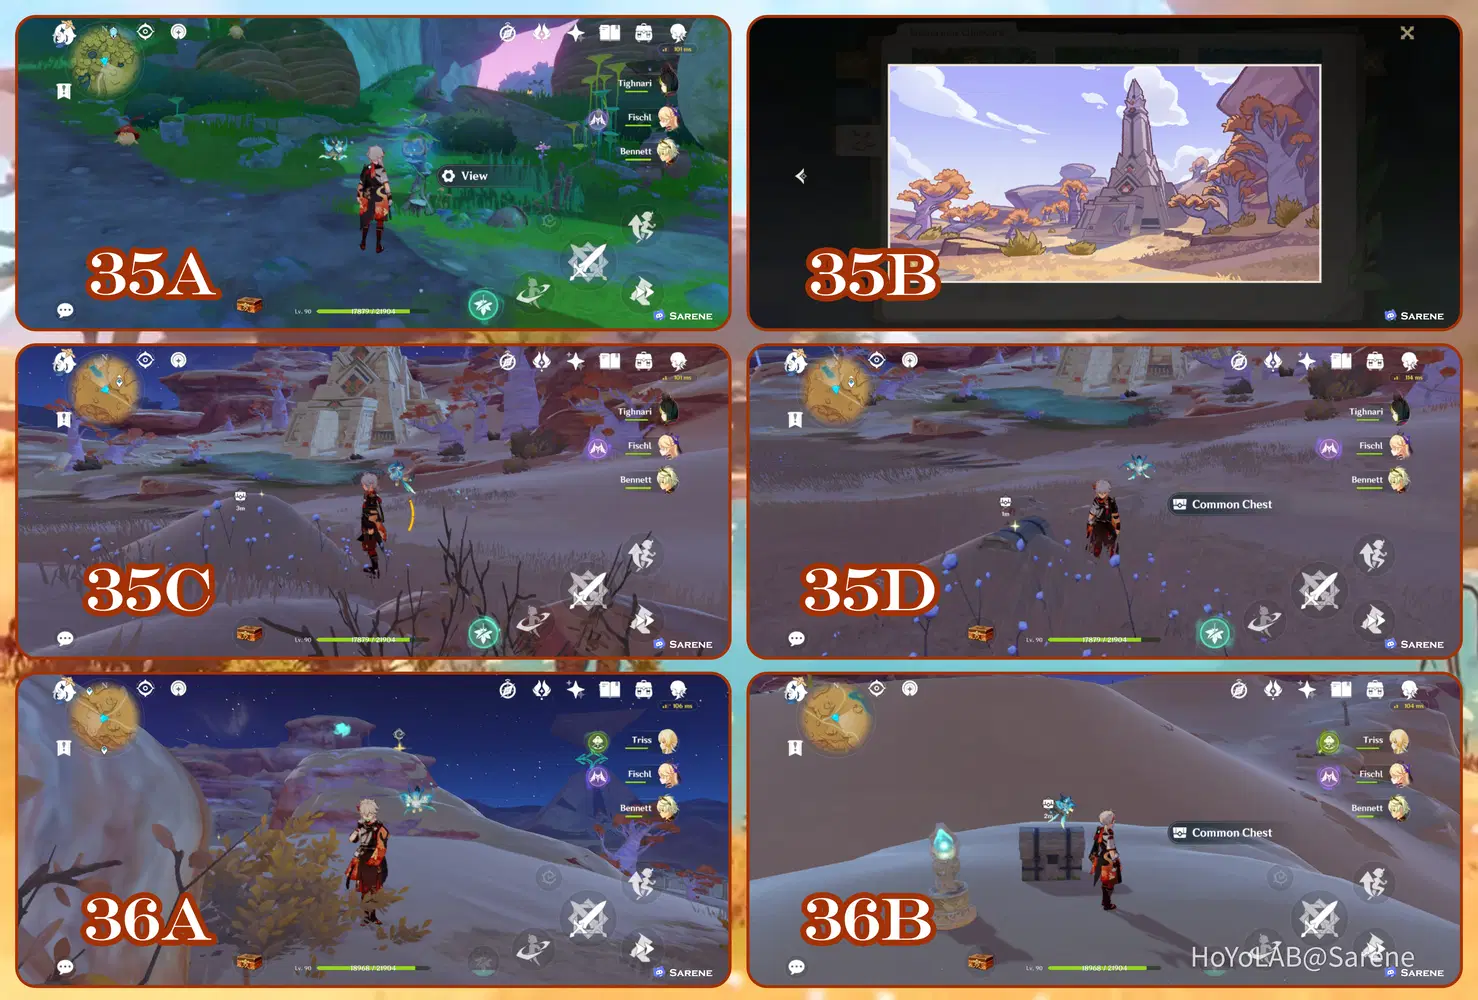
37 - 40
37. Defeat the Eremites
38. Defeat the Eremites
39. Defeat the Eremites
40. Complete the Time Trial Challenge
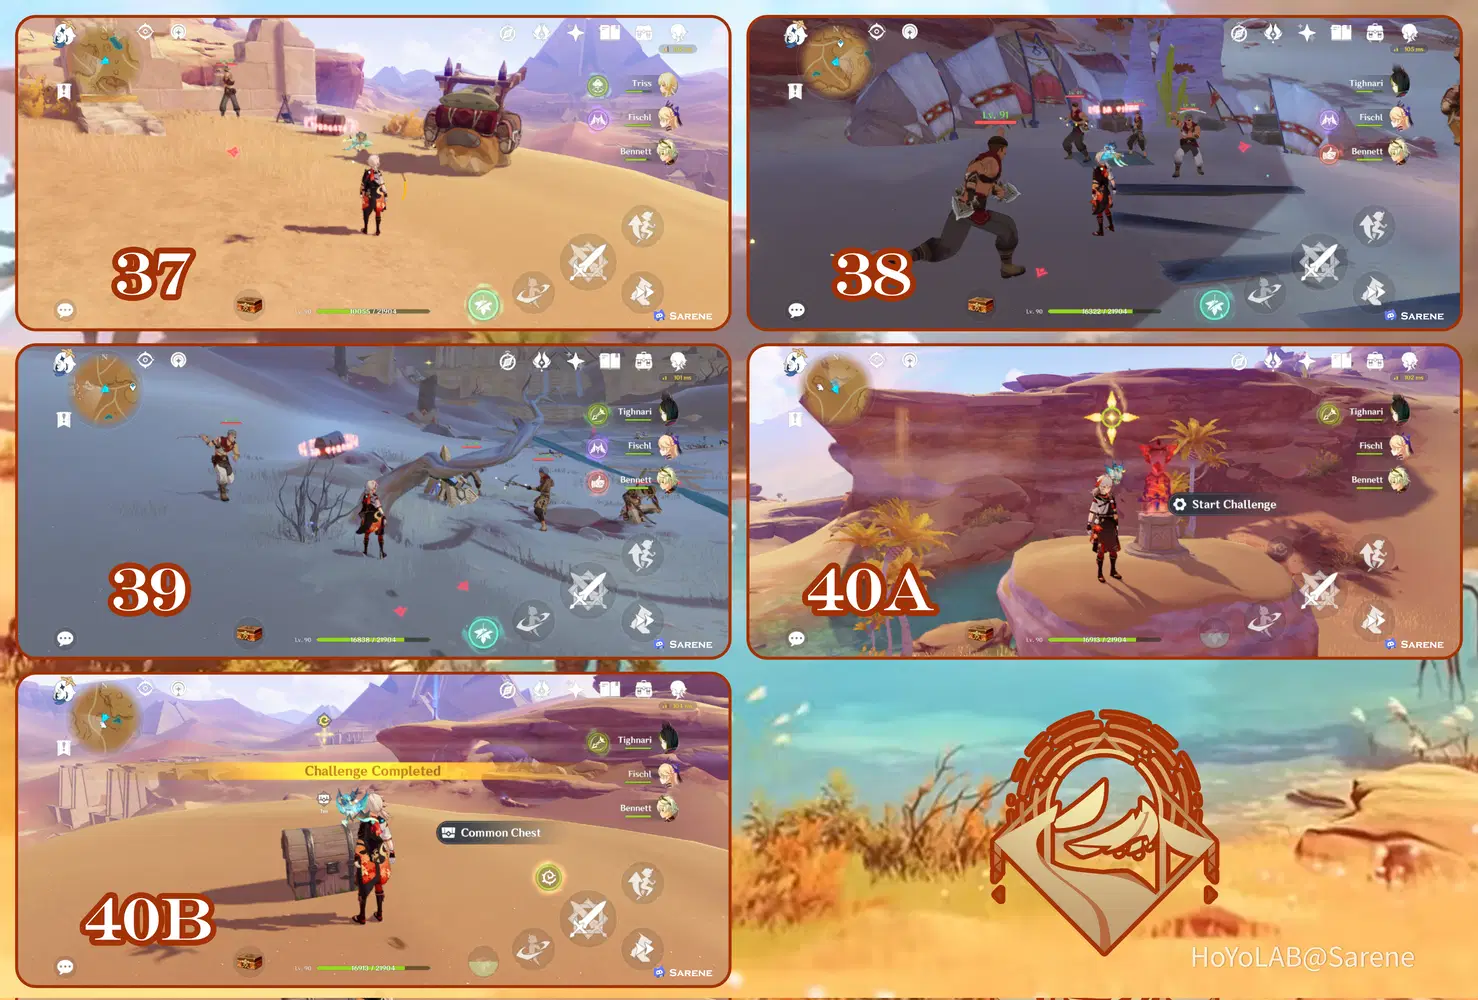
41 - 43
41. Destroy the Tumor of the Whithering
42. Defeat the Eremites
43. Complete the Time Trial Challenge
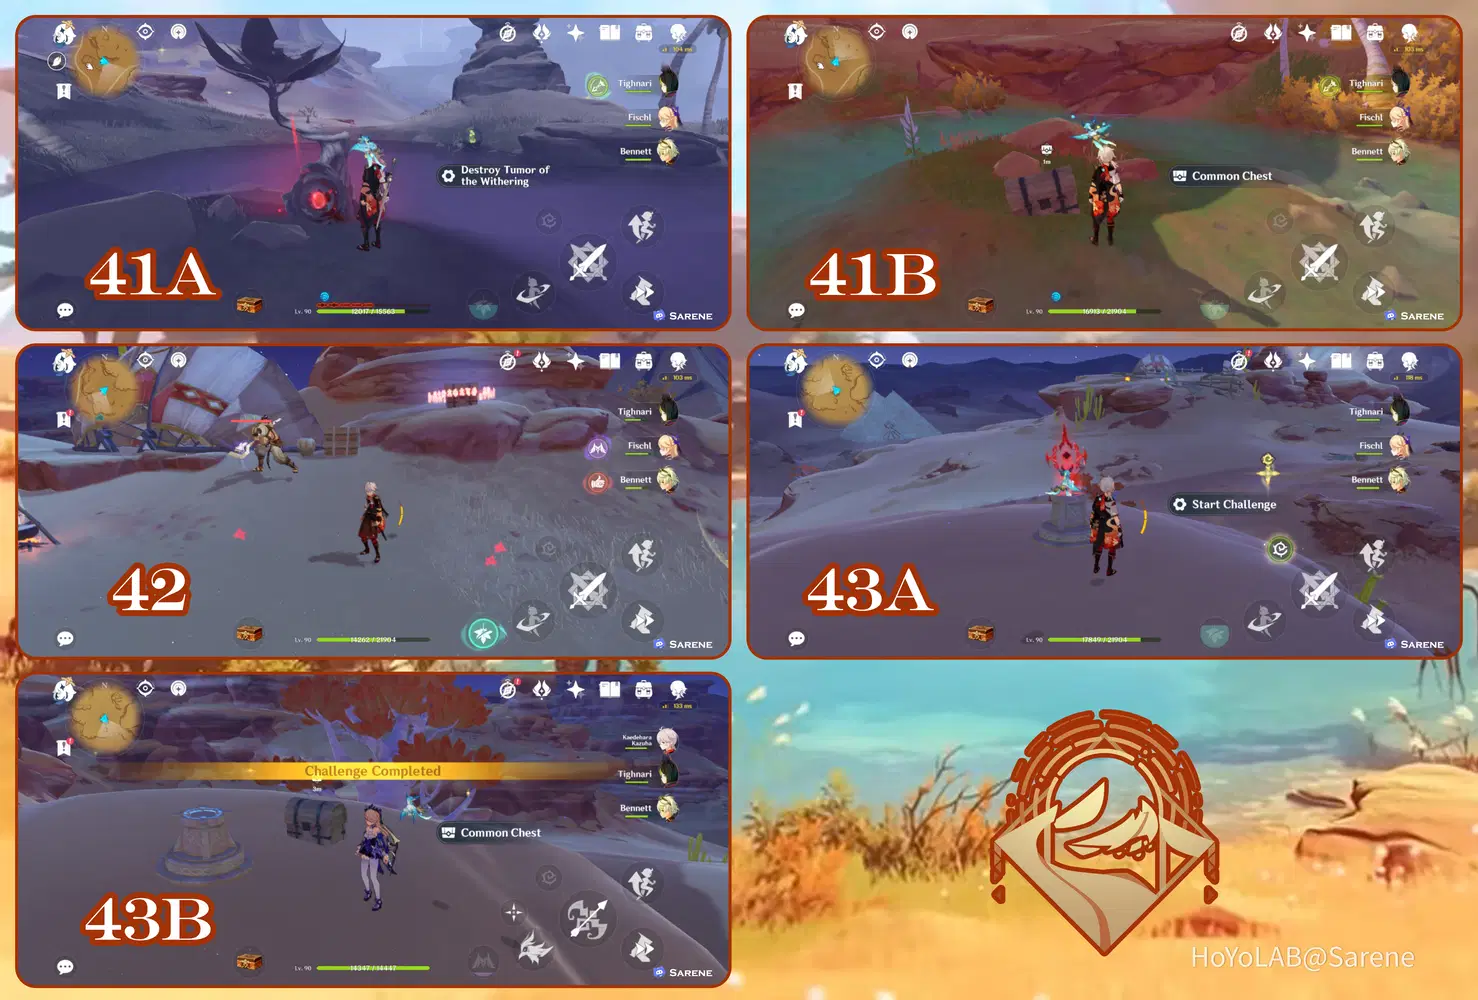
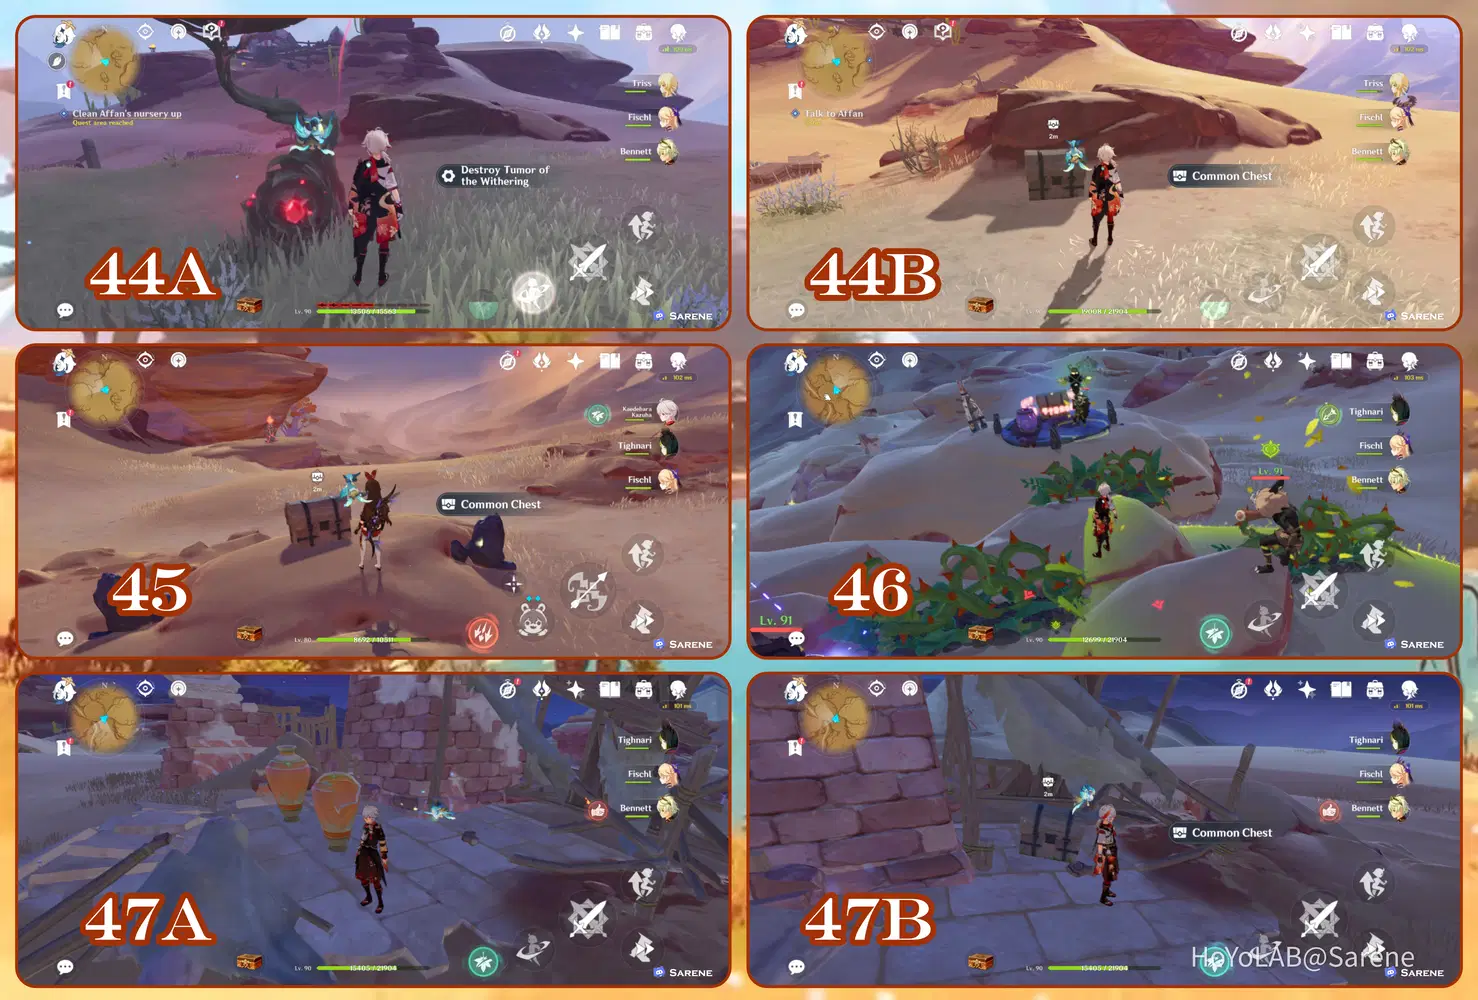
44 - 47
44. The chest is part of the A Gifted Rose: *****ly as Thorns World Quest. The Tumor of the Whithering will only appear during the quest.
45. Light the Pyro totems (Amber or Yoimiya is ideal here)
46. Defeat the Hilichurlts
47. Destroy all the vases by the abandoned building to spawn the chest
48 - 50
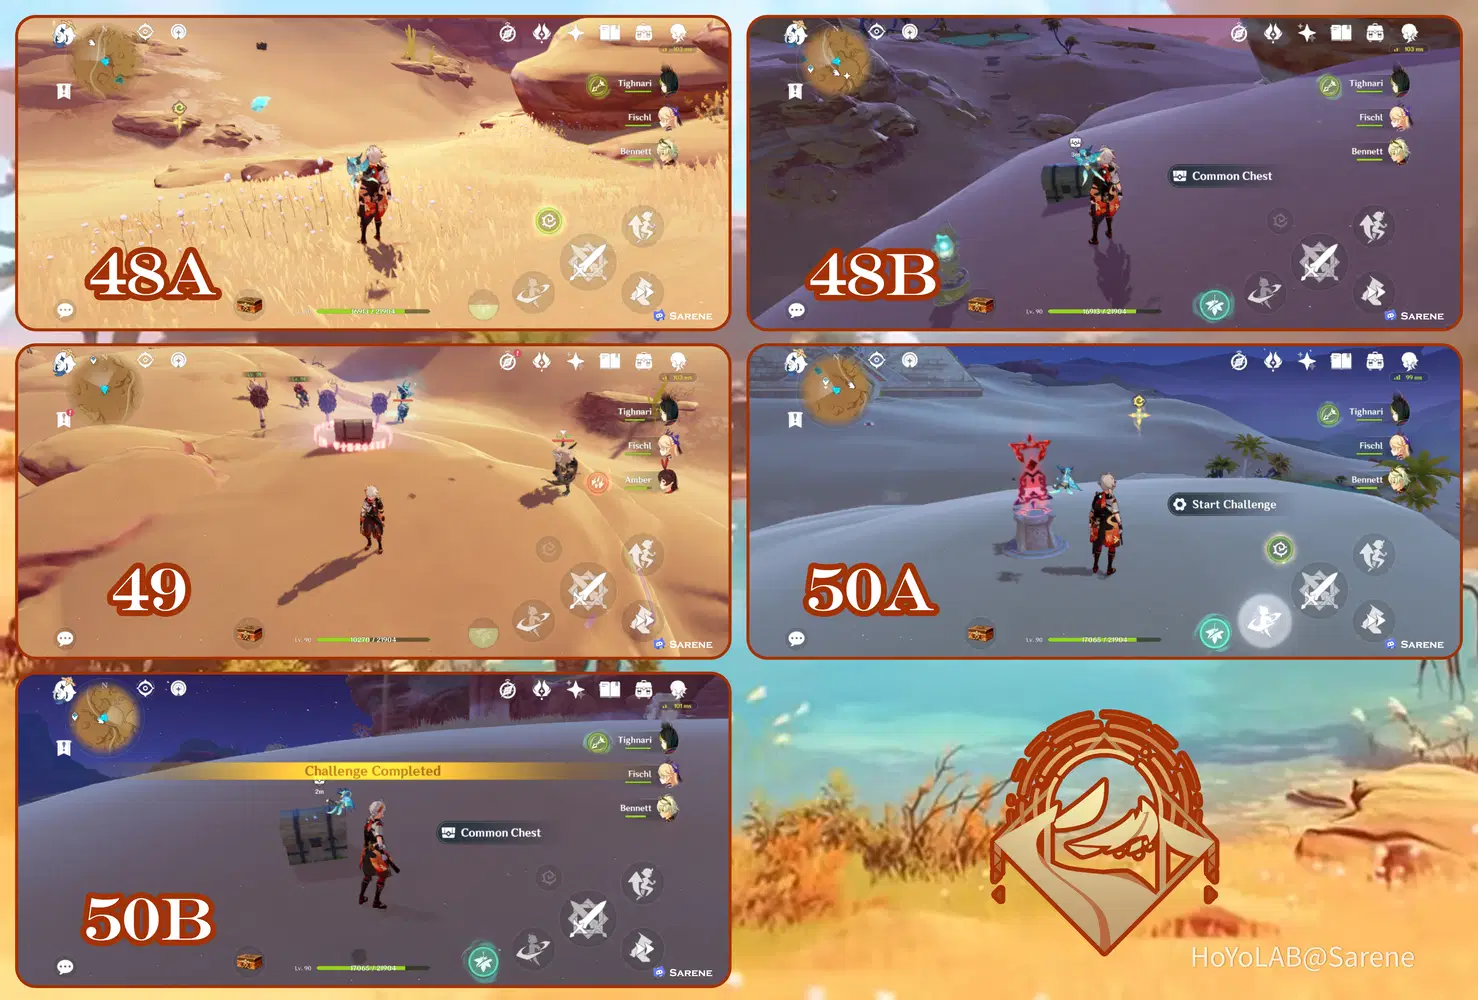
48. Follow the Seelie to its court
49. Defeat the Hilichurls
50. Complete the Time Trial Challenge
51 - 53
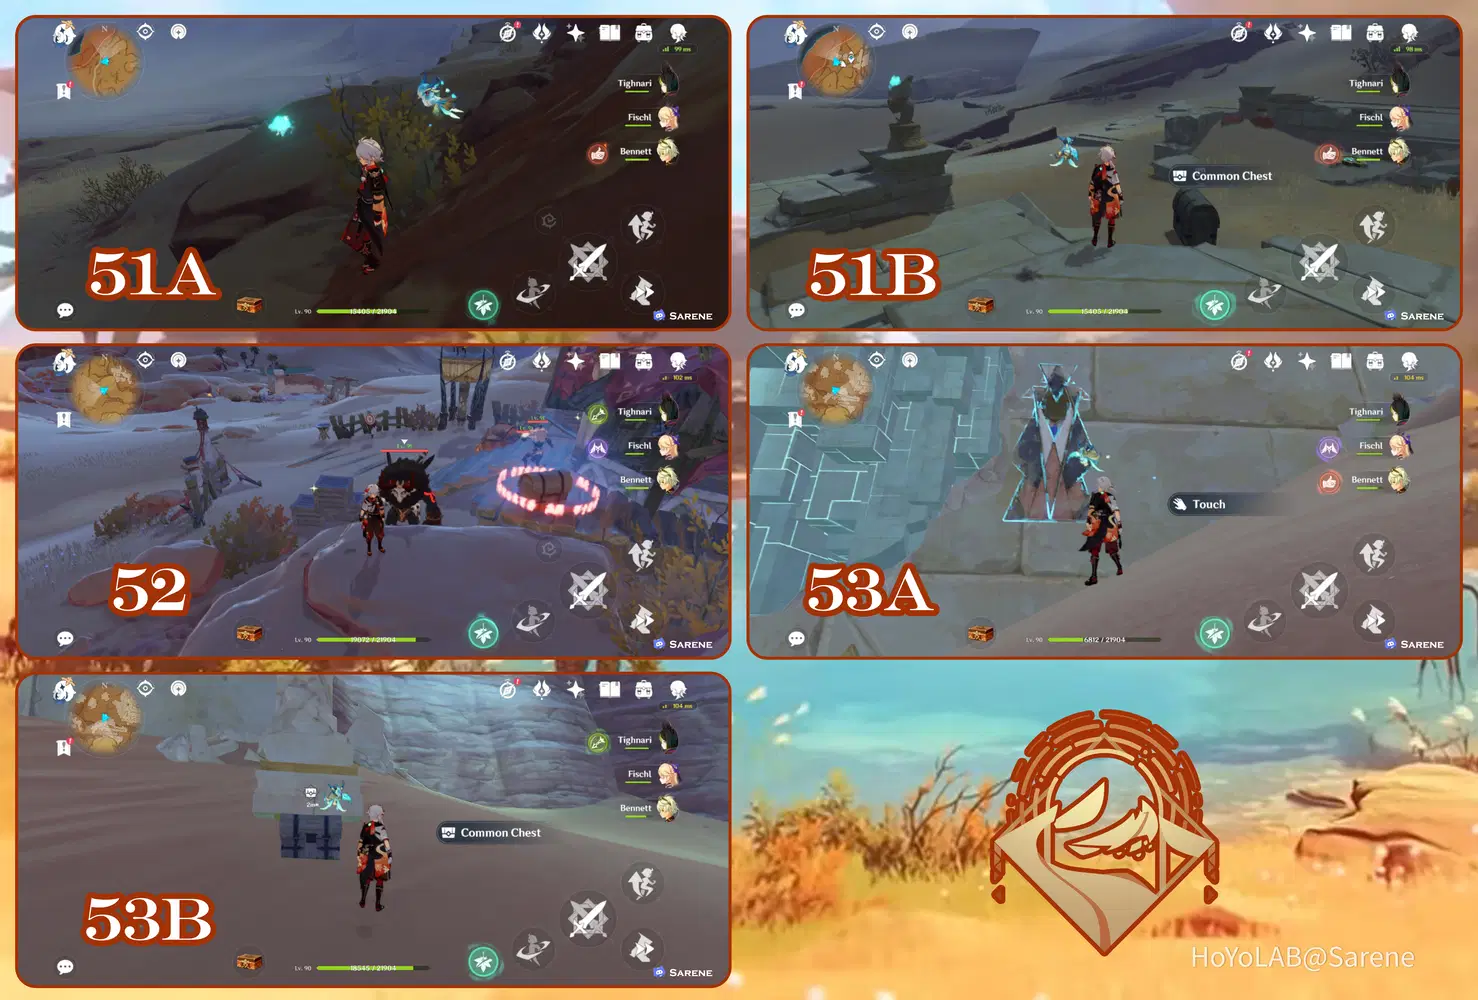
51. Follow the Seelie to its court
52. Defeat the Hilichurls
53. Make sure the time is set to night (18:00 - 6:00). Touch the Mirages and defeat the enemies to spawn the chest
54 - 55
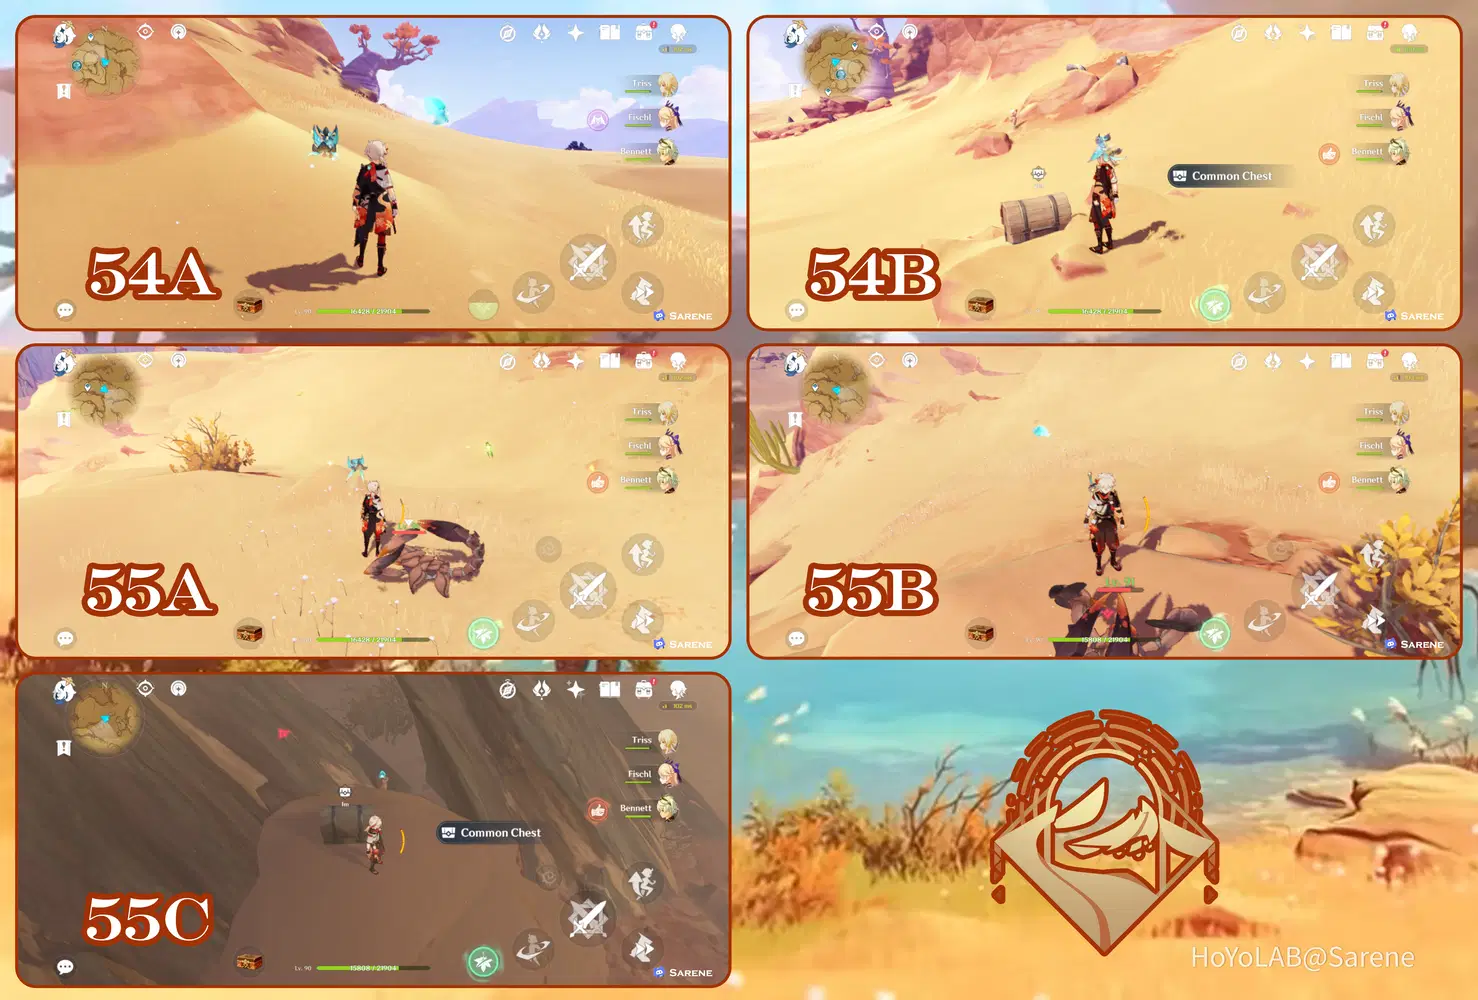
54. Follow the Seelie to its court
55. Use Anemo to reveal the Seelie hidden in the Sand Pile. Then follow it to its court
56 - 58
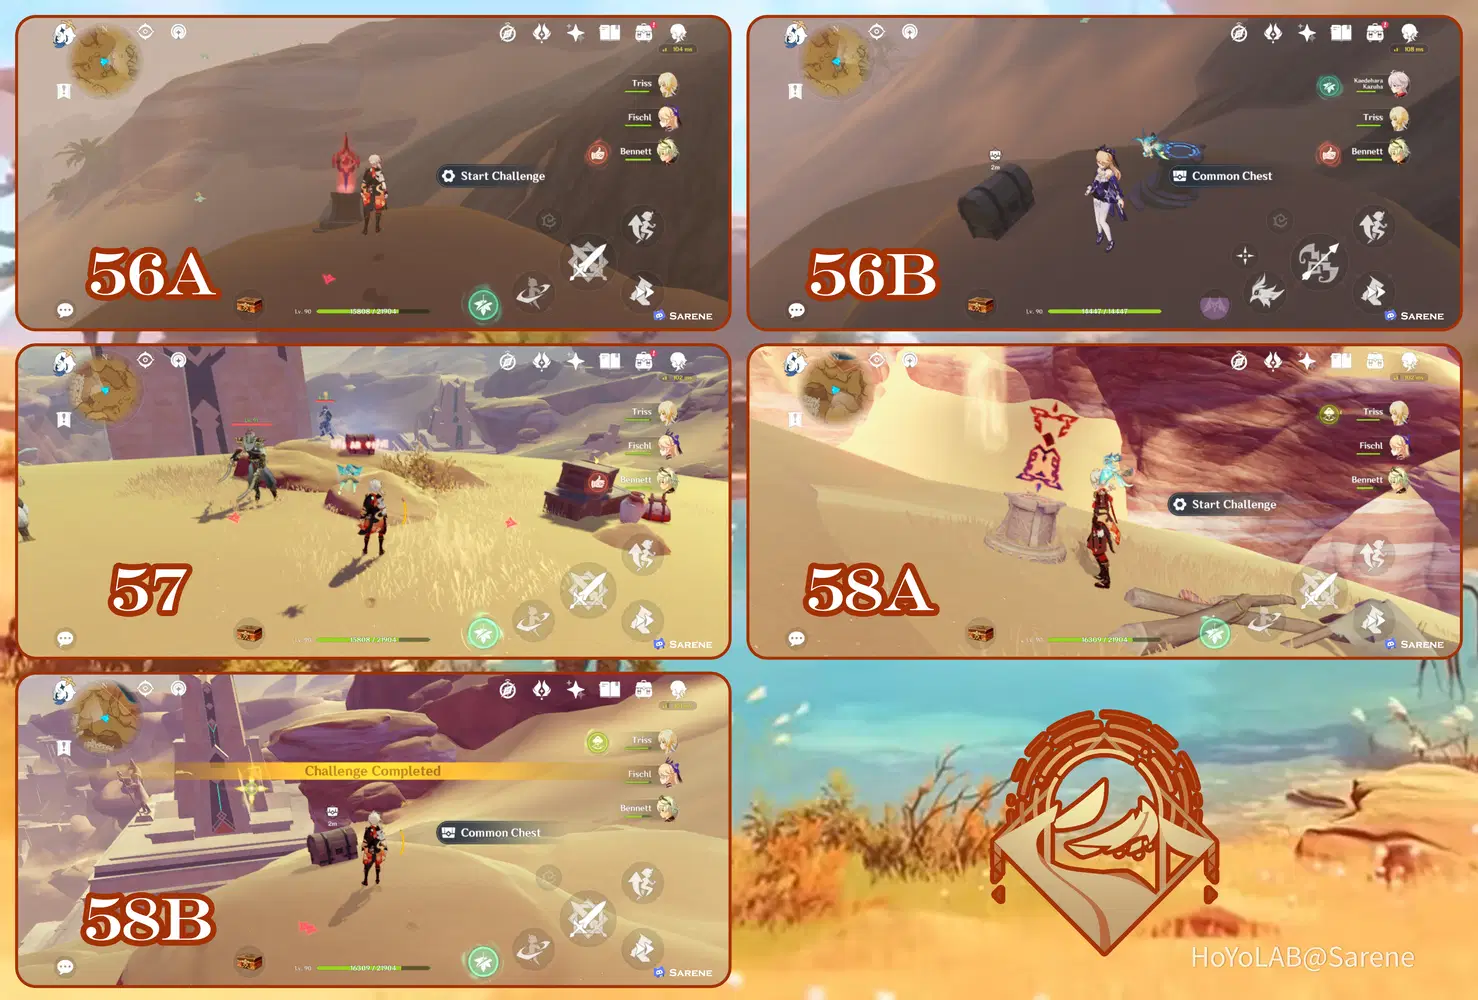
56. Complete the Time Trial Challenge
57. Defeat the Eremites
58. Complete the Time Trial Challenge
Land of Lower Setekh - Below Ground
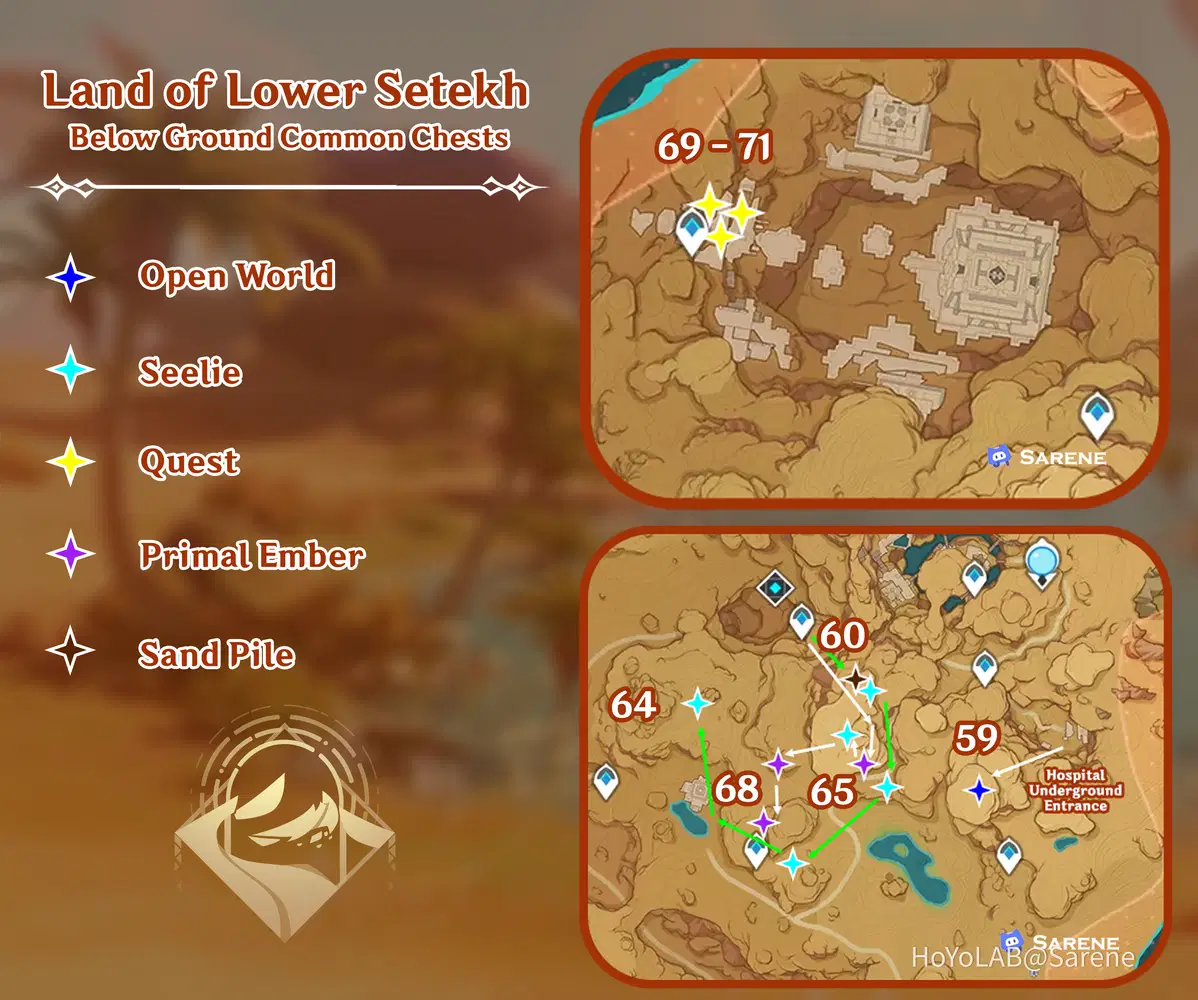
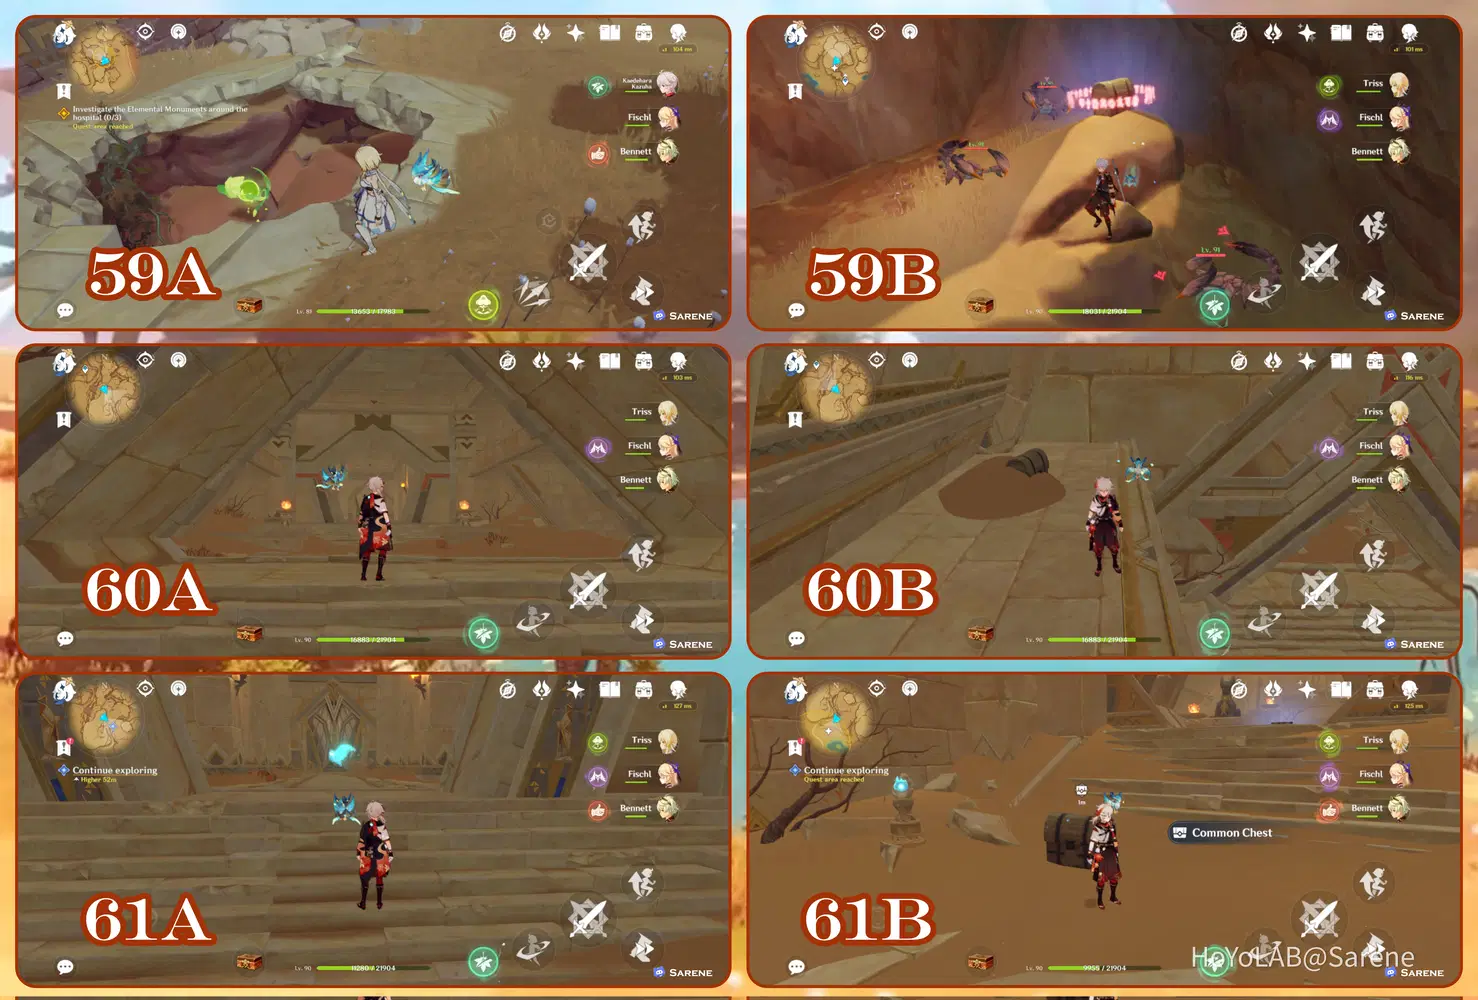
59 - 61
59. Defeat the Hilichurls (This chest Does Not give Dendro Sigils)
60. Upon entering the temple, climb to the ledge on the right. The chest is buried under a Sand Pile
61. Follow the Seelie to its court (Part of the Golden Slumber World Quest)
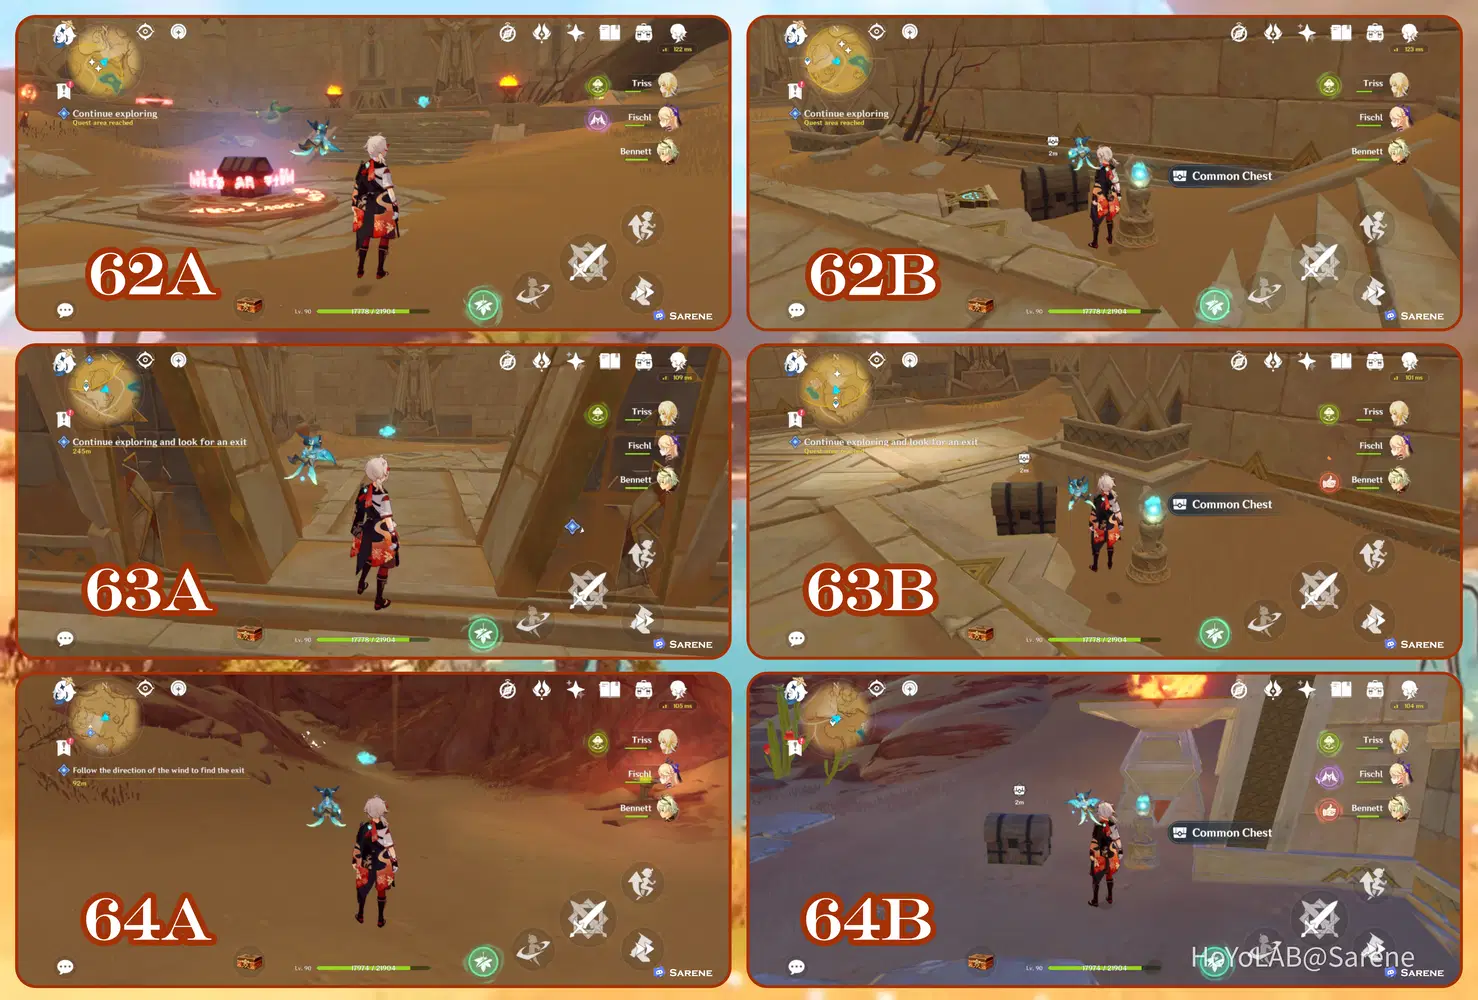
62 - 64
62. Follow the Seelie to its court (Part of the Golden Slumber World Quest)
63. Follow the Seelie to its court (Part of the Golden Slumber World Quest)
64. Follow the Seelie to its court (Part of the Golden Slumber World Quest)
65
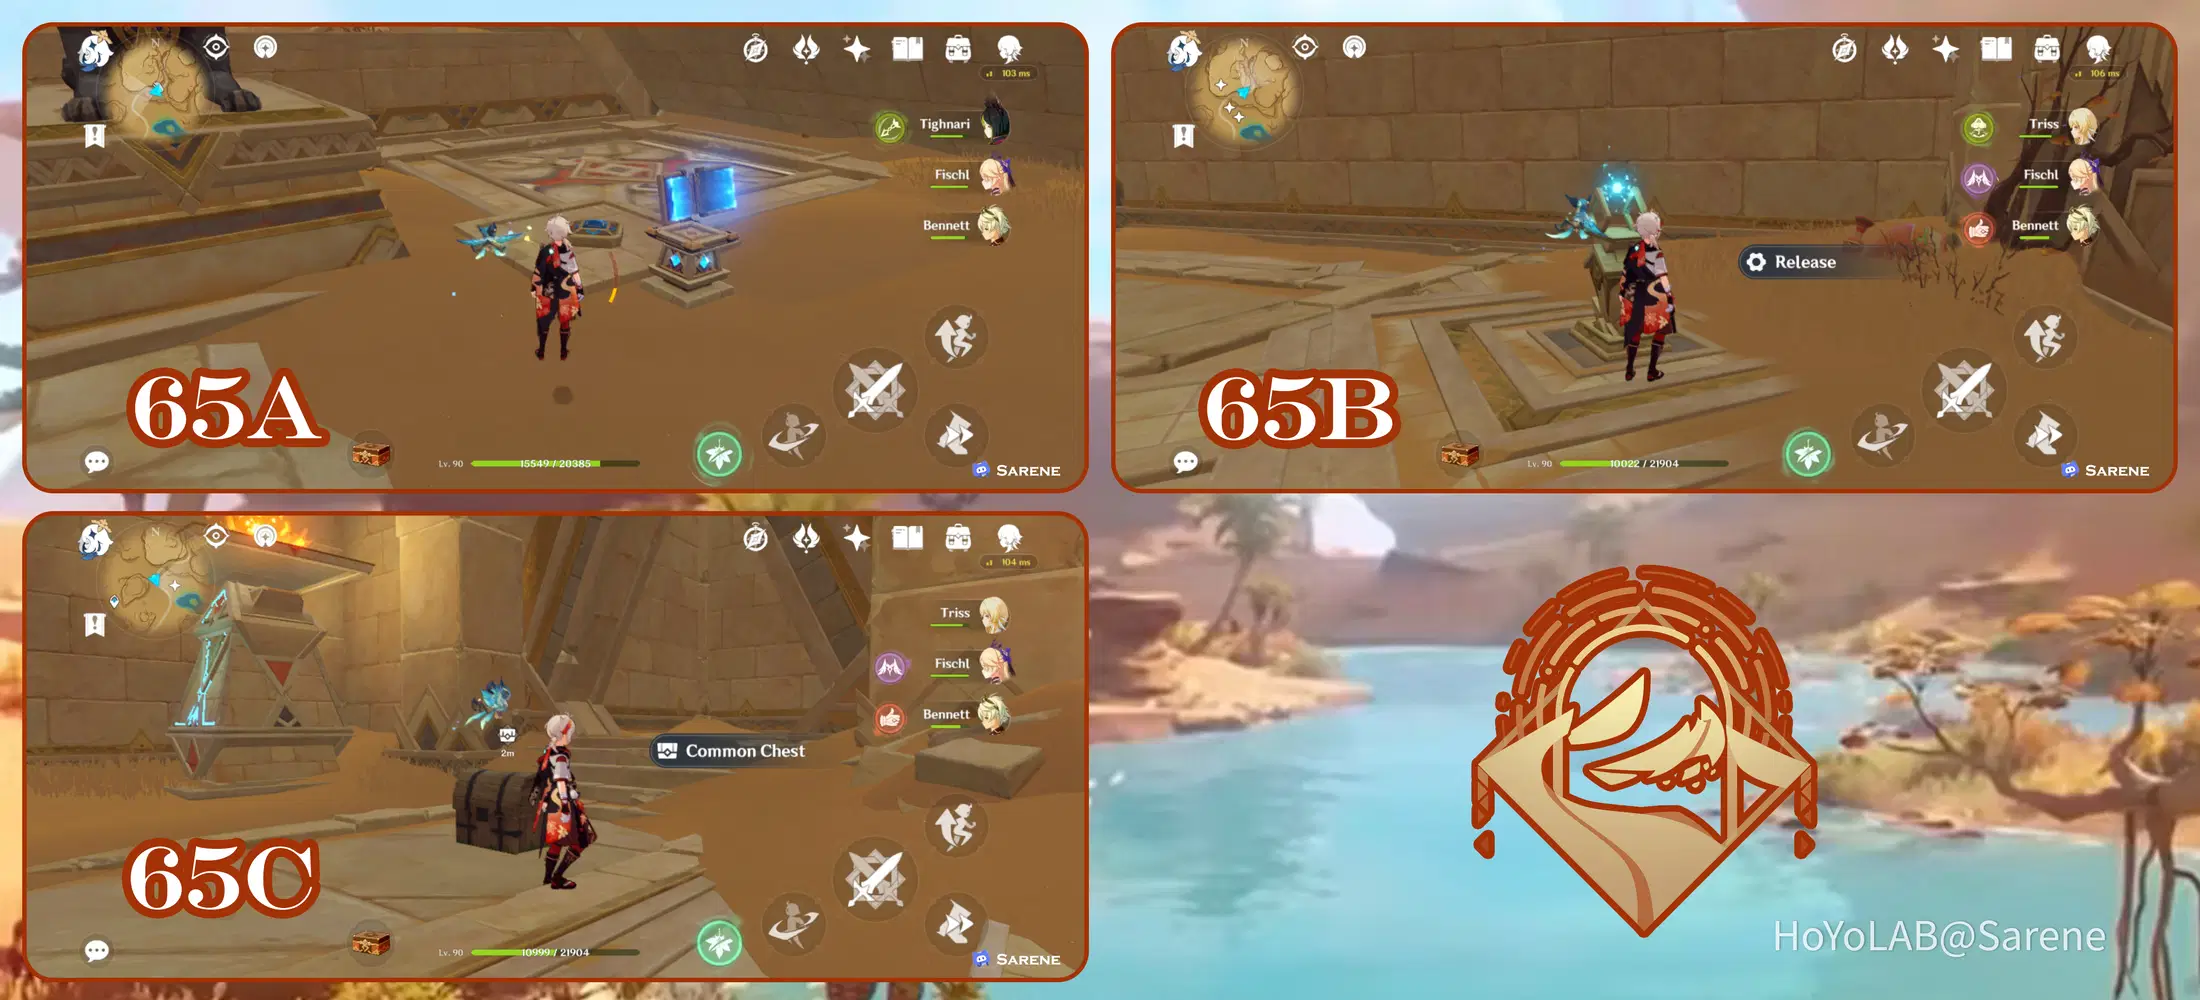
65. Reenter the temple using the same Teleport Waypoint as 62. Once you reach the room with the elevators, take the one of the lower right hand side. You won't be able to access this area without a high enough Clearance Level. Follow the Primal Ember to its Torch.
66- 68
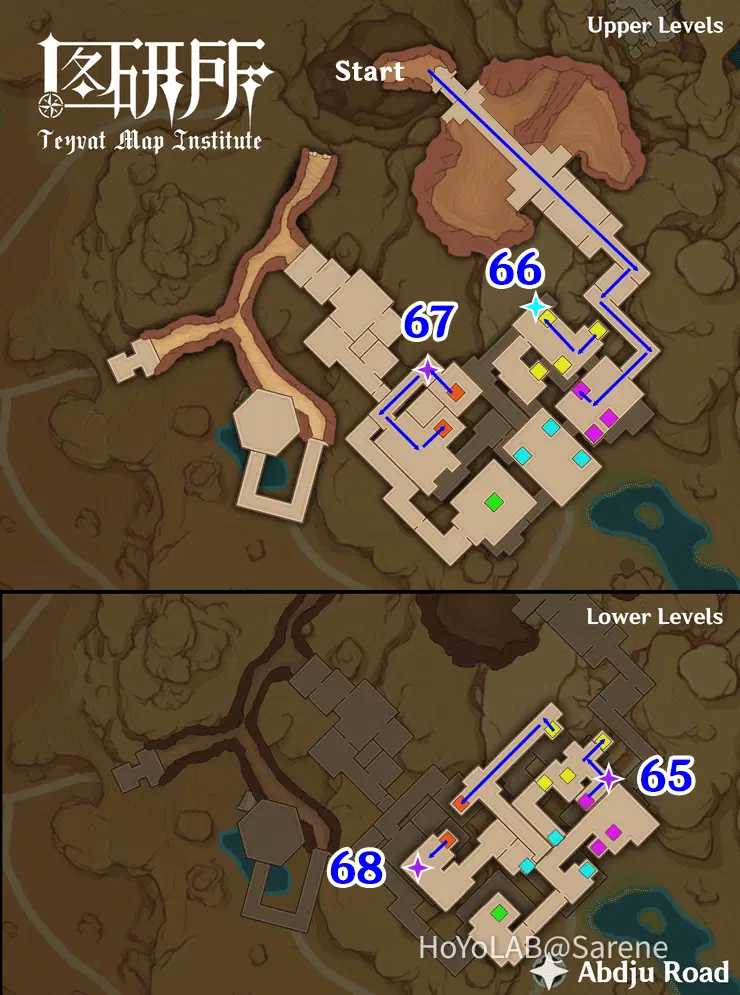
See the underground Map created by Teyvat Map Institute (提瓦特图研所 on Bilibili) below if you get lost. They were kind enough to allow me to use their map for my guides. You can check out their other amazing maps here.
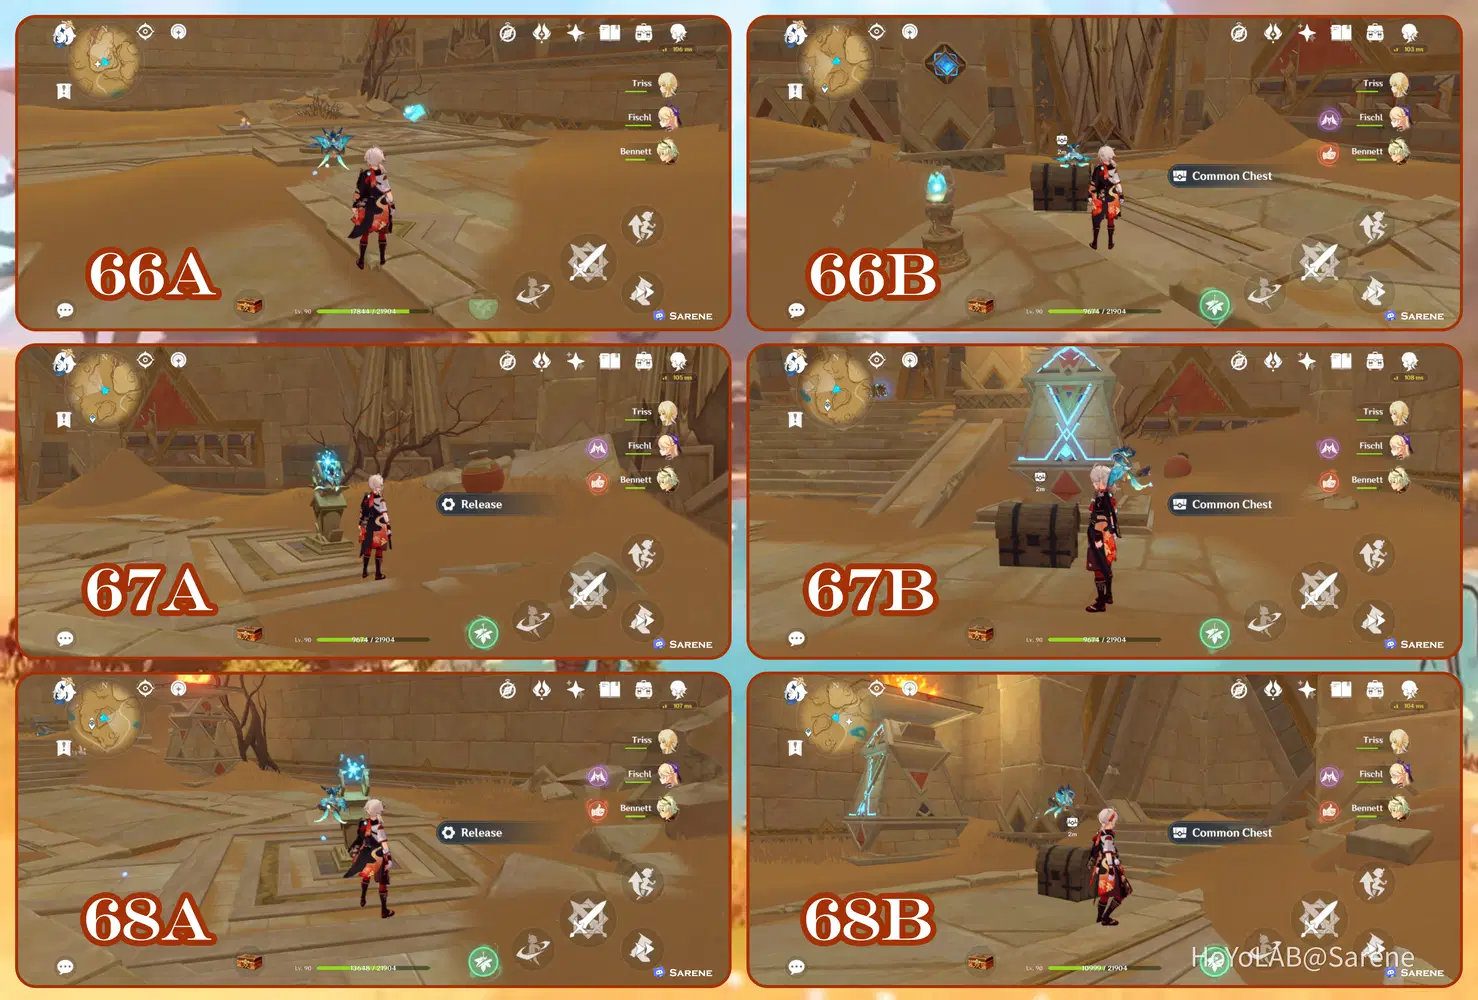
66. Follow the Seelie to its court
67. Follow the Primal Ember to its Torch.
68. Follow the Primal Ember to its Torch.
69 - 71
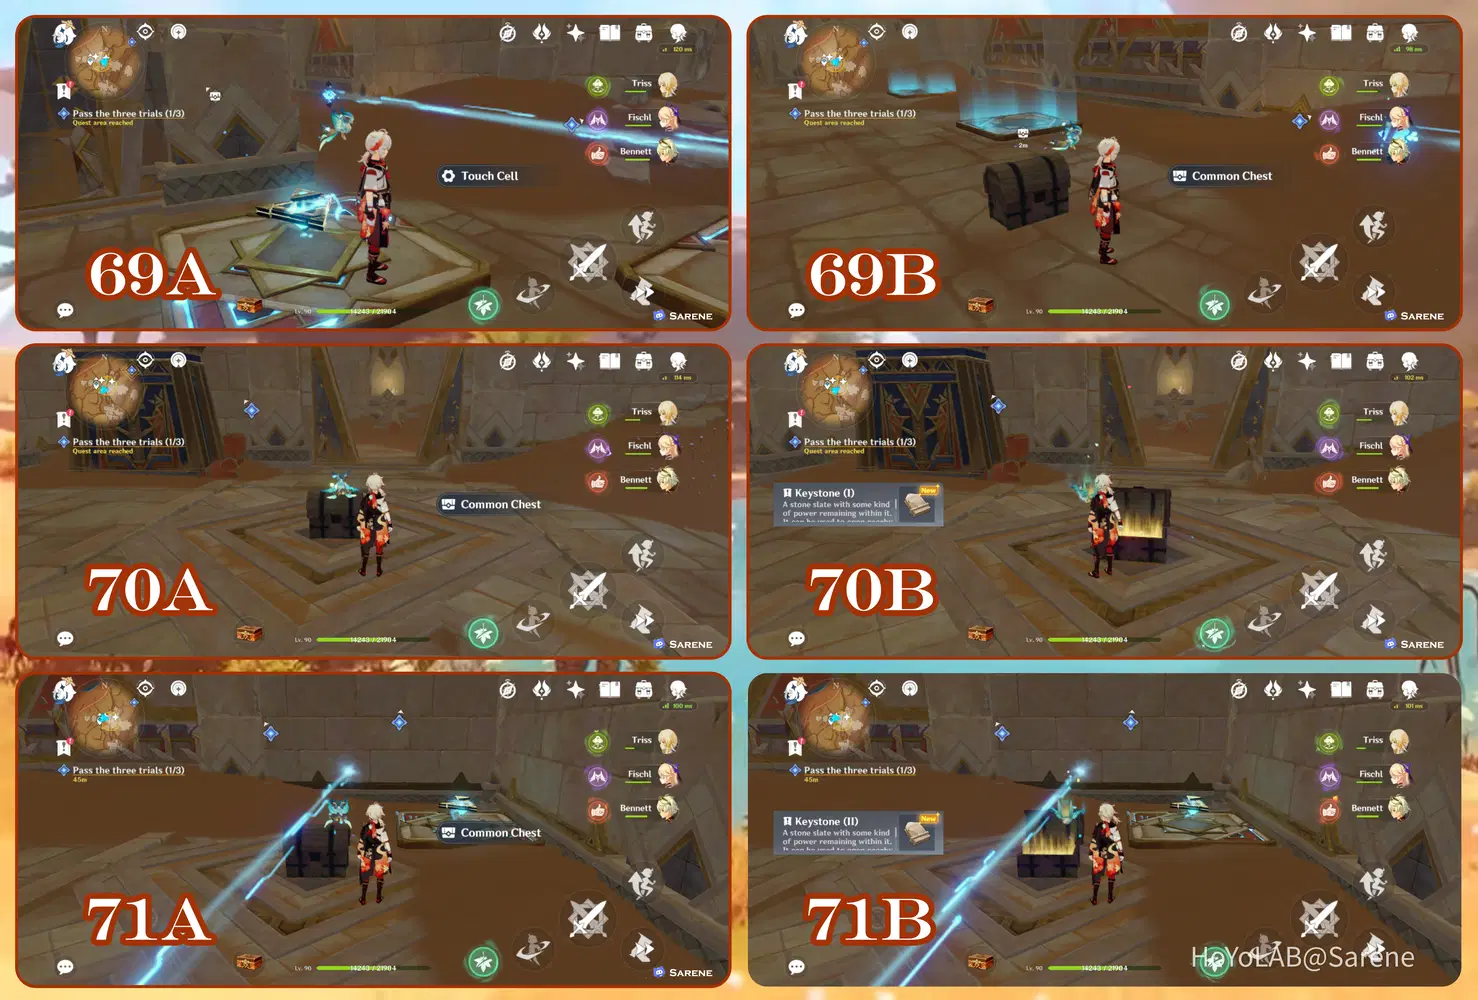
The following chests are all part of the Golden Slumber World Quest, so you won't miss it.
69. Complete the Everlight Cell Puzzle
70. Contains Keystone (I) and no sigils
71. Contains Keystone (II) and no sigils
Now you should have all the common chests from Land of Lower Setekh! Thanks for reading and feel free to leave a comment below if you have any questions.

Wishing you the best with your exploration!




