


Good Morning/Afternoon/Evening everyone!
I have returned once again with another build guide for you all to use!
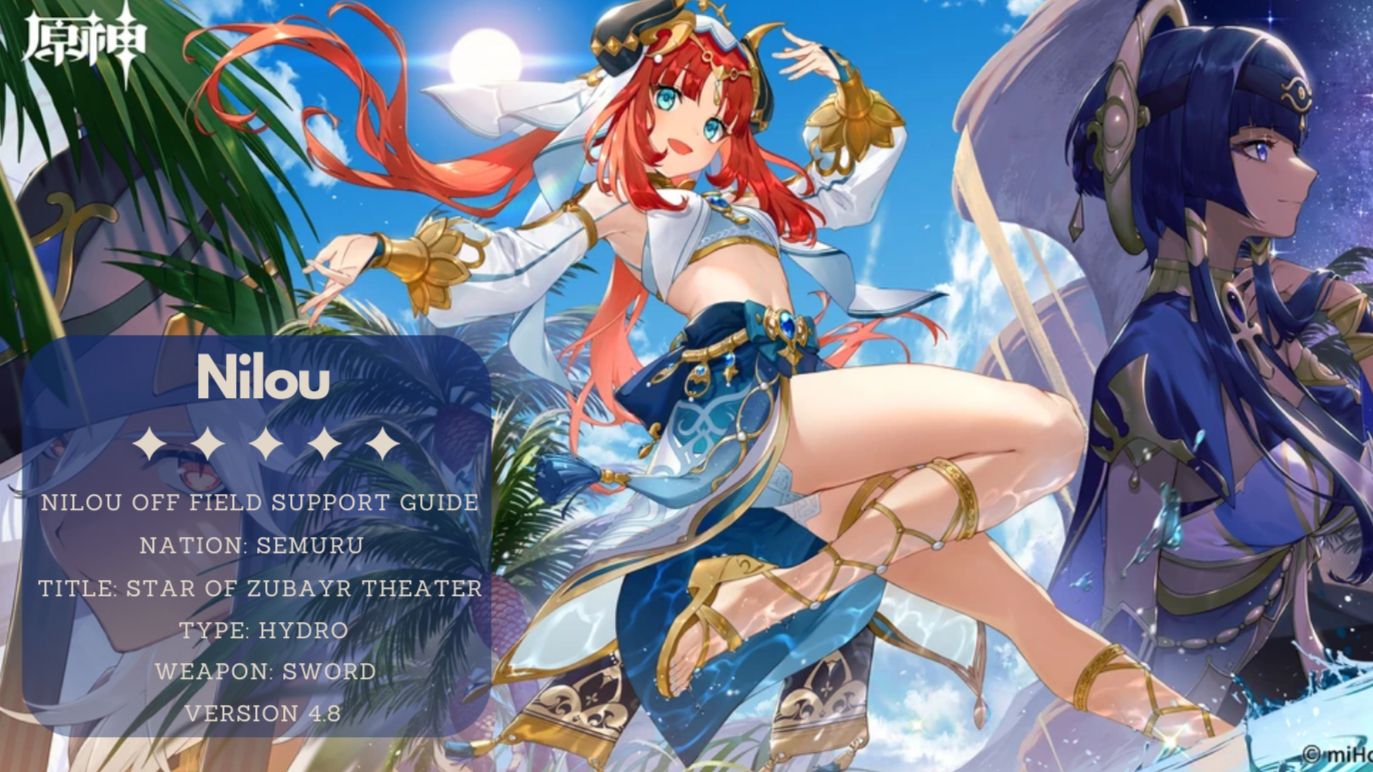
This time we will be looking over the beautiful dancer Nilou!

Materials
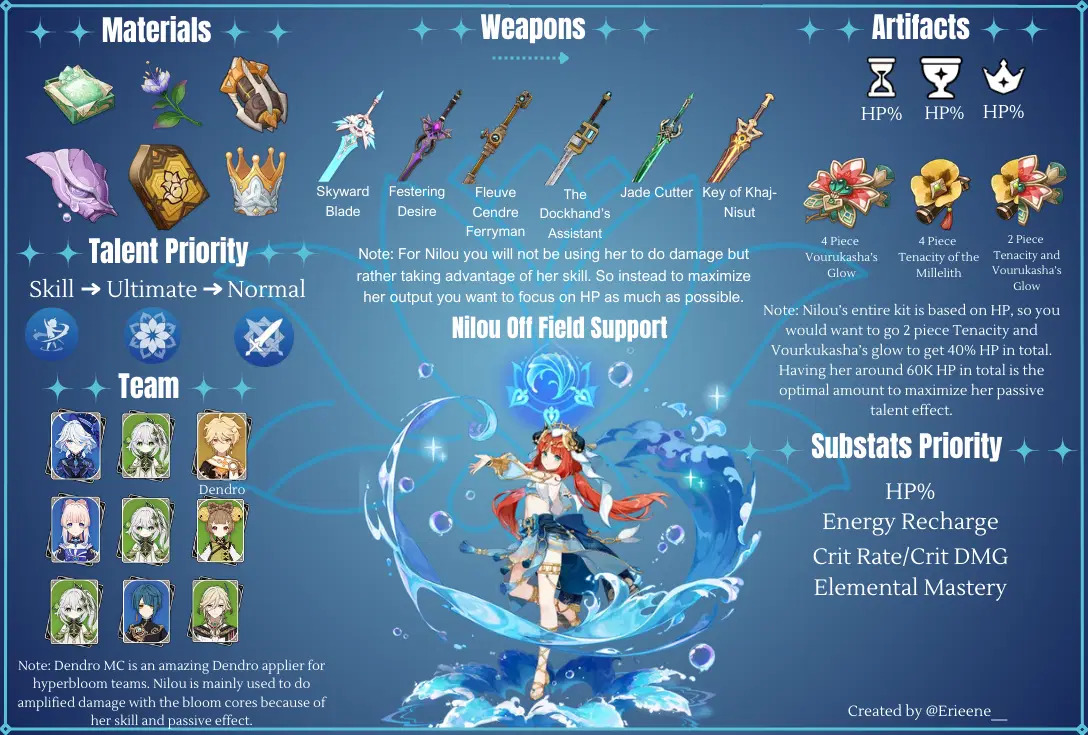
Build Materials
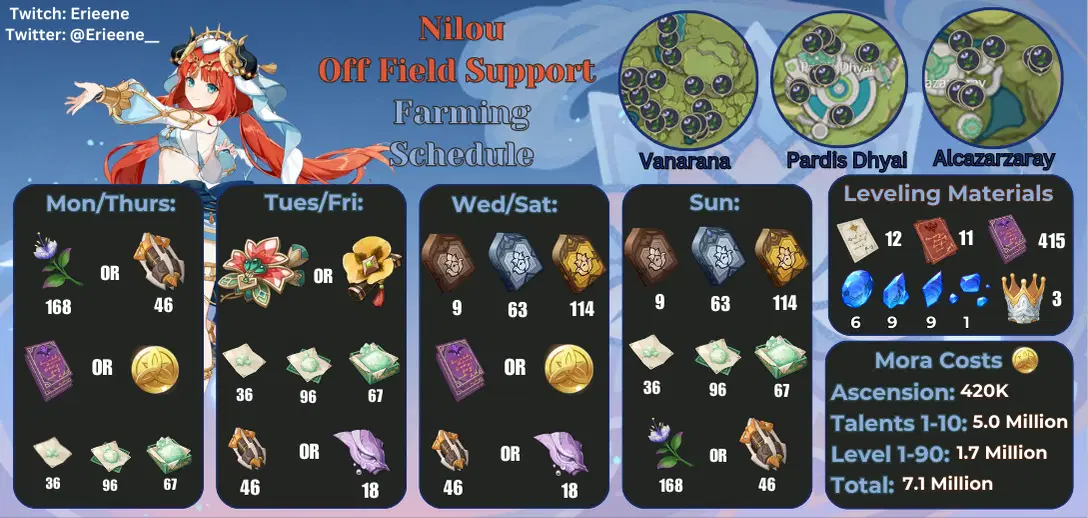
Farming Schedule
Skill Kit
Now Nilou is not used for her on-field capabilities, but rather what is focused on is her passive effects and her skill. The reason why is that she has the ability to increase bloom cores damage greatly, to the point that if you wish to do a bloom team she is an essential component for the team.
Normal Attack

Dance of Samser

Normal Attack

Charged Attack

Plunging Attack
Normal Attack
Performs up to 3 consecutive sword strikes.
Charged Attack
Consumes a certain amount of Stamina to perform a twirling slash.
Plunging Attack
Plunging from mid-air to strike the ground below, damaging opponents along the path and dealing AoE DMG upon impact.
Talent Level 1:
3 - Hit DMG: 70.4%
Charged Attack DMG: 50.2% + 54.4%
Charged Attack Stamina Cost: 20.0
Plunge DMG: 63.9%
Low/High Plunge DMG: 128%/160%
Talent Level 10:
3 - Hit DMG: 99.4%
Charged Attack DMG: 99.3% + 107.6%
Charged Attack Stamina Cost: 20.0
Plunge DMG: 126.4%
Low/High Plunge DMG: 253%/316%
Skill

Dance of Haftkarsvar

Pirouette

Sword Dance

Whirling Steps
Enters the Pirouette state, dealing Hydro DMG to nearby opponents based on Nilou's Max HP.
While she is in the Pirouette state, Nilou's Normal Attacks and Elemental Skill will cause her to enter the Sword Dance and Whirling Steps stances respectively, causing DMG she deals to be converted to Hydro DMG that cannot be overridden and that is considered Elemental Skill DMG.
In these stances, Nilou's third dance step will end Pirouette, and has the following effects based on the type of said dance step:
· Sword Dance: unleashes a Luminous Illusion that deals Hydro DMG to opponents it touches and grants Nilou the Lunar Prayer effect. This effect converts Nilou's Normal Attacks into Sword Dance techniques, and her final hit will unleash a Luminous Illusion.
· Whirling Steps: Nilou unleashes a Whirling Water Wheel that deals AoE Hydro DMG and creates a Tranquility Aura that follows your active character around and applies Wet to opponents within its AoE.
Nilou is unable to perform Charged Attacks when under the effect of Pirouette or Lunar Prayer. These effects will be removed once she leaves the field.
Talent Level 1:
Skill DMG: 3.34% Max HP
Sword Dance/Whirling Steps 1-Hit DMG: 4.55%/3.26% Max HP
Sword Dance/Whirling Steps 2-Hit DMG: 5.14%/3.96% Max HP
Watery Moon/Water Wheel DMG: 7.17%/5.06% Max HP
Pirouette Duration: 10.0s
Lunar Prayer Duration: 8.0s
Tranquility Aura Duration: 12.0s
CD: 18.0s
Talent Level 10:
Skill DMG: 6.01% Max HP
Sword Dance/Whirling Steps 1-Hit DMG: 8.19%/5.87% Max HP
Sword Dance/Whirling Steps 2-Hit DMG: 9.26%/7.13% Max HP
Watery Moon/Water Wheel DMG: 12.90%/9.11% Max HP
Pirouette Duration: 10.0s
Lunar Prayer Duration: 8.0s
Tranquility Aura Duration: 12.0s
CD: 18.0s
Burst

Dance of Abzendegi: Distant Dreams, Listening Spring

Burst Animation
Begins the dance of faraway dreams and springs that hear, causing a Lotus of Distant Waters to bloom, dealing AoE Hydro DMG based on Nilou's Max HP and applying the Lingering Aeon effect to all opponents hit.
After an interval, opponents affected by Lingering Aeon will take Hydro DMG.
Talent Level 1:
Skill DMG: 18.4% Max HP
Lingering Aeon DMG: 22.5% Max HP
CD: 18.0s
Energy Cost: 70
Talent Level 10:
Skill DMG: 33.2% Max HP
Lingering Aeon DMG: 40.6% Max HP
CD: 18.0s
Energy Cost: 70
Passive Talent 1
When all characters in the party are all Dendro or Hydro, and there are at least one Dendro character and one Hydro character.
The completion of the third dance step of Nilou's Dance of Haftkarsvar will grant all nearby characters the Golden Chalice's Bounty for 30s upon its completion.
Characters under the effect of Golden Chalice's Bounty will increase the Elemental Mastery of all nearby characters by up to 100 for 10s whenever they are hit by Dendro attacks. Also, triggering the Bloom reaction will create Bountiful Cores instead of Dendro Cores.
Such Cores will burst very quickly after being created, and they have larger AoEs.
Bountiful Cores cannot trigger Hyperbloom or Burgeon, and they share an upper numerical limit with Dendro Cores. Bountiful Core DMG is considered DMG dealt by Dendro Cores produced by Bloom.
Should the party not meet the conditions for this Passive Talent, any existing Golden Chalice's Bounty effects will be canceled.
Passive Talent 2
Every 1,000 points of Nilou's Max HP above 30,000 will cause the DMG dealt by Bountiful Cores created by characters affected by Golden Chalice's Bounty to increase by 9%. The maximum increase in Bountiful Core DMG that can be activated this way is 400%.
Note: To maximize this passive is 74,444 HP but if you do double hydro then you would only need around 61K HP then. This is why with Nilou teams there is always another Hydro team member.
Constellations
C1:

Dance of the Waning Moon
Dance of Haftkarsvar will be enhanced as follows:
· Luminous Illusion DMG is increased by 65%.
· The Tranquility Aura's duration is extended by 6s.
C2:

The Starry Skies Their Flowers Rain
After characters affected by the Golden Chalice's Bounty deal Hydro DMG to an opponent, that opponent's Hydro RES will be decreased by 35% for 10s. After a triggered Bloom reaction deals DMG to opponents, their Dendro RES will be decreased by 35% for 10s.
You need to have unlocked the "Court of Dancing Petals" Talent.
C3:

Beguiling Shadowstep
Increases the Level of Dance of Abzendegi: Distant Dreams, Listening Spring by 3.
Maximum upgrade level is 15.
C4:

Fricative Pulse
After the third dance step of Dance of Haftkarsvar's Pirouette hits opponents, Nilou will gain 15 Elemental Energy, and DMG from her Dance of Abzendegi: Distant Dreams, Listening Spring will be increased by 50% for 8s.
C5:

Twirling Light
Increases the Level of Dance of Haftkarsvar by 3.
Maximum upgrade level is 15.
C6:

Frostbreaker's Melody
For every 1,000 points of Max HP, Nilou's CRIT Rate and CRIT DMG will increase by 0.6% and 1.2% respectively.
The maximum increase in CRIT Rate and CRIT DMG via this method is 30% and 60% respectively.
Artifacts

Vourukasha's Glow
2 Piece: HP +20%
4 Piece: Elemental Skill and Elemental Burst DMG will be increased by 10%. After the equipping character takes DMG, the aforementioned DMG Bonus is increased by 80% for 5s. This effect increase can have 5 stacks. The duration of each stack is counted independently. These effects can be triggered even when the equipping character is not on the field.

Tenacity of the Millelith
2 Piece: HP increased by 20%.
4 Piece: When an Elemental Skill hits an opponent, the ATK of all nearby party members is increased by 20% and their Shield Strength is increased by 30% for 3s. This effect can be triggered once every 0.5s. This effect can still be triggered even when the character who is using this artifact set is not on the field.
Note: It is best to go 2 piece with the two artifacts because you want Nilou's HP to be as high as possible for the passive talent of hers. The great thing is that Tenacity is in the Strong Box so one can focus on getting some artifacts of Vourukasha and put the rest into Tenacity.
Weapons
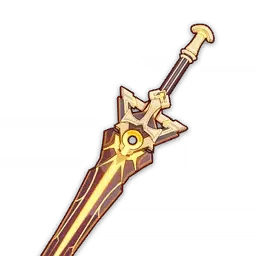
Key of Khaj-Nisut
Base ATK: 542
Secondary Attribute: 66.2% HP
HP increased by 20%/25%/30%/35%/40%. When an Elemental Skill hits opponents, you gain the Grand Hymn effect for 20s. This effect increases the equipping character's Elemental Mastery by 0.12%/0.15%/0.18%/0.21%/0.24% of their Max HP. This effect can trigger once every 0.3s. Max 3 stacks. When this effect gains 3 stacks, or when the third stack's duration is refreshed, the Elemental Mastery of all nearby party members will be increased by 0.2%/0.25%/0.3%/0.35%/0.4% of the equipping character's max HP for 20s.
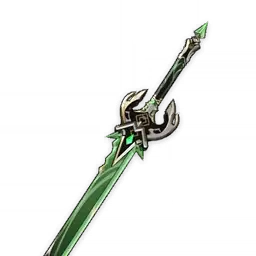
Primordial Jade Cutter
Base Attack: 542
Secondary Attribute: 44.1% Crit Rate
HP increased by 20%/25%/30%/35%/40%. Additionally, provides an ATK Bonus based on 1.2%/1.5%/1.8%/2.1%/2.4% of the wielder's Max HP

The Dockhand's Assistant
Base ATK: 510
Secondary Attribute: 41.3% HP
When the wielder is healed or heals others, they will gain a Stoic's Symbol that lasts 30s, up to a maximum of 3 Symbols. When using their Elemental Skill or Burst, all Symbols will be consumed and the Roused effect will be granted for 10s. For each Symbol consumed, gain 40/50/60/70/80 Elemental Mastery, and 2s after the effect occurs, 2/2.5/3/3.5/4 Energy per Symbol consumed will be restored for said character. The Roused effect can be triggered once every 15s, and Symbols can be gained even when the character is not on the field.
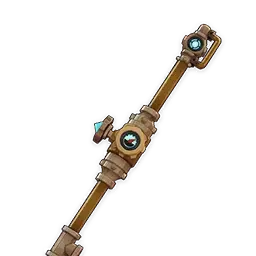
Fleuve Cendre Ferryman
Base ATK: 510
Seconary Attribute: 45.9% Energy Recharge
Increases Elemental Skill CRIT Rate by 8%/10%/12%/14%/16%. Additionally, increases Energy Recharge by 16%/20%/24%/28%/32% for 5s after using an Elemental Skill.
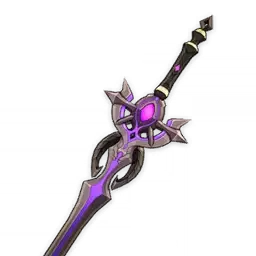
Festering Desire
Base ATK: 510
Secondary Attribute: 45.9% Energy Recharge
Increases Elemental Skill DMG by 16%/20%/24%/28%/32% and Elemental Skill CRIT Rate by 6%/7.5%/9%/10.5%/12%.

Skyward Blade
Base ATK: 510
Secondary Attribute: 45.9% Energy Recharge
Increases Elemental Skill DMG by 16%/20%/24%/28%/32% and Elemental Skill CRIT Rate by 6%/7.5%/9%/10.5%/12%.
CRIT Rate increased by 4%/5%/6%/7%/8%. Gains Skypiercing Might upon using an Elemental Burst: Increases Movement SPD by 10%, increases ATK SPD by 10%, and Normal and Charged hits deal additional DMG equal to 20%/25%/30%/35%/40% of ATK. Skypiercing Might lasts for 12s.
Team Set Up
Bloom Galore Team
Nilou, Nahida, Kokomi, Baizhu
Nahida: Has amazing Dendro application by tagging all enemies in the surrounding area with her skill. Partial damage will be given to the linked enemies as well, and with her burst allowing the increase of Elemental Mastery which is essential for bloom reactions
Kokomi: A really solid healer who can handle the amount of damage that will be dealt to the team with the bloom cores. She can be the driver in this team by consistently applying Hydro while Nahida's mark still exists, and in her burst form can ensure the entire team lives.
Baizhu: A secondary healer who will also apply Dendro and give a small shield (not the strongest) and can come in a pinch for healing when Kokomi's skill is on cooldown.
Budget Bloom Team
Nilou, Nahida, Barbara/Xingque, Yaoyao/Dendro MC
Nahida: Has amazing Dendro application by tagging all enemies in the surrounding area with her skill. Partial damage will be given to the linked enemies as well, and with her burst allowing the increase of Elemental Mastery which is essential for bloom reactions
Barbara: A good substitute if one does not have Kokomi, but requires a highly invested build to ensure healing can keep up with the bloom cores damage. Can also take upon the driver position, but not the best at it.
Xingque: Used purely for Hydro application, having him C6 allows his damage to increase, his Rainswords also have the ability to shield some damage and even give a minor heal. Do keep in mind that it is not the most consistent to be depended on!
Yaoyao: An amazing healer and Dendro applicator, can keep up with the damage inflicted on the team in her burst form and can create just as plenty cores. If using her, Xingque can be on the team instead
Dendro MC: If there is no Baizhu, a good substitute due to the AoE of their burst. Allowing them to be more of a off-field support, where using skill twice (sacrificial sword equipped) and bursting when possible. If using them, Barbara would be necessary and it will be hard to keep the entire team alive, but it is possible!
Gameplay Tips
Bloom Galore Team
- Nahida Skill on all surrounding enemies, Burst as well
- Nilou max skill (3 tap Es)
- Baizhu Burst (if available)
- Kokomi skill and burst, normal attack until Nilou skill disappears
- Rinse and Repeat
Other Guides
Furina Sub DPS/Support Guide
Al-Haitham Main DPS Guide
Arlecchino Main DPS Guide
Neuvillette Charge Main DPS Guide
Lynette Main DPS/Support Build Guide
Resources Used
Hoyowiki
Genshin Wiki



