


 Yoimiya

✦ Pyro DPS Guide ✦
Welcome to my Yoimiya Guide! We will cover basic info while also going deep into mechanics and playstyles!
If you need help building your characters you can join my community at https://discord.gg/uZeRYTUor catch me live at https://www.twitch.tv/sevenevenpls
✦ Quick Infographic ✦
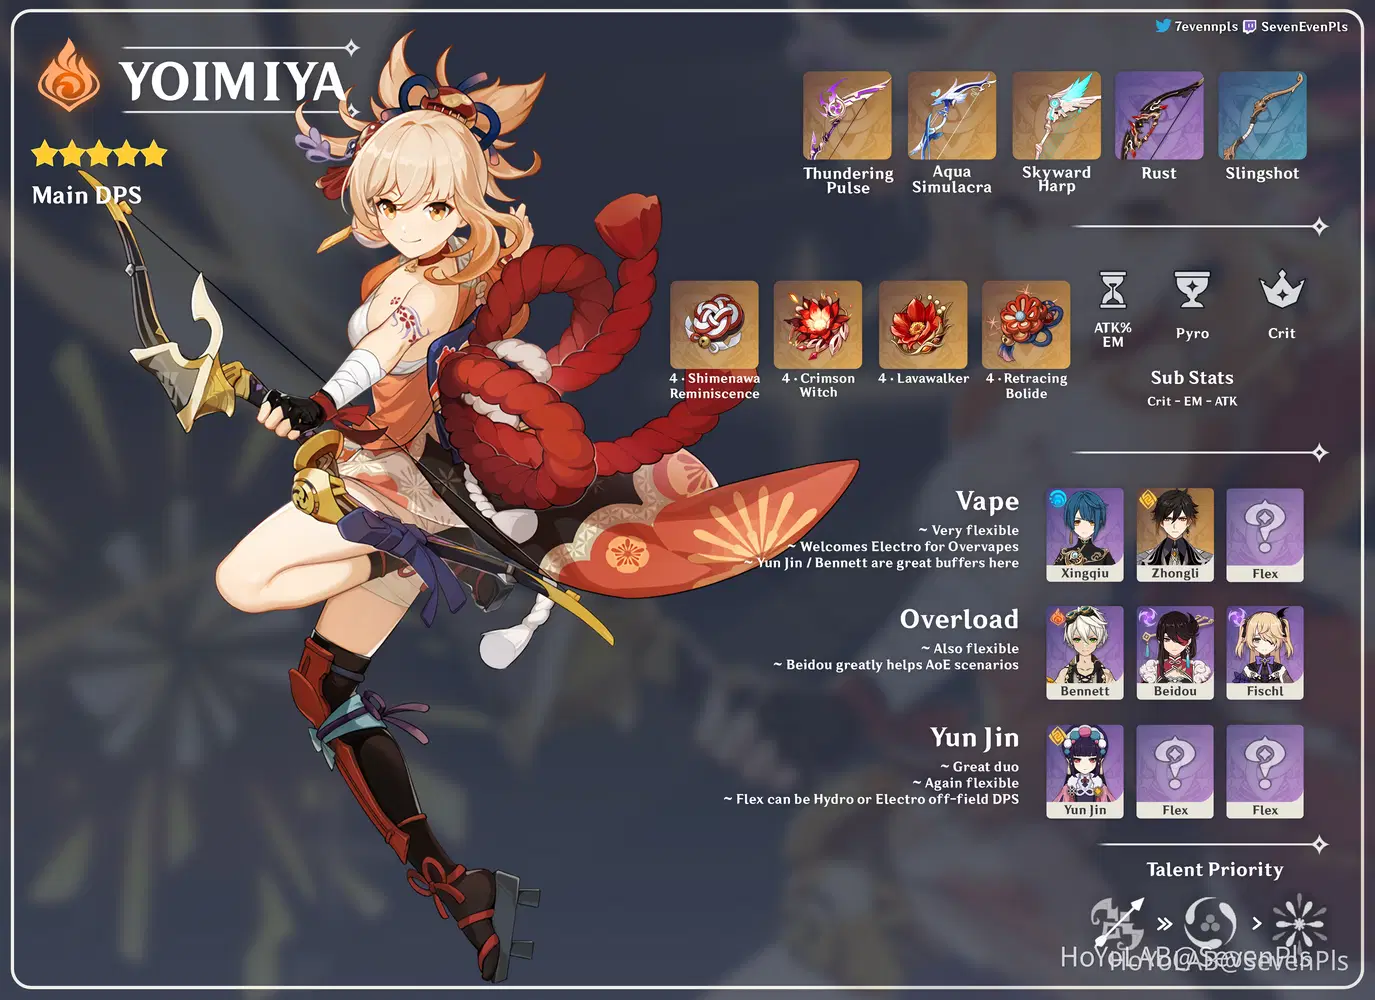

✦ Introduction ✦
Yoimiya is a 5 star Pyro Bow user. She is most known for her high and fast ranged single target damage, she is easy to play and has pretty much straight forward team choices. She unfortunately doesn't perform as well as some of the other Pyro damage dealers in many situations and she's very behind in any AoE scenario.
She is by no means a bad character to have and, if you like her gameplay or personality, will provide a great game experience.
✦ Talents Overview ✦
✦ Normal Attack: Firework Flare-Up ✦
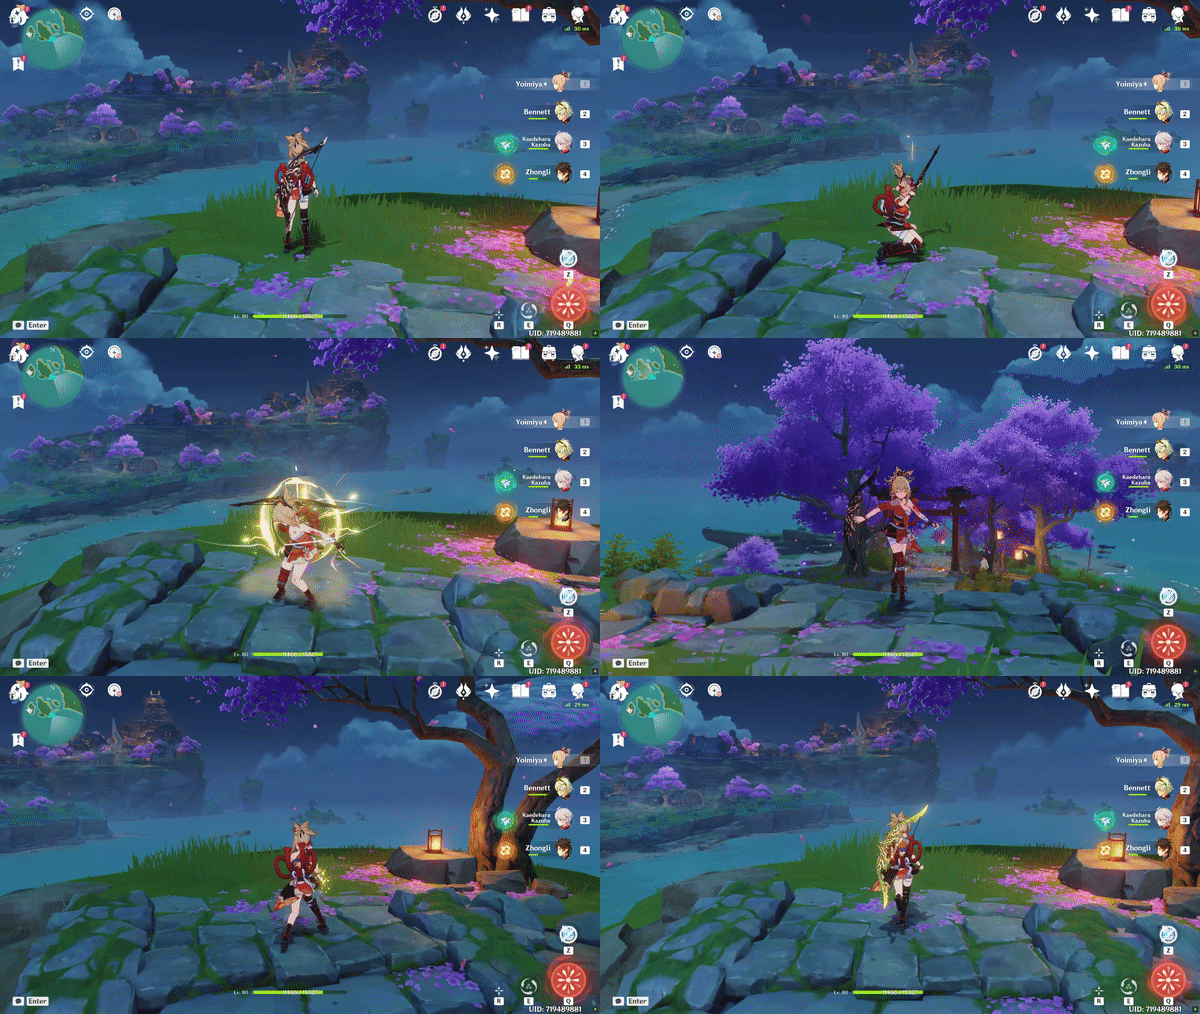
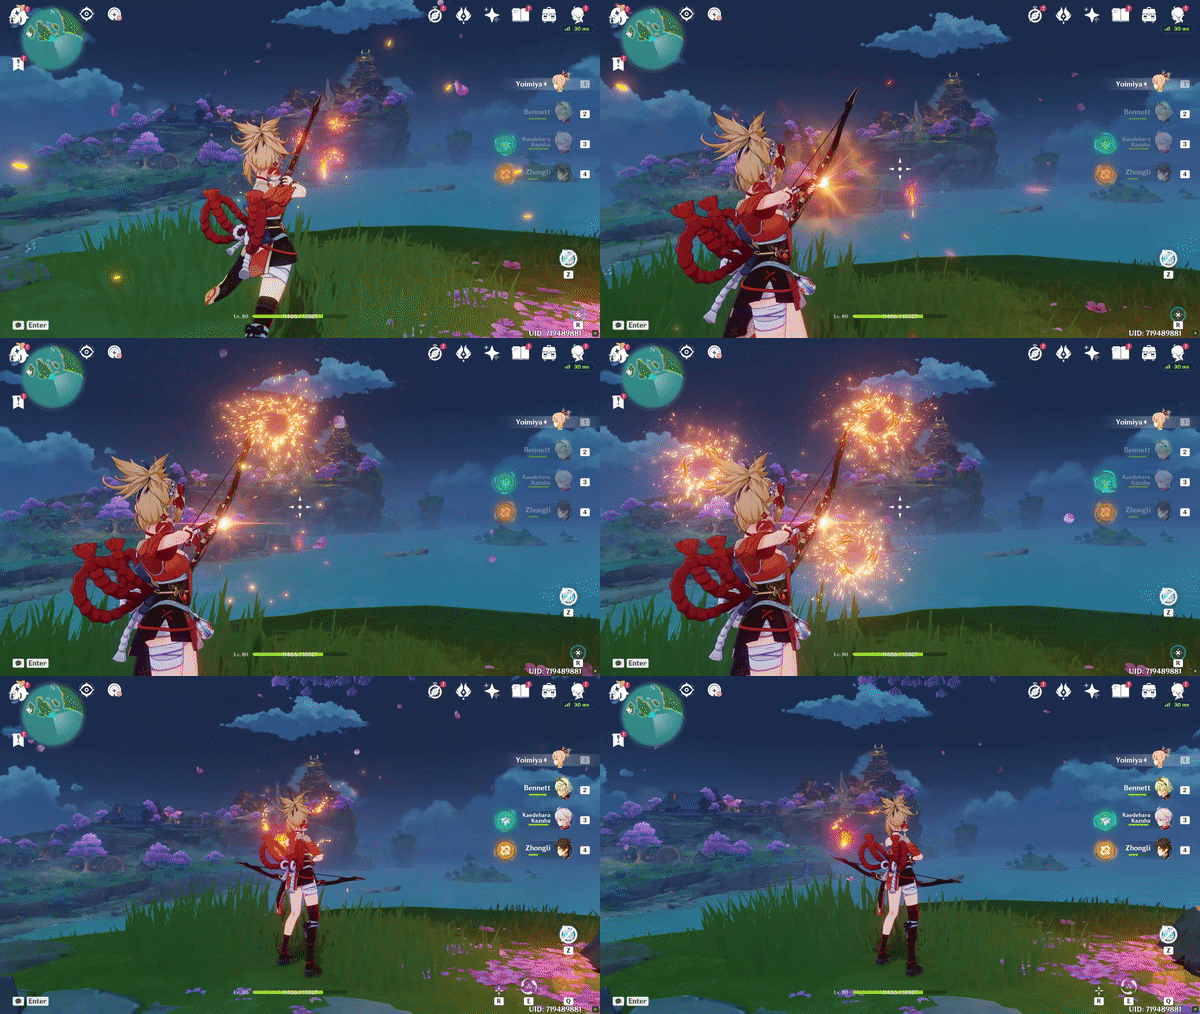
Yoimiya's Normal, Charged and Plunge Attack talent. The Normal attack consists of up to 5 strikes (7 total hits). The 2 highest multipliers of this skill are on the 3rd and 5th hit while the 1st and 4th are double hits and the 2nd is average. We will explore this more and why it's important in a bit.
Charged Attack
Performs a different Aimed Shot the more it charges.
Charge Level 1: Standard 1 hit arrow that deals Pyro DMG
Charge Level 2: Adds up to 3 Kindling Arrows, releasing them together with the basic Pyro DMG hit, aiming at nearby opponents.
• Kindling Arrows deal Pyro DMG on hit.
• They have Standard ICD (Internal Cooldown)
• They can be used to target puzzle's torches, wildlife, etc.
✦ Elemental Skill: Niwabi Fire-Dance ✦
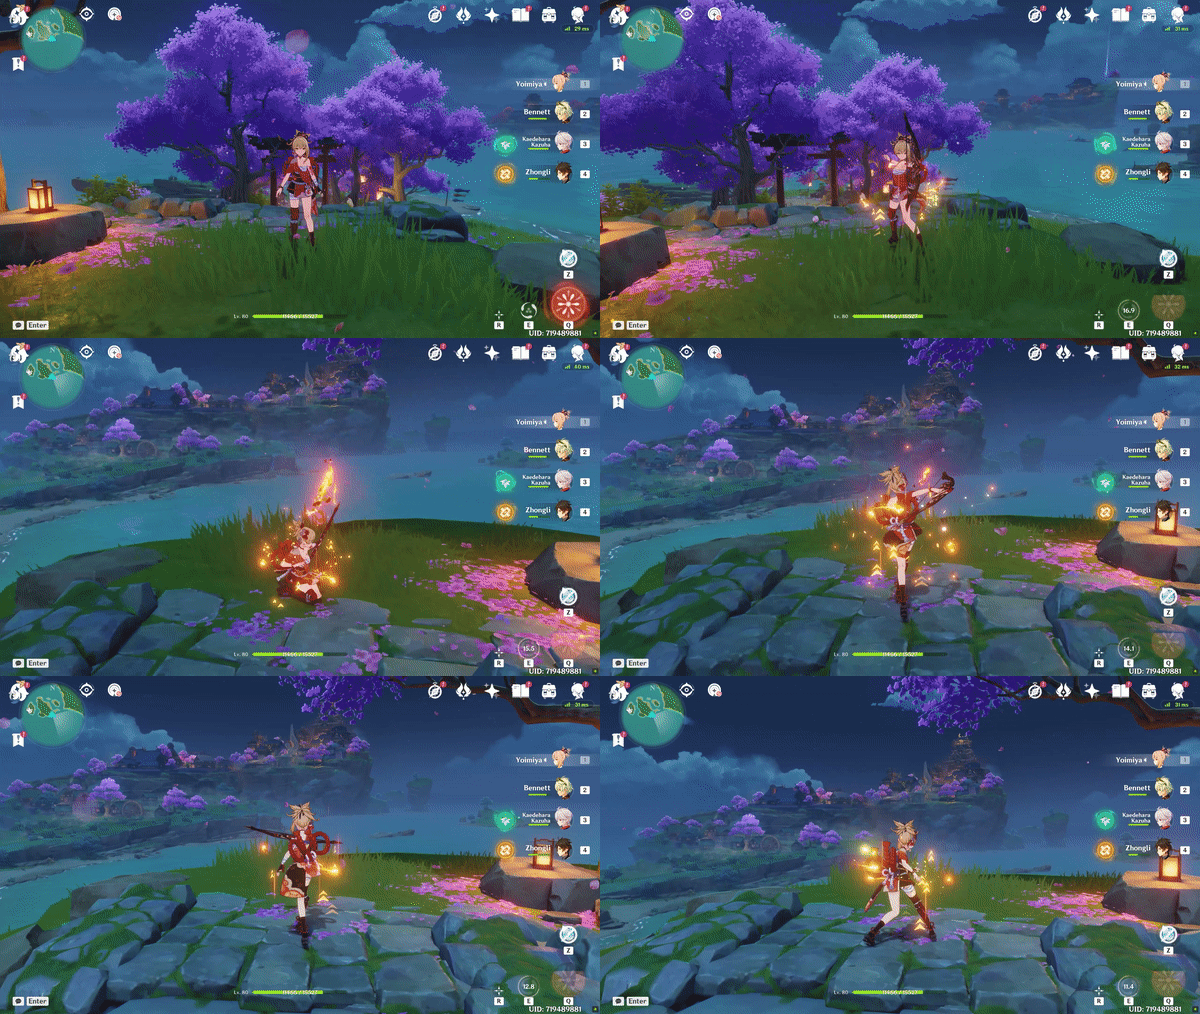
Buffs herself converting Normal attacks to Pyro DMG and increasing their DMG.
• Cooldown 18s
• Duration 10s
• During the Skill, each time an enemy is hit by her Normal Attacks, 1 Elemental Particle is generated, with a 2s cooldown (total of 4 particles during its duration)
• The effect will deactivate when Yoimiya leaves the field
• The talent scaling number is multiplicative with her Normal Attack damage and separate from DMG Bonus, Crit., etc. - So it will not be multiplied by buffs like Yun Jin's (although they are still a great duo)
✦ Elemental Burst: Ryuukin Saxifrage ✦

Deals AoE Pyro DMG marking one of the hit opponents by Aurous Blaze.
• Energy cost 60, Cooldown 15s
• Duration 10s
Aurous Blaze
All Normal/Charged/Plunging Attacks, Elemental Skills, and Elemental Bursts by any party member other than Yoimiya that hit an opponent marked by Aurous Blaze will trigger an explosion, dealing AoE Pyro DMG.
• It can be triggered every 2s
• When an opponent is defeated while under Aurous Blaze, the effect will pass on a nearby opponent for the remaining duration
• If Yoimiya is down the effect will be deactivated
• It can also be triggered by off-field abilities when Yoimiya is on the field
• Skill DMG and Aurous Blaze share ICD (Internal Cooldown)
• Damage is calculated dynamically and does not snapshot (it will always use Yoimiya's stats in real time)
• Works in co-op mode
✦ Ascension 1: Tricks of the Trouble-Maker ✦
During her Skill, her Normal attacks will increase grant her 2% Pyro DMG Bonus on hit.
• The effect lasts for 3s and has a maximum of 10 stacks (Max 20% Pyro DMG Bonus)
• Gaining a new stack will refresh the duration of old ones
✦ Ascension 4: Summer Night's Dawn ✦
Using her Burst will grant nearby party members a 10% ATK increase for 15s. Additionally, 1% ATK will be provided for each stack of Tricks of the Trouble-Maker (Ascension 1 Talent) for a maximum total of 20% ATK for your team.
✦ Talent Priority ✦
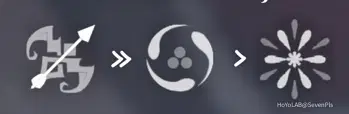
Normal Attack >> Elemental Skill > Elemental Burst
Always prioritize your Normal Attack talent as it represents most of your damage.
✦ Yoimiya and ICD ✦
ICD or Internal Cooldown is a limit to how often an ability can apply an element for reactions or elemental auras on a target.
The standard ICD (which Yoimiya follows on her Normal Attacks) resets after 3 hits or after 2.5 seconds.
Following this set of rules will make Yoimiya truly apply Pyro (thus causing reactions) on her N1, N3 and N5. N3 and N5 being her strongest attacks. Counting for multi hit attacks then every 3rd attack will apply Pyro and after your full N5 combo, the 2.5 seconds rule will kick in making the next string of attacks start from scratch.
This rules hugely come into play for Vaporize teams where you want to stick with your N3 and N5 as your Vape hits. It can be hard to maintain her attack string with no alteration or interruption and that's why you usually want teammates that can help you just focus on attacking without interruption (Zhongli's shield for example). It is also better to avoid being too far away from your opponents since a missed hit will mess up your ICD and make your damage **** greatly.
✦ Artifacts and Stats ✦

Artifact sets
• 4 Shimenawa's Reminiscence
This is considered by many Yoimiya's first choice. Shimenawa is absolutely the best set for increasing her Normal Attack DMG but comes with a cons: 15 energy cost + the downside of not being able to Burst > Skill right away in a rotation. You Burst is not the biggest part of your damage but it still a very good Talent that shouldn't just be skipped. It not only provides damage but also a party wide ATK buff. Shimenawa should then be paired with a little higher Energy Recharge than most sets.
I'd overall recommend using this on Yoimiya, especially for how good of a domain to farm this is.
• 4 Crimson Witch
This is your go to set for Vaporize and Overload teams. Yoimiya, doens't fully benefit from the 4 set bonus as she only uses her Elemental Skill once per rotation but the increased Vaporize and Overload damage are more than enough to make this the best choice for reactions. A harder to farm set due to its domain containing this + Lavawalker.
• 4 Echoes of an Offering
It can be very good in some cases (non-reaction teams) but the RNG factor can hurt Yoimiya's damage a lot in a Vape team for example. Missing the proc on one Vaporize hit or on your last string of Normal Attacks will be a good chunk of damage missed. I would recommend this set only if you need to farm the domain, but usually, that's not the case for many.
• 4 Lavawalker
Great choice if you are in a mono Pyro team. Still hard to justify farming and a bit too niche.
• 4 Retracing Bolide
Yet another "hard to justify farming for" set. But if you have a good full set, it's basically a no energy drawbacks Shimenawa with a little less damage and a shield requirements. Note that compared to Shimenawa you not only lose 10% Normal Attack DMG but you are also trading 18% ATK for Shield Strength.
• 2 18% ATK | 2 Crimson
It's absolutely ok to go for a mix set of either Pyro DMG + ATK or ATK + ATK. A definitely lower damage potential compared to a well farmed full Shimenawa or Crimson but if not ready for a full set it might be worth to focus on using higher stats artifacts.
Main/Sub Stats
• Sands | ATK / EM
• Goblet | Pyro
• Circlet | Crit Rate / Crit DMG
ATK Sands should be used without reactions. EM Sands for Vaporize teams while, it's also possible to go full EM in a Overload focused team.
Your substats will focus on CRIT, EM and ATK%. Some ER is beneficial depending on the set used and team.
✦ Weapons ✦

Before going into details let's first talk about her usually best choice for any rarity:
• Thundering Pulse | Absolutely insane Yoimiya weapons as it not only provides high Crit DMG substat but also an ATK buff and extra Normal Attack DMG. Using your Normal Attacks, Elemental Skill and Elemental Burst (not having 100% ernergy) will buff your Normal Attack DMG so it's very easy to stack as you just need to use your entire kit. It can be sometimes difficult to run with a full Shimenawa set because of its energy drain mechanic and your energy being full mid rotation. To avoid this you can cast her Burst as an opening to your rotation then coming back for your usual Elemental Skill > Normal Attacks.
• Rust | A very straightforward weapon that offers just what Yoimiya wants, extra Normal Attack DMG and ATK. Paired with a good amount of Crit will make this one of your best bet. Some bows can outperform Rust, even Slingshot, depending on refinements and team comps.
• Slingshot | An amazing 3 star weapon that, provided a decent ATK buff (Bennett for example), can even surpass most 4 star options. Its only drawbacks are the 3 star rarity making it have a lower Base ATK (hence the need of Bennett) and having to be not too far away from your opponent to get the full effect.
Now onto other options that can and should be used:
• Aqua Simulacra | Polar Star | Skyward Harp | Amos Bow | All are good choices in lack of Thundering Pulse.
• Hamayumi | Prototype Crescent | Viridescent Hunt | All ok options in lack of anything mentioned above.
✦ Teams ✦
Teammates for Yoimiya are very flexible and there are plenty of characters you can bring along, making her great for a "2nd Abyss team".
Let's see what are her most used and best teams!
 Classic Vaporize

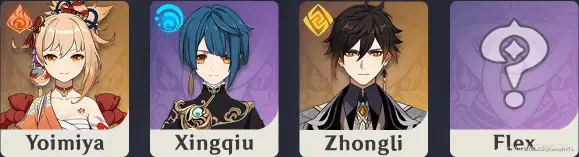
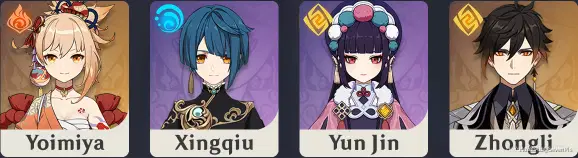
Xingqiu or Yelan or both can be used. In a ranged scenario both apply enough Hydro that if Yoimiya alone is applying Pyro it will be sufficient to Vaporize her 1st, 3rd and 5th hit. The rest of the team can include Zhongli, Anemo, Bennett or Yun Jin.
 Yun Jin

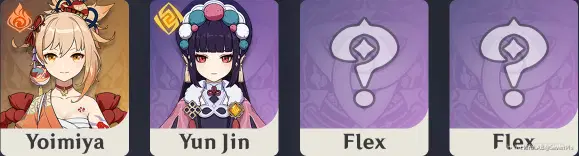
Yun Jin is simply great for Yoimiya and has an amazing value especially because, providing a similar if not higher total buff than Bennett, it frees him for your other Abyss team. They can of course be played together to make Yoimiya's autos even stronger but again the strength of Yoimiya's teams is their flexibility.
 Overload and Overvape

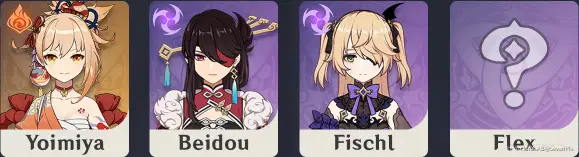
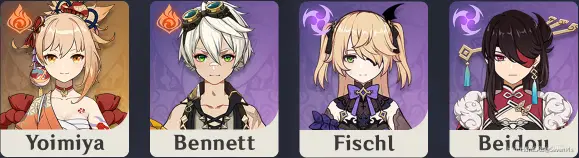
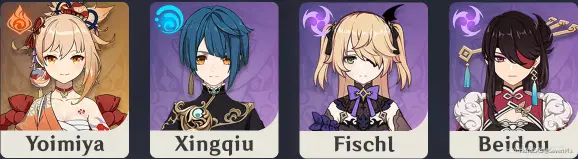
The weaker Pyro application from Yoimiya makes it so that Hydro and Electro will stay on the opponent and Yoimiya will both trigger Vaporize and Overload.
 Mono Pyro

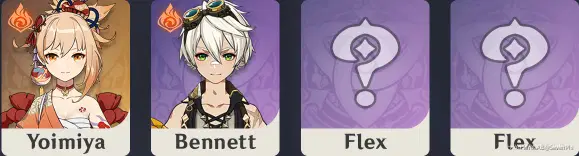
Usually Bennett is a great idea for this team, the flex slots can contain Yun Jin and Zhongli to activate Geo resonance, or even double Anemo (Kazuha is great). Or 1 Anemo + another Pyro unit like Xiangling or Thoma.
Remember to please like or share this post to help me continue making guides!
✦ Need help building your characters? Join Discord! https://discord.gg/uZeRYTU
✦ More Guides ✦
✦ [2.8] Yun Jin https://www.hoyolab.com/article/6466615
✦ [2.8] Kazuha https://www.hoyolab.com/article/5982622
✦ [2.8] Heizou https://www.hoyolab.com/article/6010909
✦ [2.8] Thoma https://www.hoyolab.com/article/5945495
✦ [2.7] Kuki Shinobuhttps://www.hoyolab.com/article/5560256
✦ [2.7] Yelan https://www.hoyolab.com/article/5076603
✦ [2.6] Rosaria https://www.hoyolab.com/article/4951637
✦ [2.6] Ayato https://www.hoyolab.com/article/4054779
✦ [2.6] Venti https://www.hoyolab.com/article/4037142
✦ [2.5] Kokomi https://www.hoyolab.com/article/3919242
✦ [2.5] Raiden Shogun https://www.hoyolab.com/article/3722617
✦ [2.5] Yae Miko https://www.hoyolab.com/article/3446583
✦ [2.5] Fischl https://www.hoyolab.com/article/3402593
✦ [2.4] Ganyu (Melt) https://www.hoyolab.com/article/2071609
✦ [2.4] Zhongli https://www.hoyolab.com/article/2013546
✦ [2.4] Yun Jin https://www.hoyolab.com/article/1999353
✦ [2.4] Shenhehttps://www.hoyolab.com/article/1906084
✦ [2.4] Xiao https://www.hoyolab.com/article/1883274
✦ More characters at https://www.hoyolab.com/accountCenter?id=14918038
✦ Socials ✦
✦ Twitch
✦ Discord




